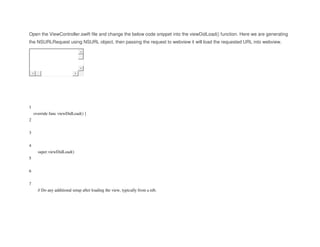
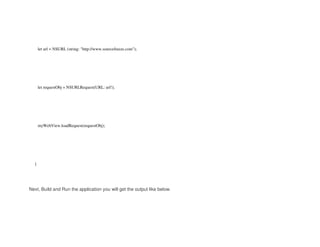
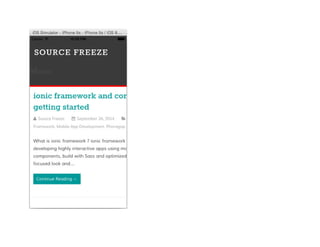
Download as PDF, PPTX
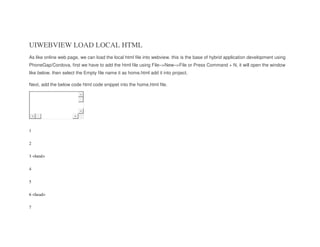
![</body>
</html>
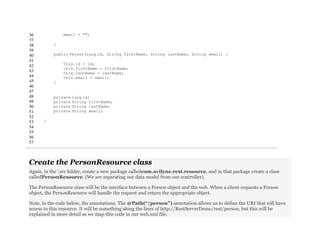
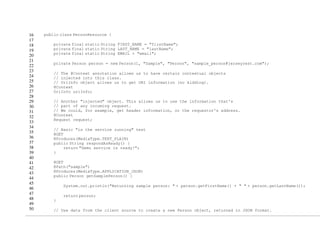
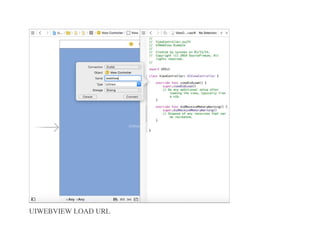
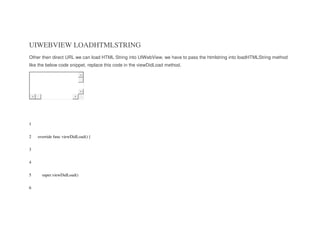
It includes HTML tags and encloses a JSP scriptlet which is a fragment of Java code that is run when the user requests the page.
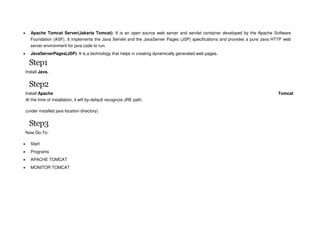
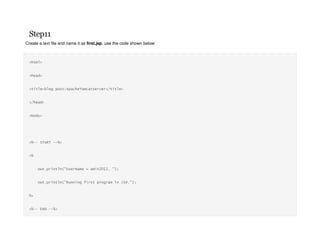
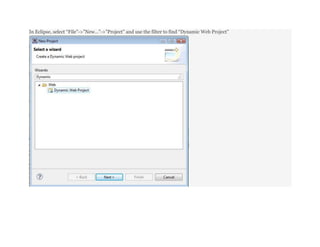
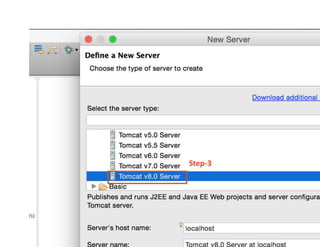
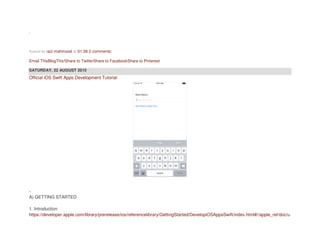
Step12
Now for running your folder [ Eg. amit2012PROJECT as shown above]
http://localhost:8080/foldername.extension in any WebBrowser i.e:
http://localhost:8080/amit2012PROJECT/first.jsp
The Project will run successfully, as shown below:](https://image.slidesharecdn.com/tomcatotherthings-150925070615-lva1-app6891/85/Tomcat-other-things-7-320.jpg)

![42
43
44
45
46
47
48
49
50
51
52
53
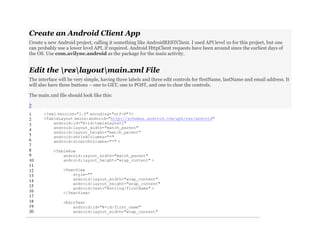
54
55
56
57
58
59
60
61
62
63
64
65
66
67
68
69
70
71
72
73
74
75
76
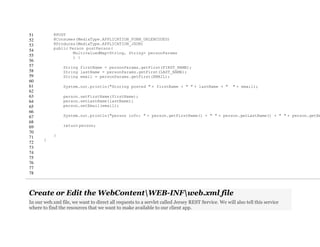
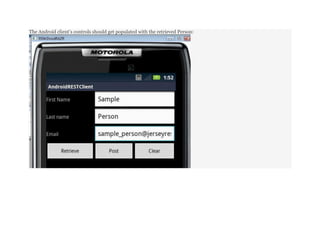
public void retrieveSampleData(View vw) {
String sampleURL = SERVICE_URL + "/sample";
WebServiceTask wst = new WebServiceTask(WebServiceTask.GET_TASK, this, "GETting data...");
wst.execute(new String[] { sampleURL });
}
public void clearControls(View vw) {
EditText edFirstName = (EditText) findViewById(R.id.first_name);
EditText edLastName = (EditText) findViewById(R.id.last_name);
EditText edEmail = (EditText) findViewById(R.id.email);
edFirstName.setText("");
edLastName.setText("");
edEmail.setText("");
}
public void postData(View vw) {
EditText edFirstName = (EditText) findViewById(R.id.first_name);
EditText edLastName = (EditText) findViewById(R.id.last_name);
EditText edEmail = (EditText) findViewById(R.id.email);
String firstName = edFirstName.getText().toString();
String lastName = edLastName.getText().toString();
String email = edEmail.getText().toString();
if (firstName.equals("") || lastName.equals("") || email.equals("")) {
Toast.makeText(this, "Please enter in all required fields.",
Toast.LENGTH_LONG).show();
return;
}](https://image.slidesharecdn.com/tomcatotherthings-150925070615-lva1-app6891/85/Tomcat-other-things-34-320.jpg)
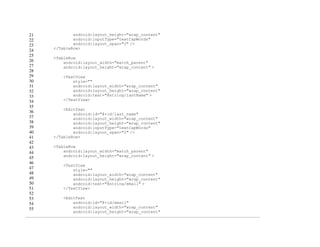
![77
78
79
80
81
82
83
84
85
86
87
88
89
90
91
92
93
94
95
96
97
98
99
100
101
102
103
104
105
106
107
108
109
110
111
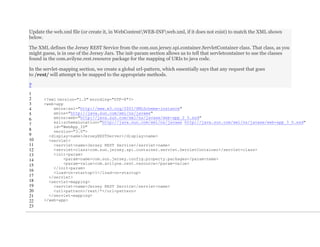
WebServiceTask wst = new WebServiceTask(WebServiceTask.POST_TASK, this, "Posting data...");
wst.addNameValuePair("firstName", firstName);
wst.addNameValuePair("lastName", lastName);
wst.addNameValuePair("email", email);
// the passed String is the URL we will POST to
wst.execute(new String[] { SERVICE_URL });
}
public void handleResponse(String response) {
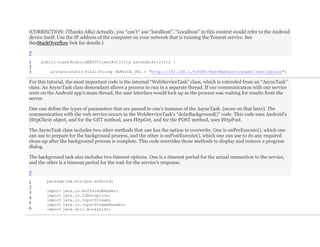
EditText edFirstName = (EditText) findViewById(R.id.first_name);
EditText edLastName = (EditText) findViewById(R.id.last_name);
EditText edEmail = (EditText) findViewById(R.id.email);
edFirstName.setText("");
edLastName.setText("");
edEmail.setText("");
try {
JSONObject jso = new JSONObject(response);
String firstName = jso.getString("firstName");
String lastName = jso.getString("lastName");
String email = jso.getString("email");
edFirstName.setText(firstName);
edLastName.setText(lastName);
edEmail.setText(email);
} catch (Exception e) {
Log.e(TAG, e.getLocalizedMessage(), e);
}](https://image.slidesharecdn.com/tomcatotherthings-150925070615-lva1-app6891/85/Tomcat-other-things-35-320.jpg)
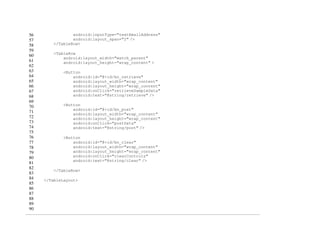
![147
148
149
150
151
152
153
154
155
156
157
158
159
160
161
162
163
164
165
166
167
168
169
170
171
172
173
174
175
176
177
178
179
180
181
this.mContext = mContext;
this.processMessage = processMessage;
}
public void addNameValuePair(String name, String value) {
params.add(new BasicNameValuePair(name, value));
}
private void showProgressDialog() {
pDlg = new ProgressDialog(mContext);
pDlg.setMessage(processMessage);
pDlg.setProgressDrawable(mContext.getWallpaper());
pDlg.setProgressStyle(ProgressDialog.STYLE_SPINNER);
pDlg.setCancelable(false);
pDlg.show();
}
@Override
protected void onPreExecute() {
hideKeyboard();
showProgressDialog();
}
protected String doInBackground(String... urls) {
String url = urls[0];
String result = "";
HttpResponse response = doResponse(url);
if (response == null) {
return result;
} else {](https://image.slidesharecdn.com/tomcatotherthings-150925070615-lva1-app6891/85/Tomcat-other-things-37-320.jpg)

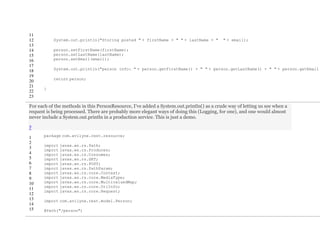
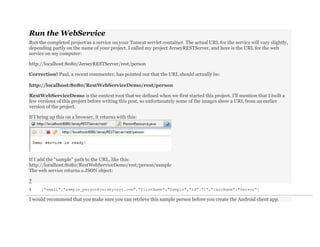
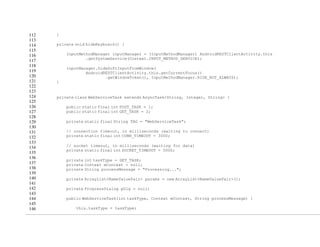
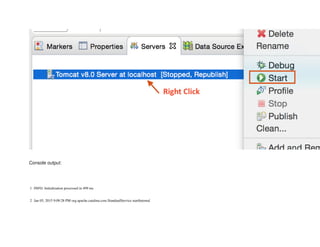
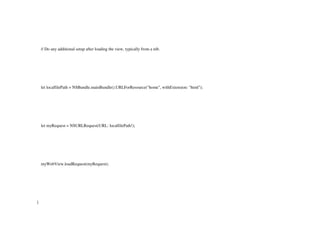
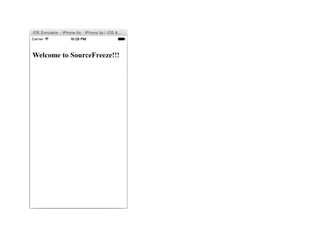
![Step-5
You should see Tomcat v8.0 Server at localhost [Stopped, Republish] under Servers tab. Double click on it verify
HTTP ports information. By default HTTP port is 8080.
Step-6
Now right click on Server and click Start .](https://image.slidesharecdn.com/tomcatotherthings-150925070615-lva1-app6891/85/Tomcat-other-things-55-320.jpg)
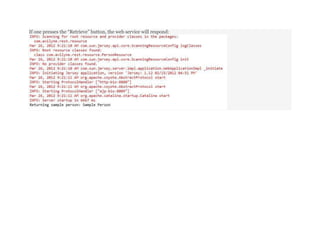
![3
4
5
6
7
8
9
10
11
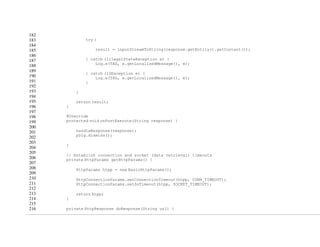
INFO: Starting service Catalina
Jan 05, 2015 9:09:28 PM org.apache.catalina.core.StandardEngine startInternal
INFO: Starting Servlet Engine: Apache Tomcat/8.0.15
Jan 05, 2015 9:09:29 PM org.apache.coyote.AbstractProtocol start
INFO: Starting ProtocolHandler ["http-nio-8080"]
Jan 05, 2015 9:09:29 PM org.apache.coyote.AbstractProtocol start
INFO: Starting ProtocolHandler ["ajp-nio-8009"]
Jan 05, 2015 9:09:29 PM org.apache.catalina.startup.Catalina start
INFO: Server startup in 262 ms
It should be up and running on port 8080 and you could visit default page using URL: http://localhost:8080/
WEDNESDAY, 26 AUGUST 2015](https://image.slidesharecdn.com/tomcatotherthings-150925070615-lva1-app6891/85/Tomcat-other-things-57-320.jpg)


![7
8
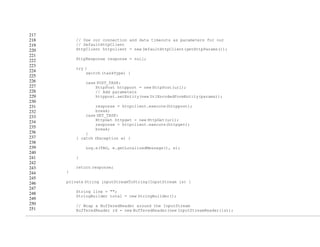
9
10
11
12
13
14
15
16
17
18
19
20
21
22
23
24
import javax.activation.DataHandler;
import javax.activation.FileDataSource;
import sun.misc.BASE64Encoder;
public class SendPDFImpl implements SendPDF {
@Override
public String[] sendPDF() {
String[] pdfFile = new String[2];
BASE64Encoder encoder = new BASE64Encoder();
File file = new File(
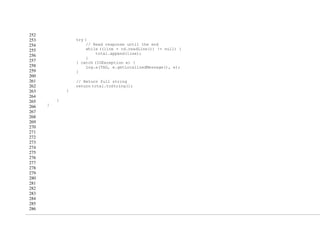
"C:/eclipse/workspace/AIPWebService/src/test.pdf");
DataHandler dh = new DataHandler(new FileDataSource(file));
String readLine = null;
byte[] data = new byte[(int) file.length()];
int offset = 0;
int numRead = 0;](https://image.slidesharecdn.com/tomcatotherthings-150925070615-lva1-app6891/85/Tomcat-other-things-111-320.jpg)
![25
26
27
28
29
30
31
32
33
34
35
36
37
38
39
40
41
42
InputStream stream = null;
try {
System.out.println("Web Service Called Successfully");
stream = dh.getInputStream();
// BufferedReader bufferedReader = new BufferedReader(
// new InputStreamReader(stream));
while (offset < data.length
&& (numRead = stream.read(data, offset, data.length
- offset)) >= 0) {
offset += numRead;
}
readLine = encoder.encode(data);
// while ((readLine = bufferedReader.readLine()) != null) {
System.out.println("'Reading File............................");
System.out.println("n");
System.out.println("Data Reading Successful");
pdfFile[0] = file.getName();
pdfFile[1] = readLine;](https://image.slidesharecdn.com/tomcatotherthings-150925070615-lva1-app6891/85/Tomcat-other-things-112-320.jpg)


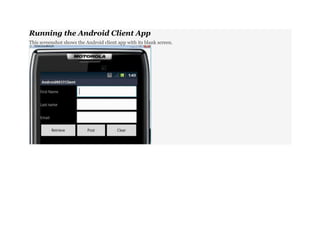
This document provides instructions for running a JavaServer Page (JSP) program using the Apache Tomcat web server. It describes how to install Java and Apache Tomcat, create a simple "Hello World" JSP file, and access it by entering a URL in a web browser. Key steps include creating a JSP file called "first.jsp", adding it to a project folder, and accessing it at a URL like http://localhost:8080/projectfolder/first.jsp to run the program on the Tomcat server.