Downloaded 1,083 times


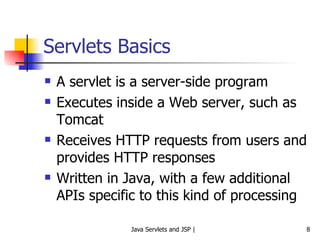


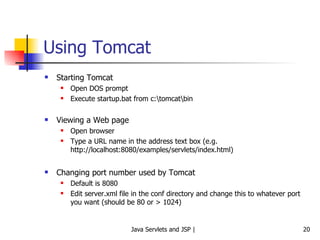


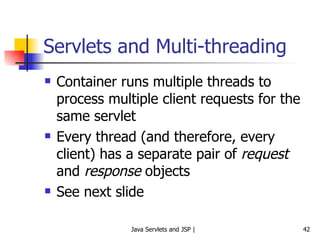
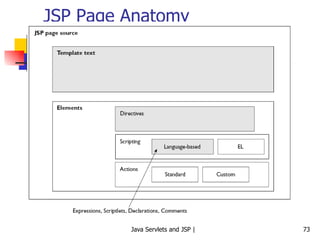
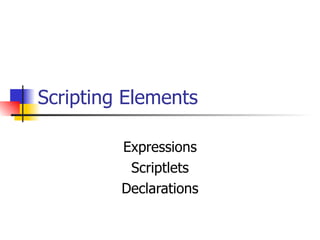
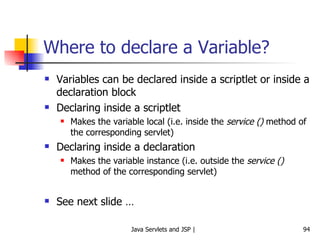
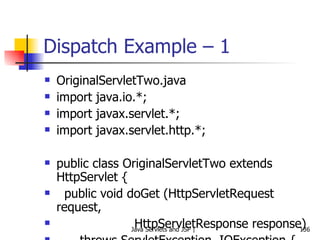
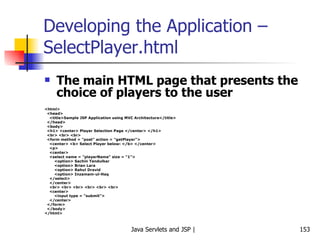
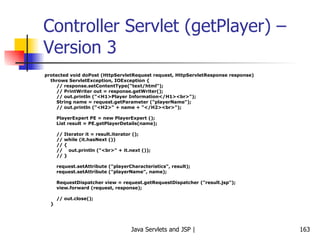
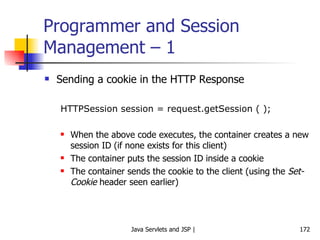
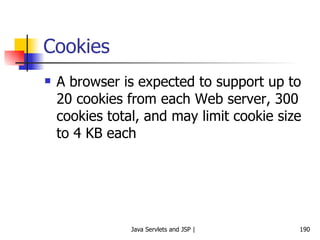
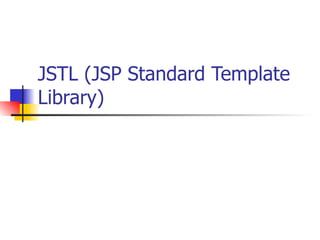
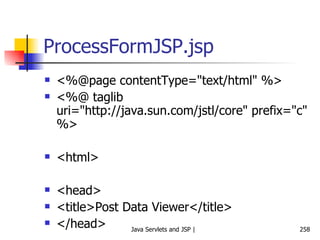
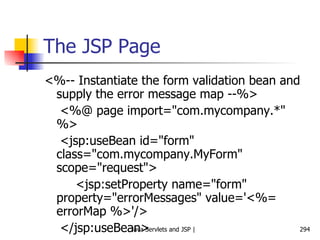
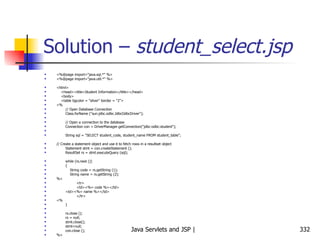
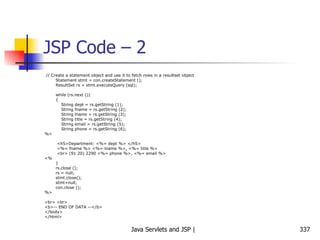
![Servlet (ShowParameters.java) package hello; import java.io.*; import javax.servlet.*; import javax.servlet.http.*; import java.util.*; /** Shows all the parameters sent to the servlet via either * GET or POST. Specially marks parameters that have no values or * multiple values. * * Part of tutorial on servlets and JSP that appears at * http://www.apl.jhu.edu/~hall/java/Servlet-Tutorial/ * 1999 Marty Hall; may be freely used or adapted. */ public class ShowParameters extends HttpServlet { public void doGet(HttpServletRequest request, HttpServletResponse response) throws ServletException, IOException { response.setContentType("text/html"); PrintWriter out = response.getWriter(); String title = "Reading All Request Parameters"; out.println(ServletUtilities.headWithTitle(title) + "<BODY BGCOLOR=\"#FDF5E6\">\n" + "<H1 ALIGN=CENTER>" + title + "</H1>\n" + "<TABLE BORDER=1 ALIGN=CENTER>\n" + "<TR BGCOLOR=\"#FFAD00\">\n" + "<TH>Parameter Name<TH>Parameter Value(s)"); Enumeration paramNames = request.getParameterNames(); while(paramNames.hasMoreElements()) { String paramName = (String)paramNames.nextElement(); out.println("<TR><TD>" + paramName + "\n<TD>"); String[] paramValues = request.getParameterValues(paramName); if (paramValues.length == 1) { String paramValue = paramValues[0]; if (paramValue.length() == 0) out.print("<I>No Value</I>"); else out.print(paramValue); } else { out.println("<UL>"); for(int i=0; i<paramValues.length; i++) { out.println("<LI>" + paramValues[i]); } out.println("</UL>"); } } out.println("</TABLE>\n</BODY></HTML>"); } public void doPost(HttpServletRequest request, HttpServletResponse response) throws ServletException, IOException { doGet(request, response); } }](https://image.slidesharecdn.com/1-javaservletsandjsp-120131021417-phpapp02/85/1-java-servlets-and-jsp-56-320.jpg)


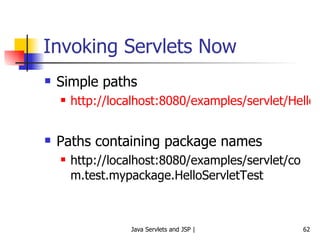
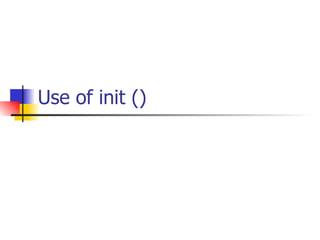
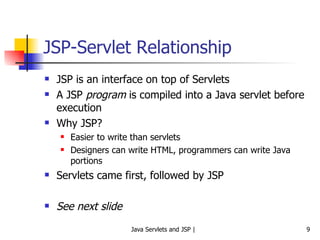
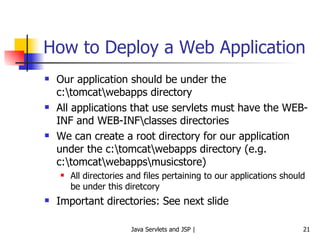
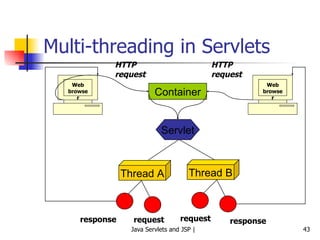
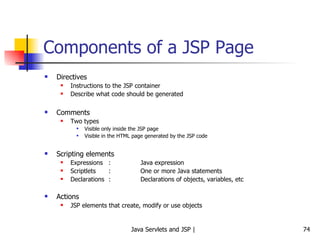
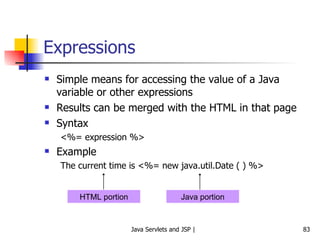
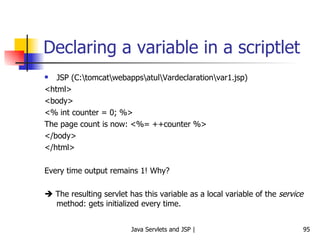
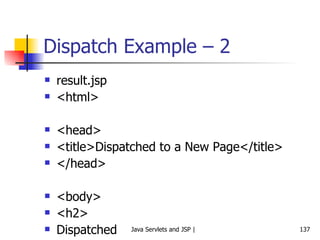
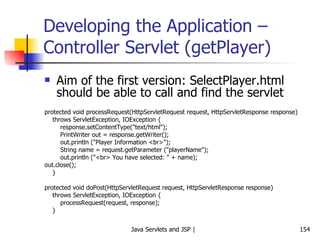
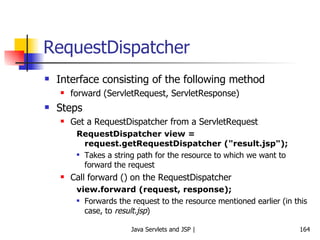
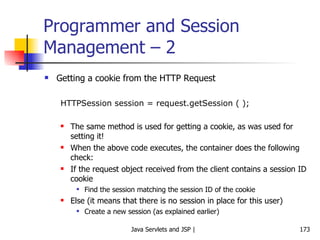
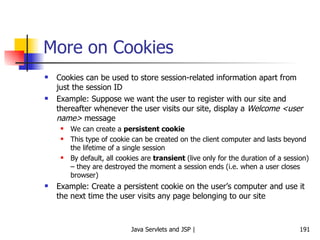
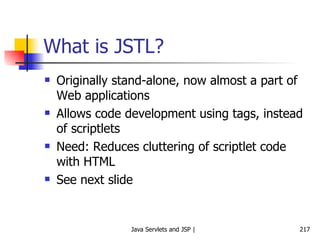
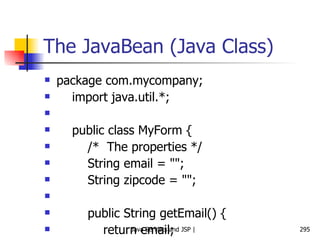
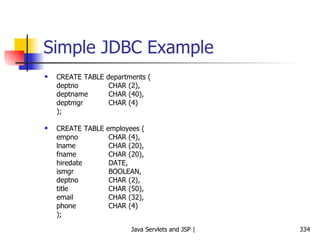
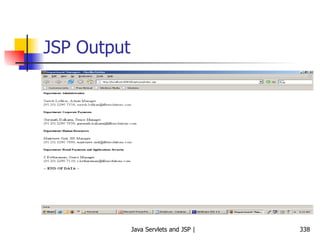
![Use of init () import java.io.*; import javax.servlet.*; import javax.servlet.http.*; public class LotteryNumbers extends HttpServlet { public long modTime; private int[] numbers = new int [10]; public void init () throws ServletException { modTime = System.currentTimeMillis ( )/1000*1000; for (int i=0; i<numbers.length; i++) { numbers[i] = randomNum (); } } public void doGet (HttpServletRequest request, HttpServletResponse response) throws ServletException, IOException { response.setContentType ("text/html"); PrintWriter out = response.getWriter (); String title = "Your Lottery Numbers"; out.println ("<HTML><HEAD><TITLE>" + title + "</TITLE></HEAD>"); out.println ("H1" + title + "/H1"); out.println ("Your lottery numbers are: " + "<BR>"); out.println ("<OL>"); for (int i=0; i<numbers.length; i++) { out.println (" <LI>" + numbers [i]); } out.println ("</OL></BODY></HTML>"); } private int randomNum () { return ((int) (Math.random () * 100)); } }](https://image.slidesharecdn.com/1-javaservletsandjsp-120131021417-phpapp02/85/1-java-servlets-and-jsp-65-320.jpg)


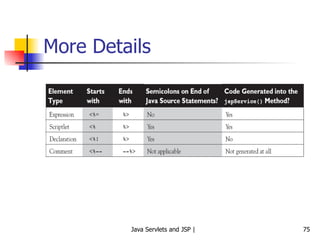

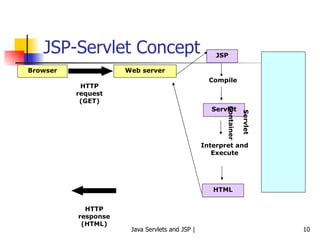
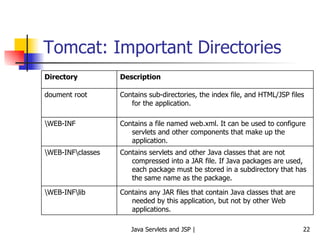
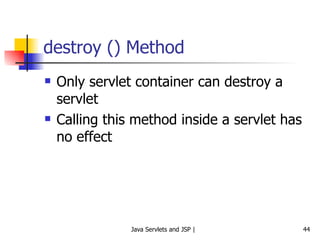
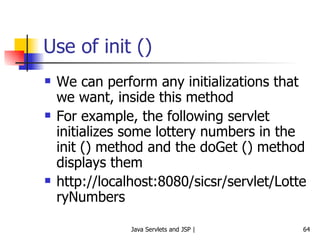
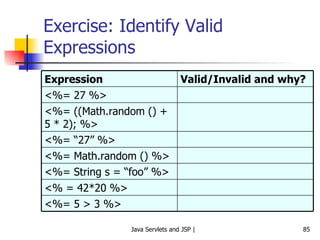
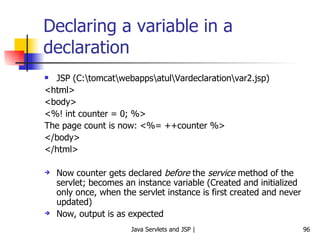
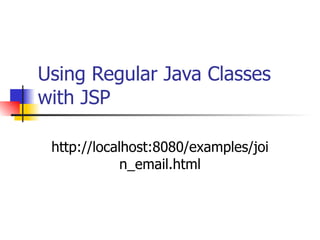
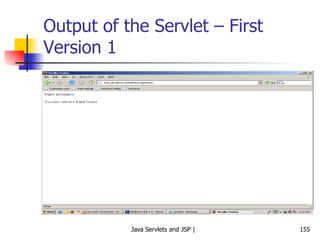
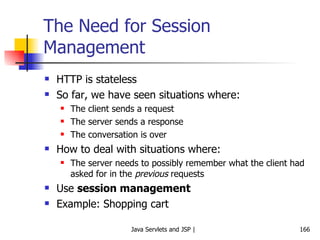
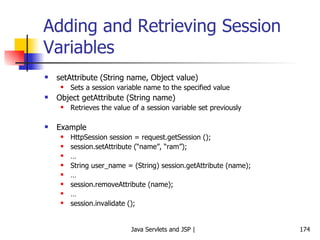
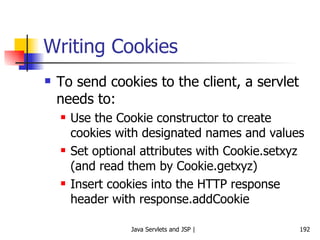
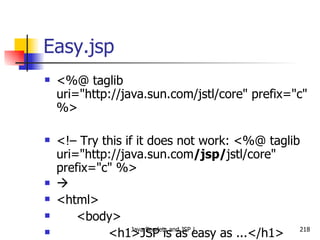
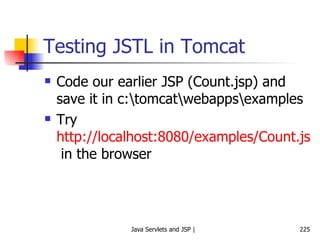
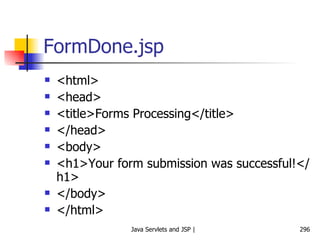
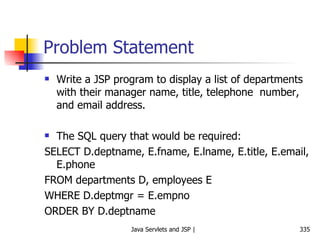
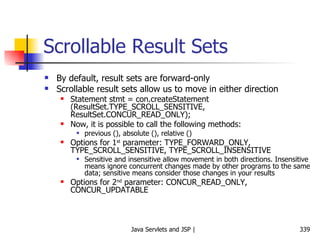
![More Expression Examples Square root of 2 is <%= Math.sqrt (2) %> The item you are looking for is <%= items [i] %> Sum of a, b, and c is <%= a + b + c %>.](https://image.slidesharecdn.com/1-javaservletsandjsp-120131021417-phpapp02/85/1-java-servlets-and-jsp-84-320.jpg)
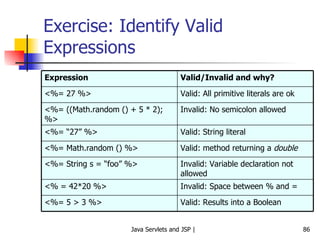


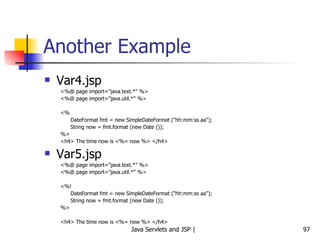


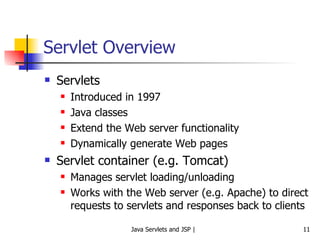
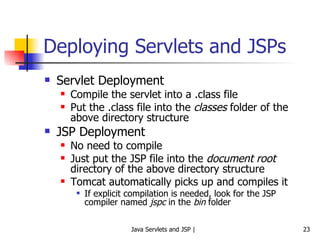
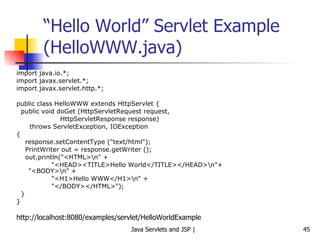
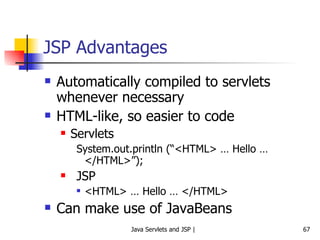
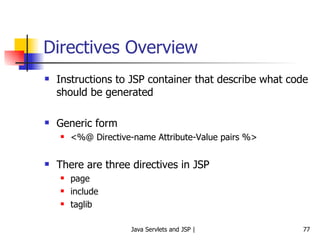
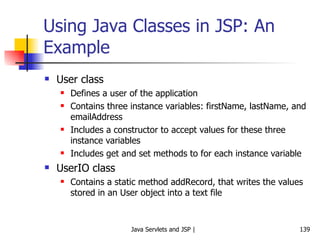
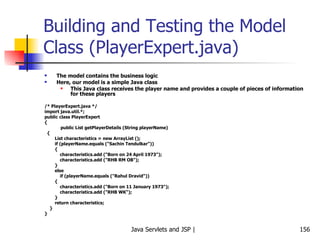
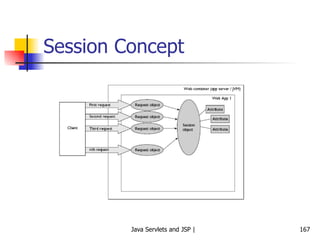
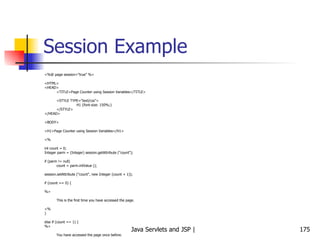
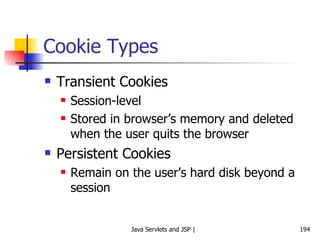
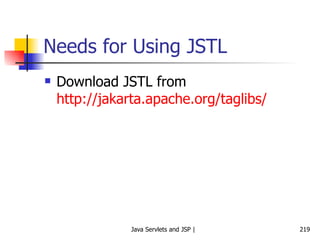
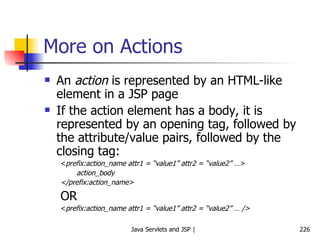
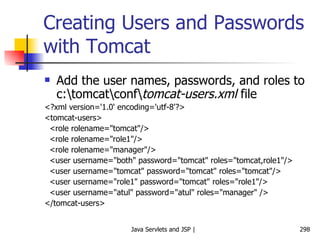
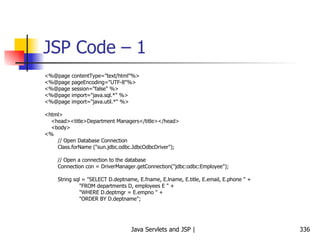
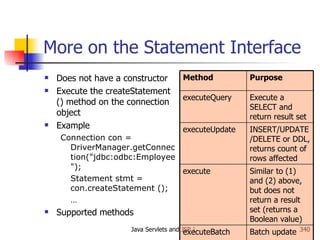
![Implicit Objects: out Object Used to generate output to be sent to the user Example <% String [] colors = {“red”, “green”, “blue”}; for (int i = 0; i < colors.length; i++) out.println (“<p>” + colors [i] + “</p>”); %> Of course, this can also be written as: <% String [] colors = {“red”, “green”, “blue”}; for (int i = 0; i < colors.length; i++) %> <p> <%= colors [i] %> </p>](https://image.slidesharecdn.com/1-javaservletsandjsp-120131021417-phpapp02/85/1-java-servlets-and-jsp-123-320.jpg)


![Reading Cookies Using a Servlet – CookieReader.java // http://localhost:8080/sicsr/servlet/CookieReader /* CookieReader.java */ import java.io.*; import javax.servlet.*; import javax.servlet.http.*; public class CookieReader extends HttpServlet { public void doGet (HttpServletRequest request, HttpServletResponse response) throws ServletException, IOException { response.setContentType("text/html"); PrintWriter out = response.getWriter(); out.println("<html>"); out.println("<head>"); out.println("<title>Cookie Reader</title>"); out.println("</head>"); out.println("<body>"); out.println ("<H1> This servlet is reading the cookies set previously </H1>"); out.println ("<P> </P>"); Cookie [] cookies = request.getCookies (); if (cookies == null) { out.println ("No cookies"); } else { Cookie MyCookie; for (int i=0; i < cookies.length; i++) { MyCookie = cookies [i]; String name = MyCookie.getName (); // Cookie name String value = MyCookie.getValue (); // Cookie value int age = MyCookie.getMaxAge(); // Lifetime: -1 if cookie expires on browser closure String domain = MyCookie.getDomain (); // Domain name out.println ("Name = " + name + " Value = " + value + " Domain = " + domain + " Age = " + age); out.println ("\n"); } } out.println ("<h2>Now reading session variables</h2>"); HttpSession session = request.getSession (); String password = (String) session.getAttribute ("password"); out.println ("Password = " + password); out.println("</body>"); out.println("</html>"); out.close(); } }](https://image.slidesharecdn.com/1-javaservletsandjsp-120131021417-phpapp02/85/1-java-servlets-and-jsp-201-320.jpg)

![RepeatVisitor Servlet import java.io.*; import javax.servlet.*; import javax.servlet.http.*; public class RepeatVisitor extends HttpServlet { public void doGet (HttpServletRequest request, HttpServletResponse response) throws ServletException, IOException { boolean newUser = true; Cookie [] cookies = request.getCookies (); if (cookies != null) { for (int i=0; i<cookies.length; i++) { Cookie c = cookies[i]; if ((c.getName ().equals ("repeatVisitor")) && (c.getValue ().equals ("yes"))) { newUser = false; } } } String title; if (newUser) { Cookie returnVisitorCookie = new Cookie ("repeatVisitor", "yes"); returnVisitorCookie.setMaxAge (60 * 60 * 24 * 365); // 1 year response.addCookie (returnVisitorCookie); title = "Welcome new user"; } else { title = "Welcome back user"; } PrintWriter out = response.getWriter (); out.println ("<HTML>" + "<HEAD>" + "<TITLE>" + "Hello" + "</TITLE>" + "</HEAD>\n"); out.println ("<BODY bgcolor = yellow>" + "<H1>" + title + "</H1>" + "</BODY>" + "</HTML>"); } }](https://image.slidesharecdn.com/1-javaservletsandjsp-120131021417-phpapp02/85/1-java-servlets-and-jsp-205-320.jpg)
![CookieUtilities Java Class import javax.servlet.*; import javax.servlet.http.*; public class CookieUtilities { public static String getCookieValue (HttpServletRequest request, String cookieName, String defaultValue) { Cookie [] cookies = request.getCookies (); System.out.println ("=== Inside CookieUtilities.java ==="); System.out.println ("Cookie name: " + cookieName); System.out.println ("Cookie value: " + defaultValue); System.out.println ("* * * *"); if (cookies != null) { for (int i=0; i<cookies.length; i++) { Cookie c = cookies[i]; if (cookieName.equals (c.getName ())) { return (c.getValue ()); } } } return defaultValue; } }](https://image.slidesharecdn.com/1-javaservletsandjsp-120131021417-phpapp02/85/1-java-servlets-and-jsp-210-320.jpg)


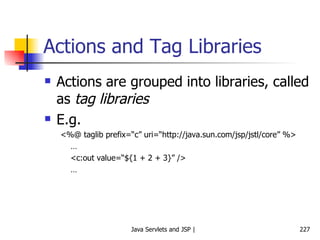
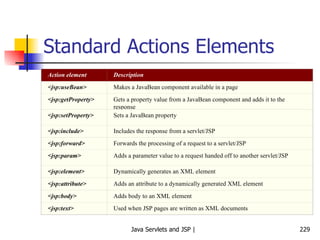
![EL Operators Operator Purpose . Access a bean property or Map entry [] Access an array or list element ( ) Group a sub-expression to change the evaluation order ? : Conditional operator + - / * % Mathematical operators < > <= >= != == (Or lt gt ge eq, …) Relational operators && || ! (or and or not) Logical operators](https://image.slidesharecdn.com/1-javaservletsandjsp-120131021417-phpapp02/85/1-java-servlets-and-jsp-232-320.jpg)
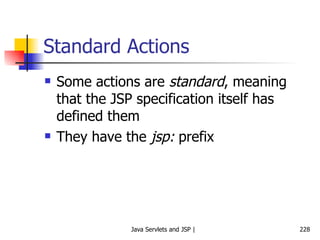
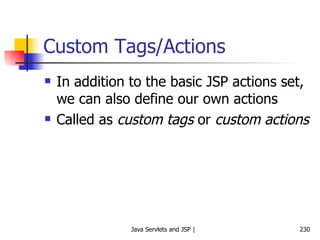
![Another JSTL Example – 1 jstlapp.jsp <%@ taglib prefix = "c" uri = "http://java.sun.com/jstl/core_rt" %> <% String names [] = {"One", "Two", "Three"}; request.setAttribute ("usernames", names); %> <html> <head> <title>Using JSTL</title> <link rel = "stylesheet" type = "text/css" href = "mystyle.css"> </head> <body> <c:set var = "message" value = "Welcome to JSTL" scope = "session" /> <h2><c:out value = "${message}" /></h2> <form action = "jstlmain.jsp" method = "post"> <table> <tr> <td colspan = "2" align = "center"> <h4>User Detail</h4> </td> </tr> <tr> <td>Enter your Name</td> <td> <input type = "text" name = "name"> </td> </tr> <tr> <td>Enter your City</td> <td> <input type = "text" name = "city"> </td> </tr> <tr> <td>Type</td> <td> <select name= "type"> <option>Manager</option> <option>Clerk</option> </select> </td> </tr> <tr> <td colspan = "2"> <input type = "submit" value = "Submit"> </td> </tr> </table> </form> <br /> <br /> Iterating over the array ... <br /> User Names: <c:forEach var = "name" items = "${usernames}"> <c:out value = "${name}" />, </c:forEach> </body> </html>](https://image.slidesharecdn.com/1-javaservletsandjsp-120131021417-phpapp02/85/1-java-servlets-and-jsp-238-320.jpg)


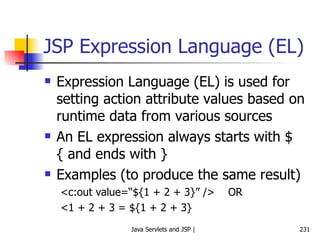
![Validate.js <script language="JavaScript"> function validate (form1) { for (i=0; i<form1.length; i++) { if ((form1.elements[i].value == "")) { alert ("You must provide a value for the field named: " + form1.elements[i].name); return false; } } return true; } </script>](https://image.slidesharecdn.com/1-javaservletsandjsp-120131021417-phpapp02/85/1-java-servlets-and-jsp-252-320.jpg)


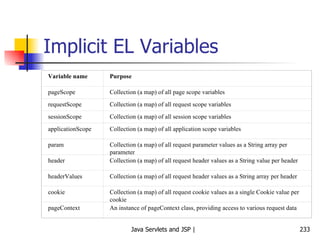
![Batch Example – JSP <%@page contentType="text/html"%> <%@page pageEncoding="UTF-8"%> <%@page session="false" %> <%@page import="java.sql.*" %> <%@page import="java.util.*" %> <% boolean ucommit = true; %> <html> <head><title>JDBC Transactions Application</title></head> <body> <% // ************************************************************************************ // THIS PART OF THE CODE PERFORMS BASIC INITIALIZATIONS SUCH AS DB CONNECTION, ETC // ************************************************************************************ // Open Database Connection Class.forName ("sun.jdbc.odbc.JdbcOdbcDriver"); // Open a connection to the database Connection con = DriverManager.getConnection("jdbc:odbc:accounts"); int account = Integer.parseInt (request.getParameter ("account")); int amount = Integer.parseInt (request.getParameter ("amount")); ResultSet rs = null; %> <% // ************************************************************************************ // THIS PART OF THE CODE DISPLAYS THE ACCOUNT DETAILS BEFORE THE BATCH OPERATION // ************************************************************************************ %> <h1> Account Balance AFTER the batch update </h1> <table bgcolor = "yellow" border = "2"> <tr> <th>Account Number</th> <th>Account Name</th> <th>Account Balance</th> </tr> <% PreparedStatement stmt = con.prepareStatement ("SELECT Account_Number, Account_Name, Balance " + "FROM accounts " + "WHERE Account_Number = ?"); stmt.setInt (1, account); // Create a statement object and use it to fetch rows in a resultset object try { rs = stmt.executeQuery (); } catch (SQLException se) { ucommit = false; out.println (se.getMessage ()); } while (rs.next ()) { String account_Number = rs.getString (1); String account_Name = rs.getString (2); String balance = rs.getString (3); %> <tr> <td><%= account_Number %> </td> <td><%= account_Name %> </td> <td><%= balance %> </td> </tr> <% } rs.close (); rs = null; stmt.close(); stmt=null; %> </table> <br> <br> <b>-- END OF DATA --</b> <br><br> <% // ************************************************************************************ // THIS PART OF THE CODE ATTEMPTS TO EXECUTE BATCH // ************************************************************************************ if (request.getParameter ("Commit") == null) { // Rollback was selected out.println ("<b> You have chosen to ROLL BACK the funds transfer. No changes would be made to the database. </b>"); } else { // Now try and execute the database operations int[] rows; // Create a PreparedStatement object PreparedStatement stmt_upd = con.prepareStatement ("UPDATE accounts " + "SET balance = balance + ? " + "WHERE account_number = ?"); for (int i=1; i<=10; i++) { stmt_upd.setInt (1, amount); stmt_upd.setInt (2, account); System.out.println ("Account = " + account); System.out.println ("Amount = " + amount); System.out.println ("Statement = " + stmt_upd); try { stmt_upd.addBatch (); } catch (SQLException se) { ucommit = false; out.println (se.getMessage ()); } } try { rows = stmt_upd.executeBatch (); con.commit (); for (int i=1; i<10; i++) System.out.println ("Result = " + rows[i]); } catch (SQLException se) { ucommit = false; out.println (se.getMessage ()); } } %> <% // ************************************************************************************ // THIS PART OF THE CODE DISPLAYS THE ACCOUNT DETAILS AFTER THE BATCH OPERATION // ************************************************************************************ %> <h1> Account Balance AFTER the batch update </h1> <table bgcolor = "lightblue" border = "2"> <tr> <th>Account Number</th> <th>Account Name</th> <th>Account Balance</th> </tr> <% stmt = con.prepareStatement ("SELECT Account_Number, Account_Name, Balance " + "FROM accounts " + "WHERE Account_Number = ?"); stmt.setInt (1, account); // Create a statement object and use it to fetch rows in a resultset object try { rs = stmt.executeQuery (); } catch (SQLException se) { ucommit = false; out.println (se.getMessage ()); } while (rs.next ()) { String account_Number = rs.getString (1); String account_Name = rs.getString (2); String balance = rs.getString (3); %> <tr> <td><%= account_Number %> </td> <td><%= account_Name %> </td> <td><%= balance %> </td> </tr> <% } rs.close (); rs = null; stmt.close(); stmt=null; con.close (); %> </table> <br> <br> <b>-- END OF DATA --</b> <br><br> </body> </html>](https://image.slidesharecdn.com/1-javaservletsandjsp-120131021417-phpapp02/85/1-java-servlets-and-jsp-361-320.jpg)


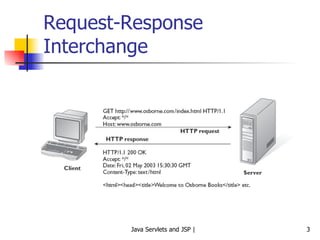
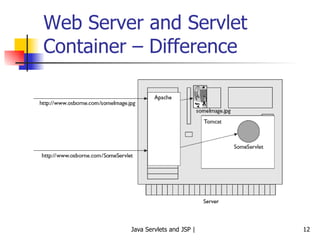
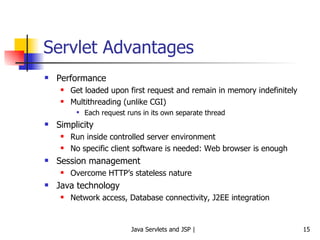
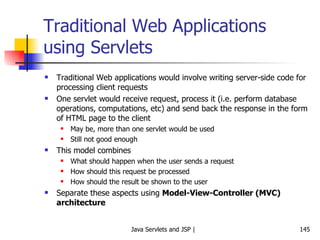
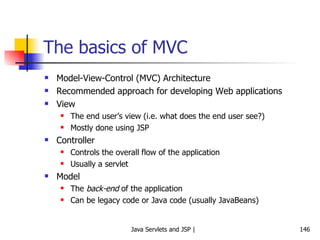
The document discusses Java servlets and Java Server Pages (JSP). It provides an introduction to HTTP and web interactions, and describes how servlets and JSPs allow Java code to generate dynamic web content. It explains the request-response cycle between clients and servers, and how servlets fit into this model. It also covers servlet containers, the servlet lifecycle, deployment descriptors, and developing and running servlets.