Time controlled switch catalogue - huimu instrumrnts v1.0 compressed
•
1 like•19 views

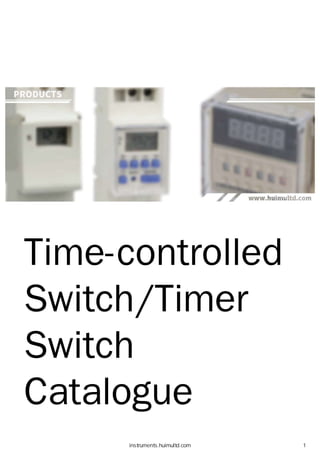
HUIMU Instrument (https://instruments.huimultd.com/) is a part of HUIMU Industrial, and committed to providing high-performance time-controlled switch devices for various electronic and electrical equipment to meet diverse automatic control needs.

Recommended
More Related Content
What's hot
What's hot (20)
Similar to Time controlled switch catalogue - huimu instrumrnts v1.0 compressed
Similar to Time controlled switch catalogue - huimu instrumrnts v1.0 compressed (20)
More from HUIMU Industrial (HUIMULTD)
Recently uploaded
Recently uploaded (20)
Time controlled switch catalogue - huimu instrumrnts v1.0 compressed
- 2. - Products - Timer switch can automatically control the switching time of the load through the internal programmable microcomputer chip unit (MCU); if time switch devices equipped with sensors (light control, rain control, sound control, etc.), the switching state of the load will also be automatically adjusted according to changes from the external environment. The bell controller can ring the bell at a specific time set by the user. The liquid level controller can control the liquid level to the set value through the water pump. You can visit the following pages to find out which products you are interested in and more details about them DIGITAL PROGRAMMABLE TIME SWITCH DIGITAL PROGRAMABLE STREET LIGHT CONTROLLER DIGITAL TIME RELAY DIGITAL PROGRAMABLE ELECTRIC BELL CONTROLLER INTELLIGENT LIQUID LEVEL CONTROLLER ACCESSORIES Digital Programmable Timer Switch The digital programmable time switch (also known as microcomputer time- controlled switch, or microcomputer time switch), is an electronic timer switch… More Digital Programmable Street Light Controller The digital programmable street light controller (or known as smart street light 'controller) is based on the digital programmable time control switch,… More Digital Time Relay The time relay is a relay with time-delay function, which can control high-current equipment through a small current, and is often used to control the… More Digital Programmable Electric Bell Controller The digital programmable electric bell controller uses a high-performance microcomputer chip as its core, which can automatically control the electric… More Intelligent Liquid Level Controller The intelligent liquid level controller (or high and low liquid level intelligent controller) uses integrated circuits as core chip, and has the funct… More .Accessories The accessories for time relays or switchs like circuit board, probe, time control switch chip module and so on… More instruments.huimultd.com 2
- 3. Location: Home > Products > Digital Programmable Timer Switch > KG316T Series (Single Output) Digital Programable Timer Switch (Single Output) Introduction KG316T series timer switch can automatically turn on or off the power of various electrical equipment according to the time set by the user. KG316T series digital time-controlled switch is consisted of digital LCD display, programmable IC chip, buttons, switching components and etc. KG316T series microcomputer timer switch is widely used in street lights, neon lights, advertising signs, production equipment, assembly lines, and broadcast equipment. The new version KG316T adopts a brand- new chip technology, which can effectively avoid the false welding and missing welding. Besides, the all-new designed KG316T has the characteristics of stable performance, low power consumption, light weight, and replaceable power supply battery. The function of KG316T-D series timer switch is similar to that of KG316T, but it adopts the wiring method of lower wiring. KG316T- II series timer switch (mini size type) is an improved version of KG316T, and KG316T-II has a smaller size and is suitable for applications that have higher requirements for installation space. KG316T-II has a built-in nickel-hydrogen rechargeable battery to prevent the battery from running out if the battery cannot be replaced in time. Parameters KG316T (Single Output, Upper Wire) Timer Range: 1min:5t:5168h (cycle work daily or weekly) Operation Voltage: AC220V/50Hz (or other customized voltage) Operation Temperature: -10°C~ 60°C Operation Humidity:<95% Switching Capacity: 25A (resistive load); 20A (inductive load) Number of Settings: 10/16 groups per day, with anti-mistouch button lock Control Mode: Manual, Auto Consumption Power: :51W Battery: 7AA battery Time Error: :51 s/day (25°C) Weight: 260g Dimensions: 120x74x58mm Mounting: Wall/Rail HUIMU INSTRUMENTS instruments.huimultd.com 3
- 4. KG316T-D (Single Output, Down Wire) Timer Range: 1minsts168h (cycle work daily or weekly) Operation Voltage: AC220V/50Hz (or other customized voltage) Operation Temperature: -10°C~ 60°C Operation Humidity:<95% Rated Current: 3A(220V), 1.9A(380V) Load Power: 6KW (resistive load), 1.8KW (inductive load), 1.2KW (electric motor), 0.9KW (light) Switching Capacity: 25A (resistive load); 20A (inductive load) Number of Settings: 16 groups per day, with anti-mistouch button lock Consumption Power: s2W Battery: SAA battery Time Error: s2s/day (25°C) Weight: 260g Dimensions: 120x77x53mm Mounting: Wall/Rail KG316T-II (Single Output, Mini Size) Timer Range: 1minsts168h (cycle work daily or weekly) Operation Voltage: AC220V/50Hz (or other customized voltage) Operation Temperature: -10°C- 60°C Operation Humidity:<95% Rated Power: 2.SKW Switching Capacity: 25A (resistive load); 20A (inductive load) Number of Settings: 16 groups per day Consumption Power: s2W Battery: Ni-MH rechargeable battery (1.2V, 40mAh) Time Error: s 1s/day (25°C) Dimensions: 98x55x40mm Weight: 66g Mounting: Wall/Rail Dimensions & Wiring Diagram KG316T (Single Output, Upper Wire) 1 Single-phase power supply (there are two wiring methods) 1.1 Direct control method (as shown in Figure 1) HUIMU INSTRUMENTS • • • • HUIMU INSTRUMENTS • • • • Applicable objects: Loads with single-phase power supply, and the power consumption does not exceed the rated capacity of the switch (resistive load 25A, inductive load 20A). 1.2 Single-phase expansion method (as shown in Figure 2) Applicable objects: load with single-phase power supply, but the power consumption exceeds the rated capacity of the switch (resistive load 25A, inductive load 20A). If this wiring method is adopted, the output terminal of the digital timer switch needs to be connected to a single phase AC contactor whose load capacity should larger than the power consumption of the load to expanse the switching capacity of the timer switch. 2 Three-phase power supply (requires an external three-phase AC contactor) Applicable objects: Loads with three-phase power supply. If the coil voltage of the three-phase AC contactor is AC220V/50Hz, the wiring method shown in Figure 3. If the coil voltage of the three-phase AC contactor is AC380V/50Hz, the wiring method shown in Figure 4. instruments.huimultd.com 4
- 5. Vl C 0 Vl C QJ E C --------- .. ■ - - - - - - ~ I 30.2mm I 30.2mm .................I I .------e- ---e ....I'-.> 0 3 3 --------·--• -0 0 ~ m ::c dl} ~ I : 1111 74mm ►~ T IN T Figure 1 llll OUT ~A-------:§:B ______....,. ITI :;o c------...... dll- N ~ T IN T OUT i Figure 3 ~3 r 0 )> 0 SI j:$ KG316T (Single Output, Upper Wire) ~@J~, J:tl~f -0 0 :eITI :;o dII- Sllfl T IN T Figure 2 lll2 OUT ;gA---------- :§: B------■.-..... ITI :;o C--------,11--....,. dII- N ~ T IN T OUT Figure 4 ~4 r- 0 );> C SI m ---r0.,.___ )> ...,___ o SI ~ KG316T (single circuit, upper wiring) dimensions and wiring diagram KG316T-D (Single Output, Down Wire} There are two wiring methods for KG16T-D series, you can choose according to your needs. instruments.huimultd.com 5
- 6. Vl C: 0 ·u5 C: <lJ E b.O C: '.P C: :::, 0 ::E: ~ ~ ~ ~ 8:f1 -flP E ~ b.O l'il Cl b.O C ·;:: ~ +-' :::, ui... u (X) 0, 3 3 ""O 0 :E:m ;;o cm ~ 1 77mm 1 ,•111----► i ---------1- - - - .- - -E) 36.5mm DIN RAIL L N N Figure 5 005 L ....N 0 3 3 r- 0 )> 0 Sl ~ KG316T-D (Single Output, Down Wire) ~@]~, ~t~~i L N N L "'C r- 0 I o:E: __.......----1---' )> m o :;o - - - - - - - - - - Et dB- -U1II ~ ~ Figure 6 lll6 KG316T-D (single circuit, down wiring) dimensions and wiring diagram KG316T-Il(Single Output, Mini Size) There are two wiring methods for KG16T-II series, you can choose according to your needs. instruments.huimultd.com 6
- 7. V) s:: 0 -~C: <1> E C 0.0 C: ·..:; C :::s 0 ~ ~ ~ 1!ei gg -HP E ~ 0.0 n, 0 0.0 s:: -~ ~ .t: ~ ~ u lO u, 3 3 ""Cl 0 ~ m ;;a cllr ~ 36.5mm DIN RAIL ct>3 ---~I I I 27.5mm 1 27.Smm I ·~·◄ ►'I I I L N N Figure 7 ~ 7 L I.O (X) 3 3 r- ~ 0 )3) ~ KG316T- II (Single Output, Mini Size) *@J~,~1m~ L N N L "'Cl r a a :::---......- - ' ):, m o;;a _______._______ ~ :; ~ Figure 8 1118 KG316T-II (single circuit, mini size) dimensions and wiring diagram Instructions For Use (How to set) Please make sure that you have understood the functions of all the buttons on the panel (button area), and perform the actual operation according to the instructions. 1 Description of buttons and indicators: CLOCK (0): Press to display your local time (it should be set by yourself: you can press and hold the "CLOCK" key to enter the "Time Adjustment Mode", and adjust the "WEEK", "HOUR", and "MINUTE" key to set the local time). PS: If no operation is performed within 30 seconds, the timer switch will automatically display the local time. TIMER(®): Press to enter the "Editing Mode", and then set the time to switch the load by adjusting the "WEEK", "HOUR", and "MINUTE" key. WEEK (D+): Adjust week or day. There are various working modes, such as "Five-day Mode" (Monday to Friday), "Six-day Mode" (Monday to Saturday), "Weekend Mode" (Saturday, Sunday), "Daily Mode" (Monday to Sunday), and "Three-day Mode" (Mon-Wed-Fri; Tue-Thu-Sat; Mon-Tue-Wed; Thu-Fri-Sat). instruments.huimultd.com 7
- 8. HOUR (H+): Adjust hour. MINUTE (M+): Adjust minute. AUTO/MANU (MANUAL): Switch the three switching mode of "ON", "AUTO" and "OFF". RESET/RECALL (Cancel/Restore, C/R): Press to cancel or restore the timing setting. PS: For products with button lock function, press the" RESET/RECALL" key four times to lock or unlock all buttons. C: Long press the "C" key to clear all settings of the timer switch. POWER LED: When the Power LED (red) is on, it means that the timer switch has been successfully connected to the power source. WORK LED: When the Power LED (red) and the Work LED (green) are on at the same time, it means that the load is powered on. 2 Operating instructions: Step 1. Timing setting (on): Press the" TIMER" button to enter the "Editing Mode". At this time, the "1 ON" symbol will appear at the bottom left of the LCD screen (that is, the first time to turn on the load, as shown in Figure 9), and then press the "WEEK" to select Working Mode, and then press the "HOUR" and "MINUTE" keys to input the required switching on time. Step 2. Timing setting (off): Press the" TIMER" button again, the "1 OFF" symbol will appear at the bottom left of the LCD screen (that is, the first time to turn off the load, as shown in Figure 10), and then press the "WEEK" to select Working Mode, and then press the "HOUR" and "MINUTE" keys to input the required switching off time. At this time, the first group of timing setting has been completed. Step 3. Timing setting (number of groups): After completing the first group of timing setting, press the "TIMER" button again, the LCD display will show the "20N• symbol, and you can set the second set of time setting. According to actual needs, you can repeat steps 1 and 2 to set many groups (the maximum programmable group number depends on the product's built-in chip). If you want to exit the "Editing Mode", you can press the "CLOCK" key to exit it. 1i _I I BWeek ~jffl Switching State ,,.MO TU WE TH FR SA SU~ **~~ - -••Timer Group No.~ ,.. - - Hour: Minute 1J,Bj: 5:H¢ B"1fa!±@~ --~(O_N_A_U_T_O_O_FF"""''.:◄:::_switching Mode ff §rib ~ H~:tt:rt MO TU WE TH FR SA SU • •... ON AUTO OFF MO TU WE TH FR SA SU loFF •• ON AUTO OFF Step 4. RESET/RECALL: Figure 9 IID9 Figure 10 ~10 Timing Setting1 MO TU WE TH FR SA SU 18: 3 0... ON AUTO OFF MO TU WE TH FR SA SU 2 3: 2 0...l oFF ON AUTO OFF Figure 11 1§11 Figure 12 ~12 After setting a group of time, for example, turn on the load at 18:30 every day (Figure 11), and turn off the load at 23:20 every day (Figure 12). If you want to cancel this group, you can press the "RESET/RECALL" button to delete this group of time settings. At this time, the group of time will be reset to the initial state, that is, "--: --" (Figure 9 and Figure 10). Under certain instruments.huimultd.com 8
- 9. conditions (without any key operation or switching to other interfaces within 20 seconds after cancel operation), just press the "RESET/RECALL" button again to restore this group of time settings. Step 5. AUTO/MANU: The timer switch has two switching modes: automatic and manual. In the automatic mode, the timer switch will be set according to the timing of steps 1 to 3, and the load will be automatically turned on or off at the corresponding time without human intervention. In manual mode, the load must be turned on or off by manual adjustment. The specific operations are as follows: 1) If you need to turn on the load manually, you can click the "AUTO/MANU" button to switch the "T" symbol on the display to the "ON" position (Figure 13). At this time, the load will always be in the on state and cannot be turned off automatically. 2) If you need to turn off the load manually, you can click the "AUTO/MANU" button to switch the" T" symbol on the display to the "OFF" position (Figure 14). At this time, the load will always be in the off state and cannot be turned on automatically. 3) If you need to switch the load automatically, you can click the "AUTO/MANU" button to switch the "T" symbol on the display to the "AUTO" position (Figure 15). At this time, the working state of the load will be switching automatically according to the timing setting, without being interfered by humans. Manul Mode: ON Manul Mode: OFF Auto Mode -¥ii:bflit::FF -¥iijJf~°it :* §ii:Mlit MO TU WE TH FR SA SU MO TU WE TH FR SA SU MO TU WE TH FR SA SU l oFF 18: 0 0 ... ON AUTO OFF Figure 13 0013 Button Lock: Locked ~iiim: _tim MO TU WE TH FR SA SU a ••... ON AUTO OFF loFF 18: 0 0 ... ON AUTO OFF Figure 16 ~16 Figure 14 0014 Timing Setting2 Step 6. Lock and unlock: loFF 18: 0 0 ... ON AUTO OFF Figure 15 lil15 Button Lock: Un-Locked ~i1irt1: Mi11W MO TU WE TH FR SA SU ••... ON AUTO OFF Figure 17 ~17 For the timer switch with button lock (or keyboard lock), you can quick press the "RESET/RECALL" key four times to lock or unlock all the buttons. -How to lock the buttons? In the unlocked state, quick press the "RESET/RECALL" button four times or without any operation within 30 seconds to lock all the buttons (Figure 16). At this time, there will be a "a" symbol in the bottom left, and you cannot make any settings for the timer switch. -How to unlock buttons? In the locked state, quick press the "RESET/RECALL" button four times to unlock all the buttons (Figure 17), and you can make settings at this time. instruments.huimultd.com 9
- 10. Location: Home > Products > Digital Programmable Timer Switch > KG316T Series (Multiple Output) Digital Programable Timer Switch (Multiple Output) Introduction KG316T series timer switch can automatically turn on or off the power of various electrical equipment according to the time set by the user. KG316T series digital time-controlled switch is consisted of digital LCD display, programmable IC chip, buttons, switching components and etc. KG316T series microcomputer timer switch is widely used in street lights, neon lights, advertising signs, production equipment, assembly lines, and broadcast equipment. The new version KG316T adopts a brand- new chip technology, which can effectively avoid the false welding and missing welding. Besides, the all-new designed KG316T has the characteristics of stable performance, low power consumption, light weight, and replaceable power supply battery. KG316T series multiple outputs type timer switch has multiple sets of independent output terminals, which can efficiently control multiple loads without interfering with each other. KG316T series multiple output timer switch is suitable for equipment that has limited installation space but needs to control multiple loads. KG316T (multiple output) has two sub-series, KG316T-2a can control the working status of two independent loads, and KG316T-3a can control the working status of three independent loads. Parameters KG316T (Multiple Output) Timer Range: 1min!>t:!>168h (cycle work daily or weekly) Operation Voltage: AC220V/50Hz (or other customized voltage) Operation Temperature: -10°C~ 50°C Operation Humidity:<95% Switching Capacity: 10A per output (resistive load) Number of Outputs: KG316T-2a (max two outputs), KG316T-3a (max three outputs); Each output is independent of each other and does not interfere with each other. Number of Settings: 16 groups per output, with anti-mistouch button lock Control Mode: Manual, Auto Consumption Power: !>4W Battery: SAA battery Time Error: !>2s/day (25°C) Weight: 450g Dimensions: 120x74x58mm Mounting: Wall/Rail Dimensions & Wiring Diagram KG316T (Multiple Output) 1 Direct control method (as shown in Figure 1) HUIMU INSTRUMENTS Applicable objects: Loads with single-phase power supply, and the power consumption does not exceed the rated switching capacity of the timer switch. 2 Single-phase expansion method (as shown in Figure 2) Applicable objects: load with single-phase power supply, but the power consumption exceeds the rated switching capacity of the timer switch. This method should be adopted for inductive loads. instruments.huimultd.com 10
- 11. If this wiring method is adopted, the output terminal of the digital timer switch needs to be connected to a single phase AC contactor whose switching capacity should larger than the power consumption of the load to expanse the switching capacity of the timer switch. For example, Figure 2.1 shows how to expand the switching capacity of OUT2 of KG316T-2a, and Figure 2.2 shows how to expand the switching capacity of OUT3 of KG316T-3a. *Note: Each load of this product and the power supply share a neutral line. Please make sure not to connect it wrongly when wiring. Vl C 0 Vl C Q) E Cl bJ) C ·..:; C ::::, 0 ~ ~ ~ ~ s<H fill E cu,._ bJ) cu Cl bJ) C ,._ ~ -~::::, u,._ u ------.- --- ------~ 30.2mm I 30.2mm ................... __. N 0 3 3 .----•(:)- ---(:) -----------· -o N r 0 0 ~ )> m C, ::0 ):]} cm- ~ L ~ N L OUT1 OUT2 KG316T-2a -0 ~L ~N cm- ~ Figure2.1 KG316T-2a 002.1 Figure 1 001 Figure 2 1!12 KG316T {Multiple Output) ~@]fl~ -0 N r0 0 ~ )> m C, ::0 ):]} cm- ~ L l!1I! N L OUT1 OUT2 OUT3 KG316T-3a -0 ~L ~N cm- ~ N L OUT1 OUT2 OUT3 LOAD ff!fi Figure 2.2 KG316T-3a 002.2 KG316T (multiple output) dimensions and wiring diagram Instructions For Use (How to set) Please make sure that you have understood the functions of all the buttons on the panel (button area), and perform the actual operation according to the instructions. 1 Description of buttons and indicators instruments.huimultd.com 11
- 12. CLOCK (0): Press to display your local time (it should be set by yourself: you can press and hold the "CLOCK" key to enter the "Time Adjustment Mode", and adjust the "WEEK", "HOUR", and "MINUTE" key to set the local time). PS: If no operation is performed within 30 seconds, the timer switch will automatically display the local time. TIMER(®): Press to enter the "Editing Mode", and then set the time to switch the load by adjusting the "WEEK", "HOUR", and "MINUTE" key. WEEK (D+): Adjust week or day. There are various working modes, such as "Five-day Mode" (Monday to Friday), "Six-day Mode" (Monday to Saturday), "Weekend Mode" (Saturday, Sunday), "Daily Mode" (Monday to Sunday), and "Three-day Mode" (Mon-Wed-Fri; Tue-Thu-Sat; Mon-Tue-Wed; Thu-Fri-Sat). HOUR (H+): Adjust hour. MINUTE (M+): Adjust minute. AUTO/MANU (MANUAL): Switch the three switching mode of "ON", "AUTO" and "OFF". For multiple-output timer switches, the output combination can be configured through the "AUTO/MANU" key when in the "Editing Mode" RESET/RECALL (Cancel/Restore, C/R): Press to cancel or restore the timing setting. PS: For products with button lock function, press the" RESET/RECALL" key four times to lock or unlock all buttons. C: Long press the "C" key to clear all settings of the timer switch. POWER LED: When the Power LED (red) is on, it means that the timer switch has been successfully connected to the power source. WORK LED: When the Power LED (red) and the Work LED (green) are on at the same time, it means that the load is powered on. 2 Operating instructions Step 1. Timing setting (on) Press the" TIMER" button to enter the "Editing Mode". At this time, the "1 ON" symbol will appear at the bottom left of the LCD screen (that is, the first time to turn on the load, as shown in Figure 3), and then press the "WEEK" to select Working Mode, and then press the "HOUR" and "MINUTE" keys to input the required switching on time. Step 2. Timing setting (off) Press the" TIMER" button again, the "1 OFF" symbol will appear at the bottom left of the LCD screen (that is, the first time to turn off the load, as shown in Figure 4), and then press the "WEEK" to select Working Mode, and then press the "HOUR" and "MINUTE" keys to input the required switching off time. At this time, the first group of timing setting has been completed. Week ~,~ Switching State tf3c~jU$ Timer Group No. B11aJ!.§.~ MO TU WE TH FR SA SU ◄ ON AUTO OFF MO TU WE TH FR SA SU ◄ 1OFF 'f ON AUTO OFF E B 1MO TU WE TH FR SA SU Output ttutb@~ I- • • T 7◄ )l.iif.--◄ ◄ Hour; Minute ON AUTO OFF 1-◄-- /JB1 : :n-tcfl Switching Mode H*tlit Figure 3 003 Figure4 1!14 H ~zW ~ Timing Setting1 MO TU WIE TH FR SA SU ◄ 1Otl 1 8: 3 0 'f ON AUTO OFF MO TU W!'t. TH FR SA SU 2 3: 2 0 ◄ "ON AUTO OFF Figure 5 005 Figure 6 006 Step 3. Timing setting (output combination) instruments.huimultd.com 12
- 13. For multiple-output timer switches, the output combination can be configured through the "AUTO/MANU" key when in the "Editing Mode" (as shown in Figure 7). KG316T-2a has three output combinations (OUT1, OUT2, OUT1 -OUT2); KG316T-3a has six output combinations (OUT1, OUT2, OUT3, OUT1-OUT2, OUT1-OUT3, OUT1-OUT2-OUT3, OUT2-OUT3). Take KG316T-3a as an example. If you want LOAD 2 to turn on at 10 o'clock AM, you can set it according to Figure 8; if you want LOAD1 and LOAD 3 to turn off at 6 o'clock PM, you can set it according to Figure 9. KG316T-2a MO TU WE TH FR SA SU (three combinations ◄ of outputs) 1OFF ◄.... 3.fitl1~DUtlj!fl.-g ON AUTO OFF KG316T-3a (six cornbinations MO TU WE TH FR SA SU ◄of outputs) . ◄1OFF • 6~,$fi1 teHl.~ .... ◄ ON AUTO OFF MO TU WE TH FR SA SU 1 0: 0 0.... ON AUTO OFF Figure 8 008 Timing Setting2 Step 4. Timing setting (number of groups) ◄ ◄ ◄ Figure 7 ◄ ◄ 007 ◄ ◄ ◄ ◄ ◄ ◄ ◄ ◄ ◄ MO TU WE TH FR SA SU 1 8: 0 0 'f' ON AUTO OFF ◄ Figure 9 1119 ◄ ◄ After completing the first group of timing setting, press the "TIMER" button again, the LCD display will show the "20N• symbol, and you can set the second set of time setting. According to actual needs, you can repeat steps 1 to 3 to set many groups (the maximum programmable group number depends on the product's built-in chip). If you want to exit the "Editing Mode", you can press the "CLOCK" key to exit it. Step 5. RESET/RECALL After setting a group of time, for example, turn on the LOAD1 at 18:30 every day (Figure 5), and turn off the LOAD1 at 23:20 every day (Figure 6). If you want to cancel this group, you can press the "RESET/RECALL" button to delete this group of time settings. At this time, the group of time will be reset to the initial state, that is, "--: --" (Figure 3 and Figure 4). Under certain conditions (without any key operation or switching to other interfaces within 20 seconds after cancel operation), just press the "RESET/RECALL" button again to restore this group of time settings. Step 6. AUTO/MANU The timer switch has two switching modes: automatic and manual. In the automatic mode, the timer switch will be set according to the timing of steps 1 to 4, and the load will be automatically turned on or off at the corresponding time without human intervention. In manual mode, the load must be turned on or off by manual adjustment. The specific operations are as follows: 1) If you need to turn on the load manually, you can click the "AUTO/MANU" button to switch the "T" symbol on the display to the "ON" position (Figure 10). At this time, the load will always be in the on state and cannot be turned off automatically. 2) If you need to turn off the load manually, you can click the "AUTO/MANU" button to switch the" T" symbol on the display to the "OFF" position (Figure 11 ). At this time, the load will always be in the off state and cannot be turned on automatically. 3) If you need to switch the load automatically, you can click the "AUTO/MANU" button to switch the "T" symbol on the display to the "AUTO" position (Figure 12). At this time, the working state of the load will be switching automatically according to the timing setting, without being interfered by humans. instruments.huimultd.com 13
- 14. Manul Mode: ON =J=-iJ.Jtli: H Manul Mode: OFF =J=zW*l~: ~ Auto Mode ~ iih:f-irt MO TU WE lH FR SA SU MO l U WE TH FR SA SU MO TU WE TH FR SA SU 1Off 1 8: 0 0 ◄ .... ON AUTO OFF Figure 1o 1!11 0 Button Lock: Locked t:iimtm.: ...ttm MO TU WE TH FR SA SU . ◄ a .... ON AUTO OFF 1 8: 0 01Off .... ON AUTO OFF Figure 13 1!113 Figure 11 ~11 Timing Setting3 Step 7. Lock and unlock ◄ 1 8 : 0 0 ◄ 1i,Ff .... ON AUTO OFF Figure 12 0012 Button Lock: lln-Locked i!b.~ ~m • ~?i'¢ rn,~m i!J,. • m t!J, MO TU WE TH FR SA SU . ◄ • .... OIN AUTO OFF Figure 14 111114 For the timer switch with button lock (or keyboard lock), you can quick press the "RESET/RECALL" key four times to lock or unlock all the buttons. -How to lock the buttons? In the unlocked state, quick press the "RESET/RECALL" button four times or without any operation within 30 seconds to lock all the buttons (Figure 13). At this time, there will be a "a" symbol in the bottom left, and you cannot make any settings for the timer switch. -How to unlock buttons? In the locked state, quick press the "RESET/RECALL" button four times to unlock all the buttons (Figure 14), and you can make settings at this time. instruments.huimultd.com 14
- 15. Location: Home > Products > Digital Programmable Timer Switch > JFT-02 Digital Programable Time Switch (DIN Rail Mount) Introduction JFT02 series microcomputer time control switch is specially designed for DIN Rail Mount installation. It can be directly installed into the power distribution cabinet, meter box, signal box, etc., and used with other electrical equipment to achieve efficient control of the load JFT02 series digital time-controlled switch is consisted of digital LCD display, programmable IC chip, buttons, switching components and etc. JFT02 series digital timer switch is widely used in street lights, neon lights, advertising signs, production equipment, assembly lines, and broadcast equipment. The new version JFT02 adopts a brand-new chip technology, which can effectively avoid the false welding and missing welding. Besides, the all-new designed JFT02 has the characteristics of stable performance, low power consumption, light weight, and etc. The JFT02 series has two sub-series. JFT02-1 a adopts single pole single throw switching plan (SPST), with only one normally open contact, which can control the switching state of a load; JFT02-1c adopts double pole double throw switching plan (SPDT), which has One normally open contact and one normally closed contact can simultaneously control the switching state of two loads. Parameters JFT02 (DIN Rail Mount) Timer Range: 1min:5t:5168h (cycle work daily or weekly) Operation Voltage: 110VAC, 220VAC/50Hz (or other customized voltage) Operation Temperature: -10°C~ 60°C Operation Humidity: <95% Switching Capacity: 30A (resistive load), 15A (inductive load) Contact Type: JFT02-1 a (SPST, only 1 NO contact); JFT02-1c (SPDT, 1 NO and 1 NC contact) Number of Settings: 10 groups per day Control Mode: Manual, Auto Consumption Power: :55W Battery: BAA battery Time Error: :52s/day (25°C) Dimensions: 100x50x74mm Mounting: Wall/Rail Dimensions & Wiring Diagram JFT02 (DIN Rail Mount) HUIMU INSTRUMENTS JFT02 has two sub-series (as shown in Figure 1): JFT02-1a has one normally open contact (PORT4); JFT02-1c has one normally open contact (PORT4) and one normally closed contact (PORTS). 1 Single Phase Power Supply 1.1 Direct control method (as shown in Figure 2) Applicable objects: Loads with single-phase power supply, and the power consumption does not exceed the rated switching capacity of the timer switch. 1.2 Single-phase expansion method Applicable objects: load with single-phase power supply, but the power consumption exceeds the rated switching capacity of instruments.huimultd.com 15
- 16. the timer switch. This method should be adopted for inductive loads. If this wiring method is adopted, the output terminal of the digital timer switch needs to be connected to a single phase AC contactor whose switching capacity should larger than the power consumption of the load to expanse the switching capacity of the timer switch. 2 Three Phase Power Supply Applicable objects: load with three-phase power supply (as shown in Figure 3). 1/l, C: 0 1/l C: Q) E 0 0.0 C t,c, C: ::::, 0 ~ :!::: :::, U ' 1- u 35.3mm DIN RAIL 50mm JfT02-1 a POWER @$ LOAD fnii JFT02-1a NO ffl'ff I I ----►.., I 74mrn JFT02-1c POWER ~~ JFf02-1c LOAD $J_fl .-: NC '/lti'il POWER ~~ POWER ~ ;'Ji LOAD fnti Figure 2 ~2 JFT02 (DIN RAILMOU NT) @$11~ Figure 1: IID1 JFT0,2-1a 1 2 _ 3 4 5_ E9 EB EB E9 E9 N ___._---'~ ~7-1-1 POWER A--....,. ~~ B---c--- Figure 3 003 LOAD fb.fi JFT02 dimensions and wiring diagram Instructions For Use (How to set) Please make sure that you have understood the functions of all the buttons on the panel (button area), and perform the actual operation according to the instructions. 1 Description of buttons and indicators instruments.huimultd.com 16
- 17. CLOCK (0): Press to display your local time (it should be set by yourself: you can press and hold the "CLOCK" key to enter the "Time Adjustment Mode", and adjust the "WEEK", "HOUR" , and "MINUTE" key to set the local time). PS: If no operation is performed within 30 seconds, the timer switch will automatically display the local time. TIMER(®): Press to enter the "Editing Mode", and then set the time to switch the load by adjusting the "WEEK", "HOUR" , and "MINUTE" key. WEEK (D+): Adjust week or day. There are various working modes, such as "Five-day Mode" (Monday to Friday), "Six-day Mode" (Monday to Saturday), "Weekend Mode" (Saturday, Sunday), "Daily Mode" (Monday to Sunday), and "Three-day Mode" (Mon-Wed-Fri; Tue-Thu-Sat; Mon-Tue-Wed; Thu-Fri-Sat). HOUR (H+): Adjust hour. MINUTE (M+): Adjust minute. AUTO/MANU (MANUAL): Switch the three switching mode of "ON", "AUTO" and "OFF". For multiple-output timer switches, the output combination can be configured through the "AUTO/MANU" key when in the "Editing Mode" RESET/RECALL (Cancel/Restore, C/R): Press to cancel or restore the timing setting. PS: For products with button lock function, press the" RESET/RECALL" key four times to lock or unlock all buttons. C: Long press the "C" key to clear all settings of the timer switch. POWER LED: When the Power LED (red) is on, it means that the timer switch has been successfully connected to the power source. WORK LED: When the Power LED (red) and the Work LED (green) are on at the same time, it means that the load is powered on. 2 Operating instructions Step 1. Timing setting (on) Press the" TIMER" button to enter the "Editing Mode". At this time, the "1 ON" symbol will appear at the bottom left of the LCD screen (that is, the first time to turn on the load, as shown in Figure 4), and then press the "WEEK" to select Working Mode, and then press the "HOUR" and "MINUTE" keys to input the required switching on time. Step 2. Timing setting (off) Press the" TIMER" button again, the "1 OFF" symbol will appear at the bottom left of the LCD screen (that is, the first time to turn off the load, as shown in Figure 5), and then press the "WEEK" to select Working Mode, and then press the "HOUR" and "MINUTE" keys to input the required switching off time. At this time, the first group of timing setting has been completed. MO TU WE TH FR SA SU • AUTO MO TU WE TH FR SA SU • • AUTO Figure 4 11]4 Figure 5 [!IS Step 3. Timing setting (number of groups) Timing Setting1 Hour: Minute Second ,J,Btj" : n'lifl fJ Switching Mode ff~~xt MO TU WE TH FR SA SU 10N O8 : 3 0 -- AUTO MO TU WE TH FR SA SU 1OFF 2 0 : ~UT~ - - Figure 6 1116 Figure 7 007 instruments.huimultd.com 17
- 18. After completing the first group of timing setting, press the "TIMER" button again, the LCD display will show the "2ON" symbol, and you can set the second set of time setting. According to actual needs, you can repeat steps 1 and 2 to set many groups (the maximum programmable group number depends on the product's built-in chip). If you want to exit the "Editing Mode" , you can press the "CLOCK" key to exit it. Step 4. RESET/RECALL After setting a group of time, for example, turn on the load at 18:30 every day (Figure 6), and turn off the load at 23:20 every day (Figure 7). If you want to cancel this group, you can press the "RESET/RECALL" button to delete this group of time settings. At this time, the group of time will be reset to the initial state, that is, "--: --" (Figure 4 and Figure 5). Under certain conditions (without any key operation or switching to other interfaces within 20 seconds after cancel operation), just press the "RESET/RECALL" button again to restore this group of time settings. Step 5. AUTO/MANU The timer switch has two switching modes: automatic and manual. In the automatic mode, the timer switch will be set according to the timing of steps 1 to 3, and the load will be automatically turned on or off at the corresponding time without human intervention. In manual mode, the load must be turned on or off by manual adjustment. The specific operations are as follows: 1) If you need to turn on the load manually, you can click the "AUTO/MANU" button to switch the "T" symbol on the display to the "ON" position (Figure 8). At this time, the load will always be in the on state and cannot be turned off automatically. 2) If you need to turn off the load manually, you can click the "AUTO/MANU" button to switch the" T" symbol on the display to the "OFF" position (Figure 9). At this time, the load will always be in the off state and cannot be turned on automatically. 3) If you need to switch the load automatically, you can click the "AUTO/MANU" button to switch the "T" symbol on the display to the "AUTO" position (Figure 10). At this time, the working state of the load will be switching automatically according to the timing setting, without being interfered by humans. Manul Mode: ON Manul Mode: OFF Auto Mode =J=.rJ.Jt~it : fF =f.rJJ~lit: * §rJ.J;f;fit MO TU WE TH FR SA SU MO TU WE TH FR SA SU MO TU WE TH FR SA SU 1OFF 0 .5: 2 0 13 1OFF 0 5 : 2 0 13 1OfF 0 5: 2 0 13 ON OFF AUTO Figure 8 Figure 9 Figure 10 (118 1!19 0010 Timing Setting2 instruments.huimultd.com 18
- 19. Location: Home > Products > Digital Programmable Timer Switch > JFT-03 Series Digital Programmable Time Switch Introduction JFT series digital programmable time-controlled switch can automatically turn on or off the power of various electrical equipment according to the time set by the user. JFT series microcomputer time-controlled switches are composed of LCD digital display, programmable IC chips, buttons, switch components, etc., which are widely used in street lights, neon lights, advertising signs, production equipment, assembly lines, broadcast equipment and other equipment. The JFT series time- controlled switch adopts a new patch technology, which can effectively avoid the phenomenon of false welding and missing welding, and has the characteristics of stable performance, low power consumption, and light weight. JFT-03 can be directly welded into the instrument, or be panel mounted with a contact bracket. Parameters JFT-03 Timer Range: 1min:,;t:,;168h (cycle work daily or weekly) Voltage: 110VAC, 220VAC/50Hz (or other customized voltage) Operation Temperature: -10°C-50°C Operation Humidity: <95% Number of Settings: 10 groups per day Switching Capacity: 10A (resistive load) Contact Type: SPDT, 1 NO and 1 NC contact Battery: Built-in rechargeable Ni-MH battery Consumption Power: :,;5W Time Error: :,;2s/day (25°C) Weight:140g Dimensions: 48x48x96mm Mounting: Panel/Wall Dimensions & Wiring Diagram JFT-03 1 DC power supply (as shown in Figure 1) 2 Single-phase AC power supply 2.1 Direct control method (as shown in Figure 2.1) HUIMU INSTRUMENTS Applicable objects: Loads with single-phase power supply, and the power consumption does not exceed the rated switching capacity of the switch. 2.1 Single-phase expansion method (as shown in Figure 2.2) Applicable object: Load with single-phase power supply, but the power consumption exceeds the rated switching capacity of this switch. The capacity expansion method should be adopted for inductive loads. 3 Three-phase AC power supply (as shown in Figure 3) Need to connect a three-phase AC contactor (coil voltage is 220VAC/50HZ). instruments.huimultd.com 19
- 20. Vl C 0 1/1 C: QJ E Cl eo C: -C: ::i 0 2 Iii fil ~ &<g m1 E roL.. eore Cl eo C: ·;:: ~ -·5 uI,,,. u 3 8mm -~I--- •--r ---------111 14 1 1--.....:7:..;;3:.:.:m~m.:;,:.' ----1..-- 1 • ... ,, 0 ~m ::0 cm ~ 96mm + POWER ~;m, LOAD !!:i'J.fi ~ 3 3 Figure 1 1!11 Figure 2.2 002.2 48mm JFT-03 Series Figure 2.1 1!12.1 Figure 3 003 POWER f:@.li: c5 N --+,--➔-+I ~A-----,..m ::0 8-----.... =c-----...JFT-03 dimensions and wiring diagram Instructions For Use (How to set) Please make sure that you have understood the functions of all the buttons on the panel (button area), and perform the actual operation according to the instructions. 1 Description of buttons and indicators CLOCK (0): Press to display your local time (it should be set by yourself: you can press and hold the "CLOCK" key to enter the "Time Adjustment Mode", and adjust the "WEEK", "HOUR", and "MINUTE" key to set the local time). PS: If no operation is performed within 30 seconds, the timer switch will automatically display the local time. TIMER(®): Press to enter the "Editing Mode", and then set the time to switch the load by adjusting the "WEEK", "HOUR", and "MINUTE" key. WEEK (D+): Adjust week or day. There are various working modes, such as "Five-day Mode" (Monday to Friday), "Six-day Mode" (Monday to Saturday), "Weekend Mode" (Saturday, Sunday), "Daily Mode" (Monday to Sunday), and "Three-day Mode" (Mon-Wed-Fri; Tue-Thu-Sat; Mon-Tue-Wed; Thu-Fri-Sat). instruments.huimultd.com 20
- 21. HOUR (H+): Adjust hour. MINUTE (M+): Adjust minute. AUTO/MANU (MANUAL): Switch the three switching mode of "ON", "AUTO" and "OFF". For multiple-output timer switches, the output combination can be configured through the "AUTO/MANU" key when in the "Editing Mode" RESET/RECALL (Cancel/Restore, C/R): Press to cancel or restore the timing setting. PS: For products with button lock function, press the" RESET/RECALL" key four times to lock or unlock all buttons. C: Long press the "C" key to clear all settings of the timer switch. POWER LED: When the Power LED (red) is on, it means that the timer switch has been successfully connected to the power source. WORK LED: When the Power LED (red) and the Work LED (green) are on at the same time, it means that the load is powered on. 2 Operating instructions Step 1. Timing setting (on) Press the" TIMER" button to enter the "Editing Mode". At this time, the "1 ON" symbol will appear at the bottom left of the LCD screen (that is, the first time to turn on the load, as shown in Figure 4), and then press the "WEEK" to select Working Mode, and then press the "HOUR" and "MINUTE" keys to input the required switching on time. Step 2. Timing setting (off) Press the" TIMER" button again, the "1 OFF" symbol will appear at the bottom left of the LCD screen (that is, the first time to turn off the load, as shown in Figure 5), and then press the "WEEK" to select Working Mode, and then press the "HOUR" and "MINUTE" keys to input the required switching off time. At this time, the first group of timing setting has been completed. Week gy E B 5-_ -_·t -h'- Smt Mt. . MO TU WE TH FR SA SUI WI C Ing . a e---.., - { - Hour : Minute Second ;J,8'f : 5tl!fl t.PIl¥~* • ,~ / I 7'.1A1i1 (-i10N) - - • - - Ti mer Group No. ~ r ,.OFF ON AUTO OFF B1fl3]£gs ff §lrJJ * MO TU WE TH FR SA SU • • AUTO MO TU WE TH FR SA SU • • AUTO Figure4 004 Figure 5 !)5 Timing Setting 1 Step 3. Timing setting (number of groups) Switching Mode H*~it MO TU WE TH FR SA SU 10N08:30-- ALJTQ MO TU WE TH FR SA SU 2 0 : 3 0 -- 1OFF AUTO Figure 6 006 Figure 7 007 After completing the first group of timing setting, press the "TIMER" button again, the LCD display will show the "20N• symbol, and you can set the second set of time setting. According to actual needs, you can repeat steps 1 and 2 to set many groups (the maximum programmable group number depends on the product's built-in chip). If you want to exit the "Editing Mode", you can press the "CLOCK" key to exit it. Step 4. RESET/RECALL After setting a group of time, for example, turn on the load at 18:30 every day (Figure 6), and turn off the load at 23:20 every day (Figure 7). If you want to cancel this group, you can press the "RESET/RECALL" button to delete this group of time settings. At this time, the group of time will be reset to the initial state, that is, "--: --" (Figure 4 and Figure 5). Under certain conditions instruments.huimultd.com 21
- 22. (without any key operation or switching to other interfaces within 20 seconds after cancel operation), just press the "RESET/RECALL" button again to restore this group of time settings. Step 5. AUTO/MANU The timer switch has two switching modes: automatic and manual. In the automatic mode, the timer switch will be set according to the timing of steps 1 to 3, and the load will be automatically turned on or off at the corresponding time without human intervention. In manual mode, the load must be turned on or off by manual adjustment. The specific operations are as follows: 1) If you need to turn on the load manually, you can click the "AUTO/MANU" button to switch the "T" symbol on the display to the "ON" position (Figure 8). At this time, the load will always be in the on state and cannot be turned off automatically. 2) If you need to turn off the load manually, you can click the "AUTO/MANU" button to switch the" T" symbol on the display to the "OFF" position (Figure 9). At this time, the load will always be in the off state and cannot be turned on automatically. 3) If you need to switch the load automatically, you can click the "AUTO/MANU" button to switch the "T" symbol on the display to the "AUTO" position (Figure 10). At this time, the working state of the load will be switching automatically according to the timing setting, without being interfered by humans. Manul Mode: ON Manul Mode: OFF Auto Mode =I=-Lbtlrt : H =J=-LJJ~Iit : * 13Lbtfit MO TU WE TH FR SA SU MO TU WE TH FR SA SU MO TU WE TH FR SA SU 1OFF 0 .5: 2 0 13 1OFF 0 5 : 2 0 13 1OfF 0 5: 2 0 13 ON OFF AUTO Figure 8 Figure 9 Figure 10 (!18 1!19 0010 Timing Setting 2 instruments.huimultd.com 22
- 23. Location: Home > Products > Digital Programmable Timer Switch > JFT-15 Series Digital Programable Time Switch (DIN Rail Mount) Introduction The JFT series digital programmable timer switch can automatically turn on or off the power of various electrical equipment according to the time set by the user. JFT series microcomputer time-controlled switch is composed of LCD digital display, programmable IC chip, buttons, switch components, etc. It is widely used in street lights, neon lights, advertising signs, production equipment, assembly lines, broadcasting equipment and other equipment. The JFT series time-controlled switch adopts a new patch technology, which can effectively avoid the phenomenon of false welding and missing welding, and has the characteristics of stable performance, low power consumption, and light weight. JFT-15 has a built-in rechargeable nickel hydrogen battery, which can avoid data loss due to power failure, and there is no need to worry about the inconvenience caused by the inability to replace the battery in time. JFT-15 has two output terminals: a normally open terminal (NO) and a normally closed terminal (NC). JFT-1 SA uses a flip-type panel protection cover, and JFT-15B uses a transparent panel protection cover. The panel protection cover can effectively prevent dust and prevent the keys from being touched by mistake. Parameters JFT-1 SA/B Timer Range: 1min:5t:5168h (cycle work daily or weekly) Operation Voltage: AC220V/50Hz (or other customized voltage) Operation Temperature: -10°C~50°C Operation Humidity: <95% Switching Capacity: 16A (resistive load) Number of Settings: 8 groups per day Battery: Built-in rechargeable nickel-metal hydride battery Consumption Power: :55W Time Error: :52s/day (25°C) Weight: 120g Dimensions: 86x36x65mm Mounting: Rail Dimensions & Wiring Diagram JFT-15A/B HUIMU INSTRUMENTS Terminal introduction: PORT 1 and PORT 2 are power terminals; PORT 3 is normally closed terminal; PORT 4 is common terminal; PORT 5 is normally closed terminal Wiring diagram: If you need to control a single-phase normally closed load (LOAD1) and a single-phase normally open load (LOAD2), you can connect them as shown in Figure 2. If you need to control a three-phase load, you can connect it as shown in Figure 3. instruments.huimultd.com 23
- 24. V'l C 0 Vl C (I) E c5 bO C ....... C ::::i 0 ~ Iii ~ ~ &<g ffil E re~ bO re ci bO C ~ ~ -::::i u~ u 000 000 I I. -I36mm • 0 ,:r NQ N~ om <7'1 ;!:;(ffl- ~ I I POWER~~ 220VAC LOADff.J,~ 65mm 0 NO Figure 2 002 I ►, POWER E@.;!: 2 3 NC LOAD fflfi JFT-1 SA/B (DINI RAIL MIOU NT) ~~nit Figure 1 1!11 0 POWER ~;j: 220VAC I Figure 3 003 JFT-1 SA/B dimensions and wiring diagram Instructions For Use (How to set) Please make sure that you have understood the functions of all the buttons on the panel (button area), and perform the actual operation according to the instructions. 1 Description of buttons and indicators CLOCK (0): Press to display your local time (it should be set by yourself: you can press and hold the "CLOCK" key to enter the "Time Adjustment Mode", and adjust the "WEEK", "HOUR", and "MINUTE" key to set the local time). PS: If no operation is performed within 30 seconds, the timer switch will automatically display the local time. TIMER(®): Press to enter the "Editing Mode", and then set the time to switch the load by adjusting the "WEEK", "HOUR", and "MINUTE" key. WEEK (D+): Adjust week or day. There are various working modes, such as "Five-day Mode" (Monday to Friday), "Six-day Mode" (Monday to Saturday), "Weekend Mode" (Saturday, Sunday), "Daily Mode" (Monday to Sunday), and "Three-day Mode" (Mon-Wed-Fri; Tue-Thu-Sat; Mon-Tue-Wed; Thu-Fri-Sat). instruments.huimultd.com 24
- 25. HOUR (H+): Adjust hour. MINUTE (M+): Adjust minute. AUTO/MANU (MANUAL): Switch the three switching mode of "ON", "AUTO" and "OFF". For multiple-output timer switches, the output combination can be configured through the "AUTO/MANU" key when in the "Editing Mode" RESET/RECALL (Cancel/Restore, C/R): Press to cancel or restore the timing setting. PS: For products with button lock function, press the" RESET/RECALL" key four times to lock or unlock all buttons. C: Long press the "C" key to clear all settings of the timer switch. POWER LED: When the Power LED (red) is on, it means that the timer switch has been successfully connected to the power source. WORK LED: When the Power LED (red) and the Work LED (green) are on at the same time, it means that the load is powered on. 2 Operating instructions Step 1. Timing setting (on) Press the" TIMER" button to enter the "Editing Mode". At this time, the"oN1" symbol will appear at the bottom left of the LCD screen (that is, the first time to turn on the load, as shown in Figure 4), and then press the "WEEK" to select Working Mode, and then press the "HOUR" and "MINUTE" keys to input the required switching on time. Step 2. Timing setting (off) Press the" TIMER" button again, the "1 OFF" symbol will appear at the bottom left of the LCD screen (that is, the first time to turn off the load, as shown in Figure 5), and then press the "WEEK" to select Working Mode, and then press the "HOUR" and "MINUTE" keys to input the required switching off time. At this time, the first group of timing setting has been completed. ll!I Ii R BWeek ~M Switching State MO TU WE TH FR SA SUJ Hour .: Minute !j,Btj- : )t:iqi ff*~*;$Timer Group No. SqfB].Hl~ MO TU WE TH FR SA SU • • AUTO MO TU WE TH FR SA SU • • AUTO f igure 4 004 Figure 5 005 • • Timing Setting 1 Step 3. Timing setting (number of groups) Switching Mode ff*tlit MO TU WE TH FR SA SU 0 8 : 3 0 AUTO MO TU WE TH FR SA SU 1 2 0 : 3 0 -- Off AUTO Figure 6 006 Figure 7 007 After completing the first group of timing setting, press the "TIMER" button again, the LCD display will show the" oN2" symbol, and you can set the second set of time setting. According to actual needs, you can repeat steps 1 and 2 to set many groups (the maximum programmable group number depends on the product's built-in chip). If you want to exit the "Editing Mode", you can press the "CLOCK" key to exit it. Step 4. RESET/RECALL After setting a group of time, for example, turn on the load at 18:30 every day (Figure 6), and turn off the load at 23:20 every day (Figure 7). If you want to cancel this group, you can press the "RESET/RECALL" button to delete this group of time settings. At this time, the group of time will be reset to the initial state, that is, "--: --" (Figure 4 and Figure 5). Under certain conditions instruments.huimultd.com 25
- 26. (without any key operation or switching to other interfaces within 20 seconds after cancel operation), just press the "RESET/RECALL" button again to restore this group of time settings. Step 5. AUTO/MANU The timer switch has two switching modes: automatic and manual. In the automatic mode, the timer switch will be set according to the timing of steps 1 to 3, and the load will be automatically turned on or off at the corresponding time without human intervention. In manual mode, the load must be turned on or off by manual adjustment. The specific operations are as follows: 1) If you need to turn on the load manually, you can click the "AUTO/MANU" button to switch the "T" symbol on the display to the "ON" position (Figure 8). At this time, the load will always be in the on state and cannot be turned off automatically. 2) If you need to turn off the load manually, you can click the "AUTO/MANU" button to switch the" T" symbol on the display to the "OFF" position (Figure 9). At this time, the load will always be in the off state and cannot be turned on automatically. 3) If you need to switch the load automatically, you can click the "AUTO/MANU" button to switch the "T" symbol on the display to the "AUTO" position (Figure 10). At this time, the working state of the load will be switching automatically according to the timing setting, without being interfered by humans. Manul Mode: ON ~Mtlrt: ff MO TU WE TH FR SA SU Figu re 8 1118 Manul Mode: OFF q=Lf.J1frt: * MO TU WE TH FR SA SU 1OFf O5 : 2 0OFF Figure 9 009 Timing Setting 2 Auto Mode ~n!.J~fte MO TU WE TH FR SA SU 0 5: 2 01oFf AUTO Figure 10 1!110 instruments.huimultd.com 26
- 27. Location: Home > Products > Digital Programmable Timer Switch > Introduction JFT-16, JFT-17 Series Digital Programmable Time Switch JFT series timer switch can automatically turn on or off the power of various electrical equipment according to the time set by the user. JFT series digital time-controlled switch is consisted of digital LCD display, programmable IC chip, buttons, switching components and etc. JFT series microcomputer timer switch is widely used in street lights, neon lights, advertising signs, production equipment, assembly lines, and broadcast equipment. The new version JFT series digital smart timer switch adopts a brand-new chip technology, which can effectively avoid the false welding and missing welding. Besides, the all-new designed JFT series timer switch has the characteristics of stable performance, low power consumption, light weight, and replaceable power supply battery. JFT-16 is the normal type, and JFT-17 is the economic type. JFT-16 adopts the integrated process of immersion gold craft, and a highly textured shell, and is also equipped with a panel dust cover, but its battery is not removable. JFT-17 has the same performance as KG316T, has a keyboard lock, and its battery can be removed. Parameters JFT16 Timer Range: 1minsts168h (cycle work daily or weekly) Operation Voltage: AC220V/50Hz (or other customized voltage) Operation Temperature: -20°C~60°C Operation Humidity: <95% Switching Capacity: 25A (resistive load) Number of Settings: 8 groups per day Consumption Power: s2W Battery: SAA battery Time Error: s2s/day (25°C) Weight: 216g Dimensions: 123x71 x58mm Mounting: Wall/Rail JFT17 Timer Range: 1minsts168h (cycle work daily or weekly) Operation Voltage: AC220V/50Hz (or other customized voltage) Operation Temperature: -10°C~S0°C Operation Humidity: <95% Switching Capacity: 25A (resistive load) Number of Settings: 16 groups per day, with anti-mistouch button lock Consumption Power: s2W Battery: SAA battery Time Error: s2s/day (25°() Weight: 222g Dimensions: 113x64x42mm Mounting: Wall/Rail Dimensions & Wiring Diagram HUIMU INSTRUMENTS HUIMU INSTRUMENTS instruments.huimultd.com 27
- 28. JFT-16, JFT-17 1 Single-phase power supply (there are two wiring methods) 1.1 Direct control method (as shown in Figure 1) Applicable objects: Loads with single-phase power supply, and the power consumption does not exceed the rated capacity of the switch. 1.2 Single-phase expansion method (as shown in Figure 2) Applicable objects: load with single-phase power supply, but the power consumption exceeds the rated capacity of the switch. If this wiring method is adopted, the output terminal of the digital timer switch needs to be connected to a single phase AC contactor whose load capacity should larger than the power consumption of the load to expanse the switching capacity of the timer switch. 2 Three-phase power supply (requires an external three-phase AC contactor) Applicable objects: Loads with three-phase power supply. If the coil voltage of the three-phase AC contactor is AC220V/50Hz, the wiring method shown in Figure 3. If the coil voltage of the three-phase AC contactor is AC380V/50Hz, the wiring method shown in Figure 4. V'l C 0 Vl C (I) E ci bO C ....... C ::i 0 ~ Iii ~ ~ ~ ffil E re ~ bO .!:2 Q b.() C "i:: ~ -:::::l u~ u ....'0 ,UJ l1l ,3 3 "'ti 0 ~m :::0 cBJ- ~ "0 0 N ::Em A ;:o B clll- C ~ I 71mm I ... II I I 64mm I I ...-------~ . -- ---~ co 36.5mm N 36.5mmVJ 0 3DIN RAIL 3 DIN RAIL 3 3 -----· JFT-16 JFT-17 Figure 1 1!11 L N N L N N r- 0 "ti ► 0c:, :'E ~ m ;:o ~ cHI- ~ Figure 3 003 L N N L L N N, r "'ti 0 0 N ► :ii: A0 m }3) ;;o B ~ [til- ~ C JFT-16, JFT-17 dimensions and wiring diagram I •• ---- w 3 3 -----. Figure 2 W2 L r- g CJ ):II J®: Figure4 004 L r- 0 ►0 ):II J®: instruments.huimultd.com 28
- 29. Instructions For Use (How to set) Please make sure that you have understood the functions of all the buttons on the panel (button area), and perform the actual operation according to the instructions. 1 Description of buttons and indicators CLOCK (0): Press to display your local time (it should be set by yourself: you can press and hold the "CLOCK" key to enter the "Time Adjustment Mode", and adjust the "WEEK", "HOUR", and "MINUTE" key to set the local time). PS: If no operation is performed within 30 seconds, the timer switch will automatically display the local time. TIMER(®): Press to enter the "Editing Mode", and then set the time to switch the load by adjusting the "WEEK", "HOUR", and "MINUTE" key. WEEK (D+): Adjust week or day. There are various working modes, such as "Five-day Mode" (Monday to Friday), "Six-day Mode" (Monday to Saturday), "Weekend Mode" (Saturday, Sunday), "Daily Mode" (Monday to Sunday), and "Three-day Mode" (Mon-Wed-Fri; Tue-Thu-Sat; Mon-Tue-Wed; Thu-Fri-Sat). HOUR (H+): Adjust hour. MINUTE (M+): Adjust minute. AUTO/MANU (MANUAL): Switch the three switching mode of "ON", "AUTO" and "OFF". For multiple-output timer switches, the output combination can be configured through the "AUTO/MANU" key when in the "Editing Mode" RESET/RECALL (Cancel/Restore, C/R): Press to cancel or restore the timing setting. PS: For products with button lock function, press the" RESET/RECALL" key four times to lock or unlock all buttons. C: Long press the "C" key to clear all settings of the timer switch. POWER LED: When the Power LED (red) is on, it means that the timer switch has been successfully connected to the power source. WORK LED: When the Power LED (red) and the Work LED (green) are on at the same time, it means that the load is powered on. 2 Operating instructions Step 1. Timing setting (on) Press the" TIMER" button to enter the "Editing Mode". At this time, the "1 ON" symbol will appear at the bottom left of the LCD screen (that is, the first time to turn on the load, as shown in Figure 5), and then press the "WEEK" to select Working Mode, and then press the "HOUR" and "MINUTE" keys to input the required switching on time. Step 2. Timing setting (off) Press the" TIMER" button again, the "1 OFF" symbol will appear at the bottom left of the LCD screen (that is, the first time to turn off the load, as shown in Figure 6), and then press the "WEEK" to select Working Mode, and then press the "HOUR" and "MINUTE" keys to input the required switching off time. At this time, the first group of timing setting has been completed. instruments.huimultd.com 29
- 30. Week ~ E A B S ·t h' St~t wr~MO TU WE TH FR SA SU I Hour. Minutew1 c mg a e ___J1 _ • ff*tk;$ ,- - - - • - - iJB"tj" : 5-tt~ Timer Group No. 1)g~~) "-----...•c - - - - ' B1fB]~H-s ON AUTO OFF -◄--Switching Mode ff ~M ;1c H*~lit MO TU WE TH FR SA SU • "ON AUTO OFF MO TU WE TH FR SA SU 1OFF • ON AUTO OFF Figure S oos Figure 6 006 Timing Setting 1 Step 3. Timing setting (number of groups) MO TU WE TH FR SA SU 1 8: 3 0 T 1ON ON AUTO OFF MO TU WE TH FR SA SU 2 3: 2 0 ..1OFF ON AUTO OFF Figure 7 007 Figure 8 008 After completing the first group of timing setting, press the "TIMER" button again, the LCD display will show the "20N• symbol, and you can set the second set of time setting. According to actual needs, you can repeat steps 1 and 2 to set many groups (the maximum programmable group number depends on the product's built-in chip). If you want to exit the "Editing Mode", you can press the "CLOCK" key to exit it. Step 4. RESET/RECALL After setting a group of time, for example, turn on the load at 18:30 every day (Figure 7), and turn off the load at 23:20 every day (Figure 8). If you want to cancel this group, you can press the "RESET/RECALL" button to delete this group of time settings. At this time, the group of time will be reset to the initial state, that is, "--: --" (Figure Sand Figure 6). Under certain conditions (without any key operation or switching to other interfaces within 20 seconds after cancel operation), just press the "RESET/RECALL" button again to restore this group of time settings. Step 5. AUTO/MANU The timer switch has two switching modes: automatic and manual. In the automatic mode, the timer switch will be set according to the timing of steps 1 to 3, and the load will be automatically turned on or off at the corresponding time without human intervention. In manual mode, the load must be turned on or off by manual adjustment. The specific operations are as follows: 1) If you need to turn on the load manually, you can click the "AUTO/MANU" button to switch the "T" symbol on the display to the "ON" position (Figure 9). At this time, the load will always be in the on state and cannot be turned off automatically. 2) If you need to turn off the load manually, you can click the "AUTO/MANU" button to switch the" T" symbol on the display to the "OFF" position (Figure 10). At this time, the load will always be in the off state and cannot be turned on automatically. 3) If you need to switch the load automatically, you can click the "AUTO/MANU" button to switch the "T" symbol on the display to the "AUTO" position (Figure 11 ). At this time, the working state of the load will be switching automatically according to the timing setting, without being interfered by humans. instruments.huimultd.com 30
- 31. Manul Mode: ON =J=.WJ*Ixt : ff Manul Mode: OFF =f.nJJfI :IC : ~ Auto Mode ~ntl:t-lx: MO TU WE TH FR SA SU MO TU WE TH FR SA SU MO TU WE TH FR SA SU 1OFf 1 8: 0 0 ... ON AUTO OFF Figure 9 m9 Button Lock: Locked ~ ¢~1-!:'m • i,... ;,,il:iBC~1:Y~ , .L ty,. MO TU WE TH FR SA SU a • T ON AUTO OFF 1OFF 1 8: 0 0... ON AUTO OFF Figure 10 ~10 Figure 12 1!)12 Timing Setting 2 Step 6. Lock and unlock 1()FF 1 8: 0 0 ... ON AUTO OFF Figure 11 00 11 Button Lock: Un-Locked -b:f:,¢~lejf. tl,!,ll;~ ~ t,'li!: fy, • /!ff "t)J., MO TU WE TH FR SA SU 1QN ON AUTO OFF Figure 13 1!)13 For the timer switch with button lock (or keyboard lock), you can quick press the "RESET/RECALL" key four times to lock or unlock all the buttons. -How to lock the buttons? In the unlocked state, quick press the "RESET/RECALL" button four times or without any operation within 30 seconds to lock all the buttons (Figure 12). At this time, there will be a "a" symbol in the bottom left, and you cannot make any settings for the timer switch. -How to unlock buttons? In the locked state, quick press the "RESET/RECALL" button four times to unlock all the buttons (Figure 13), and you can make settings at this time. instruments.huimultd.com 31
- 32. Location: Home > Products > Digital Programmable Timer Switch > CN Series Digital Programmable Time Switch (Panel Mount) Introduction CN series digital programmable time-controlled switches are specially designed for panel-mounting installation. CN series microcomputer time-controlled switches are composed of LCD digital display, programmable IC chips, buttons, switch components, etc., and are widely used in street lights, neon lights, advertising signs, production equipment, assembly lines, broadcast equipment and other equipment. The CN series digital time control switch adopts a brand-new patch technology, which has the characteristics of stable performance, low power consumption and light weight. The CN series has a built-in rechargeable battery, which can save the data for more than 30 days without power supply. The CN series timer switch are divided into CN101A (JFT18) series and CN304 (JFT19) series. Parameters CN101A (Panel Mount) Timer Range: 1min:,;t:,;168h (cycle work daily or weekly) Operation Voltage: 220VAC /S0Hz (or other customized voltage) Operation Temperature: -10°C-60°C Switching Capacity: 16A (resistive load) Number of Settings: 16 groups per day, with anti-mistouch button lock Battery: Built-in rechargeable Ni-MH battery Consumption Power: :a;3W Weight: 100g Dimensions: 60x60x30mm Mounting: Panel/Wall CN101A (Panel Mount) Timer Range: 1min:,;t:,;168h (cycle work daily or weekly) Operation Voltage: 220VAC /50Hz (or other customized voltage) Operation Temperature: -10°C-60°C Switching Capacity: 16A (resistive load) Number of Settings: 16 groups per day, with anti-mistouch button lock Battery: Built-in rechargeable Ni-MH battery Consumption Power: :a;3W Weight: 120g Dimensions: 60x60x30mm Mounting: Panel/Wall Dimensions & Wiring Diagram CN Series (Panel Mount) HUIMU INSTRUMENTS -- - HUIMU INSTRUMENTS The installation dimensions and wiring diagram of the CN series timer switch are shown in Figure 1. • instruments.huimultd.com 32
- 33. t, a:::: ~~ {-t,; 1/l, C: 0 Vl O'I C: a Q) 3 E 3 0 t).() C: .,i:j 60mmC: ::::,, 0 ~ [M3 ffl ~ ~ fB1 Ero, L. t).() ro 0 t).() C: 'i:: ~ :!::::! ::::, uL. u CN Series 1 2 3 4 E9 E9 EB EB POWER LOAD Eta.~~ ~ti CN Series (PANEL MOUNT) 001.&it Figure 1 001 CN Series (Panel Mount) dimensions and wiring diagram Instructions For Use (How to set) Please make sure that you have understood the functions of all the buttons on the panel (button area), and perform the actual operation according to the instructions. 1 Description of buttons and indicators CLOCK (0): Press to display your local time (it should be set by yourself: you can press and hold the "CLOCK" key to enter the "Time Adjustment Mode", and adjust the "WEEK", "HOUR", and "MINUTE" key to set the local time). PS: If no operation is performed within 30 seconds, the timer switch will automatically display the local time. TIMER(®): Press to enter the "Editing Mode", and then set the time to switch the load by adjusting the "WEEK", "HOUR", and "MINUTE" key. WEEK (D+): Adjust week or day. There are various working modes, such as "Five-day Mode" (Monday to Friday), "Six-day Mode" (Monday to Saturday), "Weekend Mode" (Saturday, Sunday), "Daily Mode" (Monday to Sunday), and "Three-day Mode" (Mon-Wed-Fri; Tue-Thu-Sat; Mon-Tue-Wed; Thu-Fri-Sat). instruments.huimultd.com 33
- 34. HOUR (H+): Adjust hour. MINUTE (M+): Adjust minute. AUTO/MANU (MANUAL): Switch the three switching mode of "ON", "AUTO" and "OFF". For multiple-output timer switches, the output combination can be configured through the "AUTO/MANU" key when in the "Editing Mode" RESET/RECALL (Cancel/Restore, C/R): Press to cancel or restore the timing setting. PS: For products with button lock function, press the" RESET/RECALL" key four times to lock or unlock all buttons. C: Long press the "C" key to clear all settings of the timer switch. POWER LED: When the Power LED (red) is on, it means that the timer switch has been successfully connected to the power source. WORK LED: When the Power LED (red) and the Work LED (green) are on at the same time, it means that the load is powered on. 2 Operating instructions Step 1. Timing setting (on) Press the" TIMER" button to enter the "Editing Mode". At this time, the "1 ON" symbol will appear at the bottom left of the LCD screen (that is, the first time to turn on the load, as shown in Figure 2), and then press the "WEEK" to select Working Mode, and then press the "HOUR" and "MINUTE" keys to input the required switching on time. Step 2. Timing setting (off) Press the" TIMER" button again, the "1 OFF" symbol will appear at the bottom left of the LCD screen (that is, the first time to turn off the load, as shown in Figure 3), and then press the "WEEK" to select Working Mode, and then press the "HOUR" and "MINUTE" keys to input the required switching off time. At this time, the first group of timing setting has been completed. Week E B mM MO TU WE TH FR SA SU Switching State---.., '- ff*tK;$ (-1-10N) Timer Group No. ~ ,.o FF T Hour: Minute 1J,a,g- : :n'iti:ll B1fl3]£gs ___O_N_A_U_T_O_O_FF~-◄-----_ Switching Mode H*~it MO TU WE TH FR SA SU • T ON AUTO OFF MO TU WE TH FR SA SU 1OFF • ON AUTO OFF Figure 2 1112 Figure 3 !)3 ff ~M * Timing Setting 1 Step 3. Timing setting (number of groups) MO TU WE TH FR SA SU 1 8: 3 0 T 1ON ON AUTO OFF MO TU WE TH FR SA SU 2 3: 2 01OFF .,, ON AUTO OFF Figure 4 004 Figure 5 005 After completing the first group of timing setting, press the "TIMER" button again, the LCD display will show the "20N• symbol, and you can set the second set of time setting. According to actual needs, you can repeat steps 1 and 2 to set many groups (the maximum programmable group number depends on the product's built-in chip). If you want to exit the "Editing Mode" , you can press the "CLOCK" key to exit it. Step 4. RESET/RECALL After setting a group of time, for example, turn on the load at 18:30 every day (Figure 5), and turn off the load at 23:20 every day (Figure 6). If you want to cancel this group, you can press the "RESET/RECALL" button to delete this group of time settings. At this time, the group of time will be reset to the initial state, that is, "--: --" (Figure 2 and Figure 3). Under certain conditions instruments.huimultd.com 34
- 35. (without any key operation or switching to other interfaces within 20 seconds after cancel operation), just press the "RESET/RECALL" button again to restore this group of time settings. Step 5. AUTO/MANU The timer switch has two switching modes: automatic and manual. In the automatic mode, the timer switch will be set according to the timing of steps 1 to 3, and the load will be automatically turned on or off at the corresponding time without human intervention. In manual mode, the load must be turned on or off by manual adjustment. The specific operations are as follows: 1) If you need to turn on the load manually, you can click the "AUTO/MANU" button to switch the "T" symbol on the display to the "ON" position (Figure 6). At this time, the load will always be in the on state and cannot be turned off automatically. 2) If you need to turn off the load manually, you can click the "AUTO/MANU" button to switch the" T" symbol on the display to the "OFF" position (Figure 7). At this time, the load will always be in the off state and cannot be turned on automatically. 3) If you need to switch the load automatically, you can click the "AUTO/MANU" button to switch the "T" symbol on the display to the "AUTO" position (Figure 8). At this time, the working state of the load will be switching automatically according to the timing setting, without being interfered by humans. Manul Mode: ON Manul Mode: OFF Auto Mode -¥M~lxt: H =J=.~fi:it: ~ ~~JJ:t-lx: MO TU WE TH FR SA SU MO TU WE TH FR SA SU MO TU WE TH FR SA SU 1OFf 1 8: 0 0 ... ON AUTO OFF Figure 6 mG Button Lock: Locked t±~iti;:m • 1,-1.::-ifiBCm tJJ, • ..1- iJJ.. MO TU WE TH FR SA SU a • ON AUTO OFF 1OFF 1 8: 0 0 •ON AUTO OFF Figure 9 009 Figure 7 ~7 Timing Setting 2 Step 6. Lock and unlock 1Ql'F 1 8: 0 0 ... ON AUTO OFF Figure 8 ma Button Lock: Un-Locked -I±I;~,.,.i½ • 1M ¢)iiD{t:eiJJ,. /'ff-t!I.. MO TU WE TH FR SA SU 1ON ... ON AUTO OFF Figure 10 1!)10 For the timer switch with button lock (or keyboard lock), you can quick press the "RESET/RECALL" key four times to lock or unlock all the buttons. -How to lock the buttons? In the unlocked state, quick press the "RESET/RECALL" button four times or without any operation within 30 seconds to lock all the buttons (Figure 9). At this time, there will be a "8" symbol in the bottom left, and you cannot make any settings for the timer switch. -How to unlock buttons? In the locked state, quick press the "RESET/RECALL" button four times to unlock all the buttons (Figure 10), and you can make settings at this time. instruments.huimultd.com 35
- 36. Location: Home > Products > Digital Programmable Street Light Controller > KG316 Series Digital Programmable Street Light Controller Introduction KG316 series digital street light controller is a kind of timer switch, which is widely used to control street lights, neon lights, advertising signs, factory production equipment, etc. The KG316 series timer switch is based on the KG316T series digital time- controlled switch with rain control and optical control (light control) power-off protection functions. Without any probe installed, the function of the KG316 series is exactly the same as the KG316T series timer switch. Parameters KG316-3 (Optical Control) Timer Range: 1min:,;t::;;168h (cycle work daily or weekly) Operation Voltage: AC220V/50Hz (or other customized voltage) Operation Temperature: -10°C- 60°C Operation Humidity: <95% Switching Capacity: 25A (resistive load); 20A (inductive load) Number of Settings: 10 groups per day Control Mode: Manual, Auto Consumption Power: ::;;1W Battery: 7AA battery Time Error: :,;1s/day (25°C) Weight: 260g Dimensions: 120x74x58mm Mounting: Wall/Rail KG316V-G (Optical Control, Rain Control) Timer Range: 1min:,;t::;;168h (cycle work daily or weekly) Operation Voltage: AC220V/50Hz (or other customized voltage) Operation Temperature: -10°C- 60°C Operation Humidity: <95% Switching Capacity: 25A (resistive load); 20A (inductive load) Number of Settings: 10 groups per day Control Mode: Manual, Auto Consumption Power: ::;;3W Battery: SAA battery Time Error: ::;;1s/day (25°C) Weight: 260g Dimensions: 126x88x51 mm Mounting: Wall/Rail Dimensions & Wiring Diagram KG316-3 (Optical Control) HUIMU INSTRUMENTS HUIMU INSTRUMENTS instruments.huimultd.com 36
- 37. 1 Single-phase power supply (there are two wiring methods) 1.1 Direct control method (as shown in Figure 1) Applicable objects: Loads with single-phase power supply, and the power consumption does not exceed the rated capacity of the switch. 1.2 Single-phase expansion method (as shown in Figure 2) Applicable objects: load with single-phase power supply, but the power consumption exceeds the rated capacity of the switch. If this wiring method is adopted, the output terminal of the digital timer switch needs to be connected to a single phase AC contactor whose load capacity should larger than the power consumption of the load to expanse the switching capacity of the timer switch. 2 Three-phase power supply (requires an external three-phase AC contactor) Applicable objects: Loads with three-phase power supply. If the coil voltage of the three-phase AC contactor is AC220V/50Hz, the wiring method shown in Figure 3. If the coil voltage of the three-phase AC contactor is AC380V/50Hz, the wiring method shown in Figure 4. IJl, C: 0 IJl, C: Q) E 0 bO C ·p C: :::, 0 :a: :!::: :::::l U ' 1- u ------.---- ------~I 30.2mm .I 30,2mm ~.......... ..,. N a 3 3 _____...., _____ _ ""1J 0 :Em ;::o ca ~ I 1 74mm ►•• ·◄ - I T IN T Figure 1 1!11 OUT ~ A ---------1.. :z: B-------.,.,.., ;::o c---------1...cm N ~ T IN T OUT Figure 3 003 r- 0 ►0 ~ = .+-- r 0 .+-- ► 0 ---SI $ KG316-3 (Optical Control) 76!~ ""1J 0 :z:m ;::o cm ~ T IN T Figure 2 002 OUT ~ A ---------1,.. :Z: B--------m ;::o c----+----,1----1... tlll-N ~ T IN T OUT Figure 4 004 r- 0 )> 0 ~ ~ .,..__, 0 ...--► 0.,..__):)} ~ KG316-3 (Optical Control) dimensions and wiring diagram KG316Y-G (Optical Control, Rain Control) instruments.huimultd.com 37
- 38. 1 Single-phase power supply (there are two wiring methods) 1.1 Direct control method (as shown in Figure 5) Applicable objects: Loads with single-phase power supply, and the power consumption does not exceed the rated capacity of the switch. 1.2 Single-phase expansion method (as shown in Figure 6) Applicable objects: load with single-phase power supply, but the power consumption exceeds the rated capacity of the switch. If this wiring method is adopted, the output terminal of the digital timer switch needs to be connected to a single phase AC contactor whose load capacity should larger than the power consumption of the load to expanse the switching capacity of the timer switch. 2 Three-phase power supply (requires an external three-phase AC contactor) Applicable objects: Loads with three-phase power supply. If the coil voltage of the three-phase AC contactor is AC220V/50Hz, the wiring method shown in Figure 7. If the coil voltage of the three-phase AC contactor is AC380V/50Hz, the wiring method shown in Figure 8. Ill C 0 Vl C Q) E i:5 bO C ".i:j c:: =i 0 ~ Iii m ~ &<g ffil E ro lo.. bO -~Cl b.O C L.. ~ ...... ::::l uL.. u -----... -- -- ---'---~I 38.5mm I 38.5mm ................. ■ - - - - ,.9. - --(:)' '"C IN T 0 ~ rn ;:o ell ~ IN T TOUT -0 N0 :',E Am ;:o B cl& C~ N m 3 3 Figures ms r- 0 )> 0 )3) tJll Figure 7 1117 r- 0 ►0 ~ J!Jlt KG316Y-G (Optical Control, Rain Control) a5t~ l"l'il J.:c: Figure 6 006 IN T -0 r- 0 ~~ 0m :;;o - - ~ @ ~ ~ Figure 8 1!]8 IN T TOUT -0 N0 r- :',E A 0 m )> ;:o B 0 cm- C ~ ~ ~ KG316Y-G (Optical Control, Rain Control) dimensions and wiring diagram Instructions For Use (How to set) instruments.huimultd.com 38
- 39. Please make sure that you have understood the functions of all the buttons on the panel (button area), and perform the actual operation according to the instructions. 1 Probe installation and use 1.1 When the KG316 series street lamp controller is not equipped with an optical control probe or a rain control probe, its use method is the same as the KG316T series time control switch. 1.2 Installation and use of optical probe: insert the optical control probe into the "Optical Control" jack. If the probe senses light, KG316 will turn off in about one minute; if there is no light, KG316 will return to its original state after about five minutes (continue to perform work according to the timing program). On-off illumination is 25LX±SLX. 1.3 Installation and use of rain probe: insert the rain control probe into the "Rain Control" jack. If the probe senses rain, KG316 will shut down immediately; if there is no rain, KG316 will return to its original state after about five minutes (continue to work according to the timing program). The power-off resistance is 100KQ, and the power-on resistance is 1MQ. 1.4 Installation and use of optical probe and rain probe at the same time: insert the optical probe and rain probe into the corresponding jacks respectively. As long as it senses light or rain (any of them), KG316 will shut down; if there is neither light nor rain, KG316 will return to its original state after about five minutes (continue to perform work according to the timing program). 1.5 The probe can be available only when KG316 is working in "AUTO" or "ON" mode. 2 Description of buttons and indicators CLOCK (0): Press to display your local time (it should be set by yourself: you can press and hold the "CLOCK" key to enter the "Time Adjustment Mode", and adjust the "WEEK", "HOUR", and "MINUTE" key to set the local time). PS: If no operation is performed within 30 seconds, the timer switch will automatically display the local time. TIMER(®): Press to enter the "Editing Mode", and then set the time to switch the load by adjusting the "WEEK", "HOUR", and "MINUTE" key. WEEK (D+): Adjust week or day. There are various working modes, such as "Five-day Mode" (Monday to Friday), "Six-day Mode" (Monday to Saturday), "Weekend Mode" (Saturday, Sunday), "Daily Mode" (Monday to Sunday), and 'Three-day Mode" (Mon-Wed-Fri; Tue-Thu-Sat; Mon-Tue-Wed; Thu-Fri-Sat). HOUR (H+): Adjust hour. MINUTE (M+): Adjust minute. AUTO/MANU (MANUAL): Switch the three switching mode of "ON", "AUTO" and "OFF". For multiple-output timer switches, the output combination can be configured through the "AUTO/MANU" key when in the "Editing Mode" RESET/RECALL (Cancel/Restore, C/R): Press to cancel or restore the timing setting. PS: For products with button lock function, press the" RESET/RECALL" key four times to lock or unlock all buttons. C: Long press the "C" key to clear all settings of the timer switch. POWER LED: When the Power LED (red) is on, it means that the timer switch has been successfully connected to the power source. WORK LED: When the Power LED (red) and the Work LED (green) are on at the same time, it means that the load is powered on. 3 Operating instructions Step 1. Timing setting (on) Press the" TIMER" button to enter the "Editing Mode". At this time, the "1 ON" symbol will appear at the bottom left of the LCD screen (that is, the first time to turn on the load, as shown in Figure 9), and then press the "WEEK" to select Working Mode, and then press the "HOUR" and "MINUTE" keys to input the required switching on time. Step 2. Timing setting (off) Press the" TIMER" button again, the "1 OFF" symbol will appear at the bottom left of the LCD screen (that is, the first time to turn off the load, as shown in Figure 10), and then press the "WEEK" to select Working Mode, and then press the "HOUR" and "MINUTE" keys to input the required switching off time. At this time, the first group of timing setting has been completed. instruments.huimultd.com 39
- 40. MO TU WE TH FR SA SU •• "ON AUTO OFF MO TU WE TH FR SA SU l QFF •• ON AUTO OFF Figure9 ~ i9 Figure 10 IIl'IO Timing Setting 1 Step 3. Timing setting (number of groups) MO TU WE TH FR SA SU 18: 3 0 T ON AUTO OFF MO TU WE TH FR SA SU 2 3: 2 0 ..l oFF ON AUTO OFF Figure 11 ~11 Figure 12 ~12 After completing the first group of timing setting, press the "TIMER" button again, the LCD display will show the "20N• symbol, and you can set the second set of time setting. According to actual needs, you can repeat steps 1 and 2 to set many groups (the maximum programmable group number depends on the product's built-in chip). If you want to exit the "Editing Mode", you can press the "CLOCK" key to exit it. Step 4. RESET/RECALL After setting a group of time, for example, turn on the load at 18:30 every day (Figure 11), and turn off the load at 23:20 every day (Figure 12). If you want to cancel this group, you can press the "RESET/RECALL" button to delete this group of time settings. At this time, the group of time will be reset to the initial state, that is, "--: --" (Figure 9 and Figure 10). Under certain conditions (without any key operation or switching to other interfaces within 20 seconds after cancel operation), just press the "RESET/RECALL" button again to restore this group of time settings. Step 5. AUTO/MANU The timer switch has two switching modes: automatic and manual. In the automatic mode, the timer switch will be set according to the timing of steps 1 to 3, and the load will be automatically turned on or off at the corresponding time without human intervention. In manual mode, the load must be turned on or off by manual adjustment. The specific operations are as follows: 1) If you need to turn on the load manually, you can click the "AUTO/MANU" button to switch the "T" symbol on the display to the "ON" position (Figure 13). At this time, the load will always be in the on state and cannot be turned off automatically. 2) If you need to turn off the load manually, you can click the "AUTO/MANU" button to switch the" T" symbol on the display to the "OFF" position (Figure 14). At this time, the load will always be in the off state and cannot be turned on automatically. 3) If you need to switch the load automatically, you can click the "AUTO/MANU" button to switch the "T" symbol on the display to the "AUTO" position (Figure 15). At this time, the working state of the load will be switching automatically according to the timing setting, without being interfered by humans. instruments.huimultd.com 40
- 41. Manul Mode: ON -¥-itJt~rt:H MO TU WE TH FR SA SU loFF 18: 0 0 ... ON AUTO OFF Figure 13 ~13 Button Lock: Locked ~4'2'5,_m ·J:,_m1>'-l~. f!.l! , f.!)~ MO TU WE TH FR SA SU a • •T ~ ~ ON AUTO OFF Manul Mode: OFF Auto Mode ,¥riil{irt:* §iijJf~it MO TU WE TH FR SA SU MO TU WE TH FR SA SU loFF 18: 0 0 l o~F 18: 00 ... ... ON AUTO OFF ON AUTO OFF Figure 14 Figure15 [§114 ~15 Button Lock: Un-Locked t~mtm: ~ttili Figure 16 ~16 MO TU WE TH FR SA SU • • iiiiiiii! ~ ON AUTO OFF Figure 17 IIl17 Timing Setting 2 Step 6. Lock and unlock For the timer switch with button lock (or keyboard lock), you can quick press the "RESET/RECALL" key four times to lock or unlock all the buttons. -How to lock the buttons? In the unlocked state, quick press the "RESET/RECALL" button four times or without any operation within 30 seconds to lock all the buttons (Figure 16). At this time, there will be a "a" symbol in the bottom left, and you cannot make any settings for the timer switch. -How to unlock buttons? In the locked state, quick press the "RESET/RECALL" button four times to unlock all the buttons (Figure 17), and you can make settings at this time. instruments.huimultd.com 41
- 42. Location: Home > Products > Digital Programmable Street Light Controller > JFT Series Digital Programmable Street Light Controller Introduction JFT series digital street light controller adopts intelligent micro-processing chip, which can calculate the sunrise and sunset time through the latitude and longitude algorithm according to the operation law of the sun and the earth and the relationship between the latitude and longitude of the earth and the sunrise and sunset. It has the advantages of high reliability, small error, strong stability, and strong anti-interference ability, and can adapt to the needs of different geographic environments. JFT smart street light controller also has a built-in high-energy lithium battery (which can maintain the clock running for more than 10 years without changing the battery), which can effectively protect data in the event of a power failure. JFT intelligent street lamp controller has high-power relay output, which can be directly connected to 220VAC contactor or 380VAC contactor. JFT smart street lamp controllers are widely used in streets, railways, stations, waterways, industrial and mining, schools and power supply departments and other places. The JFT series street lamp controller can be divided into JFT-6 series and JFT-9 series. JFT-6 series street light controller is wall-mounted and has two output circuits (channel A and channel B). JFT-6 street light controllers have several working modes: full-night mode, half-night mode, and 2on-2off mode. According to whether it contains light control device, JFT-6 series can be divided into normal type and light-sense type. JFT-9 series street lamp controller is rail-mounted and has two output circuits (one normally open and one normally closed). JFT-9 series street light controllers have two working modes: full-night mode, and half-night mode. Parameters JFT-6 (Latitude and Longitude Control) Operation Voltage: AC220V/50Hz (or other customized voltage) Operation Temperature: -15°C~60°C Operation Humidity: <90% Switching Capacity: 10A (resistive load) Working Mode: Full-night mode, half-night mode, 2on-2off mode Consumption Power: :51W Battery: Built-in high-energy lithium battery Time Error: :5 ±0.Ss/day (25°() Dimensions: 1S0x100x48mm Mounting: Wall JFT-9 (Latitude and Longitude Control) Operation Voltage: AC220V/50Hz (or other customized voltage) Operation Temperature: -40°C~70°C Operation Humidity: <90% Switching Capacity: 1QA (resistive load) Working mode: Mode 0 (user setting); Mode 1 (latitude and longitude control) Number of time periods: Mode 0 (once/month); Mode 1 (daily) Control interval: 24 hours (the minimum step length is 1 minute) Consumption Power: :51W Time Error: :530s/year (25°C) Dimensions: 100x50x74mm Mounting: Rail HUIMU INSTRUMENTS HUIMU INSTRUMENTS instruments.huimultd.com 42
- 43. Dimensions & Wiring Diagram JFT-6 1 JFT6 can carry two loads, LOAD1 (Channel A) and LOAD2 (Channel B). (As shown in Figure 1) 2 JFT6 has two wiring methods, as shown in Figure 2 and Figure 3. Vl C 0 IJl, C: Q) E Q 0.0 C: ~ ffl ~ ~ ffil E ro,._ b.O ro i:5 0.0 C: -I--'' ::::, u,._ u ---------- 0 ....V1 ' 0 3 3 ______,. _____ _ 100mm • ►, A B Figure 1 N L N _..N............... (EB--EB! lEB EBl !EB EBi POWER LOAD 1 LOAD2 El!im. !n~1 ff!ff2 A B N L N N ~N--~~~-------~~--~OA--------------~~B----~t-------~-- ~c--------------Figure 2 002 001 JFT-6 {WALL M1 OUNT) ~ti~ A N L N N B ~ N---------------~~ A ~mB ----~t------1o-,1,--- ~ c--------------Figure 3 003 JFT-6 dimensions and wiring diagram JFT-9 1 Terminal introduction: PORT 1 and PORT 2 are power terminals; PORT 3 is a normally open contact; PORT 4 is a common contact; PORT 5 is a normally closed contact. (As shown in Figure 4) 2 Wiring diagrams: 2.1 Single-phase power supply-direct control method If the load is single-phase power supply, and the power consumption does not exceed the rated capacity of the switch. (As shown in Figure 5) instruments.huimultd.com 43
- 44. 2.2 Three-phase power supply If the load is three-phase power supply, an external three-phase AC contactor (coil voltage is AC220V/50Hz) is required. (As shown in Figure 6) "P ~ ~~ {.p( 1/1 C 0 Vl C: QJ E 0 00 C -~ C :::::, 0 ~ Iii ~ ~ ~ m1 E n:i L. 00 n:, Cl 00 !::: .i:: ~ ..... :::::, uL. u 0 35.3mm0 ~ I DIN RAIL ,.. .,., • 50mm I NO NC 'ij';;Jt ;t~ 1 2 3 4 5 EB tB EB POWER ~Uj LOAD ~ti! NO NC ~* '/li'.1;ll 1 2 3 4 5 POWER ~;~ Figure 5 005 ..0 0 3 3 ~:s 74mm NO NC -i:tfr iii"~ 1 2 3 4 5 EBEBEB · POWER ~;m.: LOAD 1hfl NO NC 1l':ff m1~ 1 2 3 4 5 EB EB LOAD fnfi JFT-9 {DIN RAIL MOUNT) ~$Jt~ Figure 4 1114 NO NC 'Iliff '/j!;;it] 1 2 3 4 5 EB EB EB ffi EB N ___..__,l'-f-£9:J+I POWER A ---+-B ------ti.. ~j~ C ------ti.. Figure 6 006 LOAD :fuft JFT-9 dimensions and wiring diagram Instructions For Use (How to set JFT-6) Please make sure that you have understood the functions of all the buttons on the panel (button area), and perform the actual operation according to the instructions. I Description of buttons and indicators SET/SHIFT: Used to set parameters; in the "Check Mode", the displayed parameter group can be switched. CHECK/NEXT: Used to check parameters; in the "Setting Mode", it can be used to select the parameters that need to be modified. MONTH/+: Used to increase the value of the parameter. DAV/-: Used to reduce the value of the parameter. instruments.huimultd.com 44
- 45. MANU/ON: Used to turn on or off the "Manual Mode". OPERATION LED: When JFT-6 is working normally, the operation LED will flash. MANUAL LED: When JFT-6 is working in "Manual Mode", the manual LED will always be on. OUTPUT 1: When the load 1 is connected to the Channel A, the output 1 LED will always be on. OUTPUT 2: When the load 2 is connected to the Channel B, the output 2 LED will always be on. n Description of working modes 1 Automatic Mode Channel A and Channel B can be set to three automatic working modes-full-night light mode, half-night light mode, 2on-2off light mode. Once set to automatic working mode, the load can be automatically switched on and off every day without human intervention. Full-night working mode (turn on the lights in the evening and turn off the lights in the morning): According to the latitude and longitude information, the switching time of the street light is automatically controlled according to the seasonal change, that is, the street light is automatically turned on in the evening and the street light is automatically turned off in the morning. You can fine-tune the automatic switching time within ±120 minutes (negative means advance, positive means delay). Half-night working mode (turn on the lights in the evening and turn off the lights in the middle of the night): According to the latitude and longitude information, the turn-on time of the street light is automatically controlled according to the seasonal change, that is, the street light is automatically turned on in the evening; the turn-off time needs to be set by yourself. You can fine-tune the auto-opening time in the range of±120 minutes (negative means advance, positive means delay). The midnight light work mode can effectively save power than the all night light work mode. 2on-2off working mode (turn on the light in the evening and turn off the light in the middle of the night, and turn on the light in the early morning and turn off the light in the morning): On the basis of the half-night working mode, it will add a set of time to turn on the street light for a short time (which should be set by yourself) . This mode is often used to provide street lighting for cleaning staff working in the early morning. 2 Manual Mode Long press the "MANU/ON" button for more than 2 seconds, JFT-6 will enter the "Manual Mode"(or "manual emergency light mode"), at this time JFT-6 will immediately turn on the street lights, and the display will show "MANUAL". In this mode, the switch states of A and Bwill not be controlled by the program. Long press the "MANU/ON" button for more than 2 seconds, JFT-6 will exit the "Manual Mode", at this time A and Bwill be automatically switched according to the set program, and the display will no longer display "MANUAL". Manual mode is often used for emergency lighting, equipment maintenance, major celebrations, etc. 3 Light Sensing Mode If you need to turn on the street lights in advance in the evening of rainy days, you can choose the light-sense type JFT-6 (up to 30 minutes in advance). Compared with the normal type JFT-6, the light-sense type JFT-6 is equipped with a light sensor controller, which can turn on the lights in advance according to the change of natural light based on the latitude and longitude switching time. The light-sense type JFT-6 uses fuzzy mathematics to deal with changes in natural light, so it will not be affected by light fluctuations, artificial lighting, etc. during operation. Because light-sense type JFT-6 adopts automatic adjustment technology, it can effectively avoid the actual illuminance detection error caused by the different installation conditions of the photosensitive device and the drift of the device during long-term operation. mOperating instructions In order to save power consumption, during normal operation, the display screen of JFT-6 will not display anything, only the running light flashes, and the load light (Outpu1 and Output2) is displayed normally. When you press any button or just turn on the power, the LED display will show the "Current Time". If there is no operation, the LED display will turn off after 1 minute. 1 Setting Mode (the detailed process is shown in Figure 7) 1.1 Enter/exit "Setting Mode": Long press the "SET/SHIFT" key to enter the "Setting Mode" (buzzer sounds), at this time the LED display will start to flash, and the flashing value is a modifiable value. Exit the "Setting Mode" (buzzer sounds) through long press the "SET/SHIFT" button or without any operation within 3 minutes. At this time, JFT-6 will automatically save the set instruments.huimultd.com 45