Download as PDF, PPTX

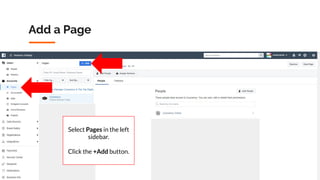
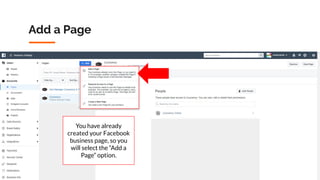
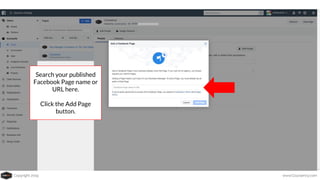
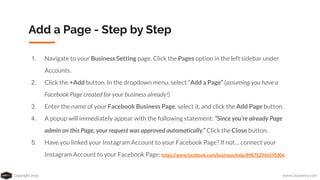
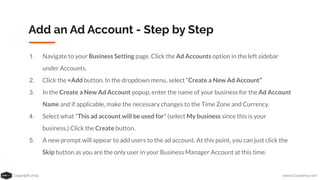

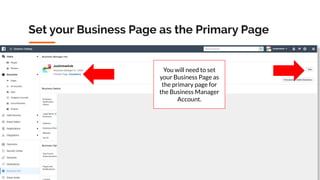

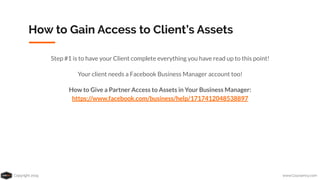
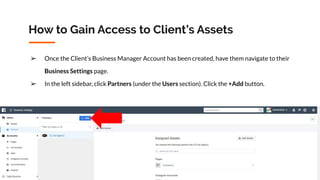
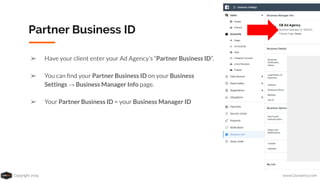


The document outlines the features and steps to set up and use Facebook Business Manager for managing ad accounts and pages. It emphasizes the importance of having separate ad accounts for clients and the need for a Facebook business account to streamline advertising efforts. Key features include role-based access control, reporting capabilities, and integration of Instagram accounts.