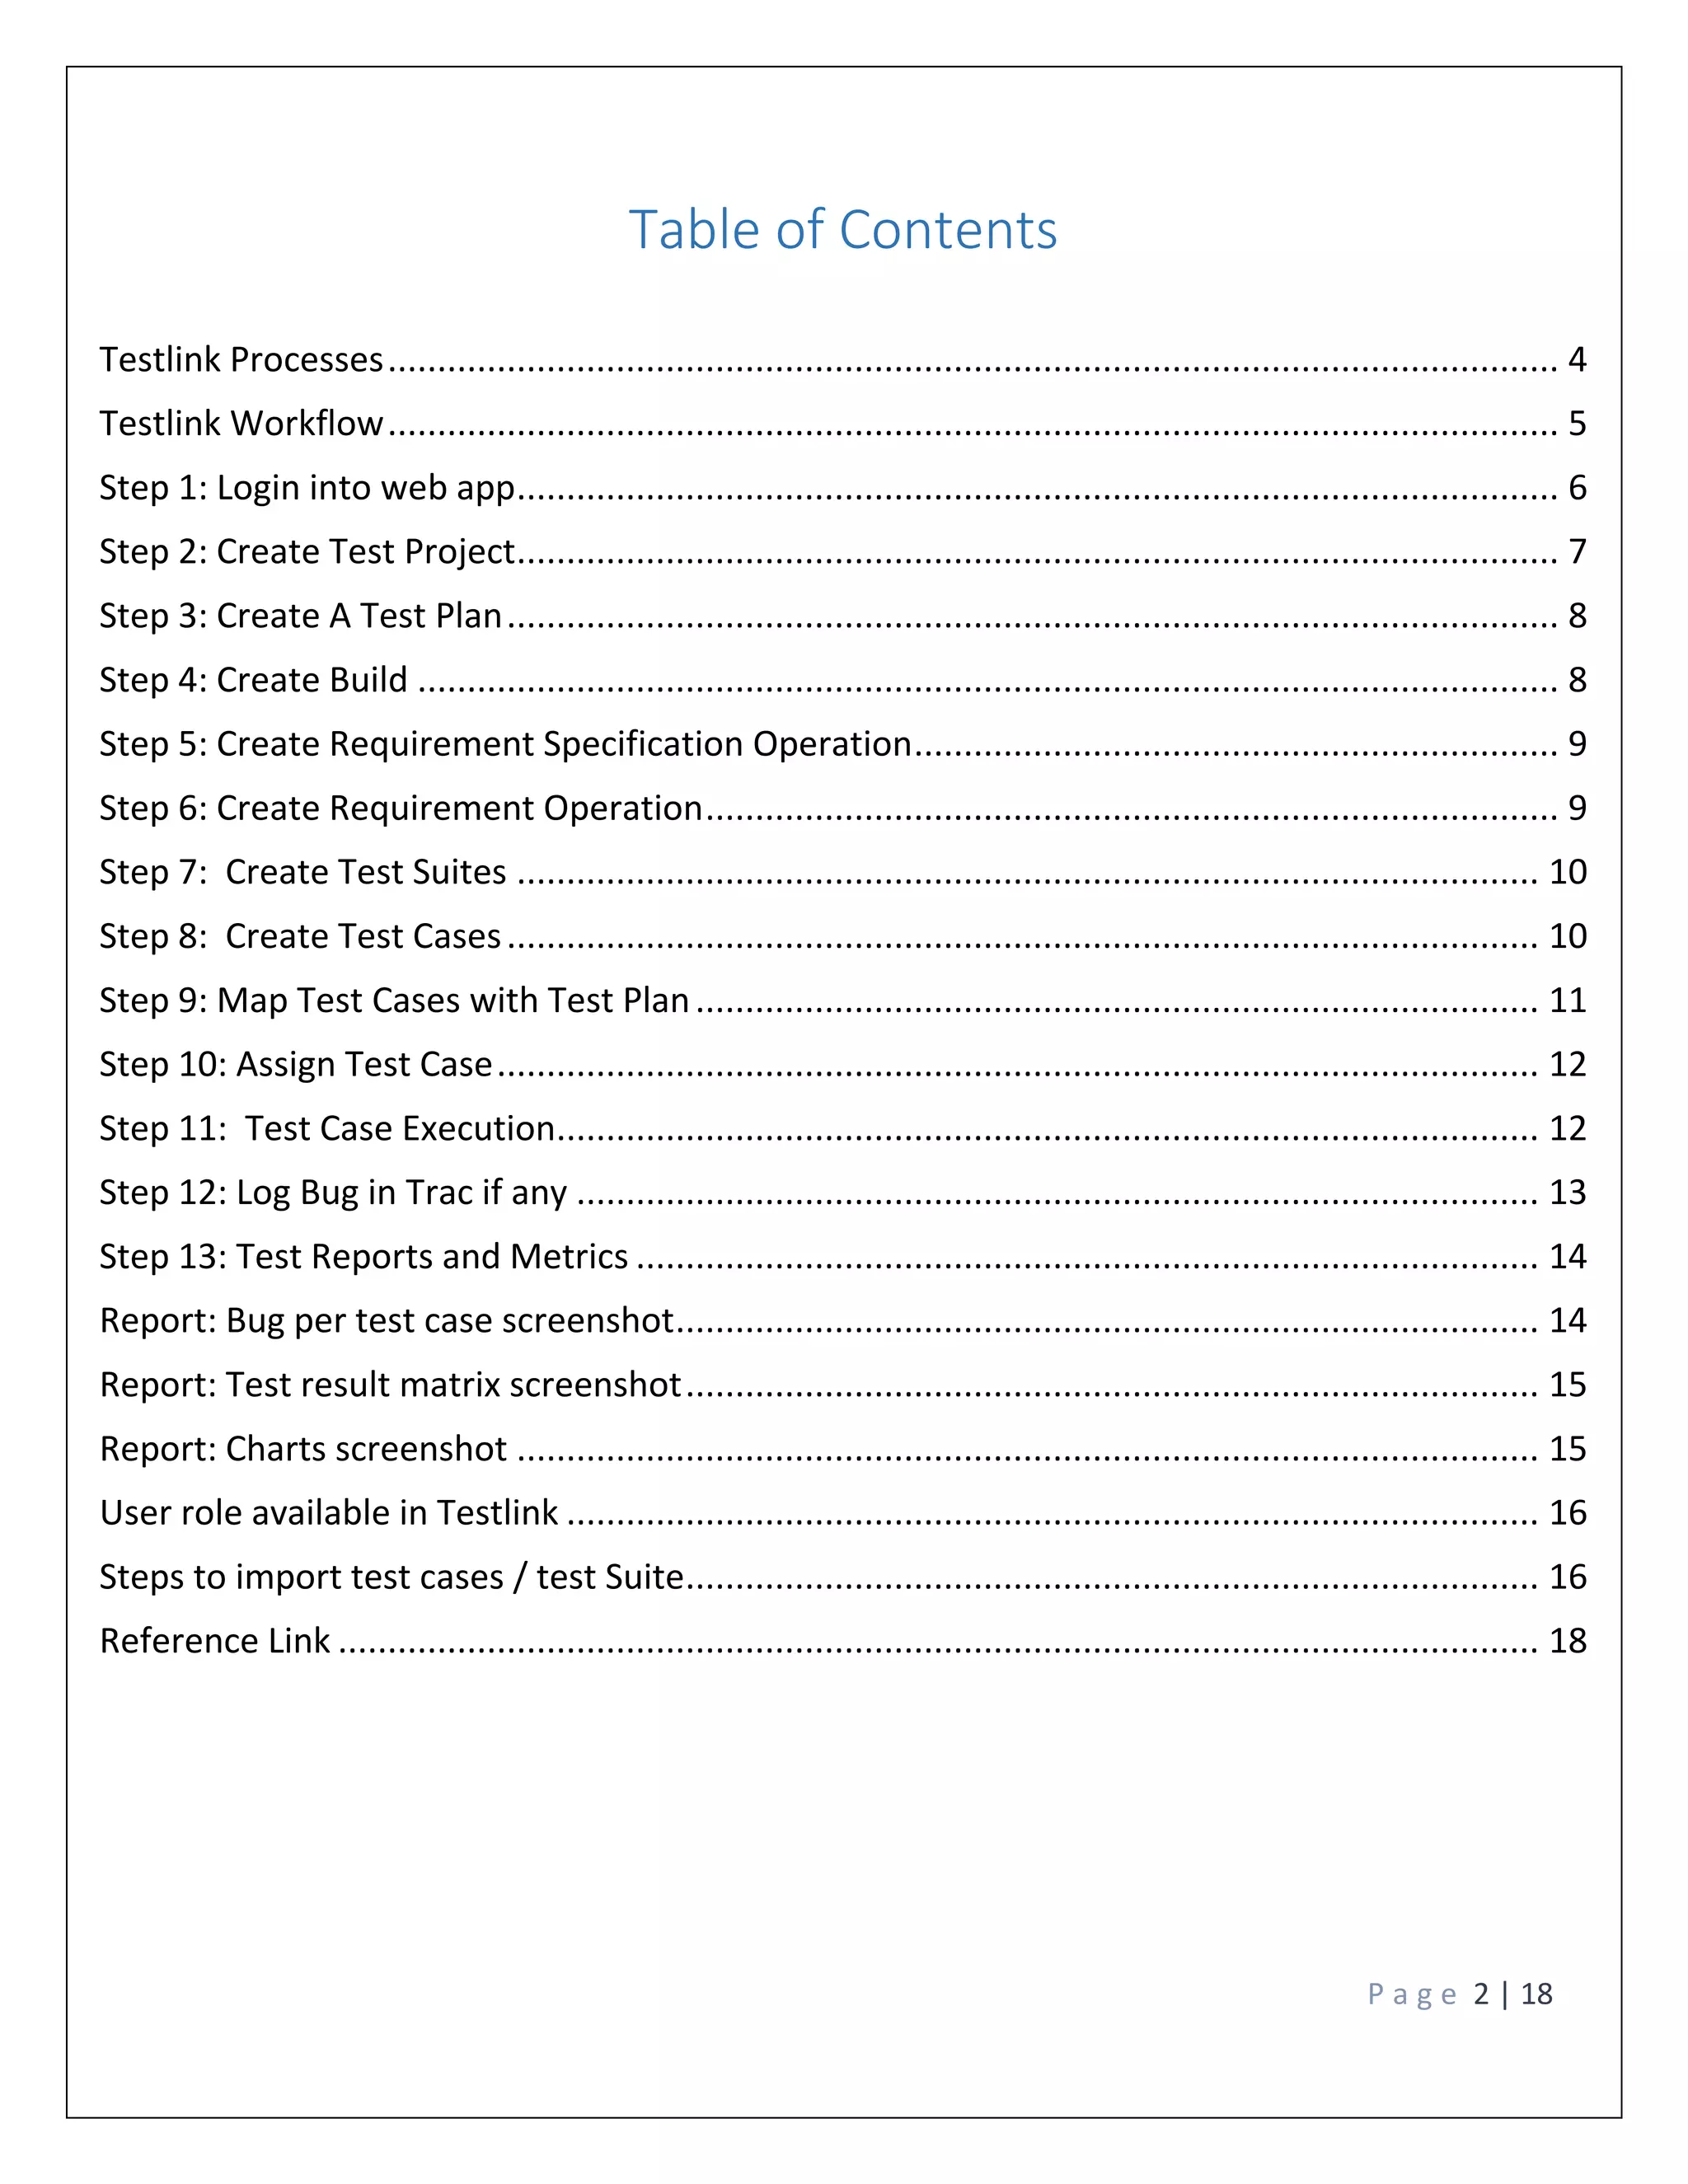
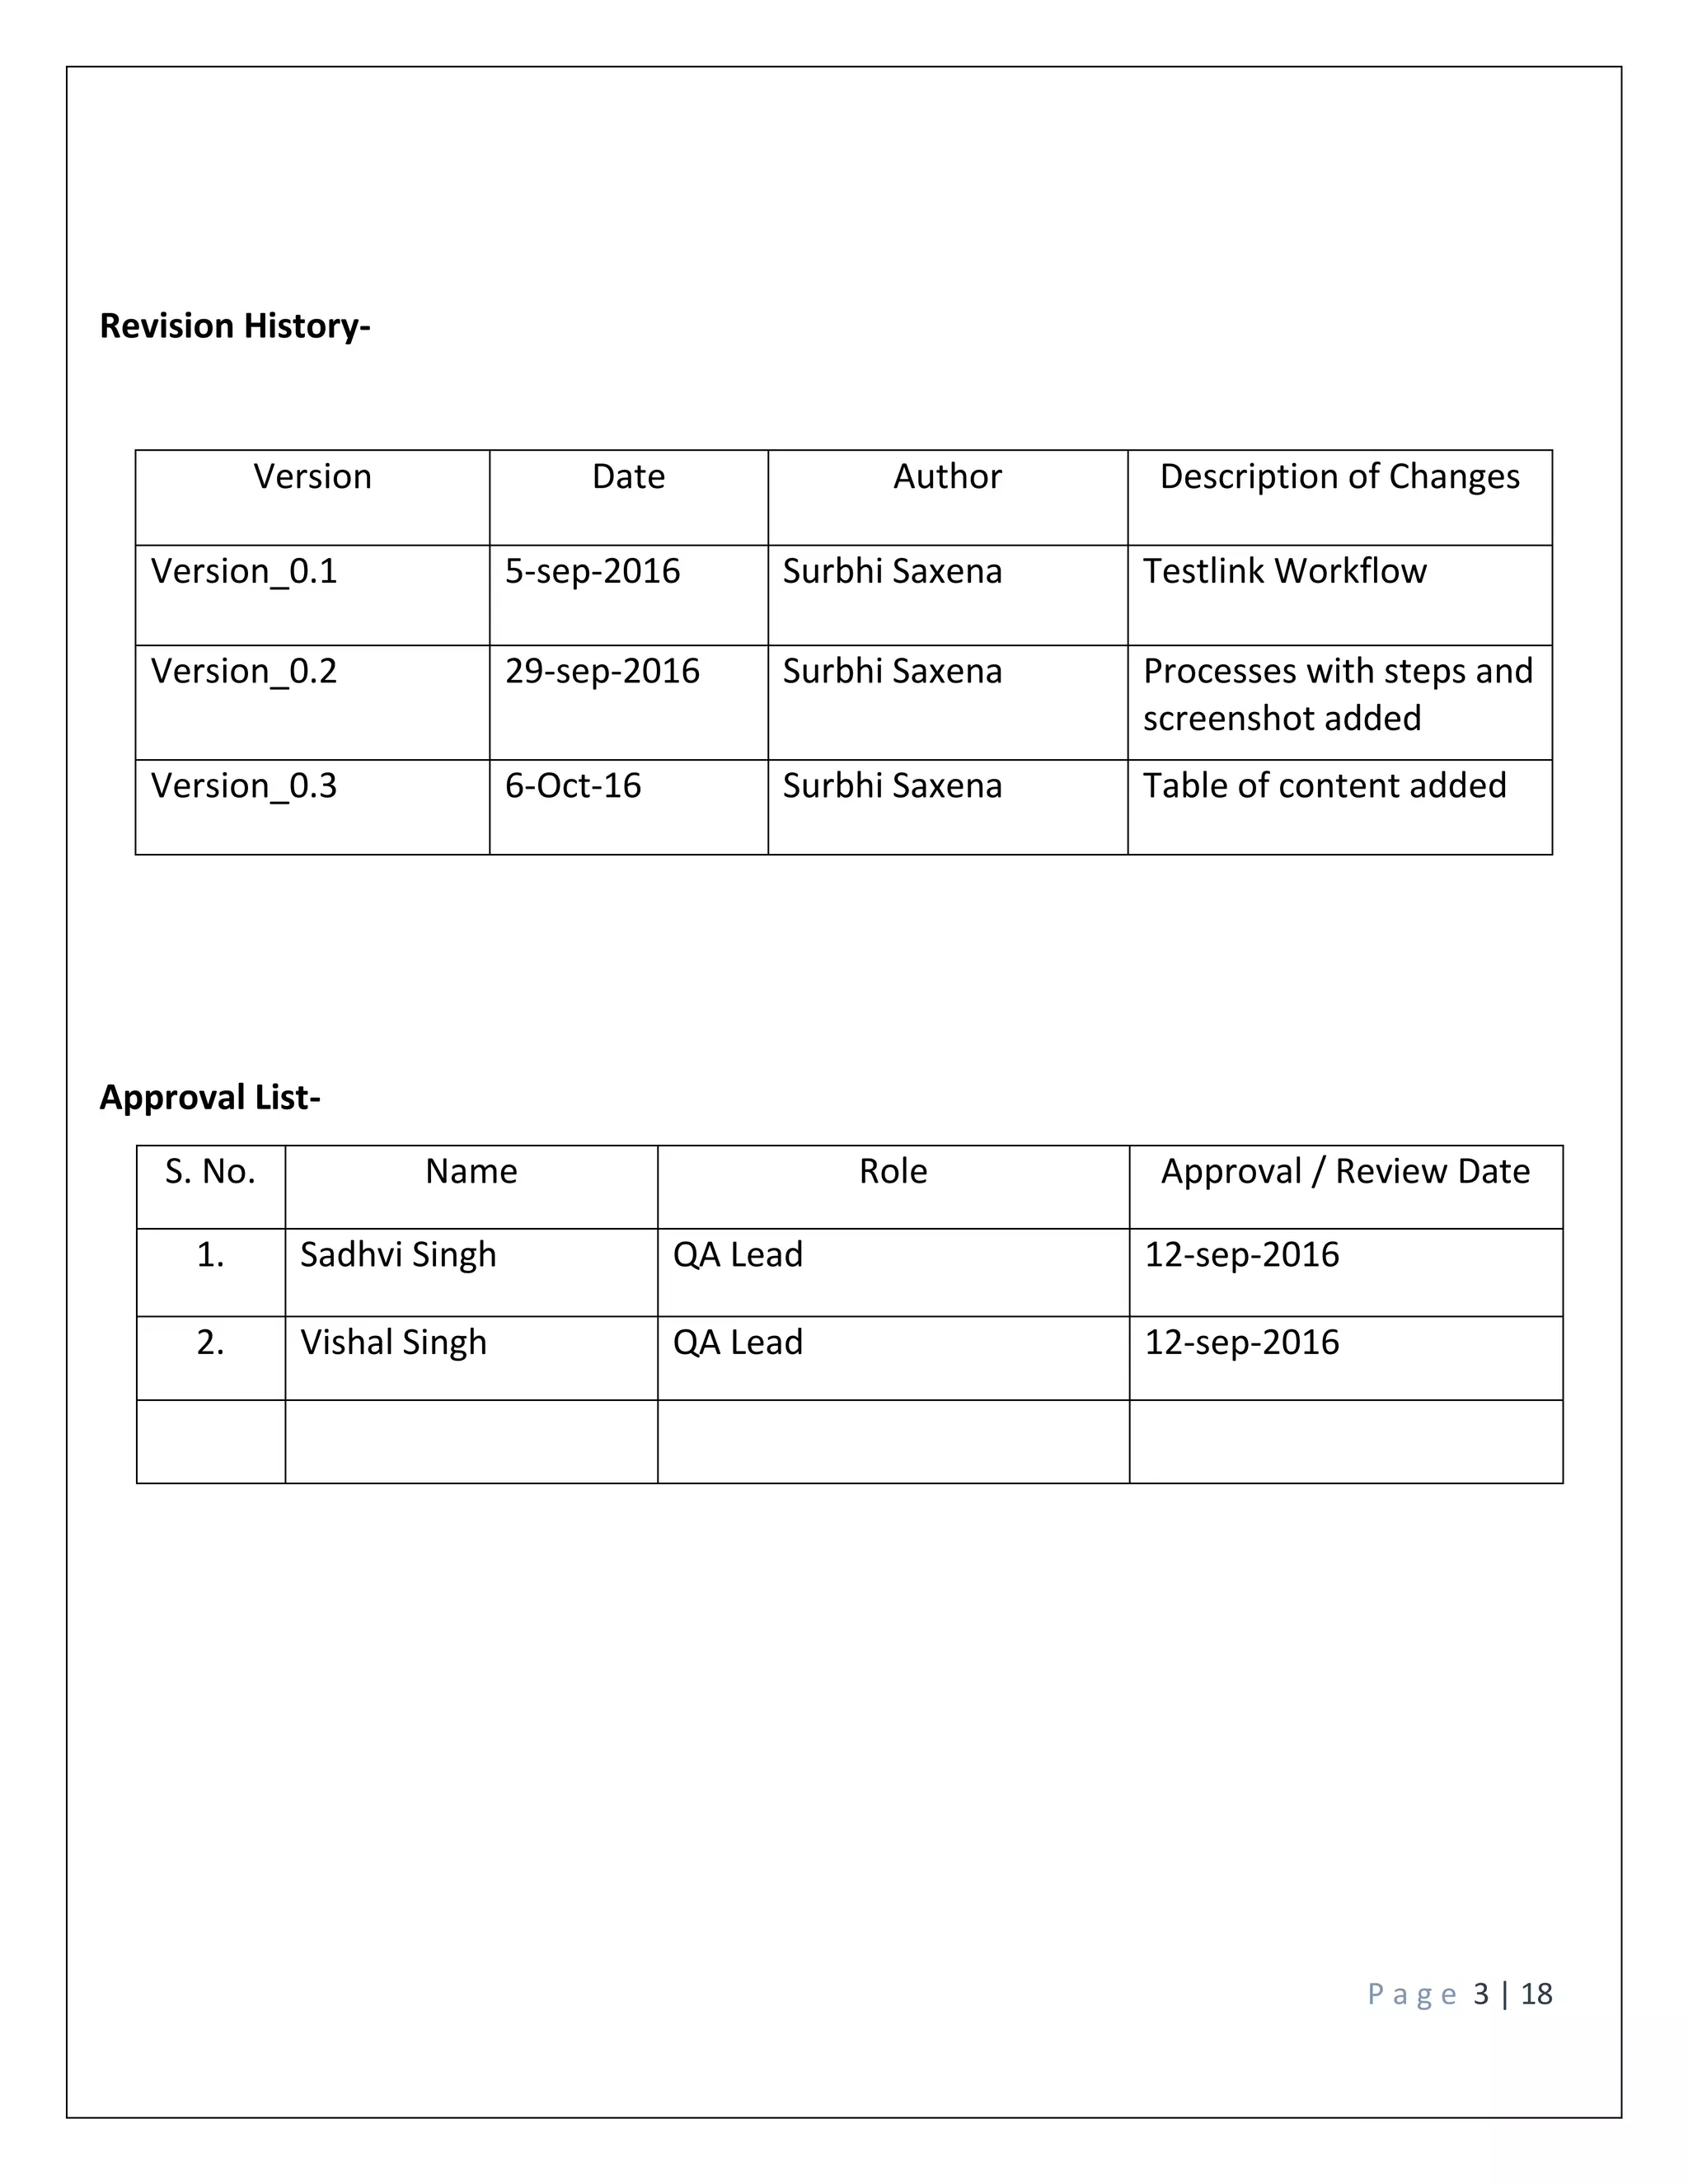
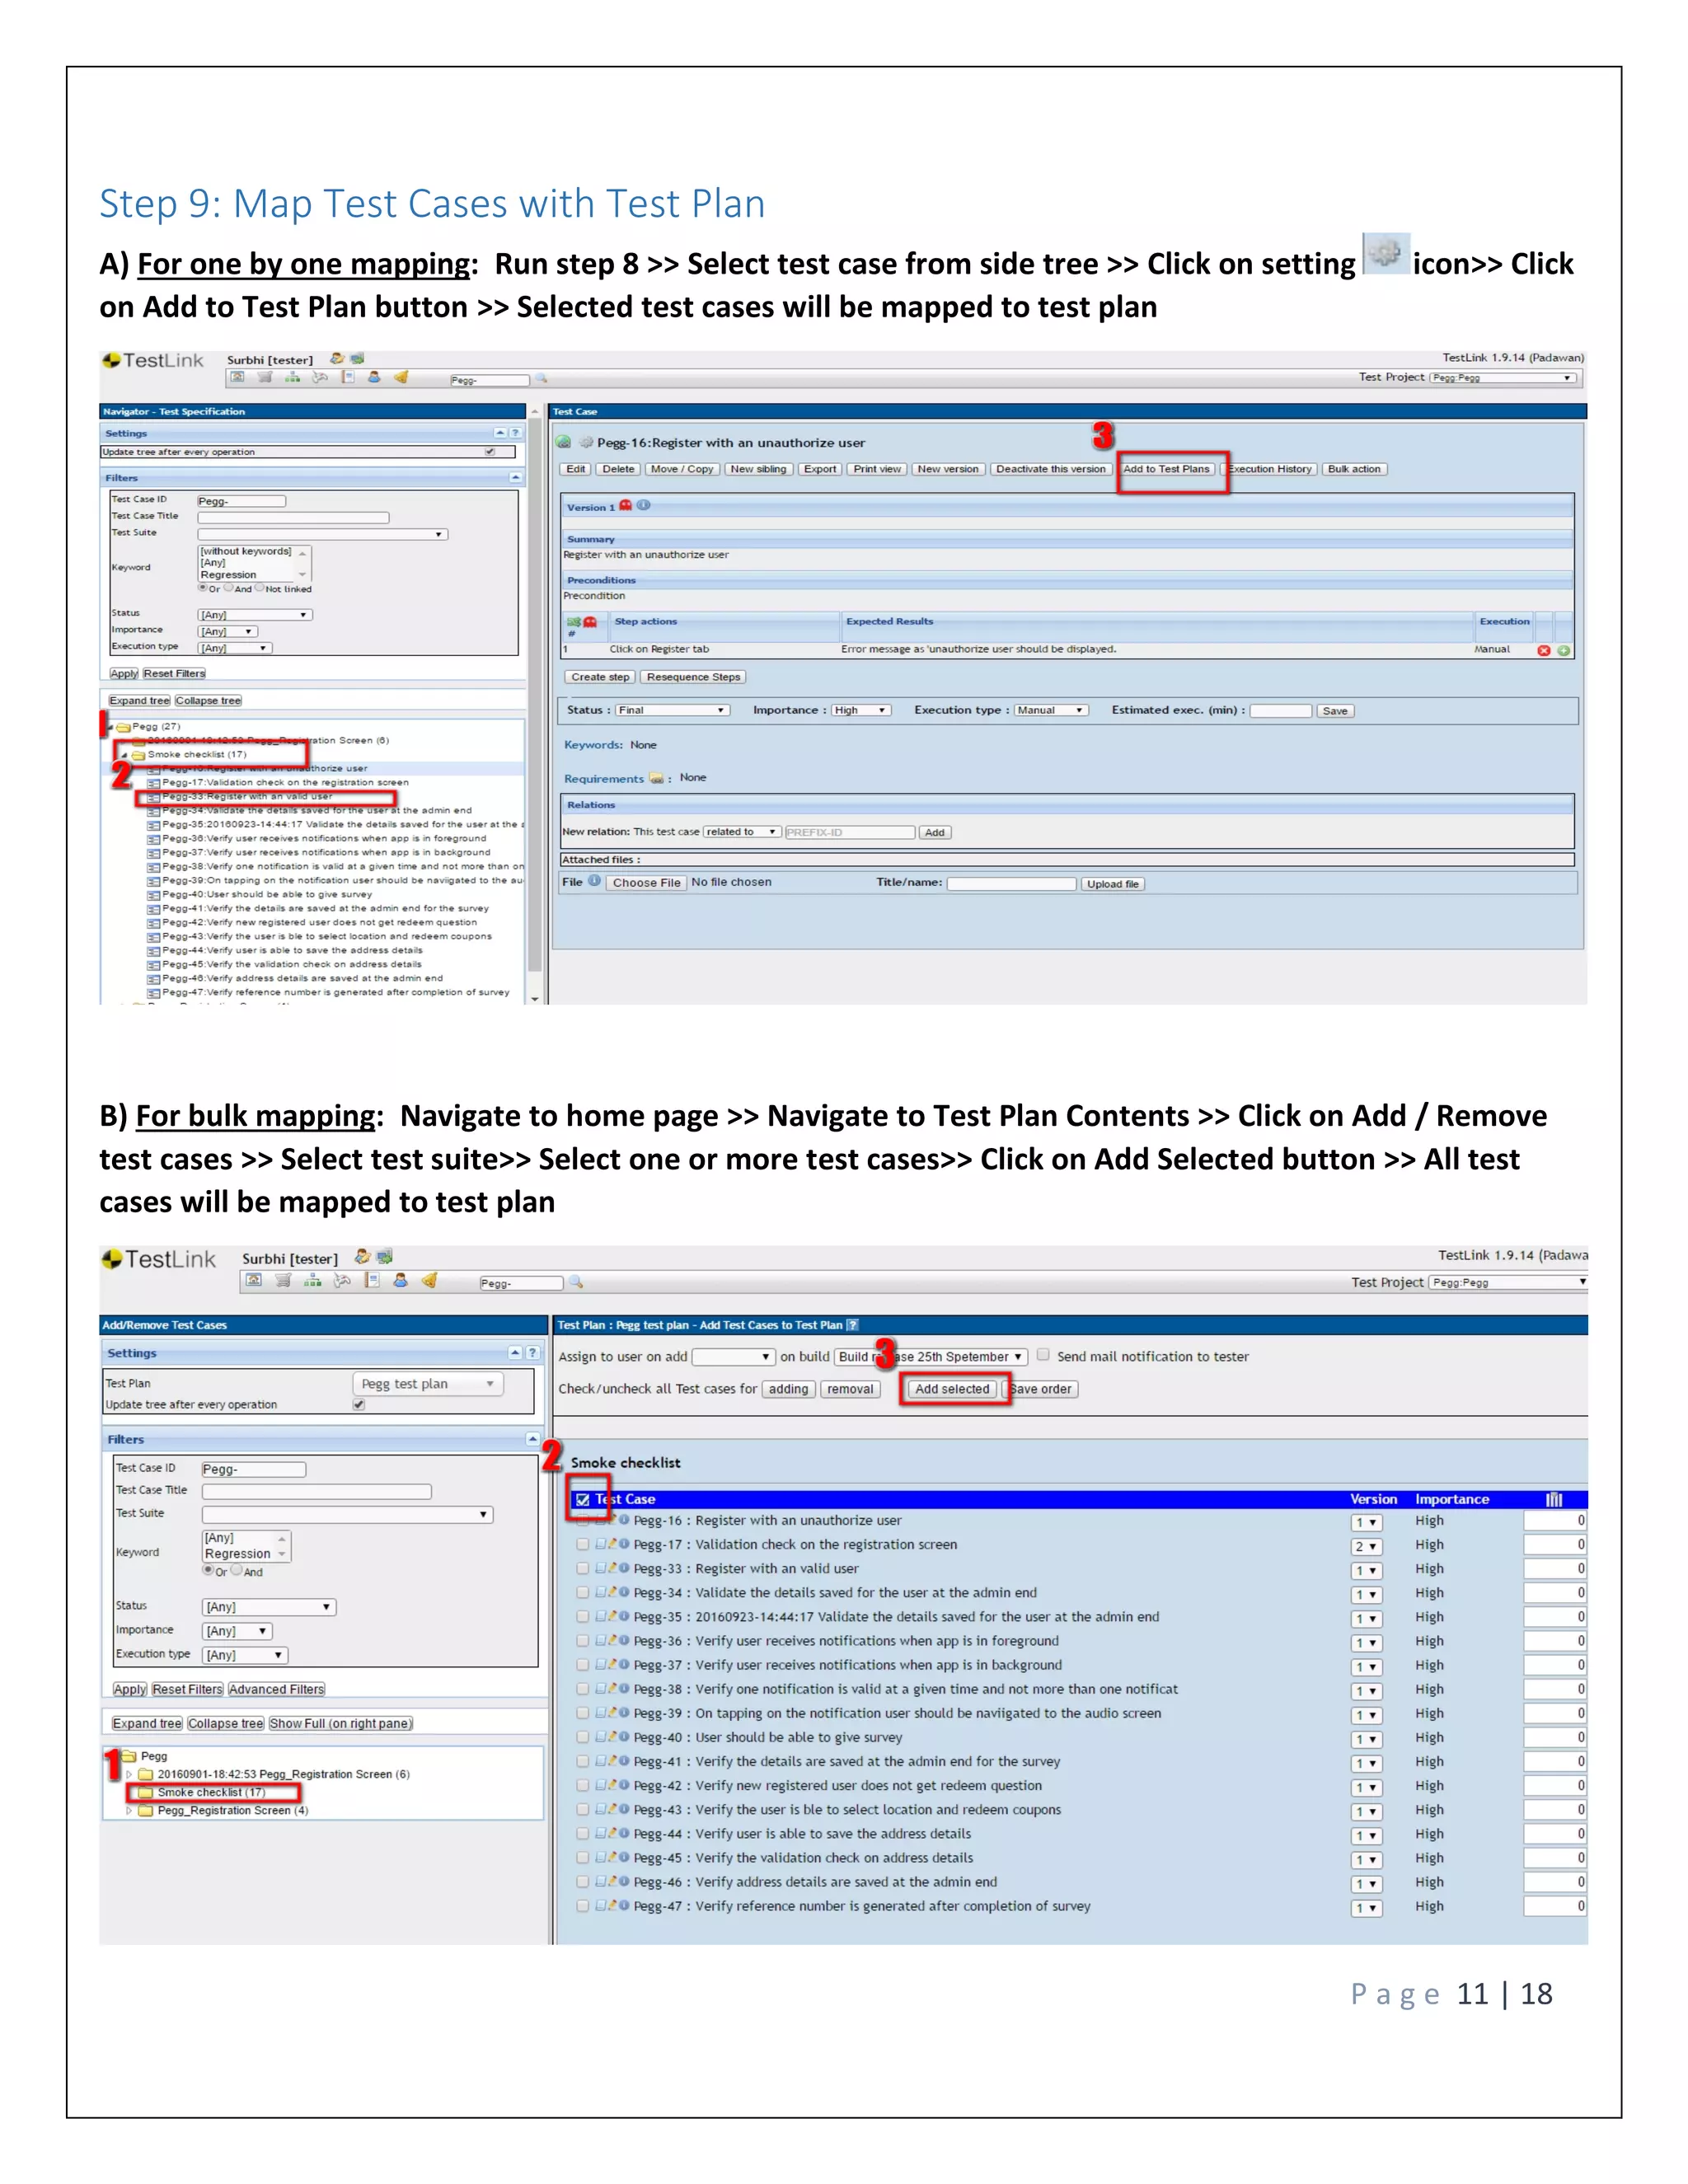
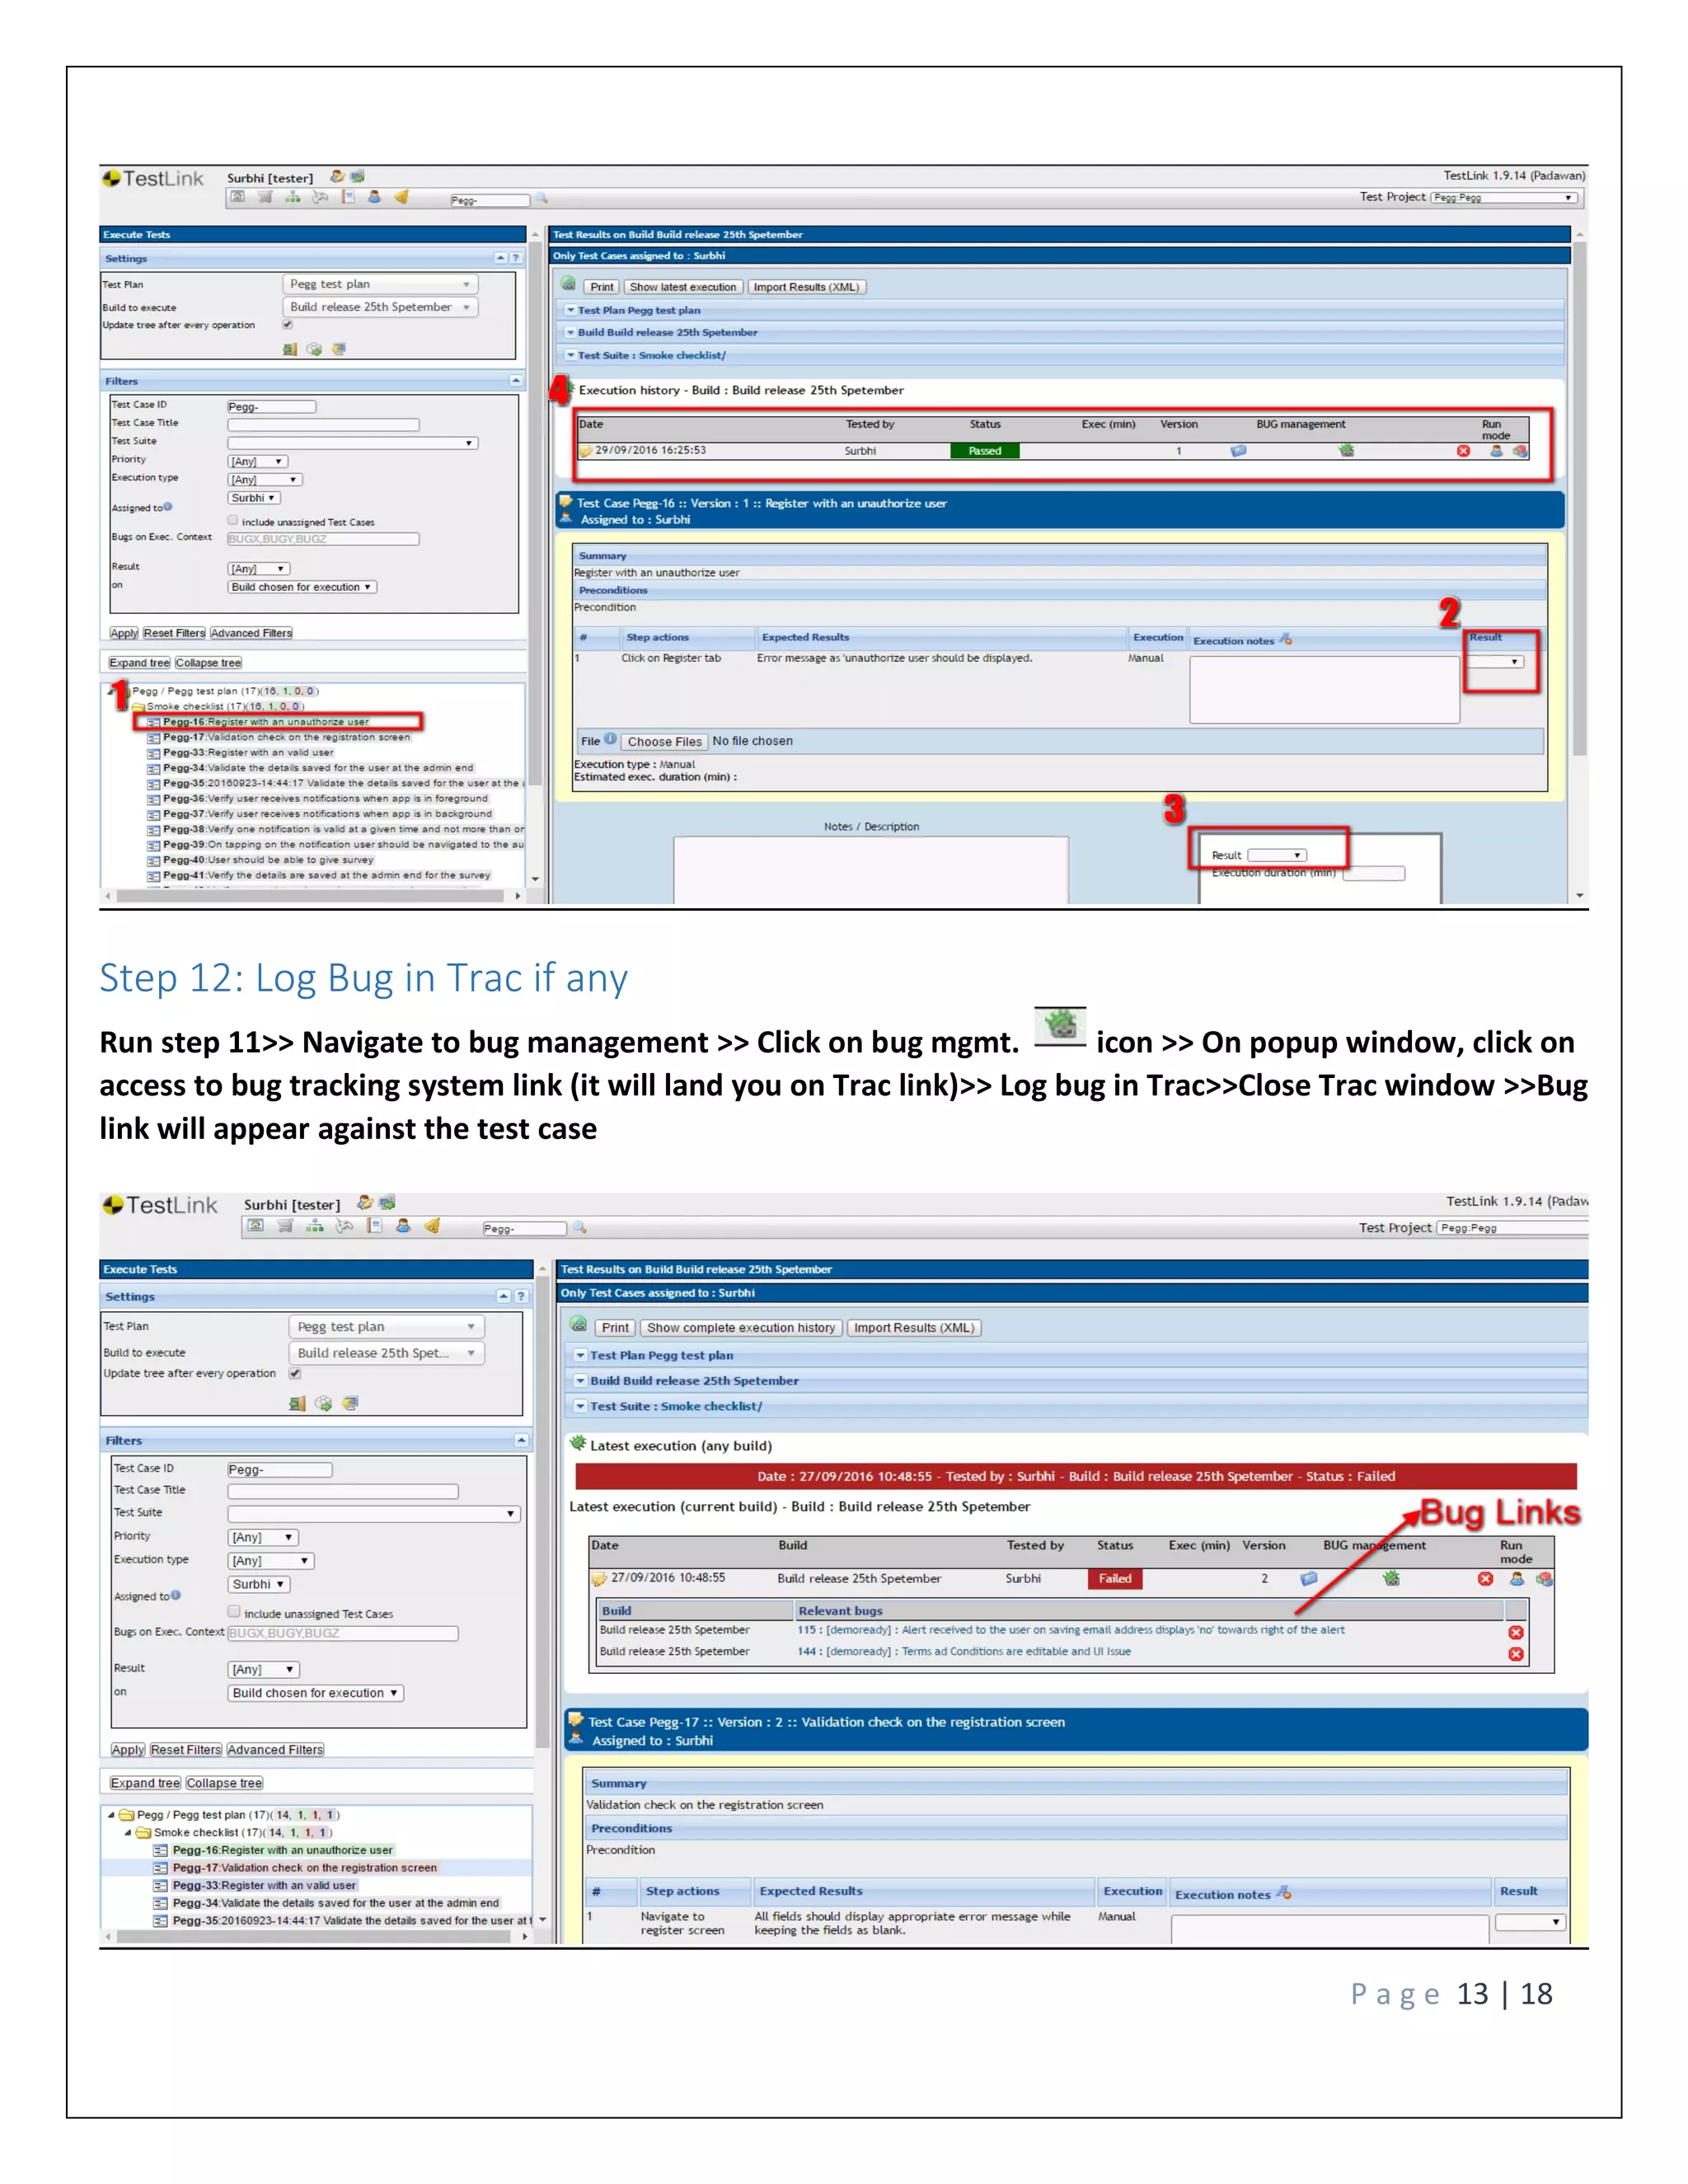
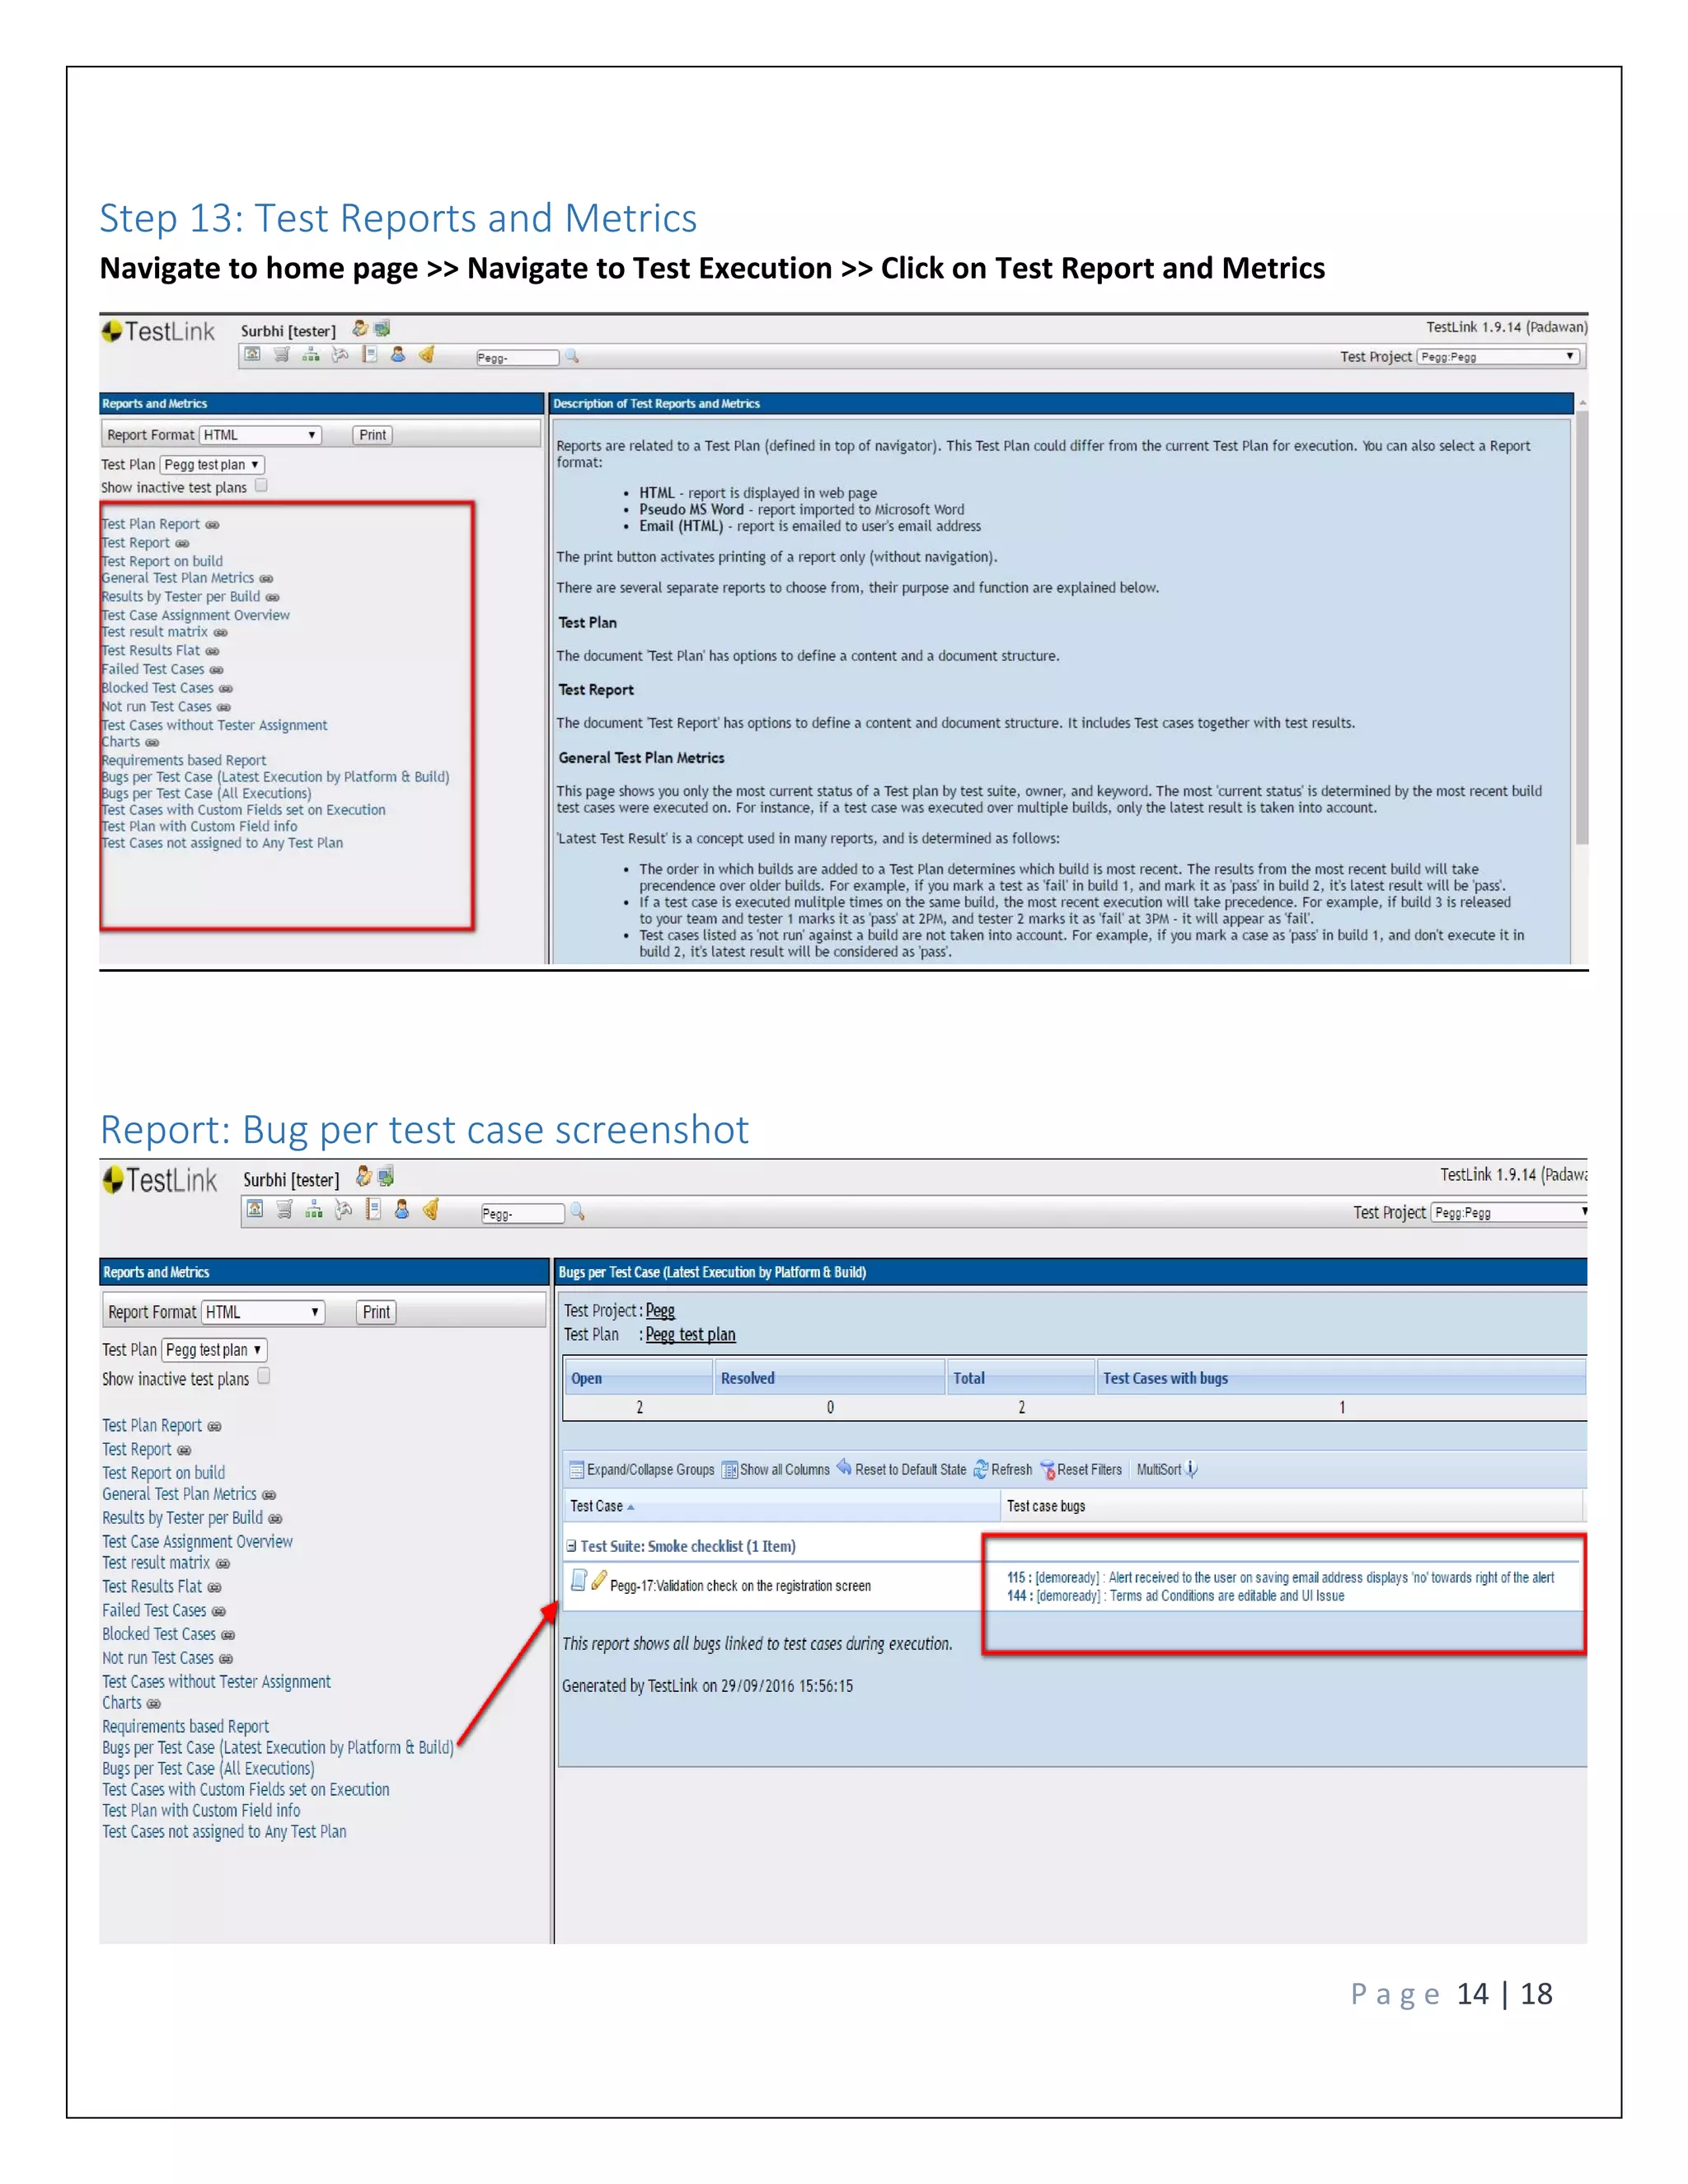
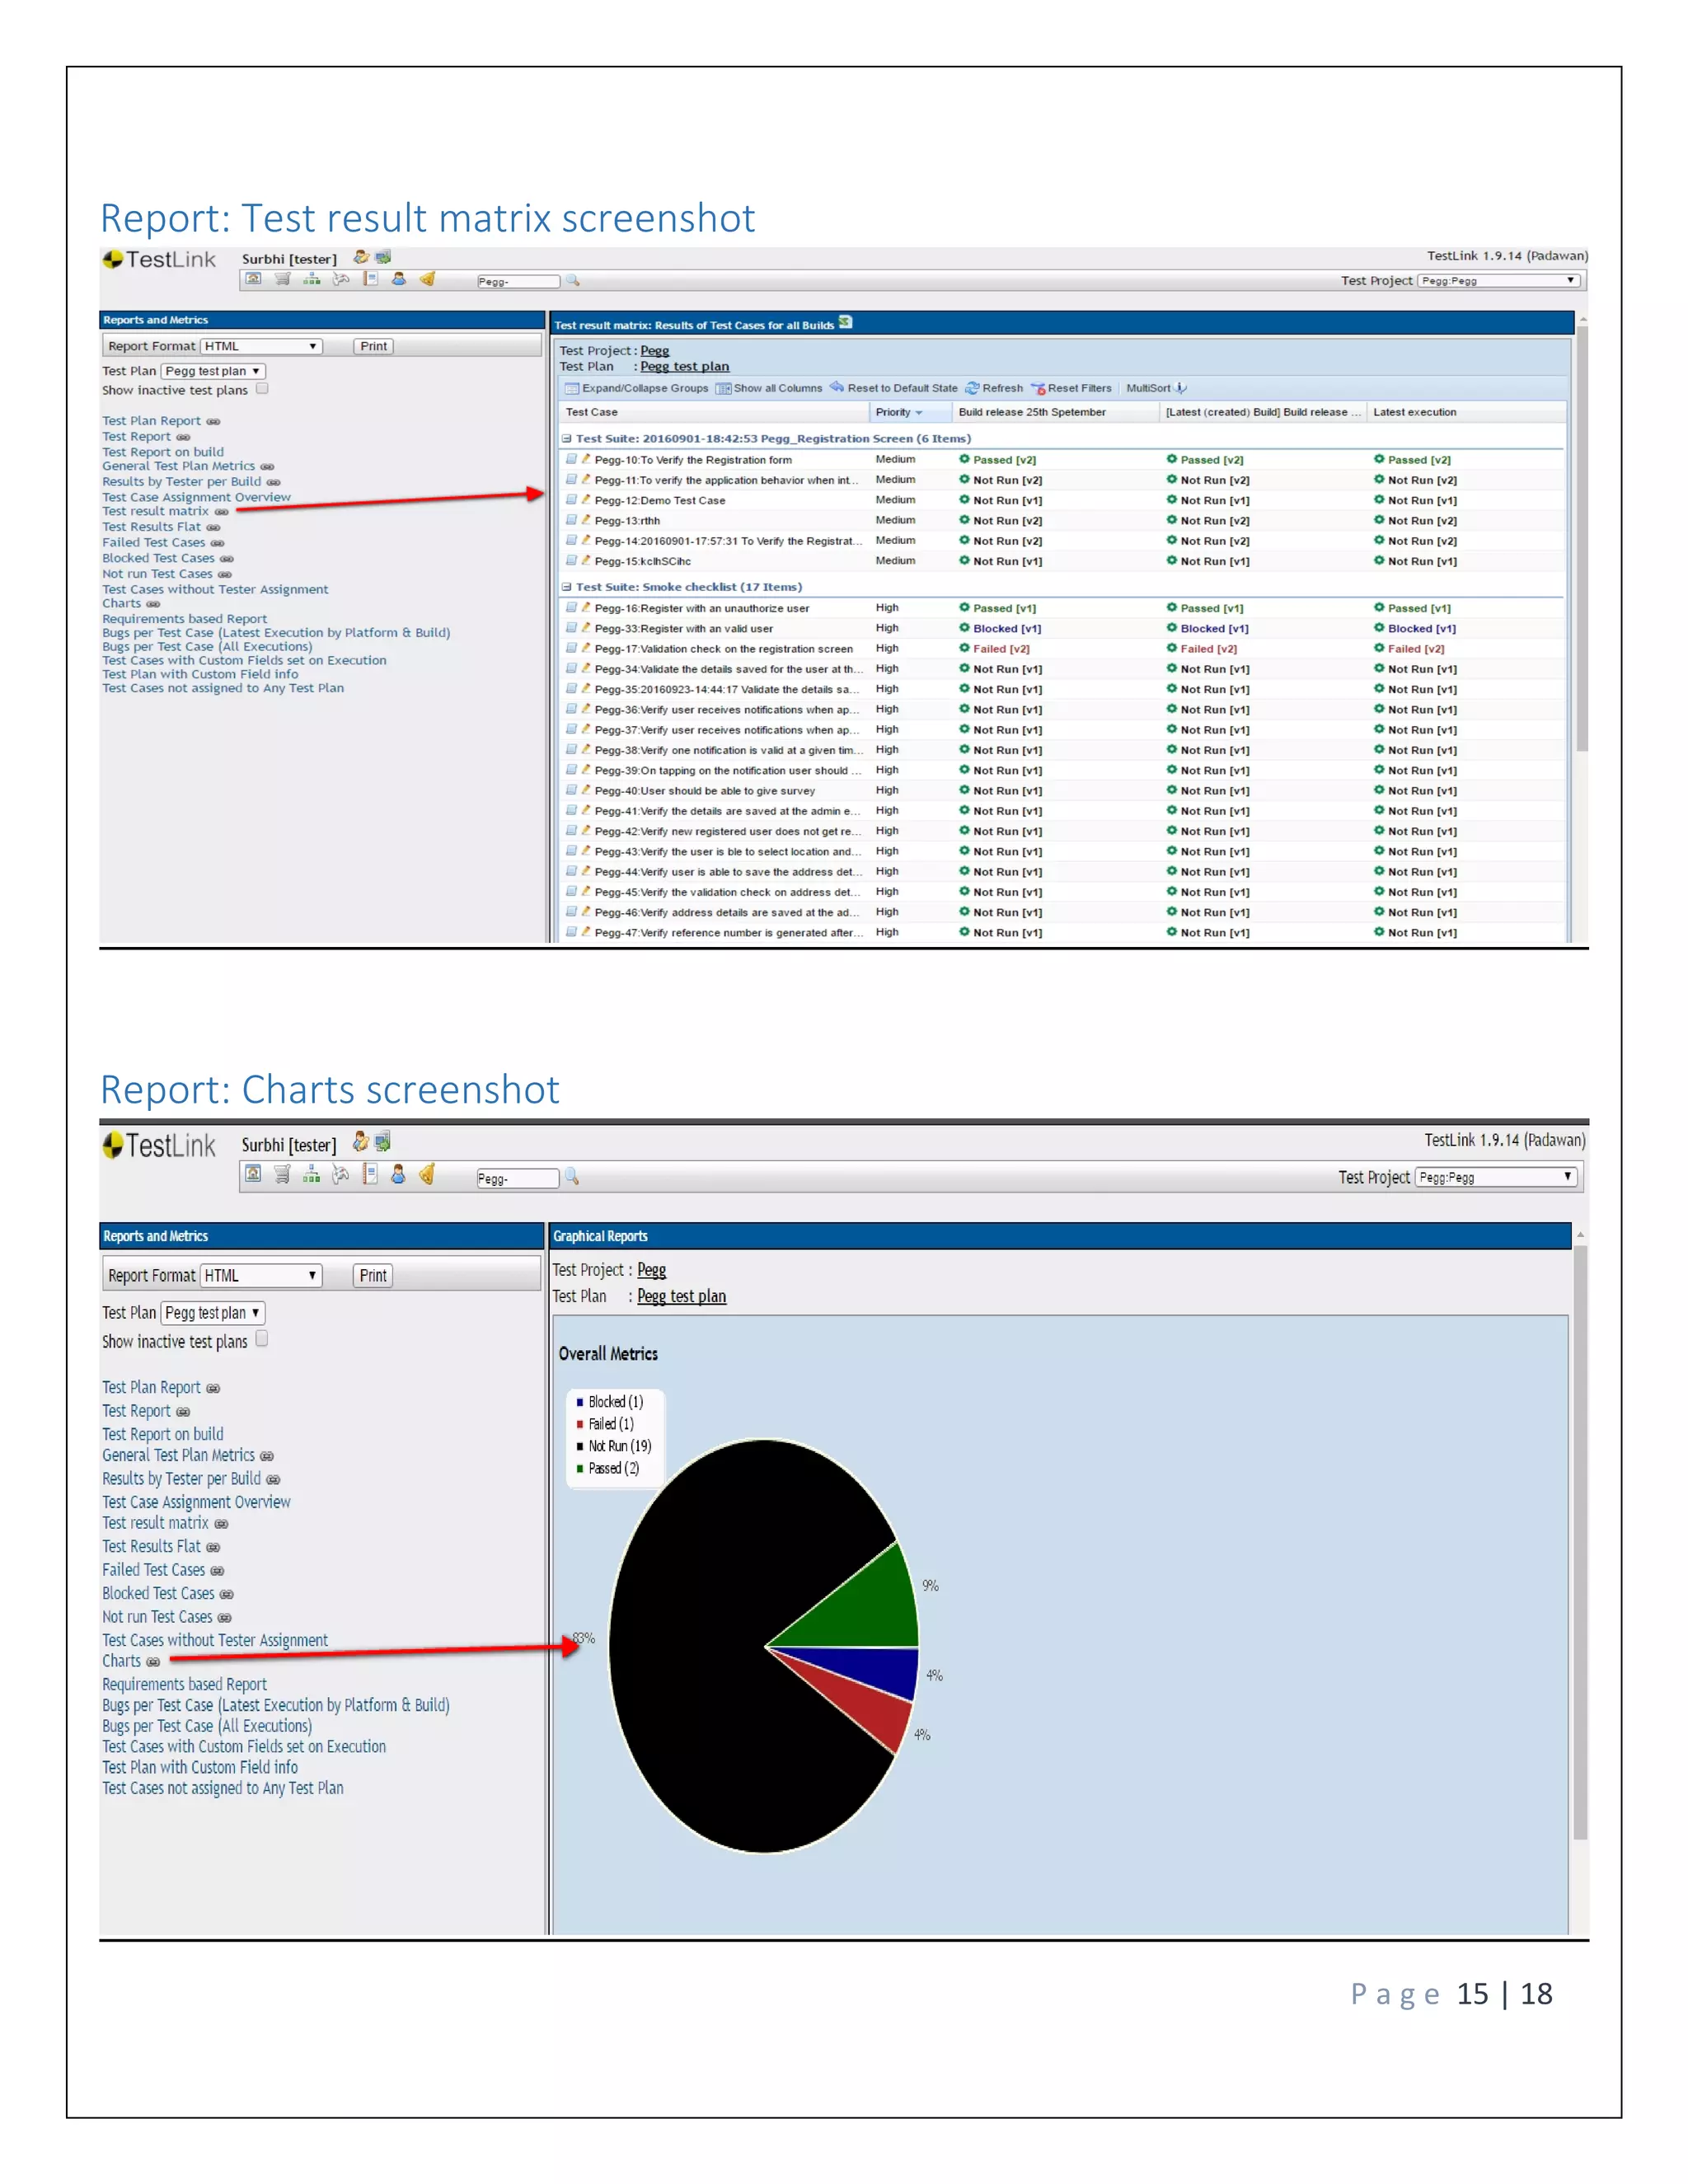
The document describes Testlink processes and workflow. It includes:
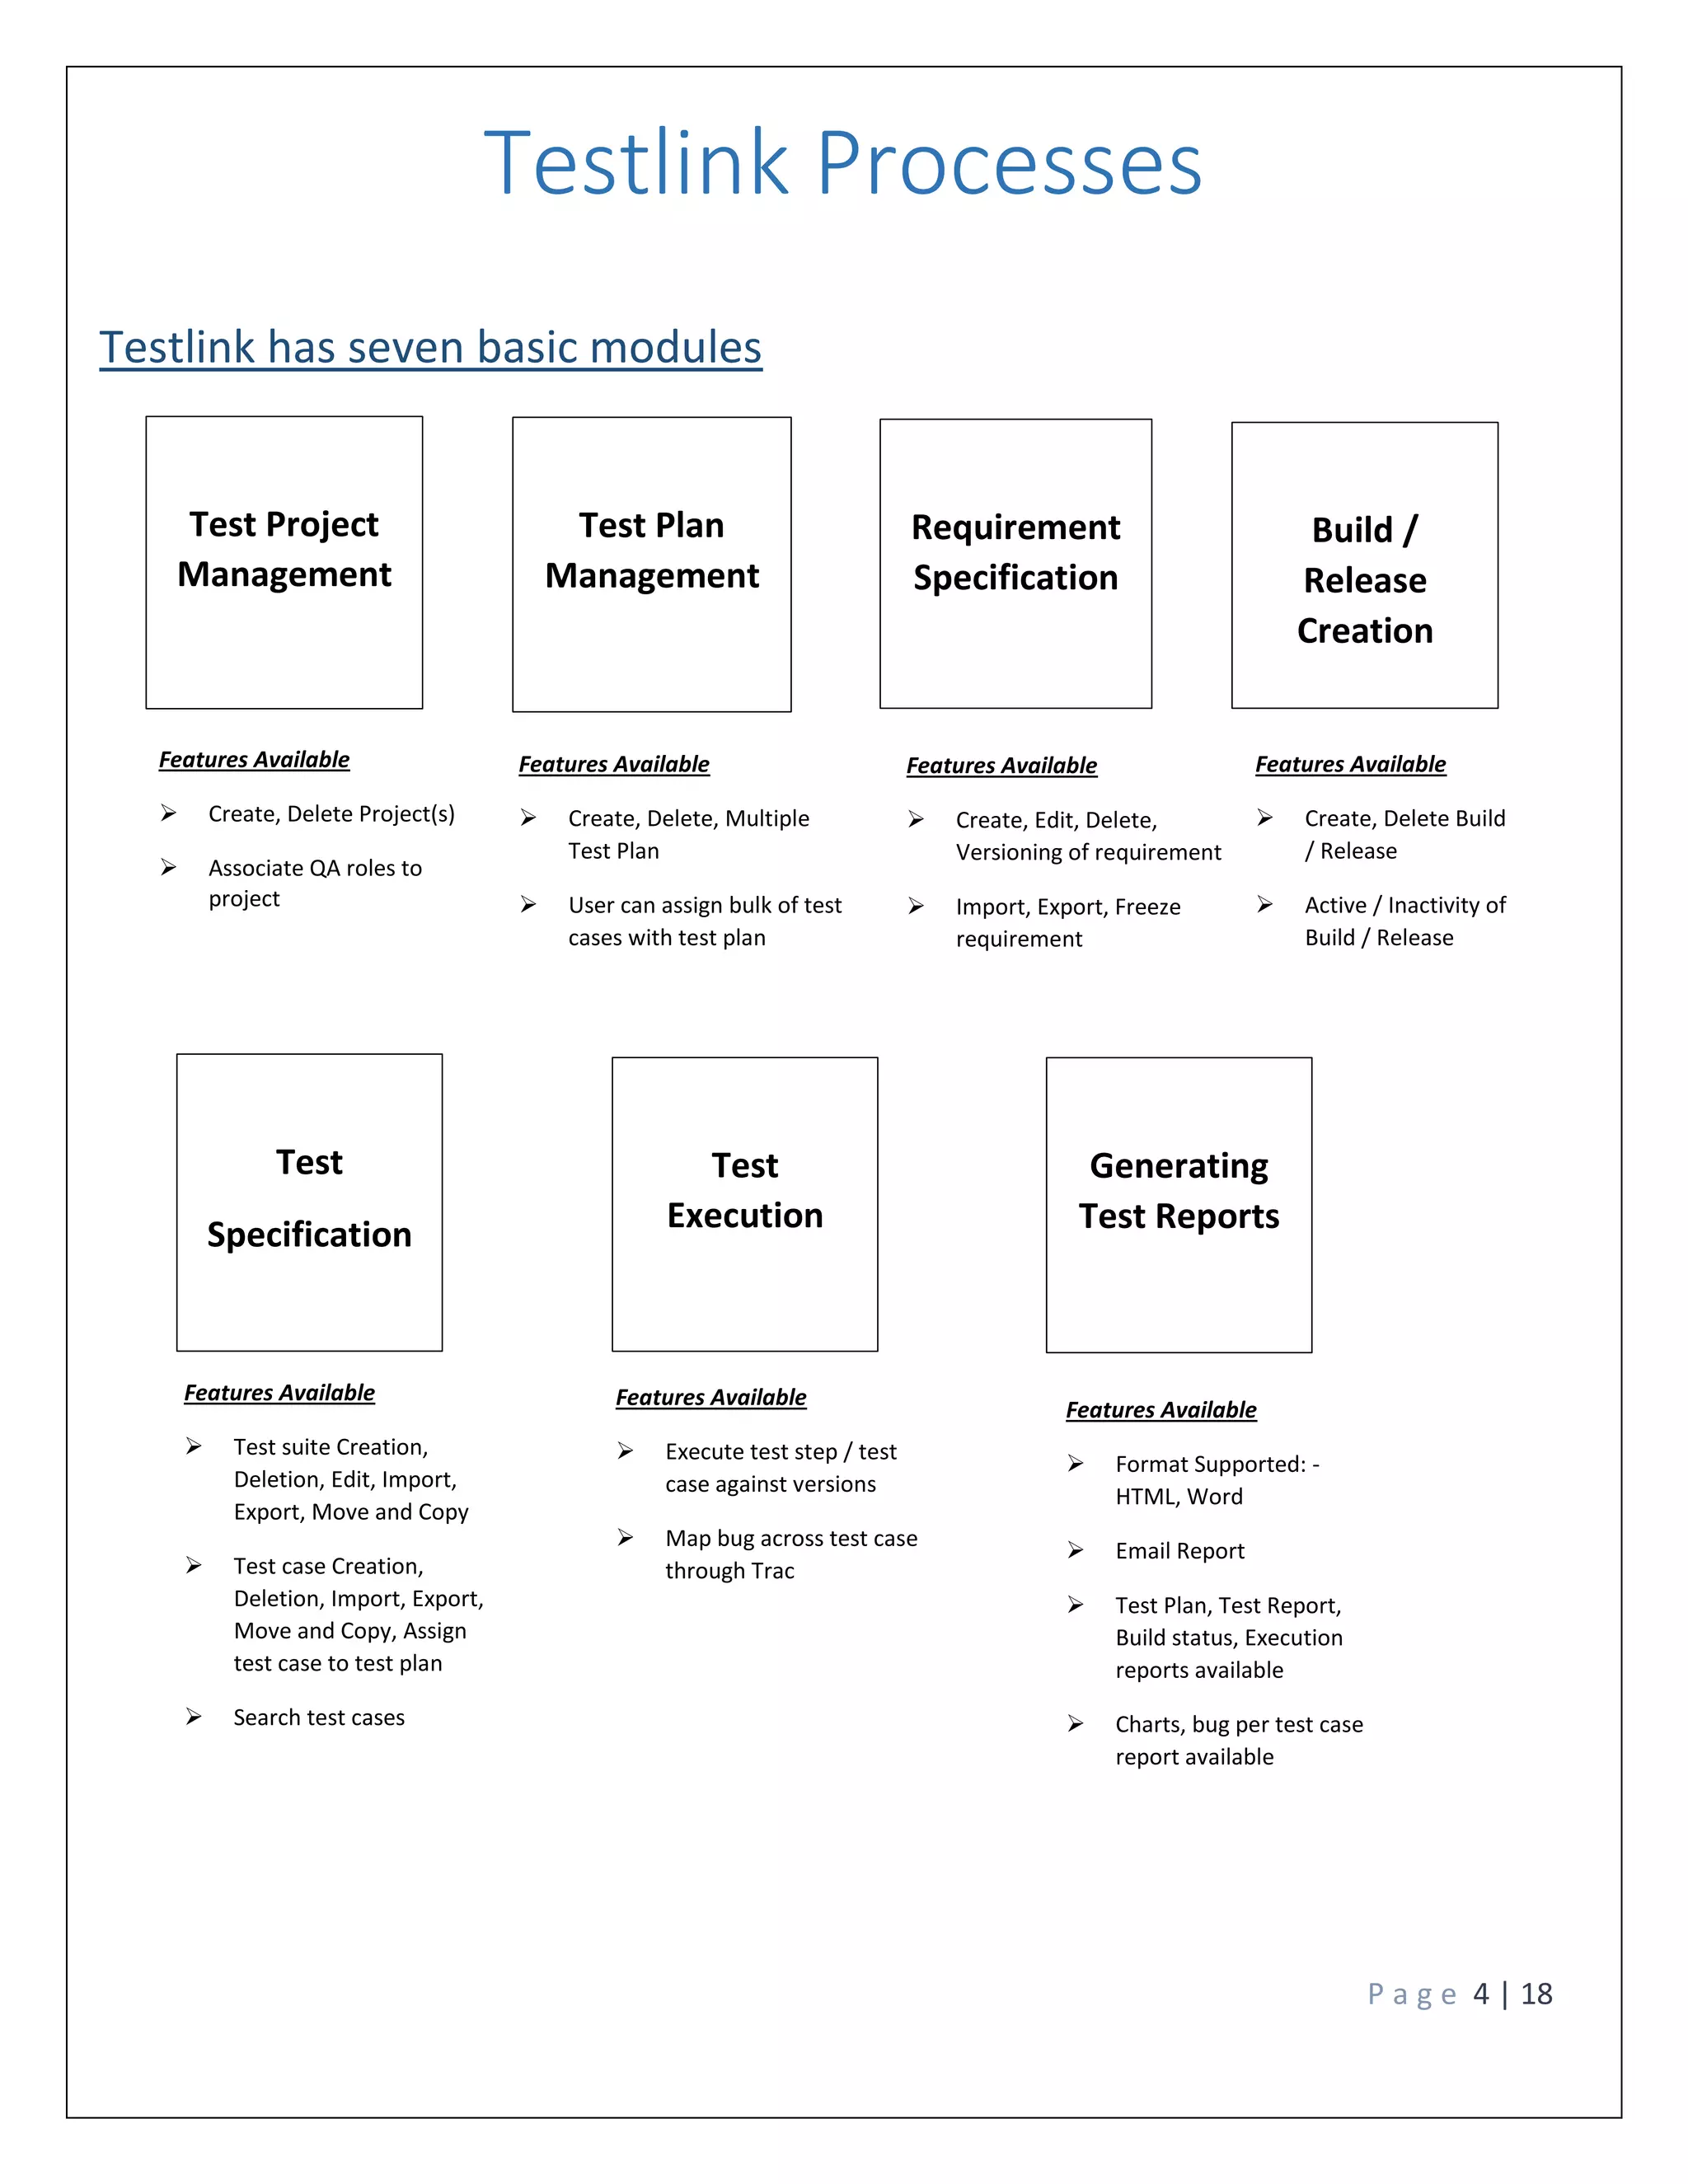
1) An overview of Testlink modules including test project management, test plan management, requirement specification, build/release creation, test specification, test execution, and test report generation.
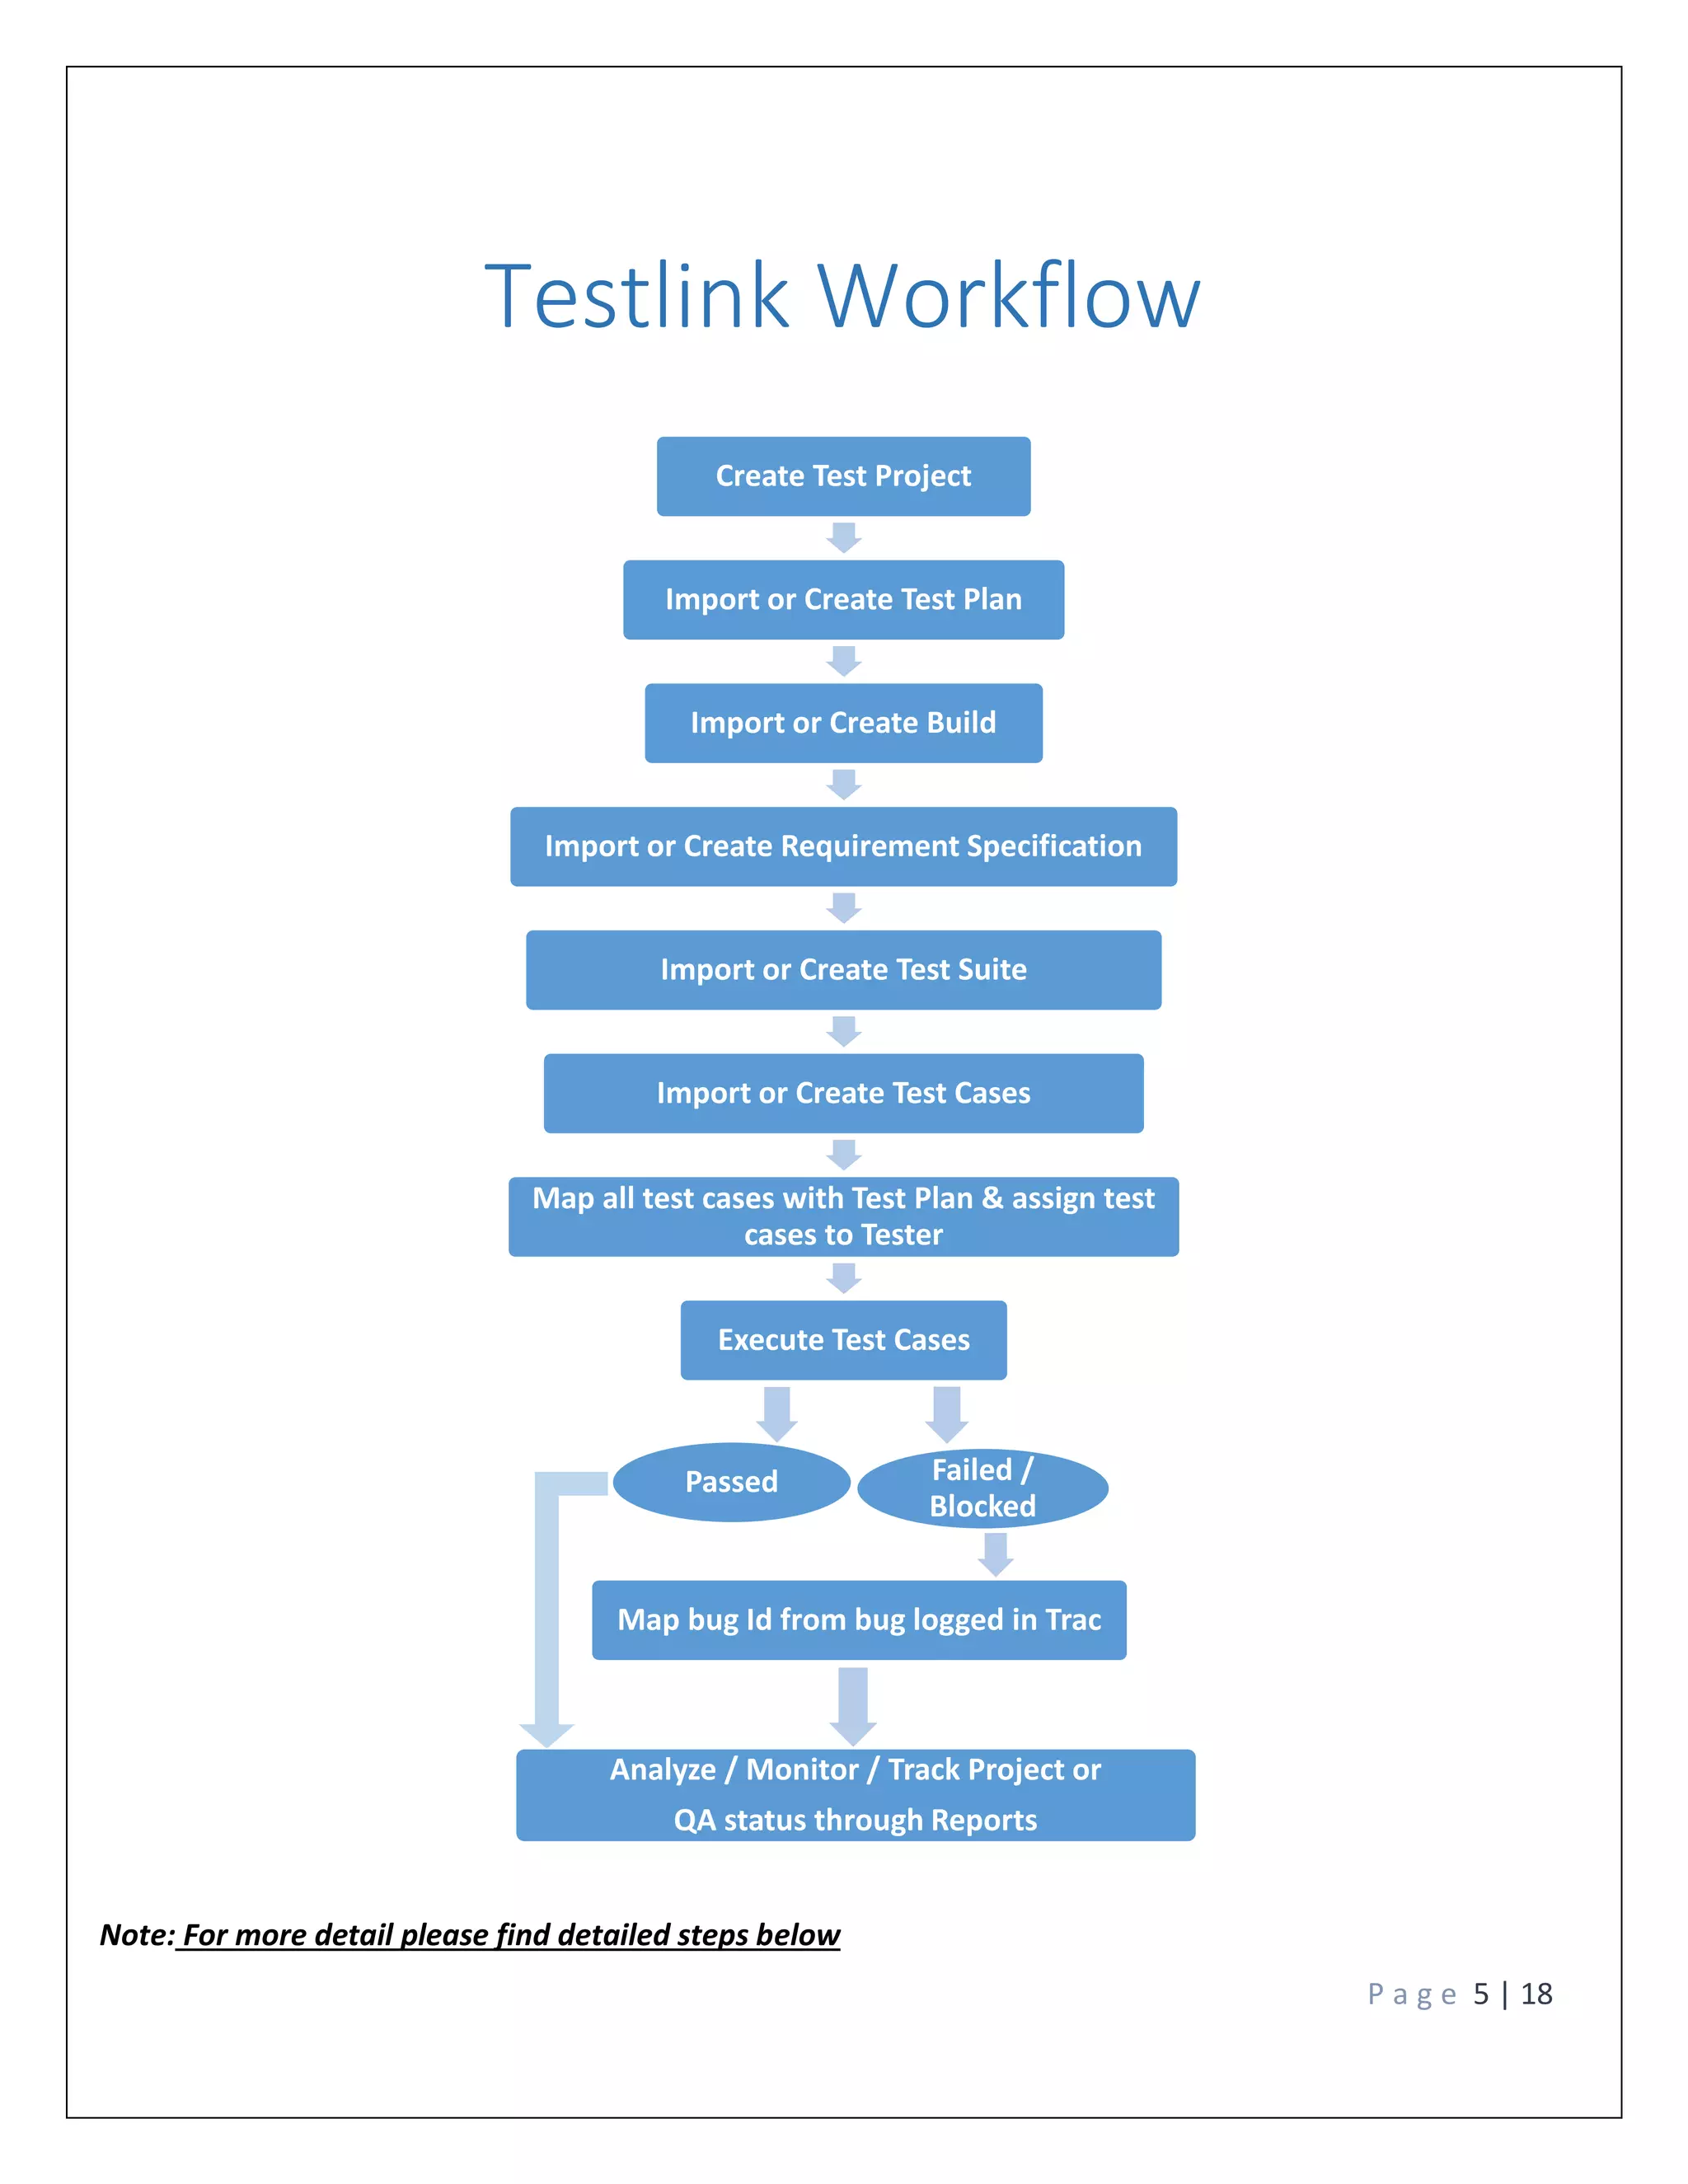
2) A high-level workflow showing the typical process from creating a test project to executing tests and generating reports.
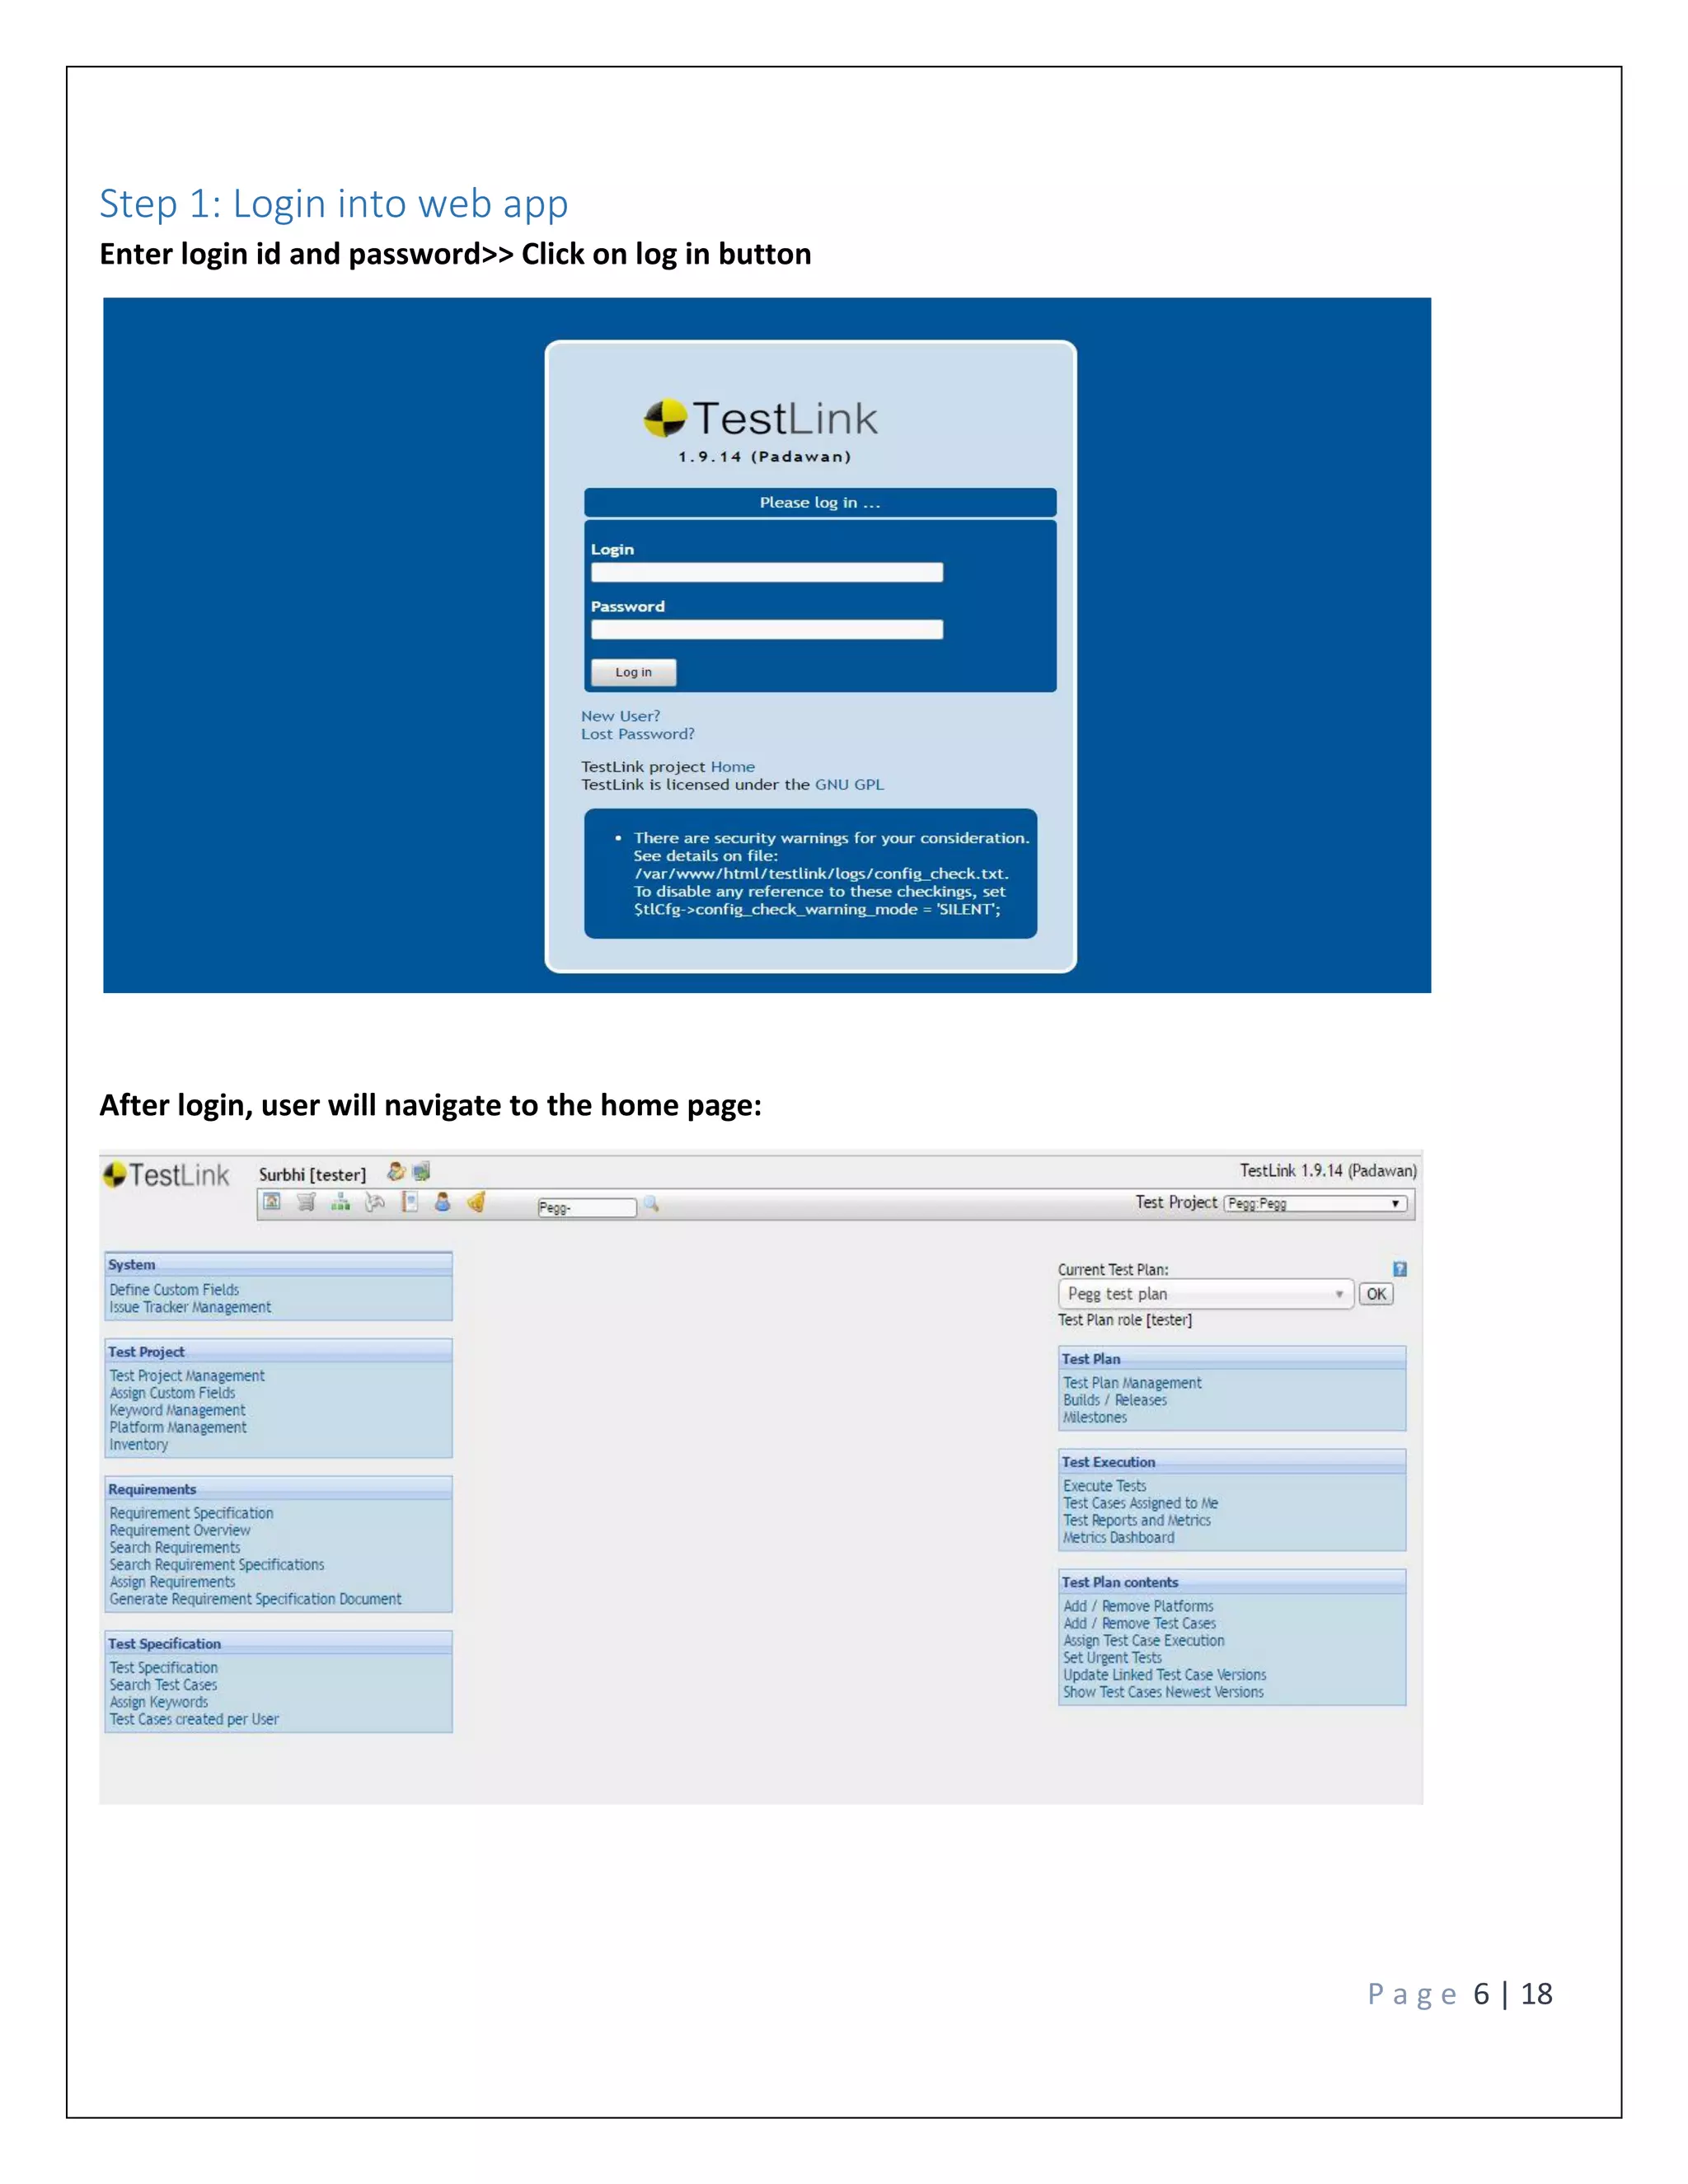
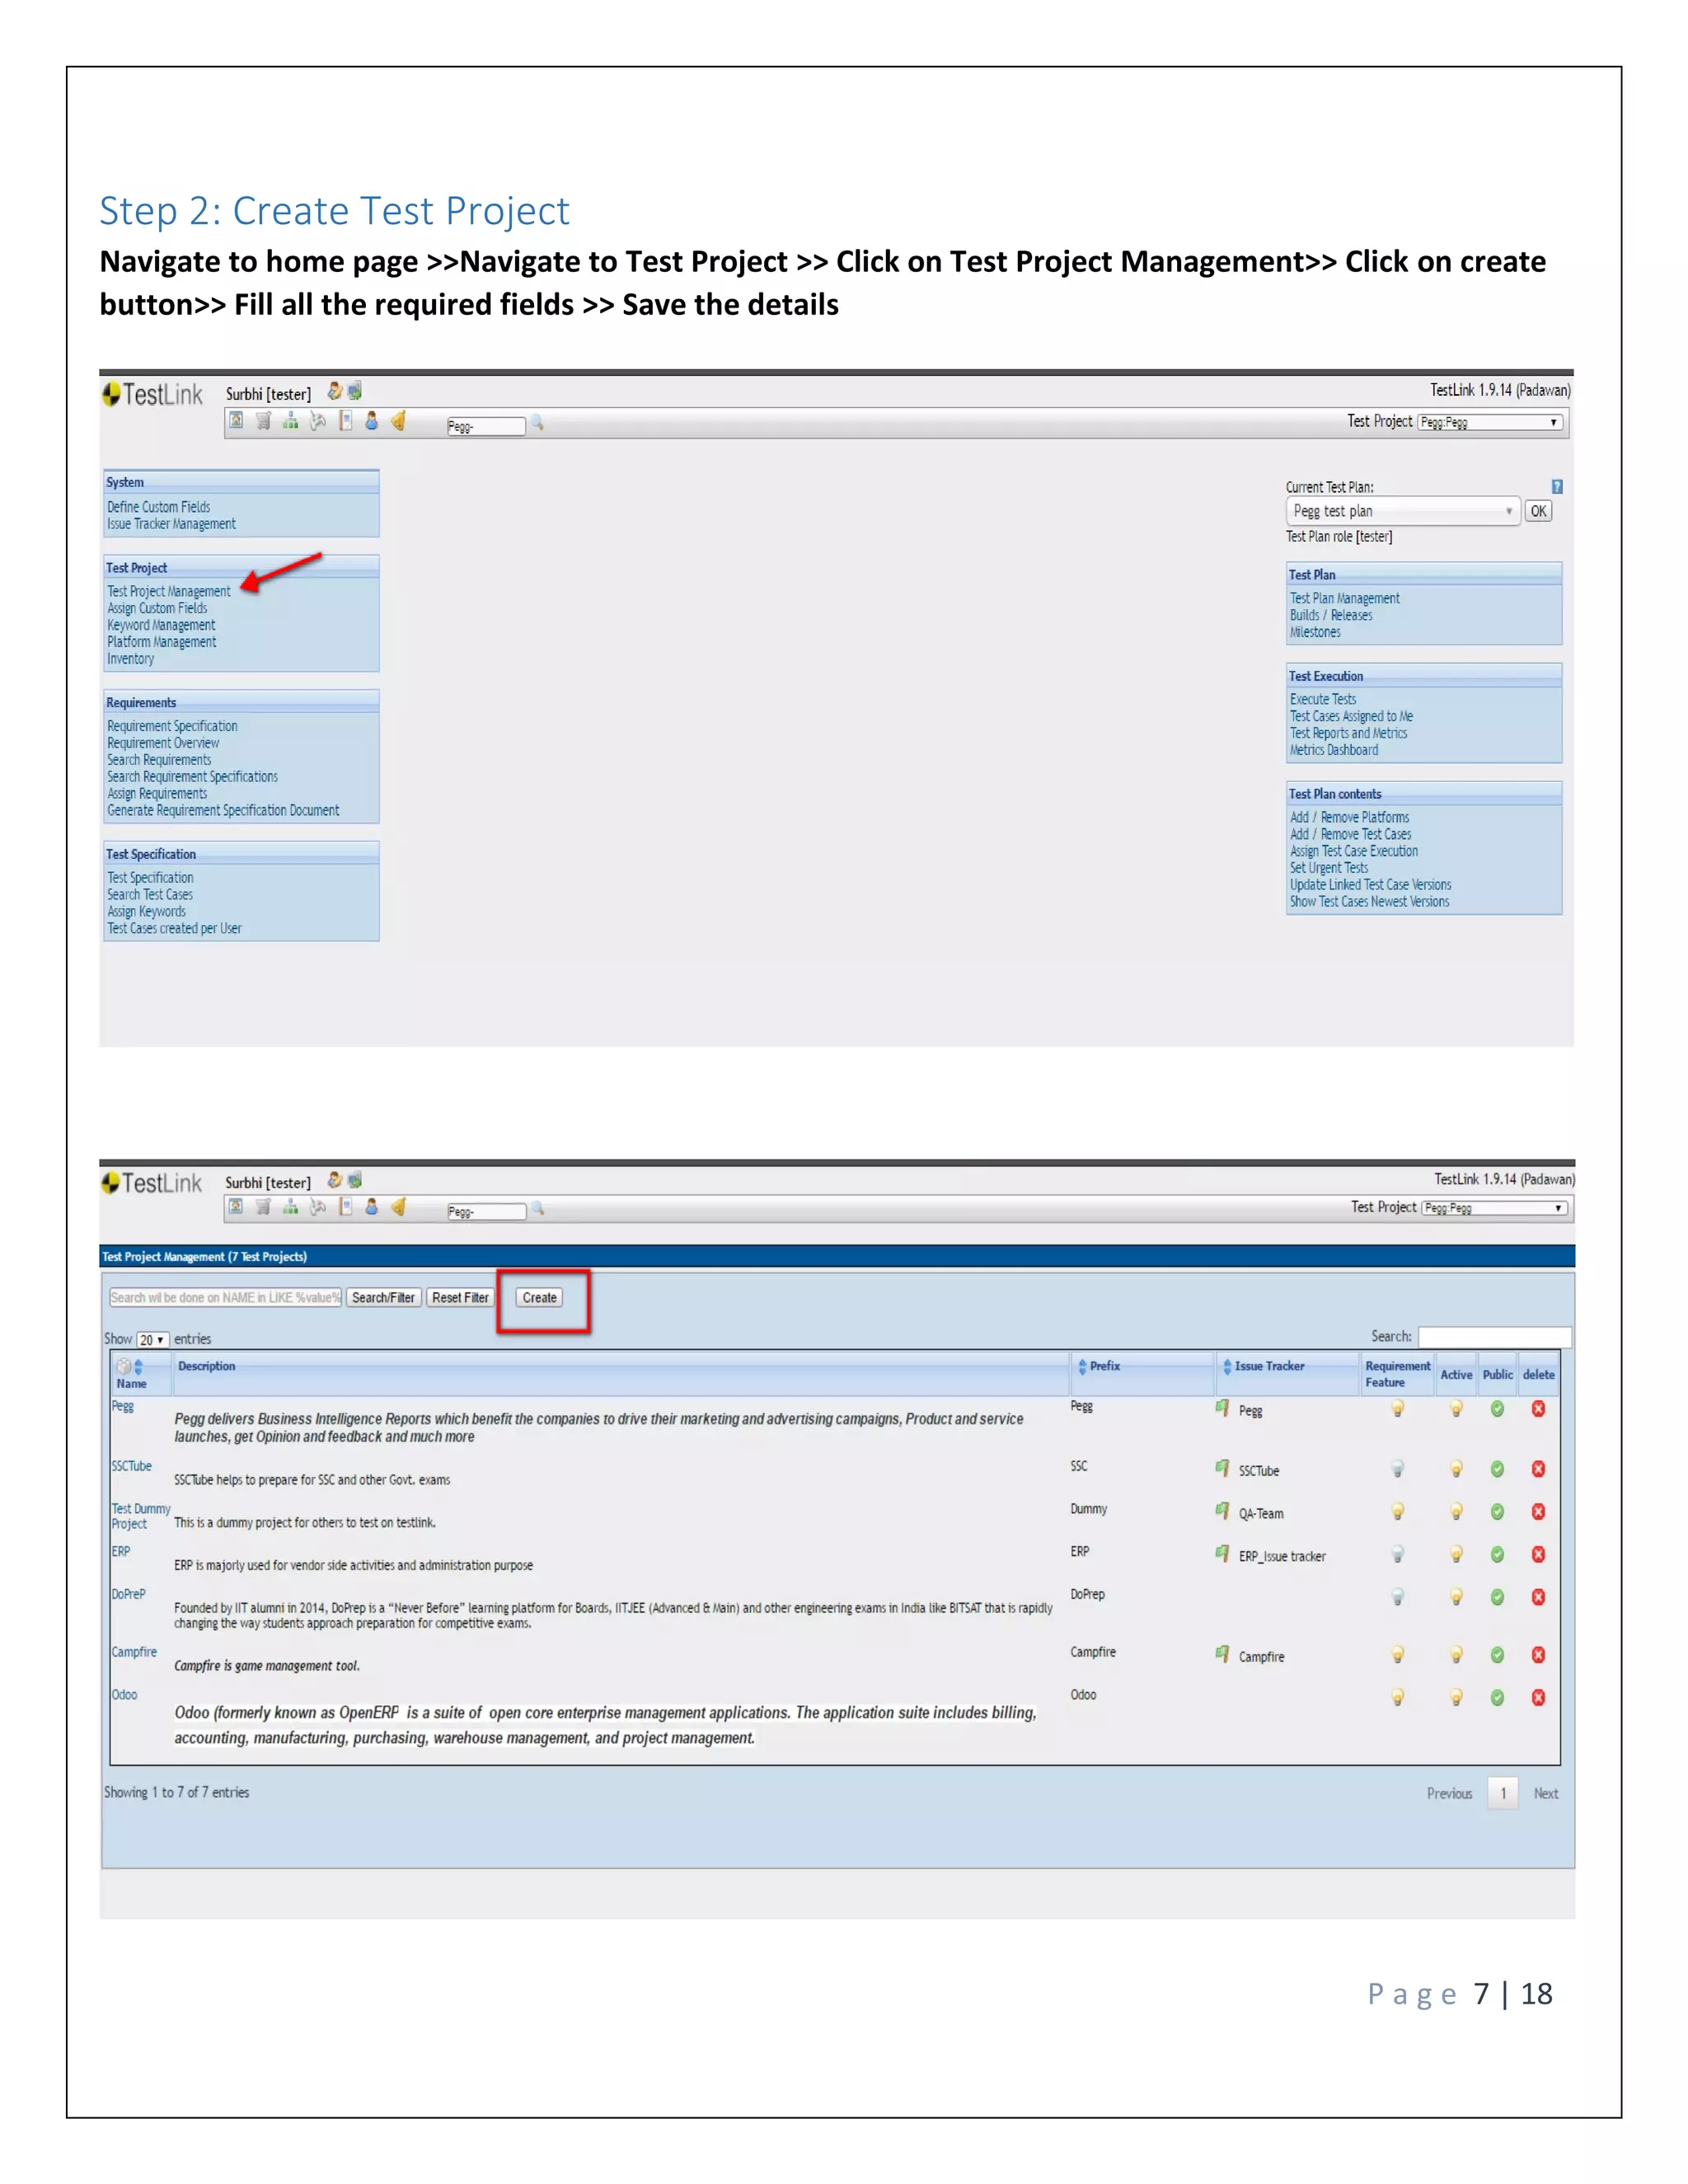
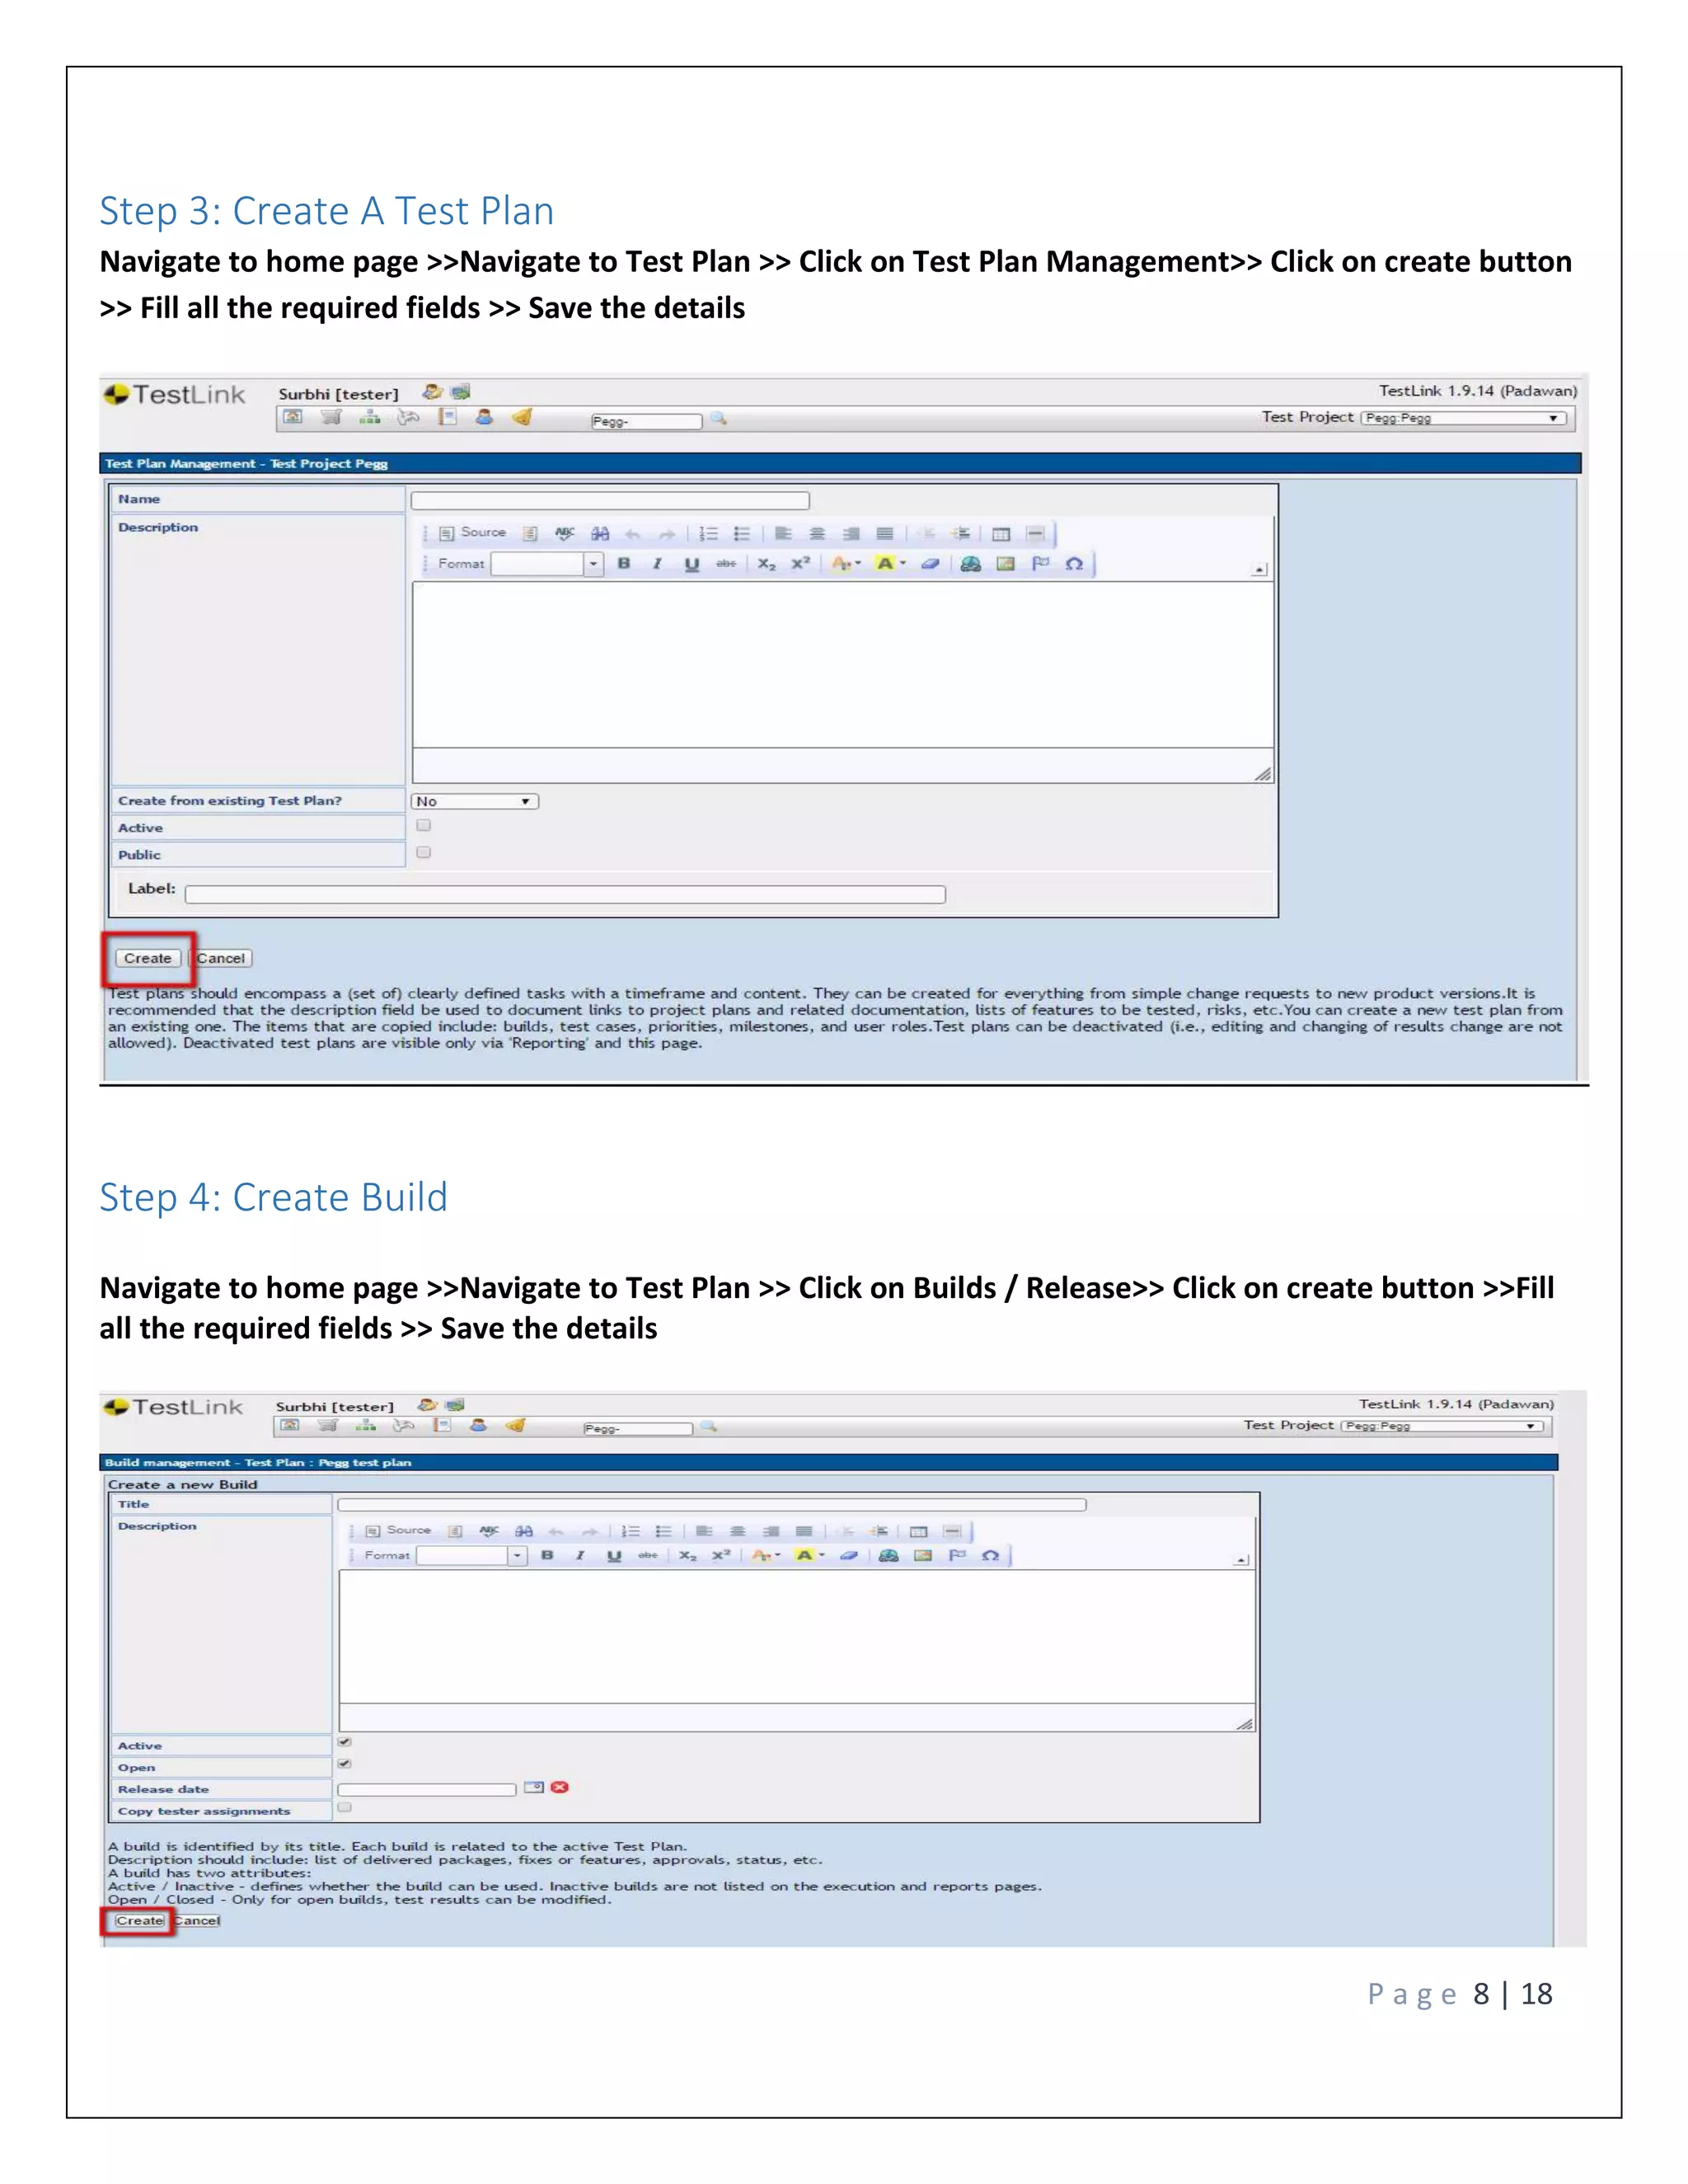
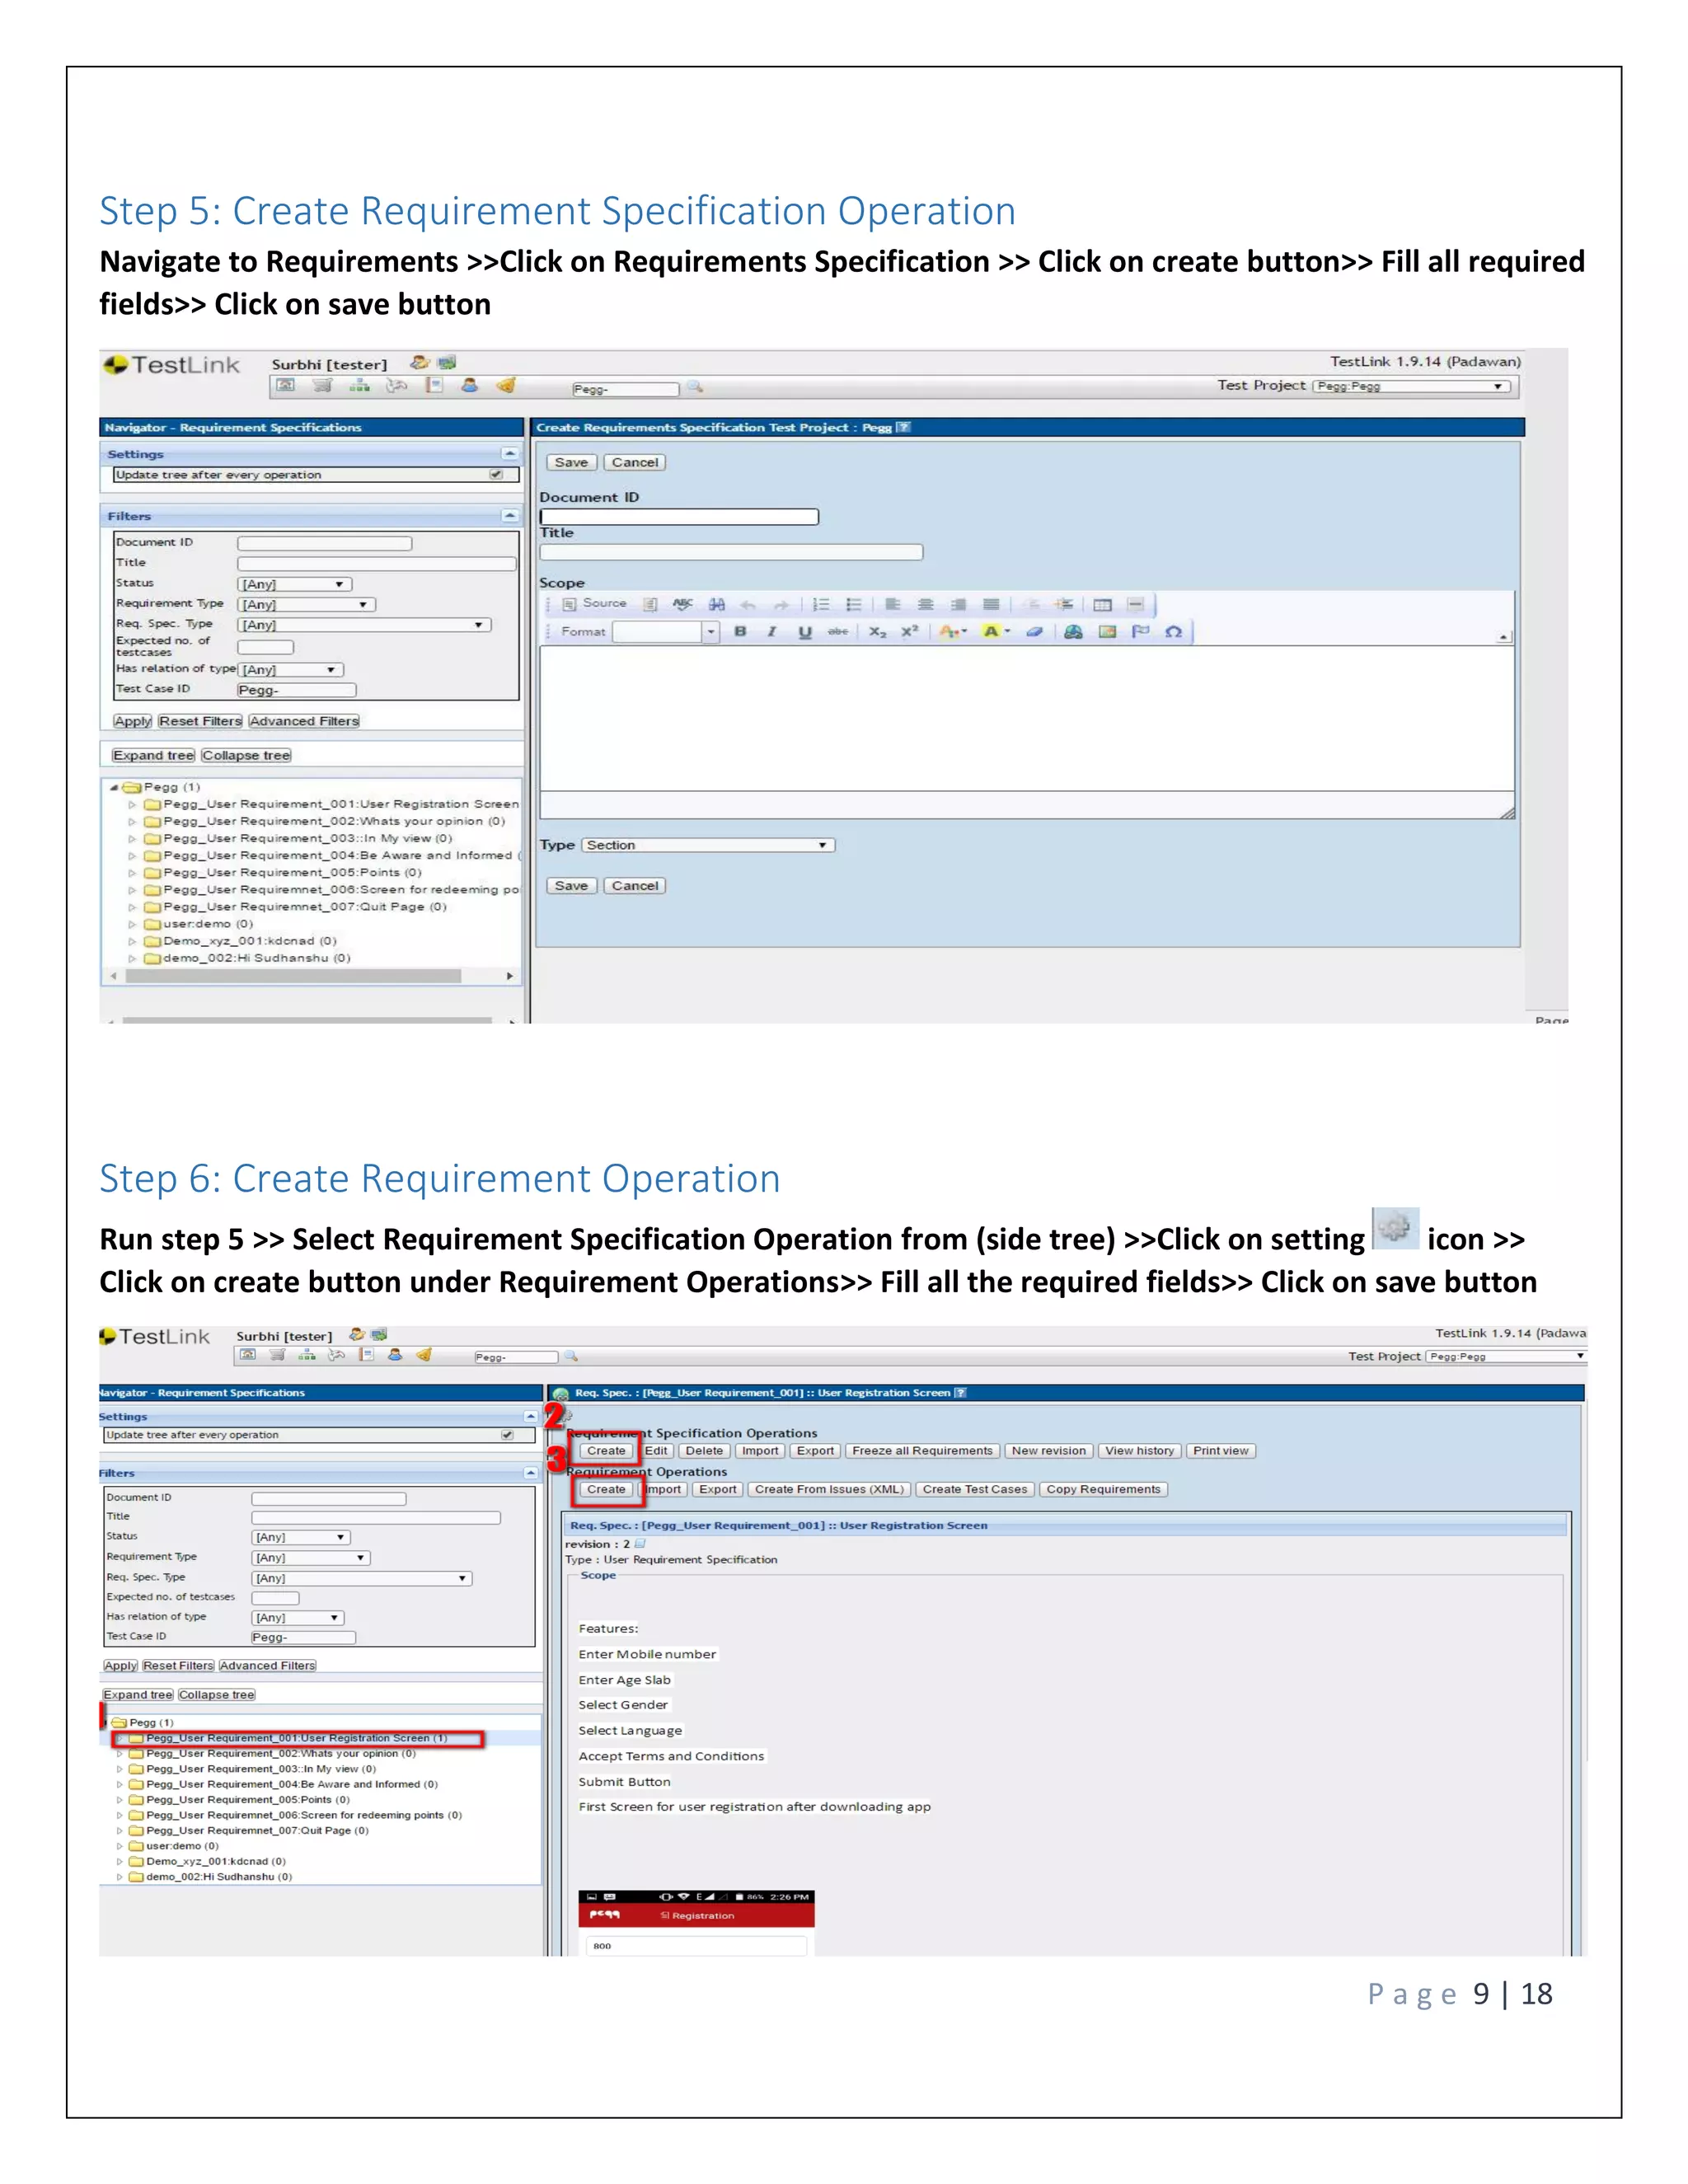
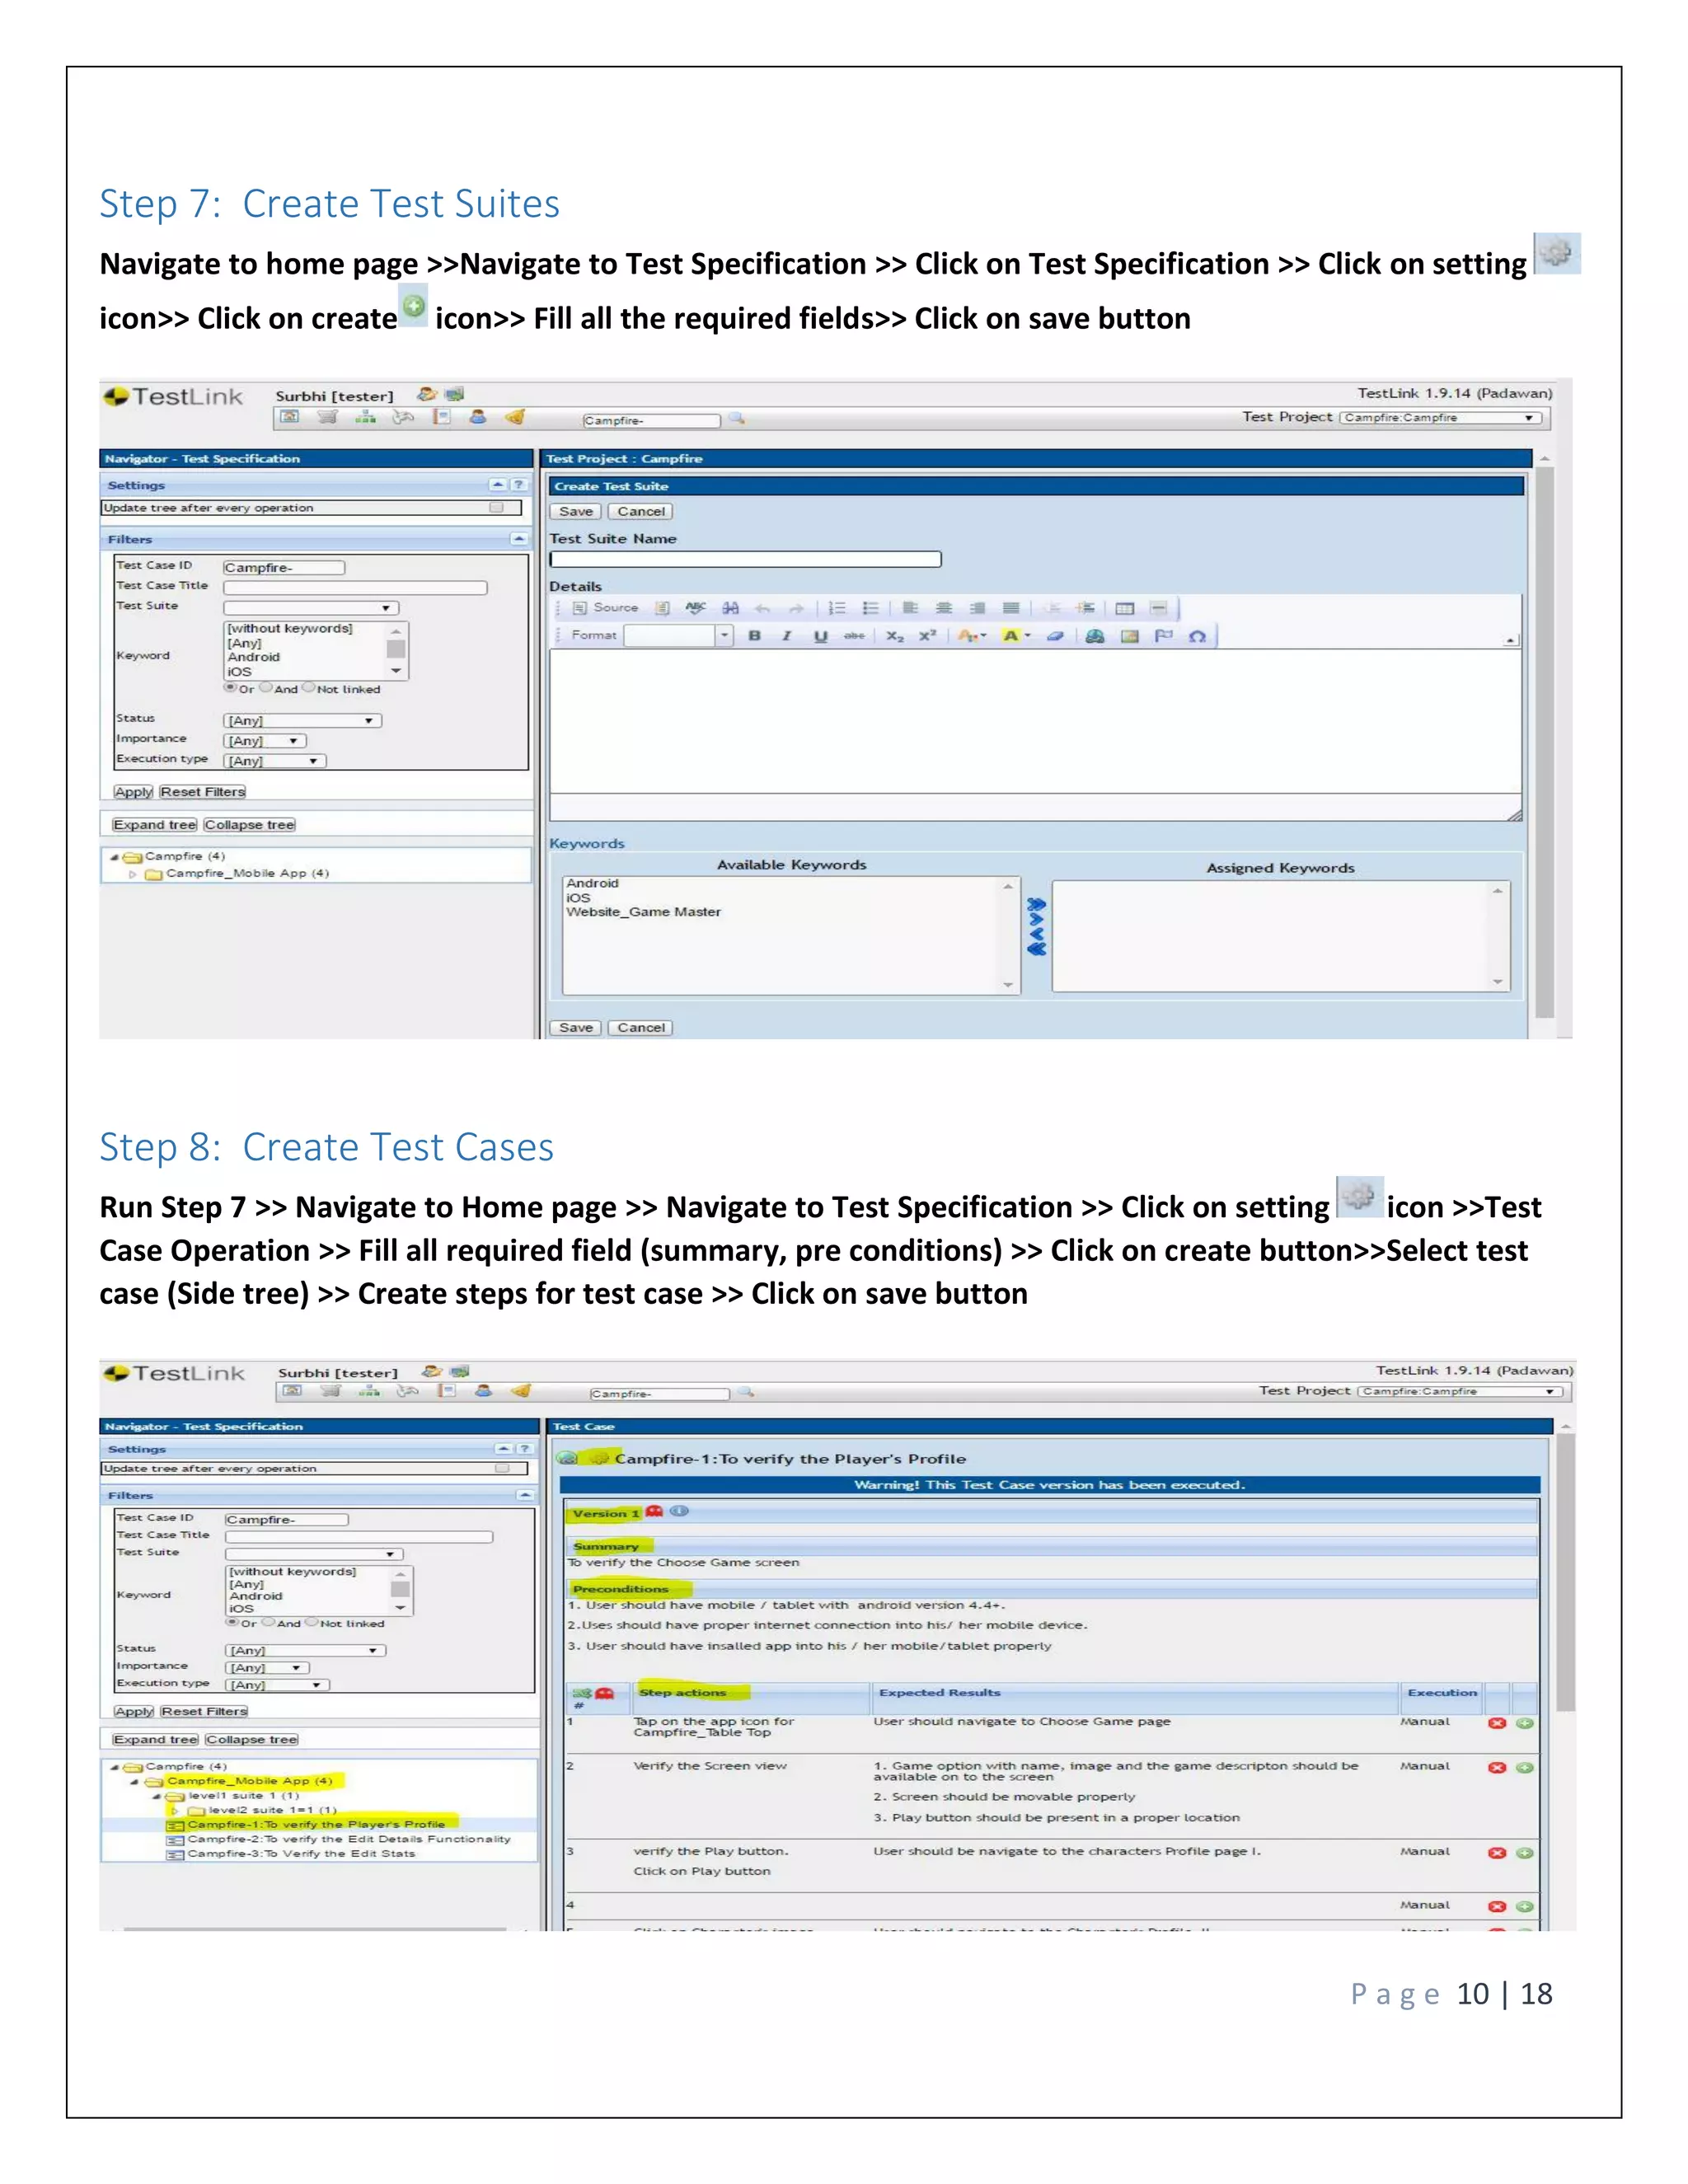
3) Detailed steps for key Testlink functions like creating a test project, test plan, requirements, test suites, test cases, assigning tests, test execution, and reports.

![P a g e 16 | 18
User role available in Testlink
Guest Tester
Senior Tester
Leader
Admin
Note: Roles & Responsibilities can change or are customizable through rights available in Testlink
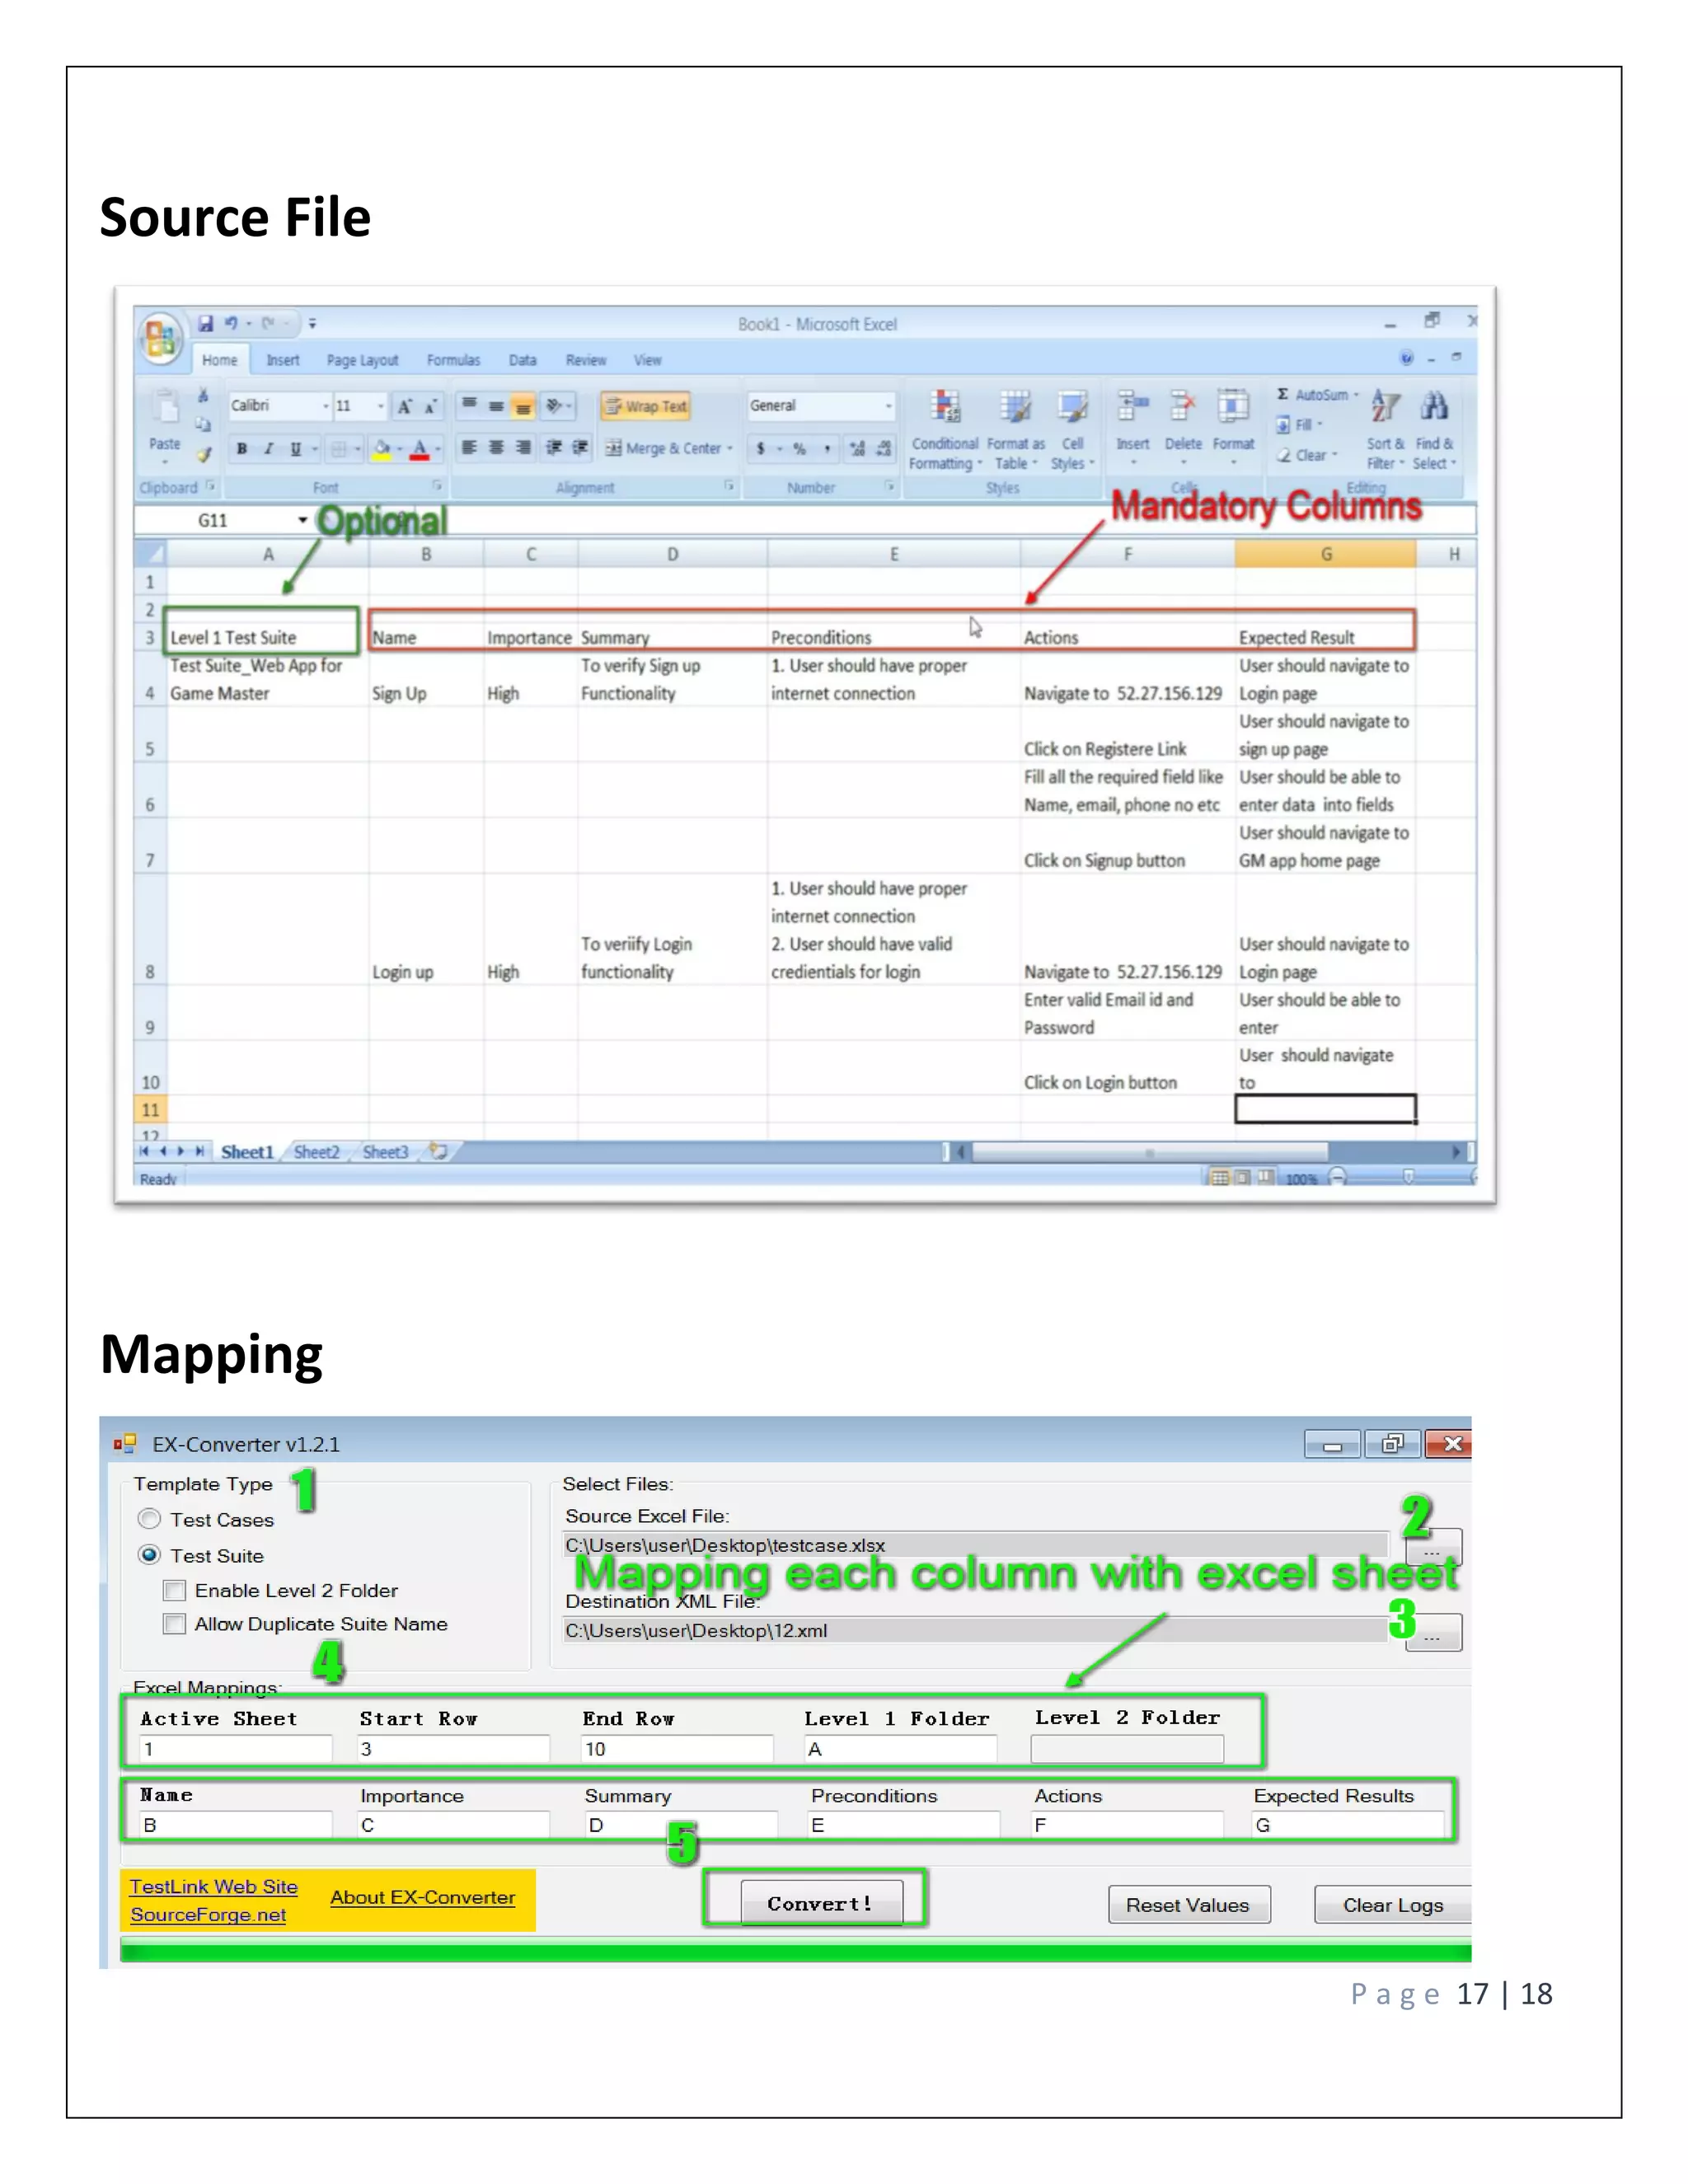
Steps to import test case / test suite
Pre Conditions:
1. Ex-Converter should be installed on user’s machine [https://sourceforge.net/pro-
jects/ex-converter/] for Version 1.2.1
2. User should have “Source Excel File” (Excel file with desired test cases or test suites)
Steps:
Step 1: Launch Ex-Converter
Step 2: Select desired template type radio button for Test Cases / Test Suites.
Step 3: Select “Source Excel File” From hard disk.
Step 4: Select “Destination XML File” or create a new XML file.
Step 5: Enter ‘1’ under ‘Active Sheet’, since sheet in use is the first one of the Excel file
Step 5: Map all fields with your “Source Excel File”. Let say your test cases starts form row 3
and ends on 10th
row so enter ‘3’ in ’Start Row’ and ‘10’ in ‘End. Map other field corresponding
to the source file.
Note: Please find below mapping screenshot](https://image.slidesharecdn.com/b6802ca8-f422-42b0-aaf0-fe8f963e0aa2-161112123134/75/Testlink_Version-0-3-16-2048.jpg)