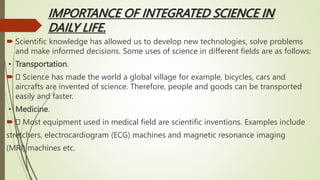
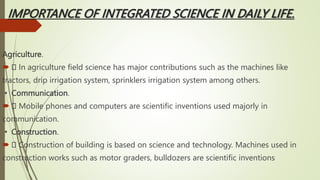
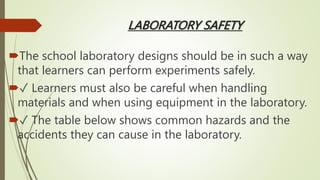
2. INTRODUCTION TO INTEGRATED SCIENCE
Meaning & Components of integrated science.
To integrate is to bring together or to combine parts of something into a whole.
Integrated science means the study of five basic natural sciences which are Physics, Chemistry,
Biology, Earth Science and Astronomy and how they overlap.
Biology -deals with the study of living things.
Physics – deals with the study of matter and energy.
Chemistry - a branch of science which deals with the study of nature, properties, and
composition of matter
3. IMPORTANCE OF INTEGRATED SCIENCE IN
DAILY LIFE.
Scientific knowledge has allowed us to develop new technologies, solve problems
and make informed decisions. Some uses of science in different fields are as follows:
▪ Transportation.
Science has made the world a global village for example, bicycles, cars and
aircrafts are invented of science. Therefore, people and goods can be transported
easily and faster.
▪ Medicine.
Most equipment used in medical field are scientific inventions. Examples include
stretchers, electrocardiogram (ECG) machines and magnetic resonance imaging
(MRI) machines etc.
4. IMPORTANCE OF INTEGRATED SCIENCE IN DAILY LIFE.
Agriculture.
In agriculture field science has major contributions such as the machines like
tractors, drip irrigation system, sprinklers irrigation system among others.
▪ Communication.
Mobile phones and computers are scientific inventions used majorly in
communication.
▪ Construction.
Construction of building is based on science and technology. Machines used in
construction works such as motor graders, bulldozers are scientific inventions
5. LABORATORY SAFETY
The school laboratory designs should be in such a way
that learners can perform experiments safely.
✓ Learners must also be careful when handling
materials and when using equipment in the laboratory.
✓ The table below shows common hazards and the
accidents they can cause in the laboratory.
6. HAZARD ACCIDENT CAUSED.
Acids and bases (chemicals) ▪ These can irritate or burn the eyes and the skin.
▪ They can also cause respiratory complications.
Corrosives. • These can cause severe burns on contact.
Electrical hazards (heating
apparatus)
Electricity can cause electric shock, burns, fires and
even explosions
Glass apparatus These can cause cuts and bruises.
7. COMMON HAZARDS AND THEIR SYMBOLS IN THE
LABORATORY.
Besides the laboratory acting as a store for chemicals
and apparatus, many experiments
are done in the laboratory. Hence there are many
hazard symbols in the laboratory to
help learners take necessary precautions against
dangers and hazards.
▪ The following are hazard symbols, their meaning and
interpretations.
8. HAZARD SYMBOL
Corrosive
The substance can destroy living tissues and equipment on contact.
Caution! Do not breathe in vapour ; avoid contact with skin and eyes
9. OXIDIZER
The substance can ignite flammable and combustible
materials or worsen existing fires thus make firefighting
more difficult. Caution! Keep away from such flammable
and combustible materials.
10. POISONOUS
The substance is hazardous when inhaled, swallowed or
exposed to the skin. It may even lead to death. Caution!
Avoid contact with the human body and immediately
consult a physician in case of contact.
12. FLAMMABLE
The substance can easily catch fire.
Caution! Keep away from open flames, sources of heat and sparks
13. TOXIC
The substance is toxic, will contaminate the environment and affects aquatic animals.
Caution! Avoid contact with human body and water bodies. Immediately consult a
doctor in case of contact
14. HARMFUL OR IRRITATING
This substance can cause harm or irritation to human beings.
Caution! Avoid contact with the human body and immediately consult a doctor in case of contact
16. COMMON ACCIDENTS IN THE LABORATORY AND
RELATED FIRST AID MEASURES
The following are the causes of common laboratory
accidents.
Cuts are caused by broken glass apparatus (for example
test tubes or glass tunings), tools (for example dissecting
instruments or cutters) or sharp edges.
Carelessness in handling hot objects for example tripod
stands, glassware, metal rods or plates), hot liquids, Bunsen
burner flame or lighted matches.
17. CAUSES OF COMMON LABORATORY ACCIDENTS.
Learners’ mischievous behaviour of pouring chemicals
to others that result into chemical spillage.
Learner’s unintentionally rubbing their eyes with
hands contaminated with chemicals.
Accidental ignition of flammable liquids.
Drinking liquids or inhaling fumes accidentally
18. CAUSES OF COMMON LABORATORY ACCIDENTS
The effects of common laboratory accidents include burns
and scalds, cuts and
ingestion of harmful substances.
In case of an accident, proceed using the PIA rule where:
P: PROTECT- move the causality to a safe place.
I: INFORM-report to the appropriate authority.
A: ASSIST-give the necessary help.
19. CAUSES OF COMMON LABORATORY ACCIDENTS
Keep calm.
Keep the casualty warm.
Do not move the causality if you are unaware of
the seriousness of the situation.
20. All laboratories should have a first aid kit. The first aid kit should
contain the
Following:
An instruction manual giving general guidance.
Individually wrapped sterile adhesive dressings
in a variety of sizes.
Sterile eye pads with bandages for attachment.
21. A FIRST AID KIT
Triangular bandages.
Safety pins.
A bottle that contains eye drops.
A First Aid manual.
Scissors.
Gloves.
Antiseptic
22. CUTS.
Sharp or pointed objects penetrate the skin causing cuts. Cuts
result in bleeding.
FIRST AID
Wash the wound using clean water.
Disinfect the wound.
Apply an antiseptic solution to the wound.
Place a dressing and a bandage to hold it in place.
Go to a health center in case the cut needs stitches.
23. Burns and Scalds.
Burns are soft tissue injuries caused by chemical hazards, electrical hazards or radiation.
Scalds are soft tissue injuries caused by hot liquid or steam.
FIRST AID.
Run the burnt area under cold tap water with low pressure for 10-15 minutes.
Study the size, depth and location of the burnt areas. If necessary, proceed to a
health center.
Cover the burn with a loose gauze dressing or a clean piece of cloth. Do not
puncture blisters.
24. FIRST AID.
Note;
In case of chemical burns, remove any clothing contaminated by
the chemical, as long as it is not stuck to the skin. Do not apply any
lotion or any other remedy to the burnt area.
In case of electrical burns, ensure the following
Before starting First Aid, stop the flow of
electricity.
The rescuer must be on a rubber or wooden surface.
Remove the injured person from the source of electricity using a
plastic or wooden object, as these do not conduct electricity.
25. INGESTION OF HARMFUL SUBSTANCES
Harmful substances can enter the body through the mouth by swallowing.
If the victim is unconscious:
Ask for urgent medical assistance.
Put the causality in recovery position.
Loosen the clothing and wrap the victim in a warm blanket.
Do not induce vomit. If the victim
vomits, clear up the respiratory tract
(cover your fingers) with fabric to clean
the victim’s mouth).
Do not administer anything orally to an unconscious victim.
Do not try to neutralize the toxic product.
26. IF THE VICTIM IS CONSCIOUS AND THE TOXIC
SUBSTANCE IS CORROSIVE
Make the victim drink plenty of water.
Do not induce vomit.
Take the victim to a health center
Read him the last right
27. SAFETY MEASURES AND REGULATIONS IN THE
LABORATORY
When working in the laboratory, you must observe the following safety rules:
Work carefully as carelessness can cause accidents as well as inaccurate results.
Wear gloves, laboratory aprons and safety glasses.
Never eat or drink in the laboratory.
Tie back loose hair, roll back and secure open sleeves and neckties and make sure you wear shoes that fully
cover your feet.
Do not carry out laboratory experiments at home or in the dormitories unless directed to do so by your class
teacher.
28. SAFETY MEASURES AND REGULATIONS IN THE
LABORATORY
Carefully read chemical labels and understand the hazard symbol on them.
Listen carefully to your teacher’s instructions on when and how to use safety equipment
such as glasses, protective aprons, fire extinguishers and fire blankets.
Make sure you know where the nearest fire alarm is in your school laboratory.
Do not begin an experiment until the teacher instructs you to do so.
Do not touch substances unless the teacher instructs you to do so. What looks harmless may be dangerous.
Wash your hands with soap and running water after handling chemical substances. Some chemical substances
are poisonous
29. SAFETY MEASURES AND REGULATIONS IN THE
LABORATORY
Heat materials in suitable containers only, such as Pyrex glass container that can resist breakage.
Always keep the open end of the test tube pointed away from the learners and yourself
when heating chemicals because the fumes produced may be harmful.
Pick up hot objects carefully using tongs or insulated materials.
Make sure that you turn off the heat source when not in use to conserve energy.
Always unplug electric cords by pulling out the plug and not the cord.
Check that there are no flammable substances near the burner. Flammable substances will cause fire if
exposed to a flame.
30. SAFETY MEASURES AND REGULATIONS IN THE
LABORATORY
After each experiment, tidy up your working area, clean all equipment and put them in their respective storage
areas.
Report any accidents, broken equipment and damaged facilities to your teacher. In this way, you will be taking
responsibility for your safety and for those who use the laboratory after you.
If a chemical gets into your eyes, wash it out with running water for about 12 minutes and then visit a health
cen tre or hospital for further medical attention.
If you inhale poisonous gases or vapour, move outside the laboratory for fresh air. Immediately seek medical
assistance
31. LABORATORY APPARATUS AND INSTRUMENTS
Basic Science Skills.
Science involves processes that are part of a
scientific method.
Scientists approach problems in various ways
which have several processes that are common to
them. These commonly used processes are called
science process skills
32. MANIPULATIVE SKILLS AND
ABILITIES.
✓ These include skills in handling materials and apparatus in a scientific investigation.
✓ They also involve the ability to follow instructions and make accurate observations.
Examples.
Using and handling scientific apparatus.
Cleaning and maintaining scientific apparatus properly and
safely.
Handling specimens properly and safely.
Mixing primary colours to create more colours.
33. OBSERVATION SKILLS
This is the most common basic skill in science.
Scientists make observations by using the five senses.
Good observation skills are helpful in learning other
science process skills.
Example.
Making observations using the sense of touch.
Creating observation about a coin using the five
senses.
34. CLASSIFICATION SKILLS
After observing, it is important to identify he
similarities and differences and to group objects.
Examples.
Using a magnet to classify objects as either magnetic
or nonmagnetic.
Using a balance and sorting objects according to
mass.
35. MEASURING SKILLS.
Measuring is very important in collecting, comparing and
interpreting data.
✓ It helps us to classify and communicate with others.
Examples.
Finding the mass of different liquids that have the same
volume.
Using technology to find the speed of a vehicle.
Measuring the distance that a person travel.
36. COMMUNICATION SKILLS
Important so that it becomes possible to share our
experiences.
✓ One can do this by using graphs, diagrams, maps and
spoken word.
Examples.
Creating a line graph showing the relationship between
speed and time.
Discussing possible errors with other classmates
37. PREDICTING SKILLS
A prediction is an educated guess based on good observation
and making a conclusion about an observed event or prior
knowledge.
Examples.
Predicting what is in a box based on the sense of touch.
Writing an assumption about the effect of increasing salt on
the buoyancy of an egg.
38. CONCLUSION SKILLS ALSO CALLED INFERRING SKILLS
A conclusion is an explanation based on observation. It
is a link between what you observe and what you
already know.
Example
Writing a conclusion at the end of each
investigation.
Creating conclusions about observations made
about a particular object, for example, I conclude that it
is a solid and not a liquid.’
39. INTERNATIONAL SYSTEM OF UNITS (SI) FOR BASIC AND
DERIVED QUANTITIES
Products such as sugar, milk, salt are purchased from
shops in specific quantities or units of measure.
Basic and derived units of measurement.
✓ In 1971 the fourth General Conference on Weights
and measures identified seven (7) quantities as basic
quantities. This formed the basis of the International
System of Units
abbreviated as SI units from French name Syteme
Internationale d’unites.
40. WHAT ARE BASIC QUANTITIES
A basic quantity is one whose unit can be defined
without referring to other quantities.
✓ The basic quantities are:
Length.
Mass.
Time.
Temperature.
Electric current.
41. THE TABLE BELOW SHOWS THE BASIC QUANTITY UNITES
AND THEIR SYMBOLS
Basic quantity SI unit Symbol
Mass Kilogram kg
Length Metre. m
Time Second s
Temperature Kelvin K
Electric current Ampere A
42. WHAT ARE DERIVED QUANTITIES
Derived quantities are quantities that are calculated from two or more
measurements.
Derived quantities cannot be measured directly.
Derived quantities an only be calculated.
Examples of derived quantities are:
Volume.
Density.
Area.
43. DERIVED QUANTITIES
Volume =length x width x height (m x m x m) or m3 (cubic
metres).
✓ Density = Mass (Kg/m3)
Volume
✓ Area (square or rectangle) = Length x width (m x m) or m2
(square metres)
44. APPLYING THE INTERNATIONAL SYSTEM OF UNITS (SI)
Mass.
Mass is the amount of matter in an object.
Mass is measured in milligrams (mg), grams (g), kilograms
(kg) and tonnes (t).
45. INTERNATIONAL SYSTEM OF UNITS
Length.
Length is defined when we measure how long something is.
It is the distance between two points.
The units for measurement of length are millimeter (mm),
centimeter (cm), Metre (m) and Kilometres (km)
46. Time.
Time is measured using a digital or analogue
clock.
The basic unit of measuring time is seconds (s).
Larger units of time are minutes (min) and hours
hours (hr)
47. TEMPERATURE.
An instrument that measures temperature is called a
thermometer.
Temperatures is measured in
Degrees Celsius (0C.)
Degree Fahrenheit (0F.)
Kelvin (K)
The thermometer that measures our body temperature id called
a clinical thermometer.
The scale used or unit of measurement used is the Celsius scale
(0C.)
A clinical thermometer reads temperatures from 35oC to 42 oC.
49. THERMOMETER
There are other thermometers that measure temperature of other
materials such as
laboratory thermometer which has a range from -10 oC. to 110 oC.
50. ELECTRIC CURRENT
An electric current is the rate of flow of charge
through a given point in an electric
circuit.
The SI unit for measuring the magnitude of an
electric current is Amperes (A).
51. AREA.
Area is the measure of the size of a surface.
Two length measurements usually describe area hence
presented in square units.
The basic unit of measuring area is square metres (m2)
Area can also be expressed in square millimeters (mm2),
square centimeters (cm2) and square kilometers (km2).
52. AREA OF REGULAR SHAPES
Triangle
Area =1/2 x base x perpendicular
height
=1/2 bh
56. AREA OF IRREGULAR SHAPES.
Area of an irregular shape can be estimate by first sub diving the shape into small
regular shapes.
The small regular shapes used can be of 1 cm length.
57. THE AREA OF THE WHOLE SHAPE CAN BE CALCULATED
AS FOLLOWS
Count the number of whole squares.
Count the squares which are either half or more than half.
Add the total number of complete squares to half the total number of
the
incomplete squares. For example, in the above picture
Full squares=5
Number of squares that are more than half or half =6 then divide by 2 =3
Approximated are=5+3 = 8 square units.
58. VOLUME
It is the amount of space an object occupies.
Objects can be solids like a brick or liquid like water.
Apparatus that measure volume of a liquid include;
Measuring spoon.
Measuring jug.
Measuring cylinder.
59. VOLUME
The SI unit for measuring volume is cubic metre (m3)
Volume can also be measured in other units such as;
Cubic centimetres (cm3)
Cubic millimetres (mm3)
Common units for measuring liquid volume include
Litres.
Milliliters.
60. DENSITY
It is the heaviness of a substance in relation to their volume.
Therefore, density is mass per unit volume.
Mass can be measured in kilograms (kg) while volume is
measured in cubic metre (m3)
Since mass is measured in kg and volume is measured in m3,
the SI unit for density is kg/m3.
Density can also be expressed in grams per cubic centimetre
(g/cm3)
61. LABORATORY APPARATUS AND INSTRUMENTS
Apparatus and Instruments for Heating.
Most common source of heat in the
laboratory is the Bunsen burner.
Other heat sources include portable
burners, kerosene stoves, spirit lamps, candles
and electric hot plates.
64. FUNCTIONS OF THE PARTS OF A BUNSEN BURNER.
Part Function
Collar Regulates amount of air entering the Bunsen burner through
the air hole.
Air hole Allows air to enter the chimney. (air mixes with the gas making
flame hotter and
blue.
Chimney
(barrel)
Raises the flame to a suitable height for burning.
Base Supports the Bunsen burner and prevent it from toppling.
Gas hose The flexible hose pipe connects the Bunsen burner and the gas
tap.
Flame A hot glowing mass of ignited gas that is generated by
65. Apparatus and Instruments for Measuring Mass.
Various instruments are used to measure mass.
Mass can be measured using a beam balance, electronic balance and weighing balance
66. APPARATUS AND INSTRUMENTS FOR TEMPERATURE
Temperature is defined as the hotness or coldness of
any object or substance.
Kelvin (K) is the SI units for temperature.
Apart from Kelvin, temperature is also measured
using the Celsius scale (oC) and Fahrenheit scale (oF)
A laboratory thermometer is the instrument used to
measure temperature in the laboratory.
67. APPARATUS AND INSTRUMENTS FOR MEASURING
LENGTH
Length of an object in the laboratory is mostly measured using the metre rule, 15 cm ruler, 30 cm ruler and the
tape measure
68. APPARATUS AND INSTRUMENTS FOR MEASURING
VOLUME
In the laboratory various instruments are used
to measure volume of liquids.
Examples of these instruments include:
Conical flask.
Syringe.
69. APPARATUS AND INSTRUMENTS FOR
MEASURING VOLUME
Beaker.
Burette.
Graduated cylinder.
Pipette.
Volumetric flask.
73. APPARATUS AND INSTRUMENTS FOR MEASURING
WEIGHT
Weight is the pull of gravity on a mass of a body.
The pull of gravity is the force that pulls objects towards
the centre of the earth.
The SI unit of weight is Newton (N)
A spring balance is commonly used to measure weights of
objects in the laboratory.
74. APPARATUS AND INSTRUMENTS FOR MEASURING TIME.
In the laboratory, a clock, wristwatches and stopwatches are commonly used to
measure time.
The SI units for measuring time is seconds (s).
Time can also be measures using other dimensions such as minutes and hours.
75. APPARATUS AND INSTRUMENTS FOR MAGNIFICATION.
Hand lens.
It is a lens of specified magnification fixed on a frame.
When a hand lens is moved up (far) and down (close) over a
specimen, it enlarges up to
the sharpest image where you can clearly view the specimen and
the viewer can
observe particular details.
Hand lens have a limited magnification of between X5 and X10
76. MICROSCOPE.
A microscope is an instrument used to magnify
(enlarge) small objects for clear visibility.
Plant and animal cells are too small to be
viewed with naked eyes, therefore a microscope is
used to view the cells
77. PACKAGING LABELS ON QUANTITIES OR PRODUCTS
Packaging labels can be used to pass information
about a certain type of products such as chemicals or
food materials.
A food label is a piece of paper or other materials
marked or inscribed and attached to a food package.
It contains a variety of information about the nutritive
value of the food label.
79. INFORMATION THAT ARE FOUND ON A PACKAGING
LABEL.
Name under which the product sells.
The manufacture and expiry date.
Lis of ingredients. Ingredients are things that are
combined to make a particular product.
The quantity of product in the package.
Any special storage instructions.
Instructions for use, where necessary.
80. WHAT IS THE IMPORTANCE OF READING PACKAGING
LABELS?
Labels help the consumers to make the right choices on
what to buy.
Labels guide on how to use, store and what to avoid
while using the product.
Labels inform consumers of the products’ name,
quantity, ingredients, manufacturing and expiry date.
Labels also help people with allergies, especially food
allergies, to make informed choices and know what to