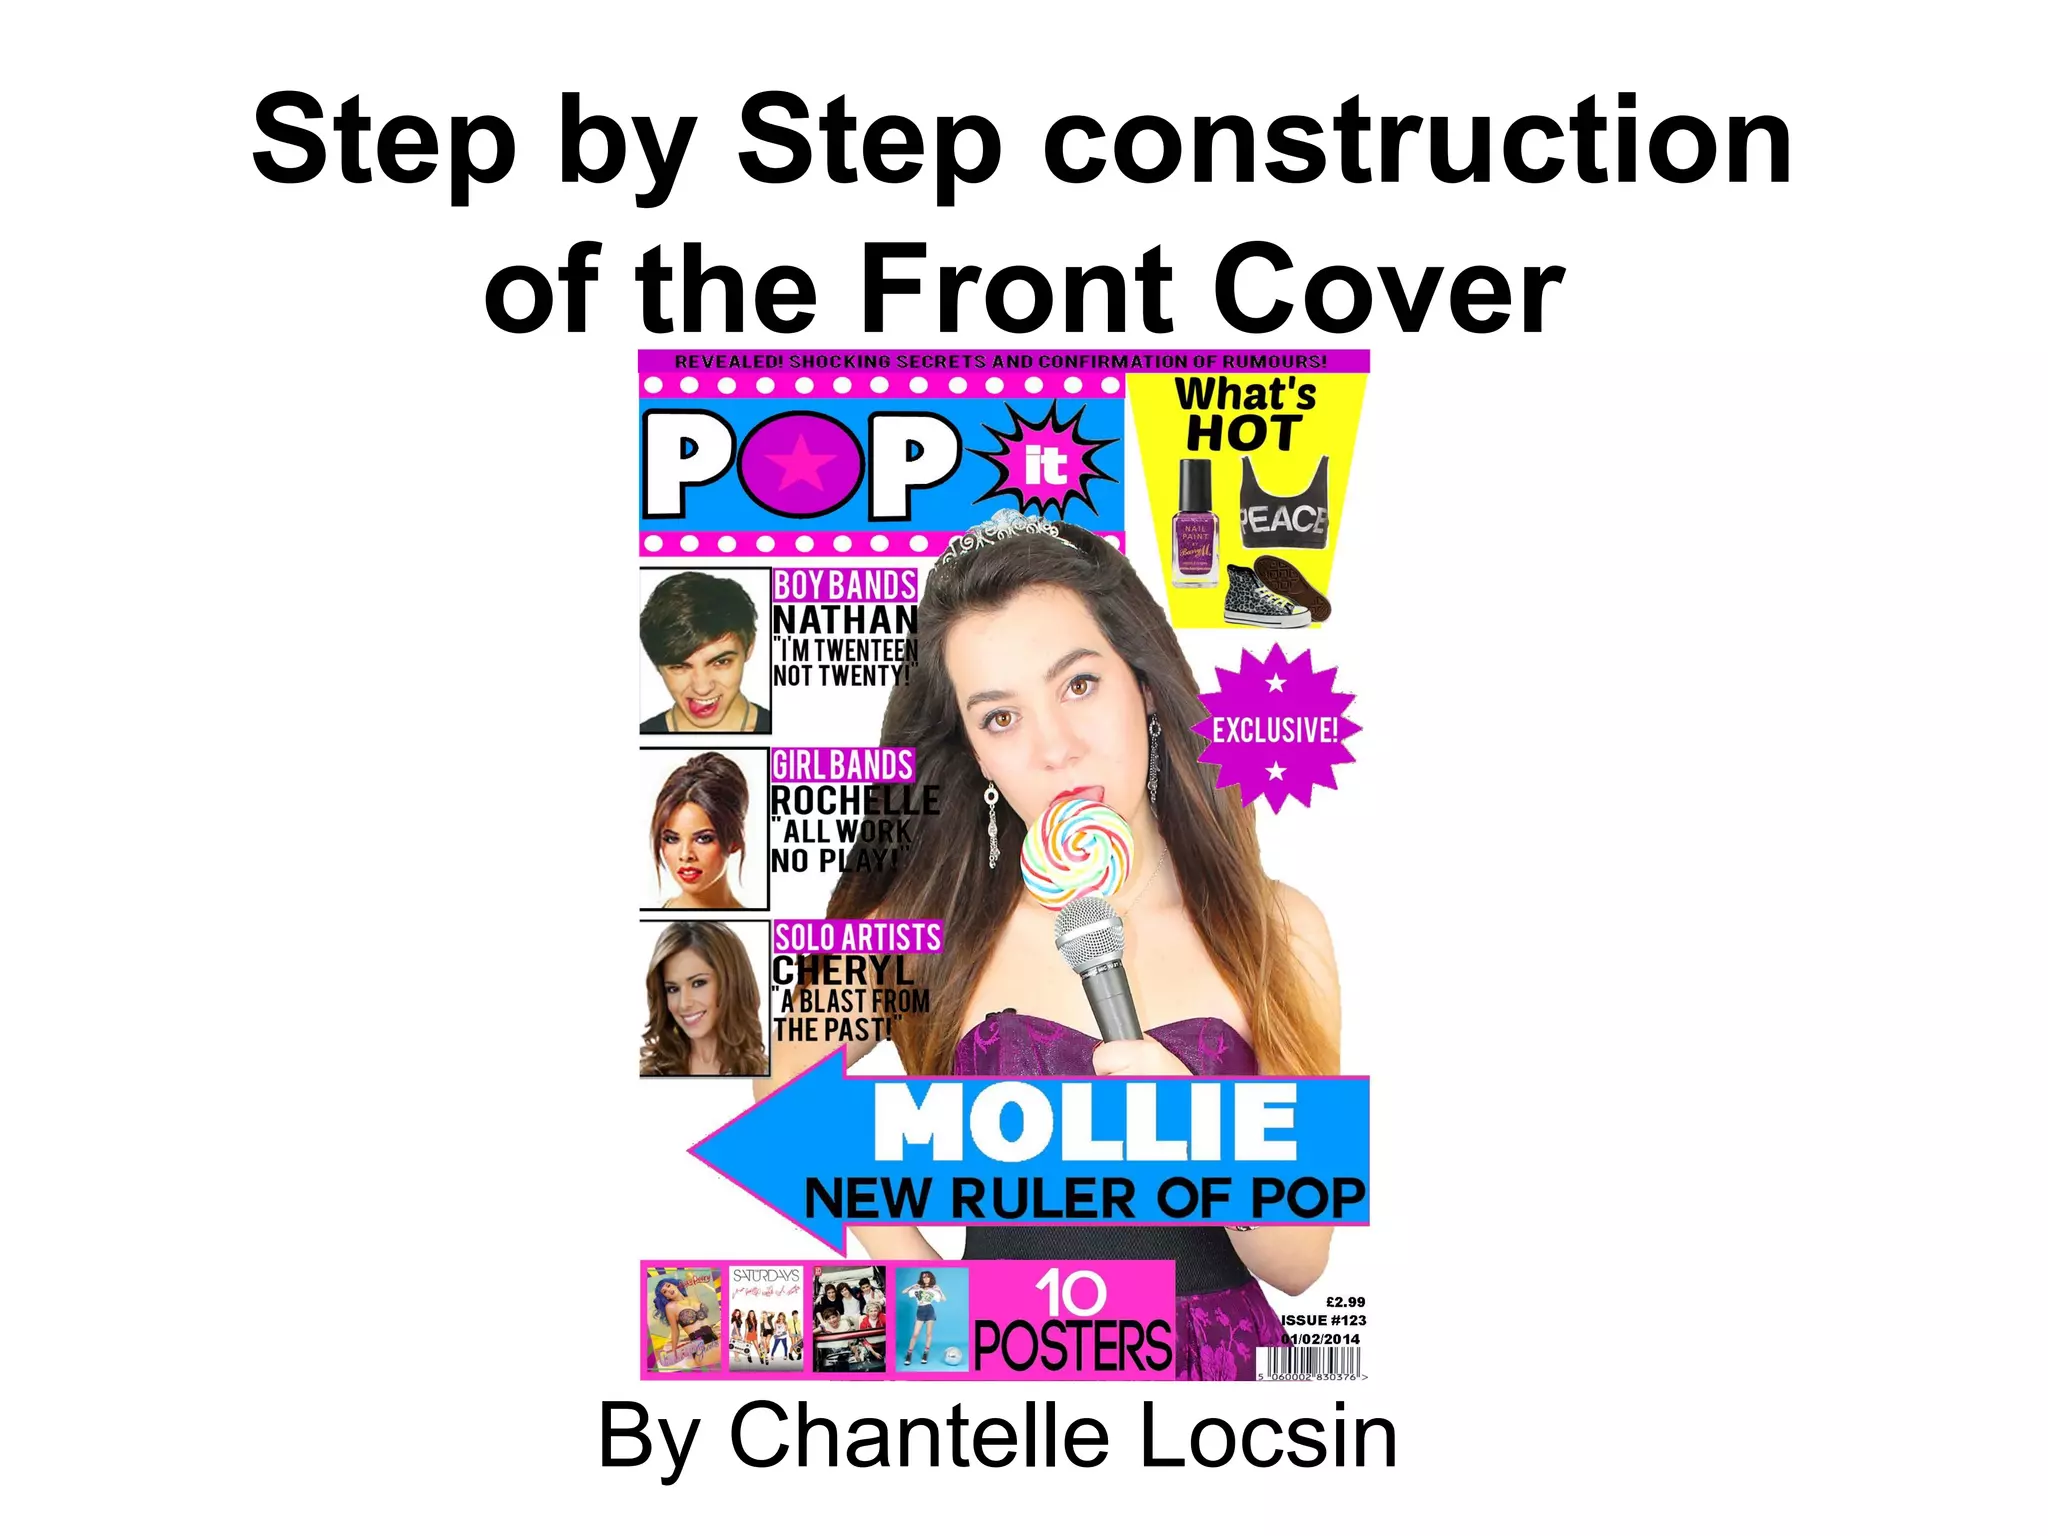
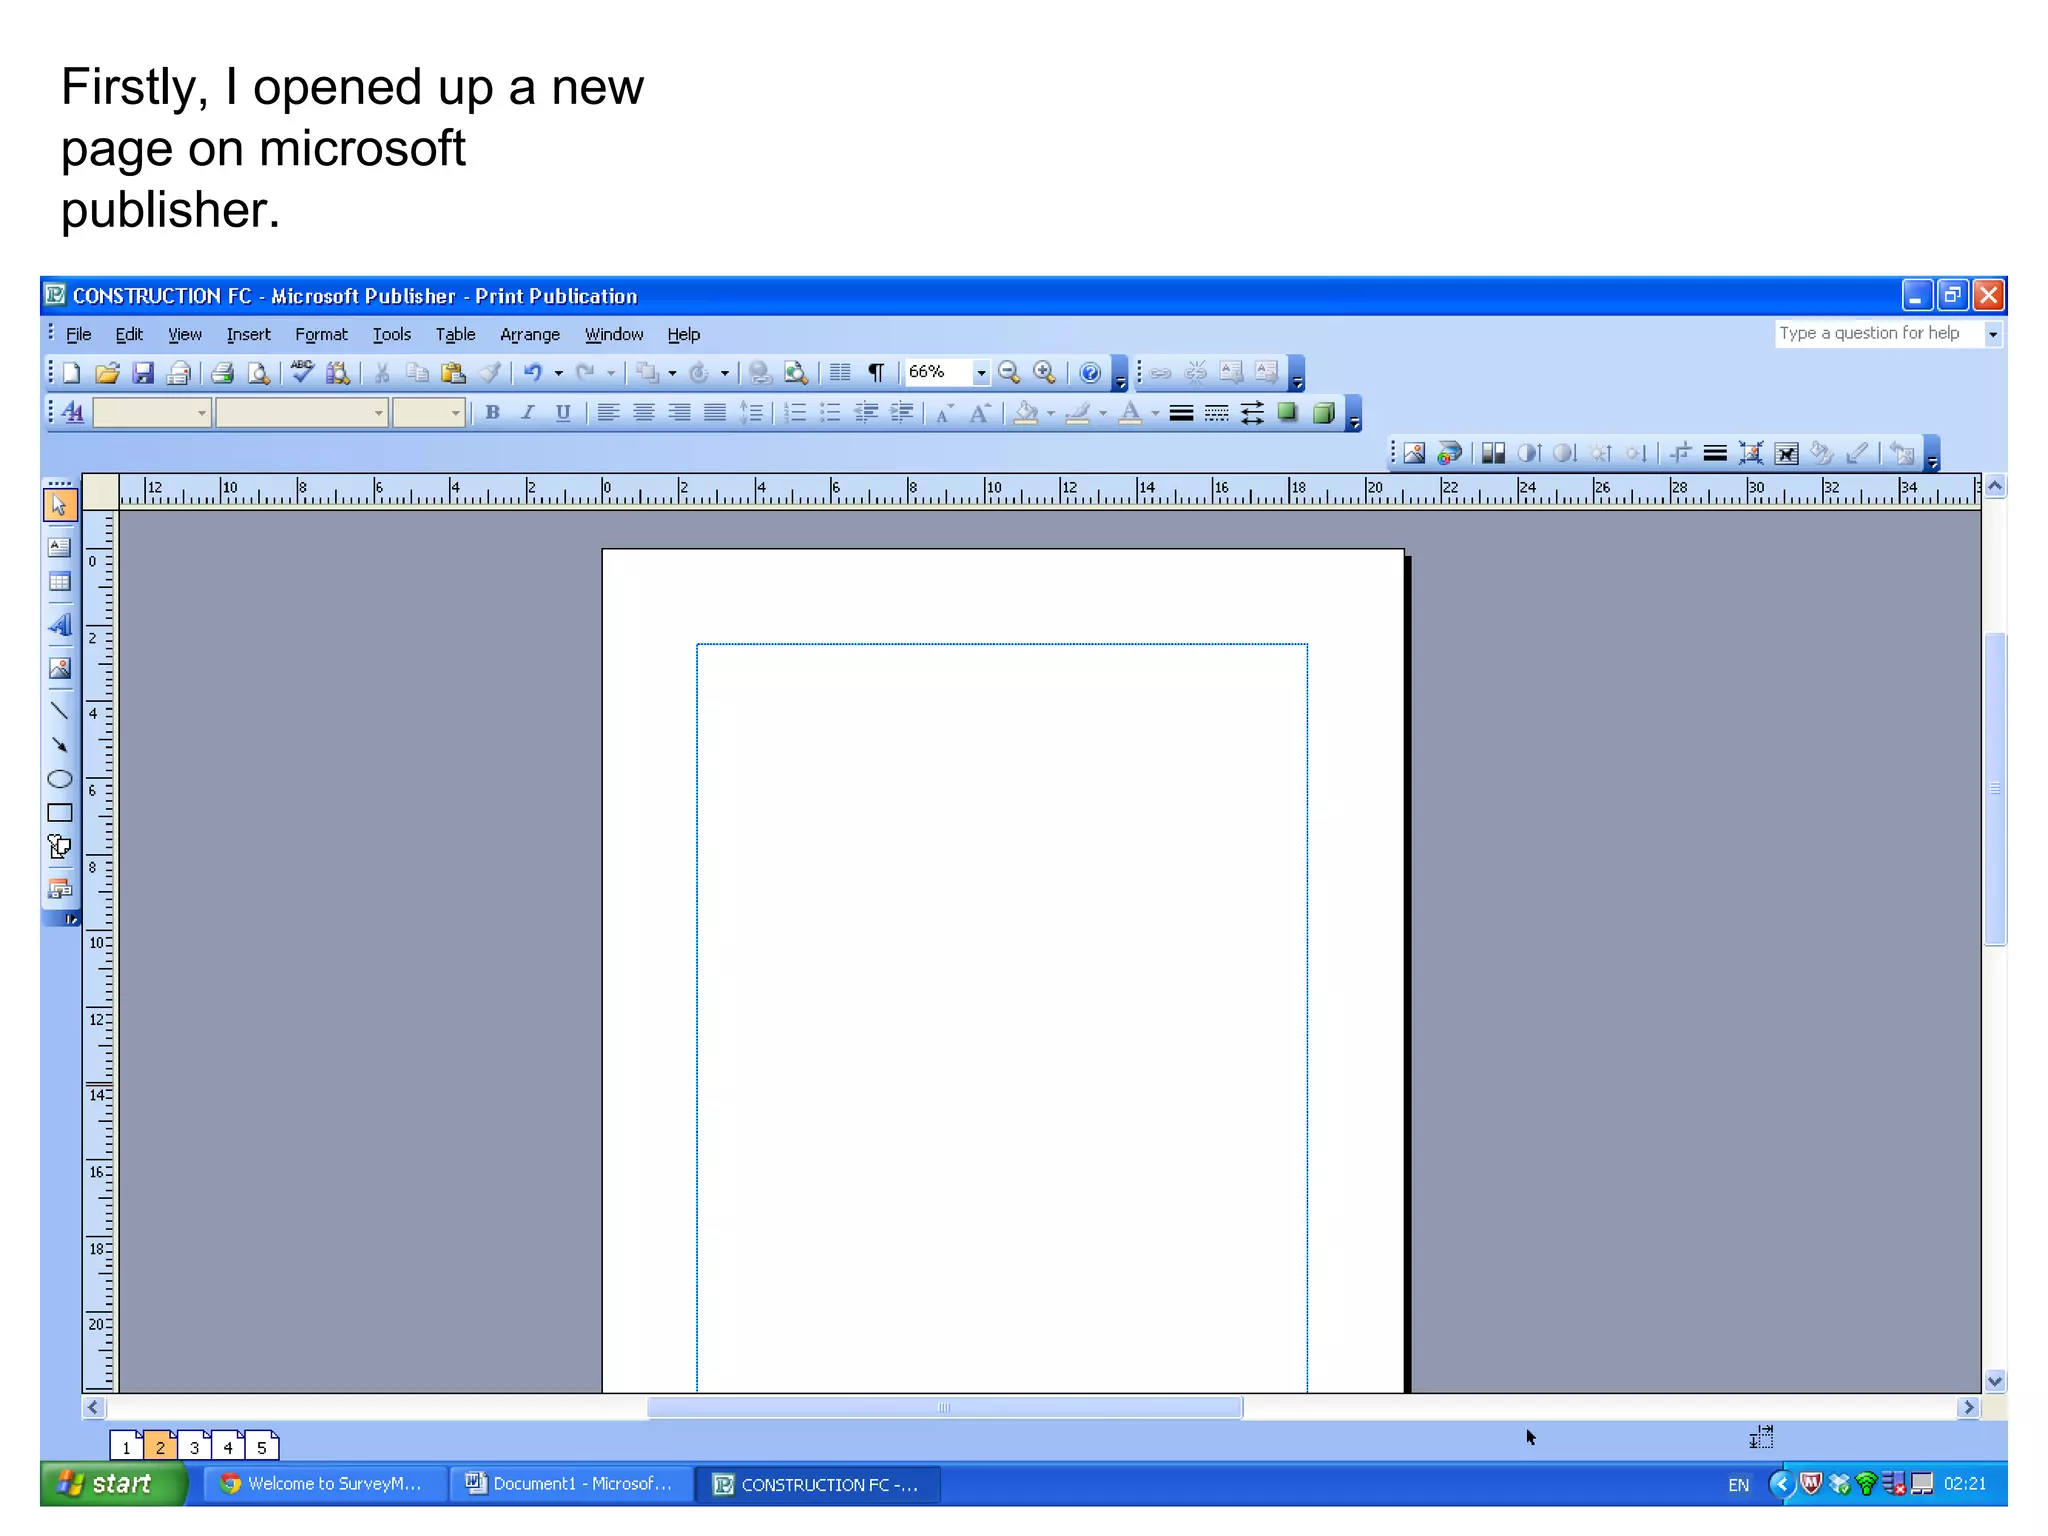
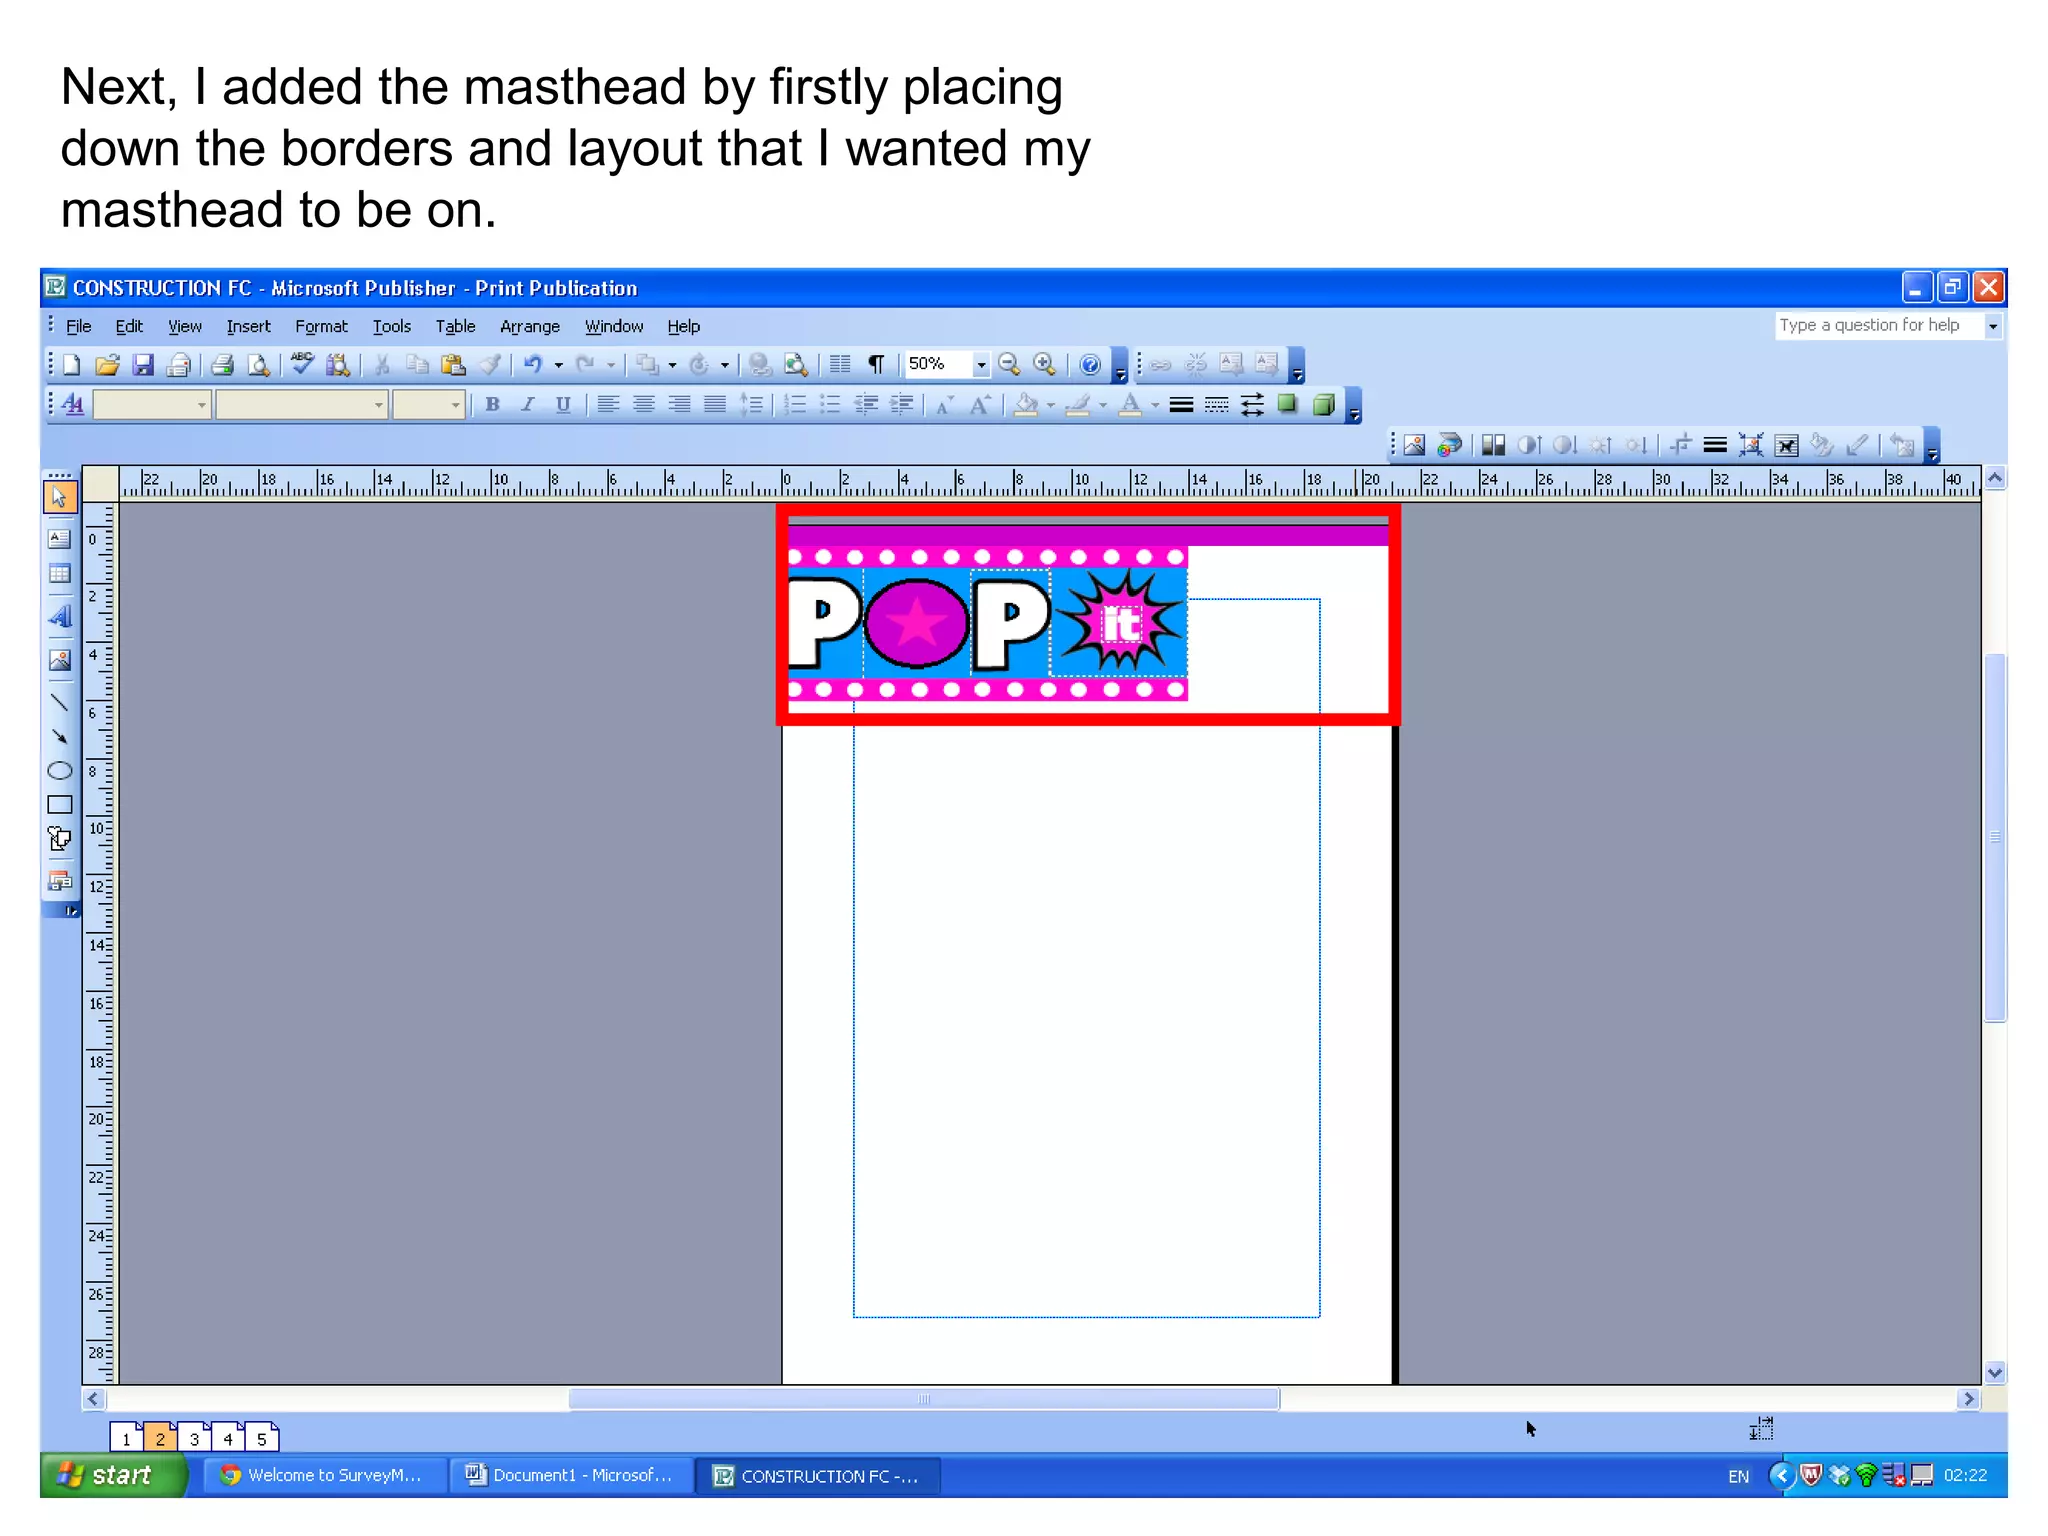
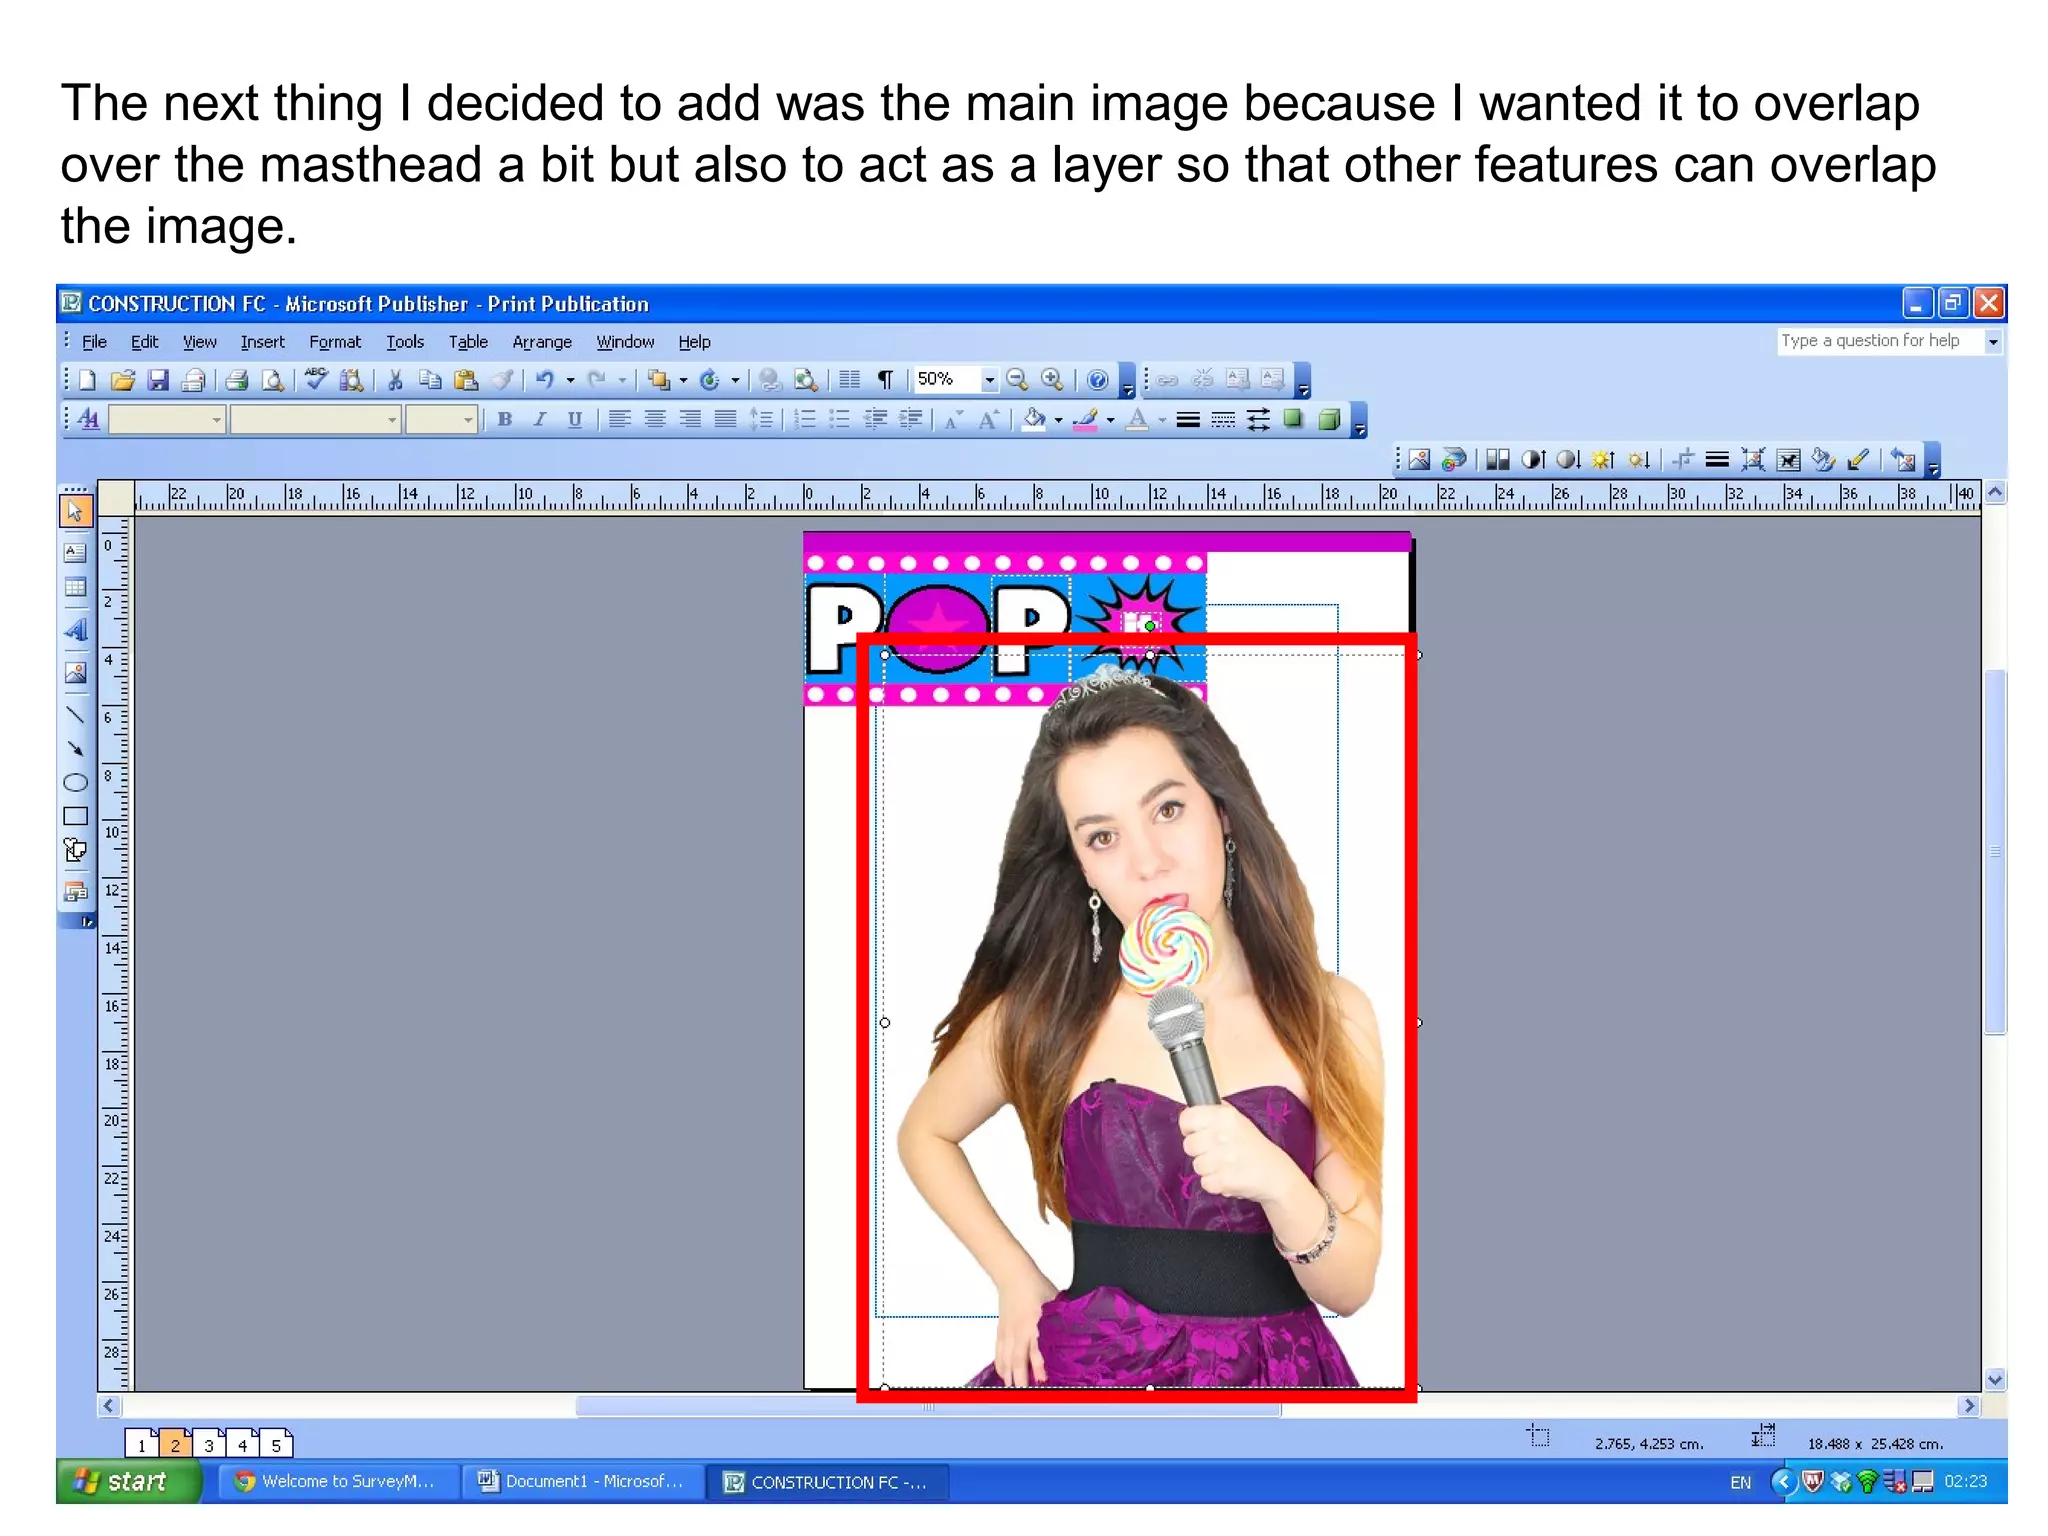
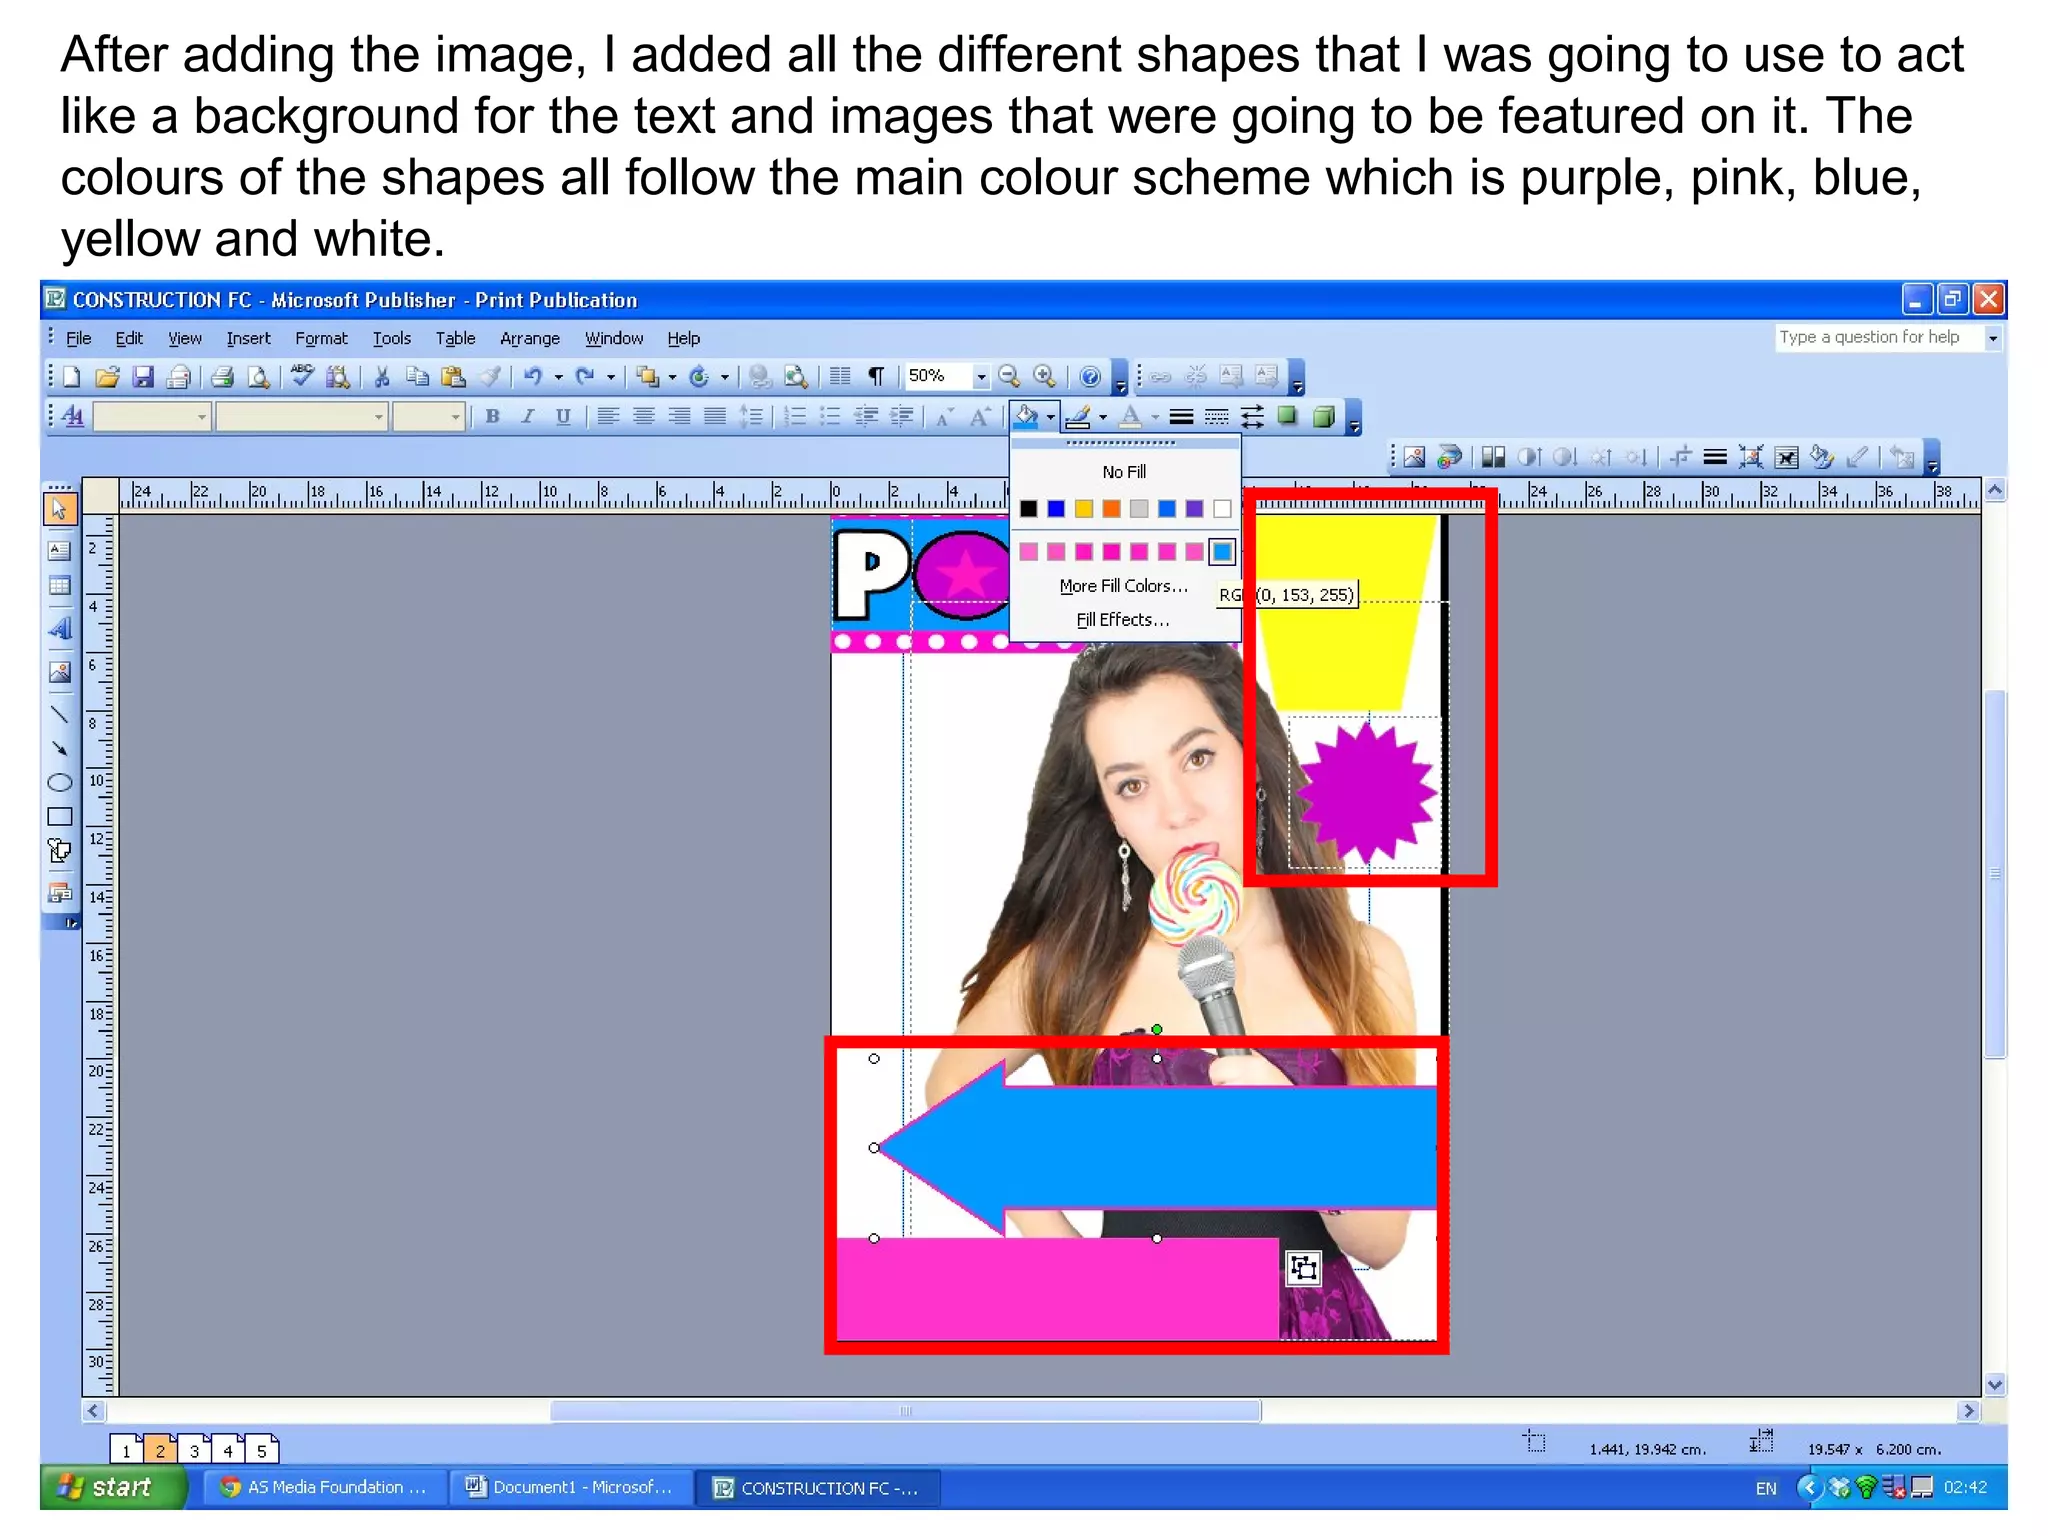
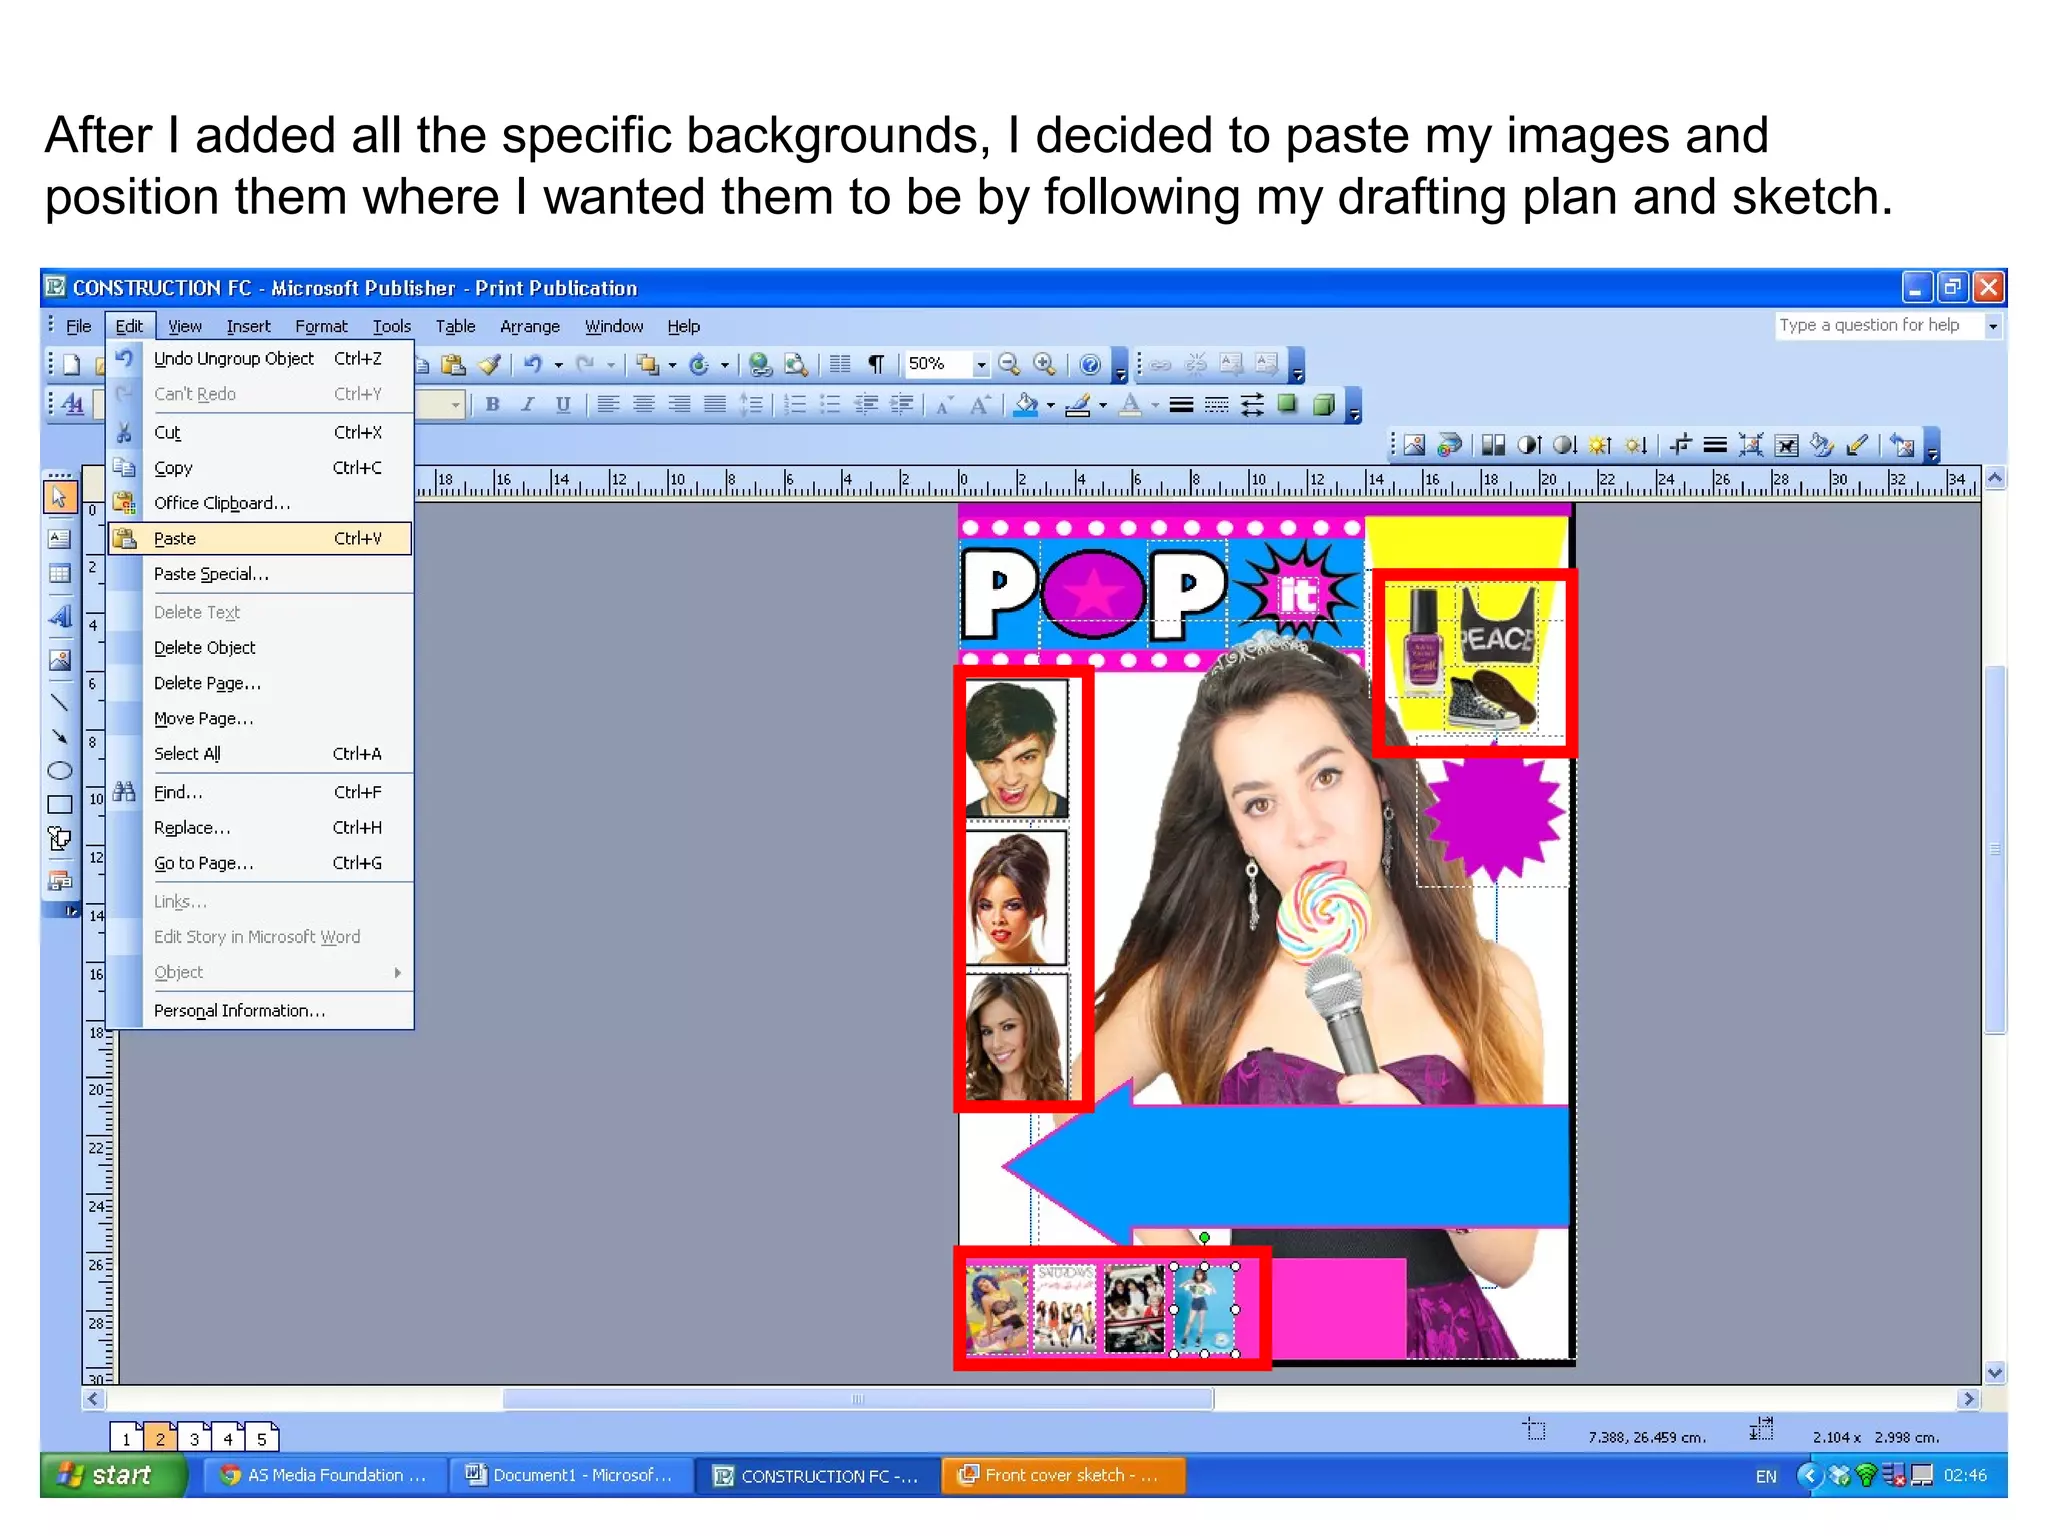
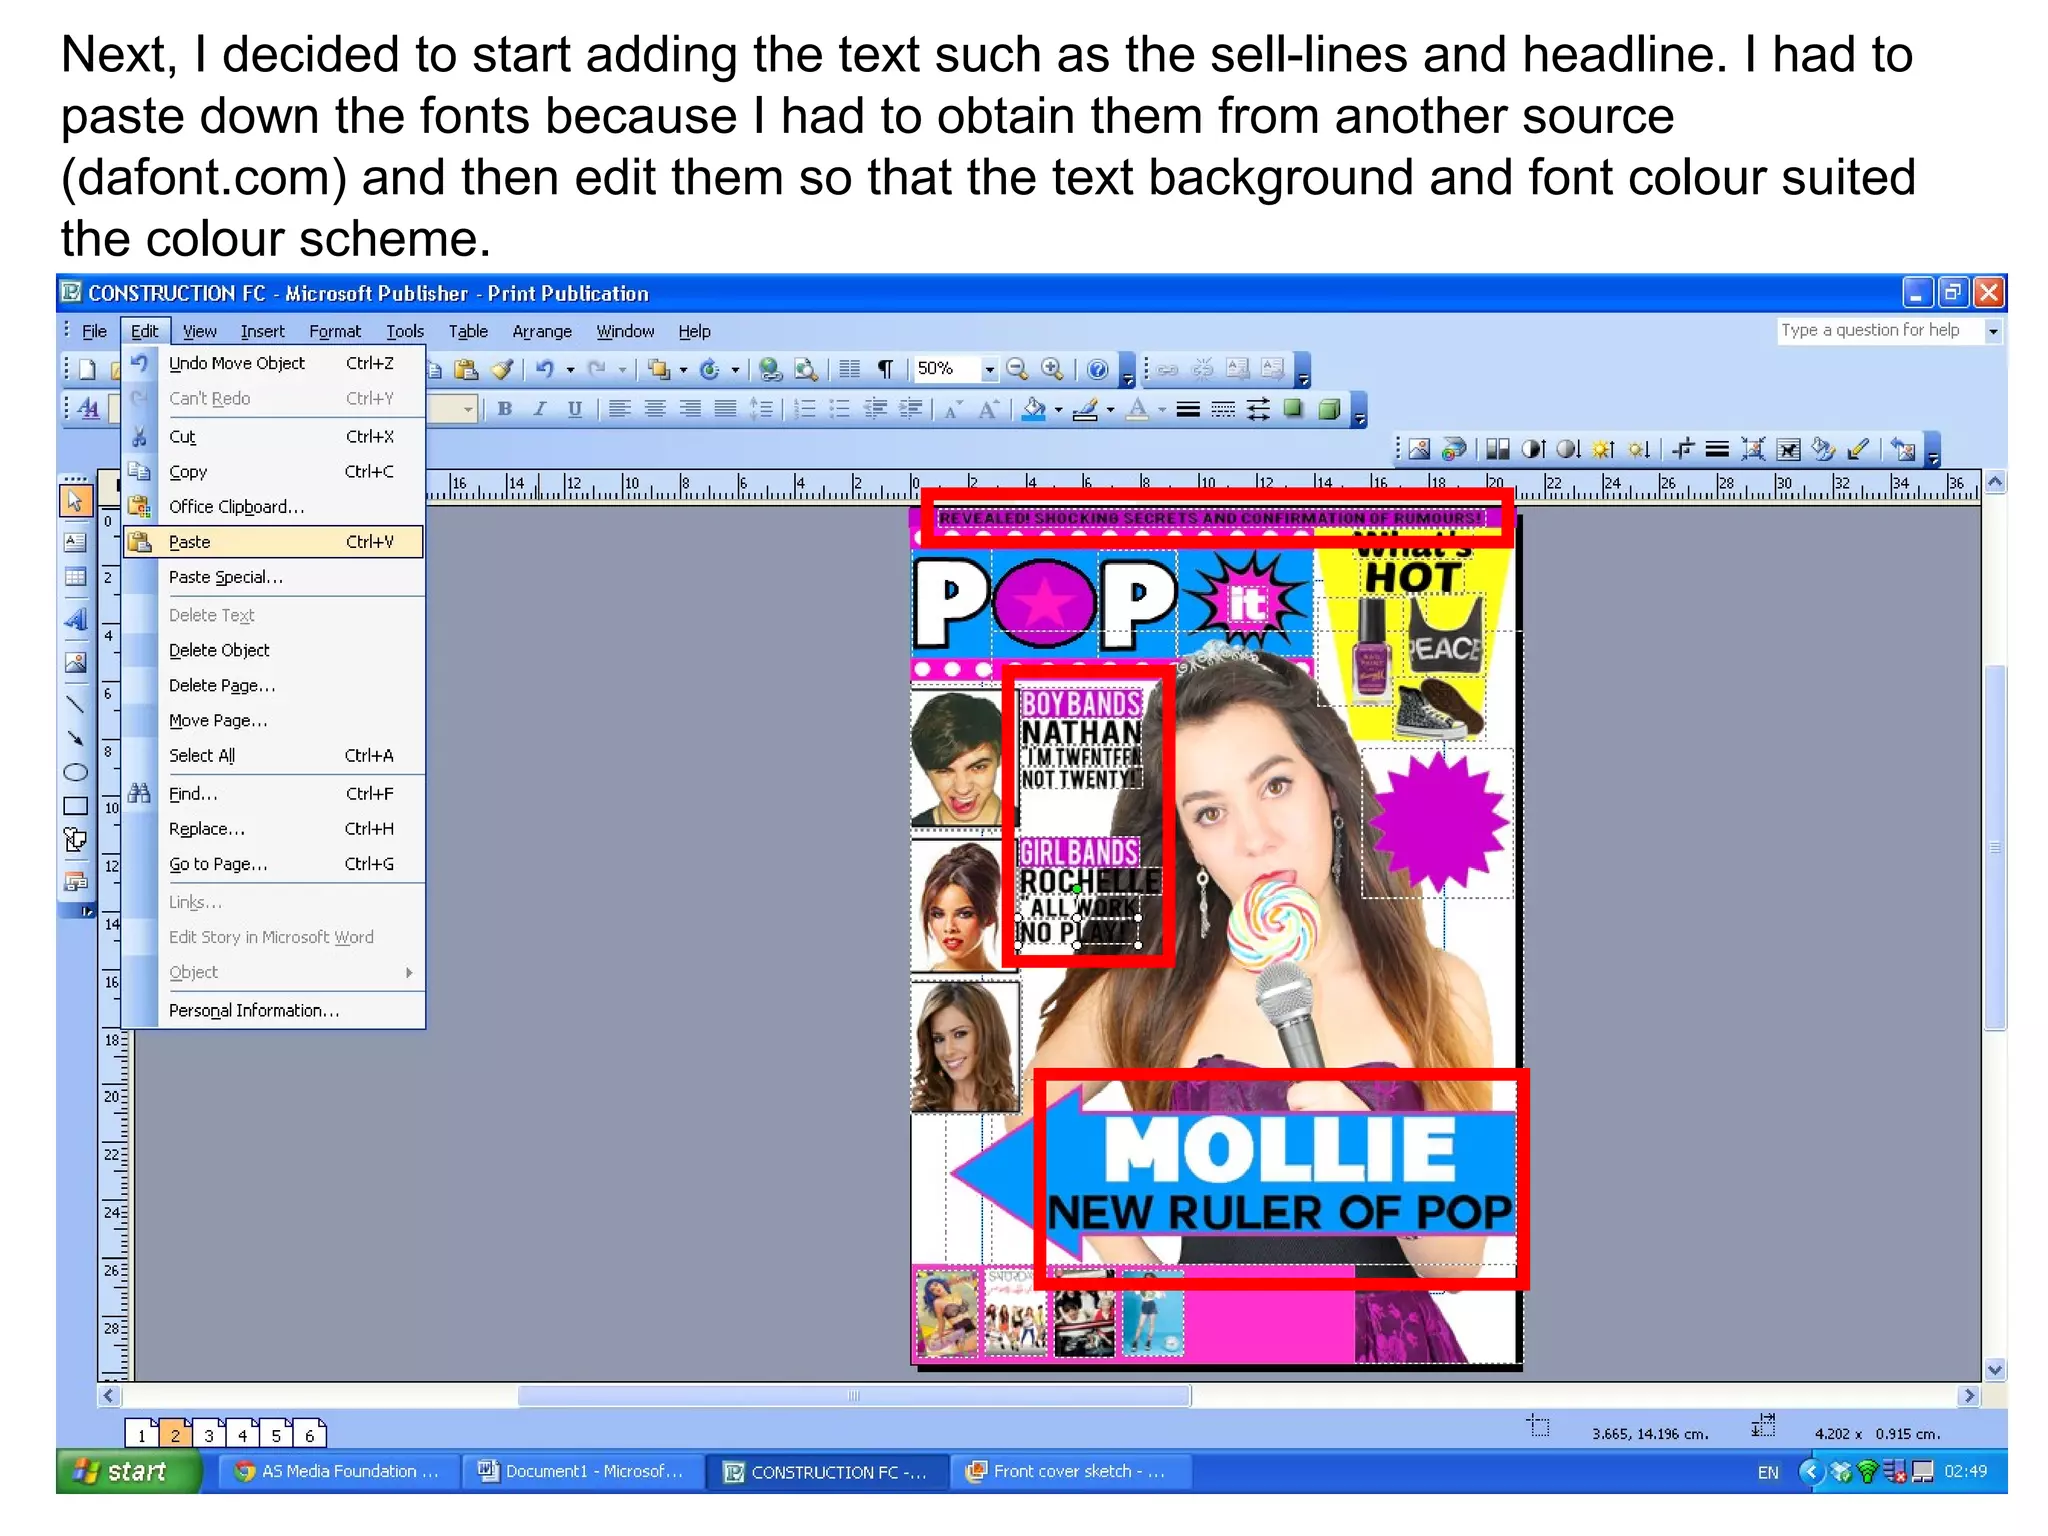
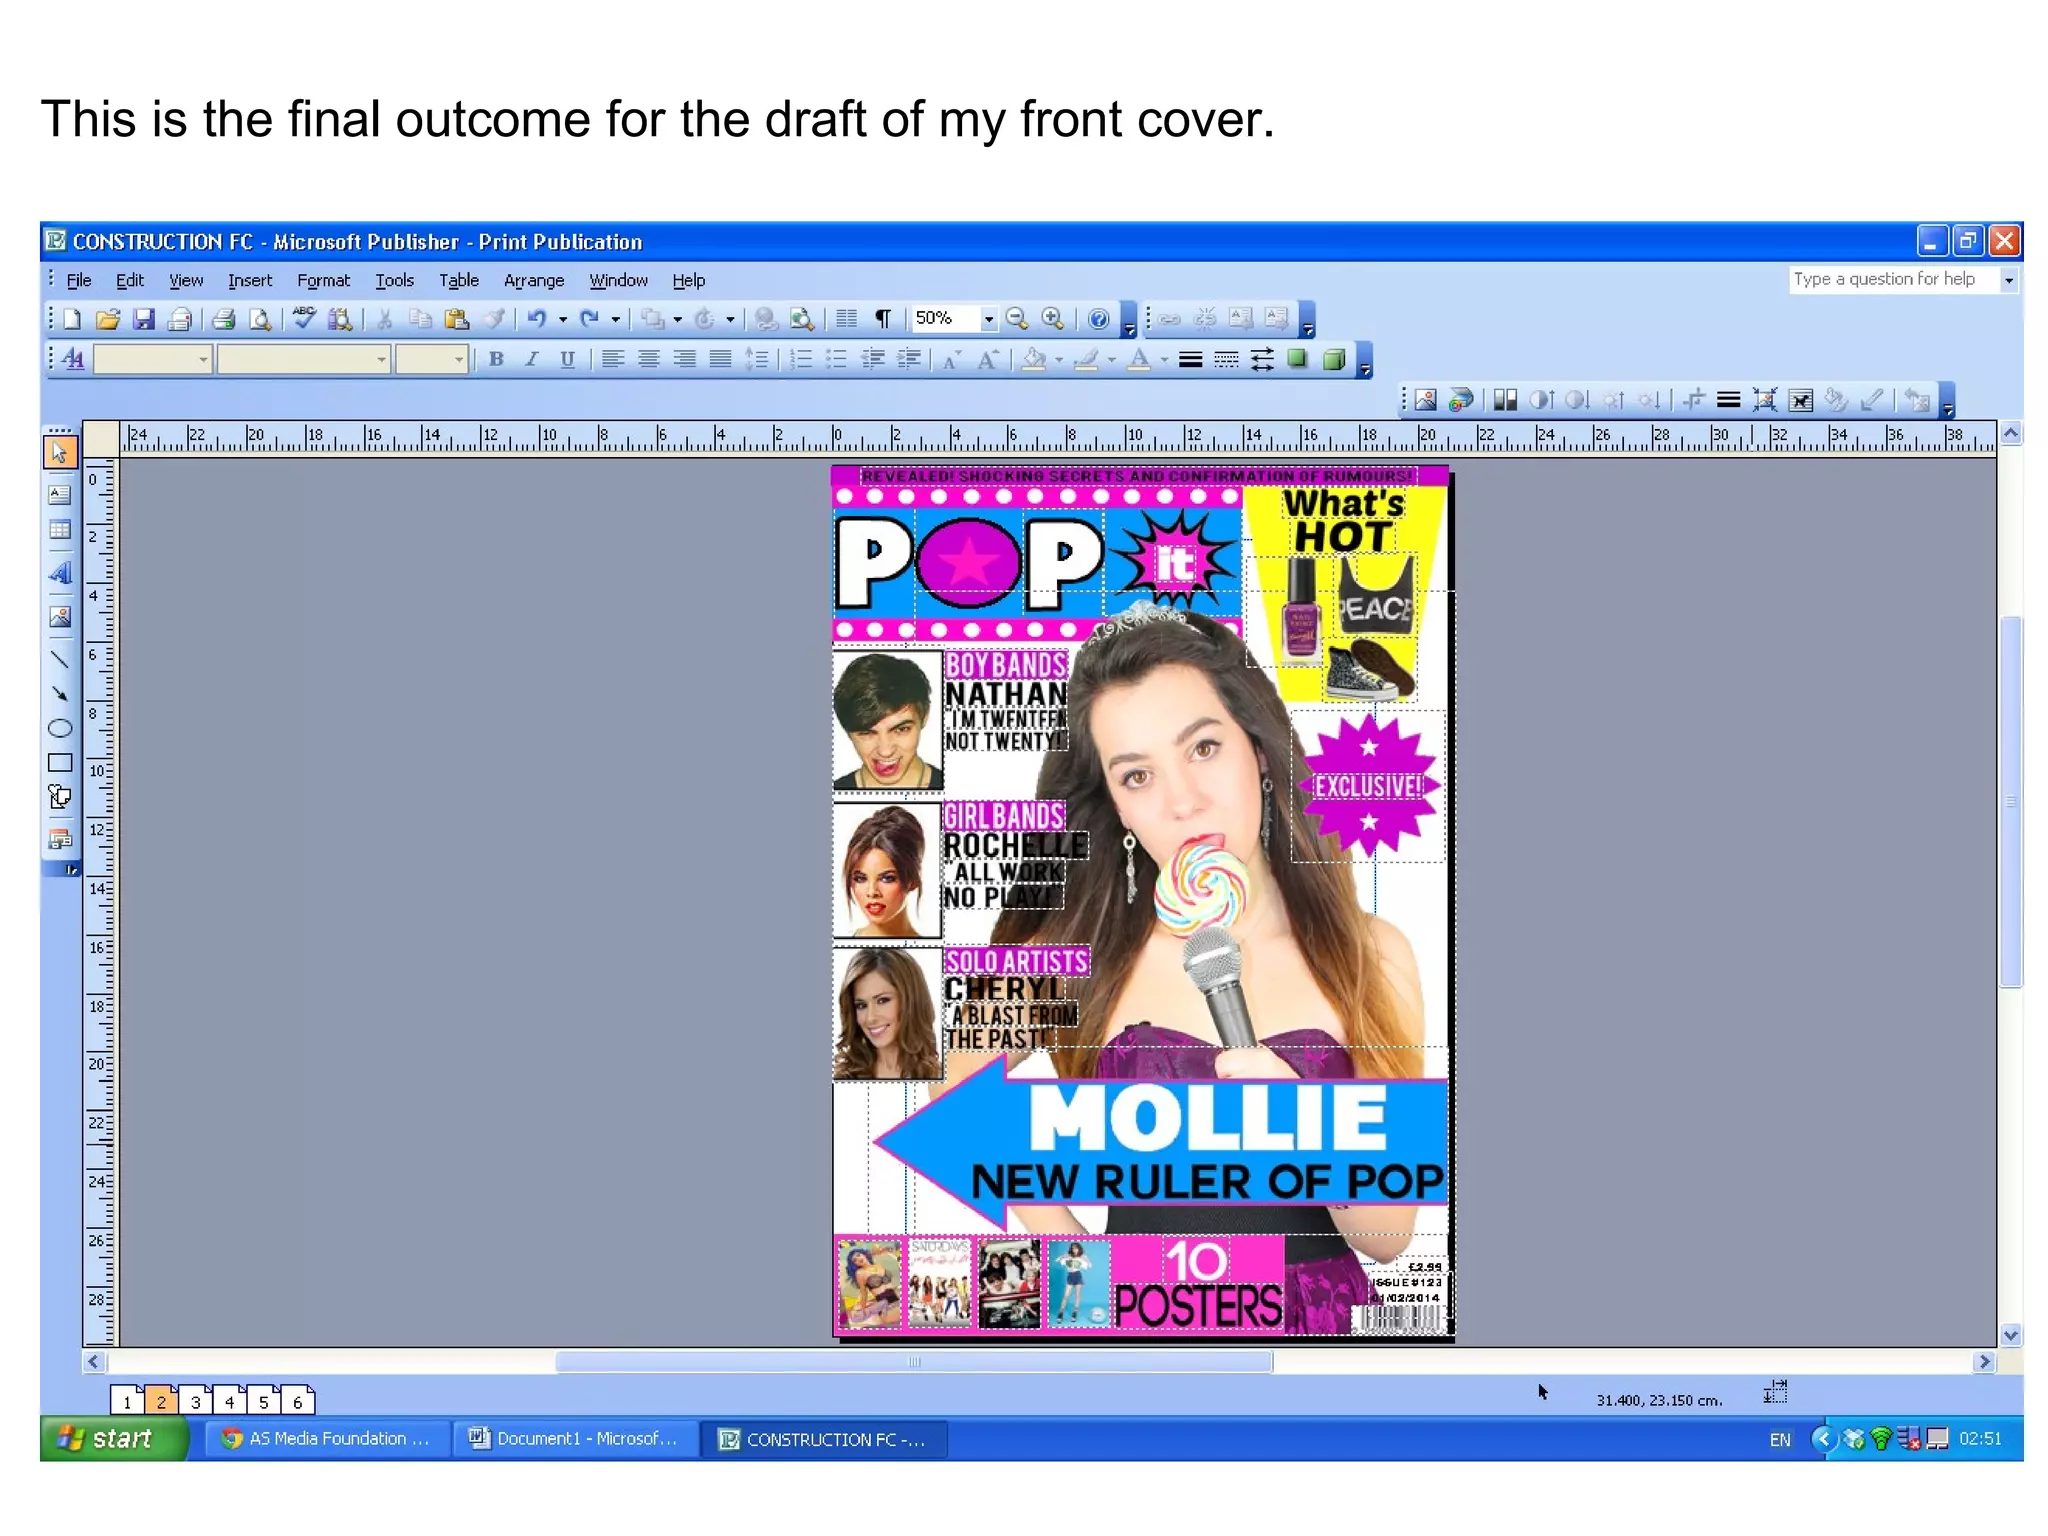
Step by Step construction
of the Front Cover
By Chantelle Locsin
Firstly, I opened up a new
page on microsoft
publisher.
Next, I added the masthead by firstly placing
down the borders and layout that I wanted my
masthead to be on.
The next thing I decided to add was the main image because I wanted it to overlap
over the masthead a bit but also to act as a layer so that other features can overlap
the image.
After adding the image, I added all the different shapes that I was going to use to act
like a background for the text and images that were going to be featured on it. The
colours of the shapes all follow the main colour scheme which is purple, pink, blue,
yellow and white.
After I added all the specific backgrounds, I decided to paste my images and
position them where I wanted them to be by following my drafting plan and sketch.
Next, I decided to start adding the text such as the sell-lines and headline. I had to
paste down the fonts because I had to obtain them from another source
(dafont.com) and then edit them so that the text background and font colour suited
the colour scheme.
After I added all the text on my front cover, I added the barcode with its price, issue
number and the month of the issue.
This is the final outcome for the draft of my front cover.
The End

Step by step construction of the Front Cover - Drafting

  • 1.
    Step by Stepconstruction of the Front Cover By Chantelle Locsin
  • 2.
    Firstly, I openedup a new page on microsoft publisher.
  • 3.
    Next, I addedthe masthead by firstly placing down the borders and layout that I wanted my masthead to be on.
  • 4.
    The next thingI decided to add was the main image because I wanted it to overlap over the masthead a bit but also to act as a layer so that other features can overlap the image.
  • 5.
    After adding theimage, I added all the different shapes that I was going to use to act like a background for the text and images that were going to be featured on it. The colours of the shapes all follow the main colour scheme which is purple, pink, blue, yellow and white.
  • 6.
    After I addedall the specific backgrounds, I decided to paste my images and position them where I wanted them to be by following my drafting plan and sketch.
  • 7.
    Next, I decidedto start adding the text such as the sell-lines and headline. I had to paste down the fonts because I had to obtain them from another source (dafont.com) and then edit them so that the text background and font colour suited the colour scheme.
  • 8.
    After I addedall the text on my front cover, I added the barcode with its price, issue number and the month of the issue.
  • 9.
    This is thefinal outcome for the draft of my front cover.
  • 10.