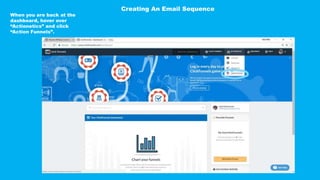
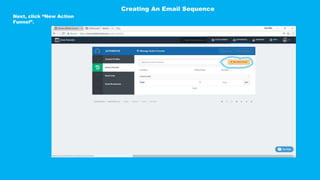
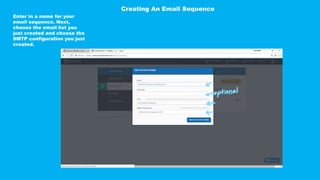
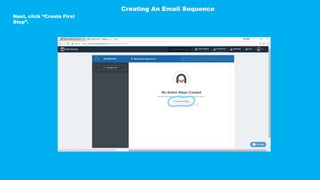
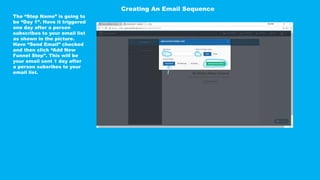
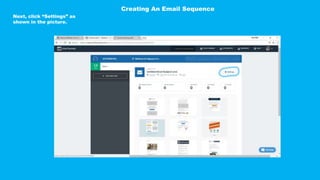
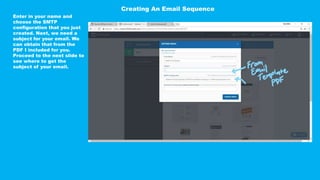
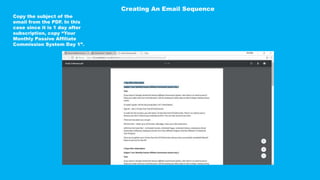
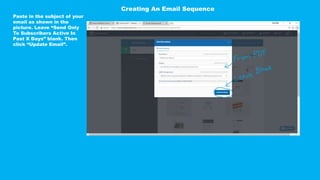
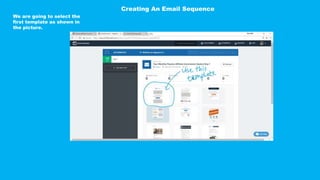
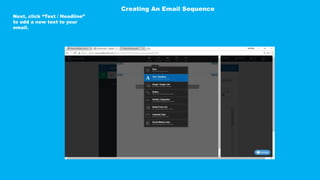
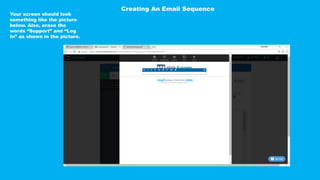
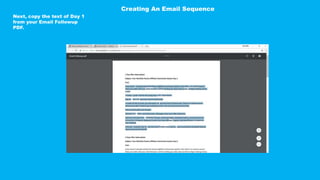
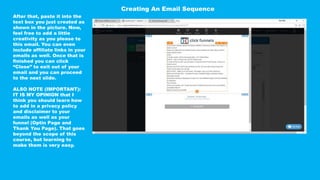
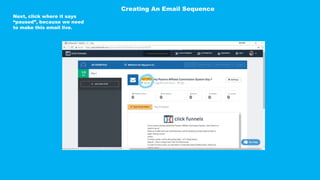
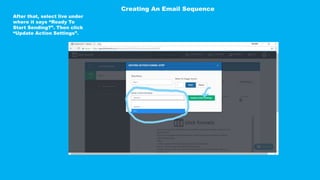
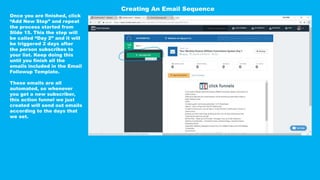
Step #4 Part 2
Setting Up Your Email Sequence
(Using Actionetics)
Objectives:
- Set up an automated email sequence
incorporating the Email Followup
Template PDF
When you are back at the
dashboard, hover over
“Actionetics” and click
“Action Funnels”.
Creating An Email Sequence
Next, click “New Action
Funnel”.
Creating An Email Sequence
Enter in a name for your
email sequence. Next,
choose the email list you
just created and choose the
SMTP configuration you just
created.
Creating An Email Sequence
Next, click “Create First
Step”.
Creating An Email Sequence
The “Step Name” is going to
be “Day 1”. Have it triggered
one day after a person
subscribes to your email list
as shown in the picture.
Have “Send Email” checked
and then click “Add New
Funnel Step”. This will be
your email sent 1 day after
a person subsribes to your
email list.
Creating An Email Sequence
Next, click “Settings” as
shown in the picture.
Creating An Email Sequence
Enter in your name and
choose the SMTP
configuration that you just
created. Next, we need a
subject for your email. We
can obtain that from the
PDF I included for you.
Proceed to the next slide to
see where to get the
subject of your email.
Creating An Email Sequence
Copy the subject of the
email from the PDF. In this
case since it is 1 day after
subscription, copy “Your
Monthly Passive Affiliate
Commission System Day 1”.
Creating An Email Sequence
Paste in the subject of your
email as shown in the
picture. Leave “Send Only
To Subscribers Active In
Past X Days” blank. Then
click “Update Email”.
Creating An Email Sequence
We are going to select the
first template as shown in
the picture.
Creating An Email Sequence
Click “Open Email Editor”.
Creating An Email Sequence
Next, click the gear icon for
the second row as shown in
the picture.
Creating An Email Sequence
Next, click “Delete Row” as
shown in the picture.
Creating An Email Sequence
Next, delete the row shown
in the picture (like last two
slides).
Creating An Email Sequence
After that, click the plus
sign icon underneath the
ClickFunnels Logo as shown
in the picture.
Creating An Email Sequence
Next, click “Text / Headline”
to add a new text to your
email.
Creating An Email Sequence
Your screen should look
something like the picture
below. Also, erase the
words “Support” and “Log
In” as shown in the picture.
Creating An Email Sequence
Next, copy the text of Day 1
from your Email Followup
PDF.
Creating An Email Sequence
After that, paste it into the
text box you just created as
shown in the picture. Now,
feel free to add a little
creativity as you please to
this email. You can even
include affiliate links in your
emails as well. Once that is
finished you can click
“Close” to exit out of your
email and you can proceed
to the next slide.
ALSO NOTE (IMPORTANT):
IT IS MY OPINION that I
think you should learn how
to add in a privacy policy
and disclaimer to your
emails as well as your
funnel (Optin Page and
Thank You Page). That goes
beyond the scope of this
course, but learning to
make them is very easy.
Creating An Email Sequence
Next, click where it says
“paused”, because we need
to make this email live.
Creating An Email Sequence
After that, select live under
where it says “Ready To
Start Sending?”. Then click
“Update Action Settings”.
Creating An Email Sequence
Once you are finished, click
“Add New Step” and repeat
the process started from
Slide 15. This the step will
be called “Day 2” and it will
be triggered 2 days after
the person subscribes to
your list. Keep doing this
until you finish all the
emails included in the Email
Followup Template.
These emails are all
automated, so whenever
you get a new subscriber,
this action funnel we just
created will send out emails
according to the days that
we set.
Creating An Email Sequence

Step #4 Final

  • 1.
    Step #4 Part2 Setting Up Your Email Sequence (Using Actionetics) Objectives: - Set up an automated email sequence incorporating the Email Followup Template PDF
  • 2.
    When you areback at the dashboard, hover over “Actionetics” and click “Action Funnels”. Creating An Email Sequence
  • 3.
    Next, click “NewAction Funnel”. Creating An Email Sequence
  • 4.
    Enter in aname for your email sequence. Next, choose the email list you just created and choose the SMTP configuration you just created. Creating An Email Sequence
  • 5.
    Next, click “CreateFirst Step”. Creating An Email Sequence
  • 6.
    The “Step Name”is going to be “Day 1”. Have it triggered one day after a person subscribes to your email list as shown in the picture. Have “Send Email” checked and then click “Add New Funnel Step”. This will be your email sent 1 day after a person subsribes to your email list. Creating An Email Sequence
  • 7.
    Next, click “Settings”as shown in the picture. Creating An Email Sequence
  • 8.
    Enter in yourname and choose the SMTP configuration that you just created. Next, we need a subject for your email. We can obtain that from the PDF I included for you. Proceed to the next slide to see where to get the subject of your email. Creating An Email Sequence
  • 9.
    Copy the subjectof the email from the PDF. In this case since it is 1 day after subscription, copy “Your Monthly Passive Affiliate Commission System Day 1”. Creating An Email Sequence
  • 10.
    Paste in thesubject of your email as shown in the picture. Leave “Send Only To Subscribers Active In Past X Days” blank. Then click “Update Email”. Creating An Email Sequence
  • 11.
    We are goingto select the first template as shown in the picture. Creating An Email Sequence
  • 12.
    Click “Open EmailEditor”. Creating An Email Sequence
  • 13.
    Next, click thegear icon for the second row as shown in the picture. Creating An Email Sequence
  • 14.
    Next, click “DeleteRow” as shown in the picture. Creating An Email Sequence
  • 15.
    Next, delete therow shown in the picture (like last two slides). Creating An Email Sequence
  • 16.
    After that, clickthe plus sign icon underneath the ClickFunnels Logo as shown in the picture. Creating An Email Sequence
  • 17.
    Next, click “Text/ Headline” to add a new text to your email. Creating An Email Sequence
  • 18.
    Your screen shouldlook something like the picture below. Also, erase the words “Support” and “Log In” as shown in the picture. Creating An Email Sequence
  • 19.
    Next, copy thetext of Day 1 from your Email Followup PDF. Creating An Email Sequence
  • 20.
    After that, pasteit into the text box you just created as shown in the picture. Now, feel free to add a little creativity as you please to this email. You can even include affiliate links in your emails as well. Once that is finished you can click “Close” to exit out of your email and you can proceed to the next slide. ALSO NOTE (IMPORTANT): IT IS MY OPINION that I think you should learn how to add in a privacy policy and disclaimer to your emails as well as your funnel (Optin Page and Thank You Page). That goes beyond the scope of this course, but learning to make them is very easy. Creating An Email Sequence
  • 21.
    Next, click whereit says “paused”, because we need to make this email live. Creating An Email Sequence
  • 22.
    After that, selectlive under where it says “Ready To Start Sending?”. Then click “Update Action Settings”. Creating An Email Sequence
  • 23.
    Once you arefinished, click “Add New Step” and repeat the process started from Slide 15. This the step will be called “Day 2” and it will be triggered 2 days after the person subscribes to your list. Keep doing this until you finish all the emails included in the Email Followup Template. These emails are all automated, so whenever you get a new subscriber, this action funnel we just created will send out emails according to the days that we set. Creating An Email Sequence