
Recommended
More Related Content
Similar to School garden lesson plans' book
Similar to School garden lesson plans' book (20)
Recently uploaded
Recently uploaded (20)
School garden lesson plans' book
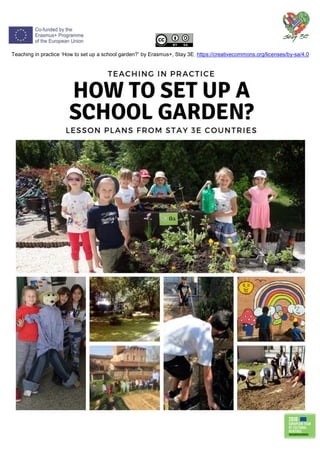
- 1. Teaching in practice ‘How to set up a school garden?’ by Erasmus+, Stay 3E, https://creativecommons.org/licenses/by-sa/4.0
- 2. ‘STAY 3E –Stay Eco-friendly, Entrepreneurial, European. Providingpracticalsolutionsforeffectiveteachingandenjoyable learning at primarylevel´ LESSON PLAN Lesson plan no 1 Country France Course / subject “How to set up a school garden?” Topic Planting a tree Lesson title How to plant a plum tree ? Level /Age Level 1 – 6/10 years old Lesson duration 90 minutes Procedure 1. Dig a hole and put water in the bottom 2. Comb the roots of the clod 3. Put the clod in the hole 4. Refill the hole 5. Spread stall and the soil around the tree 6. Dig a groove around the tree to keep water whan it’s raining 7. Tamp the soil around the tree 8. Water Materials A tree A pickaxe A shovel A hoe Reference https://www.youtube.com/watch?v=Fs9gQY7wYCk https://prezi.com/mp-kq92vtdwc/erasmus-stay-3e-how-to-plant-a-plum- tree/
- 3. ‘STAY 3E –Stay Eco-friendly, Entrepreneurial, European. Providing practical solutions for effective teaching and enjoyable learning at primary level´ LESSON PLAN Lesson objectives Pupils learn about the different geometrical shapes in practice. calculate the length and the width of a surface and measure them learn to use Maths in everyday activities and in real situations manage to cooperate and work in groups in order to create something in common realise that they can learn Maths biomatically inside and outside the classroom Procedure Step 1 Shape hunt in the classroom. Kids choose a card that the teacher offers that shows a particular geometrical shape and separated in groups search for objects in the classroom that have a shape similar to the one in the card they chose. They touch and notice the objects they found and try to say some characteristics of the particular shape(it is round, it has sharp angles etc.). Then the different groups find similarities and differences among these shapes. Step 2 Kids watch a video about the different names and characteristics of the shapes. The teacher suggests to the kids to create signs in different shapes for the school garden veggies that they had already planted earlier on . They use their rulers to measure the Lesson plan no 2 Country Greece Course / subject ‘“How to set up a school garden?” Topic Preparing the garden Lesson title A scarecrow and signs for our school garden Level /Age Level 1 Lesson duration 90 minutes
- 4. length and the width of coloured cardboards to cut triangles, rectangles, circles. Step 3 They in groups draw the picture of the vegetable they want to put the sign on to and write its name as well. After that, they use their rulers to measure the length of the sticks they will use for their sign. Step 4 Another group of kids with the help of the teacher try to create a scarecrow for the garden. So they use a meter to choose logs of the same length and width in order to create its body. Others use cloth and plastic bags to create a circular head and so on. Step 5 Kids and their teacher carry the signs and the scarecrow in the school garden and everything is put in the right place. Materials rulers, pencils,colours,scissors,cardboards,glue, old clothes,small wooden logs Reference https://www.youtube.com/watch?v=gOJk8650Va4 https://www.youtube.com/watch?v=r156y9KWOkU https://www.youtube.com/watch?v=LR89nToMnME https://www.youtube.com/watch?v=-JAm4-1azsU https://www.youtube.com/watch?v=Ss6dTrtcLFU https://www.youtube.com/watch?v=5cjGMEpIMw0 https://www.youtube.com/watch?v=vMkyXGlvn34 https://www.youtube.com/watch?v=ZzGWcCh_6WY
- 6. ‘STAY 3E –Stay Eco-friendly, Entrepreneurial, European. Providing practical solutions for effective teaching and enjoyable learning at primary level´ LESSON PLAN Lesson plan no 3 Country Italy Course / subject ‘ “How to set up a school garden?” Topic Maths in the garden Lesson title Let’s measure in the garden! Level /Age LEVEL 1 Lesson duration 90 MINUTES Lesson objectives Understand the concept of distance Understand the concept of perimeter. Measure school garden perimeter. Procedure Discuss the definition of distance by talking directly in front of your students and then moving some distance away from them. Explain that you are now talking from a distance. You may want to get even further away from your students to model the concept of distance. Measure the distance between you and various students, and have students make judgments about which distances are long or short, far away or close by. Next, showing some shapes, introduce the word “perimeter,” or the distance around an object. Walk in a series of straight lines, because perimeter is based on measuring polygons (closed figures) with straight sides (squares, rectangles, hexagons, etc.). Have a group of students follow your perimeter path.
- 7. Go outside and try to measure the perimeter of the school garden. Use wooden sticks to mark off the perimeter. Once you reach the starting point, cut the yarn. You should have a piece of yarn that measures the distance of the perimeter. Go back to the classroom. Use rulers inside the classroom to measure the yarn, then calculate the perimeter. Using rulers and sticks create math problems about measurement conversions. Materials For the teacher: Yarn or string Wooden sticks For the students: Helping hands Listening ears Reference https://www.education.com/lesson-plan/finding-perimeter/ http://www.sheppardsoftware.com/mathgames/geometry/shapeshoot/PerimeterShapesShoot.htm
- 9. ‘STAY 3E –Stay Eco-friendly, Entrepreneurial, European. Providing practical solutions for effective teaching and enjoyable learning at primary level´ LESSON PLAN Lesson objectives to get familiar with the build / elements of a flower based on crocus to practise counting: summing and subtracting within 100, multiplying and dividing within 30 to name a few earliest spring flowers to name and describe a few protected species of flowers to develop vocabulary connected with environment protection to make full sentences – spoken descriptions to name different parts of plants and cups of plants (flowers as a part) to sing the song ‘I am a gardener’ Procedure Greeting. Introducing the topic of the lesson Learning the song ‘I am a gardener’ Watching the presentation https://www.youtube.com/watch?v=rANDOonihZg Discussing the presentation Presenting some photos concerning the build of a flower Discussing the way of pollinating flowers by insects Going to the school garden to see crocuses in bloom which were grown in autumn by the pupils Watching flowers with magnifying glass, finding pistils and stamens Lesson plan no 4 Country Poland Course / subject “How to set up a school garden?” Topic ‘Stay 3E gardening classes’ Lesson title Spring flowers Level /Age Beginners Lesson duration 90 minutes
- 10. Making attempts in taking some pollen from one flower’s anther to another flower’s pistil Returning to the classroom and collecting notes about gardening activities Doing a few exercises on practice copies and doing interactive exercises Summing up the lesson, collecting information from the students Finishing the lesson with the song ‘I am a gardener’ Materials Crocuses in bloom grown in autumn in the school garden by the pupils, cosmetic sticks, magnifying glass, boards with the collected information and pictures, notebooks, practice copies Follow-up : https://www.youtube.com/watch?v=rANDOonihZg interactive exercises: http://www.epodreczniki.pl/reader/c/238784/v/7/t/student- canon/m/KL2_ORE_V7_WIOSNA_2_3_31_140_p3 Reference http://slide.ly/view/5144110f293d1cb77503babd2c707196 Take Home Tasks practice copies
- 11. ‘STAY 3E –Stay Eco-friendly, Entrepreneurial, European. Providing practical solutions for effective teaching and enjoyable learning at primary level´ LESSON PLAN Lesson plan no 5 Country Romania Course / subject “How to set up a school garden?” Topic Maths in practice, measuring, calculating Lesson title Problem Solving Level /Age Level 1 Lesson duration 45 minutes Lesson objectives • to develop of exploration / investigation and problem solving • students will be able to use mathematics in order to arrange the school garden. Procedure INTRODUCTION (5 minutes) Teacher presents a letter from our headmistress who asks for help in rearranging our school garden: "Dear children, I heard you are very good at Maths. I would like you to help us make the most beautiful school garden. Our schoolyard has 3350 square meters, 1700 of them are used for Gymnastics/Physical education. How can you divide the remaining land in equal parts of flowers, trees/shrubs and grass? What else would you bring into the garden to make it more beautiful? I am convinced that you will succeed! Yours sincerely, Virginia Arghiropol” Tell students that today we use concepts learned in mathematics to solve problems in everyday life. EXPLICIT INSTRUCTION/TEACHER MODELLING (5 minutes) • Updating knowledge about gardens - acquired in Science lessons, based on a Power Point
- 12. material. • Updating knowledge about solving problems. GUIDED PRACTICE/INTERACTIVE MODELLING (5 minutes) Children reformulate the problem presented in the letter and write it on the blackboard and in their notebooks: Schoolyard measures 3350 square meters, of which 1700 are used for sports. How can we divide what remains to include equal parts of flowers, shrubs and grass? What else would you bring into the garden to make it more beautiful? Children examine the problem using the method What I know / What I want to know / What I learned. INDEPENDENT WORK (5 minutes) Give students worksheets to complete and allow them time to work on them. TEAMWORK TIME (20 minutes) Divide the class into five groups: circles, squares, rectangles, triangles and trapezoids. Each group presents the ideas about rearranging the garden, usingdata obtained from solving the problem. REVIEW AND CLOSING (5 minutes) GALLERY METHOD: Each group presents the drawings. Materials Slide-show Paper Pencils, rulers Laptop, projector Reference https://www.education.com/lesson-plans/first-grade/math/ https://www.time4learning.com/scope-sequence/1st-math.shtml Teacher – Maria Forgaci Class 4A
- 15. ‘STAY 3E –Stay Eco-friendly, Entrepreneurial, European. Providing practical solutions for effective teaching and enjoyable learning at primary level´ Lesson plan no 6 Country Spain Course / subject “How to set up a school garden?” Topic ‘Stay 3E gardening classes’ Lesson title Getting products in our school garden Level /Age Lesson 1. Level 1 Lesson 2. Level 2 Lesson duration 90 minutes (2 lessons) LESSON PLAN Lesson objectives ● To weigh strawberries collected from our school garden. ● To calculate their real price. ● To calculate volume. ● To calculate mass. ● To calculate garden areas. ● To difference width and long. ● To know areas formula. ● To read and understand a mathematical problem related with measure. Procedure Lesson 1. Level 1 ● Greeting. Introducing the topic of the lesson. Talking about typical products in Aranjuez (the city where we live). ● Brainstorming about our school garden and the products we are going to get. ● Going to the garden and observing which products we can collect. ● Collecting the strawberries and weighting them with teachers help. ● Give each group some strawberries to weight and calculate how much money we could get selling the strawberries. ● Giving students coins and notes (school material), they must take the exact quantity to pay them. ● Children are going to size in feet and metres. They will go to the school garden. They will measure in feet and metres width and long garden areas. They will write and draw all the measures in their notebooks . ● They will understand the difference between width and long in a real
- 16. situation. Lesson 2. Level 2 ● Greeting. Introducing the topic of the lesson. ● Brainstorming about our school garden. ● The teacher will explain area formulas. Later, they will go to the school garden with a measuring meter. They will write all the measures of different parts of our school garden. They will calculate the areas. ● They will have to calculate how many m3 of substratum we should buy for a gardening zone according with its measure. ● They will calculated the money we should pay for that substratum. Materials Lesson 1. Baskets to collect the strawberries. Instruments to weigh the products. School material: coins and notes (Euros). Lesson 2. Measuring meter. Notebook. Reference Our math books.
- 17. ‘STAY 3E –Stay Eco-friendly, Entrepreneurial, European. Providing practical solutions for effective teaching and enjoyable learning at primary level´ LESSON PLAN Lesson objectives Pupils obtain Math skills as they measure the growth of plants,trees and plan for the dimensions of the school garden combine both math and science concepts by comparing and contrasting the success of different plants Cultivate relationships through classroom decision making and teamwork Share responsibilities in order to creat the design of the garden in groups Learn the meaning of perimeter and area in real life situations like measuring the dimensions of the garden. Realise that Maths can be fun when it needs pupils’ discovery ,concentration , cooperation and it is taught in a pleasant environment like the garden Understand that they learn easier in such an environment when they discover knowledge than when they find it already made for them inside the classroom Lesson plan no 7 Country Greece Course / subject “How to set up a school garden?” Topic School gardening Lesson title Measure and design our school garden Level /Age Level 2 Lesson duration 180 minutes(separated in two days)
- 18. Procedure STEP 1 Pupils are separated into two groups. One takes cards with shapes (rectangles, circles etc.) that have outlined the perimeter of the shape and the other group takes shapes that are filled in. So they really understand the difference between the two different meanings. Each one tries to find another kid who has the same shape and colour but it is outlined differently and they have to see and say what the difference between the two almost the same shapes are (one shows the perimeter and the other the area) STEP 2 Next thing they have to do is to measure the dimensions of each shape by using their rulers .They note the results them on the shapes. STEP 3 It is time to introduce them the formulas we use for calculating the perimeter of a shape and the ones for the area. They watch a video https://www.youtube.com/watch?v=Of7mFp_EmzE https://www.youtube.com/watch?v=hrVsIZovH-c They do lots of examples in worksheets STEP 4 They move one step further to learn how to calculate the perimeter and the area of a combined shape. They again watch videos to help them more https://www.youtube.com/watch?v=UN0skzqpzHU https://www.youtube.com/watch?v=Eb_GYmtA45o STEP 5 Time for action. The kids take the meters they brought from home , notebooks, rulers ,coloured pencils and go to the school garden where separated in groups measure the perimeter and the area of it. Of course the shape of the garden is not a perfect shape but a combination of different ones. They have already learnt how to find the area and the perimeter of combined shapes. They also measure the flower beds and the length of the roots of plants like carrots, beetroots, lettuces which are ready to take them and prepare a healthy salad with them. STEP 6 (the next day) During Maths lesson the teacher announced that they are going to have an arts and crafts lesson with mathematic theme. They are going to design their school garden by following the measurements they did the day before. Each group of pupils take one A3 size piece of paper where they have to plan the shape of the garden, calculate its perimeter and its area. STEP 7 Next project is to design details of their garden on the piece of paper given .In order to get an idea of how to do it they watch presentations on the computer of the
- 19. classroom of how professional garden architects work and what symbols they use in order to show their designs to their clients. http://www.greenart.gr/meleth-sxediash They follow these sketches and create their own unique ones. The result of their effort is magnificent !!! Materials notebooks, meter, rulers, coloured pencils, pieces of big size paper Reference https://www.youtube.com/watch?v=slzAm1tTV5A https://www.youtube.com/watch?v=d_6XOBpoDz4 https://www.youtube.com/watch?v=xCdxURXMdFY
- 21. ‘STAY 3E –Stay Eco-friendly, Entrepreneurial, European. Providing practical solutions for effective teaching and enjoyable learning at primary level´ LESSON PLAN Lesson plan no 8 Country Italy Course / subject ‘ “How to set up a school garden?” Topic Maths in the garden Lesson title Perimeter and area Level /Age 11 years old Lesson duration 2 hours Lesson objectives Use common units of measure. Measure the perimeter of the school garden. Measure the area of the school garden. Procedure Pupils decide how they will measure the garden (wheel or tape, a piece of rope). Measure a part of the school garden. Once measurements have been recorded ask pupils to transfer this data onto cm squared paper. Decide on a scale (10cm:1cm ) and demonstrate scaling measurements to squared paper. Work in groups and share out the measuring, then collect the results. Pupils have to calculate the perimeter and the area of the school garden Pupils compare results
- 22. Materials Wheel or tape A piece of rope Squared paper Reference https://www.worksheetworks.com/math/geometry/measuring-figures/perimeter-area.html
- 24. STAY 3E –Stay Eco-friendly, Entrepreneurial, European. Providing practical solutions for effective teaching and enjoyable learning at primary level´ LESSON PLAN Lesson objectives The use of field and cuboid volume calculation in a practical situation Practising written calculations with decimals and natural numbers Developing work skills using the project method Developing group work skills Procedure Welcoming and writing the topic of the lesson Giving the job cards with a task which should be done To deal the measuring tapes out Dividing the class into groups of 3-4 pupils Going out into a school garden and sharing the flower boxes between the groups Students measure the boxes and make calculations on the work cards Going back to the classrooms and finishing all works Presenting results by each group Summing up the lesson, collecting information from the students Materials Work card, measuring tape WORK CARD: Ex.1 You have to measure the external dimensions of the box. All dimensions use to answer these questions: a) How much soil do you have to buy to fill in all your box? b) How much will you pay for soil if it is sells in bags with a capacity of 50 l. and one bag costs 6,50 zloty. Lesson plan no 9 Country Poland Course / subject “How to set up a school garden?” Topic Cuboid volume calculations used in a practical task. Lesson title How much soil do you need to fill the flower boxes in a school garden? Level /Age 6 class/12years Lesson duration 1h in the school garden
- 26. ‘STAY 3E –Stay Eco-friendly, Entrepreneurial, European. Providingpracticalsolutionsforeffectiveteachingand enjoyablelearning at primarylevel´ LESSON PLAN Lesson plan no 10 Country Romania Course / subject “How to set up a school garden?” - Topic Maths in practice, measuring, calculating Lesson title Quadrilaterals Areas Level /Age Level 2 (A2 and above) Lesson duration 90 minutes Lesson objectives Upon completion of this lesson, students will: • have been introduced to quadrilaterals and their properties. • have learned the terminology used with quadrilaterals. • have practiced creating particular quadrilaterals based on specific characteristics of the quadrilaterals. Procedure Standards -Geometry Analyze characteristics and properties of two- and three-dimensional geometric shapes anddevelopmathematicalargumentsaboutgeometricrelationships Describe, classify, and understand relationships among types of two- and three- dimensional objects using their defining properties Understand relationships among the angles, side lengths, perimeters, areas, and volumes of similar objects Create and critique inductive and deductive arguments concerning geometric ideas and relationships,suchascongruence, similarity,andthePythagoreanrelationship Usevisualization,spatialreasoning,andgeometricmodellingtosolveproblems
- 27. drawgeometricobjectswithspecifiedproperties,suchassidelengthsorangle measures AREA OF THE PARALLELOGRAM Theareaofaparallelogramisequaltotheproductofthelengthofasidebandits correspondingheighth. A =b∙h Application: Determine the yard area of a householder which has the shape of a parallelogram with a side length of 40 m and 22 m corresponding to her. AREA OF THE RECTANGLE Areaof arectangleisequal to theproductof length Land width, l. A =L∙l Application: Onland parallelogram shaped ourhouseholder who builds ahousefootprint is a rectanglewithalengthof12mandwidthof9.5m.Thelandareawilloccupythe house.
- 28. RHOMBOID AREA The area of a rhombus is equal to half the product of its diagonal lengths d1 and d2. Application: Ourmaninfrontofthehousearrangedaflowerbedasarhombuswithdiagonalsof4 m and 2 m. What is its area? SQUARE AREA The area of a square is the square of the length of its side , l. A = l 2
- 29. Materials Slide-show Paper Pencils, rulers Laptop, projector Reference https://www.education.com/lesson-plans/ https://www.teacher.org/lesson-plans/ Maths Teacher – Virginia Arghiropol Class 7 A Application: every 5 kg of tomatoes, which is the total harvest obtained? TRAPEZIUM AREA The area of a trapezoid is equal to half the product of the combined length of itsbases B, b and height h length of the trapezium. Application: basedthan7mandh=22m.Howmanykilosofgrassareneededtosowthisareaif 100 g seed sufficient for one square meter soil? How many boxes will buy 2 kg householder will payand howthe seeds if 1 kg costs 5 euro?