The controller ZRC-90 Remotec scenes can execute scenes in your Z-Wave network. When one of the ZRC-90 buttons is pressed, your central controller or box Z-Wave home automation will receive a signal that it can use to trigger scripts.
This smart color button device is a multifunction switch that can control appliances and dimmers. It has a magnetic back and wall bracket for mounting. It can switch devices on/off, adjust dimming levels, and operate as a timer. The device uses Z-Wave to connect to other devices and supports features like auto-reporting, association groups, and configuration settings.
The document provides technical specifications for a Z-Wave Panic Button, including its normal operating voltage, wireless range, basic operations, how it operates within a Z-Wave network after inclusion, technical details, supported command classes, and configuration parameters. It can be used to trigger rules, lifestyles, or directly send alarm messages to associated Z-Wave devices when its big red button is pressed.
The document provides instructions for setting up and using a Z-Wave wall controller device. It can be used to control other Z-Wave devices or activate scenes. Pushing all four buttons for five seconds puts the device in management mode for configuration. The device supports secure communication and runs on a single CR2032 battery. It has different operating modes for direct control or scene activation of associated Z-Wave devices.
Qubino flush dimmer 0 10-v plus user manual_v1.0_engDomotica daVinci
The document describes the Qubino Flush Dimmer 0-10V, a Z-Wave compatible dimmer module with a 0-10V output and multi-function input. It can be controlled via push button, potentiometer, or 0-10V signal. The module includes to a Z-Wave network and supports association groups to control other devices. It has configuration parameters to set functions like input type, auto on/off times, minimum/maximum dimming levels, and sensor reporting thresholds.
Micromodule Mural On/Off Z-Wave Plus AN179 Smart Home Europe manual englishDomotica daVinci
The document describes an In-Wall On/Off Z-Wave module that can control lighting and appliances. It has two dry contacts that provide wiring flexibility and overheating protection. It supports loads up to 11A and can be included in a Z-Wave network to allow remote control. The module has a link button for inclusion, exclusion and reset, and supports auto-inclusion on first power-up without a node ID.
The document provides an operating manual for a Scene Controller device that can:
1. Control Z-Wave devices like smart plugs and dimmers through a Z-Wave gateway and activate scenes with four buttons.
2. Be included in a Z-Wave network to remotely control devices anywhere and supports low battery and communication failure alarms.
3. Be reset by holding the Z-button for 20 seconds to clear network information and reset to factory defaults.
This device is a portable Z-Wave wall controller that can control other Z-Wave devices and act as a primary or secondary controller in a Z-Wave network. It includes devices by pressing the Include button for 2 seconds and issues node information frames with triple clicks of the Up/Down buttons. The controller runs on 2 AAA batteries and can be mounted on flat surfaces.
Wall dimmer with dual paddle and frame tkb manualDomotica daVinci
1. The document provides installation and operation instructions for the TZ65D radio frequency controlled dimmer module. It is a 6A, 230VAC wall mounted 3-way dimmer switch that is part of a Z-Wave enabled lighting control system.
2. The dimmer module can control other Z-Wave devices by associating them into groups that can then be turned on, off, or dimmed using the switches. It also acts as a wireless repeater to extend the range of the Z-Wave network.
3. The document describes how to install, include in the Z-Wave network, operate, and configure the dimmer module as well as its specifications and interoperability with other Z
This in-wall remote module is a Z-Wave transceiver that can be installed in a wall box. It allows connection of traditional wall switches or sensors to create a wireless Z-Wave network. The module has a link button and LED for inclusion, exclusion, reset, and association with other Z-Wave devices. It supports basic functions like on/off switching through the Z-Wave protocol.
The WWA-02 is a wireless water and temperature alarm that detects leaks and temperature changes. It sends alerts via the Z-Wave network to associated devices. It uses a lithium battery that is estimated to last 1-2 years. The unit can be included and excluded from the Z-Wave network using the rear button. It detects water leaks, high temperatures over 70°C, and low temperatures below -10°C.
This document summarizes the features and functionality of an in-wall dual relay switch module. The module contains two relays that can be used to control AC power to loads like lights. It supports inclusion and exclusion from Z-Wave networks as well as basic on/off control. The module can also monitor power usage of connected loads and report this data to the Z-Wave controller. It supports association groups to send reports to other devices and responds to metering commands to provide power readings.
The Scene Controller is a Z-Wave device that can activate up to 14 scenes with 7 buttons. It operates using 2 AAA batteries, has a wireless range of up to 30 meters, and sends notifications to associated devices when buttons are pressed to trigger scenes. Scenes 1-7 are activated by single presses while scenes 8-14 are activated by double presses within 0.2 seconds.
This document provides instructions and specifications for a Z-Wave wall dimmer switch compatible with the Busch-Jaeger Duro 2000 design. It can dim lights up to 300W and is controlled via buttons or Z-Wave commands. Installation involves mounting the insert plate into a standard wall box and connecting live and load wires. The device can join a Z-Wave network via inclusion triggered by a button click.
The document provides instructions for setting up and using an Aeotec by Aeon Labs Key Fob Z-Wave remote control. The Key Fob has four buttons and can be used to control Z-Wave devices in either Setup Mode or Use Mode. In Setup Mode, the Key Fob can add or remove devices from a Z-Wave network, while in Use Mode it functions as a remote control. The instructions outline how to power on the Key Fob, change between modes, add it to an existing Z-Wave network or set it up as the primary controller, and program the buttons to control scenes of connected devices.
This document provides information about the Qubino Flush 1D relay Z-Wave module. The module is used for switching electrical devices on or off and can be controlled via Z-wave network or a wall switch. It is designed to fit inside a flush mounting box and can support connection of a digital temperature sensor. The module also functions as a Z-Wave repeater to improve network range and stability. Installation and configuration details are included along with technical specifications.
This document provides instructions for installing and configuring a PAN06-1/-2/-3 In Wall Dual relay switch module. It can be included in a Z-Wave network and used to control loads by switching relays on and off. The module has an LED indicator and button for inclusion, exclusion, reset, and association. It supports association groups to send switch reports and overload alarms to other devices. Configuration parameters allow controlling both relays together or individually.
The document provides information about a Z-Wave glass surface 4 channel touch panel switch, including:
1. It can switch 4 separate loads up to 1100W and includes or excludes from the Z-Wave network by pressing any key for 3 seconds.
2. As a Z-Wave device, it can control or be controlled by other Z-Wave devices and supports association groups to send commands to associated devices.
3. It has 4 groups to switch associated devices and 1 group to report state changes to the controller.
The document provides instructions for installing and operating the TZ66-D ON/OFF MODULE, a radio frequency controlled, 6A, 230 VAC, European wall mounted 3-way switch. It can be used to control lights and other Z-Wave enabled devices. The switch has two sides that can be used to control up to 5 associated Z-Wave devices each in 4 groups through tapping or holding the switch. The document outlines wiring, inclusion, exclusion, basic and advanced operation including association, configuration, and LED indicators.
The document provides instructions for setting up and using the Aeotec by Aeon Labs Smart Dimmer 6 Z-Wave dimmer module. It can be used to control lighting and report energy usage. The summary is:
The Aeotec Smart Dimmer 6 is a Z-Wave dimmer module that allows controlling and monitoring of lights and energy usage. It includes an RGB LED for status. To add it to a Z-Wave network, press the Action Button while in inclusion mode on the Z-Stick or Minimote controller. The Smart Dimmer can be configured using home control software and has modes for the RGB LED.
This document provides information about a wall switch that is part of the Z-Wave wireless network standard. It can switch loads up to 2300W and includes instructions on installation, inclusion in a Z-Wave network, operation, and technical specifications. The switch uses a dual color LED to indicate status and can be operated locally using buttons or remotely using Z-Wave commands. It has one association group to control other devices and supports features like child protection mode.
The document provides instructions for setting up and using the Aeotec by Aeon Labs Smart Switch 6 Z-Wave plug-in module. It can be added to a Z-Wave network using a Z-Stick or Minimote controller by pressing the Action Button while in inclusion mode. It has an RGB LED that indicates output level in Energy mode or can be configured for other uses. Advanced functions and settings like security mode, LED brightness and reset are also described.
1. The document provides instructions and specifications for the Vision wireless deadbolt door lock (ZM 1701).
2. It describes how to include and exclude the lock from a Z-Wave network and associate it with other devices.
3. The lock supports various Z-Wave commands and reports lock/unlock status. It allows setup of master and user codes to control door access.
This document provides information about a Z-Wave DIN dimmer module used for dimming lights and fans. The module can be controlled through a Z-Wave network or wall switch. It measures power consumption and supports connecting a temperature sensor. The module is small, designed to mount on a DIN rail, and can act as a repeater to improve the Z-Wave network range. Technical specifications, diagrams, instructions and configuration parameters are provided.
This document provides instructions for a Z-Wave window blind actuator. The actuator can be included in a Z-Wave network by triple clicking a button and will indicate inclusion with a green LED blink. It controls 230V motors for blinds and calibration is required by moving the blind to upper and lower positions. The actuator has basic on/off association for controlling other nodes.
This document provides information about the Qubino Flush 1 relay Z-Wave module. The module can be used to switch electrical devices on or off through the Z-Wave network or a wall switch. It supports connection to a digital temperature sensor and can act as a repeater to improve the Z-Wave network range. The module measures power consumption and supports mono-stable and bi-stable switches. It provides information on inclusion into a Z-Wave network and configuration parameters for functions like power reporting and input settings.
In-wall dimmer module Z-Wave Plus Smart Home Europe manual englishDomotica daVinci
The document summarizes an in-wall dimmer module that is Z-Wave enabled and can control lighting and appliance loads. It describes how to include the module in a Z-Wave network, configure its settings, and troubleshoot issues. The module supports dimming light bulbs and controlling loads between 6W-300W. It transmits wirelessly within a 30 meter range and has overload protection.
4 in 1 multi sensor Philio PSM02 (motion, door/window, temperature, lightness)Domotica daVinci
The slim multi-sensor PSM02 has 4 sensors (PIR, door/window, temperature, and illumination) and uses Z-Wave wireless technology. It can be included in a Z-Wave home automation network to remotely control devices. When motion, door, temperature, or light changes are detected, it will report to the network. It has different operating modes (test, home automation, security) and can be configured via the Z-Wave controller.
The document provides instructions for setting up and using the Aeotec WallMote Quad, a Z-Wave remote controller with 4 touch buttons that can control Z-Wave devices. It has an RGB LED, touch beep, vibration, and is mounted on a wall. The instructions cover installing it, adding it to a Z-Wave network, configuring the buttons, charging the rechargeable battery, resetting it, and more. It can send on/off, dimmer, and scene control commands to associated Z-Wave devices on different channels.
FIBARO KeyFob is a fully compatible Z-Wave PLUS remote control device with 6 buttons. It can control other Z-Wave devices and activate scenes. The manual provides instructions on adding the device to a Z-Wave network, operating and configuring its buttons, checking battery level, and setting an optional lock mode with an unlock sequence. Advanced parameters allow customizing sequences and associations to other Z-Wave devices.
Zipatile is an all-in-one home control system that can replace multiple devices such as a security system, thermostat, elderly care system, home automation system, and intercom. It features a touch screen, sensors, video camera, speakers and microphones. The system is powered by an Android operating system and allows remote control through a smartphone app for security monitoring, video monitoring, thermostat control and more. Zipatile integrates a variety of protocols to connect devices from Philips Hue, Sonos, Nest and more for smart home control and automation.
This document provides instructions and specifications for a Z-Wave wall dimmer set. It can dim lights up to 300W and includes wirelessly through triple clicking a button. It describes installation which involves mounting the insert and frame, and wiring the line and load. The dimmer operates locally by the paddle or remotely via Z-Wave commands, and can control other devices through associations.
The document provides an operating manual for the FIBARO Swipe gesture control device, which allows contactless control of Z-Wave devices through gestures without touching the device, detailing its features, gestures and menu options, power modes, adding and removing from networks, and creating custom sequences of gestures. The FIBARO Swipe is a battery-powered gesture control device that can detect gestures like swipes and circles to control connected Z-Wave devices without being touched.
The document provides instructions for setting up and configuring the FIBARO Swipe device. It outlines the 8 steps to physically assemble the device, including detaching the frame, inserting batteries, and replacing the photo. It then details the process for adding the device to the Home Center controller via learning mode. Finally, it explains how to configure gestures and sequences using the Home Center interface to control other connected devices.
This document provides instructions for setting up and using the Popp HUB home automation controller. The Popp HUB is a Z-Wave Plus smart home controller that can connect and control various Z-Wave devices within a home automation network. It has a web-based user interface that allows monitoring and controlling connected devices from any browser or mobile app. The three main steps to set up the Popp HUB are to connect it to the local network, access the web UI to register the device, and begin adding Z-Wave devices which will appear as controllable elements within the interface. The interface provides options to organize devices into rooms, create scenes and automations using apps, and monitor activity through an event log.
Door lock without handle vision operational manualDomotica daVinci
This document contains information about a wireless electronic deadbolt door lock, including:
1) Specifications of the lock such as operating temperature range, frequency range, battery requirements, and included items.
2) Instructions on setting up the lock with a Z-Wave network controller and adding or removing the lock from the network.
3) Directions for operating the lock including entering codes to lock/unlock and supported code lengths and quantities.
This document provides instructions for setting up and using a Popp HUB home automation controller. The Popp HUB is a Z-Wave gateway that can control smart home devices and define scenes. Setup involves connecting the HUB to a local network, accessing the web interface, and registering the device. The HUB interface allows adding and controlling Z-Wave devices, creating rooms and dashboard widgets. Additional functionality is provided through apps that integrate other technologies and automation logic.
This page shows the
current status of the robot and allows
sending basic commands like Clean,
Dock and Spot.
User’s Remote: This page allows
sending more advanced commands
like:
- Change robot mode (Safe, Passive,
Full)
- Control motors
- Send virtual walls
- Check battery status
- Check firmware version
Driver’s Remote: This page allows
sending low level commands directly
to the robot like:
- Direct motor control
- LED control
- Buzzer control
- Sensors values
- Firmware update
Setup Wi-Fi Configuration: This
page allows configuring the Wi-Fi
parameters to connect RooWifi to
Manual of Flow Stop is a motor operated shut-off controller for automatic flow stop of gas and water pipes. It is equipped with Z-Wave Plus technology. This means it is particularly suitable for use in smart homes. By manufacturer PoPP
Mini Socket Dimmer is designed to control the switching on and off lighting and electrical equipment in your home. It also enables a dimming function that is only compatible with the bulbs. With a voltage of 220 - 240 V, this jack converter can support a
This USB stick connects computers to a wireless Z-Wave network and allows them to manage and use Z-Wave devices. It implements a virtual serial interface for a Z-Wave application and works with certified Z-Wave devices regardless of vendor or date. Linux and Mac OSX have built-in drivers for it, while Windows may require an additional driver available online. It uses 865-870 MHz frequencies to communicate wirelessly up to 100 meters in open fields or over 40 meters in rooms.
1. The document provides instructions for choosing a mounting location and installing a motion detector that is part of a Z-Wave enabled wireless network. It should be mounted 2 meters high in a corner to detect movement within 6-12 meters, avoiding direct sunlight or heat sources.
2. The motion detector is added to the Z-Wave network by putting the wireless controller into inclusion mode and pressing the tamper switch on the detector. It detects movement through changes in infrared radiation and triggers connected devices when motion is detected.
3. It has a time-off knob to set how long connected devices stay on after detection from 5 seconds to 12 minutes. Pressing the tamper switch for over 5 seconds triggers an
The document is a user manual for the MCOHome Touch Panel Switch, a Z-Wave compatible wall switch. It provides specifications for the switch, instructions for installation and inclusion in a Z-Wave network, and operation details. The switch supports basic command class and association command class to control associated devices synchronously. It has a 1-year limited warranty against defects but not against improper installation or use.
This document provides instructions for installing and operating a solar-powered outdoor siren that communicates using Z-Wave technology. The siren receives power from a solar panel and internal battery, and can be controlled wirelessly. It includes an alarm with flashing light and reports temperature. The document outlines how to include the device in a Z-Wave network and configure its behavior and sensor reporting settings.
The document provides operating instructions for a universal roller shutter that can be controlled via Z-Wave network or external switch. It describes the device's electrical connections, installation process, inclusion into a Z-Wave network, associations with other devices, and configuration via parameters to customize its control behavior. Resetting the device to factory settings can be done by removing it from the network, pressing the external switch buttons in a specific pattern, or changing a parameter.
This document provides instructions for installing and using the GR-105 Auto Valve. The valve uses Z-wave technology to remotely control gas flow. It can be installed on main ball valves for gas ductwork by attaching brackets and connecting the manipulator shaft to the valve handle. For bottled gas, the manipulator installs between the original angle valve and pressure reducing valve. If a gas alarm fails, the clutch can be pulled down to manually turn the handle until it reaches the dead point.
The document provides instructions for the ZXT-120 Z-Wave to AC IR Extender. It can be used to control IR-controlled air conditioners using Z-Wave commands from a controller. It has a built-in IR code library and temperature sensor. The document discusses including the ZXT-120 in a Z-Wave network, configuring its IR codes and operating modes, learning new IR codes, and resetting it to factory defaults. Safety precautions are provided for mounting the ZXT-120 to a wall.
Z wave.me double controller set for duro 200 manualDomotica daVinci
The document provides information about the Wall Controller WALLC device, including:
1. The device can operate in normal control mode or management mode, which is entered by pushing all four buttons for 5 seconds. In management mode, each button performs a different function like inclusion, exclusion, sending information, or association.
2. As a Z-Wave device, it can control other devices and activate scenes. It requires inclusion in a Z-Wave network controlled by a primary controller.
3. The device has multiple operation modes for controlling groups of devices with on/off buttons or scenes in gateways. It can be installed on walls and uses a CR battery that is replaced by pushing a nipple.
The Wall Controller is a Z-Wave device that can control other devices and activate scenes. It has 4 buttons that can control associated devices or scenes in different modes selected by configuration parameters. Pushing all 4 buttons for 5 seconds puts it in management mode where the buttons have special functions like inclusion, exclusion, sending node information, and setting associations. It operates on a CR2032 battery and can be mounted on a wall.
1) This document provides instructions for setting up and using a Hank motion sensor that uses Z-Wave technology for wireless communication.
2) It describes how to include the sensor in a Z-Wave network by putting the controller in add mode and pressing the sensor's Z-button, and explains the sensor's motion detection range and parameters that can be configured like sensitivity.
3) The technical specifications are also summarized, including the sensor's dimensions, battery type, supported command classes, and certifications.
The document provides an operating manual for a Scene Controller device that can control Z-Wave devices and activate scenes wirelessly through a Z-Wave gateway. The Scene Controller uses a rechargeable battery, supports inclusion and exclusion from Z-Wave networks, and can control other devices through association groups activated by button presses of different lengths. It also describes resetting, low battery alerts, firmware updates, and testing network range functionality.
The document describes an AD147 Z-Wave Dimmer Plug that can be included in a Z-Wave network to remotely control connected loads of 6W-250W. It supports inclusion, exclusion, and reset via a link key, and auto-inclusion for 4 minutes when no node ID is stored. The dimmer plug supports on/off and dimming control of lights, remembers the last settings, and supports 2 association groups for commands.
This document provides information about the Hank Flood Sensor device, including how to include it in a Z-Wave network, its configuration parameters, technical specifications, and explanations of Z-Wave terminology. The sensor can detect leaks and floods and sends alerts. It uses the international Z-Wave protocol for wireless communication between smart home devices.
This document provides information about the Danfoss Hydronic Controller 10, a Z-Wave device for controlling hot water underfloor heating systems. It can control up to 10 outputs and includes functions like pump control, heating/cooling, and individual room temperature control. The document explains how to include the controller in a Z-Wave network and configure its settings, and provides the device's technical specifications.
The document provides an installation guide for the ZXT-600 AC Master device. It includes instructions on powering on the device, including it in a Z-Wave network, setting up automatic status reports and associations, selecting an IR code to control an air conditioner, learning IR codes, and configuration options.
Wall Plug switch with Metering Z-Wave.me ZME_064374 manual englishDomotica daVinci
This device is a Z-Wave actuator plug that can be plugged into a wall outlet to control electric devices plugged into it. It can switch loads up to 3500W and includes features like LED indication of switch status, power consumption reporting, and association with other Z-Wave devices. The device supports standard Z-Wave functions and can be controlled wirelessly or via the local button.
This document provides instructions for a portable Z-Wave wall controller. It can be included in a Z-Wave network to control other devices and act as a primary controller. The controller has buttons for inclusion, exclusion, association and wakeup functions. It runs on two AAAA batteries and can be mounted on walls using screws or adhesive.
This document provides information about the MCO Home Glass Touch Switch GEN5 (1 Button) Z-Wave actuator. It can be used to control electrical loads and integrated into a Z-Wave home automation network to be controlled remotely. The switch has a touch button and LED for local control and supports inclusion in Z-Wave scenes. It also includes details on installation, configuration parameters, technical specifications, and explanations of related Z-Wave terms.
This document provides instructions for a wireless battery-powered Z-Wave siren. The siren warns of alarms with a loud sound and flashing light. It can be configured to use just the siren, just the strobe, or both. The siren operates on 4 AA batteries and joins a Z-Wave network through an inclusion process initiated by a primary controller. It provides alarm indications based on configuration settings for the siren and strobe.
This document provides instructions for installing and operating a Z-Wave repeater device. The repeater extends the range of an existing Z-Wave network by receiving and retransmitting signals. It can increase the range by up to 200 meters when installed high on a wall. The repeater must be included in a Z-Wave network controlled by a primary controller to communicate. A single click of the program switch will confirm inclusion or exclusion from the network.
The document provides information about a Z-Wave glass surface 2 channel touch panel switch, including:
1) It can switch two separate loads up to 1100W and is designed for UK pattress boxes.
2) It uses Z-Wave wireless communication at 868.42MHz to control associated devices or scenes.
3) It must be included in a Z-Wave network by a primary controller to communicate with other devices.
This document provides information about a Z-Wave wall plug switch that can be used to control electric devices plugged into an outlet. It describes what Z-Wave is, the different roles devices can have in a Z-Wave network, and how the switch can be included in or excluded from a network. The switch can control loads up to 3500W, has a button for local control, and indicators for its switching status. It supports various configuration options for behaviors like its LED, automatic shut-off, and response to network commands.
Ph pat02 - zipato flood multisensor 3 in 1 user manual v1.0Domotica daVinci
This document provides a summary of a quick installation guide for a Zipato Flood Multisensor 3 in 1 device. It includes sections on trademarks, notices, electromagnetic compatibility, safety, introduction, mounting, power up procedure, adding to a Z-Wave network, configuration settings, and specifications. The guide provides instructions on installing, setting up, and integrating the flood, temperature, and humidity sensor device into a Z-Wave home automation network.
This document provides instructions for a wireless Z-Wave siren. The siren warns of alarms with a loud sound and flashing light. It can be configured to use sound, light, or both. The siren includes a tamper switch and backup battery, and connects to a Z-Wave network by inclusion initiated by a primary controller. The document describes installing the siren, operating modes, configuration parameters for settings like alarm duration, and technical specifications.
Manual sensor temperature and humidity z-wave plus - philioDomotica daVinci
This document provides instructions for a temperature and humidity sensor that uses Z-Wave technology to communicate wirelessly. It describes how to install batteries, include the device in a Z-Wave network, and configure settings like temperature units and sensor reporting intervals. The device can detect and report changes in temperature and humidity based on configured thresholds.
Mini jack On / Off is designed to control the switching on and off lighting and electrical equipment in your home. With a voltage of 220 - 240 V, this socket can withstand loads up to 1500W (resistance), 800W (incandescent), 200W (motor, fluorescent, LED)
Similar to Scenes controller z wave plus remotec (20)
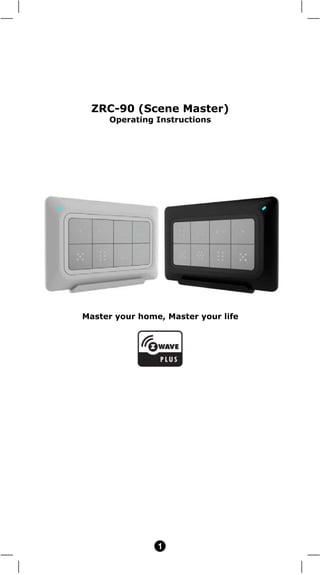
The 2CH Dimmer Module allows manual control of lights through a push switch and app control. It can control up to two lighting circuits and provides options for permanent on/off or dimming control through short or long button pushes. Installation requires turning off power and properly wiring the unit according to diagrams. The module can be reset through a long button press or external button presses and pairs with Zigbee gateways through a learning mode button hold.
Zi-Stick is a self-powered Zigbee 3.0 USB adapter that is used to control actuators and sensors in a Zigbee network. It connects to a computer via USB and appears as a virtual serial or COM port. The user guide provides instructions for installing any necessary drivers, identifying the Zi-Stick's COM port, and connecting it to software like Home Assistant or OpenHAB. Safety information is also included, noting that the Zi-Stick should be used indoors and away from heat or moisture.
This document provides installation and operation instructions for a BRT-100 radiator thermostat in French. It includes:
1. An introduction and welcome message thanking the customer for their purchase.
2. Technical characteristics and features of the thermostat such as LED display, color display, curved design, energy efficient battery that lasts 1 year.
3. Step-by-step instructions for installation including selecting the correct adapter, installing the mounting plate and battery, and connecting the thermostat.
Cherubini Meta Z-Wave Double Switch A510083-84-90Domotica daVinci
Este documento proporciona instrucciones para un actuador con dos salidas independientes de 230V. Incluye especificaciones técnicas, información de seguridad, diagramas de conexión e instrucciones de instalación, control y configuración. El dispositivo permite controlar dos cargas de forma independiente a través de radio o pulsador y puede integrarse en sistemas domóticos Z-Wave.
Este documento proporciona instrucciones para el uso de un enchufe inteligente. Describe las especificaciones técnicas del dispositivo, cómo incluirlo y excluirlo de una red Z-Wave, cómo controlarlo y leer sus parámetros eléctricos, y cómo configurar sus alarmas y asociaciones con otros dispositivos.
Quinto Z-Wave Heltun_HE-RS01_User_Manual_B9AH.pdfDomotica daVinci
The document provides instructions for installing and operating the HE-RS01 five-channel relay switch. Key details include:
- The HE-RS01 can control up to five on/off devices or combinations of on/off and two-direction motor devices.
- It has five configurable relay outputs, two independent inputs, and supports schedules, motor control, and association with other Z-Wave devices.
- Installation requires connecting power, load, and external switch wires per the provided diagrams and safely turning power back on at the circuit breaker.
- The HE-RS01 can be included in a Z-Wave network and each relay and external input is configurable for different control modes.
Z-Wave Fan coil Thermostat Heltun_HE-HT01_User_Manual.pdfDomotica daVinci
The document provides a user manual for the HE-HT01 thermostat. It has 6 operating modes including Comfort, Schedule, Floor Drying, Energy Saving, Vacation, and Manual. It can be installed flush in an electrical junction box and controls heating systems up to 16A. The thermostat integrates Z-Wave technology for smart home control and has touch buttons, LCD display, and sensors for temperature, humidity, and energy usage.
The document provides instructions for an energy-saving radiator thermostat that uses Z-Wave wireless technology. It includes details on installation, setup, operation, and technical specifications. The thermostat can be added to a Z-Wave network to communicate with other devices and be controlled remotely. It offers functions like setting target temperatures, child lock, operating modes, and displaying network information.
The motion sensor user guide provides specifications and setup instructions. It detects motion within 10 meters at a 120 degree angle using Zigbee wireless communication. To set up, download the Smart Life app, register an account, add the Zigbee controller, then search for and add the motion sensor, which can be configured for various alarm settings and linkages within the app.
The document provides a user guide for the Aeotec Range Extender 7, which is a Z-Wave signal amplifier developed to extend the range of a Z-Wave network. It describes how to include the Range Extender in a Z-Wave network using either SmartStart or classic inclusion. It also explains how to control the LED, test connectivity health, remove the device from the network, and manually reset the Range Extender.
The document provides specifications for a Z-Wave multi-sensor device. It includes details on the device's library and command classes, Z-Wave network operation including button functions and LED indicators, association groups and commands, wakeup settings, battery information, sensor readings for temperature, humidity, light and UV, notification types, manufacturer information, and configuration parameters.
Z-Stick 7 is a Z-Wave USB adapter that allows users to control Z-Wave devices and sensors. It uses Series700 and Gen7 technology with SmartStart and S2 security. The guide provides instructions on installing drivers, adding the Z-Stick to home automation software as a primary or secondary controller, using serial API mode, development tools, and resetting the Z-Stick. Compatible software setup guides are also listed.
Optimal protection for critical loads. To limit starting currents on problematic devices, such as energy saving bulbs and fluorescent bulbs. Problematic devices, such as electronic ballasts, energy-saving light bulbs, incandescent bulbs, LED drivers, and switching power supplies, consume a lot of power during ignition due to the multiplication of current. nominal and can therefore destroy the switching relay.
With the ESB200 current limiter, the high current that can occur when switching on electronic devices is limited to a harmless value. It is also possible to limit the inrush current of incandescent lamps to give them a longer life. A protection fuse is also integrated. This starting current limiter can be plugged directly into the power supply circuit for loads up to 200 VA. This compact device can be installed very easily in junction and recessed boxes or in lamp boxes, for example. The device is easily installed in series with the load
wiDom Smart Roller Shutter Z-Wave Plus Module ManualDomotica daVinci
The document provides instructions for installing and operating the WiDom Smart Roller Shutter, a Z-Wave enabled device for controlling roller shutters, blinds, and curtains. It can accurately control opening and closing positions through local or remote commands. After an initial calibration, it identifies the position without sensors. Safety information warns that installation requires qualified electricians and live voltages are present. Installation instructions explain connecting it according to the diagrams and including it in a Z-Wave network. The LED status indicator shows inclusion status and communication events.
Digital Banking in the Cloud: How Citizens Bank Unlocked Their MainframePrecisely
Inconsistent user experience and siloed data, high costs, and changing customer expectations – Citizens Bank was experiencing these challenges while it was attempting to deliver a superior digital banking experience for its clients. Its core banking applications run on the mainframe and Citizens was using legacy utilities to get the critical mainframe data to feed customer-facing channels, like call centers, web, and mobile. Ultimately, this led to higher operating costs (MIPS), delayed response times, and longer time to market.
Ever-changing customer expectations demand more modern digital experiences, and the bank needed to find a solution that could provide real-time data to its customer channels with low latency and operating costs. Join this session to learn how Citizens is leveraging Precisely to replicate mainframe data to its customer channels and deliver on their “modern digital bank” experiences.
A Comprehensive Guide to DeFi Development Services in 2024Intelisync
DeFi represents a paradigm shift in the financial industry. Instead of relying on traditional, centralized institutions like banks, DeFi leverages blockchain technology to create a decentralized network of financial services. This means that financial transactions can occur directly between parties, without intermediaries, using smart contracts on platforms like Ethereum.
In 2024, we are witnessing an explosion of new DeFi projects and protocols, each pushing the boundaries of what’s possible in finance.
In summary, DeFi in 2024 is not just a trend; it’s a revolution that democratizes finance, enhances security and transparency, and fosters continuous innovation. As we proceed through this presentation, we'll explore the various components and services of DeFi in detail, shedding light on how they are transforming the financial landscape.
At Intelisync, we specialize in providing comprehensive DeFi development services tailored to meet the unique needs of our clients. From smart contract development to dApp creation and security audits, we ensure that your DeFi project is built with innovation, security, and scalability in mind. Trust Intelisync to guide you through the intricate landscape of decentralized finance and unlock the full potential of blockchain technology.
Ready to take your DeFi project to the next level? Partner with Intelisync for expert DeFi development services today!
Have you ever been confused by the myriad of choices offered by AWS for hosting a website or an API?
Lambda, Elastic Beanstalk, Lightsail, Amplify, S3 (and more!) can each host websites + APIs. But which one should we choose?
Which one is cheapest? Which one is fastest? Which one will scale to meet our needs?
Join me in this session as we dive into each AWS hosting service to determine which one is best for your scenario and explain why!
5th LF Energy Power Grid Model Meet-up SlidesDanBrown980551
5th Power Grid Model Meet-up
It is with great pleasure that we extend to you an invitation to the 5th Power Grid Model Meet-up, scheduled for 6th June 2024. This event will adopt a hybrid format, allowing participants to join us either through an online Mircosoft Teams session or in person at TU/e located at Den Dolech 2, Eindhoven, Netherlands. The meet-up will be hosted by Eindhoven University of Technology (TU/e), a research university specializing in engineering science & technology.
Power Grid Model
The global energy transition is placing new and unprecedented demands on Distribution System Operators (DSOs). Alongside upgrades to grid capacity, processes such as digitization, capacity optimization, and congestion management are becoming vital for delivering reliable services.
Power Grid Model is an open source project from Linux Foundation Energy and provides a calculation engine that is increasingly essential for DSOs. It offers a standards-based foundation enabling real-time power systems analysis, simulations of electrical power grids, and sophisticated what-if analysis. In addition, it enables in-depth studies and analysis of the electrical power grid’s behavior and performance. This comprehensive model incorporates essential factors such as power generation capacity, electrical losses, voltage levels, power flows, and system stability.
Power Grid Model is currently being applied in a wide variety of use cases, including grid planning, expansion, reliability, and congestion studies. It can also help in analyzing the impact of renewable energy integration, assessing the effects of disturbances or faults, and developing strategies for grid control and optimization.
What to expect
For the upcoming meetup we are organizing, we have an exciting lineup of activities planned:
-Insightful presentations covering two practical applications of the Power Grid Model.
-An update on the latest advancements in Power Grid -Model technology during the first and second quarters of 2024.
-An interactive brainstorming session to discuss and propose new feature requests.
-An opportunity to connect with fellow Power Grid Model enthusiasts and users.
Let's Integrate MuleSoft RPA, COMPOSER, APM with AWS IDP along with Slackshyamraj55
Discover the seamless integration of RPA (Robotic Process Automation), COMPOSER, and APM with AWS IDP enhanced with Slack notifications. Explore how these technologies converge to streamline workflows, optimize performance, and ensure secure access, all while leveraging the power of AWS IDP and real-time communication via Slack notifications.
Freshworks Rethinks NoSQL for Rapid Scaling & Cost-EfficiencyScyllaDB
Freshworks creates AI-boosted business software that helps employees work more efficiently and effectively. Managing data across multiple RDBMS and NoSQL databases was already a challenge at their current scale. To prepare for 10X growth, they knew it was time to rethink their database strategy. Learn how they architected a solution that would simplify scaling while keeping costs under control.
How to Interpret Trends in the Kalyan Rajdhani Mix Chart.pdfChart Kalyan
A Mix Chart displays historical data of numbers in a graphical or tabular form. The Kalyan Rajdhani Mix Chart specifically shows the results of a sequence of numbers over different periods.
Main news related to the CCS TSI 2023 (2023/1695)Jakub Marek
An English 🇬🇧 translation of a presentation to the speech I gave about the main changes brought by CCS TSI 2023 at the biggest Czech conference on Communications and signalling systems on Railways, which was held in Clarion Hotel Olomouc from 7th to 9th November 2023 (konferenceszt.cz). Attended by around 500 participants and 200 on-line followers.
The original Czech 🇨🇿 version of the presentation can be found here: https://www.slideshare.net/slideshow/hlavni-novinky-souvisejici-s-ccs-tsi-2023-2023-1695/269688092 .
The videorecording (in Czech) from the presentation is available here: https://youtu.be/WzjJWm4IyPk?si=SImb06tuXGb30BEH .
Skybuffer SAM4U tool for SAP license adoptionTatiana Kojar
Manage and optimize your license adoption and consumption with SAM4U, an SAP free customer software asset management tool.
SAM4U, an SAP complimentary software asset management tool for customers, delivers a detailed and well-structured overview of license inventory and usage with a user-friendly interface. We offer a hosted, cost-effective, and performance-optimized SAM4U setup in the Skybuffer Cloud environment. You retain ownership of the system and data, while we manage the ABAP 7.58 infrastructure, ensuring fixed Total Cost of Ownership (TCO) and exceptional services through the SAP Fiori interface.
Digital Marketing Trends in 2024 | Guide for Staying AheadWask
https://www.wask.co/ebooks/digital-marketing-trends-in-2024
Feeling lost in the digital marketing whirlwind of 2024? Technology is changing, consumer habits are evolving, and staying ahead of the curve feels like a never-ending pursuit. This e-book is your compass. Dive into actionable insights to handle the complexities of modern marketing. From hyper-personalization to the power of user-generated content, learn how to build long-term relationships with your audience and unlock the secrets to success in the ever-shifting digital landscape.
TrustArc Webinar - 2024 Global Privacy SurveyTrustArc
How does your privacy program stack up against your peers? What challenges are privacy teams tackling and prioritizing in 2024?
In the fifth annual Global Privacy Benchmarks Survey, we asked over 1,800 global privacy professionals and business executives to share their perspectives on the current state of privacy inside and outside of their organizations. This year’s report focused on emerging areas of importance for privacy and compliance professionals, including considerations and implications of Artificial Intelligence (AI) technologies, building brand trust, and different approaches for achieving higher privacy competence scores.
See how organizational priorities and strategic approaches to data security and privacy are evolving around the globe.
This webinar will review:
- The top 10 privacy insights from the fifth annual Global Privacy Benchmarks Survey
- The top challenges for privacy leaders, practitioners, and organizations in 2024
- Key themes to consider in developing and maintaining your privacy program
2. 2
Introduction
The ZRC-90 Scene Master (Figure 1) is a Z-Wave Central Scene
Controller. When one of the buttons on the ZRC-90 is pushed, your Z-
Wave central controller will receive a signal which it can use to trigger
unlimited control possibilities. With 8 buttons, each supporting a long-
press capability, you can control 16 different actions in your central
controller. The ZRC-90 is a great solution for triggering events more
quickly than taking out your smart-phone and running a home control
App. The Scene Master is ideal for kids, elderlies and guests who may
not have full access to your smart home’s mobile application and
hence may not have the rights to switch on various lighting, heating,
air conditioning and other home appliance. With a convenient snap-in
wall mount, the ZRC-90 can also be removed to keep it handy while
you go about your home for the ultimate in simple convenience.
Figure 1 ZRC-90
Gateway Requirements
Please make sure your gateway supports below functions before use
ZRC-90.
Z-Wave Command Class Controlled Supported
Association command class Y N
Association Group Information (AGI)
command class
Y N
Central Scene command class Y Y
3. 3
Key Features
- Controls up to 8x2 pre-set scenes and 8 groups dimming function
- One learn-key setup and simple operation
- Report for key pressed 1 time, 2 times, released and held down
- Unlimited controlling capability through gateway
- Able to act as a primary or secondary controller
- Z-Wave Plus compliant
- Super thin, elegant design and able to mount to the wall-bracket
Glossary
Device or Node
Devices and nodes are all terms to describe
an individual ZWave device. These are all
interchangeable when setting up your Z-
Wave network.
Inclusion Add a Z-Wave device to the network.
Exclusion Remove a Z-Wave device from the network.
Z-Wave
Network
A collection of Z-Wave devices controlled by
primary and secondary controllers operating
on the same system. A Z-Wave network has
its own unique ID code so that controllers
not in the network cannot control the
system.
Scene
A collection of Z-Wave devices configured to
turn to a specific level, setting, mode, or
perform an operation. Scenes are usually
activated by a controller, timed event, or
specific conditions.
Primary
Controller
The first controller used to set up your
devices and network. Only the Primary
Controller can be used to include or remove
modules from a network. It is recommended
that you mark the primary controller for
each network for ease in modifying your
network.
Secondary
Controller
A controller containing network information
about other modules within the network
and is used for controlling devices.
Secondary controller is created from the
Primary Controller and cannot include or
remove modules to the network.
4. 4
SUC ID Server
(SIS)
When a SUC is also configured as a node ID
server (SIS) it enables all other controllers to
include/exclude nodes. The SIS
automatically becomes the Primary
Controller in the network when enabled.
There can only be one SIS in each individual
network. To avoid inconsistency, all node ID
allocations are maintained by the SIS.
Inclusion
Controller
The SIS enables other controllers to
include/exclude nodes to/from the network.
When SIS functionality is enabled the
controller also takes the role as the Primary
Controller because it has both latest
network topology and allocated node IDs. All
the other controllers are called Inclusion
Controllers because they can
include/exclude nodes to/from the network.
5. 5
Product Overview
Figure 2 Setup and control keys of ZRC-90
LED indication for
Operation and Setup
Wall mount bracketScene control keyboard
Setup buttons
Upgrade
header
Upgrade slide
switch
Battery door
Back block for
plastic insert
LED indication
for Operation
and Setup
6. 6
Description of Function Keys
Keys Functions
Scene control buttons
Learn mode (Click once)
Wake up (Click once)
Remove device (Click once)
+
Add device (Press the keys until
LED light up)
+
Create Primary (Press the keys
until LED light up)
+
Create Secondary (Press the
keys until LED light up)
Reset to factory default
(Press and keep holding 10
seconds then triple click)
Slide switch
OP = Normal operation (default)
PC = PC firmware upgrade mode
(The slide switch is designed for
firmware upgrade by supplier,
please switch to "OP" direction
for normal operation.)
7. 7
Setup and Operations
Before using the ZRC-90, please install the batteries:
• 2xAAA (alkaline is recommended) batteries are required for
operation.
• Remove the battery cover on the back of your remote.
• Check the polarity of the batteries and the "+/-" marks inside the
battery compartment.
• Insert the batteries.
• Push the battery cover back in place.
CAUTION (battery safety)
− Use new batteries of the recommended type and size only.
− Never mix used and new batteries together.
− To avoid chemical leaks, remove batteries from the remote
controller if you do not intend to use the remote for an
extended period of time.
− Dispose of used batteries properly; do not burn or bury them.
(Please carefully read through the following sections of this user
manual and store for future reference.)
ZRC-90 can be included and operated in any Z-Wave network with
other Z-Wave certified devices from other manufacturers and/or
other applications. All non-battery operated devices within the
network will act as repeaters regardless of vendor to increase
reliability of the network.
ZRC-90 can act as a secondary Central Scene Controller and trigger
the pre-defined scenes through the gateway. Please follow “Add ZRC-
90 into gateway network” by the procedures of “Learn mode” and
“Scene activation and deactivation”.
Z-Wave Learn mode
ZRC-90 can also receive network information from other controllers
by enter “Learn mode”.
(Add / Remove ZRC-90 into / from gateway network)
Step Setup Key
Setup LED Indication
on ZRC-90
1
Refer to your primary controller
instructions to process the Inclusion
/ Exclusion setup procedure.
-
8. 8
2
When prompted by your primary
controller (gateway), click once on
the “L” button.
(The primary controller should
indicate the action was successful.
If the controller indicates the action
was unsuccessful, please repeat
above procedure.)
LED will flash slowly
until complete the
step of inclusion /
exclusion.
3
User can perform scene control by
the keypad of ZRC-90.
LED flash once then
stay off if the scene
operation is valid
or
LED flashes 6 times
rapidly then stay off if
the command or
operation is invalid
Notes:
1. If the device already existed into the network, the unit will exit
Learn mode automatically after 5 seconds.
2. If the device does not exist into the network and no command
from gateway, the unit will exit Learn mode automatically after
30 seconds.
Scene activation and deactivation
The real actions of scene will be depended on each gateway
interpretation.
ZRC-90 key action Gateway interpretation example
Key pressed 1 time
(within 1 seconds )
Scene activation
Key released -
Key held down
(press and keep
holding more than 2
seconds)
Dimming up/down for a group device
Key pressed 2 times
(within 1 seconds)
Scene deactivation
9. 9
Notes:
1. Association Group-1 will be a default status report channel in Z-
Wave+ lifeline requirement. Only one node can be assigned to
this association group.
Z-Wave Wakeup (Listening mode)
There are multiple usages by entering this mode:
• Version information: To get application software version, the Z-
Wave protocol version and the supported Z-Wave command
version of this controller.
• Manufacturer Specific information: To get the manufacture ID,
product type ID and the product ID of this controller.
• Association configuration: To create and maintain associations to
ZRC-90.
Step Setup Key
Setup LED Indication
on ZRC-90
1
Enter to the Listening mode by click
once on “W” button.
LED will keep flashes
slowly
2
Listening mode will exit
automatically after 30 seconds of
inactivity.
LED stay off
Notes:
1. The mode must not be exited during communication process
with another controller. Please wait for entire communication
process to be completed.
2. It is not allowed to enter any user input from the remote's hard
key after entry this mode.
ZRC-90 act as a primary controller. It can perform Add/Remove
device to/from a network and create a primary/secondary controller.
Please reset ZRC-90 to factory default to act as a primary controller if
need perform Add or Remove function.
Add/Remove Devices
Adding Device to the Network
Step Setup Key
Setup LED Indication
on ZRC-90
1
Press “L+R” buttons simultaneously
until LED light up to add the device
LED will keep flashes
slowly
10. 10
into ZRC-90 Z-Wave network.
2
Press the program button on the
target device.
LED flash once then
stay off if the device
is included into the
network
or
LED flashes 6 times
rapidly then stay off if
the operation is
invalid
Notes:
1. If you can’t add your Z-Wave device, this device might have been
included in another Z-Wave network. In this case, please remove
this device following the steps in the [Removing Device from the
Network] section then add this device again.
2. This step can be skipped if the device is already included in the
network.
3. In a Z-Wave network, only the primary controller or inclusion
controller can add or include devices into its network. If ZRC-90
is configured as a secondary controller, it will report “Error” if
users attempt to use ZRC-90 to add a device into its network.
4. If no ACK signal received for more than 30 seconds, the “Add
Device” mode will exit automatically.
Removing Device from the Network
Step Setup Key
Setup LED Indication
on ZRC-90
1
Click once on the “R” button to
remove the device from ZRC-90 Z-
Wave network.
LED will keep flashes
slowly
2
Press the program button on the
target device.
LED flash once then
stay off if the device
is excluded from the
network
or
LED flashes 6 times
rapidly then stay off if
the operation is
invalid
11. 11
Notes:
1. In a Z-Wave network, only the primary controller or inclusion
controller can remove or exclude devices from its network. If
ZRC-90 is configured as a secondary controller, it will report
“Error” if users attempt to use ZRC-90 to remove a device from
its network.
2. If no ACK signal received for more than 30 seconds, the “Remove
Device” mode will exit automatically.
Create a Primary Controller
(Transferring Only Network Information to a New Primary Controller)
You can just transfer network information to another controller so
that it will act as a new primary controller and ZRC-90 will act as a
secondary controller. This primary shift is done by following the steps
below.
Step Setup Key
Setup LED Indication
on ZRC-90
1
Place the two controllers close to
each other.
-
2
Press “W+L” buttons
simultaneously until LED light up.
LED will keep flashes
slowly
3
Please make sure the target
primary controller is setup to
receive information mode.
(e.g. target primary controller
should entry the “Learn mode” if
this is a another ZRC-90. Please
refer to the target controller user
manual for more information)
=> Target primary controller will act
as a primary controller after this
action.
=> Original ZRC-90 primary
controller will act as a secondary
controller after this action.
LED will flashes
slowly until complete
the step of “Create a
Primary Controller
12. 12
Create a Secondary Controller
(Copying Network Information to a Secondary Controller)
You can add a secondary controller to your network and copy all of
ZRC-90 primary controller’s network information to the secondary
controller by following the steps below.
Step Setup Key
Setup LED Indication
on ZRC-90
1
Place the two controllers close to
each other.
-
2
Press “W+R” buttons
simultaneously until LED light up.
LED will keep flashes
slowly
3
Please make sure the target
secondary controller is setup to
receive information mode.
(e.g. target secondary controller
should entry the “Learn mode” if
this is a another ZRC-90. Please
refer to the target controller user
manual for more information)
=> Target secondary controller will
act as a secondary controller after
this action.
=> Original ZRC-90 primary
controller will still keep in a primary
controller after this action.
LED will flashes
slowly until complete
the step of “Create a
Secondary Controller
Reset to factory default
ZRC-90 will be excluded from network and restored to factory default
setting.
Step Setup Key
Setup LED Indication
on ZRC-90
1
Press and keep holding “R” button
not less than 10 seconds.
LED will light up at
first 5seconds.
LED will turn off after
10seconds.
2
Release “R” button then triple click
on “R” button within 2 seconds.
LED flashes twice
then stay off after
reset process
completed.
13. 13
Battery low indication
The unit will detect battery status after key pressed, the LED will
flashes 3 times rapidly then stay off when battery low is detected.
Meanwhile, it will report battery low status to gateway automatically.
Physical Installation
In case you need to mount the ZRC-90 into the wall bracket, please be
sure to fully read the following precautions and procedures.
MOUNTING LOCATION PRECAUTIONS
• Before mounting, check the material and structure of the
mounting location. If the location does not have the proper
material or structure, the unit can fall and cause injuries.
• Use commercial items that best match the wall structure and
material for the screws and other fixtures.
• Do not mount near a kitchen counter, humidifier, or other
location in which it can be exposed to smoke or steam. Doing so
could cause a fire or electrical shock.
• Do not mount in locations with high humidity or large amounts of
dust. Doing so could cause a fire or electrical shock.
• Do not mount to locations subject to high temperatures, high
humidity, or exposure to water. Doing so could cause a fire or
electrical shock.
• Do not mount to locations subject to large amounts of vibration,
large jolts, or large forces. These could cause an injury if the unit
falls and breaks.
MOUNTING PROCEDURE PRECAUTIONS
• Do not modify parts or use the unit in ways other than its
intended use. Doing so could cause the unit to fall and result in an
injury.
• Be sure to fully check that there are no electrical wires or pipes
inside the wall before mounting.
• If any of the screws are loose, the unit can fall and cause an injury.
Do not mount the unit with the screws still loose.
• Check that the two screws mounted to the wall are fully inserted
into the key holes of the unit. Otherwise, the unit can fall and
cause an injury.
• Do not mount the unit so that it sticks out from the wall edge. It
could get hit by people’s bodies or objects and cause an injury.
• Supplier will not be liable for any accidents or injuries that occur
due to improper mounting or handling.
• When mounting, be careful not to get your fingers pinched or
injure your hands.
14. 14
MOUNTING PROCEDURE
The ZRC-90 can be mounted to a wall or wooden racks using the two
key holes in the wall bracket.
Notes:
1. The RF reception sensitivity and transmit power are varies
depending on the antenna direction.
2. Before mounting to a wall, be sure to fully read the precautions.
Mount to the wall bracket Dismount from wall bracket
Figure 3 Installation
Technical Specifications
Model no.
BW8510US (ZRC-90US)
BW8510EU (ZRC-90EU)
BW8510AU (ZRC-90AU)
BW8510RU (ZRC-90RU)
BW8510IN (ZRC-90IN)
BW8510IL (ZRC-90IL)
BW8510JP (ZRC-90JP)
RF frequency
908.42MHz (ZRC-90US)
868.42MHz (ZRC-90EU)
921.42MHz (ZRC-90AU)
869.02MHz (ZRC-90RU)
15. 15
865.22MHz (ZRC-90IN)
916.02MHz (ZRC-90IL)
922.50MHz (ZRC-90JP)
LED indication Blue
RF operating distance
up to 132ft (40m) outdoor line of sight, in
unobstructed environment
Powered by Dry battery AAA x 2pcs
Temperature
Operation: 0 to 40°C
Storage: -20 to 60°C
Humidity 20 to 85%, non-condensing
Dimension 110mm x 70mm x 13.5mm
Weight
60g (main unit and batteries excluded)
15g (wall mount bracket)
Checking Accessories
After opening the cover of the packing box, check that the following
accessories are included.
• ZRC-90 Scene Master
• Plastic insert
• Wall mount bracket
• Wall anchor x 2pcs
• Screw x 2pcs
• User Manual
• Warranty sheet
• Scene label sheet
Scene Reference List
Scene
Button
Action in
single click
Action in
double click
Remark
1
2
3
4
5
6
7
8
(Please write down the scene action in case you need further reference
in the future.)
16. 16
Wireless Information
This device has an open-air line-of-sight transmission distance of 132
feet (40m) which complies with the Z-Wave standards. Performance
can vary depending on the amount of objects in between Z-Wave
devices such as walls and furniture. Every Z-Wave device set up in
your network will act as a signal repeater allowing devices to talk to
each other and find alternate routes in the case of a reception dead
spot.
Radio frequency limitations:
1. Each wall or object (i.e.: refrigerator, bookshelf, large TV, etc) can
reduce the maximum range of 65 feet (20m) by up to 20 to 30%.
2. Plasterboard and wooden walls block less of the radio signal then
concrete, brick or tile walls which will have more of an effect on
signal strength.
3. Wall mounted Z-Wave devices will also suffer a loss of range if
they are housed in metal junction boxes which could also reduce
the range by up to 20 to 30%.
Maintenance
1. Do not expose your unit to dust, strong sunlight, humidity, high
temperatures or mechanical shocks.
2. Do not use old and new batteries together as old batteries tend to
leak.
3. Do not use corrosive or abrasive cleansers on your unit.
4. Keep the unit dust free by wiping it with a soft, dry cloth.
5. Do not disassemble the unit, it contains no user-serviceable parts.
FCC Notice
This device complies with Part 15 of the FCC rules. Operation is
subject to the following two conditions:
(1) this device may not cause harmful interference, and
(2) this device must accept any interference received, including
interference that may cause undesired operation.
Note: This equipment has been tested and found to comply with the
limits for a Class B digital device, pursuant to Part 15 of the FCC Rules.
These limits are designed to provide reasonable protection against
harmful interference in a residential installation. This equipment
generates, uses and can radiate radio frequency energy and, if not
installed and used in accordance with the instructions, may cause
harmful interference to radio communications. However, there is no
guarantee that interference will not occur in a particular installation. If
this equipment does cause harmful interference to radio or television
reception, which can be determined by turning the equipment off and
on, the user is encouraged to try to correct the interference by one or
more of the following measures:
17. 17
- Reorient or relocate the receiving antenna.
- Increase the separation between the equipment and receiver.
- Connect the equipment into an outlet on a circuit different from
that to which the receiver is connected.
- Consult the dealer or an experienced radio/TV technician for help.
Notice: Changes or modifications to this unit not expressly approved
by the party responsible for compliance could void the user authority
to operate the equipment.
Warnings
- Do not modify the unit in any way.
- Risk of fire.
- Risk of electrical shock.
- Risk of burns.
- Do not dispose of electrical appliances and unsorted municipal
waste, use separate collection facilities. Contact your local
government for information regarding the collection systems
available.
- There is no user serviceable parts in this unit.
- Use only power supplies listed in the user instructions.
Caution
- Risk of explosion if battery is replaced by an incorrect type.
- Dispose of used batteries according to the instructions.
F820-8510-0000Printed in China