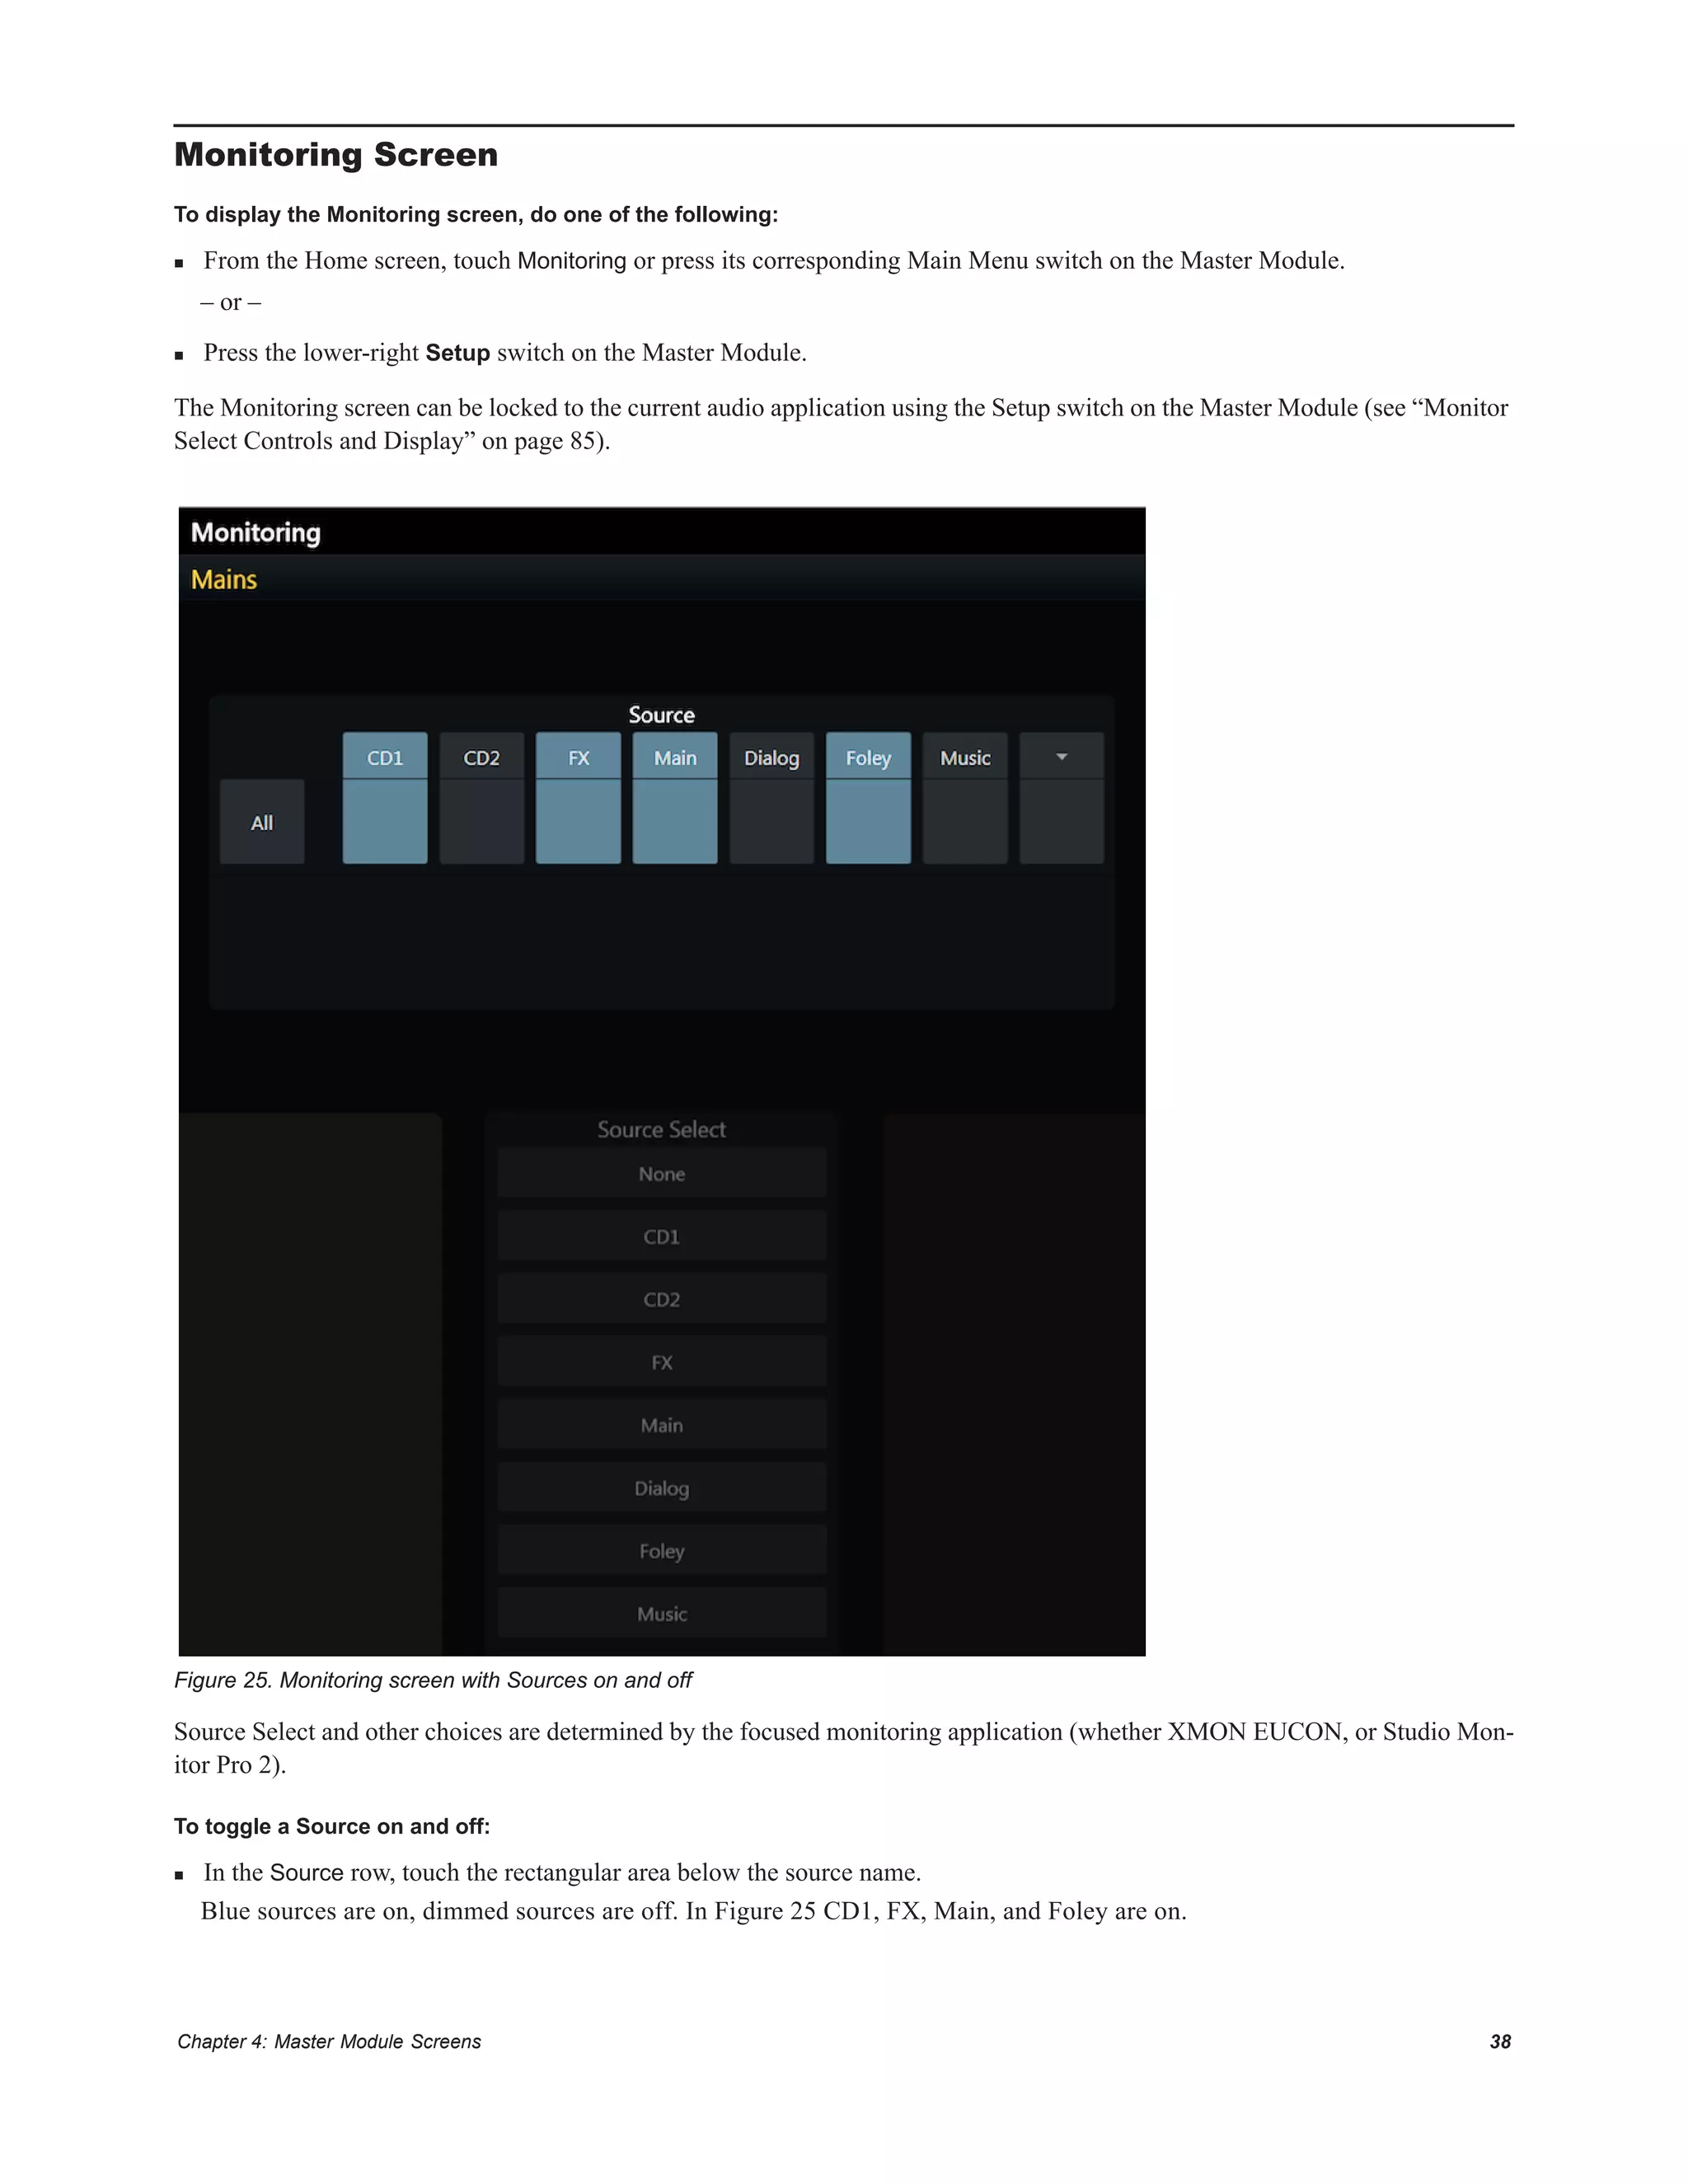
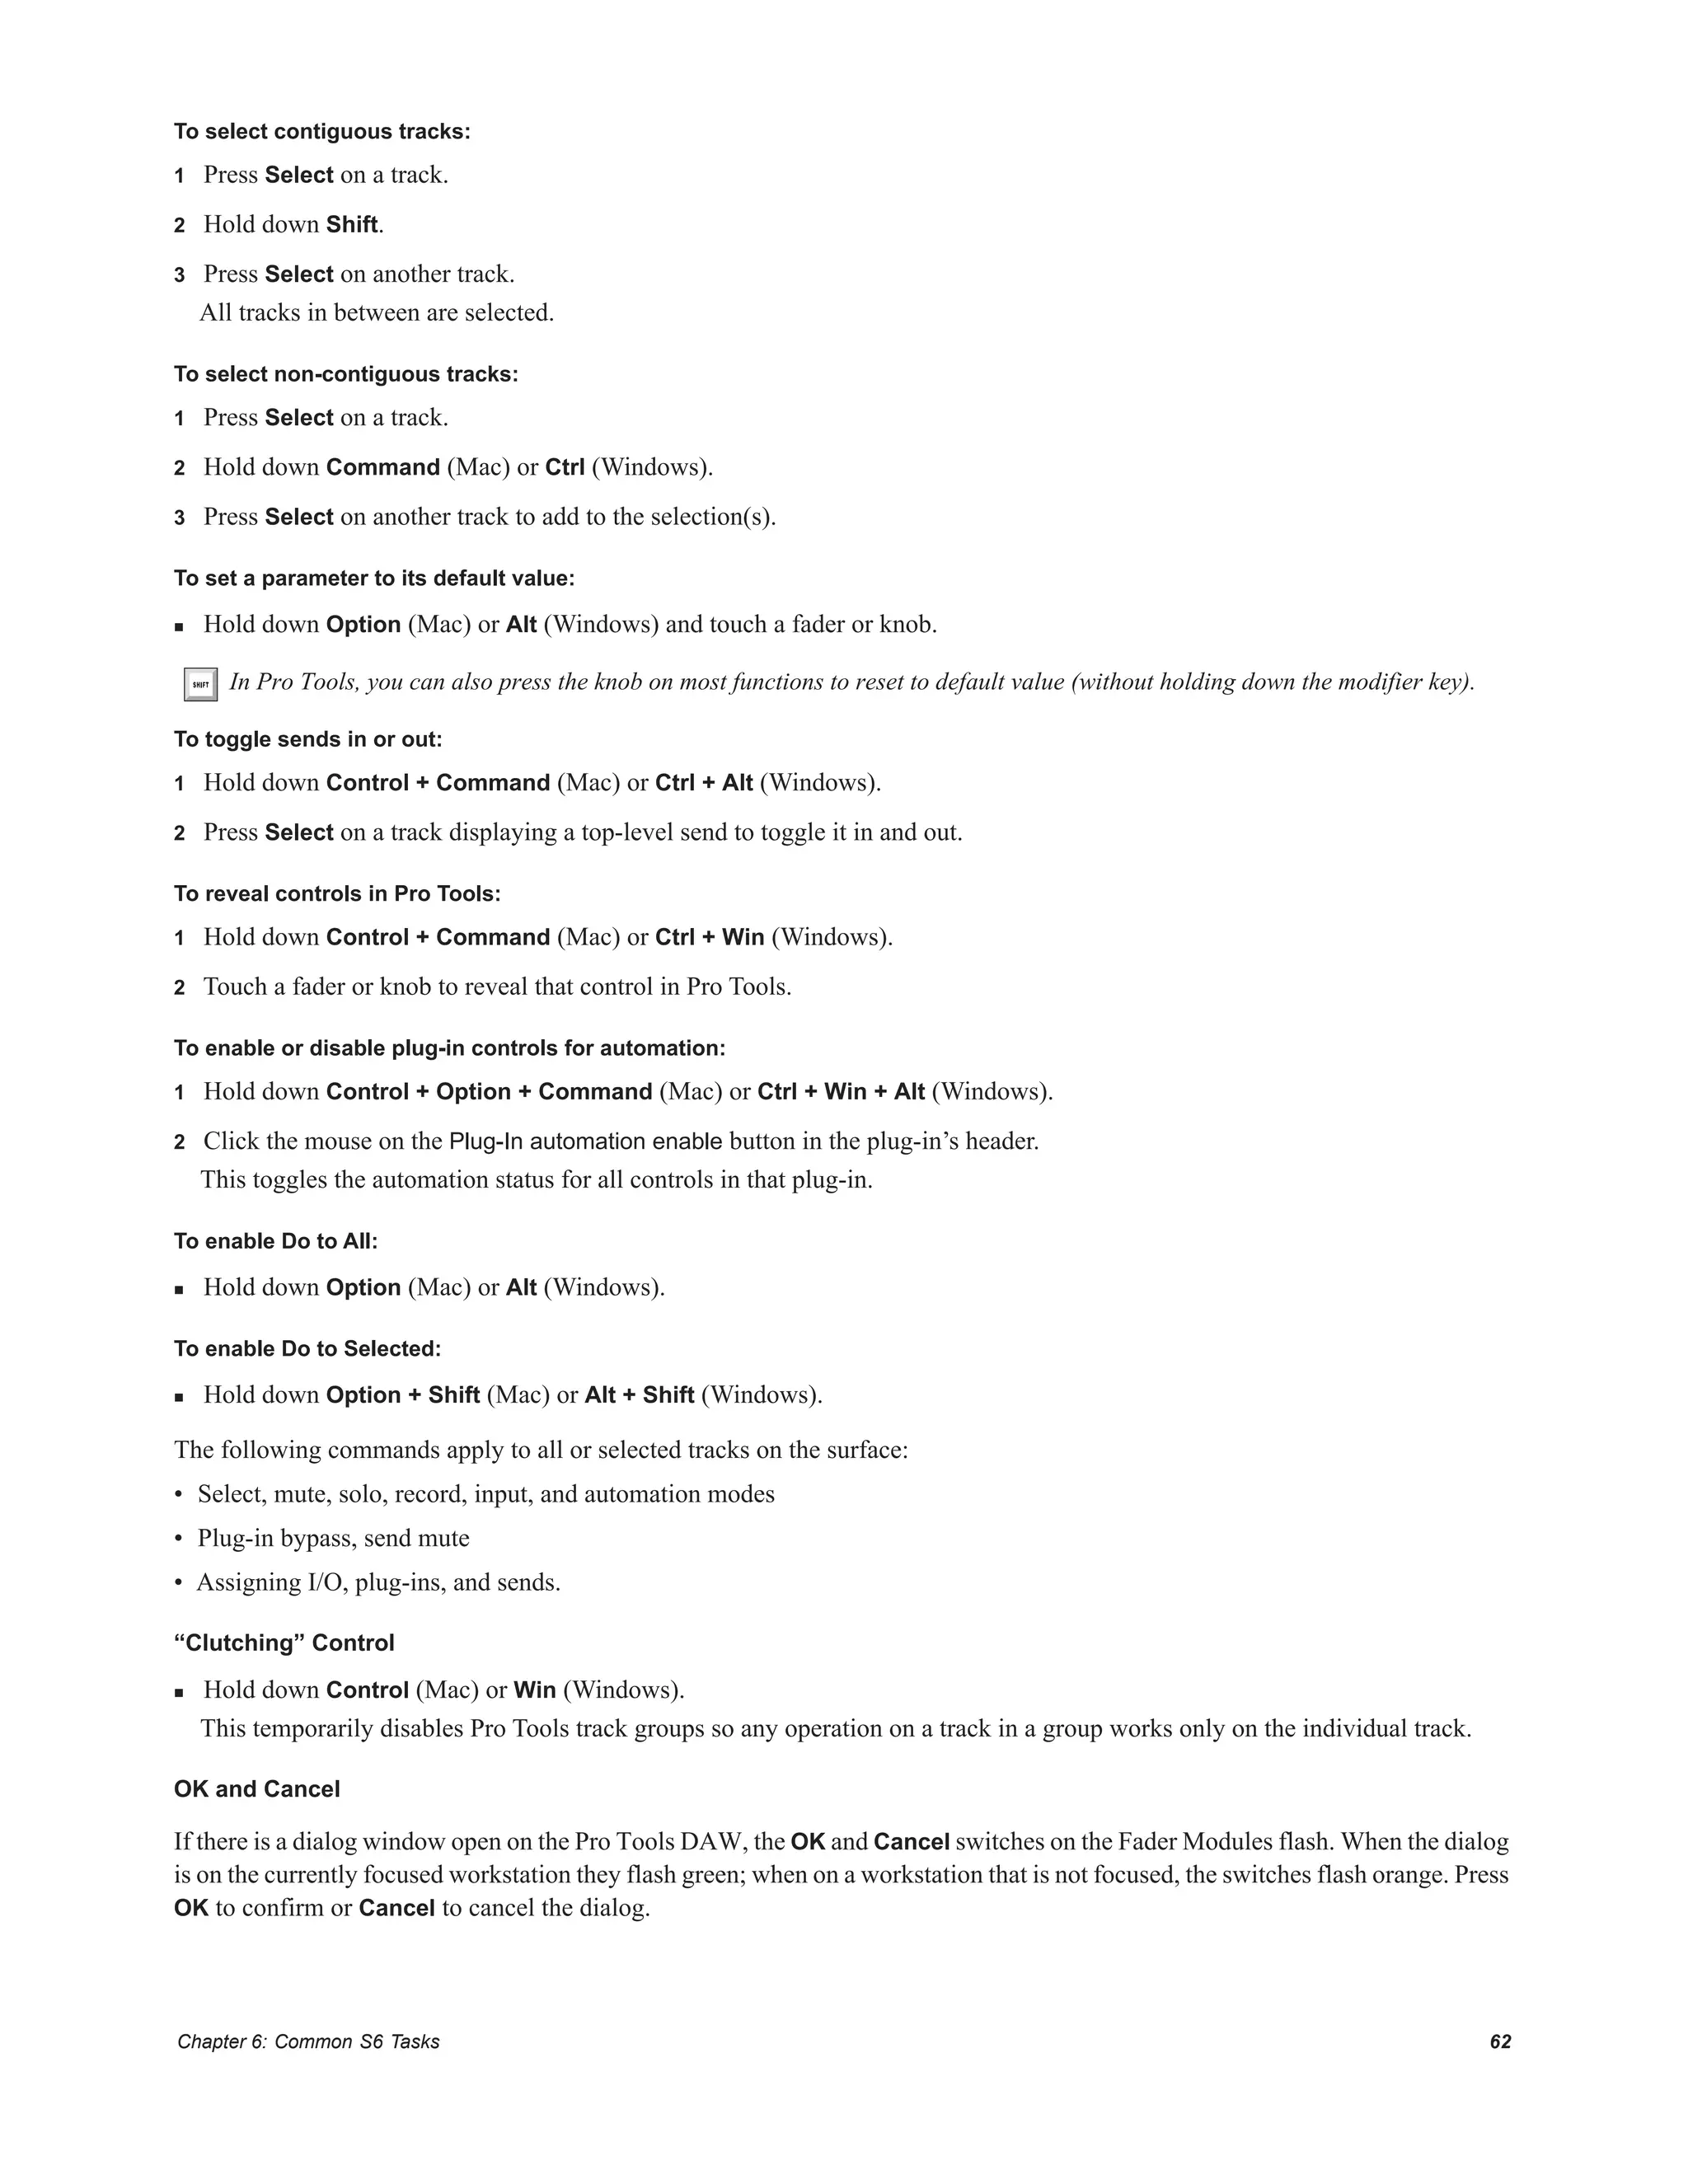
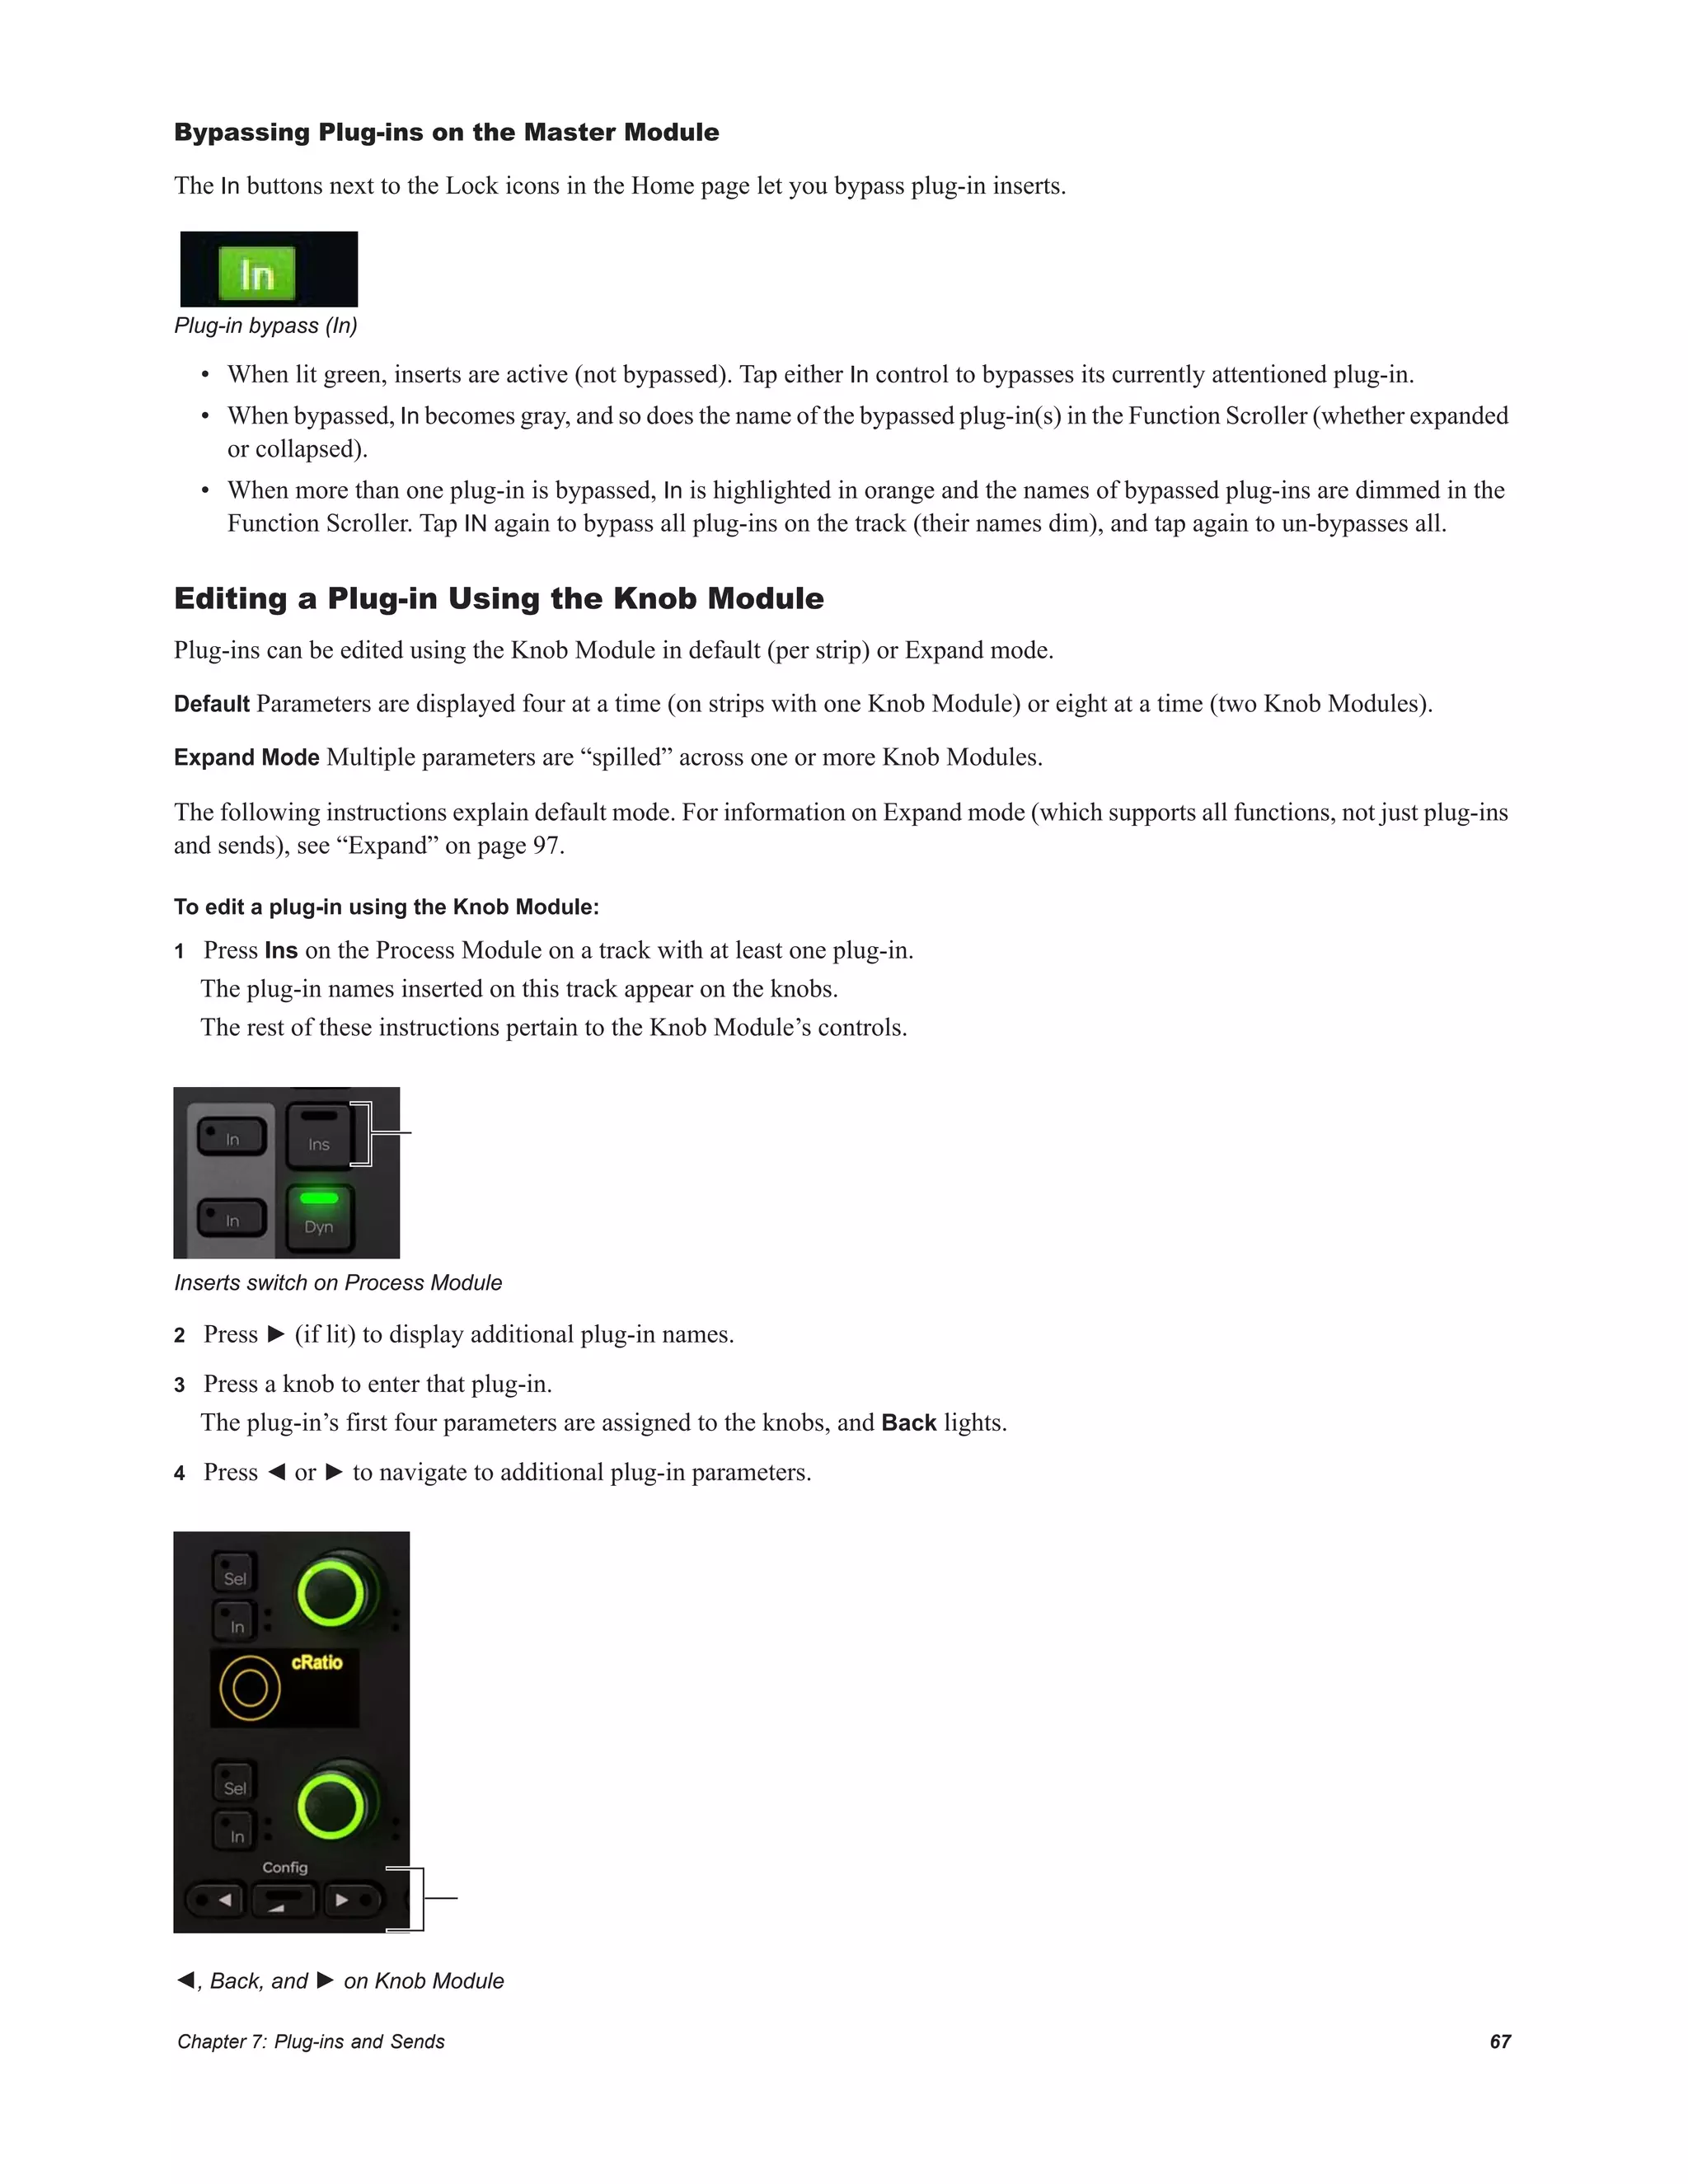
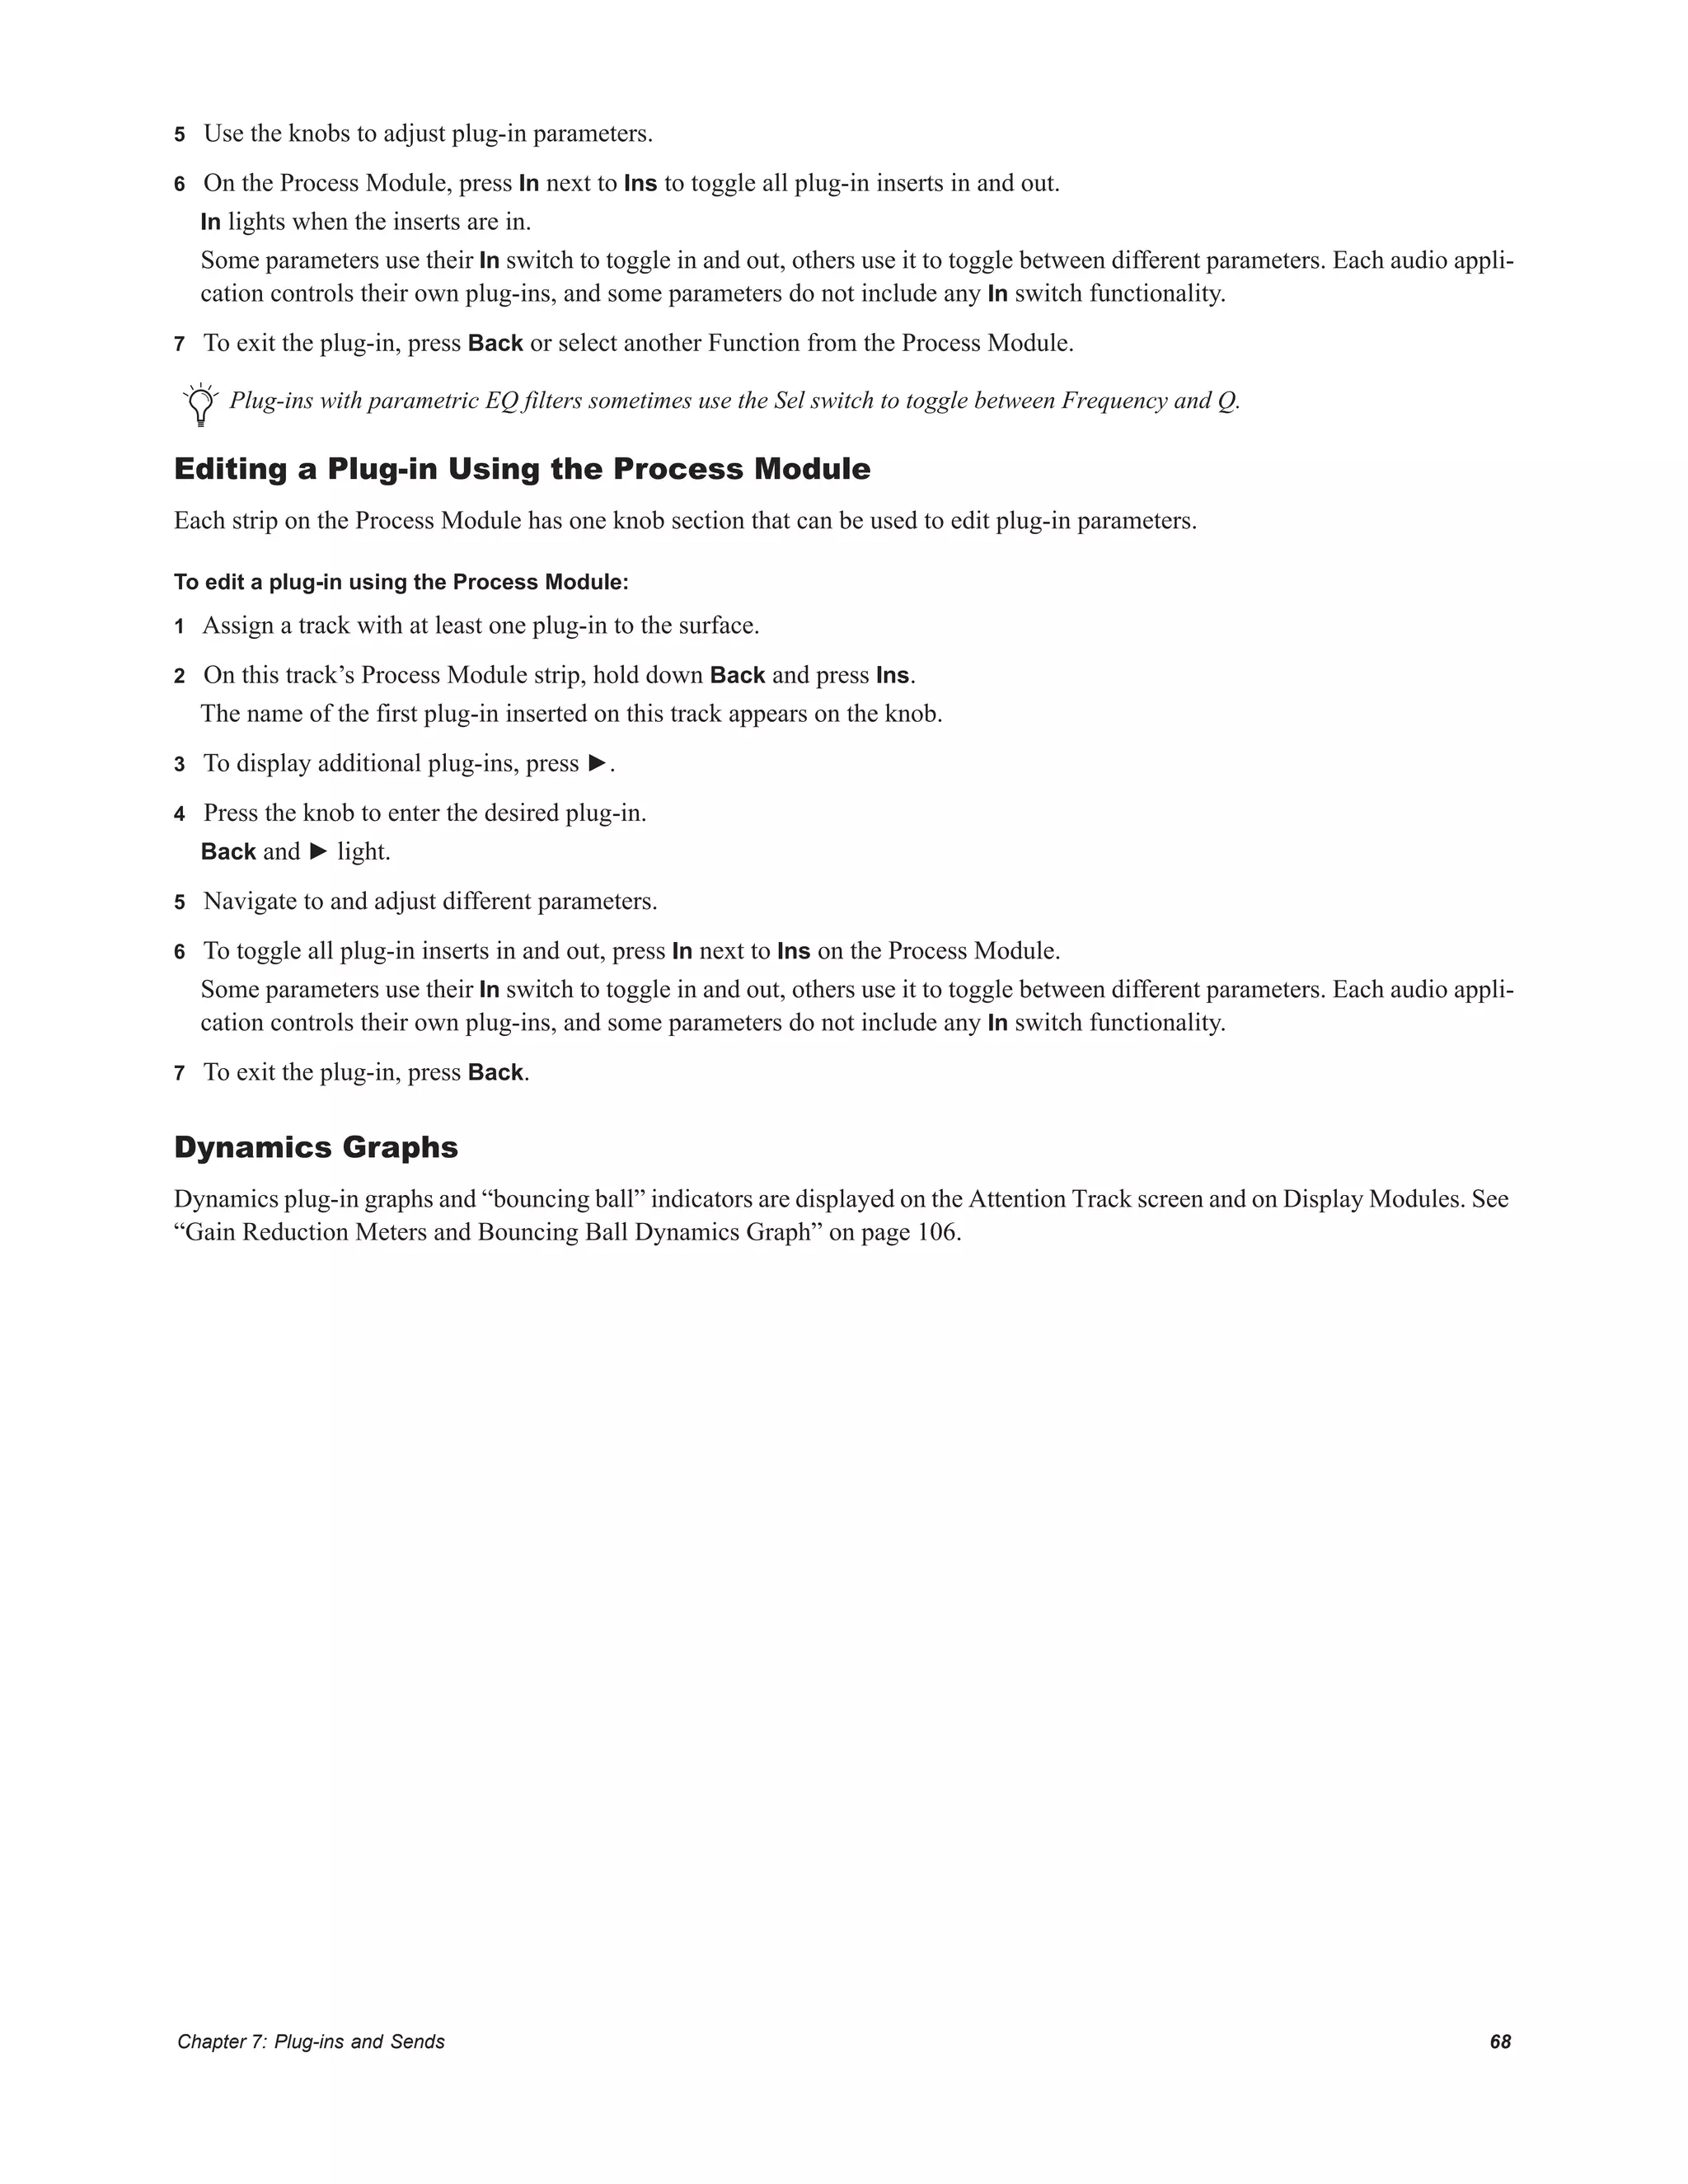
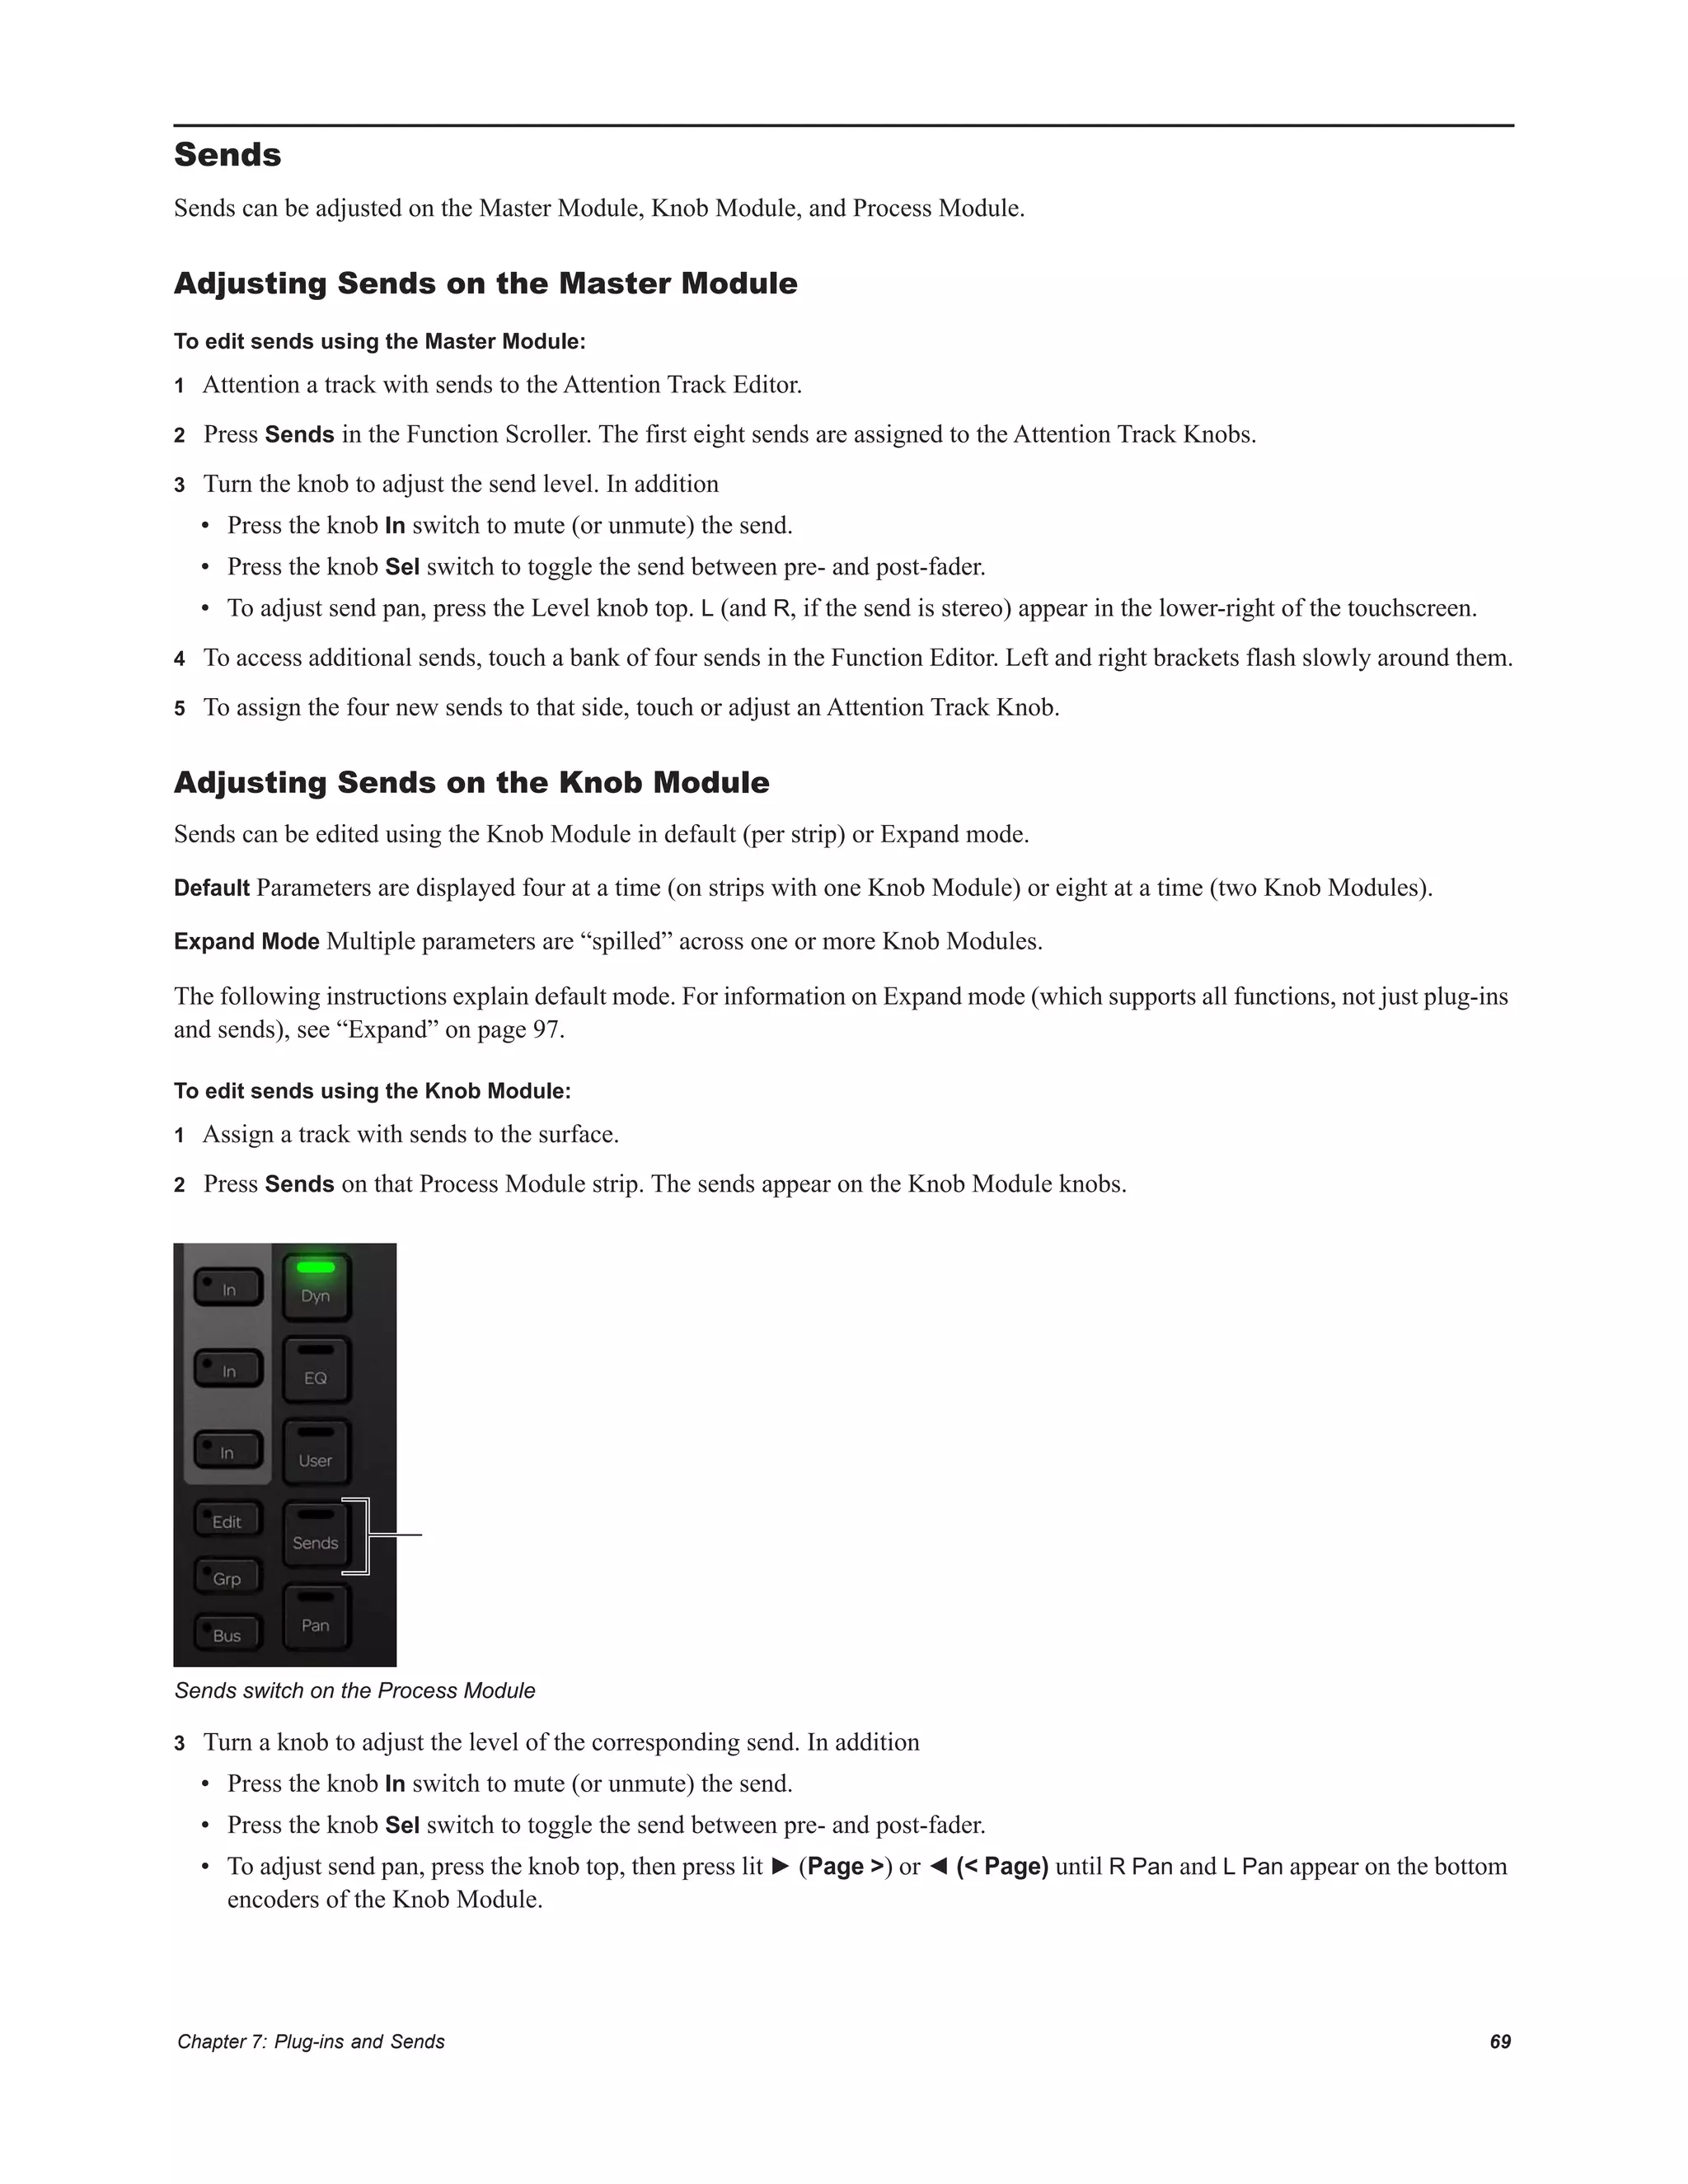
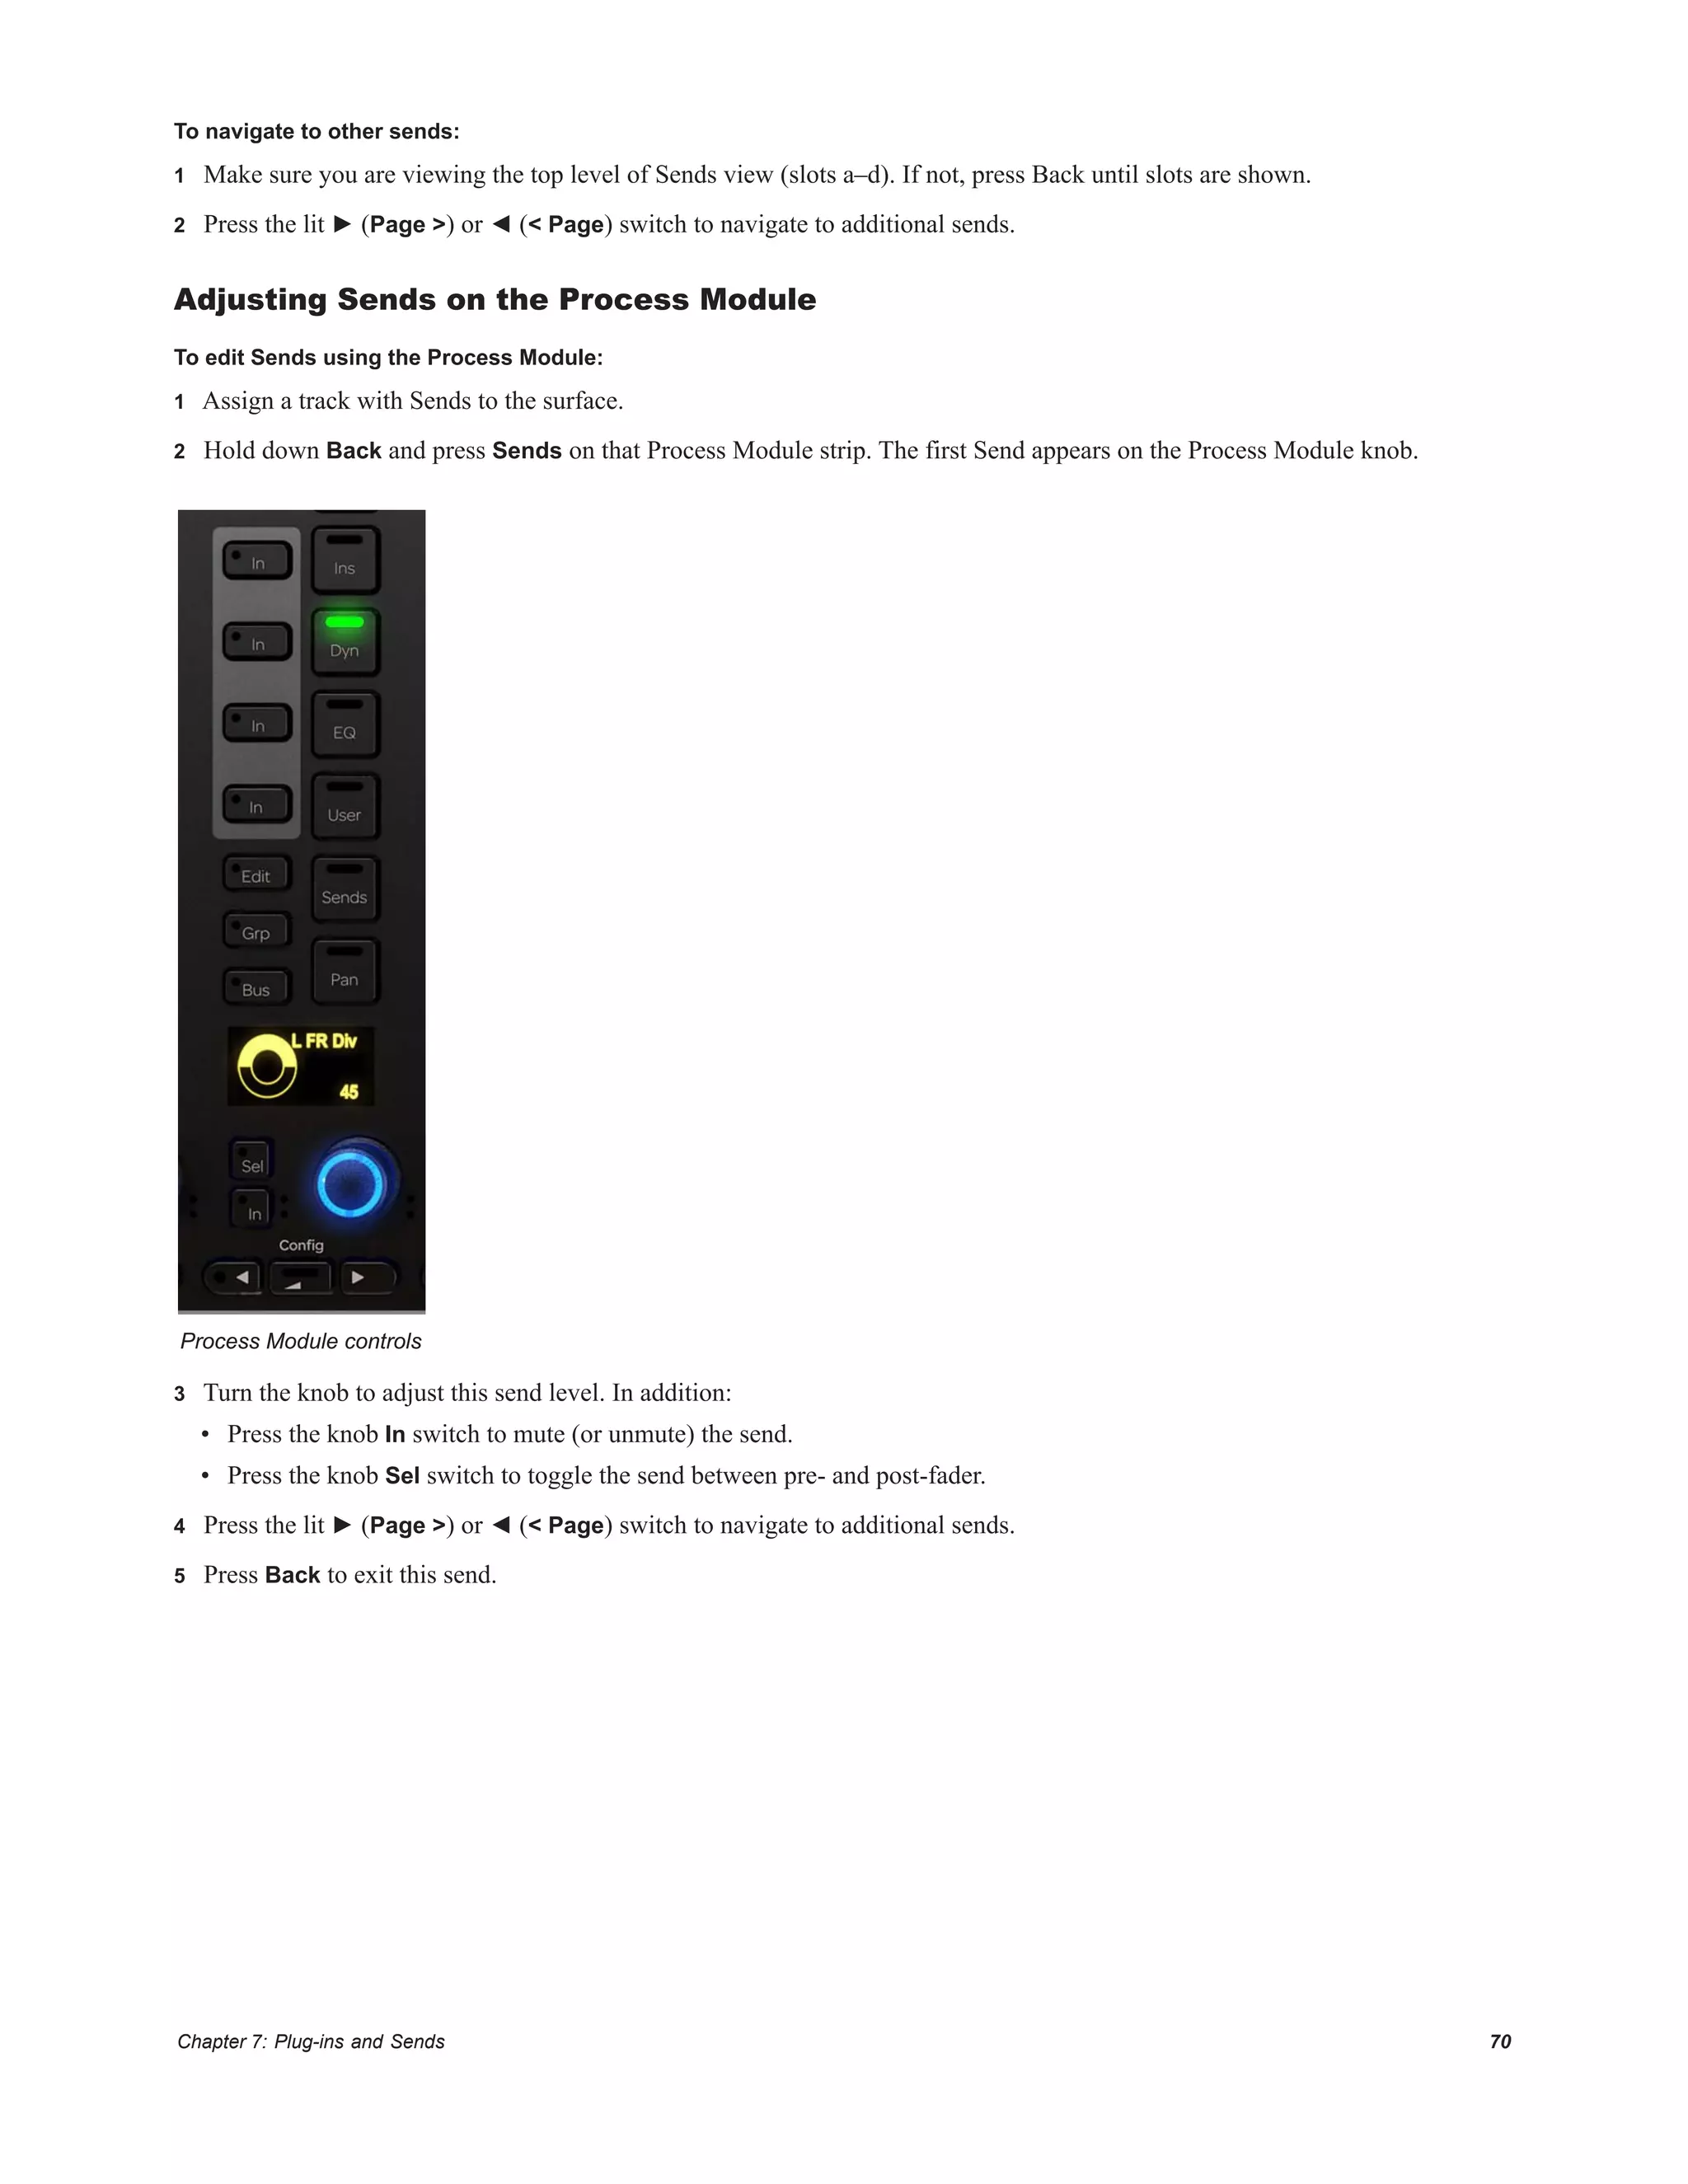
This document provides legal notices and trademark information regarding Pro Tools | S6 software and hardware. It lists many Avid and third party trademarks. It also provides information on patents, specifications that may change, and a guide part number. The document is copyrighted by Avid Technology, Inc and prohibits duplication without written consent.


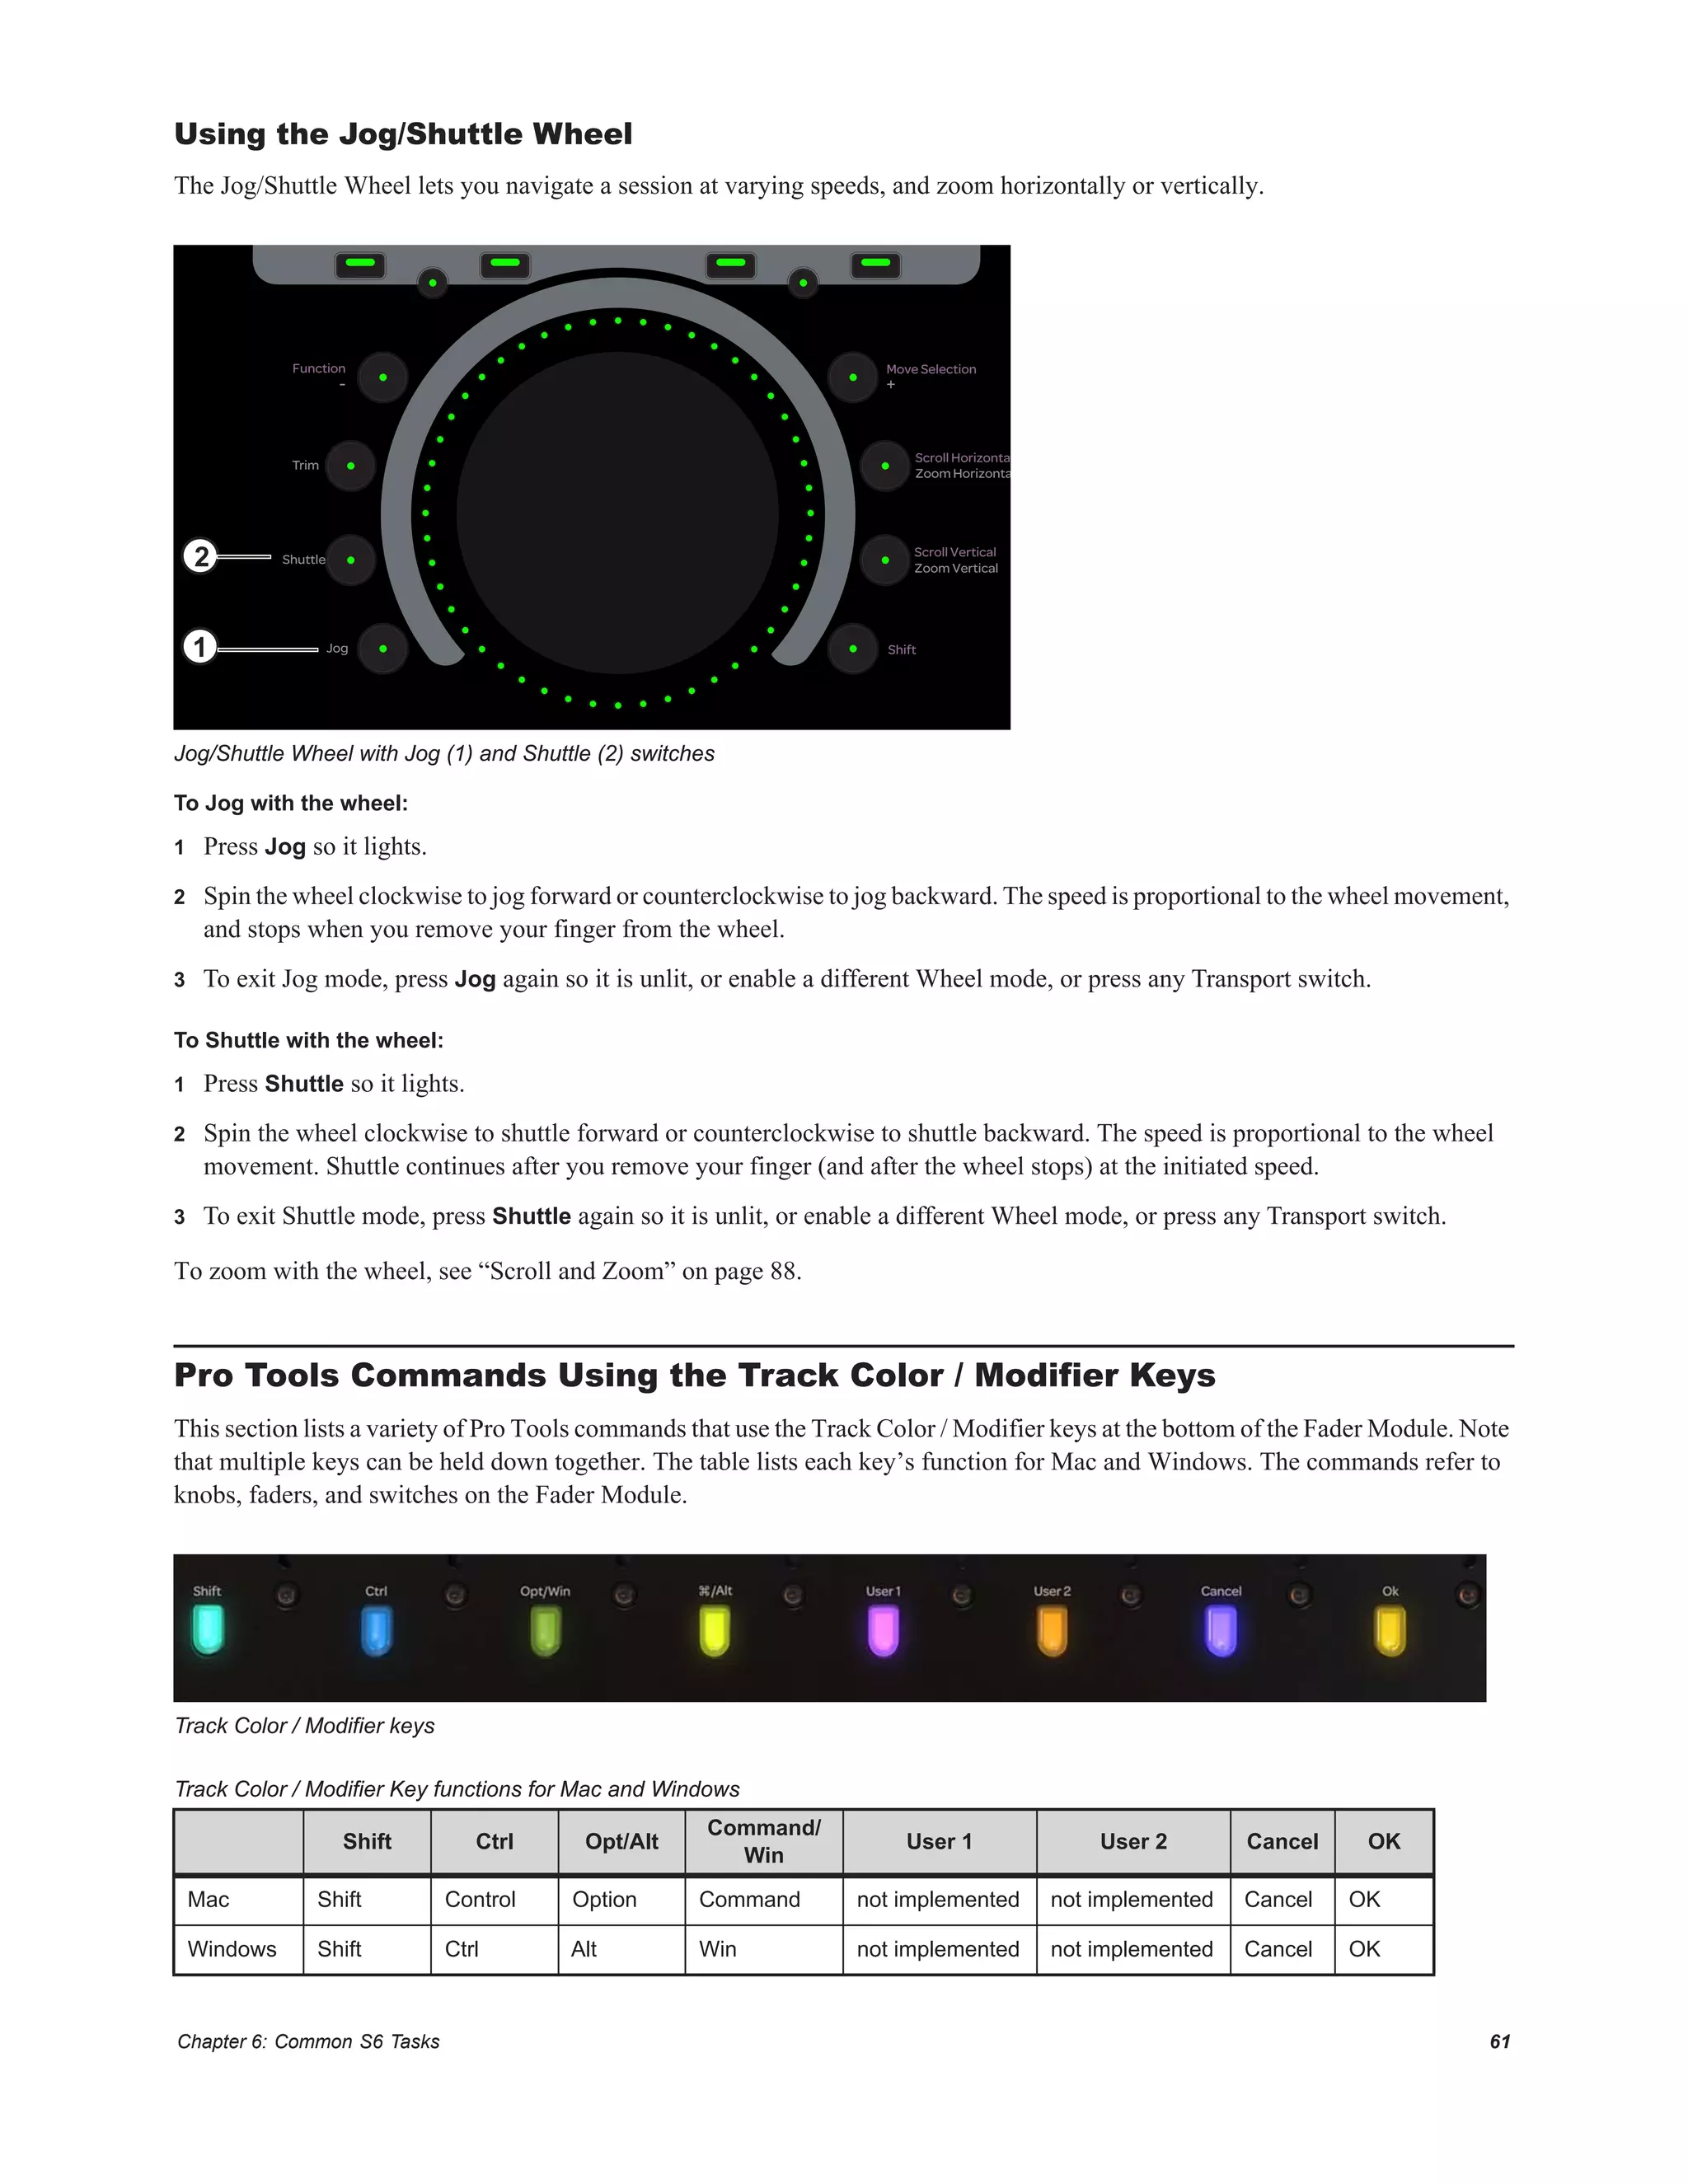
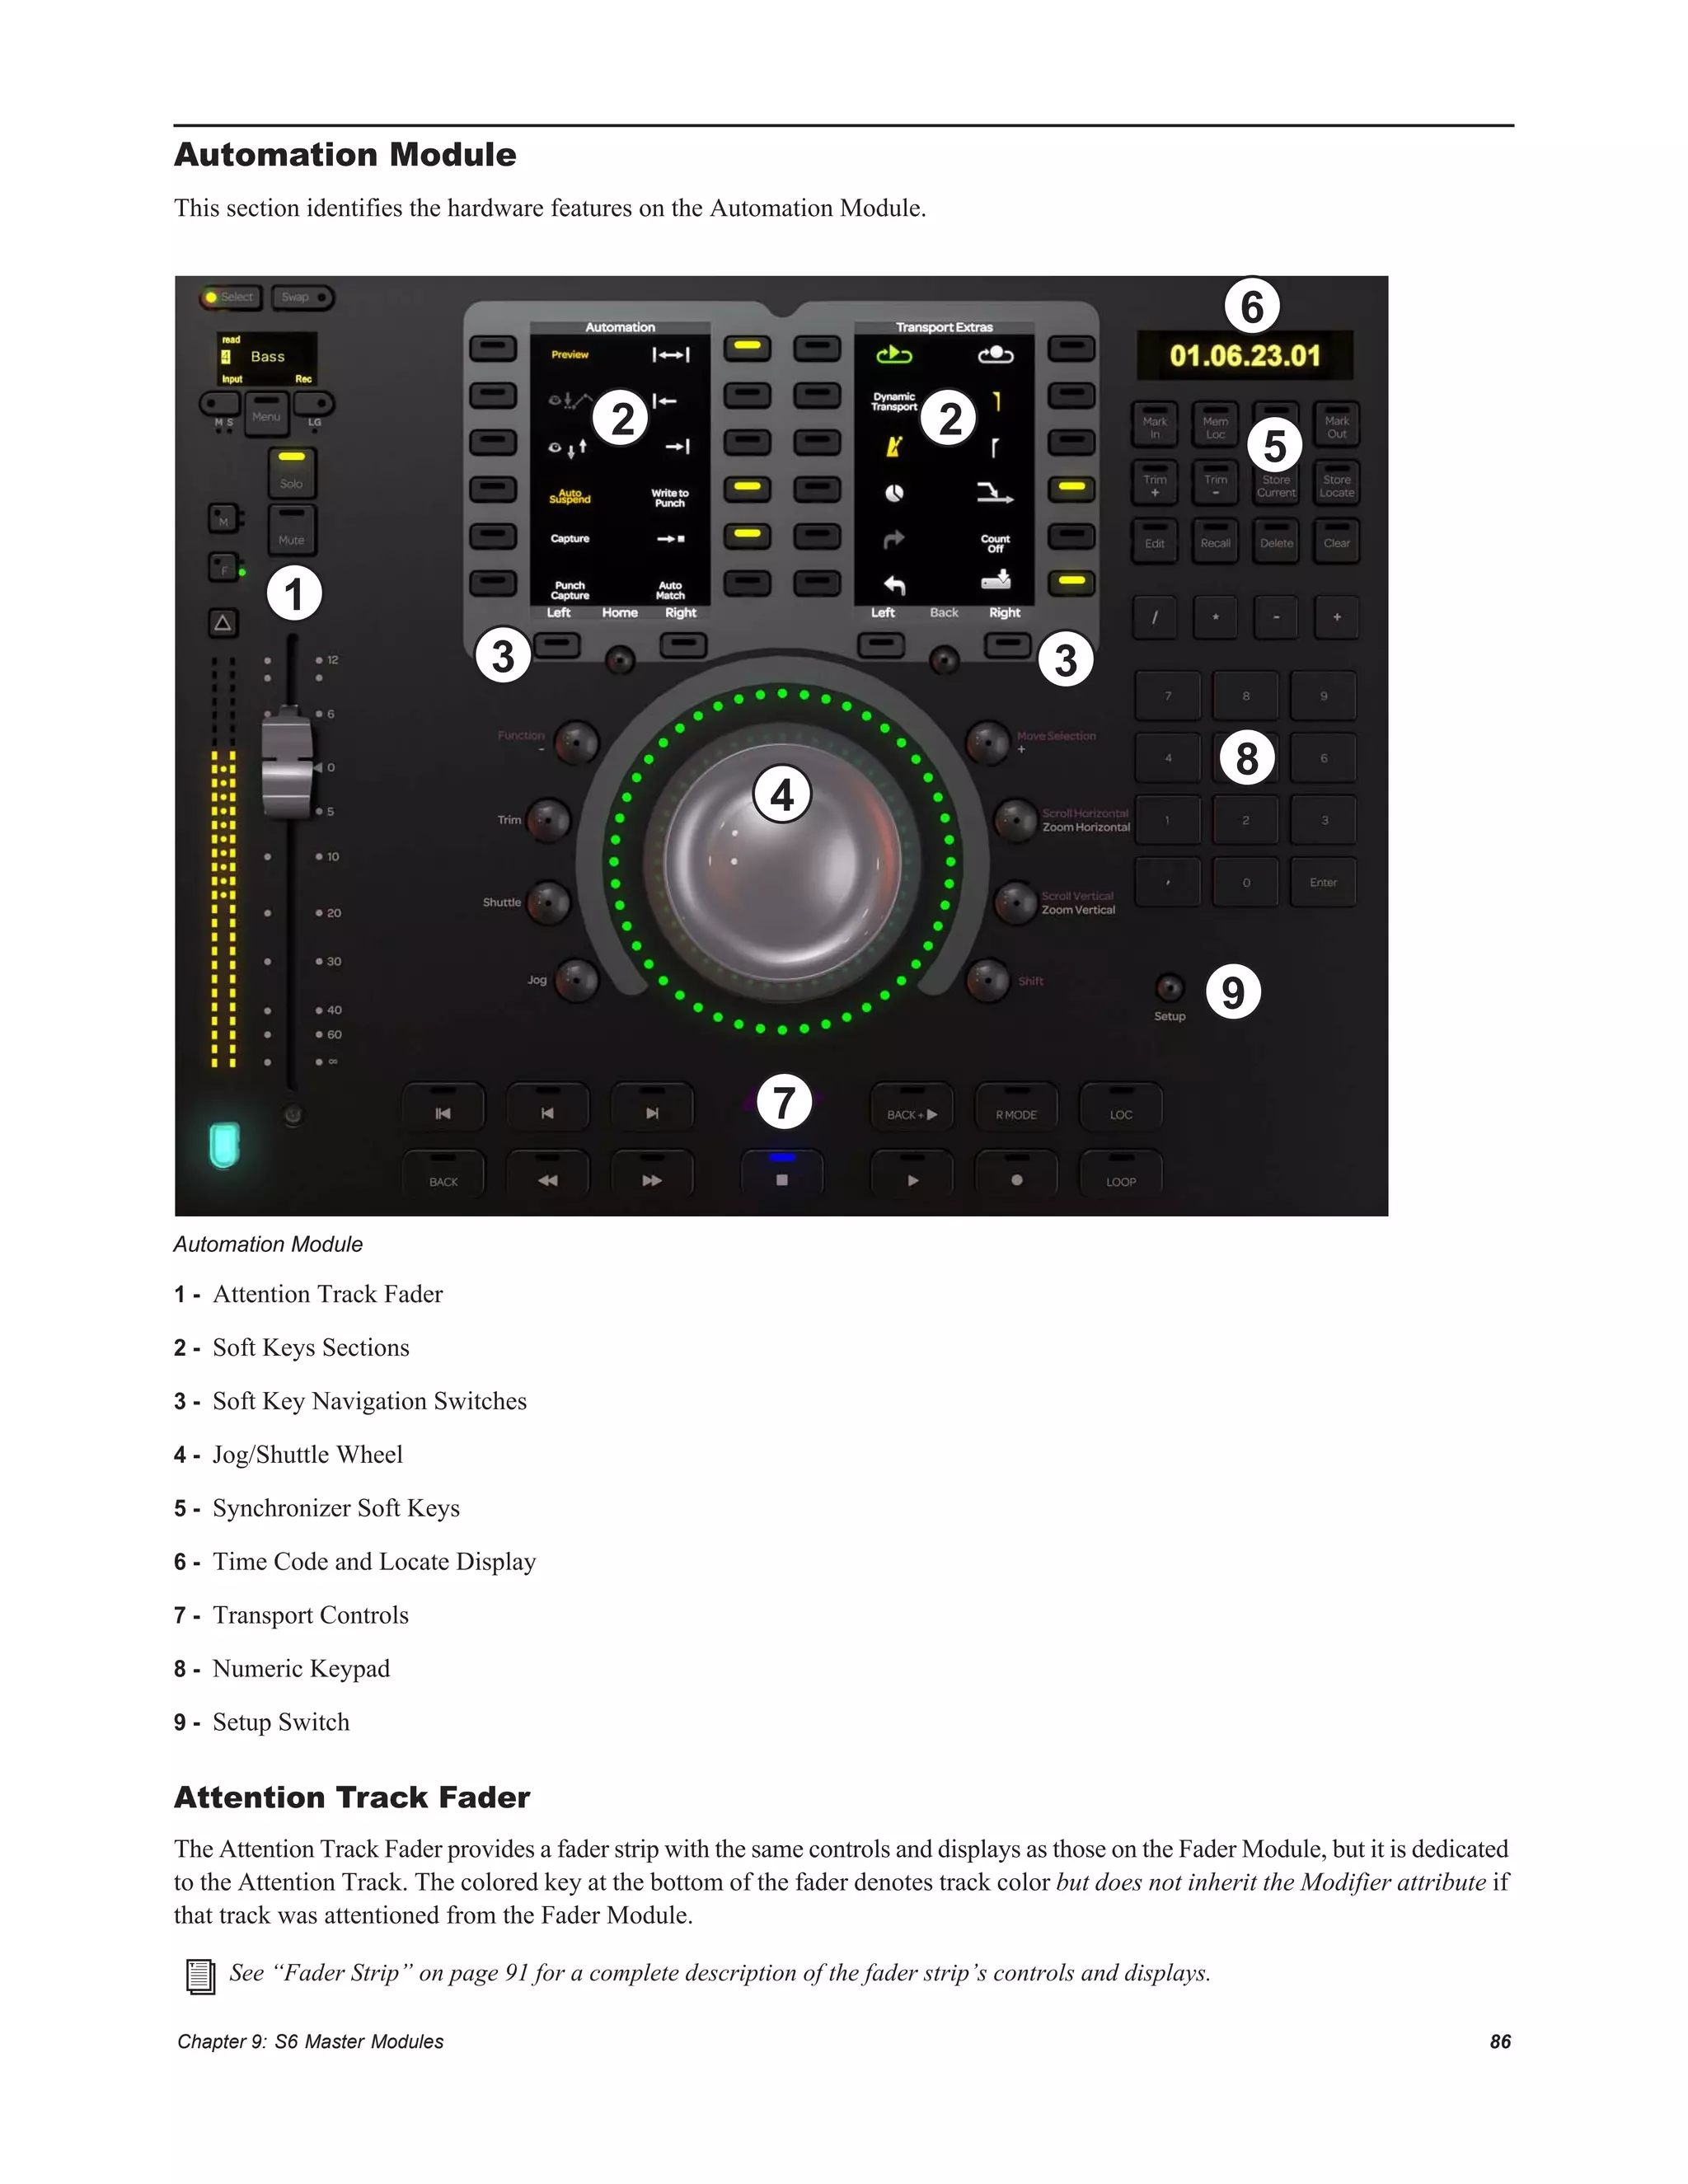
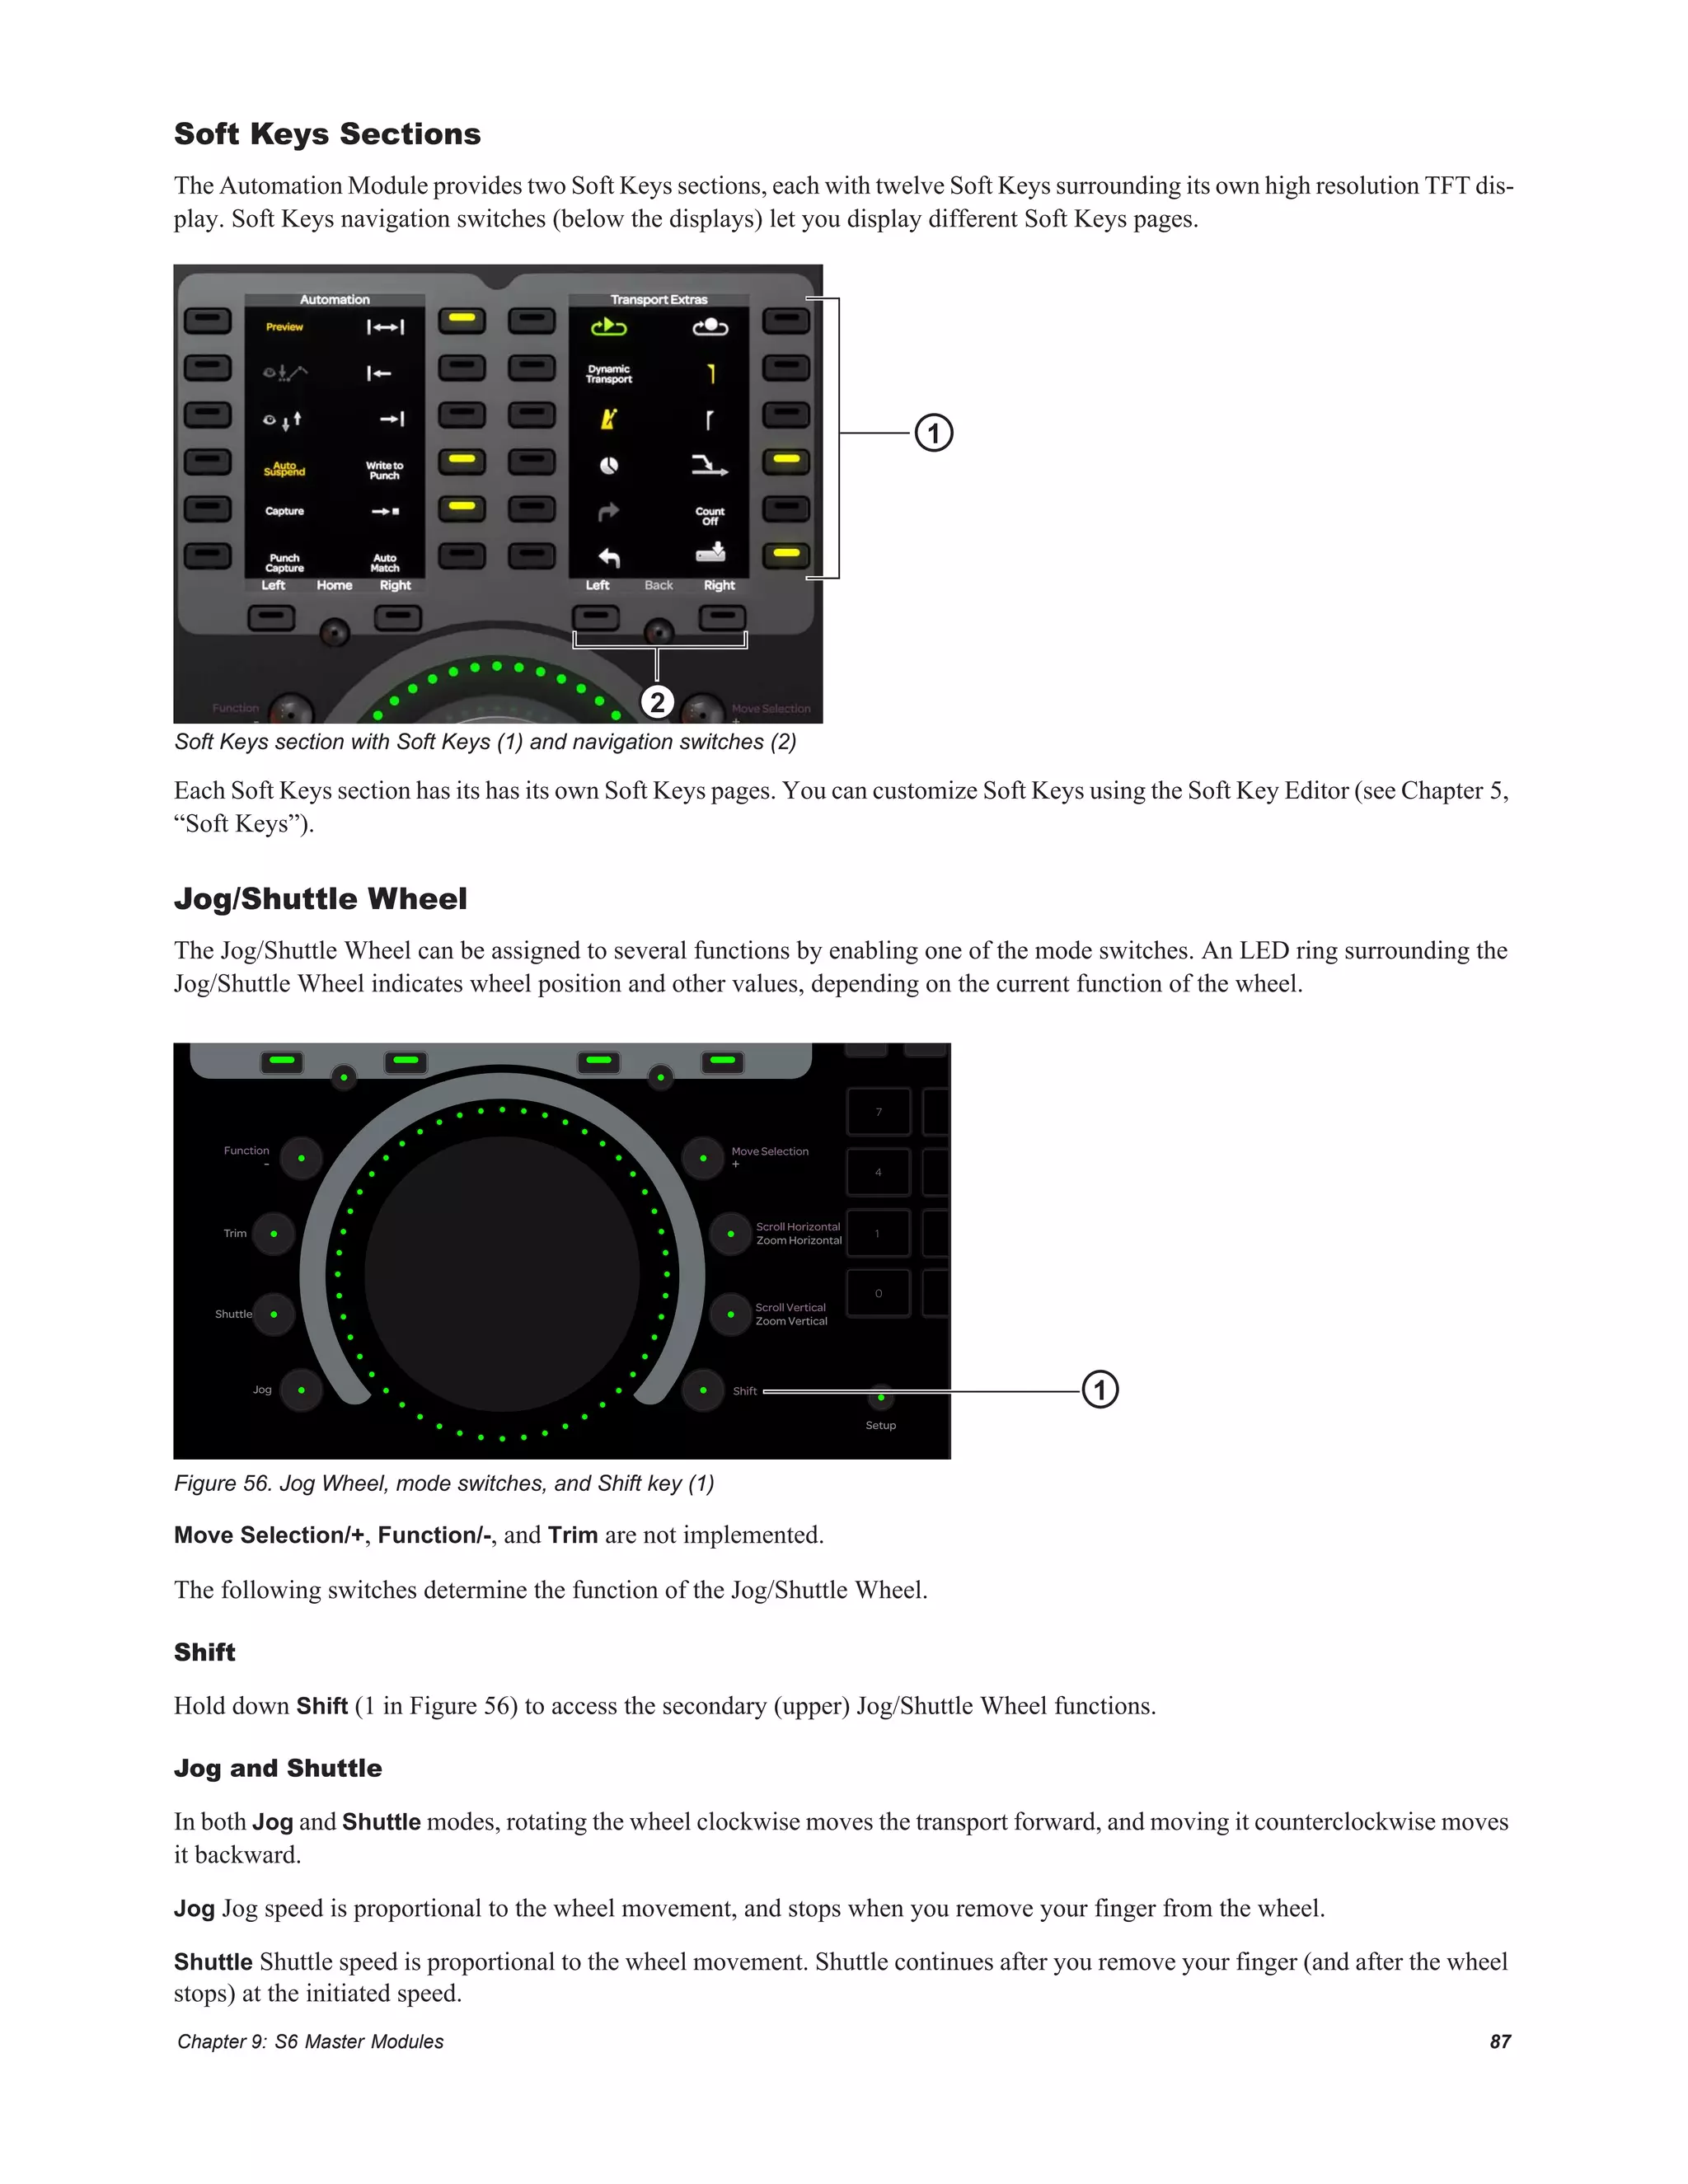
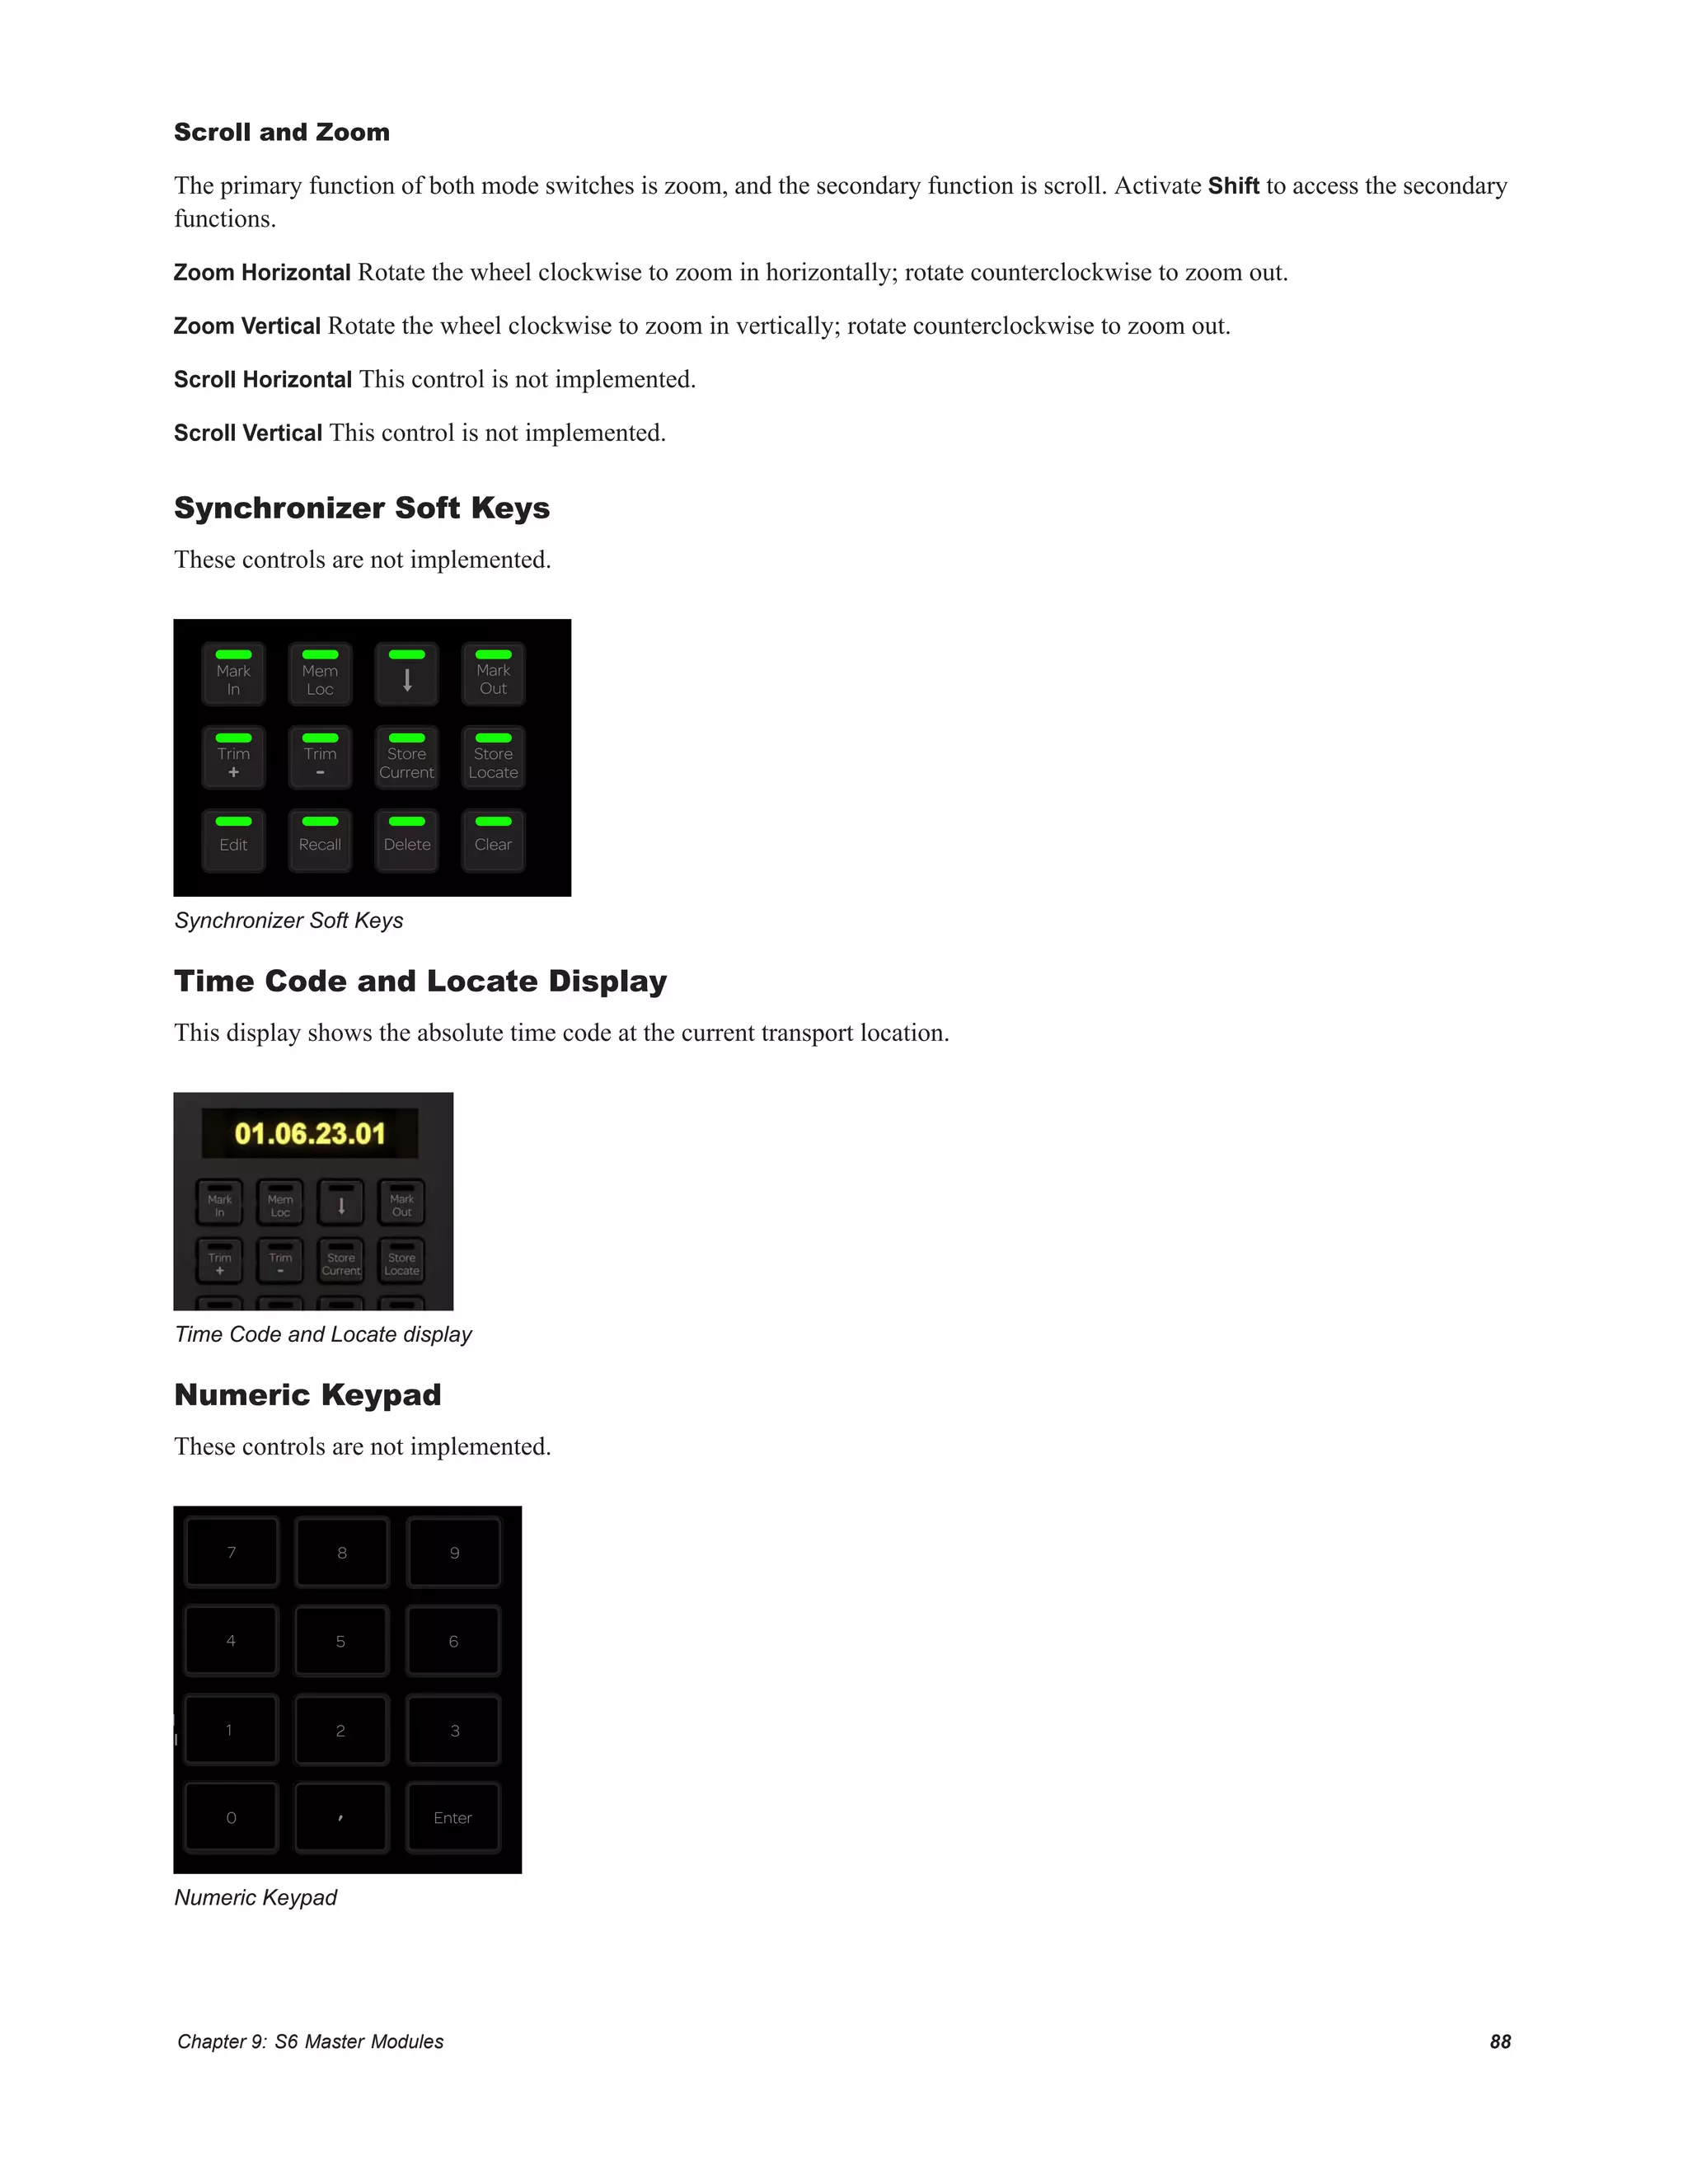
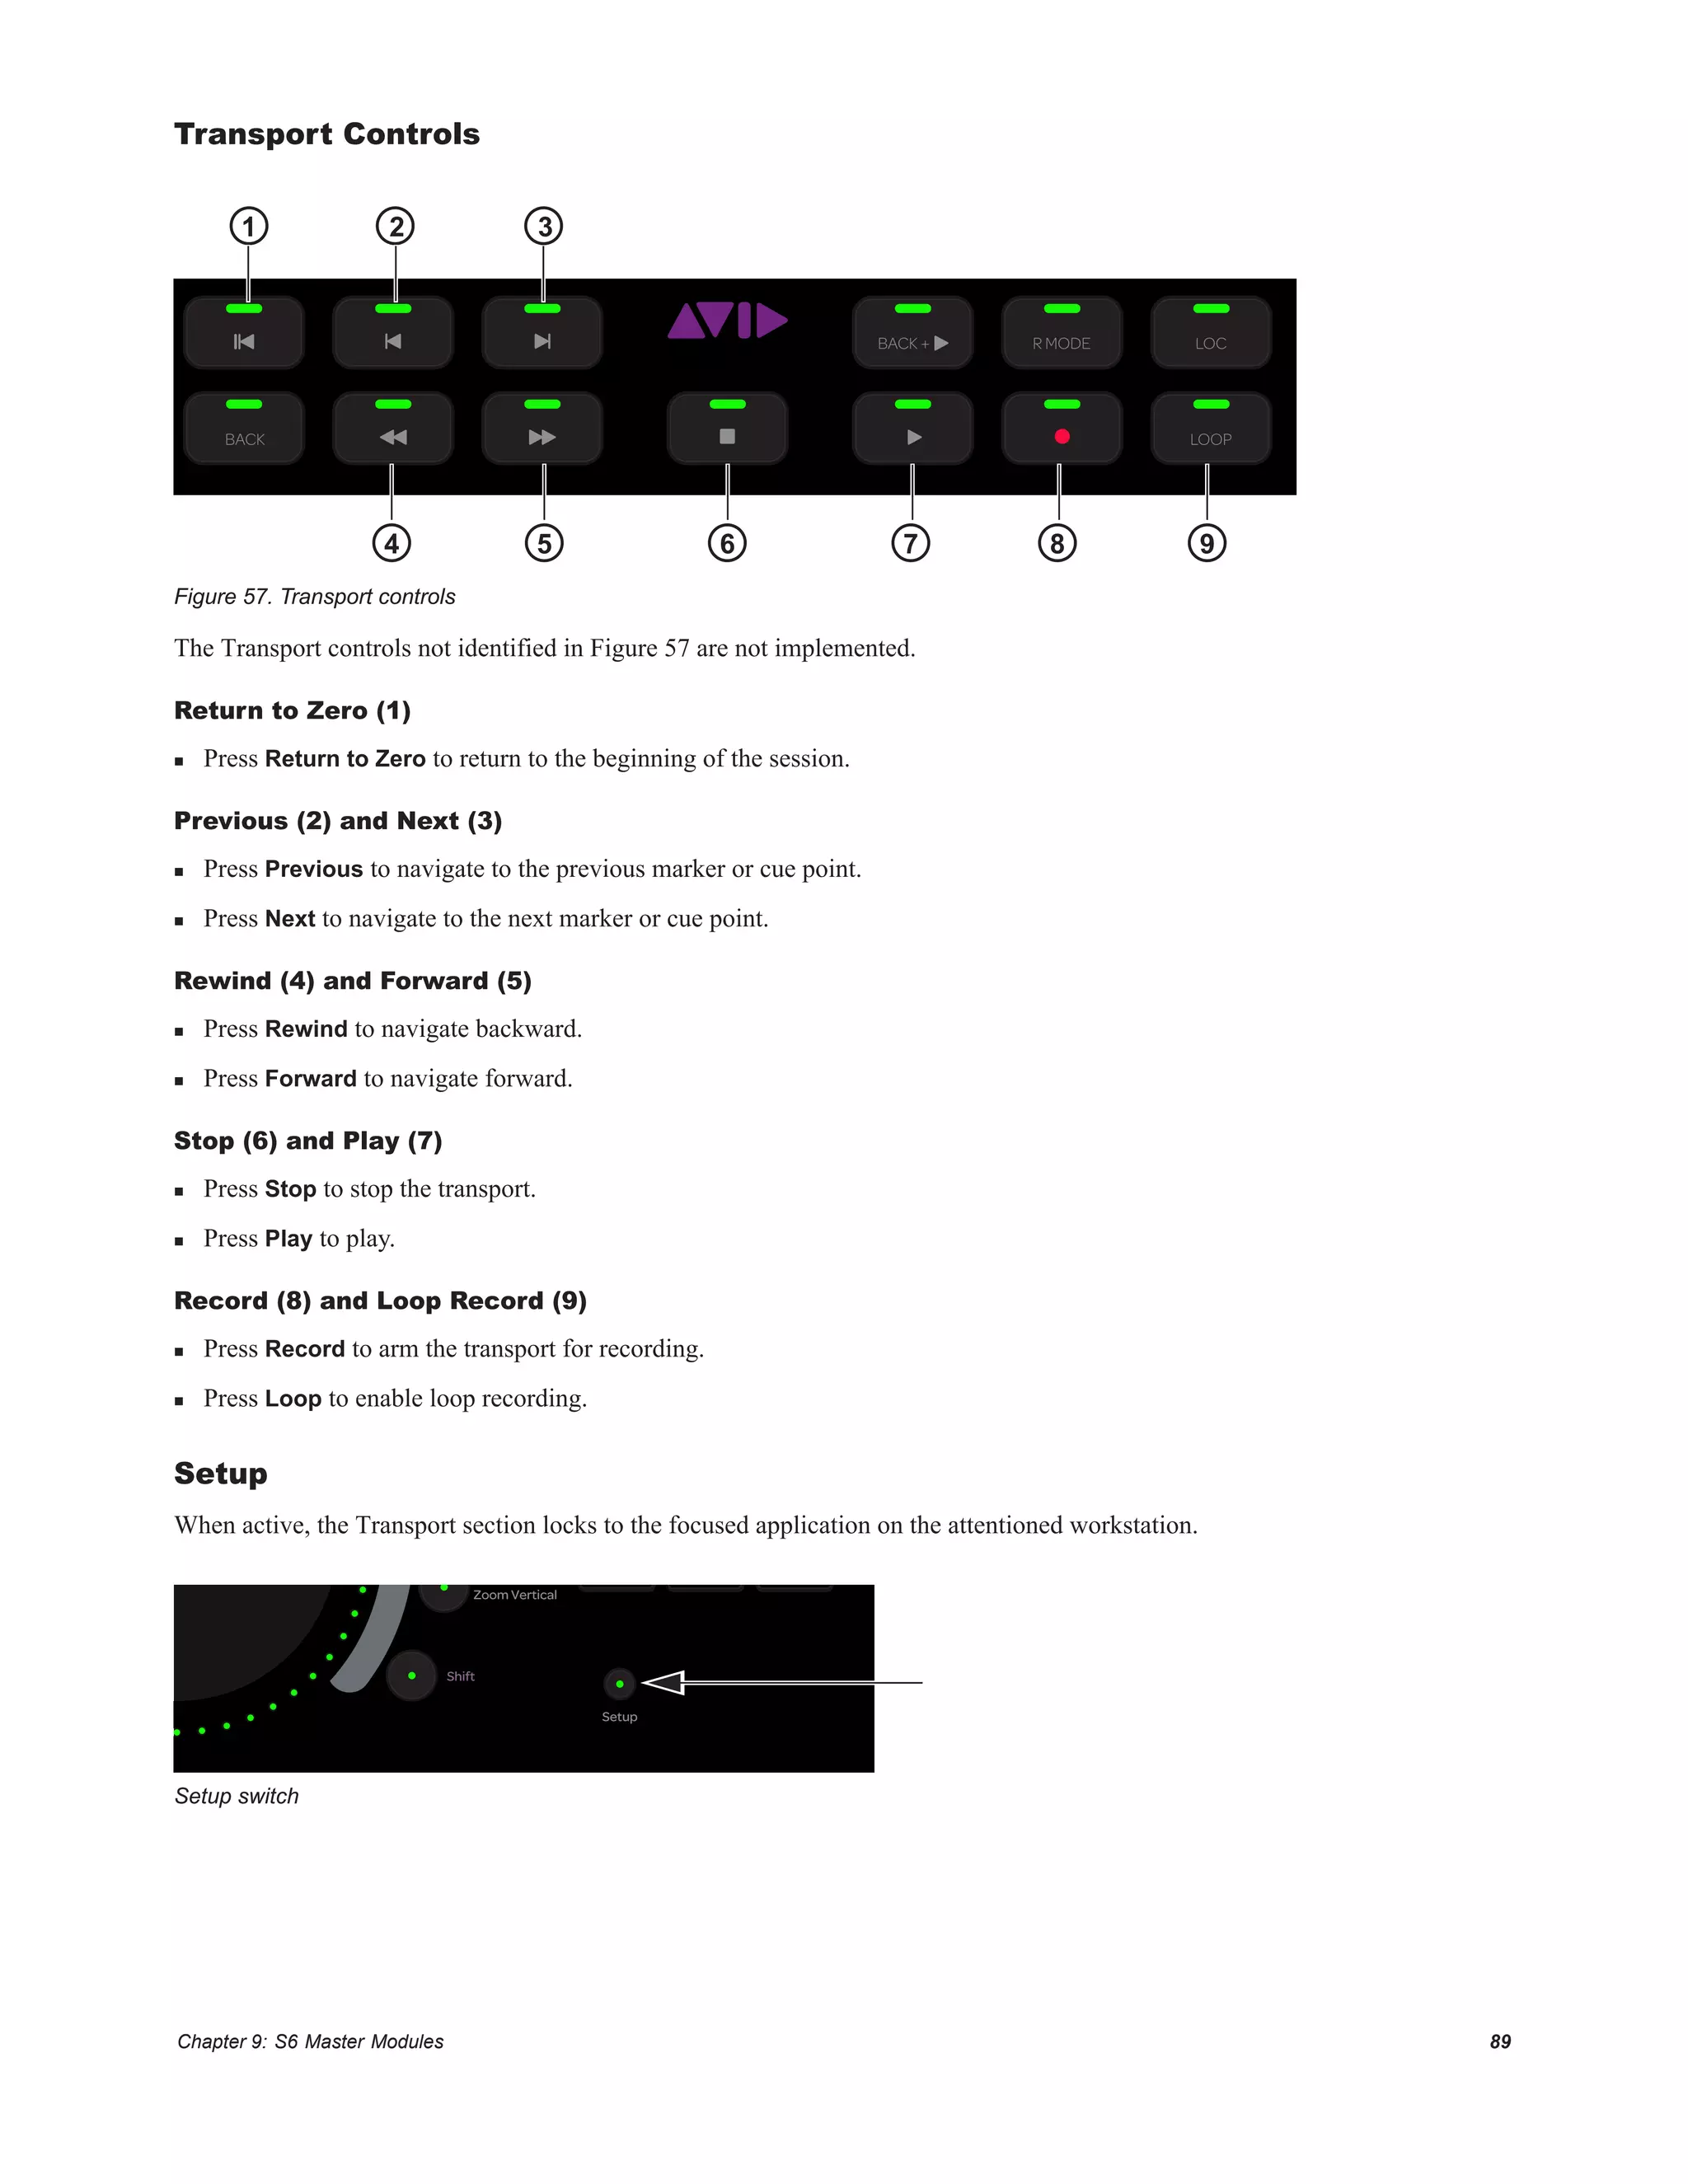
![Chapter 3: First Time Setup 8
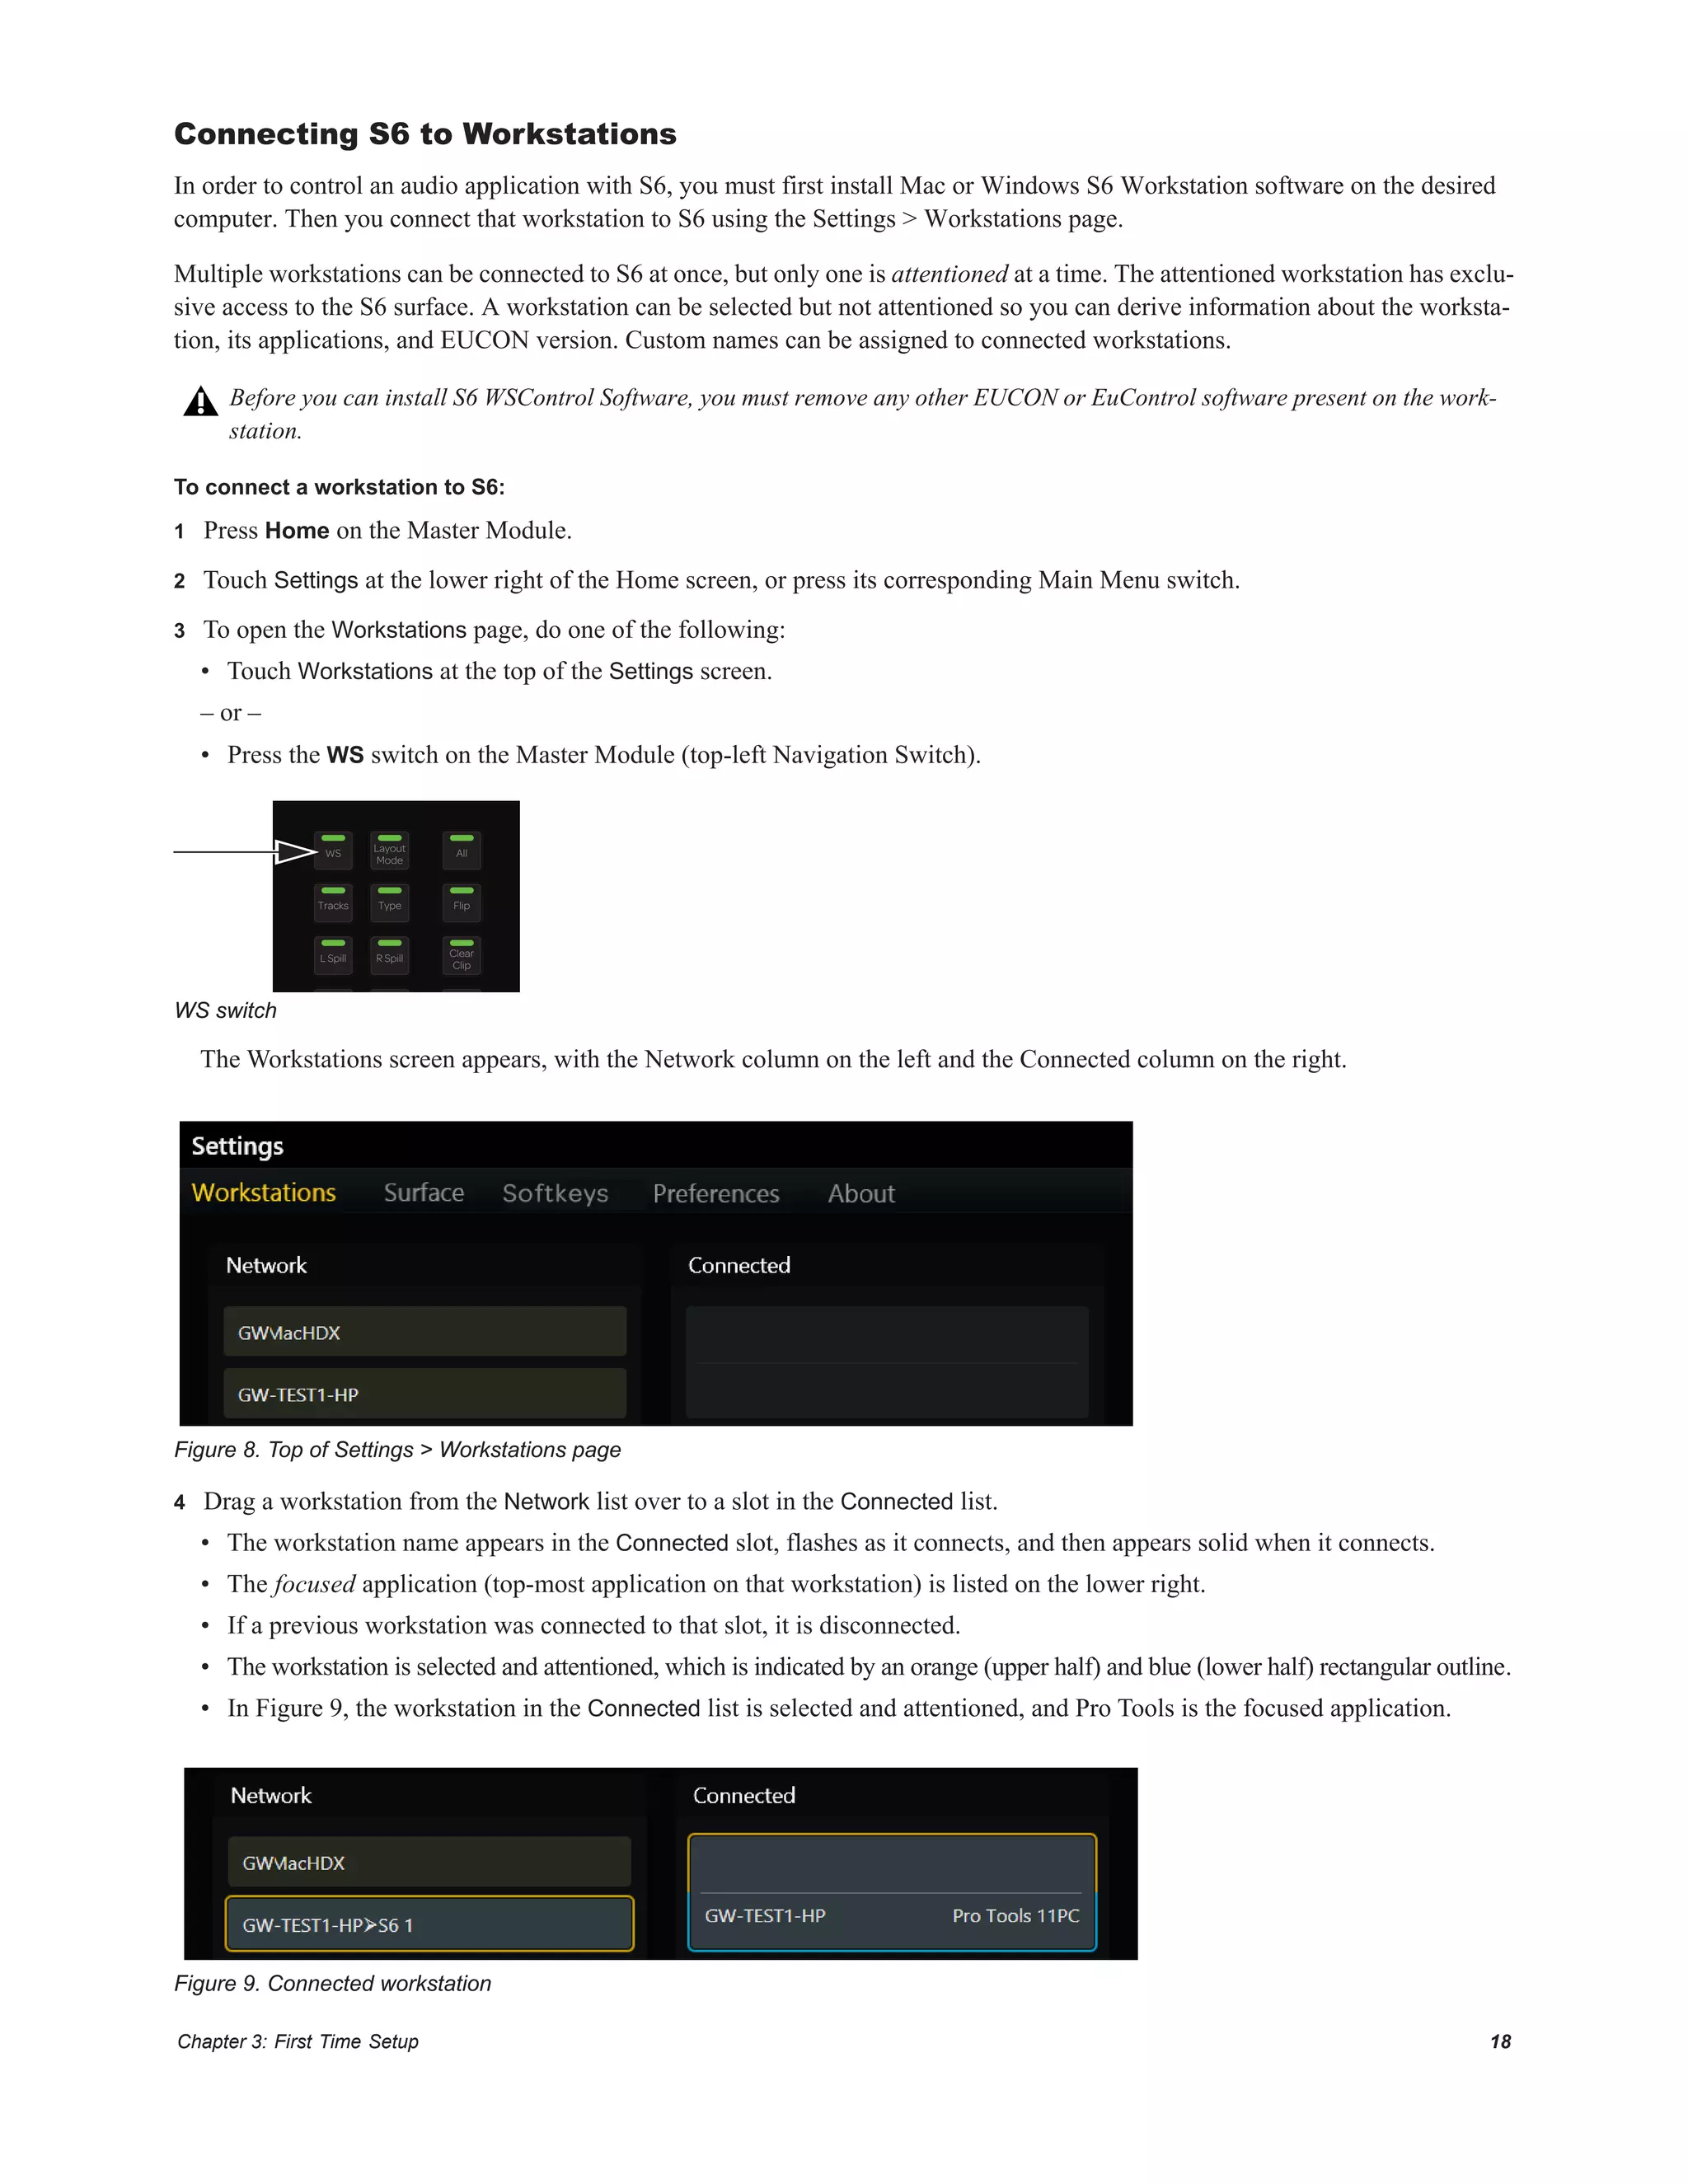
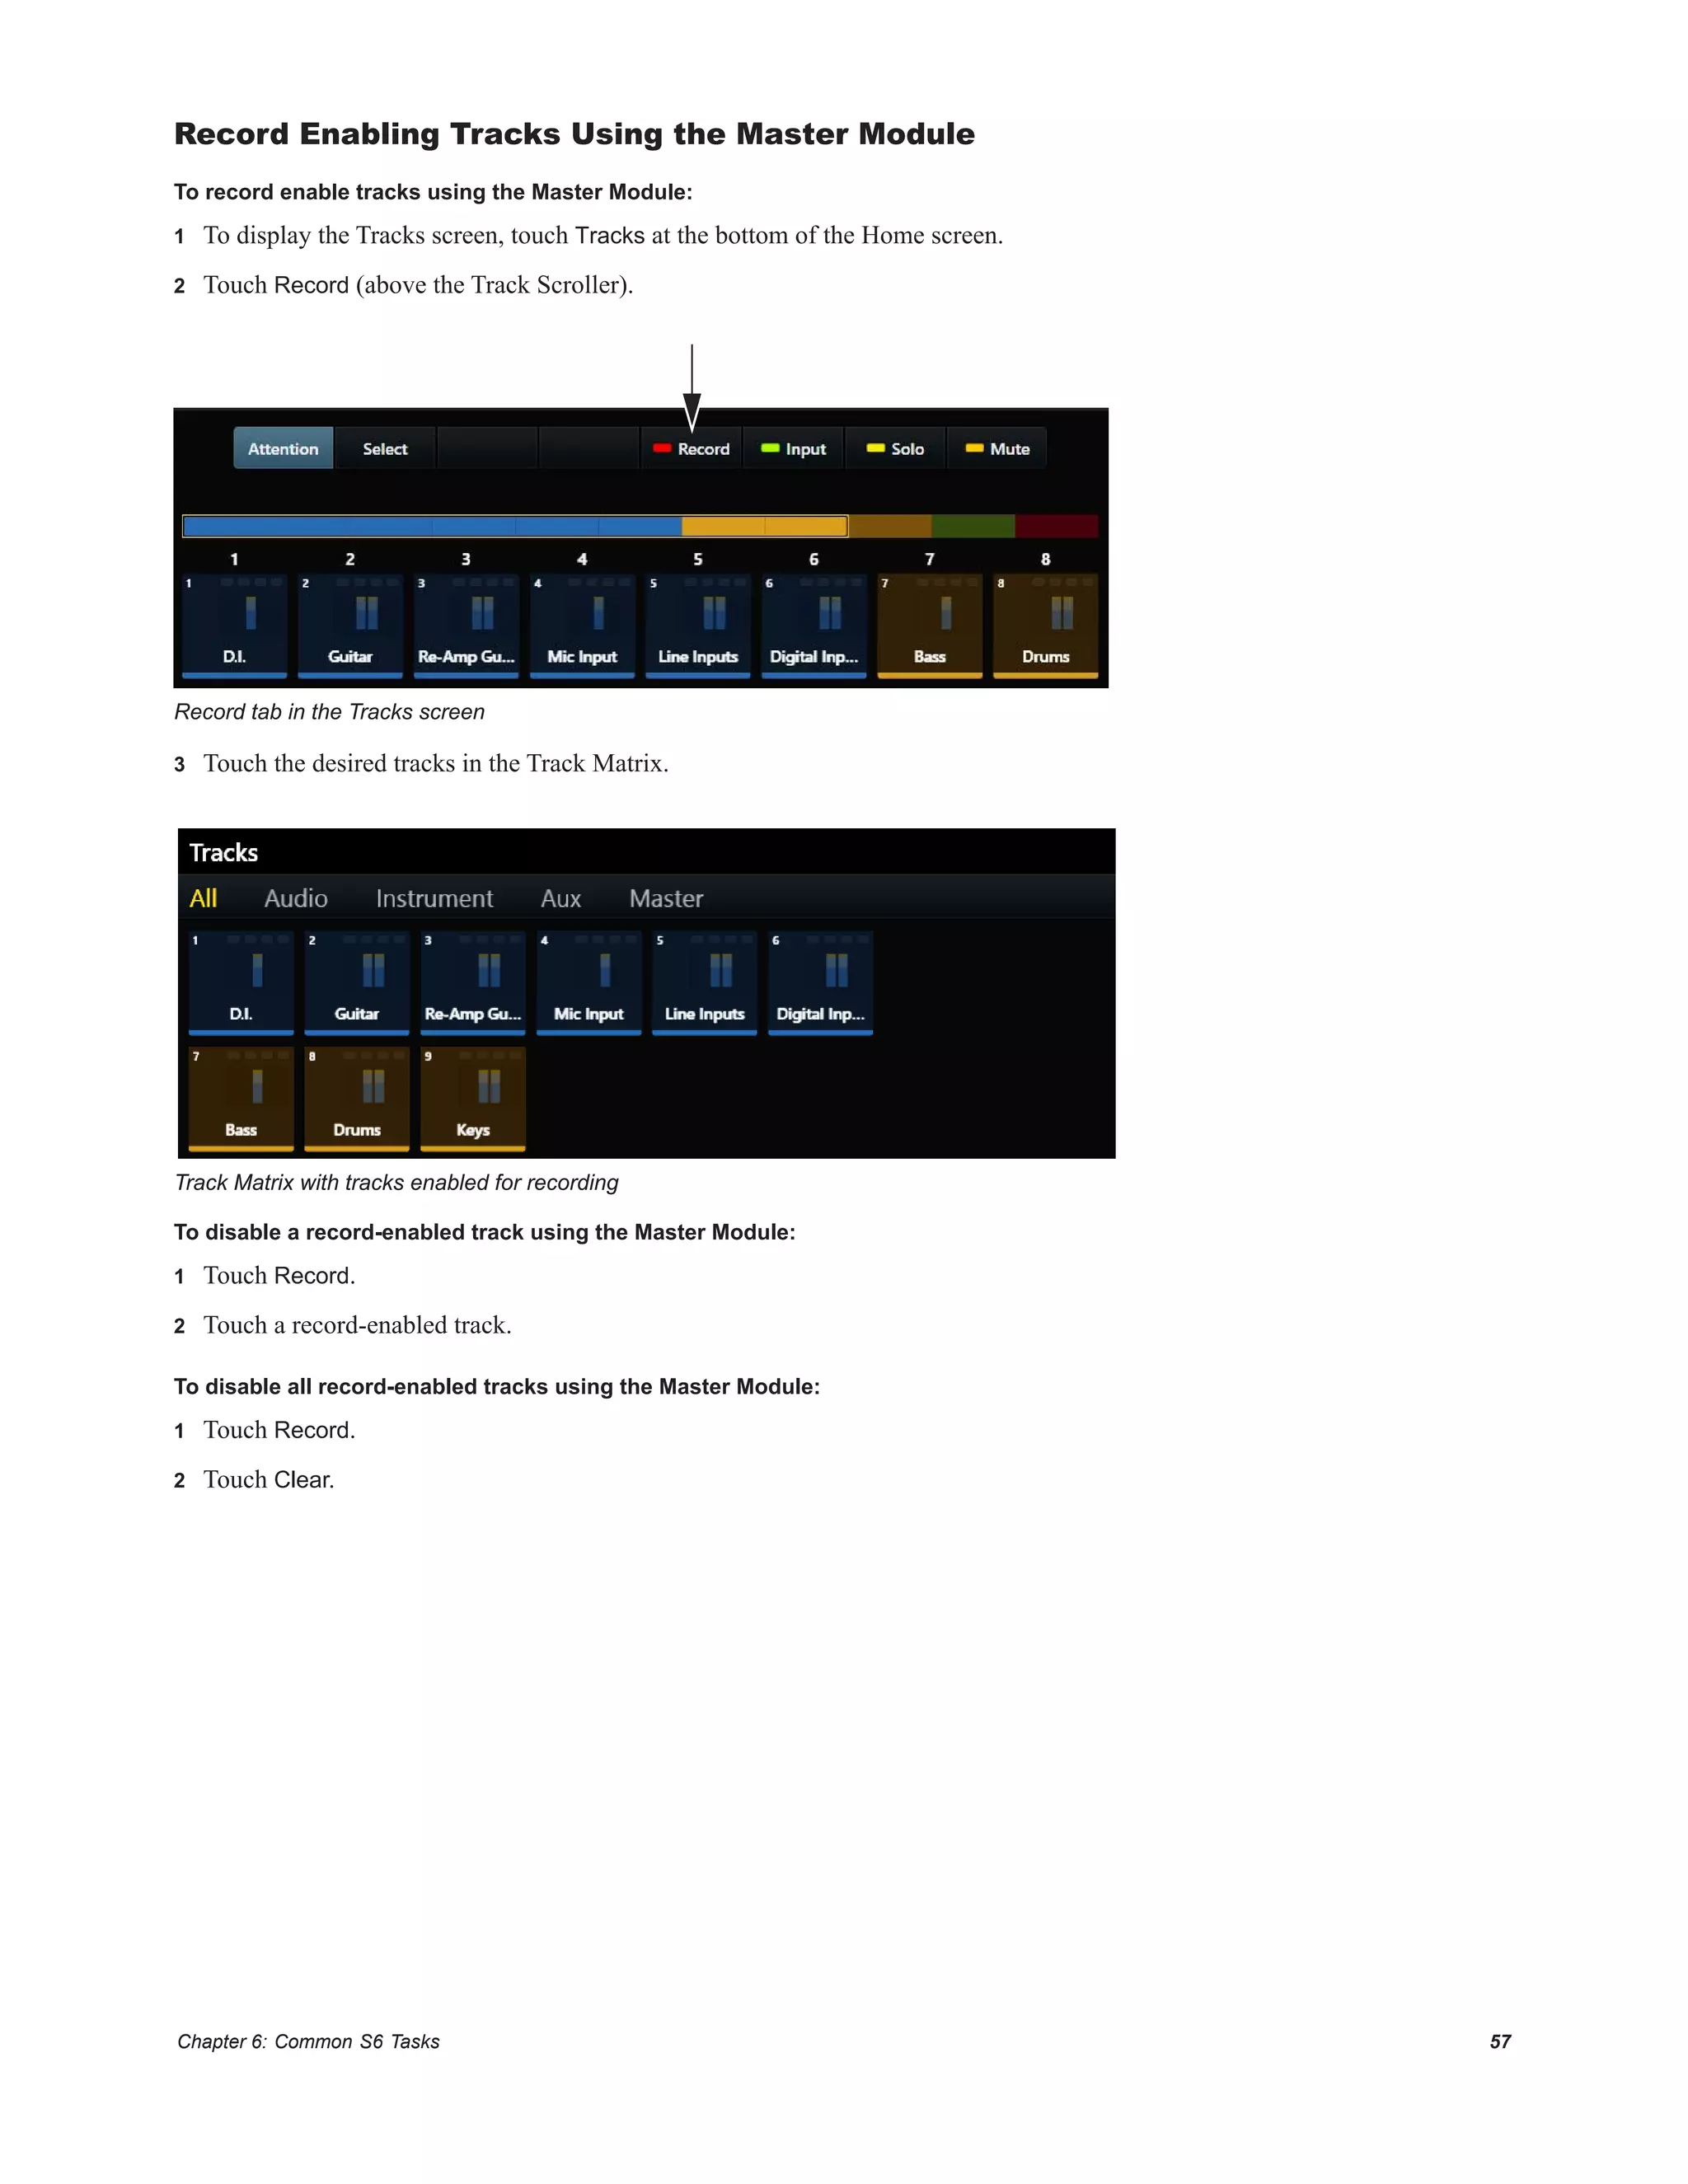
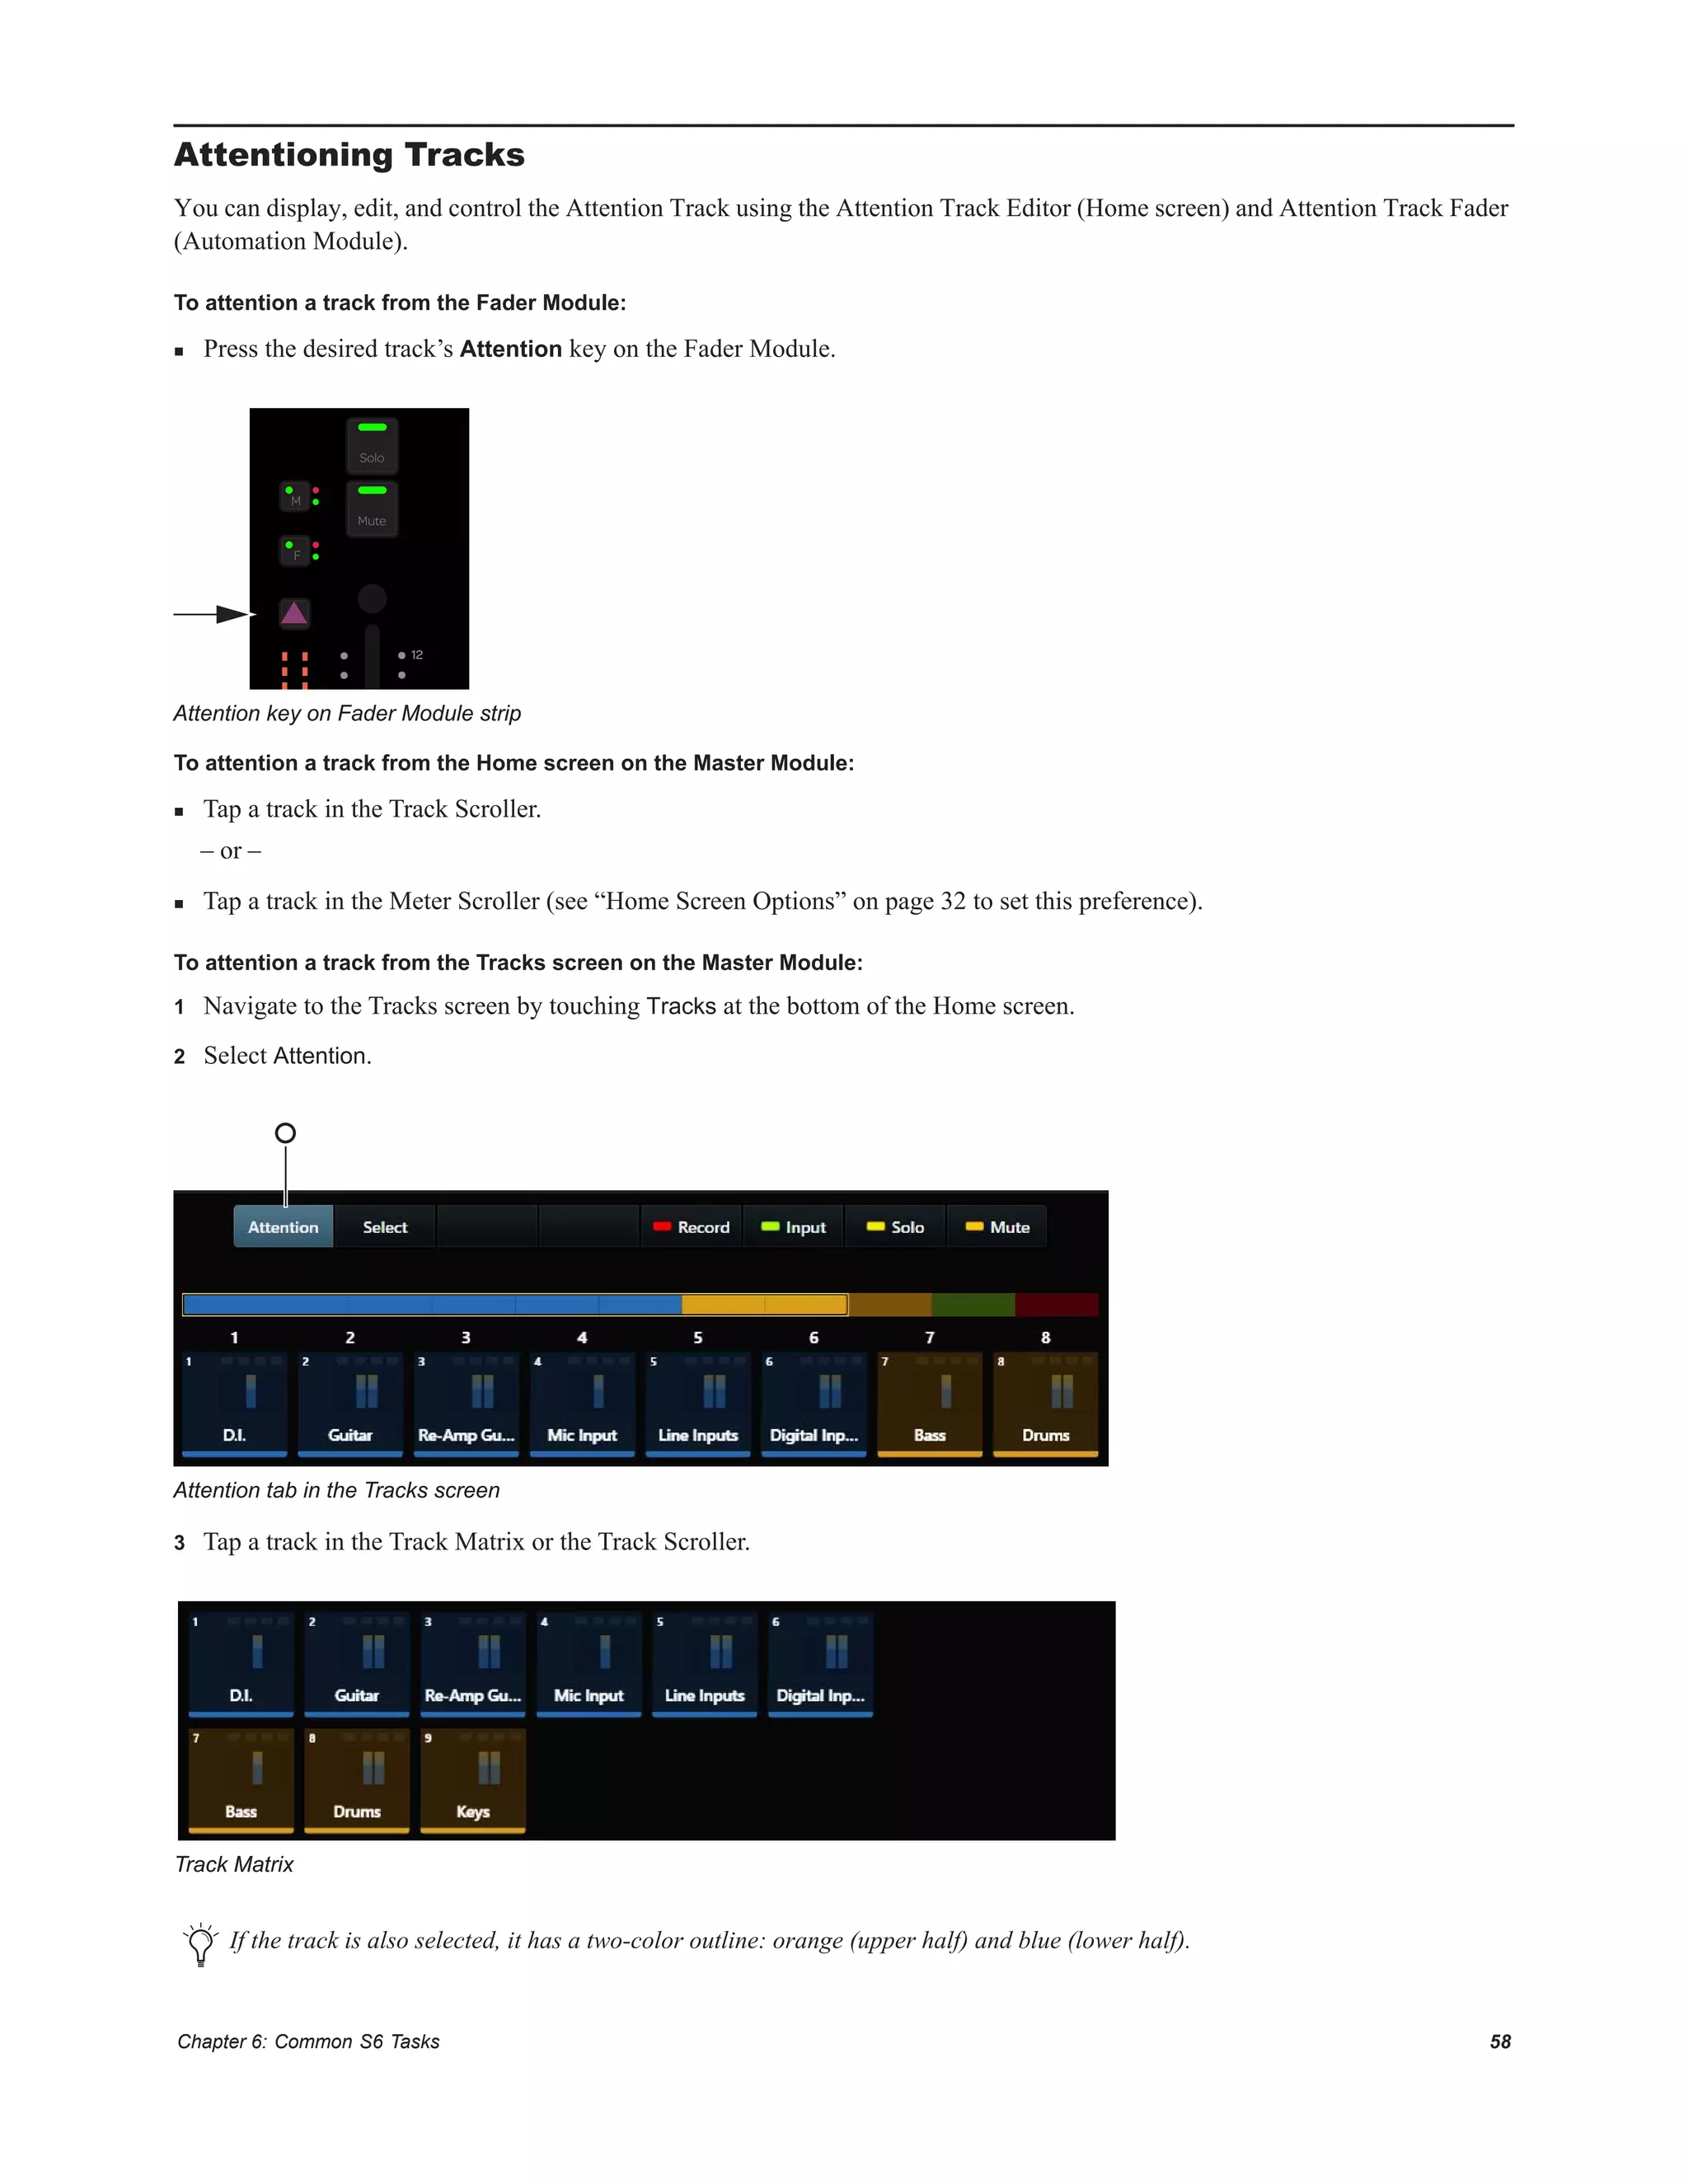
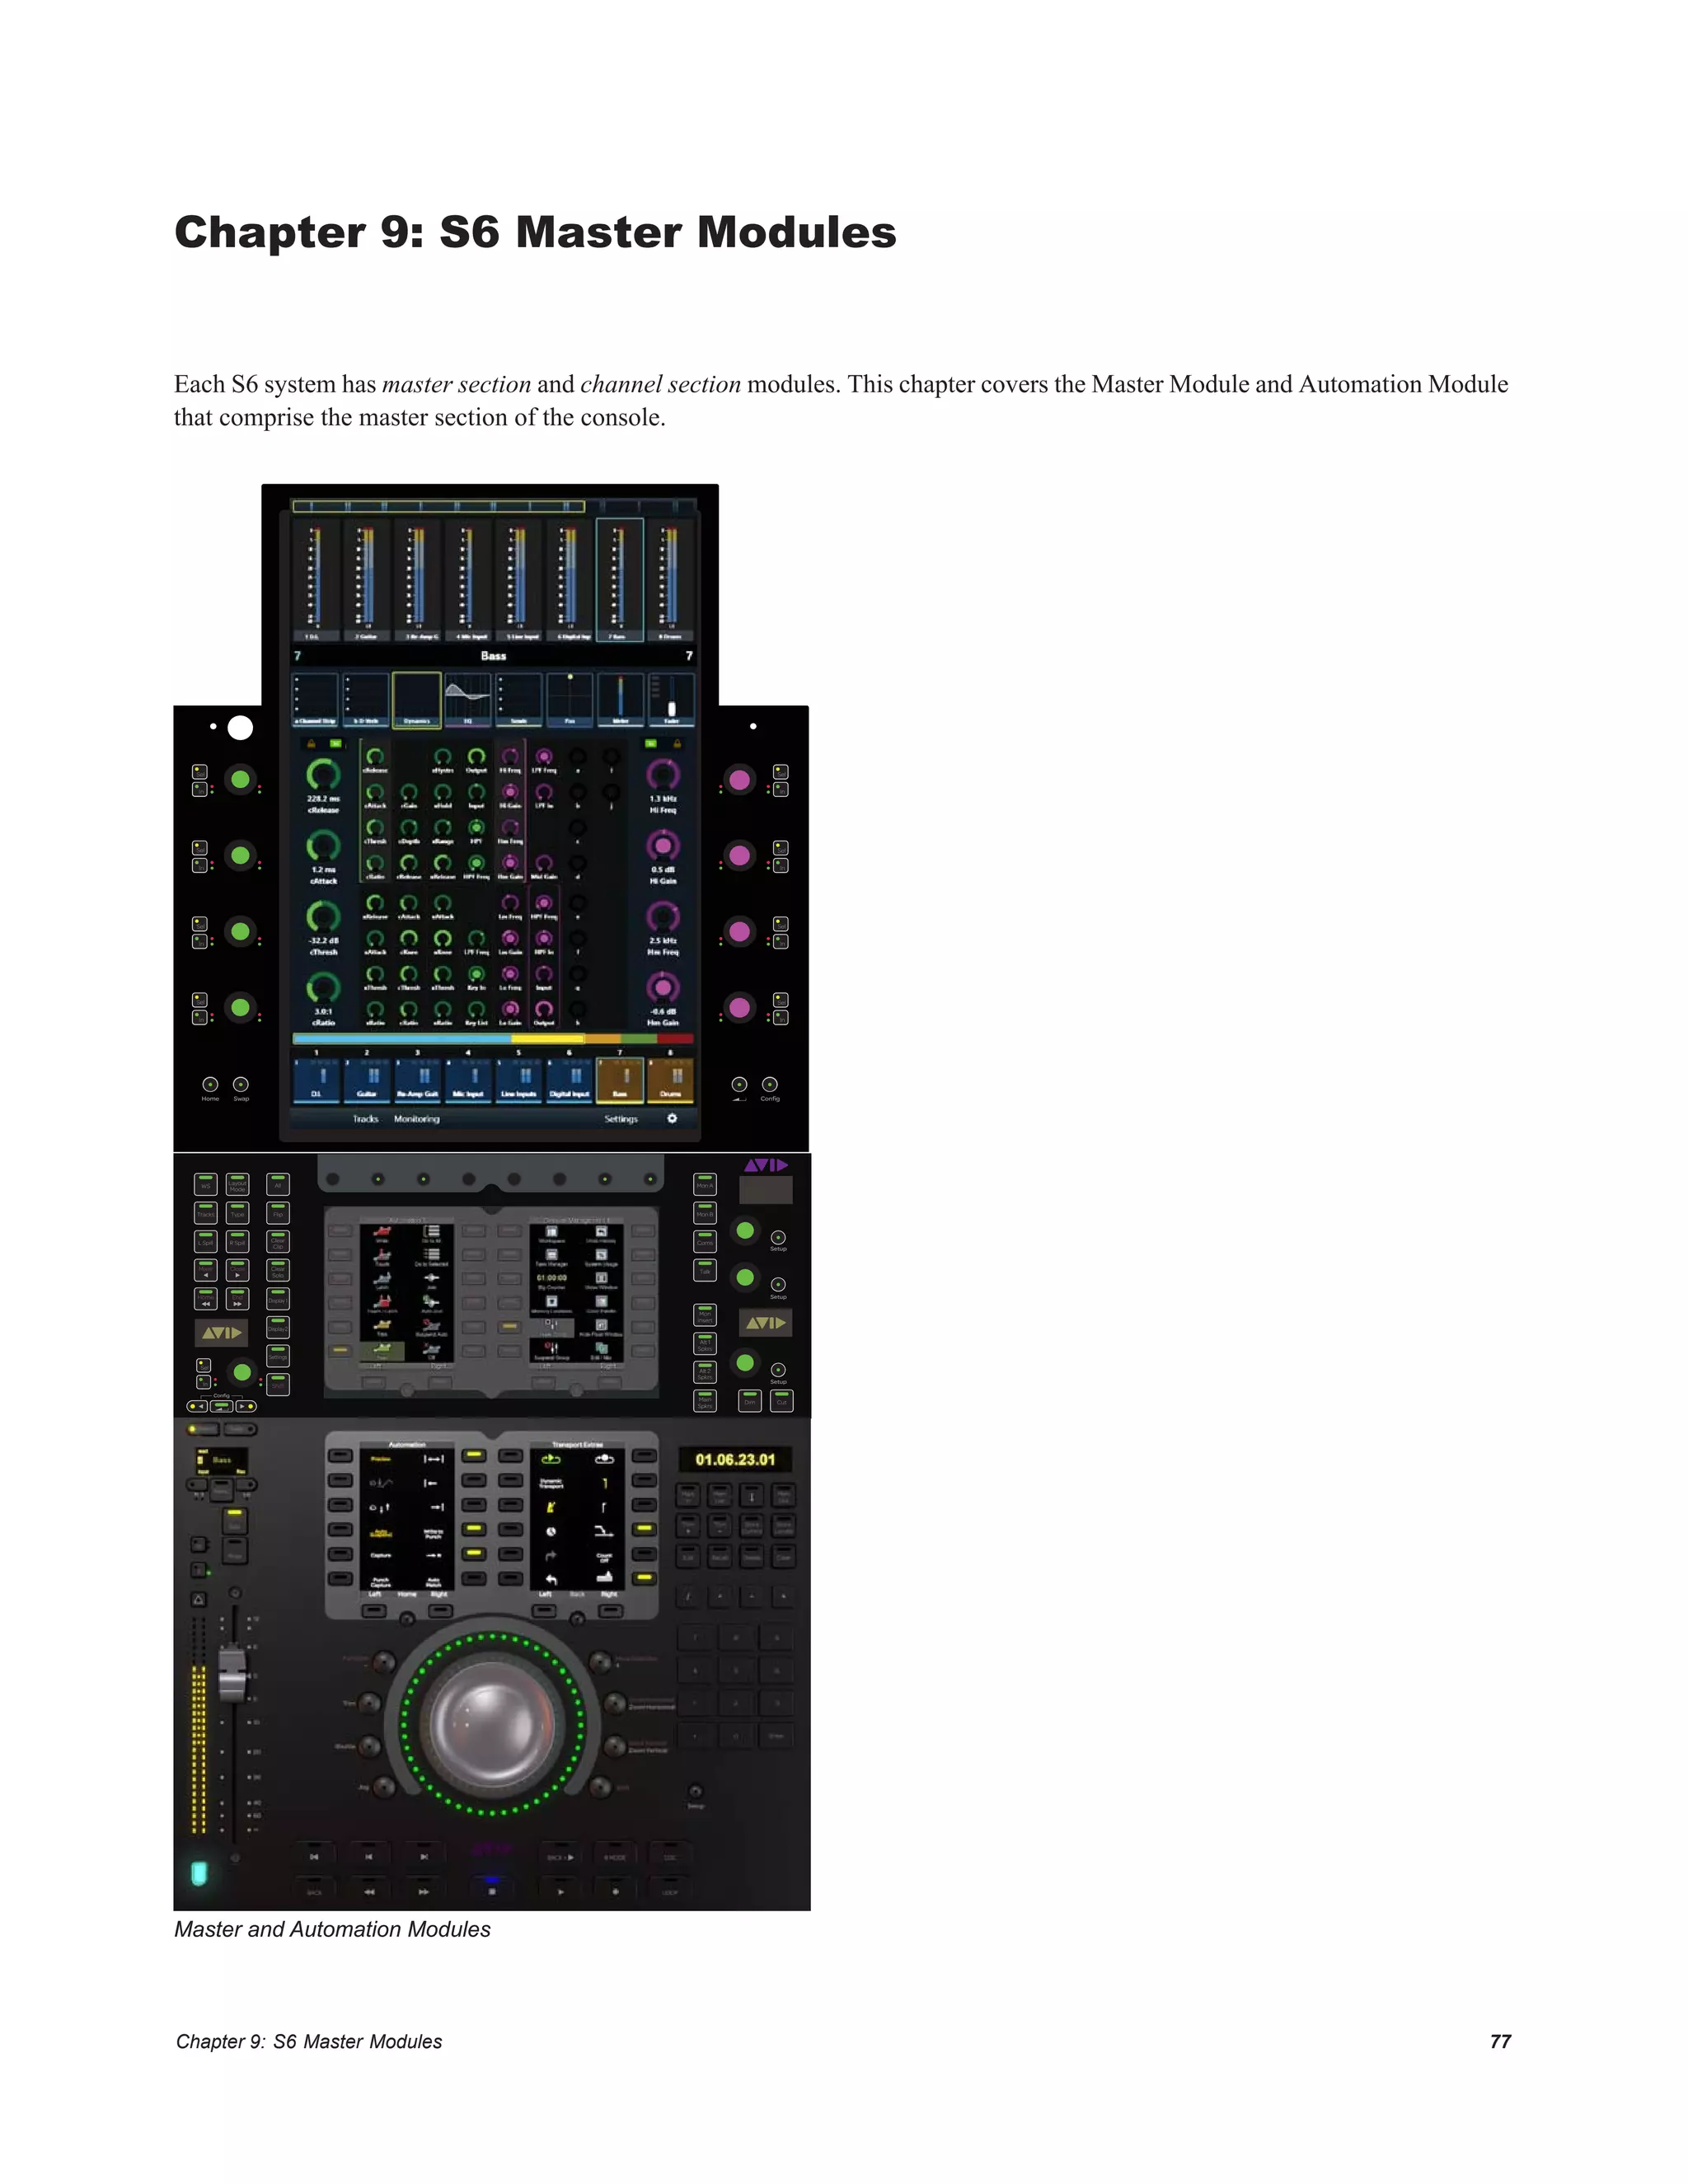
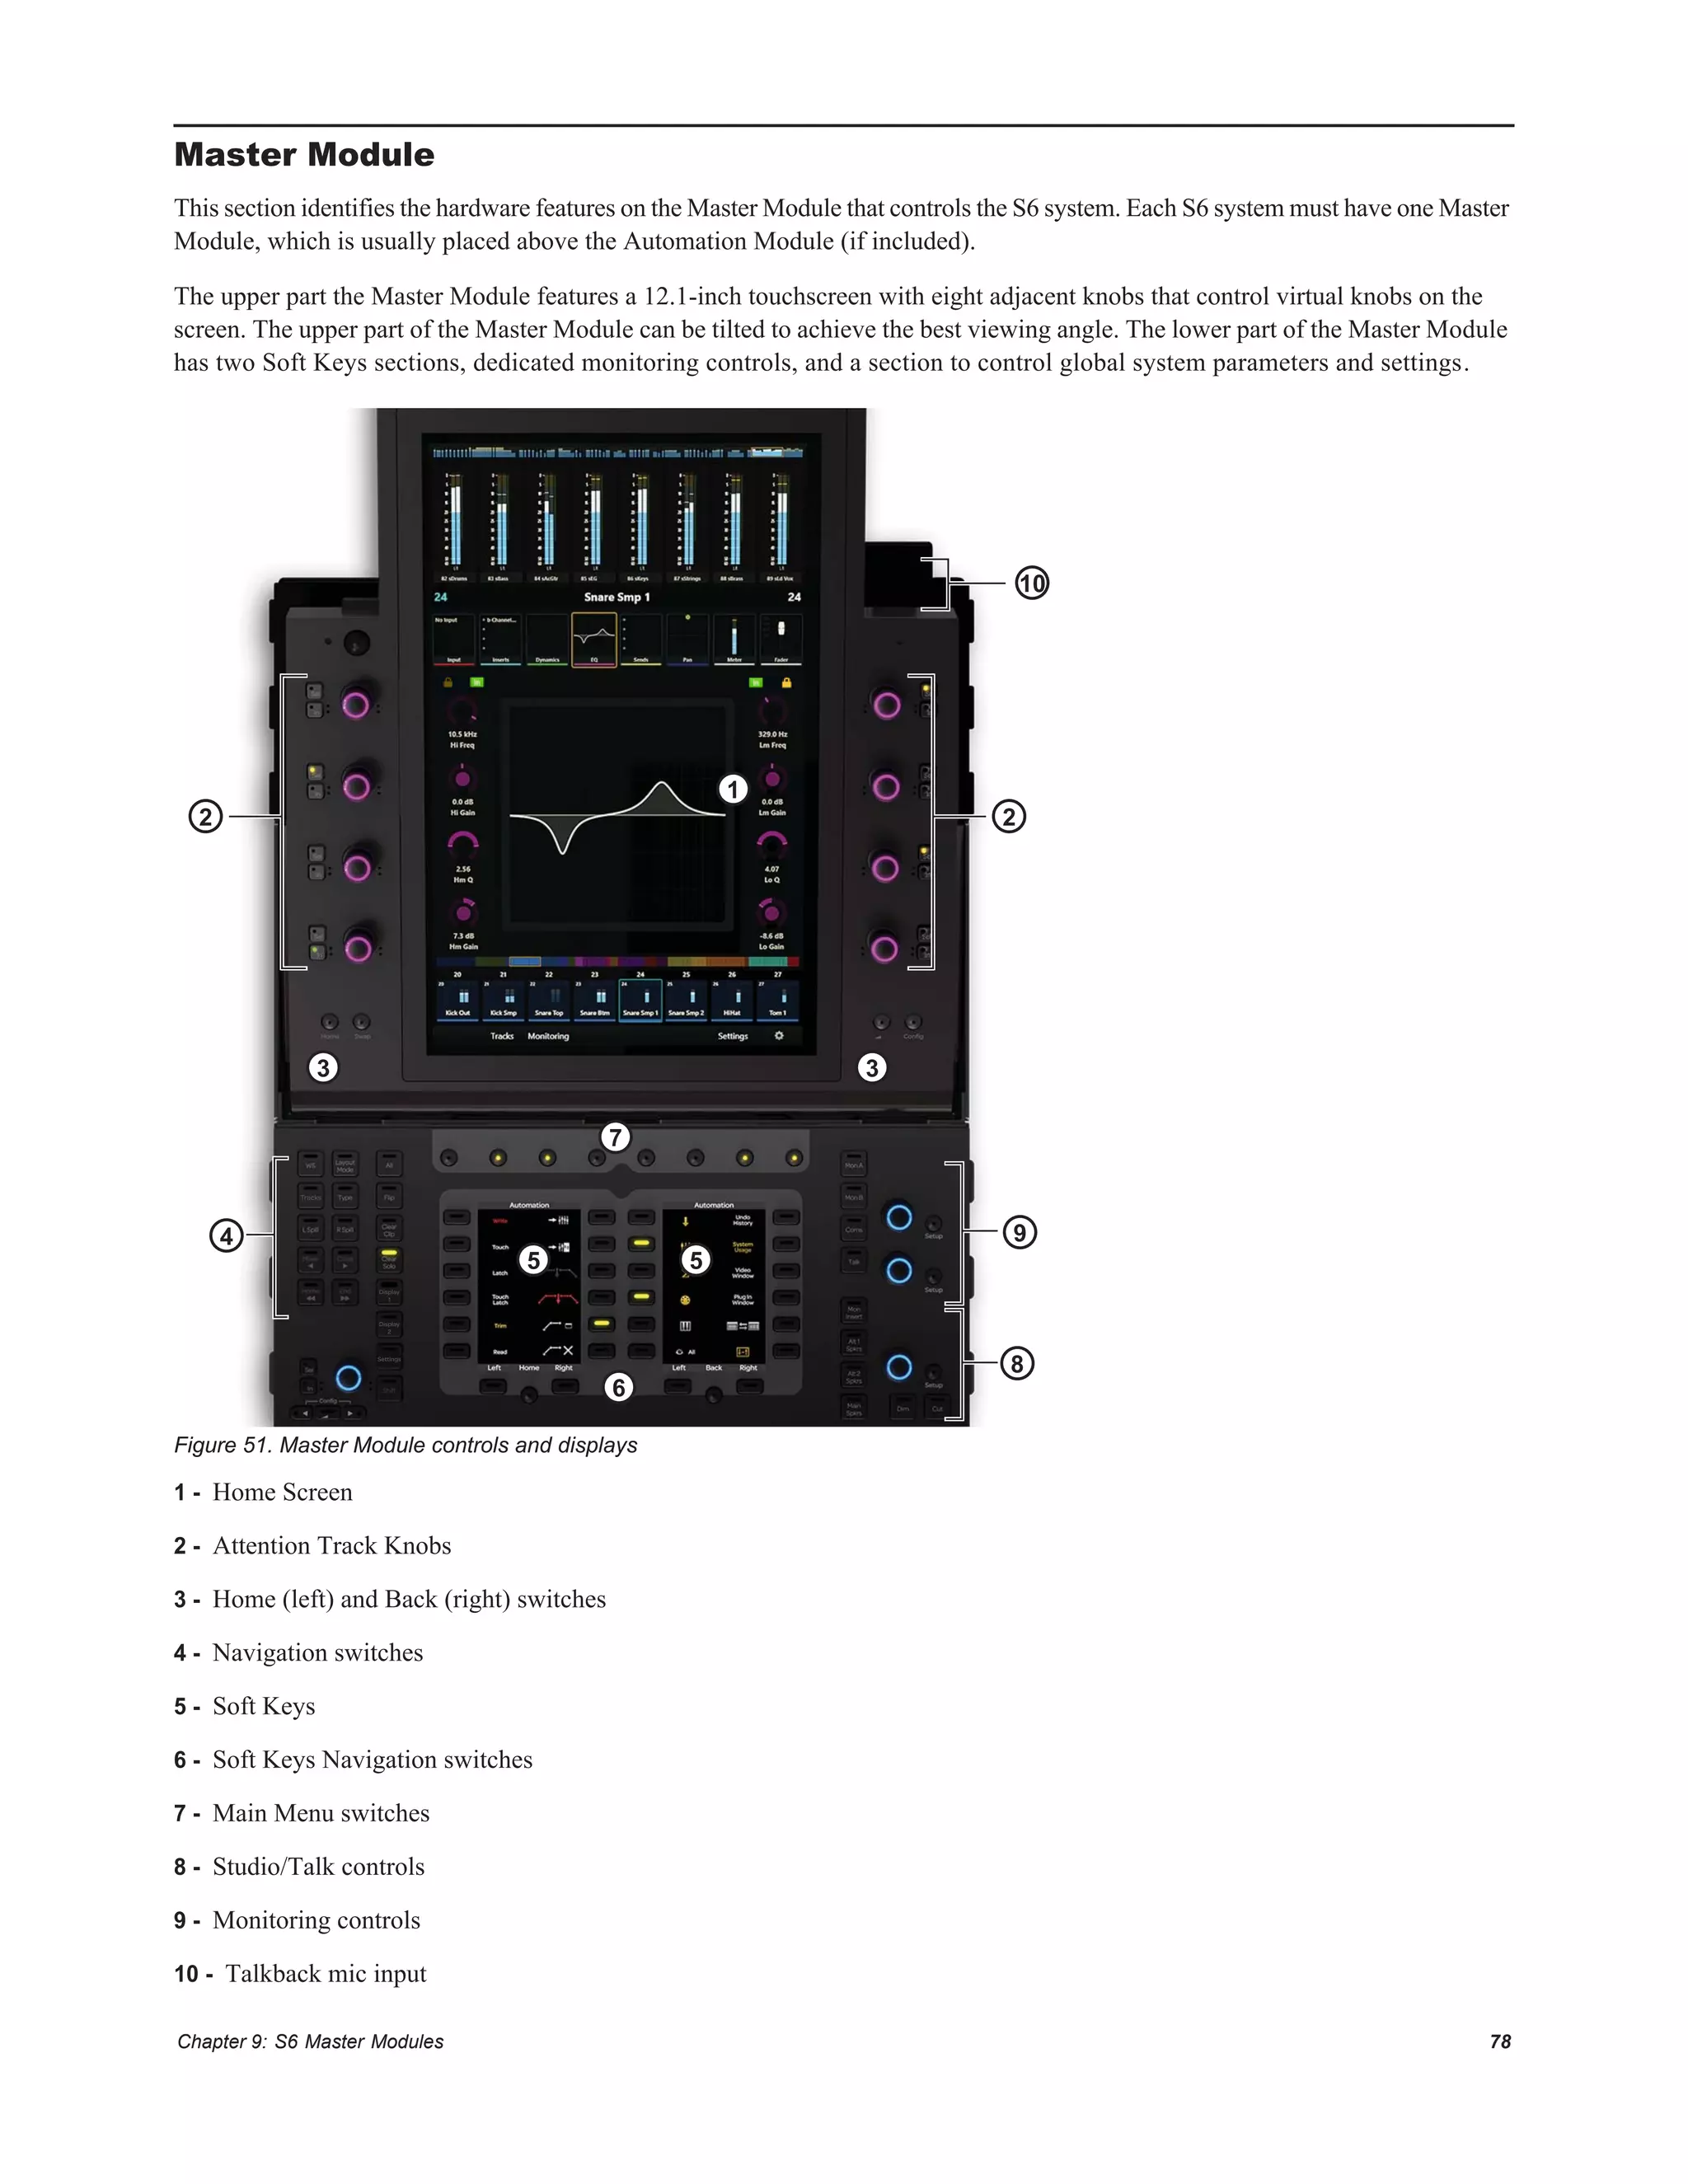
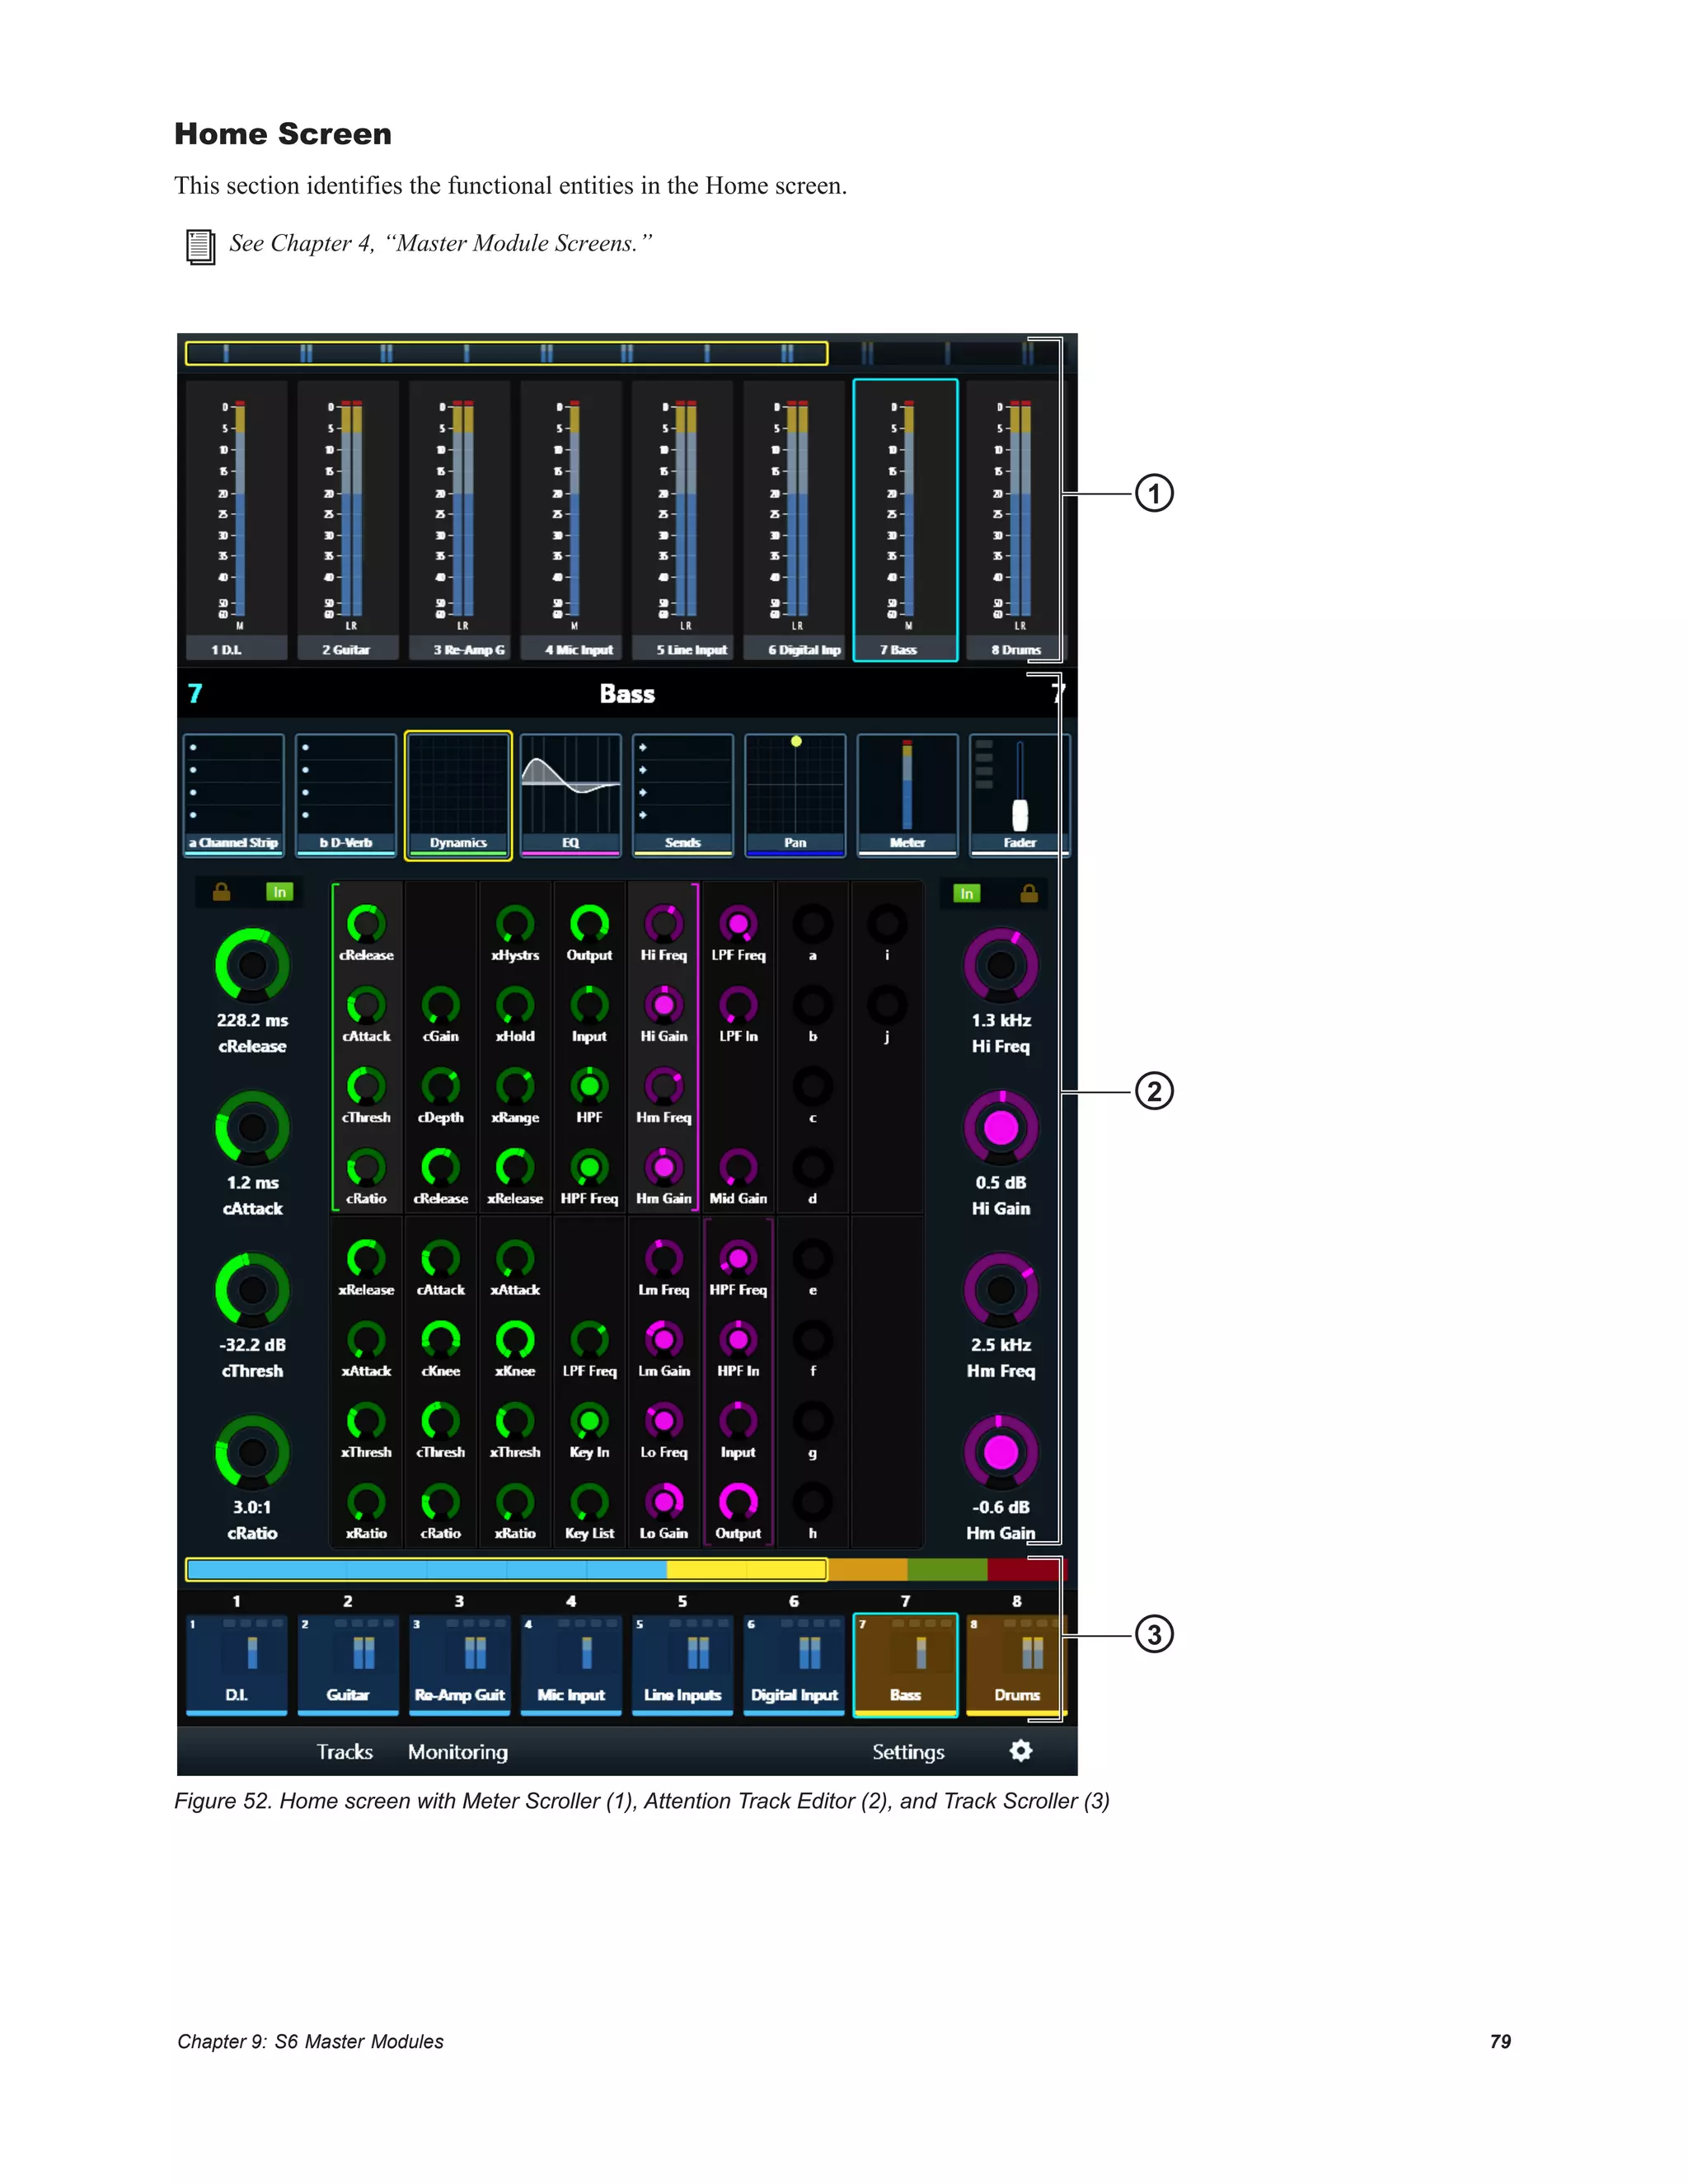
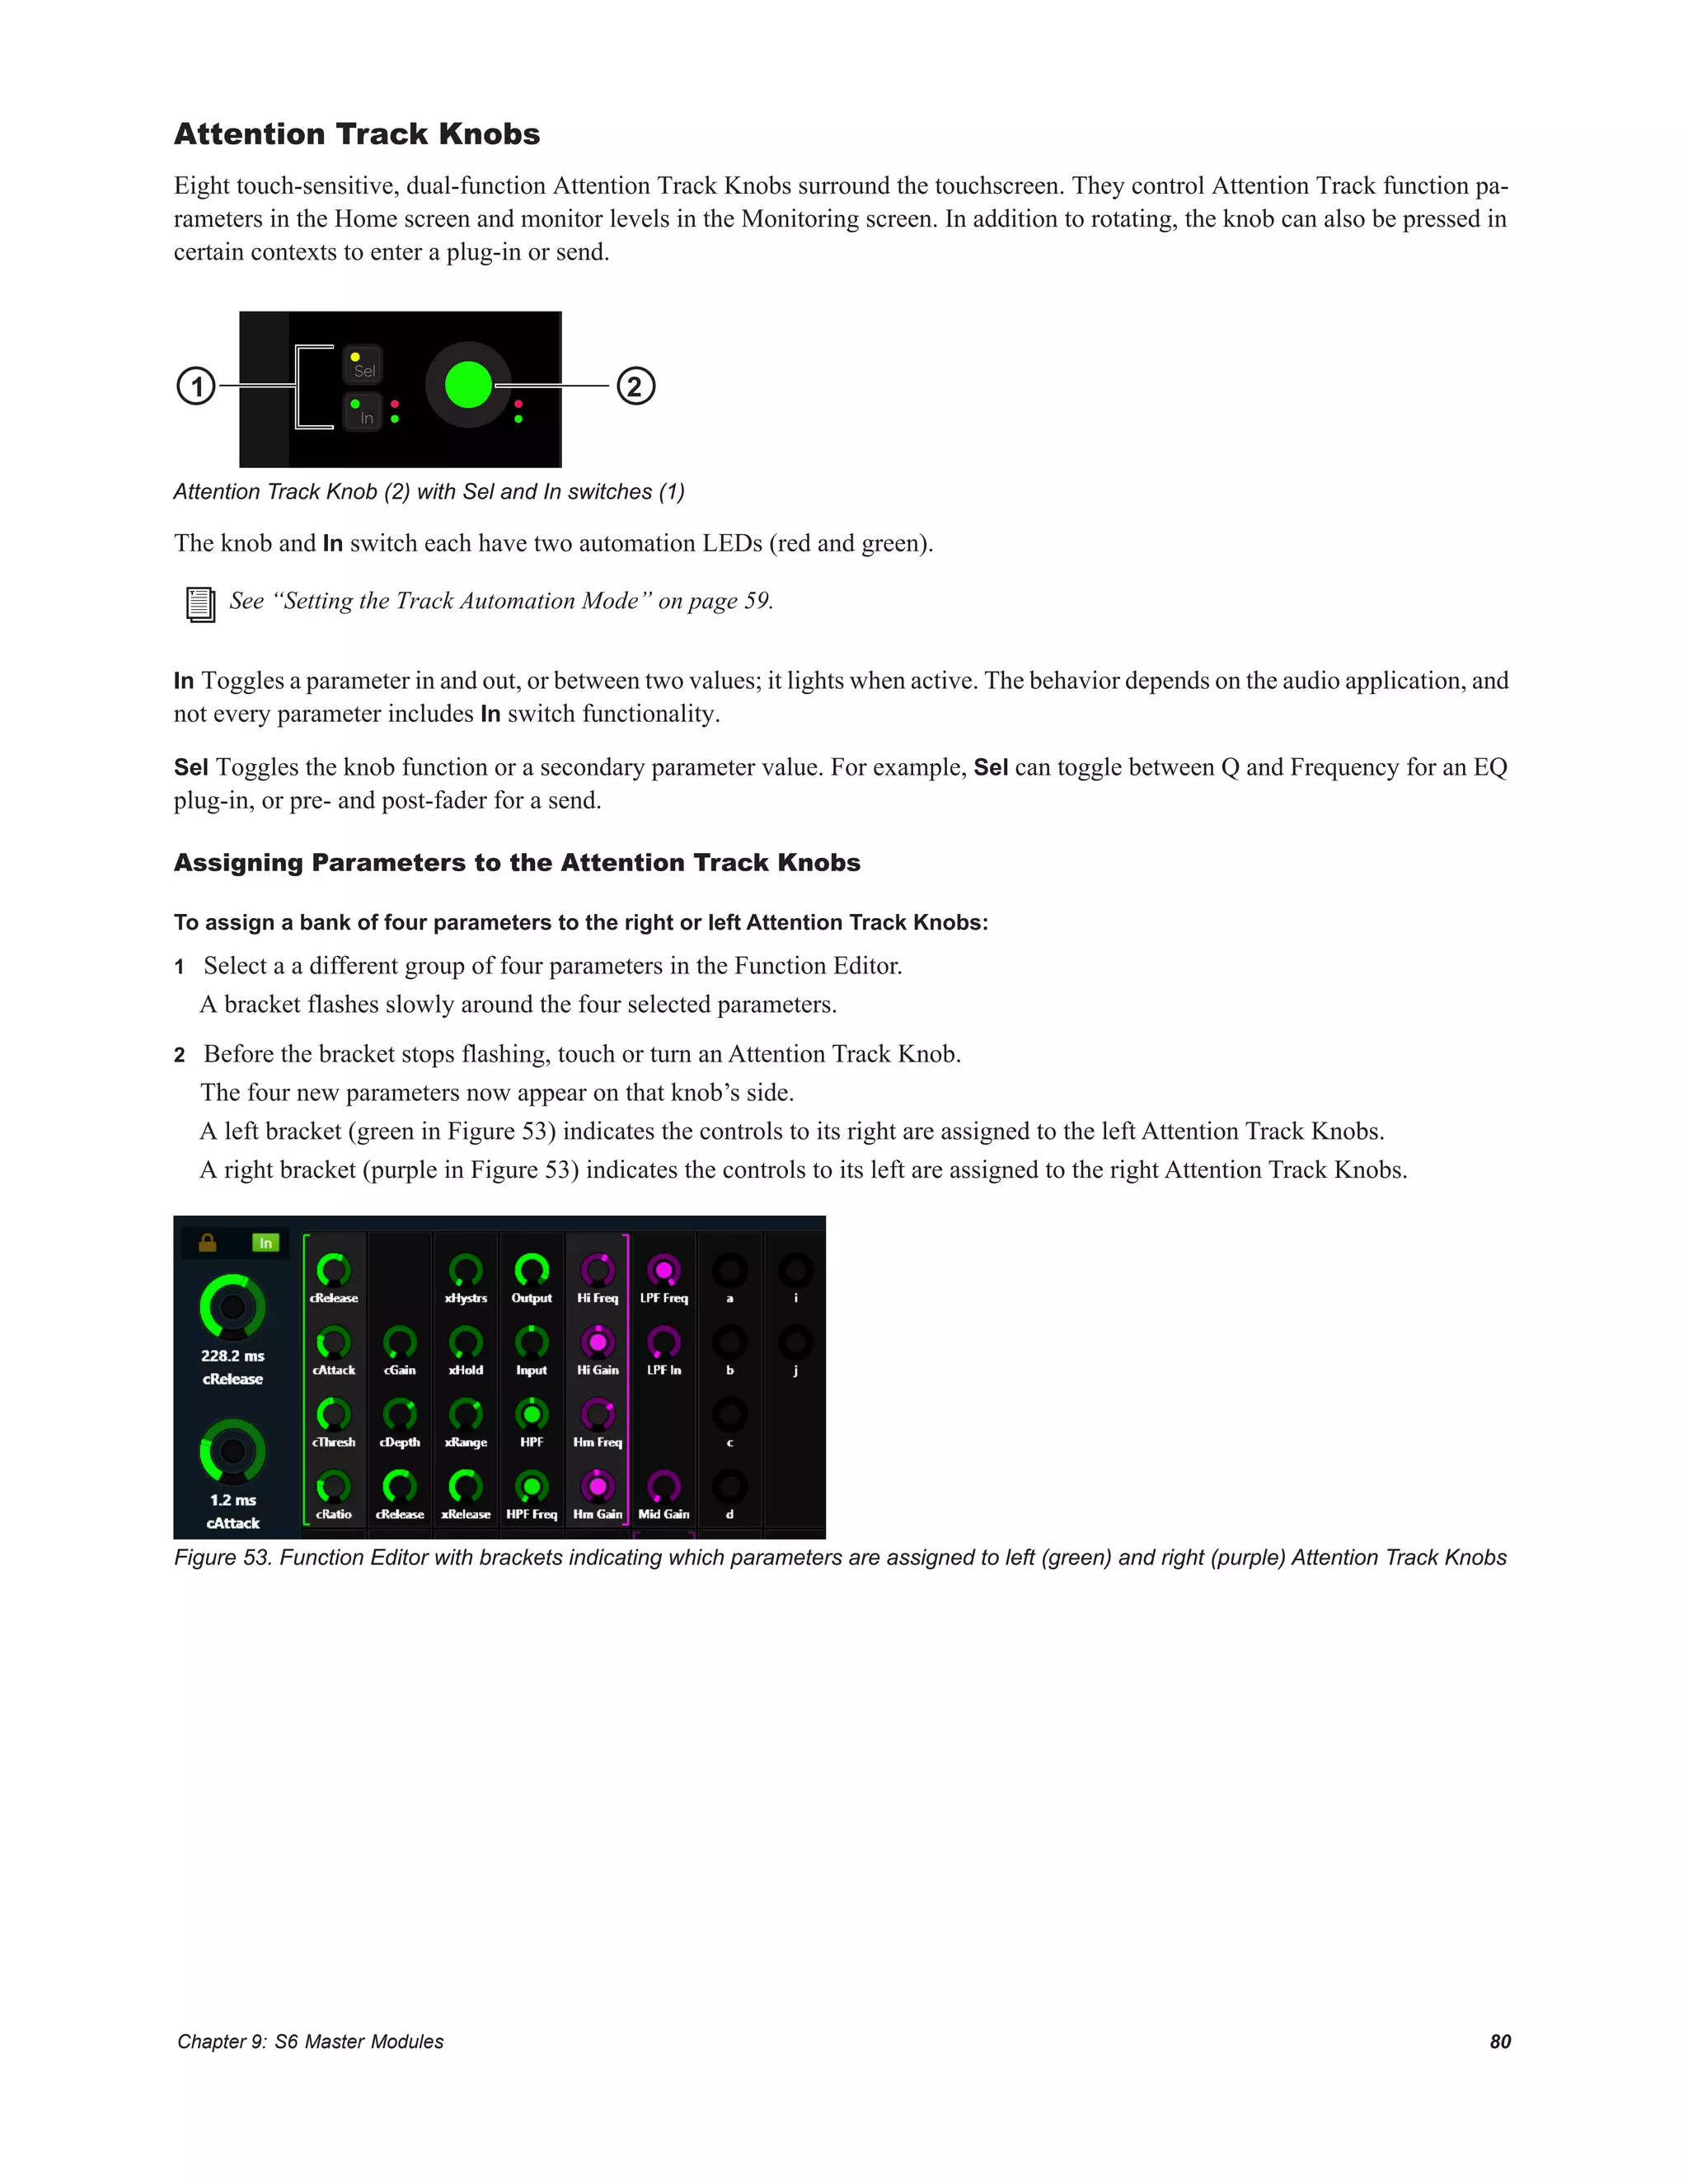
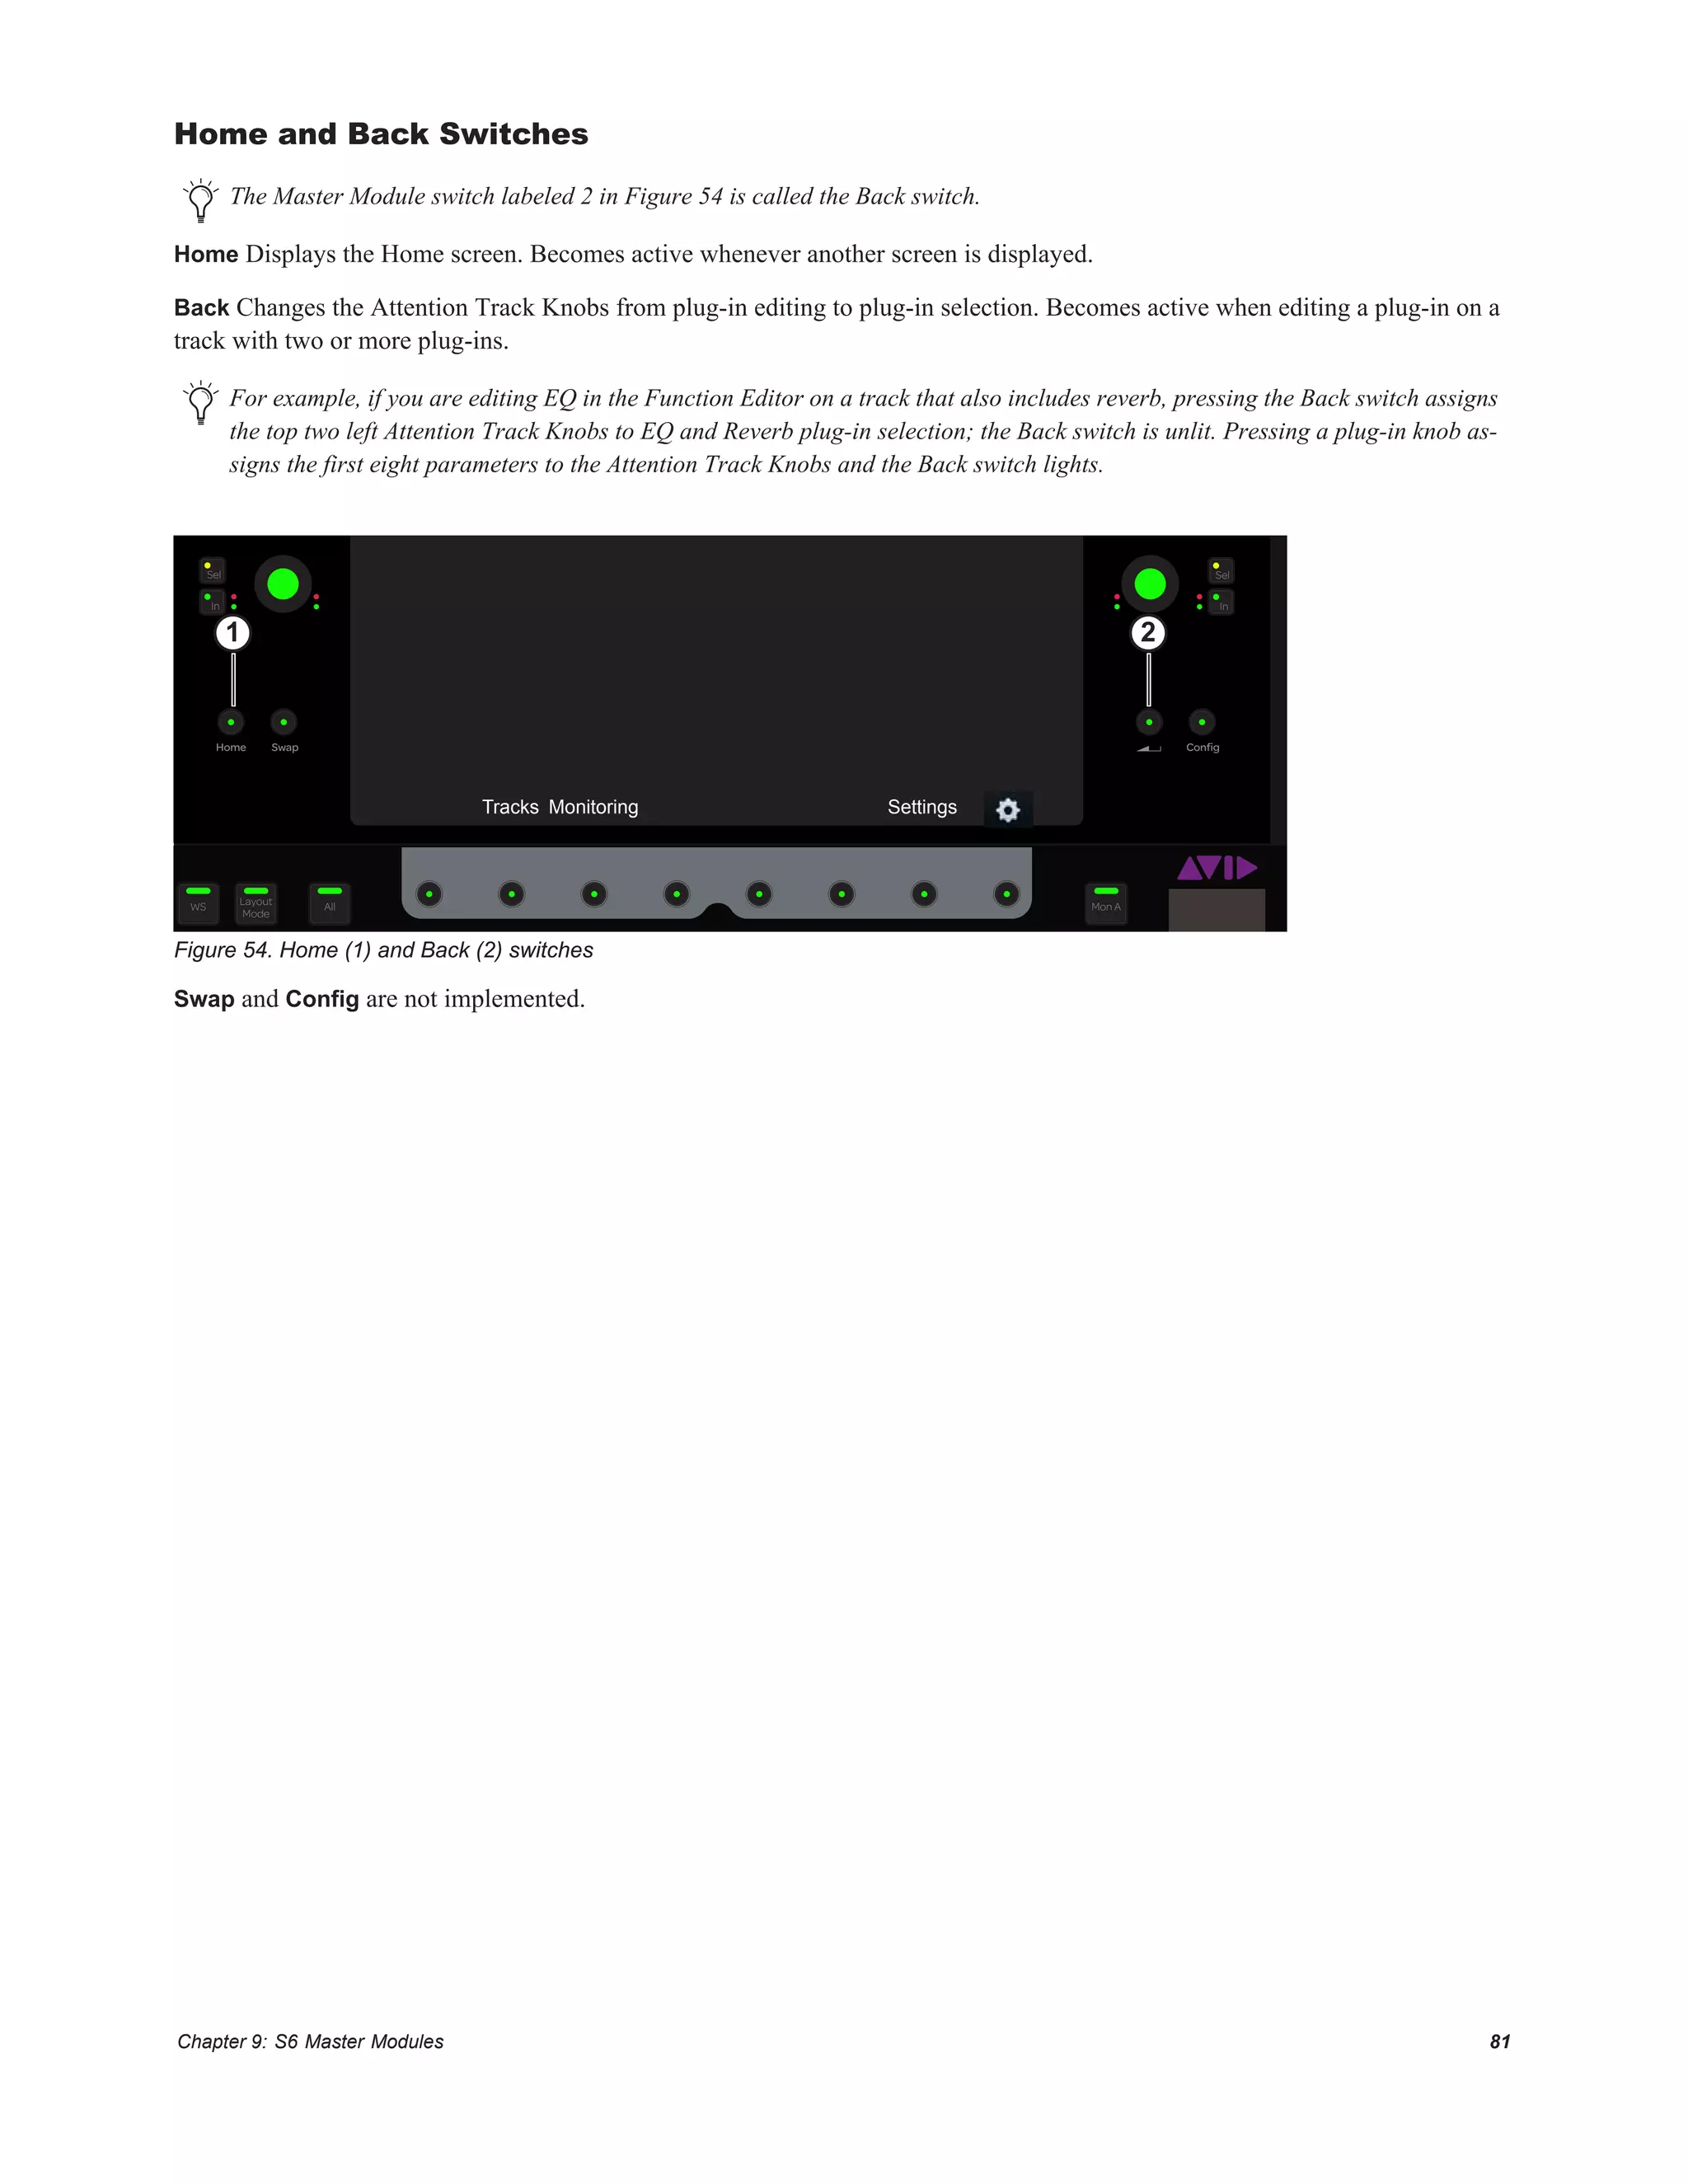
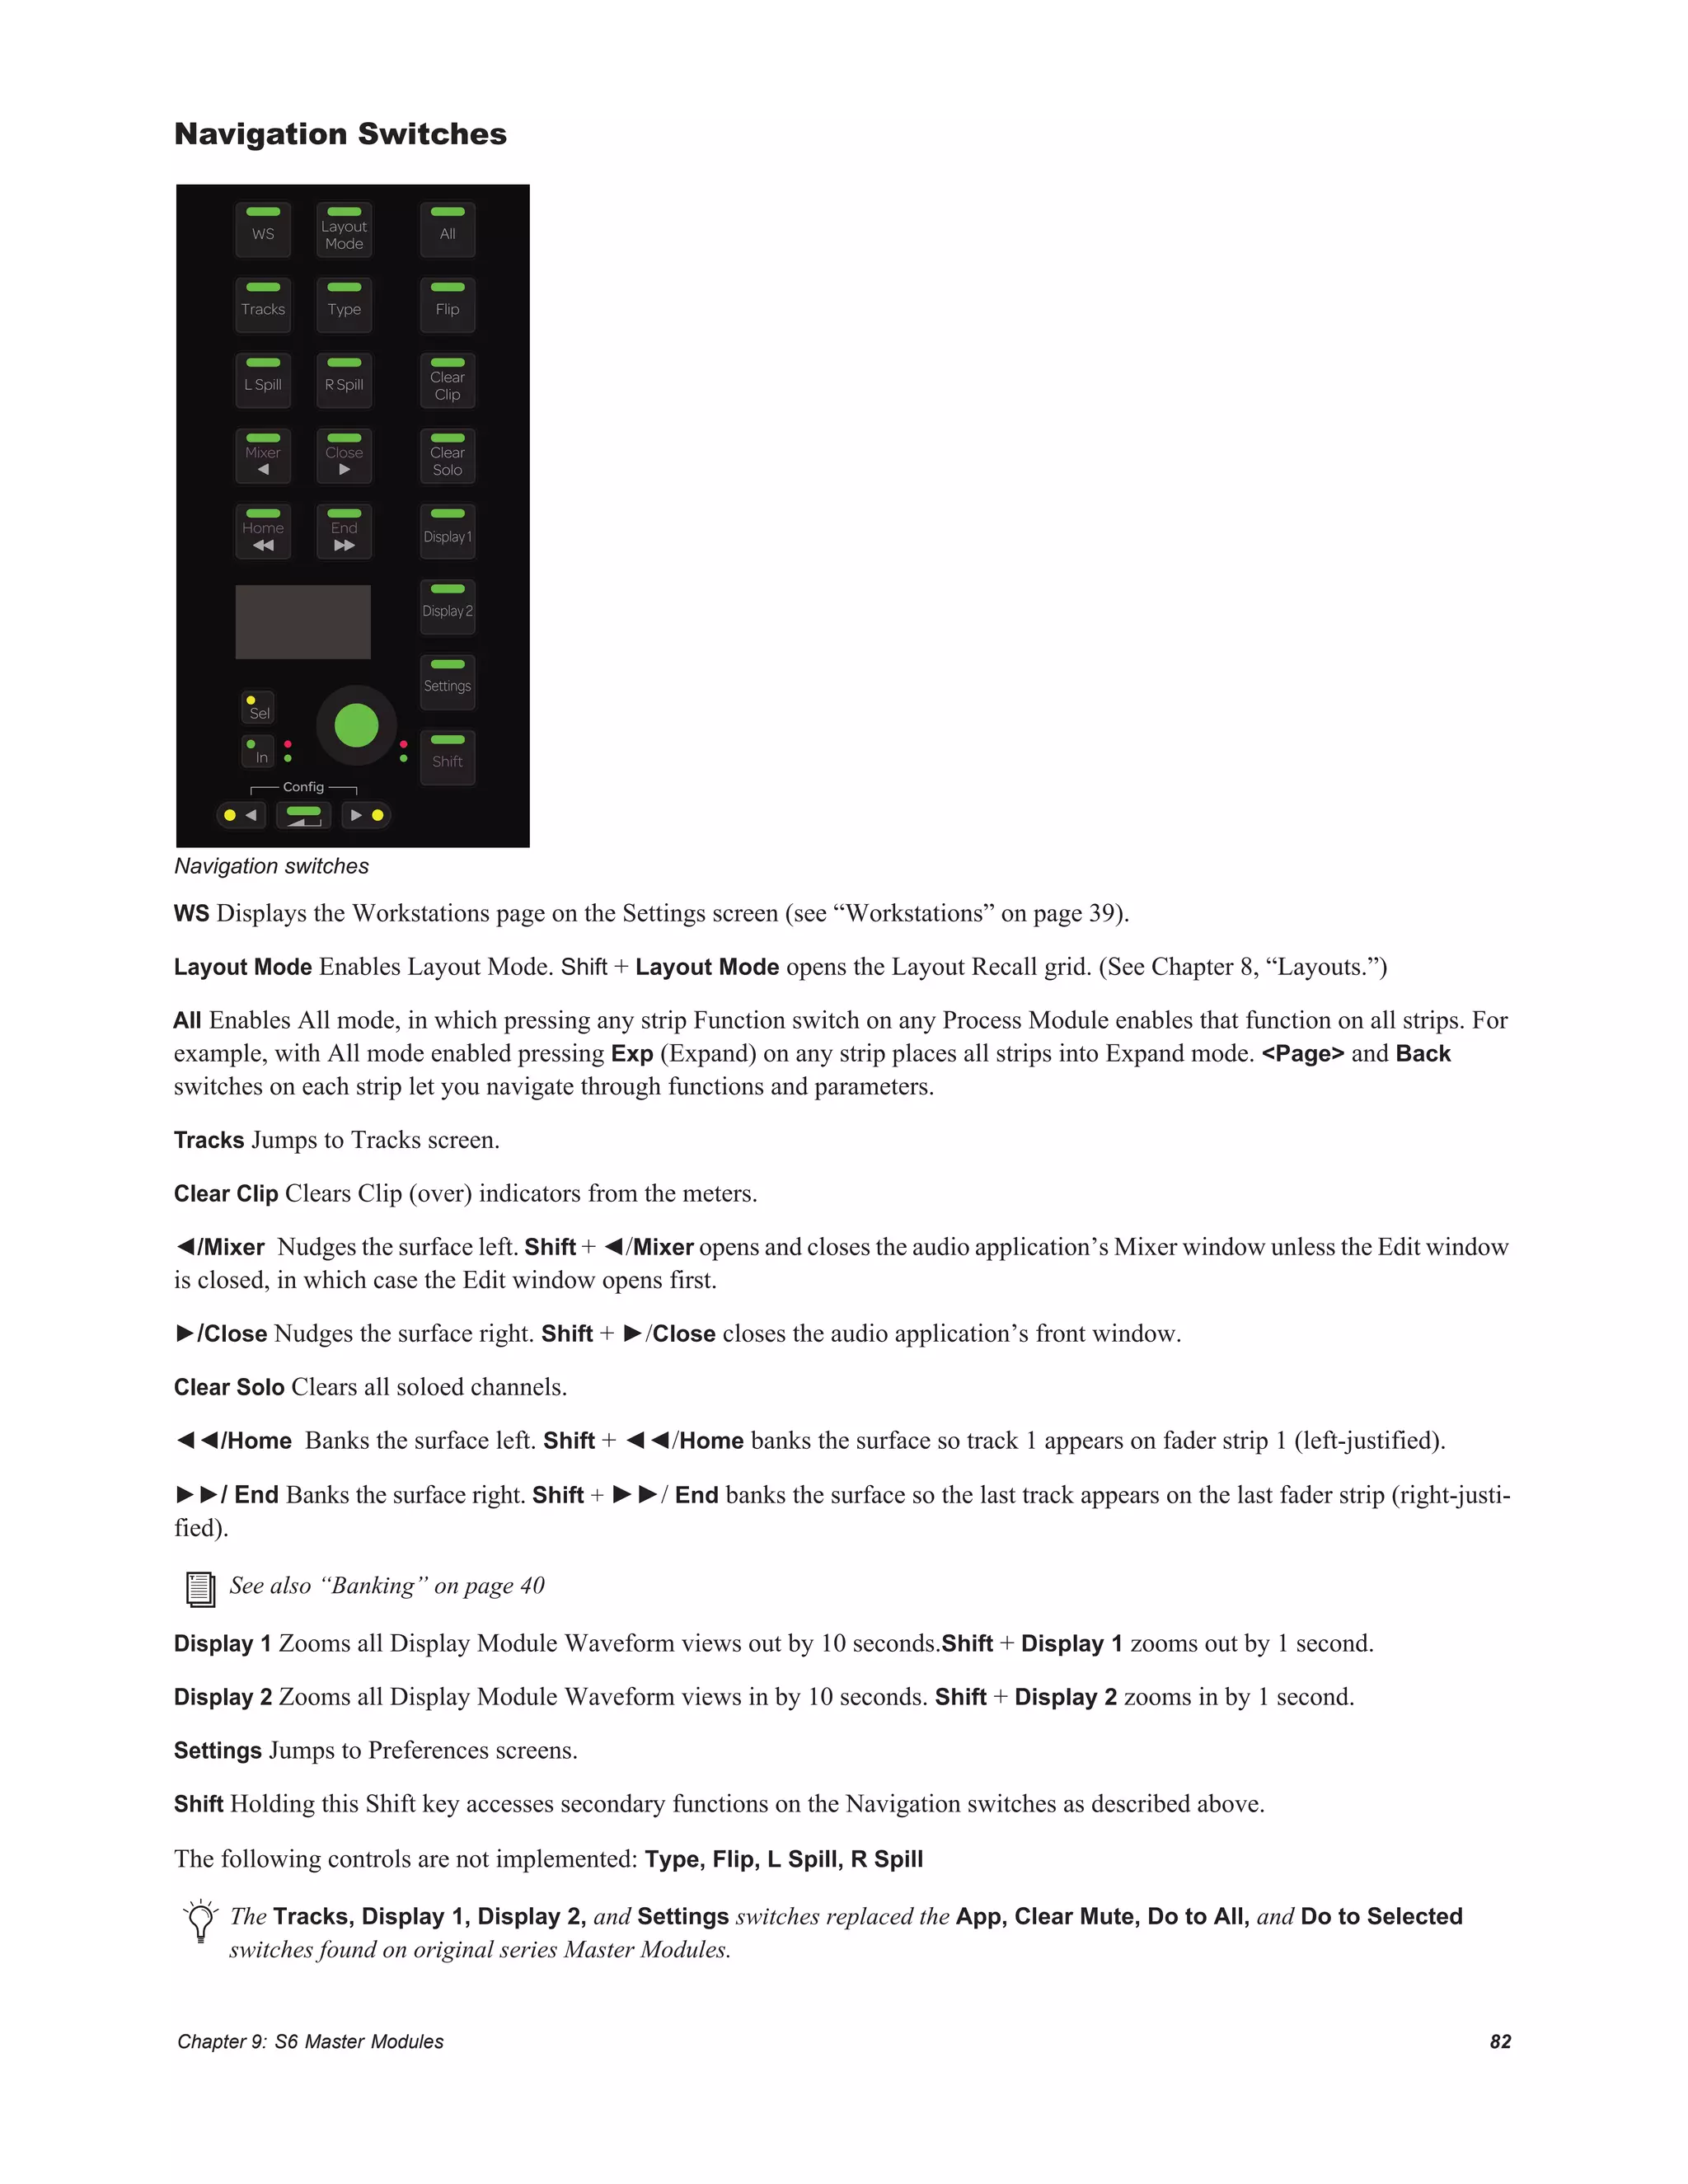
Chapter 3: First Time Setup
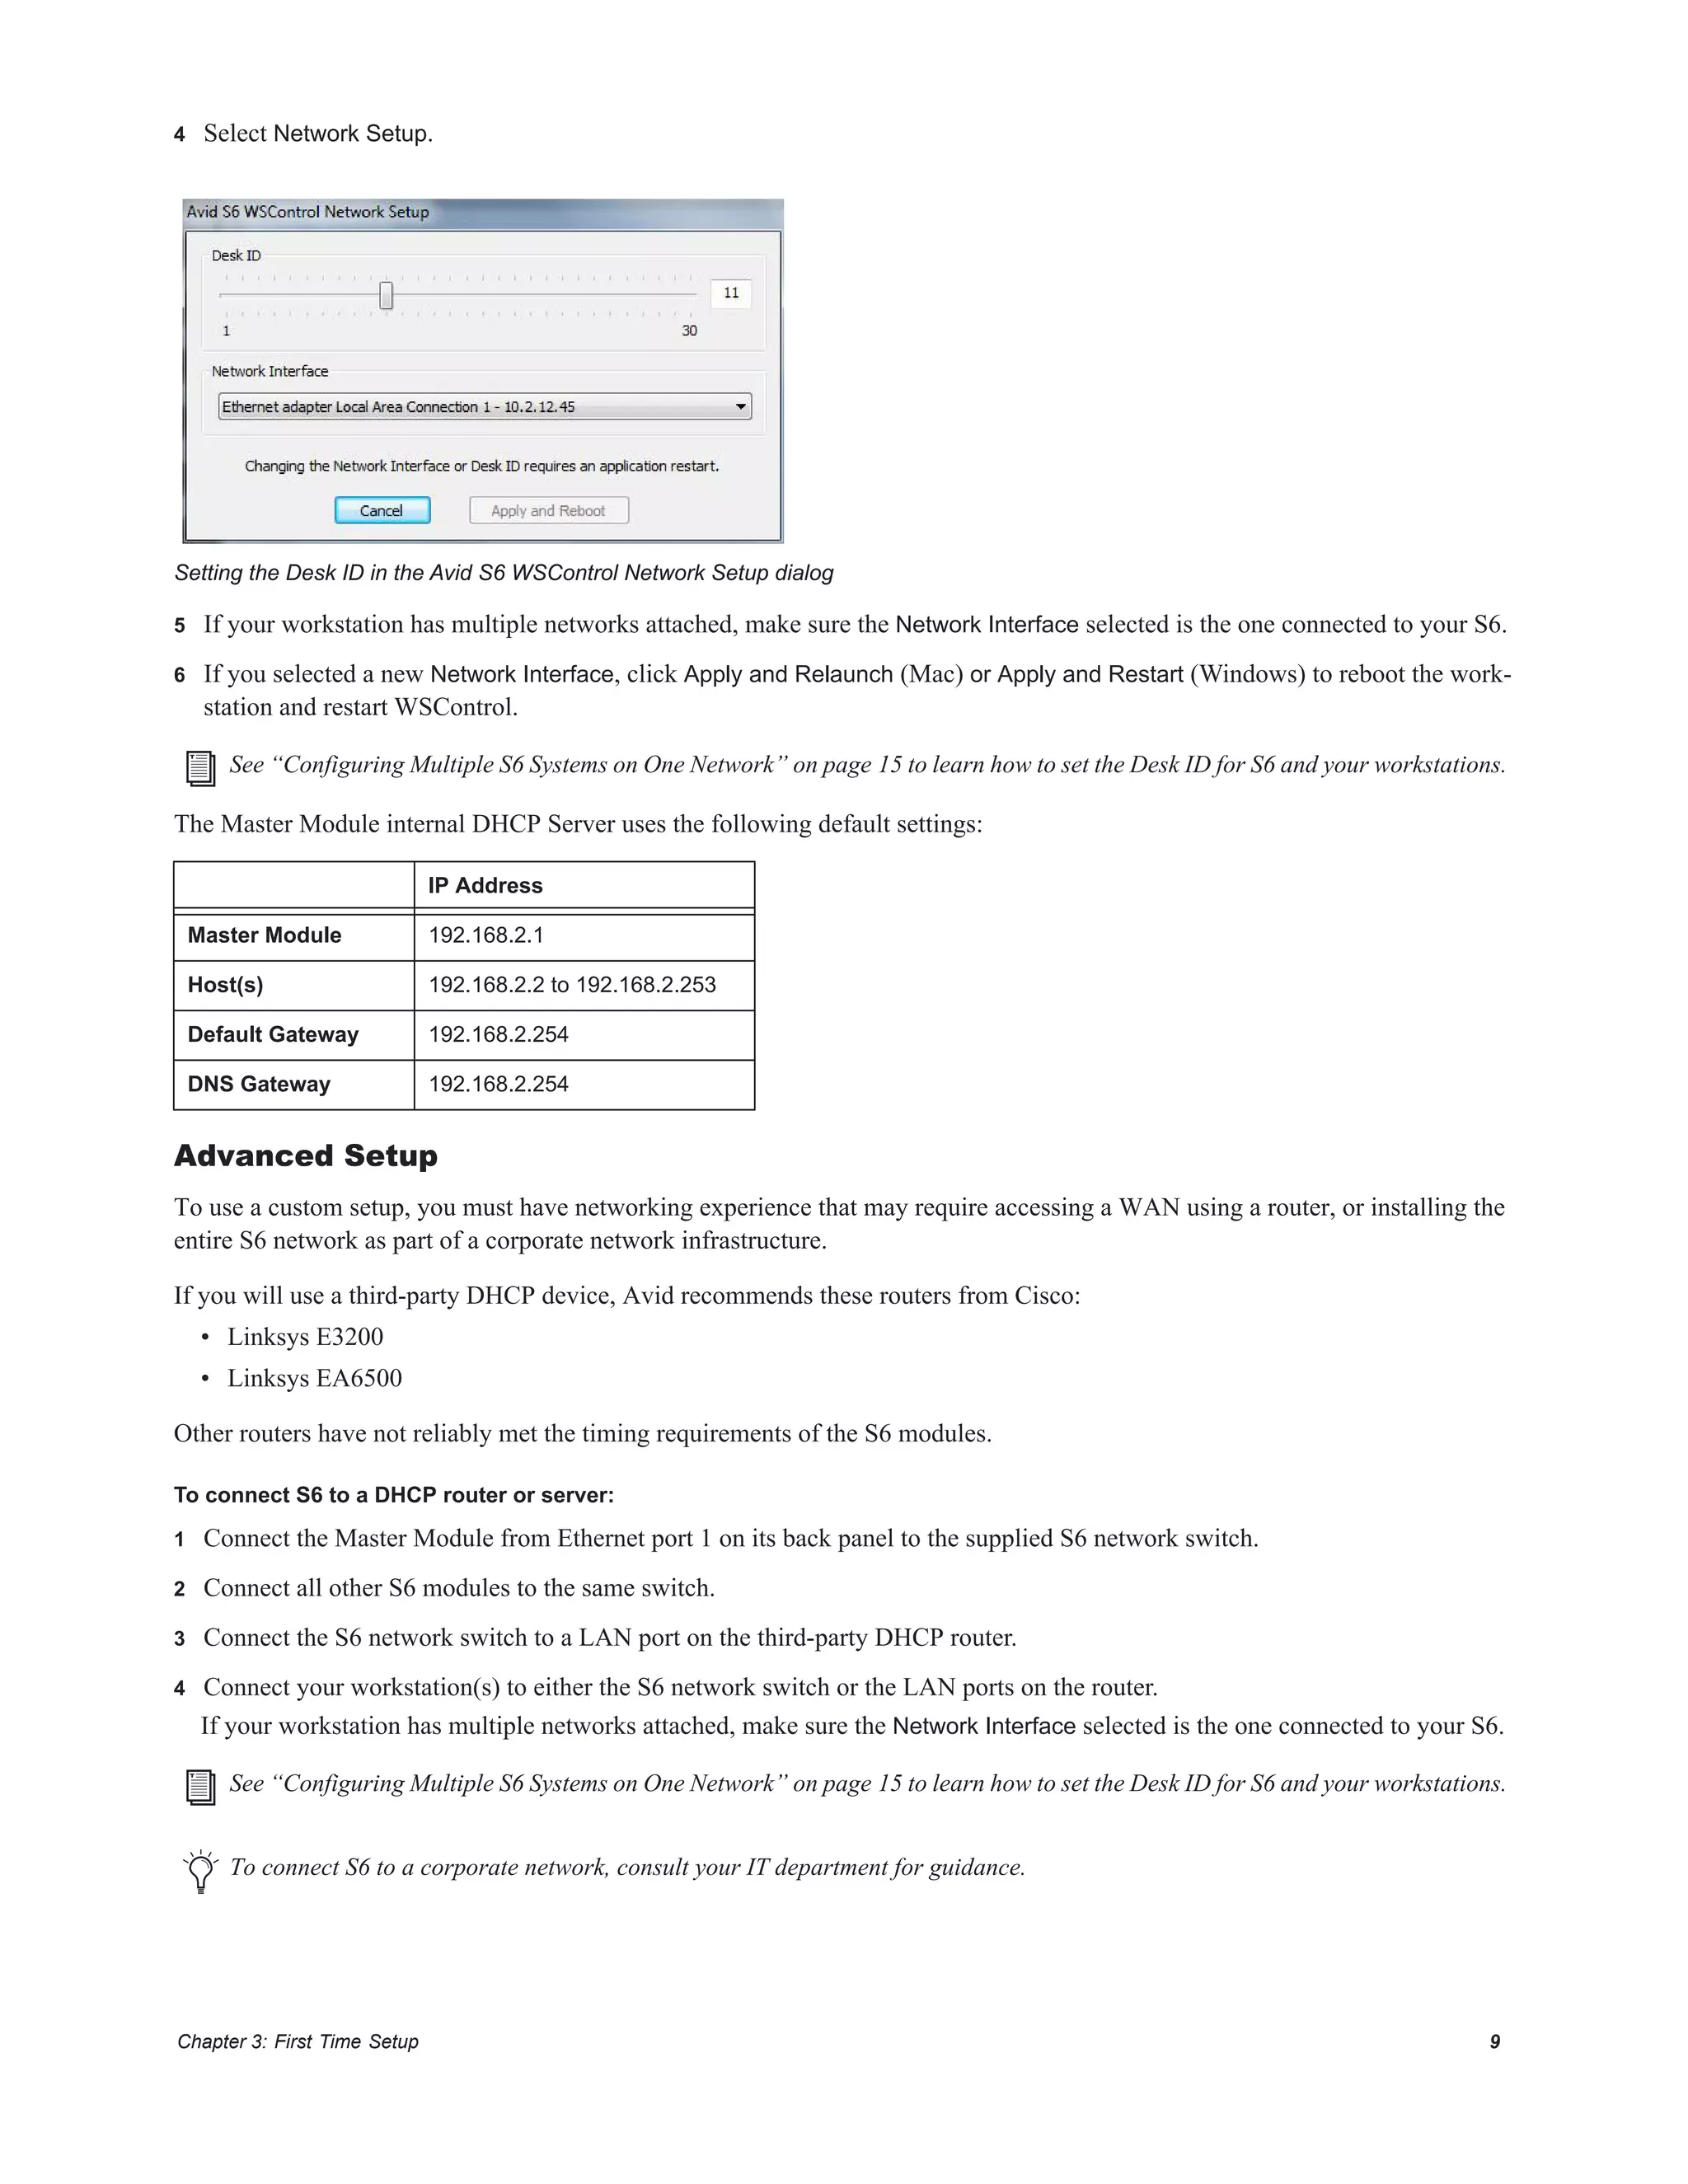
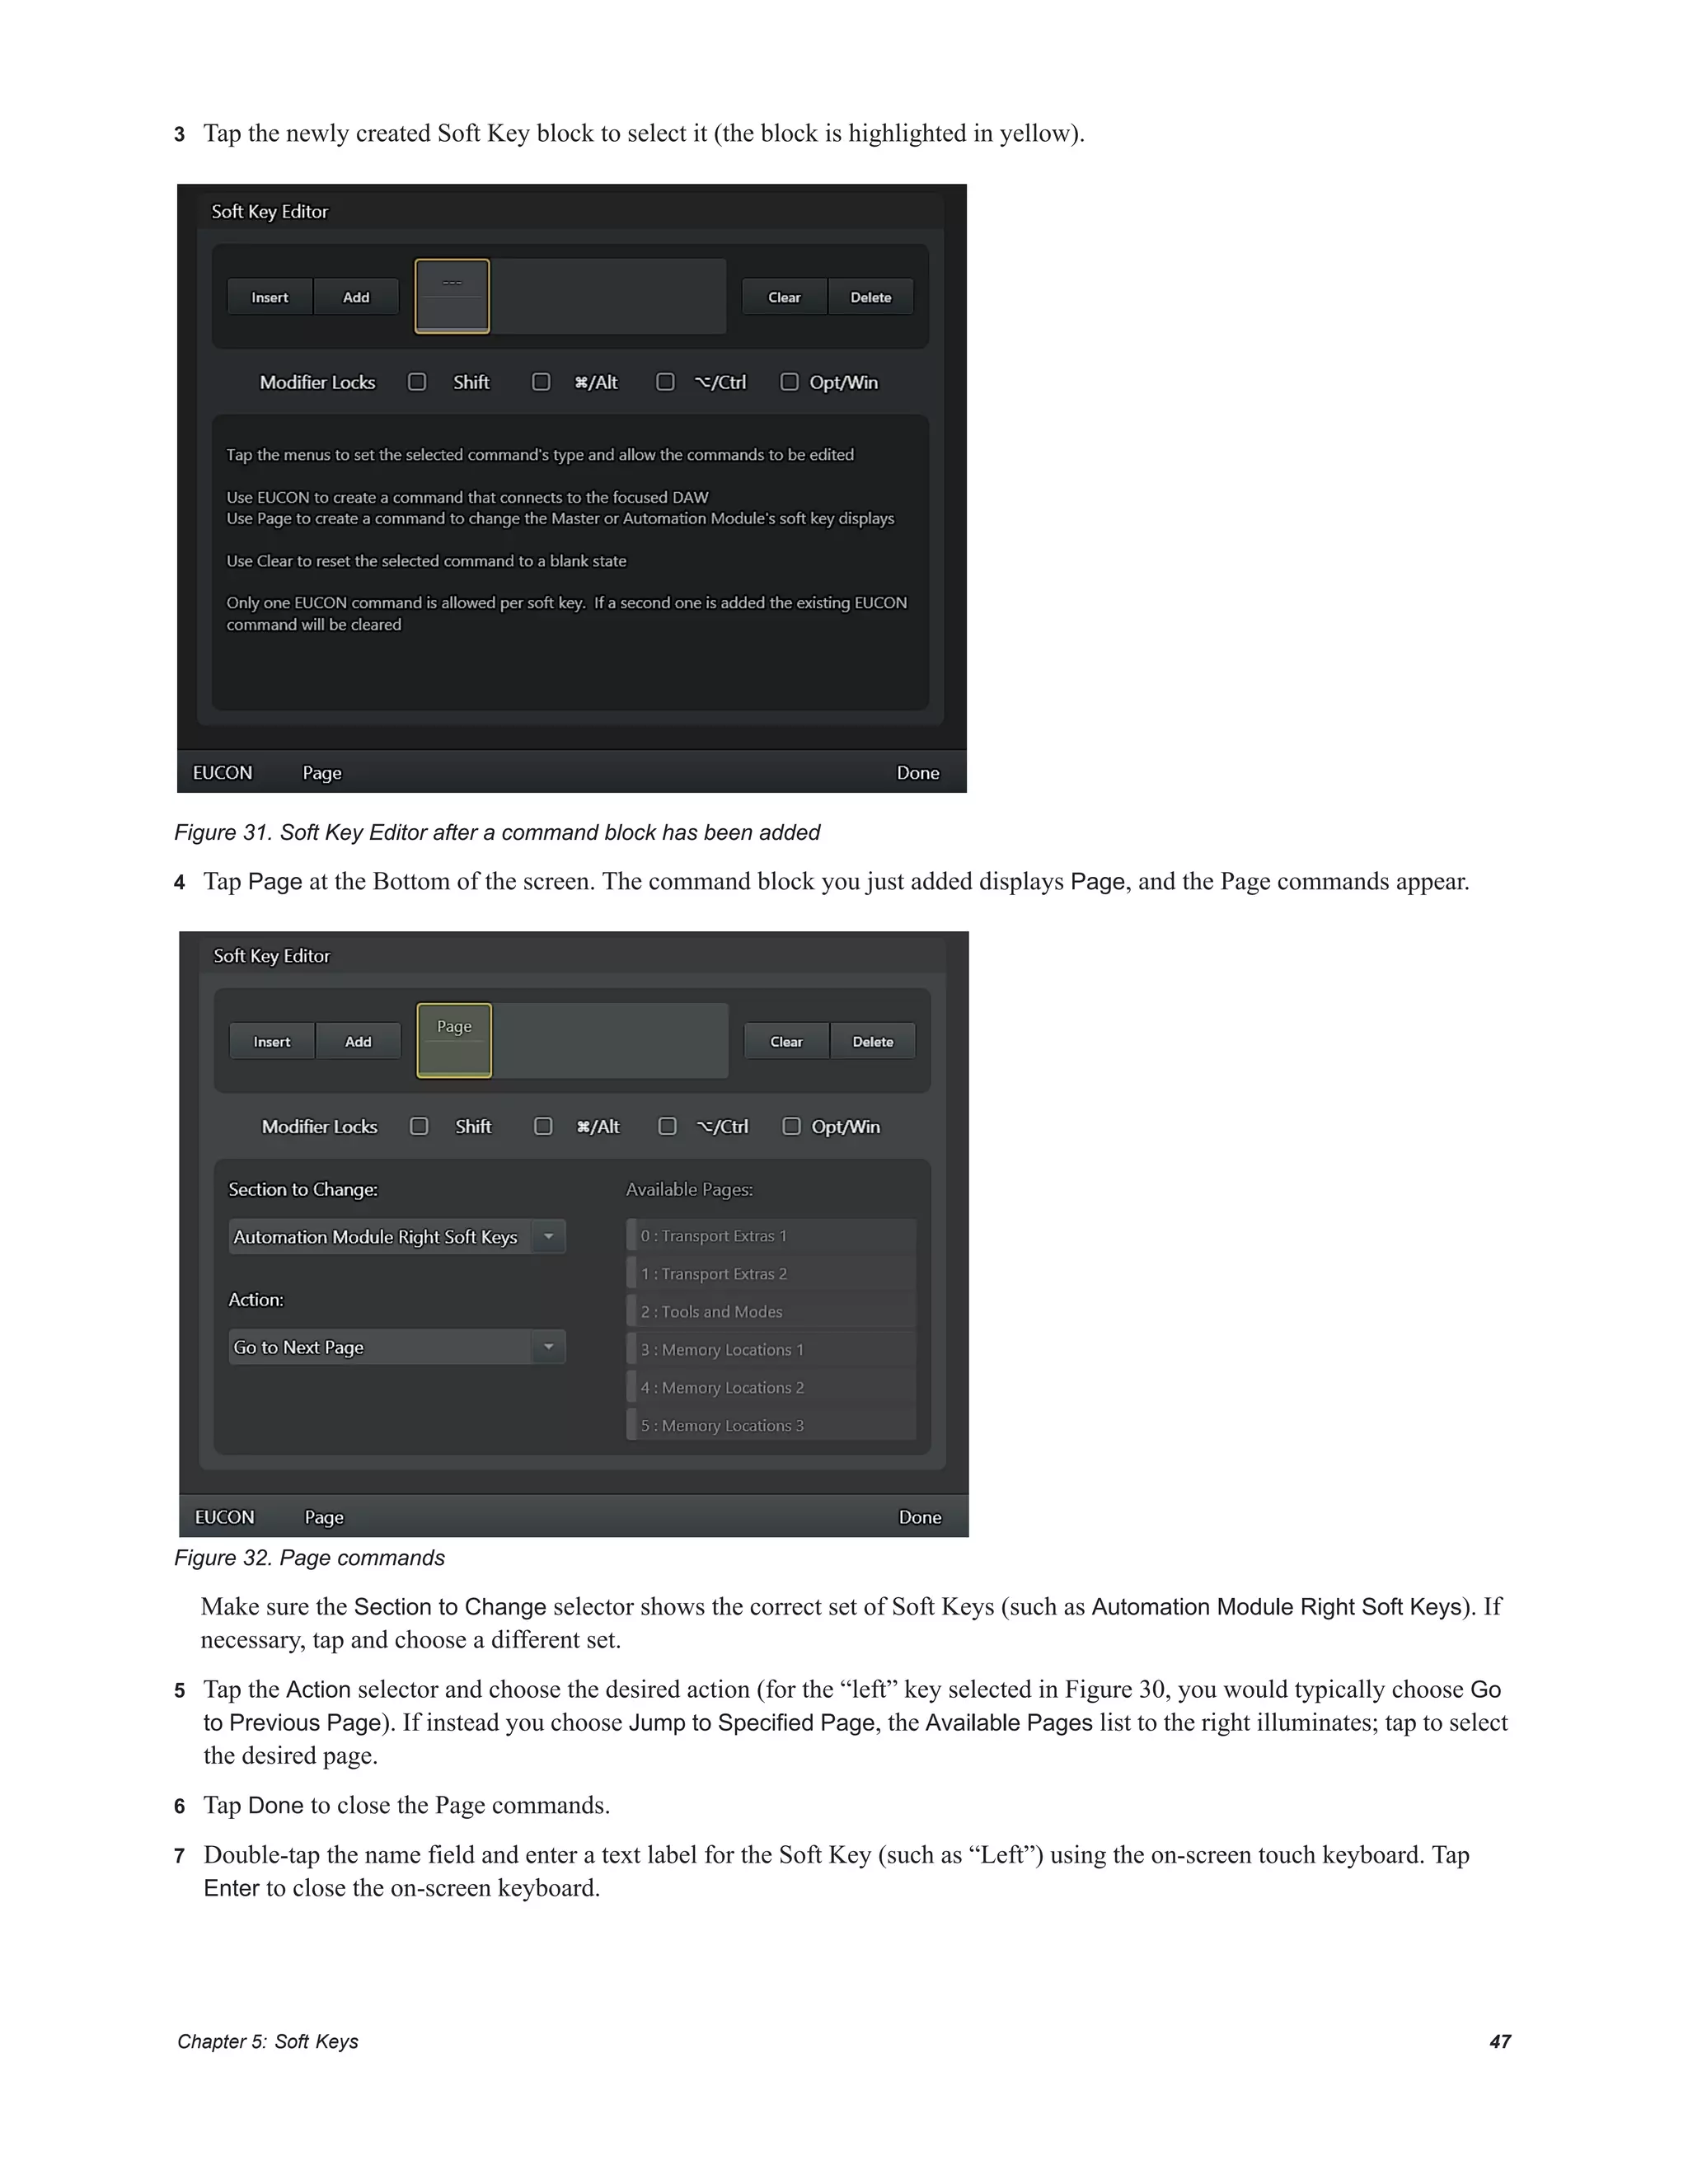
Connecting S6 to a Network
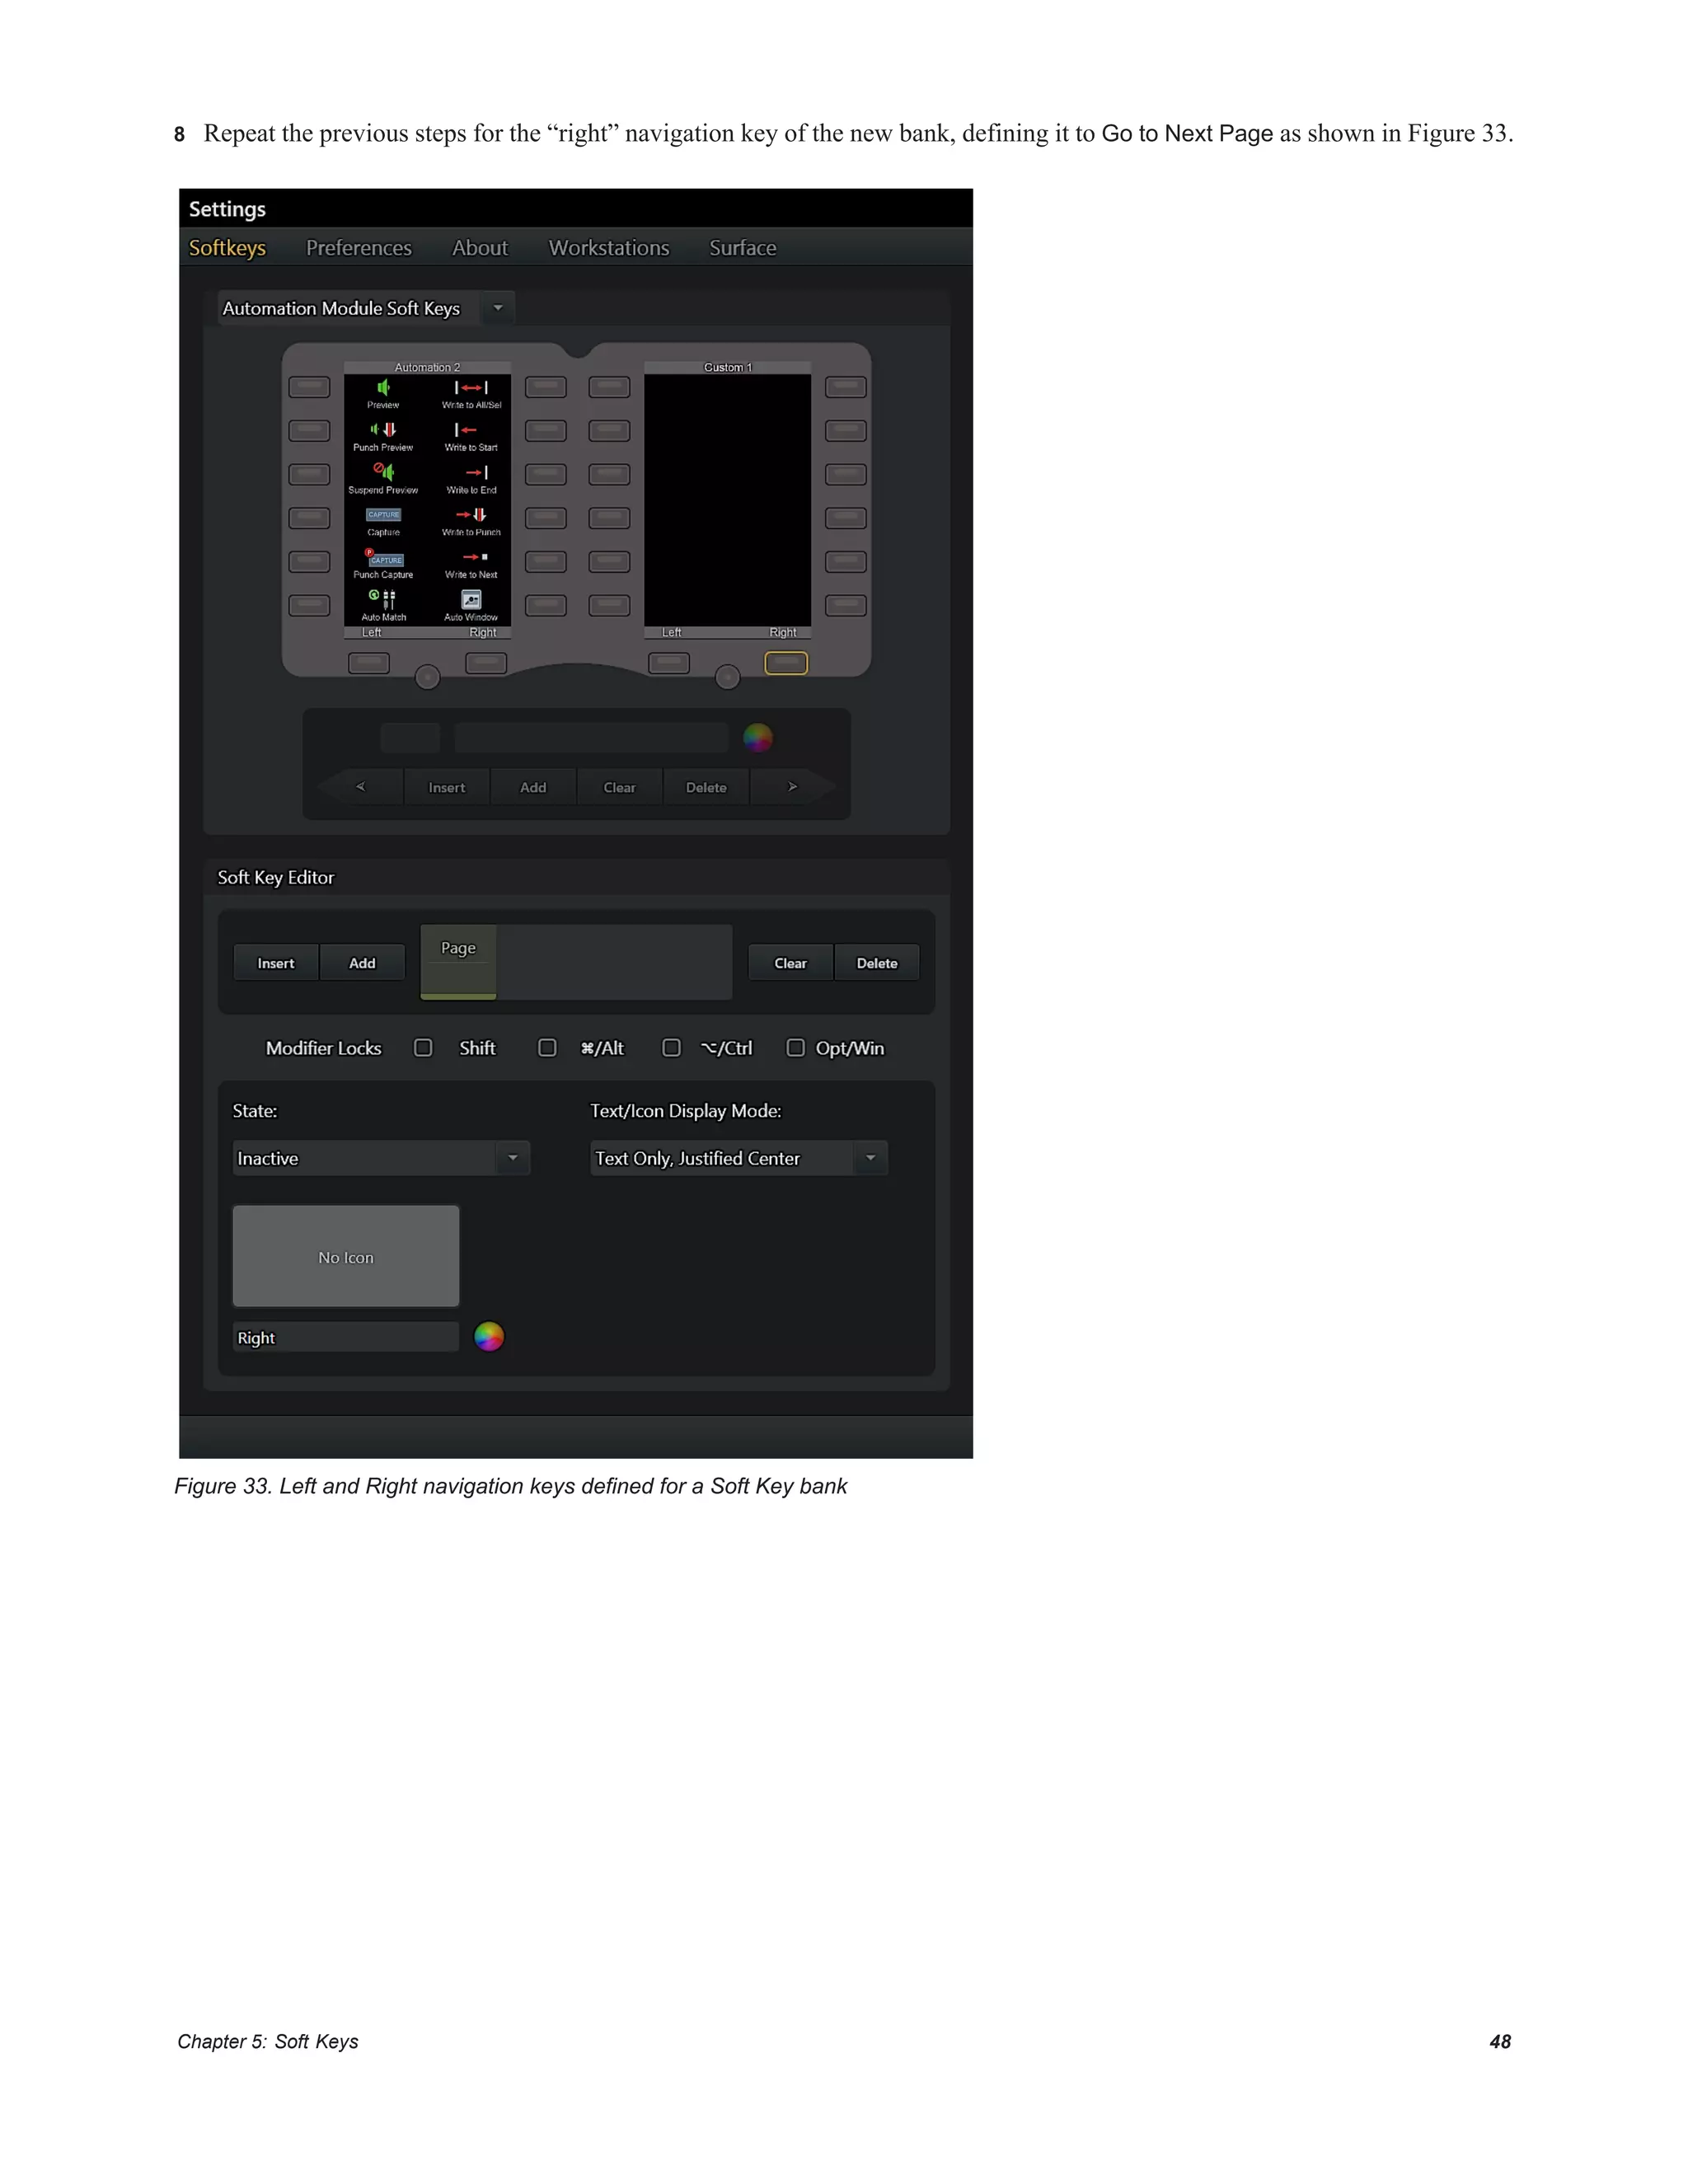
S6 modules communicate with digital audio workstations over an IP Ethernet network. All S6 modules and one or more worksta-
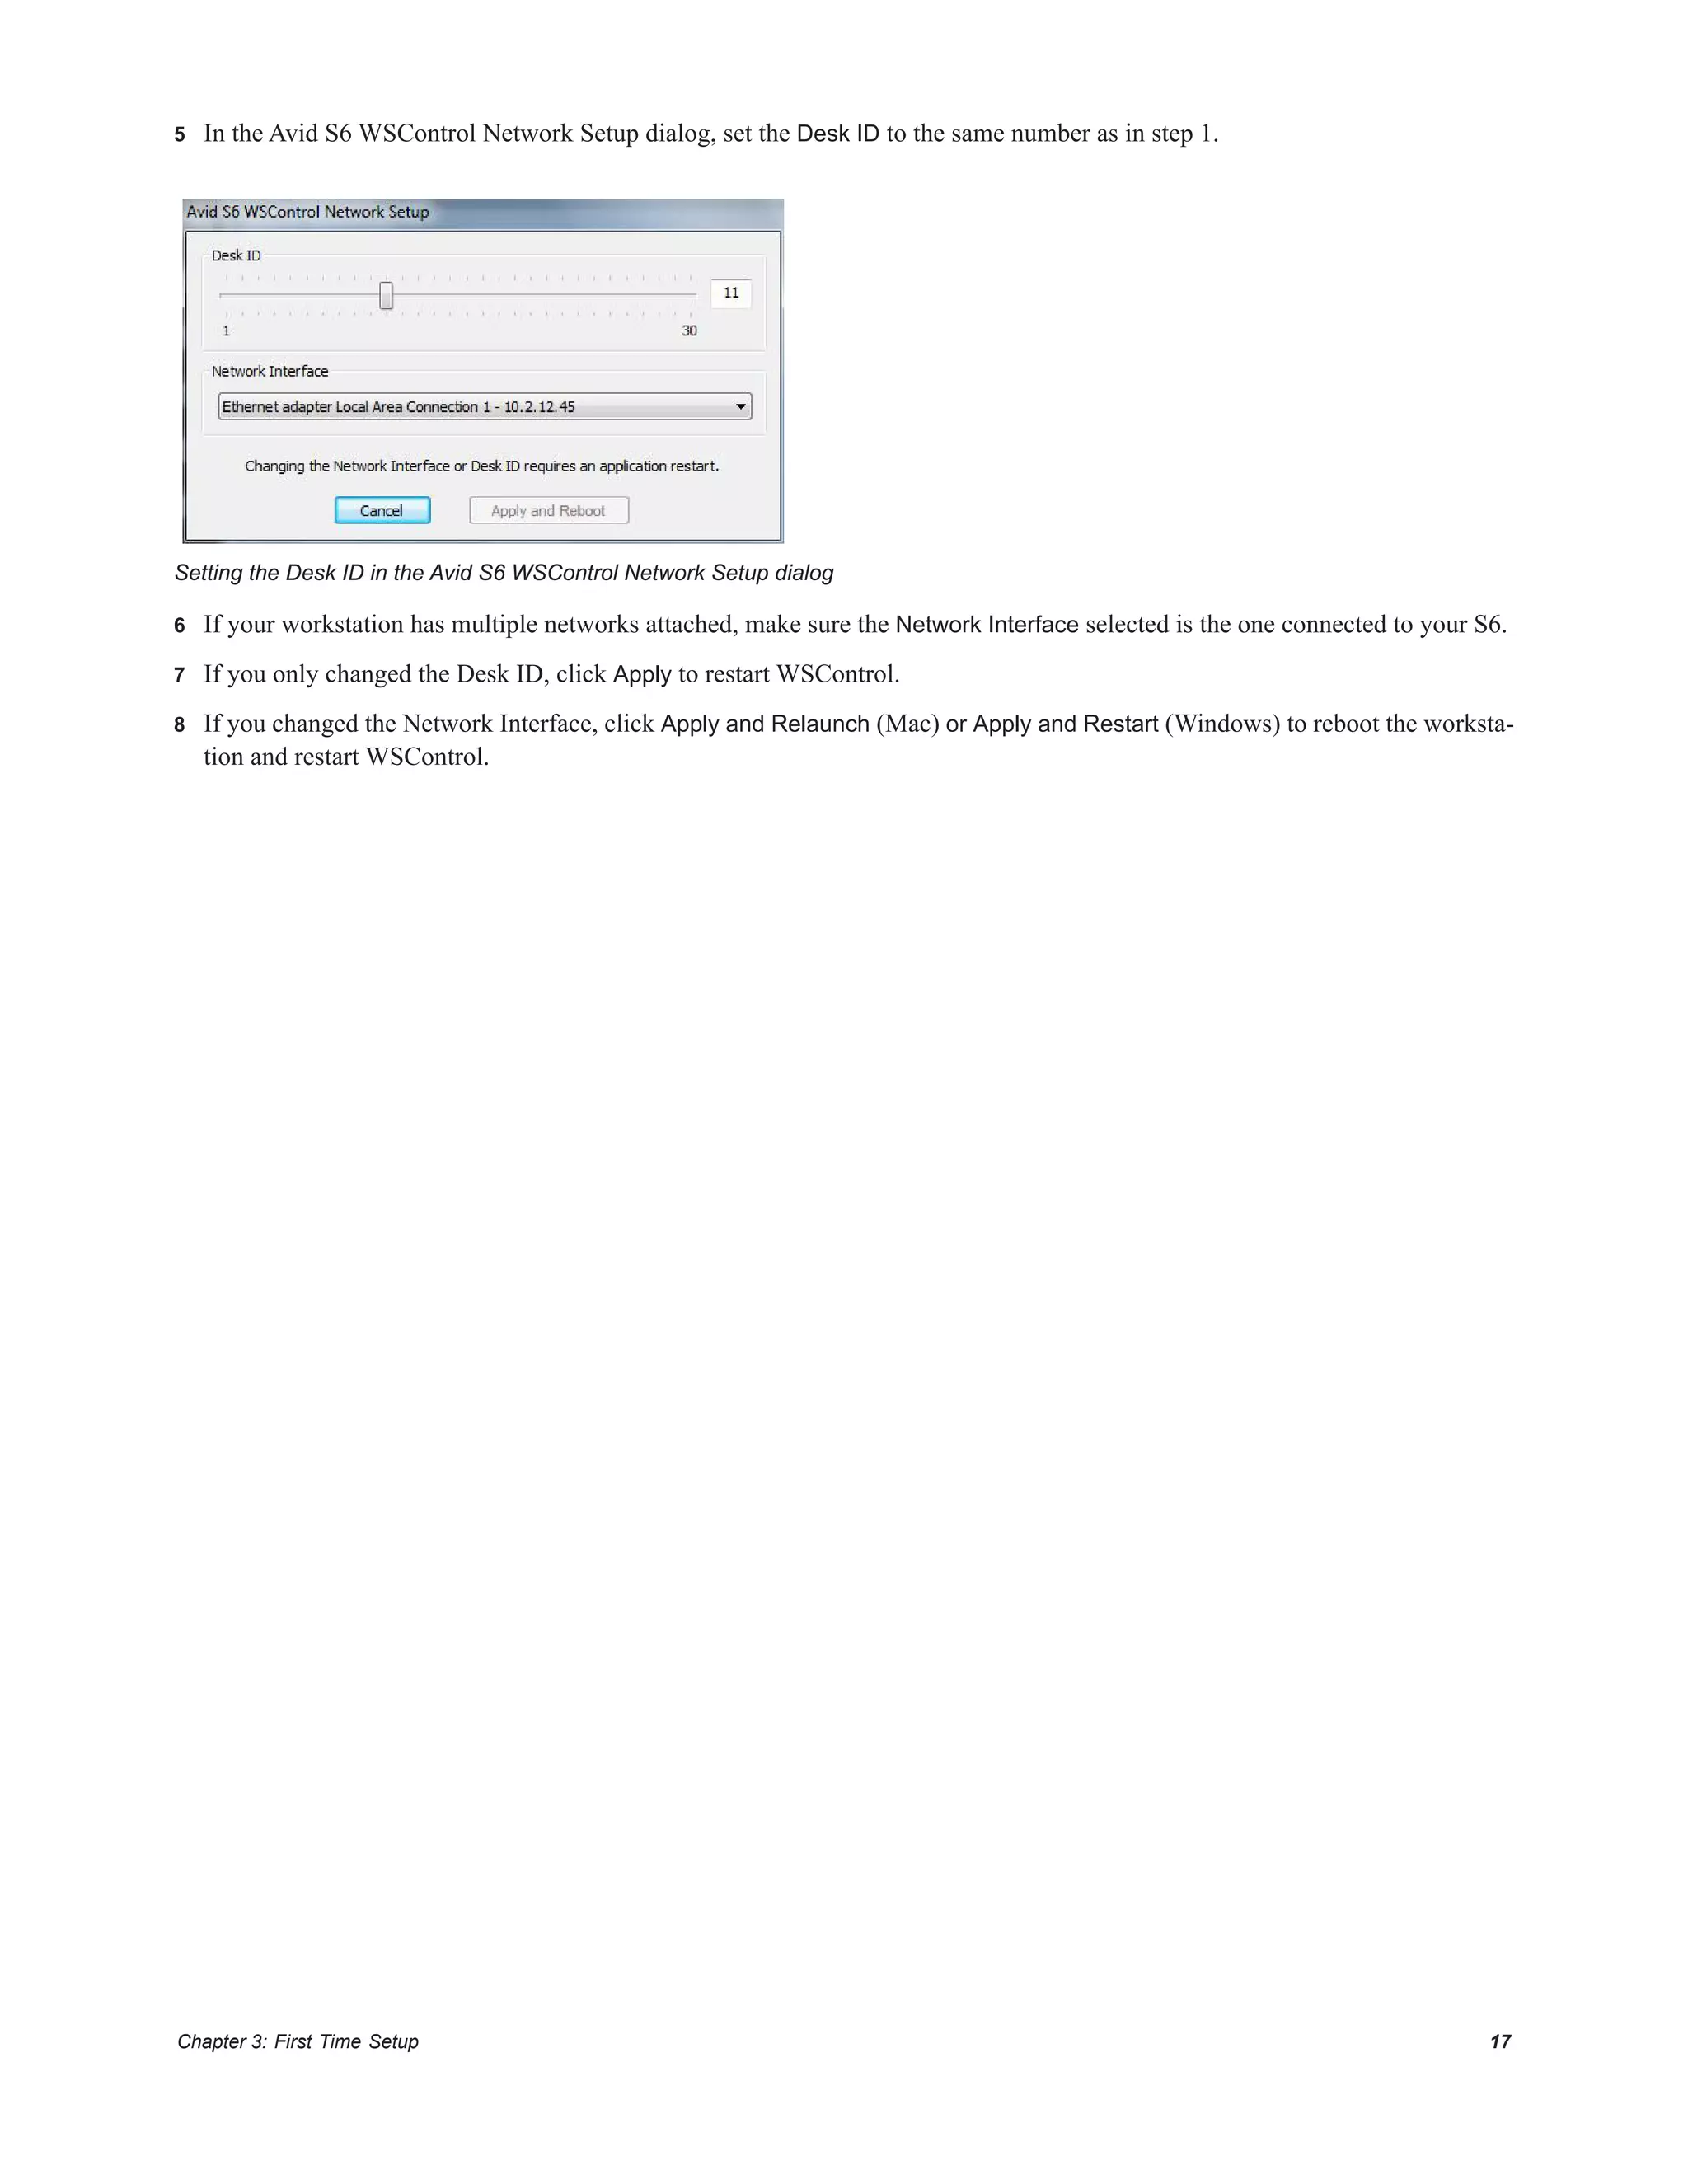
tions must connect to the supplied Ethernet switch.
Each S6 module and workstation requires a valid and unique IP address in the same range. This IP address can be created from either
of the following:
• DHCP (Dynamic Host Configuration Protocol) server in the Master Module
• External, third-party DHCP device, such as a standalone router or corporate network remote server
Recommended Setup
Since S6 requires substantial bandwidth, and the network timing between modules is critical, we recommend installing S6 and your
workstation(s) on an isolated network/subnet using the Master Module’s internal DHCP server.
To connect S6 with your workstation(s) using the Master Module’s internal DHCP server:
1 Connect the Master Module from Ethernet port 2 on its back panel to the supplied Ethernet switch.
2 Connect all other S6 modules and workstations to the same Ethernet switch. Do not connect any other equipment to this network.
3 Set your workstation network adapters to: Obtain IP addresses automatically by DHCP (default).
If you must connect your workstation to a Wide Area Network (WAN) to access the Internet or a corporate network, we recom-
mend using a workstation with two Ethernet ports.
To connect your workstation to a WAN:
1 Connect one port to the WAN.
2 Connect the other port to the S6 Ethernet switch.
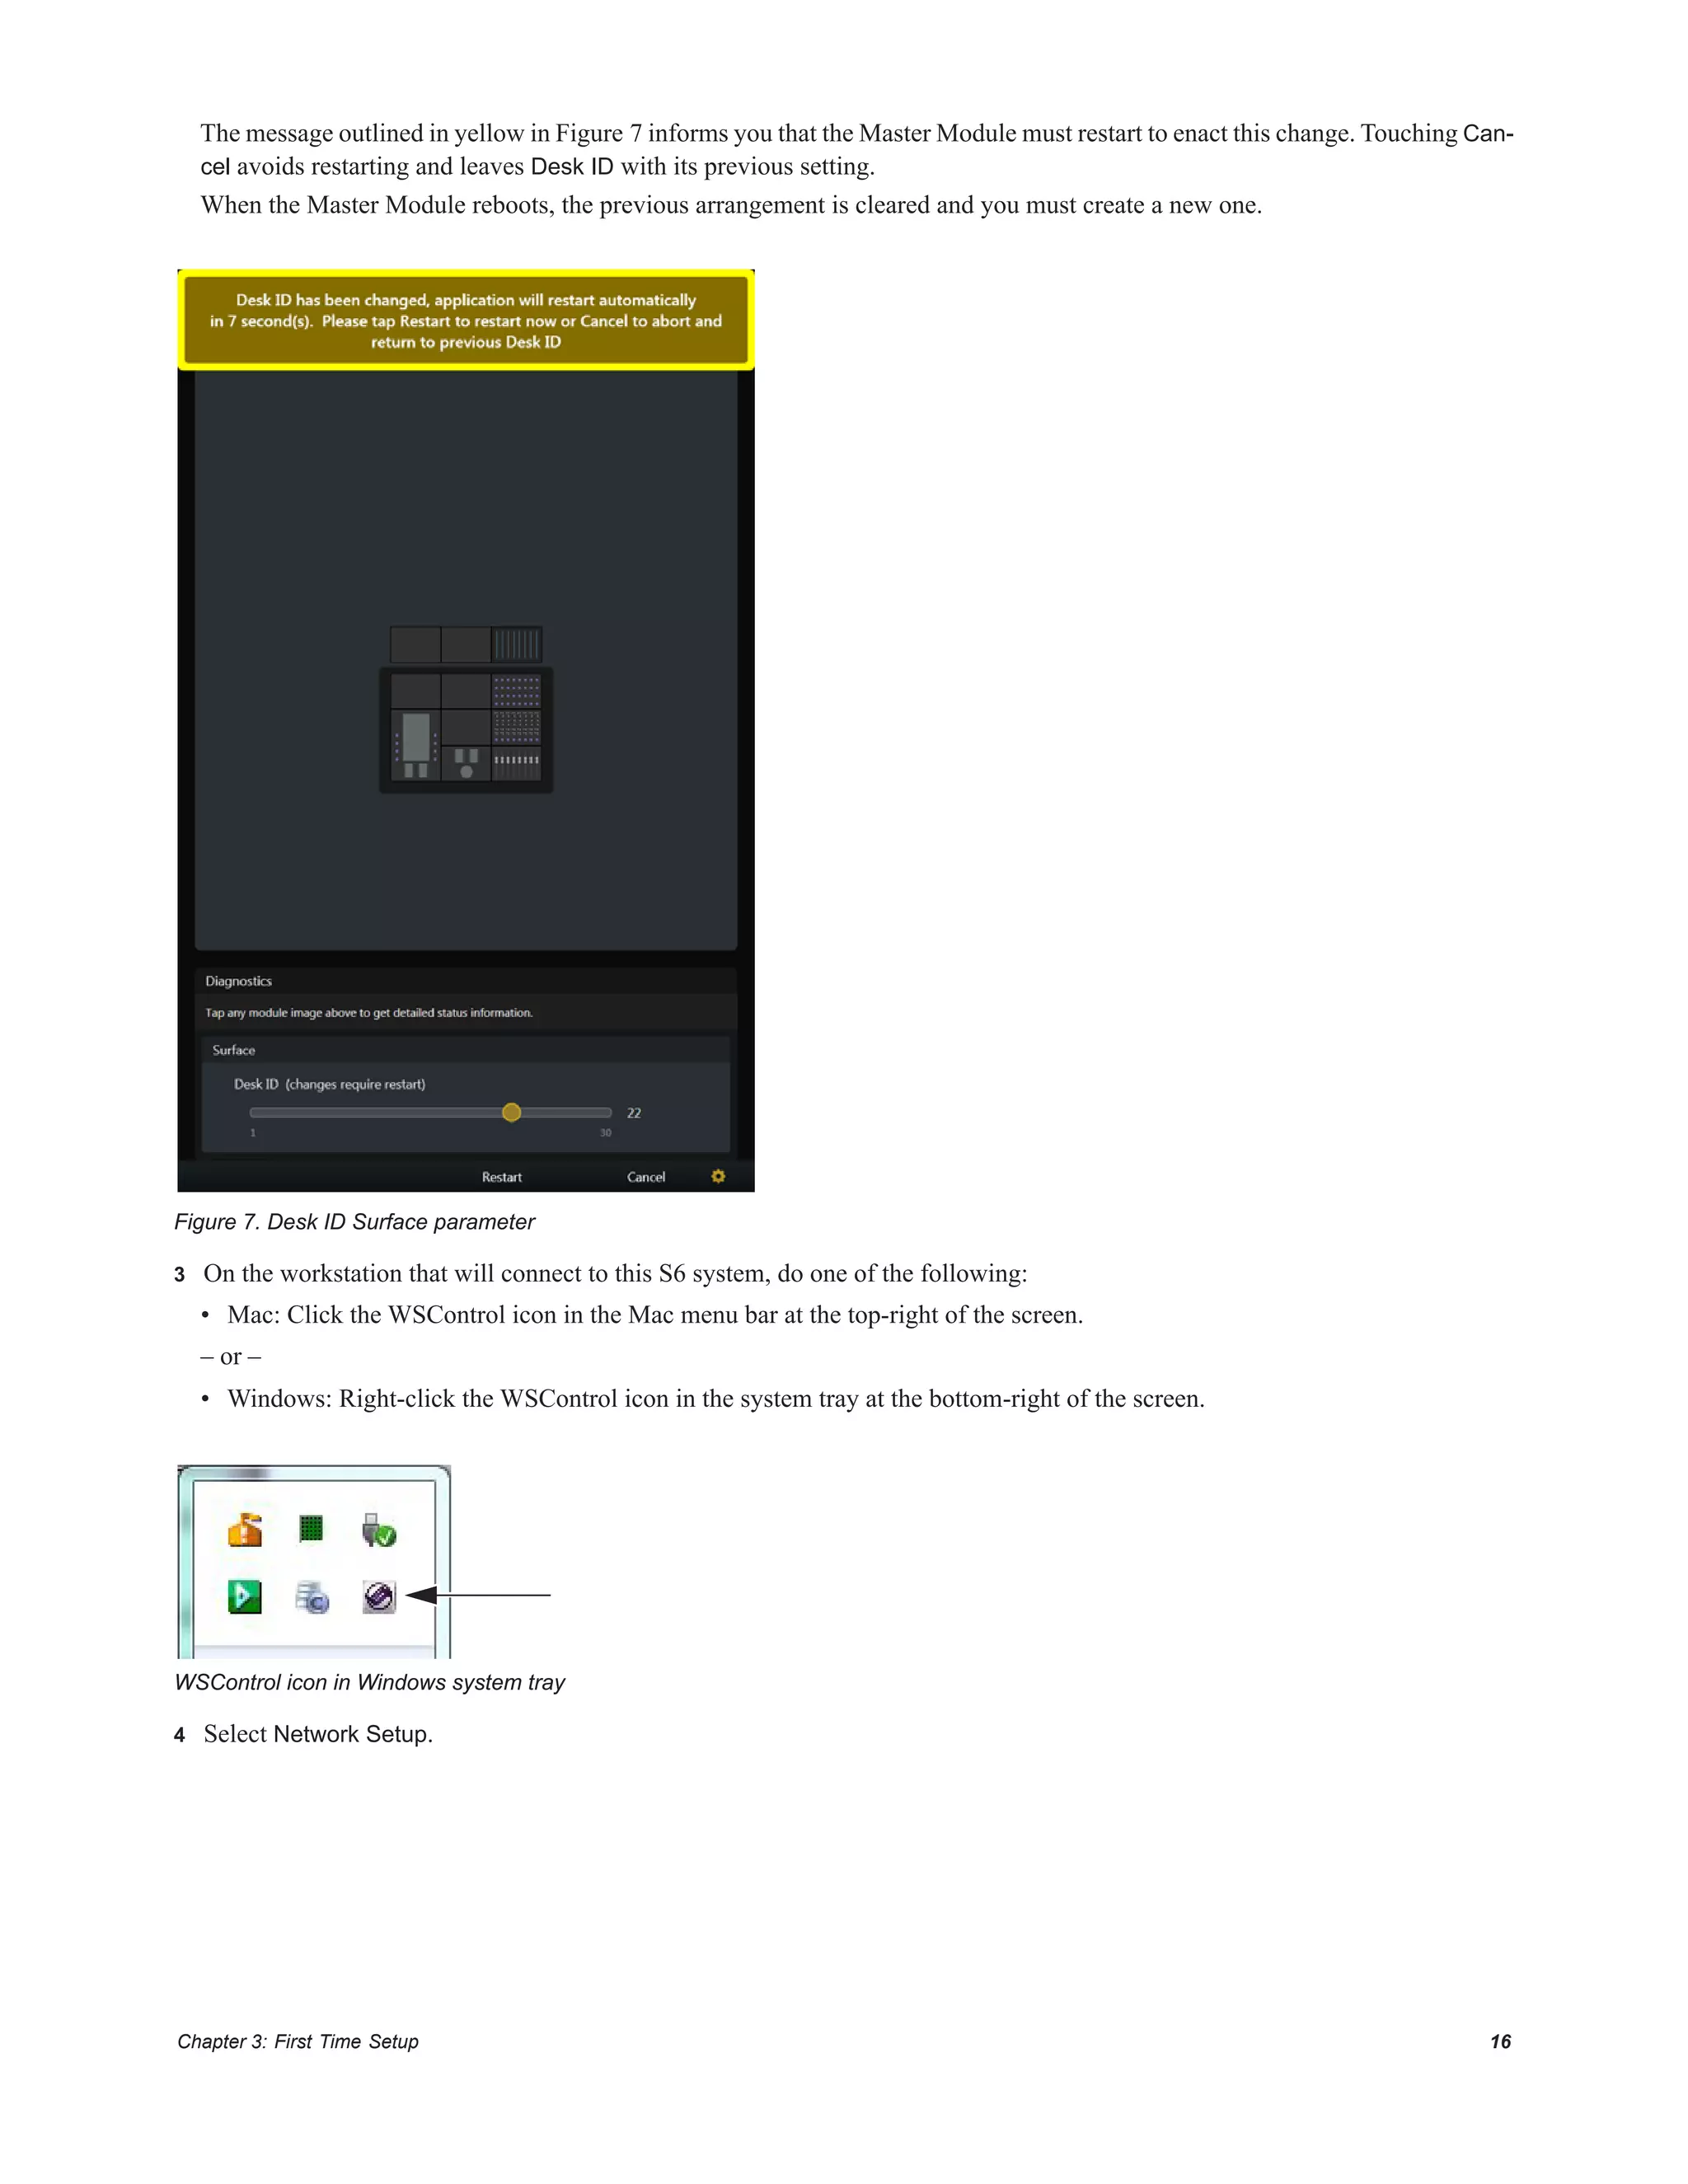
3 On the workstation that will connect to this S6 system, do one of the following:
• Mac: Click the WSControl icon in the Mac menu bar at the top-right of the screen.
– or –
• Windows: Right-click the WSControl icon in the system tray at the bottom-right of the screen.
A Windows workstation name with any of the following characters will not be able to connect to S6: / [ ] " : ; |< > + = ,? * _
See http://support.microsoft.com/kb/228275 for more information.
WSControl icon in Windows system tray](https://image.slidesharecdn.com/860ef939-8bf2-4c3b-8479-bb7ec4e88b27-170104205246/75/S6_Guide_80752-13-2048.jpg)