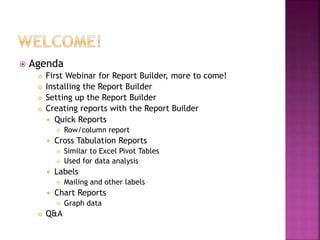
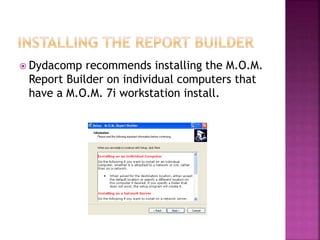
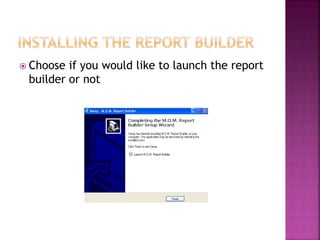
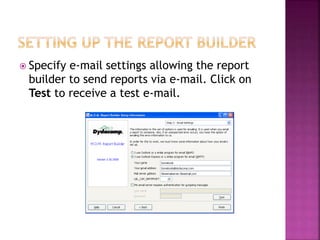
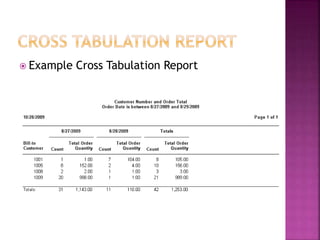
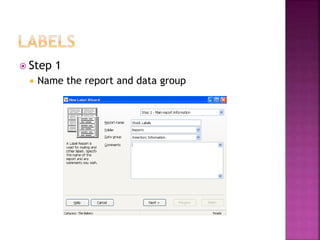
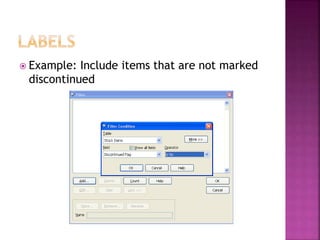
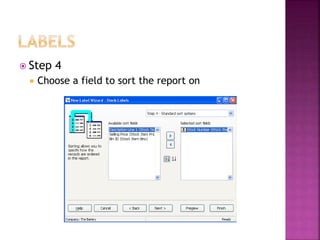
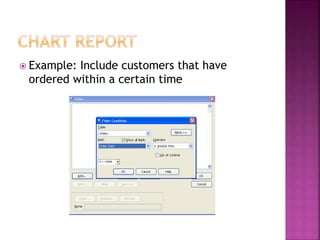
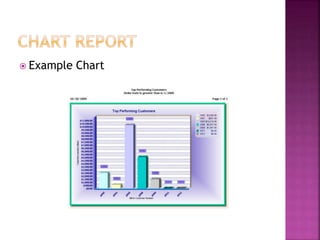
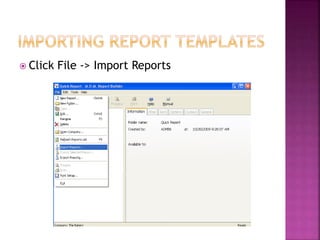
Introduction to the Report Builder Module
 Agenda
 First Webinar for Report Builder, more to come!
 Installing the Report Builder
 Setting up the Report Builder
 Creating reports with the Report Builder
 Quick Reports
 Row/column report
 Cross Tabulation Reports
 Similar to Excel Pivot Tables
 Used for data analysis
 Labels
 Mailing and other labels
 Chart Reports
 Graph data
 Q&A
 Prerequisites
 Mail Order Manager 7.0 and up
 M.O.M. Report Builder Software
 Find the install on the knowledge base, KB899
 Can also be found on the support section of our website
under Misc Utilities for M.O.M. 7i
 The latest M.O.M. 7i program update installed dated
10/20/09 and beyond.
 Remember to run a successful backup before doing a
program update
 One license of a Report Designer/Viewer comes
with 7i
 Additional designers and viewers can be purchased
 Running the setup.exe file for the report
builder will launch the M.O.M. Report Builder
Setup Wizard
 Dydacomp recommends installing the M.O.M.
Report Builder on individual computers that
have a M.O.M. 7i workstation install.
 Specify a location for the Report Builder
program to be installed
 Specify a Start Menu folder
 Choose if you would like to create a desktop
icon or not
 Click next to install the report builder
 Choose if you would like to launch the report
builder or not
 When the Report Builder is run for the first
time, a screen will appear allowing you to
specify the location of the report data files
and the Mail Order Manager program folder.
For example: C:MOMlocal7
 Specify e-mail settings allowing the report
builder to send reports via e-mail. Click on
Test to receive a test e-mail.
 This screen allows activation of the M.O.M.
Report Builder, e-mail technical support
support@dydacomp.com or visit the
Dydacomp website www.dydacomp.com
 Click activate
 Click next to continue the activation
 Enter the appropriate contact information
 Enter the serial number provided from your
purchase and click Online. An activation
code will be generated online for the M.O.M.
Report Builder software.
 Please note: The Registration number is
unique to every computer. The activation
code that is created uses the registration
number and the serial number to generate a
unique activation code. If you move
computers and would like to re-install the
Report Builder software, please contact
Dydacomp Support so that we can re-activate
the serial number. The reactivation process
may take up to 24-48 hours.
 After a successful activation, you will see the
following message
 To activate additional licenses, click add and
enter the serial number from your purchase,
then click online
 An Options Update must be done in M.O.M.
 User IDs must be set up in the Report Builder
 Report Designer
 Can view and create reports
 Report Viewer
 Can only view reports
 Under the Options drop down, choose M.O.M.
Report Builder
 Choose M.O.M. Report Builder Setup
 Choose the path for the M.O.M. Report
Builder exe file
 After this is set up, the report builder can be
launched by going to Options -> M.O.M.
Report Builder -> Launch M.O.M. Report
Builder
 The default user name and password is
ADMIN/ADMIN
 Company drop down is available if you have
the Multi Company Controller Module
 Once logged in, you can double click a report
to launch it, or choose New to create a new
report
 Data groups
 In Step 1 of all reports, choose the correct data
group
 In each data group, the most popular tables
have been joined
 Stock item ordered by customer
 Step 1
 Name the report and data group
 Step 2
 Select the fields for the report
 Step 3
 Filter or exclude results for the report
 Example: Include certain stock numbers
 After creating a filter or exclude you are
returned to step 3
 Step 4
 Choose a field to sort the report on
 Step 5
 Choose formatting options to control how the
report will appear
 Step 6
 Define what groups can see the report, and have
access to modify or delete the report
 On the left side, you will see the report
 Double click the report name to run the report
 Example Quick Report
 Customer number and order total
 Step 1
 Name the report and data group
 Step 2
 Select the fields for the report
 Step 3
 Click and drag the available fields to the
appropriate place on the right side
 Step 4
 Filter or exclude results for the report
 Example: Choose an order date range
 After creating a filter or exclude you are
returned to step 4
 Step 5
 Choose formatting options to control how the
report will appear
 Step 6
 Define what groups can see the report, and have
access to modify or delete the report
 On the left side, you will see the report
 Double click the report name to run the report
 Example Cross Tabulation Report
 Stock labels
 Step 1
 Name the report and data group
 Step 2
 Select the fields for the report
 Step 3
 Filter or exclude results for the report
 Example: Include items that are not marked
discontinued
 After creating a filter or exclude you are
returned to step 3
 Step 4
 Choose a field to sort the report on
 Step 5
 Choose the label style and if the report can be
filtered or sorted
 Step 6
 Define what groups can see the report, and have
access to modify or delete the report
 On the left side, you will see the report
 Double click the report name to run the report
 Example Label
 Top performing customers chart
 Step 1
 Name the report and data group
 Step 2
 Select the fields for the report
 Step 3
 Click and drag the available fields to the Y and X
axis spots
 Step 4
 Choose a chart type
 This will change how the information is displayed
 Step 4
 Choose a Palette
 This will change the color scheme
 Step 4
 Choose a theme
 This will change the display of the chart
 Step 5
 Filter or exclude results for the report
 Example: Include customers that have
ordered within a certain time
 After creating a filter or exclude you are
returned to step 5
 Step 6
 Define what groups can see the report, and have
access to modify or delete the report
 On the left side, you will see the report
 Double click the report name to run the report
 Example Chart
 Click File -> Import Reports
 Choose the report to import
 Must be .sfx file
 The report now can be ran or edited
 This is the first of many webinars on the Report
Builder
 Future webinars will explain formulas, properties of
fields, and feature different reports
 Support offers light guidance
 Create a ticket using Online Support
 Set up guide KB896
 Help file KB897
 Check the KB for report templates
 Check the forum for report templates and tips
 support@dydacomp.com
 Custom work is available
 sales@dydacomp.com
 Suggestions
 Suggestions for future webinar topics as well as the
module
 reportbuildersuggestions@dydacomp.com

Report Builder Training 7i

  • 1.
    Introduction to theReport Builder Module
  • 2.
     Agenda  FirstWebinar for Report Builder, more to come!  Installing the Report Builder  Setting up the Report Builder  Creating reports with the Report Builder  Quick Reports  Row/column report  Cross Tabulation Reports  Similar to Excel Pivot Tables  Used for data analysis  Labels  Mailing and other labels  Chart Reports  Graph data  Q&A
  • 3.
     Prerequisites  MailOrder Manager 7.0 and up  M.O.M. Report Builder Software  Find the install on the knowledge base, KB899  Can also be found on the support section of our website under Misc Utilities for M.O.M. 7i  The latest M.O.M. 7i program update installed dated 10/20/09 and beyond.  Remember to run a successful backup before doing a program update  One license of a Report Designer/Viewer comes with 7i  Additional designers and viewers can be purchased
  • 4.
     Running thesetup.exe file for the report builder will launch the M.O.M. Report Builder Setup Wizard
  • 5.
     Dydacomp recommendsinstalling the M.O.M. Report Builder on individual computers that have a M.O.M. 7i workstation install.
  • 6.
     Specify alocation for the Report Builder program to be installed
  • 7.
     Specify aStart Menu folder
  • 8.
     Choose ifyou would like to create a desktop icon or not
  • 9.
     Click nextto install the report builder
  • 10.
     Choose ifyou would like to launch the report builder or not
  • 11.
     When theReport Builder is run for the first time, a screen will appear allowing you to specify the location of the report data files and the Mail Order Manager program folder. For example: C:MOMlocal7
  • 12.
     Specify e-mailsettings allowing the report builder to send reports via e-mail. Click on Test to receive a test e-mail.
  • 13.
     This screenallows activation of the M.O.M. Report Builder, e-mail technical support support@dydacomp.com or visit the Dydacomp website www.dydacomp.com  Click activate
  • 14.
     Click nextto continue the activation
  • 15.
     Enter theappropriate contact information
  • 16.
     Enter theserial number provided from your purchase and click Online. An activation code will be generated online for the M.O.M. Report Builder software.
  • 17.
     Please note:The Registration number is unique to every computer. The activation code that is created uses the registration number and the serial number to generate a unique activation code. If you move computers and would like to re-install the Report Builder software, please contact Dydacomp Support so that we can re-activate the serial number. The reactivation process may take up to 24-48 hours.
  • 18.
     After asuccessful activation, you will see the following message
  • 19.
     To activateadditional licenses, click add and enter the serial number from your purchase, then click online  An Options Update must be done in M.O.M.
  • 20.
     User IDsmust be set up in the Report Builder  Report Designer  Can view and create reports  Report Viewer  Can only view reports
  • 21.
     Under theOptions drop down, choose M.O.M. Report Builder  Choose M.O.M. Report Builder Setup
  • 22.
     Choose thepath for the M.O.M. Report Builder exe file  After this is set up, the report builder can be launched by going to Options -> M.O.M. Report Builder -> Launch M.O.M. Report Builder
  • 23.
     The defaultuser name and password is ADMIN/ADMIN  Company drop down is available if you have the Multi Company Controller Module
  • 24.
     Once loggedin, you can double click a report to launch it, or choose New to create a new report
  • 25.
     Data groups In Step 1 of all reports, choose the correct data group
  • 26.
     In eachdata group, the most popular tables have been joined
  • 27.
     Stock itemordered by customer
  • 28.
     Step 1 Name the report and data group
  • 29.
     Step 2 Select the fields for the report
  • 30.
     Step 3 Filter or exclude results for the report
  • 31.
     Example: Includecertain stock numbers
  • 32.
     After creatinga filter or exclude you are returned to step 3
  • 33.
     Step 4 Choose a field to sort the report on
  • 34.
     Step 5 Choose formatting options to control how the report will appear
  • 35.
     Step 6 Define what groups can see the report, and have access to modify or delete the report
  • 36.
     On theleft side, you will see the report  Double click the report name to run the report
  • 37.
  • 38.
     Customer numberand order total
  • 39.
     Step 1 Name the report and data group
  • 40.
     Step 2 Select the fields for the report
  • 41.
     Step 3 Click and drag the available fields to the appropriate place on the right side
  • 42.
     Step 4 Filter or exclude results for the report
  • 43.
     Example: Choosean order date range
  • 44.
     After creatinga filter or exclude you are returned to step 4
  • 45.
     Step 5 Choose formatting options to control how the report will appear
  • 46.
     Step 6 Define what groups can see the report, and have access to modify or delete the report
  • 47.
     On theleft side, you will see the report  Double click the report name to run the report
  • 48.
     Example CrossTabulation Report
  • 49.
  • 50.
     Step 1 Name the report and data group
  • 51.
     Step 2 Select the fields for the report
  • 52.
     Step 3 Filter or exclude results for the report
  • 53.
     Example: Includeitems that are not marked discontinued
  • 54.
     After creatinga filter or exclude you are returned to step 3
  • 55.
     Step 4 Choose a field to sort the report on
  • 56.
     Step 5 Choose the label style and if the report can be filtered or sorted
  • 57.
     Step 6 Define what groups can see the report, and have access to modify or delete the report
  • 58.
     On theleft side, you will see the report  Double click the report name to run the report
  • 59.
  • 60.
     Top performingcustomers chart
  • 61.
     Step 1 Name the report and data group
  • 62.
     Step 2 Select the fields for the report
  • 63.
     Step 3 Click and drag the available fields to the Y and X axis spots
  • 64.
     Step 4 Choose a chart type  This will change how the information is displayed
  • 65.
     Step 4 Choose a Palette  This will change the color scheme
  • 66.
     Step 4 Choose a theme  This will change the display of the chart
  • 67.
     Step 5 Filter or exclude results for the report
  • 68.
     Example: Includecustomers that have ordered within a certain time
  • 69.
     After creatinga filter or exclude you are returned to step 5
  • 70.
     Step 6 Define what groups can see the report, and have access to modify or delete the report
  • 71.
     On theleft side, you will see the report  Double click the report name to run the report
  • 72.
  • 73.
     Click File-> Import Reports
  • 74.
     Choose thereport to import  Must be .sfx file
  • 75.
     The reportnow can be ran or edited
  • 76.
     This isthe first of many webinars on the Report Builder  Future webinars will explain formulas, properties of fields, and feature different reports  Support offers light guidance  Create a ticket using Online Support  Set up guide KB896  Help file KB897  Check the KB for report templates  Check the forum for report templates and tips  support@dydacomp.com  Custom work is available  sales@dydacomp.com  Suggestions  Suggestions for future webinar topics as well as the module  reportbuildersuggestions@dydacomp.com