Download to read offline
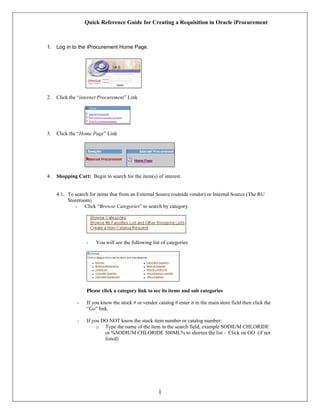

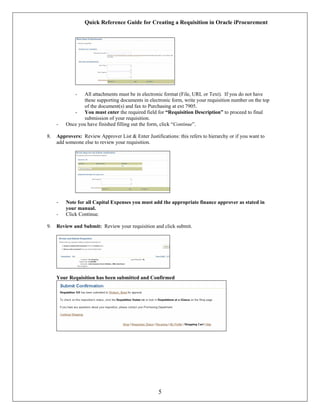

This document provides a quick reference guide for creating a requisition in Oracle iProcurement. It outlines the 9 step process: 1) Log in and select procurement, 2) search for items and add them to your cart from internal or external sources, 3) create a non-catalog request if the item is not found, 4) enter delivery information, 5) enter billing information such as the PTAEO, 6) add any notes for approvers or attach documents, 7) review the approver list, 8) review the full requisition, and 9) submit the requisition for approval.


![谷歌留痕技术教程[ 𝙩𝙤𝙥 𝟮𝟯𝟯. 𝙘 𝙤𝙢 ]](https://cdn.slidesharecdn.com/ss_thumbnails/top233-260130173900-2eb784f9-thumbnail.jpg?width=640&height=640&fit=bounds)


