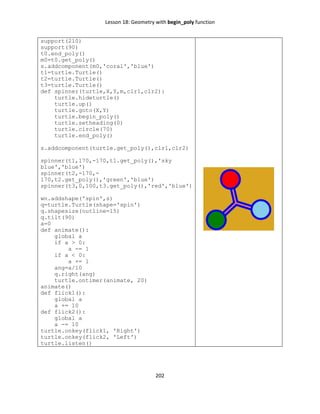
This book teaches Python programming using the turtle graphics library, aimed at children over the age of 10. It includes 19 lessons covering various programming concepts through engaging projects like animations, games, and mathematics applications. The lessons provide step-by-step instructions and examples, making it a comprehensive educational resource for young learners.


![Lesson 6: Loopy loops in Python
39
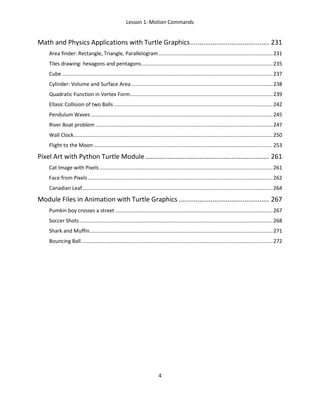
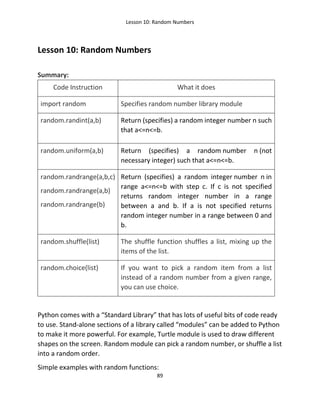
Lesson 6: Loopy loops in Python
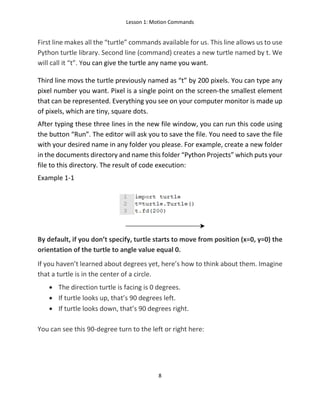
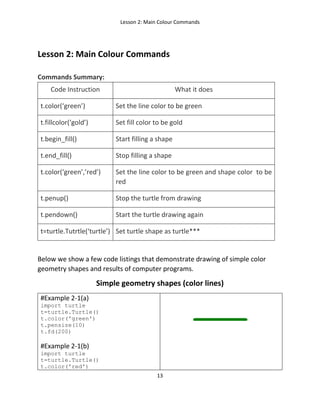
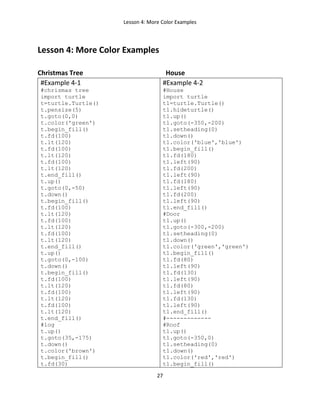
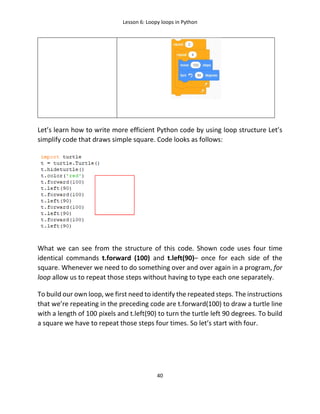
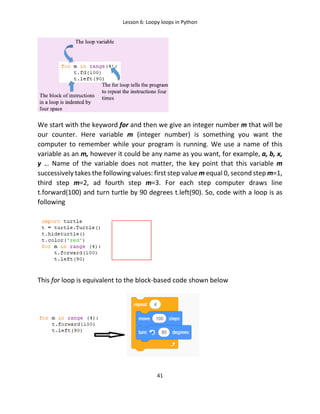
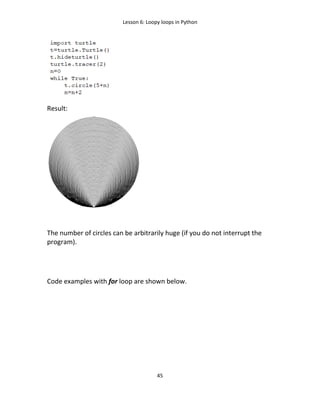
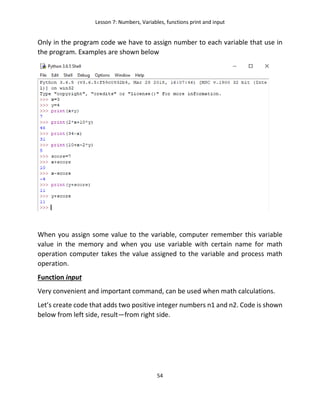
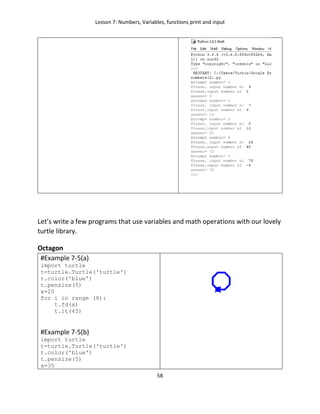
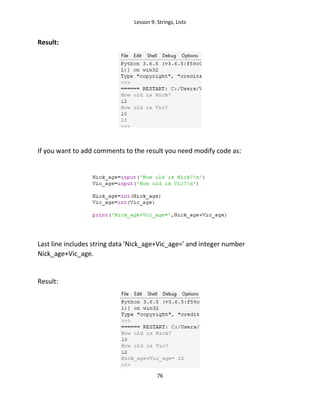
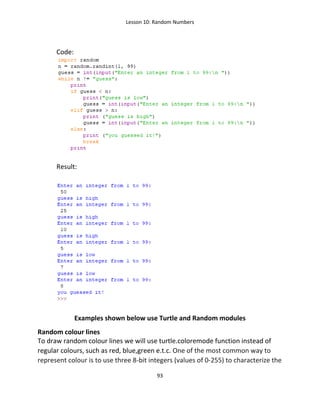
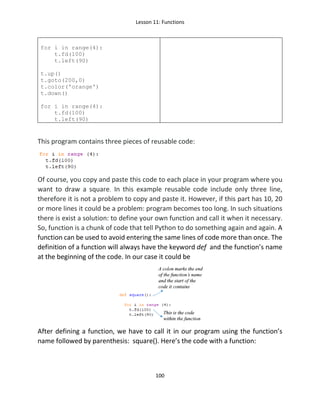
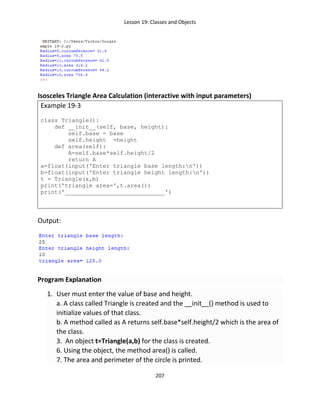
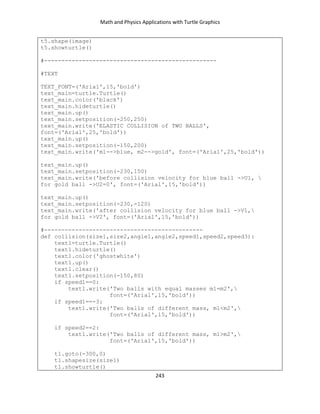
In programming, a loop means repeating something multiple times. One of the
main Python primitive loop commands is for loop:
Summary:
Code Instruction What it does
for m in range(4):
t.forward(1000)
t.left(90)
Here for loop is used for a block of two lines code
[t.forward(100) and t.left(90)] which you want to
repeat 4 times. This short program is equivalent to
the following
for m in range(2):
for n in range(4):
t.forward(100)
t.left(90)
The body of a loop have
another loop within it.
This is called a nested
loop
Nested Loop, equivalent to the following block-
based code. Nested loop is loop inside a loop, the
outer loop only repeats (2 times) after inner loop
has gone round its required number of times 4.](https://image.slidesharecdn.com/pythonbook06-03-200309004706/85/Python-book-39-320.jpg)


![Lesson 9: Strings, Lists
81
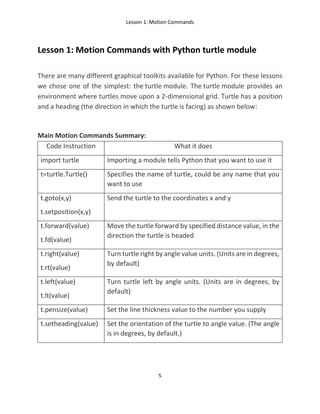
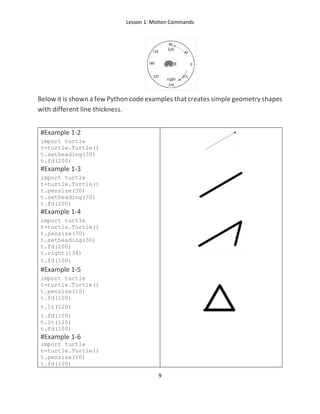
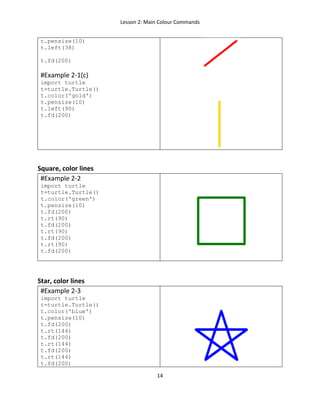
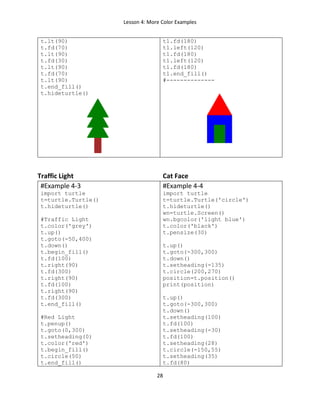
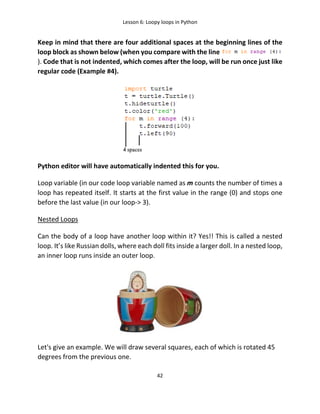
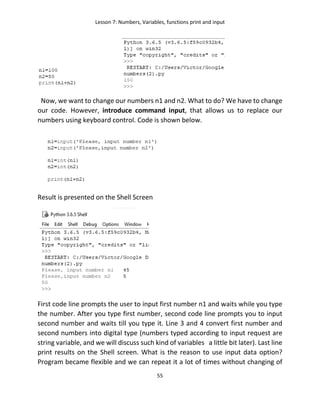
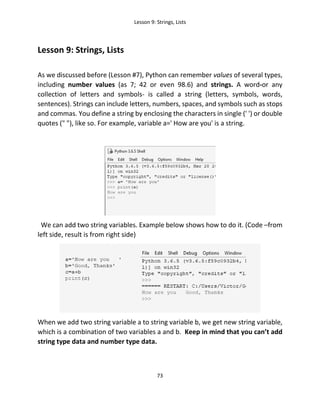
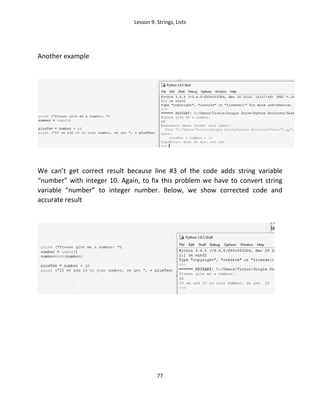
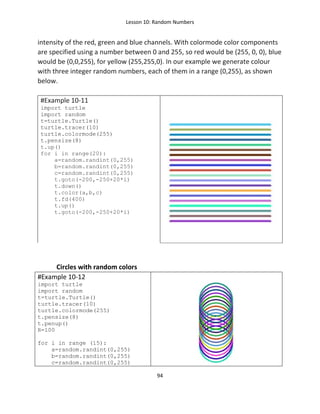
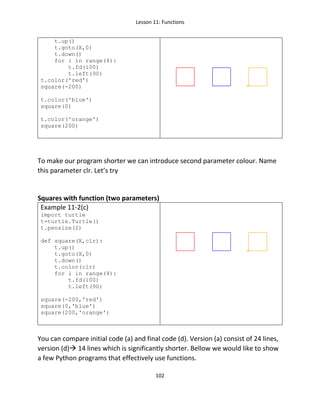
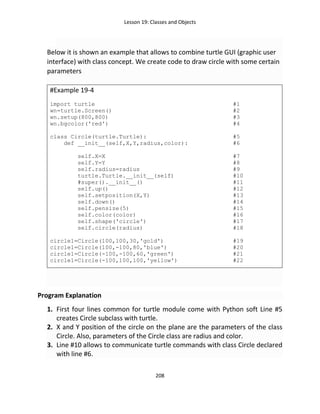
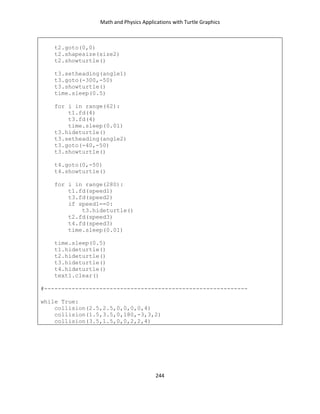
Now, Let’s demonstrate example how to turn turtle with input code
1. Example #9-1 (Turtle turns 45 degrees)
You can include input code line in the loop. In this case program requests you to
input data a few times and you will see the results for each request:
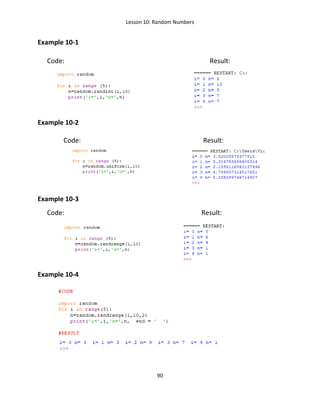
LISTS
When you want to store a lot of data, you may need to use a list. A list can hold
many items together and keep them in order. Python gives each item a number
that shows its position in the list. A list is a group of values, separated by commas,
between square brackets, []. We can store any value types in lists, including
numbers and strings. We can store a few objects as turtles in list (Lesson 12). Let’s
go to list example, called color_list:](https://image.slidesharecdn.com/pythonbook06-03-200309004706/85/Python-book-81-320.jpg)
![Lesson 9: Strings, Lists
82
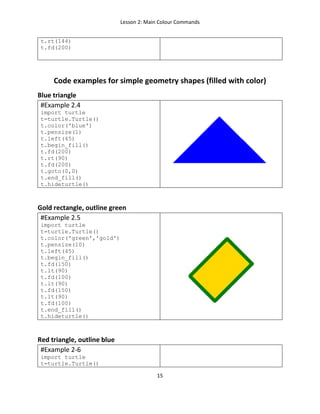
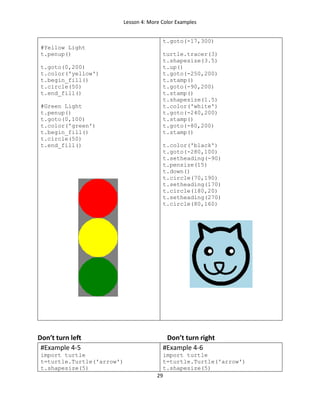
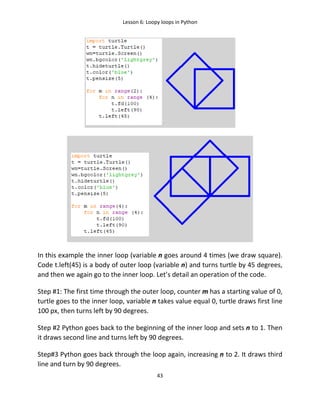
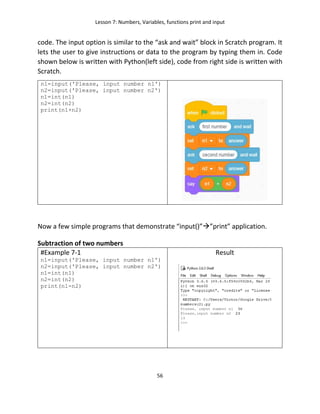
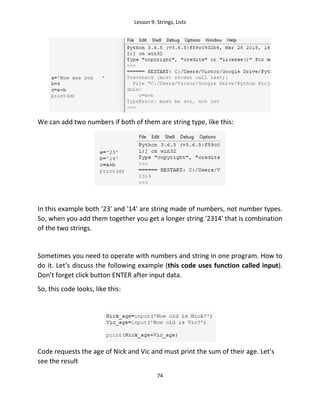
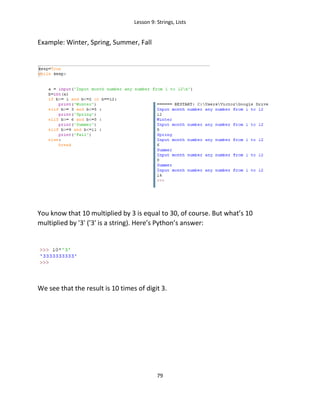
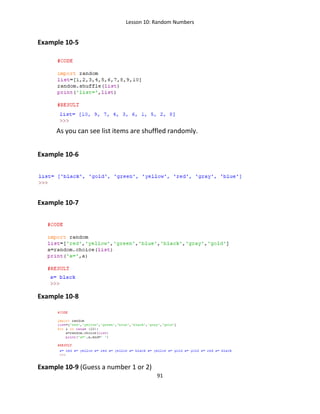
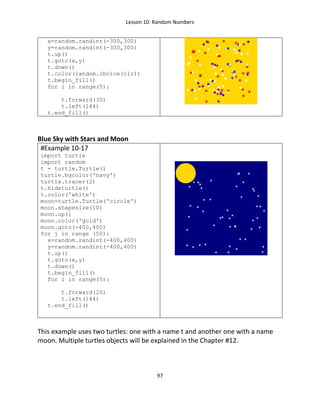
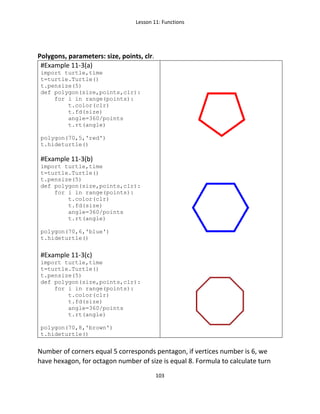
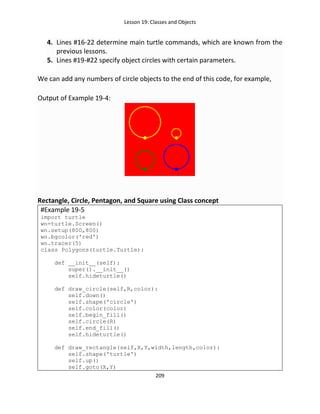
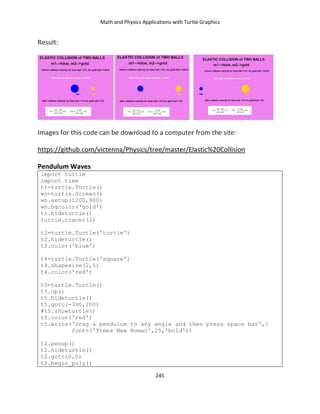
color_list=['red', 'blue', 'gold', 'green', 'yellow', 'pink’]
This list consists of 6 string variables. If you want to do anything with one of the
words from that list, you can use something called the index- the position of the
item in the list. So, a list is a structure in Python where items are kept in order. Each
entry is given a number that you can use to refer back to it.
color_list[0]= 'red'
color_list[1]= 'blue'
color_list[2]= 'gold'
color_list[3]= 'green'
color_list[4]= 'yellow'
color_list[5]= 'pink'
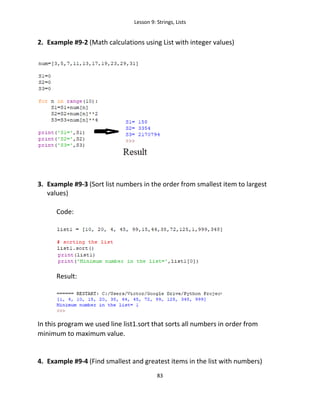
Below it is shown a list that includes integer numbers
number_list=[3,5,7,11,13,17,19,23,29,31]
Now we create our first program with a list. Let’s calculate the following sums:
S1=3+5+7+11+13+17+19+23+29+31
S2=32
+52
+72
+112
+132
+172
+192
+232
+292
+312
S3=34
+54
+74
+114
+134
+174
+194
+234
+294
+314
All of these integers are prime numbers. Code, shown below, calculates these
values S1, S2, and S3. To make calculations we use list called num.](https://image.slidesharecdn.com/pythonbook06-03-200309004706/85/Python-book-82-320.jpg)
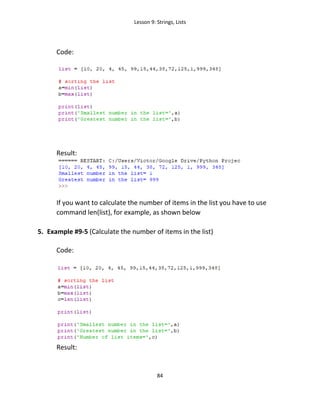
![Lesson 9: Strings, Lists
86
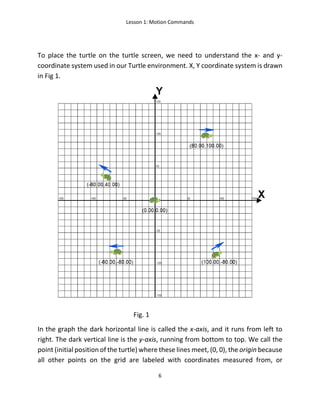
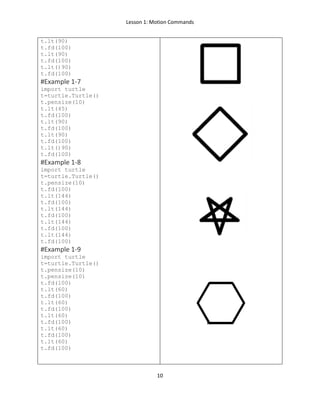
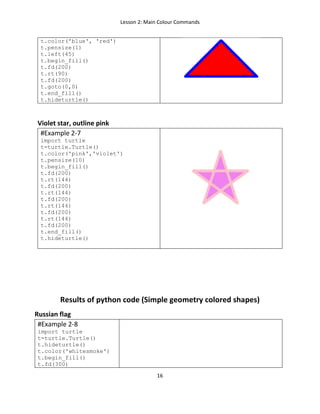
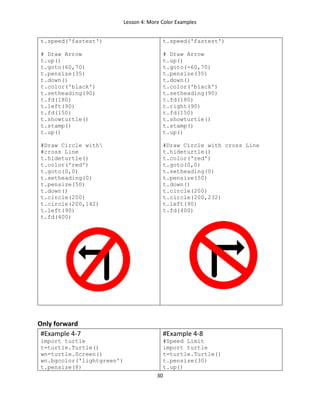
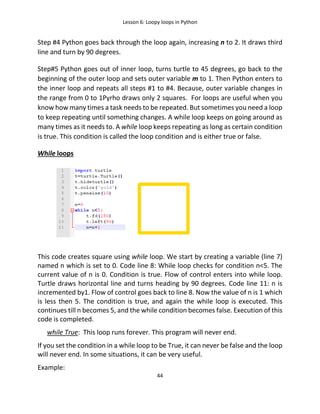
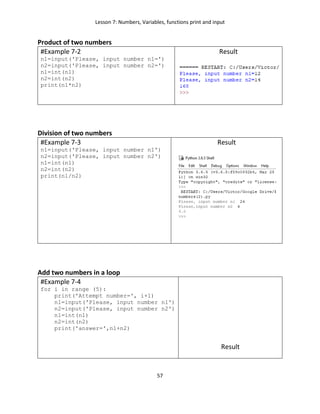
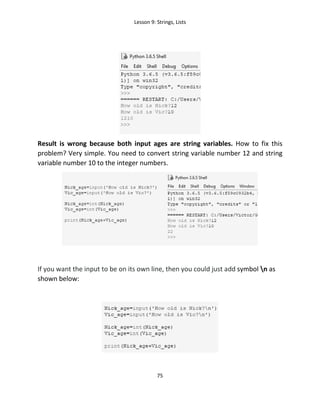
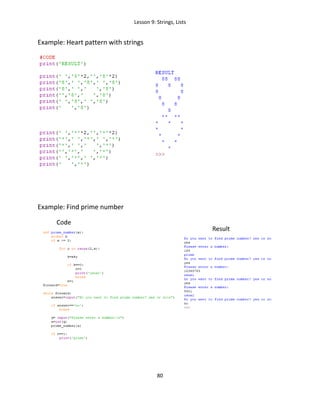
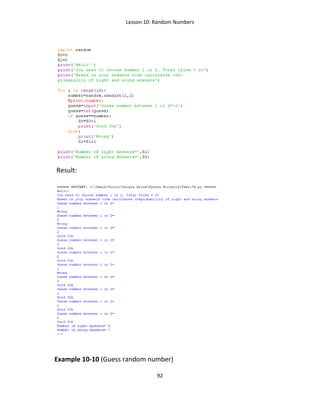
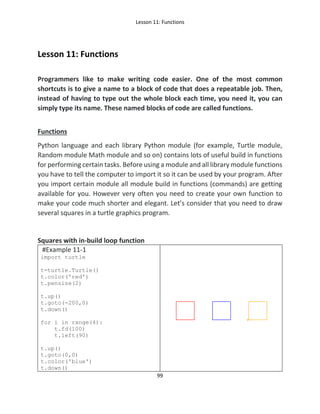
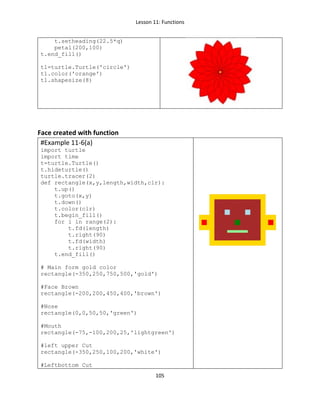
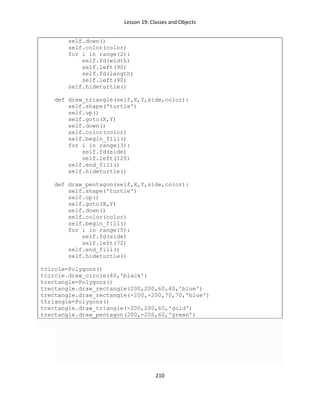
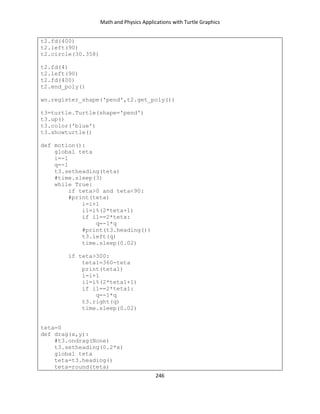
In this example we have three lists: list; list1; and list2. All of them initially
are empty. However using lines “list.append(i)” , “list1.append(i*i)”, and
“list2.append(i**3)” we add to the end of each list integer numbers equal
i for list,
i*i for list1,
i**3 for list2.
8. Example #9-8 (Number of different colour turtles, code uses list with string
variables)
Here we set up the colour of turtle with a line t.color(color_list[i]), where i is an
integer number that takes sequentially the following values 0,1,2,3,4,5.
9. Example #9-9 (Example shows the combination of number and string lists)](https://image.slidesharecdn.com/pythonbook06-03-200309004706/85/Python-book-86-320.jpg)

![Lesson 10: Random Numbers
95
t.goto(0,-250+20*i)
t.pendown()
t.pencolor(a,b,c)
t.circle(R)
t.penup()
t.goto(0,-250+20*i)
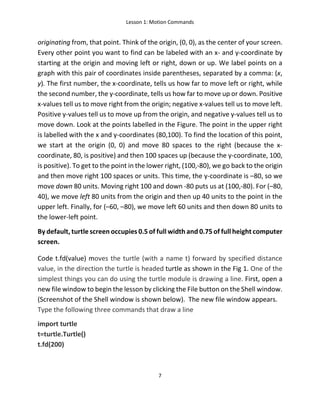
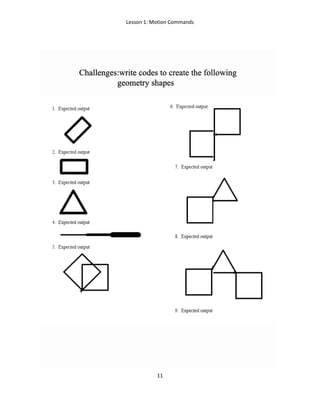
Random Spiral
#Example 10-13
import turtle
import random
t = turtle.Turtle()
turtle.bgcolor('navy')
turtle.tracer(3)
clr=['red','blue','yellow',
'green','gray',
'violet','pink']
for j in range (20):
a=random.randint(-300,300)
b=random.randint(-300,300)
t.penup()
t.color(random.choice(clr))
for i in range(100):
t.forward(30)
t.left(70)
t.forward(10)
t.right(40)
t.penup()
t.setposition(a,b)
t.pendown()
t.right(2)
Snowflakes
#Example 10-14
import turtle,random
wn=turtle.Screen()
wn.setup(1000,1000)
wn.bgcolor('blue')
turtle.tracer(3)
t=turtle.Turtle()
import random
t.shape('circle')
t.speed(11)
clr=['red','white','green','blue',
'yellow','orange','purple']
t.pensize(3)](https://image.slidesharecdn.com/pythonbook06-03-200309004706/85/Python-book-95-320.jpg)
![Lesson 10: Random Numbers
96
for n in range(20):
t.penup()
a1=random.randint(-300,300)
a2=random.randint(-300,300)
t.goto(a1,a2)
t.pendown()
colr = random.choice(clr)
t.color(colr)
for i in range(12):
t.right(30)
t.forward(20)
t.backward(20)
Random motion
#Example 10-15
import turtle,random,time
t = turtle.Turtle('turtle')
t.pensize(5)
turtle.bgcolor("blue")
for i in range (30):
t.color('red')
t.fd(random.randint(40,80))
a=random.randint(0,1000)
b=a%2
if a%2==0:
t.left(90)
else:
#if a%2>0:
t.left(-90)
time.sleep(1)
Random Stars Location
#Example 10-16
import turtle
import random
t = turtle.Turtle()
turtle.bgcolor('gold')
turtle.tracer(2)
t.hideturtle()
clr=['red','blue','white']
for j in range (100):](https://image.slidesharecdn.com/pythonbook06-03-200309004706/85/Python-book-96-320.jpg)


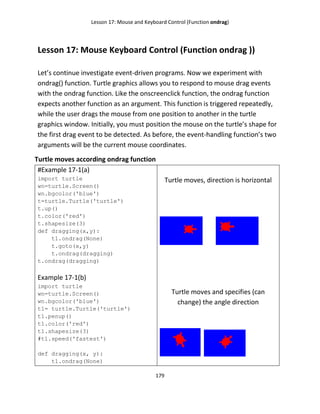
![Lesson 11: Functions
104
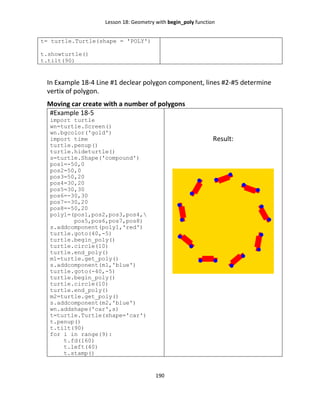
angle for polygon (variable angle in our example) is given by expression
angle=360/points.
Now let’s draw a few polygons on the window screen placed on the randomly
located positions.
Polygons, randomly located on the window screen)
#Example 11-4
import turtle,random
t=turtle.Turtle()
turtle.bgcolor('gold')
turtle.tracer(3)
t.pensize(5)
clr=['red','navy','brown',
'green','violet','pink',
'orange',]
def polygon(size,points,clr):
for i in range(points):
t.color(clr)
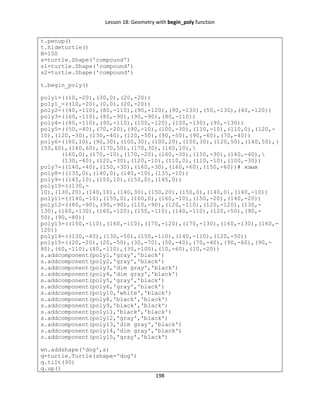
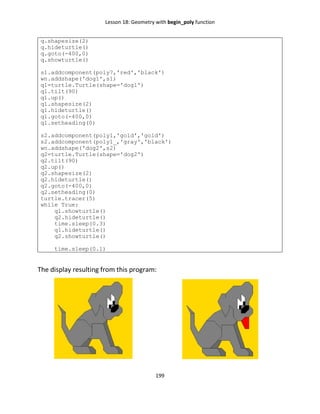
t.fd(size)
angle=360/points
t.rt(angle)
for i in range(7):
t.up()
t.setpos(random.randint(-400,400)
,random.randint(-200,200))
t.down()
t.begin_fill()
polygon(25,8,clr[i])
t.end_fill()
t.hideturtle()
Sun Flower
Example 11-5
import turtle
t=turtle.Turtle('turtle')
t.color('black','red')
turtle.tracer(2)
def petal(r,angle):
for i in range(2):
t.circle(r,angle)
t.left(180-angle)
t.begin_fill()
for q in range (16):](https://image.slidesharecdn.com/pythonbook06-03-200309004706/85/Python-book-104-320.jpg)
![Lesson 11: Functions
106
rectangle(-350,-100,100,200,'white')
#Right upper Cut
rectangle(300,250,100,200,'white')
#Right bottom Cut
rectangle(300,-100,100,200,'white')
#Left and Right ears
rectangle(325,0,50,50,'red')
rectangle(-325,0,50,50,'red')
#Left and right eyes
rectangle(-100,100,50,50,'lightblue')
rectangle(100,100,50,50,'lightblue')
#Example 11-6(b)
import turtle,random
t=turtle.Turtle('circle')
t.setheading(0)
def face(clr,size1,size2,X,Y):
t.color(clr)
t.up()
t.shapesize(size1,size2)
t.goto(X,Y)
t.stamp()
face('yellow',30,30,0,0)
face('red',3,12,0,-150)
face('black',4,4,-130,120)
face('black',4,4,130,120)
face('gray',10,2,0,0)
#Example 11-7
import turtle
t = turtle.Turtle()
turtle.bgcolor('chocolate')
t.pensize(40)
t.color('blue')
clr=['firebrick','navy','green','gold','violet']
def drawing(r,x,y,n):
t.color(clr[n])
t.up()
t.goto(x,y)
t.down()
t.circle(r)
drawing(50,100,100,0)](https://image.slidesharecdn.com/pythonbook06-03-200309004706/85/Python-book-106-320.jpg)
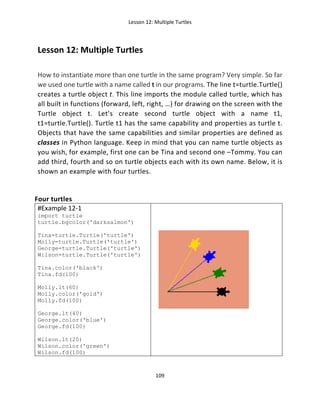

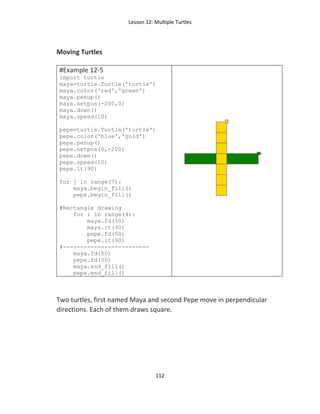
![Lesson 12: Multiple Turtles
114
Multiple Turtles code with LIST
#Example 12-7(a)
import turtle
q=[turtle.Turtle('square'),
turtle.Turtle('circle'),
turtle.Turtle('turtle'),
turtle.Turtle('arrow')]
clr=['red','gold','blue','violet']
for i in range(4):
q[i].shapesize(2)
q[i].up()
q[i].color(clr[i])
q[i].goto(100*i,0)
#Example 12-7(b)
import turtle
turtle.delay(0)
t = [turtle.Turtle('turtle')
for q in range(8)]
for i, j in enumerate(t):
j.right(i*45)
j.speed(0)
for i in range(720):
for j in t:
j.forward(1)
j.right(1)
#Example 12-7(c)
import turtle
turtle.bgcolor('darksalmon')
wn=turtle.Screen()
turtle.tracer(4)
q=[]
clr=['pink','blue','gold',
'red','green']
pos=[(0,-100),(150,50),
(-150,50),(-150,-250),
(150,-250)]
for n in range (5):](https://image.slidesharecdn.com/pythonbook06-03-200309004706/85/Python-book-114-320.jpg)
![Lesson 12: Multiple Turtles
115
q.append(turtle.Turtle())
q[n].shape('turtle')
q[n].shapesize(5)
q[n].color(clr[n])
q[n].up()
q[n].goto(pos[n])
while True:
for i in range(5):
q[i].fd(2)
q[i].left(1)
#Example 12-7(d)
import turtle
t1=turtle.Turtle()
turtle.bgcolor('blue')
t1.hideturtle()
t2=turtle.Turtle()
t2.hideturtle()
t3=turtle.Turtle()
t3.hideturtle()
t4=turtle.Turtle()
t4.hideturtle()
def run(turtle,delta,
angle,clr,shape):
turtle.showturtle()
turtle.shape(shape)
turtle.shapesize(2)
turtle.color(clr)
turtle.pensize(10)
turtle.fd(delta)
turtle.left(angle)
while True:
run(t1,100,45,'red','turtle')
run(t2,100,-45,'brown','turtle')
run(t3,-100,45,'gold','turtle')
run(t4,-100,-45,'brown','turtle')](https://image.slidesharecdn.com/pythonbook06-03-200309004706/85/Python-book-115-320.jpg)
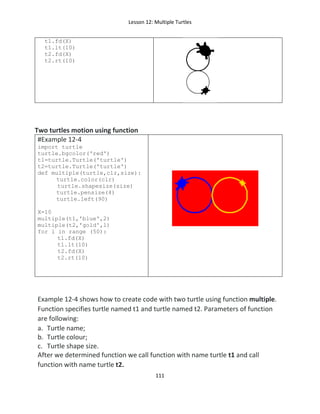
![Lesson 12: Multiple Turtles
116
#Example 12-8
import turtle,random
turtle.bgcolor('darksalmon')
q=[]
clr=['pink','blue','gold',
'red','green','skyblue',
'hotpink','crimson',
'olive','tomato']
for n in range (len(clr)):
t=turtle.Turtle('turtle')
q.append(t)
q[n].color(clr[n])
q[n].down()
angle=random.randint(-90,90)
q[n].setheading(angle)
for j in range (15):
for i in range(10):
d=random.randint(20,30)
angle=random.randint
(-90,90)
q[i].stamp()
q[i].pensize(3)
q[i].fd(d)
q[i].left(angle)](https://image.slidesharecdn.com/pythonbook06-03-200309004706/85/Python-book-116-320.jpg)
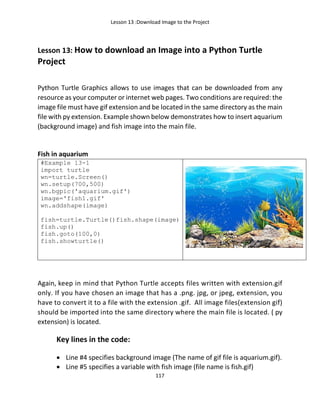

![Lesson 13 :Download Image to the Project
124
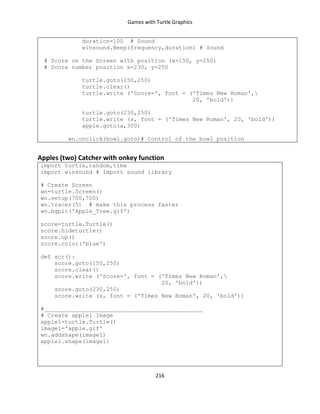
module first (second line of the listing). Code time.sleep(0.1) means suspending of
code execution for the given number of seconds (in our case 0.1 sec).
Link to access images for this code and code listing:
https://github.com/victenna/Aquarium-with-Fish
The link below shows the final result (click on the link to watch video)
https://www.youtube.com/watch?v=4wKyoa5SHqc&feature=youtu.be
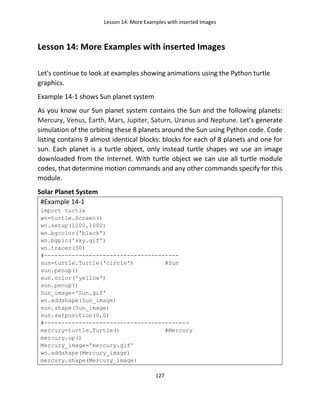
Code shown below in Example 13-7 simulates rainbow prism. It is known that
light is made up of a collection of many colors: red, orange, yellow, green, blue,
indigo, violet. Prism can take in white light on one side and produce its own mini-
rainbow on the other side.
#Example 13-7
import turtle
import time
wn=turtle.Screen()
wn.setup(800,800)
wn.bgpic('raincolors.gif') #background image
t=turtle.Turtle()
clr=['red','orange','yellow','green',
'blue','indigo','violet']
t.color('white')
rainbow=[]
q=0
t.penup()
t.hideturtle()
t.goto(-275,-85)
t.setheading(29)
t.pensize(15)
t.pendown()
turtle.tracer(20)
for n in range (155):
t.fd(1)
X=t.xcor() # return the turtle’s X coordinate.
Y=t.ycor() # return the turtle’s Y coordinate.
if X>-140:
t.penup()
X1=t.xcor()
Y1=t.ycor()](https://image.slidesharecdn.com/pythonbook06-03-200309004706/85/Python-book-124-320.jpg)
![Lesson 13 :Download Image to the Project
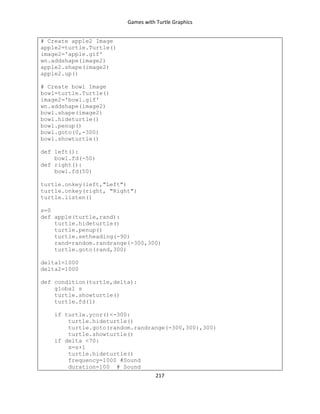
125
for n in range (7):
rainbow.append(turtle.Turtle())
rainbow[n].hideturtle()
rainbow[n].penup()
rainbow[n].setposition(X1+5,Y1+3)
rainbow[n].setheading(10-5*n)
rainbow[n].pendown()
rainbow[n].color(clr[n])
for m in range(70):
for n in range (7):
rainbow[n].pensize(5+0.35*m)
if m>43+2*n:
rainbow[n].setheading(-5*n)
rainbow[n].fd(5)
Result of Example 13-7:
Link to access image for this code and code listing:
https://github.com/victenna/Rainbow-Prism](https://image.slidesharecdn.com/pythonbook06-03-200309004706/85/Python-book-125-320.jpg)
![Lesson 14: More Examples with inserted Images
130
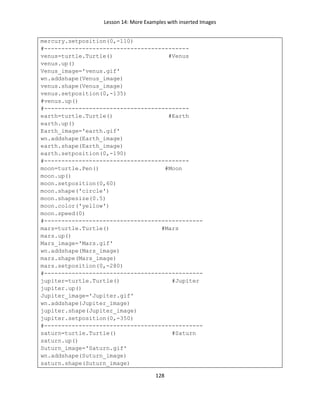
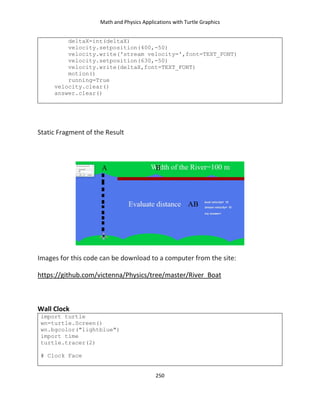
Static result of this code is shown below:
Code in Example 14-1 can be significantly simplified if we combine all images
inthe list. New simplified code listing is shown in Example 14-2.
#Example 14-2
#Solar Planet Motion
import turtle
wn=turtle.Screen()
wn.setup(1300,1300)
wn.bgpic('sky.gif')
wn.bgcolor('black')
wn.tracer(20)
Img=['Sun.gif','mercury.gif','venus.gif','earth.gif','Mars.gif',
'Jupiter.gif','Saturn.gif','Uranus.gif','Neptune.gif','Moon.gif']](https://image.slidesharecdn.com/pythonbook06-03-200309004706/85/Python-book-130-320.jpg)
![Lesson 14: More Examples with inserted Images
131
planet=[]
turtle.hideturtle()
for n in range(10):
planet.append(turtle.Turtle())
planet[n].up()
wn.addshape(Img[n])
planet[n].shape(Img[n])
if n==0:
planet[0].setposition(0,0)
elif n==9:
planet[n].goto(0,-310)
else:
planet[n].goto(0,-120-70*(n-1))
while True:
for m in range (1,10):
planet[m].circle(120+70*(m-1),0.8-0.1*(m-1))
planet[9].hideturtle()
planet[9].goto(planet[3].xcor(),planet[3].ycor())
planet[9].fd(45)
planet[9].showturtle()
planet[9].left(0.1)
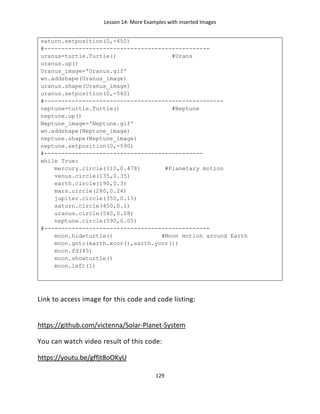
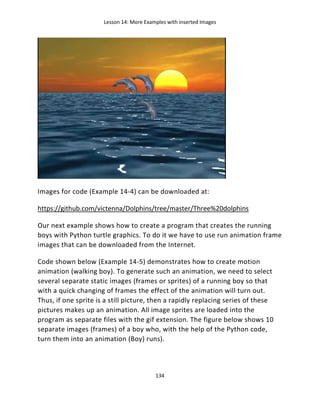
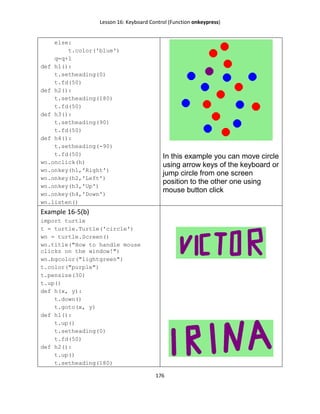
Example 14-3 demonstrates Dolphins jumping out of the water. There is an ongoing
debate about why dolphins jump out of the water. Scientists think about different
reasons for this behaviour. Among them, some believe that dolphins jump while
traveling to save energy as going through the air consume less energy than going
through the water. Some others believe that jumping is to get a better view of
distant things in the water, mainly prey. So, in this way, dolphins jump to locate
food or food related activity like seagulls eating or pelicans hunting. Other
explanations suggest that dolphins use jumping to communicate either with a mate
or with another pod as they can hear and interpret the splashes. Some people even
think that dolphins jump for cleaning, trying to get rid of parasites while jumping.
Below we will create Python code that demonstrates animation of three dolphins
that jump out of the water.](https://image.slidesharecdn.com/pythonbook06-03-200309004706/85/Python-book-131-320.jpg)
![Lesson 14: More Examples with inserted Images
132
Dolphins in the sea
#Example 14-3
import turtle
import time
wn = turtle.Screen()
wn.setup(800,800)
wn.tracer(2)
wn.bgpic('more.gif')
image=['do1.gif','do2.gif'] (#1)
wn.addshape(image[0])
wn.addshape(image[1])
t1=turtle.Turtle()
t1.up()
while True:
t1.shape(image[0])
t1.goto(-300,-300)
#----jump out of water
t1.setheading(45)
for i in range(30):
t1.shape(image[0])
t1.fd(20)
time.sleep(0.05)
#-------for fall into water
t1.setheading(-45)
for i in range(30):
t1.shape(image[1])
t1.fd(20)
time.sleep(0.05)
time.sleep(0.5)
Code Result
Let’s take a look for the code. Line, noted as (31) includes two images: first
image for three dolphins that jump out of the water and second- for dolphins
that drop into the water. Motion of the dolphins also includes two blocks of
codes: lines for dolphins jumping out of the water and lines for dolphins that
drop into the water. All images are presented in the Lesson #14. Images for
code (Example 14-3) can be downloaded at:
https://github.com/victenna/Dolphins/tree/master/No%20waves
Sophisticated code with water waves animation is shown in Example 14-4.](https://image.slidesharecdn.com/pythonbook06-03-200309004706/85/Python-book-132-320.jpg)
![Lesson 14: More Examples with inserted Images
133
Example 14-4
import turtle
import time
wn = turtle.Screen()
wn.setup(1000,800)
turtle.tracer(3)
#-----------------15 image frames for water waves
image0=[]
for i in range (15):
i1=str(i)
image0.append(i1+'.gif')
image=['do1.gif','do2.gif']
t1=turtle.Turtle()
t1.up()
k=-1
def motion (direction,img):
global k
t1.setheading(direction)
for i in range(10):
k=k+1
k1=k%15
wn.bgpic(image0[k1])
wn.addshape(img)
t1.shape(img)
t1.showturtle()
t1.fd(40)
time.sleep(0.05)
while True:
k=k+1
k1=k%15
wn.bgpic(image0[k1])
t1.hideturtle()
t1.goto(-300,-200)
motion(45,image[0])
motion(-45,image[1])
Real result of the code with water motion is shown below:
https://youtu.be/qhXDb4E2XdY](https://image.slidesharecdn.com/pythonbook06-03-200309004706/85/Python-book-133-320.jpg)
![Lesson 14: More Examples with inserted Images
135
Walking Boy
#Example 14-5
import turtle,time
wn=turtle.Screen()
wn.setup(850,800)
wn.bgpic('cross1.gif')
turtle.tracer(2)
image0=['01.gif','02.gif','03.gif',
'04.gif','05.gif','06.gif',
'07.gif','08.gif','09.gif',
'010.gif']
t=turtle.Turtle()
t.up()
t.hideturtle()
t.goto(-40,-275)
t.showturtle()
t.speed(10)
t.penup()
dx,dy=2,4
k=0
while True:
k=k+1
k1=k%10
wn.addshape(image0[k1])
t.shape(image0[k1])
t.fd(10)
X,Y=t.position()
time.sleep(0.2)](https://image.slidesharecdn.com/pythonbook06-03-200309004706/85/Python-book-135-320.jpg)
![Lesson 14: More Examples with inserted Images
136
if X>500:
t.hideturtle()
t.goto(-40,-275)
t.showturtle()
Images for the example #14-5 are at:
https://github.com/victenna/Animation-with-Images/tree/master/Pumkin%20boy
Code shown below (Example 14-6) demonstrates how to animate three
running boys. To create animation for running boy we have to use run
animation frame images that can be downloaded from the Internet.
Three Running Boys
#Example 14-6
import turtle,time
t1=turtle.Turtle()
t2=turtle.Turtle()
t3=turtle.Turtle()
wn = turtle.Screen()
wn.bgcolor('green')
wn.setup(800,800)
wn.bgpic('field.gif')
turtle.tracer(2)
image1=['boy11.gif','boy12.gif','boy13.gif','boy14.gif'] #1
image2=['boy21.gif','boy22.gif','boy23.gif','boy24.gif'] #2
image3=['boy31.gif','boy32.gif','boy33.gif','boy34.gif'] #3
for i in range (4):
wn.addshape(image1[i])
wn.addshape(image2[i])
wn.addshape(image3[i])
t1.up()
t1.goto(-600,-150)
t2.up()
t2.goto(-450,110)
t3.up()
t3.goto(-300,200)
delta=7
i=0
import winsound #4
winsound.PlaySound('music3.wav', winsound.SND_ASYNC) #5
while True:
X1=t1.xcor()
if X1>400: #6
t1.goto(-600,-150) #7
t2.goto(-450,110) #8
t3.goto(-300,200) #9](https://image.slidesharecdn.com/pythonbook06-03-200309004706/85/Python-book-136-320.jpg)
![Lesson 14: More Examples with inserted Images
137
i1=i%4
t1.shape(image1[i1])
t1.fd(delta)
t2.shape(image2[i1])
t2.fd(delta)
t3.shape(image3[i1])
t3.fd(delta)
i=i+1
time.sleep(0.035)
Take a look at this code. To generate the motion animation effect we have to
choose a few images( sprites), each of themIt has three lists of images (Lines
noted as #1-#3). To generate the animation effect we have chosen four different
boy images-positions that create running boys. Each line (#15-#17) describes 4
positions of each boy, so we can simulate boy running. Lines named as #4 and #5
provide sound effect when running. Line #4 imports sound module and line #5
calls sound file music3.wav. Turtle module allows sound recording for files with an
extension wav. If boy is out of the screen, conditions (lines #6 to #9) return him to
the left corner of the screen and motion continues again.
Static Result of Code:
Video below shows the final result (click on the image or link to watch video)
https://youtu.be/4L2BMKNKJH8](https://image.slidesharecdn.com/pythonbook06-03-200309004706/85/Python-book-137-320.jpg)
![Lesson 14: More Examples with inserted Images
141
Aquarium with water waves
#Example 14-8
import turtle,time,random
wn=turtle.Screen()
wn.setup(850,600)
AQ=[] #1
for i in range(74): #2
i1=str(i) #3
AQ.append(i1+'.gif')#4
image11 = ("fi11.gif") #5
image12 = ("fi12.gif") #6
image31 = ("fi31.gif") #7
image32 = ("fi32.gif") #8
wn.addshape(image11)
wn.addshape(image12)
wn.addshape(image31)
wn.addshape(image32)
t=turtle.Turtle()
t.showturtle()
t.speed(10)
t.penup()
X,Y=90,-90
dx,dy=2,4
k,r=0,0
while True:
r=r+1
k=k+1
k1=k%74
r1=r%100
wn.bgpic(AQ[k1])
t.setposition(X+dx,Y+dy)
X,Y=t.position()
if dx>0 and r1<50:
t.shape(image11)
if dx>0 and r1>50:
t.shape(image12)
if dx<0 and r1<50:
t.shape(image31)
if dx<0 and r1>50:
t.shape(image32)
if X>250 or X<-260:
dx=-dx
if Y<-205 or Y>210:
dy=-dy
The program shown in example 14-8 is constructed as follows:](https://image.slidesharecdn.com/pythonbook06-03-200309004706/85/Python-book-141-320.jpg)
![Lesson 14: More Examples with inserted Images
142
In order to create water motion in the aquarium (water animation), several static
fixed sprites of water images are introduced into the program, each frame differs
from the previous one so that quick changing of frames creates animation effect.
In our case, each frame contains an image of water with fish, and only one red with
blinking eyes moves around the aquarium due to the control Python codes. All
image sprites are downloaded into the program as separate files with GIF
extension. For water we downloaded 74 files, for red fish 4 images. The names of
the sprites for water are as follows: 0.gif, 1.gif, 2.gif…. 73.gif. Files for these sprites
are downloaded into the program using code lines # 1- # 4. Lines # 5 - # 8 specify
the image of a fish that moves and blinks its eyes due to the Python code. Images
for the project Aquarium with wqter waves can be download at:
https://github.com/victenna/Aquarium-with-water-waves
You can watch real code result at:
https://youtu.be/XeTwY9bwFLk
Below it is shown an animation that demonstrates the motion of a helicopter and
skydivers. The design of this animation can be combined with an explanation of
the motion laws and forces that affect different objects during motion. Code and
images can be downloaded at:
https://github.com/victenna/Helicopter
Helicopter
#Example 14-9
import turtle,time
wn=turtle.Screen()
wn.bgpic('road.gif')
t=turtle.Turtle()
t.up()
turtle.tracer(2)
turtle.bgcolor('brown')
image1=['helicopter11.gif','helicopter12.gif']
image2=['helicopter21.gif','helicopter22.gif']
for i in range(2):
wn.addshape(image1[i])
wn.addshape(image2[i])
image3=['boy.gif','girl.gif','boy1.gif']
for i in range(3):](https://image.slidesharecdn.com/pythonbook06-03-200309004706/85/Python-book-142-320.jpg)
![Lesson 14: More Examples with inserted Images
143
wn.addshape(image3[i])
t1=turtle.Turtle()
t1.shape(image3[0])
t1.up()
t1.hideturtle()
t1.goto(120,400)
t1.setheading(-90)
t2=turtle.Turtle()
t2.shape(image3[1])
t2.up()
t2.hideturtle()
t2.goto(-175,400)
t2.setheading(-90)
t3=turtle.Turtle()
t3.shape(image3[2])
t3.up()
t3.hideturtle()
t3.goto(-295,400)
t3.setheading(-90)
X=0
t.setheading(90)
def up_down(direction):
for i in range (100):
i1=i%2
t.shape(image2[i1])
t.fd(direction)
time.sleep(0.015)
up_down(4.5)
t.setheading(0)
q1=1
q2=0
q3=1
for i in range(450):
if i>=25 and t1.ycor()>-10:
t1.showturtle()
t1.fd(q3*2)
if t1.ycor()<-10:
t1.fd(0)
if i>=230 and t2.ycor()>-10:
t2.showturtle()
t2.fd(q3*2)
if t2.ycor()<-10:
t2.fd(0)
if i>=330 and t3.ycor()>-10:
t3.showturtle()
t3.fd(q3*5)
if t3.ycor()<-10:
t3.fd(0)](https://image.slidesharecdn.com/pythonbook06-03-200309004706/85/Python-book-143-320.jpg)
![Lesson 14: More Examples with inserted Images
144
i1=i%2
X=t.xcor()
t.shape(q1*image1[i1]+abs(q2)*image2[i1])
t.fd(q1*5+q2*5)
time.sleep(0.02)
if X>=480:
q1=0
q2=-1
if X<=-480:
q1=1
q2=0
t.setheading(-90)
up_down(4.5)
Static result of this code
Video result is available:
https://youtu.be/5P104dh_1cU
Pedestrian Crossing (One pedestrian)
#Example 14-10(a)
import turtle,time
wn=turtle.Screen()
wn.setup(800,800)
turtle.bgcolor('light blue')
wn.bgpic('street.gif')
turtle.tracer(2)
#car ========================================](https://image.slidesharecdn.com/pythonbook06-03-200309004706/85/Python-book-144-320.jpg)
![Lesson 14: More Examples with inserted Images
145
car=turtle.Turtle()
cars=['car2.gif','car3.gif','car4.gif']
for i in range(3):
wn.addshape(cars[i])
car.up()
car.setposition(-400,-210)
car.setheading(12)
#light========================================
light=turtle.Turtle()
lights=['red_light.gif','yellow_light.gif','green_light.gif']
for i in range(3):
wn.addshape(lights[i])
light.up()
light.setposition(350,150)
light.shape(lights[2])
#sign===================================
sign=turtle.Turtle()
signs=['w_no.gif','w_yes.gif']
for i in range(2):
wn.addshape(signs[i])
sign.up()
sign.setposition(90,20)
sign.shape(signs[1])
#man============================================
man=turtle.Turtle()
mans=['man1.gif','man2.gif','man3.gif','man4.gif','man5.gif','man6
.gif']
for i in range(6):
wn.addshape(mans[i])
man.shape(mans[3])
man.up()
man.goto(180,-20)
deltaX=5 #determines direction 0f walking (X coordinate)
deltaY=-2.5 #determines direction of walking (Y coordinate)
q=-1
move=1
r=0
while True:
q=q+1
q0=q%3
time.sleep(0.03)
if car.xcor()<-151:
car.shape(cars[q0])
move=1
car.fd(10*move)
light.shape(lights[2])
sign.shape(signs[0])](https://image.slidesharecdn.com/pythonbook06-03-200309004706/85/Python-book-145-320.jpg)
![Lesson 14: More Examples with inserted Images
146
if car.xcor()>-152:
if r<30:
car.shape(cars[0])
r=r+1
light.shape(lights[1])
sign.shape(signs[0])
if r>=29 and r<81:
r=r+1
q1=q%6
light.shape(lights[0])
sign.shape(signs[1])
r1=r-29
man.shape(mans[q1])
man.goto(180+r1*deltaX,-20+r1*deltaY)
time.sleep(0.1)
if r>=81:
car.shape(cars[q0])
move=1
car.fd(10*move)
light.shape(lights[2])
sign.shape(signs[0])
if car.xcor()>500:
q=-1
man.shape(mans[3])
man.hideturtle()
man.goto(180,-20)
man.showturtle()
r=0
car.hideturtle()
car.setposition((-400,-210))
car.showturtle()
Static code result is:](https://image.slidesharecdn.com/pythonbook06-03-200309004706/85/Python-book-146-320.jpg)
![Lesson 14: More Examples with inserted Images
147
You can download images fo Example 14-10(a) at:
https://github.com/victenna/Pedestrian-Crossing
Pedestrian Crossing (Three pedestrians)
#Example 14-10(b)
import turtle,time
car=turtle.Turtle()
turtle.tracer(2)
car.up()
car.hideturtle()
wn=turtle.Screen()
wn.setup(800,800)
turtle.bgcolor('light blue')
wn.bgpic('street.gif')
#car image========================================
cars=['car2.gif','car3.gif','car4.gif']
car=turtle.Turtle() #car turtle
for i in range(3):
wn.addshape(cars[i])
car.up()
car.setposition(-400,-210)
car.setheading(12)
#boy image===========================================
image1=['man1.gif','man2.gif','man3.gif','man4.gif','man5.gif','ma
n6.gif']
image2=['boy21.gif','boy22.gif','boy23.gif','boy24.gif','boy25.gif
','boy26.gif']
image3=['boy41.gif','boy42.gif','boy43.gif','boy44.gif','boy45.gif
','boy46.gif']
t11=turtle.Turtle() #boy turtle
t12=turtle.Turtle() #boy turtle
t13=turtle.Turtle() #boy turtle
X1=180
Y1=-20
def boy_(turtle,X,Y,img):
wn.addshape(img)
turtle.shape(img)
turtle.up()
turtle.goto(X,Y)
turtle.showturtle()
boy_(t11,180,-20,image1[0])
boy_(t12,230,-10,image2[0])
boy_(t13,130,-40,image3[0])
#sign image for pedestrians===============================
sign=['w_no.gif','w_yes.gif']](https://image.slidesharecdn.com/pythonbook06-03-200309004706/85/Python-book-147-320.jpg)
![Lesson 14: More Examples with inserted Images
148
t2=turtle.Turtle() #sign turtle
t2.hideturtle()
t2.up()
t2.setposition(90,20)
t2.showturtle()
def sign_(img1):
wn.addshape(img1)
t2.shape(img1)
sign_(sign[1])
#traffic light image=============================================
light=['red_light.gif','yellow_light.gif','green_light.gif']
t3=turtle.Turtle() #traffic light
t3.hideturtle()
t3.up()
t3.setposition(350,150)
t3.showturtle()
def light_(img2):
wn.addshape(img2)
t3.shape(img2)
light_(light[2])
turtle.tracer(2)
# function man walks===========================
deltaX=5 #determines walking direction
deltaY=-2.5 #determines walking direction
q=-1
move=1
r=0
while True:
q=q+1
q0=q%3
time.sleep(0.03)
if car.xcor()<-151:
car.shape(cars[q0])
move=1
car.fd(10*move)
light_(light[2])
sign_(sign[0])
if car.xcor==-152:
car.shape(car[0])
if car.xcor()>-152:
if r<30:
car.shape(cars[0])
r=r+1
light_(light[1])
sign_(sign[0])
if r>=29 and r<81:
r=r+1
q1=q%6
light_(light[0])
sign_(sign[1])
r1=r-29](https://image.slidesharecdn.com/pythonbook06-03-200309004706/85/Python-book-148-320.jpg)
![Lesson 14: More Examples with inserted Images
149
boy_(t11,180+r1*deltaX,-20+r1*deltaY,image1[q1])
boy_(t12,230+r1*deltaX,-10+r1*deltaY,image2[q1])
boy_(t13,130+r1*1.2*deltaX,-
40+1.2*r1*deltaY,image3[q1])
time.sleep(0.05)
if r>=81:
car.shape(cars[q0])
move=1
car.fd(10*move)
light_(light[2])
sign_(sign[0])
if car.xcor()>500:
q=-1
boy_(t11,180,-20,image1[0])
boy_(t12,230,-10,image2[0])
boy_(t13,130,-40,image3[0])
r=0
car.hideturtle()
car.setposition((-400,-210))
car.showturtle()
Static code result is:
You can watch result of animation at
https://youtu.be/zvTHDusc-H0
Images are at:](https://image.slidesharecdn.com/pythonbook06-03-200309004706/85/Python-book-149-320.jpg)
![Lesson 14: More Examples with inserted Images
150
https://github.com/victenna/Pedestrian-Crossing
Chess Board
import turtle
wn=turtle.Screen()
wn.setup(700,700)
q=turtle.Turtle('square')
q.hideturtle()
q.hideturtle()
q.shapesize(3)
q.color('black')
q.penup()
q.hideturtle()
q.goto(0,0)
turtle.tracer(2)
def condition(a,clr1,clr2):
if j%2==0:
q.color(clr1)
else:
q.color(clr2)
q.goto(a+j*60,a+60*i)
q.stamp()
for i in range(8):
for j in range (8):
if i%2==0:
condition(-200,'coral','lightgray')
if i%2>0:
condition(-200,'lightgray','coral')
t=[]
im=['Rook.gif','Rook.gif','Knight.gif','Knight.gif','Bishop.gif',
'Bishop.gif','King.gif','Queen.gif','Pawn.gif','Pawn.gif','Pawn.gi
f','Pawn.gif',
'Pawn.gif','Pawn.gif','Pawn.gif','Pawn.gif',
'Rookw.gif','Rookw.gif','Knightw.gif','Knightw.gif','Bishopw.gif',
'Bishopw.gif','Kingw.gif','Queenw.gif','Pawnw.gif','Pawnw.gif','Pa
wnw.gif','Pawnw.gif',
'Pawnw.gif','Pawnw.gif','Pawnw.gif','Pawnw.gif']
for n in range (32):
t.append(turtle.Turtle())
wn.addshape(im[n])
t[n].shape(im[n])
t[n].penup()](https://image.slidesharecdn.com/pythonbook06-03-200309004706/85/Python-book-150-320.jpg)
![Lesson 14: More Examples with inserted Images
151
t[0].goto(220,-200)
t[1].goto(-205,-200)
t[2].goto(-140,-200)
t[3].goto(160,-200)
t[4].goto(-85,-200)
t[5].goto(90,-200)
t[6].goto(-25,-200)
t[7].goto(40,-200)
for s in range (8,16):
t[s].goto(-200+(s-8)*60,-140)
t[16].goto(220,220)
t[17].goto(-205,220)
t[18].goto(-140,220)
t[19].goto(160,220)
t[20].goto(-85,220)
t[21].goto(90,220)
t[22].goto(-25,220)
t[23].goto(40,220)
for s in range (24,32):
t[s].goto(-200+(s-24)*60,160)
for n in range(32):
t[n].ondrag(t[n].goto)
Code Result :](https://image.slidesharecdn.com/pythonbook06-03-200309004706/85/Python-book-151-320.jpg)

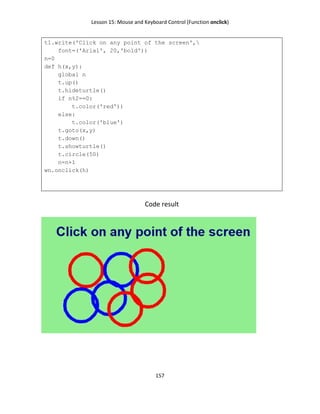
![Lesson 15: Mouse and Keyboard Control (Function onclick)
158
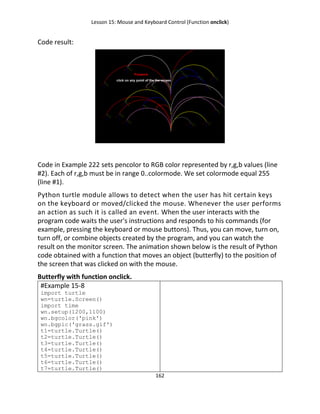
Firework
#Example 15-7(a)
import turtle
import time
import random
wn=turtle.Screen()
wn.bgcolor('black')
t=turtle.Turtle('circle')
t.shapesize(0.3)
t.up()
turtle.tracer(50)
clr=['red','blue','gold','yellow','green','pink','lightgreen']
t1=turtle.Turtle()
t1.up()
t1.hideturtle()
t1.color('red')
t1.goto(-150,300)
t1.write('Firework', font=("Arial",20,'bold'))
t1.goto(-300,250)
t1.color('white')
t1.write('click on any point of the the screen',
font=("Arial",20,'bold'))
def firework(x,y):
t.clear()
t.goto(x,y)
for j in range(5):
a=random.choice(clr)
t.color(a)
time.sleep(0.1)
for i in range(9):
b=random.choice(clr)
t.color(b)
t.circle(40+20*j,40)
t.stamp()
for i in range(10):
wn.bgcolor('red')
time.sleep(0.2)
wn.bgcolor('blue')
time.sleep(0.2)
wn.onclick(firework)](https://image.slidesharecdn.com/pythonbook06-03-200309004706/85/Python-book-158-320.jpg)
![Lesson 15: Mouse and Keyboard Control (Function onclick)
163
t1.up()
t2.up()
t3.up()
t4.up()
t5.up()
t6.up()
t7.up()
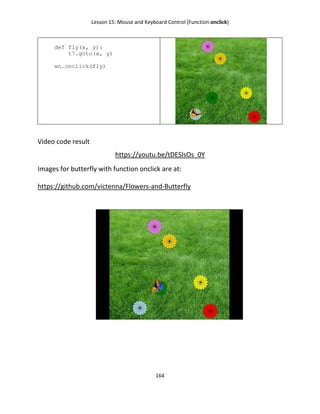
image1='flo11.gif'
image2='flo2.gif'
image3='flo3.gif'
image4='flo4.gif'
image5='flo5.gif'
image6='flo6.gif'
image=[]
for i in range (118):
#print(i)
i1=str(i)
image.append(i1+'.gif')
wn.addshape(image1)
t1.shape(image1)
t1.goto(-100,-230)
wn.addshape(image2)
t2.shape(image2)
t2.goto(-300,-420)
wn.addshape(image3)
t3.shape(image3)
t3.goto(300,-170)
wn.addshape(image4)
t4.shape(image4)
t4.goto(0,235)
wn.addshape(image5)
t5.shape(image5)
t5.goto(-150,380)
wn.addshape(image6)
t6.shape(image6)
t6.goto(400,-450)
while True:
for i in range (18):
wn.addshape(image[i])
t7.shape(image[i])
time.sleep(0.1)](https://image.slidesharecdn.com/pythonbook06-03-200309004706/85/Python-book-163-320.jpg)
![Lesson 15: Mouse and Keyboard Control (Function onclick)
165
Helicopter with skydivers (skydiver descends to the ground when clicking the
screen by mouse)
#Example 15-9
import turtle,time
wn=turtle.Screen()
wn.bgpic('road.gif')
t=turtle.Turtle()
t.up()
turtle.tracer(2)
turtle.bgcolor('brown')
image1=['helicopter11.gif','helicopter12.gif']
image2=['helicopter21.gif','helicopter22.gif']
for i in range(2):
wn.addshape(image1[i])
wn.addshape(image2[i])
diver=[]
image3=['boy.gif','boy1.gif','boy2.gif', 'boy3.gif','girl.gif']
def condition(turtle):
turtle.setheading(-90)
if turtle.ycor()>-10:
turtle.fd(5)
if turtle.ycor()<-10:
turtle.fd(0)
for i in range(5):
wn.addshape(image3[i])
diver.append(turtle.Turtle())
diver[i].shape(image3[i])
diver[i].up()
diver[i].hideturtle()
diver[i].setheading(-90)
t.setheading(90)
def up_down(step):
for i in range (100):
i1=i%2
t.shape(image1[i1])
t.fd(step)
time.sleep(0.015)
up_down(4.5)](https://image.slidesharecdn.com/pythonbook06-03-200309004706/85/Python-book-165-320.jpg)
![Lesson 15: Mouse and Keyboard Control (Function onclick)
166
t.setheading(0)
s=1
q=0
q1=1
q2=0
i=0
while True:
i=i+1
i1=i%2
X=t.xcor()
if i1==0:
t.shape(image1[0])
if i1==1:
t.shape(image1[1])
t.shape(q1*image1[i1]+abs(q2)*image2[i1])
t.fd(q1*5+q2*5)
time.sleep(0.02)
if X>=480:
q1=0
q2=-1
if X<=-480:
q1=1
q2=0
for m in range(5):
condition(diver[m])
def h(x,y):
global q
global X
q=q+1
for n in range (1,6):
if q==n:
diver[n-1].goto(X,400)
diver[n-1].showturtle()
wn.onclick(h)
Static code result:](https://image.slidesharecdn.com/pythonbook06-03-200309004706/85/Python-book-166-320.jpg)


![Lesson 17: Mouse and Keyboard Control (Function ondrag)
182
t4.ondrag(dragging4)
Video code result
https://youtu.be/pFRGnwrFAyQ
Build a house (short version)
#Example 17-3(b)
import turtle
t=[]
sh=['square','square','triangle','circle']
clr=['red','black','green','grey']
for n in range (4):
t.append(turtle.Turtle())
t[n].shape(sh[n])
t[n].up()
t[n].color(clr[n])
t[n].speed('fastest')
t[0].shapesize(15,10)
t[1].shapesize(5,3)
t[2].shapesize(14,6)
t[2].left(90)
t[3].shapesize(2)
def dragging0(x, y):
t[0].goto(x, y)
def dragging1(x, y):
t[1].goto(x, y)
def dragging2(x, y):
t[2].goto(x, y)
def dragging3(x, y):
t[3].goto(x, y)
t[0].ondrag(dragging0)
t[1].ondrag(dragging1)
t[2].ondrag(dragging2)
t[3].ondrag(dragging3)](https://image.slidesharecdn.com/pythonbook06-03-200309004706/85/Python-book-182-320.jpg)
![Lesson 17: Mouse and Keyboard Control (Function ondrag)
183
Images to build a house can be download at:
https://github.com/victenna/My-House
Build 3D house
#Example 17-4
import turtle
wn=turtle.Screen()
wn.setup(1000,1000)
turtle.tracer(2)
TEXT_FONT=('Arial', 20,'bold')
capture=turtle.Turtle()
capture.hideturtle()
capture.up()
capture.setposition(-400,-300)
capture.write('Build a House dragging parts with a mouse',
font=TEXT_FONT)
t=[]
sh=['square','square','triangle','square','square','square']
clr=['red','whitesmoke','green','whitesmoke','blue','gray']
for n in range (6):
t.append(turtle.Turtle())
t[n].shape(sh[n])
t[n].up()
t[n].color(clr[n])
t[n].speed('fastest')
t[0].shapesize(15,13.8)
t[0].goto(-300,200)
t[1].shapesize(7,3)
t[1].goto(-300,-100)
t[2].shapesize(14,6)
t[2].goto(300,200)
t[2].left(90)
t[3].shapesize(2)
t[3].shearfactor(-0.5)
t[3].goto(300,-100)
t[4].shapesize(12,7.8)
t[4].right(-116.5)
t[4].shearfactor(-0.5)
t[4].goto(0,300)
t[5].shapesize(14.8,10.6)
t[5].right(0)
t[5].shearfactor(-0.5)
t[5].goto(0,-10)
def dragging0(x, y):
t[0].goto(x, y)
def dragging1(x, y):](https://image.slidesharecdn.com/pythonbook06-03-200309004706/85/Python-book-183-320.jpg)
![Lesson 17: Mouse and Keyboard Control (Function ondrag)
184
t[1].goto(x, y)
def dragging2(x, y):
t[2].goto(x, y)
def dragging3(x, y):
t[3].goto(x, y)
def dragging4(x, y):
t[4].goto(x, y)
def dragging5(x, y):
t[5].goto(x, y)
my_dragg=[dragging0,dragging1,dragging2,dragging3,dragging4,dragging5]
for m in range (6):
t[m].ondrag(my_dragg[m])
Static result:
------------------------
Video Result:
https://www.youtube.com/watch?v=tDgwecF0kP8
Boy assemble
#Example 17-5
import turtle](https://image.slidesharecdn.com/pythonbook06-03-200309004706/85/Python-book-184-320.jpg)

![Lesson 18: Geometry with begin_poly function
189
wn=turtle.Screen()
t.up()
t.begin_poly()
for count in range(8):
t.forward(20)
t.left(360 / 8)
t.end_poly()
t.get_poly()
m=t.get_poly()
wn.addshape('pentagon',m)
t.shape('pentagon')
t.tilt(90)
t.shapesize(5)
t.color('red')
for i in range (2):
t.left(30)
time.sleep(1)
In example 18-3 created component octagon moves and rotates along the screen.
Top image corresponds parameter i=0, bottom to i=1.
Now consider geometry of more sophisticated non regular polygon. Specify the
vertex of this polygon and create it using Turtle module commands. Python’s Shape
class allows you to create compound shape. To use compound turtle shape, which
typically consist of several polygons of different color, you must:
Create an empty Shape object of type “compound”.
Add as many components to this object as desired, using the addcomponent()
method. Create on irregular polygon using such method
Irregular polygon
#Example 18-4
import turtle
wn=turtle.Screen()
import time
s=turtle.Shape('compound') #1
turtle.hideturtle()
turtle.up()
poly1=[(60,-20),(20,40), #2
(-40,60),(-40,-20), #3
(-20,-80),(40,-80), #4
(60,-20)] #5
s.addcomponent(poly1,'blue') #6
wn.addshape('POLY',s)](https://image.slidesharecdn.com/pythonbook06-03-200309004706/85/Python-book-189-320.jpg)

![Lesson 18: Geometry with begin_poly function
194
Result:
Motion of Rocketship around the Earth
#Example 18-8
import turtle,time
wn=turtle.Screen()
wn.bgcolor('navy')
wn.setup(900,900)
#t.hideturtle()
#t.up()
image1='Earth.gif'
wn.addshape(image1)
earth=turtle.Turtle()
earth.shape(image1)
earth.goto(0,0)
turtle.tracer(2)
s1=turtle.Shape("compound")
poly1=((0,0),(25,0),(25,10),(0,10))
poly2=((25,0),(35,5),(25,10))
poly3=((0,10),(-5,19),(10,10))
poly4=((0,0),(-5,-10),(10,0))
poly5=((5,7),(15,7),(15,10),(5,10))
poly6=((0,3),(-10,-4),(-10,14),(0,8))
clr=['red','light
blue','gold','yellow']
s1.addcomponent(poly1,clr[0],'black')
s1.addcomponent(poly2,clr[1],'black')
s1.addcomponent(poly3,clr[2],'black')
s1.addcomponent(poly4,clr[3],'black')
s1.addcomponent(poly5,'blue','black')
s1.addcomponent(poly6,'yellow','black')](https://image.slidesharecdn.com/pythonbook06-03-200309004706/85/Python-book-194-320.jpg)
![Lesson 18: Geometry with begin_poly function
195
wn.addshape('geometry',s1)
Roket=turtle.Turtle(shape='geometry')
Roket.shapesize(2)
Roket.tilt(90)
Roket.showturtle()
Roket.up()
Roket.goto(0,-400)
Roket.rt(0)
turtle.tracer(2)
while True:
Roket.circle(400,1)
time.sleep(0.01)
Satellite and Rockets around the spinning Earth (with animation)
#Example 18-9
import turtle,time
wn=turtle.Screen()
wn.bgpic('sky.gif')
wn.setup(900,900)
t=turtle.Turtle()
t.up()
turtle.tracer(2)
s1=turtle.Shape("compound")
s2=turtle.Shape("compound")
s3=turtle.Shape("compound")
#Earth file images
image=[]
for i in range(45):
i1=str(i)
image.append(i1+'.gif')
wn.addshape(image[0])
turtle.shape(image[0])
#======================================
#Rocket polygons
poly1=((0,0),(25,0),(25,10),(0,10))
poly2=((25,0),(35,5),(25,10))
poly3=((0,10),(-5,19),(10,10))
poly4=((0,0),(-5,-10),(10,0))
poly5=((5,7),(15,7),(15,10),(5,10))
poly6=((0,3),(-10,-4),(-10,14),(0,8))
#Rocket1 geometry
s1.addcomponent(poly1,'red','black')
s1.addcomponent(poly2,'light blue','black')
s1.addcomponent(poly3,'gold','black')
s1.addcomponent(poly4,'yellow','black')
s1.addcomponent(poly5,'blue','black')
s1.addcomponent(poly6,'yellow','black')
wn.addshape('geometry1',s1)](https://image.slidesharecdn.com/pythonbook06-03-200309004706/85/Python-book-195-320.jpg)
![Lesson 18: Geometry with begin_poly function
196
Rocket1=turtle.Turtle(shape='geometry1')
Rocket1.hideturtle()
Rocket1.shapesize(2)
Rocket1.tilt(90)
Rocket1.up()
Rocket1.goto(0,-400)
Rocket1.showturtle()
#=================================================
#Rocket2 geometry
s2.addcomponent(poly1,'light blue','black')
s2.addcomponent(poly2,'red','black')
s2.addcomponent(poly3,'gold','black')
s2.addcomponent(poly4,'brown','black')
s2.addcomponent(poly5,'blue','black')
s2.addcomponent(poly6,'yellow','black')
wn.addshape('geometry2',s2)
Rocket2=turtle.Turtle(shape='geometry2')
Rocket2.hideturtle()
Rocket2.shapesize(1.4)
Rocket2.tilt(90)
Rocket2.up()
Rocket2.goto(-220,0)
Rocket2.lt(270)
Rocket2.showturtle()
#=================================================
#Sattelite polygons
poly1=((0,0),(30,0),(30,10),(0,10)) #red
poly2=((20,5),(40,-5),(40,15))
poly3=((0,3),(-10,-4),(-10,14),(0,8))
poly4=((10,0),(20,0),(20,-30),(10,-30)) #gold
poly5=((5,7),(15,7),(15,10),(5,10))
poly6=((10,10),(20,10),(20,40),(10,40))
clr=['red','gold','gainsboro','light blue']
s3.addcomponent(poly1,'red','black') #red
s3.addcomponent(poly3,'gold','black')
s3.addcomponent(poly4,'gainsboro','black') #gold
s3.addcomponent(poly6,'light blue','black')
wn.addshape('geometry3',s3)
Sat1=turtle.Turtle(shape='geometry3')
Sat1.hideturtle()
Sat1.shapesize(2)
Sat1.tilt(0)
Sat1.up()
Sat1.goto(300,0)
Sat1.lt(90)
Sat1.showturtle()
#=================================================
#Earth motion anime files
turtle.tracer(3)](https://image.slidesharecdn.com/pythonbook06-03-200309004706/85/Python-book-196-320.jpg)
![Lesson 18: Geometry with begin_poly function
197
k=0
while True:
k=k+1
k0=k%44
k1=k%44
if k0<22:
wn.bgpic('sky.gif')
if k0>22:
wn.bgpic('sky1.gif')
wn.addshape(image[k1])
t.shape(image[k1])
Rocket1.circle(400,1)
Rocket2.circle(220,3)
Sat1.fd(10)
angle=Sat1.heading()
Sat1.setheading(angle+2)
time.sleep(0.01)
Static code results
Images for project #18-9 are availabe at:
https://github.com/victenna/Rockets-around-Earth
You can watch video at:
https://youtu.be/s2Ksfeeo1Dc
Animated Gog
#Example 18-10
import turtle,time
wn=turtle.Screen()
wn.setup(1200,900)
turtle.tracer(3)
wn.bgcolor('gold')
t=turtle.Turtle('turtle')](https://image.slidesharecdn.com/pythonbook06-03-200309004706/85/Python-book-197-320.jpg)
![Lesson 19: Classes and Objects
205
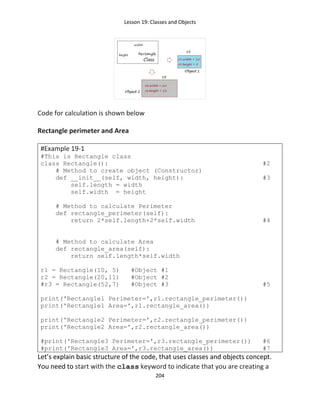
class, then you add the name of the class (in our case Rectangle) and colon (:)
[line #2]. Remember: the class is just for defining the Rectangle, not actually
creating instances of individual rectangles with specific width and height; we’ll get
to that shortly.
In the class body [all lines between #4 and #4 including lines #3 and #4], you declare
parameters (attributes), methods (method of calculation in our case), and
constructors.
Attribute:
The attribute is a member of the class. Our rectangle code has two attributes
(parameters): width and height. All classes create objects, and all objects contain
characteristics called attributes (In our case class-Rectangle and objects-r1, r2,
which is shown in Fig 19-1)
Method:
The method of class is similar to a normal function but it is a function of class, in
order to use it, you need to call through object. The first parameter of the method
is always self (a keyword that refers to the class itself).
Constructor:
Constructor is used to create an object. Constructor assigns values of the
parameter to the properties of the object that will be created. You can only define
a constructor in class. The task of constructors is to initialize (assign values) to the
data members of the class when an object of class is created. In Python the
__init__() method is called the constructor and is always called when an object is
created. The first parameter of the constructor is always self (a keyword refers to
the class itself). If the class is not defined by the constructor, Python assumes that
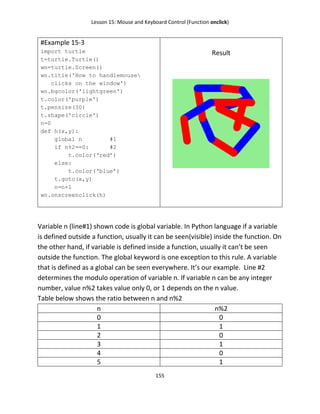
it inherits constructor of parent class.](https://image.slidesharecdn.com/pythonbook06-03-200309004706/85/Python-book-205-320.jpg)
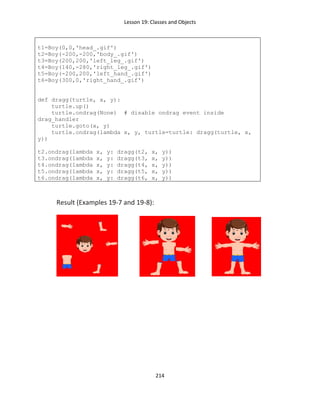
![Lesson 19: Classes and Objects
213
Class function together with ondrag function
#Example 19-7
import turtle
wn=turtle.Screen()
wn.setup(800,800)
wn.bgcolor('red')
turtle.tracer(2)
class Boy(turtle.Turtle):
def __init__(self,X,Y,image):
super().__init__()
wn.addshape(image)
self.shape(image)
self.up()
self.goto(X,Y)
self.down()
t=[0,0,0,0,0,0]
t[0]=Boy(0,0,'head_.gif')
t[1]=Boy(-200,-200,'body_.gif')
t[2]=Boy(200,200,'left_leg_.gif')
t[3]=Boy(140,-280,'right_leg_.gif')
t[4]=Boy(-200,200,'left_hand_.gif')
t[5]=Boy(300,0,'right_hand_.gif')
for m in range(1,6):
t[m].up()
t[m].ondrag(t[m].goto)
#Example 19-8
import turtle
wn=turtle.Screen()
wn.setup(800,800)
wn.bgcolor('red')
class Boy(turtle.Turtle):
def __init__(self,X,Y,image):
super().__init__()
wn.addshape(image)
self.shape(image)
self.up()
self.goto(X,Y)
self.down()](https://image.slidesharecdn.com/pythonbook06-03-200309004706/85/Python-book-213-320.jpg)
![Games with Turtle Graphics
219
for n in range (3):
t1.goto(-100+60*n,100-60*m)
t1.stamp()
grid()
reference=[(-100,100),(-40,100),(20,100),(-100,40),(-40,40),(20,40)
,(-100,-20),(-40,-20),(20,-20)]
delta=[100,100,100,100,100,100,100,100,100]
q=-1
t=turtle.Turtle('square')
t.shapesize(1.5)
t.hideturtle()
t.speed(10)
crs=[0,0,0,0,0,0,0,0,0]
circ=[0,0,0,0,0,0,0,0,0]
z=[0,0,0,0,0,0,0,0,0]
def loopp():
for u in range(9):
crs[u]=0
circ[u]=0
z[u]=0
def h(x, y):
sum=0
global q
#global zz
t.penup()
t.goto(x, y)
q=q+1
#print('q=',q)
for s in range(9):
if q%2==0:
t.shape('square')
t.shapesize(1.5)
t.color('red')
else:
t.shape('circle')
t.shapesize(1.5)
t.color('blue')
delta[s]= t.distance(reference[s])
print(z[s])
X0,Y0=t.position()
if X0<-130 or X0>50 or Y0>130 or Y0<-50:
exit()](https://image.slidesharecdn.com/pythonbook06-03-200309004706/85/Python-book-219-320.jpg)
![Games with Turtle Graphics
220
if delta[s]>40:
t.hideturtle()
if delta[s]<40 and z[s]==0:
t.hideturtle()
t.setposition(reference[s])
t.showturtle()
z[s]=1
print('s=',s)
#print('z[s]=',z[s])
q1=q
t.stamp()
X,Y=t.position()
for w in range(3):
if Y==(100-w*60):
if q%2==0:
crs[w]=crs[w]+X
if crs[w]==-120:
print('cross win')
time.sleep(2)
q=-1
grid()
loopp()
else:
circ[w]=circ[w]+X
if circ[w]==-120:
print('circle win')
time.sleep(2)
q=-1
grid()
loopp()
for w1 in range(3):
if X==-(100-w1*60):
if q%2==0:
crs[3+w1]=crs[3+w1]+Y
if crs[3+w1]==120:
print('cross win')
time.sleep(2)
q=-1
grid()
loopp()
else:
circ[3+w1]=circ[3+w1]+Y
if circ[3+w1]==120:
print('circle win')
time.sleep(2)
q=-1](https://image.slidesharecdn.com/pythonbook06-03-200309004706/85/Python-book-220-320.jpg)
![Games with Turtle Graphics
221
grid()
loopp()
if (X==-100 and Y==100) or (X==-40 and Y==40) or
(X==20 and Y==-20):
if q%2==0:
crs[6]=crs[6]+Y
if crs[6]==120:
print('cross win')
time.sleep(2)
q=-1
grid()
loopp()
else:
circ[6]=circ[6]+Y
if circ[6]==120:
print('circle win')
time.sleep(2)
q=-1
grid()
loopp()
if (X==-100 and Y==-20) or (X==-40 and Y==40) or
(X==20 and Y==100):
if q%2==0:
crs[7]=crs[7]+Y
if crs[7]==120:
print('cross win')
time.sleep(2)
q=-1
grid()
loopp()
else:
circ[7]=circ[7]+Y
if circ[7]==120:
print('circle win')
time.sleep(2)
q=-1
grid()
loopp()
for s in range (9):
sum=sum+z[s]
print('sum=',sum)
if sum==9:
print('q=',q)
print('Draw')
time.sleep(2)
q=-1
grid()](https://image.slidesharecdn.com/pythonbook06-03-200309004706/85/Python-book-221-320.jpg)
![Games with Turtle Graphics
222
loopp()
wn.onclick(h)
Ball eats squares
import turtle
import time
import random
TEXT_FONT = ('Arial', 50, 'bold')
SCORE_FONT = ('Arial', 20, 'bold')
TIME_FONT = ('Arial', 20, 'bold')
wn=turtle.Screen()
wn.setup(800,800)
wn.tracer(33)
wn.update()
wn.bgcolor('yellow')
text_turtle = turtle.Turtle()
text_turtle.write('Press SPACE to start', align='center',
font=TEXT_FONT)
time.sleep(5)
wn.clear()
wn.bgcolor('black')
wn.tracer(3)
t0=turtle.Turtle('circle')
t0.shapesize(1)
t0.up()
t0.color('red')
q=[]
q1=[]
q.append(t0)
q[0].goto(-350,-40)
q1.append(0)
q1[0]=q[0].position()
for n in range(1,20):
t1=turtle.Turtle('square')](https://image.slidesharecdn.com/pythonbook06-03-200309004706/85/Python-book-222-320.jpg)
![Games with Turtle Graphics
223
t1.shapesize(1)
t1.color('white')
t1.penup()
t1.speed(2)
#print(n)
q.append(t1)
q[n].penup()
q[n].goto(random.randint(-300,300),random.randint(-300,300))
q1.append(0)
q1[n]=q[n].position()
q[n].showturtle()
def jump_up():
q[0].speed(1)
y=q[0].ycor()
y =y+20
q[0].sety(y)
def jump_down():
q[0].speed(1)
y =q[0].ycor()
y =y-20
q[0].sety(y)
def jump_right():
q[0].speed(1)
x=q[0].xcor()
x =x+20
q[0].setx(x)
def jump_left():
q[0].speed(1)
x =q[0].xcor()
x =x-20
q[0].setx(x)
def score_number():
score_turtle.clear()
score_turtle.hideturtle()
score_turtle.up()
score_turtle.setposition(10,330)
score_turtle.write('Score=', font=SCORE_FONT)
score_turtle.setposition(110,330)
score_turtle.write(score, font=SCORE_FONT)
def time_number():
time_turtle.clear()
time_turtle.hideturtle()
time_turtle.up()
time_turtle.setposition(-390,330)
time_turtle.write('Time(seconds)=', font=TIME_FONT)
time_turtle.setposition(-160,330)
time_turtle.write((delta_t), font=TIME_FONT)
def start_game():
wn.onkey(None, 'space') # can't restart currently
text_turtle.clear()](https://image.slidesharecdn.com/pythonbook06-03-200309004706/85/Python-book-223-320.jpg)
![Games with Turtle Graphics
224
score = 0
score_number()
delta_t=0
time_number()
score_turtle=turtle.Turtle()
score_turtle.color('white')
score_turtle.hideturtle()
time_turtle=turtle.Turtle()
time_turtle.color('white')
time_turtle.hideturtle()
text_turtle = turtle.Turtle()
text_turtle.write('Press SPACE to start', align='center',
font=TEXT_FONT)
turtle.listen()
wn.onkey(start_game, 'space')
turtle.onkey(jump_up, "Up")
turtle.onkey(jump_down, "Down")
turtle.onkey(jump_left, "Left")
turtle.onkey(jump_right, "Right")
score=0
delta_t=0
then = round(time.time()) #Time before the operations start
while True:
for s in range(1,20):
q[s].fd(-3)
if q[s].xcor()<-400:
q[s].hideturtle()
q[s].goto(q1[s])
q[s].showturtle()
dist=t0.distance(q[s].xcor(),q[s].ycor())
if dist<25:
q[s].hideturtle()
q[s].goto(random.randint(-300,300),random.randint(-
300,300))
score=score+1
score_number()
now =round( time.time()) #Time after it finished
delta_t=now-then
time_number()
if score==150:
print("It took: ", now-then, " seconds")](https://image.slidesharecdn.com/pythonbook06-03-200309004706/85/Python-book-224-320.jpg)
![Games with Turtle Graphics
225
Turtle and Balls
import turtle
import random
import time
t1=turtle.Turtle('turtle')
t1.hideturtle()
t1.up()
t1.goto(-400,25)
t1.color('gold')
t1.showturtle()
wn=turtle.Screen()
wn.setup(1000,1000)
wn.bgcolor('black')
turtle.tracer(40)
p=[]
def left():
global tX
global tY
t1.speed(10)
t1.setheading(180)
t1.forward(10)
tX=t1.xcor()
tY=t1.ycor()
def right():
global tX
global tY
t1.speed(10)
t1.setheading(0)
t1.forward(10)
tX=t1.xcor()
tY=t1.ycor()
def up():
global tX
global tY](https://image.slidesharecdn.com/pythonbook06-03-200309004706/85/Python-book-225-320.jpg)
![Games with Turtle Graphics
226
t1.speed(10)
t1.setheading(90)
t1.forward(10)
tX=t1.xcor()
tY=t1.ycor()
def down():
global tX
global tY
t1.speed(10)
t1.setheading(-90)
t1.forward(10)
tX=t1.xcor()
tY=t1.ycor()
wn.listen()
wn.onkey(left, 'Left')
wn.onkey(right, 'Right')
wn.onkey(up, 'Up')
wn.onkey(down, 'Down')
clr=['red','pink','green','brown','yellow','gold','blue','light
blue']
for n in range(8):
p.append(turtle.Turtle('circle'))
p[n].hideturtle()
p[n].up()
p[n].shapesize(1)
p[n].color(clr[n])
if n==0:
p[n].color('black')
p[n].goto(0,-50*n)
p[n].showturtle()
while True:
for m in range (8):
p[m].circle(50*m,random.randint(1,10))
p1=turtle.distance(p[m])
pX=p[m].xcor()
pY=p[m].ycor()
dist=abs(t1.distance(pX,pY))
if dist<25:
t1.goto(-400,25)
t1.setheading(0)
time.sleep(0.005)
#wn.exitonclick()](https://image.slidesharecdn.com/pythonbook06-03-200309004706/85/Python-book-226-320.jpg)
![Games with Turtle Graphics
227
Turtle is eating balls
import turtle
import time
import random
wn=turtle.Screen()
wn.bgcolor('lightblue')
turtle.tracer(3)
t1=turtle.Turtle('turtle')
t1.shapesize(2)
t1.color('red')
t1.speed(2)
t1.penup()
t1.goto(-300,0)
q=[]
q1=[0,0,0,0,0]
for i in range (5):
c=random.randint(50,200)
c1=random.randint(1,5)
t=turtle.Turtle('circle')
t.shapesize(2)
t.speed(0)
q.append(t)
q[i].penup()
q[i].goto(100*(i-1),c)
q1[i]=q[i].position()
q[i].setheading(-90)
q[i].color('black')
q[i].showturtle()
k1=0
def motion(ang):
global k1
t1.goto(-300,0)
t1.setheading(ang)
for j in range(601):
k1=k1+1
#print(k1)](https://image.slidesharecdn.com/pythonbook06-03-200309004706/85/Python-book-227-320.jpg)
![Games with Turtle Graphics
228
if k1<601:
t1.fd(1)
a1=t1.position()
for m in range(5):
if j==0:
q1[m]=q[m].position()
q[m].fd(0.4)#+0.04*m)
a2=q[m].position()
dist=abs(a1-a2)
if dist<40:
q[m].hideturtle()
if k1==599:
t1.goto(-300,0)
a1=t1.position()
for m in range(5):
print(q1[m])
q[m].goto(q1[m])
#print(q1[5])
k1=0
for k in range (10):
t1.penup()
t1.goto(-300,0)
a1=input ('Please,input turtle angle?')
b1=int(a1)
t1.setheading(b1)
motion(b1)
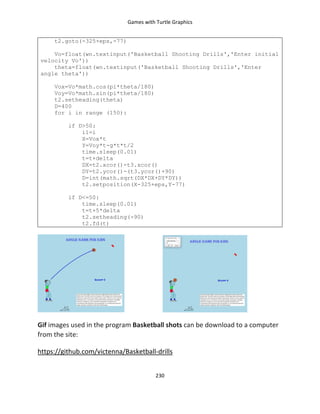
Basketball shots
import turtle
import time
import math,random
#turtle.tracer(2)
t1=turtle.Turtle()
wn=turtle.Screen()
wn.setup(1000,900)
wn.bgcolor('light blue')
# box around a player
t5=turtle.Turtle()
t5.up()
t5.pensize(15)
t5.goto(-450,-318)
t5.down()
#t5.color('blue')
t5.goto(200,-318)
#player image
image1='player.gif'
wn.addshape(image1)
t1.shape(image1)](https://image.slidesharecdn.com/pythonbook06-03-200309004706/85/Python-book-228-320.jpg)

![Math and Physics Applications with Turtle Graphics
235
https://github.com/victenna/Math
Tiles drawing: hexagons and pentagons
#Hexagon Tiles
import turtle
turtle.tracer(2)
turtle.bgcolor('navajo white')
t=turtle.Turtle('turtle')
t.hideturtle()
t.pensize(1)
length=100
t.up()
t.goto(0,0)
t.down()
clr=['red','medium purple','green','blue','brown','medium
orchid','magenta']
for m in range(7):
t.color(clr[m])
t.setheading(150+m*60)
if m==6:
t.setheading(150)
t.up()
t.goto(0,0)
t.fd(length)
if m==6:
t.goto(0,-length)
t.down()
t.begin_fill()
for i in range(6):
t.fd(length)
t.right(60)
t.end_fill()
#Pentagon Tiles
import turtle,time
#turtle.tracer(5)
turtle.bgcolor('navajo white')
t=turtle.Turtle('turtle')
t.hideturtle()
t.pensize(1)
length=200
a=1-0.27
t.up()
t.goto(100,200)
t.down()](https://image.slidesharecdn.com/pythonbook06-03-200309004706/85/Python-book-235-320.jpg)
![Math and Physics Applications with Turtle Graphics
236
clr=['red','medium purple','green','blue','brown','medium
orchid','magenta']
def
tile(length1,length2,length3,length4,length5,ang1,ang2,ang3,ang4,colo
r):
t.color(color)
t.begin_fill()
t.fd(length1)
t.lt(ang1)
t.fd(length2)
t.lt(ang2)
t.fd(length3)
t.lt(ang3)
t.fd(length4)
t.lt(ang4)
t.fd(length5)
t.end_fill()
t.setheading(0)
tile((length*a),length,length,length,length,60,90,60,90,clr[0])
t.left(180)
tile(length,length,length*a,length,length,90,60,60,90,clr[1])
t.setheading(0)
tile(length*a,length,length,length,length,-60,-90,-60,-90,clr[2])
t.rt(60)
t.fd(length*a)
t.lt(60)
tile(length,length,length*a,length,length,-90,-60,-60,-90,clr[3])
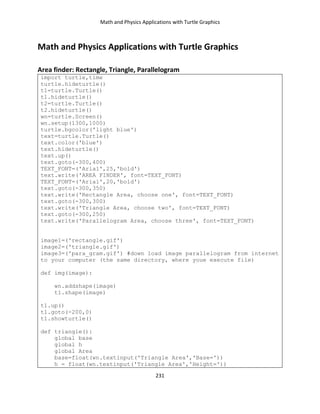
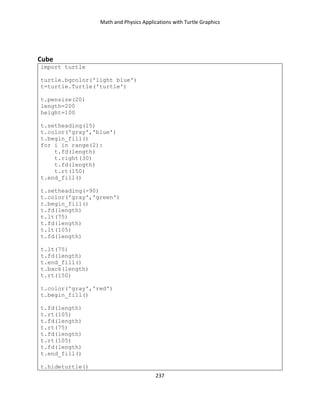
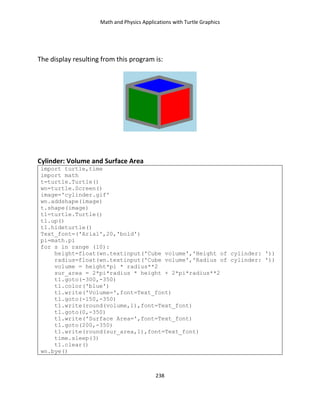
The display resulting from these programs(hexagon and pentagon tiles) is:](https://image.slidesharecdn.com/pythonbook06-03-200309004706/85/Python-book-236-320.jpg)
![Math and Physics Applications with Turtle Graphics
239
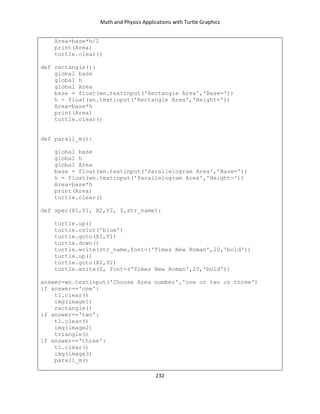
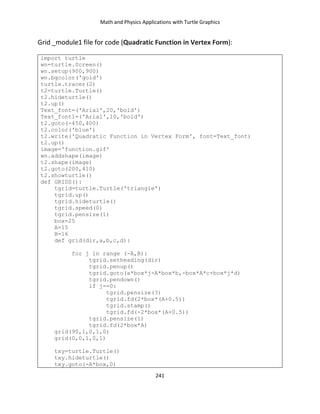
Result:
Image for this code can be download to a computer from the site:
https://github.com/victenna/Math
Quadratic Function in Vertex Form
import turtle,time
import grid_module1 #Grid_module1 is shown below
#from grid_module1 import GRIDS
wn=turtle.Screen()
wn.setup(950,900)
wn.tracer(10)
t1=turtle.Turtle()
t1.setheading(0)
t1.pensize(5)
t1.hideturtle()
t1.up()
r=-1
clr=['blue','red','green']
while True:
def shift(a,h,k):
#global X,Y
#A=40/Q
X1=-400
Y1=a*(X1-h)*(X1-h)+k
t1.up()
t1.setposition(X1,Y1)
deltax=2
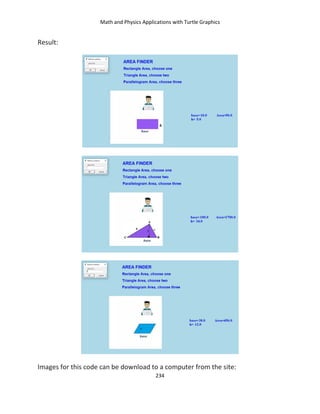
for q in range(0,400):](https://image.slidesharecdn.com/pythonbook06-03-200309004706/85/Python-book-239-320.jpg)
![Math and Physics Applications with Turtle Graphics
240
X=(X1+q*deltax)
Y=a/25*(X-25*h)*(X-25*h)+25*k
if abs(Y)<370 and abs(X)<360:
#print(Y)
t1.down()
else:
t1.up()
t1.setposition(X,Y)
r=r+1
r1=r%3
a1=float(wn.textinput('Quadratic Function','Enter value a'))
h1=float(wn.textinput('Quadratic Function','Enter value h'))
k1=float(wn.textinput('Quadratic Function','Enter value k'))
print(k1)
t1.color(clr[r1])
shift(a1,h1,k1)
if r1==2:
time.sleep(4)
t1.clear()
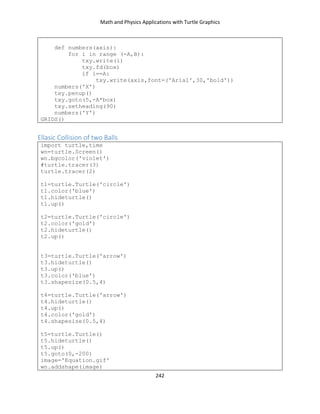
Images for this code can be download to a computer from the site:
https://github.com/victenna/Quadratic-function](https://image.slidesharecdn.com/pythonbook06-03-200309004706/85/Python-book-240-320.jpg)
![Math and Physics Applications with Turtle Graphics
248
# Upper shore line position
t2X=-450
t2Y=250
t2=turtle.Turtle('turtle')
t2.hideturtle()
t2.pensize(5)
t2.penup()
t2.goto(-t2X,t2Y)
t2.goto(t2X,t2Y)
# Turtle of letter B and position of letter B
t4=turtle.Turtle('turtle')
image4='B.gif'
wn.addshape(image4)
t4.shape(image4)
t4.hideturtle()
t4.penup()
#Turtle of sentence AB, positition (0,0)
t5=turtle.Turtle('turtle')
image5='AB.gif'
wn.addshape(image5)
t5.shape(image5)
t5.hideturtle()
t5.penup()
TEXT_FONT=('Arial', 20,'bold')
#Velocity (boat and stream) and position of the text
velocity=turtle.Turtle()
velocity.color('white')
velocity.hideturtle()
velocity.up()
#Text answer and position of the text
answer=turtle.Turtle()
answer.color('white')
answer.hideturtle()
answer.up()
image=[image1,image2,image3]
q=-1
# Function for main boat motion
def motion():
X=-580
Y=-310
q=-1
running=True
while running:
q=q+1
q1=q%3
X=X+deltaX](https://image.slidesharecdn.com/pythonbook06-03-200309004706/85/Python-book-248-320.jpg)
![Math and Physics Applications with Turtle Graphics
249
Y=Y+deltaY
wn.addshape(image[q1])
t1.shape(image[q1])
time.sleep(0.1)
t1.setposition(X,Y)
Xcor=t1.xcor()
Ycor=t1.ycor()
dist=abs(Ycor-t2Y)
if dist<40:
t1.hideturtle()
t1.goto(-580,-310)
t1.showturtle()
t4.setposition(Xcor,Ycor+130)
t4.showturtle()
t5.showturtle()
time1=100/deltaY
AB_distance=time1*deltaX
answer.setposition(400,-110)
answer.write('my answer=',font=TEXT_FONT)
answer.setposition(580,-110)
#my_answer=input('answer=')
my_answer=wn.textinput("Welcome to River Boat Problem!",
"my answer?")
answer.write(my_answer,font=TEXT_FONT)
answer.setposition(400,-160)
answer.write('real answer=',font=TEXT_FONT)
answer.setposition(580,-160)
answer.write(round(AB_distance),font=TEXT_FONT)
time.sleep(3)
print(AB_distance)
running=False
while True:
activation = wn.textinput("Welcome to River Boat Problem!",
"Are you ready?")
if activation=='no':
print("Goodbye!")
#wn.clear()
wn.bye()
else:
deltaY= wn.textinput('Welcome to River Boat Problem!',
'Boat velocity')
deltaY=int(deltaY)
velocity.setposition(400,0)
velocity.write('boat velocity=',font=TEXT_FONT)
velocity.setposition(600,0)
velocity.write(deltaY,font=TEXT_FONT)
deltaX= wn.textinput('Welcome to River Boat Problem!',
'Stream velocity')](https://image.slidesharecdn.com/pythonbook06-03-200309004706/85/Python-book-249-320.jpg)
![Math and Physics Applications with Turtle Graphics
253
Flight to the Moon
import turtle,time
import winsound
wn=turtle.Screen()
t=turtle.Turtle()
t.hideturtle()
t.up()
turtle.tracer(2)
wn.setup(900,900)
#Moon Sky
wn.bgpic('moon3.gif')
turtle.bgcolor('black')
#Astronaut1
image1=['ast11.gif','ast12.gif','ast11_m.gif','ast12_m.gif']
ast1=turtle.Turtle()
ast1.up()
ast1.goto(-250,-240)
wn.addshape('ast11.gif')
wn.addshape('ast12.gif')
wn.addshape('ast11_m.gif')
wn.addshape('ast12_m.gif')
ast1.shape('ast11.gif')
#______________________Atronaut2 is standing
ast2=turtle.Turtle()](https://image.slidesharecdn.com/pythonbook06-03-200309004706/85/Python-book-253-320.jpg)
![Math and Physics Applications with Turtle Graphics
254
ast2.up()
ast2.goto(390,-240)
wn.addshape('ast2.gif')
ast2.shape('ast2.gif')
#______________________________________
#____________Astronaut3 Comes out of the Shuttle
image3=['ast31.gif','ast32.gif','ast33.gif','ast34.gif','ast35.gif']
ast3=turtle.Turtle()
ast3.hideturtle()
for i in range (4):
wn.addshape(image3[i])
s = turtle.Shape("compound")
#Space Shuttle
poly1=((0,0),(25,0),(25,10),(0,10))
poly2=((25,0),(35,5),(25,10))
poly3=((0,10),(-5,19),(10,10))
poly4=((0,0),(-5,-10),(10,0))
#poly5=((5,2),(15,2),(15,5),(5,5))
poly5=((5,7),(15,7),(15,10),(5,10))
poly6=((0,3),(-10,-4),(-10,14),(0,8))
s.addcomponent(poly1,'red','black')
s.addcomponent(poly2,'pink','black')
s.addcomponent(poly3,'green','black')
s.addcomponent(poly4,'green','black')
s.addcomponent(poly5,'blue','black')
wn.addshape('roket',s)
Roket=turtle.Turtle(shape='roket')
Roket.penup()
Roket.hideturtle()
Roket.tilt(90)
Roket.setheading(90)
Roket.hideturtle()
s.addcomponent(poly6,'yellow','black')
wn.addshape('roket1',s)
Roket1=turtle.Turtle(shape='roket1')
Roket1.hideturtle()
Roket1.up()
Roket1.shapesize(0.1)
Roket1.tilt(90)
Roket1.hideturtle()](https://image.slidesharecdn.com/pythonbook06-03-200309004706/85/Python-book-254-320.jpg)
![Math and Physics Applications with Turtle Graphics
255
Roket1.goto(400,400)
Roket1.setheading(230)
Roket1.showturtle()
a1=2/100
a2=4/100
length=0.5
#Roket arrives to the Moon
winsound.PlaySound('to_moon.wav', winsound.SND_ASYNC)
for m in range(160):
Roket1.fd(2)
Roket1.shapesize(length)
length=length+0.03
time.sleep(0.01)
time.sleep(0.1)
print('length=',length)
Roket1.rt(139)
for i in range(82):
Roket1.fd(-4.5)
time.sleep(0.1)# 0.01??????????????
time.sleep(0.5)
Roket1.fd(-65)
X,Y=Roket1.position()
#Roket.hideturtle()
Roket.goto(X,Y)
Roket.showturtle()
Roket1.hideturtle()
Roket.shapesize(5)
#_____Astronaut1 moves to the Shuttle
for m in range(21):
for n in range(2):
ast1.shape(image1[0])
ast1.fd(5)
time.sleep(0.2)
ast1.shape(image1[1])
ast1.fd(5)
time.sleep(0.2)
ast1.hideturtle()
X1,Y1=ast1.position()
#_______________________________
#Astronaut2 comes out!!!!!!!
delta=5
ast3.hideturtle()](https://image.slidesharecdn.com/pythonbook06-03-200309004706/85/Python-book-255-320.jpg)
![Math and Physics Applications with Turtle Graphics
256
ast3.up()
ast3.goto(X1,Y1)
ast3.showturtle()
for m in range(50):
m1=m%4
wn.addshape(image3[m1])
ast3.shape(image3[m1])
ast3.goto(X1,Y1)
X1=ast3.xcor()
X1=X1-delta
time.sleep(0.2)
wn.addshape(image3[4])
ast3.shape('ast35.gif')
ast3.showturtle()
time.sleep(1)
winsound.PlaySound('come.wav', winsound.SND_ASYNC)
# Shuttle starts from the moon
length=5
Roket.shapesize(0.01)
for i in range(130):
Roket1.showturtle()
Roket1.rt(0.35)
Roket1.shapesize(length)
length=length-0.04
time.sleep(0.01)
Roket1.fd(5)
time.sleep(0.2)
wn.setup(900,900)
Roket1.hideturtle()
Roket1.shapesize(2)
#________________Shuttle in free space
ast1.hideturtle()
ast2.hideturtle()
ast3.hideturtle()
sky=['sk1.gif','sk2.gif']
winsound.PlaySound('kosmos.wav', winsound.SND_ASYNC)
for m in range(2):
Roket1.goto(-400,-400)
Roket1.setheading(45)
Roket1.showturtle()
k=0
for i in range(430):
k=k+1
k1=k%15
if k1==0:](https://image.slidesharecdn.com/pythonbook06-03-200309004706/85/Python-book-256-320.jpg)
![Math and Physics Applications with Turtle Graphics
257
wn.bgpic(sky[0])
if k1==7:
wn.bgpic(sky[1])
Roket1.fd(3)
time.sleep(0.01)
turtle.tracer(1)
# Shuttle arrives to the Earth
wn.bgpic('Spaceport2.gif') # Earth Image
winsound.PlaySound('to_earth.wav', winsound.SND_ASYNC)
#____________________________Guest3 and Guest4 meet the roket
imageg3=['guest11.gif','guest12.gif']#,'guest13.gif']
imageg4=['guest21.gif','guest22.gif']#,'guest23.gif','guest24.gif','g
uest25.gif']
guest3=turtle.Turtle()
guest3.hideturtle()
guest3.up()
guest3.goto(350,-350)
guest4=turtle.Turtle()
guest4.hideturtle()
guest4.up()
guest4.goto(-200,-120)
for i in range(2):
wn.addshape(imageg3[i])
for i in range(2):
wn.addshape(imageg4[i])
guest3.shape(imageg3[0])
guest4.shape(imageg4[0])
Roket1.hideturtle()
Roket1.goto(400,400)
Roket1.setheading(-135)
a1=2/100
a2=4/100
length=0.3
Roket1.shapesize(length)
Roket1.showturtle()
guest3.showturtle()
guest4.showturtle()
#_____________________________
#_________________________Rocket arrives to the Earth](https://image.slidesharecdn.com/pythonbook06-03-200309004706/85/Python-book-257-320.jpg)
![Math and Physics Applications with Turtle Graphics
258
for m in range(180):
Roket1.fd(2)
Roket1.shapesize(length)
length=length+0.025
time.sleep(0.01)
Roket1.setheading(90)
for i in range(95):
Roket1.fd(-4.5)
time.sleep(0.02)
X,Y=Roket1.position()
time.sleep(0.5)
Roket.goto(X,Y)
Roket.showturtle()
Roket1.hideturtle()
Roket.shapesize(5)
#________________________________________________
ast1.goto(100,-240)
ast1.showturtle()
winsound.PlaySound('clap.wav', winsound.SND_ASYNC)
#turtle.tracer(2)
for i in range(70):
i1=i%2
#i2=i%5
if i<10:
for n in range(4):
n1=n%2
ast1.shape(image1[2])
ast1.fd(-5)
time.sleep(0.04)
ast1.shape(image1[3])
ast1.fd(-5)
time.sleep(0.04)
guest3.shape(imageg3[n1])
guest4.shape(imageg4[n1])
if i>=10:
guest3.shape(imageg3[i1])
guest4.shape(imageg4[i1])
time.sleep(0.08)
ast1.shape(image1[0])](https://image.slidesharecdn.com/pythonbook06-03-200309004706/85/Python-book-258-320.jpg)
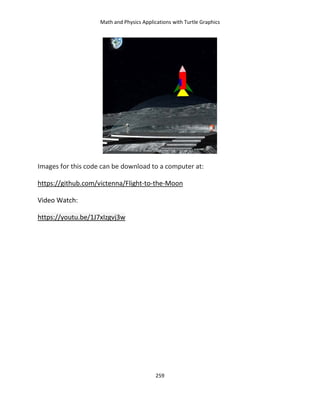
![Pixel Art with Python Turtle Module
261
Pixel Art with Python Turtle Module
Cat Image with Pixels
import turtle
t= turtle.Turtle()
wn=turtle.Screen()
wn.tracer(0)
t.speed(0)
#Pen.color("#000000")
t.color("black")
# This function draws a box by drawing each side of the square and
using the fill function
def box(size,color):
t.fillcolor(color)
t.begin_fill()
# 0 deg.
t.forward(size)
t.left(90)
# 90 deg.
t.forward(size)
t.left(90)
# 180 deg.
t.forward(size)
t.left(90)
# 270 deg.
t.forward(size)
t.end_fill()
t.setheading(0)
#Position t in top left area of the screen
t.penup()
t.forward(-100)
t.setheading(90)
t.forward(100)
t.setheading(0)
##Here is an example of how to draw a box
#box(boxSize)
#Here is how your PixelArt is stored (using a "list of lists")
pixels = [[1,1,1,1,1,1,1,1,1,1,1,2,2,2,1,1]]
pixels.append([2,1,1,1,1,1,1,2,1,1,1,1,1,2,2,1])](https://image.slidesharecdn.com/pythonbook06-03-200309004706/85/Python-book-261-320.jpg)
![Pixel Art with Python Turtle Module
262
pixels.append([2,2,1,1,1,1,2,2,1,1,1,1,1,1,2,2])
pixels.append([2,2,2,2,2,2,2,2,1,1,1,1,1,1,2,2])
pixels.append([2,2,3,2,2,3,2,2,1,1,1,1,1,1,2,2])
pixels.append([2,2,2,2,2,2,2,2,1,1,1,1,1,1,2,2])
pixels.append([2,2,2,2,2,2,2,2,2,2,2,2,2,2,2,1])
pixels.append([1,2,2,2,2,2,2,1,2,2,2,2,2,2,2,1])
pixels.append([1,1,1,2,2,1,1,1,2,2,1,1,1,2,2,1])
pixels.append([1,1,1,1,1,1,1,1,2,2,1,1,1,2,2,1])
pixels.append([1,1,1,1,1,1,1,2,2,2,1,1,2,2,2,1])
pixels.append([1,1,1,1,1,1,1,2,2,2,1,1,2,2,2,1])
for i in range (12):
for j in range (16):
if pixels[i][j]==2:
box(40,'black')
if pixels[i][j]==3:
box(40,'blue')
t.penup()
t.forward(40)
t.pendown()
t.setheading(270)
t.penup()
t.forward(40)
t.setheading(180)
t.forward(40*16)
t.setheading(0)
t.pendown()
The display resulting from this program is:
Face from Pixels
import turtle
t=turtle.Turtle('square')
t.shapesize(2.5)
t.hideturtle()
t.speed('fastest')
t.up()](https://image.slidesharecdn.com/pythonbook06-03-200309004706/85/Python-book-262-320.jpg)
![Pixel Art with Python Turtle Module
263
t.goto(-240,100)
#Here is how your PixelArt is stored (using a "list of lists")
row0=[0,0,1,1,1,1,1,1,0,0]
row1=[0,1,1,1,1,1,1,1,1,0]
row2=[1,1,2,2,1,1,2,2,1,1]
row3=[1,1,2,2,1,1,2,2,1,1]
row4=[1,1,1,1,1,1,1,1,1,1]
row5=[1,3,1,1,1,1,1,1,3,1]
row6=[1,1,3,1,1,1,1,3,1,1]
row7=[1,1,1,3,4,4,3,1,1,1]
row8=[0,1,1,1,4,4,1,1,1,0]
row9=[0,0,1,1,1,1,1,1,0,0]
clm=[row0,row1,row2,row3,row4,row5,row6,row7,row8,row9]
clr=['gold','blue','black','red']
for i in range (10):
#print(25)
for j in range (10):
t.fd(60)
for k in range(4):
if clm[i][j]==(k+1):
t.showturtle()
t.color(clr[k])
t.stamp()
t.hideturtle()
t.setposition(-240,100-60*(i+1))
t.setheading(0)
The display resulting from this program is:](https://image.slidesharecdn.com/pythonbook06-03-200309004706/85/Python-book-263-320.jpg)
![Pixel Art with Python Turtle Module
264
Canadian Leaf
import turtle
t=turtle.Turtle('square')
t.shapesize(1)
t.hideturtle()
turtle.tracer(3)
#t.speed('fastest')
t.up()
t.goto(-240,100)
t.color('red')
#Here is how your PixelArt is stored (using a "list of lists")
row0=[0,0,0,0,0,0,0,0,0,0,0,1,1,0,0,0,0,0,0,0,0,0,0,0]
row1=[0,0,0,0,0,0,0,0,0,0,0,1,1,0,0,0,0,0,0,0,0,0,0,0]
row2=[0,0,0,0,0,0,0,0,0,0,0,1,1,0,0,0,0,0,0,0,0,0,0,0]
row3=[0,0,0,0,0,0,0,0,0,0,1,1,1,1,0,0,0,0,0,0,0,0,0,0]
row4=[0,0,0,0,0,0,0,1,1,0,1,1,1,1,0,1,1,0,0,0,0,0,0,0]
row5=[0,0,0,0,0,0,0,1,1,1,1,1,1,1,1,1,1,0,0,0,0,0,0,0]
row6=[0,0,0,0,0,0,0,1,1,1,1,1,1,1,1,1,1,0,0,0,0,0,0,0]
row7=[0,0,0,0,0,0,0,0,1,1,1,1,1,1,1,1,0,0,0,0,0,0,0,0]
row8=[0,0,0,0,1,0,0,0,1,1,1,1,1,1,1,1,0,0,0,1,0,0,0,0]
row9=[1,1,1,0,1,1,0,0,1,1,1,1,1,1,1,1,0,0,1,1,0,1,1,1]
row10=[0,1,1,1,1,1,1,0,1,1,1,1,1,1,1,1,0,1,1,1,1,1,1,0]
row11=[0,1,1,1,1,1,1,1,1,1,1,1,1,1,1,1,1,1,1,1,1,1,1,0]
row12=[0,0,1,1,1,1,1,1,1,1,1,1,1,1,1,1,1,1,1,1,1,1,0,0]
row13=[0,0,1,1,1,1,1,1,1,1,1,1,1,1,1,1,1,1,1,1,1,1,0,0]
row14=[1,1,1,1,1,1,1,1,1,1,1,1,1,1,1,1,1,1,1,1,1,1,1,1]
row15=[0,1,1,1,1,1,1,1,1,1,1,1,1,1,1,1,1,1,1,1,1,1,1,0]
row16=[0,0,0,1,1,1,1,1,1,1,1,1,1,1,1,1,1,1,1,1,1,0,0,0]
row17=[0,0,0,0,1,1,1,1,1,1,1,1,1,1,1,1,1,1,1,1,0,0,0,0]
row18=[0,0,0,0,0,1,1,1,1,1,1,1,1,1,1,1,1,1,1,0,0,0,0,0]
row19=[0,0,0,0,0,0,1,1,1,1,1,1,1,1,1,1,1,1,0,0,0,0,0,0]
row20=[0,0,0,0,0,0,1,1,1,1,1,1,1,1,1,1,1,1,0,0,0,0,0,0]
row21=[0,0,0,0,0,1,1,1,1,1,1,1,1,1,1,1,1,1,1,0,0,0,0,0]
row22=[0,0,0,0,0,0,0,0,0,0,0,1,1,0,0,0,0,0,0,0,0,0,0,0]
row23=[0,0,0,0,0,0,0,0,0,0,0,1,1,0,0,0,0,0,0,0,0,0,0,0]
row24=[0,0,0,0,0,0,0,0,0,0,0,1,1,0,0,0,0,0,0,0,0,0,0,0]
row25=[0,0,0,0,0,0,0,0,0,0,0,1,1,0,0,0,0,0,0,0,0,0,0,0]
clm=[row0,row1,row2,row3,row4,row5,row6,row7,row8,row9,row10,row11,ro
w12,
row13,row14,row15,row16,row17,row18,row19,row20,row21,
row22,row23,row24,row25]
box=10
for i in range (26):
#print(25)
for j in range (24):](https://image.slidesharecdn.com/pythonbook06-03-200309004706/85/Python-book-264-320.jpg)
![Pixel Art with Python Turtle Module
265
t.fd(box)
#print(clm[i][j])
if clm[i][j]==1:
t.showturtle()
#t.color(clr[k])
t.stamp()
t.hideturtle()
t.setposition(-240,100-box*(i+1))
t.setheading(0)
The display resulting from this program is:](https://image.slidesharecdn.com/pythonbook06-03-200309004706/85/Python-book-265-320.jpg)

![Module Files in Animation with Turtle Graphics
267
Module Files in Animation with Turtle Graphics
In Python, modules are smaller pieces of a bigger program. Each moduleis is a
separate file, that has a name, statements and extension .py. Typically, module
contains functions (you want to include in your main code) and variables of all
types (arrays, dictionaries, objects etc.). Functions stored in the module are made
available to the main program using the Python import keyword, that has to be
inserted to the main code. Module file should be placed in the same directory as
the program that we import it in. To use created module file in the main program
we hve to make two things:
a) Insert keyword import with the name of module file into the main code;
b) Call each function, created in module file, in the main program.
Below it is shown a few examples of programs, that demonstrate using of
module files in the main program. In the listing code (Pumkin boy crosses a
street) keywords that are inserted to the main file words аrе in bold.
Pumkin boy crosses a street
#Main file
import turtle,time
from mod_pumkin import sprite
from mod_pumkin import shapes
wn=turtle.Screen()
wn.setup(1000,800)
wn.bgpic('cross1.gif')
im=[]
shapes(im)
print(im)
chipo=turtle.Turtle()
chipo.showturtle()
chipo.up()
chipo.goto(-40,-275)
sprite(chipo,0,im[0])
m=0
while True:
m=m+1
m1=m%10
chipo.showturtle()
sprite(chipo,0,im[m1])
chipo.fd(10)
X,Y=chipo.position()
#Module file (mod_pumkin.py)
import turtle
wn=turtle.Screen()
def shapes(im):
for m in range(10):
im.append('0'+str(m)+'.gif')
def sprite(turtle,angle,img):
wn.addshape(img)
turtle.shape(img)
turtle.up()
turtle.setheading(angle)](https://image.slidesharecdn.com/pythonbook06-03-200309004706/85/Python-book-267-320.jpg)
![Module Files in Animation with Turtle Graphics
268
time.sleep(0.2)
if X>500:
chipo.hideturtle()
chipo.goto(-40,-275)
chipo.showturtle()
Images for this code(Pumkin boy crosses a street) can be download at:
https://github.com/victenna/Animation-with-Images/tree/master/Pumkin%20boy
Soccer Shots
#Main file
import turtle,time,random
from mod_soccer1 import sprite
from mod_soccer1 import shapes
from mod_scr import scr
from mod_scr import tot_number
wn=turtle.Screen()
wn.setup(800,800)
wn.bgpic('grass.gif')
im=[]
shapes(im)
print(im)
player=turtle.Turtle()
player.up()
wn.addshape('00.gif')
wn.addshape('03.gif')
player.shape('00.gif')
player.showturtle()
player.goto(-100,-250)
ball=turtle.Turtle()
ball.up()
ball. hideturtle()
ball.goto(170,-400)
wn.addshape('ball.gif')
ball.shape('ball.gif')
#Module file (mod_soccer1.py)
import turtle
wn=turtle.Screen()
def shapes(im):
for i in range(27):
im.append(str(i)+'.gif')
def
sprite(turtle,angle,img):
wn.addshape(img)
turtle.shape(img)
turtle.up()
turtle.setheading(angle)](https://image.slidesharecdn.com/pythonbook06-03-200309004706/85/Python-book-268-320.jpg)
![Module Files in Animation with Turtle Graphics
269
golkip=turtle.Turtle()
golkip.up()
golkip.goto(-120,80)
sprite(golkip,0,im[0])
pos=100,100
n=-1
def right():
global n
n=n+1
n1=n%27
global pos
sprite(golkip,0,im[n1])
golkip.fd(15)
pos=golkip.position()
def left():
global n
n=n+1
n1=n%27
global pos
sprite(golkip,0,im[n1])
golkip.fd(-15)
pos=golkip.position()
wn.onkey(left,'Left')
wn.onkey(right,'Right')
wn.listen()
turtle.tracer(1)
delta=100
i=-1
while True:
ball.hideturtle()
ball.setheading(random.randint(40,110))
i=i+1
i1=i%2
if i1==0:
player.shape('00.gif')
player.showturtle()
X,Y=player.position()
ball.setposition(X,Y+100)
ball.hideturtle()
time.sleep(0.2)
if i1==1:
player.shape('03.gif')
p=0
tot_number()
for q in range(110):](https://image.slidesharecdn.com/pythonbook06-03-200309004706/85/Python-book-269-320.jpg)
![Module Files in Animation with Turtle Graphics
271
time.sleep(0.5)#!!!!!!
total.goto(50,0)
total.clear()
total.write (t_num, font=FONT)
total.goto(330,0)
total.write (r, font=FONT)
Images for this code(Pumkin boy crosses a street) can be download at:
https://github.com/victenna/Animation-with-Images/tree/master/Soccer%20Sots
Shark and Muffin
#Main file
import turtle,random,time
from mod_muffin import muffin
from mod_scr import scr
#import module score
from mod_shark import shapes
from mod_shark import sprite
import winsound # Import sound
library
wn=turtle.Screen()
wn.setup(700,700)
wn.bgpic('Aquarium.gif')
im=[]
shapes(im)
print(im)
shark=turtle.Turtle()
sprite(shark,im[0])
shark.goto(0,-200)
muffin1=turtle.Turtle()
muffin(muffin1)
def right():
sprite(shark,im[0])
shark.fd(10)
def left():
sprite(shark,im[1])
shark.fd(-10)
wn.onkey(left,"Left")
wn.onkey(right, "Right")
wn.listen()
delta1=1000
#Module file(mod_shark)
import turtle
wn=turtle.Screen()
def shapes(im):
for m in range(2):
im.append('shark'+str(m+1)+'.gif')
def sprite(turtle,img):
wn.addshape(img)
turtle.shape(img)
turtle.up()
#---------------------------------
#Module file(mod_muffin)
import turtle
wn=turtle.Screen()
image0='muffin1.gif'
def muffin(turtle):
wn.addshape(image0)
turtle.shape(image0)
turtle.hideturtle()
turtle.penup()
turtle.setheading(-90)
turtle.goto(0,300)
turtle.showturtle()
#-------------------------------
#Module file(mod_scr)
import turtle
score=turtle.Turtle()
score.hideturtle()
score.up()
score.color('gold')
s=0
FONT=('Times New Roman',20,
'bold')](https://image.slidesharecdn.com/pythonbook06-03-200309004706/85/Python-book-271-320.jpg)