1. Pre-production diary
Before I began the process of filming, there were many things I had to
make sure were in order, so I did some preparatory planning. This was to
ensure that the day of shooting went as smooth as possible. This required
me to complete a risk assessment and a permission form in order to
ensure the safety of both myself and others.
I also had to consider what things may be of risk whilst out and recording.
For example: ensuring no damage was dealt to the college property
cameras or; making sure no one went off on their own or got lost. There
was also other things to consider, such as the members of public.
Because of this, I made sure to not include anyone in my footage as
anyone who was passing by wouldn't have consented to being a part of
my promotional video.
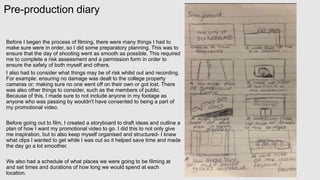
Before going out to film, I created a storyboard to draft ideas and outline a
plan of how I want my promotional video to go. I did this to not only give
me inspiration, but to also keep myself organised and structured- I knew
what clips I wanted to get while I was out so it helped save time and made
the day go a lot smoother.
We also had a schedule of what places we were going to be filming at
and set times and durations of how long we would spend at each
location.
3. Production diary
On the day of the shoot, I visited various locations around Sunderland such as: the fire station, the winter gardens and museum, the bridges and the church. All of these
locations were planned ahead, and I had permission to shoot in them. I borrowed a canon camera for college and began filming various shots of these locations. I made sure
to maintain a variety of different shot sizes, camera angles and camera movements throughout all of my filming.
Establishing shot High angle shot Low angle shot Close up shot
Above is a few examples of some of the shot sizes and camera angles that I decided to us when I was filming in Sunderland.
I used an establishing shot in order to introduce the museum and winter gardens. The establishing shot allows a smooth transition to the other shots I want to follow afterwards.
It allows an audience to see where the place is and entices them to go. This establishing shot, according to Katz and Blumer's uses and gratifications theory, would be a great
source of information for my audience.
I used a high camera angle when I shot footage of the fish inside of the winter gardens in order to connote a sense of innocence. The preferred reading- from Stuart Hall's
reception theory- of this would be that a sense of emotion and admiration is evoked in the audience when they see the fish. The preferred response would be that the audience
find the fish adorable, thus they want to go to the winter gardens to visit the fish that they see advertised on my promotional video.
I used a low angle shot for Sunderland empire. The reason for this is because low angle shots are commonly used to portray something as "powerful". Since, personally, I find
that the Sunderland Empire is a grand attraction for people to enjoy, I used the low angle shot to convey a similar message to my audience. For this shot, I also used a tilt and
tilted the camera upwards as it scaled the whole building. Both the camera tilt and the low angle shot emphasise how big the building is, portraying it as a grand attraction,
therefore inspiring my target audience to visit here.
I used a close up shot when filming one of the exhibitions inside of the museum/winter gardens. I did this in order to allow my audience to grasp what kind of interesting and
unique artifacts that can be found at Sunderland museum and winter gardens. The preferred reading of this shot would be that the audience is intrigued by what's in store for
them at the museum and perhaps may encourage them to want to visit it themselves. I maintained a symmetrical composition when filming this shot as I wanted to create a shot
that was pleasing to the audience's eye.
4. For the day of shooting, it was vital that me and my class had already discussed where and when we were going.
We organised a set time when we would all meet and where we would all meet – the fire station, which was our first
location that we were going to film. We had already discussed what day we were going to be filming and ensured
that the weather forecast aligned well with our schedule. We created a strict schedule of what places we would visit
and how long for and maintained it throughout the entire day.
Whilst shooting, I encountered some errors that I'd have to fix. For example, whilst filming in the library, one of my
classmates was in the shot. The solution to this issue was an easy fix by asking my classmate to move out of the
frame and refilming my shot. Another issue that I encountered whilst filming was some of my camera movements not
turning out how I'd like them to. When taking a pan of the art gallery, I didn't like how fast I turned the camera when I
rewatched the footage. This was fixed by me refilming the pan and ensuring I moved my camera at a much slower
pace and kept the camera still.
Before After
5. Post production diary
For the post production aspect of my project, I used the editing software 'premier pro' to bring all of my clips together. I already had
a rough idea of what I wanted to create for my final promotional video. I wanted to include upbeat music in order to appease
my target audience, therefore I sourced copyright-free music that I thought attained what I was looking for.
Whilst editing on premier pro, I learned how to add text. This was useful as it meant I could introduce the places around
Sunderland that were involved in my edit. I learned how to change the font and used a websites such as 'dafont' in order
to achieve the correct aesthetic for my promotional video. I mainly stuck with sans serif font in order to connote a slightly
less formal tone as I felt this was something that would resonate more with my target audience. Not to mention, based
on my previous research, this seems to be a common convention of promotional videos.
For my video, I decided I wanted the clips to cut to the beat to create a well put together video that
appeared professional, yet the professionalism is contrasted by the upbeat background music to
create binary opposition. This would help me to create a personal relationship with my audience.
Whilst remaining somewhat professional, there's an element of fun implied through the non-
diegetic sound. This conveys to the audience that the locations I was filming, the museum and
winter gardens for example, might not sound like much fun, however there are many things of
interest to do there. To achieve this, I sped up and slowed down some of the clips that I deemed
necessary and trimmed the clips as needed. According to Goodwins “dancing in the distraction
factor,” music videos cut to the beat in order to deliver a message to the audience more powerfully
as it makes it more engaging, exciting and memorable. Despite the fact that my promotional video
isn’t a music video, I took inspiration from this as I wanted to achieve this outcome and make my
promotional video more memorable for my audience. Therefore, I adhered to Goodwin’s theory
and made sure my clips synchronized to the beat of the background music.
6. Here, I ran into the problem of my clips being overexposed when I inserted
my footage into the timeline. This issue was an easy fix as all it required me
to do was right click on my clip, click on modify – interperate footage and
then change the colour space override under colour management to “rec
2020” which solved my issue immediately.
For the opening sequence, I created my own intro. I used a similar font to the
banner of the “fire station” as I decided that I would open with my low angle shot
of the fire station and I wanted my edit to look cohesive and well put together. For
the colour of font, I went with red and white since that is a massive part of
Sunderland’s brand identity and iconography. I used a sans serif font to create a
more personal relationship with my audience, setting a more informal tone, which
is something I believe would resonate more with a target audience of 16-21 year
olds.
In-between certain clips, I included transitions. The main transitions I
included was a “cross dissolve”. I used this transition as I believe it fit
the codes and conventions of a promotional video, based on my
previous research and knowledge.