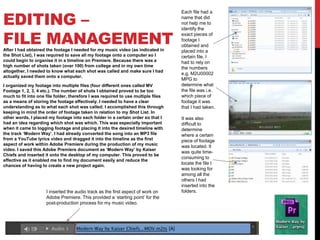
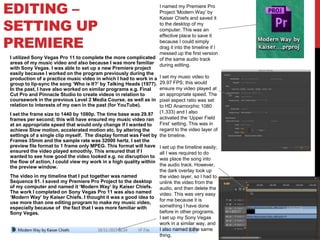
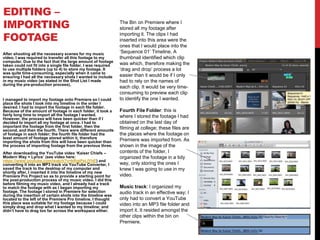
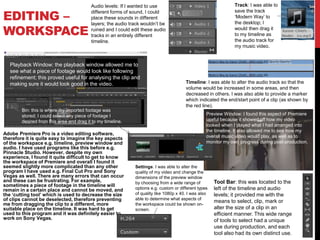
2. FILMING
• Technical – I borrowed a camera and tripod to use during filming my music video in and around the college from the media
department who would have been able to also supply me with a steadicam rig; however I did not bother with using one. I
had to borrow the aforementioned equipment three times in one week so I could film on the three days when it was possible
i.e. if there were no lessons. I used three SD cards to save my footage and enable myself to get the footage onto a
computer so I could start putting it all together in Premiere (and Sony Vegas Pro 11). I used the cameras to film my lip-sync
and the tripod was also used to hold the camera steady and enhance quality. I could not use the green screen for
production, however I was able to utilize the backdrop which proved to be somewhat effective when it came to editing the
aspects of the frame (which consisted of myself standing in front of the backdrop). There are a number of issues I came
across during filming; on the first day, the battery for the camera ran out mid-filming; therefore I was required to use a
different camera and place the SD card I was using inside it.
• Logistical –The locations I chose to film my music video at worked really well. It was a good idea to film within the college
building and on the field because there were a variety of different places to shoot footage at e.g. empty corridors. The
choice of location benefited my music video because in the same place, I could obtain equipment to use easily and free of
charge, just as long as I was responsible with it. I thought the idea of a music video revolving around the struggles of a
student in education was well-imagined and a massive place like York College was a key location to convey a sense of utter
helplessness and frightening atmosphere (due to its size). This benefited my video overall, and the decision to film in a
different location proved to be effective, not only because it provides variety for the music video, but also due to the fact that
it helped the video convey the theme of hopelessness more effectively i.e. even if the student did manage to ‘get out’ he
would still find himself lost. It also added to the eerie feel of the music video. I did not have any access problems; the places
I planned to film at were not restricted in any way and the only form of distraction that came about was a few
students/teachers who happened to be passing by. Due to the fact that the classroom planned to film at (2F065) was not
available due to a lesson taking place on the second day, I was required to use the one next door. This didn’t affect my
video too much at all. Whilst filming on the hill (the alternate location), I did not have to worry about access problems
because the area is a public footpath with a scenery of the countryside (which I included in my video). During the night
filming session before day one of filming, it rained and therefore I was forced to come back at a later time when it had
stopped raining.
3. FILMING
Personnel – My cast/crew consisted of Richard A, Richard B. and Matthew P. They seemed willing to help out and I
only had to ask. I can understand how daunting it must have been for them to film for hours at college; my music video
was set almost entirely in that location. Also, they were required to come in on Monday which is usually their day off.
However, they did not complain and were willing to help with my music video, bearing in mind that I helped them as
well/would have helped them. I think they handled the few times in which they had to either act or lip-sync really well
and with confidence, which benefited my music video. They did not let me down and I couldn’t really imagine how I will
have been able to complete the filming of my music video on my own. I managed to get their help through the call
sheet I had to complete in lesson time which had their phone numbers on it. I sent them text messages informing them
to come into college to help me film my music video, and all three of them were able to turn up. I appreciated their help.
Planning – I think my visual planning, which consisted of creation of storyboards and shot lists, as well as location
scouting and structural visualization of the song had a significant benefit on how my production went and how my
overall video turned out. Due to the fact that I was given a suitable amount of time to plan my music video carefully and
methodically, I was not stuck for ideas during filming and I knew exactly what I was doing. I am aware of the fact that it
is always a good idea to plan ahead and have an idea regarding what it is you hope to achieve. I was able to relate to
this. I think my shot list helped significantly because I knew exactly what I had to shoot and for what purpose, and my
storyboarding made a contribution to how my video looked in the end. It also provided a basis for the action that would
take place in my video. On the whole, I think my planning could have gone slightly better in terms of choosing more
places to film at as there were points in time during post-production where I had to ponder on how to fill in any gaps in
the timeline. My planning could have benefited even more if I considered how I was going to accomplish certain scenes
that were difficult to film e.g. the scene where Student 2 (the hooded character) pushes over Student 1 (the innocent
character). If I did this or even practiced before shooting with someone else, the scene might have been easier to
shoot. It may have also looked slightly better and more intense.
Next steps – I don’t think I need to re-film my music video or reconsider my planning. My finished music video is
almost exactly how I thought it would look and how the action would take place with the song. I will not need to film any
more because I was able to fill my timeline up in the desired order I wanted and this was successful. I did not change
my music video; if I did do this it would have been because I was dissatisfied with the finished product which I wasn’t. I
did add effects using Sony Vegas Pro 11 e.g. the blending effect and flash transitions as shown in my video. I also
altered the saturation of a few scenes to enhance the quality of my video as some parts seemed to be of a low quality.
There was also a shot in which Richard B. can be seen holding the camera; in a reflection in a window, therefore I had
to tone down the lighting so the viewers couldn’t see his reflection.
4. FILMING –
PRODUCTION STILLS
These are stills from when I was filming on Chapel
Hill in Pocklington. This was my first period of
filming; it took place away from the college and
before the three days of filming that took place
there. The shots from alternate locations to the
college itself were taken with the intention of
including more footage in my music video so as to
provide a variety of locations for the audience to
identify, rather than just the college.
There was a fair amount of shots collected
throughout the afternoon as well during as the
evening. My decision to film at nighttime (at around
9:00PM) was influenced by the fact that the music
video would benefit through lots of contrasting
aspects e.g. scenes within the college, outside the
college, and at night. I think this sense of variety
enhanced the quality of my video and it might have
increased the chances of the viewer desiring to
watch the video again.
The shots I collected in this location would be
added to the timeline amongst the fast-paced shots
e.g. the student running and the band playing
instruments; this could provide a sense of
juxtaposition due to the presence of calmness
(shots of countryside) and aggressiveness (the
band performing) together in the same section of
the song e.g. the chorus. The shots I intended to
obtain proved to be effective, and it was a good idea
to collect more just in case anything went wrong
with the other footage. This could have included
failure to save on the camera or other issues on
Premiere/Sony Vegas such as incompatibility.
This shot shows my
reflection from a puddle on
the ground. I positioned the
camera so that it couldn’t be
visible on-screen later on.
An impression of a low angle
shot is created of the
‘antagonist character’.
As it began to get dark, I
filmed a few more shots of
certain aspects of the hill
e.g. trees, fences, pathways
as well as the scenery of the
countryside from the hill.
At night-time, I filmed a few
shots of myself providing lip-
sync to the chorus of
‘Modern Way’. I had to use
the ‘night option’ which
proved effective in ensuring
the things I wanted to film
were visible in the darkness.
5. EDITING –
FILE MANAGEMENTAfter I had obtained the footage I needed for my music video (as indicated in
the Shot List), I was required to save all my footage onto a computer so I
could begin to organise it in a timeline on Premiere. Because there was a
high number of shots taken (over 100) from college and in my own time
altogether, I needed to know what each shot was called and make sure I had
actually saved them onto a computer.
I organized my footage into multiple files (four different ones called MV
Footage 1, 2, 3, 4 etc.). The number of shots I obtained proved to be too
much to fit into one file folder, therefore I was required to use multiple files
as a means of storing the footage effectively. I needed to have a clear
understanding as to what each shot was called; I accomplished this through
keeping in mind the order of footage taken in relation to my Shot List. In
other words, I placed my footage into each folder in a certain order so that I
had an idea regarding which shot was which. This was especially important
when it came to logging footage and placing it into the desired timeline with
the track ‘Modern Way’. I had already converted the song into an MP3 file
from a YouTube lyrics video and dragged it into the timeline as the first
aspect of work within Adobe Premiere during the production of my music
video. I saved this Adobe Premiere document as ‘Modern Way’ by Kaiser
Chiefs and inserted it onto the desktop of my computer. This proved to be
effective as it enabled me to find my document easily and reduce the
chances of having to create a new project again.
I inserted the audio track as the first aspect of work on
Adobe Premiere. This provided a ‘starting point’ for the
post-production process for my music video.
Each file had a
name that did
not help me to
identify the
exact pieces of
footage I
obtained and
placed into a
certain file. I
had to rely on
the numbers
e.g. M2U00002
MPG to
determine what
the file was i.e.
which piece of
footage it was
that I had taken.
It was also
difficult to
determine
where a certain
piece of footage
was located. It
was quite time-
consuming to
locate the file I
was looking for
among all the
others I had
inserted into the
folders.
6. EDITING –
SETTING UP
PREMIERE
I utilized Sony Vegas Pro 11 to complete the more complicated
areas of my music video and also because I was more familiar
with Sony Vegas. I was able to set up a new Premiere project
easily because I worked on the program previously during the
production of a practice music video in which I had to work in a
group to lip-sync the song ‘Who is It?’ by Talking Heads (1977).
In the past, I have also worked on similar programs e.g. Final
Cut Pro and Pinnacle Studio to create videos in relation to
coursework in the previous Level 2 Media Course, as well as in
relation to interests of my own in the past (for YouTube).
I set the frame size to 1440 by 1080p. The time base was 29.97
frames per second; this will have ensured my music video ran
at an appropriate speed that would only change if I wanted to
achieve Slow motion, accelerated motion etc. by altering the
settings of a single clip myself. The display format was Feet by
Frames 35mm and the sample rate was 32000 hertz. I set the
preview file format to 1 frame only MPEG. This format will have
ensured the video played smoothly. This ensured that if I
wanted to see how good the video looked e.g. no disruption to
the flow of action, I could view my work in a high quality within
the preview window.
The video in my timeline that I put together was named
Sequence 01. I saved my Premiere Pro Project to the desktop
of my computer and named it ‘Modern Way’ by Kaiser Chiefs.
The work I completed on Sony Vegas Pro 11 was also named
‘Modern Way’ by Kaiser Chiefs. I thought it was a good idea to
use more than one editing program to make my music video,
especially because of the fact that I was more familiar with
Sony Vegas.
I named my Premiere Pro
Project ‘Modern Way’ by
Kaiser Chiefs and saved it
to the desktop of my
computer. This was an
effective place to save it
because I could simply
drag it into the timeline if I
messed up the first version
of the same audio track
during editing.
I set my music video to
29.97 FPS; this would
ensure my video played at
an appropriate speed. The
pixel aspect ratio was set
to HD Anamorphic 1080
(1.333) and I also
activated the ‘Upper Field
First’ setting. This was in
regard to the video layer of
the timeline.
I set up the timeline easily;
all I was required to do
was place the song into
the audio track. However,
the dark overlay took up
the video layer, so I had to
unlink the video from the
audio, and then delete the
video. This was very easy
for me because it is
something I have done
before in other programs.
I set up my Sony Vegas
work in a similar way, and
I also named it the same
thing.
7. EDITING –
IMPORTING
FOOTAGE
After shooting all the necessary scenes for my music
video, I was required to transfer all this footage to my
computer. Due to the fact that the large amount of footage
taken could not fit into a single file folder, I was required
to use multiple folders (up to 4) to store my footage. It
was quite time-consuming, especially when it came to
ensuring I had all the necessary shots I wanted to include
in my music video (as stated in the Shot List I made
during the pre-production process).
I managed to import my footage onto Premiere so I could
place the shots I took into my timeline in the order I
desired. I had to import the footage in each file folder.
Because of the amount of footage in each folder, it took a
fairly long time to import all the footage I wanted.
However, the process will have been quicker than if I
decided to import all my footage at once. I had to
important the footage from the first folder, then the
second, and then the fourth. There were different amounts
of footage in each folder; the fourth file folder had the
least amount of footage stored within it, therefore
importing the shots from this will have been quicker than
the process of importing footage from the previous three.
After downloading the YouTube video ‘Kaiser Chiefs –
Modern Way + Lyrics’ (see video here:
https://www.youtube.com/watch?v=kRqtPeLlYhE) and
converting it into an MP3 track via YouTube Converter, I
saved the track to the desktop of my computer and
shortly after, I inserted it into the timeline of my new
Premiere Pro Project so as to provide a starting point for
the post-production process of my music video. I did this
before filming my music video, and I already had a track
to match the footage with as I began importing my
footage. The footage I stored in Premiere for selection
during the insertion of certain shots into the timeline was
located to the left of the Premiere Pro timeline. I thought
this place was suitable for my footage because I could
simply drag and drop what I wanted to my timeline; and
didn’t have to drag too far across the workspace either.
The Bin on Premiere where I
stored all my footage after
importing it. The clips I had
inserted into this area were the
ones that I would place into the
‘Sequence 01’ Timeline. A
thumbnail identified which clip
was which, therefore making the
‘drag and drop’ process a lot
easier than it would be if I only
had to rely on the names of
each clip. It would be very time-
consuming to preview each clip
to identify the one I wanted.
Fourth File Folder: this is
where I stored the footage I had
obtained on the last day of
filming at college; these files are
the places where the footage on
Premiere was imported from. As
shown in the image of the
contents of the folder, I
organized the footage in a tidy
way, only storing the ones I
knew I was going to use in my
video.
Music track: I organized my
audio track in an effective way; I
only had to convert a YouTube
video into an MP3 file folder and
import it. It resided amongst the
other clips within the bin on
Premiere.
8. EDITING –
WORKSPACE
Adobe Premiere Pro is a video editing software,
therefore it is quite easy to imagine the key aspects
of the workspace e.g. timeline, preview window and
audio. I have used programs like this before e.g.
Pinnacle Studio. However, despite my own
experience, I found it quite difficult to get to know
the workspace of Premiere and overall I found it
seemed slightly more complicated than any other
program I have used e.g. Final Cut Pro and Sony
Vegas as well. There are many errors that can occur
and these can be frustrating. For example,
sometimes a piece of footage in the timeline will
remain in a certain place and cannot be moved, and
the ‘cutting tool’ which is used to decrease the size
of clips cannot be deselected, therefore preventing
me from dragging the clip to a different, more
suitable place on the timeline. It was hard to get
used to this program and it was definitely easier to
work on Sony Vegas.
Preview Window: I found this aspect of Premiere
useful because it showed off how my video
looked when I played what I had arranged into
the timeline. It also allowed me to see how my
overall music video would play, as well as to
monitor my own progress during post-production.
Audio levels: If I wanted to use
different forms of sound, I could
place these sounds in different
layers; the audio track wouldn’t be
ruined and I could edit these audio
tracks in an entirely different
timeline.
Tool Bar: this was located to the
left of the timeline and audio
levels; it provided me with the
means to select, clip, mark or
alter the size of a clip in an
efficient manner. This wide range
of tools to select had a unique
use during production, and each
tool also had its own distinct use.
Timeline: I was able to alter the audio track so that the
volume would be increased in some areas, and then
decreased in others. I was also able to provide a marker
which indicated the end/start point of a clip (as shown by
the red line).
Playback Window: the playback window allowed me to
see what a piece of footage would look like following
refinement; this proved useful for analysing the clip and
making sure it would look good in the video.
Settings: I was able to alter the
quality of my video and change the
dimensions of the preview window
by choosing from a wide range of
options e.g. custom or different types
of quality like 1080p x 40. I was also
able to determine what aspects of
the workspace could be shown on-
screen.
Bin: this is where my imported footage was
stored; I could select any piece of footage I
desired from this area and drag it to my timeline.
Track: I was able to
save the track
‘Modern Way’ to
the desktop; I
would then drag it
to my timeline as
the audio track for
my music video.
9. EDITING –
ASSEMBLY EDIT
After importing all my footage, I was free to drag the shots I wanted to the
desired areas of the timeline i.e. in order so that all my footage will be in sync
with the video exactly as I had planned during pre-production. I had all the
footage I wanted, therefore I had little trouble when it came to choosing a shot
and dragging it to the timeline. Premiere benefited my music video because it
not only showed my footage gathered in a certain area (to the left of the
timeline), but it provided a thumbnail of each piece of footage so that I could
identify each one easily and not get confused over which shot was which; this
was the case for Sony Vegas in which there were no thumbnails for each piece
of footage.
If there were no thumbnails in the program, the process of attempting to select
the right clip will have been quite time consuming as I would be required to click
on each one so as to view them in the preview window to identify which was
which. Considering this enables me to understand the pros of Premiere. In this
program, each clip was previewed and I could move the mouse over the
thumbnail; this would result in the image in the thumbnail altering according to
the content of the video e.g. if it was me running, the image would show different
areas of the video with me in different positions (getting ready at the start –
gesturing for crew members to stop filming).
I dragged each clip to the timeline in the order in which I wanted. The post-
production process seemed quite complicated, especially because I had to trim
each one in a different area from where I wanted it. The reason for this was
because if I placed a clip above the audio track, the audio layer for the clip would
ruin the music track; this resulted in some problems at first until I realized why
there were gaps in the music track; each time I deleted a clip I did not want on
the timeline; the audio track would delete a small part of the music track as it
deleted itself. As I dragged each clip to the timeline, I had to make sure the clip
was positioned after the music track. I would then trim the clip in order to make
it smaller (so it fit with the size I wanted) and cut the audio layer before dragging
it in place next to the other clips already arranged at the start.
For the different sections of my music video, I dragged, trimmed and arranged a
series of clips together away from the music track; and once I had arranged
enough clips together, I would drag them all to the left so that they connected to
the main arrangement with the music track. However, this did result in
complications, however. For example, one of the clips was too long, therefore I
had to drag them all back out of the main arrangement again, separate each
piece of footage, and then re-size the clip before re-arranging all the clips and
moving them into the desired place above the audio track so that they matched
the song, specifically in regards to the lip-syncing. I did a lot of this during
filming and I had to make sure I positioned each piece of footage carefully so
that my lip-sync would match that of ‘Modern Way’.
At this point of the song, I lip-synced
‘of getting out of here’ in the door of
the classroom. I was able to perform
quite well, despite the fact that
several takes were needed just to
make sure I had something to work
with if one lip-sync didn’t match with
the song, for example. My lip-sync
matched with the song and I was
able to arrange it within the timeline
so that my performance was in-sync
with the actual track. As shown
above, all I was required to do was
drag and drop to the place I wanted,
and then I had to play the clip to see
if the lip-sync actually worked. This
was the case for all the other lip-
syncs I did.
I was able to assemble all my shots in the manner I desired. There
were a lot of shots, therefore I had to be considerate when it came to
positioning them carefully; if something went wrong in a single place, I
would be required to take the timeline apart.
10. EDITING –
REFINEMENT
After completing my initial sequence edit, I had to use colour grading,
black and white and alterations of lighting so that all the clips in my
music video took on a more visually impressive appearance. For
example, by altering the lighting, I gave an eerie appearance to certain
areas of the college where I filmed e.g. the corridors or the field.
The visual appearance of each shot looked quite different in
comparison to the way they looked after I had logged them onto my
computer to begin importing them (see comparison on the top right).
The difference between them shows just how successful I was when it
came to refining the shots of my music video so that they would match
my pre-visualization and concept boards; I had originally planned for
my music video to take on a drearily dull and slightly eerie appearance
and I was able to achieve this by using Sony Vegas to change the tones
of the video. I utilized Premiere Pro for the easier sections of
refinement. The clips within my initial sequence edit took on the exact
same appearance as the ones that I had filmed; this was not sufficient
enough to match with my initial idea generation. I was able to use
Premiere to remove aspects I did not want. A good example of this is
when one of the crew members’ reflections could be seen in a window;
therefore I used low key lighting to make him less visible.
I was able to use high-key lighting and black and white colour grading
to change the visual appearance of my music video. It took a fair
amount of time on Sony Vegas to perfect every clip I desired in my
music video. It was successful, however in the end.
This is the manner in
which my clips looked as I
imported them into
Premiere and Sony
Vegas. They are a
reflection as to what the
things I filmed e.g. myself
would have looked like in
real life.
After changing the lighting
and saturation, most of
my clips took on an eerie
atmosphere. I wanted to
accomplish this because I
initially hoped to create
my own unique
interpretation of ‘Modern
Way’ which would be set
in a dark and dreary
location. Use of high key
lighting allowed me to
ensure that bright tones
predominated within the
clip(s). This is an example
of how I achieved a
different look and feel for
my music video through
alteration of saturation
and lighting.
Colour Saturation Tool
11. EDITING –
COLOUR CORRECTION/SFX
I was able to add special effects to my music video and use colour
grading to improve its overall quality even further following the
process of refining each shot one by one. The special effects I added
consisted of colour saturation; this technique allowed me to alter the
colour tone of a certain shot e.g. a corridor. I could alter the colours,
both dark and light respectively, into red, blue and even green. This
will have resulted in connotation for my music video e.g. red
represents anger and green represents nature. However, I intended
for my video to look dull and quite depressing to match with the
emotional nature of the track ‘Modern Way’, therefore I wasn’t going
to use a lot of colour to make the video look bright and happy.
I did experiment with colour grading, however, as shown on the
right. I had the option to alter the saturation of the image, the gamma,
the offset as well as gain. These would result in darkening of the
image, brightening of the image, colours looking deeper etc. Using
colour correction in this manner had a benefit for the scenes in my
music video as I could decrease the saturation to a level considered
appropriate. For example, I did not want black and white so I had to
be careful and take into consideration how much I was changing the
image on-screen. I was also able to provide s great deal of special
effects for my music video, even though I hadn’t really planned to
use any. I thought it was a good idea to experiment and play around
with certain special effects Sony Vegas could offer, and as I altered a
certain clip to an almost visually impressive and professional
standard, I thought placing it within my music video would improve
its overall quality. As shown below, I created the impression of a
spotlight using Sony Vegas, after I had altered the lighting so that
dark tones and shadows predominated in the shot.
Colour Saturation Tool
Experimenting with
colour correction on
Sony Vegas during
production proved to
be helpful because I
was able to work in a
more confident
manner than before;
I was able to use
techniques e.g.
adding hues to my
clips. This will have
allowed me to
understand I wide
range of techniques
to employ in regard
to improving the
quality of my music
video to an almost
professional
standard.
12. EDITING –
EXPORT
The final part of the post-production process was rendering my completed music video
and, after the process of rendering the video in a suitable way e.g. with 25 frames per
second and Custom Range Settings, viewing my overall music video and ensuring that
there had been no errors during the fairly long process of rendering the file. Because I
was working on two alternative programs; Premiere and Sony Vegas, I was required to
export my music video twice in two different time periods.
On Sony Vegas, I set the project to render as an AVCHD file with a 1440 x 1080 – 60i
format. The audio was set to 182 kbps (kilo bytes per second), 45000 hertz, 24 bitmap and
ACS/Stereo. These options will have enabled my music video to render in a high visual
quality, as well as possess clear and coherent audio in the finished result. Due to
complications that arose (mostly due to my system being low on memory; I was working
on my own computer at home with Sony Vegas) I took multiple attempts to render my
music video. It was a frustrating process; and as soon as the rendering process was at
30% - 50%, an error message would come up stating that the file cannot be rendered.
On the third or fourth attempt, I managed to render my Sony Vegas Project to 100%,
therefore it succeeded and I had finished my music video. There were little to no errors,
however as I viewed the finished product multiple times and watched closely, I found a
few errors in production e.g. reflections of the camera and tripod which could potentially
decrease the quality of my video. On another day, I was able to correct small errors like
these by using low-key lighting so they weren’t as obvious upon viewing the finished
video. I rendered the music video again, this time with additional areas of refinement and
colour alteration which improved the quality of the product, in the same file format. Upon
viewing the video again, I realized that there could be some other areas worth improving
e.g. quality.
On Premiere, I imported my finished music video and added it to a new timeline so that I
could export it using the file formats stated on the board in lesson time. I made a few
small adjustments to my video e.g. alterations of lighting in some places and colour
correction in others before rendering the file as a VLC Media File. It rendered successfully
over the course of 20 minutes.
As soon as the finished file was provided, I named it Modern Way by Kaiser Chiefs and
saved it to my memory stick. The file size was 414,378 KB (as shown below). I thought
saving it to my memory stick was a good idea because there was always the chance of me
losing my work due to the desktop of the college computer being wiped or the file being
erased in my documens due to an error. If this occurred without me saving it to a USB
device beforehand, I would be required to export my video file from Sony Vegas again. I
thought this file name was suitable because it enabled me to identify my work easily and
the name seemed sophisticated and simple; it also reflected the fact that I was recreating
my own interpretation of a music track, and also highlighted which track I had chosen.
I encoded the
sequence
successfully. It
took a while to
render, but in the
end it worked.
My video was set
to a maximum
quality settings in
Premiere,
therefore the
overall quality of
my music video
was improved
and this can be
considered a
benefit.
I
I was able to understand the suspected dimensions of the file after
I had rendered my work and I had the option to alter the width and
height of the video frame. I had set the audio to 450 + 10, 29.97
frames per second, and to Stereo (which highlights the level of
quality
On Sony Vegas, I was able
to understand the impact the
overall file dimensions of the
completed product would
have on my own free disk
space. There were a lot of
options provided for me in
terms of what file format to
choose to render my project
as; this puts Sony Vegas at
an advantage because the
formats were provided for
me and I was only required
to choose one that I
assumed would be suitable.
The formats of the audio
and video were already set,
therefore I wasn’t required
to alter them like I did in
Premiere.