
Recommended
More Related Content
What's hot
What's hot (20)
Similar to Product master
Similar to Product master (20)
Recently uploaded
Recently uploaded (20)
Product master
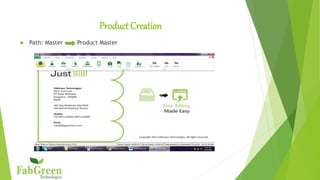
- 1. Product Creation Path: Master Product Master
- 2. Product Master Screen will appear
- 3. To create the new product Click New button to create product. Auto generated code will appear in Code Textbox. Enter Tab and fill the remaining fields with required details.
- 4. Category: Click ‘+symbol’ in category A new window will appear Enter Category Name, Description and save.
- 5. Note: Then select what category the item belongs to. Each item needs to be assigned to at least one category or more than one. Enter other details like Unit Name, Product Type and Cost Rate and Save. ViewProduct: The created product will be displayed in the left side, if you click any product the details will appear in right side input boxes. ModifyProduct: Select the product to be modified in the left side box The detail of the product will display on the screen. Press Tab and Enter Modify button to change the data Click Save/Press F4 to save the screen.
- 6. ClearProduct: If user want to clear the existing product Select the product to be cleared Alert message will appear
- 7. Click Yes Click Clear It clears the existing product. Export/ImportProduct: If user wants to export/import their product Click Export/Import button It display the data export/Import screen
- 9. Enter Export or Import icon Select Format Type (e.g.: Excel, Xml, CSV) Click Path where the data want to save It automatically generates the document in the desktop. DeleteProduct: To delete the product from the list Select Product name to be deleted Click Delete button A new pop up window will display Enter yes/no It deletes the selected item
- 11. CloseProduct: To close the product master Click Close button Administrator window will appear Click Yes It closes the product master window.
- 13. FilterSearch: It Display the products names in the search list. Op 1) category search: It Display only category wise Op 2) Text free search: Click All it display the small window
- 15. Click Choose any one Click Enter it go to next text bar Then type any product name belongs to category I. It display what are the product belongs to that category
- 16. Tabordersetting: Click Tool icon at top right corner. A control room screen will appear
- 17. Click Property Click Is Tab and select the tick mark and then save. Codesetting: User can change their code in letters and numbers Click Tool icon at the top right corner Control Room window will be displayed Click Prefix Change length and prefix value and then save. It auto generates the code in code textbox.