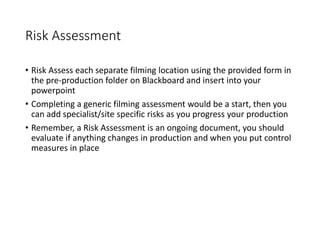
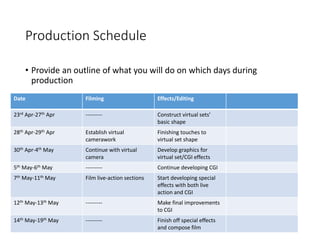
Section 2
Organisational Planning
Production Group Info
• Include names, contact info, and defined roles at difference stages of
production, using a table is suggested
• Arran Bull: lead actor
• Shahzaib Yaqoob: camera whenever I am in shot
• Me: direction, camera, CGI effects, editing, acting
Location information
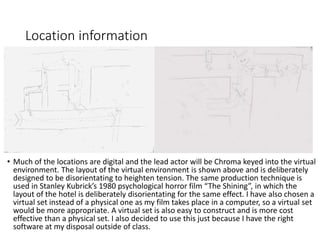
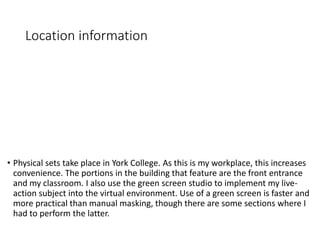
• Information and images of your location[s] for filming
• You should have address details, clearance/premissions for filming,
recce photos and floorplans [including camera, equipment and
cast/crew layouts]
• Where possible, have a plan B fallback location option
• Assess each location for any issues and suggest solutions
Location information
• Much of the locations are digital and the lead actor will be Chroma keyed into the virtual
environment. The layout of the virtual environment is shown above and is deliberately
designed to be disorientating to heighten tension. The same production technique is
used in Stanley Kubrick’s 1980 psychological horror film “The Shining”, in which the
layout of the hotel is deliberately disorientating for the same effect. I have also chosen a
virtual set instead of a physical one as my film takes place in a computer, so a virtual set
would be more appropriate. A virtual set is also easy to construct and is more cost
effective than a physical set. I also decided to use this just because I have the right
software at my disposal outside of class.
Location information
• Physical sets take place in York College. As this is my workplace, this increases
convenience. The portions in the building that feature are the front entrance
and my classroom. I also use the green screen studio to implement my live-
action subject into the virtual environment. Use of a green screen is faster and
more practical than manual masking, though there are some sections where I
had to perform the latter.
Risk Assessment
• Risk Assess each separate filming location using the provided form in
the pre-production folder on Blackboard and insert into your
powerpoint
• Completing a generic filming assessment would be a start, then you
can add specialist/site specific risks as you progress your production
• Remember, a Risk Assessment is an ongoing document, you should
evaluate if anything changes in production and when you put control
measures in place
Contingency Planning
• Things go wrong
• Your contingency plan is there to give you a backup or to minimise
the effect on production
• You should consider the following areas: Technical, Location,
Personnel and Organisational areas [about 5 potential issues for
each]
• Use the form in pre-production folder on Blackboard
Production Schedule
• Provide an outline of what you will do on which days during
production
Date Filming Effects/Editing
23rd Apr-27th Apr --------- Construct virtual sets’
basic shape
28th Apr-29th Apr Establish virtual
camerawork
Finishing touches to
virtual set shape
30th Apr-4th May Continue with virtual
camera
Develop graphics for
virtual set/CGI effects
5th May-6th May --------- Continue developing CGI
7th May-11th May Film live-action sections Start developing special
effects with both live
action and CGI
12th May-13th May --------- Make final improvements
to CGI
14th May-19th May --------- Finish off special effects
and compose film
Call sheets
• Complete a call sheet for each production activity
• Forms are on Blackboard
• Insert into powerpoint here
Clearance and Permissions
• Any place you film and anyone you use in the filming of your video
must have a completed form
• Blank forms are on Blackboard for you to complete and insert here
Section 3
Footage log
• Templates on BB to insert here
• You should have a record of all you have shot and your choices as to
whether you will use the shot or what needs to be done to it [or if it
needs re-filming!]
Section 4
Edit process log
• Templates on BB to insert here
• Track your decisions during editing and post production
• Includes screenshots of the timeline, before and after images of your
process and reflections on what you have done
Section 5
Soundtrack Planning
Prod management production template  stage 3 2015 2

Prod management production template stage 3 2015 2

  • 1.
  • 2.
    Production Group Info •Include names, contact info, and defined roles at difference stages of production, using a table is suggested • Arran Bull: lead actor • Shahzaib Yaqoob: camera whenever I am in shot • Me: direction, camera, CGI effects, editing, acting
  • 3.
    Location information • Informationand images of your location[s] for filming • You should have address details, clearance/premissions for filming, recce photos and floorplans [including camera, equipment and cast/crew layouts] • Where possible, have a plan B fallback location option • Assess each location for any issues and suggest solutions
  • 4.
    Location information • Muchof the locations are digital and the lead actor will be Chroma keyed into the virtual environment. The layout of the virtual environment is shown above and is deliberately designed to be disorientating to heighten tension. The same production technique is used in Stanley Kubrick’s 1980 psychological horror film “The Shining”, in which the layout of the hotel is deliberately disorientating for the same effect. I have also chosen a virtual set instead of a physical one as my film takes place in a computer, so a virtual set would be more appropriate. A virtual set is also easy to construct and is more cost effective than a physical set. I also decided to use this just because I have the right software at my disposal outside of class.
  • 5.
    Location information • Physicalsets take place in York College. As this is my workplace, this increases convenience. The portions in the building that feature are the front entrance and my classroom. I also use the green screen studio to implement my live- action subject into the virtual environment. Use of a green screen is faster and more practical than manual masking, though there are some sections where I had to perform the latter.
  • 6.
    Risk Assessment • RiskAssess each separate filming location using the provided form in the pre-production folder on Blackboard and insert into your powerpoint • Completing a generic filming assessment would be a start, then you can add specialist/site specific risks as you progress your production • Remember, a Risk Assessment is an ongoing document, you should evaluate if anything changes in production and when you put control measures in place
  • 7.
    Contingency Planning • Thingsgo wrong • Your contingency plan is there to give you a backup or to minimise the effect on production • You should consider the following areas: Technical, Location, Personnel and Organisational areas [about 5 potential issues for each] • Use the form in pre-production folder on Blackboard
  • 8.
    Production Schedule • Providean outline of what you will do on which days during production Date Filming Effects/Editing 23rd Apr-27th Apr --------- Construct virtual sets’ basic shape 28th Apr-29th Apr Establish virtual camerawork Finishing touches to virtual set shape 30th Apr-4th May Continue with virtual camera Develop graphics for virtual set/CGI effects 5th May-6th May --------- Continue developing CGI 7th May-11th May Film live-action sections Start developing special effects with both live action and CGI 12th May-13th May --------- Make final improvements to CGI 14th May-19th May --------- Finish off special effects and compose film
  • 9.
    Call sheets • Completea call sheet for each production activity • Forms are on Blackboard • Insert into powerpoint here
  • 10.
    Clearance and Permissions •Any place you film and anyone you use in the filming of your video must have a completed form • Blank forms are on Blackboard for you to complete and insert here
  • 12.
  • 13.
    • Templates onBB to insert here • You should have a record of all you have shot and your choices as to whether you will use the shot or what needs to be done to it [or if it needs re-filming!]
  • 14.
  • 15.
    • Templates onBB to insert here • Track your decisions during editing and post production • Includes screenshots of the timeline, before and after images of your process and reflections on what you have done
  • 16.