The document describes the process of creating virtual sets and animating a CGI virus in 3D animation software. Some key steps include:
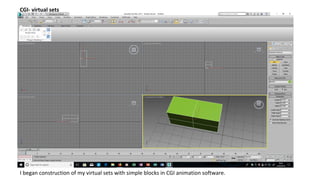
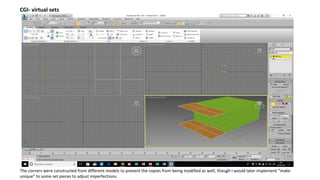
- Building virtual sets from simple blocks, adjusting dimensions, copying and rearranging pieces to create walls and corridors.
- Constructing the virus model from basic blocks and polygons, adding detail to the face through modeling, and texturing the body.
- Animating the virus by moving and rotating individual body parts around pivots, and placing reference blocks under feet.
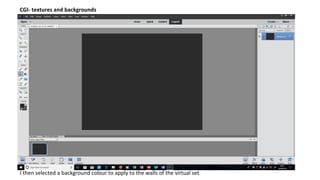
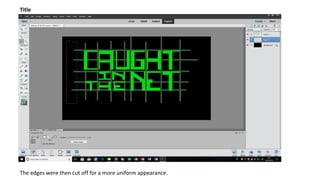
- Adding background textures like changing binary code to virtual set walls, and rendering transition graphics like a spinning tunnel to connect shots.


![[Pro forma] - mographics - case study](https://cdn.slidesharecdn.com/ss_thumbnails/pro-forma-mographics-casestudy-171018184755-thumbnail.jpg?width=640&height=640&fit=bounds)


![[Pro forma] corporate - live project evaluation](https://cdn.slidesharecdn.com/ss_thumbnails/pro-formacorporate-liveprojectevaluation-180325182310-thumbnail.jpg?width=640&height=640&fit=bounds)
![[Pro forma] corporate - live project2](https://cdn.slidesharecdn.com/ss_thumbnails/pro-formacorporate-liveproject2-180322132728-thumbnail.jpg?width=640&height=640&fit=bounds)
![[Pro forma] corporate - live project](https://cdn.slidesharecdn.com/ss_thumbnails/pro-formacorporate-liveproject-180315151712-thumbnail.jpg?width=640&height=640&fit=bounds)
![[Pro forma] corporate - live project](https://cdn.slidesharecdn.com/ss_thumbnails/pro-formacorporate-liveproject-180315133841-thumbnail.jpg?width=640&height=640&fit=bounds)

![[Pro forma] wtab theory lo1(1)](https://cdn.slidesharecdn.com/ss_thumbnails/pro-formawtabtheorylo11-180209134609-thumbnail.jpg?width=640&height=640&fit=bounds)
![[Pro forma] corporate lo1-lo2](https://cdn.slidesharecdn.com/ss_thumbnails/pro-formacorporatelo1-lo2-180202154723-thumbnail.jpg?width=640&height=640&fit=bounds)


