Download to read offline
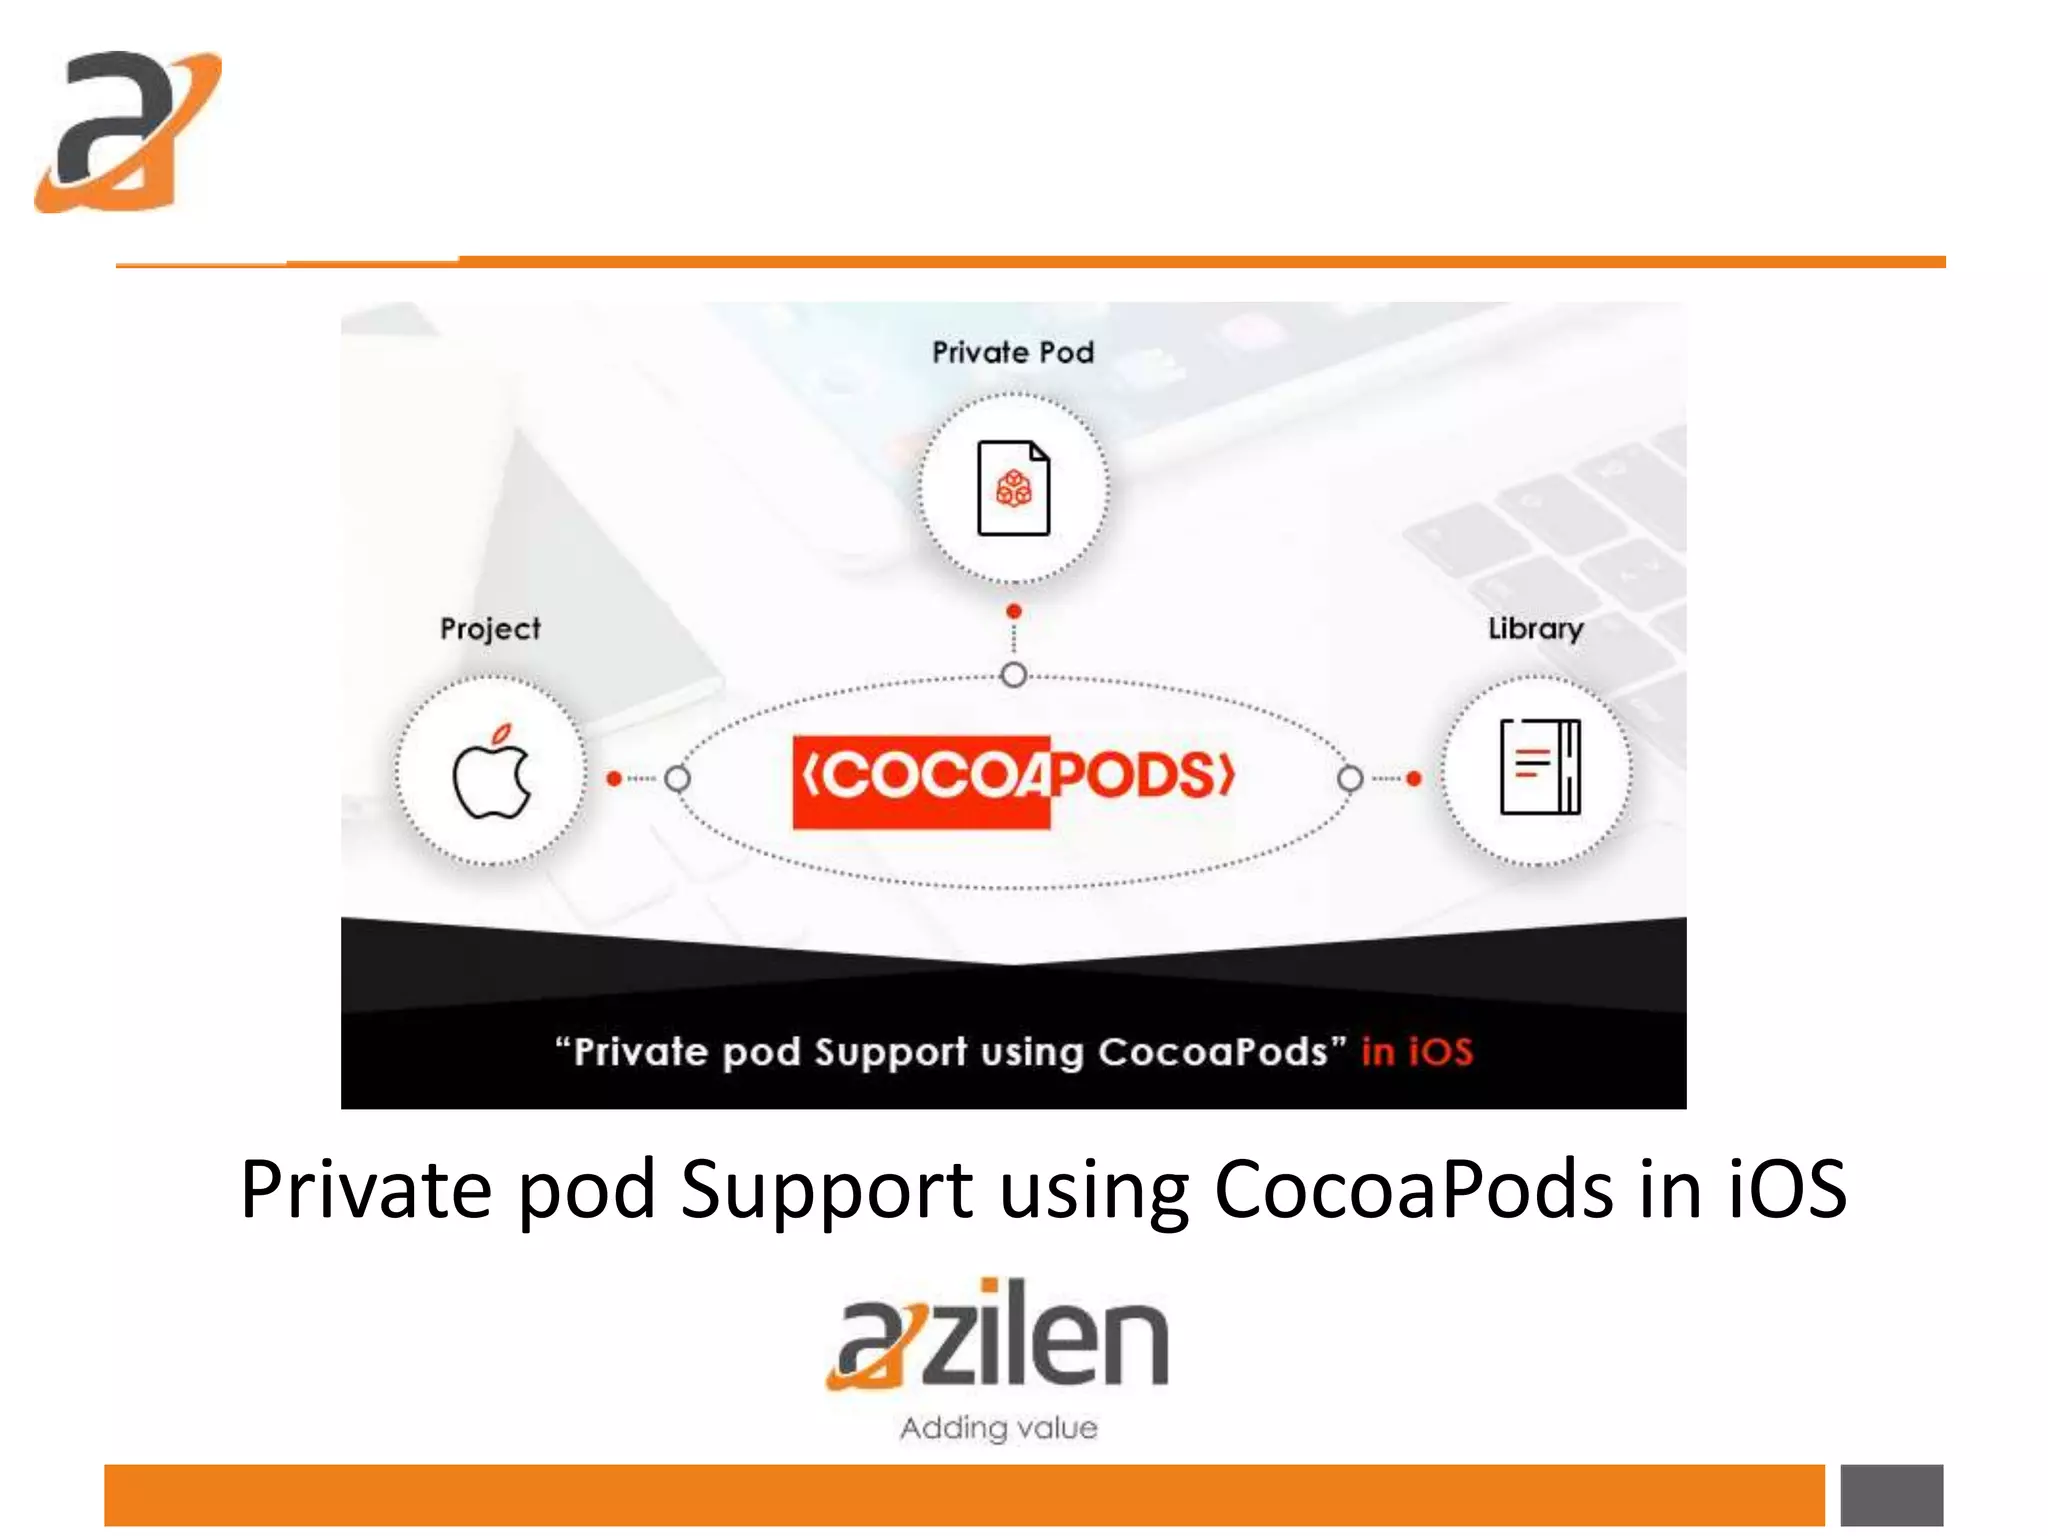
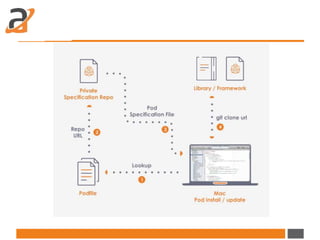
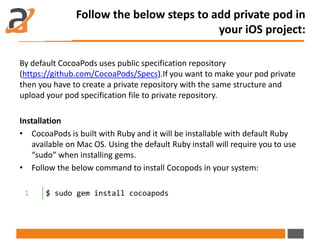
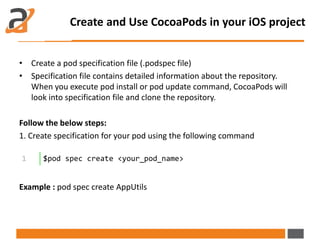
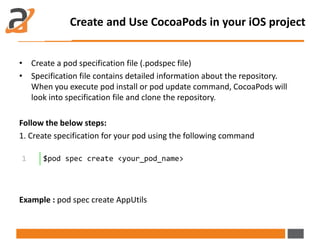
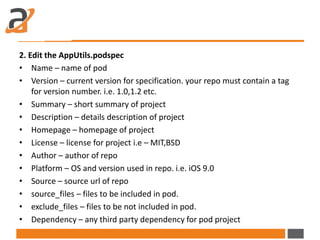
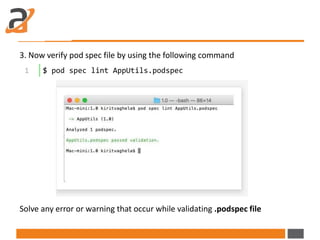
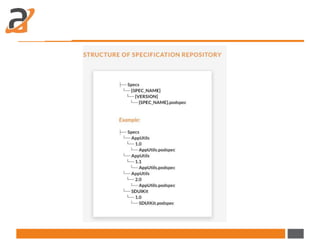
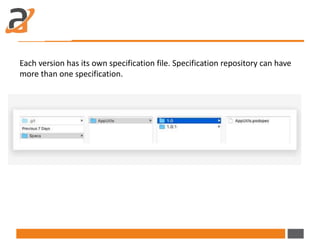
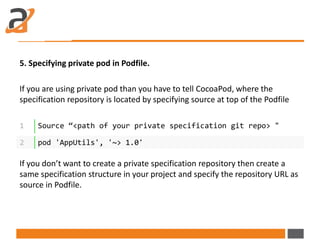
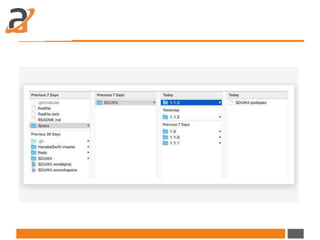


The document explains how to implement private pods using CocoaPods in iOS projects, emphasizing its role as a dependency manager that simplifies library integration. It details the steps to create a private pod specification file and the benefits of using CocoaPods over manual dependency management, including easier version control and simplified library replacements. The conclusion highlights that private pods facilitate efficient project management and can be used internally within organizations.


![[Step by-step guide] configure document generation functionality in ms dynami...](https://cdn.slidesharecdn.com/ss_thumbnails/step-by-stepguideconfiguredocumentgenerationfunctionalityinmsdynamics365-180307124316-thumbnail.jpg?width=640&height=640&fit=bounds)


![[Part 3] automation of home appliances using raspberry pi – all set to automa...](https://cdn.slidesharecdn.com/ss_thumbnails/part3automationofhomeappliancesusingraspberrypiallsettoautomatethehomeappliances-170531102832-thumbnail.jpg?width=640&height=640&fit=bounds)

![[Part 2] automation of home appliances using raspberry pi – implementation of...](https://cdn.slidesharecdn.com/ss_thumbnails/part2automationofhomeappliancesusingraspberrypiimplementationofhandgesturerecognition-170530082841-thumbnail.jpg?width=640&height=640&fit=bounds)
![[Part 1] automation of home appliances using raspberry pi – software installa...](https://cdn.slidesharecdn.com/ss_thumbnails/part-1automationofhomeappliancesusingraspberrypisoftwareinstallationguide-170529121638-thumbnail.jpg?width=640&height=640&fit=bounds)


