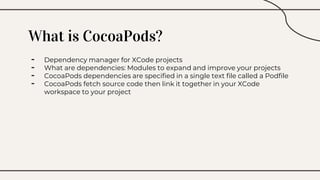
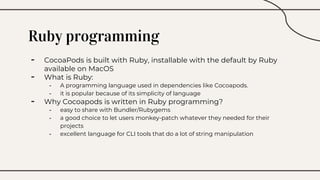
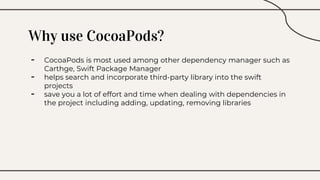
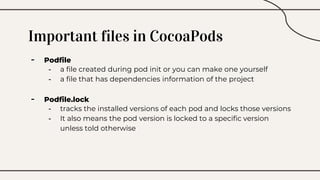
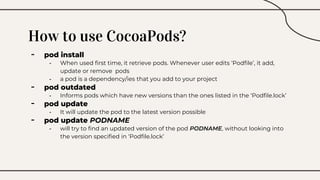
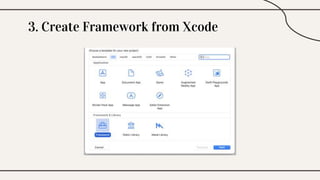
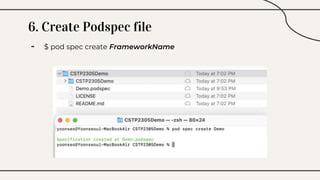
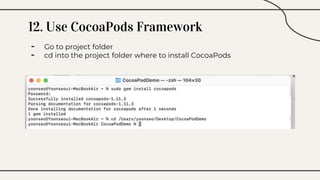
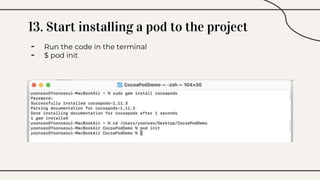
CocoaPods is a dependency manager for Xcode projects that allows developers to incorporate third-party libraries into their Swift projects. It fetches source code for specified dependencies and links them to the project. CocoaPods is built with Ruby and uses a Podfile to specify dependencies along with versions. It helps developers easily add, update, and remove library dependencies to save time.


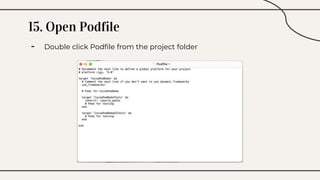
![16. Edit Podfile
- add ‘pod [name of dependency]’ in the Podfile](https://image.slidesharecdn.com/cocoapods-220718064950-87b6b506/85/CocoaPods-pptx-25-320.jpg)