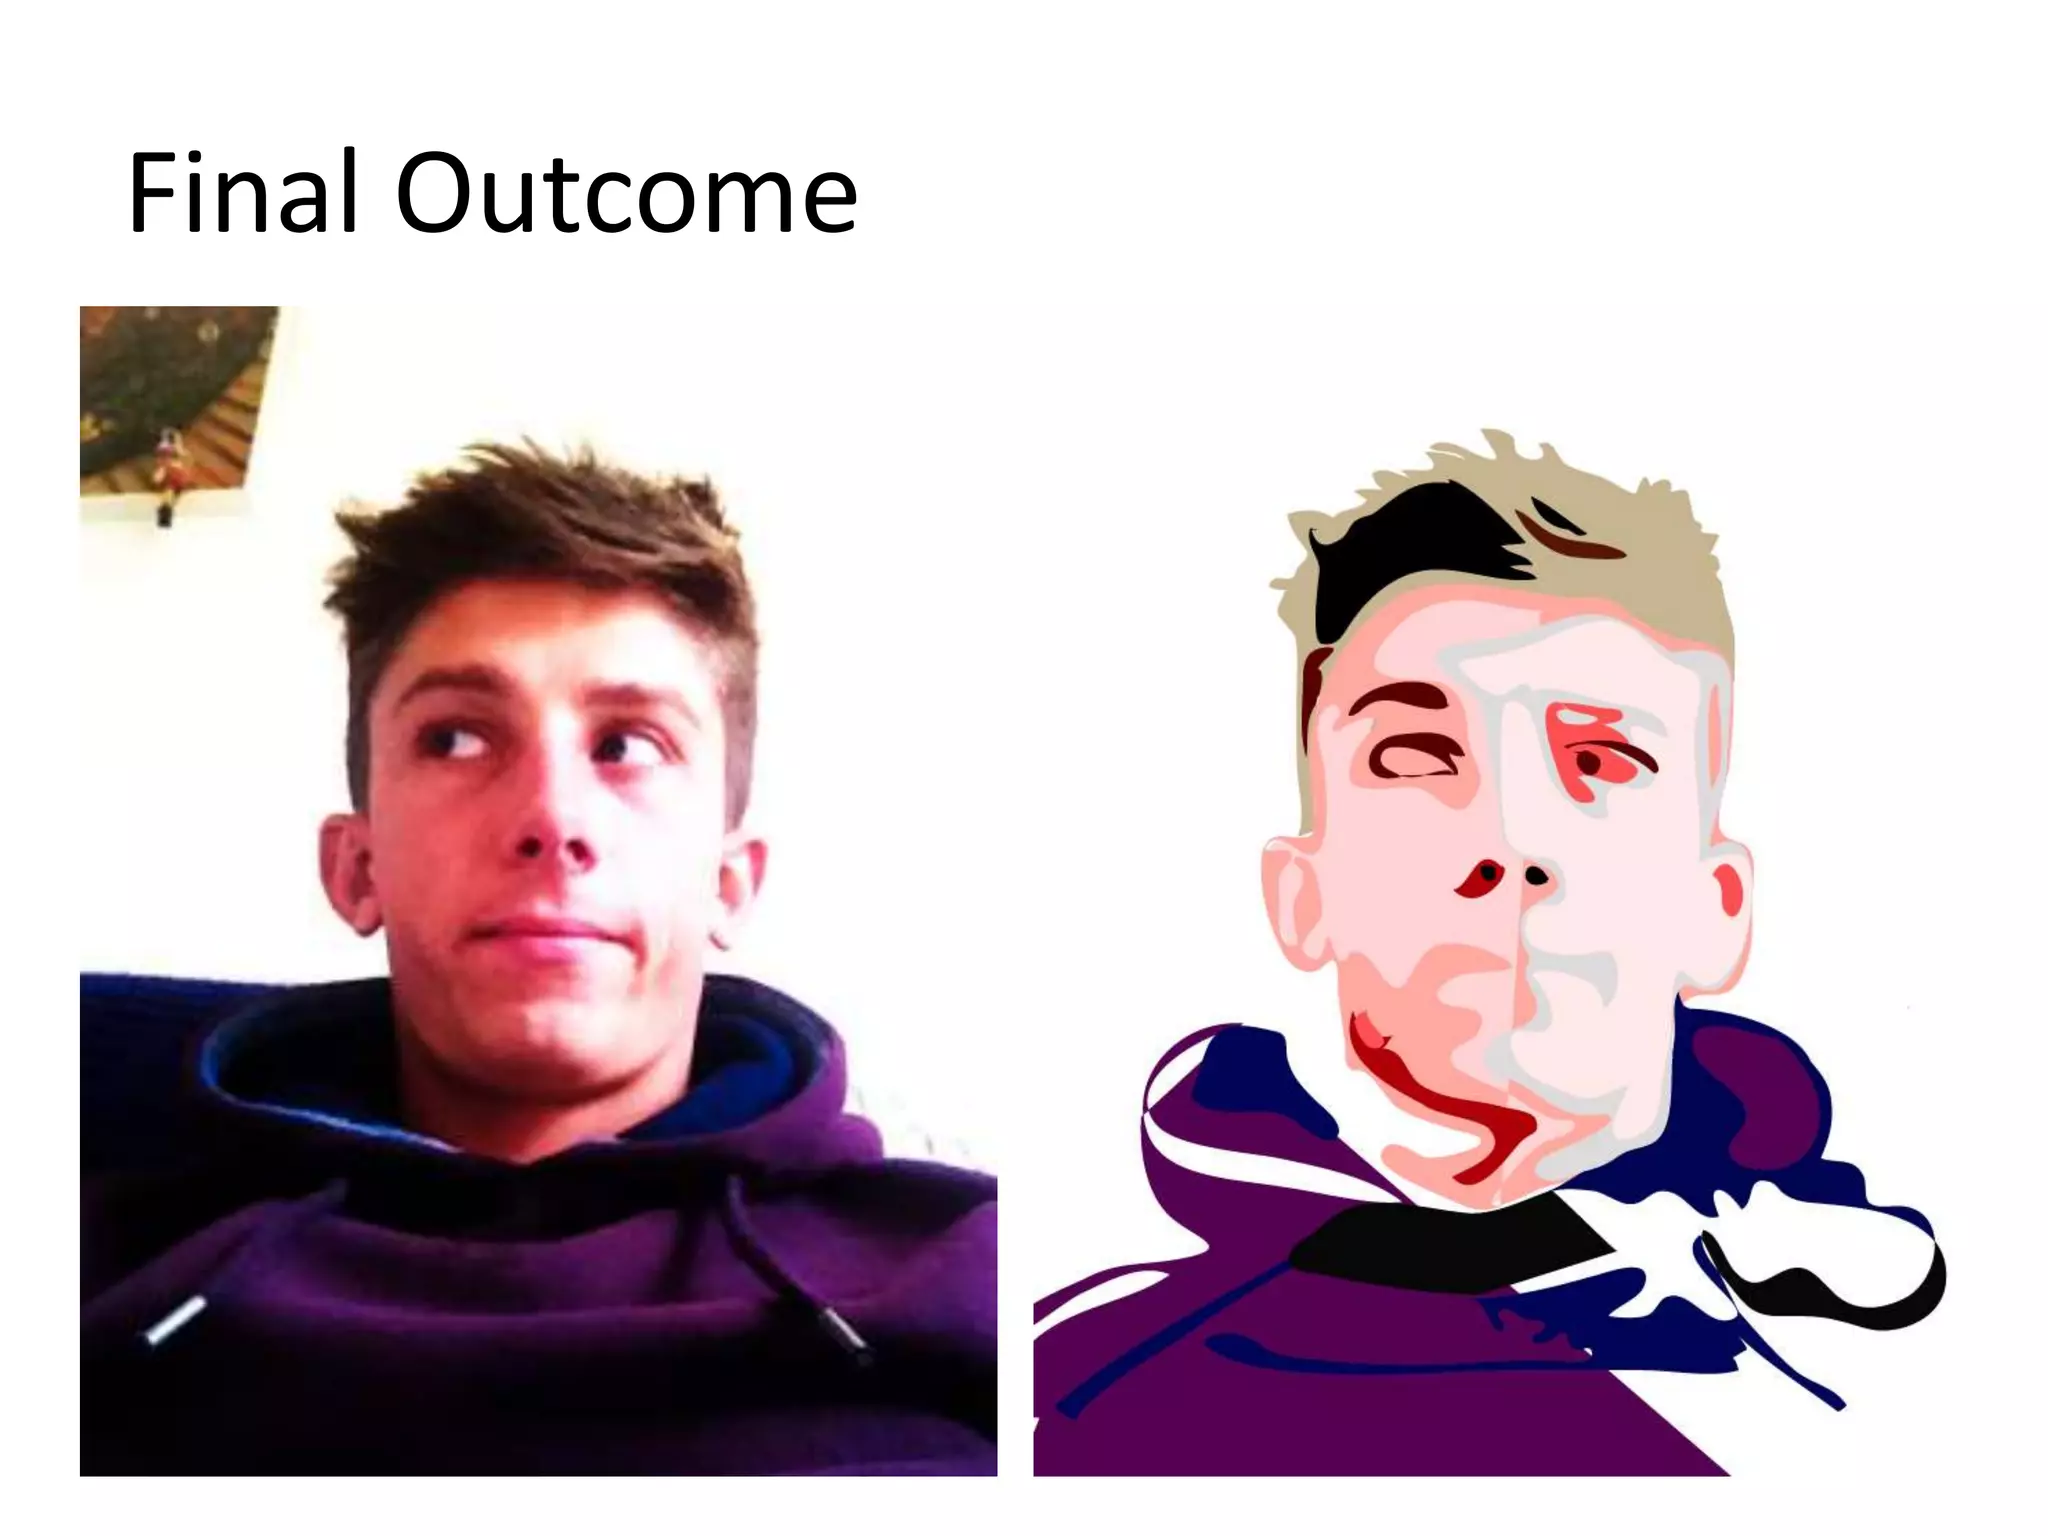
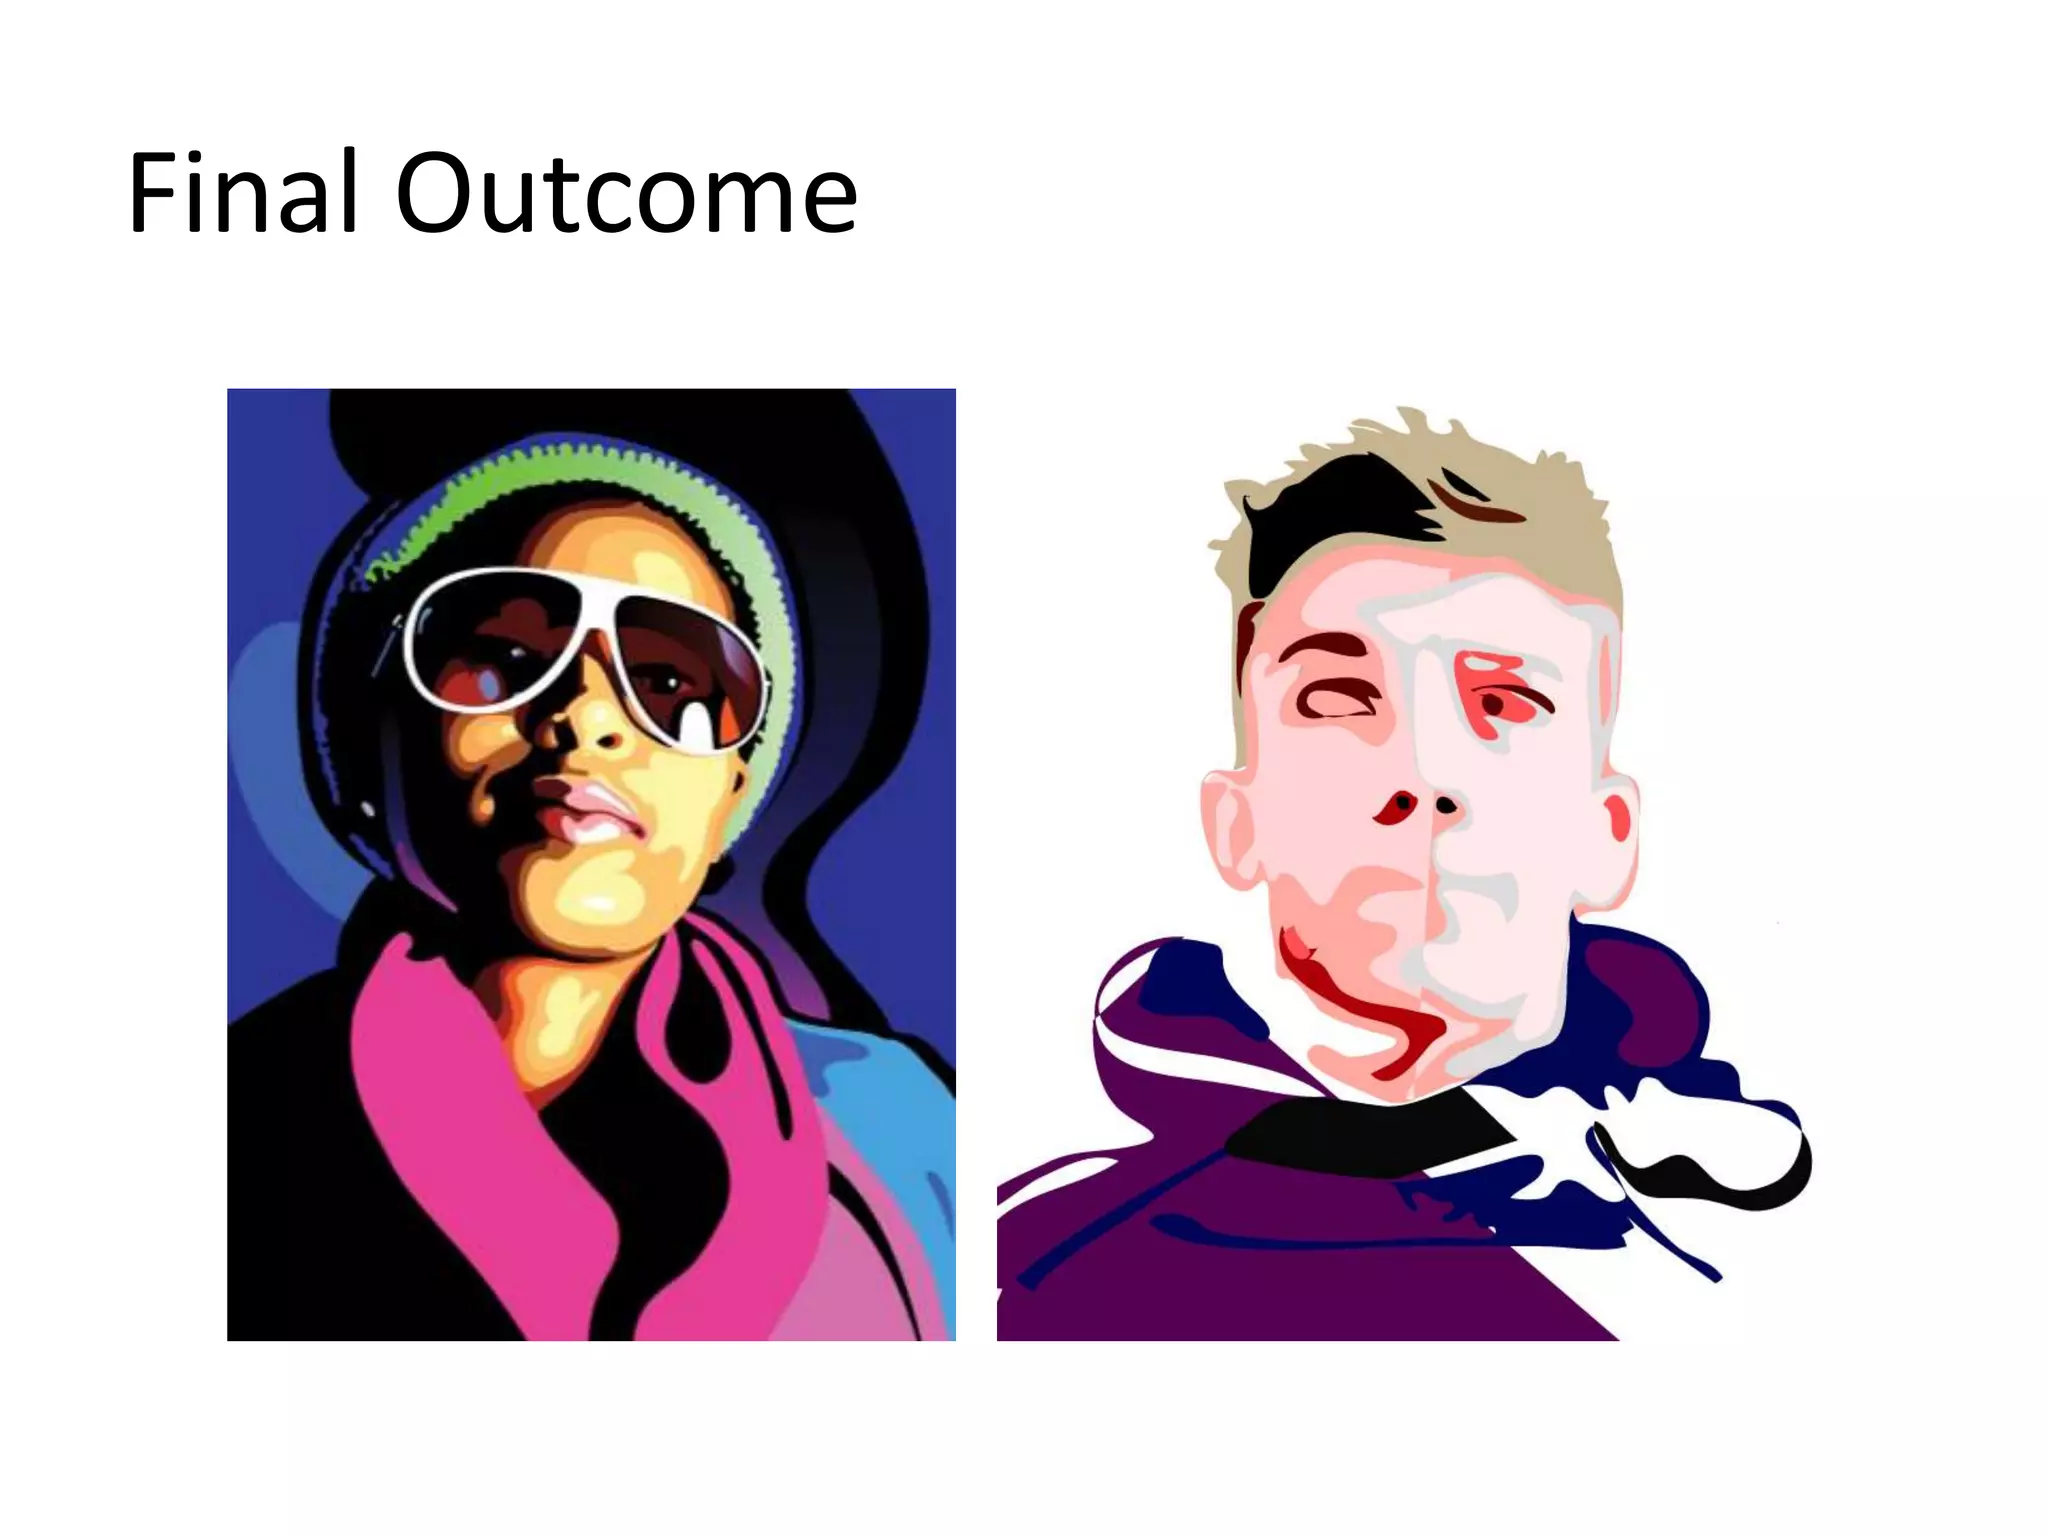
This document provides instructions for posterizing a photo in 7 steps:
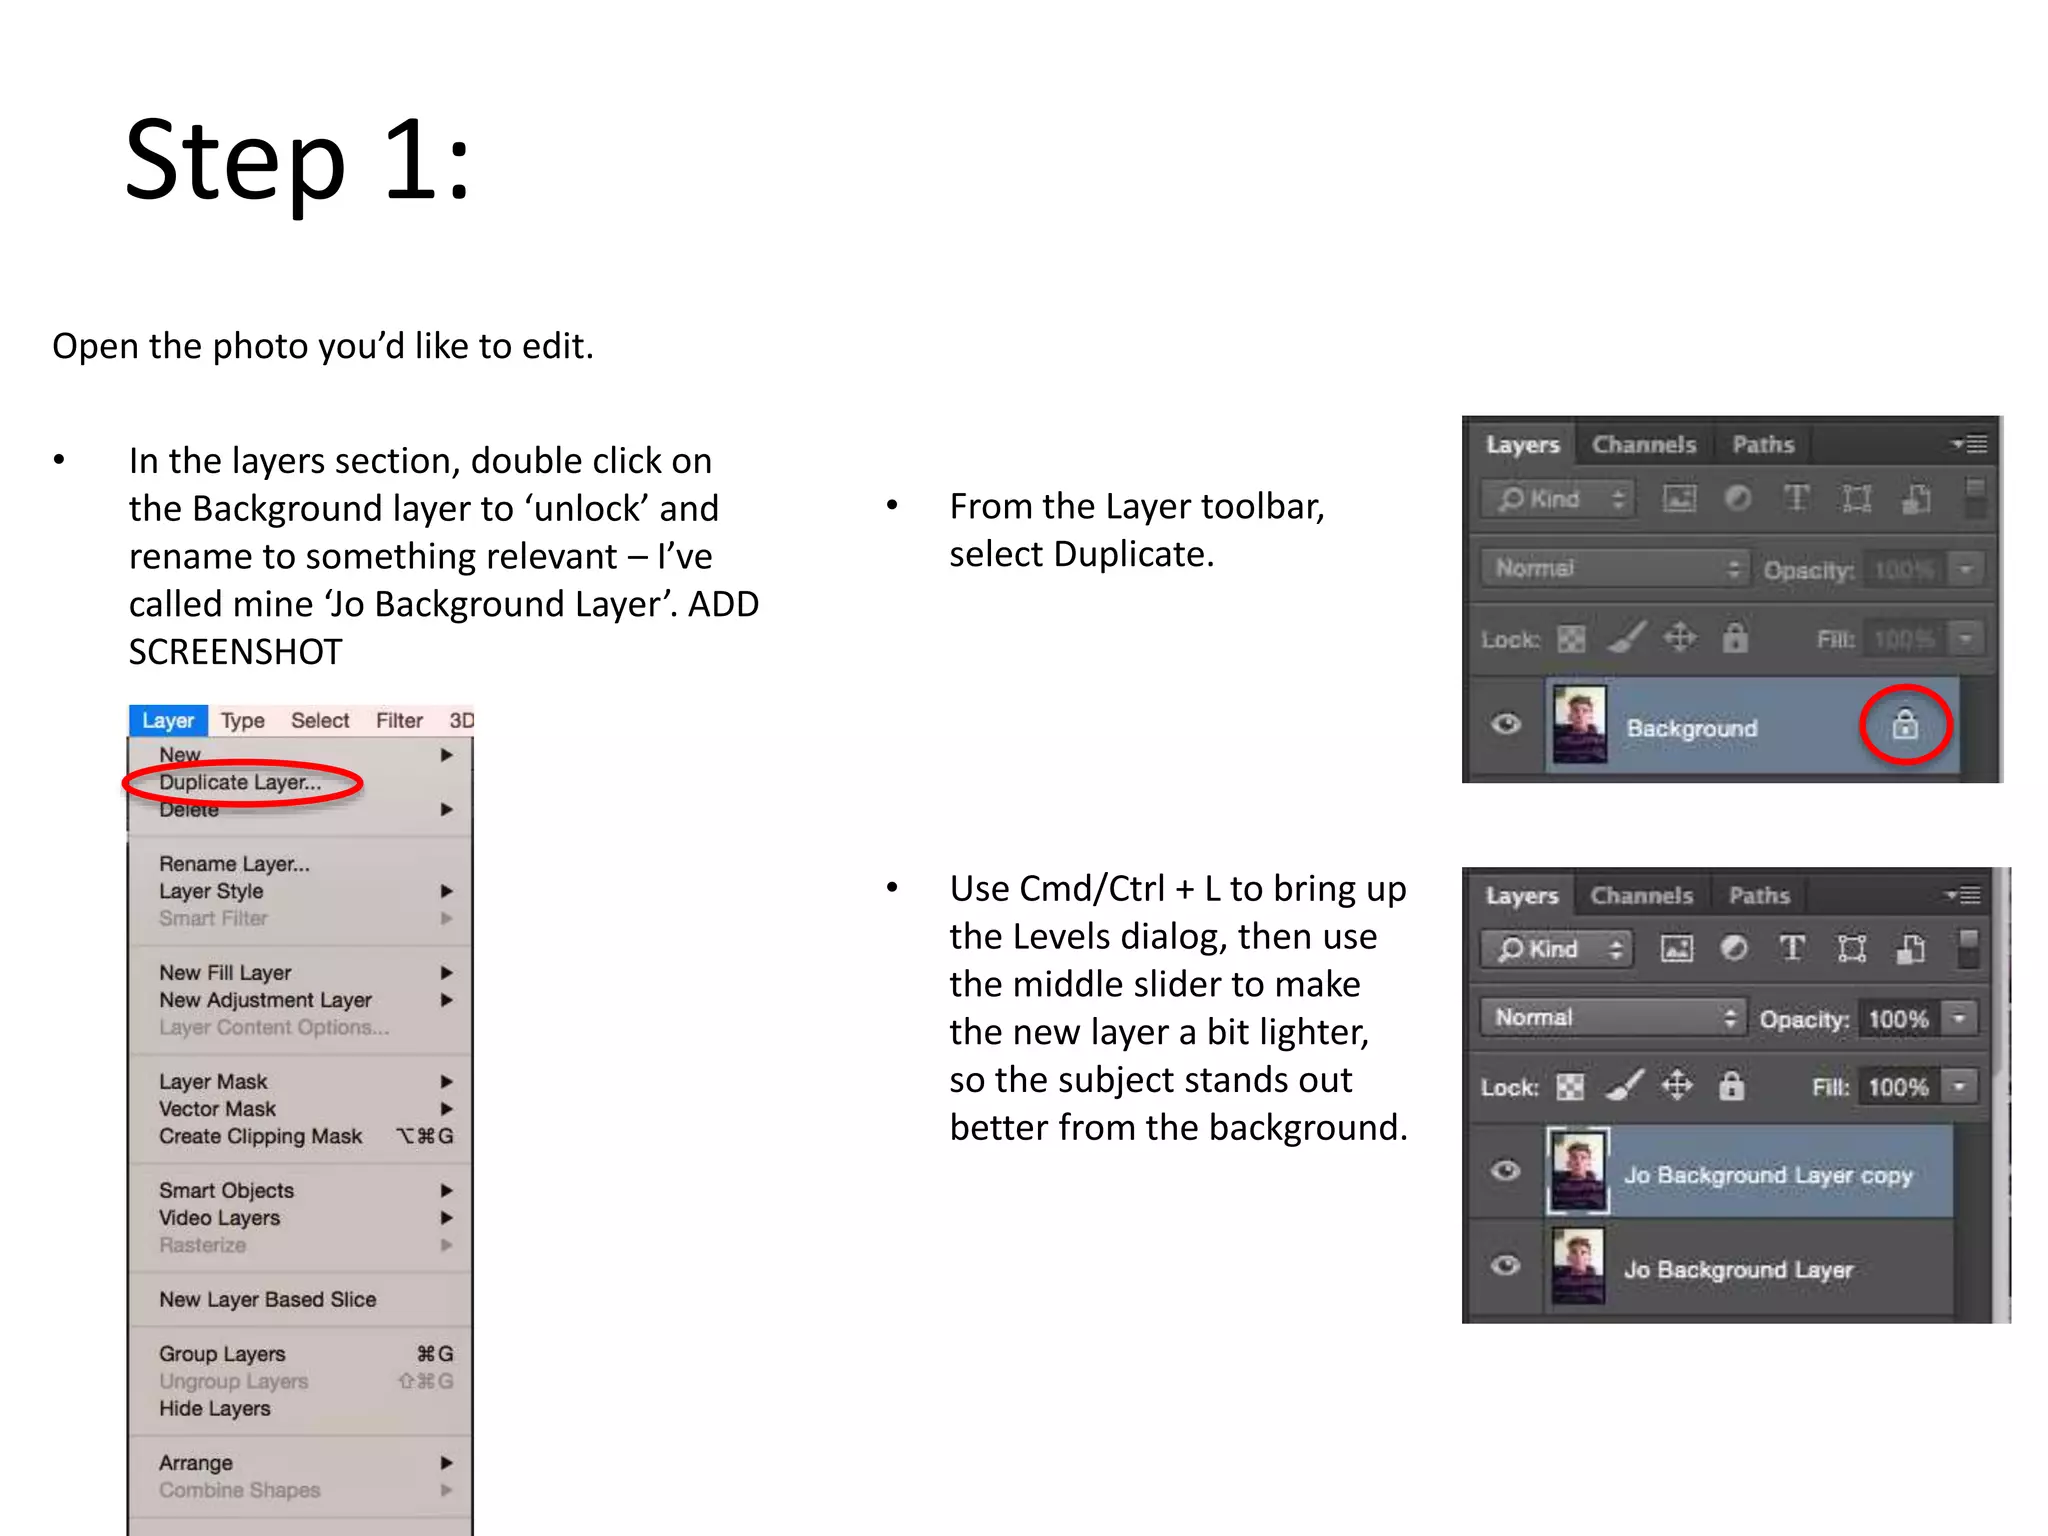
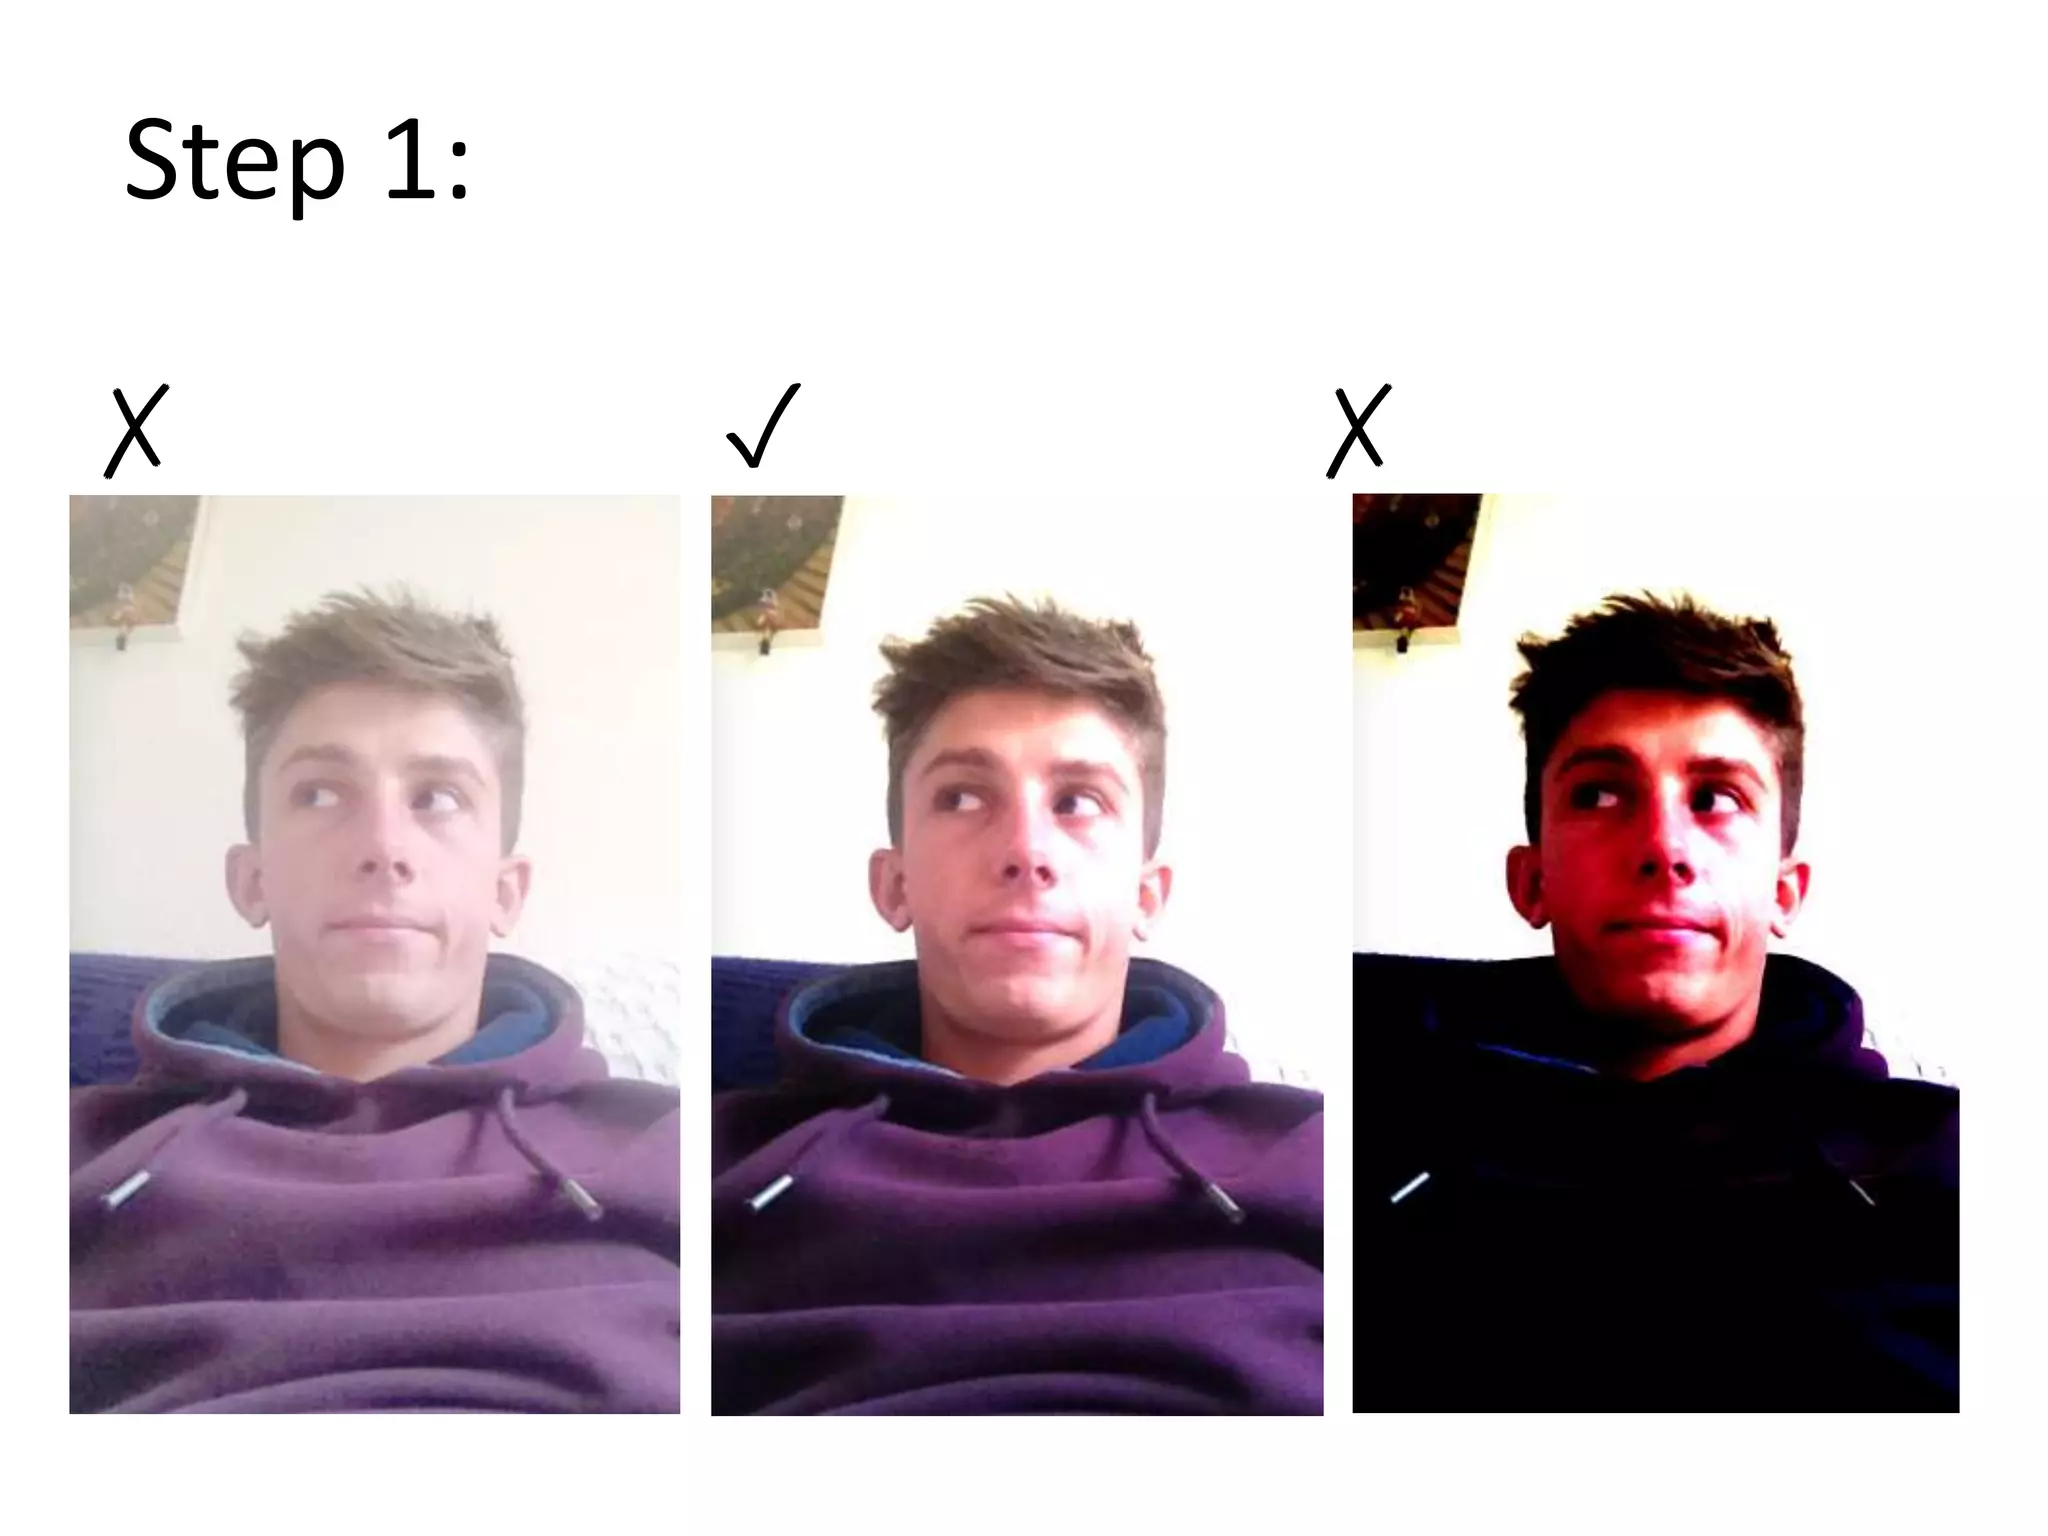
1. Open a photo and duplicate the background layer, adjusting the brightness of the copy.
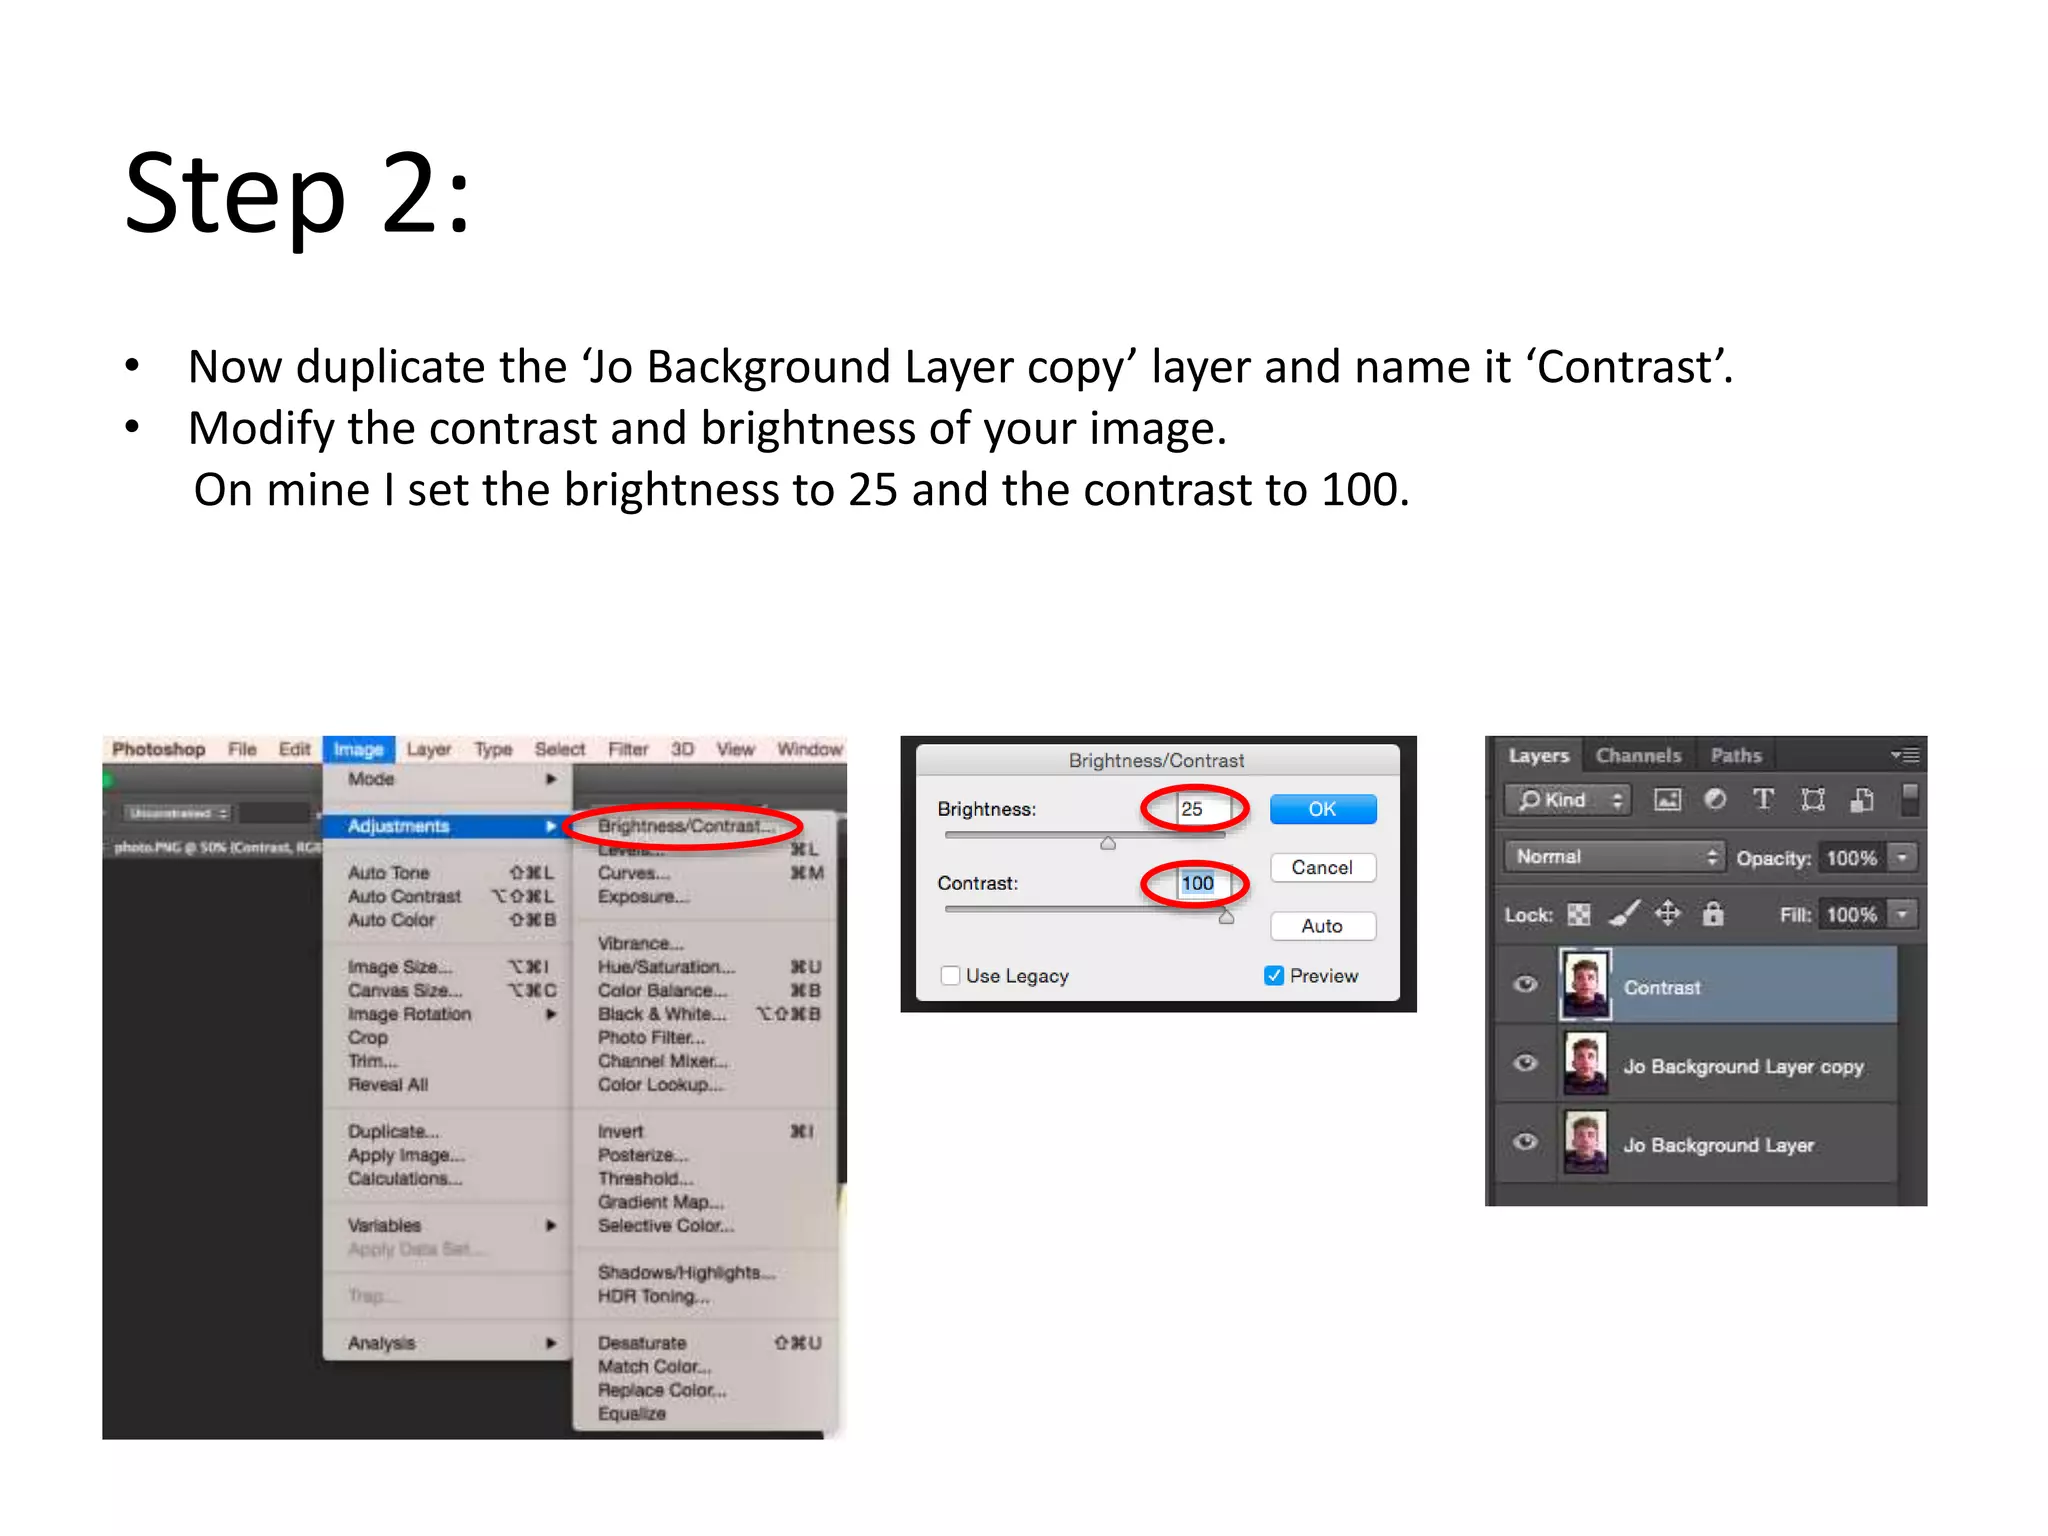
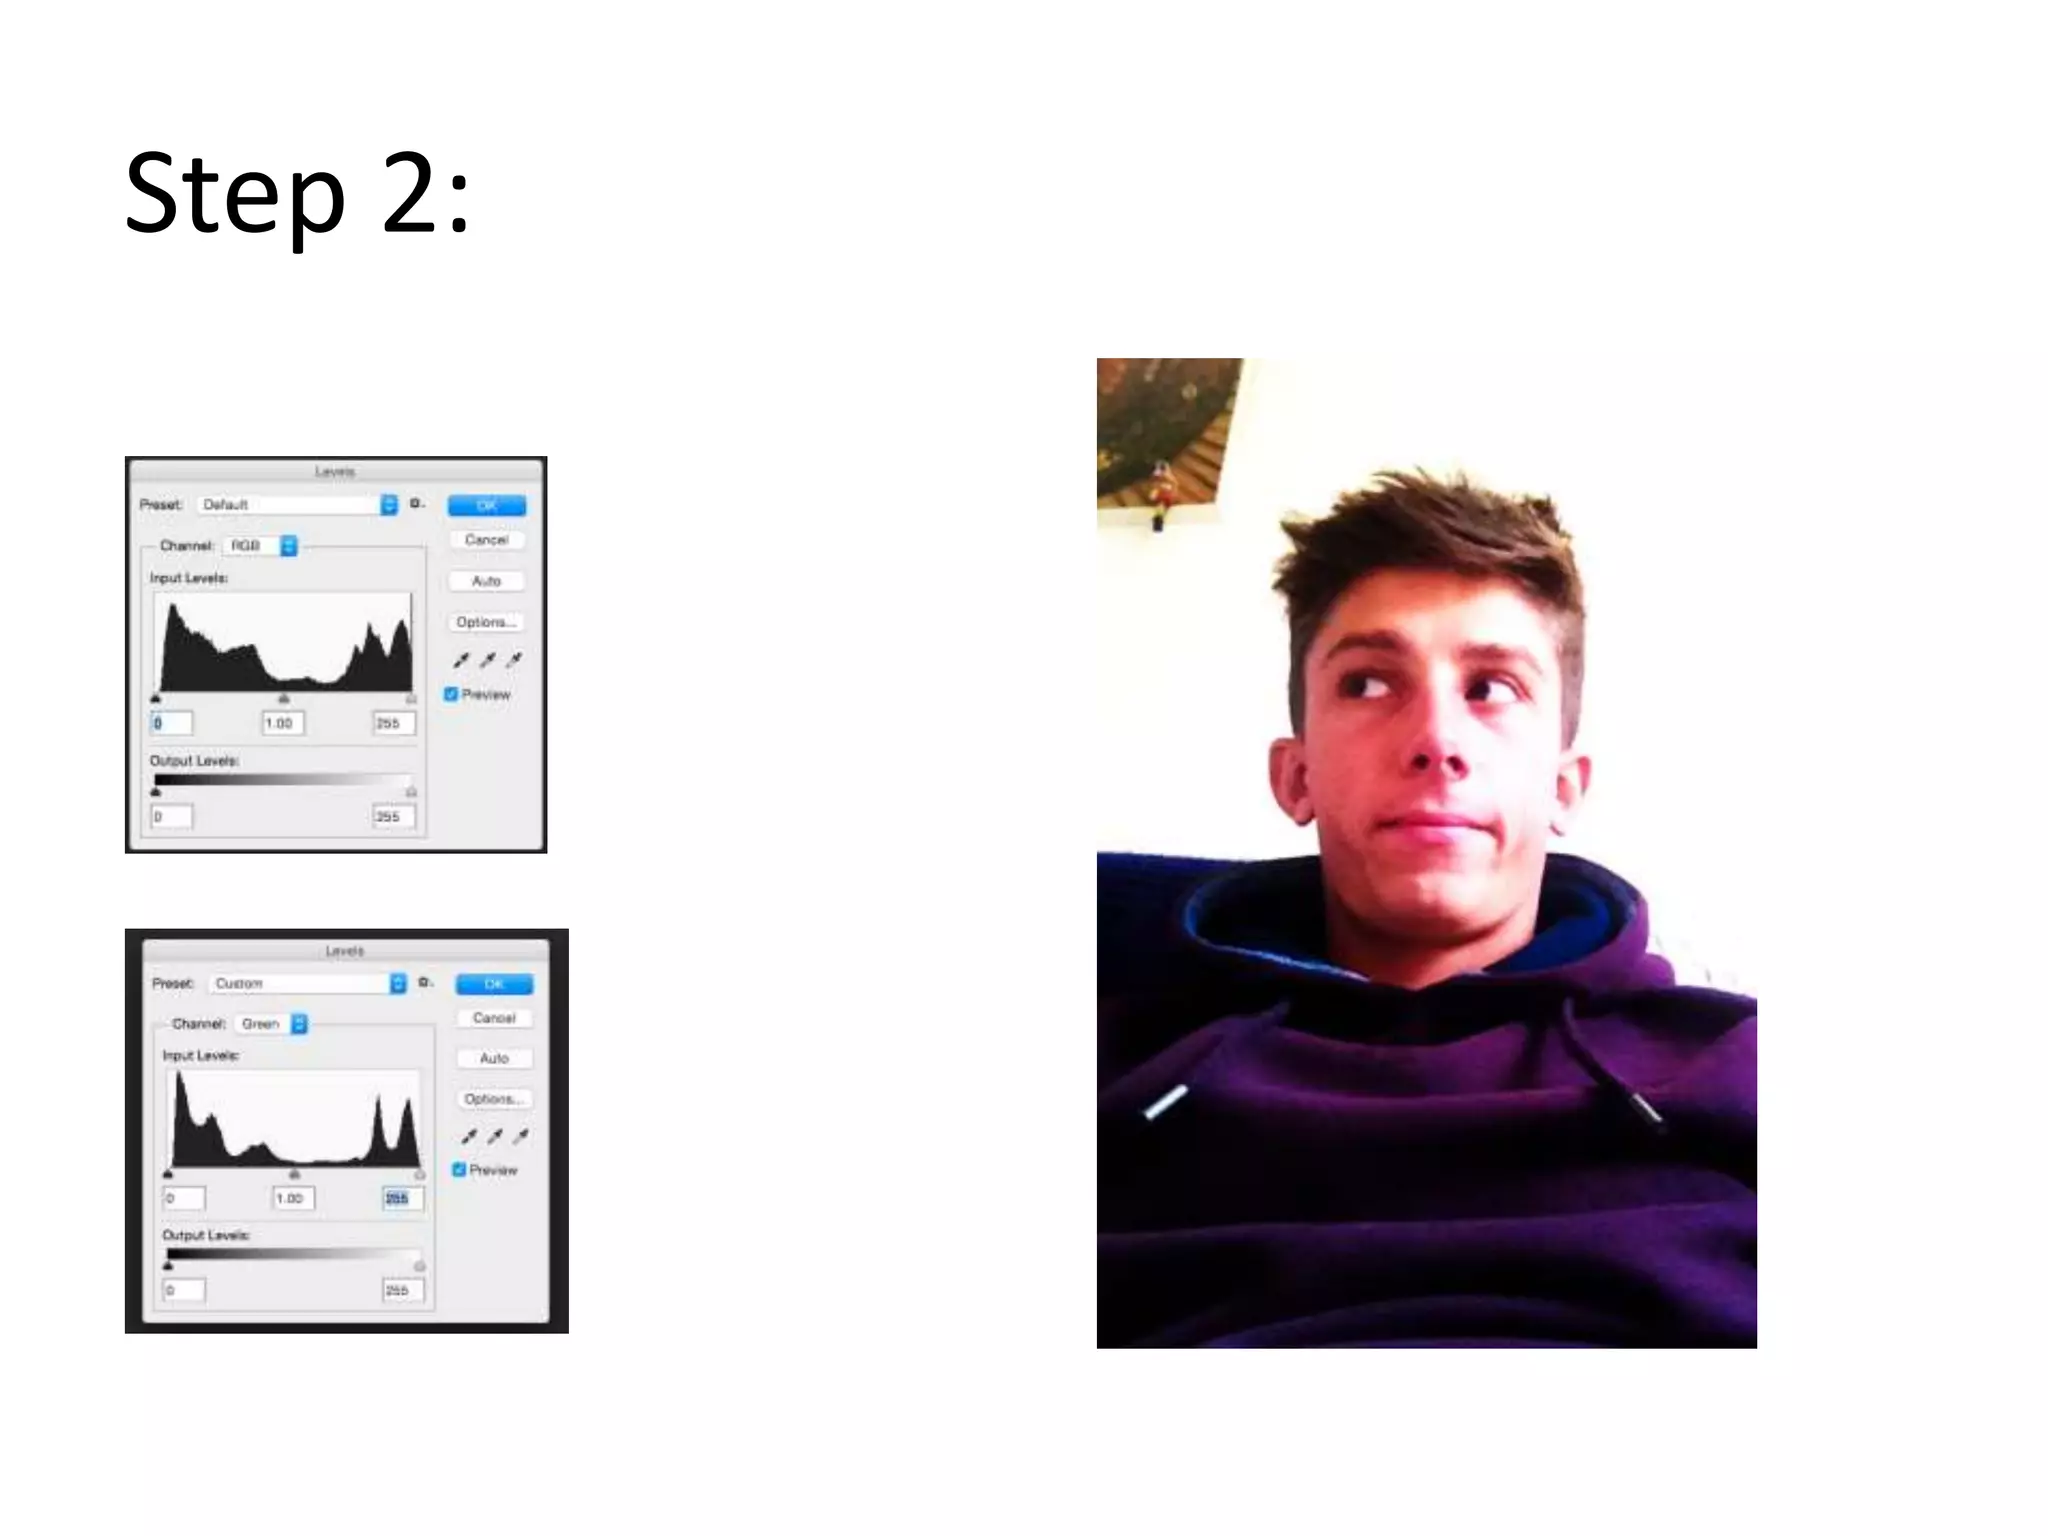
2. Duplicate the adjusted layer and modify the contrast and brightness, creating a "Contrast" layer.
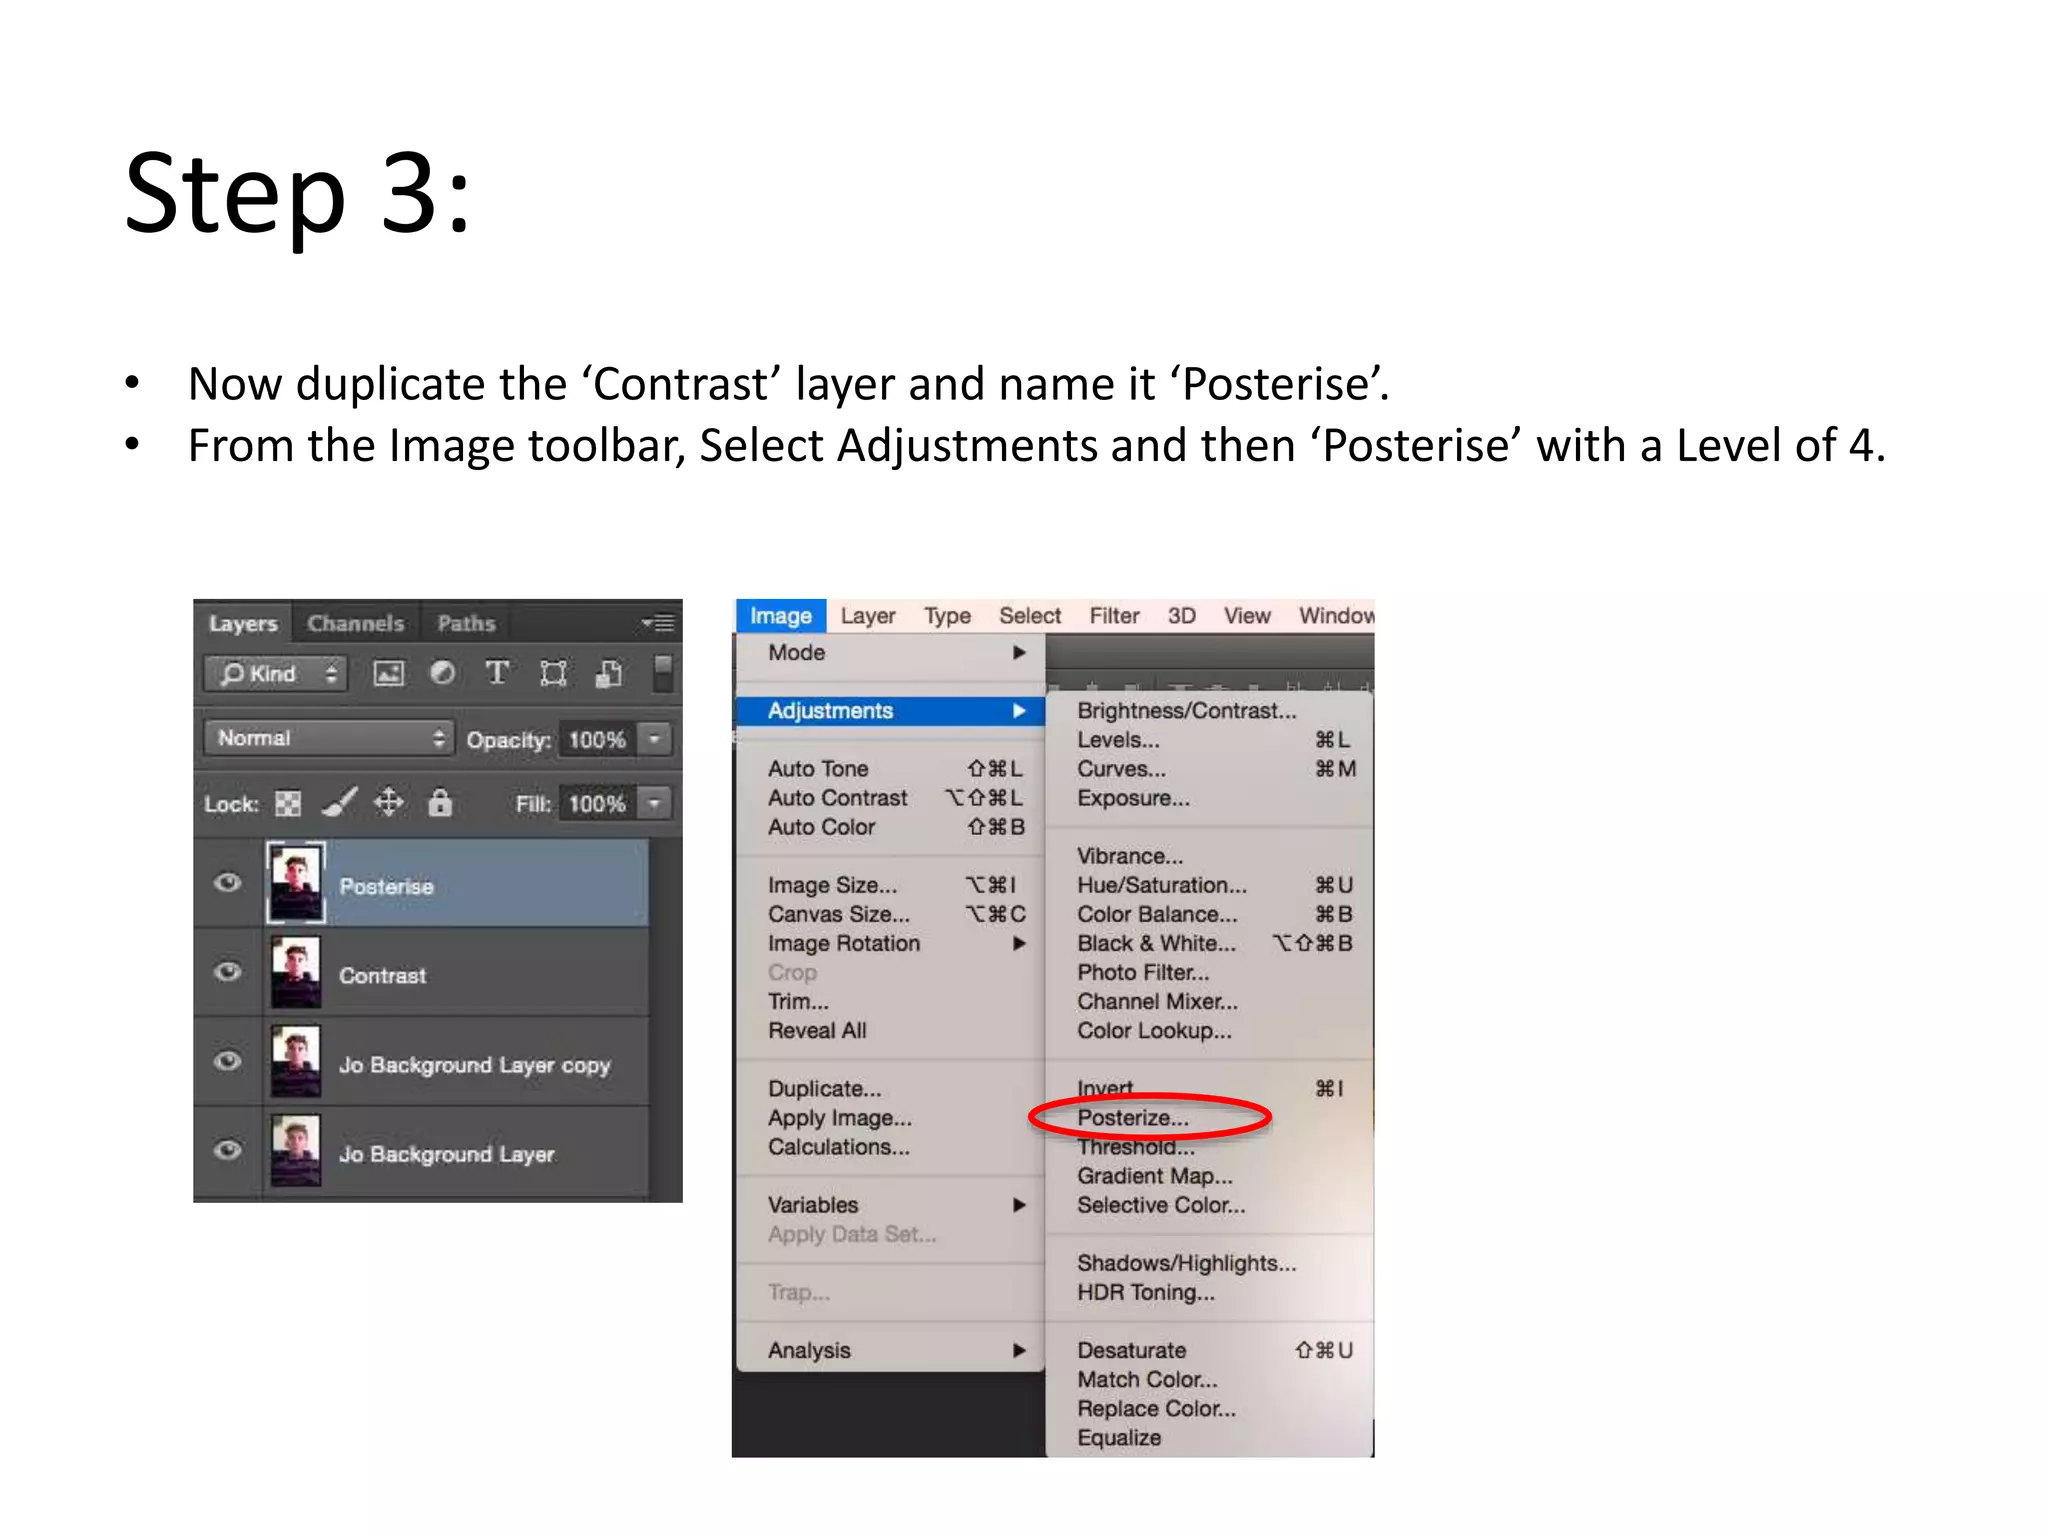
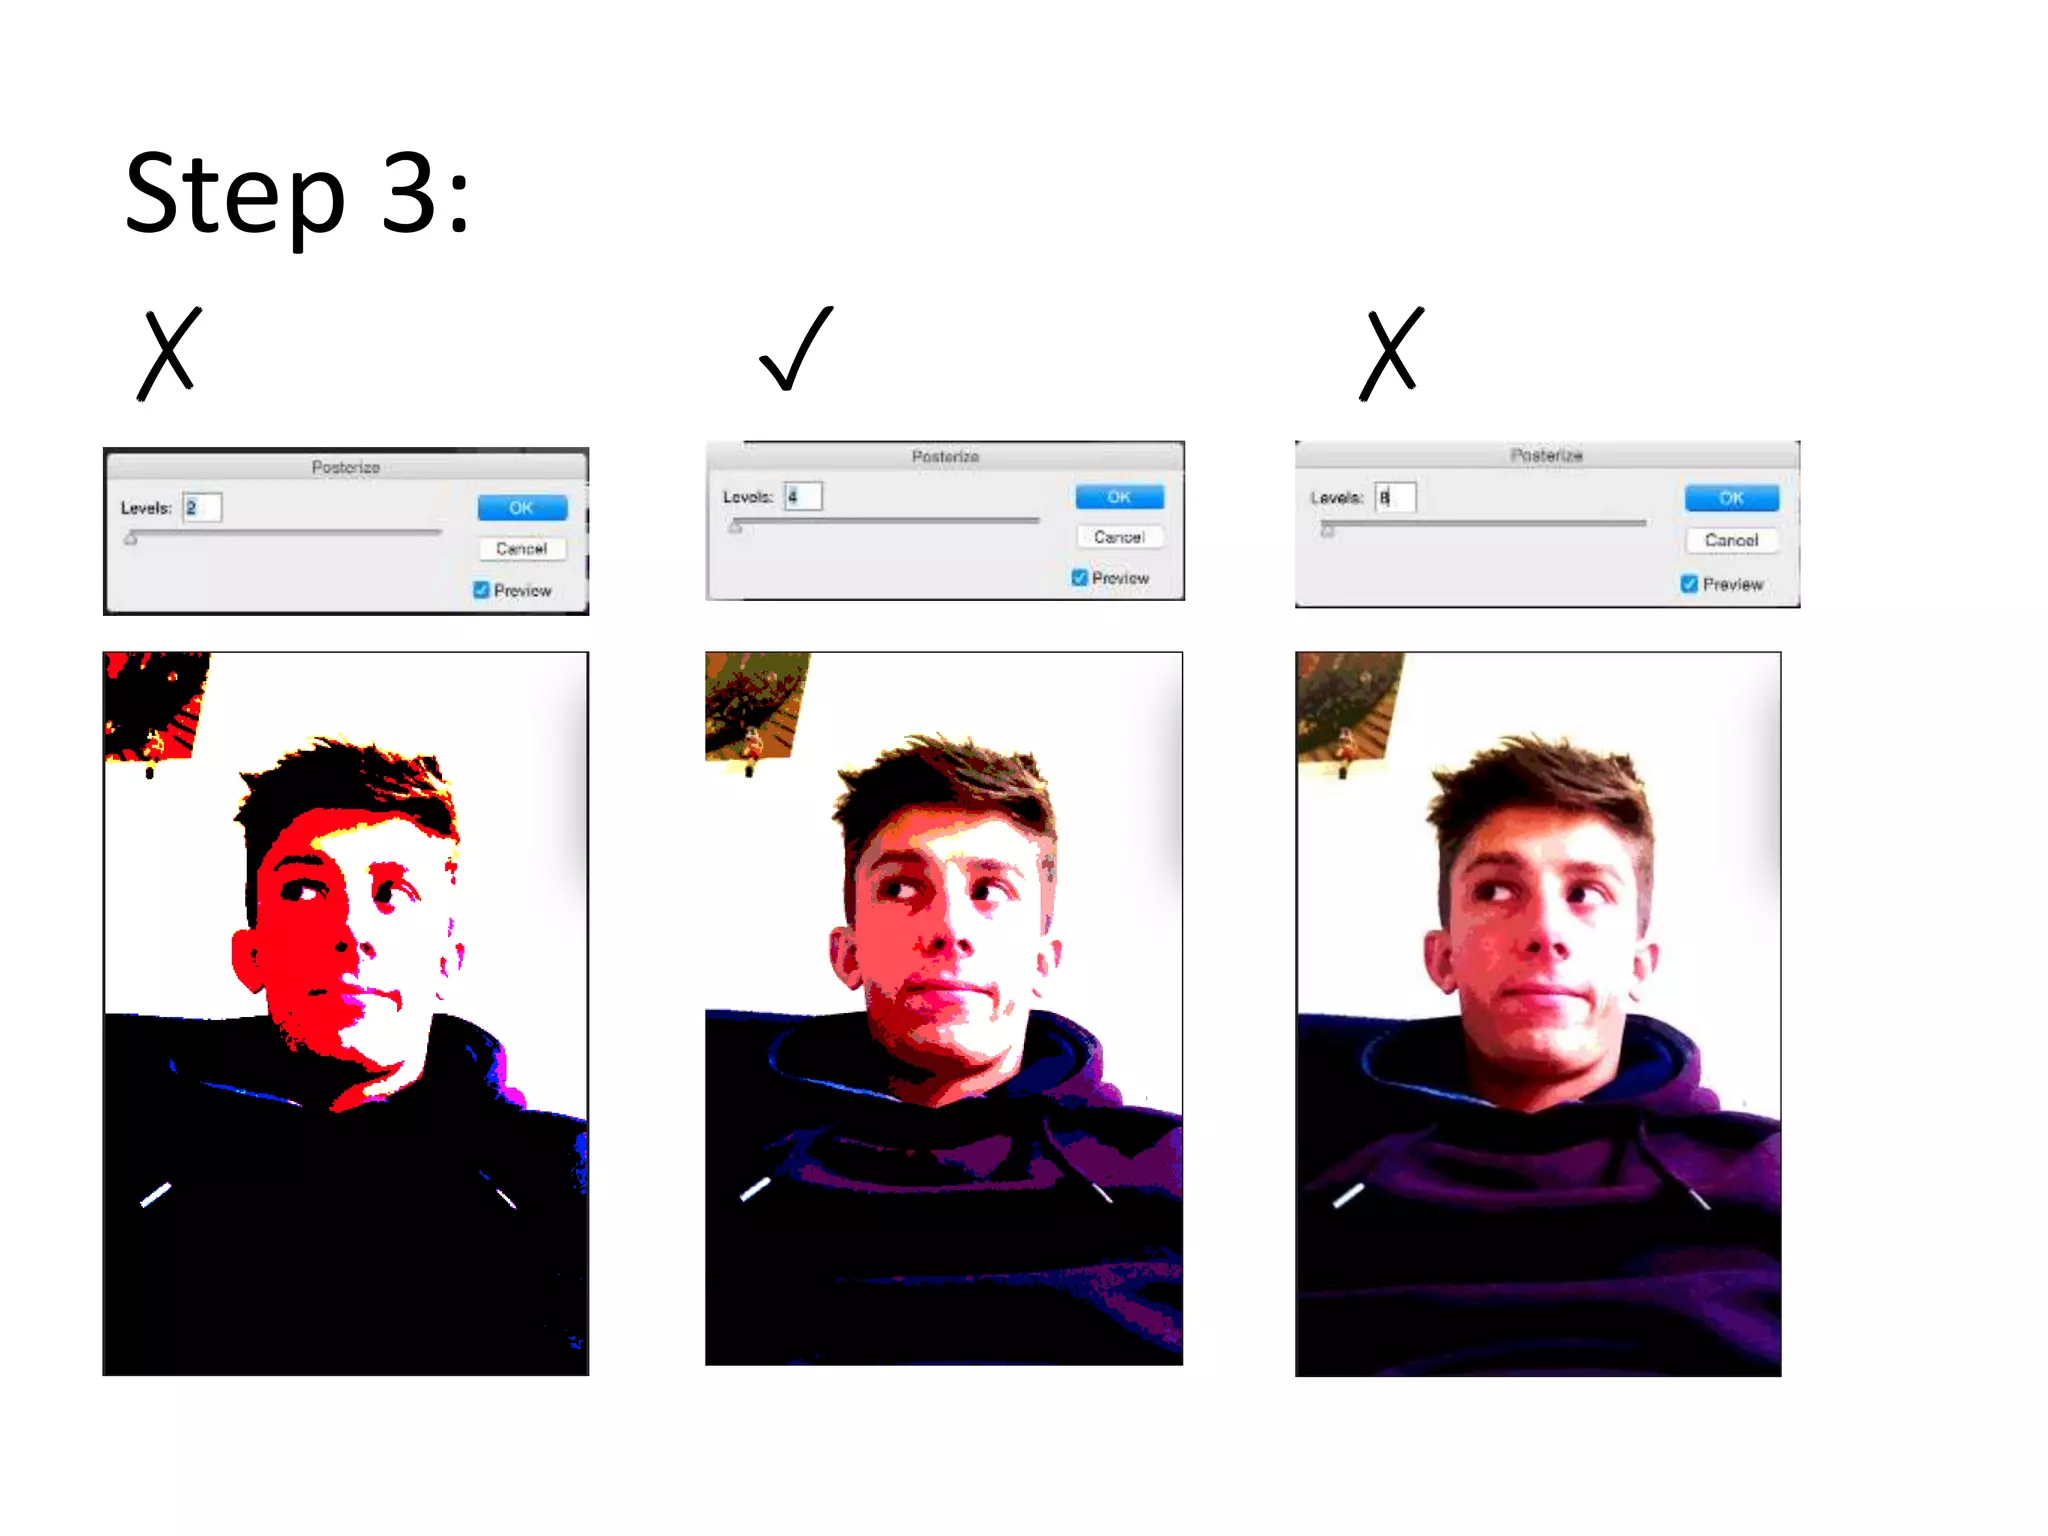
3. Duplicate the "Contrast" layer and apply a posterize effect with 4 levels, creating a "Posterize" layer.
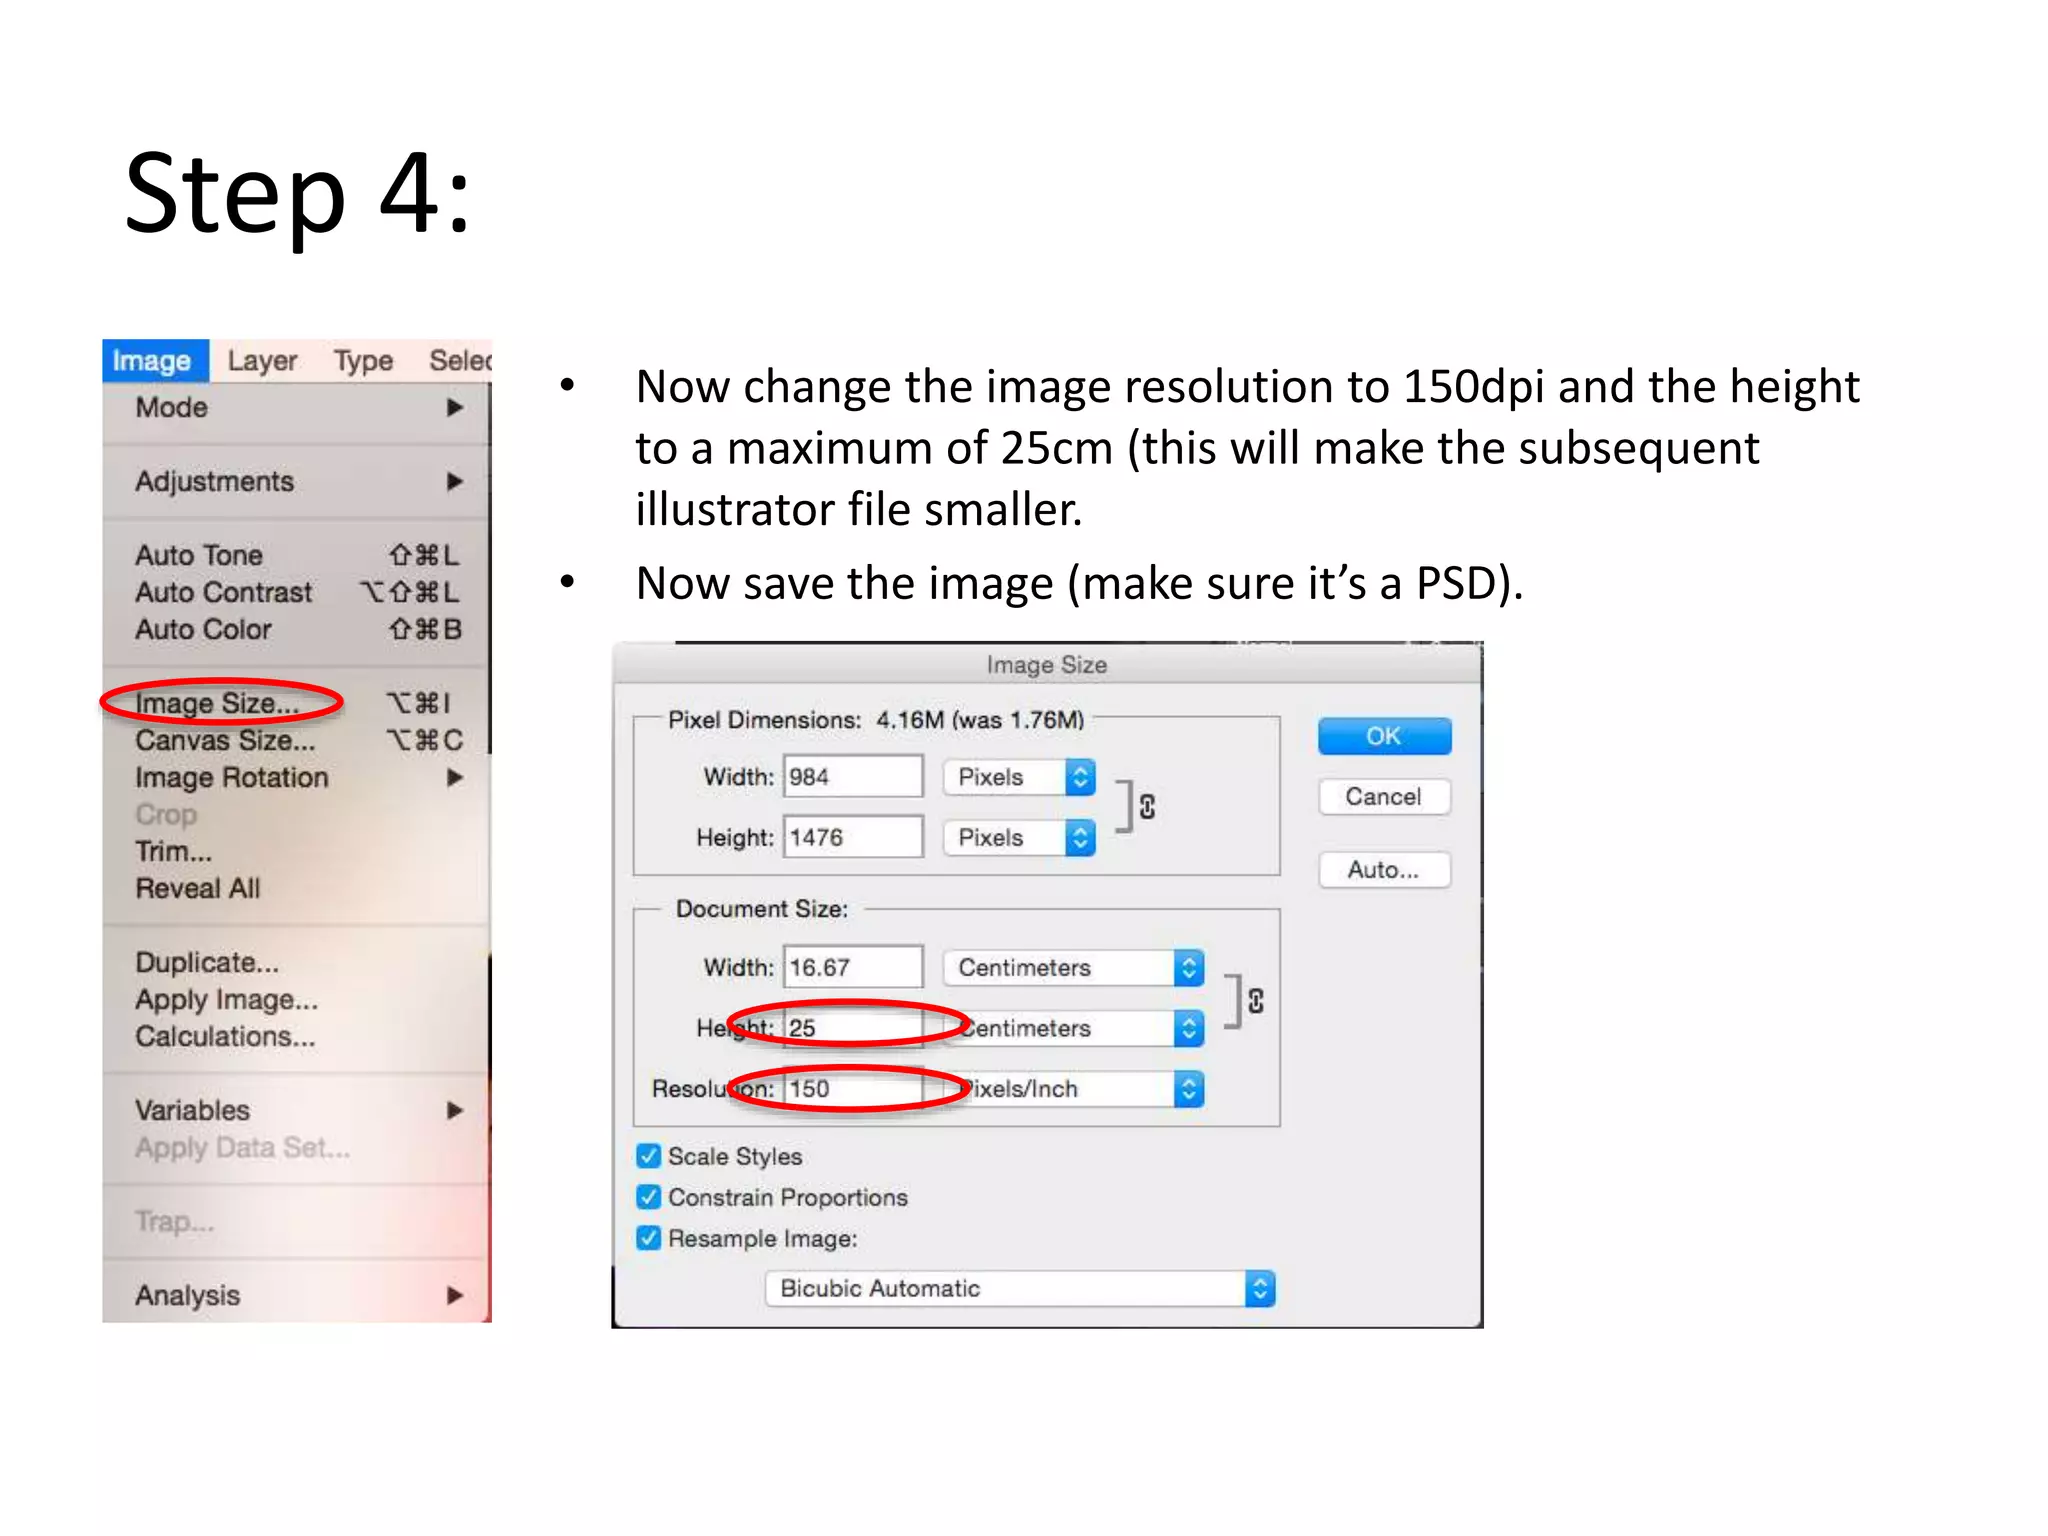
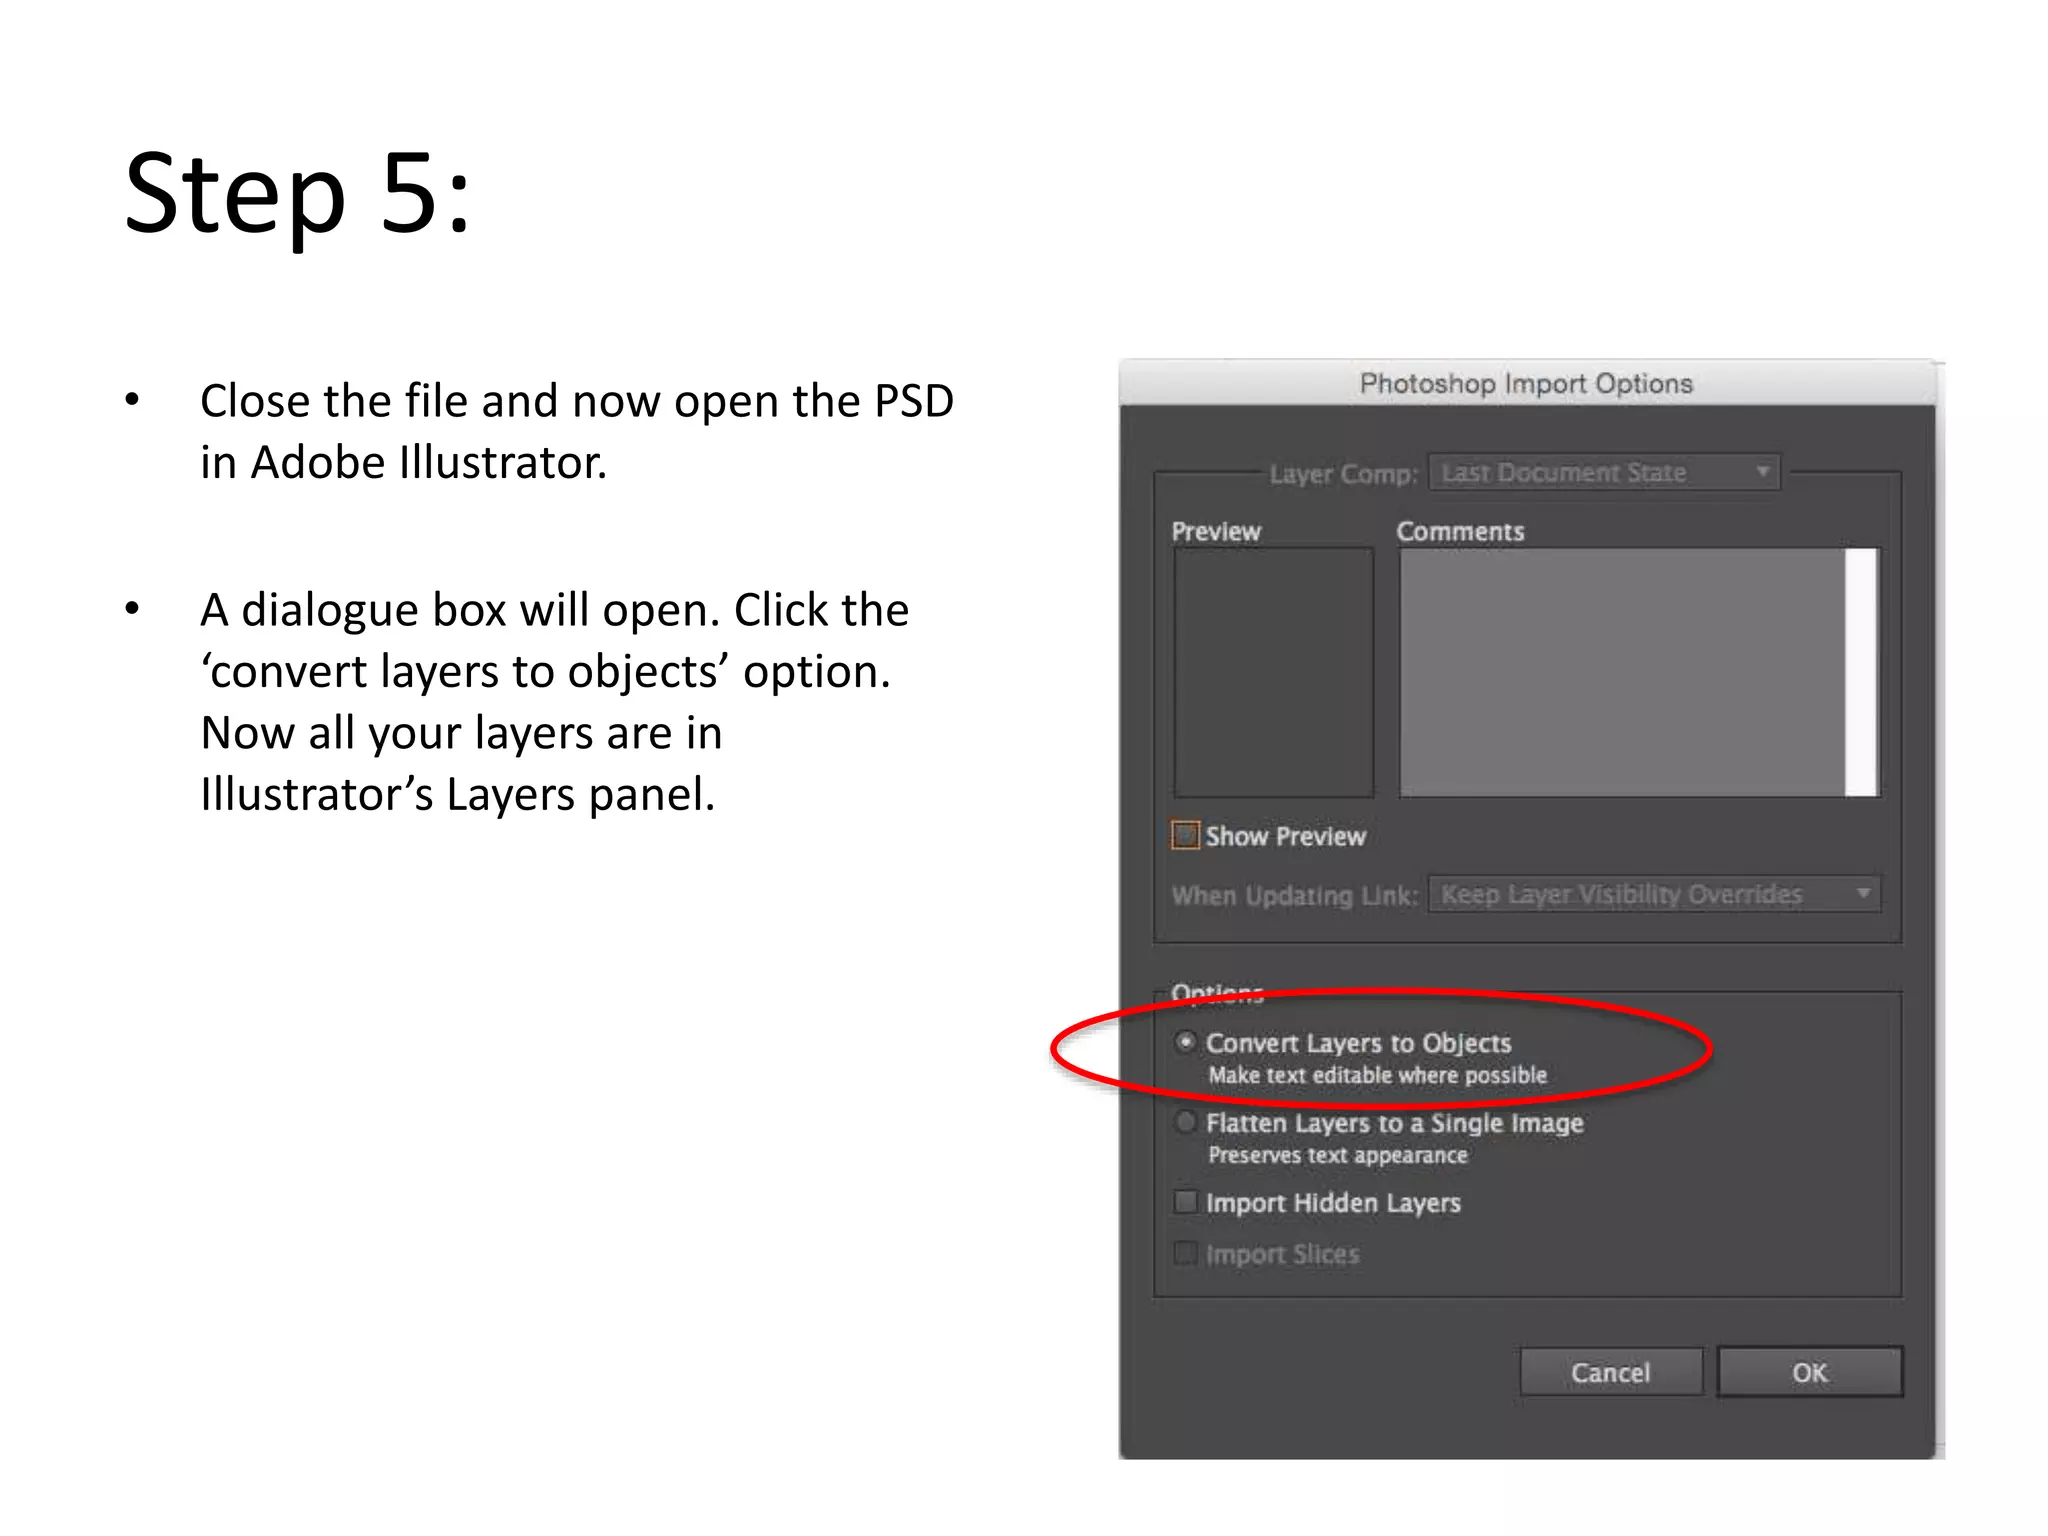
4. Save the photo as a PSD and open it in Illustrator, converting the layers to objects.
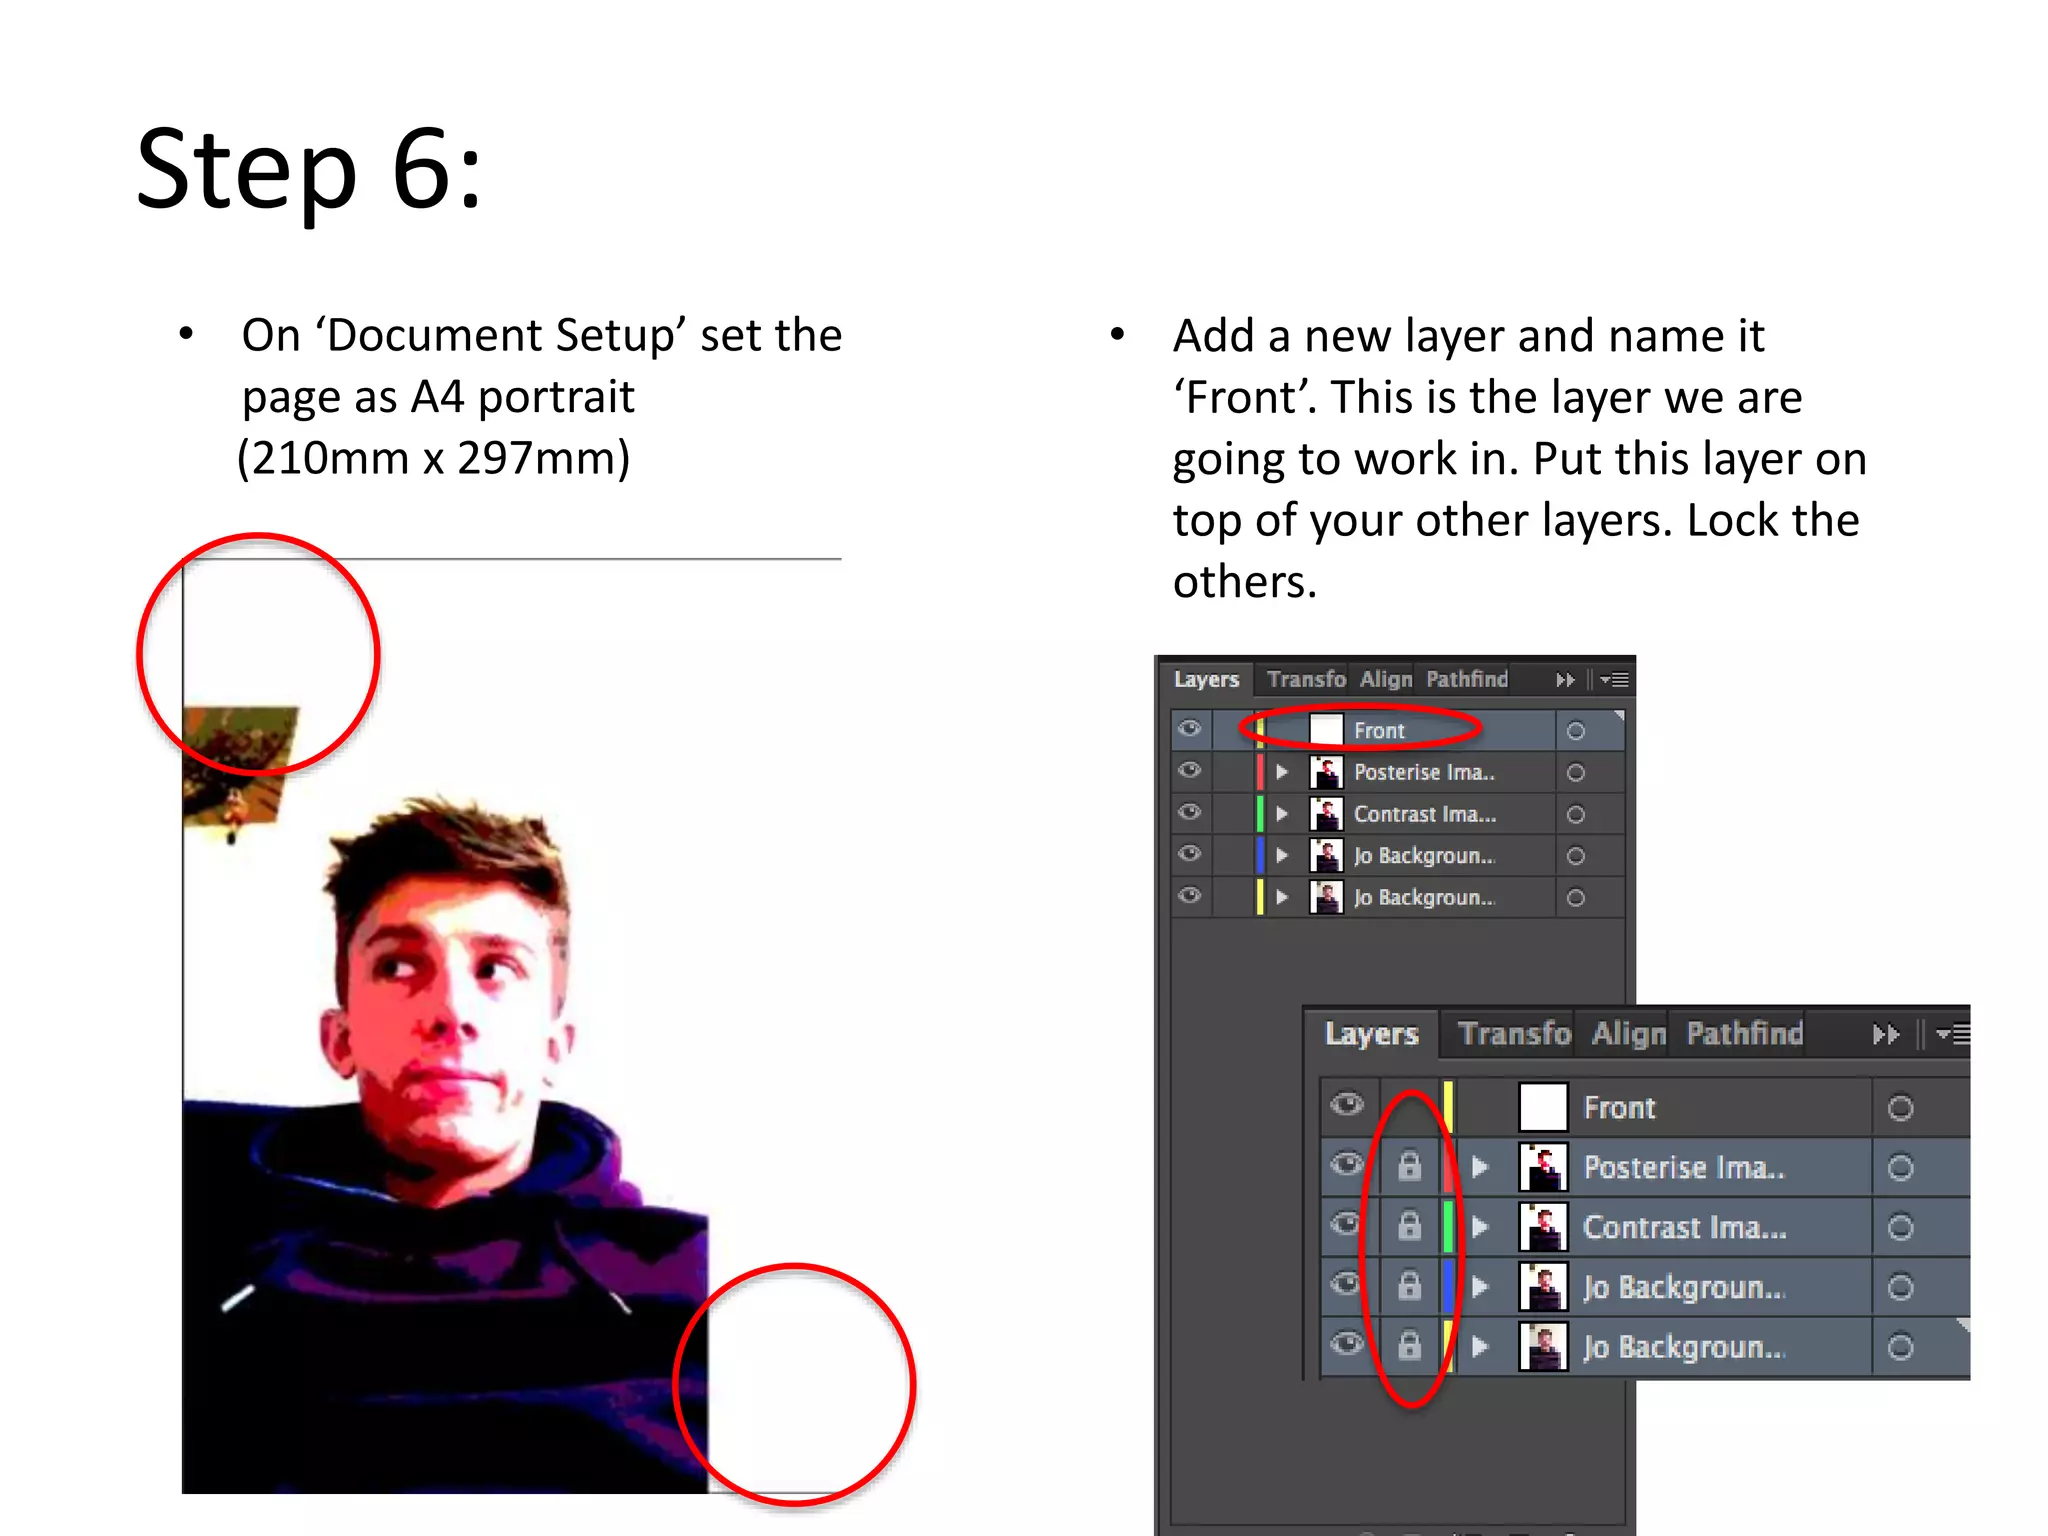
5. Create a new "Front" layer and lock the other layers.
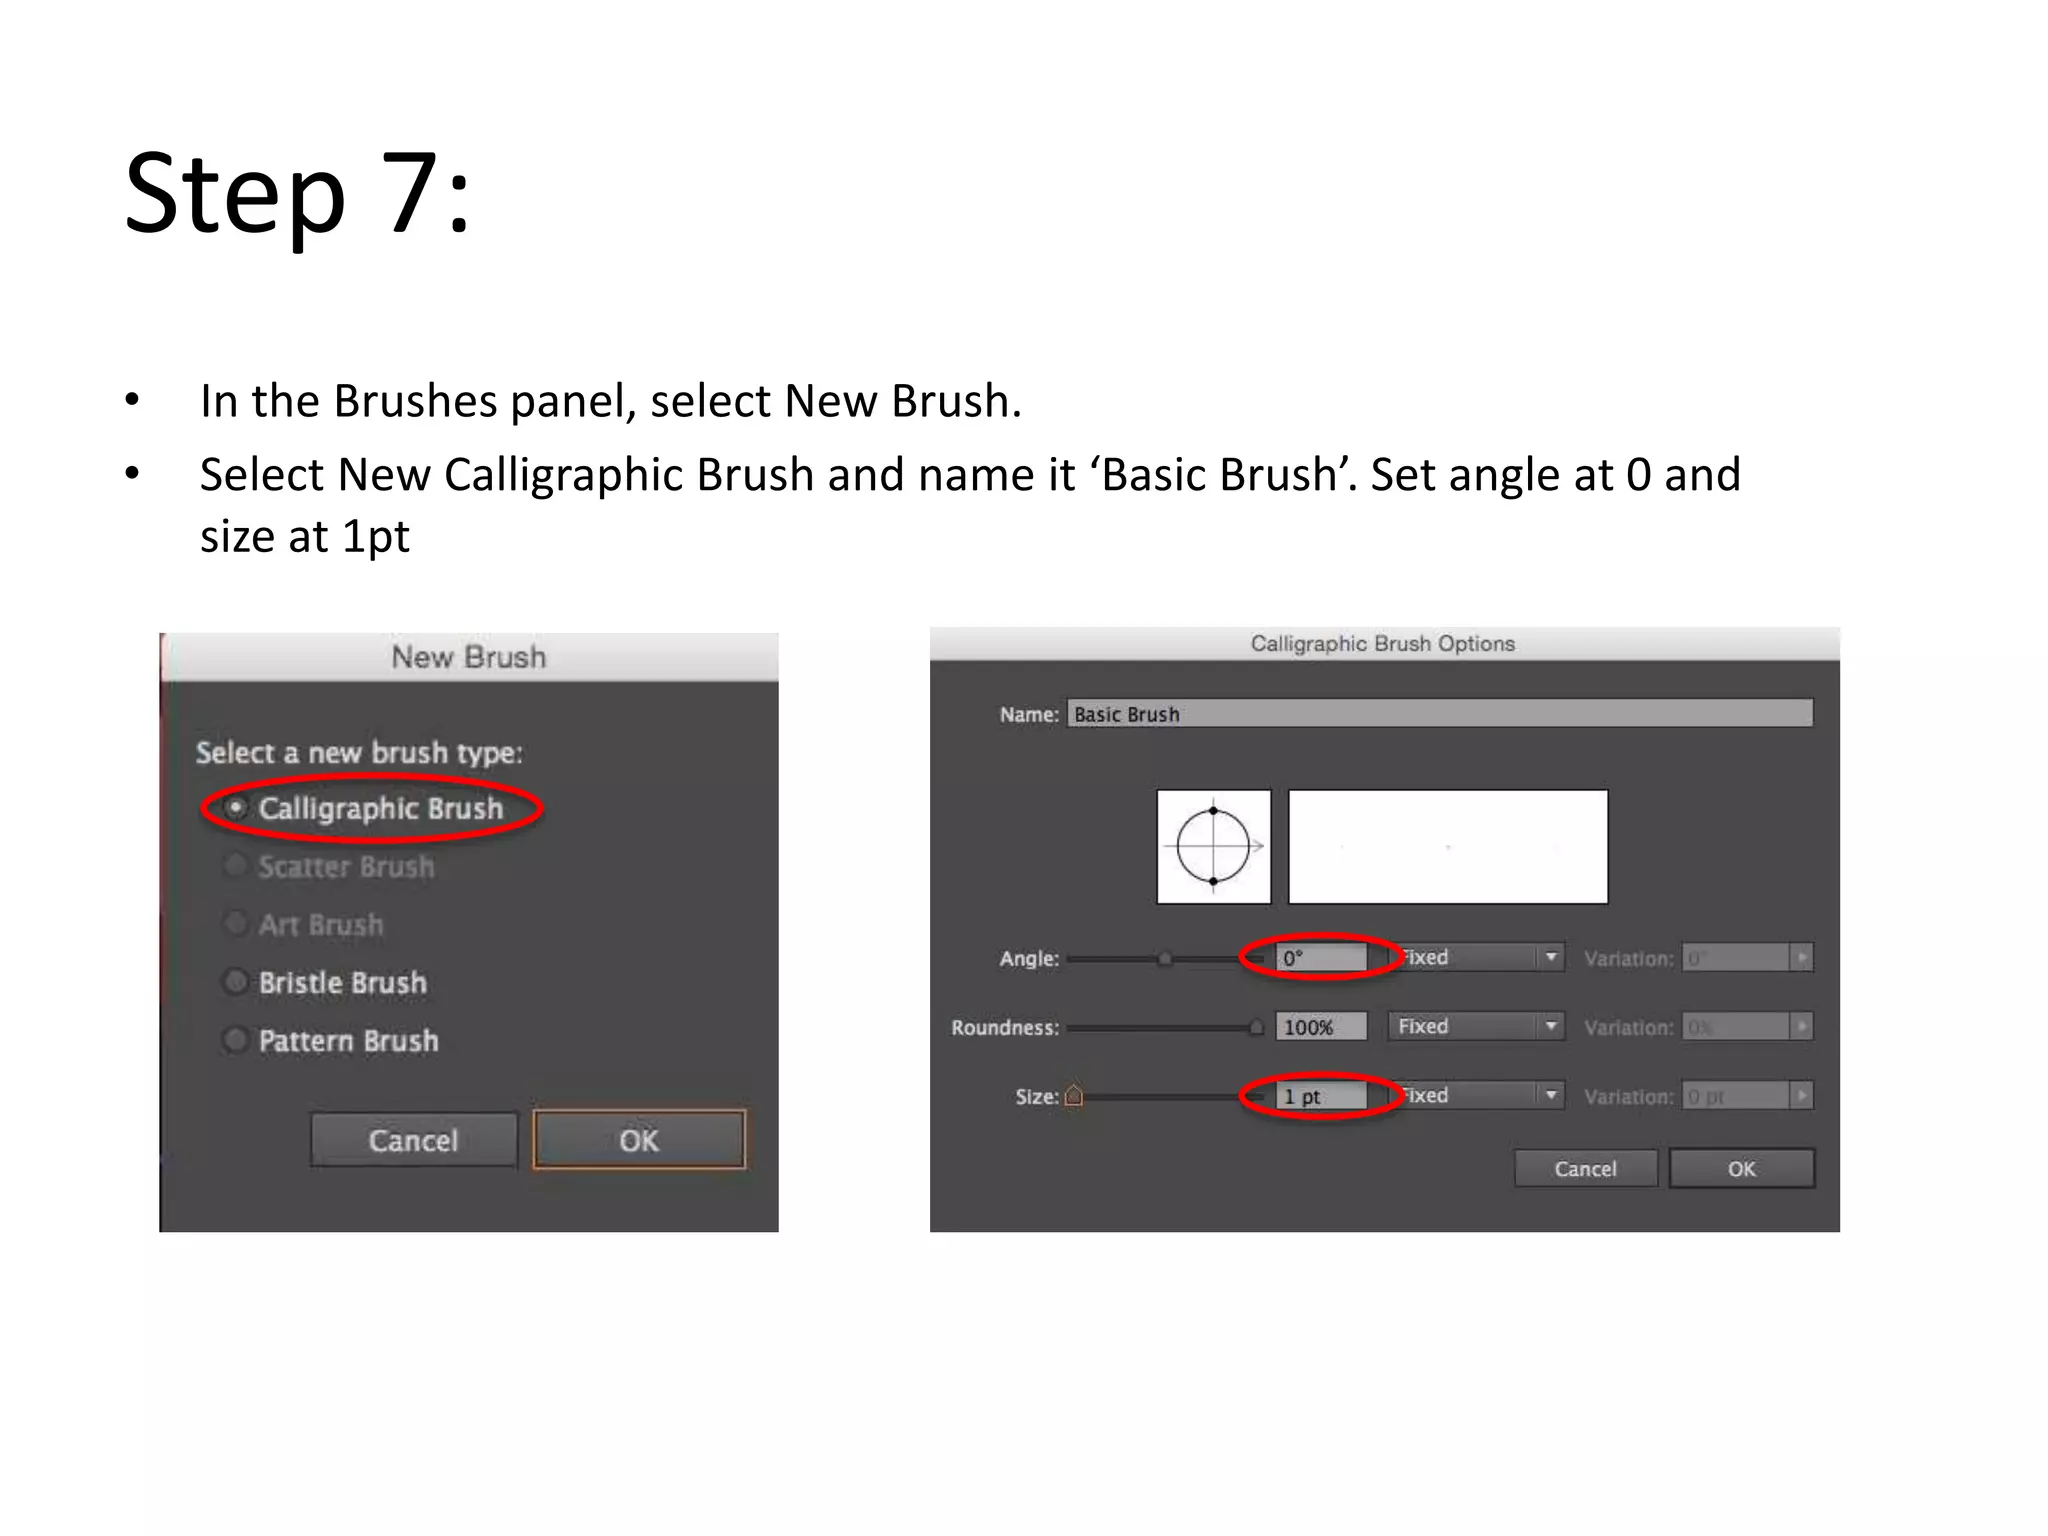
6. Select a brush and trace over the image, following shapes and blocks of color.


![Christine rose nd. tipones [gr. 11 abm, caritas]](https://cdn.slidesharecdn.com/ss_thumbnails/christinerosend-190129074921-thumbnail.jpg?width=640&height=640&fit=bounds)