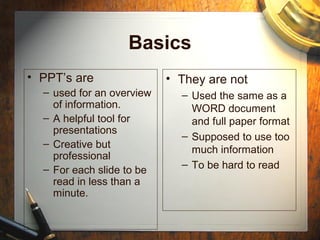
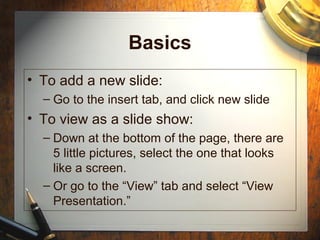
PowerPoint Information
Basics
• PPT’s are
– used for an overview
of information.
– A helpful tool for
presentations
– Creative but
professional
– For each slide to be
read in less than a
minute.
• They are not
– Used the same as a
WORD document
and full paper format
– Supposed to use too
much information
– To be hard to read
Basics
• To add a new slide:
– Go to the insert tab, and click new slide
• To view as a slide show:
– Down at the bottom of the page, there are
5 little pictures, select the one that looks
like a screen.
– Or go to the “View” tab and select “View
Presentation.”
Formatting
• To change slide format:
– 1. Use the formatting palette (toolbars)
• This includes changing colors, text boxes,
borders, animation, etc.
– 2. In the format tab, select slide design,
layout, color scheme or background.
– To change background color, right click on
the background and select format
background.
Pictures
• To add pictures:
– To add clip art/pictures/etc, choose the
insert tab.
– If using clip art, choose ‘Picture’ then ‘Clip
Art.’
– If using a saved image from your computer,
choose ‘Picture” then ‘From File.’
Formatting Pictures
• After inserting a picture, you can:
– Change the brightness/ contrast
– Change the coloring
– Change the background (sometimes)
– Crop the picture
• This is all done in the Picture Tools tab, in the
Format section. (The picture must be
selected in order for this tab to show.)
• By right-clicking on the picture, there are
other formatting options.
Formatting Pictures
• Cropping:
– Choose crop
– Drag the edges to where you want to cut
• Change color:
– Choose the “recolor” button. You can
change to many different colors.
– Also in recolor is “Set Transparent Color”
which can take the white background out of
most pictures.
Formatting Pictures
• Picture Effects:
– You can add blurry edges and change the
look of pictures in this button.
• Location:
– You can put a picture behind text or in front
of text
– Do this by selecting the Bring to front/back/
etc button in the format tab.
Sounds
• To insert sounds or movies:
– Choose the ‘Insert’ tab again and choose
sounds from gallery. This will give you
sounds already loaded on the computer.
– For movies, follow same instructions and
choose ‘Movie’ instead.
Animations
• Animations are how the slides and
information on the slides become
visible.
– Example, slides can move in from the
right/left/center/top/etc.
– Information can zoom in separately instead
of all together.
Animations
• To add an animation to the slide:
– Go to Slide Transitions in the Slide Show tab.
– Choose which one you would like and preview.
• To add animation to text on a slide:
– Go to Slide Show tab and choose Custom/Preset
transitions
– Choose what you would like and preview.
If All Else Fails...
USE HELP!!!!!

PowerPoint Lesson

  • 1.
  • 2.
    Basics • PPT’s are –used for an overview of information. – A helpful tool for presentations – Creative but professional – For each slide to be read in less than a minute. • They are not – Used the same as a WORD document and full paper format – Supposed to use too much information – To be hard to read
  • 3.
    Basics • To adda new slide: – Go to the insert tab, and click new slide • To view as a slide show: – Down at the bottom of the page, there are 5 little pictures, select the one that looks like a screen. – Or go to the “View” tab and select “View Presentation.”
  • 4.
    Formatting • To changeslide format: – 1. Use the formatting palette (toolbars) • This includes changing colors, text boxes, borders, animation, etc. – 2. In the format tab, select slide design, layout, color scheme or background. – To change background color, right click on the background and select format background.
  • 5.
    Pictures • To addpictures: – To add clip art/pictures/etc, choose the insert tab. – If using clip art, choose ‘Picture’ then ‘Clip Art.’ – If using a saved image from your computer, choose ‘Picture” then ‘From File.’
  • 6.
    Formatting Pictures • Afterinserting a picture, you can: – Change the brightness/ contrast – Change the coloring – Change the background (sometimes) – Crop the picture • This is all done in the Picture Tools tab, in the Format section. (The picture must be selected in order for this tab to show.) • By right-clicking on the picture, there are other formatting options.
  • 7.
    Formatting Pictures • Cropping: –Choose crop – Drag the edges to where you want to cut • Change color: – Choose the “recolor” button. You can change to many different colors. – Also in recolor is “Set Transparent Color” which can take the white background out of most pictures.
  • 8.
    Formatting Pictures • PictureEffects: – You can add blurry edges and change the look of pictures in this button. • Location: – You can put a picture behind text or in front of text – Do this by selecting the Bring to front/back/ etc button in the format tab.
  • 9.
    Sounds • To insertsounds or movies: – Choose the ‘Insert’ tab again and choose sounds from gallery. This will give you sounds already loaded on the computer. – For movies, follow same instructions and choose ‘Movie’ instead.
  • 10.
    Animations • Animations arehow the slides and information on the slides become visible. – Example, slides can move in from the right/left/center/top/etc. – Information can zoom in separately instead of all together.
  • 11.
    Animations • To addan animation to the slide: – Go to Slide Transitions in the Slide Show tab. – Choose which one you would like and preview. • To add animation to text on a slide: – Go to Slide Show tab and choose Custom/Preset transitions – Choose what you would like and preview.
  • 12.
    If All ElseFails... USE HELP!!!!!