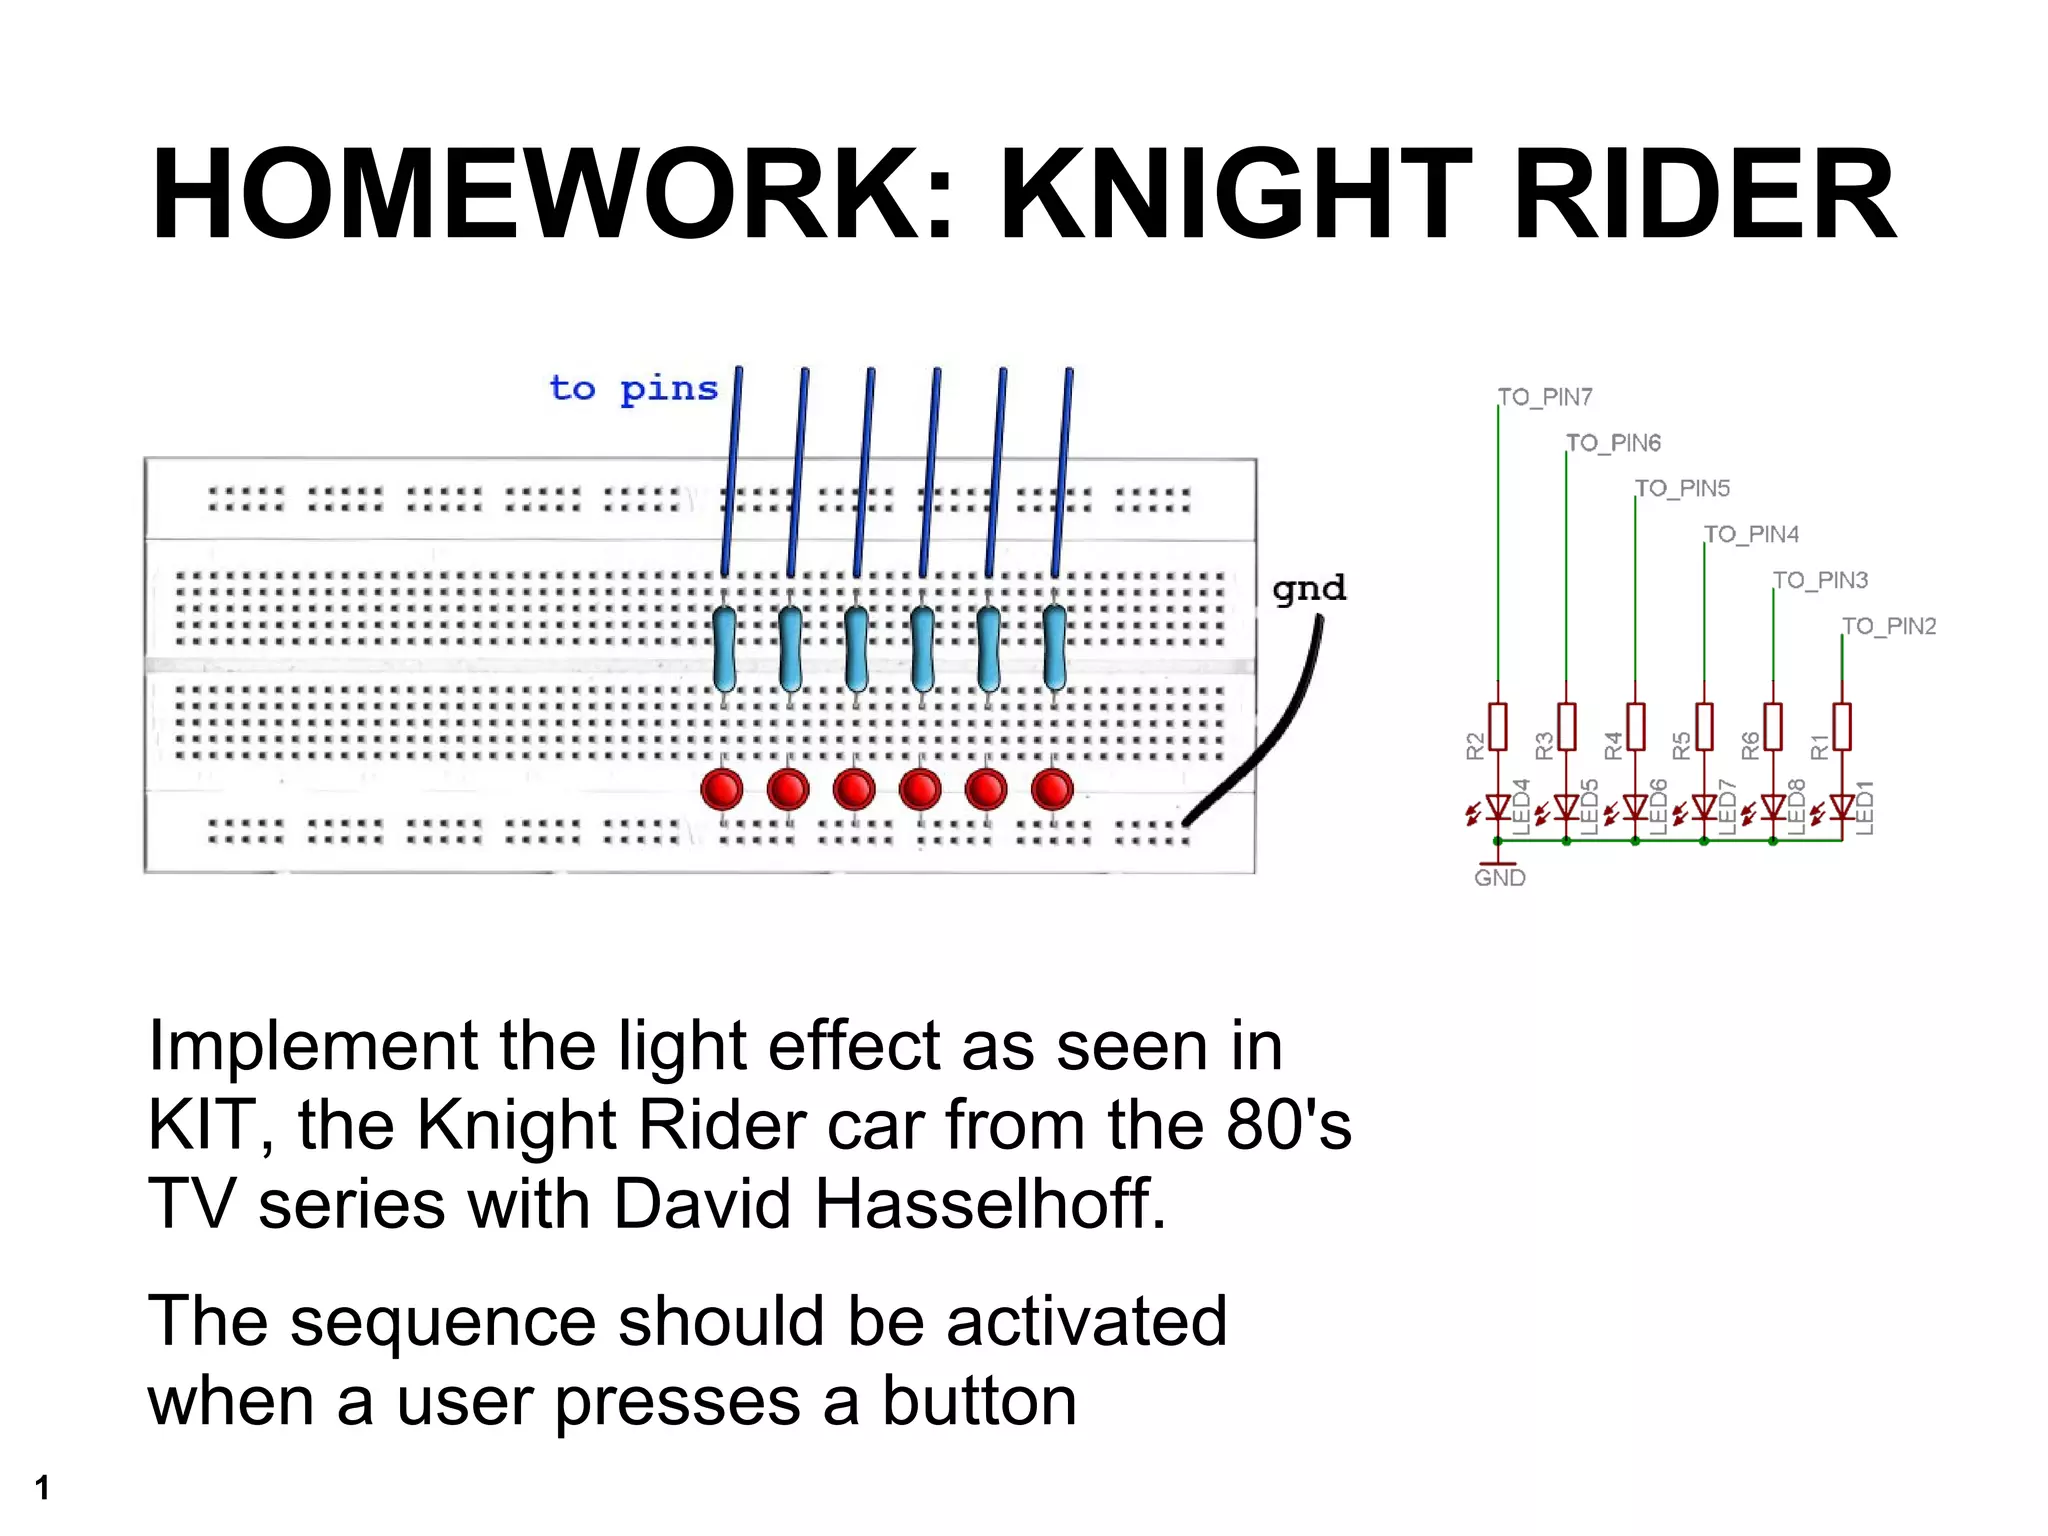
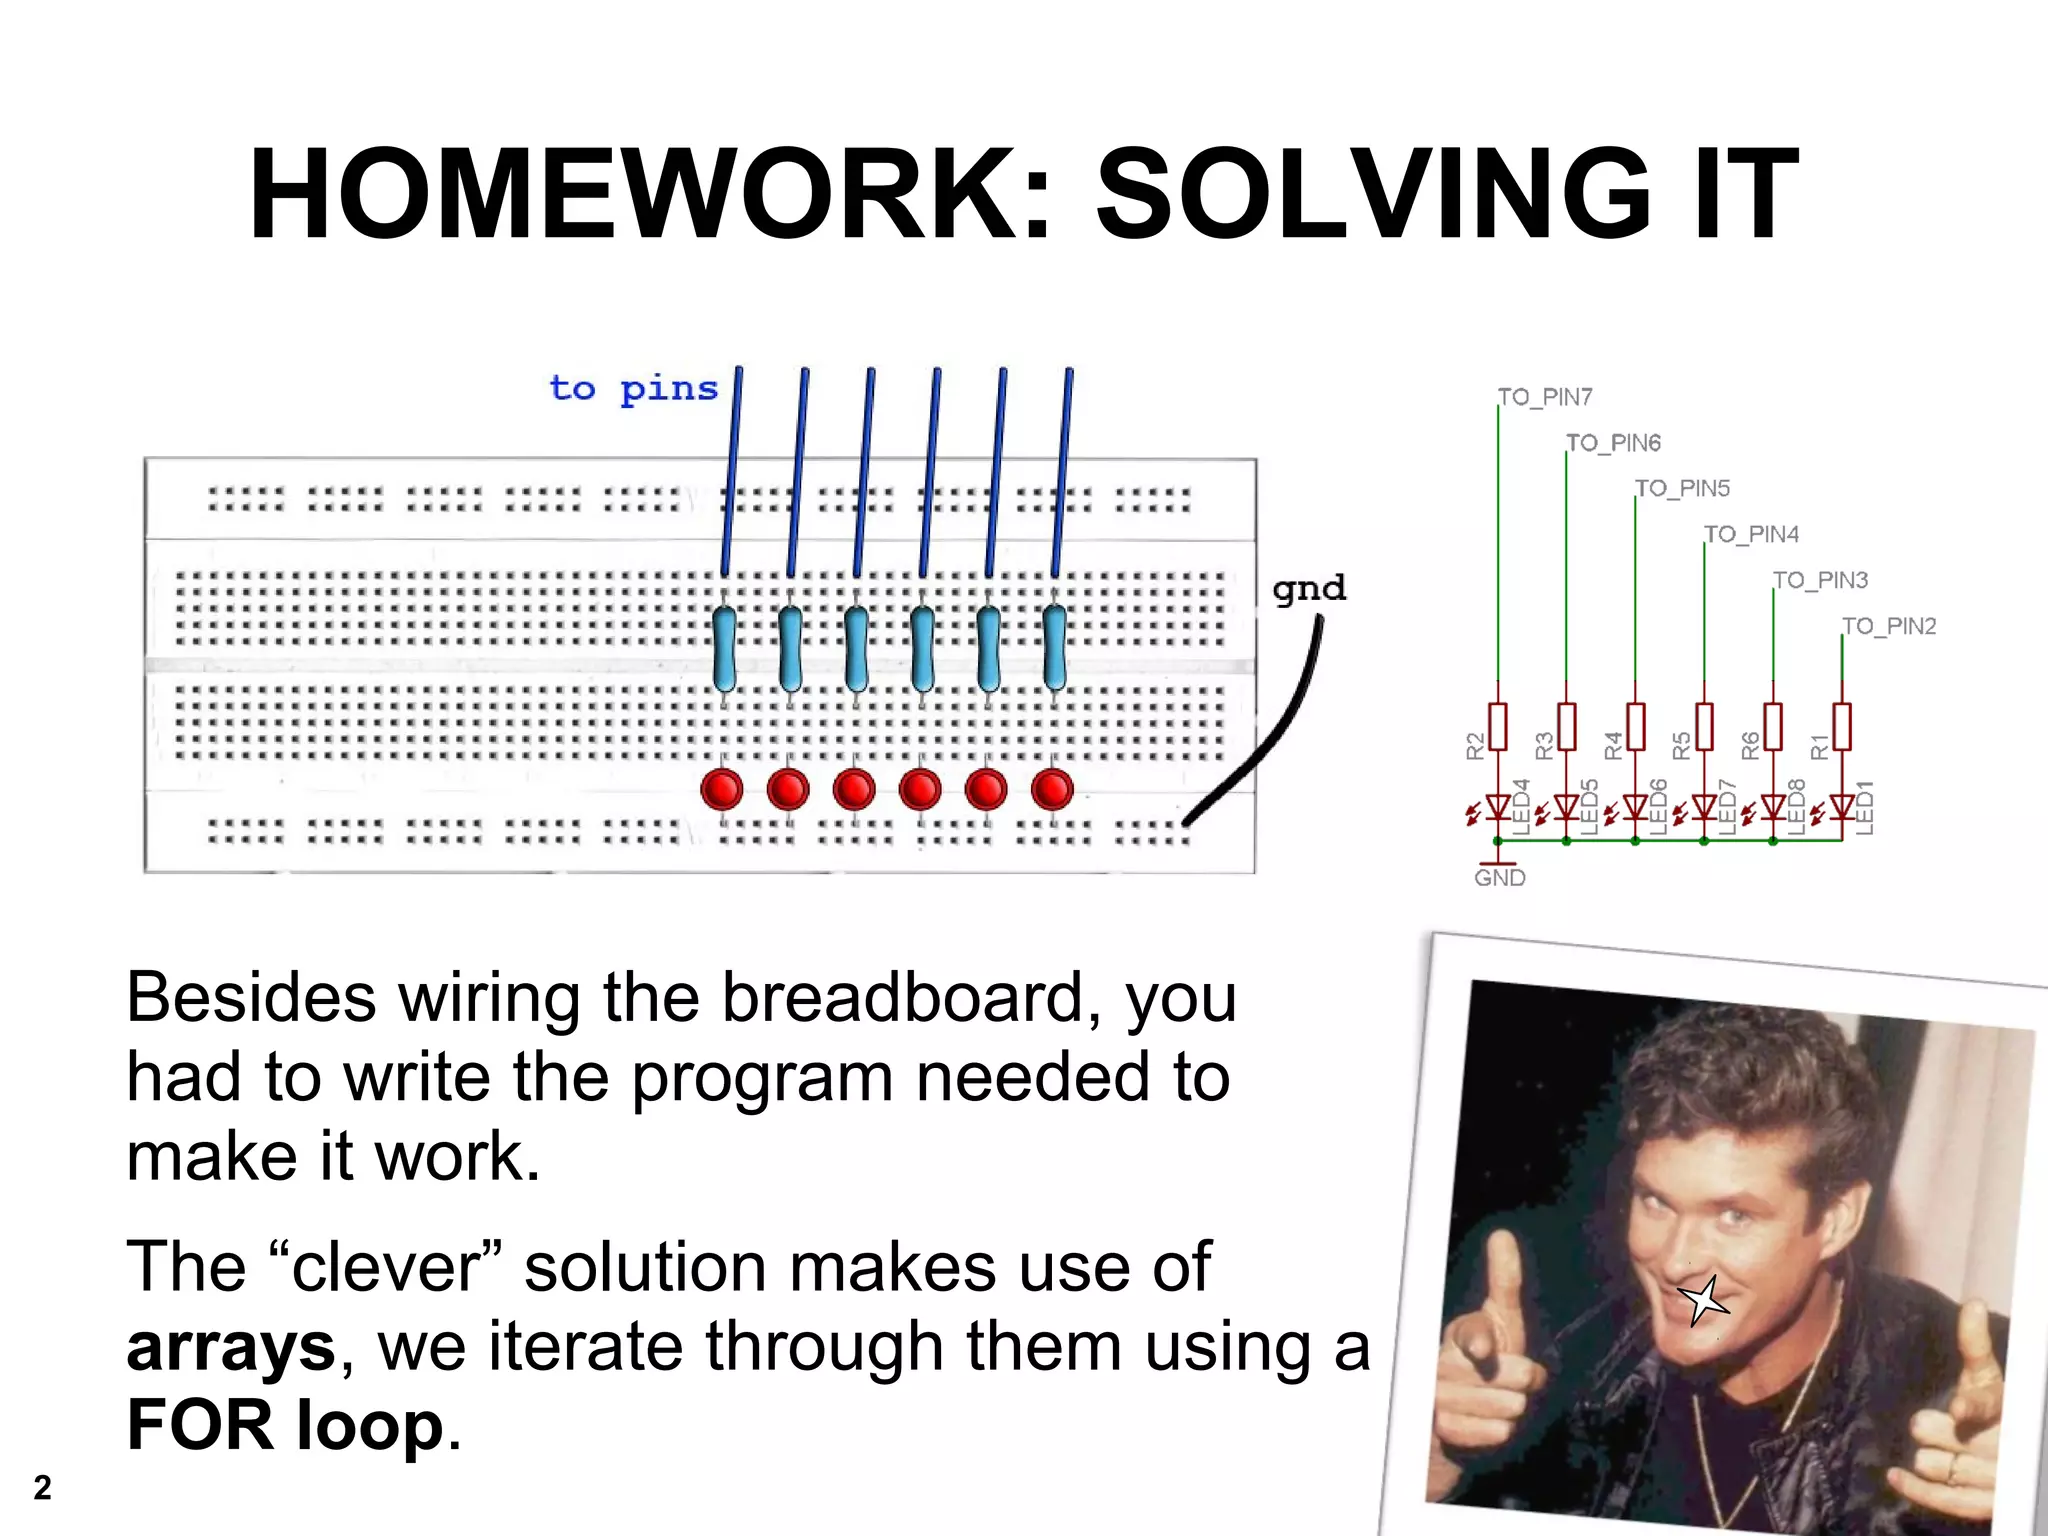
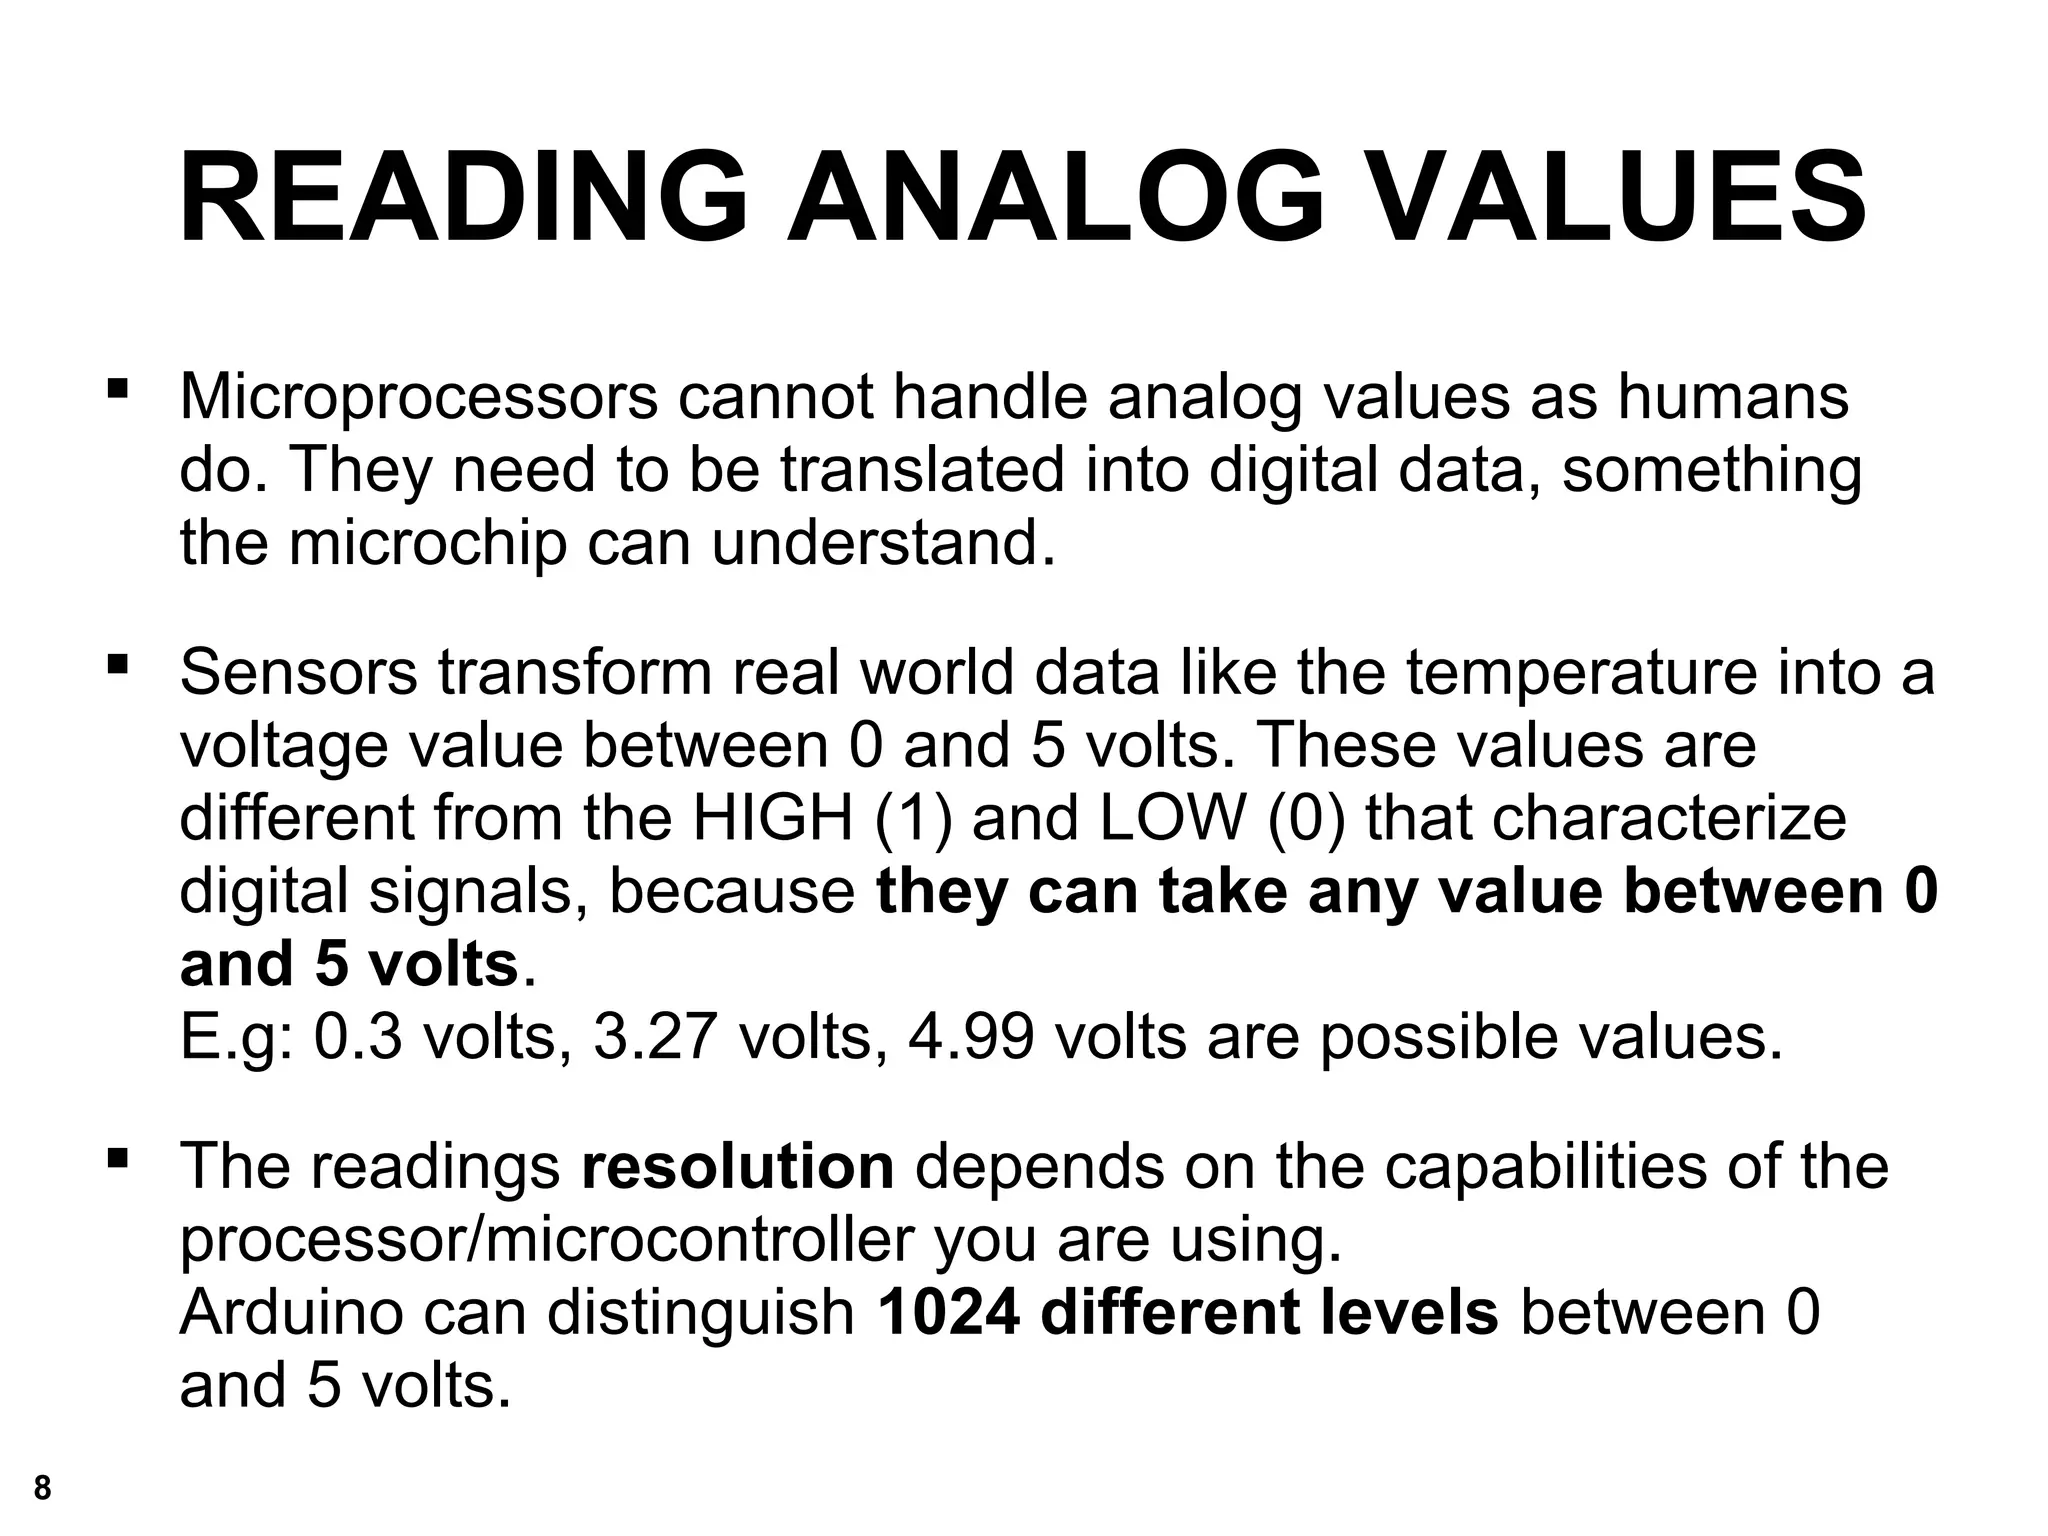
The introduction to Arduino labs at Malmö University. These slides have been handed down since the beginning of Arduino. They have more authors then i can remember and should by no means be considered mine.
School workshop done by Abarajithan G. and students of Electronics Department, University of Moratuwa.
This covers:
* Arduino Boards, Pin types
* Arduino software installation
* If, else, for, while, functions
* LED Blinking
* Library Download & installation
* Serial Communication
* Sonars, QTR Modules, Servos
* Motor Controllers
* PID Algorithm Basics
* Tips to Buying Hardware in Sri Lanka
Embedded system course projects - Arduino CourseElaf A.Saeed
• Arduino IDE.
• P1-Arduino with led.
• P2-Arduino with push button.
• P3-Arduino with potentiometer.
• P4-Arduino with PWM.
• P5-Arduino with LCD.
• P6-Arduino with PIR.
• P7-Arduino with DHT11
• P8-Arduino with LM35.
• P9-Arduino with gas sensor.
• P10-Arduino with dc motor.
• P11-Arduino with Servo Motor.
• P12-Arduino with Bluetooth.
• P13-Arduino with ultrasonic.
• P14-Arduino with IR sensor.
--------------------------------------------------------
Email: elafe1888@gmail.com
linkden: www.linkedin.com/in/elaf-a-saeed-97bbb6150
facebook: https://www.facebook.com/profile.php?id=100004305557442
github: https://github.com/ElafAhmedSaeed
youtube: https://youtube.com/channel/UCE_RiXkyqREUdLAiZcbBqSg
slideshare: https://www.slideshare.net/ElafASaeed
Slideplayer: https://slideplayer.com/search/?q=Elaf+A.Saeed
Google Scholar: https://scholar.google.com/citations?user=VIpVZKkAAAAJ&hl=ar&gmla=AJsN-F7PIgAjWJ44Hzb18fwPqJaaUmG0XzbLdzx09
The Qt GUI for Arduino is an application that allows to connect Arduino Uno/Mega boards with Desktop operating systems like(Windows,Ubuntu,Macintosh)in an easy way, the communication between Arduino and computer happens over Serial Port channel.Arduino and computer are connected by USB.Arduino uses digital pins 0 (RX) and 1 (TX),for serial port communication. It is easy to create a customizable HMI(Human Machine Interface) using Qt Widgets like Slider,Dial,Label and over 50 other GUI controls available in the library. Qt Widgets can serve both as IO(Input and Output) to the Arduino, two cases are studied for visualizing the input and output data. sending serial commands from Qt GUI to Arduino,and receiving the serial stream data coming from Arduino to computer finally displaying it on Qt GUI.
Case1: Qt GUI as Input to Arduino Microcontroller(Control brightness of LED.)
Create a custom graphical user interface (Qt GUI), that can communicate with Arduino Serial port, and facilitate brightness control of an LED .
Case 2: Qt GUI as Display screen(Ouput Device)Read RPM of a DC Motor
Create a custom graphical user interface (GUI), that can communicate with Arduino by reading RPM of a Motor.By reading the serial stream data coming from Arduino to Desktop GUI can be updated with the motor RPM.
How to measure frequency and duty cycle using arduinoSagar Srivastav
Source - http://www.engineersgarage.com
Arduino has several applications. We may find its application in many different fields and areas. It can be used in measurement field also to measure electrical quantities (like voltage, current, power etc) or physical quantities (like temperature, moisture, light intensity, humidity etc) or electronic component values etc.
Arduino
What is Arduino?
Arduino is an open-source hardware and software company, project, and user community that designs and manufactures single-board microcontrollers and microcontroller kits for building digital devices.
Where is Arduino used in real life?
Today Arduino is used for the control of traffic lights, it can also be used for the real-time control system with programmable timings, pedestrian lighting etc.
With the Arduino, you can design and build devices that can interact with your surroundings.
This articulation is on "Arduino".
This will lead you to know more about Arduino sensors, codings, ports etc.
Hope this assists you.
Thank you!
Arduino coupled with low cost sensors is an incredible opportunity to mix electronic with Physics and to implement field data collection, IBSE and Home Labs (the other face of fliped classrooms)
DevOps and Testing slides at DASA ConnectKari Kakkonen
My and Rik Marselis slides at 30.5.2024 DASA Connect conference. We discuss about what is testing, then what is agile testing and finally what is Testing in DevOps. Finally we had lovely workshop with the participants trying to find out different ways to think about quality and testing in different parts of the DevOps infinity loop.
Essentials of Automations: Optimizing FME Workflows with ParametersSafe Software
Are you looking to streamline your workflows and boost your projects’ efficiency? Do you find yourself searching for ways to add flexibility and control over your FME workflows? If so, you’re in the right place.
Join us for an insightful dive into the world of FME parameters, a critical element in optimizing workflow efficiency. This webinar marks the beginning of our three-part “Essentials of Automation” series. This first webinar is designed to equip you with the knowledge and skills to utilize parameters effectively: enhancing the flexibility, maintainability, and user control of your FME projects.
Here’s what you’ll gain:
- Essentials of FME Parameters: Understand the pivotal role of parameters, including Reader/Writer, Transformer, User, and FME Flow categories. Discover how they are the key to unlocking automation and optimization within your workflows.
- Practical Applications in FME Form: Delve into key user parameter types including choice, connections, and file URLs. Allow users to control how a workflow runs, making your workflows more reusable. Learn to import values and deliver the best user experience for your workflows while enhancing accuracy.
- Optimization Strategies in FME Flow: Explore the creation and strategic deployment of parameters in FME Flow, including the use of deployment and geometry parameters, to maximize workflow efficiency.
- Pro Tips for Success: Gain insights on parameterizing connections and leveraging new features like Conditional Visibility for clarity and simplicity.
We’ll wrap up with a glimpse into future webinars, followed by a Q&A session to address your specific questions surrounding this topic.
Don’t miss this opportunity to elevate your FME expertise and drive your projects to new heights of efficiency.
Connector Corner: Automate dynamic content and events by pushing a buttonDianaGray10
Here is something new! In our next Connector Corner webinar, we will demonstrate how you can use a single workflow to:
Create a campaign using Mailchimp with merge tags/fields
Send an interactive Slack channel message (using buttons)
Have the message received by managers and peers along with a test email for review
But there’s more:
In a second workflow supporting the same use case, you’ll see:
Your campaign sent to target colleagues for approval
If the “Approve” button is clicked, a Jira/Zendesk ticket is created for the marketing design team
But—if the “Reject” button is pushed, colleagues will be alerted via Slack message
Join us to learn more about this new, human-in-the-loop capability, brought to you by Integration Service connectors.
And...
Speakers:
Akshay Agnihotri, Product Manager
Charlie Greenberg, Host
Builder.ai Founder Sachin Dev Duggal's Strategic Approach to Create an Innova...Ramesh Iyer
In today's fast-changing business world, Companies that adapt and embrace new ideas often need help to keep up with the competition. However, fostering a culture of innovation takes much work. It takes vision, leadership and willingness to take risks in the right proportion. Sachin Dev Duggal, co-founder of Builder.ai, has perfected the art of this balance, creating a company culture where creativity and growth are nurtured at each stage.
Key Trends Shaping the Future of Infrastructure.pdfCheryl Hung
Keynote at DIGIT West Expo, Glasgow on 29 May 2024.
Cheryl Hung, ochery.com
Sr Director, Infrastructure Ecosystem, Arm.
The key trends across hardware, cloud and open-source; exploring how these areas are likely to mature and develop over the short and long-term, and then considering how organisations can position themselves to adapt and thrive.
UiPath Test Automation using UiPath Test Suite series, part 3DianaGray10
Welcome to UiPath Test Automation using UiPath Test Suite series part 3. In this session, we will cover desktop automation along with UI automation.
Topics covered:
UI automation Introduction,
UI automation Sample
Desktop automation flow
Pradeep Chinnala, Senior Consultant Automation Developer @WonderBotz and UiPath MVP
Deepak Rai, Automation Practice Lead, Boundaryless Group and UiPath MVP
Search and Society: Reimagining Information Access for Radical FuturesBhaskar Mitra
The field of Information retrieval (IR) is currently undergoing a transformative shift, at least partly due to the emerging applications of generative AI to information access. In this talk, we will deliberate on the sociotechnical implications of generative AI for information access. We will argue that there is both a critical necessity and an exciting opportunity for the IR community to re-center our research agendas on societal needs while dismantling the artificial separation between the work on fairness, accountability, transparency, and ethics in IR and the rest of IR research. Instead of adopting a reactionary strategy of trying to mitigate potential social harms from emerging technologies, the community should aim to proactively set the research agenda for the kinds of systems we should build inspired by diverse explicitly stated sociotechnical imaginaries. The sociotechnical imaginaries that underpin the design and development of information access technologies needs to be explicitly articulated, and we need to develop theories of change in context of these diverse perspectives. Our guiding future imaginaries must be informed by other academic fields, such as democratic theory and critical theory, and should be co-developed with social science scholars, legal scholars, civil rights and social justice activists, and artists, among others.
JMeter webinar - integration with InfluxDB and GrafanaRTTS
Watch this recorded webinar about real-time monitoring of application performance. See how to integrate Apache JMeter, the open-source leader in performance testing, with InfluxDB, the open-source time-series database, and Grafana, the open-source analytics and visualization application.
In this webinar, we will review the benefits of leveraging InfluxDB and Grafana when executing load tests and demonstrate how these tools are used to visualize performance metrics.
Length: 30 minutes
Session Overview
-------------------------------------------
During this webinar, we will cover the following topics while demonstrating the integrations of JMeter, InfluxDB and Grafana:
- What out-of-the-box solutions are available for real-time monitoring JMeter tests?
- What are the benefits of integrating InfluxDB and Grafana into the load testing stack?
- Which features are provided by Grafana?
- Demonstration of InfluxDB and Grafana using a practice web application
To view the webinar recording, go to:
https://www.rttsweb.com/jmeter-integration-webinar
Epistemic Interaction - tuning interfaces to provide information for AI supportAlan Dix
Paper presented at SYNERGY workshop at AVI 2024, Genoa, Italy. 3rd June 2024
https://alandix.com/academic/papers/synergy2024-epistemic/
As machine learning integrates deeper into human-computer interactions, the concept of epistemic interaction emerges, aiming to refine these interactions to enhance system adaptability. This approach encourages minor, intentional adjustments in user behaviour to enrich the data available for system learning. This paper introduces epistemic interaction within the context of human-system communication, illustrating how deliberate interaction design can improve system understanding and adaptation. Through concrete examples, we demonstrate the potential of epistemic interaction to significantly advance human-computer interaction by leveraging intuitive human communication strategies to inform system design and functionality, offering a novel pathway for enriching user-system engagements.
Transcript: Selling digital books in 2024: Insights from industry leaders - T...BookNet Canada
The publishing industry has been selling digital audiobooks and ebooks for over a decade and has found its groove. What’s changed? What has stayed the same? Where do we go from here? Join a group of leading sales peers from across the industry for a conversation about the lessons learned since the popularization of digital books, best practices, digital book supply chain management, and more.
Link to video recording: https://bnctechforum.ca/sessions/selling-digital-books-in-2024-insights-from-industry-leaders/
Presented by BookNet Canada on May 28, 2024, with support from the Department of Canadian Heritage.
UiPath Test Automation using UiPath Test Suite series, part 4DianaGray10
Welcome to UiPath Test Automation using UiPath Test Suite series part 4. In this session, we will cover Test Manager overview along with SAP heatmap.
The UiPath Test Manager overview with SAP heatmap webinar offers a concise yet comprehensive exploration of the role of a Test Manager within SAP environments, coupled with the utilization of heatmaps for effective testing strategies.
Participants will gain insights into the responsibilities, challenges, and best practices associated with test management in SAP projects. Additionally, the webinar delves into the significance of heatmaps as a visual aid for identifying testing priorities, areas of risk, and resource allocation within SAP landscapes. Through this session, attendees can expect to enhance their understanding of test management principles while learning practical approaches to optimize testing processes in SAP environments using heatmap visualization techniques
What will you get from this session?
1. Insights into SAP testing best practices
2. Heatmap utilization for testing
3. Optimization of testing processes
4. Demo
Topics covered:
Execution from the test manager
Orchestrator execution result
Defect reporting
SAP heatmap example with demo
Speaker:
Deepak Rai, Automation Practice Lead, Boundaryless Group and UiPath MVP
UiPath Test Automation using UiPath Test Suite series, part 4
Physical prototyping lab2-analog_digital
1. Implement the light effect as seen in
KIT, the Knight Rider car from the 80's
TV series with David Hasselhoff.
The sequence should be activated
when a user presses a button
HOMEWORK: KNIGHT RIDER
1
2. HOMEWORK: SOLVING IT
Besides wiring the breadboard, you
had to write the program needed to
make it work.
The “clever” solution makes use of
arrays, we iterate through them using a
FOR loop.
2
4. for(counter=0; counter<end; counter++){}
1)The FOR loop is a software construct that will execute a
block of code a number of times.
2)The code will be looped until a certain condition is met
3)FOR loops are constructed with an initialization value, a
condition statement, and a counting statement
4)We use them to iterate a certain action a determined
amount of times
counter initialization
FOR LOOP
condition counter
increment / decrement
4
5. ARRAYS
1) ARRAYS are sets of indexed values arranged in order in
the processor's memory
2) All the elements in an array have an unique identifier
3) The different “positions” in the array are addressed through
numerical index values between squared brackets
4) Array constructors include the type, and the size of the
array (the number of elements they consist of)
5) The elements of an empty array are NULL (nothing)
6) It is possible to initialize an array with a specific set of
values:
E.g. int theList[] = {1, 3, 'e', 19};
5
6. WHAT IS “ANALOG”?
The real world is NOT digital.
Temperature fluctuation, for example,
involves a range of values and generally
does not changes abruptly over time.
Using analog sensors we measure
environmental parameters like
temperature, light intensity, etc.
These are a set
of analog values
6
7. Are sensors which transform environmental parameters
into a multi-level voltage value (between 0 and 5 volts)
There are many types of sensors that provide us with
analog voltage values:
LDR (or CDS): light dependent resistors aka light
sensors
NTC and PTC: temperature dependent resistors
aka temperature sensors
Potentiometers and sliders: angle and position
dependent resistors
ANALOG SENSORS
7
8. READING ANALOG VALUES
Microprocessors cannot handle analog values as humans
do. They need to be translated into digital data, something
the microchip can understand.
Sensors transform real world data like the temperature into a
voltage value between 0 and 5 volts. These values are
different from the HIGH (1) and LOW (0) that characterize
digital signals, because they can take any value between 0
and 5 volts.
E.g: 0.3 volts, 3.27 volts, 4.99 volts are possible values.
The readings resolution depends on the capabilities of the
processor/microcontroller you are using.
Arduino can distinguish 1024 different levels between 0
and 5 volts.
8
9. Are devices which change resistance (and thus the voltage) when
you twist or slide them.
Arduino can measure the voltage which flows through them.
We can use this data to control other things, like LED’s.
We call potentiometer those that rotate around one of their axis
We call sliders those that move linearly along one of their axis
POTENTIOMETERS vs SLIDERS
A circuit using a
potentiometer
A circuit using a
slider
9
10. CONNECTING THE POTENTIOMETER
Potentiometers are useful for improvising quick interfaces.
The recommended resistive value is 10 Kilo Ohms. (10K)
On the Arduino board there are 6 Analog Input pins, they are
numbered from 0 to 5.
Analog inputs are not declared in the setup of the programs,
unlike the Digital Inputs.
We will use this easy circuit to control the oscillation speed of the
basic Blink-LED example
10
11. analogRead(pin number);
Returns the value from a specific analog
port
Values from 0 to 1023
0v = 0
5v = 1023
READING THE SENSOR
11
12. int potPin = 2; // select the input pin for the potentiometer
int ledPin = 13; // select the pin for the LED
int val = 0; // variable to store the value coming from the
// sensor
void setup() {
pinMode(ledPin, OUTPUT); // declare the ledPin as an OUTPUT
}
void loop() {
val = analogRead(potPin); // read the value from the sensor
digitalWrite(ledPin, HIGH); // turn the ledPin on
delay(val); // stop the program for some time
digitalWrite(ledPin, LOW); // turn the ledPin off
delay(val); // stop the program for some time
}
EXAMPLES ► ANALOG ►
ANALOG INPUT
13. LDR
Light dependent resistor
We call the resistor a “pull up” resistor
It is usually 10K
You can use exactly the same code as in the previous example
13
14. FADING LEDS
1) LEDs are Light Emmitting Diodes, and can only be turned on
or off.
2) However, it is possible to fake their level of intensity through
the use of a mathematical trick called PWM (Pulse Width
Modulation) which will be explained later.
3) In essence, what you need to know for making the next
experiment, is that there is a function called analogWrite(pin,
intensity) that will write an analog value to one of the PWM-
labelled pins on your prototyping boards.
4) PWM runs in parallel to the rest of Arduino, which means
it will not stop any of the other processes which are running.
5) Hook up one LED with it's correspondent resistor to
e.g. pin 10, and execute the following example.
14
15. EXAMPLES ► ANALOG ► FADING LED
int value = 0; // variable to keep the actual value
int ledpin = 9; // light connected to digital pin 9
void setup() { // nothing for setup
}
void loop() {
for(value = 0; value <= 255; value+=5) // fade in (from min to max)
{
analogWrite(ledpin, value);
delay(30); // waits for 30 milliseconds
}
for(value = 255; value >=0; value-=5) // fade out (from max to min)
{
analogWrite(ledpin, value);
delay(30);
}
}
16. SERIAL COMMUNICATION
USING THE SERIAL LIBRARY
Serial.xxxx
Serial defines a method to use the serial port
Serial.begin(baud);
Placed in setup to initiate serial communication ”baud” is baudrate
(”communication-speed”)
Serial.print();
Writes (sends) something to the serial port
Serial.println();
Writes (sends) with cr and lf
16
17. PROGRAMMING SUMMARY
Commonly used Arduino methods:
int analogRead(pin);
reads an analog value from an analog pin number
analogWrite(pin, value);
writes a time-dependant signal through the use of the
so-called PWM pins
Serial.println(data);
sends data back to the computer to be seen through the
serial monitor
Serial.begin(baud);
opens the serial communication at baud speed
17
Editor's Notes
Encourage people to interrupt you so you can help them immediately. Explain they do you a favor.
It’s good to time the duration of the presentation.
Explain the three parameters.
Again use the cooky jar analogy.
Explain the importance of positions.
Position 0 is the first position in the array. Instead of 1.
Find an explanatory picture
The real world has a range of values between 0 and 1. Arduino does not understand ranges of values.
The analog pins are used to transform values between a resistance measurement between 0 and 5 volts, chopped up in a range of 1024 values.
LDR means Light Dependent Resistor. Resistor which changes value based on the amount of light.
NTC, temperature sensor, gives value between 0 and 1024 based on temperature. NTC means Negative Temperature Coefficient resistor, NTC’s are also called Thermistors.
Potentiometers and sliders.
These are commonly used in equalizers, and hi-fi sets and other consumer electronics.
Explain potentiometer. It used 3 pins, An analog pin, power and ground.
You actually measure the resistance through the potentiometer to the ground.
Always connect the middle pin on the potentiometer to an analog pin first, because if you mix the pins up then it burns out!
The power and ground pins don’t matter which way around you connect them, only the values will be inverted.
Explain analogRead.
When it reads 0 it means there is 0 volts going through the potentiometer, if it shows 1023 then 5 volts is going through it.
Finns det tid så kombinera med knight ridern!
Do a livecoding session showing the analog input session
Explain how you can make an LED burn at half brightness by quickly turning it on and off.
Water analogy: Turning on and off a water tap to make a steady flow.
PWM pins: 3,5,6,10,11 identifiable the tilde ~ sign.
Now finally Windows users can have that nice fading LED effect when they charge their computer. ;)
Let’s do live coding here also, the fading LED example
Next time: Serial communication.
Serial communication is a library so we can call it when we need it.
You don’t always need it so you can save space by leaving it out.
Use println to print out data on a new line. Otherwise it lines up and becomes illegible.
What we explained now is 90% of all the code you ever need to write.
CR = carriage return
LF = line feed