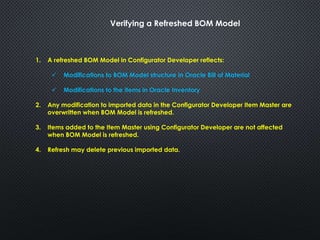
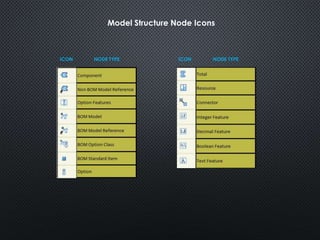
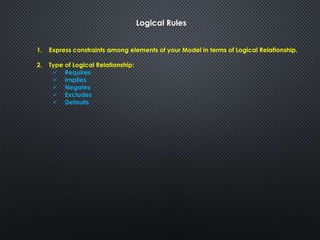
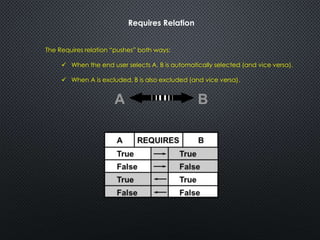
Downloaded 215 times
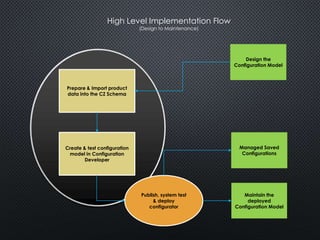

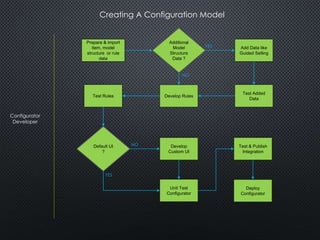
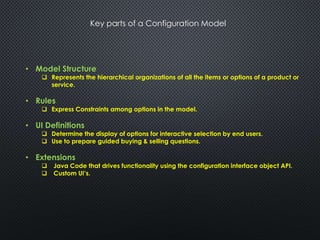


The document describes the process of designing, developing, testing, and maintaining a configuration model in Oracle Configurator. It includes steps for creating the configuration model structure and rules, importing BOM and inventory data, developing the UI, testing, publishing the model, and refreshing imported data. Key aspects covered are the model structure, logical rules, importing BOM models and data, UI templates, publishing models, and refreshing imported BOM data.