This document provides instructions for creating a splash page website using Dreamweaver. The steps include:
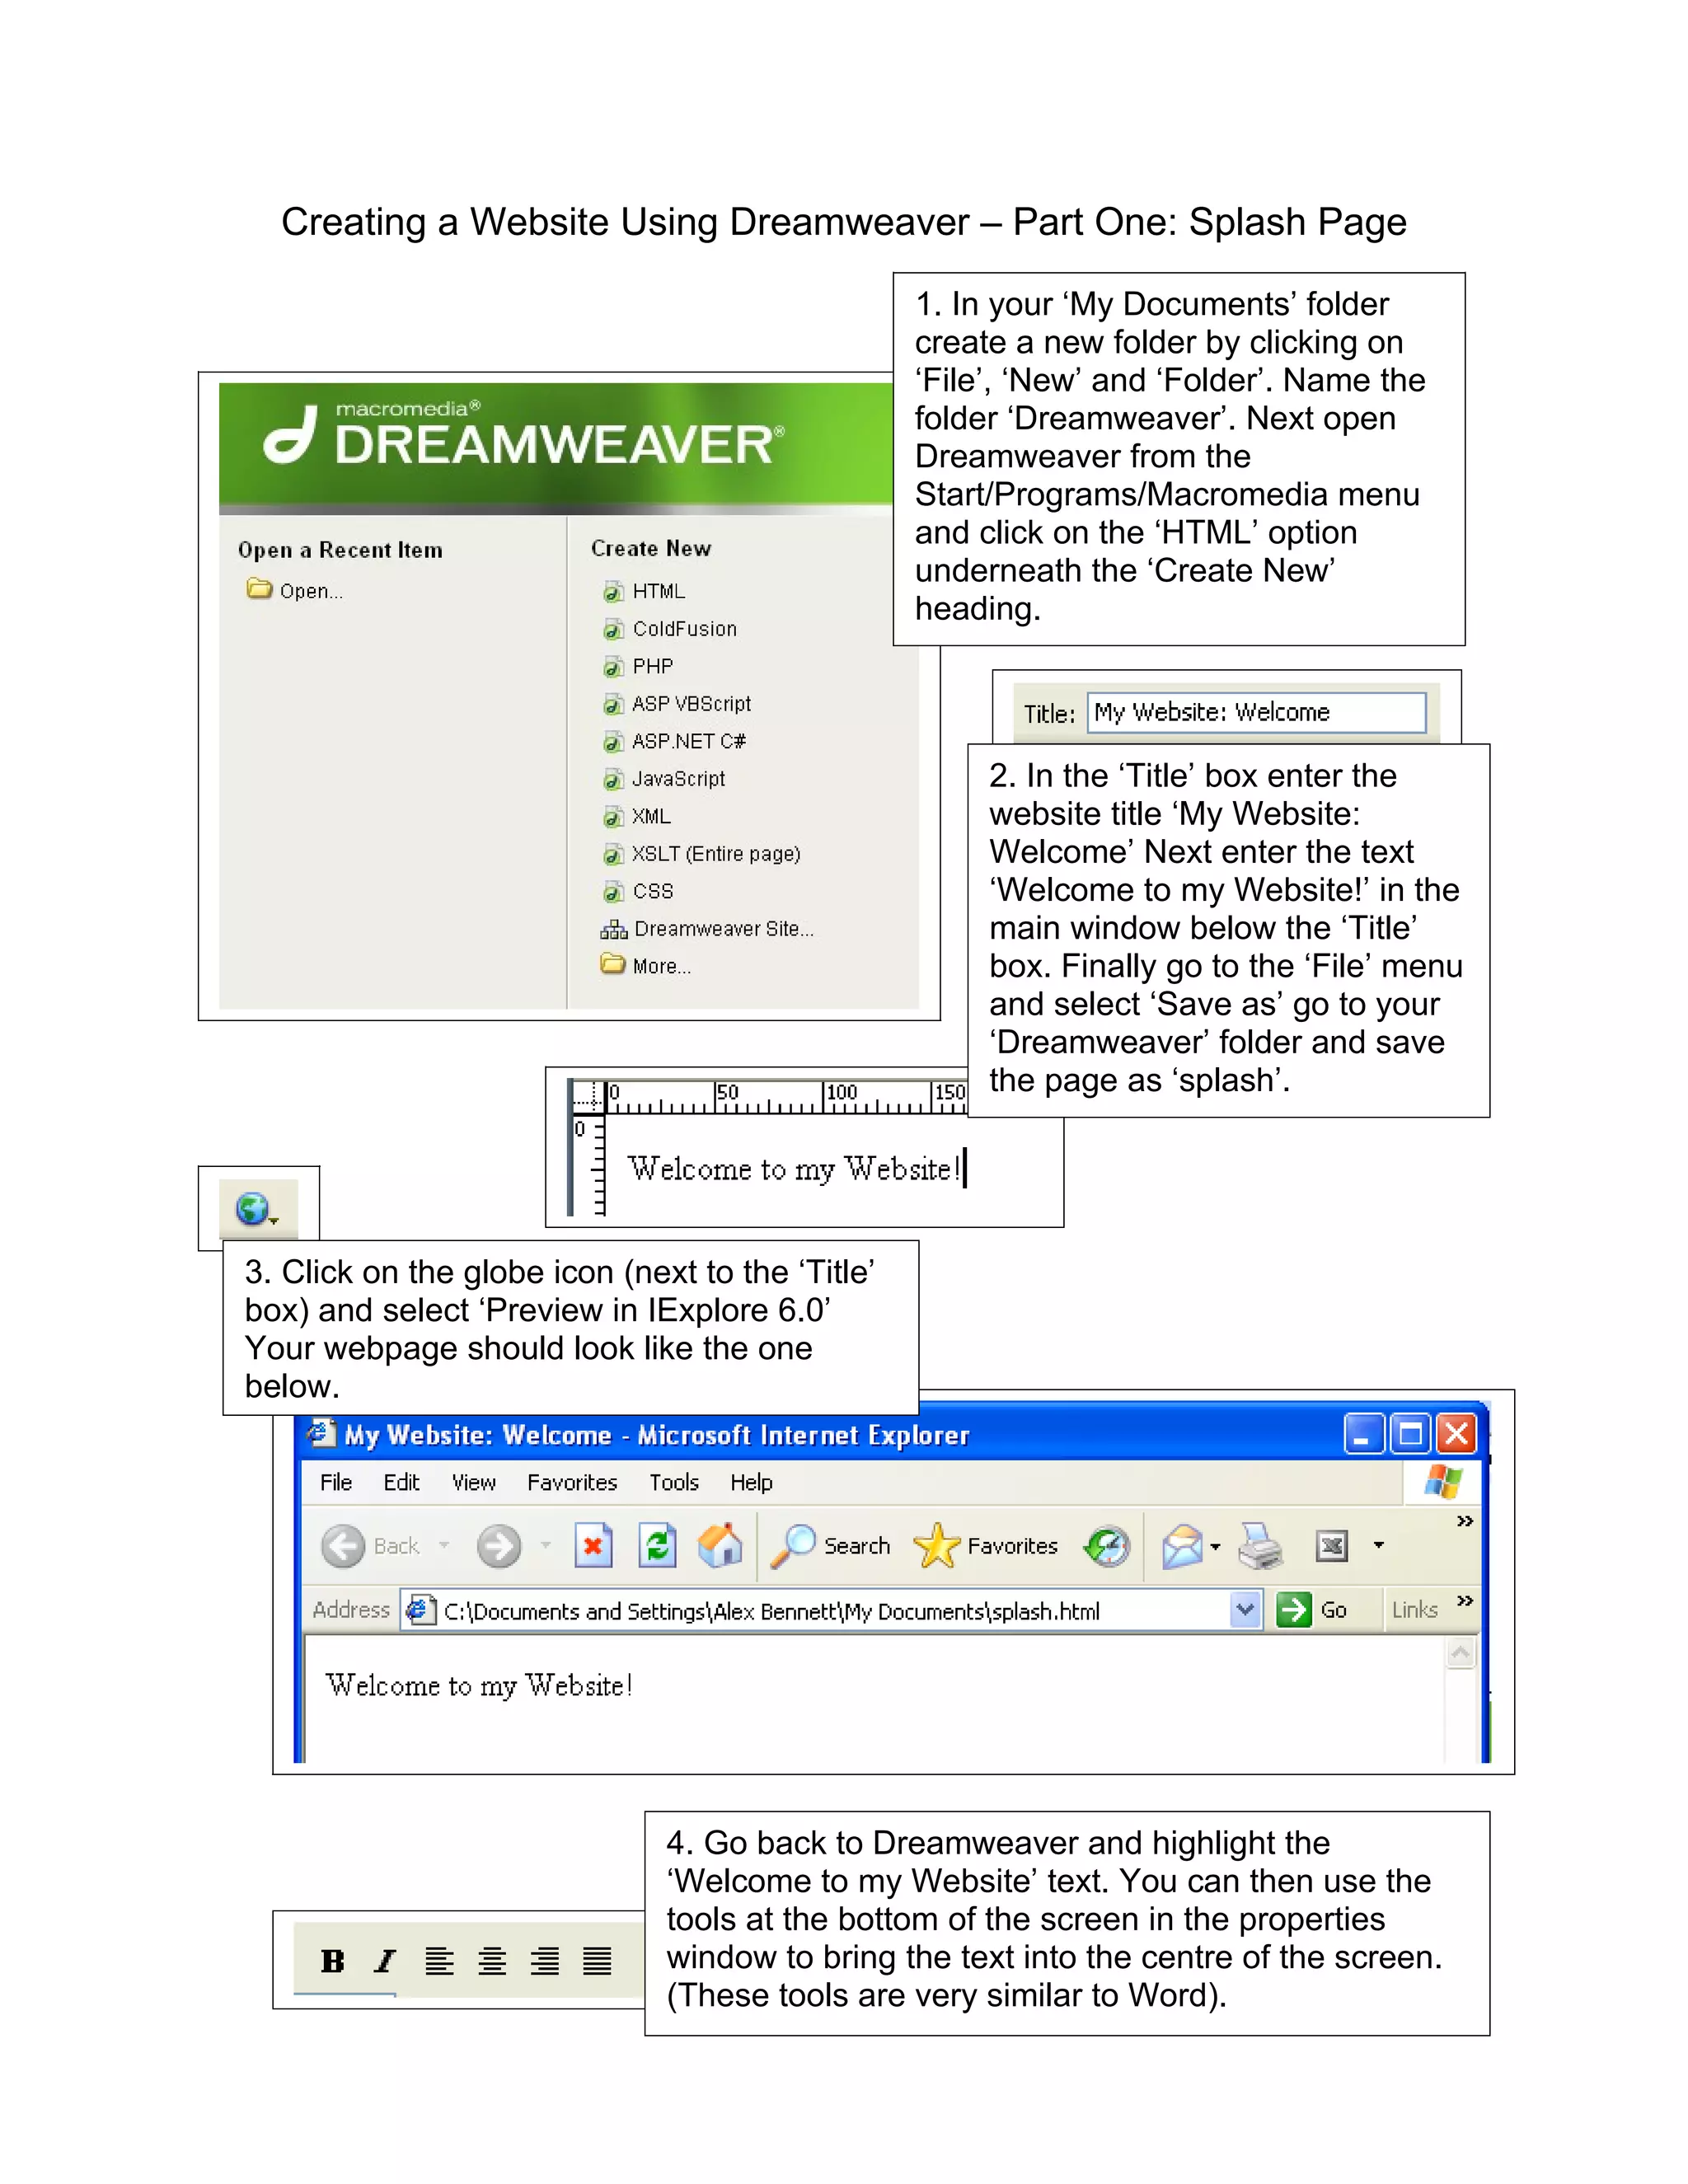
1. Creating a "Dreamweaver" folder and opening Dreamweaver to start a new HTML page titled "My Website: Welcome".
2. Entering text into the page and saving it as "splash.html" in the Dreamweaver folder.
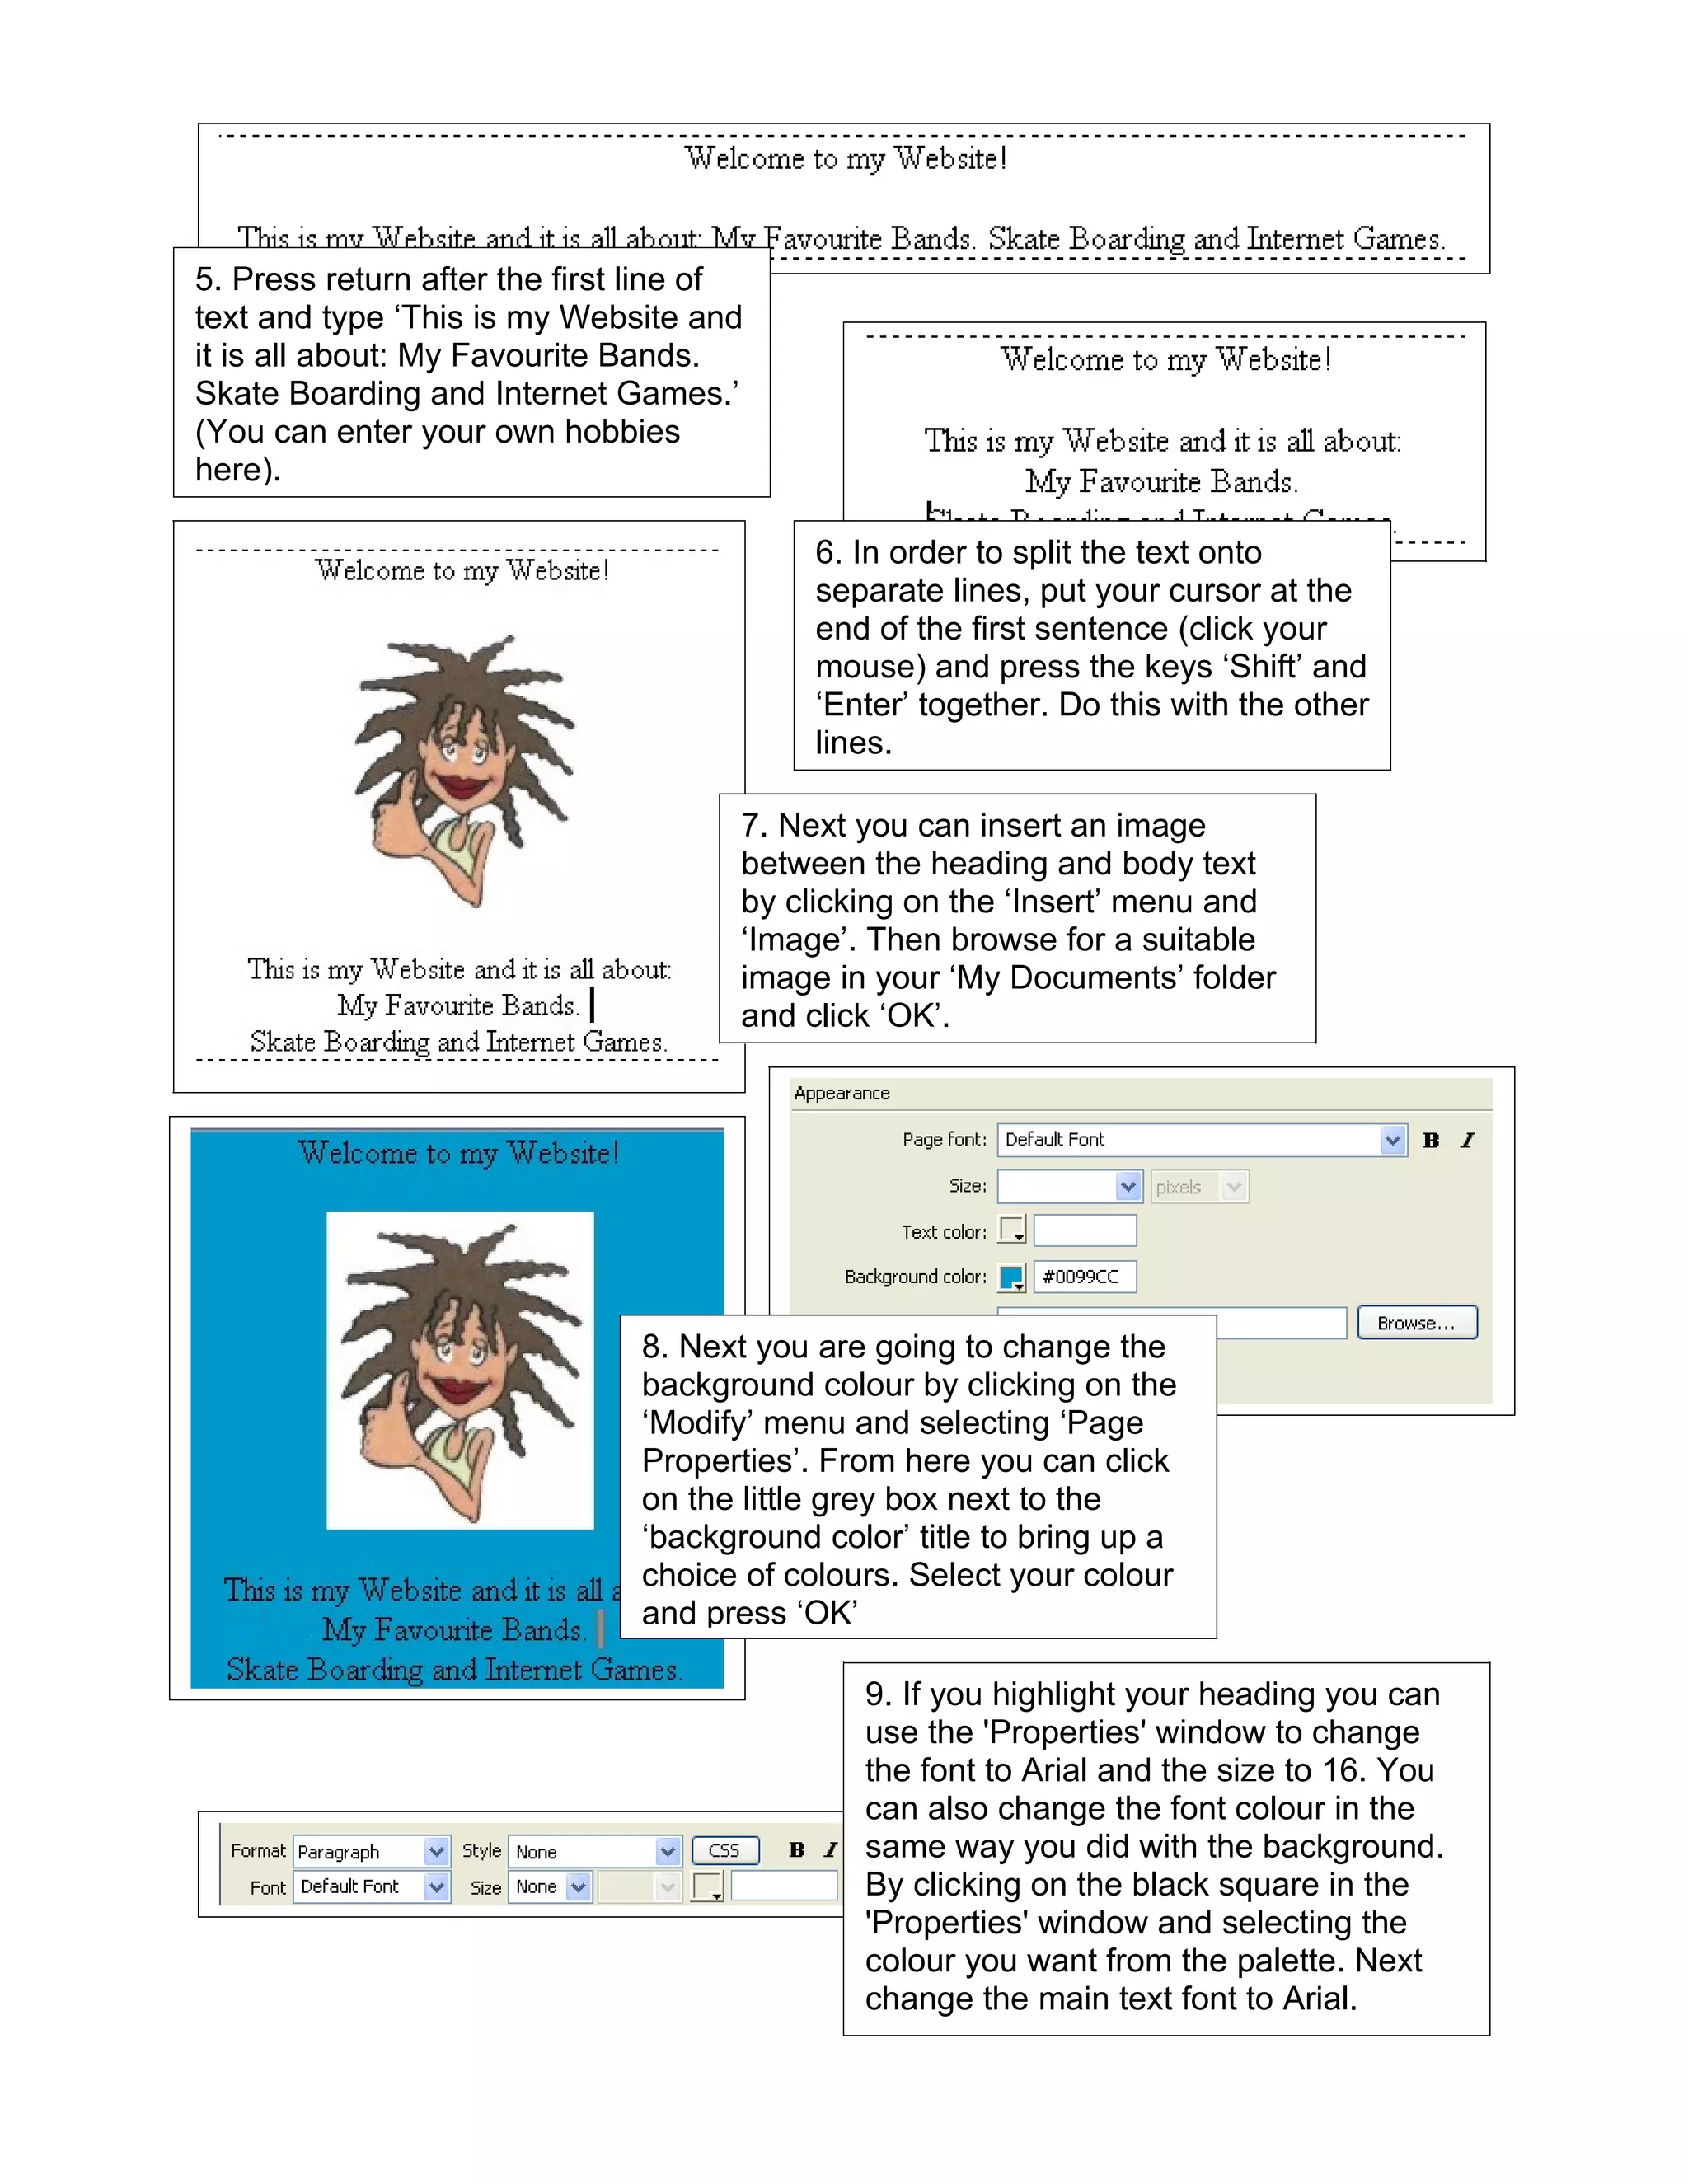
3. Previewing the page and centering the text using Dreamweaver tools.