Downloaded 88 times


![Greenbone Security Manager with Greenbone OS 4, Release 4
SNMP
The GSM appliance supports SNMP. The SNMP support can both be used for sending of traps through
alerts as well as the monitoring of vital parameters of the appliance.
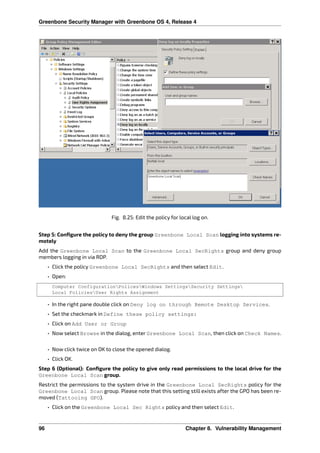
The supported parameters are specified in a Management Information Base (MIB) file. The current
MIB is available from the Greenbone tech [doc] portal4
.
The GSM appliance supports SNMP version 3 for read access and SNMPv1 for traps.
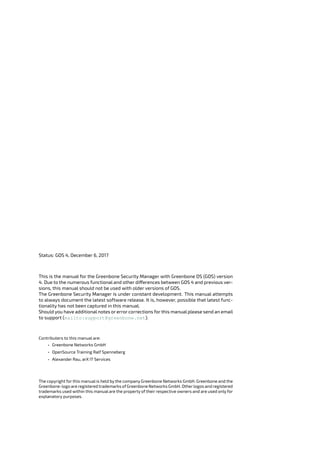
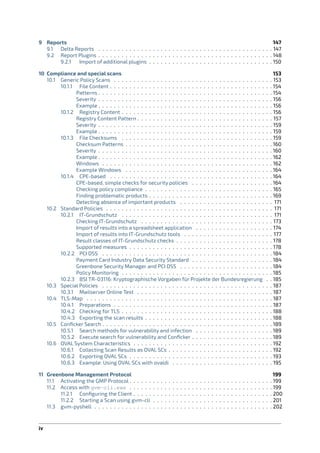
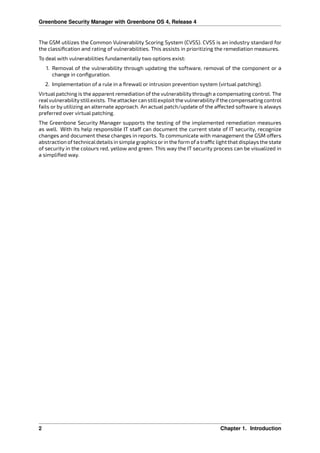
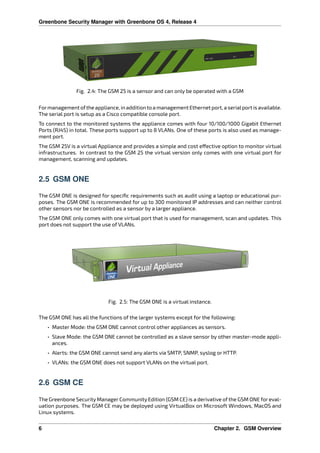
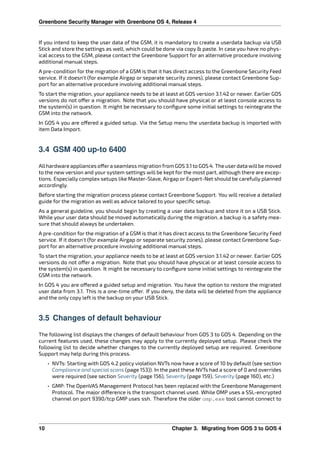
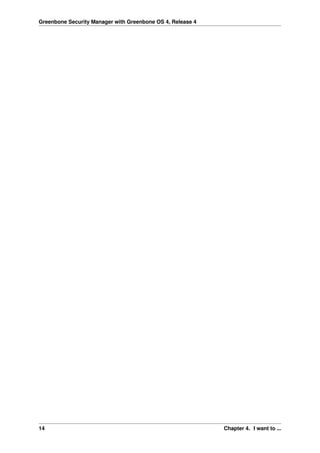
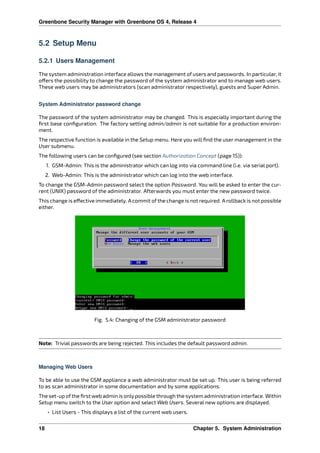
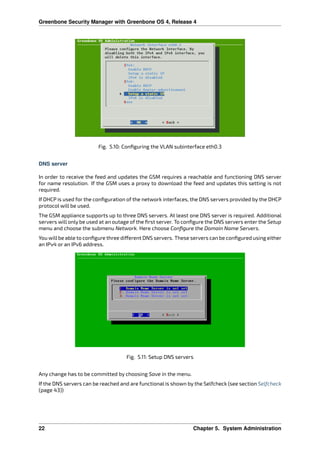
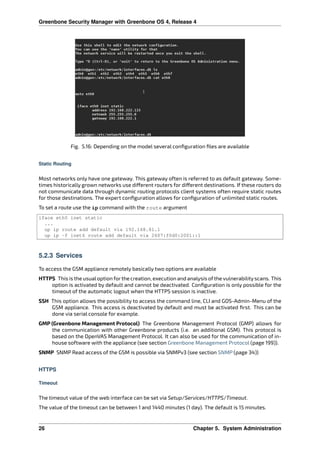
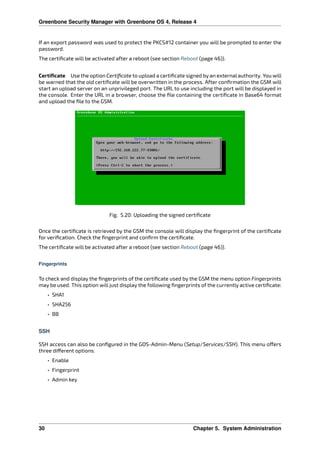
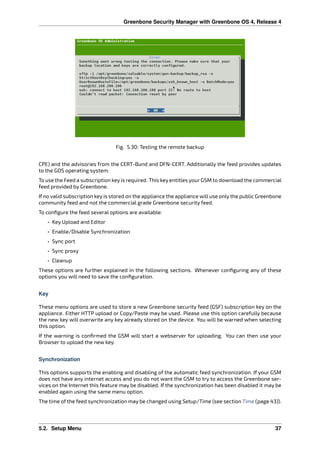
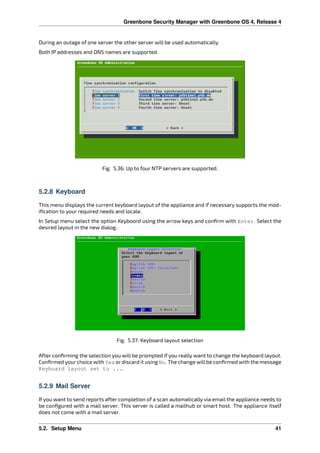
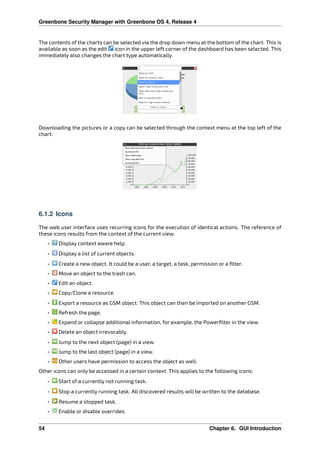
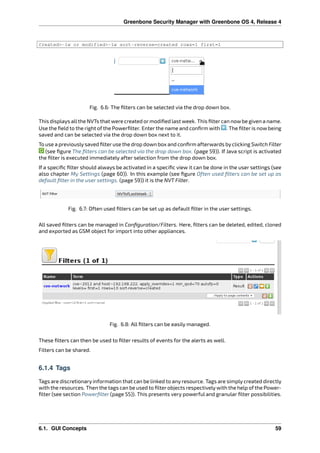
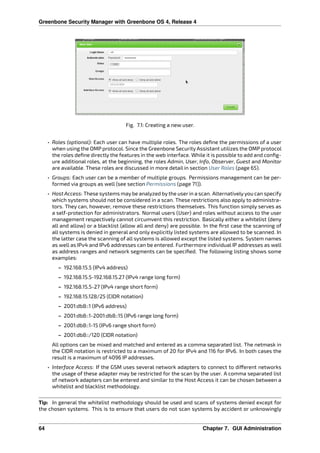
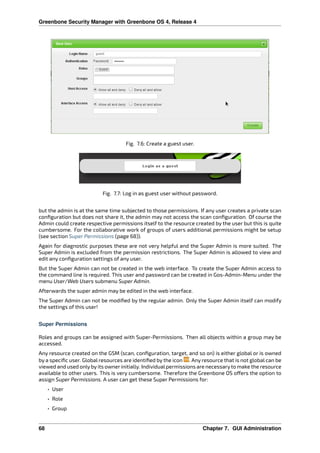
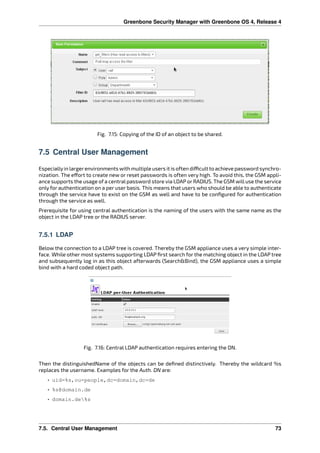
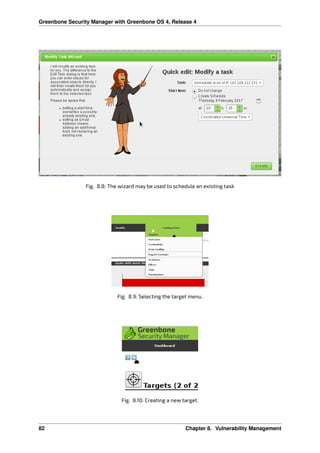
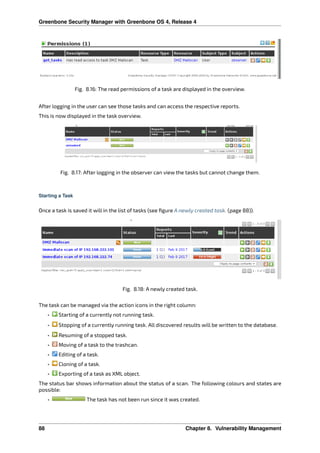
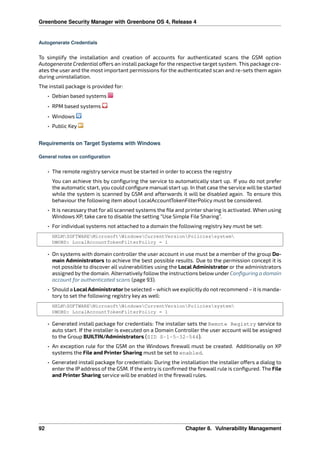
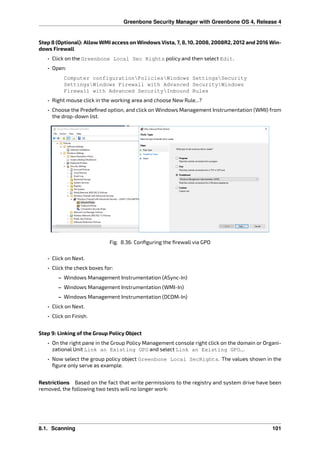
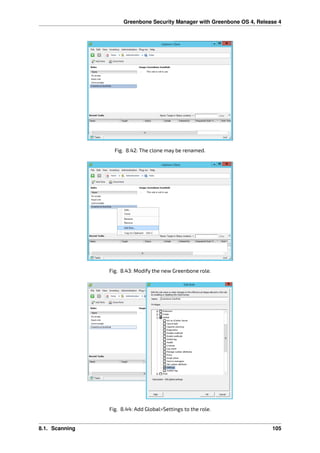
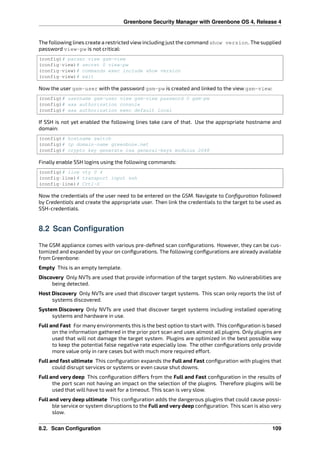
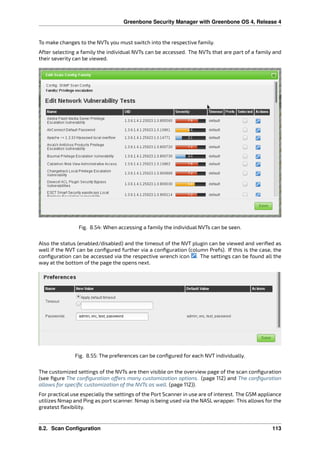
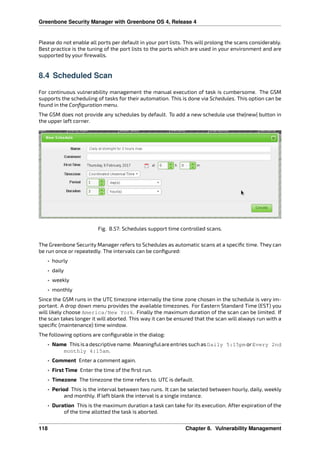
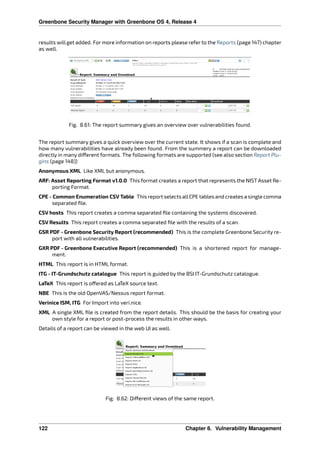
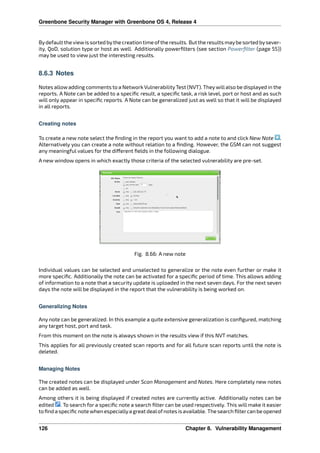
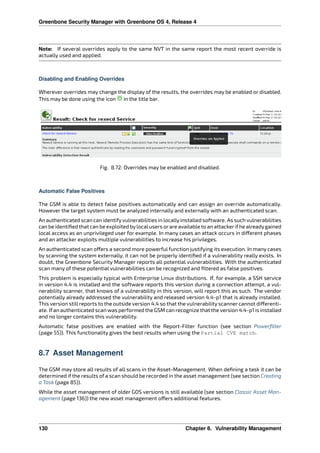
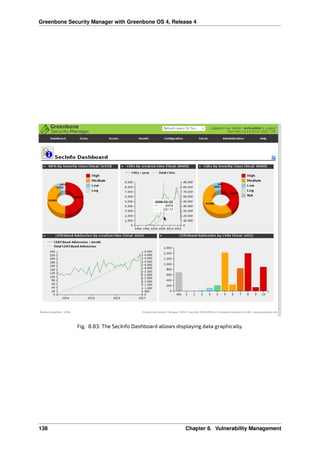
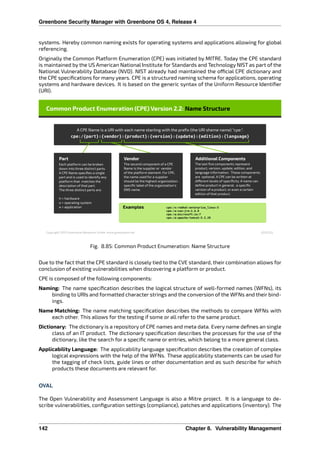
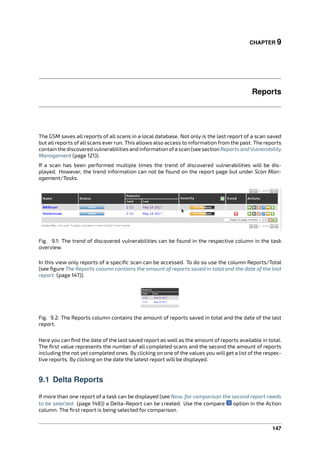
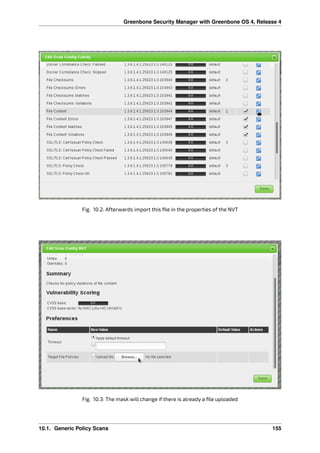
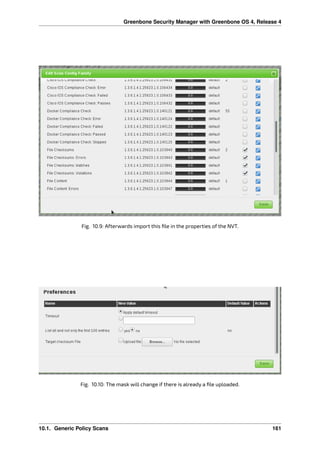
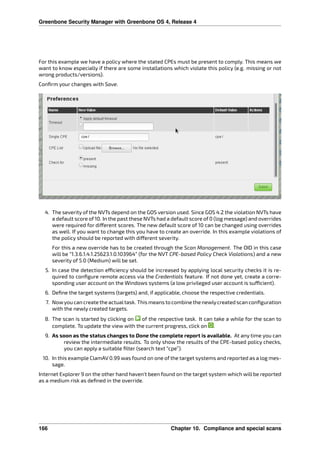
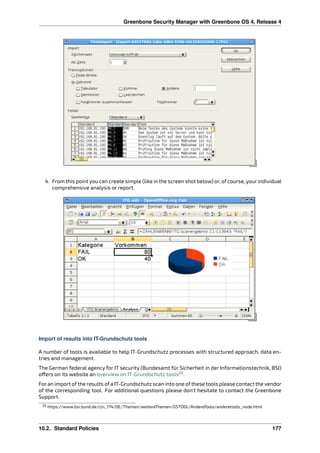
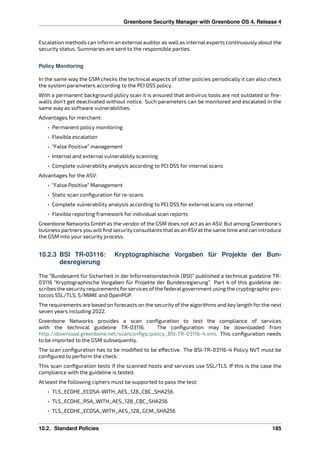
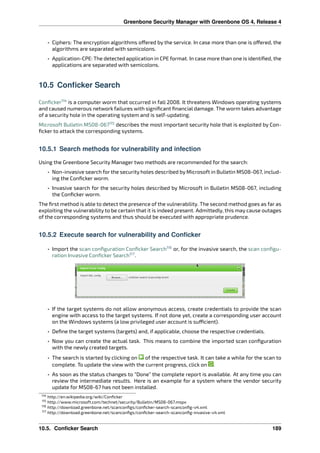
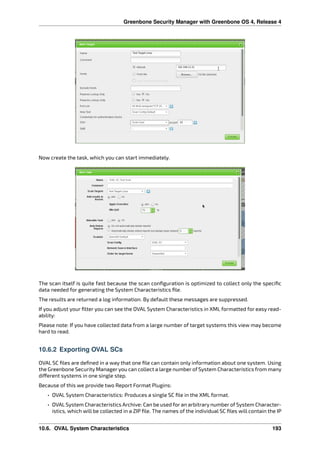
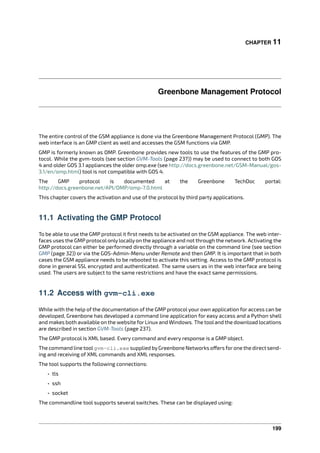
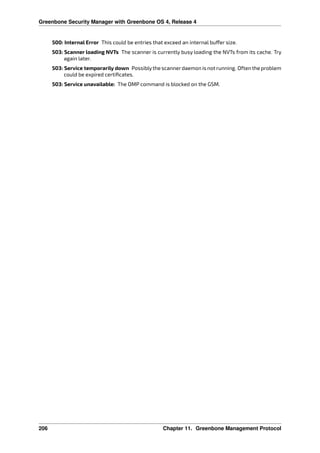
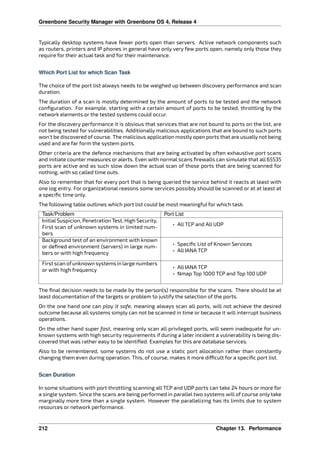
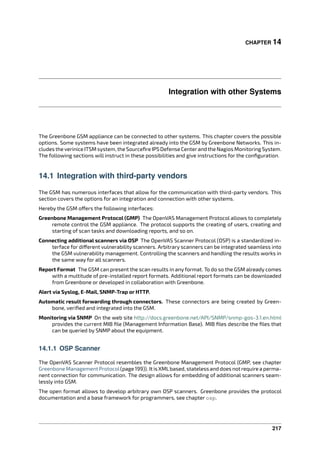
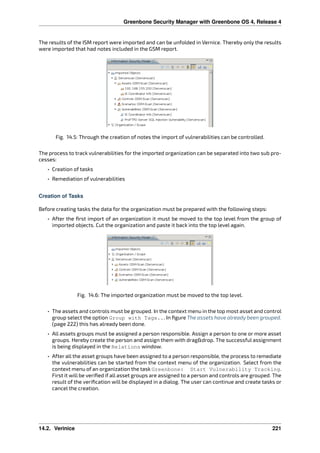
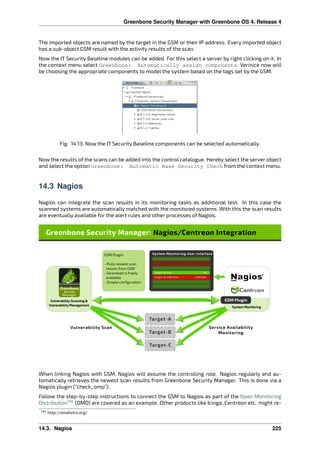
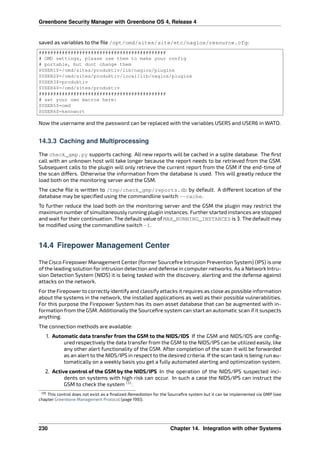
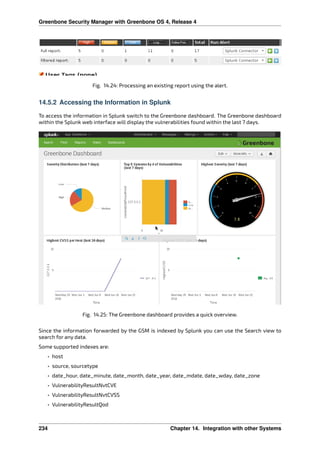
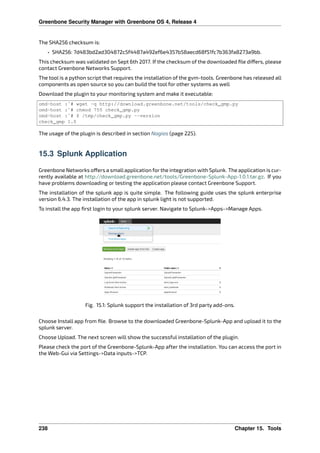
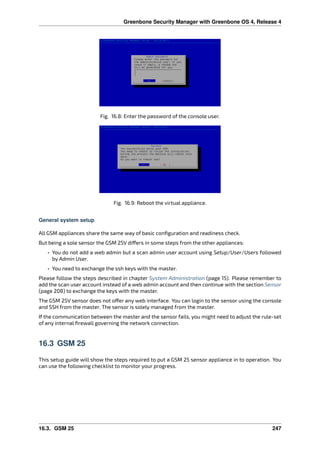
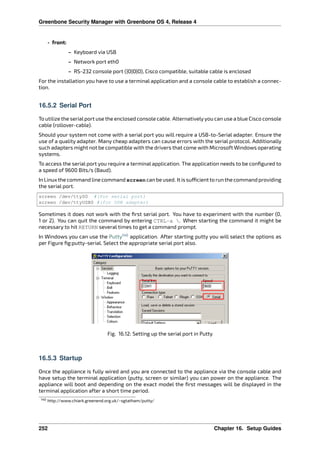
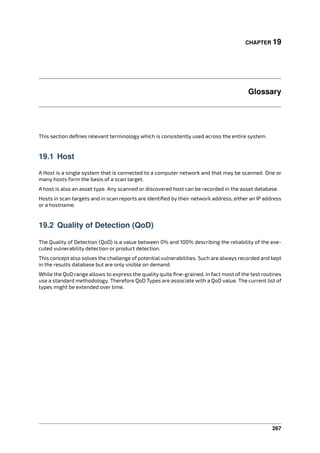
To configure the SNMPv3 navigate to Setup followed by Services. Here the option SNMP is available.
The menu supports:
• Enabling/disabling of the SNMP service
• Setting location and contact
• Configuration of username, authentication and privacy passphrase for SNMPv3
Fig. 5.26: SNMPv3 configuration
When configuring the authentication and privacypassphrase please be aware ofthe fact that the GSM
uses SHA-1 and AES128 respectively.
Afterwards test read access of the SNMP service under Linux/Unix with snmpwalk:
$ snmpwalk -v 3 -l authPriv -u user -a sha -A password -x aes -X key 192.168.222.115
iso .3.6.1.2.1.1.1.0 = STRING: "Greenbone Security Manager"
iso .3.6.1.2.1.1.5.0 = STRING: "gsm"
...
The following information may be gathered:
• Uptime
• Network interfaces
• Memory
• Harddisk
• Load
• CPU
4 http://docs.greenbone.net/API/SNMP/snmp-gos-4.1.en.html
34 Chapter 5. System Administration](https://image.slidesharecdn.com/gsmmanual-180112195921/85/Open-VAS-Manual-44-320.jpg)

![Greenbone Security Manager with Greenbone OS 4, Release 4
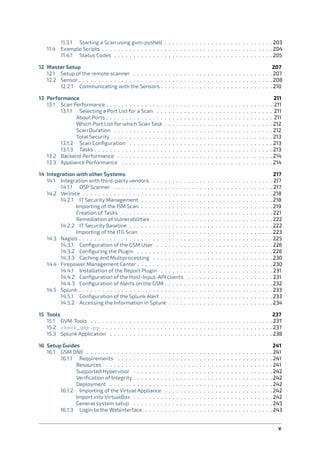
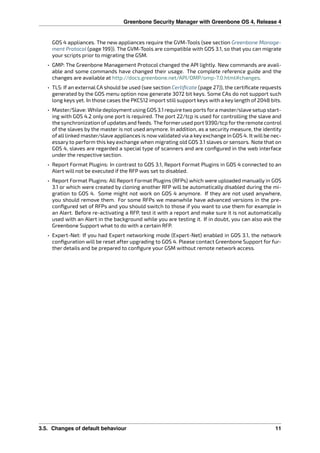
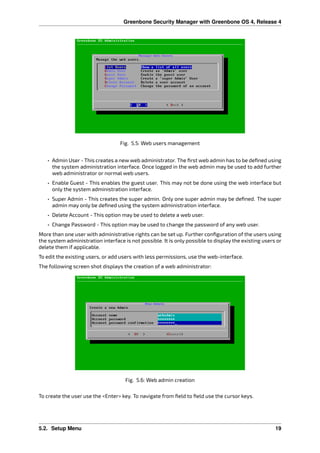
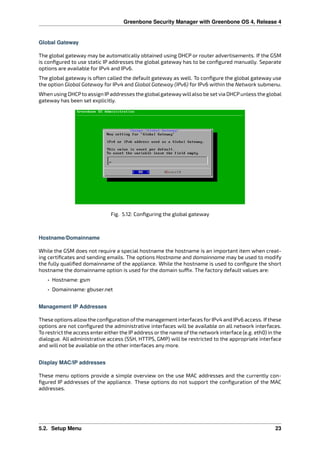
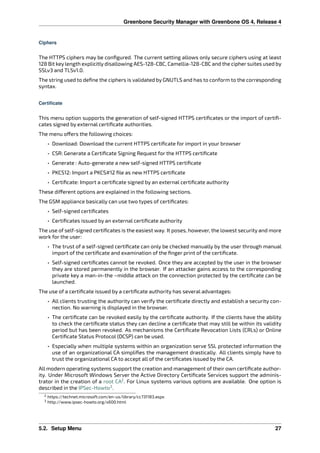
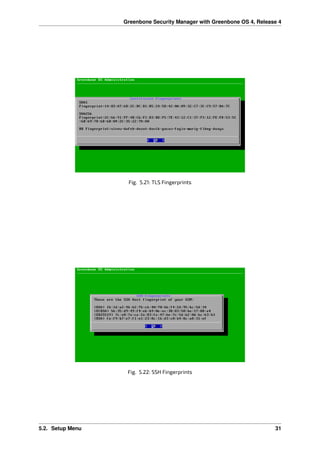
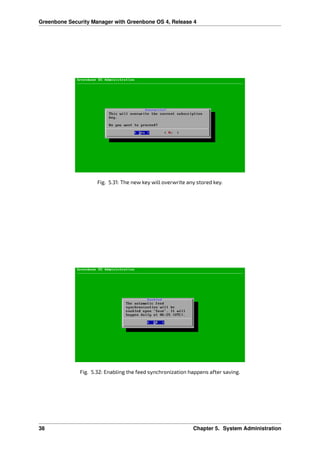
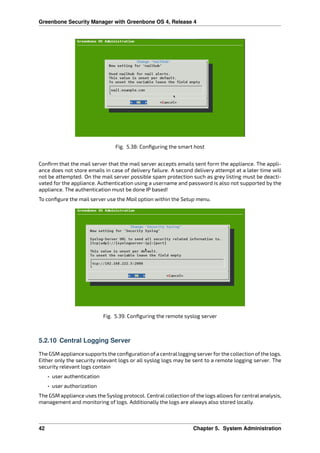
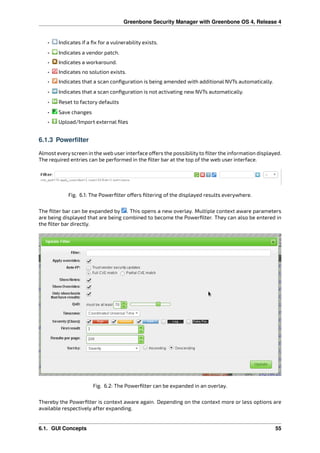
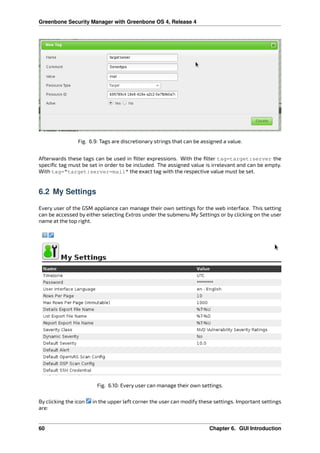
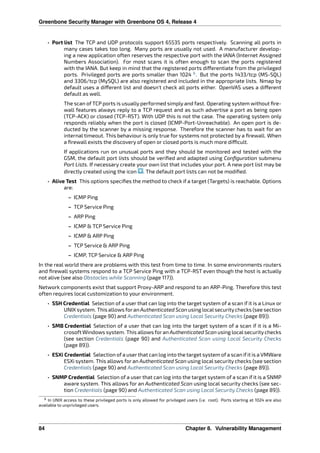
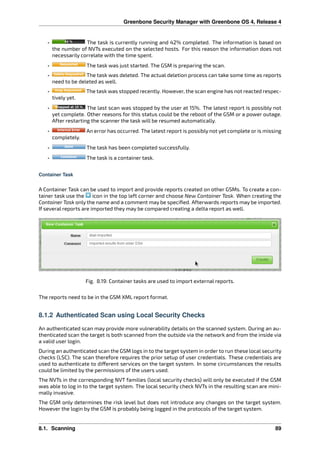
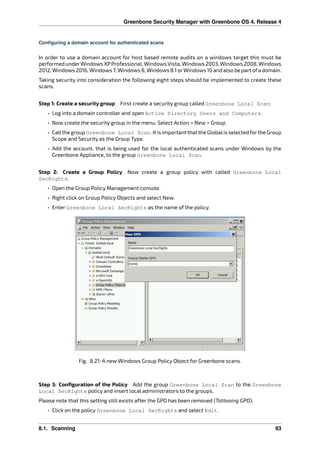
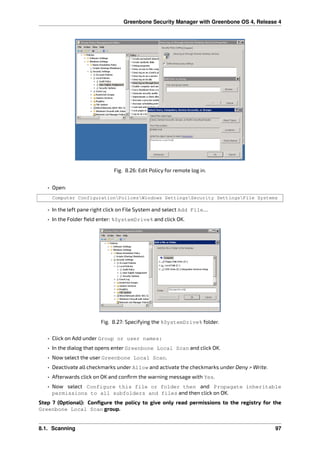
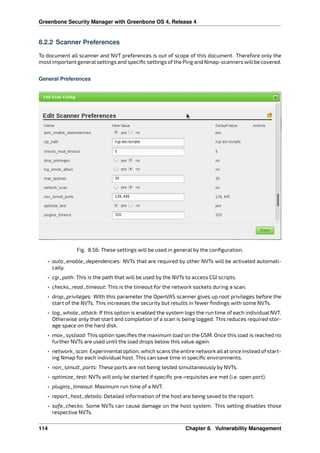
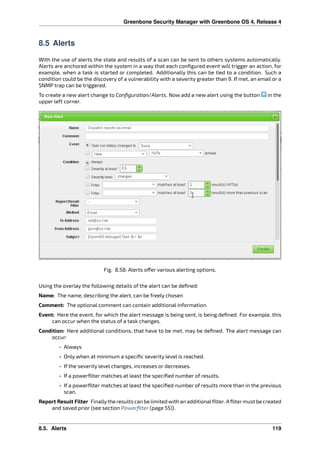
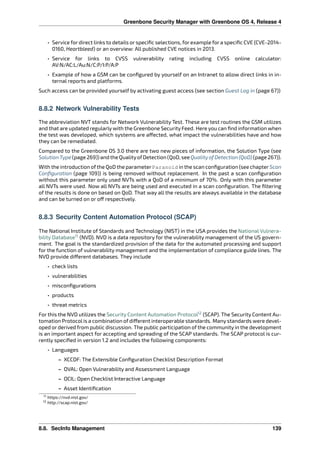
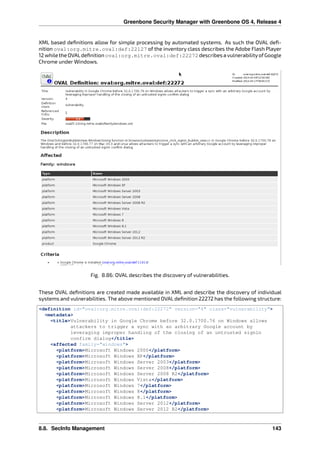
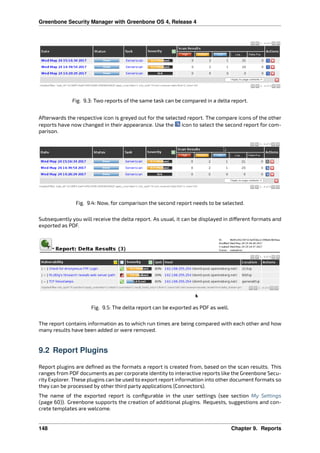
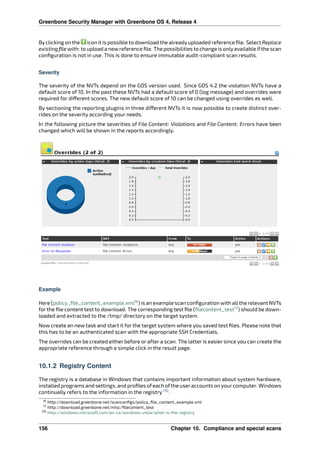
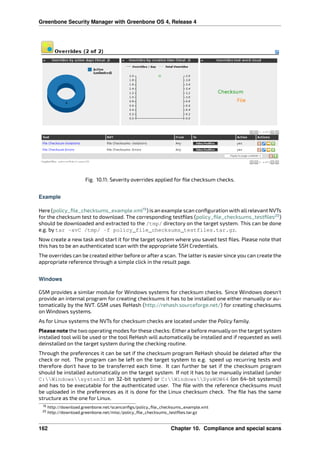
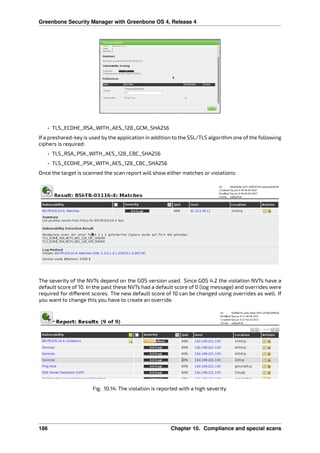
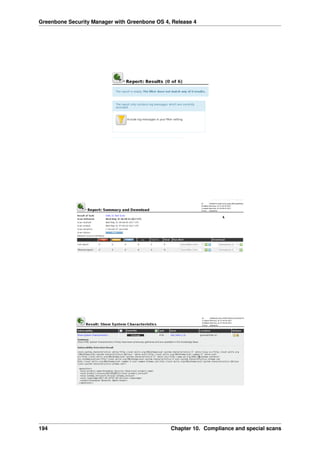
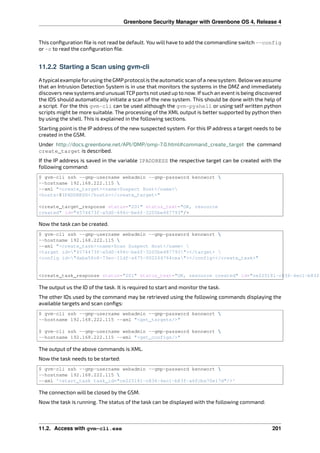
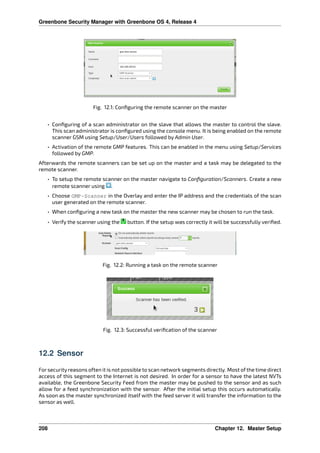
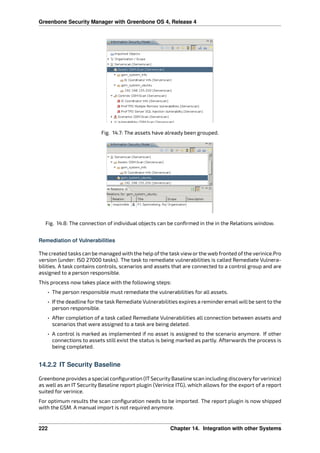
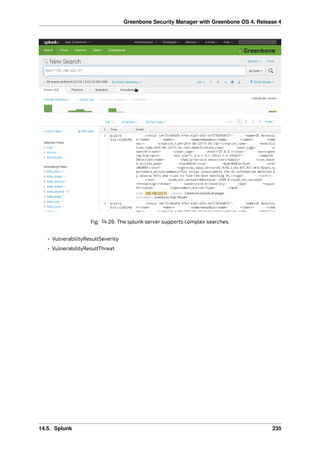
5.2.5 Backup
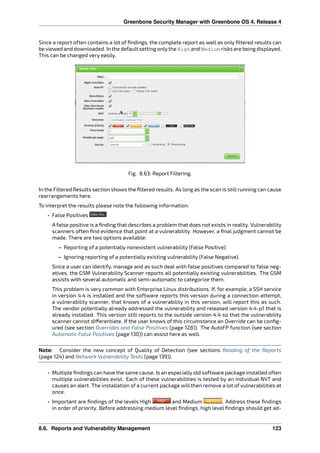
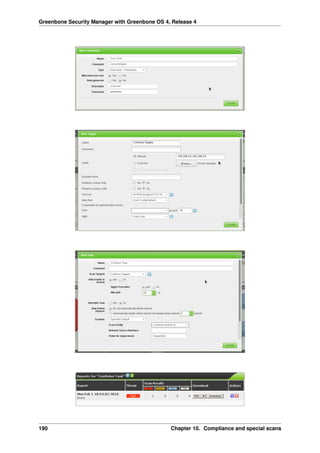
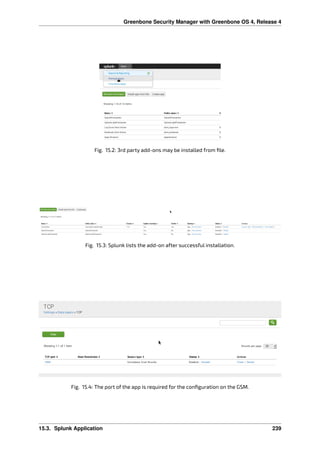
The Greenbone Security Manager supports automatic backups. These backups may be stored locally
or remote. The backups will be performed daily. Backups will be stored using the following schema:
• Last 7 daily backups
• Last 5 weekly backups
• Last 12 monthly backups
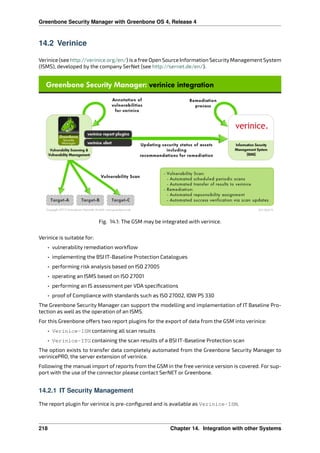
Backups older than one year will be automatically deleted. In factory state the backups are disabled.
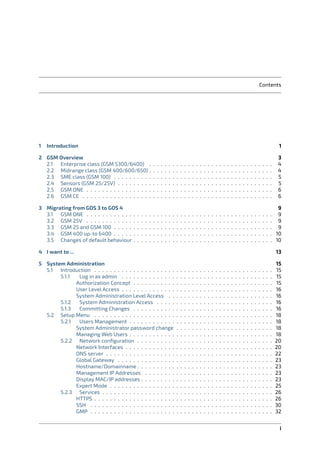
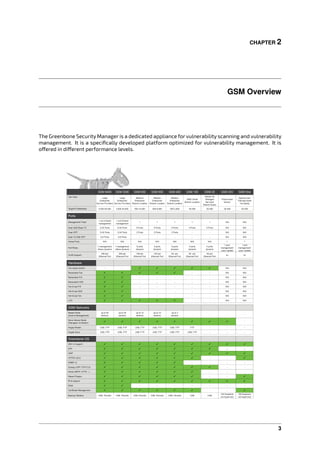
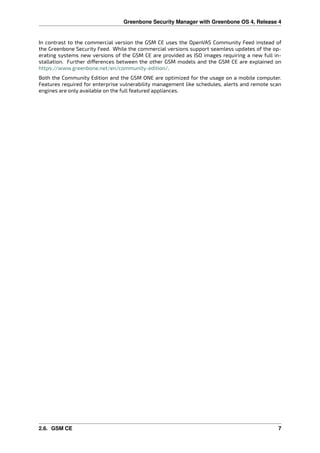
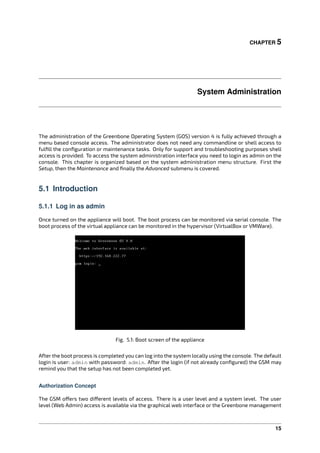
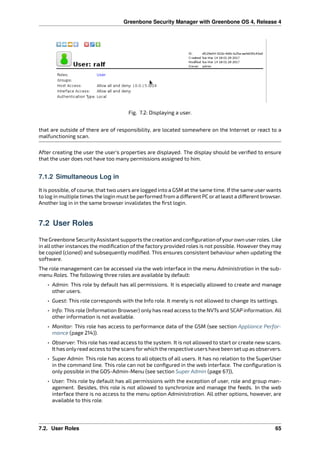
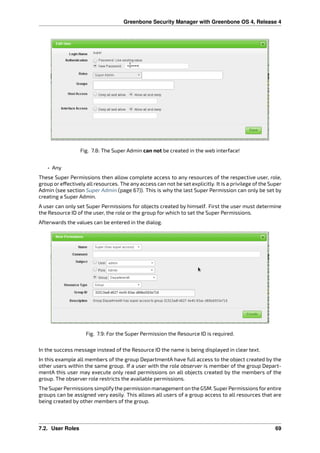
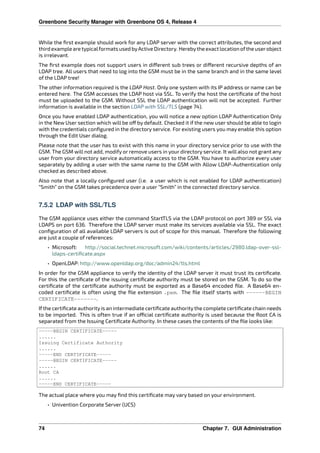
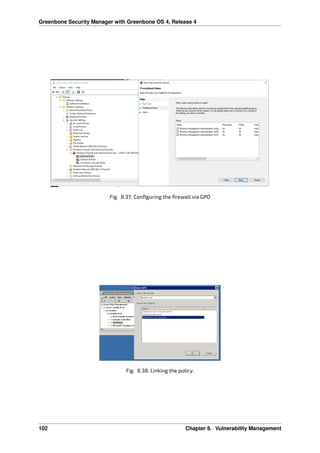
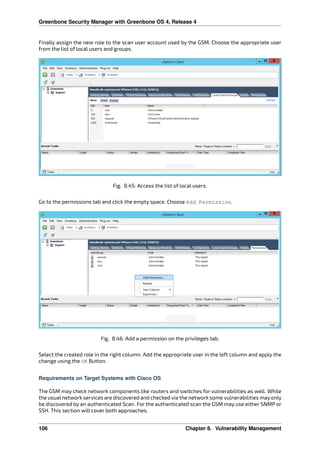
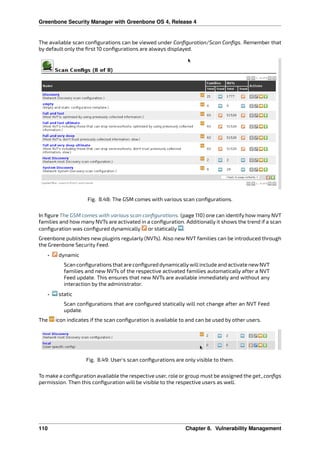
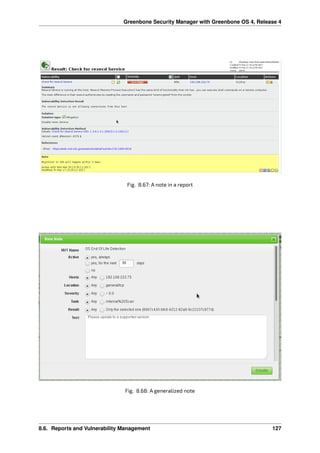
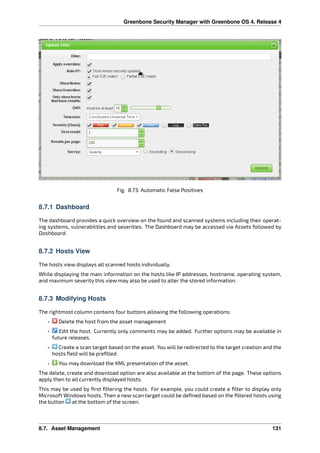
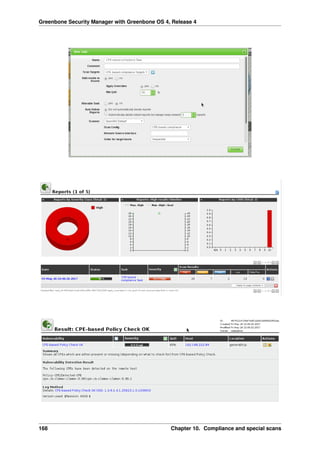
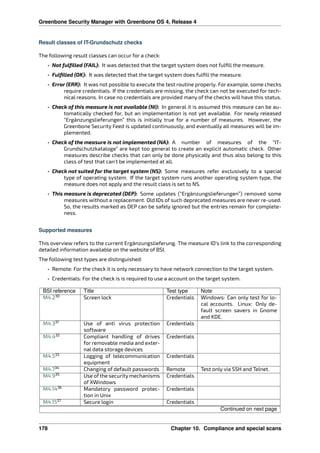
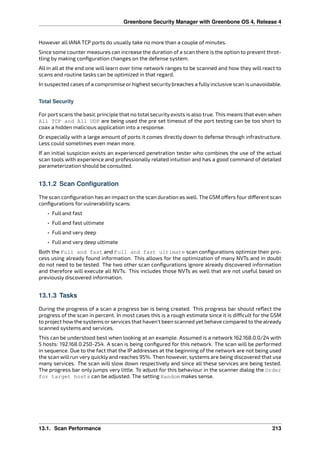
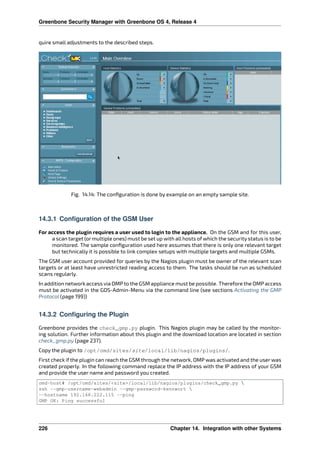
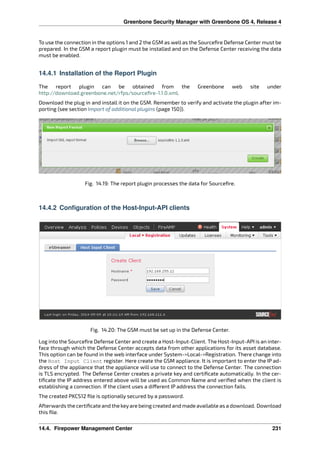
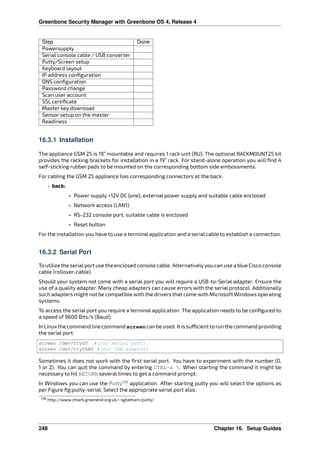
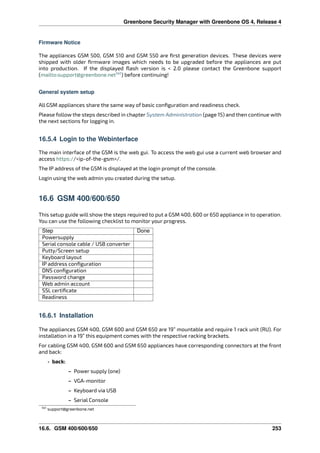
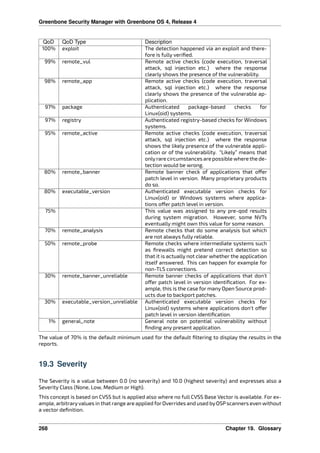
To enable the backups navigate to Setup followed by Backup.
Fig. 5.29: Configuring Backups
By default the backups are stored locally. To store the backups on a remote server the server has to
be setup appropriately. The GSM uses the SFTP protocol supported by the secure shell to transfer the
backups. The remote server is therefore provided using a URL like the following:
username@hostname[:port]/directory
The optional port may be omitted if the server uses port 22.
The GSM will verify the identity of the remote server before logging in. To identify the remote server
the GSM will use the public key of the remote host. To upload this public key use the menu option and
a web browser.
The GSM uses a SSH private key to logon on the remote server. To enable this logon process the public
keyofthe GSM must be enabled in the authorized_keys file on the remote server. To GSM generates
such a private/public key pair. To download the public key use the menu option and download the key
using a web browser.
If several GSM appliances upload their backups to the same remote server the files must be distin-
guishable. The admin has to set a unique backup identifier in these cases on each GSM appliance. If
this value is not set the hostname will be used. If the hostname was modified from the default and is
unique the backup files will be distinguishable as well.
Since the setup of the remote backup including the keys might be error-prone a test routine is avail-
able. This option will test the successful login to the remote system.
5.2.6 Feed
The Feed menu underneath Setup support the configuration and setup of the Greenbone feed. The
Greenbone feed provides updates to the network vulnerability tests (NVT), the SCAP data (CVE and
36 Chapter 5. System Administration](https://image.slidesharecdn.com/gsmmanual-180112195921/85/Open-VAS-Manual-46-320.jpg)

![Greenbone Security Manager with Greenbone OS 4, Release 4
2014-05-26
The time of 12:00am will be assumed automatically. The date specification can be used in the search
filter i.e. created>2014-05-26.
Relative time specifications are always calculated in relation to the current time. Positive time spec-
ification are interpreted as being in the future. Time specification in the past are defined with a
prepended minus (-). For time periods the following letters can be used:
• s second
• m minute
• h hour
• d day
• w week
• m month (30 days)
• y year (365 days)
To view the results of the past 5 days enter -5d. A combination 5d1h is not permitted. This is to be
replaced with 121h respectively.
To limit the time period , i.e. month, for which information should be displayed the following expres-
sion can be used:
modified>2014-06-01 and modified<2014-07-01
Text phrases
In general, additionallytext phrases that are being searched forcan be specified. Then onlyresults are
being displayed in which the text phrases where found. If the text phrases or not limited to a column
(name=text) all columns will be searched. This means that also columns that are hidden from the
current view will be searched as well.
The following examples can be useful:
overflow Finds all results that contain the word overflow. This applies to both Overflow as well
as Bufferoverflow. Also 192.168.0.1 will find 192.168.0.1 as well as 192.168.0.100.
remote exploit Will find all results containing remote or exploit. Of course results that contain
both words will be displayed as well.
remote and exploit Both words must be found in a result in any column. The results do not have
to be found in the same column.
"remote exploit" The exact string is being searched for and not the individual words.
regexp 192.168.[0-9]+.1 The regex is being searched for.
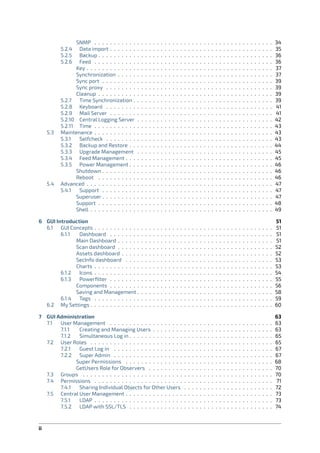
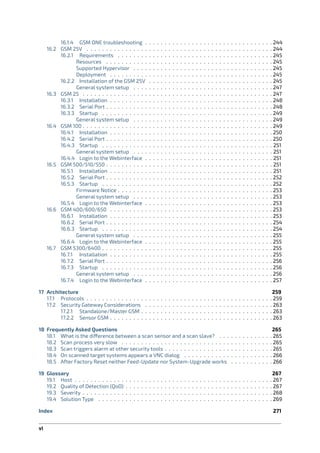
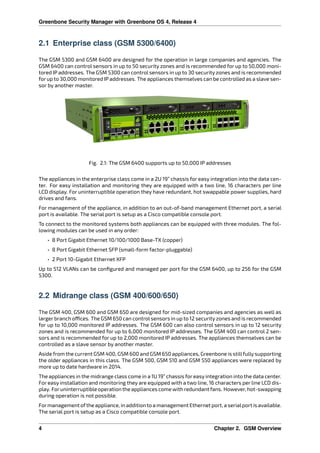
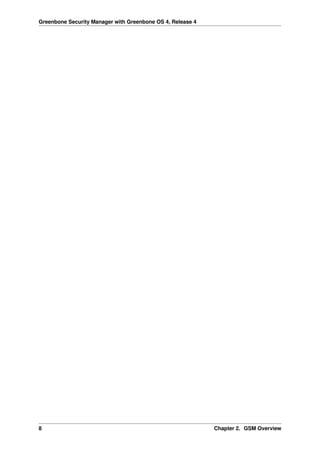
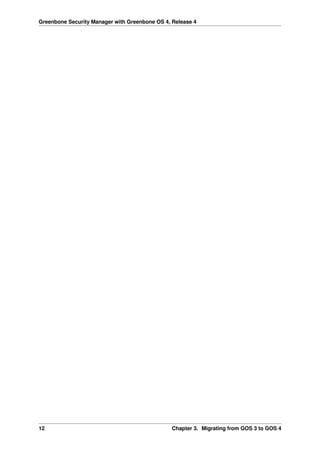
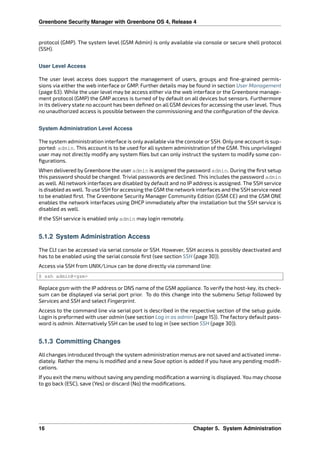
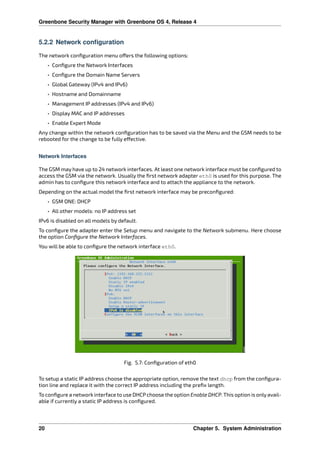
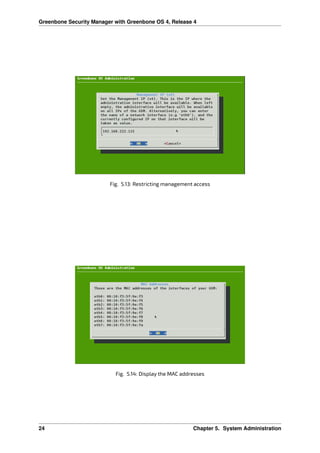
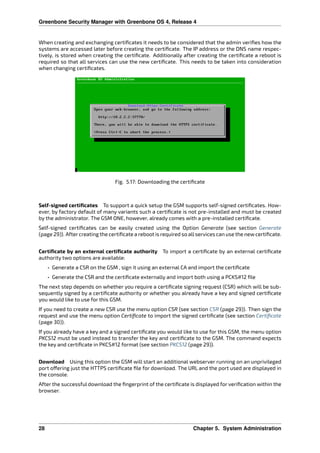
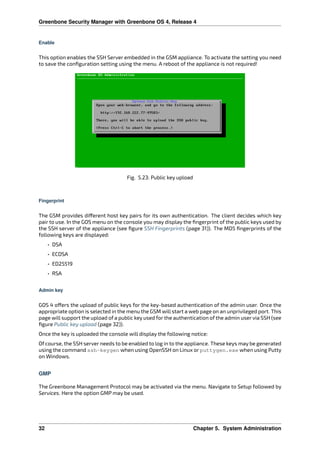
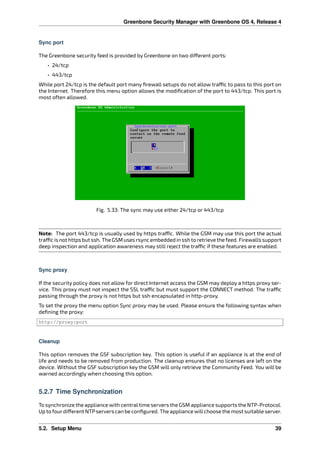
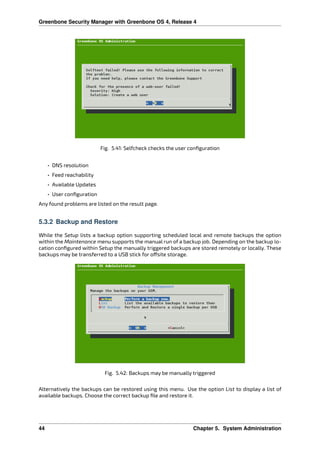
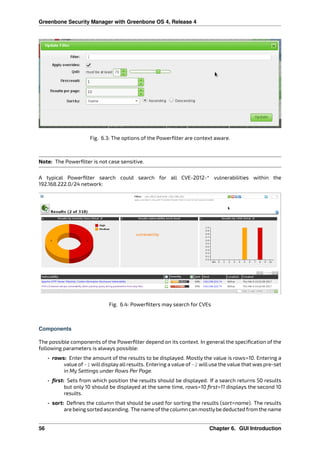
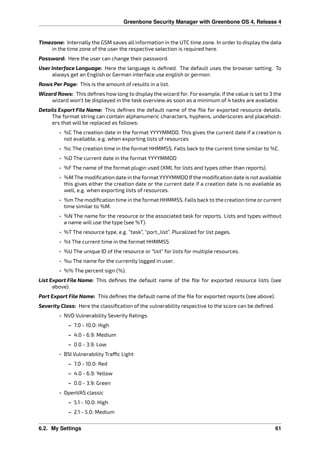
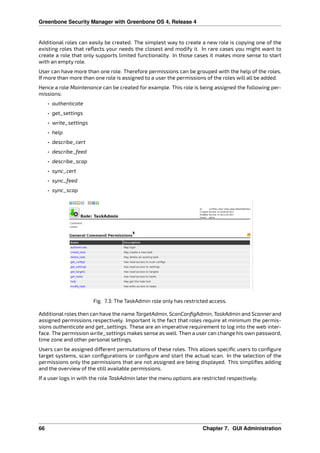
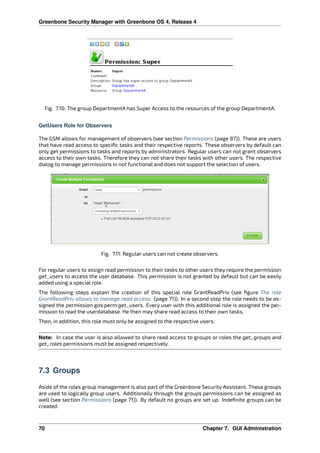
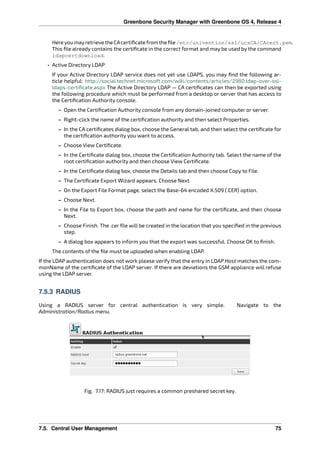
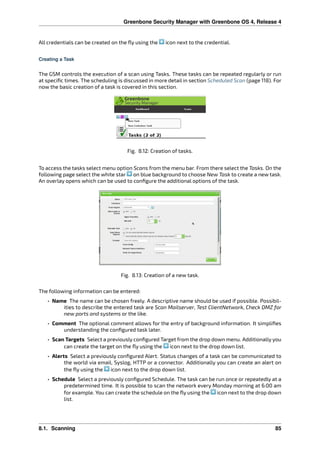
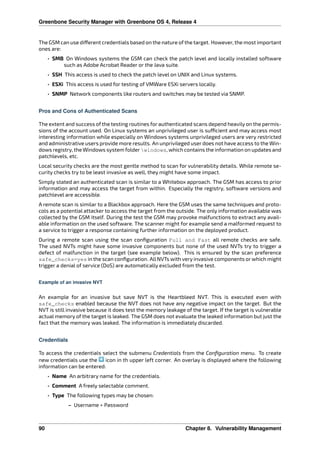
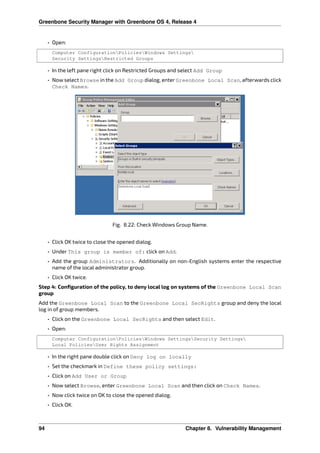
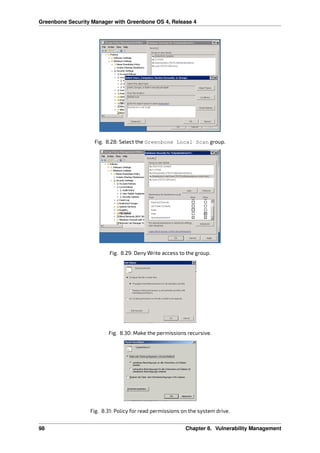
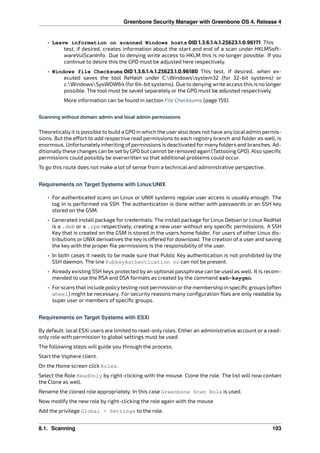
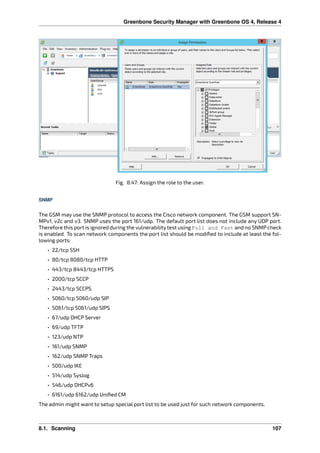
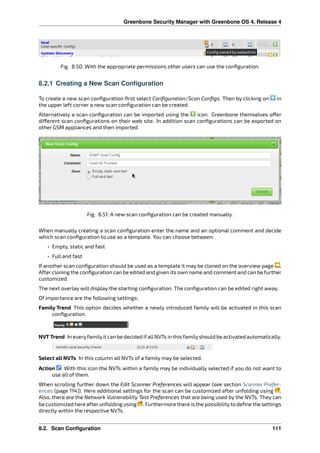
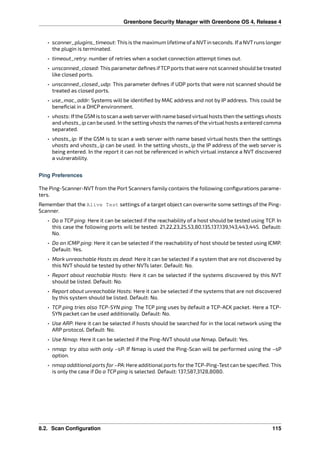
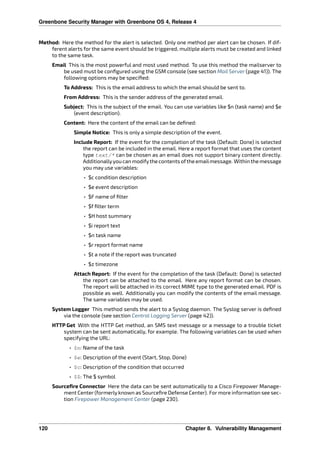
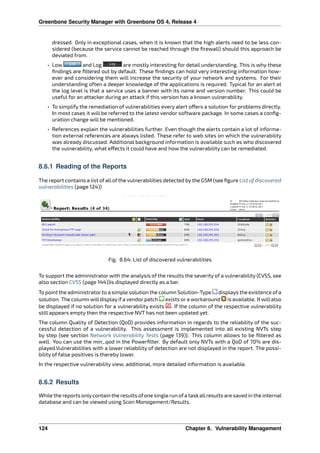
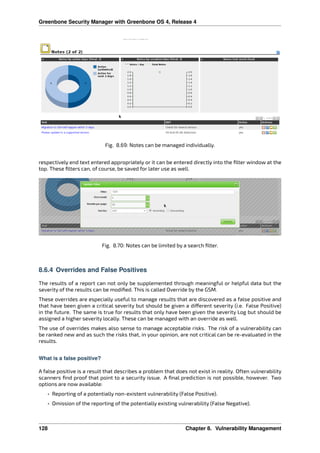
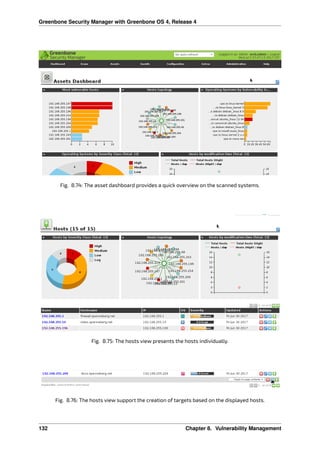
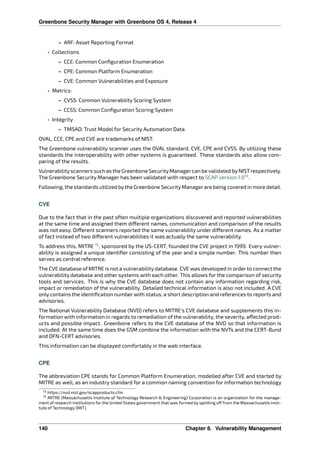
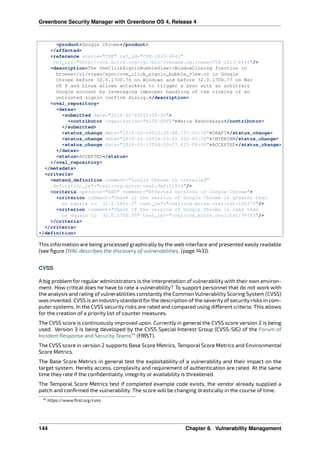
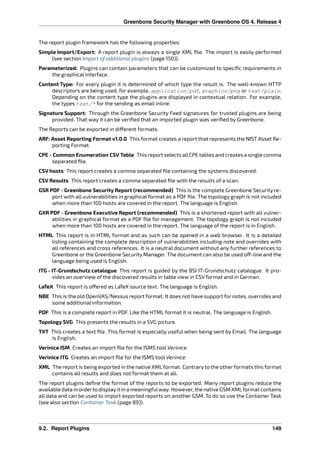
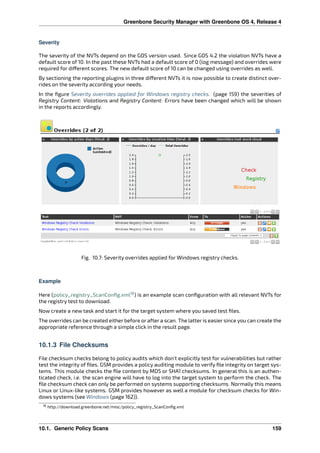
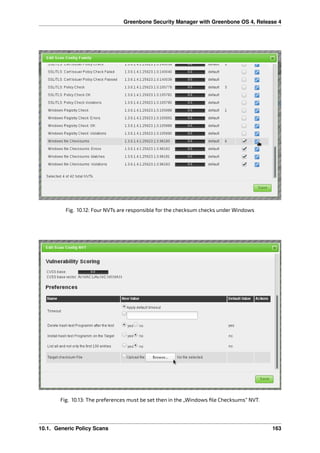
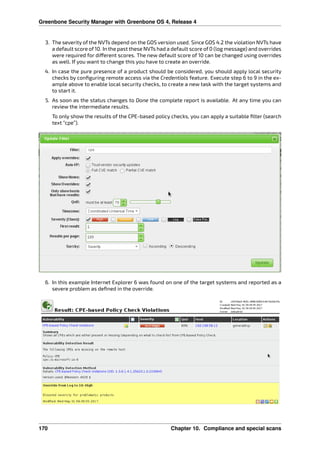
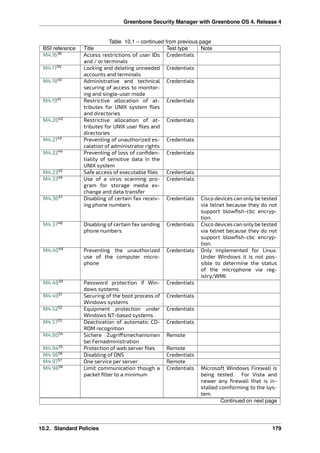
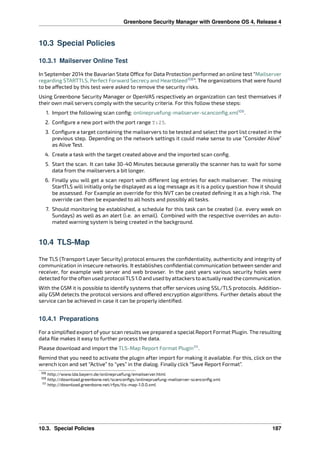
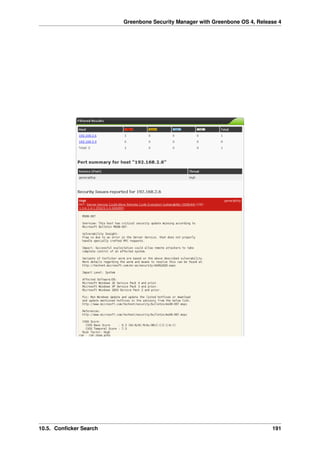
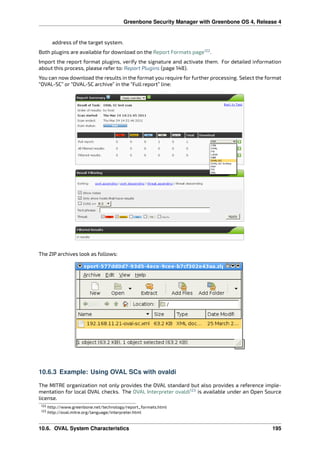
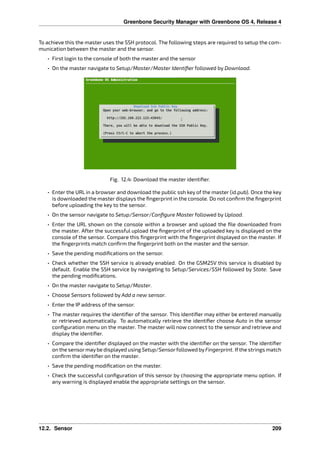
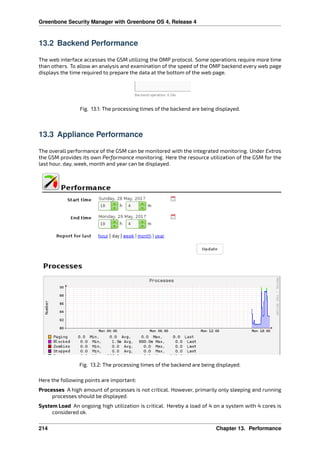
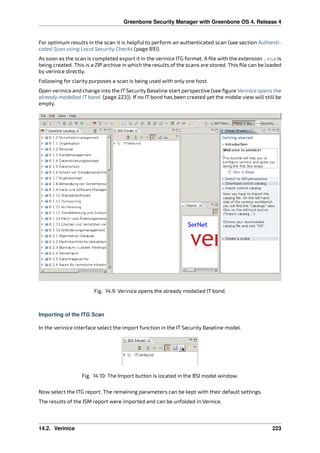
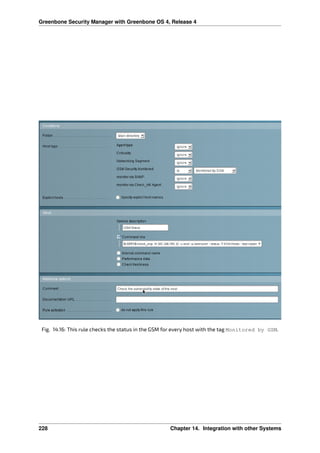
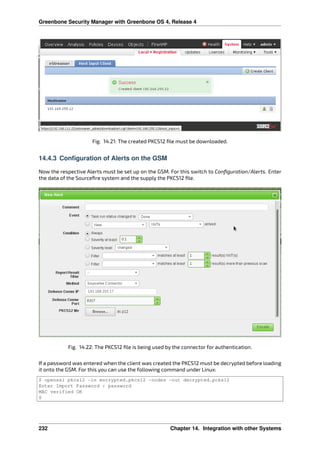
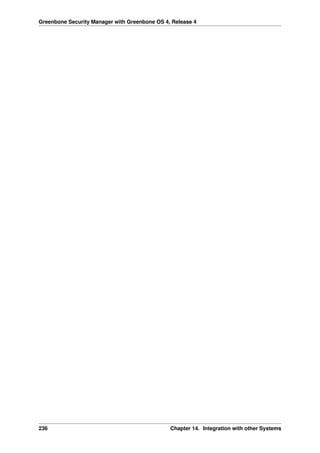
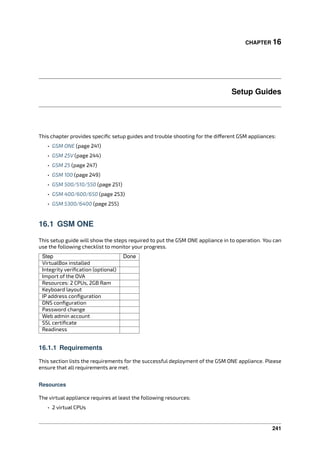
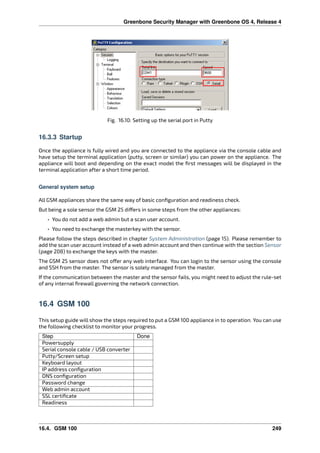
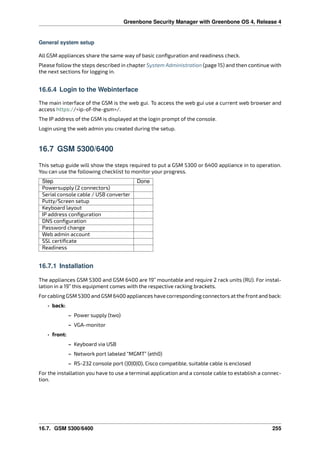
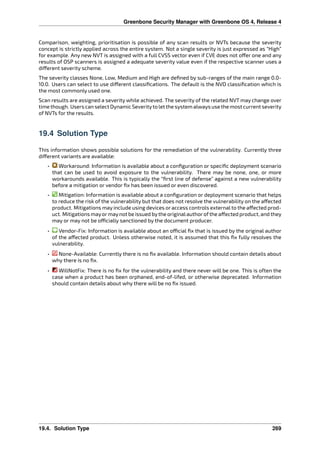
Fig. 6.5: Often used Powerfilters can be saved and retrieved again.
Saving and Management
Interesting and often used filters can be saved as well. This simplifies their re-use. For example, to
display the NVTs that were modified or added to the feed last week, in the GUI select SecInfo Man-
agement followed by NVTs. Then edit the Powerfilter so that it has the following content (see figure
Often used Powerfilters can be saved and retrieved again. (page 58)):
58 Chapter 6. GUI Introduction](https://image.slidesharecdn.com/gsmmanual-180112195921/85/Open-VAS-Manual-68-320.jpg)


![Greenbone Security Manager with Greenbone OS 4, Release 4
$ gvm-cli -h
usage: gvm-cli [-h] [-V] [connection_type] ...
gvm-cli 1.2.0 (C) 2017 Greenbone Networks GmbH
This program is a command line tool to access services via
GMP (Greenbone Management Protocol).
Examples:
gvm-cli --xml "<get_version/>"
gvm-cli --xml "<commands><authenticate><credentials><username>myuser</username><password>mypass<
...
While the tool supports more switches the additional options are only displayed when the connec-
tion_type is specified:
$ gvm-cli ssh -h
usage: gvm-cli ssh [-h] [-c [CONFIG]] [--timeout TIMEOUT]
[--log [{DEBUG,INFO,WARNING,ERROR,CRITICAL}]]
[--gmp-username GMP_USERNAME] [--gmp-password GMP_PASSWORD]
[-X XML] --hostname HOSTNAME [--port PORT]
[--ssh-user SSH_USER]
[infile]
positional arguments:
infile
optional arguments:
-h, --help show this help message and exit
-c [CONFIG], --config [CONFIG]
Configuration file path. Default: ~/.config/gvm-
tools.conf
...
While the current GSM Appliances (GOS 4) use ssh to protect the GMP protocol, older appliances used
TLS and Port 9390 to transport the GMP protocol. The gvm tools may be used with both the older and
the current Greenbone OS.
The tools are mostly helpful for batch mode (batch processing, scripting).
With this tool the GMP protocol can be used in a simple way:
gvm-cli --xml "<get_version/>"
gvm-cli --xml "<get_tasks/>"
gvm-cli < file
11.2.1 Configuring the Client
To use the gvm-cli command you need to log into the appliance. For this the required information is
supplied either using command line switches or a configuration file (~/.config/gvm-tools.conf).
To provide the GMP user using command line switches use:
• --gmp-username
• --gmp-password
Alternatively a configuration file ~/.config/gvm-tools.conf containing these informations may be cre-
ated:
[Auth]
gmp_username=webadmin
gmp_password=kennwort
200 Chapter 11. Greenbone Management Protocol](https://image.slidesharecdn.com/gsmmanual-180112195921/85/Open-VAS-Manual-210-320.jpg)
![Greenbone Security Manager with Greenbone OS 4, Release 4
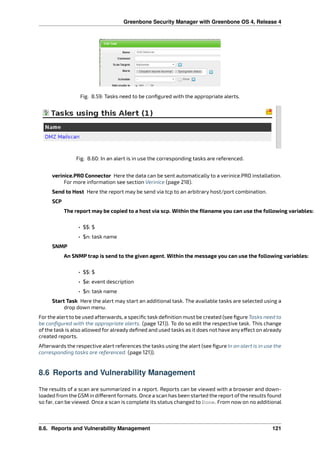
11.3.1 Starting a Scan using gvm-pyshell
A typical example for using the GMP protocol is the scan of a new system. Below we assume that an
Intrusion Detection System is in use that monitors the systems in the DMZ and immediately discovers
new systems and unusual TCP ports not used up to now. If such an event is being discovered the IDS
should automatically initiate a scan of the new system. This should be done with the help of a script.
For the this the gvm-pyshell is very suitable. The processing of the XML output is better supported
by python then by using the shell.
Starting point is the IP address of the new suspected system. For this IP address a target needs to be
created in the GSM.
Under http://docs.greenbone.net/API/OMP/omp-7.0.html#command_create_target the command
create_target is described.
The following lines will first step through the required commands using the interactive python shell:
$ gvm-pyshell ssh
--gmp-username webadmin --gmp-password kennwort
--hostname 192.168.222.115
GVM Interactive Console. Type "help" to get information about functionality.
>>> res=gmp.create_target("Suspect Host", True, hosts="192.168.255.254")
>>> target_id = res.xpath(‛@id‛)[0]
The variable target_id contains now the id of the created target. This id can now be used to create the
corresponding task.
The task creation requires the following input:
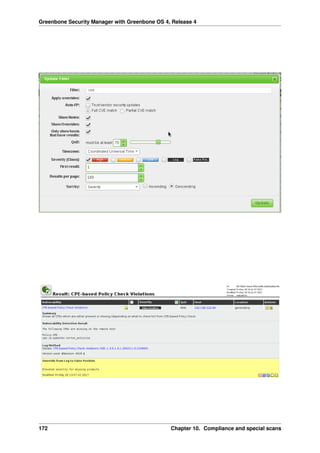
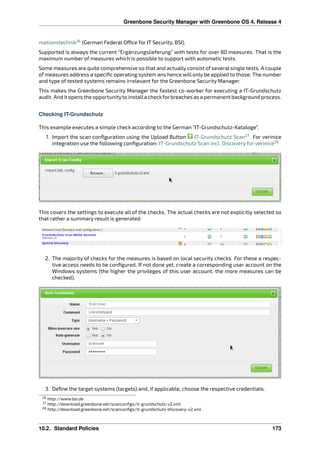
• target_id
• config_id
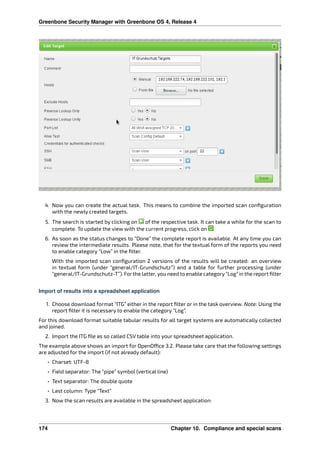
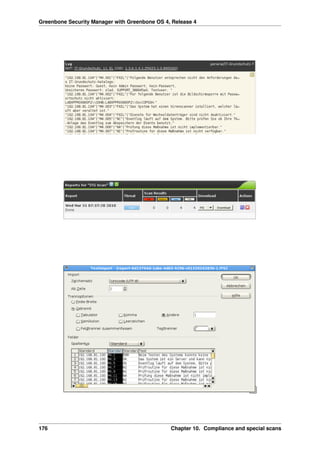
• scanner_id
• task_name
• task_comment
To display all available scan configurations the following code may be used:
>>> res = gmp.get_configs()
>>> for i, conf in enumerate(res.xpath(‛config‛)):
... id = conf.xpath(‛@id‛)[0]
... name = conf.xpath(‛name/text()‛)[0]
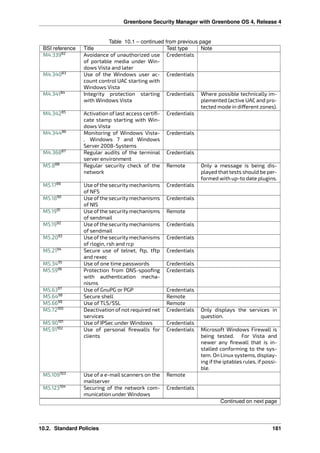
... print(‛n({0}) {1}: ({2})‛.format(i, name, id))
The scanners can be discovered using the same technique. But if only the built in scanners are used
the following id are hard-coded:
• OpenVAS 08b69003-5fc2-4037-a479-93b440211c73
• CVE 6acd0832-df90-11e4-b9d5-28d24461215b
To create the task use the following command:
>>> res=gmp.create_task(name="Scan Suspect Host",
... config_id="daba56c8-73ec-11df-a475-002264764cea",
... scanner_id="08b69003-5fc2-4037-a479-93b440211c73",
... target_id=target_id)
>>> task_id = res.xpath(‛@id‛)[0]
To start the task use:
>>> gmp.start_task(task_id)
The current version of the GSM (4.1.7) closes the connection in the gvm-pyshell imediately. Further
commands are not possible.
11.3. gvm-pyshell 203](https://image.slidesharecdn.com/gsmmanual-180112195921/85/Open-VAS-Manual-213-320.jpg)
![Greenbone Security Manager with Greenbone OS 4, Release 4
All these commands may be put in a python script which may be invoked by the gvm-pyshell:
len_args = len(args.script) - 1
if len_args is not 2:
message = """
This script creates a new task with specific host and nvt!
It needs two parameters after the script name.
First one is name of the target and the second one is the
chosen host. The task is called target-task
Example:
$ gvm-pyshell ssh newtask target host
"""
print(message)
quit()
target = args.script[1]
host = args.script[2]
task = target + " Task"
# Full and Fast
myconfig_id = "daba56c8-73ec-11df-a475-002264764cea"
# OpenVAS Scanner
myscanner_id = "08b69003-5fc2-4037-a479-93b440211c73"
res=gmp.create_target(target, True, hosts=host)
mytarget_id = res.xpath(‛@id‛)[0]
res=gmp.create_task(name=task,
config_id=myconfig_id,
scanner_id=myscanner_id,
target_id=mytarget_id)
mytask_id = res.xpath(‛@id‛)[0]
gmp.start_task(mytask_id)
11.4 Example Scripts
The gvm-tools come with a collection of example scripts which may be used by the
gvm-pyshell.exe tool. Currently the following scripts are shipped in the Bitbucket repository:
• application-detection.gmp
This script will display all hosts with the searched application.
• cfg-gen-for-certs.gmp
This script creates a new scan config with nvts based on a given CERT-Bund Advisory.
• clean-slave.gmp
This script removes all resources from a slave except active tasks.
• create-dummy-data.gmp
This script generates dummy data.
• DeleteOverridesByFilter.gmp
This script deletes overrides using a filter.
• monthly-report2.gmp
204 Chapter 11. Greenbone Management Protocol](https://image.slidesharecdn.com/gsmmanual-180112195921/85/Open-VAS-Manual-214-320.jpg)


![Greenbone Security Manager with Greenbone OS 4, Release 4
Next check if you also have access to the data. The easiest way is to do this via the command line.
omd-host# /opt/omd/sites/<site>/local/lib/nagios/plugins/check_gmp.py
ssh --gmp-username=webadmin --gmp-password=kennwort
--hostname 192.168.222.115
-F 192.168.255.254 --last-report -T "Scan Suspect Host" --status
GMP WARNING: 2 vulnerabilities found - High: 0 Medium: 1 Low: 1
|High=0 Medium=1 Low=1
The plugin supports several commandline switches. These can be displayed using:
./check_gmp.py -h
usage: check_gmp [-h] [-V] [-I MAX_RUNNING_INSTANCES] [--cache [CACHE]]
[--timeout TIMEOUT]
[connection_type] ...
Check-GMP Nagios Command Plugin 1.0 (C) 2017 Greenbone Networks GmbH
...
To display all available commandline switches the connection_type has to be specified:
./check_gmp.py ssh -h
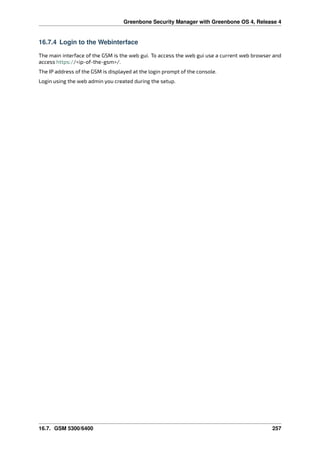
usage: check_gmp ssh [-h] [--timeout TIMEOUT]
[--log [{DEBUG,INFO,WARNING,ERROR,CRITICAL}]]
[-u GMP_USERNAME] [-w GMP_PASSWORD] [-F HOSTADDRESS]
[-T TASK] [--ping | --status] [--trend | --last-report]
[--overrides] [-d] [-l] [--dfn] [--oid] [--descr]
[--showlog] [--scanend] [--autofp {0,1,2}] [-e] [-A]
--hostname HOSTNAME [--port PORT] [--ssh-user SSH_USER]
optional arguments:
-h, --help show this help message and exit
--timeout TIMEOUT Wait <seconds> for response. Default: 60
--log [{DEBUG,INFO,WARNING,ERROR,CRITICAL}]
Activates logging. Default level: INFO.
-u GMP_USERNAME, --gmp-username GMP_USERNAME
GMP username.
...
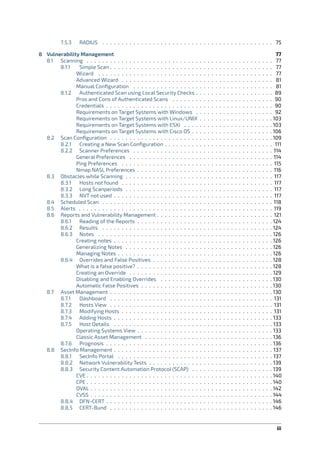
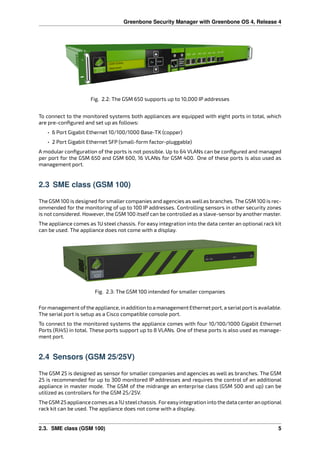
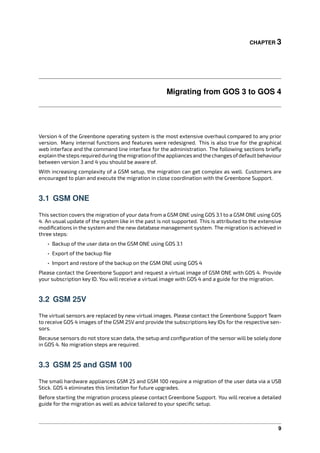
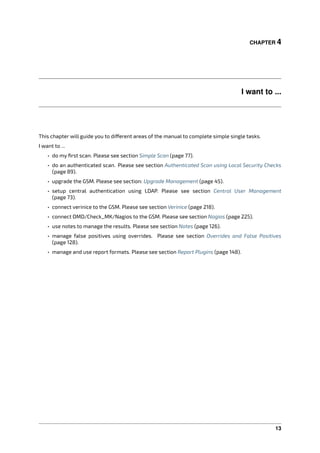
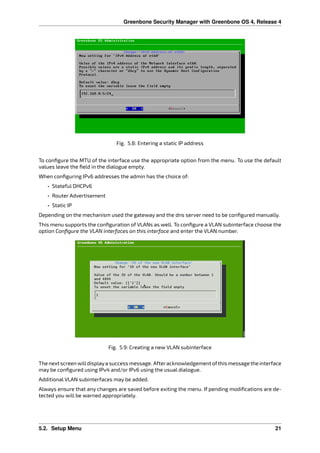
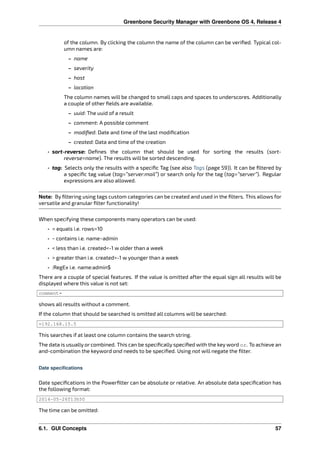
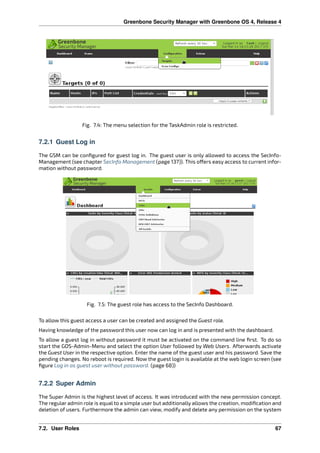
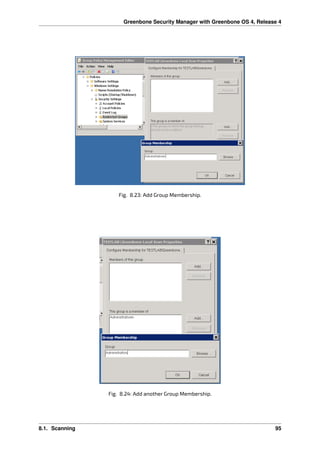
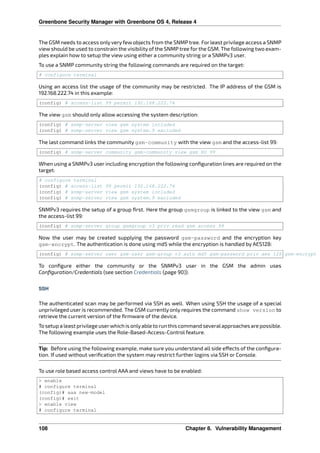
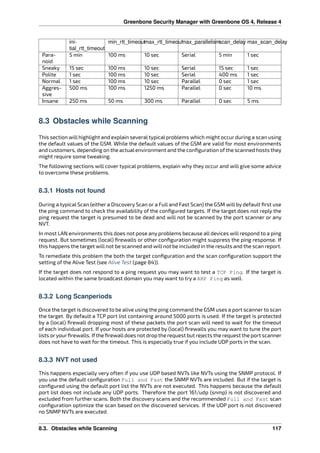
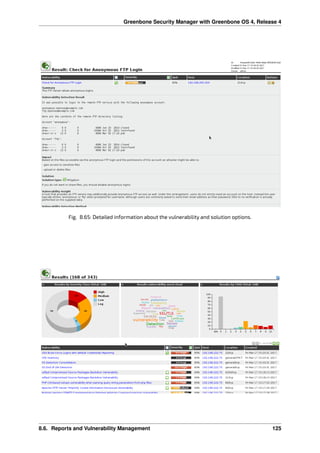
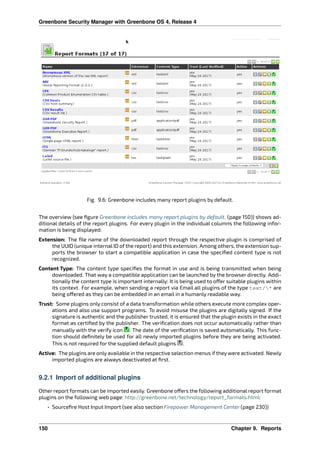
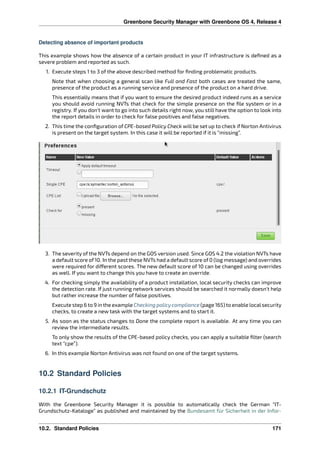
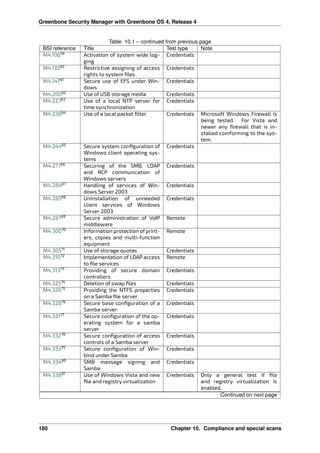
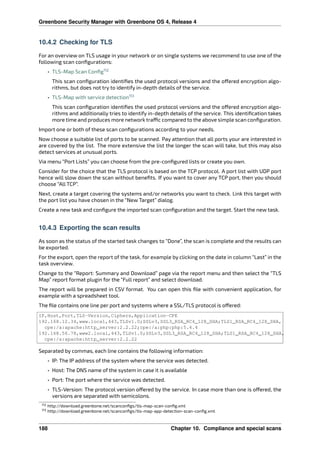
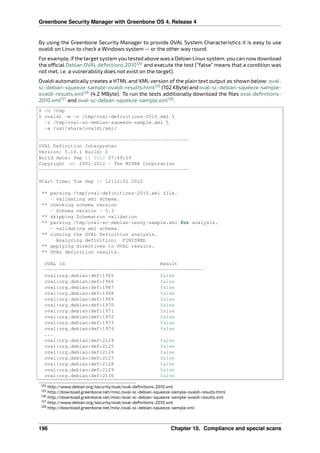
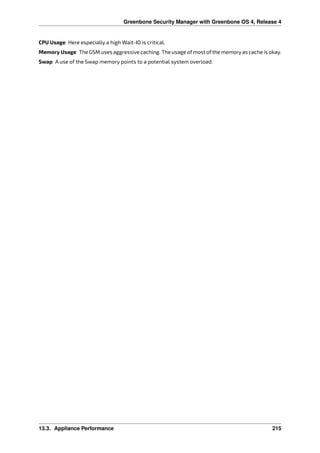
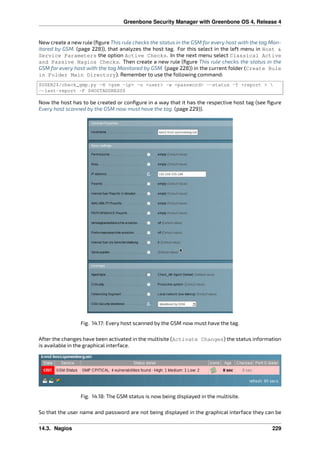
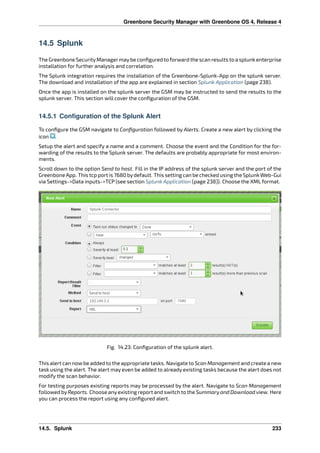
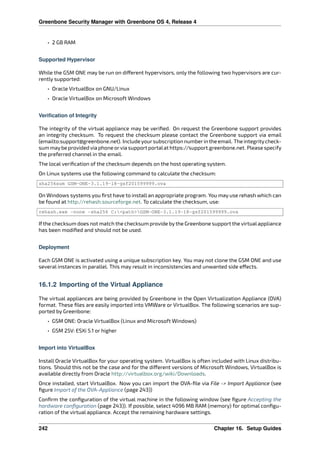
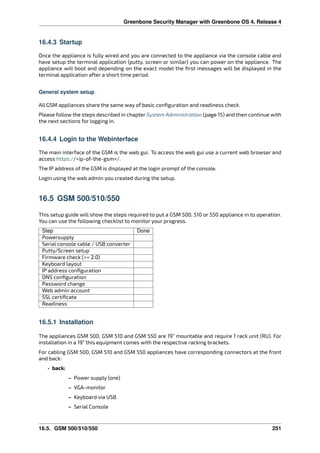
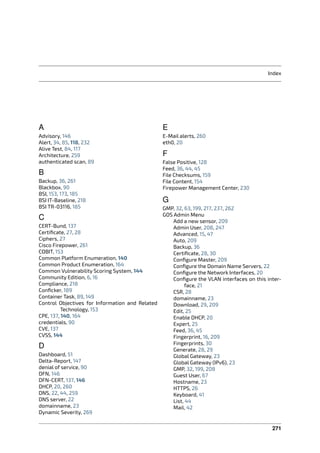
Fig. 14.15: The host tag labels the systems that are being monitored by the GSM.
If the tests were successful the check can be integrated into the web administration frontend WATO.
For this switch to the web interface Multisite for your OMD page (see figure The configuration is done
by example on an empty sample site. (page 226)).
First create the host tag (figure The host tag labels the systems that are being monitored by the GSM.
(page 227)). It labels the hosts that are also being scanned by the GSM appliance. For this select Host
Tags in the left menu and here create a new task.
14.3. Nagios 227](https://image.slidesharecdn.com/gsmmanual-180112195921/85/Open-VAS-Manual-237-320.jpg)


This document is the manual for Greenbone Security Manager version 4. It provides information on installing and configuring the Greenbone Security Manager and its components. The manual covers system administration topics like network configuration, user management, and maintenance functions. It also introduces the Greenbone Security Manager graphical user interface and concepts.