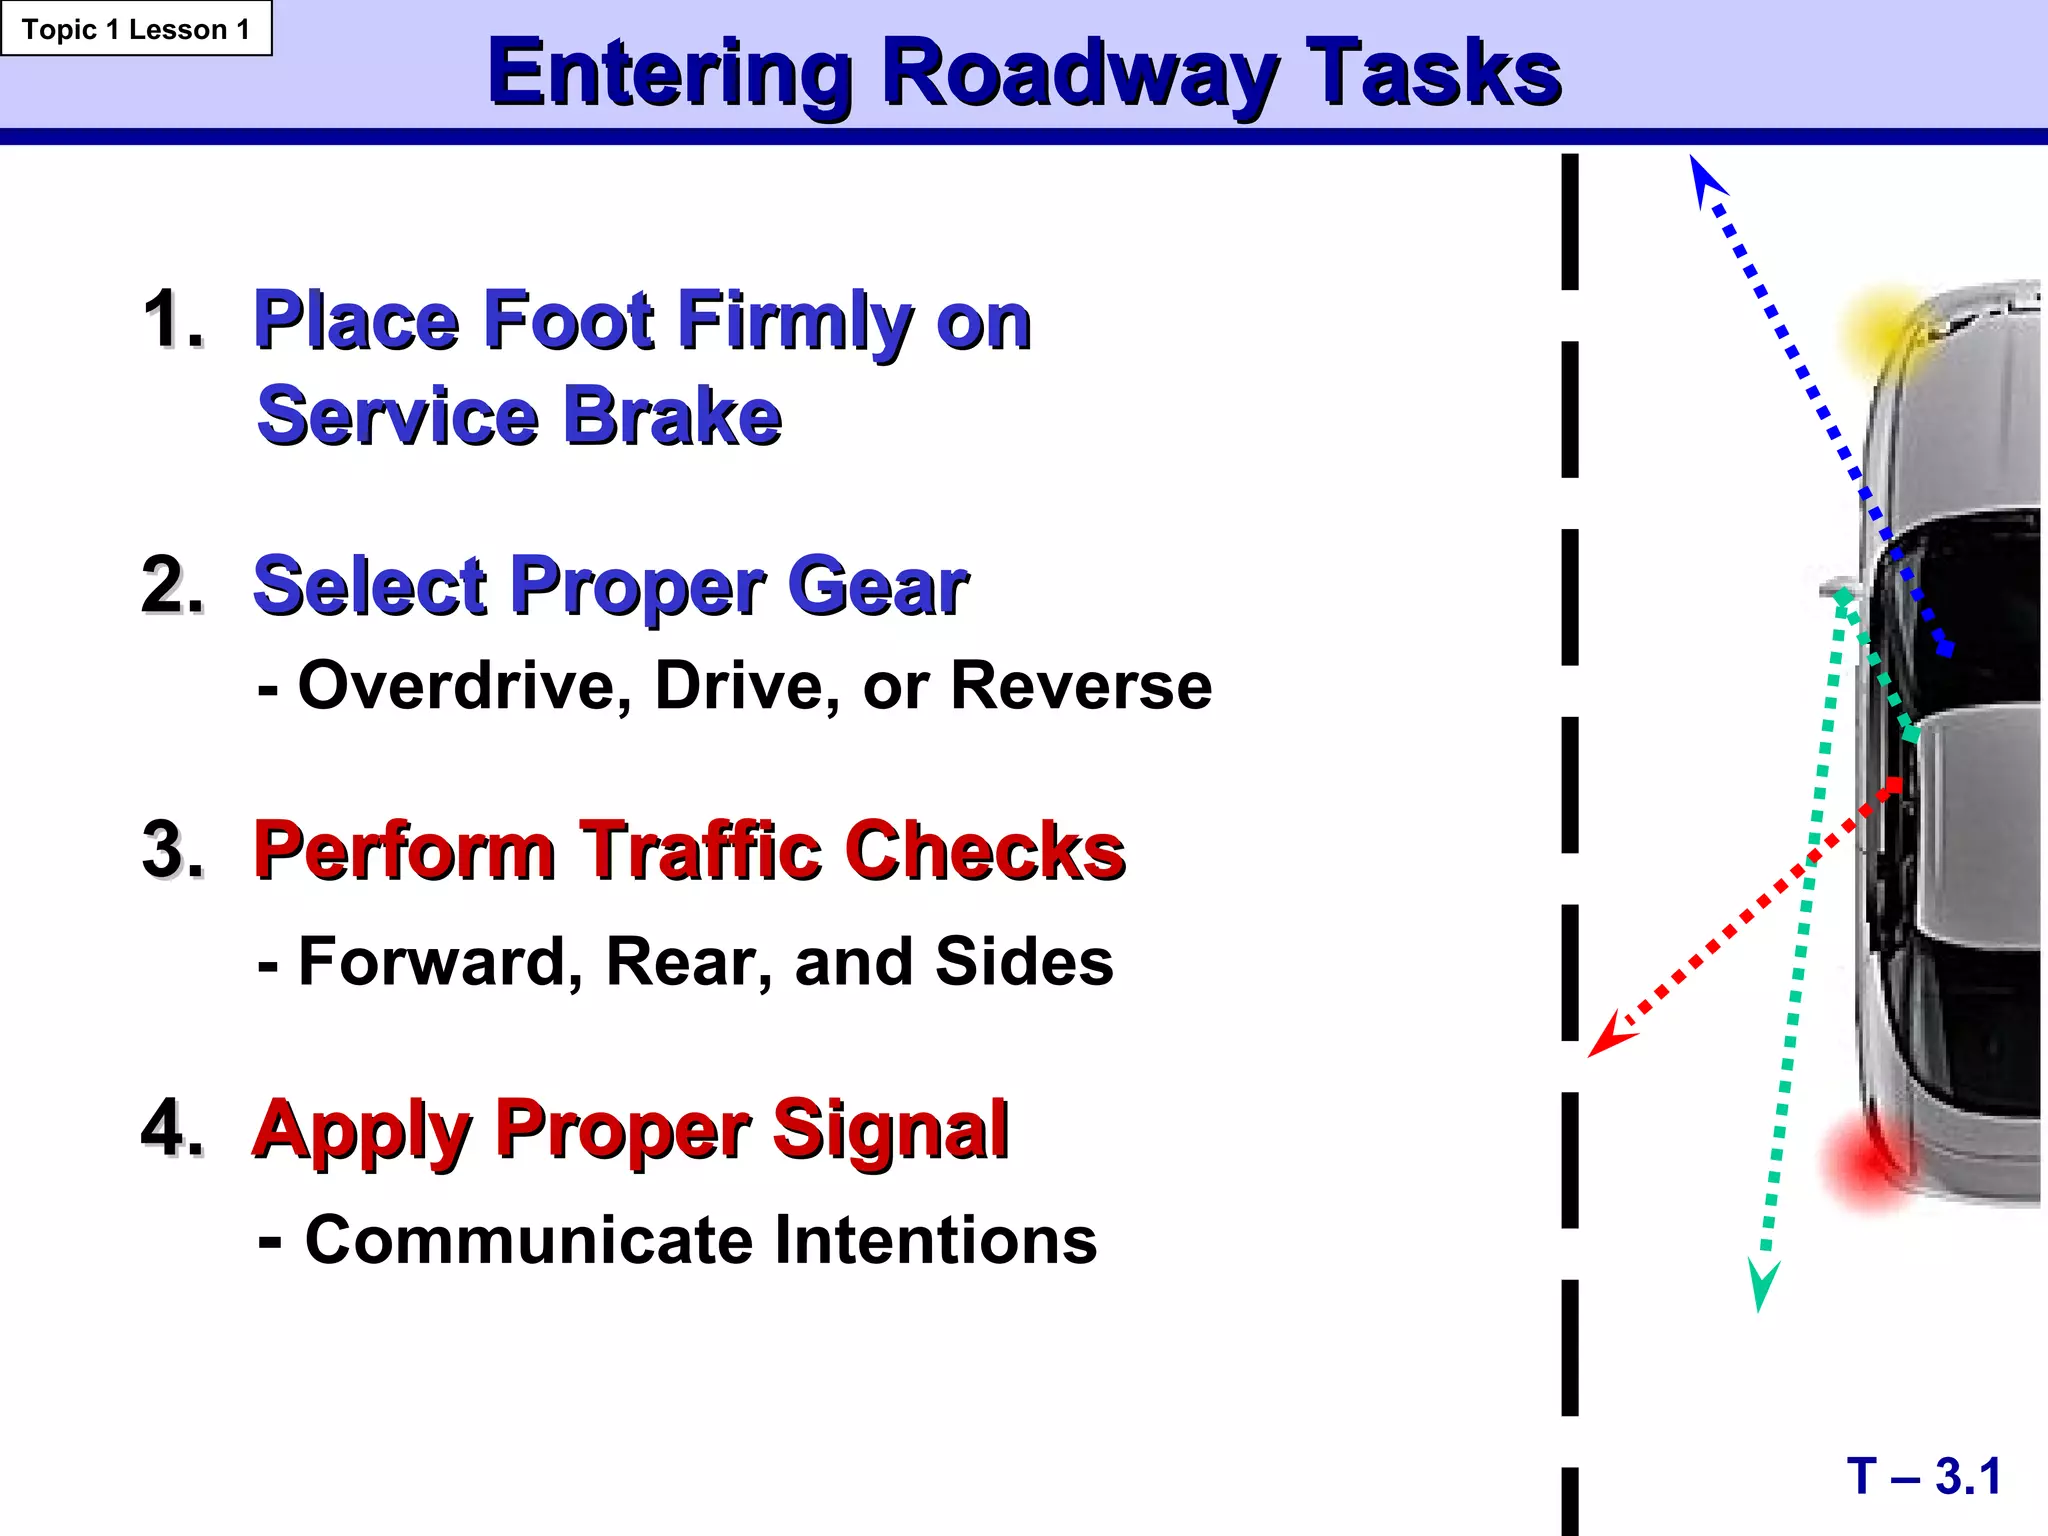
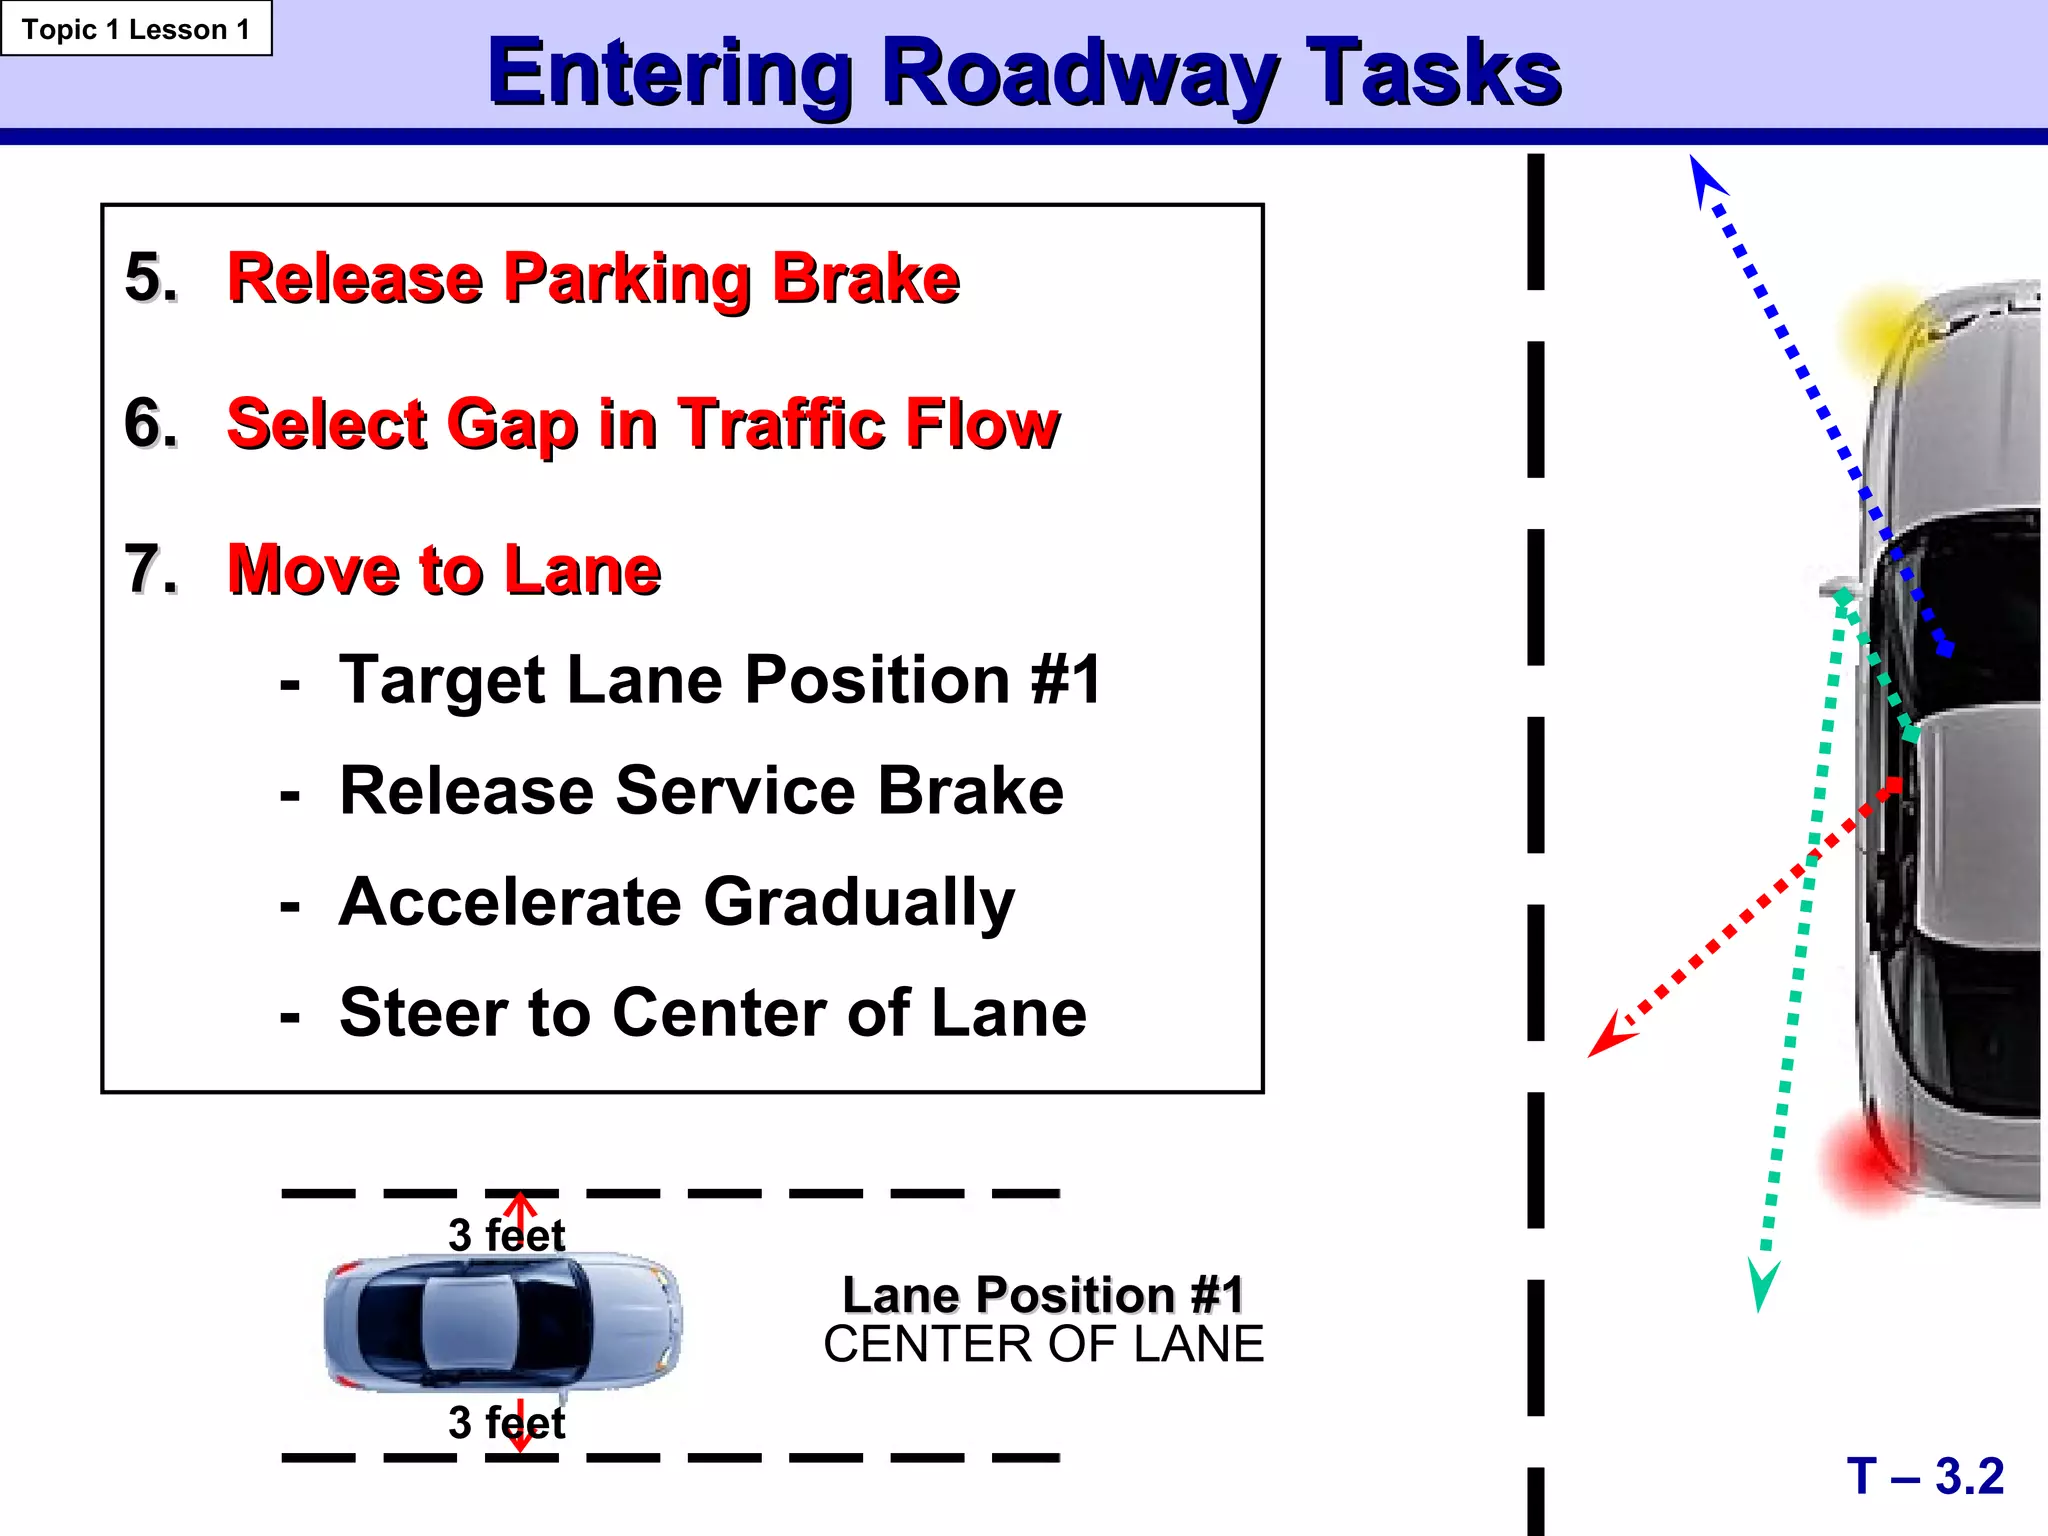
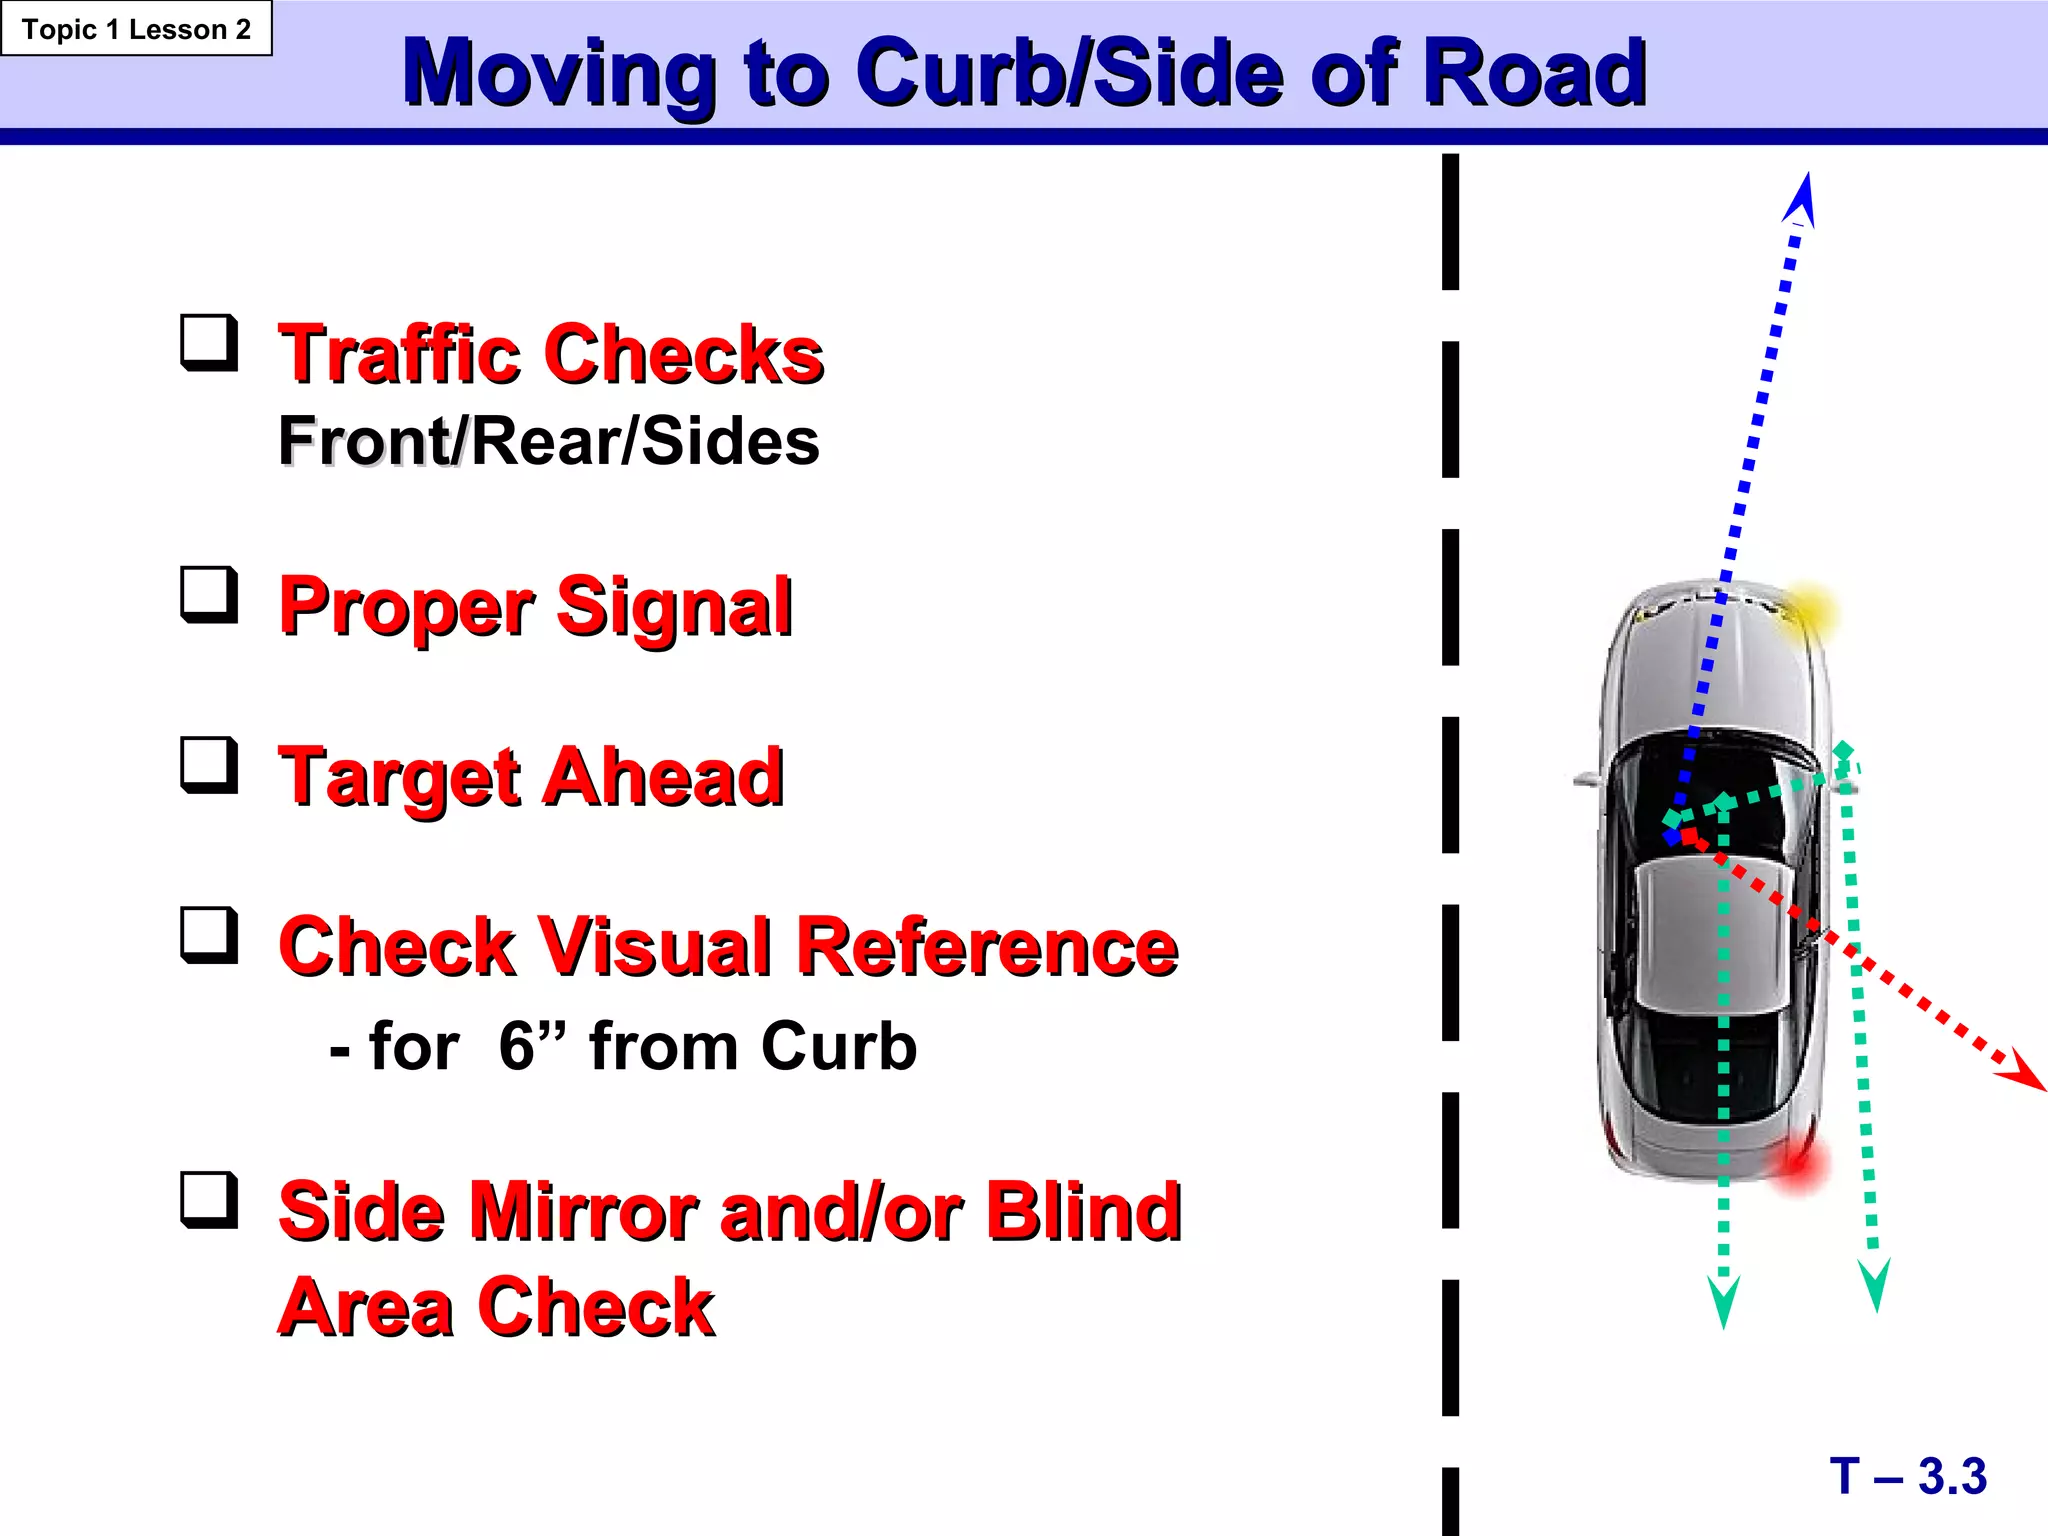
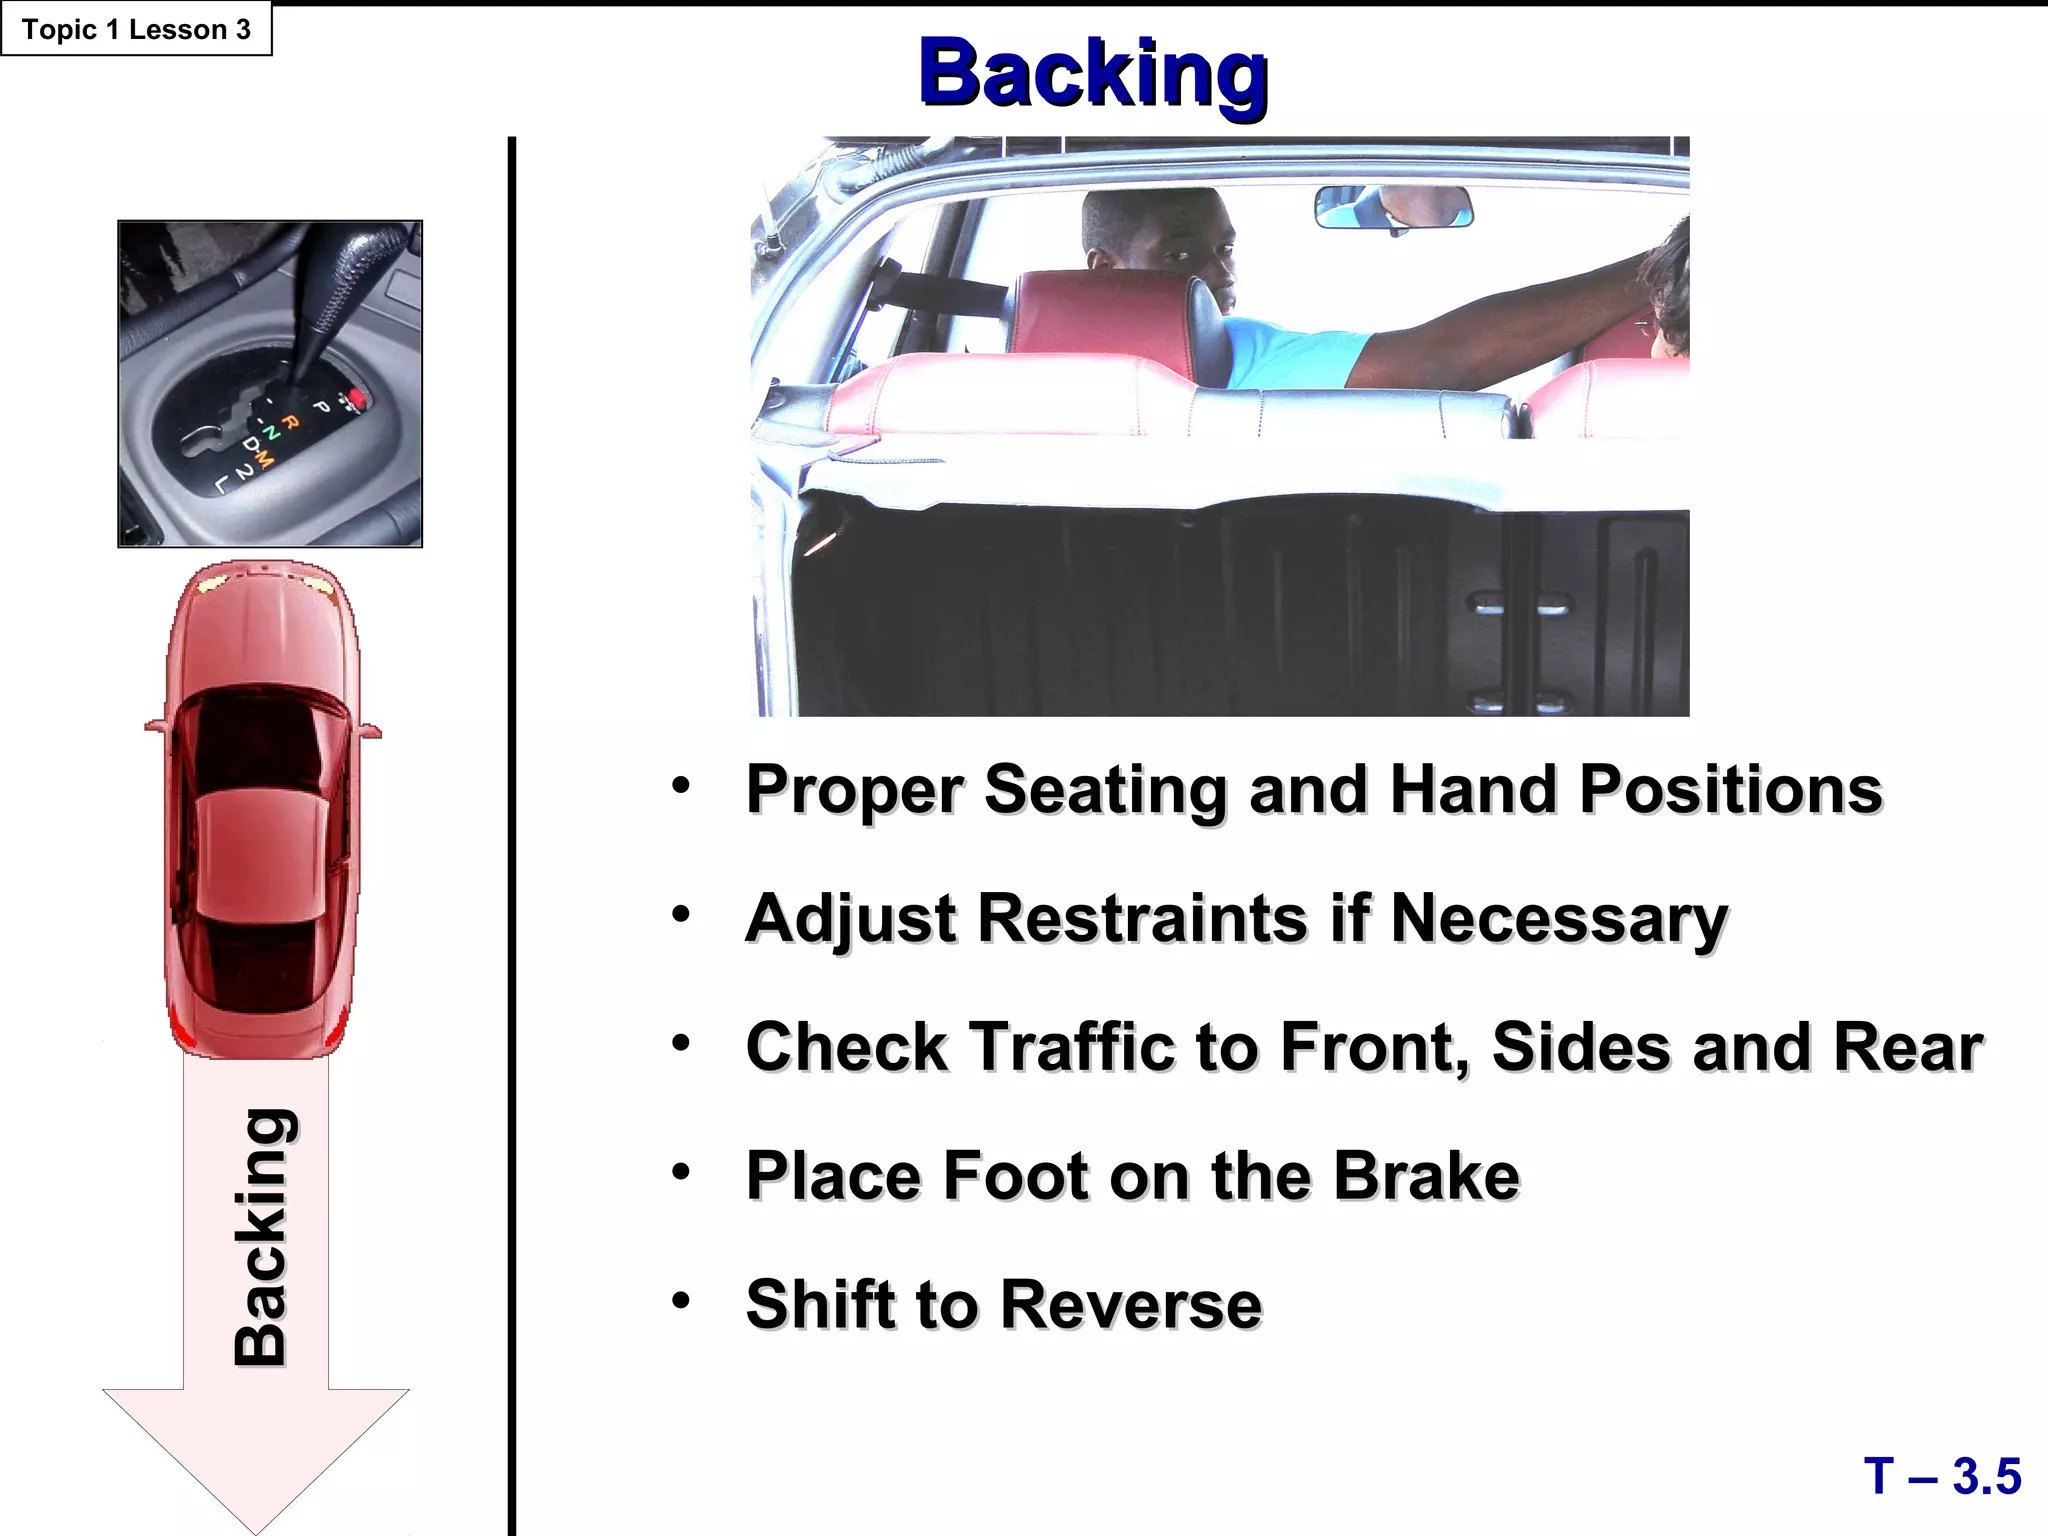
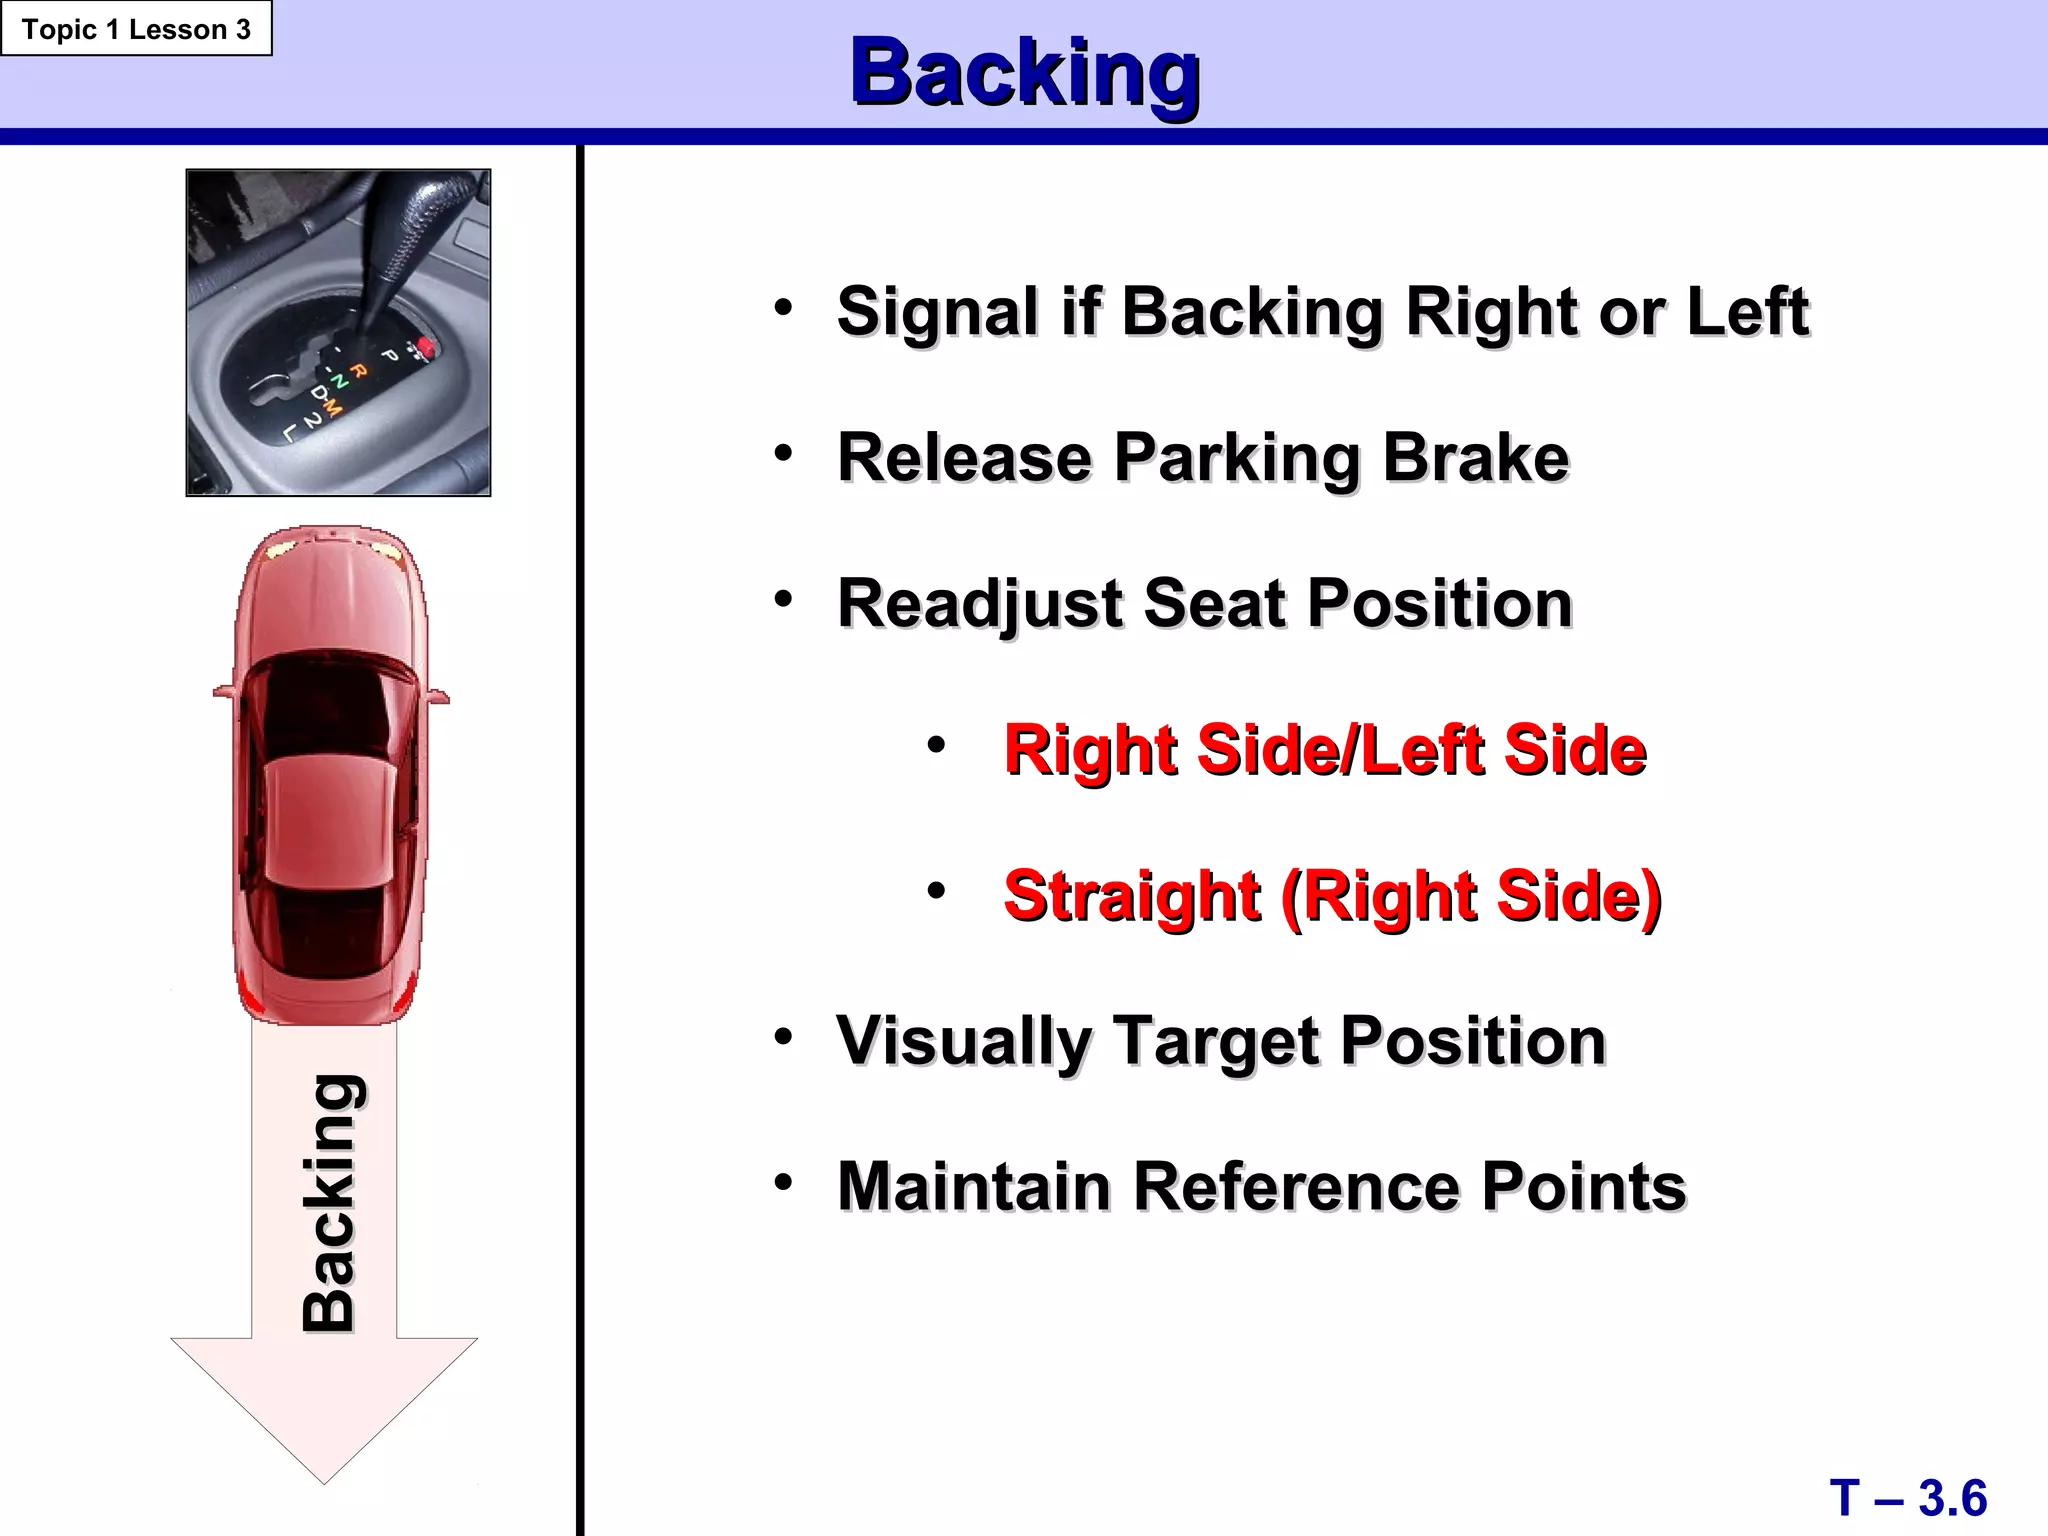
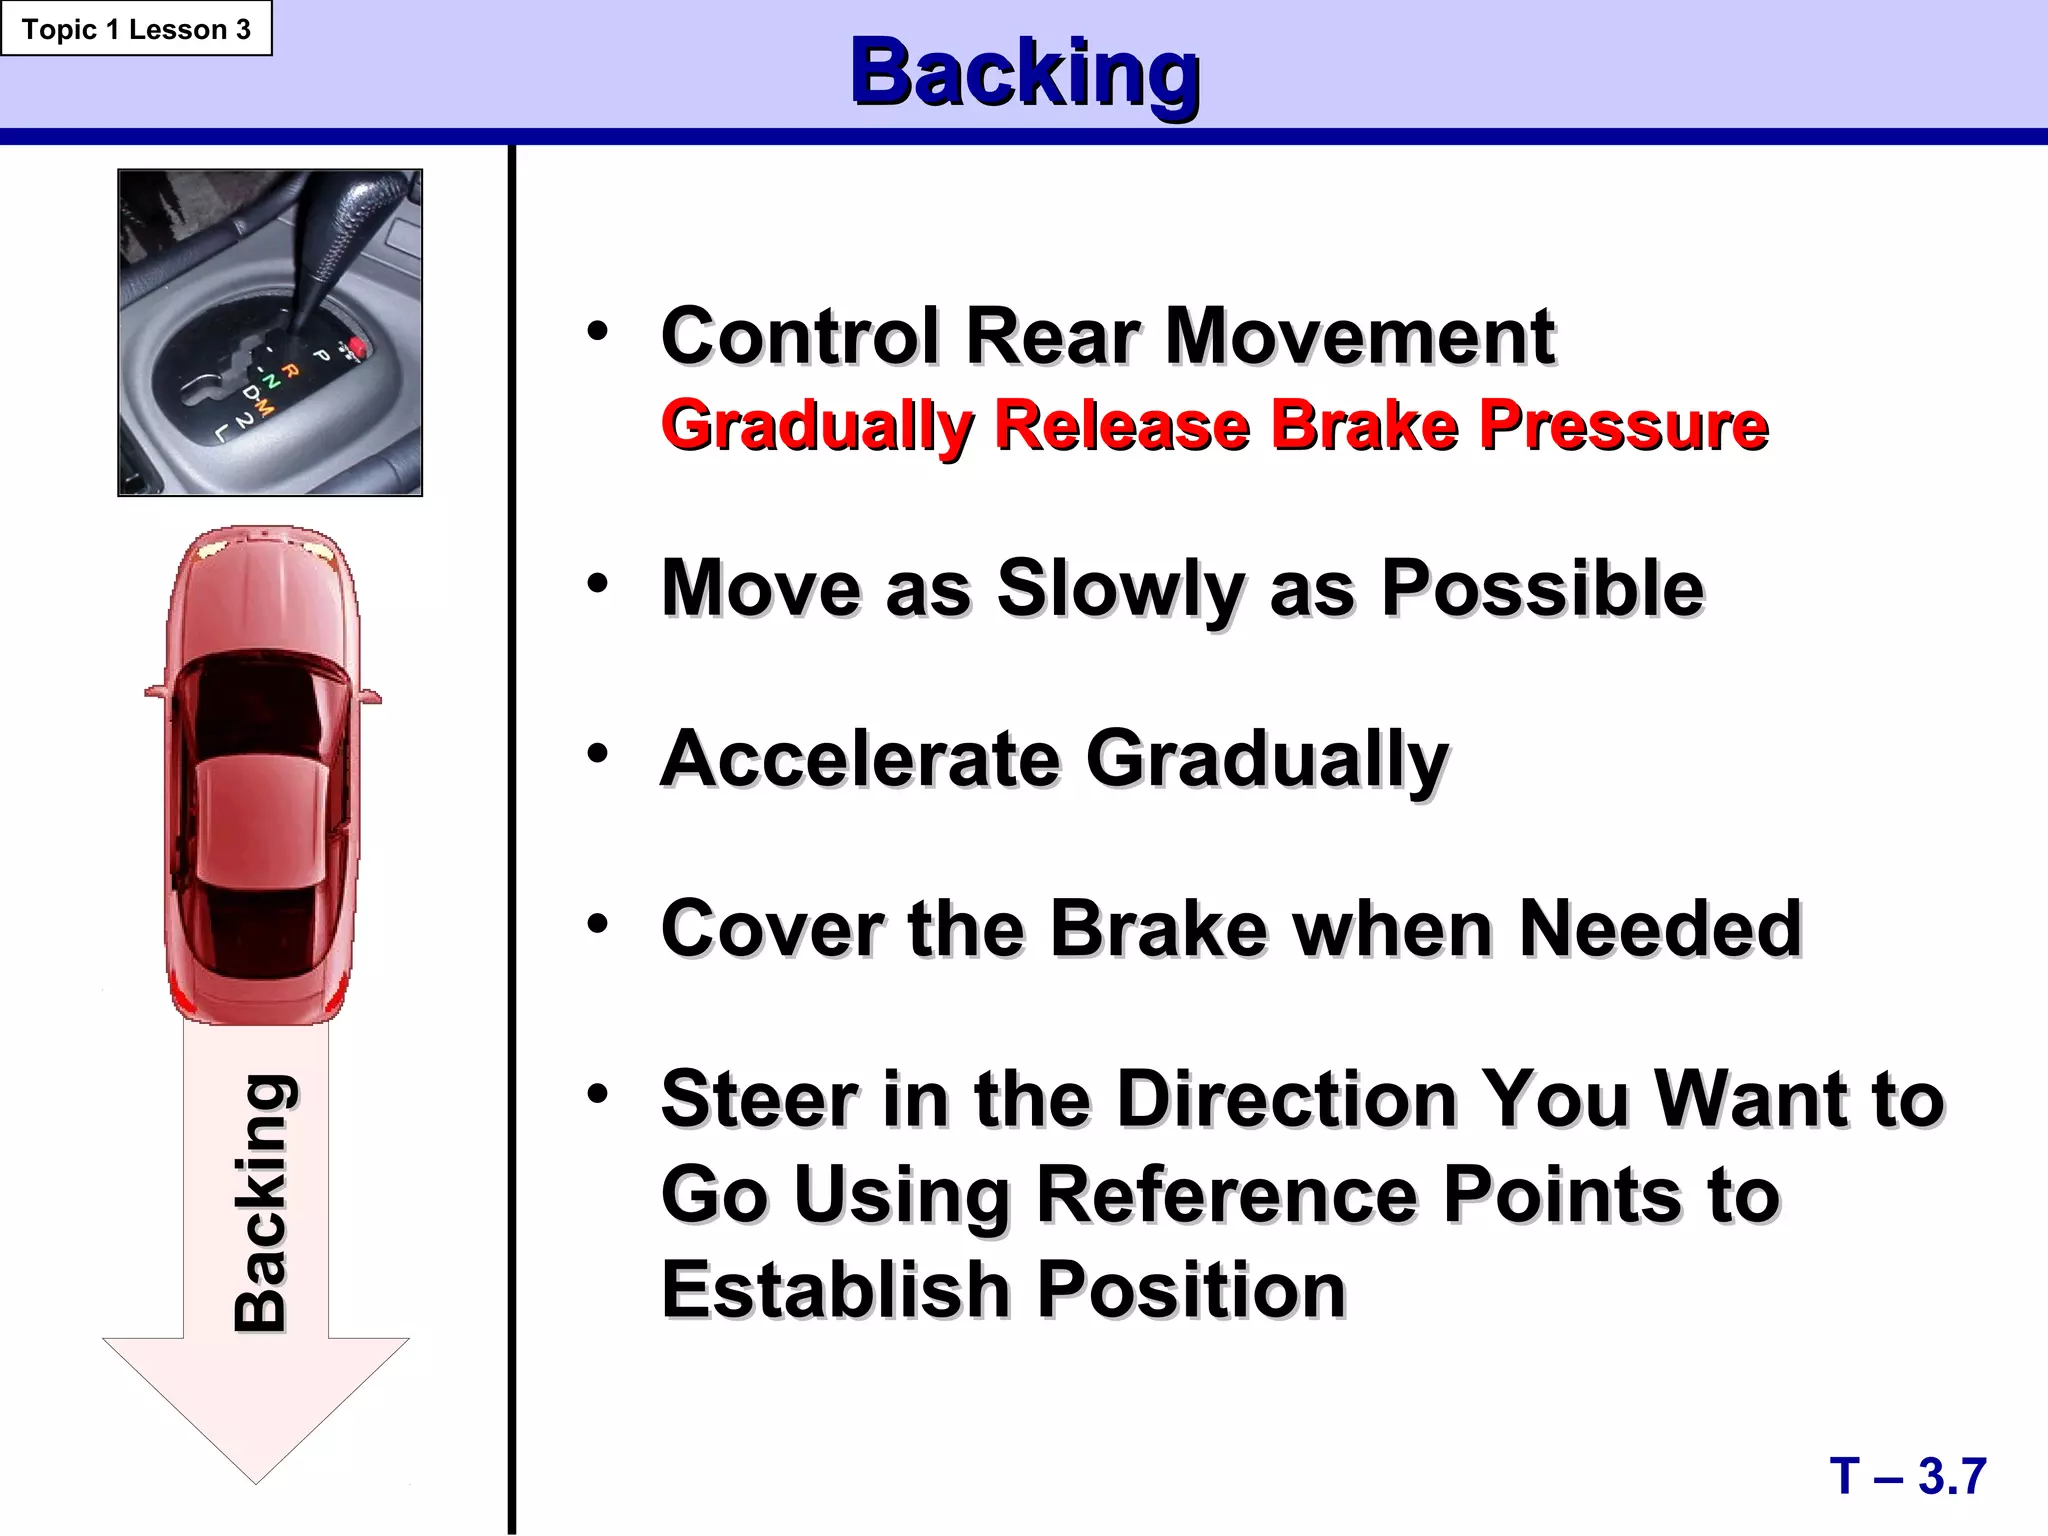
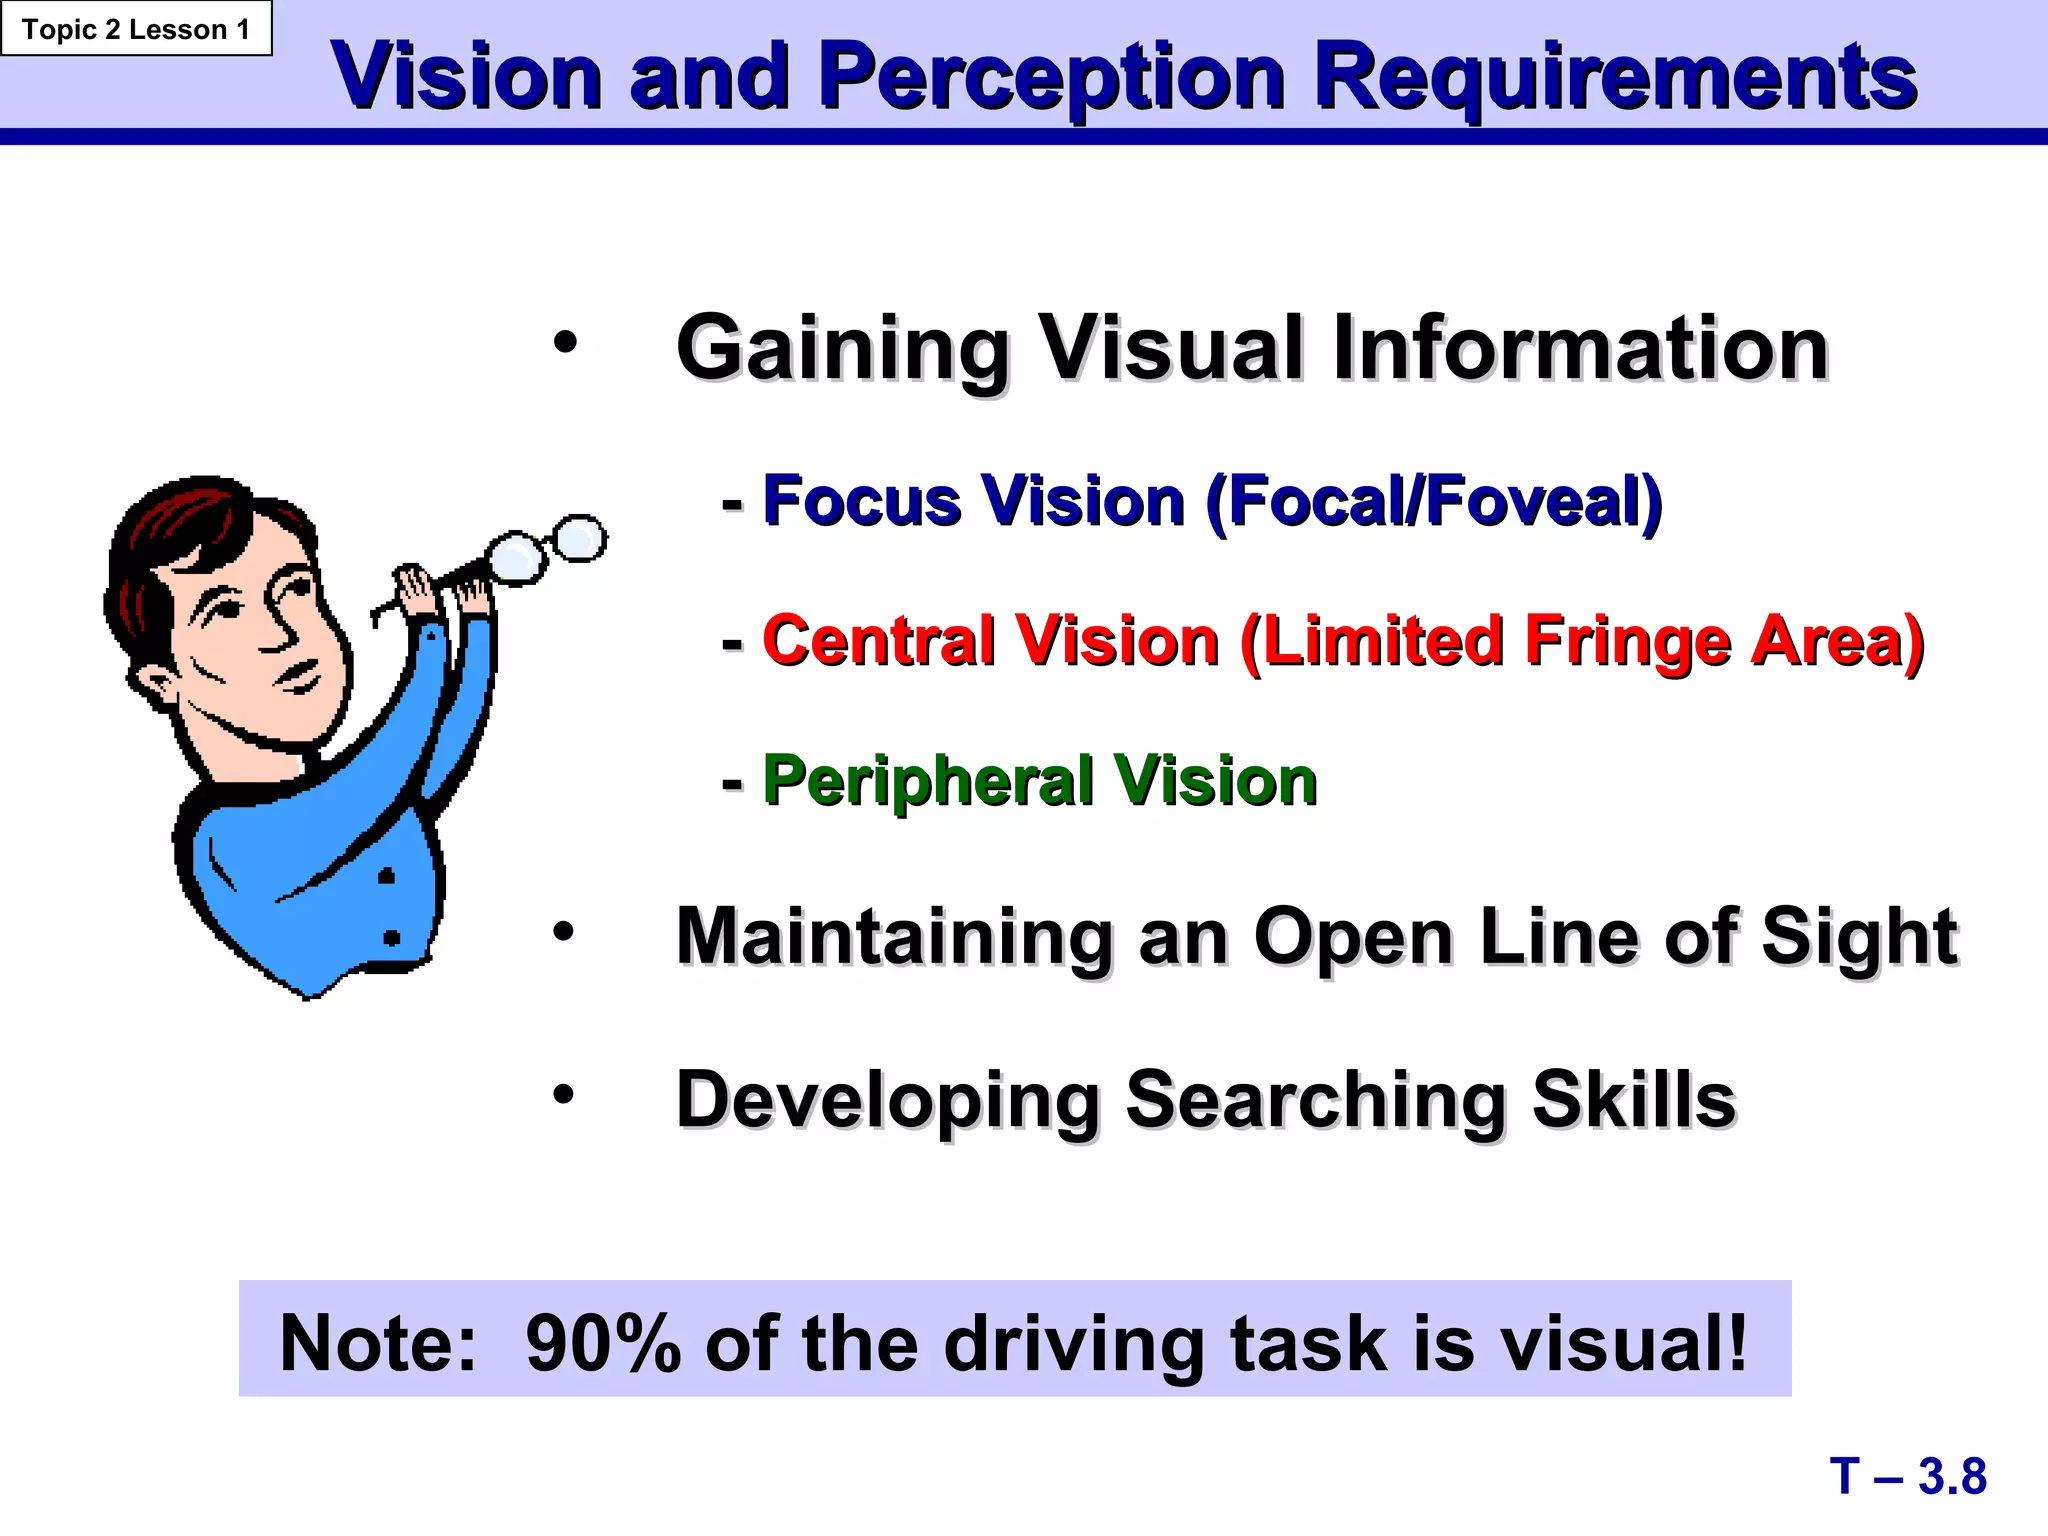
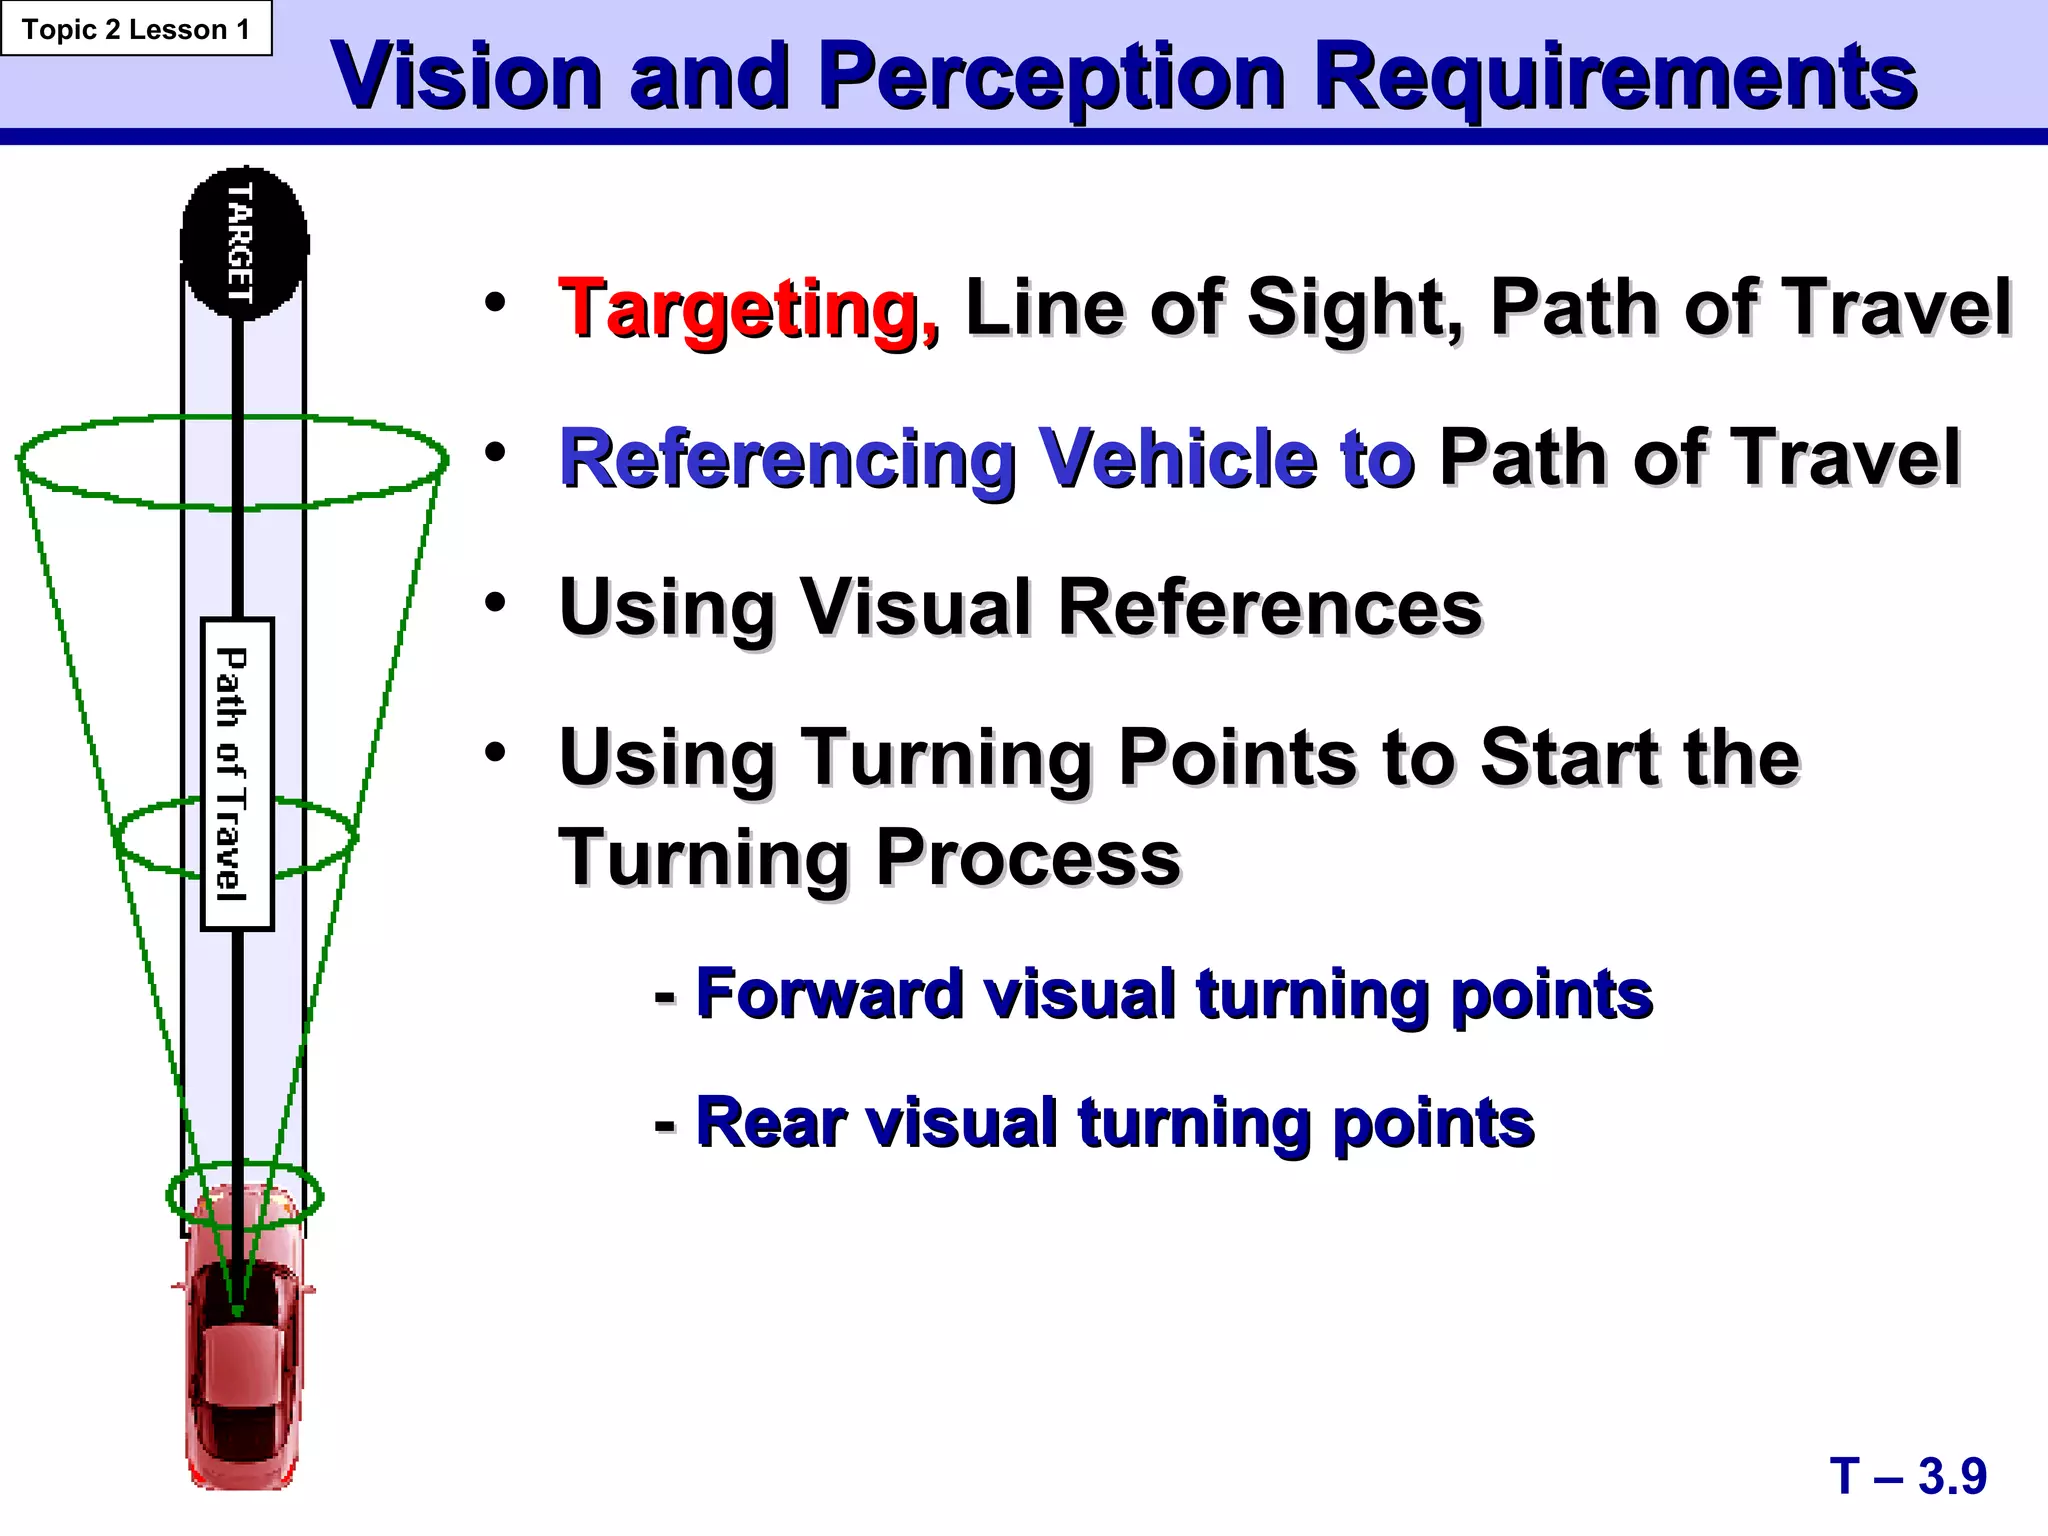
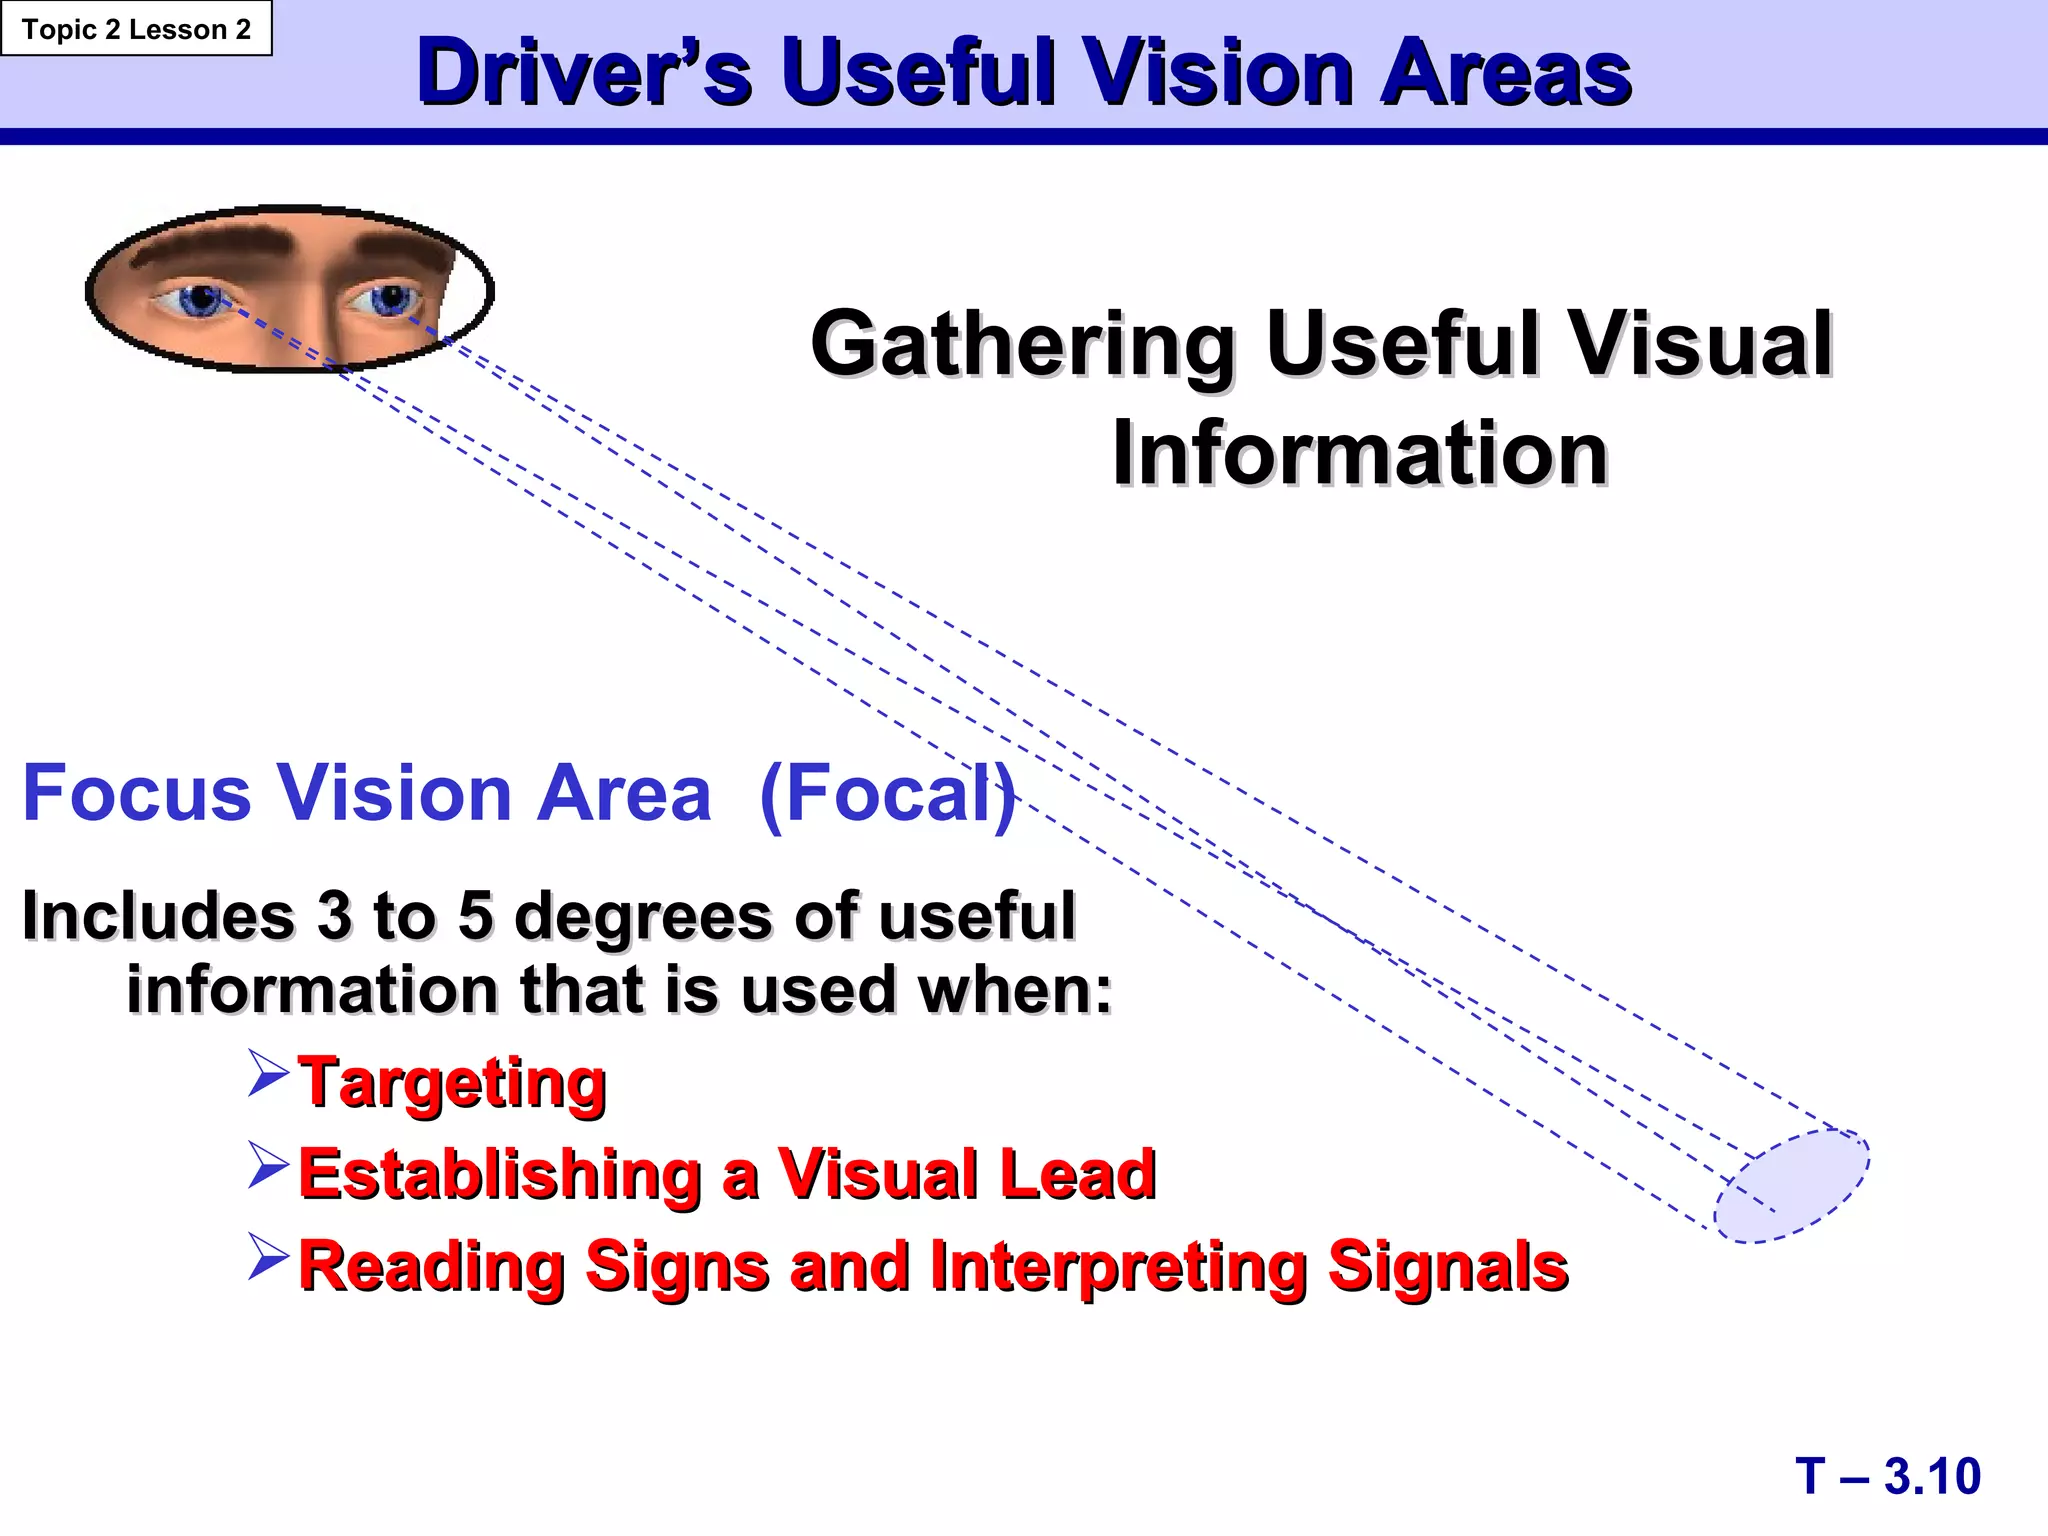
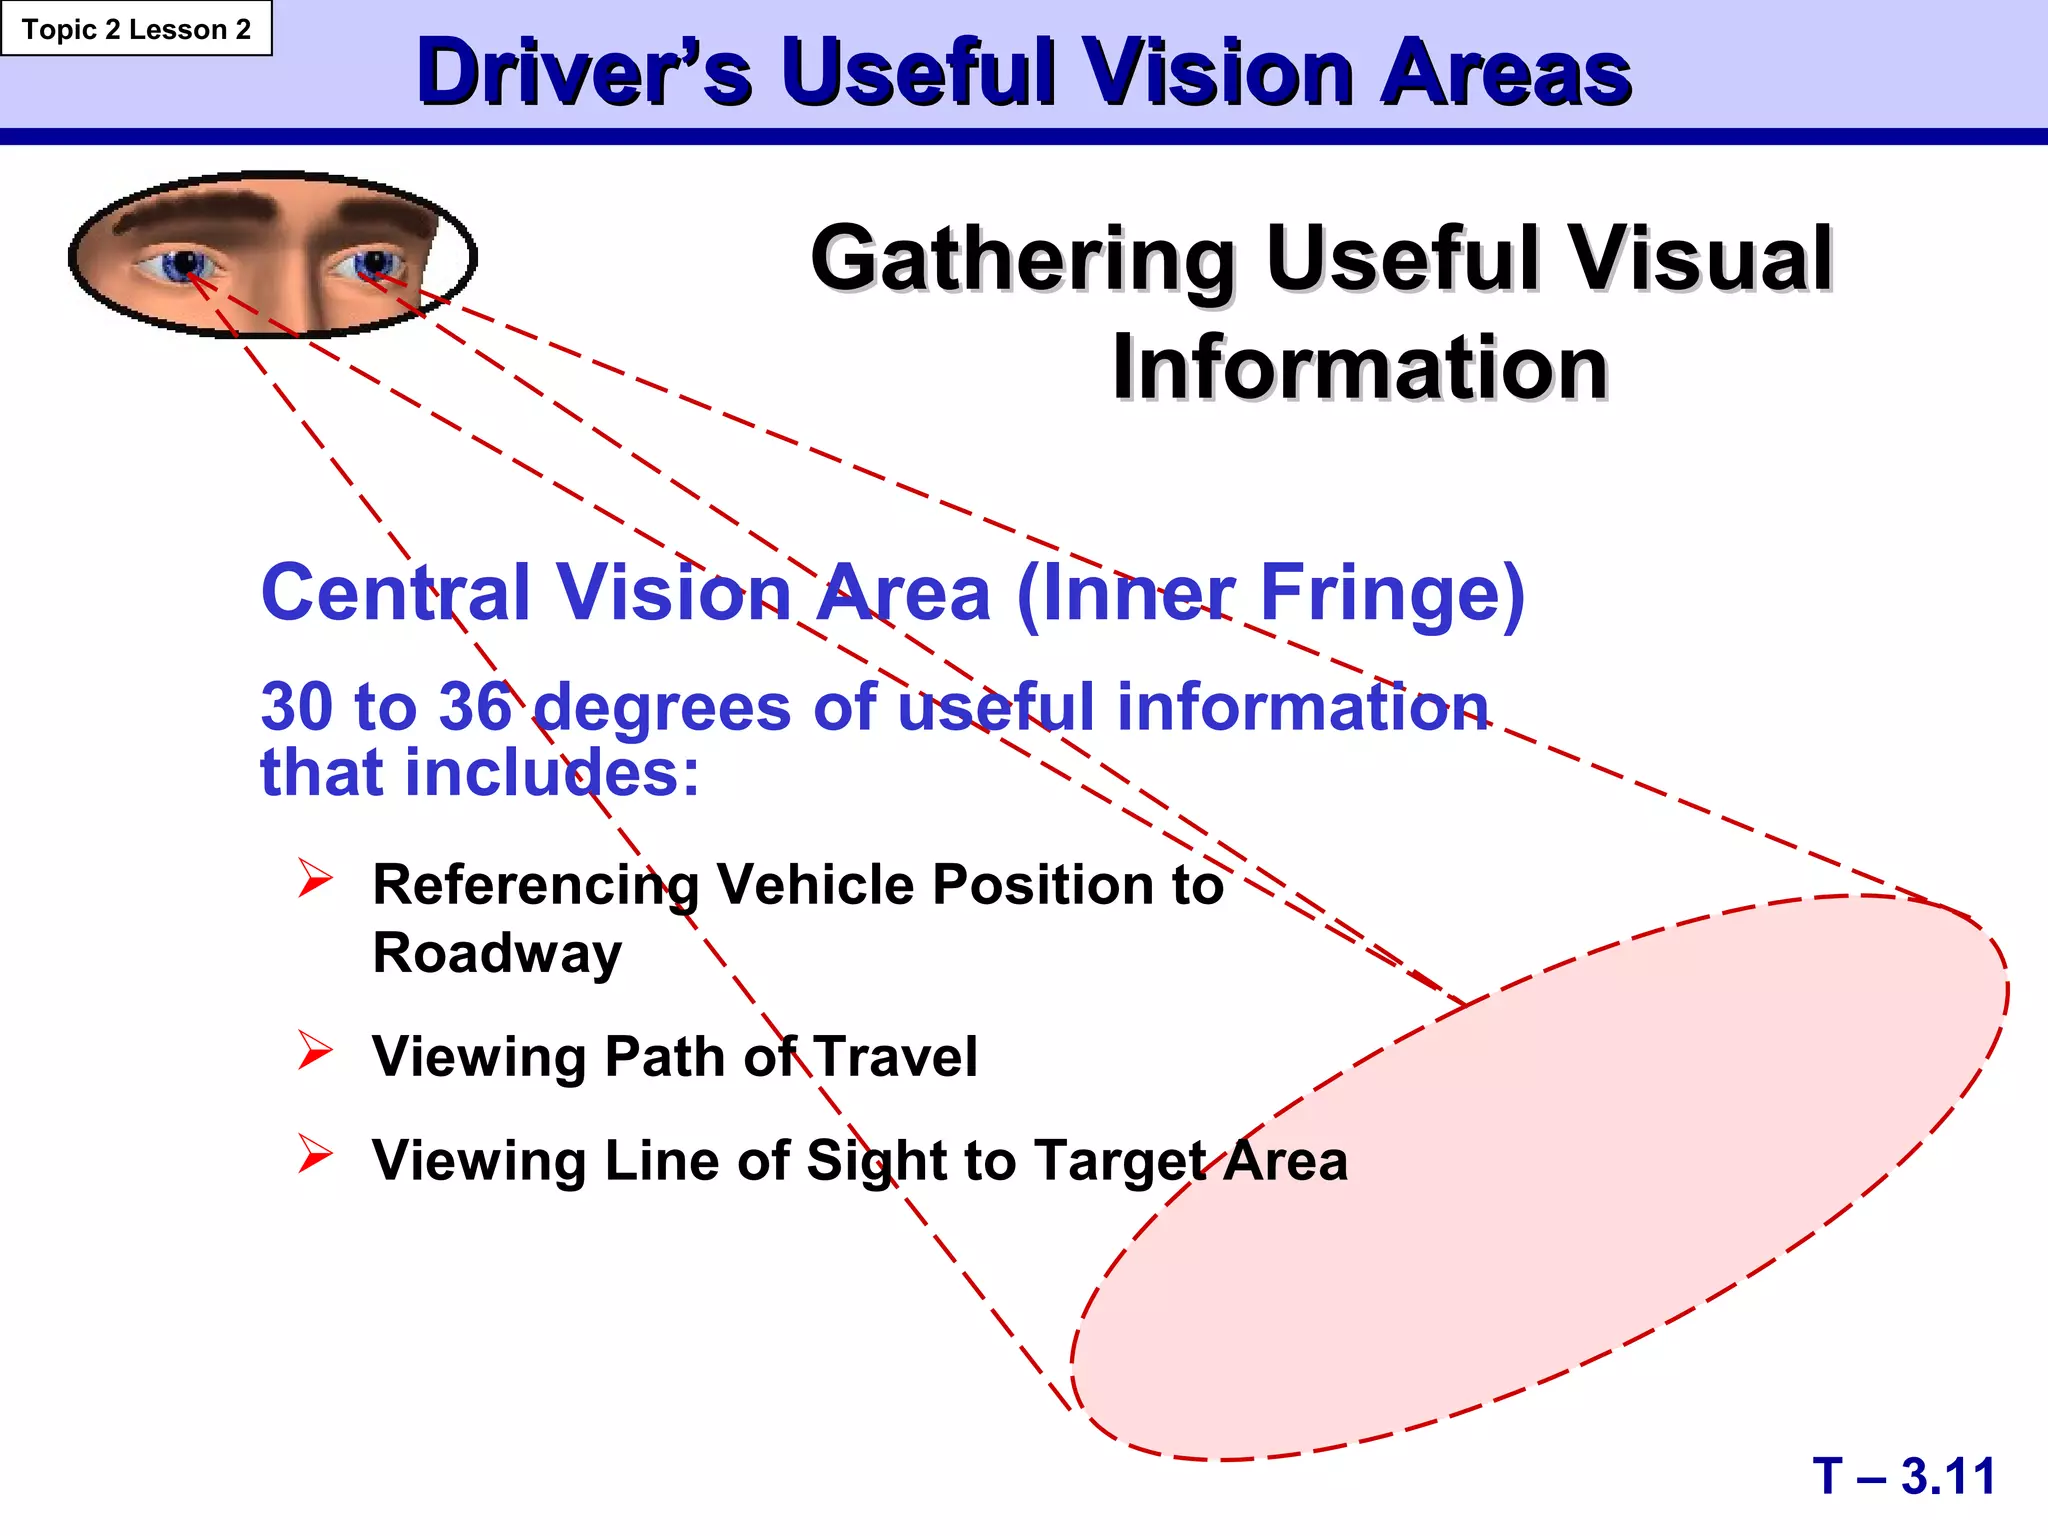
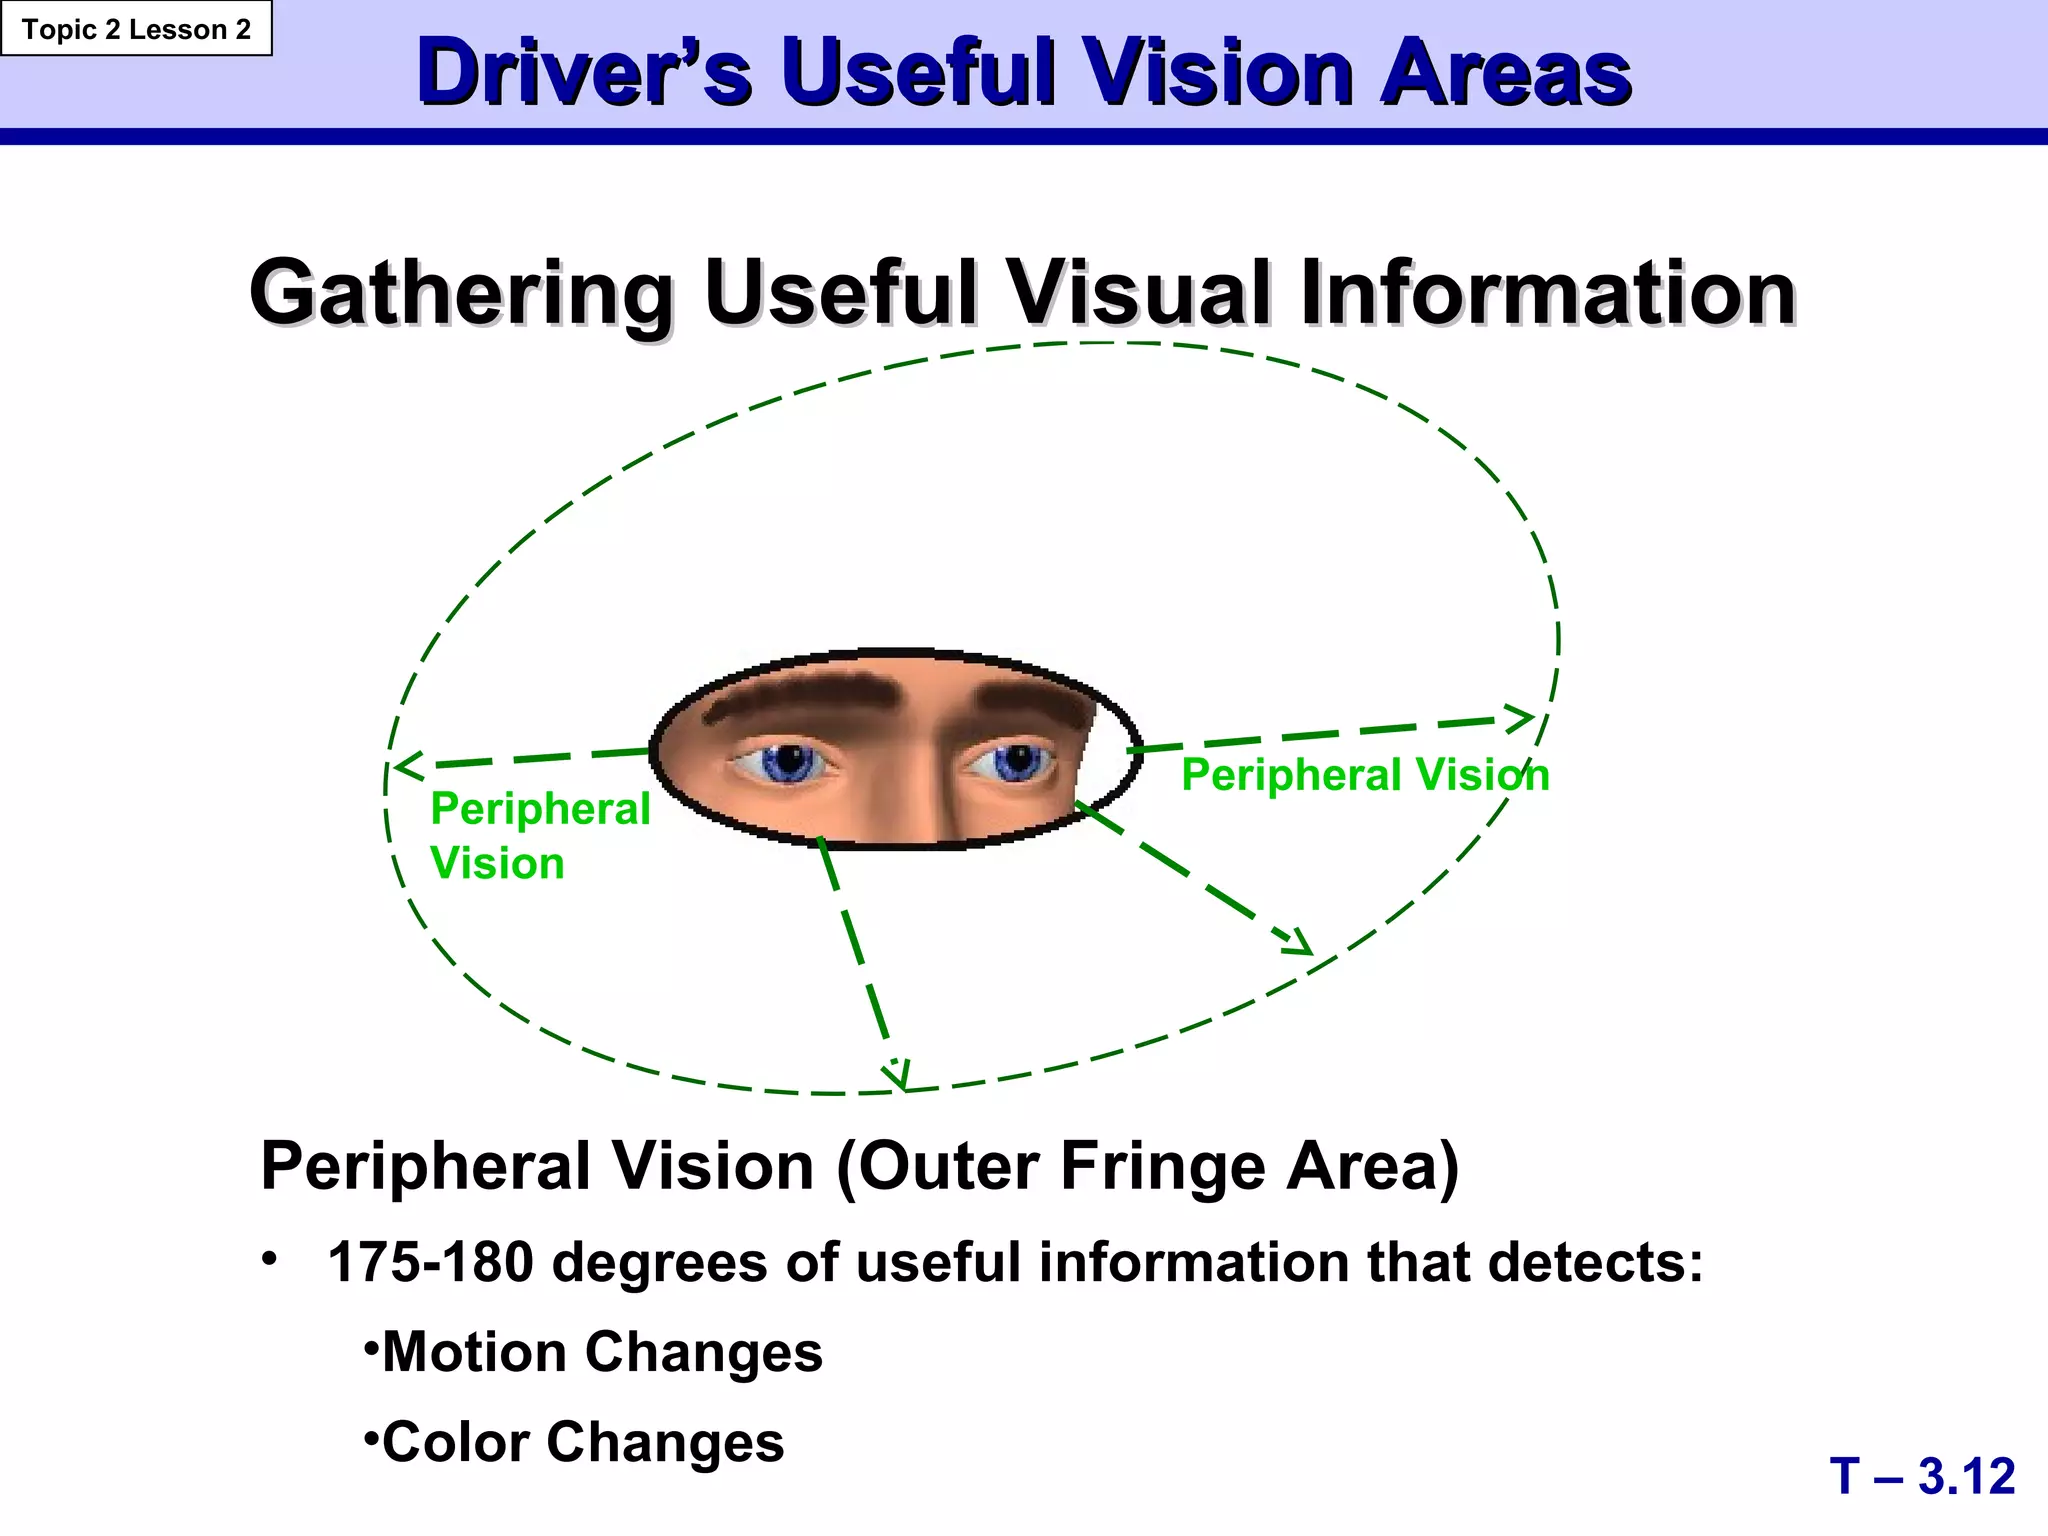
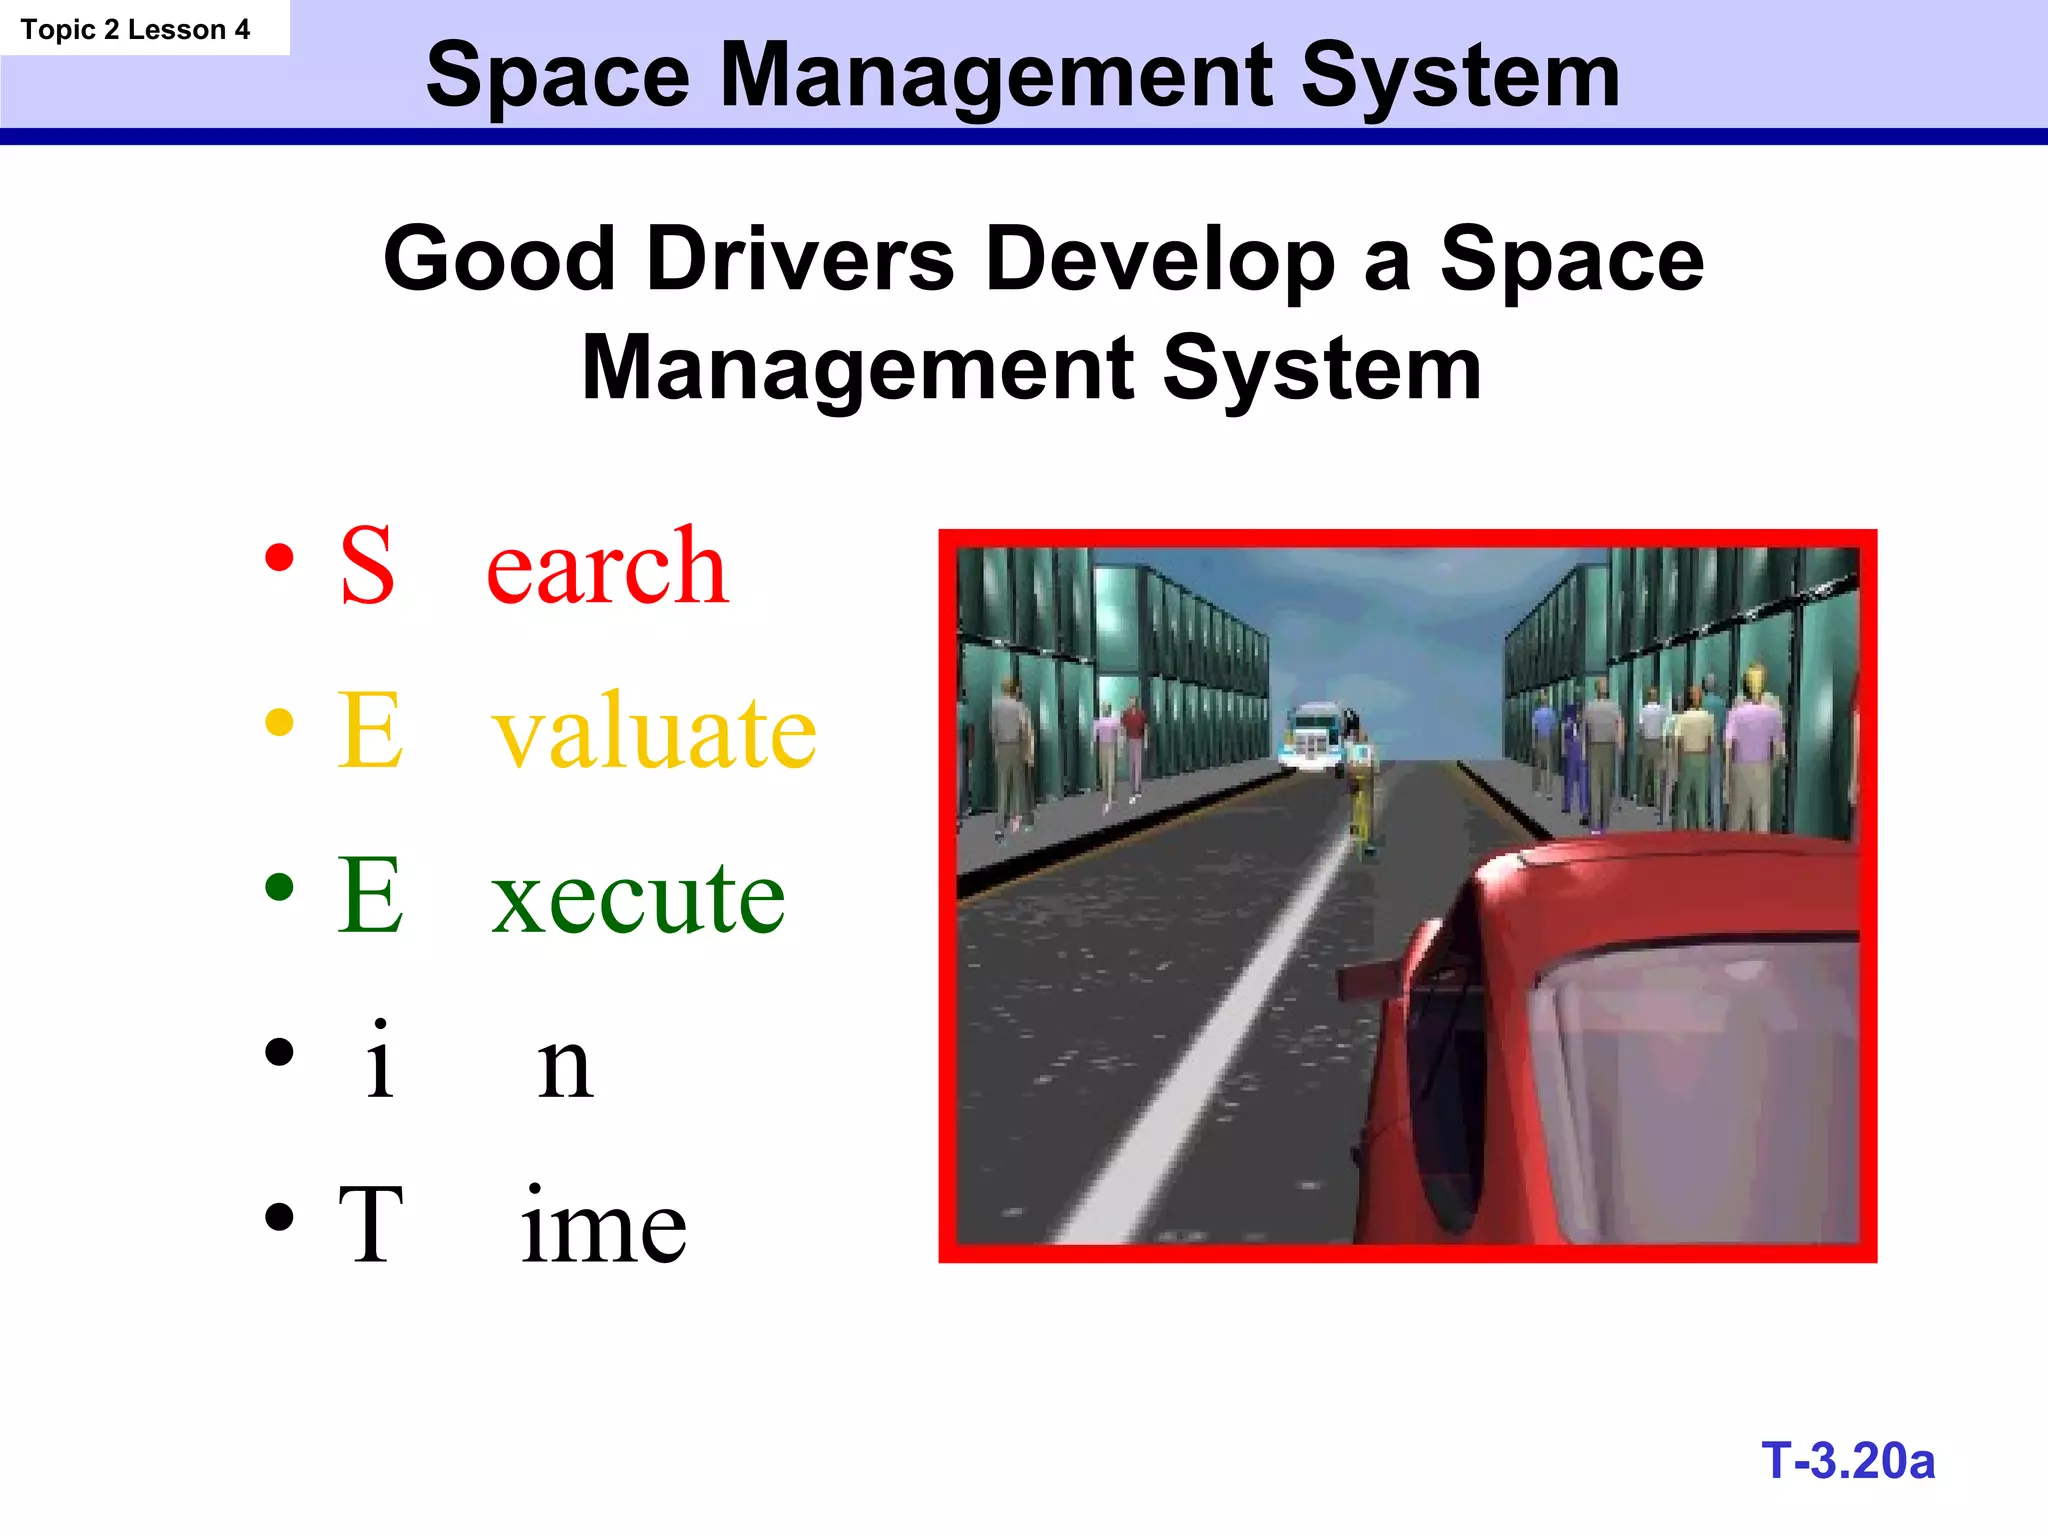
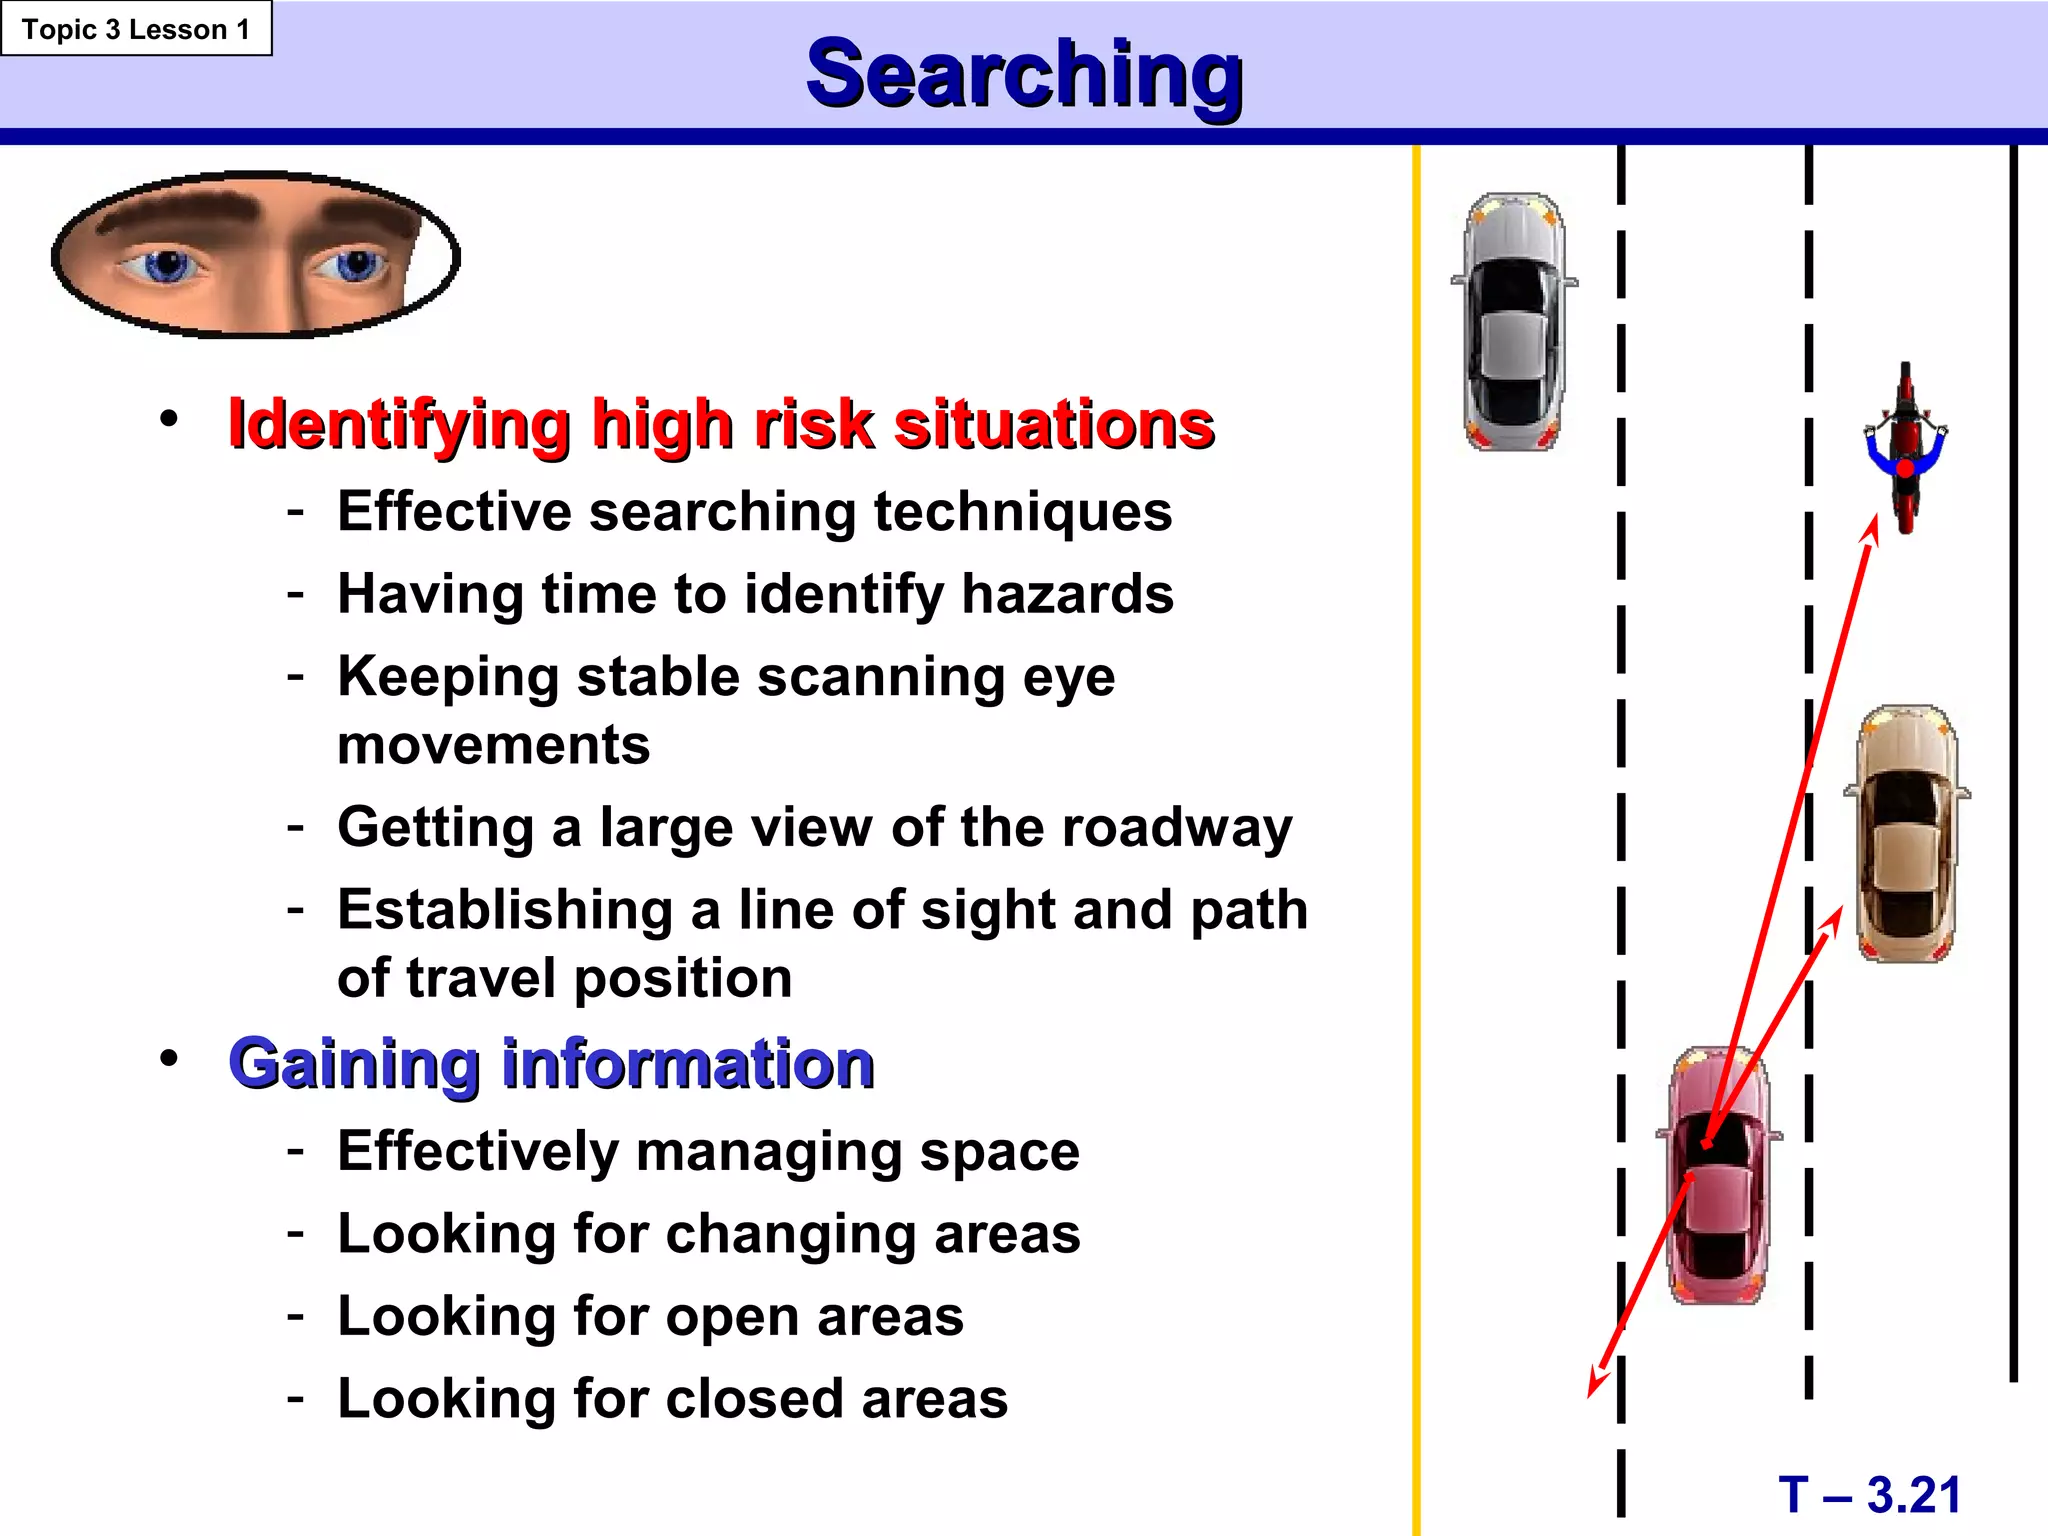
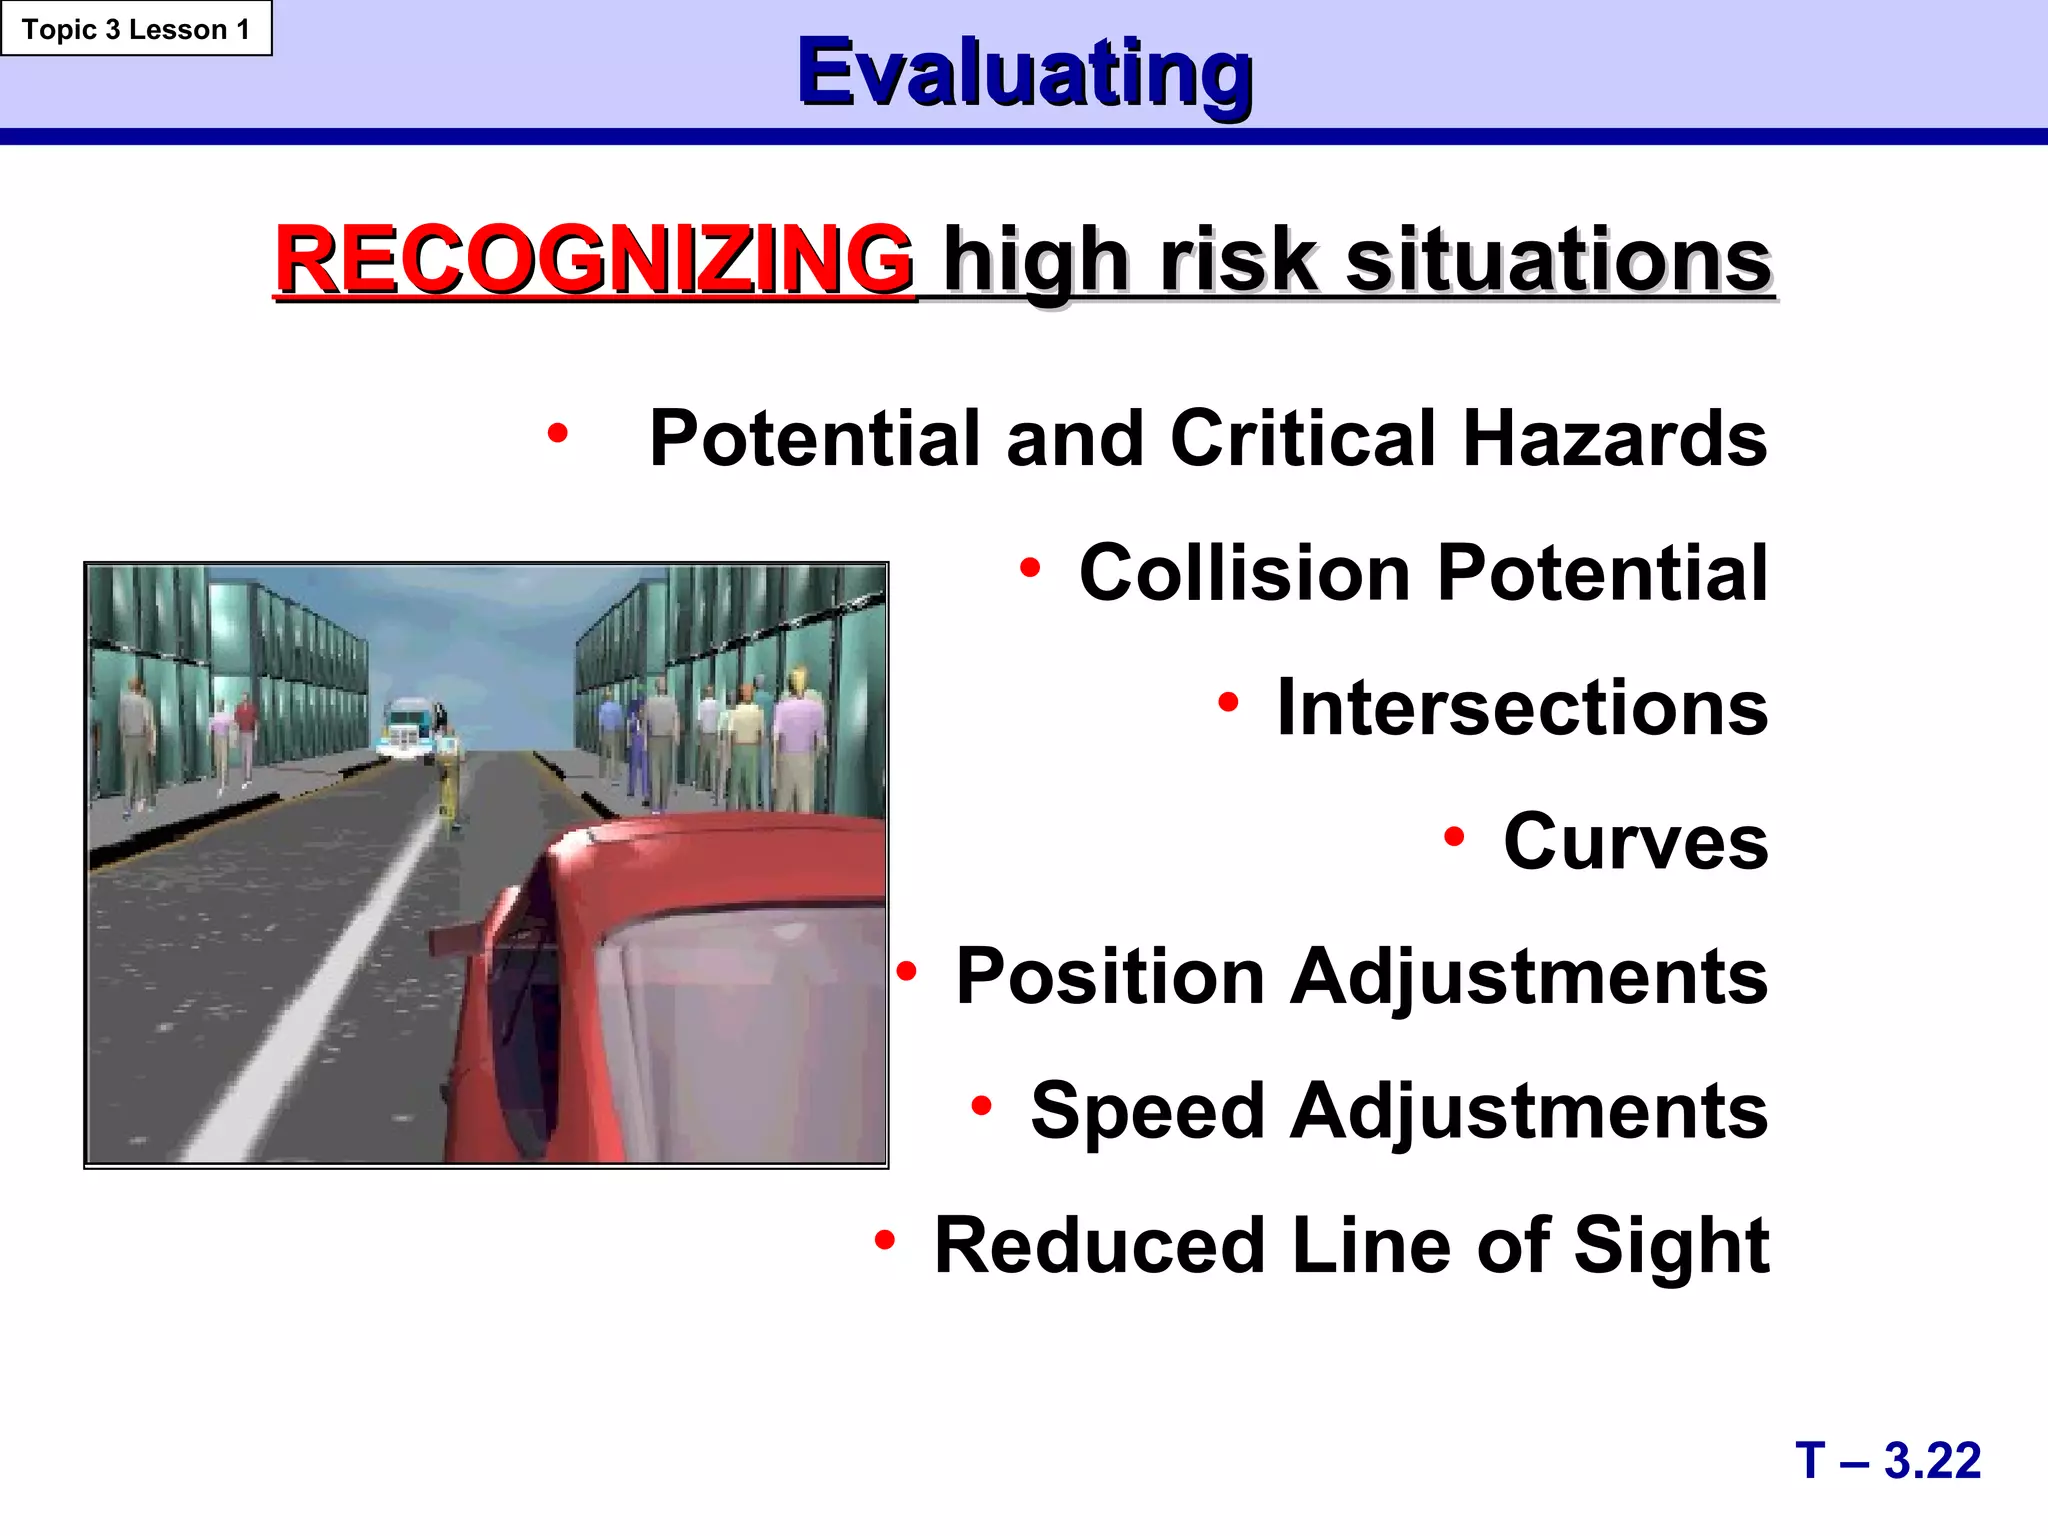
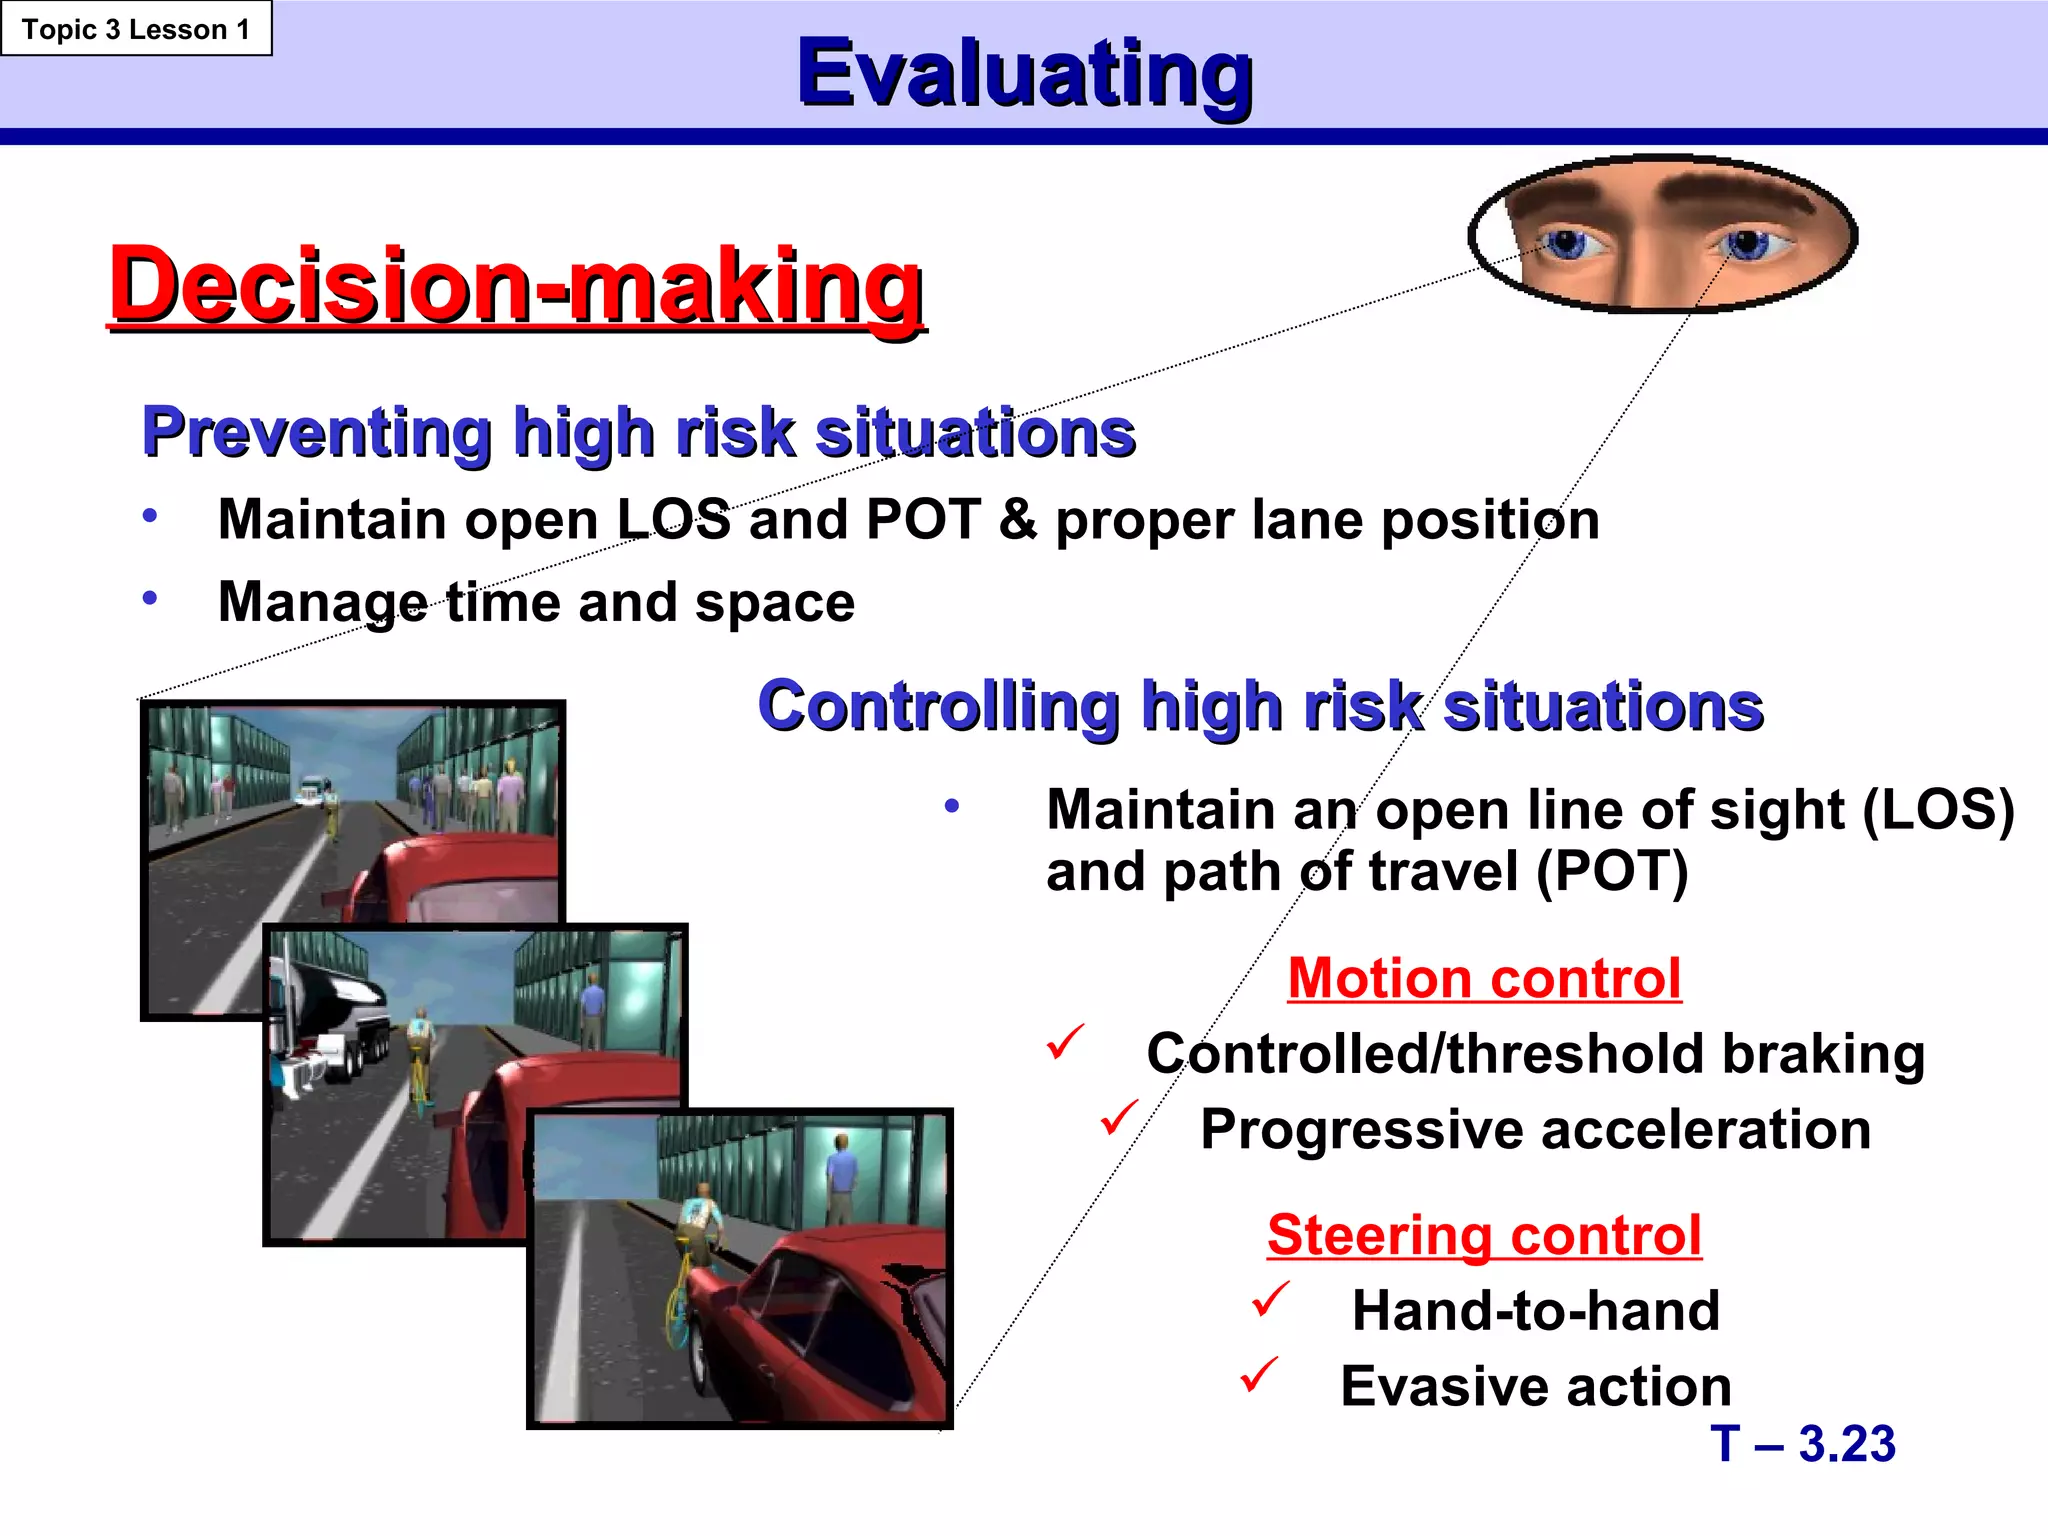
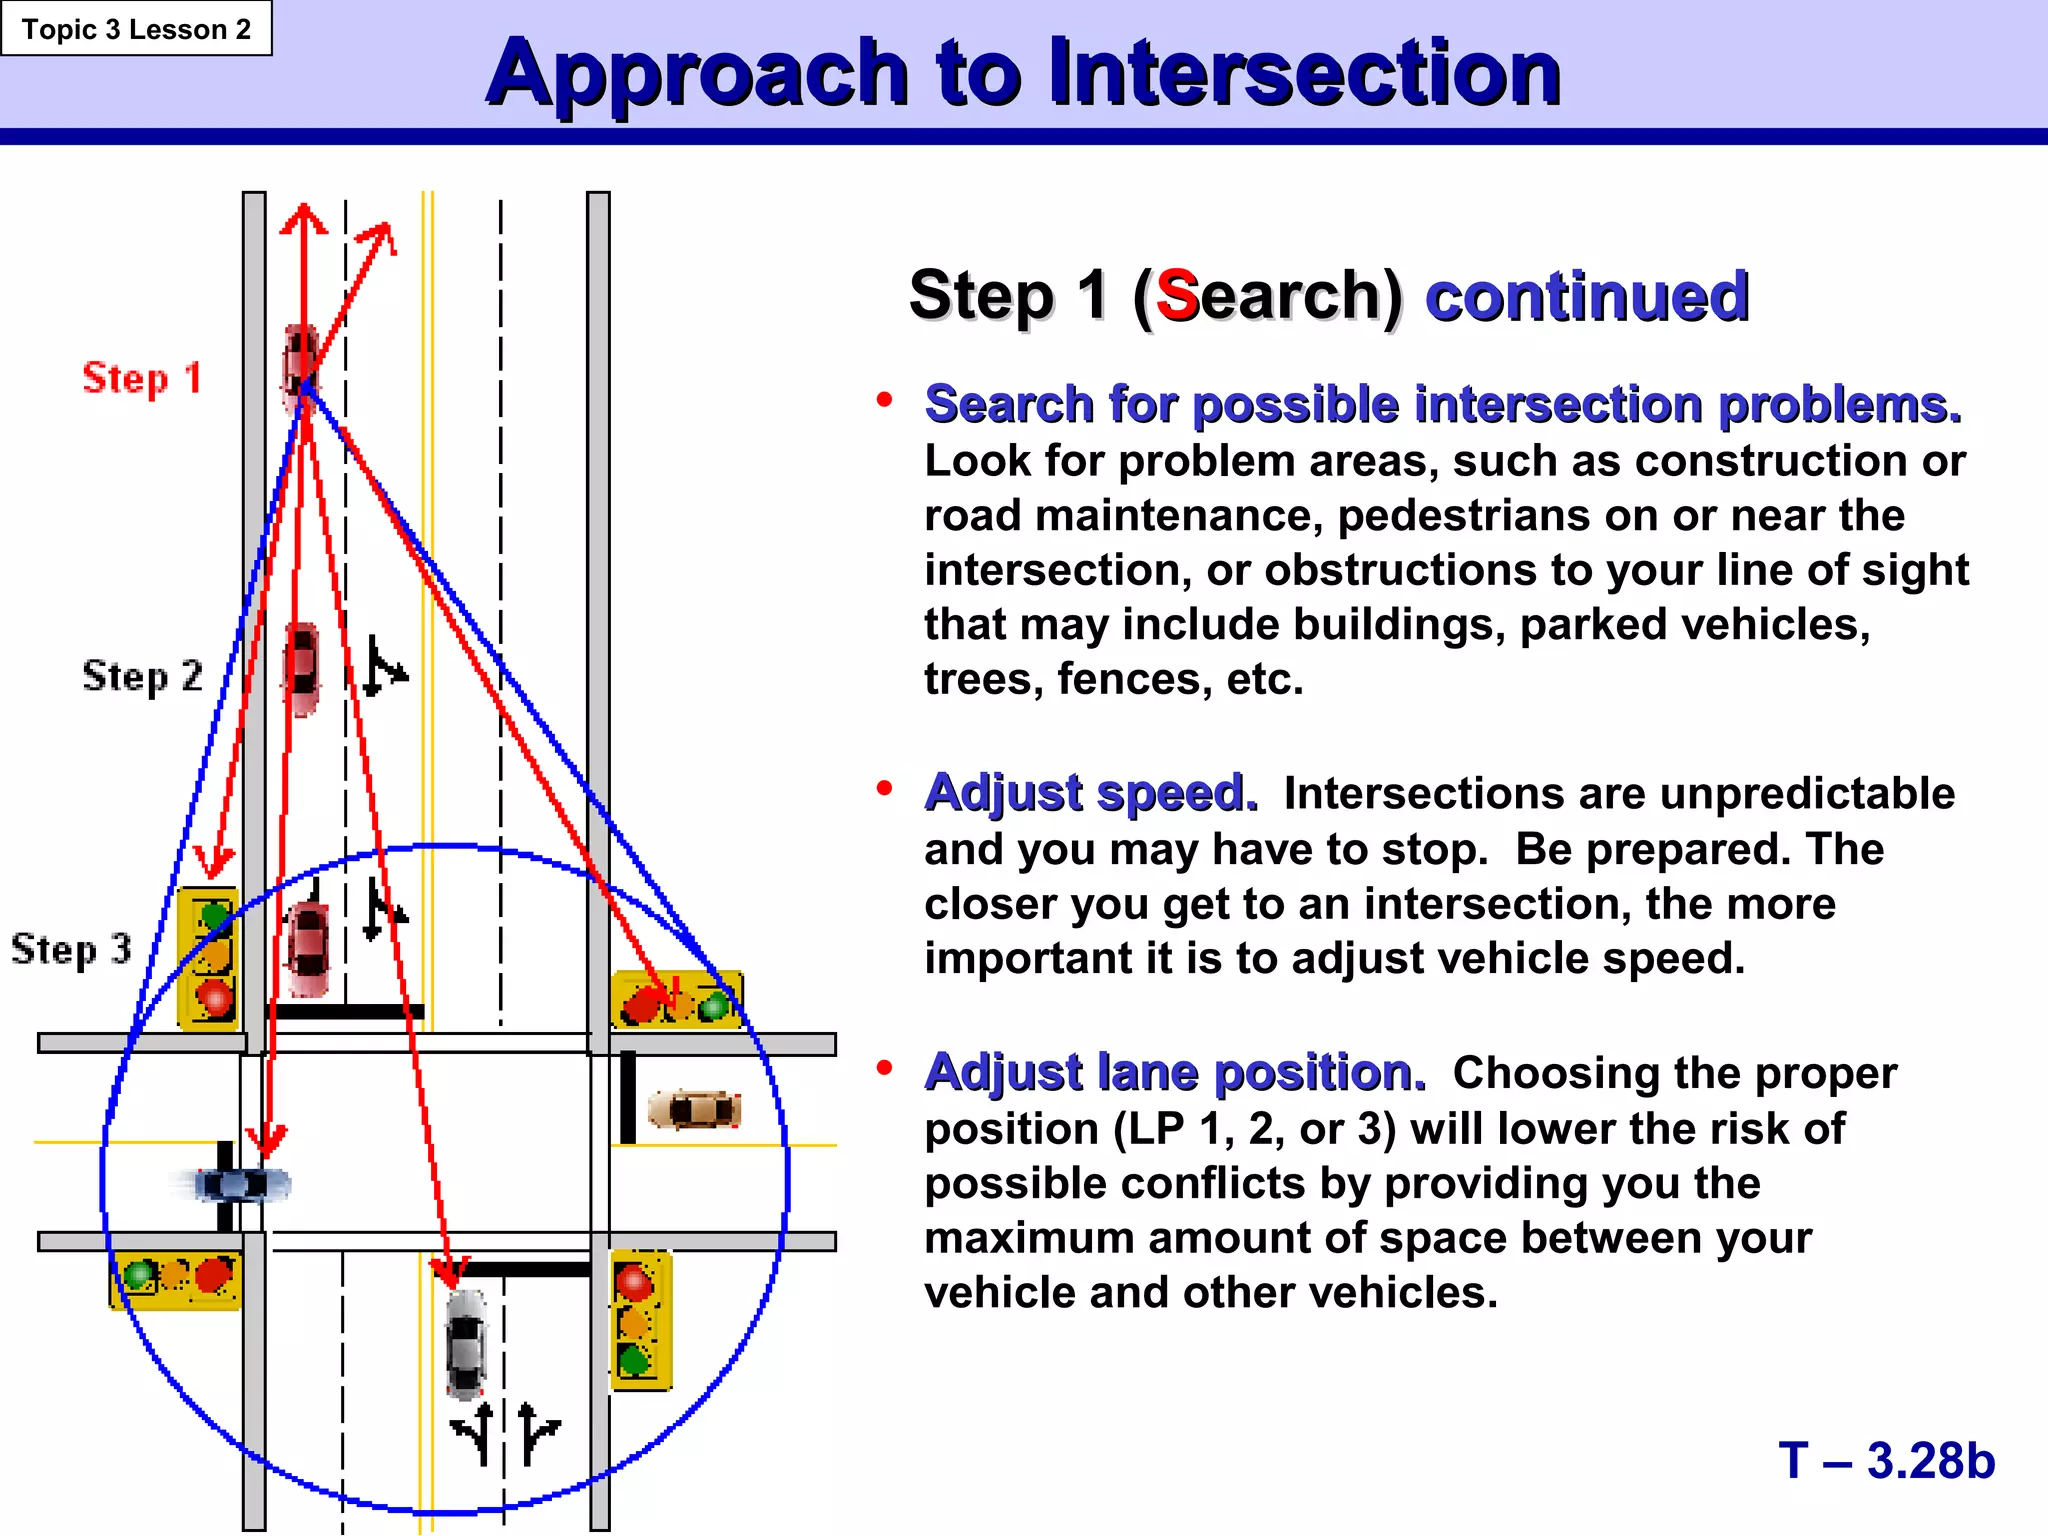
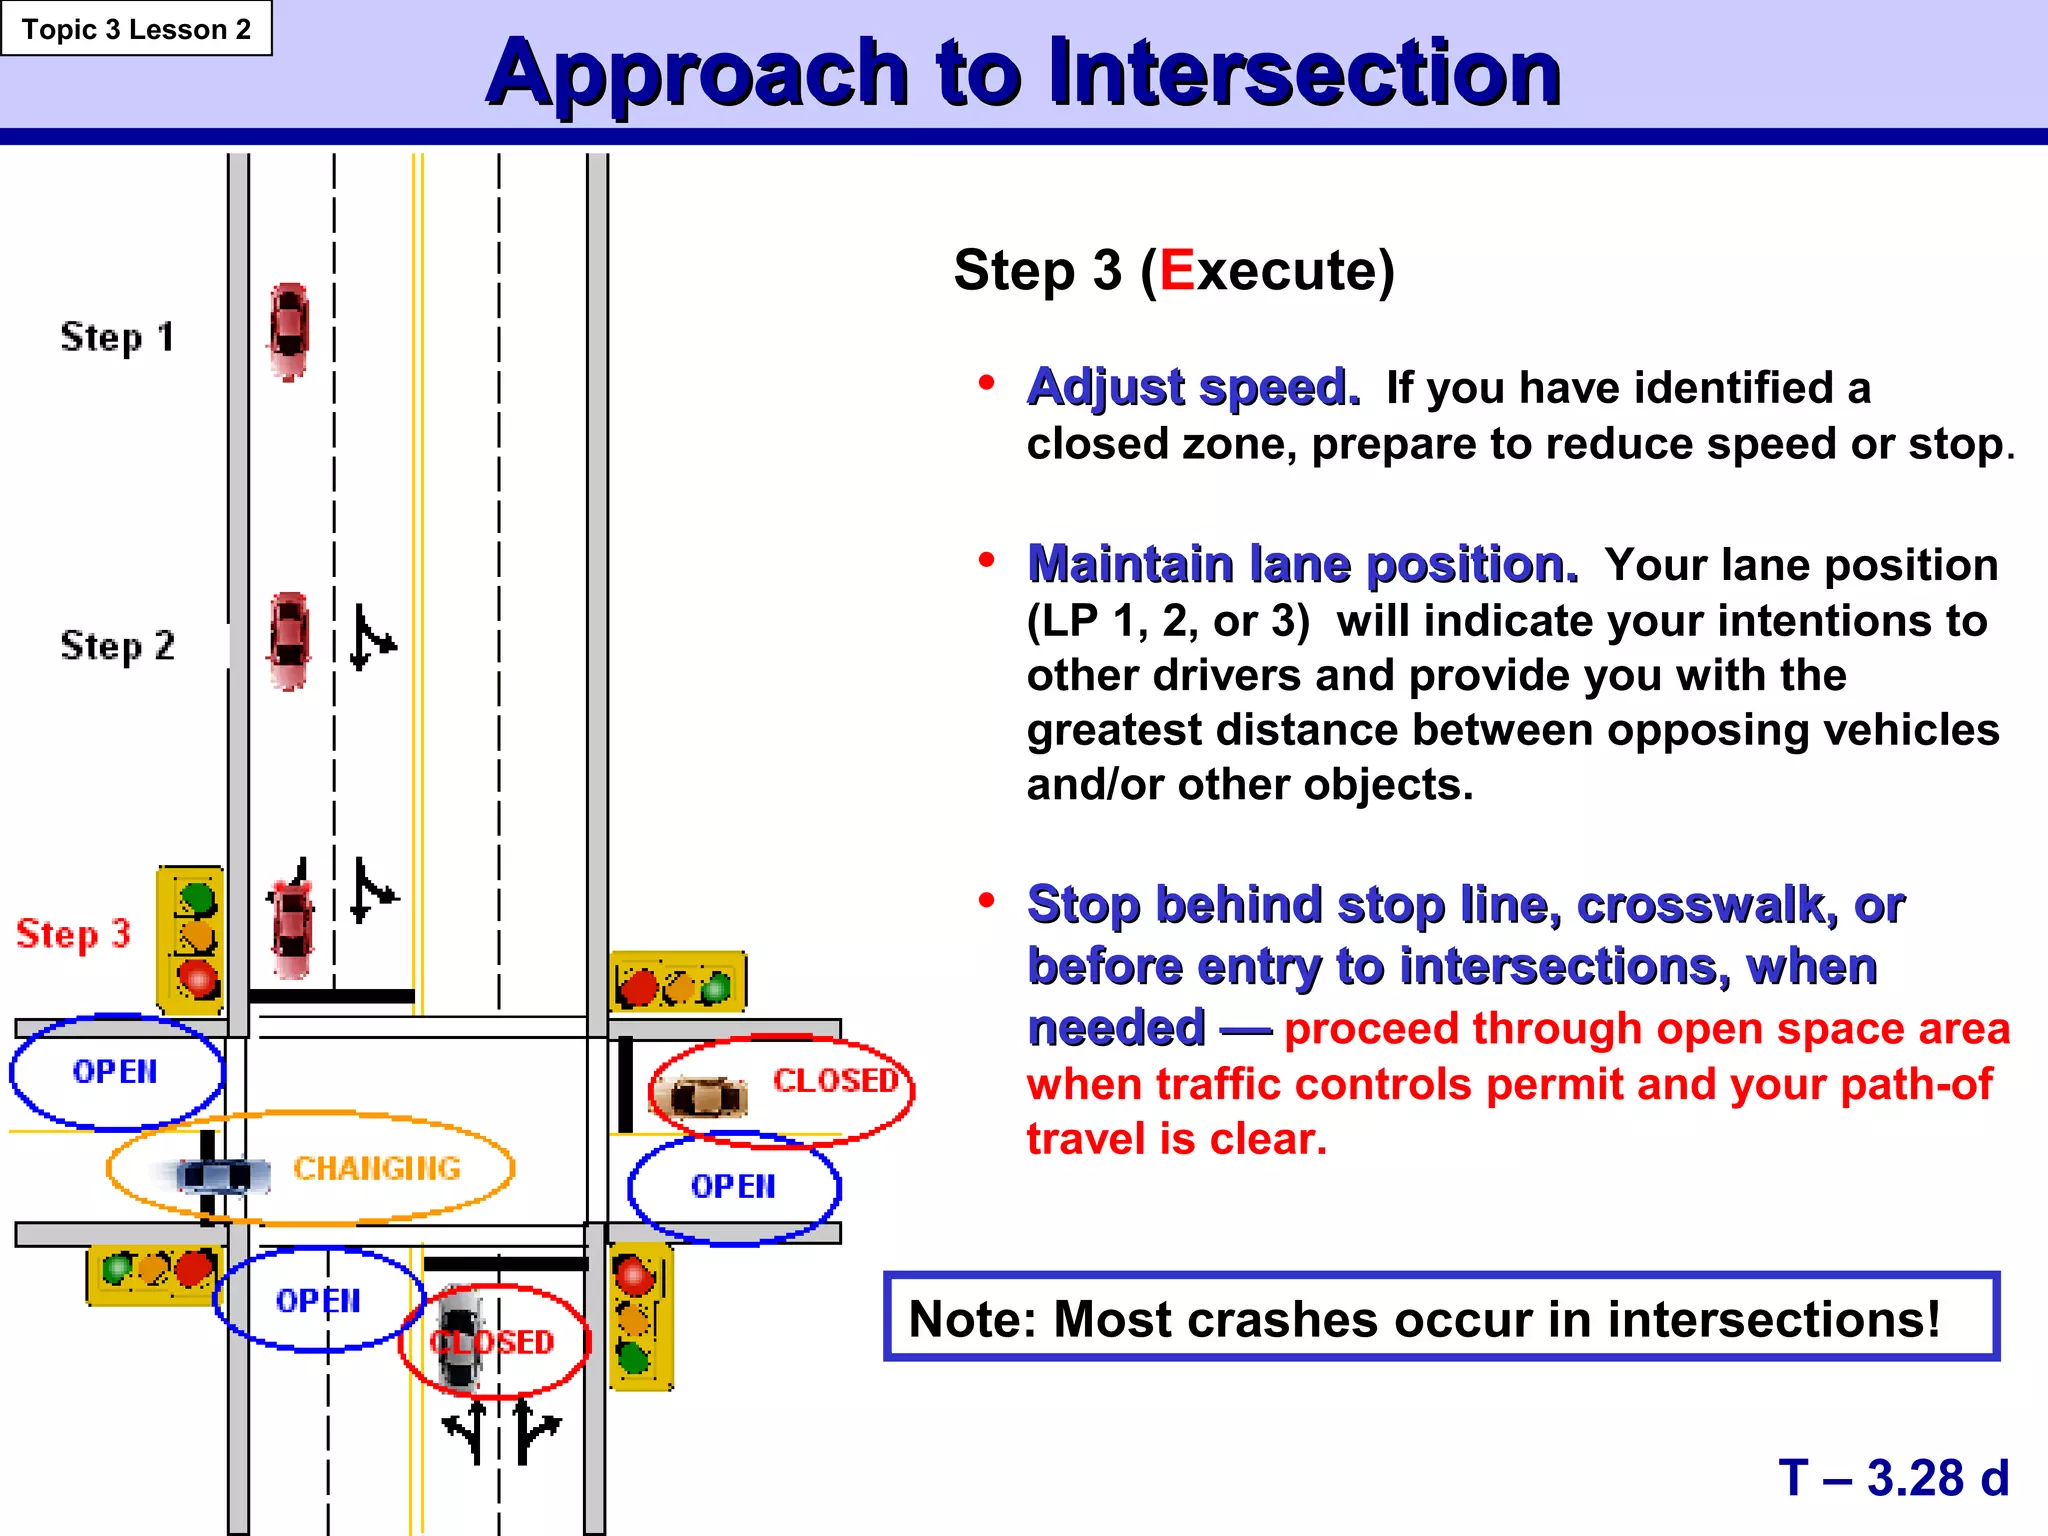
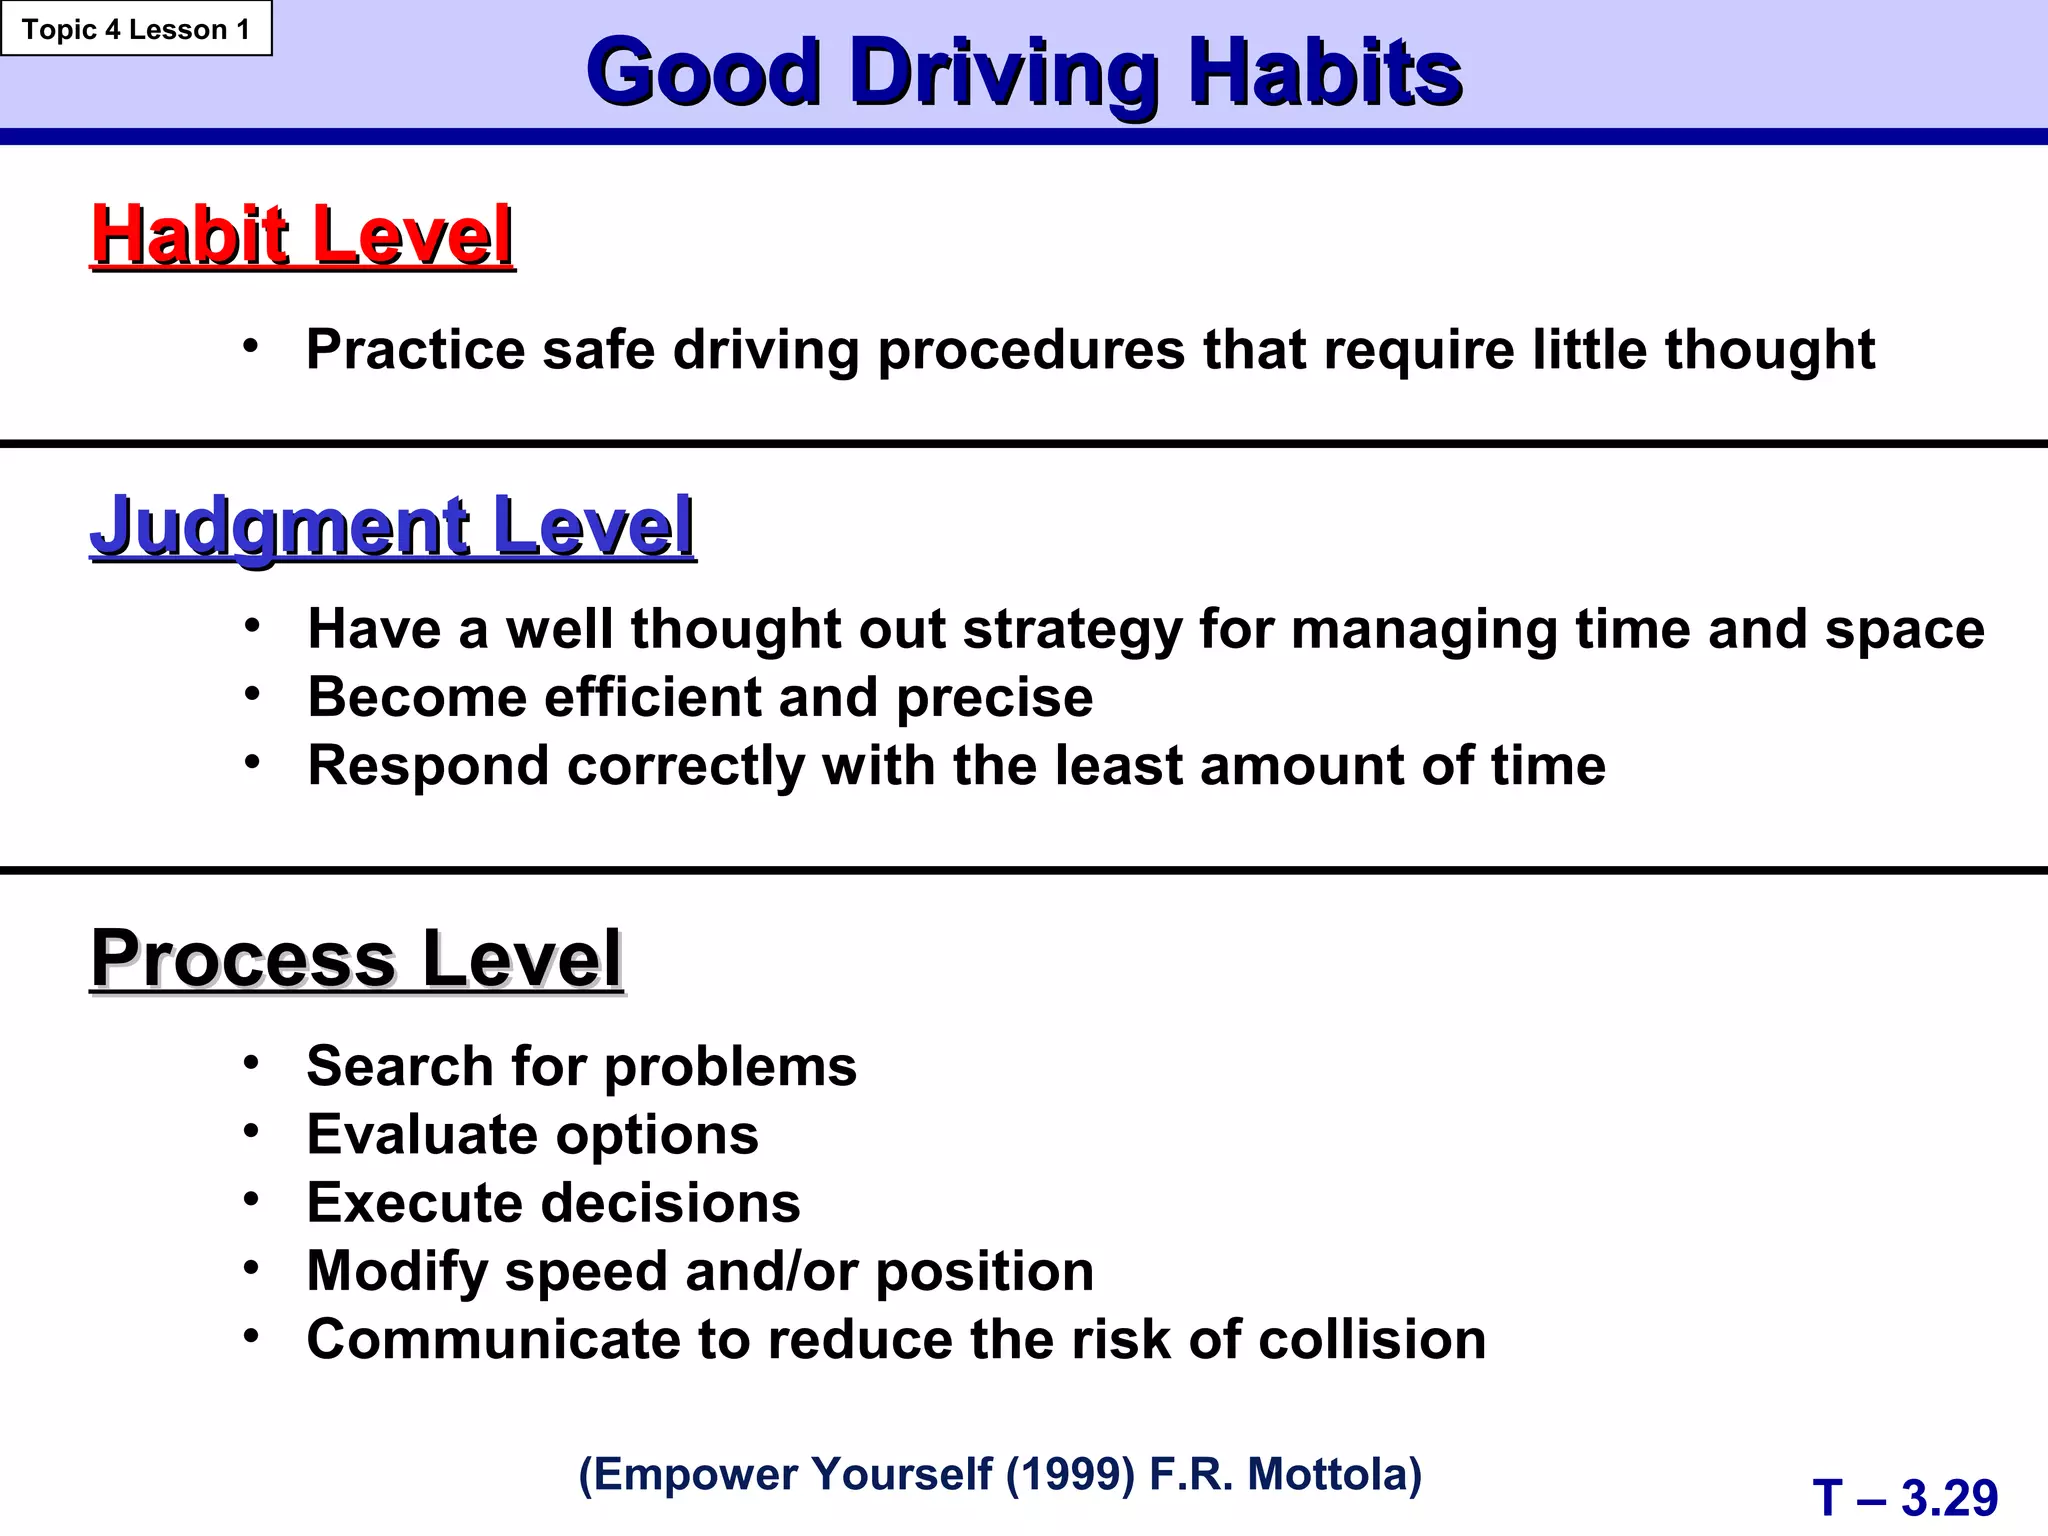
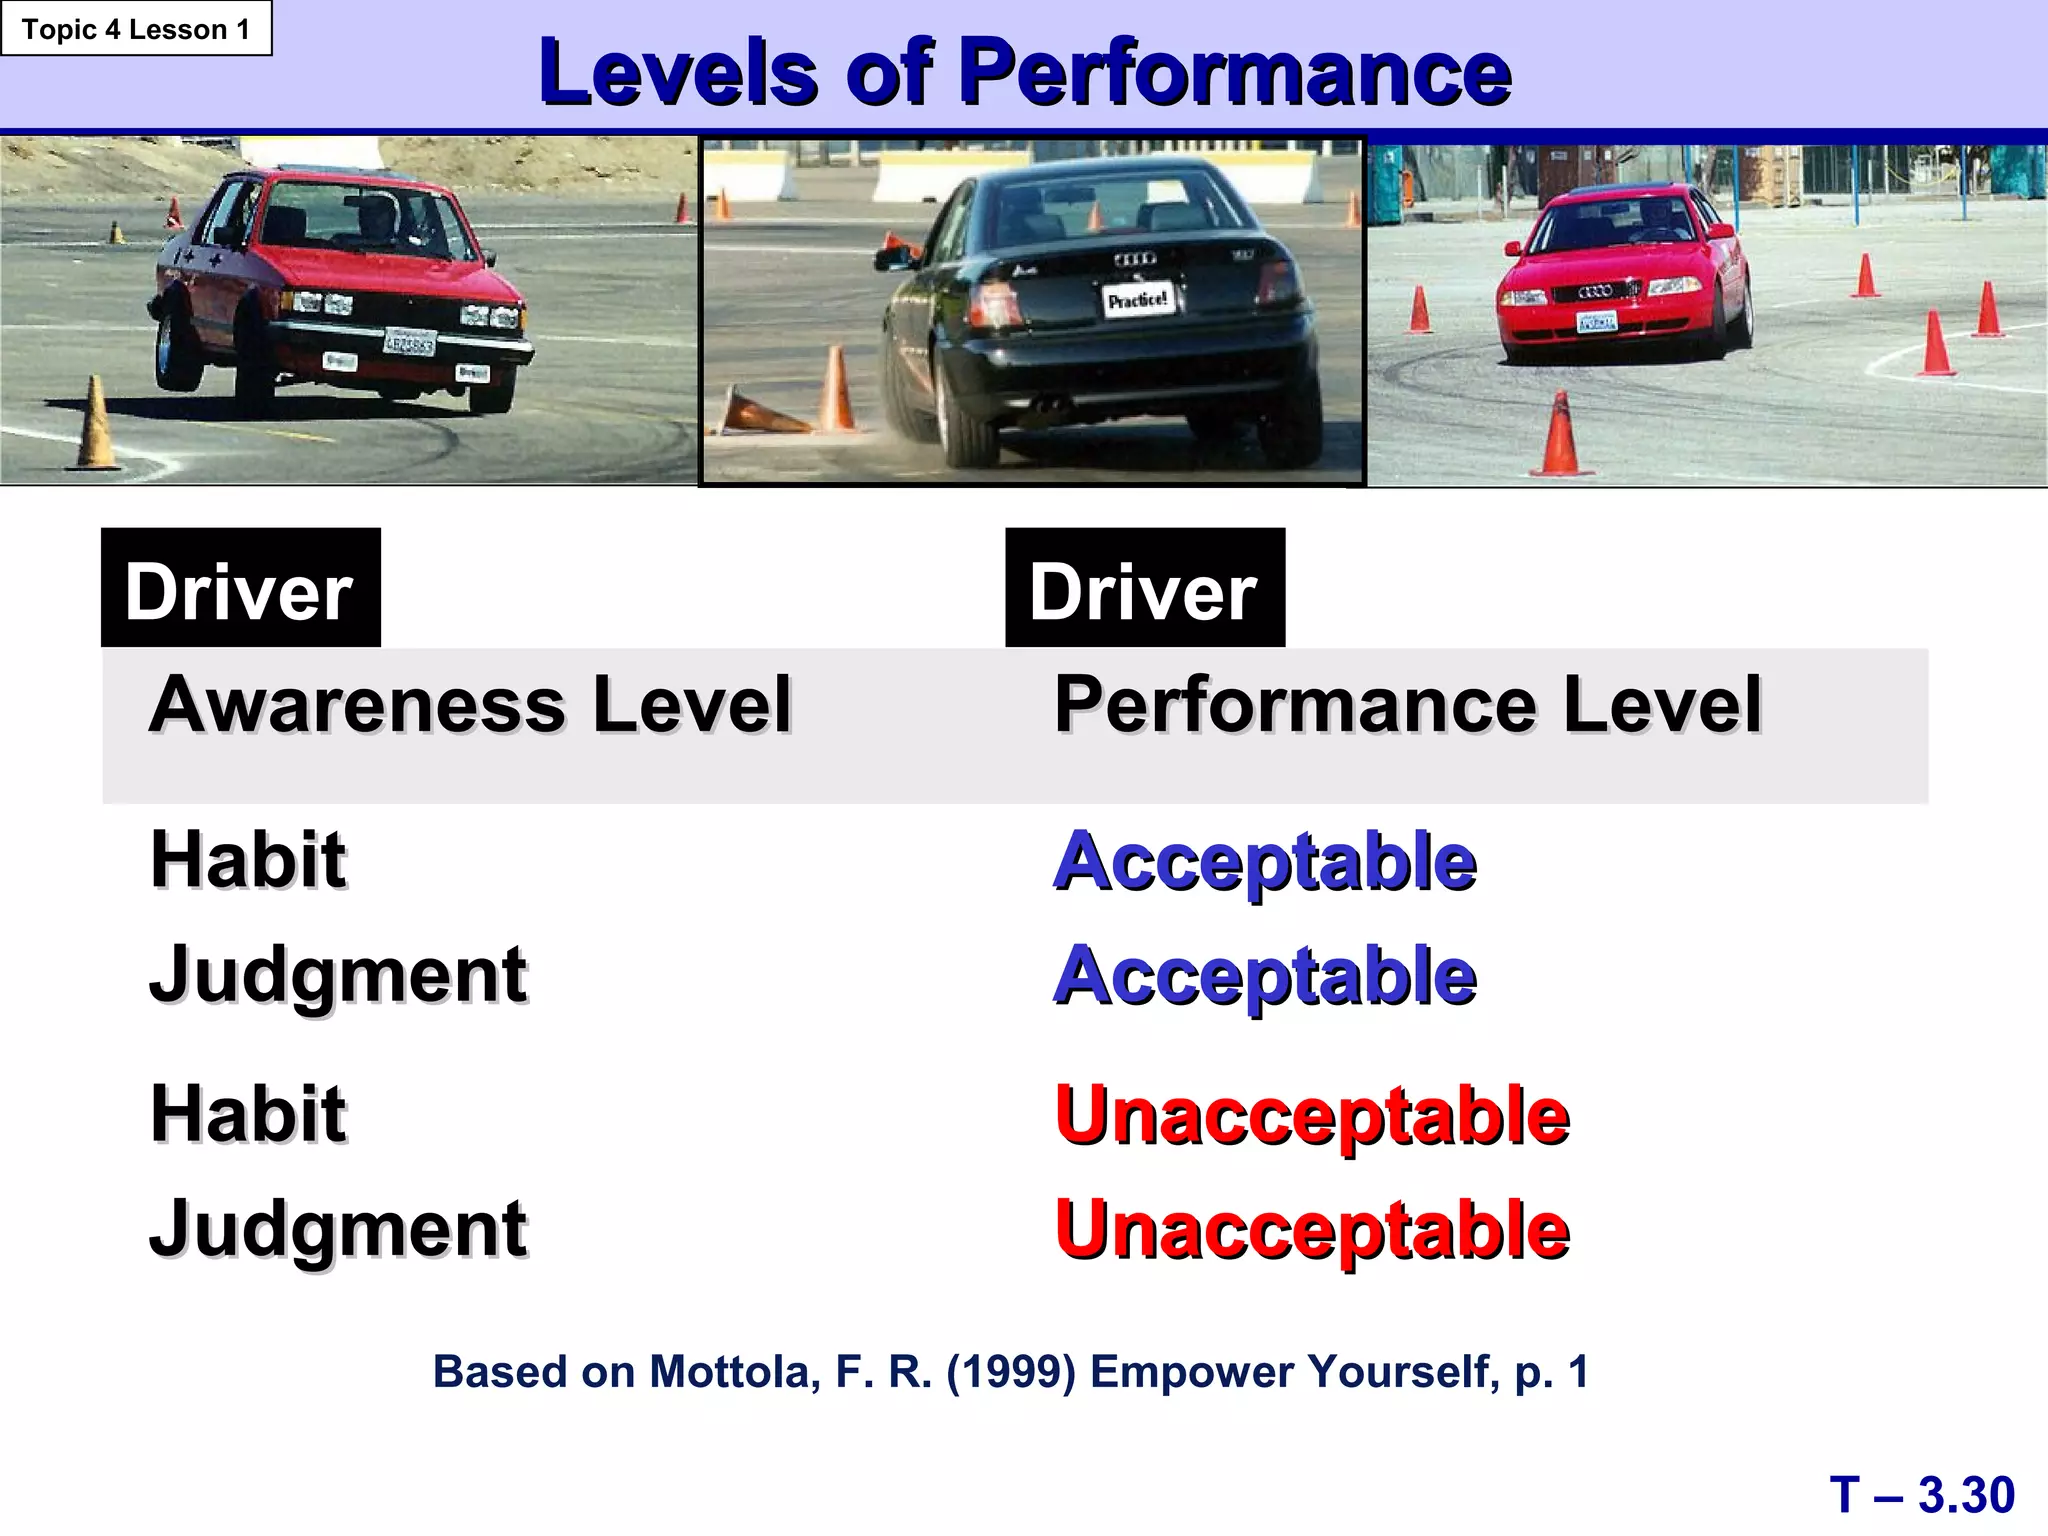
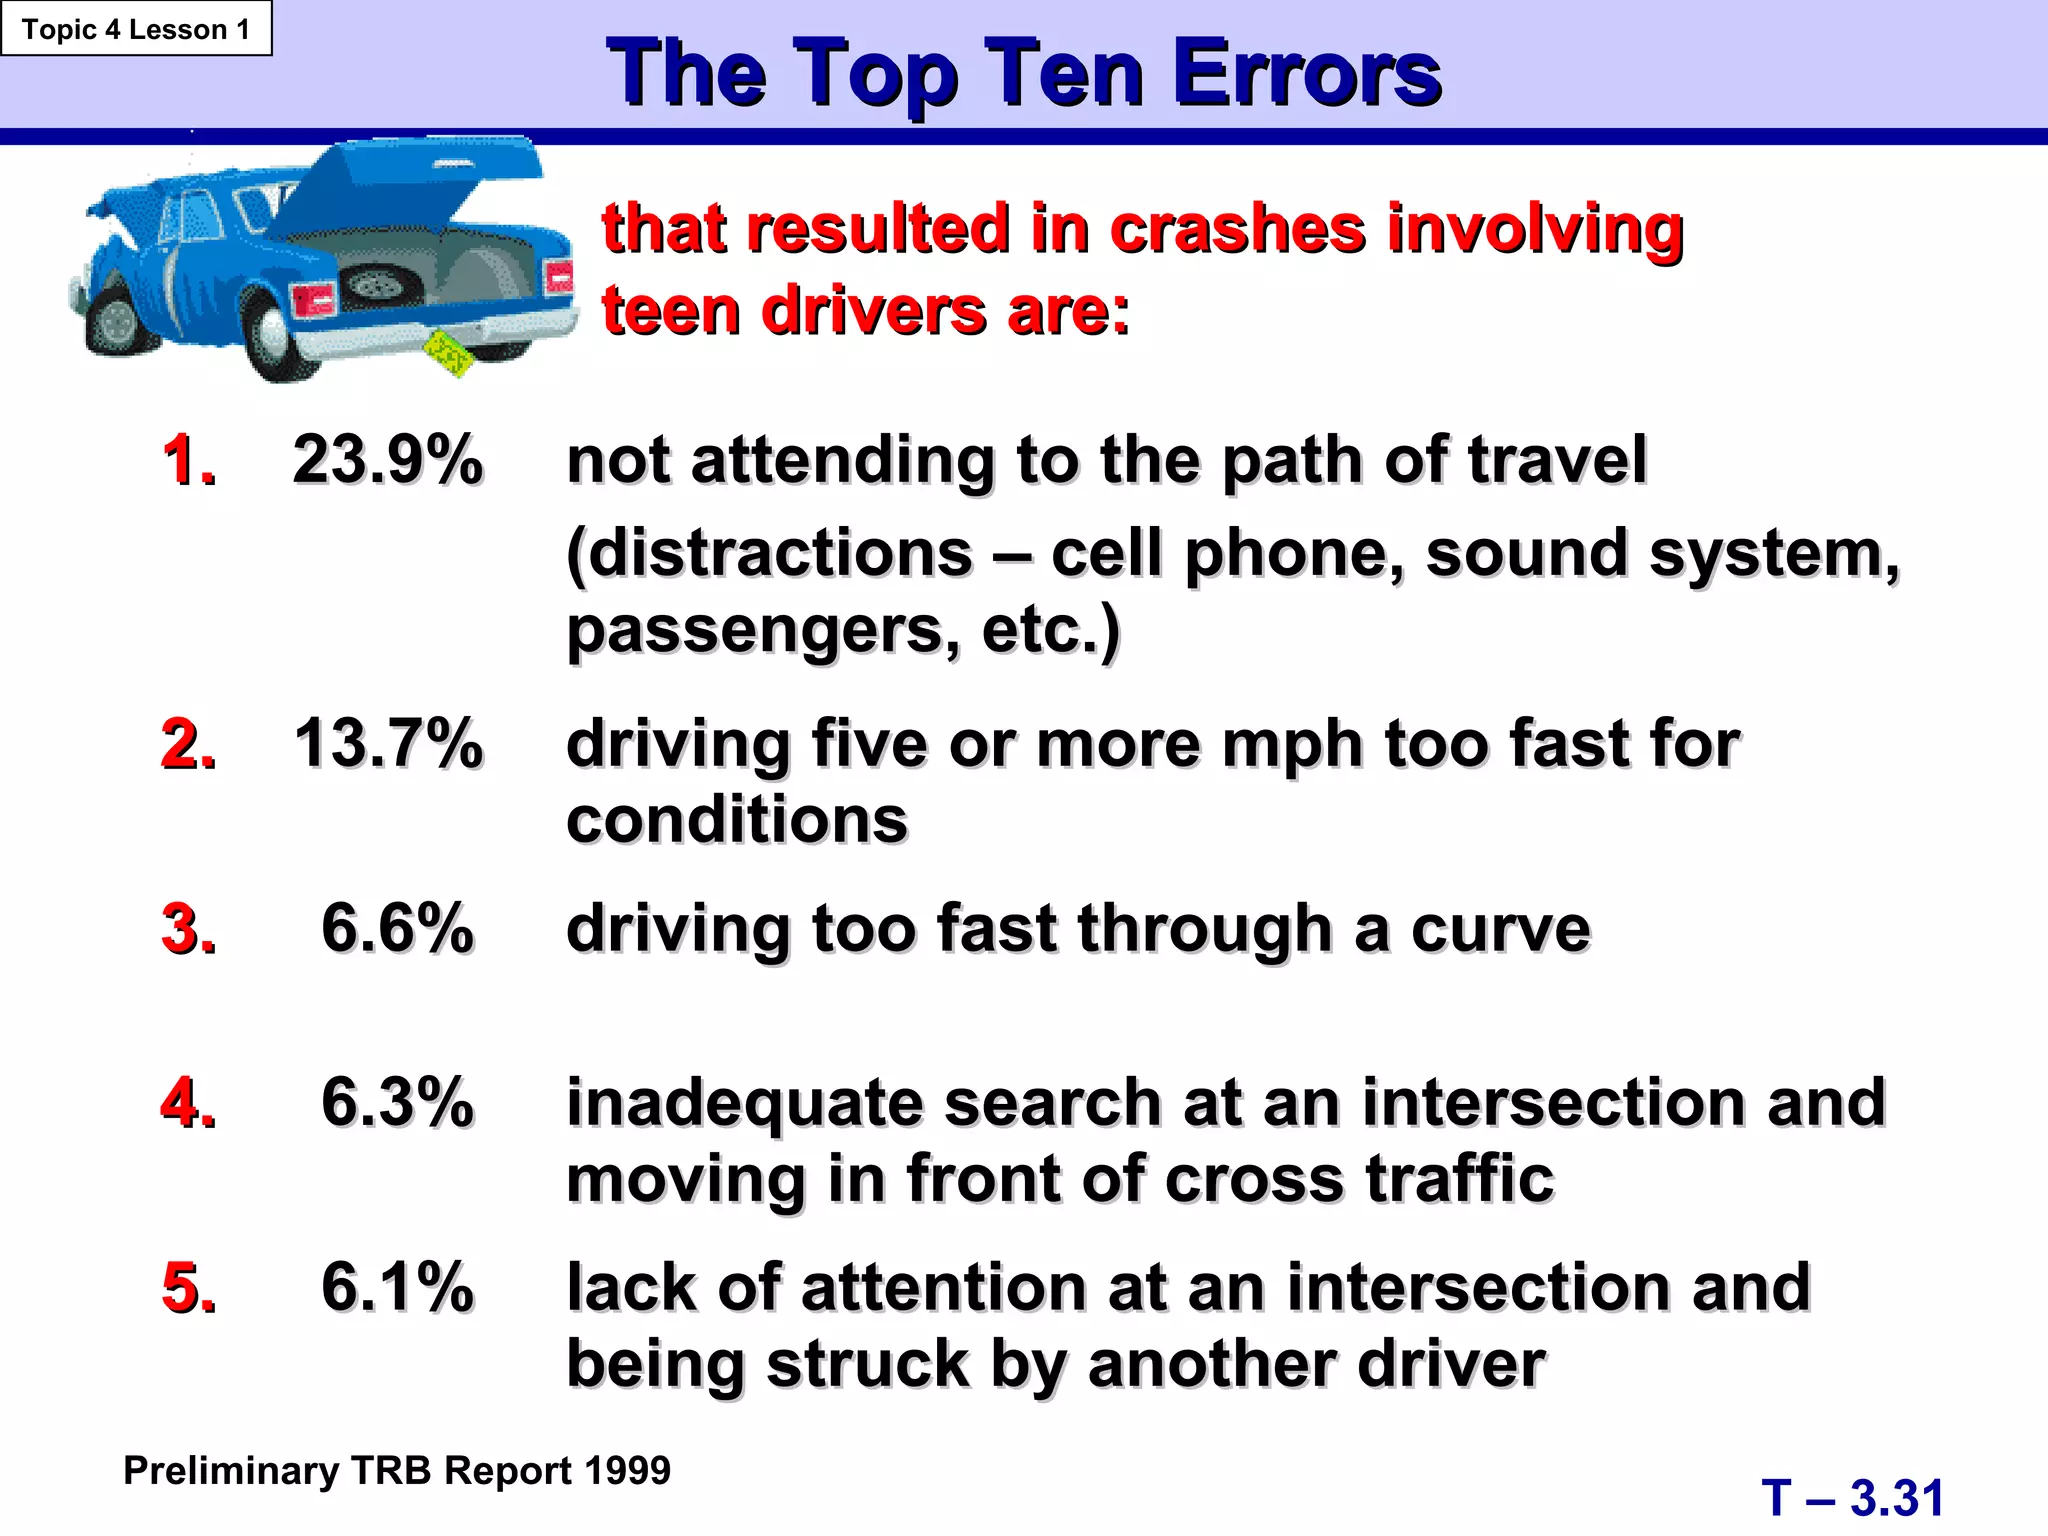
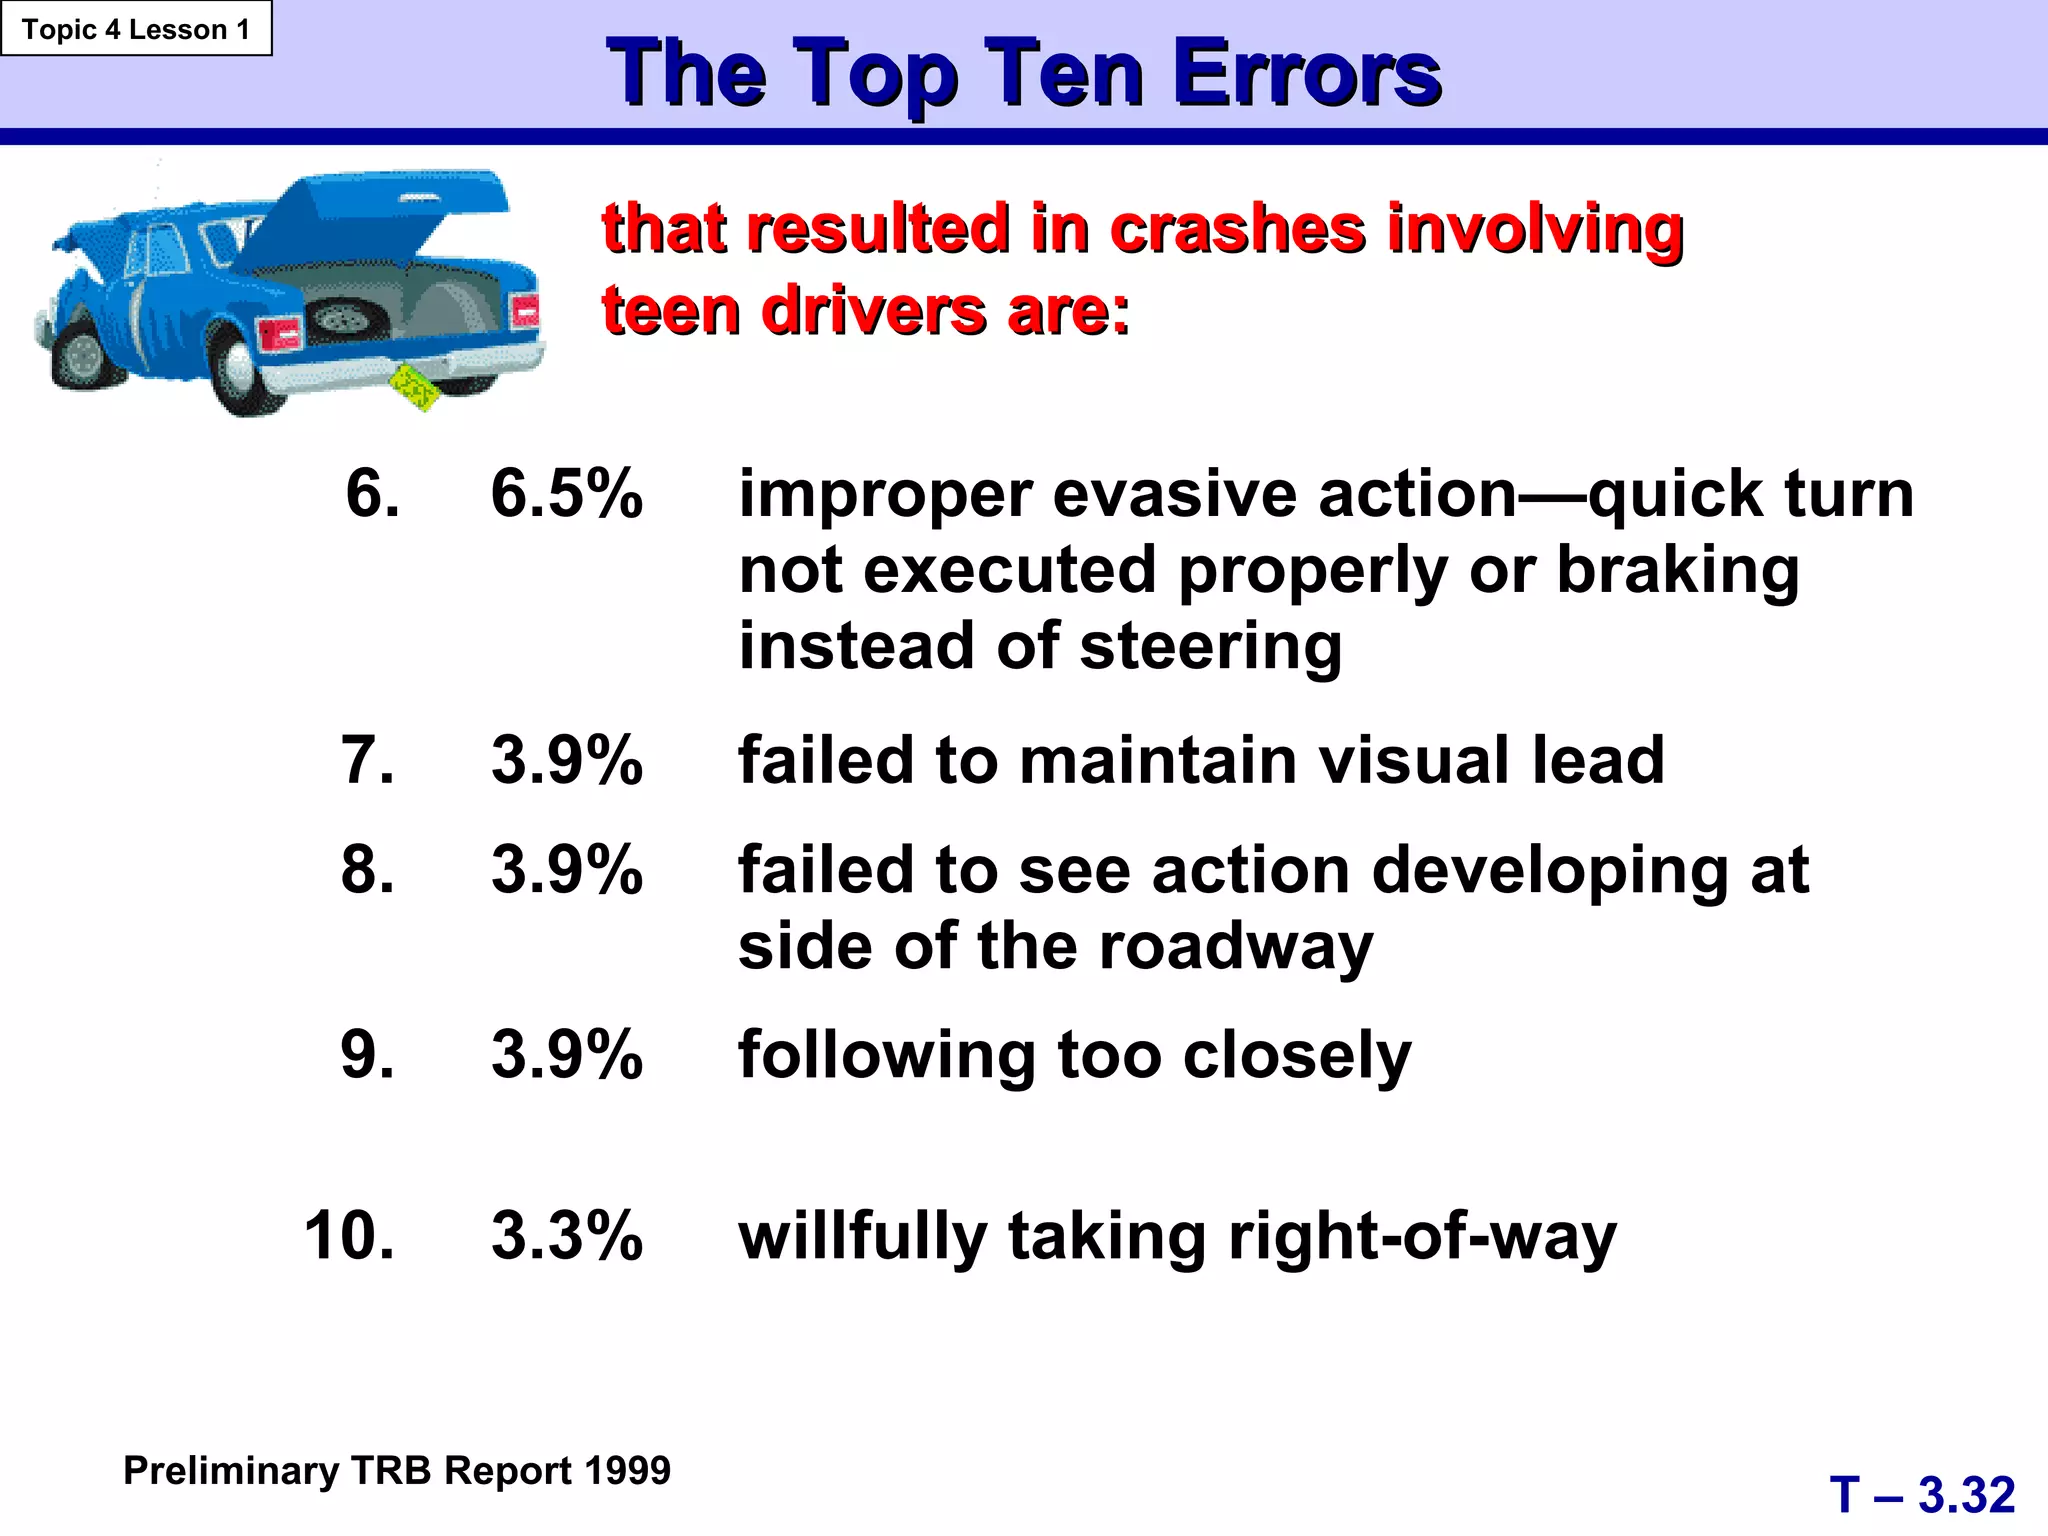
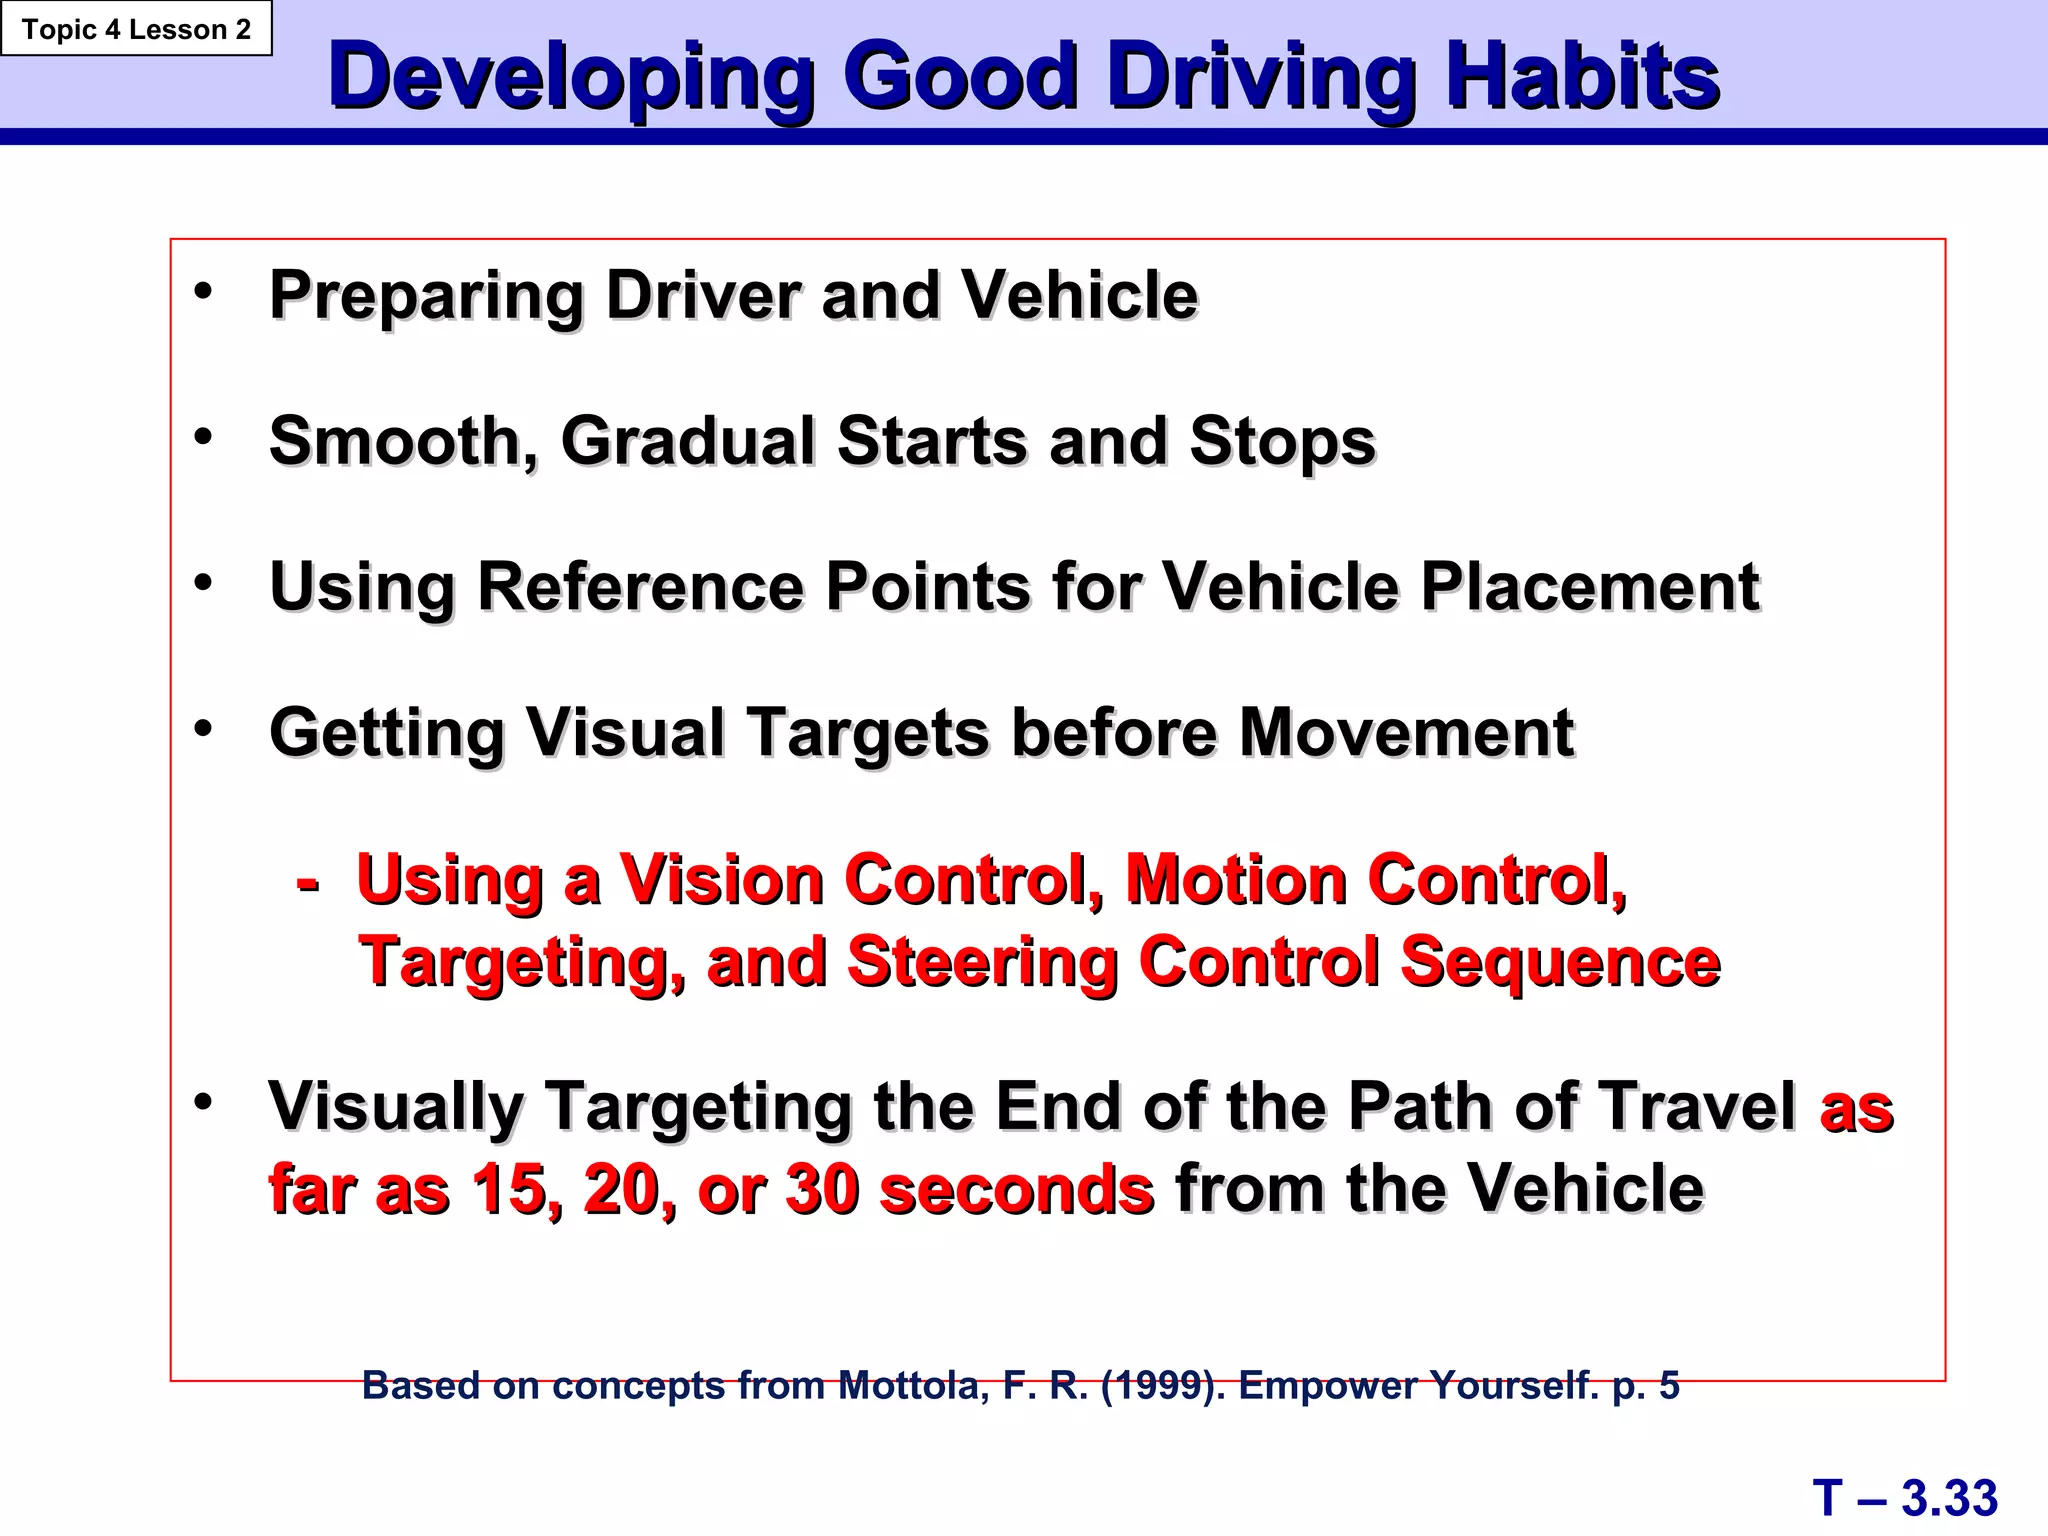
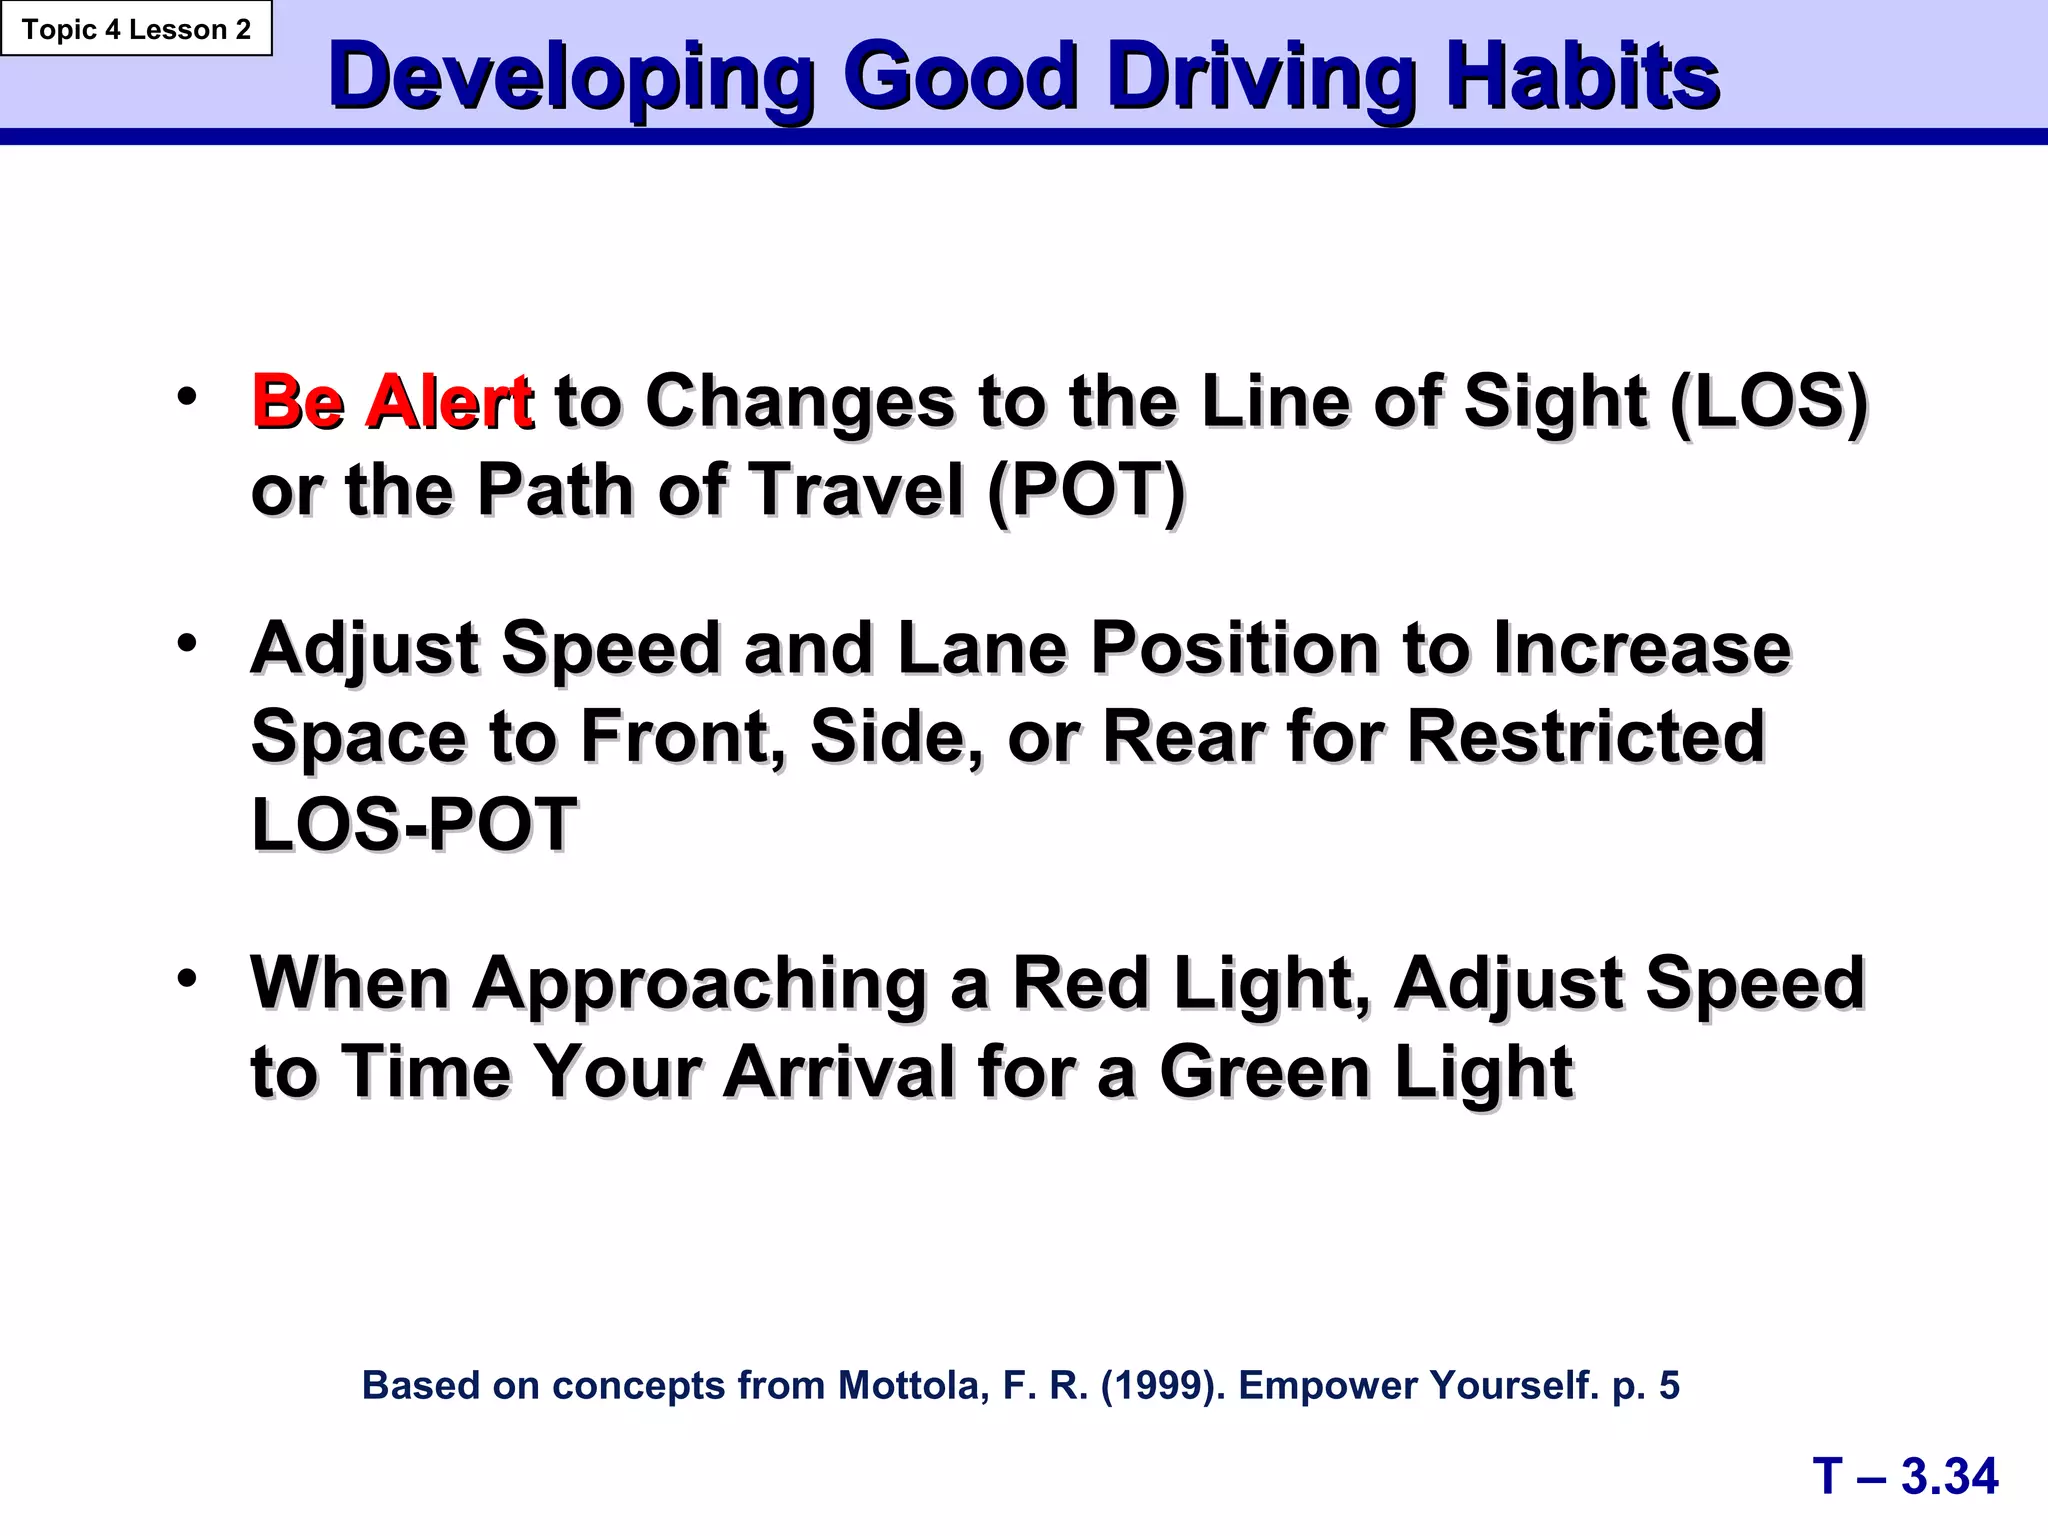
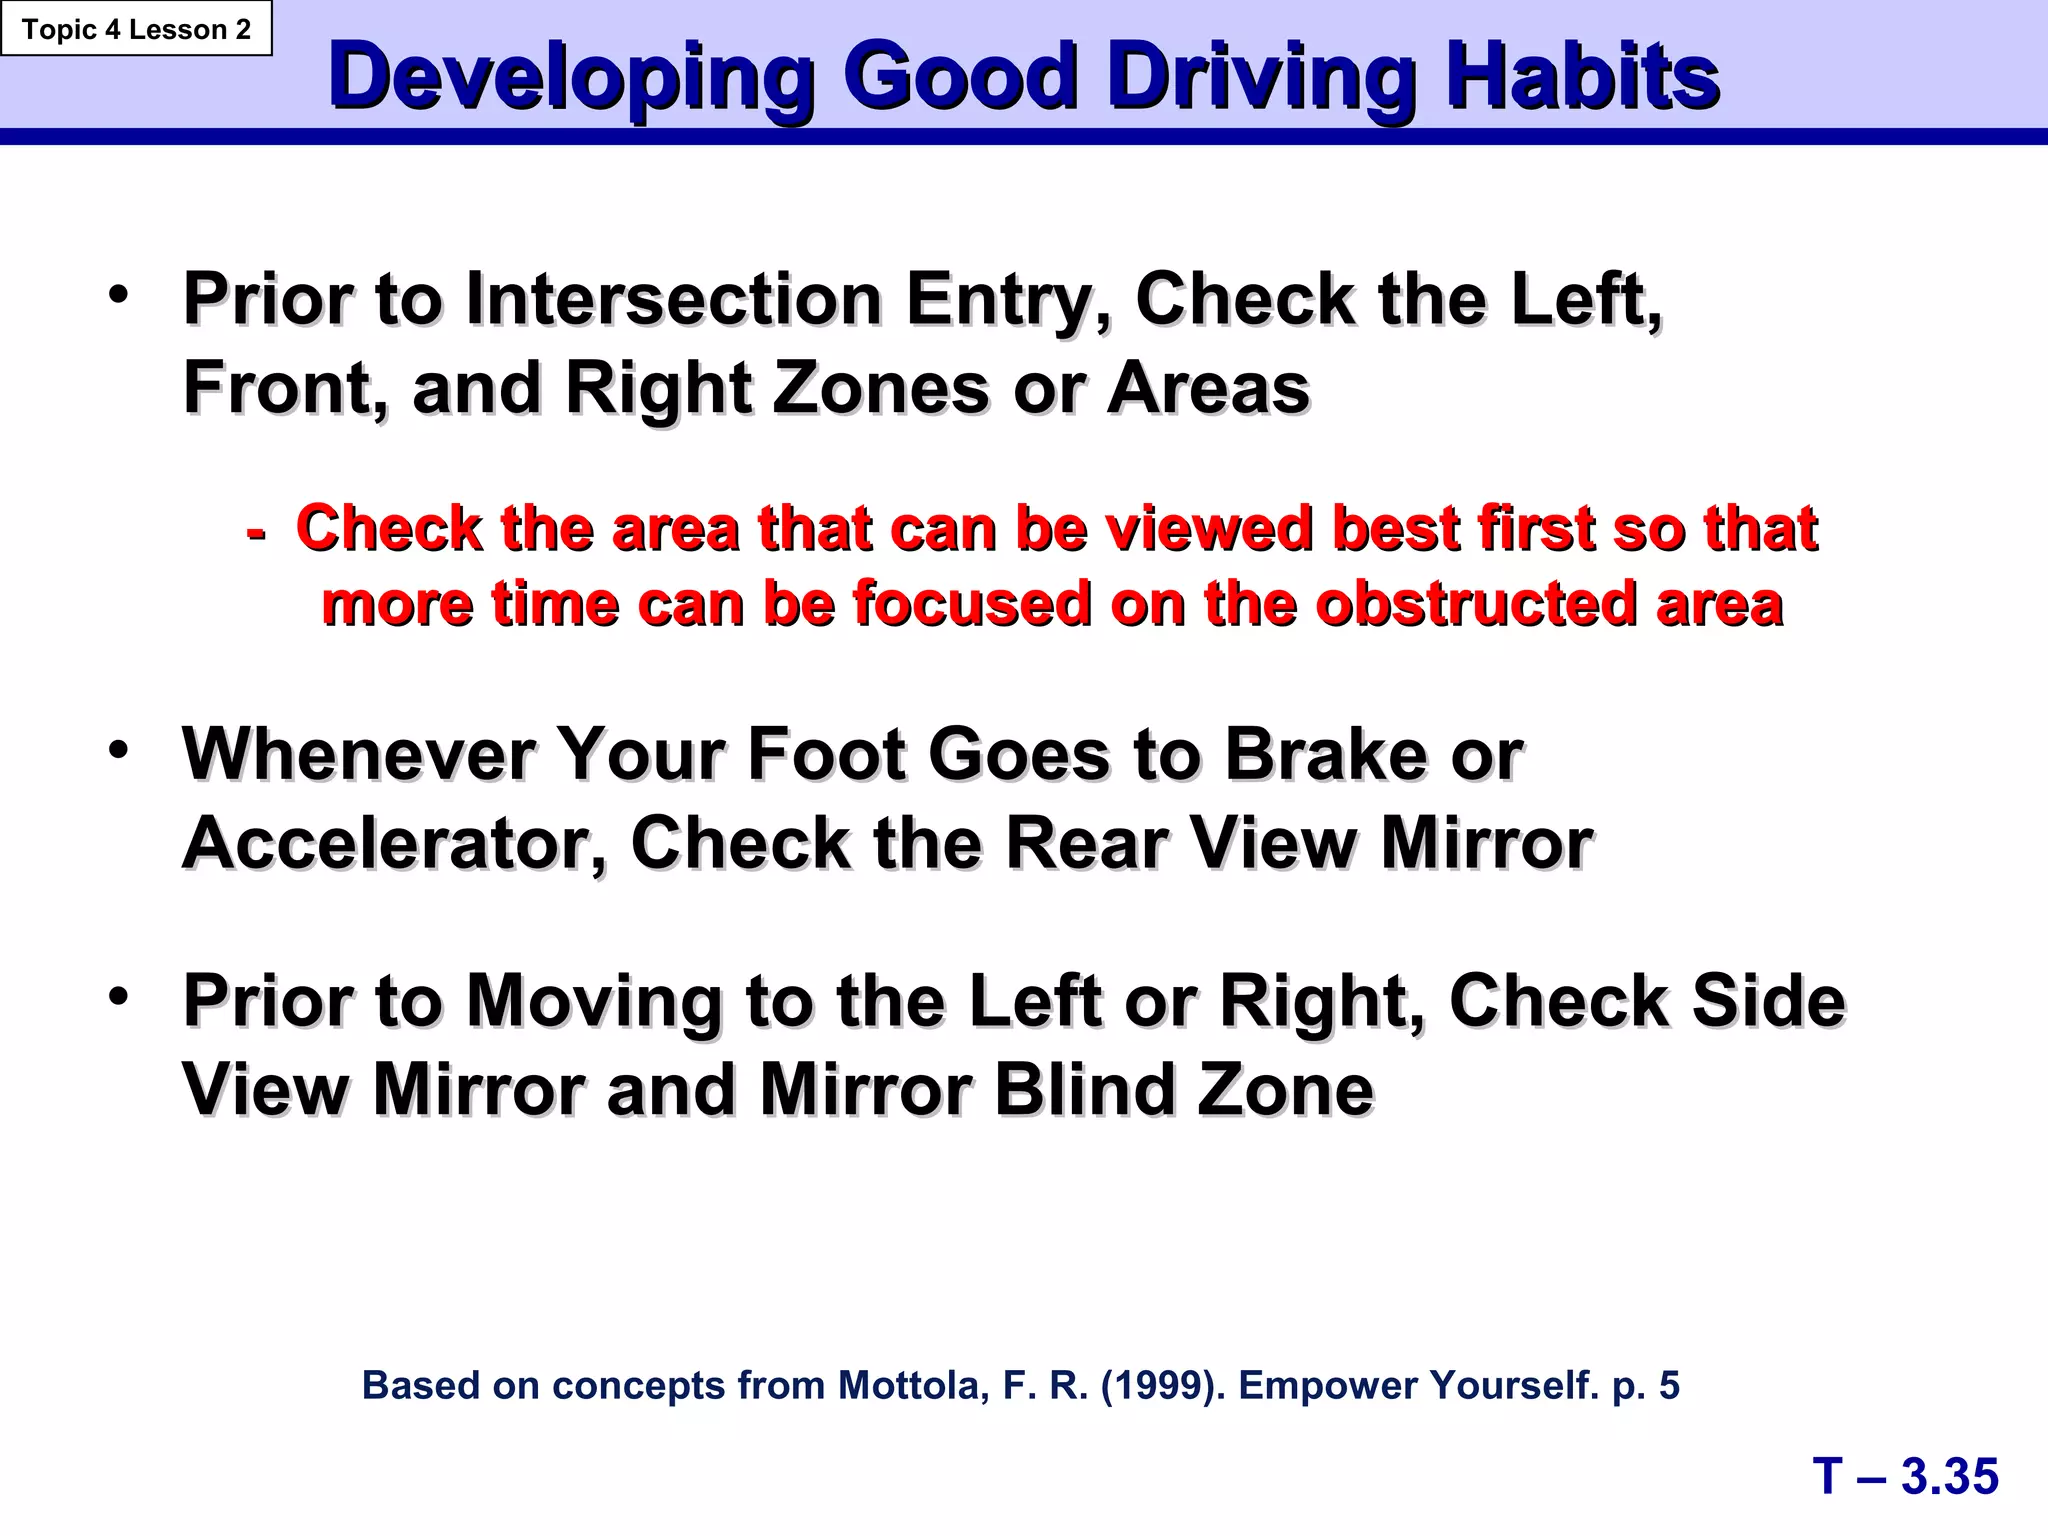
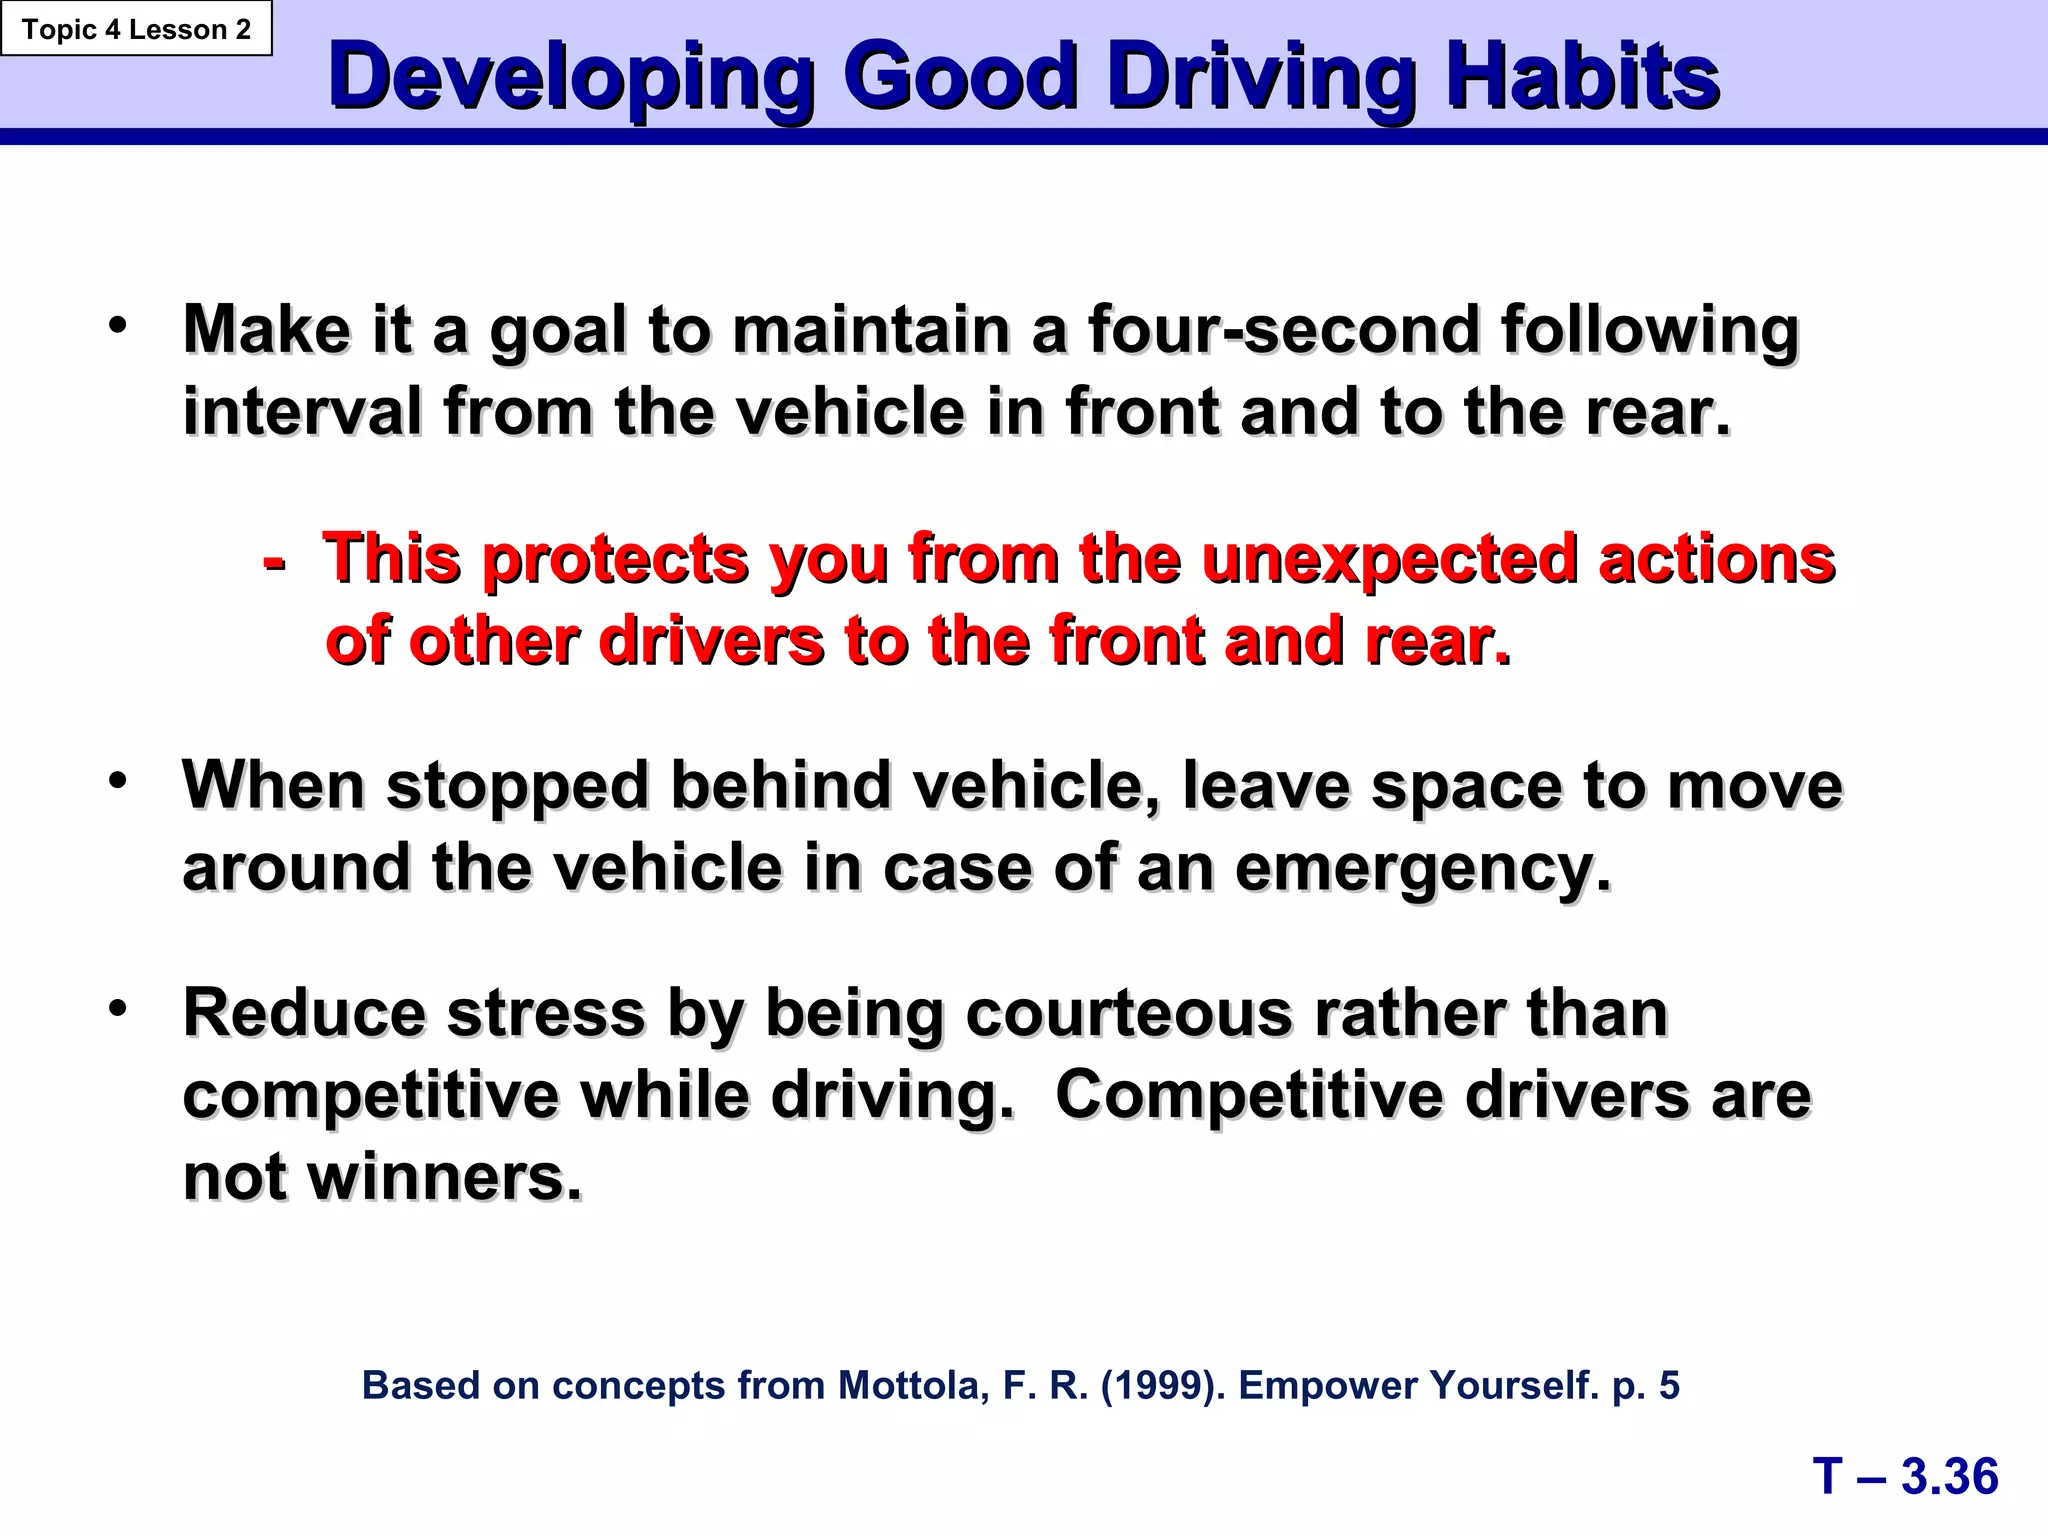
1. Basic Maneuvering Tasks:Basic Maneuvering Tasks:
Low Risk EnvironmentLow Risk Environment
Topic 1 --Topic 1 -- Basic ManeuversBasic Maneuvers
Topic 2 --Topic 2 -- Vision and PerceptionVision and Perception
Topic 3 --Topic 3 -- Controlling Risk Using a Space ManagementControlling Risk Using a Space Management
SystemSystem
Topic 4 --Topic 4 -- Developing Good Driving HabitsDeveloping Good Driving Habits
Module Three TransparenciesModule Three Transparencies
VirginiaVirginia Department of EducationDepartment of Education
Provided in cooperation with the Virginia Department of Motor VehiclesProvided in cooperation with the Virginia Department of Motor Vehicles
2. 1.1. Place Foot Firmly onPlace Foot Firmly on
Service BrakeService Brake
2.2. Select Proper GearSelect Proper Gear
- Overdrive, Drive, or Reverse
3.3. Perform Traffic ChecksPerform Traffic Checks
- Forward, Rear, and Sides
4.4. Apply Proper SignalApply Proper Signal
- Communicate Intentions
T – 3.1
Entering Roadway TasksEntering Roadway Tasks
Topic 1 Lesson 1
3. 5.5. Release Parking BrakeRelease Parking Brake
6.6. Select Gap in Traffic FlowSelect Gap in Traffic Flow
7.7. Move to LaneMove to Lane
- Target Lane Position #1
- Release Service Brake
- Accelerate Gradually
- Steer to Center of Lane
Entering Roadway TasksEntering Roadway Tasks
T – 3.2
Topic 1 Lesson 1
3 feet
Lane Position #1Lane Position #1
CENTER OF LANE
3 feet
4. Traffic ChecksTraffic Checks
Front/Front/Rear/Sides
Proper SignalProper Signal
Target AheadTarget Ahead
Check Visual ReferenceCheck Visual Reference
- for 6” from Curb
Side Mirror and/or BlindSide Mirror and/or Blind
Area CheckArea Check
T – 3.3
Moving to Curb/Side of RoadMoving to Curb/Side of Road
Topic 1 Lesson 2
5. Moving to Curb/Side of RoadMoving to Curb/Side of Road
Adjust Speed UsingAdjust Speed Using
Controlled BrakingControlled Braking
Use Gradual SteeringUse Gradual Steering
- Make Adjustments to
Align Visual Reference
Points
Re-check TrafficRe-check Traffic
Cancel Signal IndicatorCancel Signal Indicator
T – 3.4
Topic 1 Lesson 2
6. • Proper Seating and Hand PositionsProper Seating and Hand Positions
• Adjust Restraints if NecessaryAdjust Restraints if Necessary
• Check Traffic to Front, Sides and RearCheck Traffic to Front, Sides and Rear
• Place Foot on the BrakePlace Foot on the Brake
• Shift to ReverseShift to Reverse
T – 3.5
Topic 1 Lesson 3
BackingBacking
BackingBacking
7. • Signal if Backing Right or LeftSignal if Backing Right or Left
• Release Parking BrakeRelease Parking Brake
• Readjust Seat PositionReadjust Seat Position
• Right Side/Left SideRight Side/Left Side
• Straight (Right Side)Straight (Right Side)
• Visually Target PositionVisually Target Position
• Maintain Reference PointsMaintain Reference Points
T – 3.6
BackingBacking
Topic 1 Lesson 3
BackingBacking
8. • Control Rear MovementControl Rear Movement
Gradually Release Brake PressureGradually Release Brake Pressure
• Move as Slowly as PossibleMove as Slowly as Possible
• Accelerate GraduallyAccelerate Gradually
• Cover the Brake when NeededCover the Brake when Needed
• Steer in the Direction You Want toSteer in the Direction You Want to
Go Using Reference Points toGo Using Reference Points to
Establish PositionEstablish Position
BackingBacking
T – 3.7
Topic 1 Lesson 3
BackingBacking
9. • Gaining Visual InformationGaining Visual Information
-- Focus Vision (Focal/Foveal)Focus Vision (Focal/Foveal)
-- Central Vision (Limited Fringe Area)Central Vision (Limited Fringe Area)
-- Peripheral VisionPeripheral Vision
• Maintaining an Open Line of SightMaintaining an Open Line of Sight
• Developing Searching SkillsDeveloping Searching Skills
Vision and Perception RequirementsVision and Perception Requirements
T – 3.8
Topic 2 Lesson 1
Note: 90% of the driving task is visual!
10. Vision and Perception RequirementsVision and Perception Requirements
• Targeting,Targeting, Line of Sight, Path of TravelLine of Sight, Path of Travel
• Referencing Vehicle toReferencing Vehicle to Path of TravelPath of Travel
• Using Visual ReferencesUsing Visual References
• Using Turning Points to Start theUsing Turning Points to Start the
Turning ProcessTurning Process
-- Forward visual turning pointsForward visual turning points
-- Rear visual turning pointsRear visual turning points
T – 3.9
Topic 2 Lesson 1
11. Driver’s Useful Vision AreasDriver’s Useful Vision Areas
Gathering Useful VisualGathering Useful Visual
InformationInformation
Focus Vision Area (Focal)
Includes 3 to 5 degrees of usefulIncludes 3 to 5 degrees of useful
information that is used when:information that is used when:
TargetingTargeting
Establishing a Visual LeadEstablishing a Visual Lead
Reading Signs and Interpreting SignalsReading Signs and Interpreting Signals
T – 3.10
Topic 2 Lesson 2
12. Driver’s Useful Vision AreasDriver’s Useful Vision Areas
Referencing Vehicle Position to
Roadway
Viewing Path of Travel
Viewing Line of Sight to Target Area
T – 3.11
Topic 2 Lesson 2
Gathering Useful VisualGathering Useful Visual
InformationInformation
Central Vision Area (Inner Fringe)
30 to 36 degrees of useful information
that includes:
13. Driver’s Useful Vision AreasDriver’s Useful Vision Areas
Gathering Useful Visual InformationGathering Useful Visual Information
T – 3.12
Topic 2 Lesson 2
Peripheral
Vision
Peripheral Vision
Peripheral Vision (Outer Fringe Area)
• 175-180 degrees of useful information that detects:
•Motion Changes
•Color Changes
14. Capacity of Visual FieldsCapacity of Visual Fields
Focus Vision
Central Vision
Peripheral Vision
Peripheral Vision
Motion and Color
Changes
Focus Vision
(Focal/Foveal)
Visual Lead, Targeting,
Signs, Signals
Central Vision
(Limited Fringe Area)
Referencing, Path of
Travel, Sightlines
Visual Fields in OperationVisual Fields in Operation
T – 3.13
Topic 2 Lesson 3
15. Visual Fields in OperationVisual Fields in Operation
Path of TravelPath of TravelTarget
Standard Visual Target andStandard Visual Target and
Reference Fields for Lane Position 1Reference Fields for Lane Position 1
WhenWhen focus visionfocus vision is on the selected target in theis on the selected target in the
center of the path of travel, thecenter of the path of travel, the central or innercentral or inner
fringe visionfringe vision allows the driver to visually place theallows the driver to visually place the
vehicle in a specific location within the lane.vehicle in a specific location within the lane.
T – 3.14
Topic 2 Lesson 3
16. Line of Sight/Path of Travel
Line of Sight Limitations orLine of Sight Limitations or
RestrictionsRestrictions
When line of sight isWhen line of sight is
restricted or blocked,restricted or blocked,
adjust speedadjust speed untiluntil
visual lead, targetvisual lead, target
area, and the line ofarea, and the line of
sight are restored.sight are restored.
T – 3.15
Topic 2 Lesson 3
Target
17. Effect of Speed on Vision and SteeringEffect of Speed on Vision and Steering
As speed increases:As speed increases:
• central vision narrows and blurs
• peripheral vision decreases
• changes in steering will cause exaggerated
vehicle movements
VISUAL FIELDS NARROWVISUAL FIELDS NARROW
T – 3.16
Topic 2 Lesson 4
18. Effect of Speed on VisionEffect of Speed on Vision
• allow more time to gather information;
• lengthen total visual field, giving more time for
adequate response; and
• place more space between other users and
your vehicle so sudden steering changes are
held to a minimum.
As speed increases, look farther aheadAs speed increases, look farther ahead ofof your vehicle
to increase line of sight (LOS) and search your path of
travel (POT) to:
T – 3.17
Topic 2 Lesson 4
19. Determining Following IntervalsDetermining Following Intervals
Fixed Object or ShadowFixed Object or Shadow
One Thousand One
One Thousand Two
One Thousand Three
One Thousand Four
T – 3.18
Topic 2 Lesson 4
20. Time, Speed, and DistanceTime, Speed, and Distance
Topic 2 Lesson 4
T – 3.19
Vehicle Ft./Sec.
Speed Travel
Following Interval
2 Sec. 3 Sec. 4 Sec.
1/2 sec 3/4 sec Total
Steer Brake Brake
Dist. Dist. Dist.
30 mph 44 f/s 88 ft. 132 ft. 176 ft. 22 ft. 33 ft. 80 ft.
40 mph 58 f/s 116 ft. 174 ft. 232 ft. 29 ft. 44 ft. 125 ft.
50 mph 74 f/s 148 ft. 222 ft. 296 ft. 37 ft. 56 ft. 190 ft.
60 mph 88 f/s 176 ft. 264 ft. 352 ft. 44 ft. 66 ft. 275 ft.
70 mph 104 f/s 208 ft. 312 ft. 416 ft. 52 ft. 78 ft. 385 ft.
Time, Speed and Distance on Dry Pavement
Formula for approximate feet per second traveled:
Speed + ½ speed = FPS traveled
21. Following IntervalsFollowing Intervals
• 2 Seconds…2 Seconds… Allows driver time to steer out of problem areas at all
listed speeds on a dry surface and stop before problem areas at
speeds under 35 mph.
• 3 Seconds…3 Seconds… Allows driver time to steer out of problem areas at all
listed speeds on dry surface and stop before problem areas at speeds
to 45 mph.
• 4 Seconds…4 Seconds… Allows driver to steer out of problem areas at speeds
up to 65 mph on dry surface and stop before problem areas at speeds
to the legal limit of 65 mph.
T – 3.20
Topic 2 Lesson 4
Most factory equipped passenger car tires are not designed to steer out
of problem areas at speeds beyond 75 mph. At such speeds, speed rated
tires are required due to increased tire heat and reduced traction caused
by excessive sidewall flexion--especially on curves or when turning.
22. Space Management System
• S earch
• E valuate
• E xecute
• i n
• T ime
Topic 2 Lesson 4
T-3.20a
Good Drivers Develop a Space
Management System
23. SearchingSearching
• Identifying high risk situationsIdentifying high risk situations
- Effective searching techniques
- Having time to identify hazards
- Keeping stable scanning eye
movements
- Getting a large view of the roadway
- Establishing a line of sight and path
of travel position
• Gaining informationGaining information
- Effectively managing space
- Looking for changing areas
- Looking for open areas
- Looking for closed areas
T – 3.21
Topic 3 Lesson 1
24. EvaluatingEvaluating
• Potential and Critical Hazards
• Collision Potential
• Intersections
• Curves
• Position Adjustments
• Speed Adjustments
• Reduced Line of Sight
T – 3.22
Topic 3 Lesson 1
RECOGNIZINGRECOGNIZING high risk situationshigh risk situations
25. EvaluatingEvaluating
Decision-makingDecision-making
• Maintain an open line of sight (LOS)
and path of travel (POT)
Motion control
Controlled/threshold braking
Progressive acceleration
Steering control
Hand-to-hand
Evasive action
Preventing high risk situationsPreventing high risk situations
• Maintain open LOS and POT & proper lane position
• Manage time and space
T – 3.23
Topic 3 Lesson 1
Controlling high risk situationsControlling high risk situations
26. ExecutingExecuting
Speed changesSpeed changes
Lane position changesLane position changes
Space controlSpace control
in response toin response to
risk or dangerrisk or danger
traffic conditionstraffic conditions
roadway conditionsroadway conditions
vehicle balancevehicle balance
T – 3.24
Topic 3 Lesson 1
28. 12' wide traffic lane.12' wide traffic lane.
• allows for 6 feet of
space to the right of
the vehicle to avoid a
potential problem in
the area to the right
or to prepare for a left
turn.
Basic Lane Positions toBasic Lane Positions to CenterCenter,, LeftLeft && RightRight
Lane Position OneLane Position One
T – 3.26
Topic 3 Lesson 2
Lane Position TwoLane Position Two
• allows for 3 feet
on each side
when vehicle is
centered in the
lane.
Lane Position ThreeLane Position Three
• allows for 6 feet of
space to the left of
the vehicle for the
avoidance of a
potential problem to
the left or to prepare
for right turn.
6 feet
6 feet
3 feet
3 feet
29. T – 3.28
Approach to IntersectionApproach to Intersection
Topic 3 Lesson 2
Step 1 (Search)
• Identify Intersection
• Identify Controls
• Check Rear Areas
• Search for Intersection Risks
Step 2 (Evaluate)
• Scan Open Side Areas First
• Scan Closed Side Areas
• Look for Closed or Changing
Frontal Areas
Step 3 (Execute)
• Adjust Speed
• Maintain Lane Position or Stop
Behind Crosswalk
• Proceed Through Open Space
Area or Stop Behind the
Crosswalk
30. Approach to IntersectionApproach to Intersection
Topic 3 Lesson 2
T – 3.28a
Step 1 (Step 1 (SSearch)earch)
• Identify the intersection.Identify the intersection.
- Determine the type of intersection and number of
intersecting roadways.
- Determine your lane position (right turn/left
turn/straight) prior to the intersection.
• Identify any controls--Identify any controls--signal lights, stop or
yield signs and information signs. This will
provide you with the information you need to
adjust speed or position.
• Check rear areas.Check rear areas. Check if rear zones are
open or closed. If the rear zone is closed, tap your
brakes a few times before stopping— the brake
lights will flash and communicate to the driver to
the rear that you are slowing or stopping.
31. Approach to IntersectionApproach to Intersection
Topic 3 Lesson 2
T – 3.28b
Step 1 (Step 1 (SSearch)earch) continuedcontinued
• Search for possible intersection problems.Search for possible intersection problems.
Look for problem areas, such as construction or
road maintenance, pedestrians on or near the
intersection, or obstructions to your line of sight
that may include buildings, parked vehicles,
trees, fences, etc.
• Adjust speed.Adjust speed. Intersections are unpredictable
and you may have to stop. Be prepared. The
closer you get to an intersection, the more
important it is to adjust vehicle speed.
• Adjust lane position.Adjust lane position. Choosing the proper
position (LP 1, 2, or 3) will lower the risk of
possible conflicts by providing you the
maximum amount of space between your
vehicle and other vehicles.
32. Approach to IntersectionApproach to Intersection
Topic 3 Lesson 2
T – 3.28c
Step 2 (Evaluate)
• Scan open side areas firstScan open side areas first.. Try to
position your vehicle in an open zone with a
clear line-of-sight to your path-of-travel. Be
prepared to stop for a closed zone or line-of-
sight restriction in your path-of-travel.
• Scan closed or changing areasScan closed or changing areas..
Identifying closed zones early will allow you
to prepare. The greatest chance for conflict
is in areas where vehicles may cross directly
into your intended path-of-travel.
• Look for closed or changing frontalLook for closed or changing frontal
areas.areas. A closed front zone occurs when
there is a yellow or red traffic light, yield or
stop sign, or anything moving into your
intended path of travel.
33. Approach to IntersectionApproach to Intersection
Topic 3 Lesson 2
T – 3.28 d
Step 3 (Execute)
• Adjust speed.Adjust speed. If you have identified a
closed zone, prepare to reduce speed or stop.
• Maintain lane position.Maintain lane position. Your lane position
(LP 1, 2, or 3) will indicate your intentions to
other drivers and provide you with the
greatest distance between opposing vehicles
and/or other objects.
• Stop behind stop line, crosswalk, orStop behind stop line, crosswalk, or
before entry to intersections, whenbefore entry to intersections, when
needed —needed — proceed through open space area
when traffic controls permit and your path-of
travel is clear.
Note: Most crashes occur in intersections!
34. Good Driving HabitsGood Driving Habits
Habit LevelHabit Level
T – 3.29
Topic 4 Lesson 1
(Empower Yourself (1999) F.R. Mottola)
Judgment LevelJudgment Level
• Practice safe driving procedures that require little thought
• Have a well thought out strategy for managing time and space
• Become efficient and precise
• Respond correctly with the least amount of time
Process LevelProcess Level
• Search for problems
• Evaluate options
• Execute decisions
• Modify speed and/or position
• Communicate to reduce the risk of collision
35. Levels of PerformanceLevels of Performance
T – 3.30
Topic 4 Lesson 1
Based on Mottola, F. R. (1999) Empower Yourself, p. 1
Awareness LevelAwareness Level Performance LevelPerformance Level
HabitHabit
JudgmentJudgment
AcceptableAcceptable
HabitHabit
JudgmentJudgment
UnacceptableUnacceptable
DriverDriver DriverDriver
36. The Top Ten ErrorsThe Top Ten Errors
Topic 4 Lesson 1
T – 3.31
Preliminary TRB Report 1999
1.1. 23.9%23.9% not attending to the path of travelnot attending to the path of travel
(distractions – cell phone, sound system,(distractions – cell phone, sound system,
passengers, etc.)passengers, etc.)
2.2. 13.7%13.7% driving five or more mph too fast fordriving five or more mph too fast for
conditionsconditions
3.3. 6.6%6.6% driving too fast through a curvedriving too fast through a curve
4.4. 6.3%6.3% inadequate search at an intersection andinadequate search at an intersection and
moving in front of cross trafficmoving in front of cross traffic
5.5. 6.1%6.1% lack of attention at an intersection andlack of attention at an intersection and
being struck by another driverbeing struck by another driver
that resulted in crashes involvingthat resulted in crashes involving
teen drivers are:teen drivers are:
37. The Top Ten ErrorsThe Top Ten Errors
Topic 4 Lesson 1
T – 3.32
Preliminary TRB Report 1999
that resulted in crashes involvingthat resulted in crashes involving
teen drivers are:teen drivers are:
6. 6.5% improper evasive action—quick turn
not executed properly or braking
instead of steering
7. 3.9% failed to maintain visual lead
8. 3.9% failed to see action developing at
side of the roadway
9. 3.9% following too closely
10. 3.3% willfully taking right-of-way
38. A+
C+
Developing Good Driving HabitsDeveloping Good Driving Habits
• Preparing Driver and VehiclePreparing Driver and Vehicle
• Smooth, Gradual Starts and StopsSmooth, Gradual Starts and Stops
• Using Reference Points for Vehicle PlacementUsing Reference Points for Vehicle Placement
• Getting Visual Targets before MovementGetting Visual Targets before Movement
- Using a Vision Control, Motion Control,- Using a Vision Control, Motion Control,
Targeting, and Steering Control SequenceTargeting, and Steering Control Sequence
• Visually Targeting the End of the Path of TravelVisually Targeting the End of the Path of Travel asas
farfar as 15, 20, or 30 secondsas 15, 20, or 30 seconds from the Vehiclefrom the Vehicle
Based on concepts from Mottola, F. R. (1999). Empower Yourself. p. 5
T – 3.33
Topic 4 Lesson 2
39. A+
C+
Developing Good Driving HabitsDeveloping Good Driving Habits
Based on concepts from Mottola, F. R. (1999). Empower Yourself. p. 5
• Be AlertBe Alert to Changes to the Line of Sight (LOS)to Changes to the Line of Sight (LOS)
or the Path of Travel (POT)or the Path of Travel (POT)
• Adjust Speed and Lane Position to IncreaseAdjust Speed and Lane Position to Increase
Space to Front, Side, or Rear for RestrictedSpace to Front, Side, or Rear for Restricted
LOS-POTLOS-POT
• When Approaching a Red Light, Adjust SpeedWhen Approaching a Red Light, Adjust Speed
to Time Your Arrival for a Green Lightto Time Your Arrival for a Green Light
T – 3.34
Topic 4 Lesson 2
40. A+
C+
Developing Good Driving HabitsDeveloping Good Driving Habits
Based on concepts from Mottola, F. R. (1999). Empower Yourself. p. 5
• Prior to Intersection Entry, Check the Left,Prior to Intersection Entry, Check the Left,
Front, and Right Zones or AreasFront, and Right Zones or Areas
-- Check the area that can be viewed best first so thatCheck the area that can be viewed best first so that
more time can be focused on the obstructed areamore time can be focused on the obstructed area
• Whenever Your Foot Goes to Brake orWhenever Your Foot Goes to Brake or
Accelerator, Check the Rear View MirrorAccelerator, Check the Rear View Mirror
• Prior to Moving to the Left or Right, Check SidePrior to Moving to the Left or Right, Check Side
View Mirror and Mirror Blind ZoneView Mirror and Mirror Blind Zone
T – 3.35
Topic 4 Lesson 2
41. A+
C+
Developing Good Driving HabitsDeveloping Good Driving Habits
Based on concepts from Mottola, F. R. (1999). Empower Yourself. p. 5
• Make it a goal to maintain a four-second followingMake it a goal to maintain a four-second following
interval from the vehicle in front and to the rear.interval from the vehicle in front and to the rear.
- This protects you from the unexpected actions- This protects you from the unexpected actions
of other drivers to the front and rear.of other drivers to the front and rear.
• When stopped behind vehicle, leave space to moveWhen stopped behind vehicle, leave space to move
around the vehicle in case of an emergency.around the vehicle in case of an emergency.
• Reduce stress by being courteous rather thanReduce stress by being courteous rather than
competitive while driving. Competitive drivers arecompetitive while driving. Competitive drivers are
not winners.not winners.
T – 3.36
Topic 4 Lesson 2