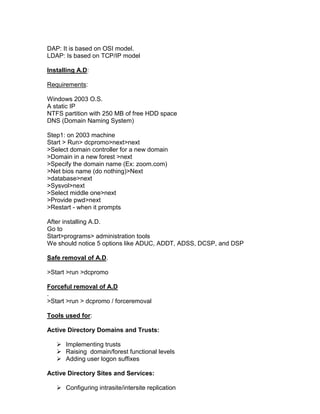
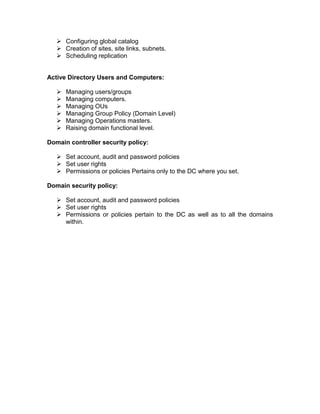
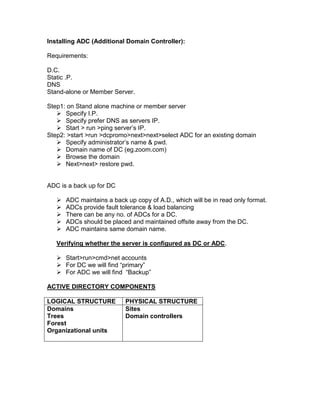
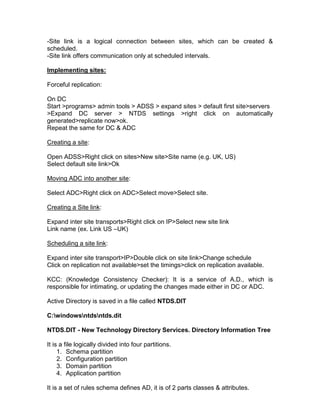
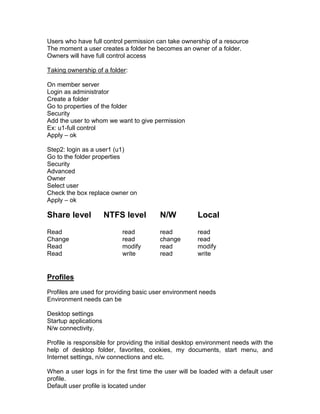
MCSE

MICROSOFT CERTIFIED SYSTEMS ENGINEER
NETWORK: A network is a collection of computers connected together.
.
NETWORKING: is a process of communication between the interconnected
devices basically to share the network resources.
Benefits of Networking:
   1. Share resources.
        i) Data
       ii) Hardware
   2. Share S/W
   3. Sharing of license

Network is a collection of computers connected together to get benefited from
networking.

Networking: Networking is a process of communication among systems.

Types of Networks:
    1) Local Area Network (LAN): Systems connected within the same
       geographical area is called LAN. A LAN can span 2 kilometers.

       Components of LAN:

          1. .NIC (Network Interface Card)
          2. Cable – Co axial, cat5 or cat6
          3. Hubs or Switches.

    2) Metropolitan Area Networking: MAN is a combination of LANs or WANS
       located and connected within the same city.

       Components of MAN:

       1. Router
       2. Brouter (Brouter is a combination of bridge or router)
       3. ATM Switches
       4. DSL connectivity (DSL – Digital Subscriber Link) ex: Star cables
.
    3) Wide Area Networking (WAN): Interconnection of LANs or MANs located
within the same geographical area or different area it depends on
telecommunication services.

       Components of WAN: Same as MAN:
Networking devices:
Hubs, Switches, Routers and NICs.

HUB: Hub is a centralized device provides communication among systems when
we have more than 2 computers we need to have a device called hub to
interconnect.

Disadvantage of a Hub:

When we want to transfer some data from one system to another system.
If our network has 24 systems the data packet instead of being sent only to the
destined system it is being send to all the network participants. (i.e. 24 systems.)
Hubs follow broadcasting

SWITCH: It is an advanced version over a Hub.
The main benefit of switch is Unicast. Data packets are transmitted only to the
target computer instead of all.
Switch maintains a table called MIT (Mac Information Table.) which is generated
as soon as we turn on the switch, which acts like an index table and easy the
process of finding the networked system. MIT contains the port no, IP address
and MAC address.
MAC: (Media Access Control): It is an address burnt in the NIC by the
manufacturer.
MAC address is of 48 bits in the farm of Hexa decimal.
Every NIC has its own unique MAC address.
MAC address determines the physical location of a system.

ROUTER: Router is a device connects two different networks.

          Class A network with Class C network etc.
Routing is a process of communication between two different networks.

Network Topologies:
The way of cabling is called topology.
The architecture of a network is called topology

E.g.: Bus, Star, Ring, and Mesh Topologies.

Bus Topology:

Components of Bus Topology:

   1.   Co-axial cable (back bone cable)
   2.   T- connectors
   3.   BNC (British Network Connector)
   4.   Terminator
   5.   Patch cable
Disadvantages of Bus:

If anything goes wrong with backbone cable whole network is down.
Follows a serial communication.
Outdated these days.

Star Topology:

Star topology is an advanced version over bus topology. Where it uses either a
hub or a switch, it uses cat5/6 cables.
It uses connecters called (Recommend Jack) - RJ45
Star topology offers faster data transfer or processing.

Ring Topology:

Ring topology is useful when we want redundancy (fault tolerance) we go with
this type of topology.
Ring topology uses a device called MSAU. (Multi Station Access Unit)
It is a unit inside which a logical ring is formed. This ring ensures the availability
of Network. The availability of ring ensures availability of network.
It was basically implemented in IBM networks.

Logical Topologies: are two types
   1. Work group.
   2. Domain

   Workgroup (peer to peer):

          Collection of computers connected together to share the resources.
          No servers are used.
          Only Client OS is mostly used.
          Any O/S like, DOS, 95, 98, workstation, win 2000 pro, and XP pro can
          be configured as work-group model.
          Suitable for smaller organizations.
          Where security is not the criteria.
          No administrator is required
          Where we are not using client server based applications. Like oracle,
          SQL and exchange etc.

Domain (Client/Server)

Domain is a collection of computers connected together with a server and users
Domain model can have servers like UNIX, Novell NetWare, WIN-NT server,
2000 server, and 2003 server.
Provides centralized administration.
Suitable for medium to large size networks/organizations.
Suitable when we have client server architecture (Back ends & front ends)
Domain offers security and provides logon authentication.
Suitable if security is criteria
Requires an administrator.

The History of MS Network O/S:

1. Desktop O.S.: DOS, 95, WKS, 98, 2k Prof., XP-Prof.
2. Network O.S.: UNIX, Win NT server 4.0, Win 2000 server, Win 2003 server.

Win NT 3.1 – was introduced in 1993
Win NT 3.5 – was introduced in 1994
Win NT 4.0 – was introduced in 1996
Win NT5.0 was renamed as windows 2000 server.
.NET server was renamed as windows 2003 server

       WINDOWS                  WINDOWS
      2000 FAMILY              2003 FAMILY


        Professional             Standard
        (Client)                 Server


        Standard                 Enterprise
        Server                   edition


        Advanced                 Advanced
        server                   server


        Data center              Data center
        server                   server
HARDWARE REQUIREMENTS

Windows 2003 Standard Edition:               Windows 2003 Enterprise Editions:

      RAM: Min:128 MB                              RAM: Min:128 MB
      Rec: 256 MB                                  Rec: 256 MB
      Max. RAM 4 GB                                Max. RAM 16 GB
      Processor: Pentium 550 MHz                   Processor: Pentium 733MHz
      HDD free space 1.5GB                         HDD free space 1.5GB
      SMP: 4 processors                            SMP:16 processors


Windows 2003 Web Edition:                    Windows 2003 DataCenter Edition:

      RAM: Min:128 MB                              RAM: Min: 1GB
      Rec: 256 MB                                  Rec: 2GB
      Max. RAM 2 GB                                Max. RAM 64 GB
      Processor: Pentium 550 MHz                   Processor: Pentium 733MHz
      HDD free space 1.5GB                         HDD free space 1.5GB
      SMP: 2 processors                            SMP: 64 processors


IP Addressing:

There are two versions of IPs

1. IP version 4: offers IPs up to 4.2 billion (32 bit size)
2. IP version 6: 128 bit size.

IP address is used for identifying the system and provides communication.
IP address is of 32 bits divided in four octets.
Each Octet is of 8 bits, separated by a (.) dot.
IP is a combination of Network ID & Host ID.
Uses subnet mask to differentiate Network ID with Host ID.
Subnet mask acts like a mask between Network ID & the Host ID.
Numbers range between 0-255.

Organizations responsible for assigning IPs to clients.

IANA: Internet Assign Naming Authority.
ICANN: Internet Corporation assigning for name Numbers.
IANA has classified IP addressing into classes.

Class A:      1-126(used in LAN/WAN)
Class B:      128 – 191(used in LAN/WAN)
Class C:      192 – 223(used in LAN/WAN)
Class D:      224 – 239 (used for multi casting)
Class E:      240 – 254 (used for experimentation & research)


Class Format             No of N/Ws        No of Hosts          Subnet mask        Range
                          28-1 126         224 – 2 16.777.214
A       N.H.H.H                                                 255.0.0.0          1 – 126

                         216-2 16.384      216 – 2 65.534
B       N.N.H.H                                                 255.255.0.0        128 - 191

                         224-3 2.097.152   28 – 2 254
C       N.N.N.H                                                 255.255.255.0      192 – 223
D       MULTICAST        N/A               N/A                  N/A                224 – 239
E       RESEARCH         N/A               N/A                  N/A                240 - 254


Class A:The first octet is reserved for network ID.
The first bit of first octet is always (0).

Class B: The first two octets are reserved for Network IDs.
The first two bits of first octet are reserved as (10)

Class C: The first three octets are reserved as network portions.
The first three bits of first octet are reserved as (110)

Class D: Used for Multicasting.
The first four bits of first octet are reserved as (1110)

Class D: Used for Experimentation.
The first four bits of first octet are reserved as (1111)

The first bit of first octet is called as priority bit which determines the class of N/W

0.0.0.0. Are reserved as N/W ID.
255.255.255.255 is reserved as broadcast ID.
127.0.0.1 Is reserved as loop back ID

Implementing/Configuring TCP/IP.

On Desktop
Right click on my network places-properties
Double click local area network-Select properties
Click-Use the following ip address
Specify the address in the box
DNS also same as IP address.


Verifying:

Go to command prompt
Type” ping IP address”. (PING: Packet Internet Groper)
ACTIVE DIRECTORY
AD: Is a centralized database where it contains the information about the
objects like users, groups, computers, printers etc.
AD is a centralized hierarchical Directory Database.
AD is a searchable Database.

2003 O/S. when installed (gets installed as a stand alone server) to promoting to
D.C. We have to install A.D.

Domain Controller (D.C.)

A server where A.D. is installed is called D.C.

Functionality of A.D.:

Using A.D. we can organize, manage and control resources.
It provides single point of administration.

Purpose of A.D.:

   1. Provides user logon authentication services.
   2. To organize and manage user A/Cs, computers, groups and n/w
      resources.
   3. Enables authorized users to easily locate n/w resources.

Features of A.D.:

  1. Fully integrated security system with the help of Kerberos.
  2. Easy administration using group policy.
  3. Scalable to any size n/w
  4. Flexible (install/uninstall)
  5. Extensible (modify the schema)
New features in 2003
  6. Rename computer name & Domain names.
  7. Cross –forest trust relationship.
  8. Site-to-Site replication is faster.


Evolution of LDAP:

Earlier we had no database standard; hence TTU & ISO introduced X-500

LDAP (Light Weight Directory Access Protocol): It is an industry standard
directory access protocol used for querying and providing communication among
the objects in A.D.
It is directory access protocol.
It runs on the port no. 389.
DAP: It is based on OSI model.
LDAP: Is based on TCP/IP model

Installing A.D:

Requirements:

Windows 2003 O.S.
A static IP
NTFS partition with 250 MB of free HDD space
DNS (Domain Naming System)

Step1: on 2003 machine
Start > Run> dcpromo>next>next
>Select domain controller for a new domain
>Domain in a new forest >next
>Specify the domain name (Ex: zoom.com)
>Net bios name (do nothing)>Next
>database>next
>Sysvol>next
>Select middle one>next
>Provide pwd>next
>Restart - when it prompts

After installing A.D.
Go to
Start>programs> administration tools
We should notice 5 options like ADUC, ADDT, ADSS, DCSP, and DSP

Safe removal of A.D.

>Start >run >dcpromo

Forceful removal of A.D
.
>Start >run > dcpromo / forceremoval

Tools used for:

Active Directory Domains and Trusts:

    Implementing trusts
    Raising domain/forest functional levels
    Adding user logon suffixes

Active Directory Sites and Services:

    Configuring intrasite/intersite replication
 Configuring global catalog
    Creation of sites, site links, subnets.
    Scheduling replication


Active Directory Users and Computers:

      Managing users/groups
      Managing computers.
      Managing OUs
      Managing Group Policy (Domain Level)
      Managing Operations masters.
      Raising domain functional level.

Domain controller security policy:

    Set account, audit and password policies
    Set user rights
    Permissions or policies Pertains only to the DC where you set.

Domain security policy:

    Set account, audit and password policies
    Set user rights
    Permissions or policies pertain to the DC as well as to all the domains
     within.
Installing ADC (Additional Domain Controller):

Requirements:

D.C.
Static .P.
DNS
Stand-alone or Member Server.

Step1: on Stand alone machine or member server
    Specify I.P.
    Specify prefer DNS as servers IP.
    Start > run >ping server‟s IP.
Step2: >start >run >dcpromo>next>next>select ADC for an existing domain
    Specify administrator‟s name & pwd.
    Domain name of DC (eg.zoom.com)
    Browse the domain
    Next>next> restore pwd.


ADC is a back up for DC

      ADC maintains a back up copy of A.D., which will be in read only format.
      ADCs provide fault tolerance & load balancing
      There can be any no. of ADCs for a DC.
      ADCs should be placed and maintained offsite away from the DC.
      ADC maintains same domain name.

   Verifying whether the server is configured as DC or ADC.

    Start>run>cmd>net accounts
    For DC we will find “primary”
    For ADC we will find “Backup”

ACTIVE DIRECTORY COMPONENTS

LOGICAL STRUCTURE           PHYSICAL STRUCTURE
Domains                     Sites
Trees                       Domain controllers
Forest
Organizational units
A.D. Components:
      Logical structure is useful for organizing the network.
      Logical components cannot be seen
      Physical structure is useful for representing our organization for
      developing the organizational structure.
      It reflects the organization (mirrors)
      Physical structure can be seen. Ex. Site – India, US, UK etc.

TREE:

A tree is a group of domains which share contiguous name space.
If more than one domain exits we can combine the multiple domains into
hierarchical tree structures.
The first domain created is the root domain of the first tree.
Additional domains in the same domain tree are child domains.
A domain immediately above another domain in the same domain tree is its
parent.

FOREST:

Multiple domain trees within a single forest do not form a contiguous namespace.
I.e. they have non-contiguous DNS domain names
Although trees in a forest do not share a name space, a forest does have a
single root domain, called the forest root domain
The forest root domain is, by definition, the first domain created in the forest.
The two forest wide predefined groups – Enterprise.
Administrators and schema administrators reside in this domain.


Physical structure

SITES:

Site is a combination of TCP/IP, subnets, connected with high-speed links.
Sites provide replication


There are 2 types of replications
   1. Intrasite replication
   2. Intersite replication

Intrasite Replication: It is a replication with in the same site. It offers full time
replication between DC & ADC when they are within the same site.

Intersite Replication: It is a replication between two different sites.
Intersite replication is implemented when the sites are away from each other.

-It requires a site link
-Site link is a logical connection between sites, which can be created &
scheduled.
-Site link offers communication only at scheduled intervals.

Implementing sites:

Forceful replication:

On DC
Start >programs> admin tools > ADSS > expand sites > default first site>servers
>Expand DC server > NTDS settings >right click on automatically
generated>replicate now>ok.
Repeat the same for DC & ADC

Creating a site:

Open ADSS>Right click on sites>New site>Site name (e.g. UK, US)
Select default site link>Ok

Moving ADC into another site:

Select ADC>Right click on ADC>Select move>Select site.

Creating a Site link:

Expand inter site transports>Right click on IP>Select new site link
Link name (ex. Link US –UK)

Scheduling a site link:

Expand inter site transport>IP>Double click on site link>Change schedule
Click on replication not available>set the timings>click on replication available.

KCC: (Knowledge Consistency Checker): It is a service of A.D., which is
responsible for intimating, or updating the changes made either in DC or ADC.

Active Directory is saved in a file called NTDS.DIT

C:windowsntdsntds.dit

NTDS.DIT - New Technology Directory Services. Directory Information Tree

It is a file logically divided into four partitions.
     1. Schema partition
     2. Configuration partition
     3. Domain partition
     4. Application partition

It is a set of rules schema defines AD, it is of 2 parts classes & attributes.
Ad is constructed with the help of classes and attributes.

   1. Schema: Logical partition in AD database “template” for AD database.
           Forms the database structures in which data is stored.
           Extensible
           Dynamic
           Protect by ACL (Access Control Lists) DACL‟s and SACL‟s
           (Directory&System ACL‟s)
           One schema for AD forest.

Collection of objects is called class.
Piece of information about the object is called attribute.

2. Configuration Partition: Logical partition in AD database.
      “map” of AD implementation
      Contains information used for replication logon searches.
      Domains
      Trust relationships
      Sites& site links
      Subnets
      Domain controller locations.

3. Domain Partition:
      Logical partition in AD database.
      Collections of users, computers, groups etc.
      Units of replication.
      Domain controllers in a domain replicate with each other and contain a full
      copy of the domain partition for their domain.
      DCs do not replicate domain partition information for other domains

4. Application Partition:
      It is a newly added partition in win2003. It can be added or removed
      It can be replicated only to the specified DCs.
      Useful when we are using AD integrated services like DNS, TAPI services
      etc..


FSMO roles: (Flexible Single Master Operations):

Forest wide Master Operation

1. Schema master           2.Domain Naming master

Domain wide master operation

3. PDC emulator
4. RID master
5. Infrastructure master
Schema Master:

Responsible for overall management of the entire schema in a forest.
The first DC installed acts as a schema master in the entire forest.
There can be only one schema master in the entire forest

Domain Naming Master:

Responsible for addition /removal of domains.
It maintains the uniqueness of domain names.
There can be only one DNM in the entire forest.

3. PDC emulator:

 PDC provides backward compatibility for existing NT BDCs and workstations. (If
it is running in mixed mode)
PDC updates the password changes made by the users.
It is also responsible for synchronizing the time.
There can be only one PDC emulator per domain.

4. RID master:

Responsible for assigning unique IDs to the objects created in the domain.
There can be only one RID master per domain
SID – Security Identifier it maintains a access control list. It is divided into two
      parts.
   1. DID (Domain Identifier)
   2. RID (Relative Identifier)

For knowing the SID of the user
>Start>run>cmd> whoam I /user

5. Infrastructure master:

Responsible for maintaining the updates made to the user & group membership.
It also maintains universal group membership.
There can be only one infrastructure master per domain

The term flexibility means we can transfer any of the 5 roles from DC to ADC.

Transfer of Roles
:
We can transfer the roles for some temporary maintenance issues on to ADC
and again we can transfer back the roles onto DC.

We can transfer the roles in two ways
  1. Command mode
  2. Graphical mode
Transfer of roles through command

On DC
Go to command prompt and type ntdsutil
Type: roles
Connections
Connect to server (name of ADC ex.sys2)
Q
Transfer schema master
Transfer RID master
Transfer infrastructure master
Transfer                                                 PDC
Q
Q
Exit


Transferring roles using GUI
:
On DC
Register the schema
For registering schema
Start > run > regsvr32 schmmgmt.dll

Transferring schema master
On Dc
Start>Run>mmc>click on file> select add/remove snap in
Select A.D.Schema>add>close>ok
From console root
Expand console root
Right click AD Schema
Change domain controller
Specify name
Ok
Right click AD schema
Select operations master
Click on change
Yes> ok> file> exit (need not to save)

Transferring Domain naming master:
On DC
Start>p>admin tools> ADDT>right click on ADDT
Connect to domain controller
Select ADC
Ok
Right click on ADDT
Operations master
Click on change>yes>ok> close

Transferring Domain wide master operations:

Start >p>admin tools> ADUC
Right click on ADUC
Connect to DC
Select ADC > ok
Right click on Domain name
Select operations master
Change>yes
Select PDC> change>yes>select infrastructure>change>close>close.


GLOBAL CATALOG
It is a service responsible for maintaining information about the objects and
serving the requests made by the users by providing the location of the object.
Global Catalog runs on the port number 3268.
All types of queries are first heard on this port number and forward the query to
port no.389 (LDAP‟s).Maintains the complete information about the objects within
the same domain and partial information about other domains.
GC communicates to infrastructure master.
If DC & ADC are located in the same location only one GC is enough.
If the DC&ADC are located remotely to avoid network traffic we need to configure
ADC as GC
Infrastructure master contacts global catalog for obtaining the updates about user
& group membership and universal group membership.
The primary functions of GC
To maintain universal group membership information, to easily locate the objects
with in the AD.:

Configuring a Global catalog server.

Either on ADC or on ChildDC
>Start >program>admin tools> ADSS> expand sites >default first site>server>
On NTDS right click> properties>check the box Global Catalog.

Installing ChildDC:

Requirements:
ParentDC
Member server or stand alone server
Static IP
DNS
NTFS volume with 250 MB of free HDD space
On Member Server or stand alone machine specify the server‟s DNS.
>Start    >run>dcpromo>next>next>next>domain      controller  for a    new
domain>next>
Child Domain in an existing tree>specify the parent domain‟s administrator‟s
name & pwd. >Specify the child name>next>netbios name> next> database
folder> next>Sysvol>next>restart.

Installing New Domain tree in an existing forest:

Requirements:
Forest (initial domain controller or root domain controller)
On member server or stand-alone machine.
Specify the server‟s DNS.
Start>run>dcpromo>next>next>next>Domain Controller for a new domain.
Select Domain tree in an existing forest.
Specify the root domain‟s admin‟s name & pwd
Next> specify the new domain name>next>net bios name>next>database >
next>sysvol>next>DNS next>permission compatible >next>restore mode
pwd>next

Trust Relationship:Trust is a process of enabling resources of one domain to be
accessed by another domain.

Functional Levels:

1. Domain Functional Level:

A) Windows 2000 mixed
B) Windows 2000 native
C) Interim
D) Windows 2003 server

2. Forest Functional Level:

a) Windows 2000 mixed
b) Interim
c) Windows 2003 server.

Windows 2000 mixed:

By default when we install 2000 or 2003 o/s it gets installed in win 2000 mixed
mode.
This mode supports older versions of win2003. We can add NT, 2000 flavors in
2003 networks.

Windows 2000 native:

It supports only 2000 and 2003; Native mode can have 2000&2003 flavors only.
Interim:

This mode can have NT and 2003. Useful when we upgrade NT to 2003

Windows 2003 server:

This mode supports only 2003 server family.
We can‟t join NT/2000 domains


Types of Trusts:

Trust relationships in Windows server2003:
Default two way transitive Kerberos trusts (intra forest)
Shortcut – one or two away transitive Kerberos trusts (intraforest)
Reduce authentication requests
Forest-one or two way- transitive Kerberos trusts.
WS2003 forests WIN 2000 does not support forest trusts
> Only between forest roots
>Creates transitive domain relationships.
External – one way non-transitive NTLM trusts.
Used to connect to /from win NT or external 2000 domains.- manually created.
Realm – one or two way non-transitive Kerberos trusts.
Connect to /from UNIX MT Kerberos realms.

Establishing Trusts:

The Domain where we have user accounts is called trusted domain.

The domain where we have resource is called trusting domain.

Trust between parent and child is two way transitive trusts.
Ex; A trusts B, automatically B trusts A this is a two way trust.

Trust between parent and Grandchild domain is called implicit trust.

One-way trust or Non-transitive Trust: A trusts B, but B doesn‟t trust A

Transitive trust (2 ways):
If A trusts B, B automatically trusts A

One way incoming trust:
It means A is getting the resources from B and B is offering the resources.

One way out going trust:
A is offering resources to B and B is getting resources from A
Benefits of Domain Functional Level:

Win 2003 server Level:

The moment we raise the functional level, form mixed mode to win 2003 mode
we get the following benefits.

Universal groups
Group nesting
Domain renaming tools.

Benefits of Forest Functional Level:

Win 2003 level
We get complete benefits of 2003 when we raise the level from 2000 to win 2003
server.
We can implement forest trusts.
Acceleration of global catalog replication information.
Domain renaming

ImplimentingForest Level:

Raising Domain Functional in both the machines:
>Start>program>admin tools>ADDT>right click on Domain>raise Domain
Functional Level>select win 2003>click on raise>ok>ok
Raising Forest Functional Level:
>Start>p>ADDT>right click on ADDT>raise forest functional level>select
win2003>rise>ok.

Member Server: A server, which is a part of DC, is called Member Server.
Server like WINNT, 2000 and 2003 can be configured as Member Server.
Server, which is part of the Domain, is called Member Server.
Member Servers are used
Load balancing
Load sharing form DCs

A member server can be configured as any of the following servers.

Application service (oracle/SQL)
Mail server
File server
Print server
DNS server
DHCP sever
Web server
RIS server
RAS server
T.S.
Configuring a member server


Requirements:

DC
Stand alone server 2003 flavor
On Stand-alone server:
Configure TCP/IP
Specify DNS server‟s address

My computer right click
Select properties
Computer name
Change
Domain
Specify name (ex: zoom.com)
Ok> it says welcome to domain
Restart system.

Configuring win2003 or XP professional as a client:

Same as configuring member server;
Server: Ex: NT, 2000, 2003
Client: ex: WKS, Prof., And XP

User Management:
User Account: User A/Cs is useful for assigning to the user to participate in the
network.
There are two types of accounts
    Domain User Accounts
    Local User Accounts

1. Domain User Accounts: These are created in the AD and they proved
centralized management of users besides easy administration
2. Local User Accounts: These can be created on the Local machines where the
client works. Ex. 2000 prof. XP prof. < win2003 member server etc.

These accounts do not provide centralized management.
Suitable only for smaller organizations where there is no server.

Creating a Domain User Accounts
.
On DC
Start> Programs>Admin tools> ADUC>expand domain name(ex.IBM.com)
>Right click on users>new>user>supply name &pwd. >User must change pwd at
next logon>next>finish
Creating a Domain User A/C through command prompt;

Start>run>cmd
dsadd user cn=username,cn=users,dc=ibm,dc=com –pwd zoom_123

For removing
dsrm user cn=username…….

Creating a local user Account in Member Server

On member server
Log on to local user a/c
Right click on my computer
Manage
Expand local users
Right click on users.
New user
Supply the user name&pwd
Click on create
Log off
Log in as user

Creating a Local user a/c from command mode

On member server
Login as administrator
Go to command prompt
Net user username
Password
Ex: net user u1 zoom_123 /add
If we want to delete.. /del

User right assignments (Logon locally allowing logon locally right to a normal
user.)
On DC
Create a user a/c in ADUC
Allowing him to logon
Start >programs>admin tools>DCSP>expand local policies>user rights>D/C
allow logon locally>add the user.
Start>run>gpupdate.

Verify:

On DC logon as a user


Disabling password complexity policy:
Start    >programs>admin      tools>domain    security  policy>expand       a/c
policies>password policy
>Double click on p/w must meet complexity requirements.
Select disabled
Apply >ok
Minimum pwd length (do it as 0 characters)
Close
For refreshing policy
Start >run>cmd>gpupdate

Password policies: Enforce password history 24 pwds remembered
Maximum p/w age
Minimum pwd age
Pwd must meet complexity requirements
Store pwds using reversible encryption.
Re-setting User passwords:
On DC
Start >p> ADUC >expand users
Select the user right click
Reset password select


Shortcuts:

Start > Run

For ADUC            dsa.msc
For ADSS            dssite.msc
For ADTT            domain.msc
For DCSP            dcpor.msc
For DSP             dompol.msc


SHARING
In order to make a resource to be available over the network and to be accessed
by network users we need to implement sharing.

The moment we create a share on a server, server acts like a file server.
Sharing a resource:

On DC
Open my computer
Select any drive
Create a new folder
Give name of the folder
Right click on the folder
Select sharing and security
Share this folder
Apply > ok

Accessing share resources from a client machine:

On client machine
Open my network places
Entire network
Microsoft windows n/w
Domain name (ex. Zoom)
Computer name

Creating a share through command line
:
On DC
Go to command prompt
md sharename
net share sharename=c: share name

Connecting to a share resource through a command prompt:

On member server
Go to command prompt
net use z:computernamesharename

Mapping a drive (connecting to the share from GUI):

On member server
Right click on my computer
Map network drive
Select the drive letter
Uncheck or check reconnect logon
Browse the share folder
Computer name>share name>ok>finish.

Permissions
Using permissions an administrator can either allow or deny access to a
resource.
Resource can be a network resource or local resource

Permissions are of two types

1. Share level
2. File system or NTFS

Share level permissions
Share level permissions are applied over the network.
Share level permissions are not applied on the local machine where the resource
is existing.
There are three types of share level permissions

Full control   RWXDO (Read/Write/Execute/Delete/Ownership)
Change         RWXD
Read           R

Practice:

On DC
Create a share
Create three users
Set permissions

Setting permissions:
Create folder> share> right click on folder> properties> permission
> Remove everyone
>Add all the users whom you want to allow or deny.
>Apply>ok.

Verification:
Move on to client machine
Login as different users
Try to access the n/w resources.


2. NTFS permissions:
NTFS permissions are powerful permissions and they offer file and folder level
security. NTFS permissions are useful for securing locally available resources.

NTFS Features:

File/folder level security
Compress
Encryption
Quotas
Reduced fragmentation
Hot fixing
Volume shadow copy services
Mounting
Separate recycle bin for each user


NTFS permissions

Full control           RWXDO
Modify                 RWXD
Read & Execute         RX
List folder contents   L
Read                   R
Write                  RWX

Implementing NTFS permissions
:
On member server-Create a folder
On DC-Create 3 users.
On member server
Right click on the folder
Properties
Security
Add the users we have created on DC
Ok
Select the user and set the permission
U1-full control
U2-modify
U3-read
Apply-ok.

Experiment2:

Login as administrator on member server
Create a folder
Folder properties
Security
Advanced-uncheck the box allow inheritable permissions..
Remove
Apply – ok.
Add the users we have created along with the administrator
Administrator -full control
U1 – full control
U2 – modify
U3 – read – apply – ok

Full control permissions
This permission offers complete control i.e., taking ownership and setting
permissions on files and folders.
Users who have full control permission can take ownership of a resource
The moment a user creates a folder he becomes an owner of a folder.
Owners will have full control access

Taking ownership of a folder:

On member server
Login as administrator
Create a folder
Go to properties of the folder
Security
Add the user to whom we want to give permission
Ex: u1-full control
Apply – ok

Step2: login as a user1 (u1)
Go to the folder properties
Security
Advanced
Owner
Select user
Check the box replace owner on
Apply – ok

Share level            NTFS level        N/W           Local
Read                       read          read          read
Change                     read          change        read
Read                       modify        read          modify
Read                       write         read          write


Profiles
Profiles are used for providing basic user environment needs
Environment needs can be

Desktop settings
Startup applications
N/w connectivity.

Profile is responsible for providing the initial desktop environment needs with the
help of desktop folder, favorites, cookies, my documents, start menu, and
Internet settings, n/w connections and etc.

When a user logs in for the first time the user will be loaded with a default user
profile.
Default user profile is located under
C:documents and settingsdefault user

Types of profiles:

Local profile
Roaming profile
Mandatory profile

Local profile: It is a profile loaded for the user and saved in the local hard drive
where the user works.
And profile will be saved when a user logs off
Local profiles are limited only to the machine where they are saved.
A user with a local profile will not be loaded with a network profile when he logs
on from another machine.

Verifying the type of the profile:
My computer
Properties
Advanced
User profile – settings

Roaming Profile: It is a profile, which is saved in the shared folder on the server.
Hence available in the entire network.
Roaming profile is a n/w profile which is available in the entire network. As a
result when a user logs in from any machine in the n/e he will be loaded with a
roaming.


Creating a roaming profile:
On DC
Create a user A/C
Create a folder
And share it and give full control permission for everyone
Start >P>ADUC
Double click the user
Profile
Profile path ex: sys1profileusername
Apply – ok

Move on to member server
Log in as user
My computer
Properties
Advanced-profile settings-you should notice “roaming profile”.

Mandatory Profile: Mandatory Profile is a profile used for controlling desktop
environment setting especially used for restricting user from saving user data,
setting, and configuration on the desktop.
It is a type of roaming profile but settings are not saved when a user logs off.
Changes will be available only for the session where user is active. (Active
session)

Creating a mandatory profile:
Open the profiles folder you‟ve created for roaming
There will be a user folder
Take the ownership of the folder of the user
Right click on the folder properties
Security – ok – advanced
Owner – administrators
Replace owner on sub >apply – ok

Open the folder
Rename the file
Ntuser.dat to ntuser.man
Back
Give back the permission (ownership)
Folder
Properties
Security – advanced
Check the box Allow inheritable
Check - Replace permission entries on all
Apply – ok


Verifying:
Move on to client machine
Login as user
Make some desktop changes
Create a folder or delete a folder

For removing mandatory profile just rename ntuser.man to ntuser.dat

Home folders:
Home folders are separate folders where users save their data and protect their
data from other users every user can have one home folder either on the server
on the local machine.
If the home folder is in the server an administrator can secure it and back-up.
If the home folders are created in the local machine backing up is not that easy.

Creating a user home folder in a server
On member server
Create a home folder for user1
Share it
Permissions
Remove everyone
Add administrator and user1
Give full control for both
Apply ok
Open ADUC
Create a user a/c
Go to user properties
Profile
Connect home folder
Select the drive letter
To mention the path
Ex: sys1u1homeu1
Apply ok

Verifying:
On client machine
Log in as user
Open my computer
We should notice an extra drive letter
Go to cmd prompt
We should not get the drive letter we have assigned.

Creating a local home folder:
On Member server
Login as administrator
Create a folder in any drive
Share it
Permissions
Remove everyone
Add administrator &u2
Give full access
Apply – ok

Move on to server or DC
Open                                                                    ADUC
create a user
Go to user properties
Profile
Home folder
Give local path
Ex: E:u2home
Apply-ok

Verifying:
Move on to client machine
Login as user
Go to command prompt.
We should notice the local folder

Offline folders:
It is a feature of 2000&03-network resources in spite of no network connections
(offline)
Implementing offline folders
On server client
Open my computer
Tools
Folder options
Offline files
Check the box enable offline files
Apply – ok
Repeat same process on the client also
On server
Create a folder
Share it
Everyone full access

On the client machine
Access the share resources through the n/w places
Right click on the share resources
Make available offline
Next
Check the box automatically
Next – finish

On the client machine
Access the n/w share

Disabling NIC
Network places
Properties
Right                      click                    on                    LAN
select disable

Open n/w places
We will notice another system
Access the offline folder from server
Do some modifications to that folder
Enable NIC.

DFS (Distributed File System)
DFS allows administrators to make it easier for users to access and manage file
that are physically distributed across a network.

With DFS, you can make files distributed across multiple servers. It may appear
for users that files actually reside in one place (computer) on the network.

Benefits of DFS
1. Easily access: users need not remember multiple locations form where they
get data just by remembering one location they get access to the data.
2. Fall tolerance: for master DFS server we can have a replica (Target) on
another DFS server. With the master DFS server face users can still continue
accessing the data from back up DFS (Target)
There is no interruption to accessing data

3. Load balancing: if all the DFS root servers and targets are working fine it leads
to load balancing.
This is achieved by specifying locations for separate users.

4. Security: We can implement security by using NTFS settings.

DFS Terminology:
  1. DFS root
  2. DFS links
  3. DFS targets
  4. Domain DFS root
  5. Stand – alone DFS root

Domain DFS root: it is a server configurable in the domain and offers fall
tolerance and load balancing. It is a root server, which maintains links from other
file servers

Requirements: DC or Member Server

Stand-alone DFS root: It is configurable work group model and does not provide
fall tolerance &load balancing

DFS root: DFS root is the beginning of a hierarchy of DFS links that points to
shared folders.

DFS link: a link from a DFS root to one or more shared file or folders.

Targets: the mapping destination of a DFS root or links, which corresponds to a
physical folder that has been shared.

Implementation of DFS
Creating a DFS root:
On DC
Create a folder in any drive
Share it
Give everyone full control
Use the folder name as DFS root
Create 2 more folders for links
Share them & everyone full control

Start >p>admin tools>DFS
Right click on DFS
New root
Select domain root
Domain name
Browse the server DC
Next mention the root name
Browse the folder to share
Next – finish.
Implementing DFS links
On DC
Create 2 folders.
Share them & give full control permission
On Member Server also same process
On DC
Start > P>Admin tools>DFS>right click on DFS
New link
Link name (e.g. Germany)
Browse the share folder from DC
Ok
Create all four links two from DC & two from member server

Accessing the resources (links)
Either on DC or member server
domain nameDFS root name
ex: zoom.comDFS root
Implementing of DFS target:
On Dc
Open DFs
Right click on DFs root
Select new root target
Browse server name >next
Browse folder to share
Next>finish

Replication: After configuring the target we can configure the replication between
DFS root and DFS target.
And this can be scheduled.
Types of replication topologies:
Ring topology
Hub & spoke topology
Mesh topology

Configuring replication between DFS root & target.
On DC
Open DFS
Right click on the DFS root
Configure replication>next
Select topology
Finish

Disk Quotas:
It is a new feature of 2000&03
Using this feature an administrator can restrict the users from using disk space.

i.e. an administrator can limit the size of the disk space usage.
Quotas can be implemented in two ways
On computer basis (local machine)
User basis (network resource)
Quotas can be implemented only on NTFS volumes.

Implementing & quota for a user (user basis)
On member server
Login as administrator
Open my computer
Right click on D or E drive
Properties
Quota
Check the box enable quota management and
Deny disk space to users
Click on quota entries tab
Select quota
New quota entry
Select the user
Set limit disk space to the user (in KB or MB only)
Verification
Login as user
Open the restricted or quota drive
Try to save something

Implementing quota on computers
On member server
Login as admin
Open my computer
E drive properties
Quota
Enable quota management
Deny disk space to user
Select limit disk space
Specify the limits in KB or MB
Apply – ok
Organizational Units (OU)
It is a logical component of AD
It is a container object
It can contain objects like users, groups, computers, share folder, printer, and
contacts.
OUs are basically used for dividing a single domain into smaller portions for
efficient management and organization of the resources

Creation of OUs:
On DC
Start >P>admin tools>ADUC
Right click on the domain
New
Organizational unit
Give the name of the unit


Delegate Control:
Useful when an administrator to handover partial administration of the domain to
an assistant administrator delegate control can be assigned to sub admins on
OUs or on domains.
Assigning Delegate control for sub administrator.
On DC
Open                                                                      ADUC
select domain controller (right click)
New user
Right click on OU
Delegate control
Next – add the user we‟ve created.
Next>select as our wish
Next – finish

Verification:
Move on to member server
Login as sub administrator
Start – run – dsa.msc
Try to create users in delegated OU

Taking back delegation of control from a User:
On DC
Open ADUC
Click on view
Advanced features
Select the OU which we want to take back control
Right click > properties
Security
Select the sub admin user
Remove – apply – ok

Group Policy
It is a feature of 2000&03 with which an administrator can have full control on
users and computers. Using group policy we can implement security, policies,
software deployment, folder redirection, Internet explorer maintenance.
Group policies enable the users either to access or to be denied of an object.
Group policy can be implemented on computers &users.

Group Policy Object (GPO)
GPO defines polices implemental for the objects. One group policy object can be
linked with multiple objects like site, domains, DCs, OUs, etc…

The order in which the group policy is applied.

When user logs in
Computer policy
Eg: no shut down, no time setting
User profile
Eg. Local, roaming, mandatory

User policy (local computer)
Site
Domain
OU

Implementing group policy on OU:
Aim: Deny accessing Control Panel

On DC
Open ADUC
Create an OU
Create user within the OU
Right click >properties
Group policy> new>
Specify GPO name
Edit
Expand user configuration
Select administrative templates
Control panel
Double click “prohibit access to control panel”
Select enable
Apply – ok

Policy inheritance:
If we implement policy on sites it applies to all the domains and OUs within that
site. All the domains & OUs within that site inherit policy from its parent.

Block policy inheritance:
Block policy inheritance is useful for blocking the inheritance of the policy from its
parent object

Note: 1. Useful when we have to perform shorter administrative tasks.
2. When there is conflict between two policies applied to the same object.

Implementing block policy inheritance:
 On DC
Open                                                                           ADUC
create an OU and a child OU within it.
Create a user a/c in child OU
On the parent OU deny control panel
Select child OU > properties
Group policy
Check the box block policy inheritance

Verification
Move client machine log in as user, we have created in child OU.
We should notice control panel.

No override: It is an option available from group policy useful when we want to
override all the policies implemented on the child objects

Implementing override
On DC
Open ADUC
Select the parent OU
We have created
Properties
Group policy
Options select no over ride
Note: No over ride is opposite to block policy inheritance;

Important group policies
User configuration
Administration templates
Windows components
Windows explorer

-Prevent access to drive
-No entire network
-Remove map drive

Under user configuration
Administrative templates
Expand system
-Run only allowed windows applications
-Do not run specified applications

Group policies are of two types.
1. Computer configuration
     Software settings
     Windows settings
     Security settings
2. User configuration
     Software setting
     Windows setting
     Administrative templates
Group Policy – II

Software Deployment
It is a feature of 2000&03 can be implemented through group policies either on
computers or users.
It is a process of spreading out the software required onto the client machines
when a user starts the computer.
With the help of software deployment we can install, uninstall, upgrade, repair
and add patches &service packets.
Software deployment is possible only when the software is with .msi extension.
(msi – Microsoft Installer)
MSI provides the services like
Installation
Uninstallation
Roll back
Repair over the network.

Software deployment is possible only with .msi or .zap extension.
Using WININSTALLLE 2003 software we can convert *.exe files to *.msi files

Setup.exe file cannot be deployed over the network but can be converted to
setup.msi files with the help of the software „wininstall le2003‟. This is the product
of Veritas Company.

Installing wininstall le2003 software
On DC
Open D or E drive
Application folder
Double click on wininstallle.exe
Next – I accept – next
Provide email details – next
 Next – next – install – finish.

Phase – I
Converting .exe to .msi (before snap shot)
On DC
Open my computer
Select any drive
Create 2 folders with the names .exe and .msi
And share them with full access
Open D or E drive
Open application folder
Copy acrobat &retina
Paste it in the .exe folder we have created
On DC
Start > p> wininstall le2003
Right click on that
Run discover ok – next
Specify the name of the application (ex. Acrobat)
Click on the dotted tab
Browse .exe folder from my n/w places
Open the folder and name the application (ex. Acrobat.msi)
Open – next - select C drive
Add the drives, which we have
Next – finish

Phase – II
Installation
On DC
Open my computer
Open exe folder we have created
Install acrobat software
In this phase II process comes up to .mxi

Phase – III
Performing After snap shot

On DC
In wininstall le
Right click on wininstall le packages
Run discover – ok
Perform after snap shot
Next

P-I                          P- II                     P- III

Scans the system             install acrobat           changes made after
                                                       installation

Registry
Software
Available


. mxi                                                  .msi

Conversion Process
Phase –I (before snap shot)
In this wininstall le scans the complete system and the register and checks for
installed applications. And takes the snap shot of the current condition of the OS.


Phase- II (Installation)
In this phase we have to install the software, which we want to convert to .msi

Phase – III (After snap shot)
In this phase wininstall le compares two previous states, before snap shot
&installation and takes another snap shot with installation.
Note: Using these three phases the Microsoft software installer can trouble-
shoot or deploy the software.

Software Deployment
On DC
Open ADUC
Create 2 OUs
Create a user in each OU
Select 1st OU properties
Group policy new
Name the GPO (ex. Deploy)
Edit user configuration
Software settings
Right click s/w installation
New package
Browse the msi s/w from my n/w places
Select .msi
Select publish
Ok
Verification:
On member server
Login as user we‟ve created in OU
Open control panel
We should notice the s/w we‟ve deployed
Add/remove program
Ok

Types of deployment

1) Publish
2) Assigned
3) Advanced
1) Publish
If we use publish software will be available in control panel and can be installed
when the user wants. (on demand)

2. Assigned
If we select assigned, s/w gets installed on the client machine when a user opens
the application for the first time.

3. Advanced:
It is useful when we want to upgrades s/w, install service packs or patches etc…

Folder Redirection

It is useful when we have implemented mandatory profile for users as a result
they cannot save anything on the desktop, unknowingly if they save, that saved
desktop contents should be saved in another location we call it as folder
redirection. (Users do not lose their data)

Implementing folder redirection:
On DC
Create a roaming profile for a user
And convert it into mandatory
Note: create a new OU at first and create a user in that and make that user
profile as mandatory.

On DC
Open ADUC
Right click on OU we‟ve created
Group policy
New > GPO name> edit
User configuration
Windows settings
Folder redirection
On desktop right click
Properties
Select the settings as basic
Browse share folder from n/w places
Ok.
Create a folder
Share it
Every one full access

Verification
On member server
Login as user we‟ve created in OU
Save something on the desktop
Ex: save some folders > properties
We should notice the location should be UNC path (Universal Naming
Convention)
Logoff &login


SCRIPTS
Scripts are useful to automate administrative tasks, which are routine. We can
have startup and shutdown scripts, administrative scripts, login & logoff scripts

Implementing scripts using group policy

On DC
Create a folder (in D or E drive)
Share it with full control
Start-run (notepad)
Type wscript.echo “use the force read the source”
Save the file as (filename.vbs) in the share folder we have created
Open ADUC
Create an OU and a user
OU properties
Group policy
GPO name (ex. Script)
Edit
User configuration
Windows settings
Scripts
Double click on logon
Add
Browse the script we‟ve save in the share folder from n/w places
Ok

Verification:
Move on to member server
Log in as a user
We should notice a welcome message

Backup:
It is a process of protecting user data or system state data on to separate storage
devices.
NT supported only one type of storage media, i.e. tapes.
2000&03 supports tapes, floppies, HDDS (Hard Disk Drives), zip floppies, RSD
(Remote Storage Devices)

Back up utilities:
The default backup utility provided by NT, 2000, 2003.
NTbackup utility Comes along with the OS. Provides minimum benefits could
have optimum benefits.


There are some third part utilities

       Veritas - BackupExec
       Veritas - Foundation suite (for UNIX flavors)
       Veritas - volume manager
       Tivoli storage manager (IBM)
       Netback up

Starting back up utility:
On DC
Or member server
Start
Run – ntbackup (or) start > programs> accessories>system tools>backup

Backing up a folder:
Create a folder in D drive and a file in that
Start - run – ntbackup – click on advanced mode
Back up
Next
Select 2nd option (backup selected files.)
Expand my computer from D drive select the folder you‟ve created
Next
Select the destination to save the back up
Next – select the type of back up (ex. Normal)
Check the box disables volume shadow copy
Next – finish

Verifying
Delete the backed up folder

Restoring the backed up folder:
Start – run – (ntbackup)
Advanced – restore – next
Select the backed-up file – next – finish

Back up types

      Normal
      Copy
      Incremental
      Differential
      Daily

   1. Normal Backup: It is a full backup backs up all selected files & folders after
      back up removes the Archie bit (A)

Achieve Bit: It is a bit used by backup utility to know whether a file is backed up.
It is used as a backup marker.

   2. Copy backup: Copy backs up all selected folders but does not remove
      archive bit after backing up. Copy is used between normal backup and
      incremental backup.

   3. Incremental backup: backs up all selected files & folders which are
      changed since backup marks the files as having been backed up.
      Removes the archive bit after back up.

   4. Differential backup: backs up all selected files & folders. After backup
      does not remove the archive bit. It backs up all the files changed since
      normal back up.

   5. Daily backup: it backs up all selected files & folders created or changed
      during the day after backed up does not remove the archive bit.

Recommended backup strategy:
1. If we select incremental back up it is faster and restoration is slower. I.e.
      more number of tapes have to be restored
   2. If we go with differential backup, backup is slow, but restoration is fast
      i.e., just by restoring 2 tapes.

System state data:
Components of SSD:
    AD
    Boot files
    System files
    Services
    Registry
    Com+inf
    Cluster info
    I.I.S.

SSD is a data store if we want to backup complete AD we can back up system
state data from backup utility.

Taking a back up of system state data:
Start - run – ntbackup – click on advanced mode – backup – next
Select 3rd one system state data – next – save in E drive - create a folder (SSD)
in this folder create a file with filename .bkf – next – advanced - next

Restoration
There are two types of restoration
Non-authoritative restore
Authoritative restore

Restoration of system state data can be done either authoritative or non
authoritative
Non-authoritative restore is a normal restore useful when we have only one DC
in the network. It does not increment the USN values of the objects after
restoration. It uses older USN values only.

1. Authoritative restore: This is useful when we want to restore a specific object
or specific object by incrementing the USN value.
Useful when we have multiple DCs in the N/W.
i.e. one Dc and multiple ADCs

USN Numbers: (Update Sequence Number)
It is a number assigned to the object and gets modify according to the changes
made on the object.

Checking USN values:
Open                                                                        ADUC
click on view
Advance features
Go to user properties
Object

When we want to perform authoritative restore, we have to restart the system in
directory services restore mode (DSRM) by pressing F8. While booting and
selecting DSRM.
Going to backup utility we can restore system state data on completion of the
restoration system prompt us to restart the system. “DO NOT RESTART THE
SYSTEM”
 If we are not restarting it becomes authoritative restoring, if we are restarting it
becomes non-authoritative restore.

Tombstone: It is an object deleted from AD but not removed. It remains in the AD
for 90 days.

Practice:
 On DC
Open ADUC
Create OU & users
Back                                up                                          SSD
check the USN values of user
Delete the user1
Restart the system in DSRM mode
By pressing F8
Open backup utility
Restore SSD
Do not restart
Start> run >ntdsutil
Authoritative restore
Restore subtree cn=u1,ou=India,dc=zoom,dc=com
Yes (or)
Restore database
Q
Q
Exit

NETWORK ADMINISTRATION

DHCP (Dynamic Host Configuration Protocol)
IPs: (Internet Protocols)

There are two versions in IP
1. Version 4.0
2. Version 6.0

IPs are of two types
    Static IPs
    Dynamic IPs
Static IP: static IPs are IPs what an admin assigns to the computer manually.
Which are not changeable.
Dynamic IPs: Are the IPs, which are assigned by DHCP server, which are
dynamic. i.e. not constant, changeable.

DHCP: useful for extremely larger networks where we want to centralize the I.P.
management to reduce human errors.
Case2: Useful for smaller networks where there are no administrators or
administrator may not be comfortable with assigning IPs.

ISP – Internet Service Provider
Usually ISPs implement DHCP servers

DHCP is a server which assigns IPs to the clients requested automatically from a
range of IPs.

IP leasing process:

   1. DHCP discover: The client machine when turned ON broad casts the
      network id, broad castes id, MAC address on Network for discovering
      DHCP server.
   2. Offer: The DHCP server listening to the request made by the client offers
      a pool of IP addresses to the client machine.
   3. Selection: The client machine on receiving the pool of IP address selects
      an IP and requests the DHCP server to offer that IP
   4. Acknowledgement: The DHCP sends a conformation about the allotment
      of the IP assigned to the client as an acknowledgement.
   5. IP lease: If the client machine is not restarted for 8 days, exactly after
      4days the client machine requests the DHCP server to extend the IP lease
      duration, on listening to this the DHCP server adds 8 more days for
      existing 4 days =12 days

If the client machine is restarted again the DHCP lease process takes place and
again the client gets an IP for 8 days.

DHCP requirements:
DC or member server
Static IP
AD
DNS (if it is win 2003)

Installing DHCP server (insert 2003 server CD)
On DC
Start - setting – control panel – addremove programs – add rem windows
components - Select n/w services – click on details
Select DHCP server – ok – next

Authorization: When we have multiple DHCP servers we can designate one of
the DHCP servers as an authorized DHCP server.
Authorizing DHCP server:
On DC
Start >p>admin tools
DHCP right click on the server
Click authorize
Refresh

Scope: Scope is a range of IP addresses from which the DHCP server assigns
IPs to the clients.

Creating a Scope:

Open DHCP Server
Right click on server
New scope- scope name
Specify the range next
Specify if we want any exclusion
Lease duration
Next – DHCP options
Router – next – specify the domain name
Server name – client on resolve – add – next – WINS server – next - yes I want
– next – finish

Configuring a client machine to obtain IP from DHCP server

By default all the clients configured as obtain IP automatically
On client machine
Right click on my n/w places
Properties – LAN properties
TCP/IP double click
Ensure that “obtain an IP address automatically” is selected.

Releasing an existing IP: (give up an IP)

Start >run>cmd>ipconfig /release

Obtaining a new IP

Start >run>cmd>ipconfig /renew

Super Scopes:

Group of scopes is called as super scope.

Note: when we have multiple scopes only one scope can be active in order to
enable all the scopes we have to merge all the scopes with super scope.

Creating super scope
Requires multiple scopes
Create 2 scopes.
Right click on server
Say new super scope
Specify the super scope name
Select 2 scopes by holding ctrl key
Next – finish

Address Pool: gives the range of IP addresses we have specified
Address leases: specifies the client (names) and the IP addresses assigned
Reservations: useful when we want to dedicate a particular IP to a particular
system.
Ex: managerial systems, important clients.


To check the MAC address

Start-run-cmd>getmac

To check the MAC address of remote system

Start-run-cmd>getmac /s systemname

Implementing reservation

Open DHCP
Right click on reservations
New – reservation – give name - mention reservation name - MAC address of the
remote machine – mention the IP address to be reserved
Close

Move on to client machine
Start - run – cmd – ipconfig /release – ipconfig - /renew

Scope options: Using scope options we can specify the other servers addresses
available in the network. So that the DHCP server maintains information about all
other servers and provides it to the client machines along with the I.P. addresses.
For NT – 66servers addresses - for 2000-03 - 77

Server options: Useful when we have multiple scopes and provide information to
all the scopes. Where as scope options are limited only to that scope.

Backing up DHCP:

Open DHCP - right click on DHCP – select backup
Select location where we want to save – ok

Restoring DHCP server:
Uninstall DHCP server
Install DHCP server
Open DHCP
Right click on it
Click on restore – specify the backed up path
We should notice our previous scopes.


Name Resolvers:
There are 2 types of name resolvers:
    WINS
    DNS

Resolver: It is a file which will contain the mapping information of the clients. Ex.
System name and its IP address

WINS: (Windows Internet Naming Service) It is a service of Microsoft used
basically on windows network to resolve NetBIOS names to IP address and IPs
to NetBIOS names.

LMhosts: It is a static text file which contains NetBIOS to IP mapping information
it was used instead of WINS.

WINS follow NetBIOS names: operating systems like NT, 95, workstation, 98
rely on WINS. Because these OS follow NetBIOS names

NetBIOS Names: Net bios names are the names assigned to network nodes.
NetBIOS names are the names without extensions. They are called „flat names‟.
2000 & 2003 also support WINS.

DNS (Domain Naming Service):
DNS resolves host names to IP addresses IP addresses to host names.
Supports all type of OS. Ex. Windows, Linux, UNIX, Mac.., etc...

DNS: defines a hierarchical namespace where each level of the namespace is
separated by a “.”

Resolver:

Resolving: It is a process of converting IPs to host names & host names to IPs.

Computer that requests DNS resolution.
Issues queries that ask for specific types of mapping of computers and IP
addresses (records)
Query types determine behavior of DNS server receiving query.
Lookup types determine whether a name to IP mapping or an IP to name
mapping is sought.


Query:

Query is a request to find an address of the DNS there are 2 types of queries.

    Recursive queries
    Iterative queries

Recursive Queries: When a client start a query, query is passed onto local DNS
for resolution if a query cannot find the solution then the DNS on behalf of client
forwards the query to another DNS, And to another DNS and so on until it finds
the mapping information or an answer.

Iterative Query: Query raised by the client to the DNS. If the DNS cannot resolve
it sends a negative response to the client, then the client has to contact another
DNS and so on.
In this case the DNS is not forwarding the query but the client itself is contacting
other DNS.

Zone: Zone is a subtree of DNS database. Zone contains the mapping
information with the help of forward lookup zone & reverse look up zone.

Forward Look up zone: Contains host record, which contain host names to IP,
address mapping information

Reverse Lookup zone: it contains mapping information about IPs to host.

DNS requirements:

DC or member server
Static IP address

Installing DNS
Either on member server or on DC
Start - settings – control panel – add/remove programs – add/remove windows
components – select networking services – details – check the box DNS – ok –
next
Insert the CD - next

Creating a forward lookup zones:
Start – p – admin tools – DNS
Right click on forward lookup zone
New zone – next – select primary – next – specify the zone name – zone file –
next –select allow both non secure & secure – next – finish


Records:
It is a database which contains information about the zone
There are a few types of records

      Host record (A record) used in FLZ
      PTR record (pointer) used in RLZ
      Alias record (nick name of a host record)
      MX record (used for mail server)

1. Creating a host record:

Right click on the zone you have created - new host – specify the servers
address –and IP
Add host - ok - done

2. Creating an alias record:

Right click on zone – new alias
Specify www. – Click on browse the host records – ok

Verification:
Start - run – cmd – ping www.Yahoo.com
Or ping sys1.yahoo.com

Creating a Reverse Lookup zone:

Right click on the R-L zone
New zone – next - zone type - next – specify the IP address – zone file – next –
allow both – next – finish

Creating a PTR record

Right click on reverse lookup zone.
New- pointer – specify IP
Browse host record – ok

Verification:
Start – run – cmd
Nslookup 192.168.1.17  - Reverse lookup zone
Nslookup www.yahoo.com Forward lookup zone.

DNS: DNS server can be configured as follows>
   Secondary
      Stub (feature of 2003)
      AD integrated
      Forwarders
      Root servers
      Caching only server
      Primary

Configuring a primary zone:

On DC
Start - p – admin tools – DNS - create a zone & host record

Creating a secondary zone:

On Member server
If DNS is not available install DNS first
Open DNS - right click on FLZ
New zone – next – specify the primary – DNS servers IP address –add – next –
finish

Zone Transfer

On DC
On Primary DNS
Open DNS – right click on zone
Properties
Zone transfer – check box allow zone
Select only to the following servers
Specify the secondary DNS servers IP address
Apply – ok

Primary Zone: Primary zones are created on the primary DNS servers. It is a
read /write copy.

Secondary Zone: There are created on the second DNS server where it holds a
read only copy of the zone.
Secondary zones provide fall tolerance and load balancing to the primary zone.
Secondary zone is a back up for primary zone

Zone transfer:
Zone transfer is a process of transferring the zone from primary to secondary or
secondary to primary. Zone transfers occur when there is a change or
modification taken place on either of the zones.

AD integrated zones:
These are useful when we want to maintain zone information in the AD . zone is
saved in the AD as a result when we back up AD we are also backing up zone
information.
If it is a primary zone, zone is saved as a normal text file as a result we have to
back p the zone separately, AD integrated zone is created when we install AD
with a domain name.

Creating in AD integrated zone:
On DC
Open DNS
Right click on FLZ
New zone
Next - check the box store the zone
Next - specify zone name
Next – allow both – next – finish

Stub zone:
Stub zone is a newly added feature in WIN 2003 stub zone contains name server
information or name server records and SOA records (Start of Authority)
Stub zones provide fault tolerance & load balancing besides providing the name
server & SOA record information.
Stub zones are useful for resolving the query faster.

Creating stub zones:

On DC
Create a primary zone with a host record ex: hp.com
On member server
Open DNS
Right click on FLZ
New zone - next
Select stub zone
Next – zone name ex.hp.com
Zone file – specify the primary DNS server‟s address - next – finish

Resource Records (RR):
RRS are useful to provide the information about the zone. There are a few types
of resource records.
Host a record
Pointer record
Alias record
MX record
AAAA record
ATMA
HINFO etc…

Service Records: There are also called as SRV records. These are useful for
locating the services. There are totally 6 service records created when we install
AD. They are located in DNS under domain subtree.

When we install AD, system automatically creates an AD integrated zone with
the corresponding domain name.
Record types:

       Msdcs: Contains the Dc‟s information
       Default site: Contains site name
       Tcp: (server side) provides global catalog, Kerberos and LDAP information
       Udp: (client side) provides Kerberos information
       Domain DNS zone
       Forest DNS zones        both are the part of application partition. Provides
        DNS information in entire forest.

Creating a secondary zone for (DC) domain name zone:

On member server
Open                                                                             DNS
right            click            on                 F               L             Z
next – secondary – specify the DC‟s
Domain name (ex: zoom.com)
Specify the DC‟s IP address
Next – finish

Move on to DC
Open DNS
DC‟s zone properties
Zone transfers
Only on the following
Specify the IP address (secondary)

Move onto member server refresh the zone
This process is we call as safe zone transfer.

Note:

1) If the 6 service records are not found in secondary server we need to restart
net logon & DNS services on DC & Member server.

2) Still if we can‟t find the 6 service records we need to perform a forceful transfer

For accessing C drive through command prompt.
Ex. sys1c$


Implementing forceful transfer:

Create secondary zone for dc zone.
On member server
Start – run - server name c$
Open windowsSystem32 confignetlogon.dns – open – select all – copy the
contents – open my computer of local machine – windows – system32 – DNS
open domain name.dns ex. Zoom.com
Come down of the page - paste - save - close –
Open DNS
Should be noticed 6 service files without refreshing

Verifying the type of zone:

Open                                                                      DNS
right click on the zone properties
Type of zone secondary
If we want to change click on change

Dynamic Updates:
It is a feature of 2000 & 03 when a client machine or a network node comes on
line; automatically get their names registered in DNS database.
Dynamic updates take place when there is a modification or change done at the
client or when we have DHCP server.

There are 2 types of Dynamic updates
Secure & Non-secure

Secure Updates:

Useful when we do not want our DNS maintain outside our network host
information.

Non-secure updates:

DNS gets updated as and when what all the hosts come online get their names
registered with DNS server.

Note: secure updates can occur only when the client machines have their a/cs in
DC

Configuring secure &non secure updates:
Zone – properties
Dynamic updates
Select either secure or non-secure
Apply - ok

Zone properties:

      Name Server - Existing DNS server‟s address
      Zone transfer
      General (status, type, aging, Dynamic Update)
      SOA (Serial no., Responsible person, refresh interval)
      WINS (existing WINS address, used for NetBIOS resolution)
DNS Server Properties:

      forwarders
      event logging
      interfaces ( used when we have multiple NICs)
      Monitoring
      Security
      Root hints
      Debug logging
      Advanced

Interfaces:
Useful when our system has multiple NICs and the DNS can listen the queries
from all available NICs
Offers load balancing

Forwarders: If the query is not resolvable by the local DNS it is being forwarded
to another DNS server for name resolution

Configuring Forwarding
:
On DC
Create a primary zone with a host
On Member server
Open DNS – properties
Forwarders
Add the DC‟s IP (DNS1‟s IP)

Verification:
On Member server
Start - run cmd – ping www.Zonename.com

Advanced:

      Disable recursion
      BIND secondary (Berkeley internet naming domain)
      Fail on load if bad zone data
      Enable round robin
      Enable net mask ordering
      Secure cache against pollution

Disable recursion: By default this is disabled i.e., recursion is enabled

BIND secondaries: useful when we have older BIND servers (ex. UNIX) as
secondaries BIND is a standard followed by DNS.
All UNIX based machines older version used BIND servers as DNS. Ex. BIND
version 4.0 series.
Useful when our network has old BIND version based DNS servers with new
BIND versions like 9.1.2, to provide zone transfer at faster rate to BIND
secondaries.
Faster zone transfer is possible by transferring multiple zones at a time besides
compression.

Fail on Load if bad zone data:

If the secondary zone comes across stale records or unwanted records the zone
will not be loaded if we check this box.

Enable Round Robin (RR):

Useful when the DNS has multiple NICs to listen the queries all NICs. If the query
is not resolvable by one NIC it can be listened by another NIC

Enable net mask ordering:

Secure cache against pollution: By default the cache DNS information is secured
against pollution.
In windossystem32DNScache.dns

Root Hints: Root hints provide the root server‟s information
There are totally 13 root servers throughout the world.

2003 server can be configured as root server. Once configured as root sever
disable forwarders and root hints.
Root servers zone name is always represented by a dot. (.)

Configuring a root server:

On DC
Open DNS
Right click on FLZ - new zone –
Primary – next – specify the root name as dot (.)
Next - zone file – allow both-Next – finish

* We should notice that forwarders &root servers are disabled.

Security: We can add sub administrator for administrator and set permission on
these administrators.

Monitoring: used for troubleshooting DNS.

Event logging: Used for maintaining events occurred pertaining to DNS can be
    Errors only
    Errors & warnings
    All events (by default)
Debug Logging: to assist with debugging we can record the packets sent and
received by the DNS server to a log file. Debug logging is disabled by default.

Implementing Round Robin:

Assigning multiple IPs to the NIC. By going to TCP/IP properties – advanced –
add – multiple ips – ok (ex. 192.168.1.17, 192.168.1.18, 192.168.1.19)
Open                                                                     DNS
create a primary zone – create a host record - create 3 more host records with
the IPs created above

Verification:
Go to command prompt.
For clearing DNS cache
C:> ipconfig /flushdns
Pingwww.zonename.com

IIS
Internet Information Service (I.I.S.): It is a web server from Microsoft used for
administering, managing, controlling websites.

I.I.S. is the server component which provides services like www, http, ftp, nntp,
SMTP, FrontPage, .net frame works

WWW: World Wide Web: enables use of internet.
HTTP: (Hiper text transfer Protocol): Supports file types like text, audio &video
Gopher: used prior to http supported only text.
FTP: (File Transfer Protocol): used for uploading or downloading, huge size files.
NNTP (Network News Transfer Protocol): Used for publishing the same message
for a group of people.

SMTP: (Simple mail transfer protocol); Used by exchange server for sending
mails.
Front page: It is a designing tool for WebPages
Win – NT 4.0 had I.I.S. version 2, 3 and 4.
Win 2000 I.I.S. version is 5.0
Win 2003 - 6.0

Port number details are available at c:windowssystem32driversetcservices

Port: port is a communication channel through which services of one system
communicate with the services of other system each service has one port
number allotted

Features of I.I.S. (6.0)

    Fully secured
    Reliability
   Salability
       Manageability
       Isolation of users.
       Backup of websites

Requirements
:
DC or member server
Static IP
NTFS partition
Web pages
DNS          and          Zones      with        concerned        records.

Installing I.I.S.:

On DC or member server
From Control Panel
Add/rem programs
Add/rem windows components
Select application server
Click on details
Select I.I.S.
Details
Select F.T.P. & www. Services
Ok – next


Requirements of a website

Web content or web pages
Zones with host records
Public IP

Creation of a Website:

(Create the zones in DNS with a host records)
Start - p – admin tools – I.I.S. right click on websites – new - website –
description ( site name, ex: yahoo)
Select the I.P> (system‟s IP)
Specify the host header as www. Sitename.com ex: www.yahoo.com
Browse the WebPages folder
Next
Check the box „browse‟
Next – finish

Adding the web content:
Right click on the .htm file name concerned
Rename – select copy – right click on the website we‟ve created >properties –
documents – add - paste – ok – move up the htm we‟ve copied. – Apply – ok.

Verification:
Open internet explorer
Type the website you‟ve created

Virtual Directory: These are useful for creating child websites or links
Ex: mail servers, chat servers, advertisement servers etc…

Creation of Child websites:

Right click on the parent website we‟ve created
New – virtual directory – next – child name - ex: mail- chat etc..
Browse WebPages folder
Check the box browse - next – finish.

Adding Web Contents

Select .htm file
Right click – rename
Copy – select child website – properties – documents – add – paste – ok
Move up – apply – ok

Verification: open     Internet           Explorer          and      type   website
name.”www.yahoo.comchat

Redirecting a website:

Redirection is useful in various cases.
Case1: renaming of the website where users are unaware of the change.
Case2: when the website is under construction
Case3: when the website hosting server is unavailable, we go for redirection

Implementing redirection or configuring redirection:

Create 2 websites
Select web content create 2 websites
Select web content
Create 2 zones with host records corresponding
Open I.I.S.
Right click on the website we want to redirect
Properties - home directory – select a redirection to url
Ex: http://www.Sitename.com apply – ok

Verification:
Open I.E. type the 1st website name
It should open second website
Document footer:

Useful for publishing advertisements in a particular websites and seen as a footer
for the website
Open I.I.S.
Right click on the website
Properties
Documents
Check the box enable documents footer
Browse webpages folder
Select any .htm file
Apply – ok

Backup of website:

It is a new feature in 2003. We can backup and restore websites.
Open I.I.S.
Right click on the website we want to back up
All tasks-Save configuration to a file
Give filename & select the browse
File where we want to save – ok
Verification:
Delete the website you‟ve backed up

Restoring a website:

Open I.I.S.
Right click on the websites
Select website from file
Browse the backup file we have saved
Click on read file
Select the site name – ok

FTP (File Transfer Protocol)
It is a service of I.I.S. used for uploading or downloading large amount of files
over internet or intranet. runs on a port no.21

Creating an FTP site:

On DC
Open E drive
Create a folder FTP root
Create few files in that folder
Open I.I.S.
Right click on FTP - new – FTP site
Next – FTP name – ex EDPFTP – Select IP
Next - do not isolate users – browse the FTP folder we have created in E drive
Next – select read &write - next – finish
Connecting to FTP server

On member server
Start – run – cmd – create a folder local in E drive - ex: md local
Cd local
Ftp (server‟s ip address)
Type administrator
Type password
You will be at FTP>.

Downloading a file from command line:

Get
Type the filename to be downloaded
Type the filename to be saved as (same file name)


Uploading a file from command line

Put
Type the filename to be uploaded
Type the filename to be saved as (same file name)

Downloading multiple files: mget *

Turning off interactive mode: prompt (system does not prompt for conformation
while downloading multiple files.)

Uploading multiple files: mput *

Practice: on DC
Create an FTP folder
Host some files in that FTP folder
On member server
Connect to ftp site
Download the files
Upload the files
Create a folder in ftp site
Upload the files to this remote folder

FTP commands:
Dir       -          for listing FTP contents
Get       -          for downloading
Put       -          uploading
Prompt    -          disable interactive mode
Mget      -          downloading multiple files
Mput      -          uploading multiple files
Bye           -       ending session
Close         -       close the session
Mkdir         -       to create a folder in ftp site
Rmdir         -       to delete a folder
Del           -       to delete a file
Pwd           -       to list present working dir
Lcd           -       locally change directory
Cd            -       change directory in ftp site
Bell          -       gives beep sound after the action

Anonymous account: It is a default a/c available with ftp any user can login to ftp
server despite no a/c in FTP server.


Connecting to FTP server as anonymous user

Go to command prompt
Ftp server‟s I.P. or
Open I.P. address
Type anonymous
Provide password if it has

Disabling anonymous connections:

Open I.I.S.
FTP site properties
Security accounts
Uncheck the box allow anonymous connections - yes
Verification
Go to FTP prompt & try to login as anonymous user.

Isolation of Users:

When we want to secure the ftp contents or when we want ftp users to have their
own folders with ftp site we use isolating users.

Creation of isolating ftp users

Create 2 users in AD
Open E drive
Create a root folder
In the folder create a subfolder named as our domain name without extension ex.
Zoom, India. - - u1, u2, u3

Creating a FTP site for isolating users open I.I.S.

Right click on new FTP site
FTP site name – select the IP
Select isolate users – next
Browse the root folder we‟ve created
Ok – next – check the box write – next - finish.

Verification:
On Member server
Open I.E.
Type ftp:I.P. add of ftp server
We should notice logon window
Provide user name & pwd
Then we notice the file we‟ve created.


Groups
Groups: Are two types
    Security
    Distribution

Groups are useful for setting common privileges or type of access to a group of
users.

Security Groups: These are used for setting permissions on the objects (printer,
data) it can also be used as a distribution groups.
This can also be used for maintaining distribution list

Distribution group: Do not provide security, used for e-mails.

Group scope: identifies the extent of the group within in a domain or a forest.
      Domain Local Group: all builtin class groups
      Global Groups: domain user, domain admins, domain guests, domain
      computers.
      Universal groups: schema admins, enterprise administrators.

Domain Local Groups: DLG pertains to the domain and it is a powerful group
used for setting permissions a DLG can contain user a/cs, global groups, it
cannot contain DLG.

Group scope:

DLG used for setting permission on resources
GG: used for organizing the users.
UG: used for or organizing the users, groups from more than one domain.

Creating Groups:

On DC
Open ADUC
Create users like s1, s2, s3, a1, a2, a3, t1, t2, t3 and m1, m2, m3
Right click on the user
Create 4 groups (sales, account, technical, marketing)

Adding users to a group: double click a group

Click on members and add the users
Creating a DLG:
Right click on users
New- group name – select domain local

Adding users to DLG
Double click the DLG we‟ve created
Add the users

Creating universal groups:

By default UGs are not available because the O.S. runs in mixed mode. In order
to enable UGs. We‟ve to raise the domain functional level to native mode.

Raising domain functional level:

Open ADUC
Right click on domain
Raise domain F.L.
Select windows 2000 native raise

Creating a universal group

Right click on users class
New – group – name – select universal – ok

ROUTING
It is a process of enabling communication between two different networks.

There are two types of routers.

1. Hardware router
2. Software router

Hardware router is a physical hardware device.

Software router: A server with 2 NICs called software router.
Ex: NT, 2000, 2003, UNIX can be configured as software router
A computer with 2 NICs is called a multihomed system.

Requirements of the Software Router:
DC or member server or stand alone machine
2 NIC cards
Two different networks
Routing &RAS service


Benefits of Routing:

      DUN (Dial Up Networking)
      NAT (Network Address Transmission)
      Basic firewall
      VPN (Virtual Private Network)
      LAN routing

Enabling LAN routing

Start > P> Admin tools>RRAS>r/c server> configure & enable routing.

NAT: It is a service of routing provides network address translation from private
to public
When we have 2 networks public & private in order to protect private network
from public network (intruders) we need NAT.
NAT enables one way communication. I.e. private network can communicate with
public network but not vice versa.

Implementing NAT

S-P- Admin tools
Open RRAS
Expand IP routing
Right click on general
New- routing protocol – select NAT/basic firewall – ok

Adding interfaces
Right click on NAT/basic firewall
Select new interface
Select the private interface
Ok
Again right click on NAT basic services
New interface
Select public interface
Click on public inter face connected to the internet
Checks the box enable NAT on this interface
Apply – ok

Verification:
On private network
Go to command prompt
Ping public network
It should ping
Move on to public network
Ping private network
It should not ping

Disabling NATing
On router
Open RRAS – expand IP routing
Right click on NAT /basic firewall
Delete – yes

Routing Protocols:

    Static
    Dynamic

Dynamic: It requires dynamic routing protocols there are a few dynamic routing
protocols. Dynamic routing enables a router could prepare dynamically
automatically on its own.
i.e., when a router is added or removed when there is a change of I.P.S. etc. will
be known by the dynamic routing protocols, to see the routing table.
On command prompt
Type root print

Routing table contains the information about

Network destination: destination of the packet reached
Net mask: subnet mask of the system.
Gateway: another router‟s address
Interface: Local NIC‟s address
Metric: determines best path

RIP (Routing Information Protocol)
OSPF (Open Shortest Path first)
NAT
IGMP (International group management)
IGRP (international gateway)
DHCP Relay agent

Static routing: It does not require any protocols; an administrator has to create a
routing table which is constant or not changeable.

DHCP Relay agent:

It is a protocol responsible for listening to the client request for assigning an IP to
the clients dynamically on behalf of DHCP server from the other network
Implementing DHCP relay agent

On router
Open RRAS
Expand IP routing
Right click on general
New routing protocol
Select DHCP relay agent
Ok – add public interface
General new interface
Select public

Configuring public network

Move on to public network
Go to TCP/IP properties
Check „obtain IP automatically‟

RAS (Remote Access Service)
It is a feature of 2000 & 2003 enables communication between a local machine &
a remote machine

RAS connectivity: types of connectivity

PSTN (public switch telephone network)
ISDN (Integrated Services Digital Network)
X.25
RS 232 (Recommended standard)
DSL (Digital Subscriber Link)
Direct cable

PSTN:
         Modem
         Telephone line
         28.8 kbps
         cheaper
         analog communication

ISDN:
         ISDN adaptors (TA)
         ISDN line
         64- 128 kbps
         Digital communication
         Costly


X – 25
PADS (frame relay)
       Packet switching n/w
       Rarely found
       PADS - Packet Assemblers & De assemblers

RS – 232
      Serial cable (direct cable)
      Provides serial communication
      Used for testing RAS
      Provides RAS environment
      It is also called as „Null modem‟.

DSL (Digital Subscriber Link)
      DSL modem or NIC
      Widely available
      Easy to implement

Direct cable
       When we are in same geographical
       Implemented only in LAN
       Bridge modem (special devices)
       Uses a direct cable to establish a communication between local& remote
       network

Installing Modem:

On server& client
Open control panel
Open phone & modems
Click on modems – add
Check box don‟t detect modem
Select communication between two computers
Select comp1 – next – finish
Same process in client machine also

Enabling routing on DC

Open RRAS
Right click server
Configure & enable routing
Next – custom configuration
Next – select VPN, dial up – next – finish.


Creating a dial connection

On the client machine
My network places - properties
Double click on new connection wizard
Next – select setup &advance connection
Next - connect directly to another computer – guest – next –computer name
(server‟s name)
Select the device „communication cable between 2 computers
Connection availability – next – finish

Note: By default users are denied permission to dial in.

To enable a user to dial in
On server
Open ADUC
Go to user properties
Dial in
Allow access – ok

Error: 649 enable the user dial in access
Error: 777 – Reinstall the modem.

Establishing Dial up connection

Dialing into the server
On the client machine
My network places – properties
Double click DUN we‟ve created
Provide user name & pwd
Click on connect

Accessing resources of a remote computer over RAS connection

On the client machine
Start – run (server nameresource name) ex: (sys1c$)

LAN protocols:

      NETBEUI protocols
      IPX/SPX
      TCP/IP
      NW link
      AppleTalk
      DEC net

   1. NETBEUI: It is a self-configurable protocol mostly use in small networks,
      outdated protocol, jointly developed by IBM &Microsoft. Does not support
      routing.
   2. IPX/SPX: It is a proprietary protocol of Novell NetWare. IPX stands for
      Internet Packet exchanger SPX – Sequential Packet exchange.
      Suitable for larger networks. It is a routable protocol.
3. TCP/IP: (Transmission Control Protocol): It is an industry standard
      protocol.
      IP – supported by many OS. It is a routable and robust (ever changing)
      protocol.

   4. NW Link: (Netware Link) from Microsoft enables communications between
      NT, 2000&2003 & Novell NetWare.

   5. Apple talk: from Microsoft enables communication between NT 2000/03
      used in Mac. OS.

   6. DEC Net: (Digital Equipment Corporation): protocol used by mini
      computers , super computers and jet direct printers. (this printer has its
      own NIC)

WAN protocols:
   SLIP
   PPP(Point to Point Protocol)

SLIP: SERIAL LINE INTERNET PROTOCOL

It is used on UNIX networks
Outdated protocol (not available now)
Doesn‟t support
Data compression
Data encryption
Error checking
Doesn‟t support
NETBEUI
IPX/SPX

PPP: POINT TO POINT PROTOCOL

Most popularly used in WAN protocol replaced by SLIP
Supports various protocols
Supports data compression
Data encryption
Error checking


VPN (Virtual Private Network)

Using public network for private use we call it as VPN.
To protect the private data over internet, It uses protocols like L2TP, PPTP
VPN uses internet for providing communication between two different networks
and With the help of these VPN protocols private data is tunneled and sent to the
destination.

L2TP: (Layer 2 Tunneling Protocol)
Jointly developed b Microsoft & CISCO
Supports all types of networks ex: IP, frame relay, IP sec etc..

Supports header compression
PPTP: (Point to Point Tunneling Protocol):
Developed by Microsoft runs only on IP based networks
Doesn‟t support header compression

Establishing VPN connection:

VPN connection requires a primary connection which can be DUN, ISDN,
internet etc.,

Creating a VPN connection
On client machine
My network places – properties
Double click new connection wizard
Next- connect to network at my work place
Next – VPN – name – public network
Specify the server name ex: sys1
Anyone‟s use – finish

Terminal Services:
Terminal Server is a server used for centralizing the management of applications

It provides remote administration for administrators.
T.S. provides sharing of application and resources.
It is used when a company cannot upgrade their client machines, hardware
infrastructure.

Benefits of terminal services:

Centralized management applications
Centralized security using NTFS permissions
Easy to administer
Easy management of TS clients
Remote administration
Terminal server provides only the subset portion of the desktop to the client
machines. i.e. when a client establishes a terminal session only the desktop
portion is downloaded to the client machine to interact with.
During the session the terminal server uses the protocol called RDP. (Remote
Desktop Protocol)
With the help of this protocol client obtains the server‟s desktop on to the client it
is nothing but thin client. Only the mouse clicks and key stokes are sent to the TS

Requirements of Terminal server:

DC
Member server
Applications (MS office, oracle, java, PageMaker etc)

Installing terminal server

On DC
Open control panel add/remove programs
Add/rem windows components
Check the box terminal server - next – yes – next –
Select relaxed security - insert CD (win2003)

T.S. operates in two modes

    remote desktop mode
    application mode

If we want to configure T.S. only for remote administration we should select
remote administration mode.
If we want to configure T.S. for centralizing management application server we
should go with application mode.
Application mode offers remote administration as well as applications.

In win2003 we can install T.S. in 2 ways.
     fully secured mode
     fully relaxed mode

Fully secured mode: if we select this option users will not have access to registry
files & system files and it doesn‟t provide backward compatibility for existing OS
or applications.

Fully Relaxed mode: Provides access to registry and other system resources
useful when the security is not criteria or for performing remote administration.


Terminal Server Licensing:

By default when we install T.S. the clients can access T.S. only for 120 days.
It is a free license provided by T.S. license manager.

T.S. License manager: responsible for maintaining the T.S. license information
and contacting Microsoft clearing house for obtaining the license activation.
When a T.S. client establishes a session with T.S. the client has to obtain a
license key in order to access the applications.

Licensing mode:
There are 2 modes
   1. Domain Licensing mode
   2. Enterprise licensing mode.
1. Domain Licensing mode: suitable when we want to maintain a separate
     licensing manager for each & every domain.
NOTE: T.S & licensing manager cannot be configured in same server.

Enterprise license mode:
Suitable when we‟ve multi domain model and centralizing the licensing manager
or issuing of the license keys to the terminal clients.
Only one T.S. licensing manager is maintained in the enterprise domain and is
connected to Microsoft clearing house from where it gets authenticated.

Installing T.S. client or Remote Desktop:

On client machine
C:windowssystem32clientstsclientwin32&setup
Before establishing the T.Session on both T.S. & client machines
Step1: my computer - properties – remote – check the box remote desktop (allow
users)
On DC
Create a user in ADUC
On member server

Establishing a session

Start – p – accessories – communication – remote desktop connections
Supply the IP of TS - connect
Provide the username &pwd we‟ve created – ok
Error1: the local policy of system
Solution: move on to DC
Start – p – admin tools – DCSP – expand local policies &user rights – select the
option „allow log on through terminal services‟
Add the user whom we want to allow
Apply - ok - start – run – gpupdate
Move on to member server
Try to login with the same user name
Error2: We don‟t have access to logon to terminal session
Solution: move on to DC
Start – p – admin tools
Open T.C. configuration
Double click RDP- TCP - permissions
Add the user – full control - apply - ok
Move on to member server
Again try to login – we should login.

Remote control: R.C. is used for viewing the session or interacting with the
session.
      View Session: If the administrator selects this option, the remote control
      session will be give only used for monitoring users.
Interacting session: useful when an administrator wants with user to
      provide remote assistance or troubleshooting.

Remote Control: To have remote control of the user, an administrator has to
login to the TS and only through the TS he can take the remote control of the
user.

Implementing remote control:

On member server
Login as a user
Establish a terminal session as a user

On DC
Login as administrator
Start - P – admin tools – Terminal Services configuration
Double click RDP - remote control
Select the type of control we want to view/interact
Apply – ok

Establish a session on to the same machine by typing server‟s IP

Login as administrator
In terminal session
Start – p – admin tools
Open terminal services manager
Right click on user – remote control
Select the release keys (ex.Ctrl+ Z)(used for giving up remote control ) – ok

Allowing Local resources to be available on TS session.

Before login
On the member server - options
Open remote desktop connections
Options - local resources
Check the box disk drives
Connect & ok

* When we open my computer of T.S. we should notice the local drives.

Allowing user to access only a particular application through TS.

(Run only allowed applications for a user)
On DC
Open                                                                        ADUC
Go to the user properties
Following program
Specify the program (ex. Notepad, cmd, etc.)– File name – ok
Allowing a common application for all the users from TS

On DC
Start – p admin tools – open TS configuration – double click RDP
Environment – check the box override setting – specify the application name
Ok

ISA (Internet Security Accelerator)
It is useful to speedup internet access and to protect private network from public
network. It is actually firewall & acts as a proxy.

Types of firewalls:
Hardware firewall
Software firewall
Hardware firewall: CISCO pix, watch guard, multi com Ethernet II

Software firewall: ISA server
Checkpoint
Smooth wall
Firewall: a firewall protects networked computers from international hostile
intrusions.


Types of Attacks:

   1.   Foot printing
   2.   Scanning
   3.   Dos attack (denial of service)
   4.   Exploits ex. Cgi scripts, perl scripts etc.)
   5.   Trojan horses ex: netbus, bo2k
   6.   Port scanner

   1. Foot printing: the art of gathering the complete security profiles of an
      organization or a target computer. By using a combination of tools and
      techniques the hacker can take up the system and determine its IP
      address and domain names.
   2. Scanning: Scanning the system for bugs and loopholes in OS. Hacker
      uses scanning technique to determine which ports are open what services
      are running and what is the OS
      Ex: RATINA, shadow security scanner, ANSIL etc..

   3. DOS attack: Denial of service attack which is an attempt to get the service
      or the server down by overflowing the buffer. Eg. Win spoof a7, my spoof.

   4. Exploits: Exploits are usually bugs in applications or OS which can be
   exploited by using a piece of code often referred as scripts.
      Ex: CGI scripts, perl scripts etc..
5. Trojan Horses: Trojan horses are a program that pretends to be a useful
   tool but actually installs malicious or damaging software.
   Trojan Horses can be used to take over the remote system sending viruses to
   steal the data. Ex. Netbus, Bo2k.

   7. Port scanner: Scanning the port to get into the application ex: port
      scanner, etc.

ISA can be configured as firewall or proxy server.
If it is configured as a firewall,
Packet filtering: ex: routers controls data transfer based on source destination IP
addresses
TCP/UDP port of source destination IP address.
Packets are allowed or dropped through the device depending on the access
control list.
If it is configured as proxy it acts like a web server
Application gateway: ex: proxy server.
Packets are allowed based on type of application and IP address.
Filter application commands such as http, GET and POST etc..
Application level gateways can also be used to log user activity and logins.

Flavors of ISA server:

                           Standard edition                   enterprise edition


Server deployment          stand-alone only            multiple servers with
                                                              centralized
management.

Policy based support              Local only                  enterprise       &array
policies

Scalability                       CPU‟s only                  no limit.

ISA server requirements:

Member server or DC
Service pack 1 or above
Two interfaces (public & private)
RRAS
Processor: PIII 300 MHz. Or above
256 MB RAM
20 MB of H.D. space on NTFS 5.0

Array considerations:

ISA server models:
 Firewall model
    Cache model
    Integrated model.

Installing ISA

On router
Open D or E drive
ISA standard - ISA – setup.exe
Select integrated mode &continue

Private                       Router                          Pubic

IP: 192.168.1.2               192.168.1.1              202.153.32.2
                              202.153.32.1

 G/W 192.168.1.1                                       202.153.32.1

DNS 202.153.32.2              202.153.32.2             202.153.32.2


                       1) Enable LAN routing           create websites & zones

                       2) Install ISA


Specify the range of address.

Installing ISA service pack
Open D or E drive
ISA 2k standard
ISA service pack2.enu
Update
Update.exe – next – agree – next

Cache mode: select this option if security is not the criteria as it is used for
accelerating the access speed of websites by the private network users. Since it
maintains the recently accessed websites information in the ISA as cache
information.
It can‟t act like a firewall.

Firewall: useful if we want to configure ISA as firewall, which protects the private
network from public network. With the help of some protocol rules and policy
elements we can set the security. We can also control the type of traffic to be
allowed in or allowed-out.

Integrated mode: useful when we want to configure ISA as cache&firewall server.

Key features of ISA:
 internet firewall (Instruction detection)
    secure sever publishing
    Web caching server.
    Secure NAT.
    Integrated VPN.
    Tiered policy management
    Web filters (for blocking audio, images etc.,)
    Alerts
    Multi processor support
    QOS (Quality of Service)
    Client side auto discovery.
   Access is controlled based on
    client address sets
    destination sets
    protocol rules
    bandwidth priorities

Allowing websites

On router (ISA)
Start - programs – ISA server
ISA management – expand server

Creating a client address set:

Expand policy elements
Right click on client address set
New – set name of the set – ex. Sales
Add the range of available IP adds. Including ISA – ok

Setting Protocol rules:

For allowing websites
Expand access policy
Right click on protocol rules
New rule
Specify the rule name
Allow next protocols next schedule
Next – client type – select specific computers
Next – add the client add set we‟ve created – ok – next – finish

Configuring the proxy client

Move onto private network
Right click IE
Properties
Connections
LAN settings - check the box proxy server
Specify the add of ISA server &port no. 8080
Ok
Open Internet explorer and access any website

Denying a particular website

Creating a destination set:
Expand policy elements
Right click on destination set
New set - specify the destination
Website name – click on add – specify the destination name
(Which site we want to block) – Ok


Creating a site & content rule:

Expand access policy
Right click on site & content rule
New rule - specify the name allow or deny
Rule action (do nothing)
Rule configuration
Destination set, select specified destination set
Select the name – next – finish

Verification:
Move on to private network
Try to access yahoo.com.
It shouldn‟t open

Redirecting a website

Create a destination set
Right click site & content rule
New rule specify the name of the rule ex: YRG, YRR
Next - check the box http
Specify the target site name (to which we want to go)
Next – select specify destination set
Click the radio button
Next – finish

Verification:
Move onto private network
Typing the source website we should find the redirected website.
Yahoo redirected to google.

Blocking images:

Create a destination set
Site (which we want to block)
Create a site & content rule
Double click on the root we‟ve created
Http content
Select content groups
Check the box whatever we want (ex. Images)
Apply – ok
Move onto private network
Open the website
We should notice no images


Specifying schedule

Double click the site & content rule we‟ve created
Click on schedule
New -specify the day and timing
Mention the schedule name – ok – apply – ok

 RIS (Remote Installation Service)
It is a feature of 2000&2003 using which we can deploy operating system
remotely on to the client machines.

Requirements of RIS:
Server side;
AD, DNS, A static IP, DHCP, RIS, 2GB of free space with NTFS partition

Client side Requirements.
Client machine
PXE enabled NIC (Pre Boot execution Environment) or remote boot floppy.

Installing RIS service

On DC
Start
Settings - control panel
Add/remove - add/remove windows programs
Check the box RIS
Insert2003 OS CD- next
Restart

Once the RIS server is ready it depends on the three RIS services for
accomplishing remote installation

Remote installation process
Client machine with pxe enable ROM when booted it will load an initial program
to find an OS from RIS server that program is called „start ROM‟. When it is doing
so it (client) broadcasts network broadcast, MAC address on the network.

DHCP Server: the DHCP server on listening t the request from the client, assigns
an IP along with the DNS address.
DNS Server: It provides the DC‟s information so that the client can contact DC
With the help of MSDCS record

AD: RIS is integrated with AD and AD maintains complete information about RIS
server and available types of images and directs the request made by the client
to the RIS server
RIS server: starts the services BINL, TFTPD, SIS. With the help of these services
can perform remote installation of OS on to the requested client.

RIS services:
   1. BINL: or RIS: (Boot Information Negotiation Layer): Responsible for
      overall management of RIS. It is a service invokes TFTPD and SIS.

   2. TFTPD: (Trivial File Transfer Protocol Demon): Responsible for
      downloading the O.S. and related files only onto the client machine for
      remote installation

   3. SIS (Single Instance Services): It is responsible for efficient management
      of Hard Disk space. Whenever there is a repetition of file copying occurs,
      it omits copying file, instead it creates a pointer and this pointer will be
      pointing to the actual files.

Creating a CD image for remote installation: ex. 2003

On DC
Or RIS server
Start – r – Risetup – next
Check the box respond to the clients
Provide CD ROM drive path
Folder name – next
Friendly description name ex: CD image
Next – finish

Implementing RIS:

On RIS server
Install DHCP server
Authorize it
Create a scope

Verifying RIS server before performing RIS installation

On RIS server
Open                                                                       ADUC
Domain controllers
Right side pane- double click on the server
Remote install - verify server-Done.
Performing remote install on client
On the client machine
Boot from pxe enabled NIC or remote bootable floppy.
Press F12 key when the system prompts and installation proceeds.
Note: If don‟t see “press F12 for booting from n/w” you have to restart the
services before performing RIS installation:
Start – Admin tools – services
Restart services following
RIS, DHCP, DNS, netlogon, remote installation, TFTPD, single instance store

On the client machine
Insert COMBO CD
Press F12 when it prompts

Creating a remote boot floppy requires 1.44MB floppy

On RIS server
Open the RIS folder from remote installadmini386
Insert floppy and double click Rbfg.exe

Creating Additional images.

Open                                                                         ADUC
DC properties (right side ex: sys1)
Remote install
Advance settings
Images – add – insert CD

Editing an answer file:

On RIS server
Open the folder remote installsetupEnglishimageswindowsi386templates
Double click ristndrd.sif
Do whatever modifications you want
Ex: set it as, Use whole disk =no
Save – close.

RIPREP image
:
It is a type of images which includes OS+ applications, settings, security and etc..
Useful when we want to perform remote installation of OS +applications.
To achieve this we have to install OS+ applications +settings & security on one of
the client machines & keep it read

Performing riprep image

On the client machines, which are ready with applications and settings
Start – run - ris server name; ex; sys1
Double click reminstadmini386
Double click riprep
Next
Server name
Next
Folder name
Ex: client image
Friendly description ex; sales dept.
Next – answer further questions

NOTE: on completion of this, the client will get restarted and starts a mini
windows setup where you‟ll have to provide the company name, CD key and so
on. Once it is over the riprep image is ready.

NOTE: riprep image requires a CD image also.

DISK MANAGEMENT

2000 and 2003 uses a tool called Disk management for administering or
managing Hard Disk Drives

Using this we can create, delete, modify, partitions and volumes.

We can also implement software rate, and disk analysis.
To open Disk manager
Start – run – diskmgmt.msc
Or right click on my computer – select manage.

Creation of a primary partition:

Start – run – diskmgmt.msc
Select free space (black color)
R/C -new – partition – select primary
Alter the size - select drive letter
Select the type of format – ex: NTFS
Next – finish.

Creating extended partition:

Start – run – diskmgmt.msc
Right click on free space
New – partition – next – select extended partition
Don‟t alter the size - next – finish

Creating Logical partitions:

Right click on the green color partition
New – logical – drive – next – alter the size
Next – drive letter
Type of file system
Next – finish

If we want to delete a partition, right click the partition and delete partition

Storage
Basic Disks – partition – primary partition – extended – Logical partitions

Dynamic disks: simple volume – spanned volume – stripped volume – mirrored
volume – RAID – 5v

Basic Disk: These are referred to partitions.
Using basic disks we can create partitions like primary, extended, logical.
Basic disks are useful for providing backward compatibility with older OS. Like
DOS, 95, 98 etc..

Basic disks are useful while implementing clustering and when we want to have
dual OS in our computers.

Basic disks can have 1primary, 1 extended and logical partition
Or four primary or 3 primary 1 extended and so on.

Basic disks can be converted to dynamic disks
For converting it requires 1MB of free space.

Conversion of basic disk to dynamic:

We can convert form basic to dynamic but not vice versa.
Possible when we get advanced

Converting from basic to Dynamic: (requires 1MB of free space)
Go to disk management
Right click on the disk1
Convert to dynamic disk.

Volume: Volume is made up of free space club or merged fro more than one H.D.
volumes avoid using of multiple drive letters or drives.
Easy to administer

Dynamic volume: Dynamic disks refer to volumes. Using dynamic disks we can
implement and extend volumes and implement raid.
Dynamic disk can be attached or detached on the file.


Simple Volumes: simple volumes are similar to partitions which can be created
only one Hard disk which do not offer fall tolerance.

Spanned Volume: A volume can be created by selecting the free space from
more than 1 Hdd
Span volumes offer extending of volume.
Do not offer fall tolerance
Maximum 32 Hdds
Min 2 Hdds

Creating simple volumes:

Open disk management
Right click on the black bar
New – volume
Select simple volume
Alter the space – next
Drive letter
File system
Check box perform quick format
Next – finish

Creating a spanned volume:

Open disk management
Right click on black bar
New volume
Select span – next
Select disk1&2 reduce &specify the size.
Drive letter – next
Perform – quick format – finish

Extending volume:
Right click on the volume we want to extend
Extend volume - next
Select the drive on which we want to extend the volume
Specify the size - next – finish

RAID: (Redundancy Array Inexpensive Disks or Independent disks)

Raid offers fall tolerance

Fault Tolerance: It is a technique used for protecting data against hardware
failures.

Software RAID: It can be implemented from the OS. Which is not a guaranteed
fault tolerance?

Hardware RAID: can be implemented above the O.S. including the OS is
protected.
Offers highest fault tolerance.

There are five RAID levels
RAID 0, 1, 2, 3, 4 and 5 these are supported by NT/2000/2003

RAID 0: striping without parity

Striped volumes:

Requires min 2 Hdds, max 32 Hdds.
Offers no fault tolerance
Suitable when performance is criteria.
Data is written evenly on to all drives
If any one of the drives fails whole data is lost.
Space selected on all the drives should be of identical size.

RAID 1 or Disk mirroring:

Requires min.2Hdds max.also 2 Hdds
Offers fall tolerance
Data is written onto both the drives simultaneously.
If one drive fails data is still available in the second drive.
I/P performance: reading is fast and writing is slow.

Implementation of mirror:

Create a simple volume ex: 100mb
Right click on S.V. and add mirror

Break mirror: Breaks the mirror and retains the partition and data and changes
the drive letter
Right click on desired drive
Select break mirror

Remove mirror: Removes the mirrored volume.

If we want to break or remove the volume
Right click on mirror volume
Select break or remove

RAID 5 Striping with parity

Requires min 3Hdds max 32 Hdds.
Offers highest fault tolerance
Data is written evenly on to all member striped volumes and
Parity information is also added.
Parity bit: It is mathematical calculation added to every piece of data and used for
regenerating the data when any HDD fails.
Offers performance and availability
I/O performance: Reading and writing both are fast.
Mounting:

It is a feature of 2000 & 2003 used for accessing free space on the hard drive
through a folder when drive letters get exhausted.

Using                                                                   mounting:
open disk management
Create a simple volume
While creating select mount in the following MT, NTFS folder
Browse – new folder (create a folder here) – next – quick format – next
Finish

Accessing the Free space through a mount point.

Open the drive where we‟ve created the folder.
We find here folder name with a drive icon

ADVANCED
Seizing of Roles: DC & ADC, when Dc abruptly goes down, irreparable, no hopes
of bringing back DC online we should seize the FSMO roles onto ADC
Permanently configures ADC as DC

Implementing:
On ADC
Start - run – cmd – (ntdsutil)
Roles
Connections
Connect to server ADC‟s server name
Q
Seize schema master
Seize Domain naming master
Seize RID master
Seize Infrastructure master
Seize PDC – q – q – exit.


Volume shadow copy services: VSCS

It is a new feature available only in 2003 flavor. Useful for taking online backup
and access recent versions of files and folders.

Useful when the users inadvertently delete their files from network share and
want them back. In case an administrator had taken a snapshot of the volume
can retrieve the recent versions of the files.

Implimenting VSCS:
On server /DC
Create a folder with 2, 3 files in D or E drive
Share the folder
Give full access permissions
Taking a snapshot (VSCS):
Open my computer
Go to the drive properties where we‟ve created the folder.
Click on shadow copies
Select the volume
Click on enable
Click on create now
Apply -ok

Verification:
Login from the client machine access the network resources from my network
places
Delete 1or 2 files we‟ve created – logoff
Login as administrator

To restore a deleted file
Access the network share from my network places
Right click on the share folder
Properties
Previous versions
Click on restore
Apply – ok

Try to access the network share from client machine
We should notice the deleted file restored.


SUS (Software Update Services):

It is a new feature of 2003. When our network client or servers wat their updates
from internet, if internet is available to all the client machines whole network will
be busying updating OS &software. This leads to network traffic
To overcome this problem we have to use a separate server configure as SUS,
which is connected to Internet and obtains updates. Client machines instead of
contacting Internet for updates contact the intranet SUS server for updates. This
can be scheduled.

SUS software has to be downloaded from the internet and also I.I.S.

Implimenting SUS:

Install SUS in one of the member servers
On DC
Configuring client machines to contact SUS server for updates.

On DC
Open ADUC
Create an OU
Join the client machines to this OU
OU properties
Group policy
GPO name
Edit
Expand computer configuration
Administrative templates
Windows components
Windows updates
Double click on specified intranet
Enable – specify the server‟s add in both the boxes.

To schedule the updates;
Double click o configure automatic updates
Specify the schedule

MBSA (Microsoft Baseline Security Analyzer):

It is a new feature of 2003. It is a service responsible for preparing a report which
reveals a loop holes and draw backs of the OS and the applications installed in
the server. Using this report an administrator can take some precautions.

It is also freely available software in internet. We can download it.
File name is mbsa.msi

It acts like a guide to the administrator

Using MBSA
:
start                         -            programs            –              MBSA
select scan a computer/scan more than one computer
Provide the IP address of the computer
Click on start scan
It creates a report contains the information about the system.

RSOP: (Resultant Set of Policies):

It is a new feature of 2003 using which we can gather all the policies
implemented by group policy in the entire forest.

RSOP works in two modes logging and planning

Logging: Generates the reports for the users who all have logged in and effected
with the policy.
Planning: it is useful for experimentation. I.e. as an admin Would like to see the
result of the policy before it is implemented.

Using RSOP

Open ADUC
Right click on the OU
Select RSOP
CIMOM (Common Information Management Object Model) is database where
GP settings are registered.

GPMC (Group Policy Management Consol):

 It is a new feature in 2003 which centralizes the management of group policies
for ex. multiple forests, sites, OUs; Domains can be administered from a central
location.

Gathering of group policies implemented in the entire forest is easy.
Implementing Group policy is also very easy
Back and restore of G.Ps is easy
Once installed, disables group policy option for local, sites & domain.
Software available in internet. Filename is gpmc.msi

Mcse notes

  • 1.
    MCSE MICROSOFT CERTIFIED SYSTEMSENGINEER NETWORK: A network is a collection of computers connected together. . NETWORKING: is a process of communication between the interconnected devices basically to share the network resources. Benefits of Networking: 1. Share resources. i) Data ii) Hardware 2. Share S/W 3. Sharing of license Network is a collection of computers connected together to get benefited from networking. Networking: Networking is a process of communication among systems. Types of Networks: 1) Local Area Network (LAN): Systems connected within the same geographical area is called LAN. A LAN can span 2 kilometers. Components of LAN: 1. .NIC (Network Interface Card) 2. Cable – Co axial, cat5 or cat6 3. Hubs or Switches. 2) Metropolitan Area Networking: MAN is a combination of LANs or WANS located and connected within the same city. Components of MAN: 1. Router 2. Brouter (Brouter is a combination of bridge or router) 3. ATM Switches 4. DSL connectivity (DSL – Digital Subscriber Link) ex: Star cables . 3) Wide Area Networking (WAN): Interconnection of LANs or MANs located within the same geographical area or different area it depends on telecommunication services. Components of WAN: Same as MAN:
  • 2.
    Networking devices: Hubs, Switches,Routers and NICs. HUB: Hub is a centralized device provides communication among systems when we have more than 2 computers we need to have a device called hub to interconnect. Disadvantage of a Hub: When we want to transfer some data from one system to another system. If our network has 24 systems the data packet instead of being sent only to the destined system it is being send to all the network participants. (i.e. 24 systems.) Hubs follow broadcasting SWITCH: It is an advanced version over a Hub. The main benefit of switch is Unicast. Data packets are transmitted only to the target computer instead of all. Switch maintains a table called MIT (Mac Information Table.) which is generated as soon as we turn on the switch, which acts like an index table and easy the process of finding the networked system. MIT contains the port no, IP address and MAC address. MAC: (Media Access Control): It is an address burnt in the NIC by the manufacturer. MAC address is of 48 bits in the farm of Hexa decimal. Every NIC has its own unique MAC address. MAC address determines the physical location of a system. ROUTER: Router is a device connects two different networks. Class A network with Class C network etc. Routing is a process of communication between two different networks. Network Topologies: The way of cabling is called topology. The architecture of a network is called topology E.g.: Bus, Star, Ring, and Mesh Topologies. Bus Topology: Components of Bus Topology: 1. Co-axial cable (back bone cable) 2. T- connectors 3. BNC (British Network Connector) 4. Terminator 5. Patch cable
  • 3.
    Disadvantages of Bus: Ifanything goes wrong with backbone cable whole network is down. Follows a serial communication. Outdated these days. Star Topology: Star topology is an advanced version over bus topology. Where it uses either a hub or a switch, it uses cat5/6 cables. It uses connecters called (Recommend Jack) - RJ45 Star topology offers faster data transfer or processing. Ring Topology: Ring topology is useful when we want redundancy (fault tolerance) we go with this type of topology. Ring topology uses a device called MSAU. (Multi Station Access Unit) It is a unit inside which a logical ring is formed. This ring ensures the availability of Network. The availability of ring ensures availability of network. It was basically implemented in IBM networks. Logical Topologies: are two types 1. Work group. 2. Domain Workgroup (peer to peer): Collection of computers connected together to share the resources. No servers are used. Only Client OS is mostly used. Any O/S like, DOS, 95, 98, workstation, win 2000 pro, and XP pro can be configured as work-group model. Suitable for smaller organizations. Where security is not the criteria. No administrator is required Where we are not using client server based applications. Like oracle, SQL and exchange etc. Domain (Client/Server) Domain is a collection of computers connected together with a server and users Domain model can have servers like UNIX, Novell NetWare, WIN-NT server, 2000 server, and 2003 server. Provides centralized administration. Suitable for medium to large size networks/organizations. Suitable when we have client server architecture (Back ends & front ends)
  • 4.
    Domain offers securityand provides logon authentication. Suitable if security is criteria Requires an administrator. The History of MS Network O/S: 1. Desktop O.S.: DOS, 95, WKS, 98, 2k Prof., XP-Prof. 2. Network O.S.: UNIX, Win NT server 4.0, Win 2000 server, Win 2003 server. Win NT 3.1 – was introduced in 1993 Win NT 3.5 – was introduced in 1994 Win NT 4.0 – was introduced in 1996 Win NT5.0 was renamed as windows 2000 server. .NET server was renamed as windows 2003 server WINDOWS WINDOWS 2000 FAMILY 2003 FAMILY Professional Standard (Client) Server Standard Enterprise Server edition Advanced Advanced server server Data center Data center server server
  • 5.
    HARDWARE REQUIREMENTS Windows 2003Standard Edition: Windows 2003 Enterprise Editions:  RAM: Min:128 MB  RAM: Min:128 MB  Rec: 256 MB  Rec: 256 MB  Max. RAM 4 GB  Max. RAM 16 GB  Processor: Pentium 550 MHz  Processor: Pentium 733MHz  HDD free space 1.5GB  HDD free space 1.5GB  SMP: 4 processors  SMP:16 processors Windows 2003 Web Edition: Windows 2003 DataCenter Edition:  RAM: Min:128 MB  RAM: Min: 1GB  Rec: 256 MB  Rec: 2GB  Max. RAM 2 GB  Max. RAM 64 GB  Processor: Pentium 550 MHz  Processor: Pentium 733MHz  HDD free space 1.5GB  HDD free space 1.5GB  SMP: 2 processors  SMP: 64 processors IP Addressing: There are two versions of IPs 1. IP version 4: offers IPs up to 4.2 billion (32 bit size) 2. IP version 6: 128 bit size. IP address is used for identifying the system and provides communication. IP address is of 32 bits divided in four octets. Each Octet is of 8 bits, separated by a (.) dot. IP is a combination of Network ID & Host ID. Uses subnet mask to differentiate Network ID with Host ID. Subnet mask acts like a mask between Network ID & the Host ID. Numbers range between 0-255. Organizations responsible for assigning IPs to clients. IANA: Internet Assign Naming Authority. ICANN: Internet Corporation assigning for name Numbers. IANA has classified IP addressing into classes. Class A: 1-126(used in LAN/WAN) Class B: 128 – 191(used in LAN/WAN) Class C: 192 – 223(used in LAN/WAN)
  • 6.
    Class D: 224 – 239 (used for multi casting) Class E: 240 – 254 (used for experimentation & research) Class Format No of N/Ws No of Hosts Subnet mask Range 28-1 126 224 – 2 16.777.214 A N.H.H.H 255.0.0.0 1 – 126 216-2 16.384 216 – 2 65.534 B N.N.H.H 255.255.0.0 128 - 191 224-3 2.097.152 28 – 2 254 C N.N.N.H 255.255.255.0 192 – 223 D MULTICAST N/A N/A N/A 224 – 239 E RESEARCH N/A N/A N/A 240 - 254 Class A:The first octet is reserved for network ID. The first bit of first octet is always (0). Class B: The first two octets are reserved for Network IDs. The first two bits of first octet are reserved as (10) Class C: The first three octets are reserved as network portions. The first three bits of first octet are reserved as (110) Class D: Used for Multicasting. The first four bits of first octet are reserved as (1110) Class D: Used for Experimentation. The first four bits of first octet are reserved as (1111) The first bit of first octet is called as priority bit which determines the class of N/W 0.0.0.0. Are reserved as N/W ID. 255.255.255.255 is reserved as broadcast ID. 127.0.0.1 Is reserved as loop back ID Implementing/Configuring TCP/IP. On Desktop Right click on my network places-properties Double click local area network-Select properties Click-Use the following ip address Specify the address in the box DNS also same as IP address. Verifying: Go to command prompt Type” ping IP address”. (PING: Packet Internet Groper)
  • 7.
    ACTIVE DIRECTORY AD: Isa centralized database where it contains the information about the objects like users, groups, computers, printers etc. AD is a centralized hierarchical Directory Database. AD is a searchable Database. 2003 O/S. when installed (gets installed as a stand alone server) to promoting to D.C. We have to install A.D. Domain Controller (D.C.) A server where A.D. is installed is called D.C. Functionality of A.D.: Using A.D. we can organize, manage and control resources. It provides single point of administration. Purpose of A.D.: 1. Provides user logon authentication services. 2. To organize and manage user A/Cs, computers, groups and n/w resources. 3. Enables authorized users to easily locate n/w resources. Features of A.D.: 1. Fully integrated security system with the help of Kerberos. 2. Easy administration using group policy. 3. Scalable to any size n/w 4. Flexible (install/uninstall) 5. Extensible (modify the schema) New features in 2003 6. Rename computer name & Domain names. 7. Cross –forest trust relationship. 8. Site-to-Site replication is faster. Evolution of LDAP: Earlier we had no database standard; hence TTU & ISO introduced X-500 LDAP (Light Weight Directory Access Protocol): It is an industry standard directory access protocol used for querying and providing communication among the objects in A.D. It is directory access protocol. It runs on the port no. 389.
  • 8.
    DAP: It isbased on OSI model. LDAP: Is based on TCP/IP model Installing A.D: Requirements: Windows 2003 O.S. A static IP NTFS partition with 250 MB of free HDD space DNS (Domain Naming System) Step1: on 2003 machine Start > Run> dcpromo>next>next >Select domain controller for a new domain >Domain in a new forest >next >Specify the domain name (Ex: zoom.com) >Net bios name (do nothing)>Next >database>next >Sysvol>next >Select middle one>next >Provide pwd>next >Restart - when it prompts After installing A.D. Go to Start>programs> administration tools We should notice 5 options like ADUC, ADDT, ADSS, DCSP, and DSP Safe removal of A.D. >Start >run >dcpromo Forceful removal of A.D . >Start >run > dcpromo / forceremoval Tools used for: Active Directory Domains and Trusts:  Implementing trusts  Raising domain/forest functional levels  Adding user logon suffixes Active Directory Sites and Services:  Configuring intrasite/intersite replication
  • 9.
     Configuring globalcatalog  Creation of sites, site links, subnets.  Scheduling replication Active Directory Users and Computers:  Managing users/groups  Managing computers.  Managing OUs  Managing Group Policy (Domain Level)  Managing Operations masters.  Raising domain functional level. Domain controller security policy:  Set account, audit and password policies  Set user rights  Permissions or policies Pertains only to the DC where you set. Domain security policy:  Set account, audit and password policies  Set user rights  Permissions or policies pertain to the DC as well as to all the domains within.
  • 10.
    Installing ADC (AdditionalDomain Controller): Requirements: D.C. Static .P. DNS Stand-alone or Member Server. Step1: on Stand alone machine or member server  Specify I.P.  Specify prefer DNS as servers IP.  Start > run >ping server‟s IP. Step2: >start >run >dcpromo>next>next>select ADC for an existing domain  Specify administrator‟s name & pwd.  Domain name of DC (eg.zoom.com)  Browse the domain  Next>next> restore pwd. ADC is a back up for DC  ADC maintains a back up copy of A.D., which will be in read only format.  ADCs provide fault tolerance & load balancing  There can be any no. of ADCs for a DC.  ADCs should be placed and maintained offsite away from the DC.  ADC maintains same domain name. Verifying whether the server is configured as DC or ADC.  Start>run>cmd>net accounts  For DC we will find “primary”  For ADC we will find “Backup” ACTIVE DIRECTORY COMPONENTS LOGICAL STRUCTURE PHYSICAL STRUCTURE Domains Sites Trees Domain controllers Forest Organizational units
  • 11.
    A.D. Components: Logical structure is useful for organizing the network. Logical components cannot be seen Physical structure is useful for representing our organization for developing the organizational structure. It reflects the organization (mirrors) Physical structure can be seen. Ex. Site – India, US, UK etc. TREE: A tree is a group of domains which share contiguous name space. If more than one domain exits we can combine the multiple domains into hierarchical tree structures. The first domain created is the root domain of the first tree. Additional domains in the same domain tree are child domains. A domain immediately above another domain in the same domain tree is its parent. FOREST: Multiple domain trees within a single forest do not form a contiguous namespace. I.e. they have non-contiguous DNS domain names Although trees in a forest do not share a name space, a forest does have a single root domain, called the forest root domain The forest root domain is, by definition, the first domain created in the forest. The two forest wide predefined groups – Enterprise. Administrators and schema administrators reside in this domain. Physical structure SITES: Site is a combination of TCP/IP, subnets, connected with high-speed links. Sites provide replication There are 2 types of replications 1. Intrasite replication 2. Intersite replication Intrasite Replication: It is a replication with in the same site. It offers full time replication between DC & ADC when they are within the same site. Intersite Replication: It is a replication between two different sites. Intersite replication is implemented when the sites are away from each other. -It requires a site link
  • 12.
    -Site link isa logical connection between sites, which can be created & scheduled. -Site link offers communication only at scheduled intervals. Implementing sites: Forceful replication: On DC Start >programs> admin tools > ADSS > expand sites > default first site>servers >Expand DC server > NTDS settings >right click on automatically generated>replicate now>ok. Repeat the same for DC & ADC Creating a site: Open ADSS>Right click on sites>New site>Site name (e.g. UK, US) Select default site link>Ok Moving ADC into another site: Select ADC>Right click on ADC>Select move>Select site. Creating a Site link: Expand inter site transports>Right click on IP>Select new site link Link name (ex. Link US –UK) Scheduling a site link: Expand inter site transport>IP>Double click on site link>Change schedule Click on replication not available>set the timings>click on replication available. KCC: (Knowledge Consistency Checker): It is a service of A.D., which is responsible for intimating, or updating the changes made either in DC or ADC. Active Directory is saved in a file called NTDS.DIT C:windowsntdsntds.dit NTDS.DIT - New Technology Directory Services. Directory Information Tree It is a file logically divided into four partitions. 1. Schema partition 2. Configuration partition 3. Domain partition 4. Application partition It is a set of rules schema defines AD, it is of 2 parts classes & attributes.
  • 13.
    Ad is constructedwith the help of classes and attributes. 1. Schema: Logical partition in AD database “template” for AD database. Forms the database structures in which data is stored. Extensible Dynamic Protect by ACL (Access Control Lists) DACL‟s and SACL‟s (Directory&System ACL‟s) One schema for AD forest. Collection of objects is called class. Piece of information about the object is called attribute. 2. Configuration Partition: Logical partition in AD database. “map” of AD implementation Contains information used for replication logon searches. Domains Trust relationships Sites& site links Subnets Domain controller locations. 3. Domain Partition: Logical partition in AD database. Collections of users, computers, groups etc. Units of replication. Domain controllers in a domain replicate with each other and contain a full copy of the domain partition for their domain. DCs do not replicate domain partition information for other domains 4. Application Partition: It is a newly added partition in win2003. It can be added or removed It can be replicated only to the specified DCs. Useful when we are using AD integrated services like DNS, TAPI services etc.. FSMO roles: (Flexible Single Master Operations): Forest wide Master Operation 1. Schema master 2.Domain Naming master Domain wide master operation 3. PDC emulator 4. RID master 5. Infrastructure master
  • 14.
    Schema Master: Responsible foroverall management of the entire schema in a forest. The first DC installed acts as a schema master in the entire forest. There can be only one schema master in the entire forest Domain Naming Master: Responsible for addition /removal of domains. It maintains the uniqueness of domain names. There can be only one DNM in the entire forest. 3. PDC emulator: PDC provides backward compatibility for existing NT BDCs and workstations. (If it is running in mixed mode) PDC updates the password changes made by the users. It is also responsible for synchronizing the time. There can be only one PDC emulator per domain. 4. RID master: Responsible for assigning unique IDs to the objects created in the domain. There can be only one RID master per domain SID – Security Identifier it maintains a access control list. It is divided into two parts. 1. DID (Domain Identifier) 2. RID (Relative Identifier) For knowing the SID of the user >Start>run>cmd> whoam I /user 5. Infrastructure master: Responsible for maintaining the updates made to the user & group membership. It also maintains universal group membership. There can be only one infrastructure master per domain The term flexibility means we can transfer any of the 5 roles from DC to ADC. Transfer of Roles : We can transfer the roles for some temporary maintenance issues on to ADC and again we can transfer back the roles onto DC. We can transfer the roles in two ways 1. Command mode 2. Graphical mode
  • 15.
    Transfer of rolesthrough command On DC Go to command prompt and type ntdsutil Type: roles Connections Connect to server (name of ADC ex.sys2) Q Transfer schema master Transfer RID master Transfer infrastructure master Transfer PDC Q Q Exit Transferring roles using GUI : On DC Register the schema For registering schema Start > run > regsvr32 schmmgmt.dll Transferring schema master On Dc Start>Run>mmc>click on file> select add/remove snap in Select A.D.Schema>add>close>ok From console root Expand console root Right click AD Schema Change domain controller Specify name Ok Right click AD schema Select operations master Click on change Yes> ok> file> exit (need not to save) Transferring Domain naming master: On DC Start>p>admin tools> ADDT>right click on ADDT Connect to domain controller Select ADC Ok
  • 16.
    Right click onADDT Operations master Click on change>yes>ok> close Transferring Domain wide master operations: Start >p>admin tools> ADUC Right click on ADUC Connect to DC Select ADC > ok Right click on Domain name Select operations master Change>yes Select PDC> change>yes>select infrastructure>change>close>close. GLOBAL CATALOG It is a service responsible for maintaining information about the objects and serving the requests made by the users by providing the location of the object. Global Catalog runs on the port number 3268. All types of queries are first heard on this port number and forward the query to port no.389 (LDAP‟s).Maintains the complete information about the objects within the same domain and partial information about other domains. GC communicates to infrastructure master. If DC & ADC are located in the same location only one GC is enough. If the DC&ADC are located remotely to avoid network traffic we need to configure ADC as GC Infrastructure master contacts global catalog for obtaining the updates about user & group membership and universal group membership. The primary functions of GC To maintain universal group membership information, to easily locate the objects with in the AD.: Configuring a Global catalog server. Either on ADC or on ChildDC >Start >program>admin tools> ADSS> expand sites >default first site>server> On NTDS right click> properties>check the box Global Catalog. Installing ChildDC: Requirements: ParentDC Member server or stand alone server Static IP DNS NTFS volume with 250 MB of free HDD space
  • 17.
    On Member Serveror stand alone machine specify the server‟s DNS. >Start >run>dcpromo>next>next>next>domain controller for a new domain>next> Child Domain in an existing tree>specify the parent domain‟s administrator‟s name & pwd. >Specify the child name>next>netbios name> next> database folder> next>Sysvol>next>restart. Installing New Domain tree in an existing forest: Requirements: Forest (initial domain controller or root domain controller) On member server or stand-alone machine. Specify the server‟s DNS. Start>run>dcpromo>next>next>next>Domain Controller for a new domain. Select Domain tree in an existing forest. Specify the root domain‟s admin‟s name & pwd Next> specify the new domain name>next>net bios name>next>database > next>sysvol>next>DNS next>permission compatible >next>restore mode pwd>next Trust Relationship:Trust is a process of enabling resources of one domain to be accessed by another domain. Functional Levels: 1. Domain Functional Level: A) Windows 2000 mixed B) Windows 2000 native C) Interim D) Windows 2003 server 2. Forest Functional Level: a) Windows 2000 mixed b) Interim c) Windows 2003 server. Windows 2000 mixed: By default when we install 2000 or 2003 o/s it gets installed in win 2000 mixed mode. This mode supports older versions of win2003. We can add NT, 2000 flavors in 2003 networks. Windows 2000 native: It supports only 2000 and 2003; Native mode can have 2000&2003 flavors only.
  • 18.
    Interim: This mode canhave NT and 2003. Useful when we upgrade NT to 2003 Windows 2003 server: This mode supports only 2003 server family. We can‟t join NT/2000 domains Types of Trusts: Trust relationships in Windows server2003: Default two way transitive Kerberos trusts (intra forest) Shortcut – one or two away transitive Kerberos trusts (intraforest) Reduce authentication requests Forest-one or two way- transitive Kerberos trusts. WS2003 forests WIN 2000 does not support forest trusts > Only between forest roots >Creates transitive domain relationships. External – one way non-transitive NTLM trusts. Used to connect to /from win NT or external 2000 domains.- manually created. Realm – one or two way non-transitive Kerberos trusts. Connect to /from UNIX MT Kerberos realms. Establishing Trusts: The Domain where we have user accounts is called trusted domain. The domain where we have resource is called trusting domain. Trust between parent and child is two way transitive trusts. Ex; A trusts B, automatically B trusts A this is a two way trust. Trust between parent and Grandchild domain is called implicit trust. One-way trust or Non-transitive Trust: A trusts B, but B doesn‟t trust A Transitive trust (2 ways): If A trusts B, B automatically trusts A One way incoming trust: It means A is getting the resources from B and B is offering the resources. One way out going trust: A is offering resources to B and B is getting resources from A
  • 19.
    Benefits of DomainFunctional Level: Win 2003 server Level: The moment we raise the functional level, form mixed mode to win 2003 mode we get the following benefits. Universal groups Group nesting Domain renaming tools. Benefits of Forest Functional Level: Win 2003 level We get complete benefits of 2003 when we raise the level from 2000 to win 2003 server. We can implement forest trusts. Acceleration of global catalog replication information. Domain renaming ImplimentingForest Level: Raising Domain Functional in both the machines: >Start>program>admin tools>ADDT>right click on Domain>raise Domain Functional Level>select win 2003>click on raise>ok>ok Raising Forest Functional Level: >Start>p>ADDT>right click on ADDT>raise forest functional level>select win2003>rise>ok. Member Server: A server, which is a part of DC, is called Member Server. Server like WINNT, 2000 and 2003 can be configured as Member Server. Server, which is part of the Domain, is called Member Server. Member Servers are used Load balancing Load sharing form DCs A member server can be configured as any of the following servers. Application service (oracle/SQL) Mail server File server Print server DNS server DHCP sever Web server RIS server RAS server T.S.
  • 20.
    Configuring a memberserver Requirements: DC Stand alone server 2003 flavor On Stand-alone server: Configure TCP/IP Specify DNS server‟s address My computer right click Select properties Computer name Change Domain Specify name (ex: zoom.com) Ok> it says welcome to domain Restart system. Configuring win2003 or XP professional as a client: Same as configuring member server; Server: Ex: NT, 2000, 2003 Client: ex: WKS, Prof., And XP User Management: User Account: User A/Cs is useful for assigning to the user to participate in the network. There are two types of accounts  Domain User Accounts  Local User Accounts 1. Domain User Accounts: These are created in the AD and they proved centralized management of users besides easy administration 2. Local User Accounts: These can be created on the Local machines where the client works. Ex. 2000 prof. XP prof. < win2003 member server etc. These accounts do not provide centralized management. Suitable only for smaller organizations where there is no server. Creating a Domain User Accounts . On DC Start> Programs>Admin tools> ADUC>expand domain name(ex.IBM.com) >Right click on users>new>user>supply name &pwd. >User must change pwd at next logon>next>finish
  • 21.
    Creating a DomainUser A/C through command prompt; Start>run>cmd dsadd user cn=username,cn=users,dc=ibm,dc=com –pwd zoom_123 For removing dsrm user cn=username……. Creating a local user Account in Member Server On member server Log on to local user a/c Right click on my computer Manage Expand local users Right click on users. New user Supply the user name&pwd Click on create Log off Log in as user Creating a Local user a/c from command mode On member server Login as administrator Go to command prompt Net user username Password Ex: net user u1 zoom_123 /add If we want to delete.. /del User right assignments (Logon locally allowing logon locally right to a normal user.) On DC Create a user a/c in ADUC Allowing him to logon Start >programs>admin tools>DCSP>expand local policies>user rights>D/C allow logon locally>add the user. Start>run>gpupdate. Verify: On DC logon as a user Disabling password complexity policy:
  • 22.
    Start >programs>admin tools>domain security policy>expand a/c policies>password policy >Double click on p/w must meet complexity requirements. Select disabled Apply >ok Minimum pwd length (do it as 0 characters) Close For refreshing policy Start >run>cmd>gpupdate Password policies: Enforce password history 24 pwds remembered Maximum p/w age Minimum pwd age Pwd must meet complexity requirements Store pwds using reversible encryption. Re-setting User passwords: On DC Start >p> ADUC >expand users Select the user right click Reset password select Shortcuts: Start > Run For ADUC dsa.msc For ADSS dssite.msc For ADTT domain.msc For DCSP dcpor.msc For DSP dompol.msc SHARING In order to make a resource to be available over the network and to be accessed by network users we need to implement sharing. The moment we create a share on a server, server acts like a file server.
  • 23.
    Sharing a resource: OnDC Open my computer Select any drive Create a new folder Give name of the folder Right click on the folder Select sharing and security Share this folder Apply > ok Accessing share resources from a client machine: On client machine Open my network places Entire network Microsoft windows n/w Domain name (ex. Zoom) Computer name Creating a share through command line : On DC Go to command prompt md sharename net share sharename=c: share name Connecting to a share resource through a command prompt: On member server Go to command prompt net use z:computernamesharename Mapping a drive (connecting to the share from GUI): On member server Right click on my computer Map network drive Select the drive letter Uncheck or check reconnect logon Browse the share folder Computer name>share name>ok>finish. Permissions
  • 24.
    Using permissions anadministrator can either allow or deny access to a resource. Resource can be a network resource or local resource Permissions are of two types 1. Share level 2. File system or NTFS Share level permissions Share level permissions are applied over the network. Share level permissions are not applied on the local machine where the resource is existing. There are three types of share level permissions Full control RWXDO (Read/Write/Execute/Delete/Ownership) Change RWXD Read R Practice: On DC Create a share Create three users Set permissions Setting permissions: Create folder> share> right click on folder> properties> permission > Remove everyone >Add all the users whom you want to allow or deny. >Apply>ok. Verification: Move on to client machine Login as different users Try to access the n/w resources. 2. NTFS permissions: NTFS permissions are powerful permissions and they offer file and folder level security. NTFS permissions are useful for securing locally available resources. NTFS Features: File/folder level security Compress Encryption Quotas Reduced fragmentation
  • 25.
    Hot fixing Volume shadowcopy services Mounting Separate recycle bin for each user NTFS permissions Full control RWXDO Modify RWXD Read & Execute RX List folder contents L Read R Write RWX Implementing NTFS permissions : On member server-Create a folder On DC-Create 3 users. On member server Right click on the folder Properties Security Add the users we have created on DC Ok Select the user and set the permission U1-full control U2-modify U3-read Apply-ok. Experiment2: Login as administrator on member server Create a folder Folder properties Security Advanced-uncheck the box allow inheritable permissions.. Remove Apply – ok. Add the users we have created along with the administrator Administrator -full control U1 – full control U2 – modify U3 – read – apply – ok Full control permissions This permission offers complete control i.e., taking ownership and setting permissions on files and folders.
  • 26.
    Users who havefull control permission can take ownership of a resource The moment a user creates a folder he becomes an owner of a folder. Owners will have full control access Taking ownership of a folder: On member server Login as administrator Create a folder Go to properties of the folder Security Add the user to whom we want to give permission Ex: u1-full control Apply – ok Step2: login as a user1 (u1) Go to the folder properties Security Advanced Owner Select user Check the box replace owner on Apply – ok Share level NTFS level N/W Local Read read read read Change read change read Read modify read modify Read write read write Profiles Profiles are used for providing basic user environment needs Environment needs can be Desktop settings Startup applications N/w connectivity. Profile is responsible for providing the initial desktop environment needs with the help of desktop folder, favorites, cookies, my documents, start menu, and Internet settings, n/w connections and etc. When a user logs in for the first time the user will be loaded with a default user profile. Default user profile is located under
  • 27.
    C:documents and settingsdefaultuser Types of profiles: Local profile Roaming profile Mandatory profile Local profile: It is a profile loaded for the user and saved in the local hard drive where the user works. And profile will be saved when a user logs off Local profiles are limited only to the machine where they are saved. A user with a local profile will not be loaded with a network profile when he logs on from another machine. Verifying the type of the profile: My computer Properties Advanced User profile – settings Roaming Profile: It is a profile, which is saved in the shared folder on the server. Hence available in the entire network. Roaming profile is a n/w profile which is available in the entire network. As a result when a user logs in from any machine in the n/e he will be loaded with a roaming. Creating a roaming profile: On DC Create a user A/C Create a folder And share it and give full control permission for everyone Start >P>ADUC Double click the user Profile Profile path ex: sys1profileusername Apply – ok Move on to member server Log in as user My computer Properties Advanced-profile settings-you should notice “roaming profile”. Mandatory Profile: Mandatory Profile is a profile used for controlling desktop environment setting especially used for restricting user from saving user data, setting, and configuration on the desktop.
  • 28.
    It is atype of roaming profile but settings are not saved when a user logs off. Changes will be available only for the session where user is active. (Active session) Creating a mandatory profile: Open the profiles folder you‟ve created for roaming There will be a user folder Take the ownership of the folder of the user Right click on the folder properties Security – ok – advanced Owner – administrators Replace owner on sub >apply – ok Open the folder Rename the file Ntuser.dat to ntuser.man Back Give back the permission (ownership) Folder Properties Security – advanced Check the box Allow inheritable Check - Replace permission entries on all Apply – ok Verifying: Move on to client machine Login as user Make some desktop changes Create a folder or delete a folder For removing mandatory profile just rename ntuser.man to ntuser.dat Home folders: Home folders are separate folders where users save their data and protect their data from other users every user can have one home folder either on the server on the local machine. If the home folder is in the server an administrator can secure it and back-up. If the home folders are created in the local machine backing up is not that easy. Creating a user home folder in a server On member server Create a home folder for user1 Share it Permissions Remove everyone Add administrator and user1 Give full control for both
  • 29.
    Apply ok Open ADUC Createa user a/c Go to user properties Profile Connect home folder Select the drive letter To mention the path Ex: sys1u1homeu1 Apply ok Verifying: On client machine Log in as user Open my computer We should notice an extra drive letter Go to cmd prompt We should not get the drive letter we have assigned. Creating a local home folder: On Member server Login as administrator Create a folder in any drive Share it Permissions Remove everyone Add administrator &u2 Give full access Apply – ok Move on to server or DC Open ADUC create a user Go to user properties Profile Home folder Give local path Ex: E:u2home Apply-ok Verifying: Move on to client machine Login as user Go to command prompt. We should notice the local folder Offline folders: It is a feature of 2000&03-network resources in spite of no network connections (offline)
  • 30.
    Implementing offline folders Onserver client Open my computer Tools Folder options Offline files Check the box enable offline files Apply – ok Repeat same process on the client also On server Create a folder Share it Everyone full access On the client machine Access the share resources through the n/w places Right click on the share resources Make available offline Next Check the box automatically Next – finish On the client machine Access the n/w share Disabling NIC Network places Properties Right click on LAN select disable Open n/w places We will notice another system Access the offline folder from server Do some modifications to that folder Enable NIC. DFS (Distributed File System) DFS allows administrators to make it easier for users to access and manage file that are physically distributed across a network. With DFS, you can make files distributed across multiple servers. It may appear for users that files actually reside in one place (computer) on the network. Benefits of DFS 1. Easily access: users need not remember multiple locations form where they get data just by remembering one location they get access to the data.
  • 31.
    2. Fall tolerance:for master DFS server we can have a replica (Target) on another DFS server. With the master DFS server face users can still continue accessing the data from back up DFS (Target) There is no interruption to accessing data 3. Load balancing: if all the DFS root servers and targets are working fine it leads to load balancing. This is achieved by specifying locations for separate users. 4. Security: We can implement security by using NTFS settings. DFS Terminology: 1. DFS root 2. DFS links 3. DFS targets 4. Domain DFS root 5. Stand – alone DFS root Domain DFS root: it is a server configurable in the domain and offers fall tolerance and load balancing. It is a root server, which maintains links from other file servers Requirements: DC or Member Server Stand-alone DFS root: It is configurable work group model and does not provide fall tolerance &load balancing DFS root: DFS root is the beginning of a hierarchy of DFS links that points to shared folders. DFS link: a link from a DFS root to one or more shared file or folders. Targets: the mapping destination of a DFS root or links, which corresponds to a physical folder that has been shared. Implementation of DFS Creating a DFS root: On DC Create a folder in any drive Share it Give everyone full control Use the folder name as DFS root Create 2 more folders for links Share them & everyone full control Start >p>admin tools>DFS Right click on DFS New root
  • 32.
    Select domain root Domainname Browse the server DC Next mention the root name Browse the folder to share Next – finish. Implementing DFS links On DC Create 2 folders. Share them & give full control permission On Member Server also same process On DC Start > P>Admin tools>DFS>right click on DFS New link Link name (e.g. Germany) Browse the share folder from DC Ok Create all four links two from DC & two from member server Accessing the resources (links) Either on DC or member server domain nameDFS root name ex: zoom.comDFS root Implementing of DFS target: On Dc Open DFs Right click on DFs root Select new root target Browse server name >next Browse folder to share Next>finish Replication: After configuring the target we can configure the replication between DFS root and DFS target. And this can be scheduled. Types of replication topologies: Ring topology Hub & spoke topology Mesh topology Configuring replication between DFS root & target. On DC Open DFS Right click on the DFS root Configure replication>next Select topology Finish Disk Quotas:
  • 33.
    It is anew feature of 2000&03 Using this feature an administrator can restrict the users from using disk space. i.e. an administrator can limit the size of the disk space usage. Quotas can be implemented in two ways On computer basis (local machine) User basis (network resource) Quotas can be implemented only on NTFS volumes. Implementing & quota for a user (user basis) On member server Login as administrator Open my computer Right click on D or E drive Properties Quota Check the box enable quota management and Deny disk space to users Click on quota entries tab Select quota New quota entry Select the user Set limit disk space to the user (in KB or MB only) Verification Login as user Open the restricted or quota drive Try to save something Implementing quota on computers On member server Login as admin Open my computer E drive properties Quota Enable quota management Deny disk space to user Select limit disk space Specify the limits in KB or MB Apply – ok Organizational Units (OU) It is a logical component of AD It is a container object It can contain objects like users, groups, computers, share folder, printer, and contacts. OUs are basically used for dividing a single domain into smaller portions for efficient management and organization of the resources Creation of OUs: On DC
  • 34.
    Start >P>admin tools>ADUC Rightclick on the domain New Organizational unit Give the name of the unit Delegate Control: Useful when an administrator to handover partial administration of the domain to an assistant administrator delegate control can be assigned to sub admins on OUs or on domains. Assigning Delegate control for sub administrator. On DC Open ADUC select domain controller (right click) New user Right click on OU Delegate control Next – add the user we‟ve created. Next>select as our wish Next – finish Verification: Move on to member server Login as sub administrator Start – run – dsa.msc Try to create users in delegated OU Taking back delegation of control from a User: On DC Open ADUC Click on view Advanced features Select the OU which we want to take back control Right click > properties Security Select the sub admin user Remove – apply – ok Group Policy It is a feature of 2000&03 with which an administrator can have full control on users and computers. Using group policy we can implement security, policies, software deployment, folder redirection, Internet explorer maintenance. Group policies enable the users either to access or to be denied of an object. Group policy can be implemented on computers &users. Group Policy Object (GPO)
  • 35.
    GPO defines policesimplemental for the objects. One group policy object can be linked with multiple objects like site, domains, DCs, OUs, etc… The order in which the group policy is applied. When user logs in Computer policy Eg: no shut down, no time setting User profile Eg. Local, roaming, mandatory User policy (local computer) Site Domain OU Implementing group policy on OU: Aim: Deny accessing Control Panel On DC Open ADUC Create an OU Create user within the OU Right click >properties Group policy> new> Specify GPO name Edit Expand user configuration Select administrative templates Control panel Double click “prohibit access to control panel” Select enable Apply – ok Policy inheritance: If we implement policy on sites it applies to all the domains and OUs within that site. All the domains & OUs within that site inherit policy from its parent. Block policy inheritance: Block policy inheritance is useful for blocking the inheritance of the policy from its parent object Note: 1. Useful when we have to perform shorter administrative tasks. 2. When there is conflict between two policies applied to the same object. Implementing block policy inheritance: On DC Open ADUC create an OU and a child OU within it.
  • 36.
    Create a usera/c in child OU On the parent OU deny control panel Select child OU > properties Group policy Check the box block policy inheritance Verification Move client machine log in as user, we have created in child OU. We should notice control panel. No override: It is an option available from group policy useful when we want to override all the policies implemented on the child objects Implementing override On DC Open ADUC Select the parent OU We have created Properties Group policy Options select no over ride Note: No over ride is opposite to block policy inheritance; Important group policies User configuration Administration templates Windows components Windows explorer -Prevent access to drive -No entire network -Remove map drive Under user configuration Administrative templates Expand system -Run only allowed windows applications -Do not run specified applications Group policies are of two types. 1. Computer configuration  Software settings  Windows settings  Security settings 2. User configuration  Software setting  Windows setting  Administrative templates
  • 37.
    Group Policy –II Software Deployment It is a feature of 2000&03 can be implemented through group policies either on computers or users. It is a process of spreading out the software required onto the client machines when a user starts the computer. With the help of software deployment we can install, uninstall, upgrade, repair and add patches &service packets. Software deployment is possible only when the software is with .msi extension. (msi – Microsoft Installer) MSI provides the services like Installation Uninstallation Roll back Repair over the network. Software deployment is possible only with .msi or .zap extension. Using WININSTALLLE 2003 software we can convert *.exe files to *.msi files Setup.exe file cannot be deployed over the network but can be converted to setup.msi files with the help of the software „wininstall le2003‟. This is the product of Veritas Company. Installing wininstall le2003 software On DC Open D or E drive Application folder Double click on wininstallle.exe Next – I accept – next Provide email details – next Next – next – install – finish. Phase – I Converting .exe to .msi (before snap shot) On DC Open my computer Select any drive Create 2 folders with the names .exe and .msi And share them with full access Open D or E drive Open application folder Copy acrobat &retina Paste it in the .exe folder we have created On DC Start > p> wininstall le2003 Right click on that Run discover ok – next Specify the name of the application (ex. Acrobat)
  • 38.
    Click on thedotted tab Browse .exe folder from my n/w places Open the folder and name the application (ex. Acrobat.msi) Open – next - select C drive Add the drives, which we have Next – finish Phase – II Installation On DC Open my computer Open exe folder we have created Install acrobat software In this phase II process comes up to .mxi Phase – III Performing After snap shot On DC In wininstall le Right click on wininstall le packages Run discover – ok Perform after snap shot Next P-I P- II P- III Scans the system install acrobat changes made after installation Registry Software Available . mxi .msi Conversion Process Phase –I (before snap shot) In this wininstall le scans the complete system and the register and checks for installed applications. And takes the snap shot of the current condition of the OS. Phase- II (Installation) In this phase we have to install the software, which we want to convert to .msi Phase – III (After snap shot) In this phase wininstall le compares two previous states, before snap shot &installation and takes another snap shot with installation.
  • 39.
    Note: Using thesethree phases the Microsoft software installer can trouble- shoot or deploy the software. Software Deployment On DC Open ADUC Create 2 OUs Create a user in each OU Select 1st OU properties Group policy new Name the GPO (ex. Deploy) Edit user configuration Software settings Right click s/w installation New package Browse the msi s/w from my n/w places Select .msi Select publish Ok Verification: On member server Login as user we‟ve created in OU Open control panel We should notice the s/w we‟ve deployed Add/remove program Ok Types of deployment 1) Publish 2) Assigned 3) Advanced 1) Publish If we use publish software will be available in control panel and can be installed when the user wants. (on demand) 2. Assigned If we select assigned, s/w gets installed on the client machine when a user opens the application for the first time. 3. Advanced: It is useful when we want to upgrades s/w, install service packs or patches etc… Folder Redirection It is useful when we have implemented mandatory profile for users as a result they cannot save anything on the desktop, unknowingly if they save, that saved
  • 40.
    desktop contents shouldbe saved in another location we call it as folder redirection. (Users do not lose their data) Implementing folder redirection: On DC Create a roaming profile for a user And convert it into mandatory Note: create a new OU at first and create a user in that and make that user profile as mandatory. On DC Open ADUC Right click on OU we‟ve created Group policy New > GPO name> edit User configuration Windows settings Folder redirection On desktop right click Properties Select the settings as basic Browse share folder from n/w places Ok. Create a folder Share it Every one full access Verification On member server Login as user we‟ve created in OU Save something on the desktop Ex: save some folders > properties We should notice the location should be UNC path (Universal Naming Convention) Logoff &login SCRIPTS Scripts are useful to automate administrative tasks, which are routine. We can have startup and shutdown scripts, administrative scripts, login & logoff scripts Implementing scripts using group policy On DC Create a folder (in D or E drive) Share it with full control Start-run (notepad) Type wscript.echo “use the force read the source” Save the file as (filename.vbs) in the share folder we have created
  • 41.
    Open ADUC Create anOU and a user OU properties Group policy GPO name (ex. Script) Edit User configuration Windows settings Scripts Double click on logon Add Browse the script we‟ve save in the share folder from n/w places Ok Verification: Move on to member server Log in as a user We should notice a welcome message Backup: It is a process of protecting user data or system state data on to separate storage devices. NT supported only one type of storage media, i.e. tapes. 2000&03 supports tapes, floppies, HDDS (Hard Disk Drives), zip floppies, RSD (Remote Storage Devices) Back up utilities: The default backup utility provided by NT, 2000, 2003. NTbackup utility Comes along with the OS. Provides minimum benefits could have optimum benefits. There are some third part utilities Veritas - BackupExec Veritas - Foundation suite (for UNIX flavors) Veritas - volume manager Tivoli storage manager (IBM) Netback up Starting back up utility: On DC Or member server Start Run – ntbackup (or) start > programs> accessories>system tools>backup Backing up a folder: Create a folder in D drive and a file in that Start - run – ntbackup – click on advanced mode
  • 42.
    Back up Next Select 2ndoption (backup selected files.) Expand my computer from D drive select the folder you‟ve created Next Select the destination to save the back up Next – select the type of back up (ex. Normal) Check the box disables volume shadow copy Next – finish Verifying Delete the backed up folder Restoring the backed up folder: Start – run – (ntbackup) Advanced – restore – next Select the backed-up file – next – finish Back up types  Normal  Copy  Incremental  Differential  Daily 1. Normal Backup: It is a full backup backs up all selected files & folders after back up removes the Archie bit (A) Achieve Bit: It is a bit used by backup utility to know whether a file is backed up. It is used as a backup marker. 2. Copy backup: Copy backs up all selected folders but does not remove archive bit after backing up. Copy is used between normal backup and incremental backup. 3. Incremental backup: backs up all selected files & folders which are changed since backup marks the files as having been backed up. Removes the archive bit after back up. 4. Differential backup: backs up all selected files & folders. After backup does not remove the archive bit. It backs up all the files changed since normal back up. 5. Daily backup: it backs up all selected files & folders created or changed during the day after backed up does not remove the archive bit. Recommended backup strategy:
  • 43.
    1. If weselect incremental back up it is faster and restoration is slower. I.e. more number of tapes have to be restored 2. If we go with differential backup, backup is slow, but restoration is fast i.e., just by restoring 2 tapes. System state data: Components of SSD:  AD  Boot files  System files  Services  Registry  Com+inf  Cluster info  I.I.S. SSD is a data store if we want to backup complete AD we can back up system state data from backup utility. Taking a back up of system state data: Start - run – ntbackup – click on advanced mode – backup – next Select 3rd one system state data – next – save in E drive - create a folder (SSD) in this folder create a file with filename .bkf – next – advanced - next Restoration There are two types of restoration Non-authoritative restore Authoritative restore Restoration of system state data can be done either authoritative or non authoritative Non-authoritative restore is a normal restore useful when we have only one DC in the network. It does not increment the USN values of the objects after restoration. It uses older USN values only. 1. Authoritative restore: This is useful when we want to restore a specific object or specific object by incrementing the USN value. Useful when we have multiple DCs in the N/W. i.e. one Dc and multiple ADCs USN Numbers: (Update Sequence Number) It is a number assigned to the object and gets modify according to the changes made on the object. Checking USN values: Open ADUC click on view Advance features Go to user properties
  • 44.
    Object When we wantto perform authoritative restore, we have to restart the system in directory services restore mode (DSRM) by pressing F8. While booting and selecting DSRM. Going to backup utility we can restore system state data on completion of the restoration system prompt us to restart the system. “DO NOT RESTART THE SYSTEM” If we are not restarting it becomes authoritative restoring, if we are restarting it becomes non-authoritative restore. Tombstone: It is an object deleted from AD but not removed. It remains in the AD for 90 days. Practice: On DC Open ADUC Create OU & users Back up SSD check the USN values of user Delete the user1 Restart the system in DSRM mode By pressing F8 Open backup utility Restore SSD Do not restart Start> run >ntdsutil Authoritative restore Restore subtree cn=u1,ou=India,dc=zoom,dc=com Yes (or) Restore database Q Q Exit NETWORK ADMINISTRATION DHCP (Dynamic Host Configuration Protocol) IPs: (Internet Protocols) There are two versions in IP 1. Version 4.0 2. Version 6.0 IPs are of two types  Static IPs  Dynamic IPs
  • 45.
    Static IP: staticIPs are IPs what an admin assigns to the computer manually. Which are not changeable. Dynamic IPs: Are the IPs, which are assigned by DHCP server, which are dynamic. i.e. not constant, changeable. DHCP: useful for extremely larger networks where we want to centralize the I.P. management to reduce human errors. Case2: Useful for smaller networks where there are no administrators or administrator may not be comfortable with assigning IPs. ISP – Internet Service Provider Usually ISPs implement DHCP servers DHCP is a server which assigns IPs to the clients requested automatically from a range of IPs. IP leasing process: 1. DHCP discover: The client machine when turned ON broad casts the network id, broad castes id, MAC address on Network for discovering DHCP server. 2. Offer: The DHCP server listening to the request made by the client offers a pool of IP addresses to the client machine. 3. Selection: The client machine on receiving the pool of IP address selects an IP and requests the DHCP server to offer that IP 4. Acknowledgement: The DHCP sends a conformation about the allotment of the IP assigned to the client as an acknowledgement. 5. IP lease: If the client machine is not restarted for 8 days, exactly after 4days the client machine requests the DHCP server to extend the IP lease duration, on listening to this the DHCP server adds 8 more days for existing 4 days =12 days If the client machine is restarted again the DHCP lease process takes place and again the client gets an IP for 8 days. DHCP requirements: DC or member server Static IP AD DNS (if it is win 2003) Installing DHCP server (insert 2003 server CD) On DC Start - setting – control panel – addremove programs – add rem windows components - Select n/w services – click on details Select DHCP server – ok – next Authorization: When we have multiple DHCP servers we can designate one of the DHCP servers as an authorized DHCP server.
  • 46.
    Authorizing DHCP server: OnDC Start >p>admin tools DHCP right click on the server Click authorize Refresh Scope: Scope is a range of IP addresses from which the DHCP server assigns IPs to the clients. Creating a Scope: Open DHCP Server Right click on server New scope- scope name Specify the range next Specify if we want any exclusion Lease duration Next – DHCP options Router – next – specify the domain name Server name – client on resolve – add – next – WINS server – next - yes I want – next – finish Configuring a client machine to obtain IP from DHCP server By default all the clients configured as obtain IP automatically On client machine Right click on my n/w places Properties – LAN properties TCP/IP double click Ensure that “obtain an IP address automatically” is selected. Releasing an existing IP: (give up an IP) Start >run>cmd>ipconfig /release Obtaining a new IP Start >run>cmd>ipconfig /renew Super Scopes: Group of scopes is called as super scope. Note: when we have multiple scopes only one scope can be active in order to enable all the scopes we have to merge all the scopes with super scope. Creating super scope
  • 47.
    Requires multiple scopes Create2 scopes. Right click on server Say new super scope Specify the super scope name Select 2 scopes by holding ctrl key Next – finish Address Pool: gives the range of IP addresses we have specified Address leases: specifies the client (names) and the IP addresses assigned Reservations: useful when we want to dedicate a particular IP to a particular system. Ex: managerial systems, important clients. To check the MAC address Start-run-cmd>getmac To check the MAC address of remote system Start-run-cmd>getmac /s systemname Implementing reservation Open DHCP Right click on reservations New – reservation – give name - mention reservation name - MAC address of the remote machine – mention the IP address to be reserved Close Move on to client machine Start - run – cmd – ipconfig /release – ipconfig - /renew Scope options: Using scope options we can specify the other servers addresses available in the network. So that the DHCP server maintains information about all other servers and provides it to the client machines along with the I.P. addresses. For NT – 66servers addresses - for 2000-03 - 77 Server options: Useful when we have multiple scopes and provide information to all the scopes. Where as scope options are limited only to that scope. Backing up DHCP: Open DHCP - right click on DHCP – select backup Select location where we want to save – ok Restoring DHCP server:
  • 48.
    Uninstall DHCP server InstallDHCP server Open DHCP Right click on it Click on restore – specify the backed up path We should notice our previous scopes. Name Resolvers: There are 2 types of name resolvers:  WINS  DNS Resolver: It is a file which will contain the mapping information of the clients. Ex. System name and its IP address WINS: (Windows Internet Naming Service) It is a service of Microsoft used basically on windows network to resolve NetBIOS names to IP address and IPs to NetBIOS names. LMhosts: It is a static text file which contains NetBIOS to IP mapping information it was used instead of WINS. WINS follow NetBIOS names: operating systems like NT, 95, workstation, 98 rely on WINS. Because these OS follow NetBIOS names NetBIOS Names: Net bios names are the names assigned to network nodes. NetBIOS names are the names without extensions. They are called „flat names‟. 2000 & 2003 also support WINS. DNS (Domain Naming Service): DNS resolves host names to IP addresses IP addresses to host names. Supports all type of OS. Ex. Windows, Linux, UNIX, Mac.., etc... DNS: defines a hierarchical namespace where each level of the namespace is separated by a “.” Resolver: Resolving: It is a process of converting IPs to host names & host names to IPs. Computer that requests DNS resolution.
  • 49.
    Issues queries thatask for specific types of mapping of computers and IP addresses (records) Query types determine behavior of DNS server receiving query. Lookup types determine whether a name to IP mapping or an IP to name mapping is sought. Query: Query is a request to find an address of the DNS there are 2 types of queries.  Recursive queries  Iterative queries Recursive Queries: When a client start a query, query is passed onto local DNS for resolution if a query cannot find the solution then the DNS on behalf of client forwards the query to another DNS, And to another DNS and so on until it finds the mapping information or an answer. Iterative Query: Query raised by the client to the DNS. If the DNS cannot resolve it sends a negative response to the client, then the client has to contact another DNS and so on. In this case the DNS is not forwarding the query but the client itself is contacting other DNS. Zone: Zone is a subtree of DNS database. Zone contains the mapping information with the help of forward lookup zone & reverse look up zone. Forward Look up zone: Contains host record, which contain host names to IP, address mapping information Reverse Lookup zone: it contains mapping information about IPs to host. DNS requirements: DC or member server Static IP address Installing DNS Either on member server or on DC Start - settings – control panel – add/remove programs – add/remove windows components – select networking services – details – check the box DNS – ok – next Insert the CD - next Creating a forward lookup zones:
  • 50.
    Start – p– admin tools – DNS Right click on forward lookup zone New zone – next – select primary – next – specify the zone name – zone file – next –select allow both non secure & secure – next – finish Records: It is a database which contains information about the zone There are a few types of records  Host record (A record) used in FLZ  PTR record (pointer) used in RLZ  Alias record (nick name of a host record)  MX record (used for mail server) 1. Creating a host record: Right click on the zone you have created - new host – specify the servers address –and IP Add host - ok - done 2. Creating an alias record: Right click on zone – new alias Specify www. – Click on browse the host records – ok Verification: Start - run – cmd – ping www.Yahoo.com Or ping sys1.yahoo.com Creating a Reverse Lookup zone: Right click on the R-L zone New zone – next - zone type - next – specify the IP address – zone file – next – allow both – next – finish Creating a PTR record Right click on reverse lookup zone. New- pointer – specify IP Browse host record – ok Verification: Start – run – cmd Nslookup 192.168.1.17 - Reverse lookup zone Nslookup www.yahoo.com Forward lookup zone. DNS: DNS server can be configured as follows>
  • 51.
    Secondary  Stub (feature of 2003)  AD integrated  Forwarders  Root servers  Caching only server  Primary Configuring a primary zone: On DC Start - p – admin tools – DNS - create a zone & host record Creating a secondary zone: On Member server If DNS is not available install DNS first Open DNS - right click on FLZ New zone – next – specify the primary – DNS servers IP address –add – next – finish Zone Transfer On DC On Primary DNS Open DNS – right click on zone Properties Zone transfer – check box allow zone Select only to the following servers Specify the secondary DNS servers IP address Apply – ok Primary Zone: Primary zones are created on the primary DNS servers. It is a read /write copy. Secondary Zone: There are created on the second DNS server where it holds a read only copy of the zone. Secondary zones provide fall tolerance and load balancing to the primary zone. Secondary zone is a back up for primary zone Zone transfer: Zone transfer is a process of transferring the zone from primary to secondary or secondary to primary. Zone transfers occur when there is a change or modification taken place on either of the zones. AD integrated zones: These are useful when we want to maintain zone information in the AD . zone is saved in the AD as a result when we back up AD we are also backing up zone information.
  • 52.
    If it isa primary zone, zone is saved as a normal text file as a result we have to back p the zone separately, AD integrated zone is created when we install AD with a domain name. Creating in AD integrated zone: On DC Open DNS Right click on FLZ New zone Next - check the box store the zone Next - specify zone name Next – allow both – next – finish Stub zone: Stub zone is a newly added feature in WIN 2003 stub zone contains name server information or name server records and SOA records (Start of Authority) Stub zones provide fault tolerance & load balancing besides providing the name server & SOA record information. Stub zones are useful for resolving the query faster. Creating stub zones: On DC Create a primary zone with a host record ex: hp.com On member server Open DNS Right click on FLZ New zone - next Select stub zone Next – zone name ex.hp.com Zone file – specify the primary DNS server‟s address - next – finish Resource Records (RR): RRS are useful to provide the information about the zone. There are a few types of resource records. Host a record Pointer record Alias record MX record AAAA record ATMA HINFO etc… Service Records: There are also called as SRV records. These are useful for locating the services. There are totally 6 service records created when we install AD. They are located in DNS under domain subtree. When we install AD, system automatically creates an AD integrated zone with the corresponding domain name.
  • 53.
    Record types:  Msdcs: Contains the Dc‟s information  Default site: Contains site name  Tcp: (server side) provides global catalog, Kerberos and LDAP information  Udp: (client side) provides Kerberos information  Domain DNS zone  Forest DNS zones both are the part of application partition. Provides DNS information in entire forest. Creating a secondary zone for (DC) domain name zone: On member server Open DNS right click on F L Z next – secondary – specify the DC‟s Domain name (ex: zoom.com) Specify the DC‟s IP address Next – finish Move on to DC Open DNS DC‟s zone properties Zone transfers Only on the following Specify the IP address (secondary) Move onto member server refresh the zone This process is we call as safe zone transfer. Note: 1) If the 6 service records are not found in secondary server we need to restart net logon & DNS services on DC & Member server. 2) Still if we can‟t find the 6 service records we need to perform a forceful transfer For accessing C drive through command prompt. Ex. sys1c$ Implementing forceful transfer: Create secondary zone for dc zone. On member server Start – run - server name c$
  • 54.
    Open windowsSystem32 confignetlogon.dns– open – select all – copy the contents – open my computer of local machine – windows – system32 – DNS open domain name.dns ex. Zoom.com Come down of the page - paste - save - close – Open DNS Should be noticed 6 service files without refreshing Verifying the type of zone: Open DNS right click on the zone properties Type of zone secondary If we want to change click on change Dynamic Updates: It is a feature of 2000 & 03 when a client machine or a network node comes on line; automatically get their names registered in DNS database. Dynamic updates take place when there is a modification or change done at the client or when we have DHCP server. There are 2 types of Dynamic updates Secure & Non-secure Secure Updates: Useful when we do not want our DNS maintain outside our network host information. Non-secure updates: DNS gets updated as and when what all the hosts come online get their names registered with DNS server. Note: secure updates can occur only when the client machines have their a/cs in DC Configuring secure &non secure updates: Zone – properties Dynamic updates Select either secure or non-secure Apply - ok Zone properties:  Name Server - Existing DNS server‟s address  Zone transfer  General (status, type, aging, Dynamic Update)  SOA (Serial no., Responsible person, refresh interval)  WINS (existing WINS address, used for NetBIOS resolution)
  • 55.
    DNS Server Properties:  forwarders  event logging  interfaces ( used when we have multiple NICs)  Monitoring  Security  Root hints  Debug logging  Advanced Interfaces: Useful when our system has multiple NICs and the DNS can listen the queries from all available NICs Offers load balancing Forwarders: If the query is not resolvable by the local DNS it is being forwarded to another DNS server for name resolution Configuring Forwarding : On DC Create a primary zone with a host On Member server Open DNS – properties Forwarders Add the DC‟s IP (DNS1‟s IP) Verification: On Member server Start - run cmd – ping www.Zonename.com Advanced:  Disable recursion  BIND secondary (Berkeley internet naming domain)  Fail on load if bad zone data  Enable round robin  Enable net mask ordering  Secure cache against pollution Disable recursion: By default this is disabled i.e., recursion is enabled BIND secondaries: useful when we have older BIND servers (ex. UNIX) as secondaries BIND is a standard followed by DNS. All UNIX based machines older version used BIND servers as DNS. Ex. BIND version 4.0 series.
  • 56.
    Useful when ournetwork has old BIND version based DNS servers with new BIND versions like 9.1.2, to provide zone transfer at faster rate to BIND secondaries. Faster zone transfer is possible by transferring multiple zones at a time besides compression. Fail on Load if bad zone data: If the secondary zone comes across stale records or unwanted records the zone will not be loaded if we check this box. Enable Round Robin (RR): Useful when the DNS has multiple NICs to listen the queries all NICs. If the query is not resolvable by one NIC it can be listened by another NIC Enable net mask ordering: Secure cache against pollution: By default the cache DNS information is secured against pollution. In windossystem32DNScache.dns Root Hints: Root hints provide the root server‟s information There are totally 13 root servers throughout the world. 2003 server can be configured as root server. Once configured as root sever disable forwarders and root hints. Root servers zone name is always represented by a dot. (.) Configuring a root server: On DC Open DNS Right click on FLZ - new zone – Primary – next – specify the root name as dot (.) Next - zone file – allow both-Next – finish * We should notice that forwarders &root servers are disabled. Security: We can add sub administrator for administrator and set permission on these administrators. Monitoring: used for troubleshooting DNS. Event logging: Used for maintaining events occurred pertaining to DNS can be  Errors only  Errors & warnings  All events (by default)
  • 57.
    Debug Logging: toassist with debugging we can record the packets sent and received by the DNS server to a log file. Debug logging is disabled by default. Implementing Round Robin: Assigning multiple IPs to the NIC. By going to TCP/IP properties – advanced – add – multiple ips – ok (ex. 192.168.1.17, 192.168.1.18, 192.168.1.19) Open DNS create a primary zone – create a host record - create 3 more host records with the IPs created above Verification: Go to command prompt. For clearing DNS cache C:> ipconfig /flushdns Pingwww.zonename.com IIS Internet Information Service (I.I.S.): It is a web server from Microsoft used for administering, managing, controlling websites. I.I.S. is the server component which provides services like www, http, ftp, nntp, SMTP, FrontPage, .net frame works WWW: World Wide Web: enables use of internet. HTTP: (Hiper text transfer Protocol): Supports file types like text, audio &video Gopher: used prior to http supported only text. FTP: (File Transfer Protocol): used for uploading or downloading, huge size files. NNTP (Network News Transfer Protocol): Used for publishing the same message for a group of people. SMTP: (Simple mail transfer protocol); Used by exchange server for sending mails. Front page: It is a designing tool for WebPages Win – NT 4.0 had I.I.S. version 2, 3 and 4. Win 2000 I.I.S. version is 5.0 Win 2003 - 6.0 Port number details are available at c:windowssystem32driversetcservices Port: port is a communication channel through which services of one system communicate with the services of other system each service has one port number allotted Features of I.I.S. (6.0)  Fully secured  Reliability
  • 58.
    Salability  Manageability  Isolation of users.  Backup of websites Requirements : DC or member server Static IP NTFS partition Web pages DNS and Zones with concerned records. Installing I.I.S.: On DC or member server From Control Panel Add/rem programs Add/rem windows components Select application server Click on details Select I.I.S. Details Select F.T.P. & www. Services Ok – next Requirements of a website Web content or web pages Zones with host records Public IP Creation of a Website: (Create the zones in DNS with a host records) Start - p – admin tools – I.I.S. right click on websites – new - website – description ( site name, ex: yahoo) Select the I.P> (system‟s IP) Specify the host header as www. Sitename.com ex: www.yahoo.com Browse the WebPages folder Next Check the box „browse‟ Next – finish Adding the web content:
  • 59.
    Right click onthe .htm file name concerned Rename – select copy – right click on the website we‟ve created >properties – documents – add - paste – ok – move up the htm we‟ve copied. – Apply – ok. Verification: Open internet explorer Type the website you‟ve created Virtual Directory: These are useful for creating child websites or links Ex: mail servers, chat servers, advertisement servers etc… Creation of Child websites: Right click on the parent website we‟ve created New – virtual directory – next – child name - ex: mail- chat etc.. Browse WebPages folder Check the box browse - next – finish. Adding Web Contents Select .htm file Right click – rename Copy – select child website – properties – documents – add – paste – ok Move up – apply – ok Verification: open Internet Explorer and type website name.”www.yahoo.comchat Redirecting a website: Redirection is useful in various cases. Case1: renaming of the website where users are unaware of the change. Case2: when the website is under construction Case3: when the website hosting server is unavailable, we go for redirection Implementing redirection or configuring redirection: Create 2 websites Select web content create 2 websites Select web content Create 2 zones with host records corresponding Open I.I.S. Right click on the website we want to redirect Properties - home directory – select a redirection to url Ex: http://www.Sitename.com apply – ok Verification: Open I.E. type the 1st website name It should open second website
  • 60.
    Document footer: Useful forpublishing advertisements in a particular websites and seen as a footer for the website Open I.I.S. Right click on the website Properties Documents Check the box enable documents footer Browse webpages folder Select any .htm file Apply – ok Backup of website: It is a new feature in 2003. We can backup and restore websites. Open I.I.S. Right click on the website we want to back up All tasks-Save configuration to a file Give filename & select the browse File where we want to save – ok Verification: Delete the website you‟ve backed up Restoring a website: Open I.I.S. Right click on the websites Select website from file Browse the backup file we have saved Click on read file Select the site name – ok FTP (File Transfer Protocol) It is a service of I.I.S. used for uploading or downloading large amount of files over internet or intranet. runs on a port no.21 Creating an FTP site: On DC Open E drive Create a folder FTP root Create few files in that folder Open I.I.S. Right click on FTP - new – FTP site Next – FTP name – ex EDPFTP – Select IP Next - do not isolate users – browse the FTP folder we have created in E drive Next – select read &write - next – finish
  • 61.
    Connecting to FTPserver On member server Start – run – cmd – create a folder local in E drive - ex: md local Cd local Ftp (server‟s ip address) Type administrator Type password You will be at FTP>. Downloading a file from command line: Get Type the filename to be downloaded Type the filename to be saved as (same file name) Uploading a file from command line Put Type the filename to be uploaded Type the filename to be saved as (same file name) Downloading multiple files: mget * Turning off interactive mode: prompt (system does not prompt for conformation while downloading multiple files.) Uploading multiple files: mput * Practice: on DC Create an FTP folder Host some files in that FTP folder On member server Connect to ftp site Download the files Upload the files Create a folder in ftp site Upload the files to this remote folder FTP commands: Dir - for listing FTP contents Get - for downloading Put - uploading Prompt - disable interactive mode Mget - downloading multiple files Mput - uploading multiple files
  • 62.
    Bye - ending session Close - close the session Mkdir - to create a folder in ftp site Rmdir - to delete a folder Del - to delete a file Pwd - to list present working dir Lcd - locally change directory Cd - change directory in ftp site Bell - gives beep sound after the action Anonymous account: It is a default a/c available with ftp any user can login to ftp server despite no a/c in FTP server. Connecting to FTP server as anonymous user Go to command prompt Ftp server‟s I.P. or Open I.P. address Type anonymous Provide password if it has Disabling anonymous connections: Open I.I.S. FTP site properties Security accounts Uncheck the box allow anonymous connections - yes Verification Go to FTP prompt & try to login as anonymous user. Isolation of Users: When we want to secure the ftp contents or when we want ftp users to have their own folders with ftp site we use isolating users. Creation of isolating ftp users Create 2 users in AD Open E drive Create a root folder In the folder create a subfolder named as our domain name without extension ex. Zoom, India. - - u1, u2, u3 Creating a FTP site for isolating users open I.I.S. Right click on new FTP site
  • 63.
    FTP site name– select the IP Select isolate users – next Browse the root folder we‟ve created Ok – next – check the box write – next - finish. Verification: On Member server Open I.E. Type ftp:I.P. add of ftp server We should notice logon window Provide user name & pwd Then we notice the file we‟ve created. Groups Groups: Are two types  Security  Distribution Groups are useful for setting common privileges or type of access to a group of users. Security Groups: These are used for setting permissions on the objects (printer, data) it can also be used as a distribution groups. This can also be used for maintaining distribution list Distribution group: Do not provide security, used for e-mails. Group scope: identifies the extent of the group within in a domain or a forest. Domain Local Group: all builtin class groups Global Groups: domain user, domain admins, domain guests, domain computers. Universal groups: schema admins, enterprise administrators. Domain Local Groups: DLG pertains to the domain and it is a powerful group used for setting permissions a DLG can contain user a/cs, global groups, it cannot contain DLG. Group scope: DLG used for setting permission on resources GG: used for organizing the users. UG: used for or organizing the users, groups from more than one domain. Creating Groups: On DC Open ADUC
  • 64.
    Create users likes1, s2, s3, a1, a2, a3, t1, t2, t3 and m1, m2, m3 Right click on the user Create 4 groups (sales, account, technical, marketing) Adding users to a group: double click a group Click on members and add the users Creating a DLG: Right click on users New- group name – select domain local Adding users to DLG Double click the DLG we‟ve created Add the users Creating universal groups: By default UGs are not available because the O.S. runs in mixed mode. In order to enable UGs. We‟ve to raise the domain functional level to native mode. Raising domain functional level: Open ADUC Right click on domain Raise domain F.L. Select windows 2000 native raise Creating a universal group Right click on users class New – group – name – select universal – ok ROUTING It is a process of enabling communication between two different networks. There are two types of routers. 1. Hardware router 2. Software router Hardware router is a physical hardware device. Software router: A server with 2 NICs called software router. Ex: NT, 2000, 2003, UNIX can be configured as software router A computer with 2 NICs is called a multihomed system. Requirements of the Software Router:
  • 65.
    DC or memberserver or stand alone machine 2 NIC cards Two different networks Routing &RAS service Benefits of Routing:  DUN (Dial Up Networking)  NAT (Network Address Transmission)  Basic firewall  VPN (Virtual Private Network)  LAN routing Enabling LAN routing Start > P> Admin tools>RRAS>r/c server> configure & enable routing. NAT: It is a service of routing provides network address translation from private to public When we have 2 networks public & private in order to protect private network from public network (intruders) we need NAT. NAT enables one way communication. I.e. private network can communicate with public network but not vice versa. Implementing NAT S-P- Admin tools Open RRAS Expand IP routing Right click on general New- routing protocol – select NAT/basic firewall – ok Adding interfaces Right click on NAT/basic firewall Select new interface Select the private interface Ok Again right click on NAT basic services New interface Select public interface Click on public inter face connected to the internet Checks the box enable NAT on this interface Apply – ok Verification: On private network Go to command prompt
  • 66.
    Ping public network Itshould ping Move on to public network Ping private network It should not ping Disabling NATing On router Open RRAS – expand IP routing Right click on NAT /basic firewall Delete – yes Routing Protocols:  Static  Dynamic Dynamic: It requires dynamic routing protocols there are a few dynamic routing protocols. Dynamic routing enables a router could prepare dynamically automatically on its own. i.e., when a router is added or removed when there is a change of I.P.S. etc. will be known by the dynamic routing protocols, to see the routing table. On command prompt Type root print Routing table contains the information about Network destination: destination of the packet reached Net mask: subnet mask of the system. Gateway: another router‟s address Interface: Local NIC‟s address Metric: determines best path RIP (Routing Information Protocol) OSPF (Open Shortest Path first) NAT IGMP (International group management) IGRP (international gateway) DHCP Relay agent Static routing: It does not require any protocols; an administrator has to create a routing table which is constant or not changeable. DHCP Relay agent: It is a protocol responsible for listening to the client request for assigning an IP to the clients dynamically on behalf of DHCP server from the other network
  • 67.
    Implementing DHCP relayagent On router Open RRAS Expand IP routing Right click on general New routing protocol Select DHCP relay agent Ok – add public interface General new interface Select public Configuring public network Move on to public network Go to TCP/IP properties Check „obtain IP automatically‟ RAS (Remote Access Service) It is a feature of 2000 & 2003 enables communication between a local machine & a remote machine RAS connectivity: types of connectivity PSTN (public switch telephone network) ISDN (Integrated Services Digital Network) X.25 RS 232 (Recommended standard) DSL (Digital Subscriber Link) Direct cable PSTN: Modem Telephone line 28.8 kbps cheaper analog communication ISDN: ISDN adaptors (TA) ISDN line 64- 128 kbps Digital communication Costly X – 25
  • 68.
    PADS (frame relay) Packet switching n/w Rarely found PADS - Packet Assemblers & De assemblers RS – 232 Serial cable (direct cable) Provides serial communication Used for testing RAS Provides RAS environment It is also called as „Null modem‟. DSL (Digital Subscriber Link) DSL modem or NIC Widely available Easy to implement Direct cable When we are in same geographical Implemented only in LAN Bridge modem (special devices) Uses a direct cable to establish a communication between local& remote network Installing Modem: On server& client Open control panel Open phone & modems Click on modems – add Check box don‟t detect modem Select communication between two computers Select comp1 – next – finish Same process in client machine also Enabling routing on DC Open RRAS Right click server Configure & enable routing Next – custom configuration Next – select VPN, dial up – next – finish. Creating a dial connection On the client machine
  • 69.
    My network places- properties Double click on new connection wizard Next – select setup &advance connection Next - connect directly to another computer – guest – next –computer name (server‟s name) Select the device „communication cable between 2 computers Connection availability – next – finish Note: By default users are denied permission to dial in. To enable a user to dial in On server Open ADUC Go to user properties Dial in Allow access – ok Error: 649 enable the user dial in access Error: 777 – Reinstall the modem. Establishing Dial up connection Dialing into the server On the client machine My network places – properties Double click DUN we‟ve created Provide user name & pwd Click on connect Accessing resources of a remote computer over RAS connection On the client machine Start – run (server nameresource name) ex: (sys1c$) LAN protocols:  NETBEUI protocols  IPX/SPX  TCP/IP  NW link  AppleTalk  DEC net 1. NETBEUI: It is a self-configurable protocol mostly use in small networks, outdated protocol, jointly developed by IBM &Microsoft. Does not support routing. 2. IPX/SPX: It is a proprietary protocol of Novell NetWare. IPX stands for Internet Packet exchanger SPX – Sequential Packet exchange. Suitable for larger networks. It is a routable protocol.
  • 70.
    3. TCP/IP: (TransmissionControl Protocol): It is an industry standard protocol. IP – supported by many OS. It is a routable and robust (ever changing) protocol. 4. NW Link: (Netware Link) from Microsoft enables communications between NT, 2000&2003 & Novell NetWare. 5. Apple talk: from Microsoft enables communication between NT 2000/03 used in Mac. OS. 6. DEC Net: (Digital Equipment Corporation): protocol used by mini computers , super computers and jet direct printers. (this printer has its own NIC) WAN protocols:  SLIP  PPP(Point to Point Protocol) SLIP: SERIAL LINE INTERNET PROTOCOL It is used on UNIX networks Outdated protocol (not available now) Doesn‟t support Data compression Data encryption Error checking Doesn‟t support NETBEUI IPX/SPX PPP: POINT TO POINT PROTOCOL Most popularly used in WAN protocol replaced by SLIP Supports various protocols Supports data compression Data encryption Error checking VPN (Virtual Private Network) Using public network for private use we call it as VPN. To protect the private data over internet, It uses protocols like L2TP, PPTP VPN uses internet for providing communication between two different networks and With the help of these VPN protocols private data is tunneled and sent to the destination. L2TP: (Layer 2 Tunneling Protocol)
  • 71.
    Jointly developed bMicrosoft & CISCO Supports all types of networks ex: IP, frame relay, IP sec etc.. Supports header compression PPTP: (Point to Point Tunneling Protocol): Developed by Microsoft runs only on IP based networks Doesn‟t support header compression Establishing VPN connection: VPN connection requires a primary connection which can be DUN, ISDN, internet etc., Creating a VPN connection On client machine My network places – properties Double click new connection wizard Next- connect to network at my work place Next – VPN – name – public network Specify the server name ex: sys1 Anyone‟s use – finish Terminal Services: Terminal Server is a server used for centralizing the management of applications It provides remote administration for administrators. T.S. provides sharing of application and resources. It is used when a company cannot upgrade their client machines, hardware infrastructure. Benefits of terminal services: Centralized management applications Centralized security using NTFS permissions Easy to administer Easy management of TS clients Remote administration Terminal server provides only the subset portion of the desktop to the client machines. i.e. when a client establishes a terminal session only the desktop portion is downloaded to the client machine to interact with. During the session the terminal server uses the protocol called RDP. (Remote Desktop Protocol) With the help of this protocol client obtains the server‟s desktop on to the client it is nothing but thin client. Only the mouse clicks and key stokes are sent to the TS Requirements of Terminal server: DC
  • 72.
    Member server Applications (MSoffice, oracle, java, PageMaker etc) Installing terminal server On DC Open control panel add/remove programs Add/rem windows components Check the box terminal server - next – yes – next – Select relaxed security - insert CD (win2003) T.S. operates in two modes  remote desktop mode  application mode If we want to configure T.S. only for remote administration we should select remote administration mode. If we want to configure T.S. for centralizing management application server we should go with application mode. Application mode offers remote administration as well as applications. In win2003 we can install T.S. in 2 ways.  fully secured mode  fully relaxed mode Fully secured mode: if we select this option users will not have access to registry files & system files and it doesn‟t provide backward compatibility for existing OS or applications. Fully Relaxed mode: Provides access to registry and other system resources useful when the security is not criteria or for performing remote administration. Terminal Server Licensing: By default when we install T.S. the clients can access T.S. only for 120 days. It is a free license provided by T.S. license manager. T.S. License manager: responsible for maintaining the T.S. license information and contacting Microsoft clearing house for obtaining the license activation. When a T.S. client establishes a session with T.S. the client has to obtain a license key in order to access the applications. Licensing mode: There are 2 modes 1. Domain Licensing mode 2. Enterprise licensing mode.
  • 73.
    1. Domain Licensingmode: suitable when we want to maintain a separate licensing manager for each & every domain. NOTE: T.S & licensing manager cannot be configured in same server. Enterprise license mode: Suitable when we‟ve multi domain model and centralizing the licensing manager or issuing of the license keys to the terminal clients. Only one T.S. licensing manager is maintained in the enterprise domain and is connected to Microsoft clearing house from where it gets authenticated. Installing T.S. client or Remote Desktop: On client machine C:windowssystem32clientstsclientwin32&setup Before establishing the T.Session on both T.S. & client machines Step1: my computer - properties – remote – check the box remote desktop (allow users) On DC Create a user in ADUC On member server Establishing a session Start – p – accessories – communication – remote desktop connections Supply the IP of TS - connect Provide the username &pwd we‟ve created – ok Error1: the local policy of system Solution: move on to DC Start – p – admin tools – DCSP – expand local policies &user rights – select the option „allow log on through terminal services‟ Add the user whom we want to allow Apply - ok - start – run – gpupdate Move on to member server Try to login with the same user name Error2: We don‟t have access to logon to terminal session Solution: move on to DC Start – p – admin tools Open T.C. configuration Double click RDP- TCP - permissions Add the user – full control - apply - ok Move on to member server Again try to login – we should login. Remote control: R.C. is used for viewing the session or interacting with the session. View Session: If the administrator selects this option, the remote control session will be give only used for monitoring users.
  • 74.
    Interacting session: usefulwhen an administrator wants with user to provide remote assistance or troubleshooting. Remote Control: To have remote control of the user, an administrator has to login to the TS and only through the TS he can take the remote control of the user. Implementing remote control: On member server Login as a user Establish a terminal session as a user On DC Login as administrator Start - P – admin tools – Terminal Services configuration Double click RDP - remote control Select the type of control we want to view/interact Apply – ok Establish a session on to the same machine by typing server‟s IP Login as administrator In terminal session Start – p – admin tools Open terminal services manager Right click on user – remote control Select the release keys (ex.Ctrl+ Z)(used for giving up remote control ) – ok Allowing Local resources to be available on TS session. Before login On the member server - options Open remote desktop connections Options - local resources Check the box disk drives Connect & ok * When we open my computer of T.S. we should notice the local drives. Allowing user to access only a particular application through TS. (Run only allowed applications for a user) On DC Open ADUC Go to the user properties Following program Specify the program (ex. Notepad, cmd, etc.)– File name – ok
  • 75.
    Allowing a commonapplication for all the users from TS On DC Start – p admin tools – open TS configuration – double click RDP Environment – check the box override setting – specify the application name Ok ISA (Internet Security Accelerator) It is useful to speedup internet access and to protect private network from public network. It is actually firewall & acts as a proxy. Types of firewalls: Hardware firewall Software firewall Hardware firewall: CISCO pix, watch guard, multi com Ethernet II Software firewall: ISA server Checkpoint Smooth wall Firewall: a firewall protects networked computers from international hostile intrusions. Types of Attacks: 1. Foot printing 2. Scanning 3. Dos attack (denial of service) 4. Exploits ex. Cgi scripts, perl scripts etc.) 5. Trojan horses ex: netbus, bo2k 6. Port scanner 1. Foot printing: the art of gathering the complete security profiles of an organization or a target computer. By using a combination of tools and techniques the hacker can take up the system and determine its IP address and domain names. 2. Scanning: Scanning the system for bugs and loopholes in OS. Hacker uses scanning technique to determine which ports are open what services are running and what is the OS Ex: RATINA, shadow security scanner, ANSIL etc.. 3. DOS attack: Denial of service attack which is an attempt to get the service or the server down by overflowing the buffer. Eg. Win spoof a7, my spoof. 4. Exploits: Exploits are usually bugs in applications or OS which can be exploited by using a piece of code often referred as scripts. Ex: CGI scripts, perl scripts etc..
  • 76.
    5. Trojan Horses:Trojan horses are a program that pretends to be a useful tool but actually installs malicious or damaging software. Trojan Horses can be used to take over the remote system sending viruses to steal the data. Ex. Netbus, Bo2k. 7. Port scanner: Scanning the port to get into the application ex: port scanner, etc. ISA can be configured as firewall or proxy server. If it is configured as a firewall, Packet filtering: ex: routers controls data transfer based on source destination IP addresses TCP/UDP port of source destination IP address. Packets are allowed or dropped through the device depending on the access control list. If it is configured as proxy it acts like a web server Application gateway: ex: proxy server. Packets are allowed based on type of application and IP address. Filter application commands such as http, GET and POST etc.. Application level gateways can also be used to log user activity and logins. Flavors of ISA server: Standard edition enterprise edition Server deployment stand-alone only multiple servers with centralized management. Policy based support Local only enterprise &array policies Scalability CPU‟s only no limit. ISA server requirements: Member server or DC Service pack 1 or above Two interfaces (public & private) RRAS Processor: PIII 300 MHz. Or above 256 MB RAM 20 MB of H.D. space on NTFS 5.0 Array considerations: ISA server models:
  • 77.
     Firewall model  Cache model  Integrated model. Installing ISA On router Open D or E drive ISA standard - ISA – setup.exe Select integrated mode &continue Private Router Pubic IP: 192.168.1.2 192.168.1.1 202.153.32.2 202.153.32.1 G/W 192.168.1.1 202.153.32.1 DNS 202.153.32.2 202.153.32.2 202.153.32.2 1) Enable LAN routing create websites & zones 2) Install ISA Specify the range of address. Installing ISA service pack Open D or E drive ISA 2k standard ISA service pack2.enu Update Update.exe – next – agree – next Cache mode: select this option if security is not the criteria as it is used for accelerating the access speed of websites by the private network users. Since it maintains the recently accessed websites information in the ISA as cache information. It can‟t act like a firewall. Firewall: useful if we want to configure ISA as firewall, which protects the private network from public network. With the help of some protocol rules and policy elements we can set the security. We can also control the type of traffic to be allowed in or allowed-out. Integrated mode: useful when we want to configure ISA as cache&firewall server. Key features of ISA:
  • 78.
     internet firewall(Instruction detection)  secure sever publishing  Web caching server.  Secure NAT.  Integrated VPN.  Tiered policy management  Web filters (for blocking audio, images etc.,)  Alerts  Multi processor support  QOS (Quality of Service)  Client side auto discovery. Access is controlled based on  client address sets  destination sets  protocol rules  bandwidth priorities Allowing websites On router (ISA) Start - programs – ISA server ISA management – expand server Creating a client address set: Expand policy elements Right click on client address set New – set name of the set – ex. Sales Add the range of available IP adds. Including ISA – ok Setting Protocol rules: For allowing websites Expand access policy Right click on protocol rules New rule Specify the rule name Allow next protocols next schedule Next – client type – select specific computers Next – add the client add set we‟ve created – ok – next – finish Configuring the proxy client Move onto private network Right click IE Properties Connections LAN settings - check the box proxy server Specify the add of ISA server &port no. 8080
  • 79.
    Ok Open Internet explorerand access any website Denying a particular website Creating a destination set: Expand policy elements Right click on destination set New set - specify the destination Website name – click on add – specify the destination name (Which site we want to block) – Ok Creating a site & content rule: Expand access policy Right click on site & content rule New rule - specify the name allow or deny Rule action (do nothing) Rule configuration Destination set, select specified destination set Select the name – next – finish Verification: Move on to private network Try to access yahoo.com. It shouldn‟t open Redirecting a website Create a destination set Right click site & content rule New rule specify the name of the rule ex: YRG, YRR Next - check the box http Specify the target site name (to which we want to go) Next – select specify destination set Click the radio button Next – finish Verification: Move onto private network Typing the source website we should find the redirected website. Yahoo redirected to google. Blocking images: Create a destination set Site (which we want to block) Create a site & content rule
  • 80.
    Double click onthe root we‟ve created Http content Select content groups Check the box whatever we want (ex. Images) Apply – ok Move onto private network Open the website We should notice no images Specifying schedule Double click the site & content rule we‟ve created Click on schedule New -specify the day and timing Mention the schedule name – ok – apply – ok RIS (Remote Installation Service) It is a feature of 2000&2003 using which we can deploy operating system remotely on to the client machines. Requirements of RIS: Server side; AD, DNS, A static IP, DHCP, RIS, 2GB of free space with NTFS partition Client side Requirements. Client machine PXE enabled NIC (Pre Boot execution Environment) or remote boot floppy. Installing RIS service On DC Start Settings - control panel Add/remove - add/remove windows programs Check the box RIS Insert2003 OS CD- next Restart Once the RIS server is ready it depends on the three RIS services for accomplishing remote installation Remote installation process Client machine with pxe enable ROM when booted it will load an initial program to find an OS from RIS server that program is called „start ROM‟. When it is doing so it (client) broadcasts network broadcast, MAC address on the network. DHCP Server: the DHCP server on listening t the request from the client, assigns an IP along with the DNS address.
  • 81.
    DNS Server: Itprovides the DC‟s information so that the client can contact DC With the help of MSDCS record AD: RIS is integrated with AD and AD maintains complete information about RIS server and available types of images and directs the request made by the client to the RIS server RIS server: starts the services BINL, TFTPD, SIS. With the help of these services can perform remote installation of OS on to the requested client. RIS services: 1. BINL: or RIS: (Boot Information Negotiation Layer): Responsible for overall management of RIS. It is a service invokes TFTPD and SIS. 2. TFTPD: (Trivial File Transfer Protocol Demon): Responsible for downloading the O.S. and related files only onto the client machine for remote installation 3. SIS (Single Instance Services): It is responsible for efficient management of Hard Disk space. Whenever there is a repetition of file copying occurs, it omits copying file, instead it creates a pointer and this pointer will be pointing to the actual files. Creating a CD image for remote installation: ex. 2003 On DC Or RIS server Start – r – Risetup – next Check the box respond to the clients Provide CD ROM drive path Folder name – next Friendly description name ex: CD image Next – finish Implementing RIS: On RIS server Install DHCP server Authorize it Create a scope Verifying RIS server before performing RIS installation On RIS server Open ADUC Domain controllers Right side pane- double click on the server Remote install - verify server-Done.
  • 82.
    Performing remote installon client On the client machine Boot from pxe enabled NIC or remote bootable floppy. Press F12 key when the system prompts and installation proceeds. Note: If don‟t see “press F12 for booting from n/w” you have to restart the services before performing RIS installation: Start – Admin tools – services Restart services following RIS, DHCP, DNS, netlogon, remote installation, TFTPD, single instance store On the client machine Insert COMBO CD Press F12 when it prompts Creating a remote boot floppy requires 1.44MB floppy On RIS server Open the RIS folder from remote installadmini386 Insert floppy and double click Rbfg.exe Creating Additional images. Open ADUC DC properties (right side ex: sys1) Remote install Advance settings Images – add – insert CD Editing an answer file: On RIS server Open the folder remote installsetupEnglishimageswindowsi386templates Double click ristndrd.sif Do whatever modifications you want Ex: set it as, Use whole disk =no Save – close. RIPREP image : It is a type of images which includes OS+ applications, settings, security and etc.. Useful when we want to perform remote installation of OS +applications. To achieve this we have to install OS+ applications +settings & security on one of the client machines & keep it read Performing riprep image On the client machines, which are ready with applications and settings Start – run - ris server name; ex; sys1 Double click reminstadmini386
  • 83.
    Double click riprep Next Servername Next Folder name Ex: client image Friendly description ex; sales dept. Next – answer further questions NOTE: on completion of this, the client will get restarted and starts a mini windows setup where you‟ll have to provide the company name, CD key and so on. Once it is over the riprep image is ready. NOTE: riprep image requires a CD image also. DISK MANAGEMENT 2000 and 2003 uses a tool called Disk management for administering or managing Hard Disk Drives Using this we can create, delete, modify, partitions and volumes. We can also implement software rate, and disk analysis. To open Disk manager Start – run – diskmgmt.msc Or right click on my computer – select manage. Creation of a primary partition: Start – run – diskmgmt.msc Select free space (black color) R/C -new – partition – select primary Alter the size - select drive letter Select the type of format – ex: NTFS Next – finish. Creating extended partition: Start – run – diskmgmt.msc Right click on free space New – partition – next – select extended partition Don‟t alter the size - next – finish Creating Logical partitions: Right click on the green color partition New – logical – drive – next – alter the size Next – drive letter Type of file system
  • 84.
    Next – finish Ifwe want to delete a partition, right click the partition and delete partition Storage Basic Disks – partition – primary partition – extended – Logical partitions Dynamic disks: simple volume – spanned volume – stripped volume – mirrored volume – RAID – 5v Basic Disk: These are referred to partitions. Using basic disks we can create partitions like primary, extended, logical. Basic disks are useful for providing backward compatibility with older OS. Like DOS, 95, 98 etc.. Basic disks are useful while implementing clustering and when we want to have dual OS in our computers. Basic disks can have 1primary, 1 extended and logical partition Or four primary or 3 primary 1 extended and so on. Basic disks can be converted to dynamic disks For converting it requires 1MB of free space. Conversion of basic disk to dynamic: We can convert form basic to dynamic but not vice versa. Possible when we get advanced Converting from basic to Dynamic: (requires 1MB of free space) Go to disk management Right click on the disk1 Convert to dynamic disk. Volume: Volume is made up of free space club or merged fro more than one H.D. volumes avoid using of multiple drive letters or drives. Easy to administer Dynamic volume: Dynamic disks refer to volumes. Using dynamic disks we can implement and extend volumes and implement raid. Dynamic disk can be attached or detached on the file. Simple Volumes: simple volumes are similar to partitions which can be created only one Hard disk which do not offer fall tolerance. Spanned Volume: A volume can be created by selecting the free space from more than 1 Hdd
  • 85.
    Span volumes offerextending of volume. Do not offer fall tolerance Maximum 32 Hdds Min 2 Hdds Creating simple volumes: Open disk management Right click on the black bar New – volume Select simple volume Alter the space – next Drive letter File system Check box perform quick format Next – finish Creating a spanned volume: Open disk management Right click on black bar New volume Select span – next Select disk1&2 reduce &specify the size. Drive letter – next Perform – quick format – finish Extending volume: Right click on the volume we want to extend Extend volume - next Select the drive on which we want to extend the volume Specify the size - next – finish RAID: (Redundancy Array Inexpensive Disks or Independent disks) Raid offers fall tolerance Fault Tolerance: It is a technique used for protecting data against hardware failures. Software RAID: It can be implemented from the OS. Which is not a guaranteed fault tolerance? Hardware RAID: can be implemented above the O.S. including the OS is protected. Offers highest fault tolerance. There are five RAID levels
  • 86.
    RAID 0, 1,2, 3, 4 and 5 these are supported by NT/2000/2003 RAID 0: striping without parity Striped volumes: Requires min 2 Hdds, max 32 Hdds. Offers no fault tolerance Suitable when performance is criteria. Data is written evenly on to all drives If any one of the drives fails whole data is lost. Space selected on all the drives should be of identical size. RAID 1 or Disk mirroring: Requires min.2Hdds max.also 2 Hdds Offers fall tolerance Data is written onto both the drives simultaneously. If one drive fails data is still available in the second drive. I/P performance: reading is fast and writing is slow. Implementation of mirror: Create a simple volume ex: 100mb Right click on S.V. and add mirror Break mirror: Breaks the mirror and retains the partition and data and changes the drive letter Right click on desired drive Select break mirror Remove mirror: Removes the mirrored volume. If we want to break or remove the volume Right click on mirror volume Select break or remove RAID 5 Striping with parity Requires min 3Hdds max 32 Hdds. Offers highest fault tolerance Data is written evenly on to all member striped volumes and Parity information is also added. Parity bit: It is mathematical calculation added to every piece of data and used for regenerating the data when any HDD fails. Offers performance and availability I/O performance: Reading and writing both are fast.
  • 87.
    Mounting: It is afeature of 2000 & 2003 used for accessing free space on the hard drive through a folder when drive letters get exhausted. Using mounting: open disk management Create a simple volume While creating select mount in the following MT, NTFS folder Browse – new folder (create a folder here) – next – quick format – next Finish Accessing the Free space through a mount point. Open the drive where we‟ve created the folder. We find here folder name with a drive icon ADVANCED Seizing of Roles: DC & ADC, when Dc abruptly goes down, irreparable, no hopes of bringing back DC online we should seize the FSMO roles onto ADC Permanently configures ADC as DC Implementing: On ADC Start - run – cmd – (ntdsutil) Roles Connections Connect to server ADC‟s server name Q Seize schema master Seize Domain naming master Seize RID master Seize Infrastructure master Seize PDC – q – q – exit. Volume shadow copy services: VSCS It is a new feature available only in 2003 flavor. Useful for taking online backup and access recent versions of files and folders. Useful when the users inadvertently delete their files from network share and want them back. In case an administrator had taken a snapshot of the volume can retrieve the recent versions of the files. Implimenting VSCS: On server /DC Create a folder with 2, 3 files in D or E drive
  • 88.
    Share the folder Givefull access permissions Taking a snapshot (VSCS): Open my computer Go to the drive properties where we‟ve created the folder. Click on shadow copies Select the volume Click on enable Click on create now Apply -ok Verification: Login from the client machine access the network resources from my network places Delete 1or 2 files we‟ve created – logoff Login as administrator To restore a deleted file Access the network share from my network places Right click on the share folder Properties Previous versions Click on restore Apply – ok Try to access the network share from client machine We should notice the deleted file restored. SUS (Software Update Services): It is a new feature of 2003. When our network client or servers wat their updates from internet, if internet is available to all the client machines whole network will be busying updating OS &software. This leads to network traffic To overcome this problem we have to use a separate server configure as SUS, which is connected to Internet and obtains updates. Client machines instead of contacting Internet for updates contact the intranet SUS server for updates. This can be scheduled. SUS software has to be downloaded from the internet and also I.I.S. Implimenting SUS: Install SUS in one of the member servers On DC
  • 89.
    Configuring client machinesto contact SUS server for updates. On DC Open ADUC Create an OU Join the client machines to this OU OU properties Group policy GPO name Edit Expand computer configuration Administrative templates Windows components Windows updates Double click on specified intranet Enable – specify the server‟s add in both the boxes. To schedule the updates; Double click o configure automatic updates Specify the schedule MBSA (Microsoft Baseline Security Analyzer): It is a new feature of 2003. It is a service responsible for preparing a report which reveals a loop holes and draw backs of the OS and the applications installed in the server. Using this report an administrator can take some precautions. It is also freely available software in internet. We can download it. File name is mbsa.msi It acts like a guide to the administrator Using MBSA : start - programs – MBSA select scan a computer/scan more than one computer Provide the IP address of the computer Click on start scan It creates a report contains the information about the system. RSOP: (Resultant Set of Policies): It is a new feature of 2003 using which we can gather all the policies implemented by group policy in the entire forest. RSOP works in two modes logging and planning Logging: Generates the reports for the users who all have logged in and effected with the policy.
  • 90.
    Planning: it isuseful for experimentation. I.e. as an admin Would like to see the result of the policy before it is implemented. Using RSOP Open ADUC Right click on the OU Select RSOP CIMOM (Common Information Management Object Model) is database where GP settings are registered. GPMC (Group Policy Management Consol): It is a new feature in 2003 which centralizes the management of group policies for ex. multiple forests, sites, OUs; Domains can be administered from a central location. Gathering of group policies implemented in the entire forest is easy. Implementing Group policy is also very easy Back and restore of G.Ps is easy Once installed, disables group policy option for local, sites & domain. Software available in internet. Filename is gpmc.msi