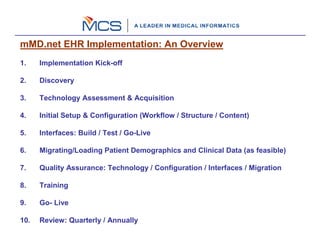
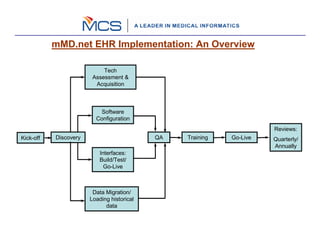
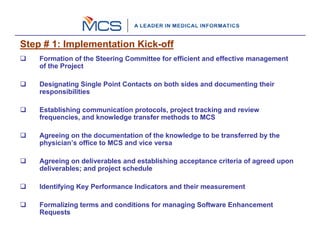
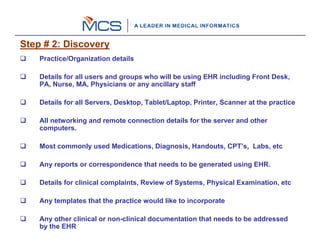
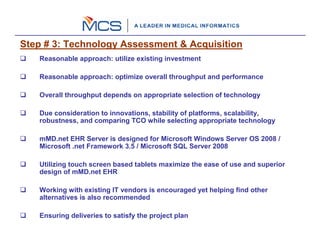
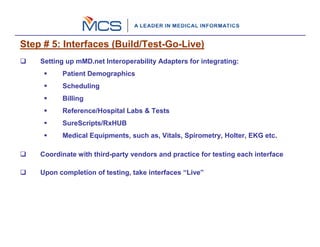
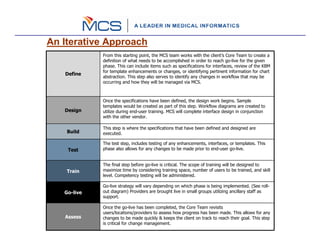
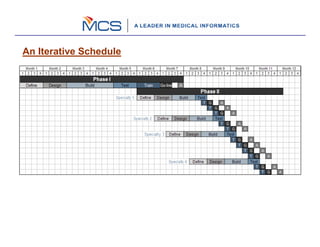
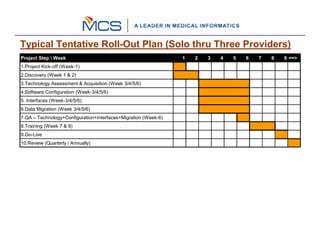
The document outlines a 10 step process for implementing an EHR system called mMD.net. The steps include: 1) implementation kickoff and project planning, 2) assessing needs through discovery, 3) acquiring technology, 4) configuring the software, 5) building and testing interfaces, 6) migrating data, 7) quality assurance testing, 8) training users, 9) going live, and 10) ongoing reviews. The implementation follows an iterative process of defining requirements, designing, building, testing, training, and going live in phases to gradually rollout the EHR system to providers and staff.
2. mMD.net EHR Implementation: An Overview
1. Implementation Kick-off
2. Discovery
3. Technology Assessment & Acquisition
4. Initial Setup & Configuration (Workflow / Structure / Content)
5. Interfaces: Build / Test / Go-Live
6. Migrating/Loading Patient Demographics and Clinical Data (as feasible)
7. Quality Assurance: Technology / Configuration / Interfaces / Migration
8. Training
9. Go- Live
10. Review: Quarterly / Annually
3. mMD.net EHR Implementation: An Overview
Tech
Assessment &
Acquisition
Software
Configuration
Reviews:
Kick-off Discovery QA Training Go-Live Quarterly/
Annually
Interfaces:
Build/Test/
Go-Live
Data Migration/
Loading historical
data
4. Step # 1: Implementation Kick-off
Formation of the Steering Committee for efficient and effective management
of the Project
Designating Single Point Contacts on both sides and documenting their
responsibilities
Establishing communication protocols, project tracking and review
frequencies, and knowledge transfer methods to MCS
Agreeing on the documentation of the knowledge to be transferred by the
physician’s office to MCS and vice versa
Agreeing on deliverables and establishing acceptance criteria of agreed upon
deliverables; and project schedule
Identifying Key Performance Indicators and their measurement
Formalizing terms and conditions for managing Software Enhancement
Requests
5. Step # 2: Discovery
Practice/Organization details
Details for all users and groups who will be using EHR including Front Desk,
PA, Nurse, MA, Physicians or any ancillary staff
Details for all Servers, Desktop, Tablet/Laptop, Printer, Scanner at the practice
All networking and remote connection details for the server and other
computers.
Most commonly used Medications, Diagnosis, Handouts, CPT’s, Labs, etc
Any reports or correspondence that needs to be generated using EHR.
Details for clinical complaints, Review of Systems, Physical Examination, etc
Any templates that the practice would like to incorporate
Any other clinical or non-clinical documentation that needs to be addressed
by the EHR
6. Step # 3: Technology Assessment & Acquisition
Reasonable approach: utilize existing investment
Reasonable approach: optimize overall throughput and performance
Overall throughput depends on appropriate selection of technology
Due consideration to innovations, stability of platforms, scalability,
robustness, and comparing TCO while selecting appropriate technology
mMD.net EHR Server is designed for Microsoft Windows Server OS 2008 /
Microsoft .net Framework 3.5 / Microsoft SQL Server 2008
Utilizing touch screen based tablets maximize the ease of use and superior
design of mMD.net EHR
Working with existing IT vendors is encouraged yet helping find other
alternatives is also recommended
Ensuring deliveries to satisfy the project plan
7. Step # 4: Software Configuration
Reasonable approach: Start with specialty specific defaults
Reasonable approach: Incorporate “improvisations” over defaults
Clinical Templates and Order Sets form crux of the “Clinical Best Practices”
Clinical Alerts and Disease Management
Due consideration to the Health Information Exchange
Preferences for managing workflow: the real tool for enhancing efficiencies
Frequent interaction with coordinators / physicians / clinicians
8. Step # 5: Interfaces (Build/Test-Go-Live)
Setting up mMD.net Interoperability Adapters for integrating:
Patient Demographics
Scheduling
Billing
Reference/Hospital Labs & Tests
SureScripts/RxHUB
Medical Equipments, such as, Vitals, Spirometry, Holter, EKG etc.
Coordinate with third-party vendors and practice for testing each interface
Upon completion of testing, take interfaces “Live”
9. Step # 6: Migrating/Loading Demographics and Clinical Data
Identification of all external system data stores that are required to support
the deployment of mMD.net database (e.g. patient demographics)
Conversion of data from the existing databases to the mMD.net database,
involving further steps such as:
identifying existing databases and segments of databases that will be moved to
tables in the mMD.net database
designing procedures for converting the data identified from the existing databases
to the mMD.net database
developing software for accomplishing each conversion
testing the conversion using test data
testing the conversion using live data
verifying the conversion results
Getting old records in EHR: Scanning / Populating Clinical Lists
Deployment of mMD.net database with data migrated from legacy systems, old
records, and definition of Masters
10. Step # 7: QA: Technology/Configuration/Interfaces/Migration
Certifying that technology acquisition and deployment is as planned and
expected for mMD.net implementation requirements
Ensuring that the information provided by the physician’s office is configured
accurately and as expected
Process check demands approval from the physician’s office that the
configuration has been done to their satisfaction
Taking a “dry run” of the complete application is not unusual as part of the
QA process which also verifies and validates data migration
A Post Configuration Report (PCR) is filled-in that includes details of the
complete technology deployment, software configuration – default plus
customizations/personalization, and accuracy and validity of data – migrated
and Masters.
PCR is eventually handed over to the Tech Support Team
11. Step # 8: Training
Focus on training physicians office as a group as well as individuals
Structured training program to maximize class room (presentation) based
training and hands-on training
Approx. 20 hours of online training per FTE provider before scheduling onsite
training
Training schedule is published in advance to ensure that the physicians office
can make appropriate resources available
All application modules are covered, including the Administrative module
Partners shadow-over to learn from the training programs conducted by MCS
in addition to structured train-the-trainer manuals and Certification Program
12. Step # 9 /10: Go-Live / Reviews: Quarterly/Annually
Focusing on upfront online training, followed by onsite training ensures
implementation going live
Continued guidance and assistance through online sessions and phone
consultations is provided, especially during initial months after going-live
KPI identified at Kick-Off are reviewed quarterly during the first year and
thereafter annually. Typical KPI reviewed are:
Improvement in E&M Coding
Reduction in Transcription Costs
Increase in Workflow efficiencies measured by reduction in pharmacy call-
backs, increased compliance to pharmacy benefits, increased adherence to
confirmed appointment scheduling (or reduction in no-shows), increased
call-back follow-up to appointment cancellation, reduction in wait-time at
each stage of patient visits
Increased compliance to clinical alerts
Increased revenues through timely charge capture
Increased revenues accrued through eligibility verification
Reduction in scanning lab reports
Increased revenues through P4P bonuses and demonstrated & measurable
quality improvements
13. An Iterative Approach
From this starting point, the MCS team works with the client’s Core Team to create a
definition of what needs to be accomplished in order to reach go-live for the given
phase. This can include items such as specifications for interfaces, review of the KBM
for template enhancements or changes, or identifying pertinent information for chart
Define
abstraction. This step also serves to identify any changes in workflow that may be
occurring and how they will be managed via MCS.
Once the specifications have been defined, the design work begins. Sample
templates would be created as part of this step. Workflow diagrams are created to
Design utilize during end-user training. MCS will complete interface design in conjunction
with the other vendor.
This step is where the specifications that have been defined and designed are
Build executed.
The test step, includes testing of any enhancements, interfaces, or templates. This
Test phase also allows for any changes to be made prior to end-user go-live.
The final step before go-live is critical. The scope of training will be designed to
Train maximize time by considering training space, number of users to be trained, and skill
level. Competency testing will be administered.
Go-live strategy will vary depending on which phase is being implemented. (See roll-
Go-live out diagram) Providers are brought live in small groups utilizing ancillary staff as
support.
Once the go-live has been completed, the Core Team revisits
users/locations/providers to assess how progress has been made. This allows for any
Assess changes to be made quickly & keeps the client on track to reach their goal. This step
is critical for change management.