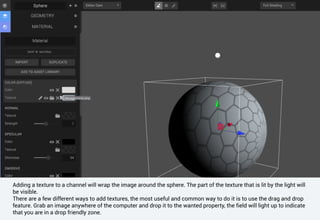
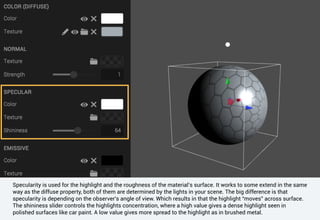
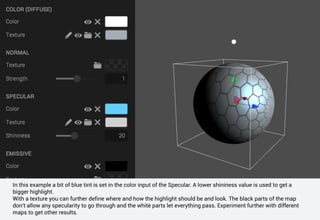
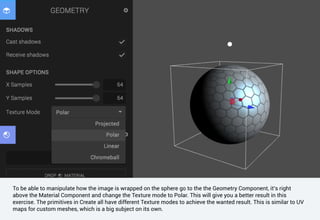
Download as PDF, PPTX
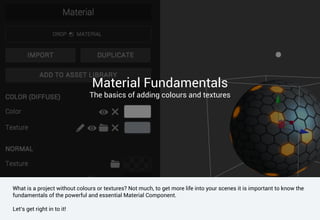
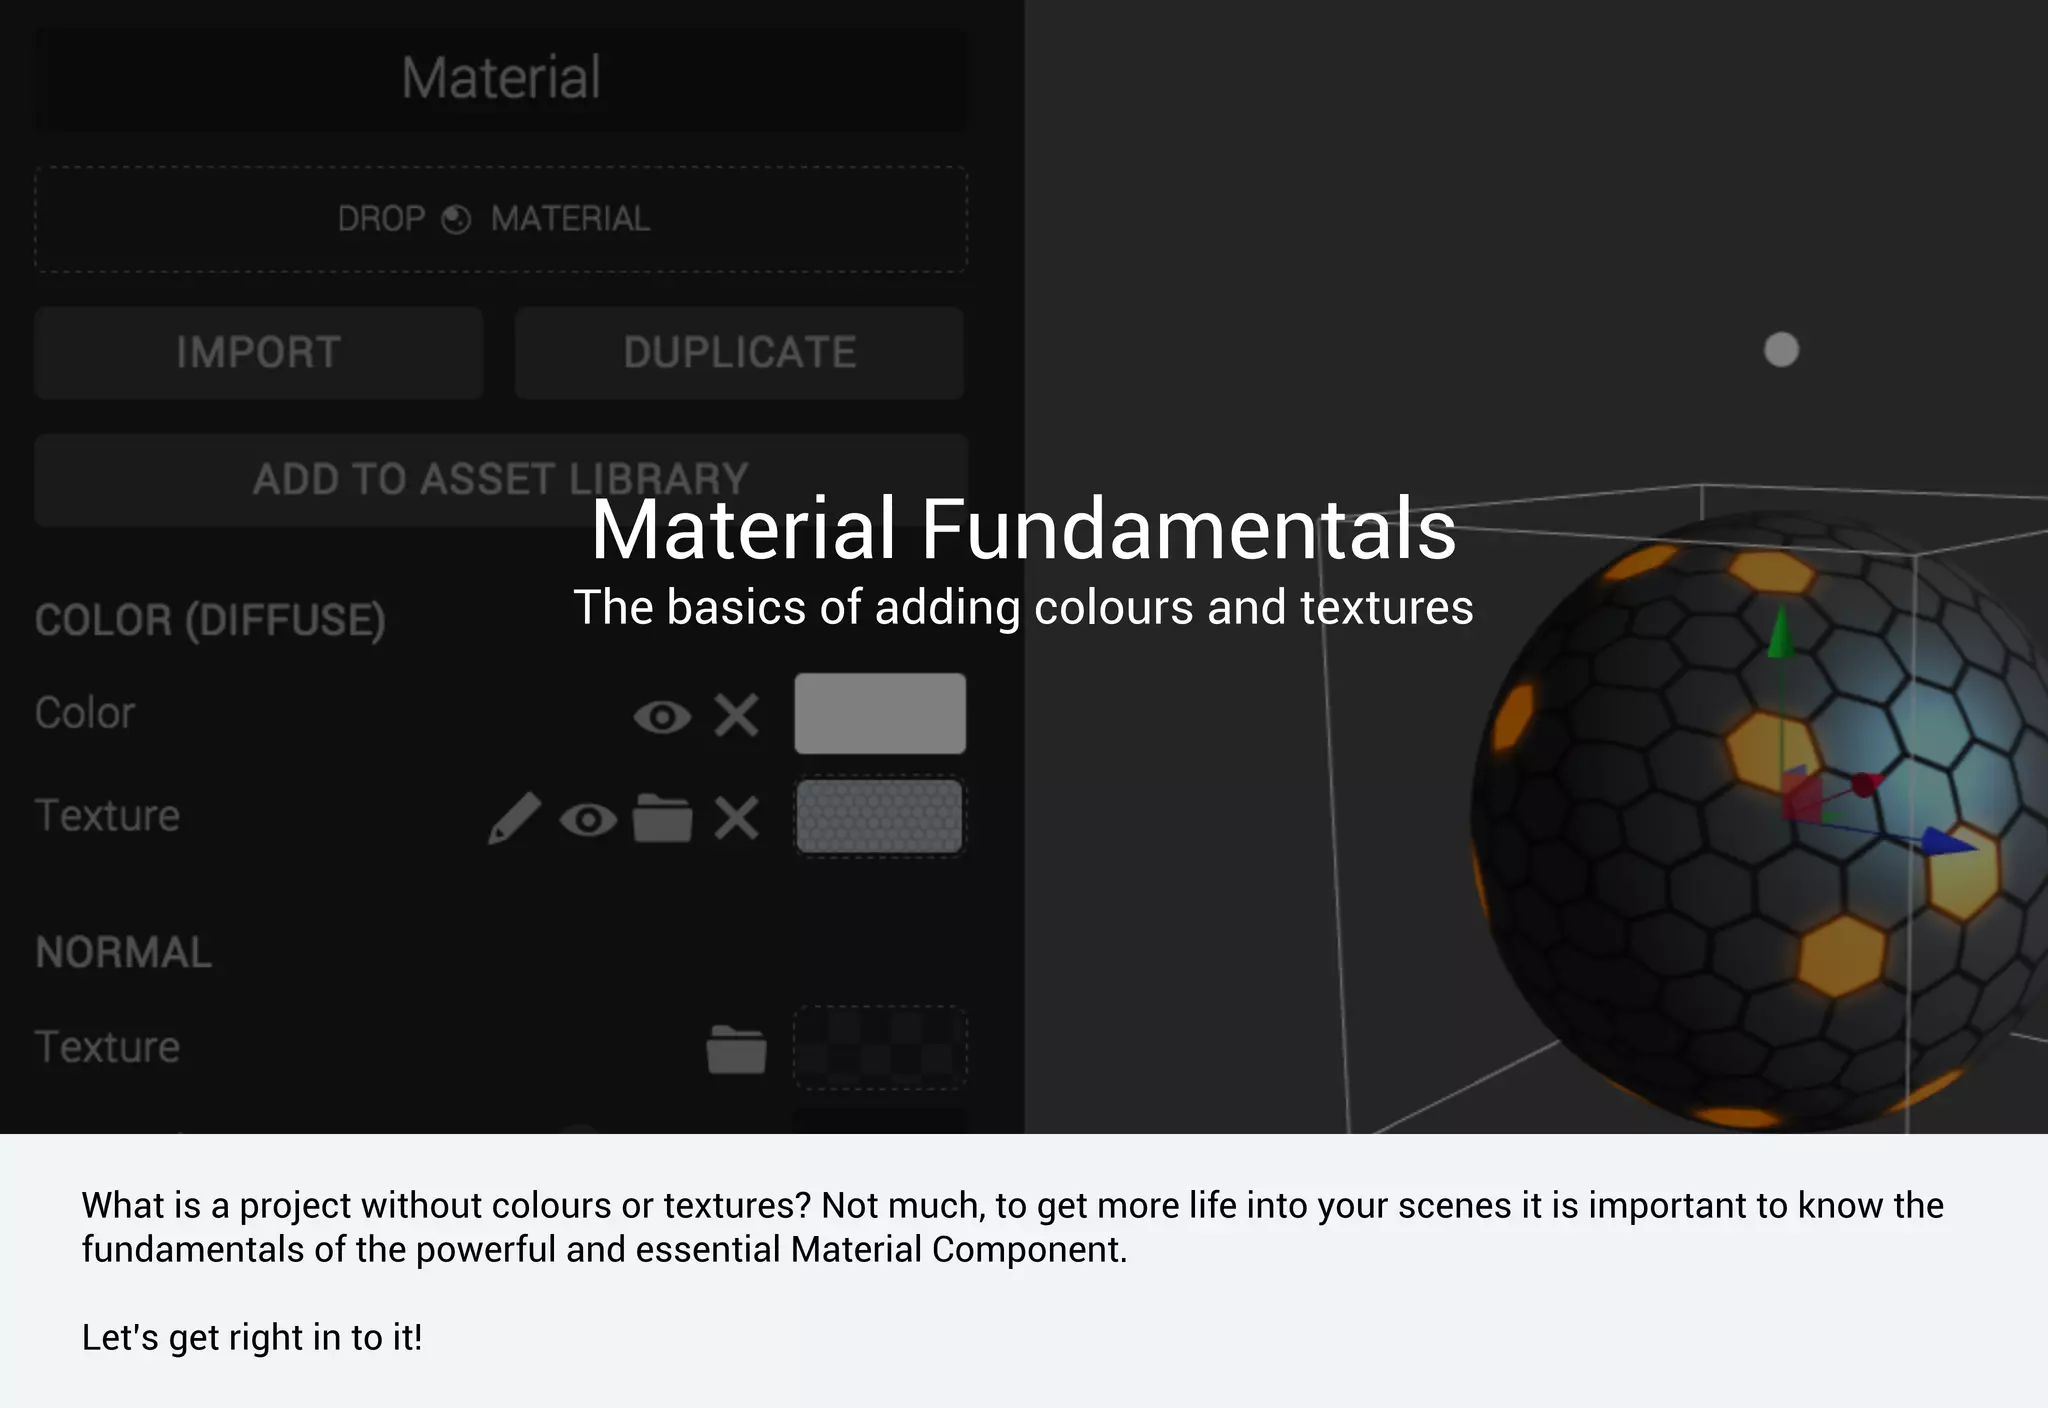
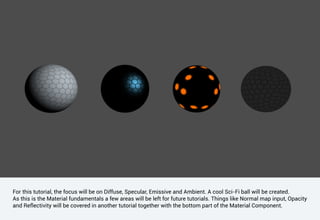
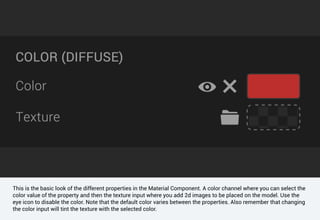

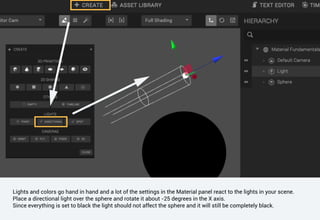


This document covers the fundamentals of adding colors and textures in 3D modeling, focusing on properties such as diffuse, specular, emissive, and ambient. A practical tutorial guides users through creating a sci-fi ball, explaining how to manipulate material properties, apply textures, and utilize lighting for desired effects. The tutorial concludes with instructions on exporting and sharing the completed scene.


![Steps to work_on_photoshop[1]](https://cdn.slidesharecdn.com/ss_thumbnails/stepstoworkonphotoshop1-110902192646-phpapp02-thumbnail.jpg?width=640&height=640&fit=bounds)