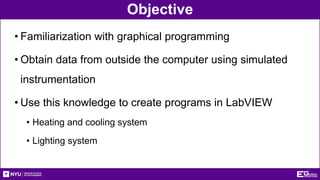
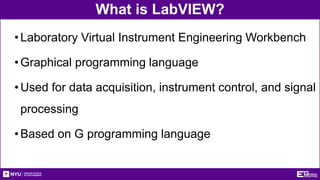
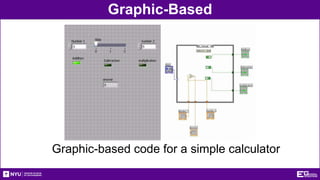
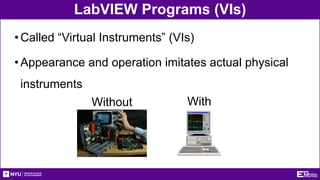
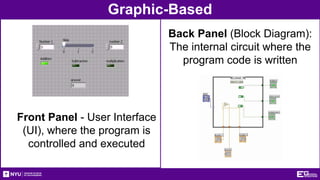
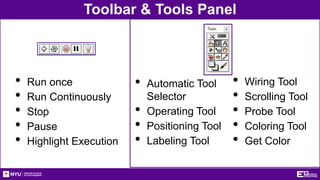
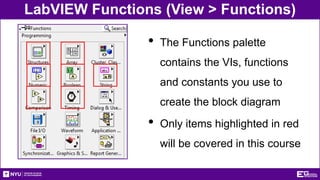
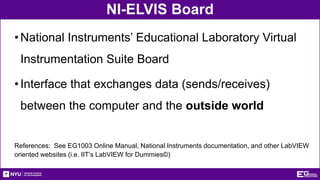
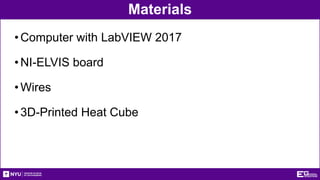
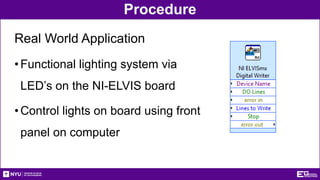
Introduction to
LabVIEW
Overview
•Objectives
•Background
•Materials
•Procedure
•Report/Presentation
•Closing
Objective
• Familiarization with graphical programming
• Obtain data from outside the computer using simulated
instrumentation
• Use this knowledge to create programs in LabVIEW
• Heating and cooling system
• Lighting system
What is LabVIEW?
•Laboratory Virtual Instrument Engineering Workbench
•Graphical programming language
•Used for data acquisition, instrument control, and signal
processing
•Based on G programming language
Text-Based
Text-based code for a simple calculator
Graphic-Based
Graphic-based code for a simple calculator
LabVIEW Programs (VIs)
•Called “Virtual Instruments” (VIs)
•Appearance and operation imitates actual physical
instruments
Without With
Graphic-Based
Back Panel (Block Diagram):
The internal circuit where the
program code is written
Front Panel - User Interface
(UI), where the program is
controlled and executed
Controls and Indicators
•Icons in back panel represent objects in front panel
•Controls can be identified by a triangle on the right of
the block shown on the back panel
Toolbar & Tools Panel
• Run once
• Run Continuously
• Stop
• Pause
• Highlight Execution
• Automatic Tool
Selector
• Operating Tool
• Positioning Tool
• Labeling Tool
• Wiring Tool
• Scrolling Tool
• Probe Tool
• Coloring Tool
• Get Color
LabVIEW Functions (View > Functions)
• The Functions palette
contains the VIs, functions
and constants you use to
create the block diagram
• Only items highlighted in red
will be covered in this course
NI-ELVIS Board
•National Instruments’ Educational Laboratory Virtual
Instrumentation Suite Board
•Interface that exchanges data (sends/receives)
between the computer and the outside world
References: See EG1003 Online Manual, National Instruments documentation, and other LabVIEW
oriented websites (i.e. IIT’s LabVIEW for Dummies©)
Materials
•Computer with LabVIEW 2017
•NI-ELVIS board
•Wires
•3D-Printed Heat Cube
Procedure
Program 1 (Thermal Control VI)
•Program requirements – Automatic Mode
• Regulate house air temperature
• AC is ON when temperature is greater than 80oF
• Heater is ON when temperature is less than 60oF
• Both OFF when the temperature is between 60oF & 80oF
•Program requirements – Manual Mode
• Heater and AC power are controlled directly by user
(overrides automatic mode)
Procedure
•Front panel must have:
• 3 LEDs: AC, Heater, and Manual operation
• 3 switches for AC, heater, and system operation
(automatic/manual)
• A temperature control represented by a thermometer
•Back panel should have:
• A Boolean case statement to control manual and
automatic operations
Procedure
Real World Application
• Functional heating/cooling system “Heat Cube”
• Import premade VIs to control fans, heaters, and
thermometers using your logic program
• Temperature Reading VI: receive real time data
• Heat Control VI: power heating element
• Cooling Control VI: power fan/cooling unit
Procedure
Program 2 (Lighting System VI)
• Program Requirements
• Control the lights in four rooms
• Turn off all lights with a master switch
• Front Panel
• Four LEDs
• Five Switches
• Back Panel
• Case Structure
• NI ELVISmx Digital Writer
Procedure
Real World Application
•Functional lighting system via
LED’s on the NI-ELVIS board
•Control lights on board using front
panel on computer
Report/Presentation
•Submit a zip file with all LabVIEW programs (.vi)
• Submit BEFORE end of lab
•Lab 5 presentation during next week’s recitation
•Individual report
•Discussion topics in the manual
•Scan in data and lab notes
Closing
•Have all lab notes signed by TA
•Each team member should have turn using software
•Save all VIs
•Submit all work electronically
•Return all unused materials to TA
Introduction to LabVIEW
QUESTIONS?

LabVIEW.pptx

  • 1.
  • 2.
  • 3.
    Objective • Familiarization withgraphical programming • Obtain data from outside the computer using simulated instrumentation • Use this knowledge to create programs in LabVIEW • Heating and cooling system • Lighting system
  • 4.
    What is LabVIEW? •LaboratoryVirtual Instrument Engineering Workbench •Graphical programming language •Used for data acquisition, instrument control, and signal processing •Based on G programming language
  • 5.
    Text-Based Text-based code fora simple calculator
  • 6.
  • 7.
    LabVIEW Programs (VIs) •Called“Virtual Instruments” (VIs) •Appearance and operation imitates actual physical instruments Without With
  • 8.
    Graphic-Based Back Panel (BlockDiagram): The internal circuit where the program code is written Front Panel - User Interface (UI), where the program is controlled and executed
  • 9.
    Controls and Indicators •Iconsin back panel represent objects in front panel •Controls can be identified by a triangle on the right of the block shown on the back panel
  • 10.
    Toolbar & ToolsPanel • Run once • Run Continuously • Stop • Pause • Highlight Execution • Automatic Tool Selector • Operating Tool • Positioning Tool • Labeling Tool • Wiring Tool • Scrolling Tool • Probe Tool • Coloring Tool • Get Color
  • 11.
    LabVIEW Functions (View> Functions) • The Functions palette contains the VIs, functions and constants you use to create the block diagram • Only items highlighted in red will be covered in this course
  • 12.
    NI-ELVIS Board •National Instruments’Educational Laboratory Virtual Instrumentation Suite Board •Interface that exchanges data (sends/receives) between the computer and the outside world References: See EG1003 Online Manual, National Instruments documentation, and other LabVIEW oriented websites (i.e. IIT’s LabVIEW for Dummies©)
  • 13.
    Materials •Computer with LabVIEW2017 •NI-ELVIS board •Wires •3D-Printed Heat Cube
  • 14.
    Procedure Program 1 (ThermalControl VI) •Program requirements – Automatic Mode • Regulate house air temperature • AC is ON when temperature is greater than 80oF • Heater is ON when temperature is less than 60oF • Both OFF when the temperature is between 60oF & 80oF •Program requirements – Manual Mode • Heater and AC power are controlled directly by user (overrides automatic mode)
  • 15.
    Procedure •Front panel musthave: • 3 LEDs: AC, Heater, and Manual operation • 3 switches for AC, heater, and system operation (automatic/manual) • A temperature control represented by a thermometer •Back panel should have: • A Boolean case statement to control manual and automatic operations
  • 16.
    Procedure Real World Application •Functional heating/cooling system “Heat Cube” • Import premade VIs to control fans, heaters, and thermometers using your logic program • Temperature Reading VI: receive real time data • Heat Control VI: power heating element • Cooling Control VI: power fan/cooling unit
  • 17.
    Procedure Program 2 (LightingSystem VI) • Program Requirements • Control the lights in four rooms • Turn off all lights with a master switch • Front Panel • Four LEDs • Five Switches • Back Panel • Case Structure • NI ELVISmx Digital Writer
  • 18.
    Procedure Real World Application •Functionallighting system via LED’s on the NI-ELVIS board •Control lights on board using front panel on computer
  • 19.
    Report/Presentation •Submit a zipfile with all LabVIEW programs (.vi) • Submit BEFORE end of lab •Lab 5 presentation during next week’s recitation •Individual report •Discussion topics in the manual •Scan in data and lab notes
  • 20.
    Closing •Have all labnotes signed by TA •Each team member should have turn using software •Save all VIs •Submit all work electronically •Return all unused materials to TA
  • 21.