Downloaded 50 times


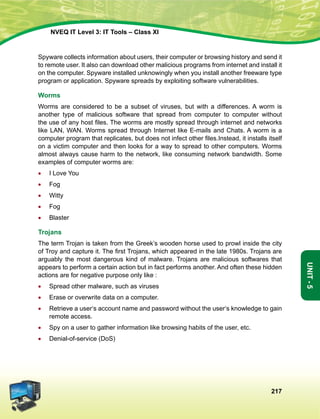
![Hkkjr dk lafo/kku
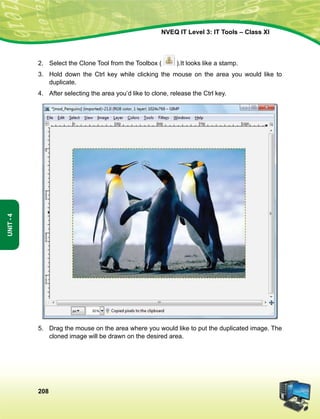
mísf'kdk
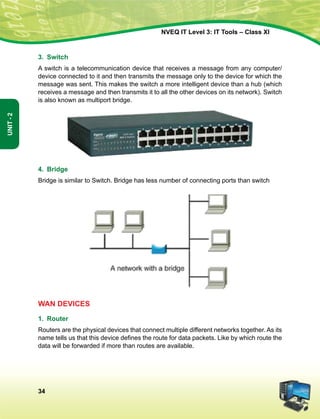
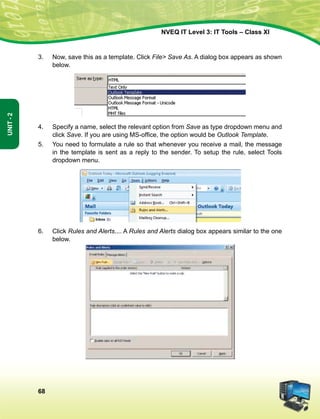
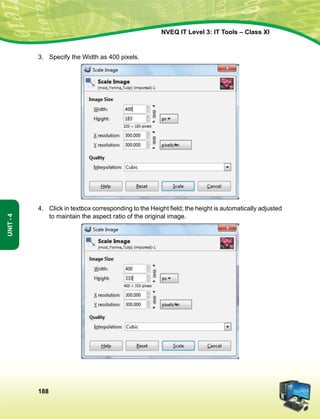
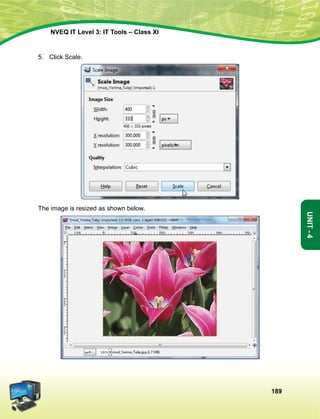
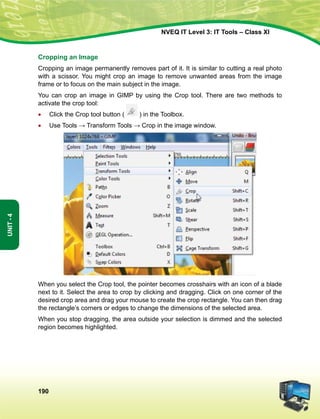
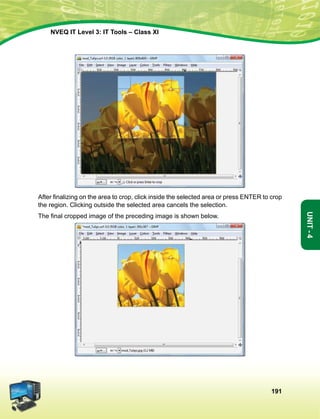
ge Hkkjr ds yksx Hkkjr dks ,d ^¿lEiw.kZ izHkqRo&laiUu lektoknh iaFkfujis{k yksdra=kRed x.kjkT;À cukus ds fy,] rFkk mlds
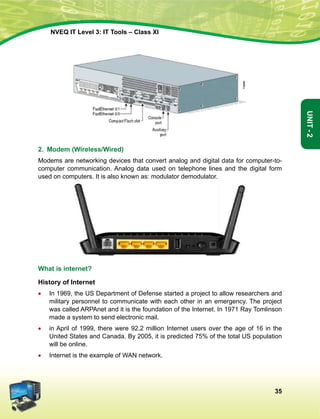
leLr ukxfjdksa dks %
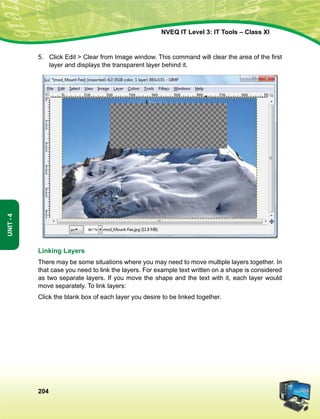
lkekftd] vkfFkZd vkSj jktuSfrd U;k;]
fopkj] vfHkO;fDr] fo'okl] /keZ
vkSj mikluk dh Lora=rk]
izfr"Bk vkSj volj dh lerk
izkIr djkus ds fy, rFkk mu lc esa O;fDr dh xfjek vkSj jk"Vª dh ,drk vkSj v[k.Mrk lqfuf'pr djus okyh ca/kqrk c<+kus
ds fy, n`<+ladYi gksdj viuh bl lafo/kku lHkk esa vkt rkjh[k 26 uoEcj] 1949 bZñ dks ,rn~}kjk bl lafo/kku dks vaxhÑr]
vf/ kfu;fer vkSj vkRekfiZr djrs gSaA
1- lafo/kku ¼c;kfyloka la'kks/ku½ vf/kfu;e] 1976 dh /kkjk 2 }kjk ¼3-1-1977½ ls ÞizHkqRolaiUu yksdra=kRed x.kjkT;ß ds LFkku ij
izfrLFkkfirA
2- lafo/kku ¼c;kfyloka la'kks/ku½ vf/kfu;e] 1976 dh /kkjk 2 }kjk ¼3-1-1977 ls½] ÞjkVª dh ,drkß ds LFkku ij izfrLFkkfirA
Hkkx 4 d
ewy dÙkZO;
51 d- ewy dÙkZO; Hkkjr ds izR;sd ukxfjd dk ;g dÙkZO; gksxk fd og
¼d½ lafo/kku dk ikyu djs vkSj mlds vkn'kks±] laLFkkvksa] jkVª/ot vkSj jkVªxku dk vknj djsa(
¼[k½ Lora=rk ds fy, gekjs jkVªh; vkanksyu dks izsfjr djus okys mPp vkn'kks± dks ân; esa latks, j[ks vkSj mudk ikyu djs(
¼x½ Hkkjr dh izHkqrk] ,drk vkSj v[kaMrk dh j{kk djs vkSj mls v{kq..k j[ks(
¼?k½ ns'k dh j{kk djs vkSj vkg~oku fd, tkus ij jkVª dh lsok djs(
¼³½ Hkkjr ds lHkh yksxksa esa lejlrk vkSj leku Hkzkr`Ro dh Hkkouk dk fuekZ.k djs tks /keZ] Hkkkk vkSj izns'k ;k oxZ ij vk/kkfjr
lHkh HksnHkko ls ijs gksa] ,slh izFkkvksa dk R;kx djs tks fL=;ksa ds lEeku ds fo#) gSa(
¼p½ gekjh lkekfld laLÑfr dh xkSjo'kkyh ijaijk dk egÙo les vkSj mldk ifjj{k.k djs(
¼N½ izkÑfrd i;kZoj.k dh ftlds varxZr ou] hy] unh] vkSj oU; tho gSa] j{kk djs vkSj mldk lao/kZu djs rFkk izkf.kek= ds
izfr n;kHkko j[ks(
¼t½ oSKkfud n`fVdks.k] ekuookn vkSj KkuktZu rFkk lq/kkj dh Hkkouk dk fodkl djs(
¼½ lkoZtfud laifÙk dks lqjf{kr j[ks vkSj fgalk ls nwj jgs(
¼´½ O;fDrxr vkSj lkewfgd xfrfof/k;ksa ds lHkh {ks=ksa esa mRdkZ dh vksj c+us dk lrr iz;kl djs ftlls jkVª fujarj c+rs
gq, iz;Ru vkSj miyfC/k dh ubZ mapkb;ksa dks Nw ysA](https://image.slidesharecdn.com/ittoolsxiit-2-160914161117/85/I-T-Tool-Class-XI-Book-2-4-320.jpg)
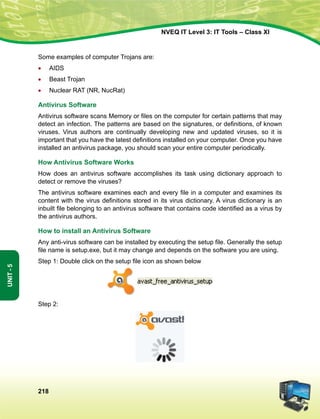
![The constitution of India
Preamble
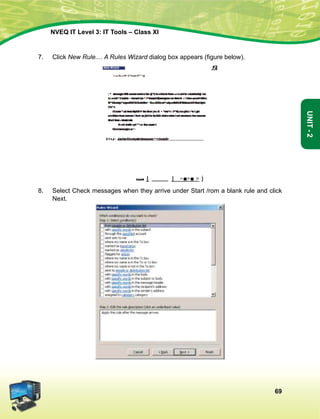
We, The people of india, having solemnly resolved to constitute India into a soveign
socialist secular democratic republic and to secure to all its citizens:
Justice, Social Economic and political;
Liberty of thought, expression, belief, faith and worship;
Equality of status and of opportunity; and to promote among them all;
fraternity assuring the dignity of the individual and the [unity and integrity of the Nation];
in out constituent assembly this twenty-sixth day of November, 1949, do hereby adopt
enact and give to ourselves this constitution.
1. Subs, by the Constitution (Forty-Second Amendment) Act. 1976, sec. 2, for Sovereign Democratic Republic
(w.e.f. 3.1.1977)
2. Subs, by the Constitution (Forty-Second Amendment) Act. 1976, sec. 2, for unity of the Nation (w.e.f. 3.1.1977)
The constitution of India
Chapter IV A
Fundamental Duties
Article 51a
Fundamental Duties - It shall be the duty of every citizen of India-
(a) to abide by the Constitution and respect its ideals and institutions, the National Flag and the
National Anthem;
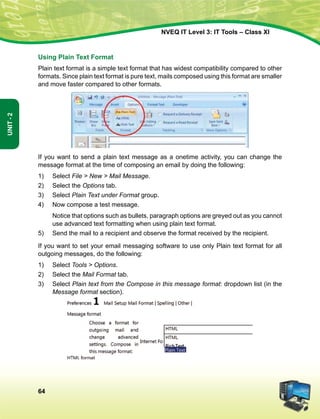
(b) to cherish and follow the noble ideals which inspired our national struggle for freedom;
(c) to uphold and protect the sovereignty, unity and integrity of India;
(d) to defend the country and render national service when called upon to do so;
(e) to promote harmony and the spirit of common brotherhood amongst all the people of India
transcending religious, linguistic and regional or sectional diversities; to renounce practices
derogatory to the dignity of women;
(f) to value and preserve the rich heritage of our composite culture;
(g) to protect and improve the natural environment including forests, lakes, rivers, wild life and to
have compassion for living creatures;
(h) to develop the scientific temper, humanism and the spirit of inquiry and reform;
(i) to safeguard public property and to abjure violence;
(j) to strive towards excellence in all spheres of individual and collective activity so that the nation
constantly rises to higher levels of endeavour and achievement.](https://image.slidesharecdn.com/ittoolsxiit-2-160914161117/85/I-T-Tool-Class-XI-Book-2-5-320.jpg)


This document provides information about the IT Level 3: IT Tools Class XI student handbook published by the Central Board of Secondary Education in India. It was developed by experts in consultation with industry representatives to provide competency-based vocational education in information technology. The handbook aims to use simple language and include illustrations to help students understand concepts. It contains 6 units that cover topics like computer hardware, operating systems, networking, internet safety, office automation tools, multimedia design, troubleshooting, and work-integrated learning in IT. The board acknowledges the contribution of practicing IT professionals and academic advisors in developing this resource for students.


![CONSTITUTION OF INDIA, PROFESSIONAL ETHICS AND CYBER [Autosaved].pptx](https://cdn.slidesharecdn.com/ss_thumbnails/constitutionofindiaprofessionalethicsandcyberautosaved-230921072350-d435b59a-thumbnail.jpg?width=640&height=640&fit=bounds)