Downloaded 175 times


![24
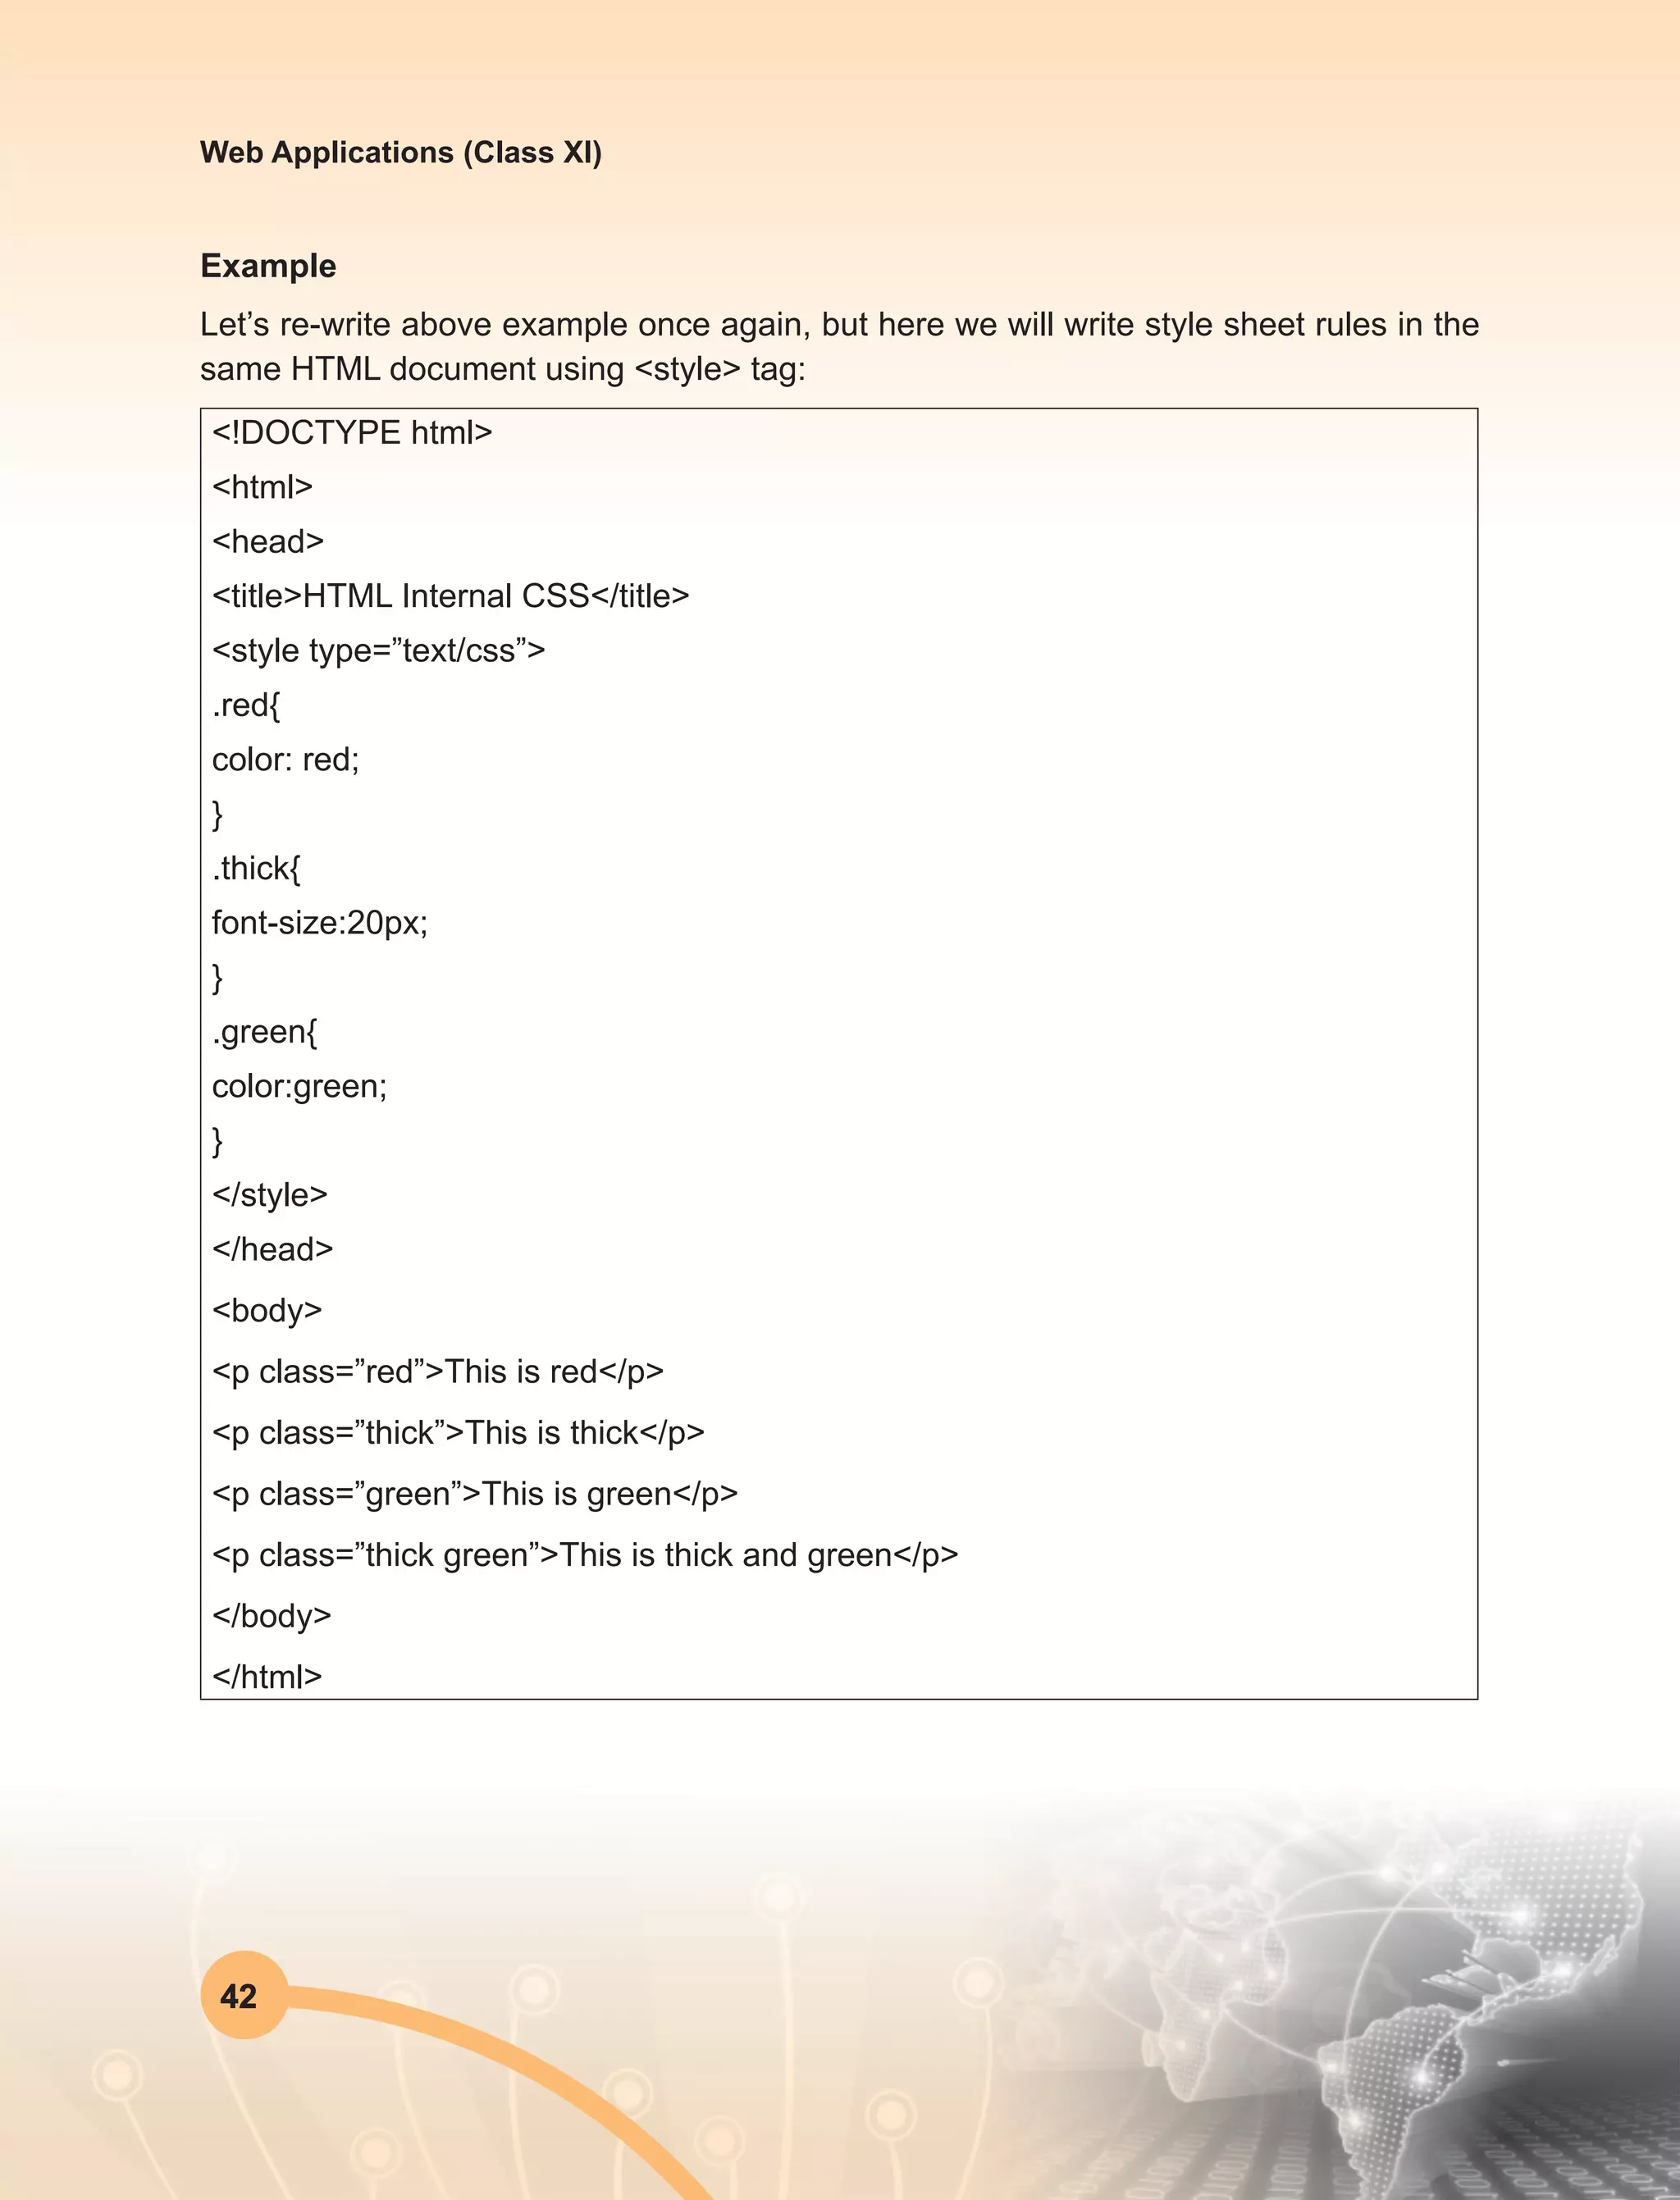
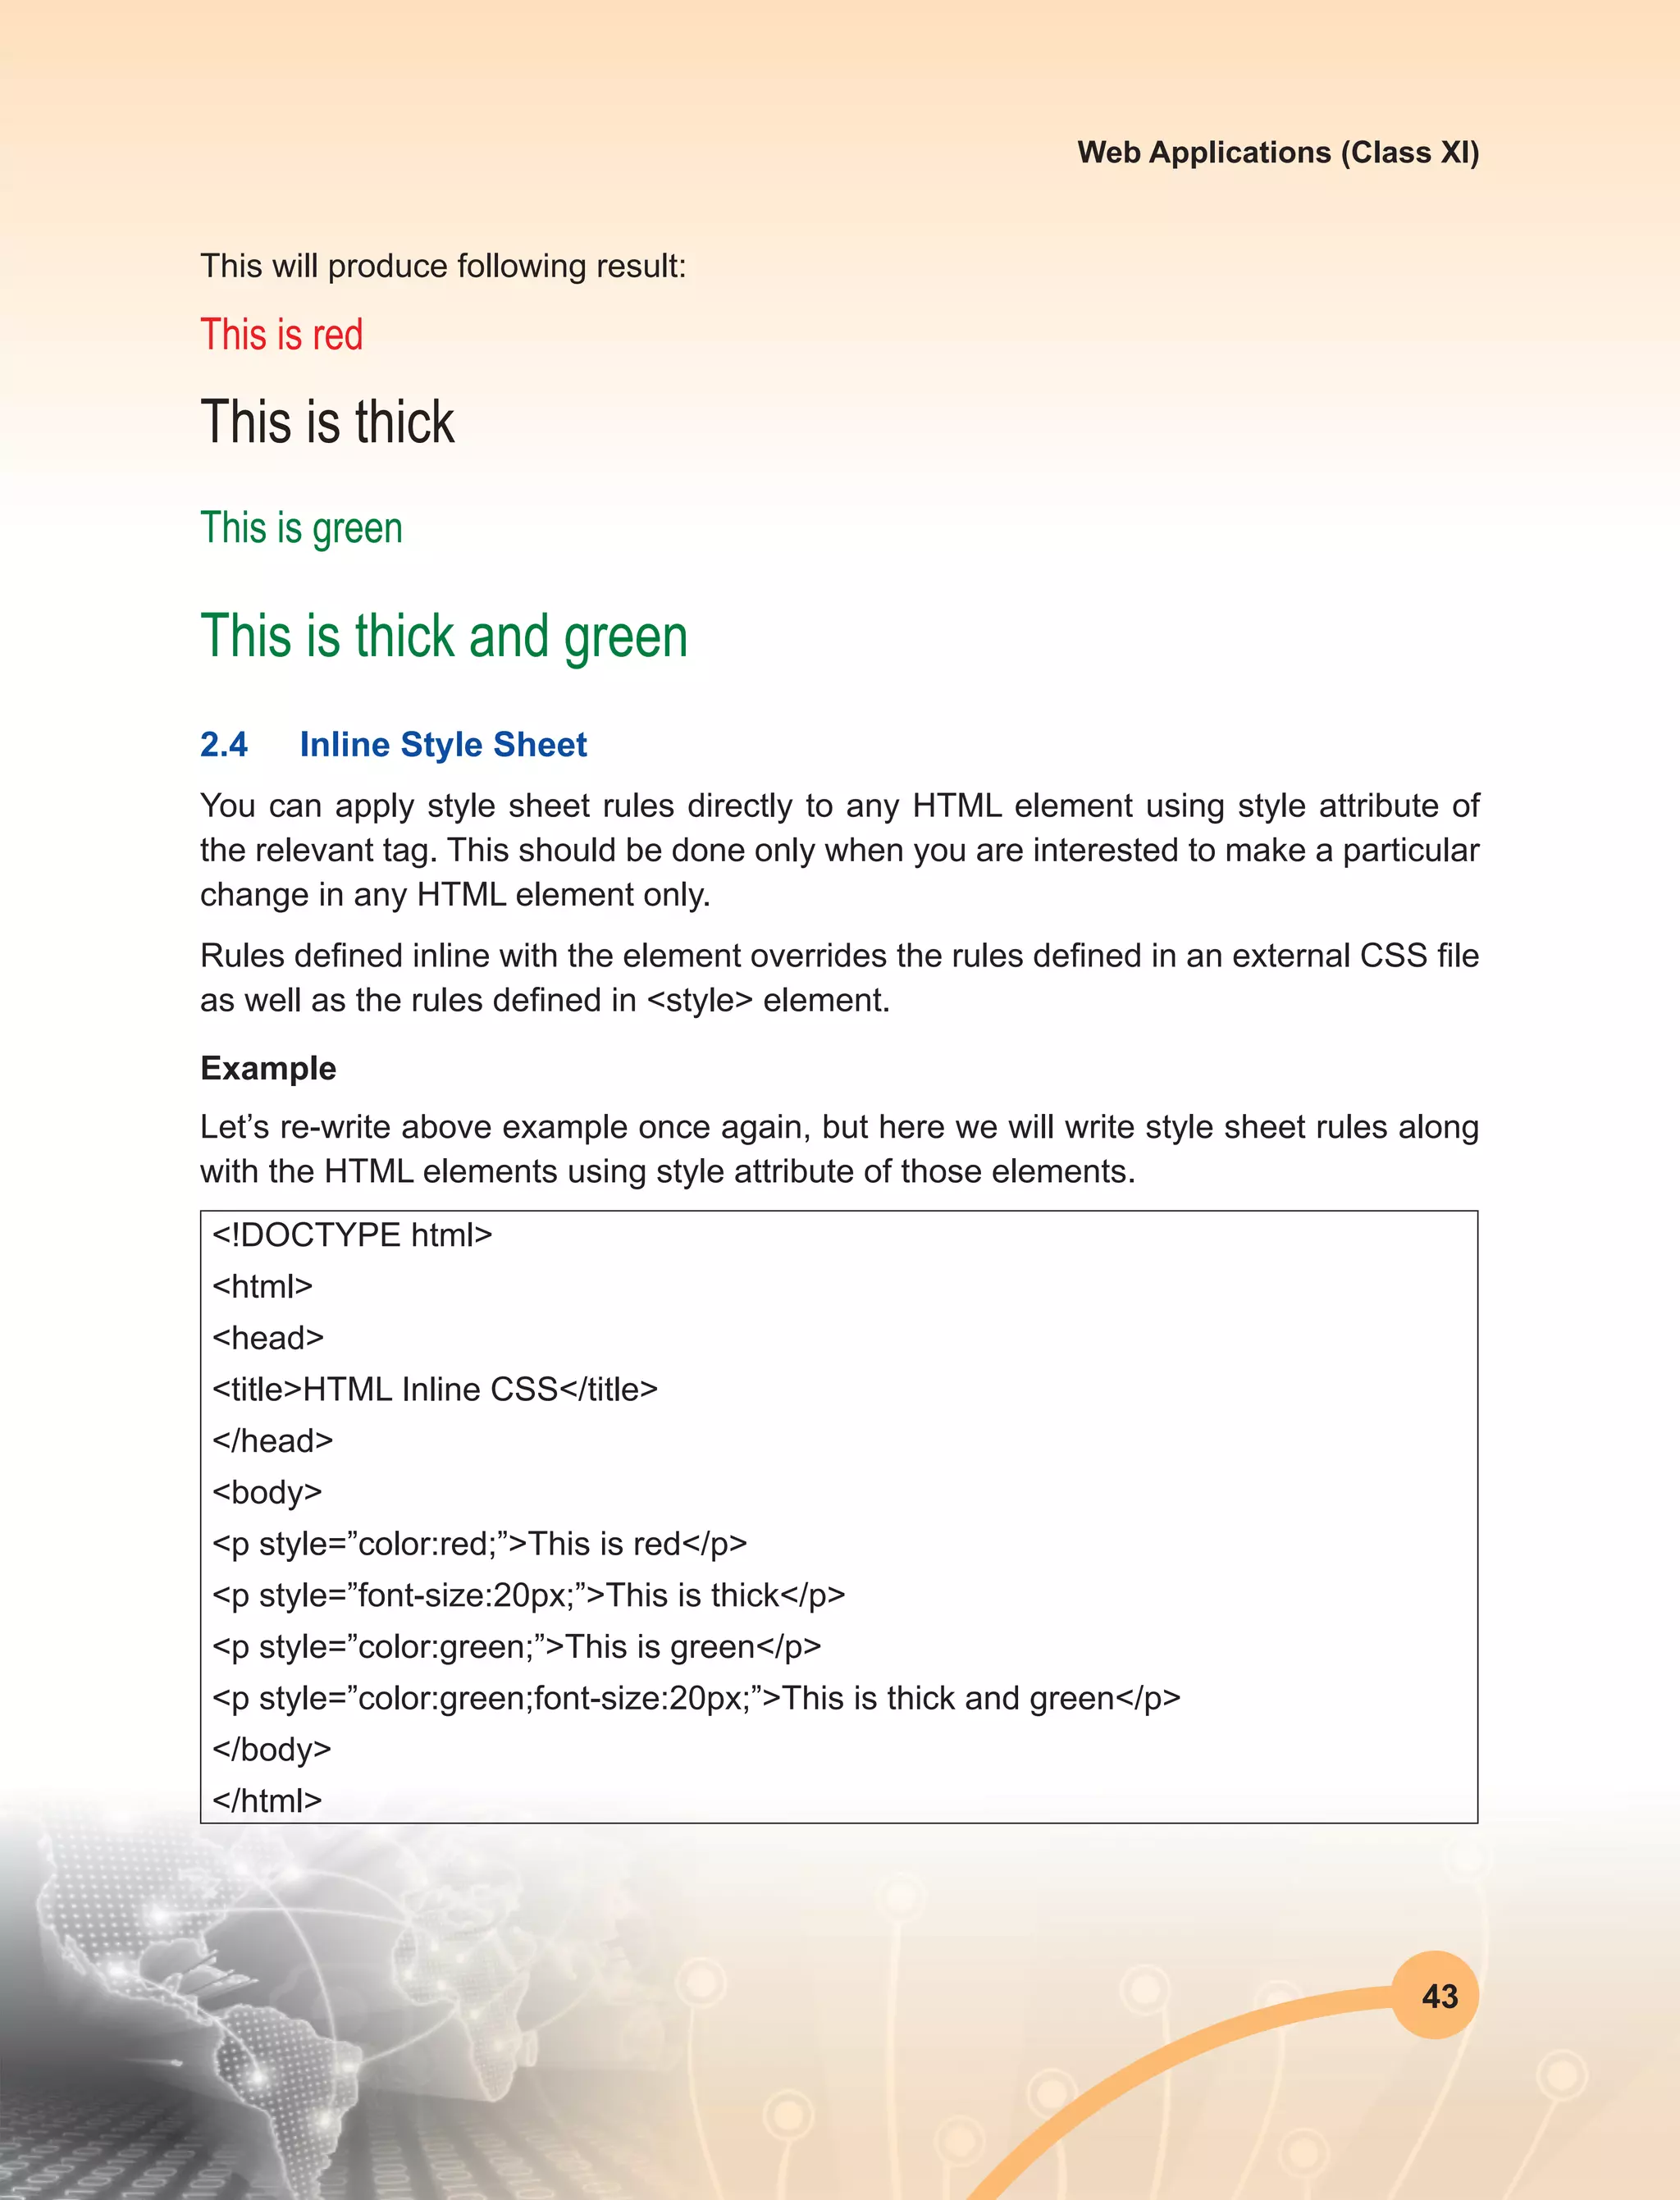
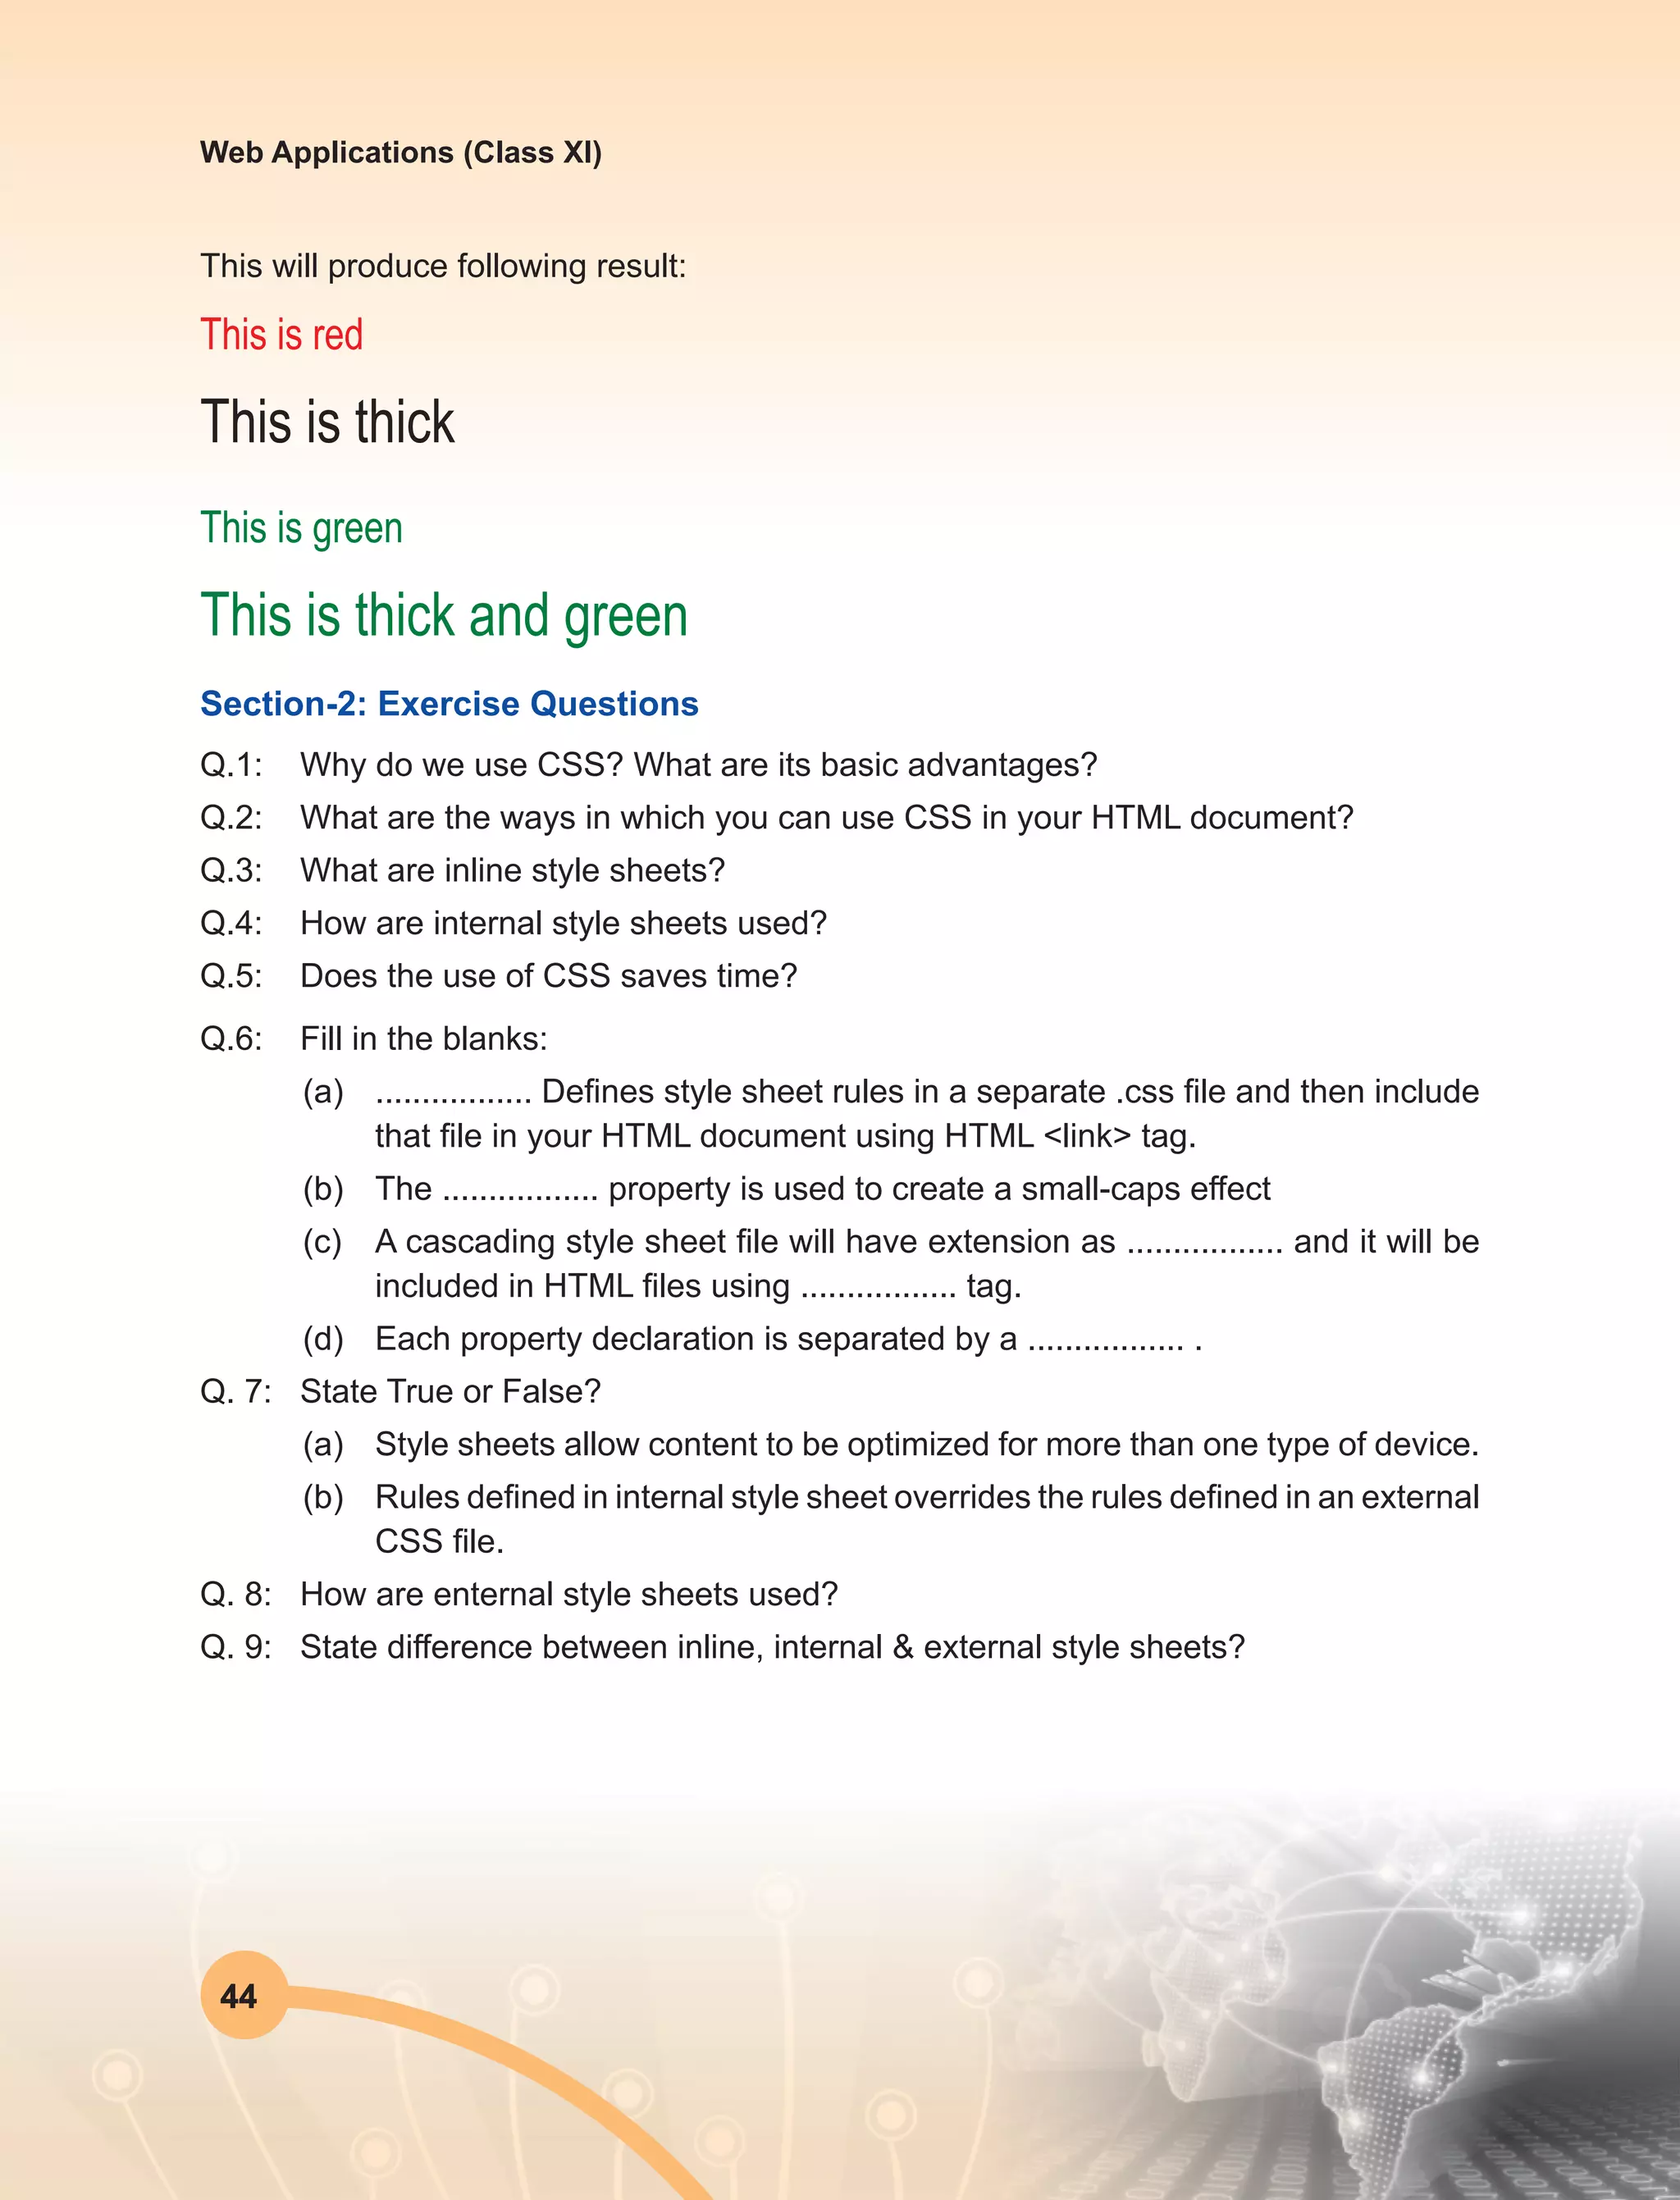
Web Applications (Class XI)
Publishing software: Various type of publishing software
Adobe premier
The premier publisher of multimedia software. Products include Adobe Director
(multimedia authoring), Dreamweaver (web publishing), PhotoShop (photo editing), and
more.store.adobe.com
Create Together
Multimedia environment that integrates creation, collaboration, communication, problem
solving, and publishing in one seamless tool.
Createanimatedgames,randomlygeneratedpuzzles,interactivesimulations,searchable
multimedia databases, hyperlinked presentations and more.
Software products for producing interactive multimedia presentations, training courses,
product catalogues and kiosk systems.
www.dazzlersoft.com
Flying Popcorn
New computer users can create multimedia contents with 3D sound effects, images,
geometrical shapes, text and movie files. Also, professional users will find abundant
application potentials and dazzling transformation capabilities to develop sophisticated
contents.
www.parasys.net
GraFX Saver Pro
Create and distribute your own professional screen savers with over 30 image, video,
and audio formats.
www.grafxsaver.com
Hyper Studio
[Win, Mac] classroom multimedia authoring program.
www.hyperstudio.com
Live Stage
QuickTime authoring application with the ability to converge more than 200 media types.
www.totallyhip.com](https://image.slidesharecdn.com/webapplicationxiit-1-160914162100/75/Web-Application-Class-XI-BOOK-1-32-2048.jpg)


![47
Web Applications (Class XI)
The Child Selectors
You have seen descendant selectors. There is one more type of selectors which is very
similar to descendants but have different functionality. Consider the following example:
body > p {
color: #000000;
}
This rule will render all the paragraphs in black if they are direct child of <body> element.
Other paragraphs put inside other elements like <div> or <td> etc. would not have any
effect of this rule.
The Attribute Selectors
You can also apply styles to HTML elements with particular attributes. The style rule
below will match all input elements that has a type attribute with a value of text:
input[type=”text”]{
color: #000000;
}
The advantage to this method is that the <input type=”submit” /> element is unaffected,
and the color is applied only to the desired text fields.
There are following rules applied to attribute selector.~
u p[lang] - Selects all paragraph elements with a lang attribute.
u p[lang="fr"] - Selects all paragraph elements whose lang attribute has a value of
exactly “fr”.
u p[lang~="fr"] - Selects all paragraph elements whose lang attribute contains the
word “fr”.
u p[lang="en"] - Selects all paragraph elements whose lang attribute contains values
that are exactly
u “en”, or begin with “en-”.
Multiple Style Rules
You may need to define multiple style rules for a single element. You can define these
rules to combine multiple properties and corresponding values into a single block as
defined in the following example:](https://image.slidesharecdn.com/webapplicationxiit-1-160914162100/75/Web-Application-Class-XI-BOOK-1-55-2048.jpg)


![73
Web Applications (Class XI)
<!DOCTYPE html>
<html>
<body>
<h1>My First Web Page</h1>
<p>My first paragraph.</p>
<script>
document.write(100); // Any number or value can be defined
</script>
</body>
</html>
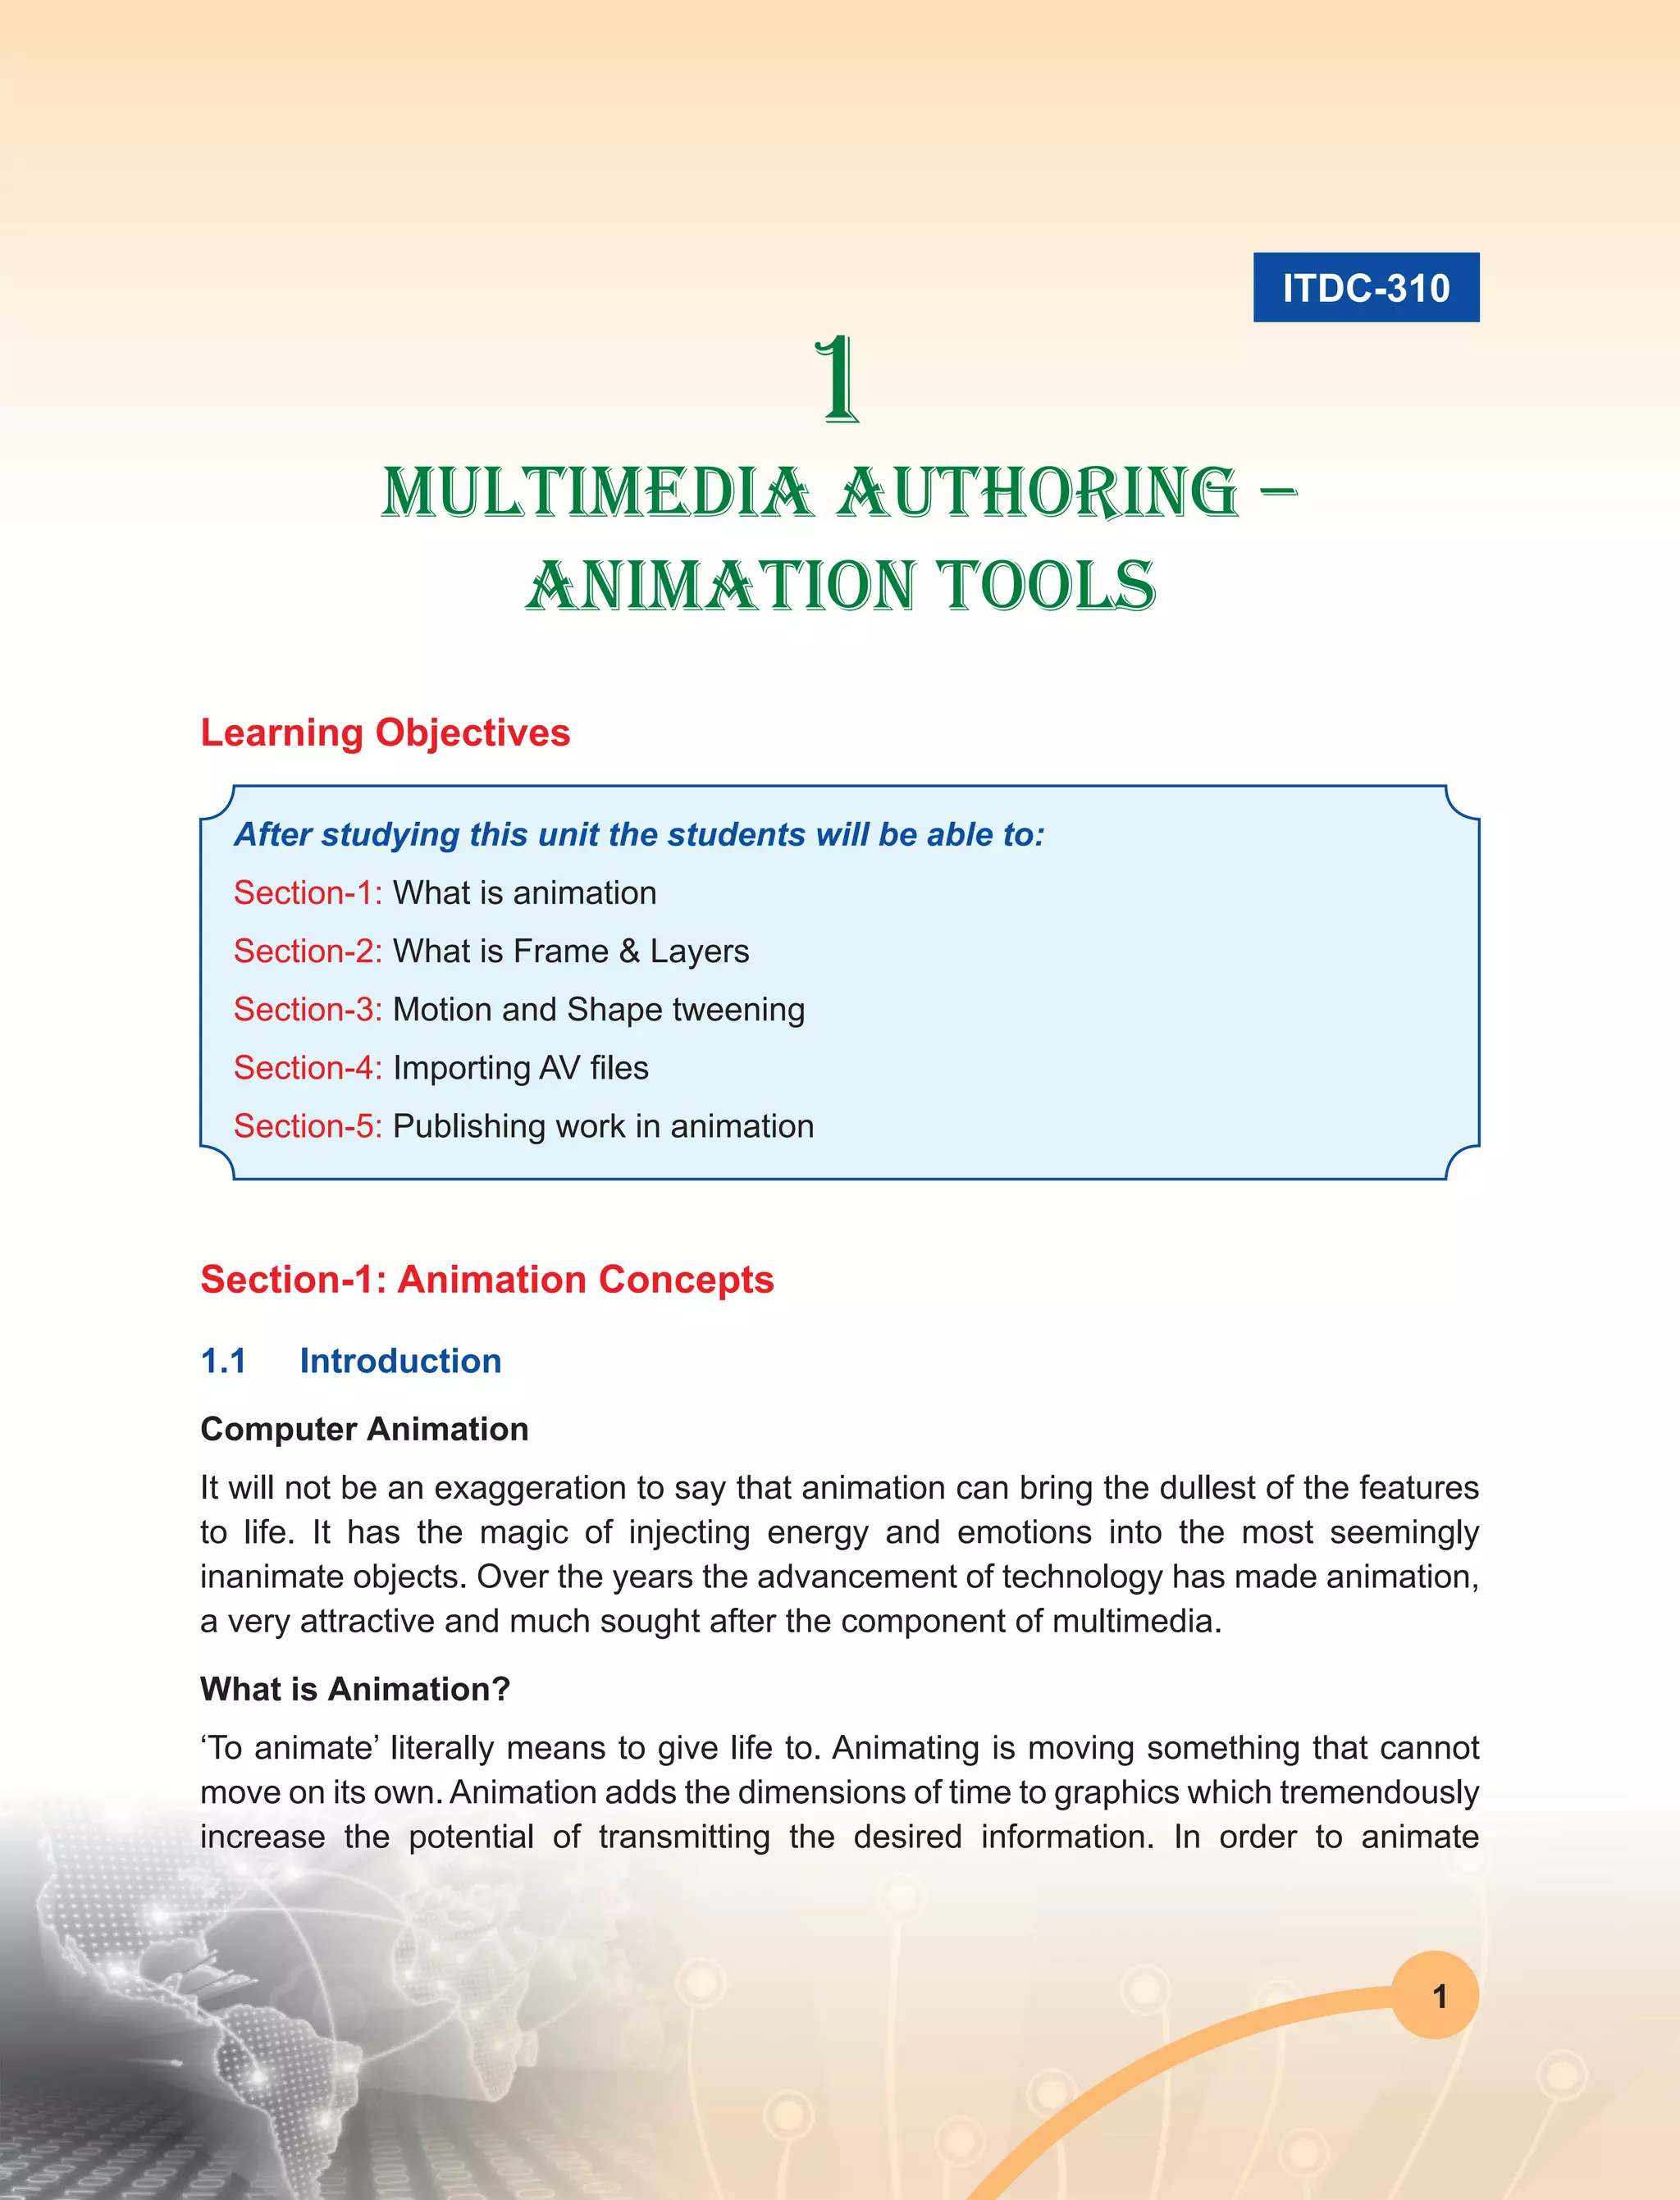
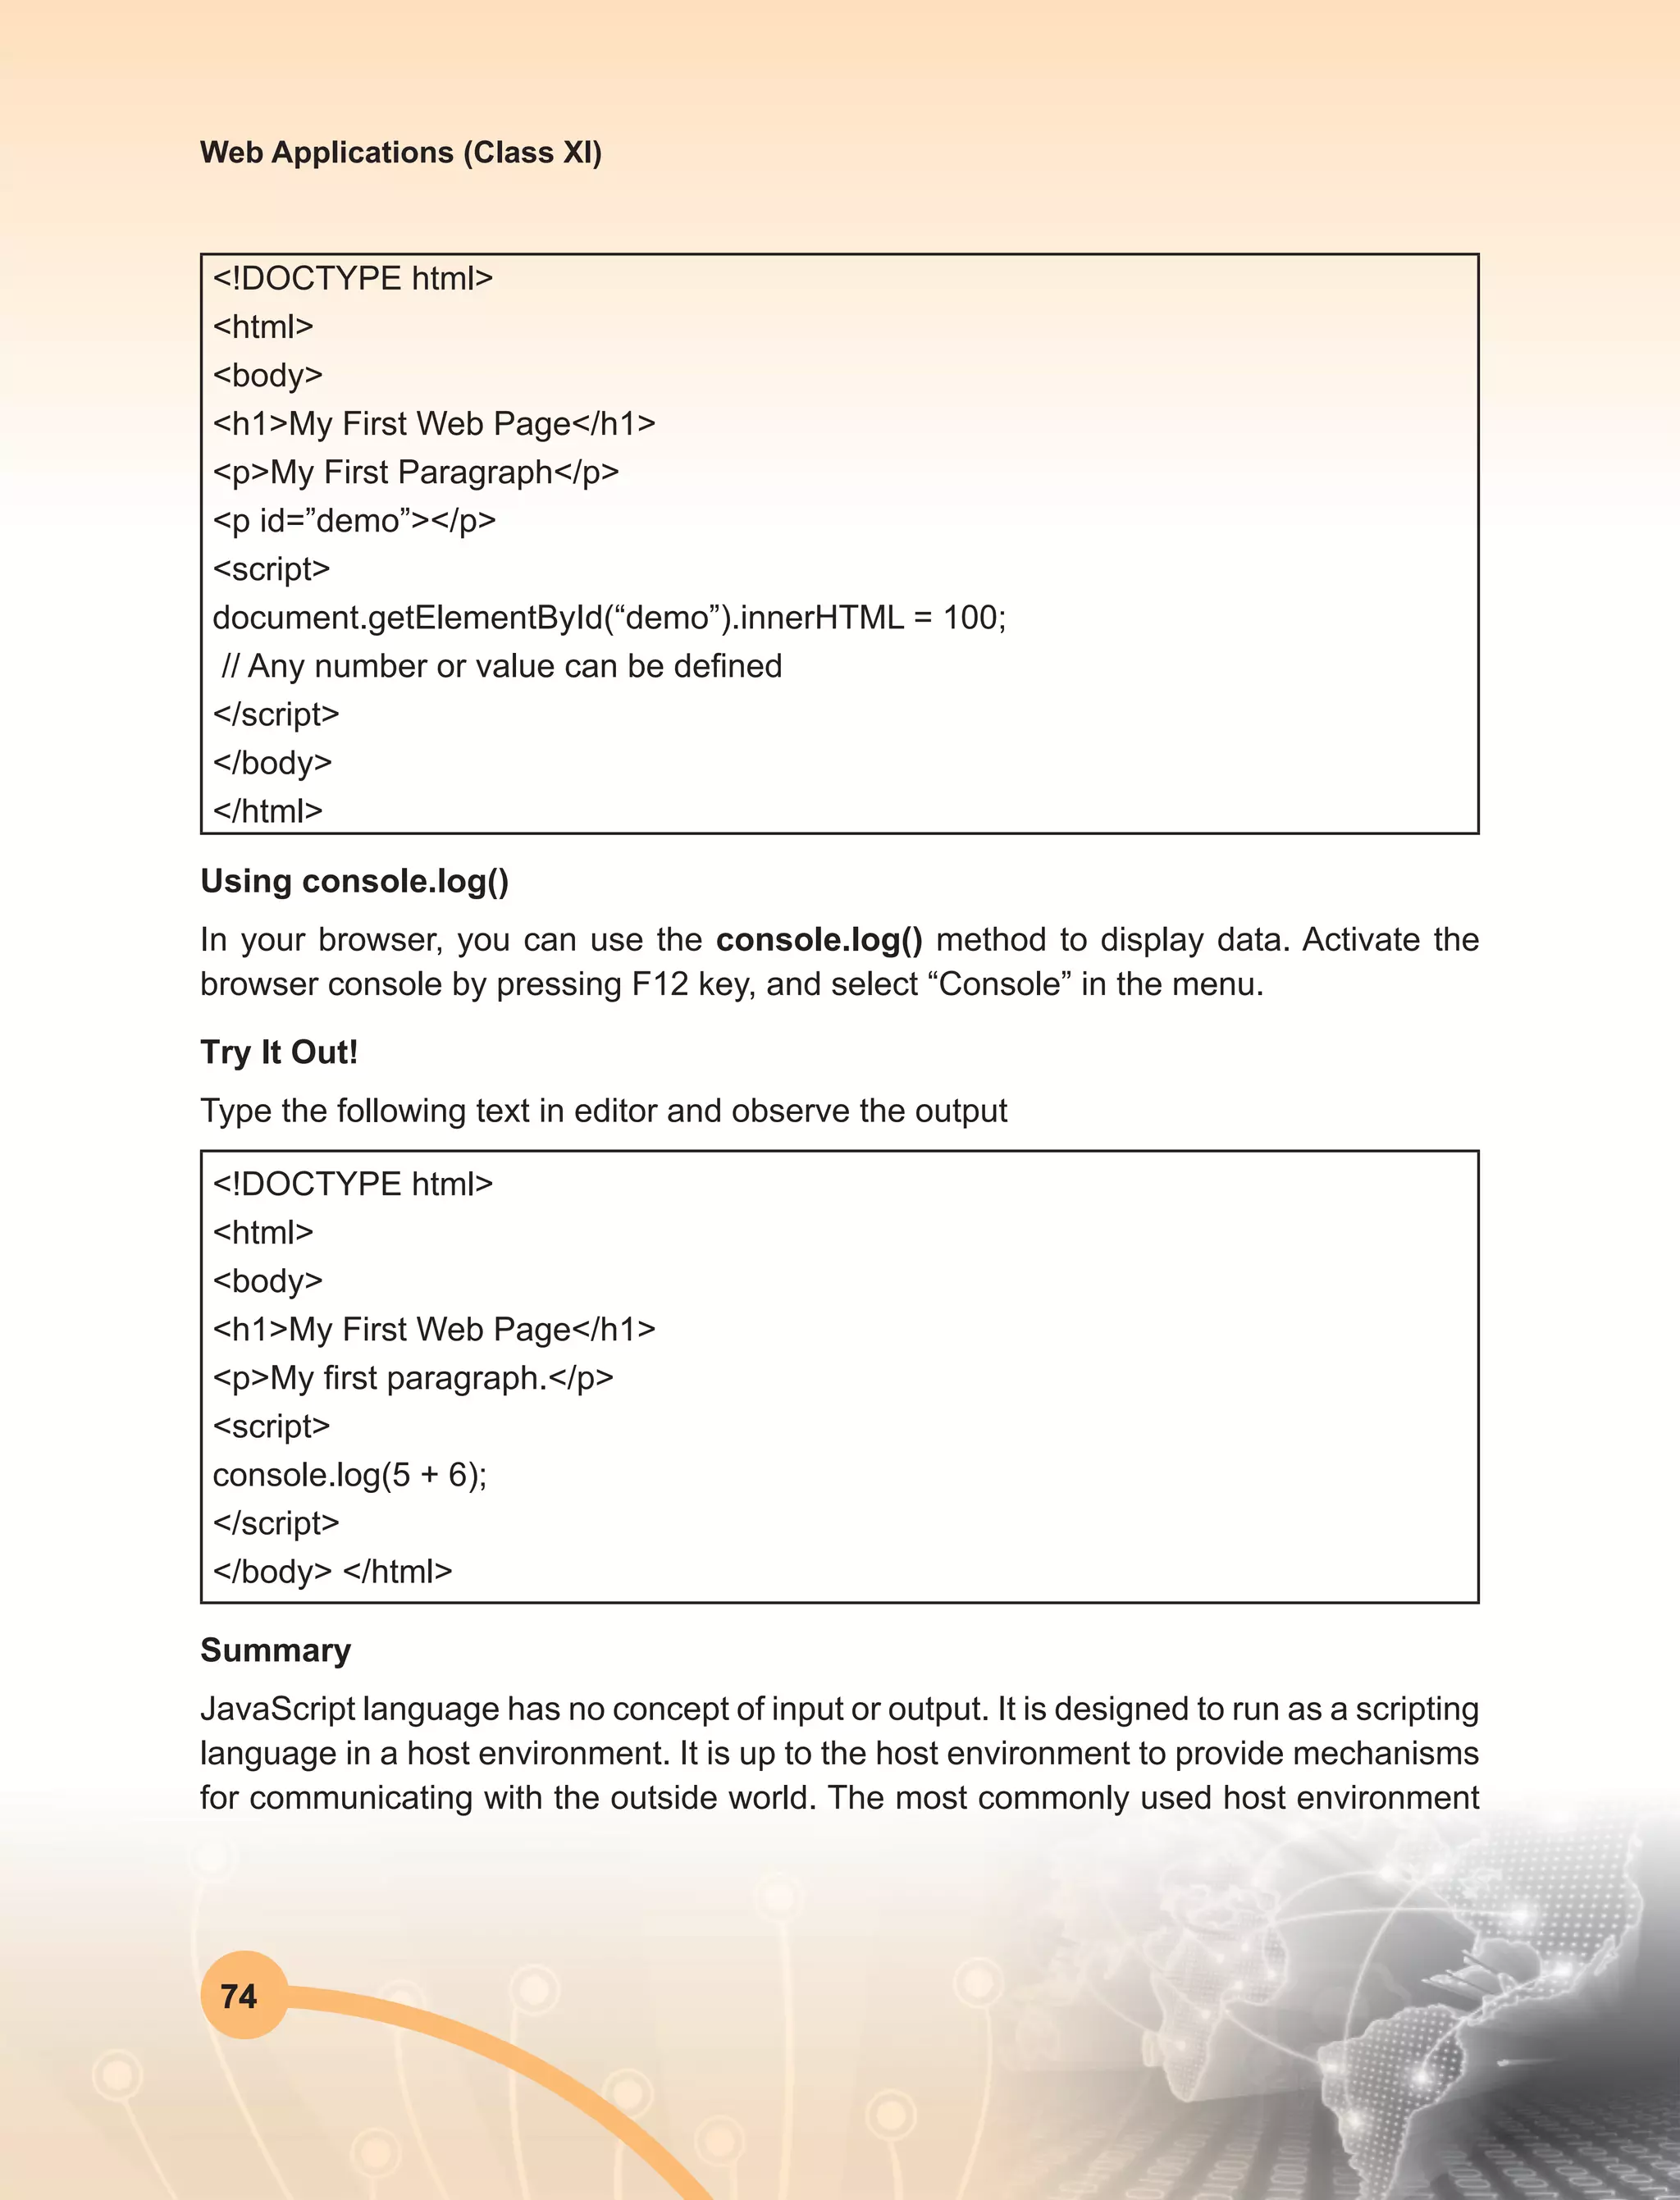
Using document.write()
Try It Out!
Type the following text in editor and observe the output:
<!DOCTYPE html>
<html>
<body>
<h1>My First Web Page</h1>
<p>My first paragraph.</p>
<button onclick=”document.write(5 + 6)”>Try it</button>
// Any number or value can be defined
</body>
</html>
Using inner HTML
To access an HTML element, JavaScript can use the document[.]
getElementById(id) method. The id attribute defines the HTML element. The
innerHTML property defines the HTML content:
Try It Out!
Type the following text in editor and observe the output](https://image.slidesharecdn.com/webapplicationxiit-1-160914162100/75/Web-Application-Class-XI-BOOK-1-81-2048.jpg)

![92
Web Applications (Class XI)
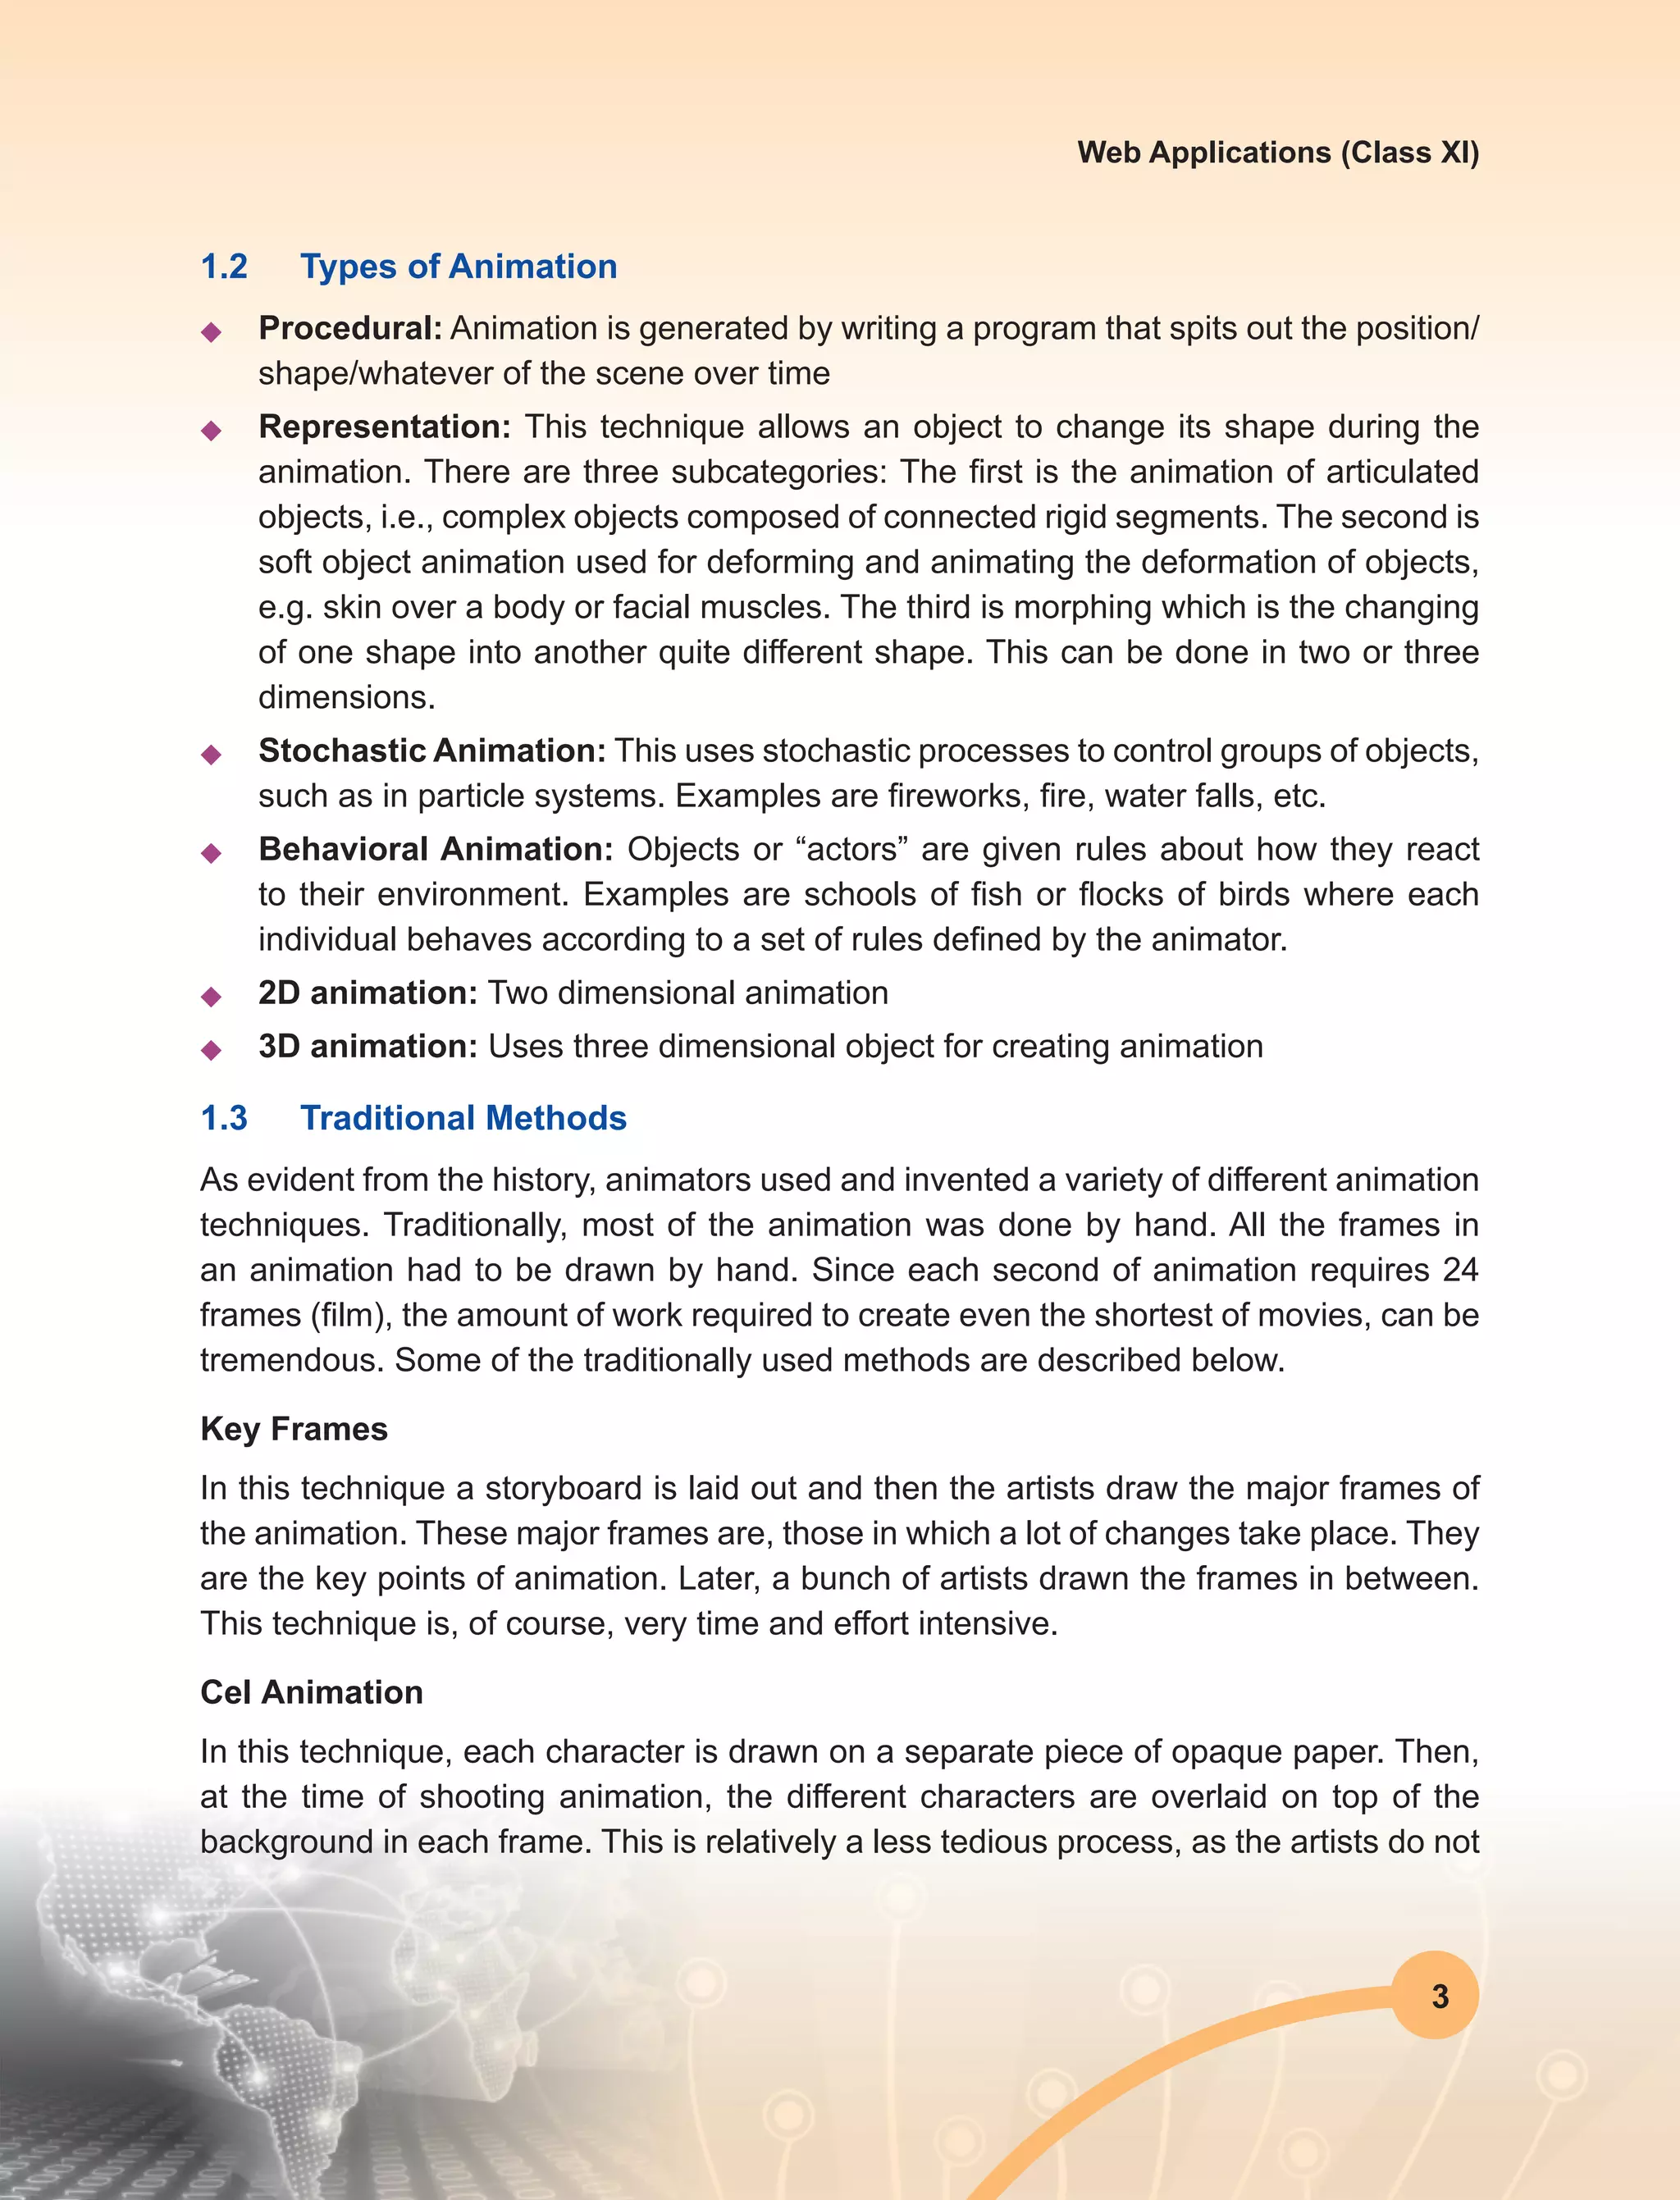
Section-3: Exercise Questions
Perform the following activities in Lab.
S. No. Activities
1. Write a program to:
u Determine if a student has passed in his exam or not. If the marks are greater
than 40 then he has a passed else he has a failed.
u Determine what grade he has obtained based on the marks obtained if 90-
100 is A+; 80-90 is A ;70-80 is B+; 60-70 is B ; 50-60 is C; 40-50 is D and
Below 40 is fail [Hint : Use the if-else if..-else]
2. Write a program using the switch statement to print the names of Class Teachers
of all grades from 1 to 10. Hint: let the grade be a variable. Depending on its
value, print the names of the class teacher.
3. If a student has an amount greater than Rs 50 he uses an auto , else if he has
an amount between Rs 20 to Rs 50 he uses the shared auto else if he has
between Rs 5 to Rs 20 he uses the public bus or Else he walks to his school.
Write this using the if-else if -else condition
4. Write a JavaScript program where the program chooses a random integer
between 1 to 10, then the user is prompted to input a guess number. If the
user input matches with the guess number, the program will display a message
“Good Work” otherwise it will display “Not matched”.
5. Write a JavaScript conditional statement to find the sign of product of three
numbers. Display an alert box with the specified sign such as:
Sample Input numbers : 3, -7, 2
Output : The sign is: -
6. Write a JavaScript conditional statement to sort three numbers in descending
order. Display an alert box to show the result.
Sample Input numbers: 0, -1, 4
Output: 4, 0, -1
7. Write a JavaScript conditional statement to find the largest of five numbers.
Display an alert box to show the result.
Sample Input numbers : -5, -2, -6, 0, -1
Output: 0](https://image.slidesharecdn.com/webapplicationxiit-1-160914162100/75/Web-Application-Class-XI-BOOK-1-100-2048.jpg)
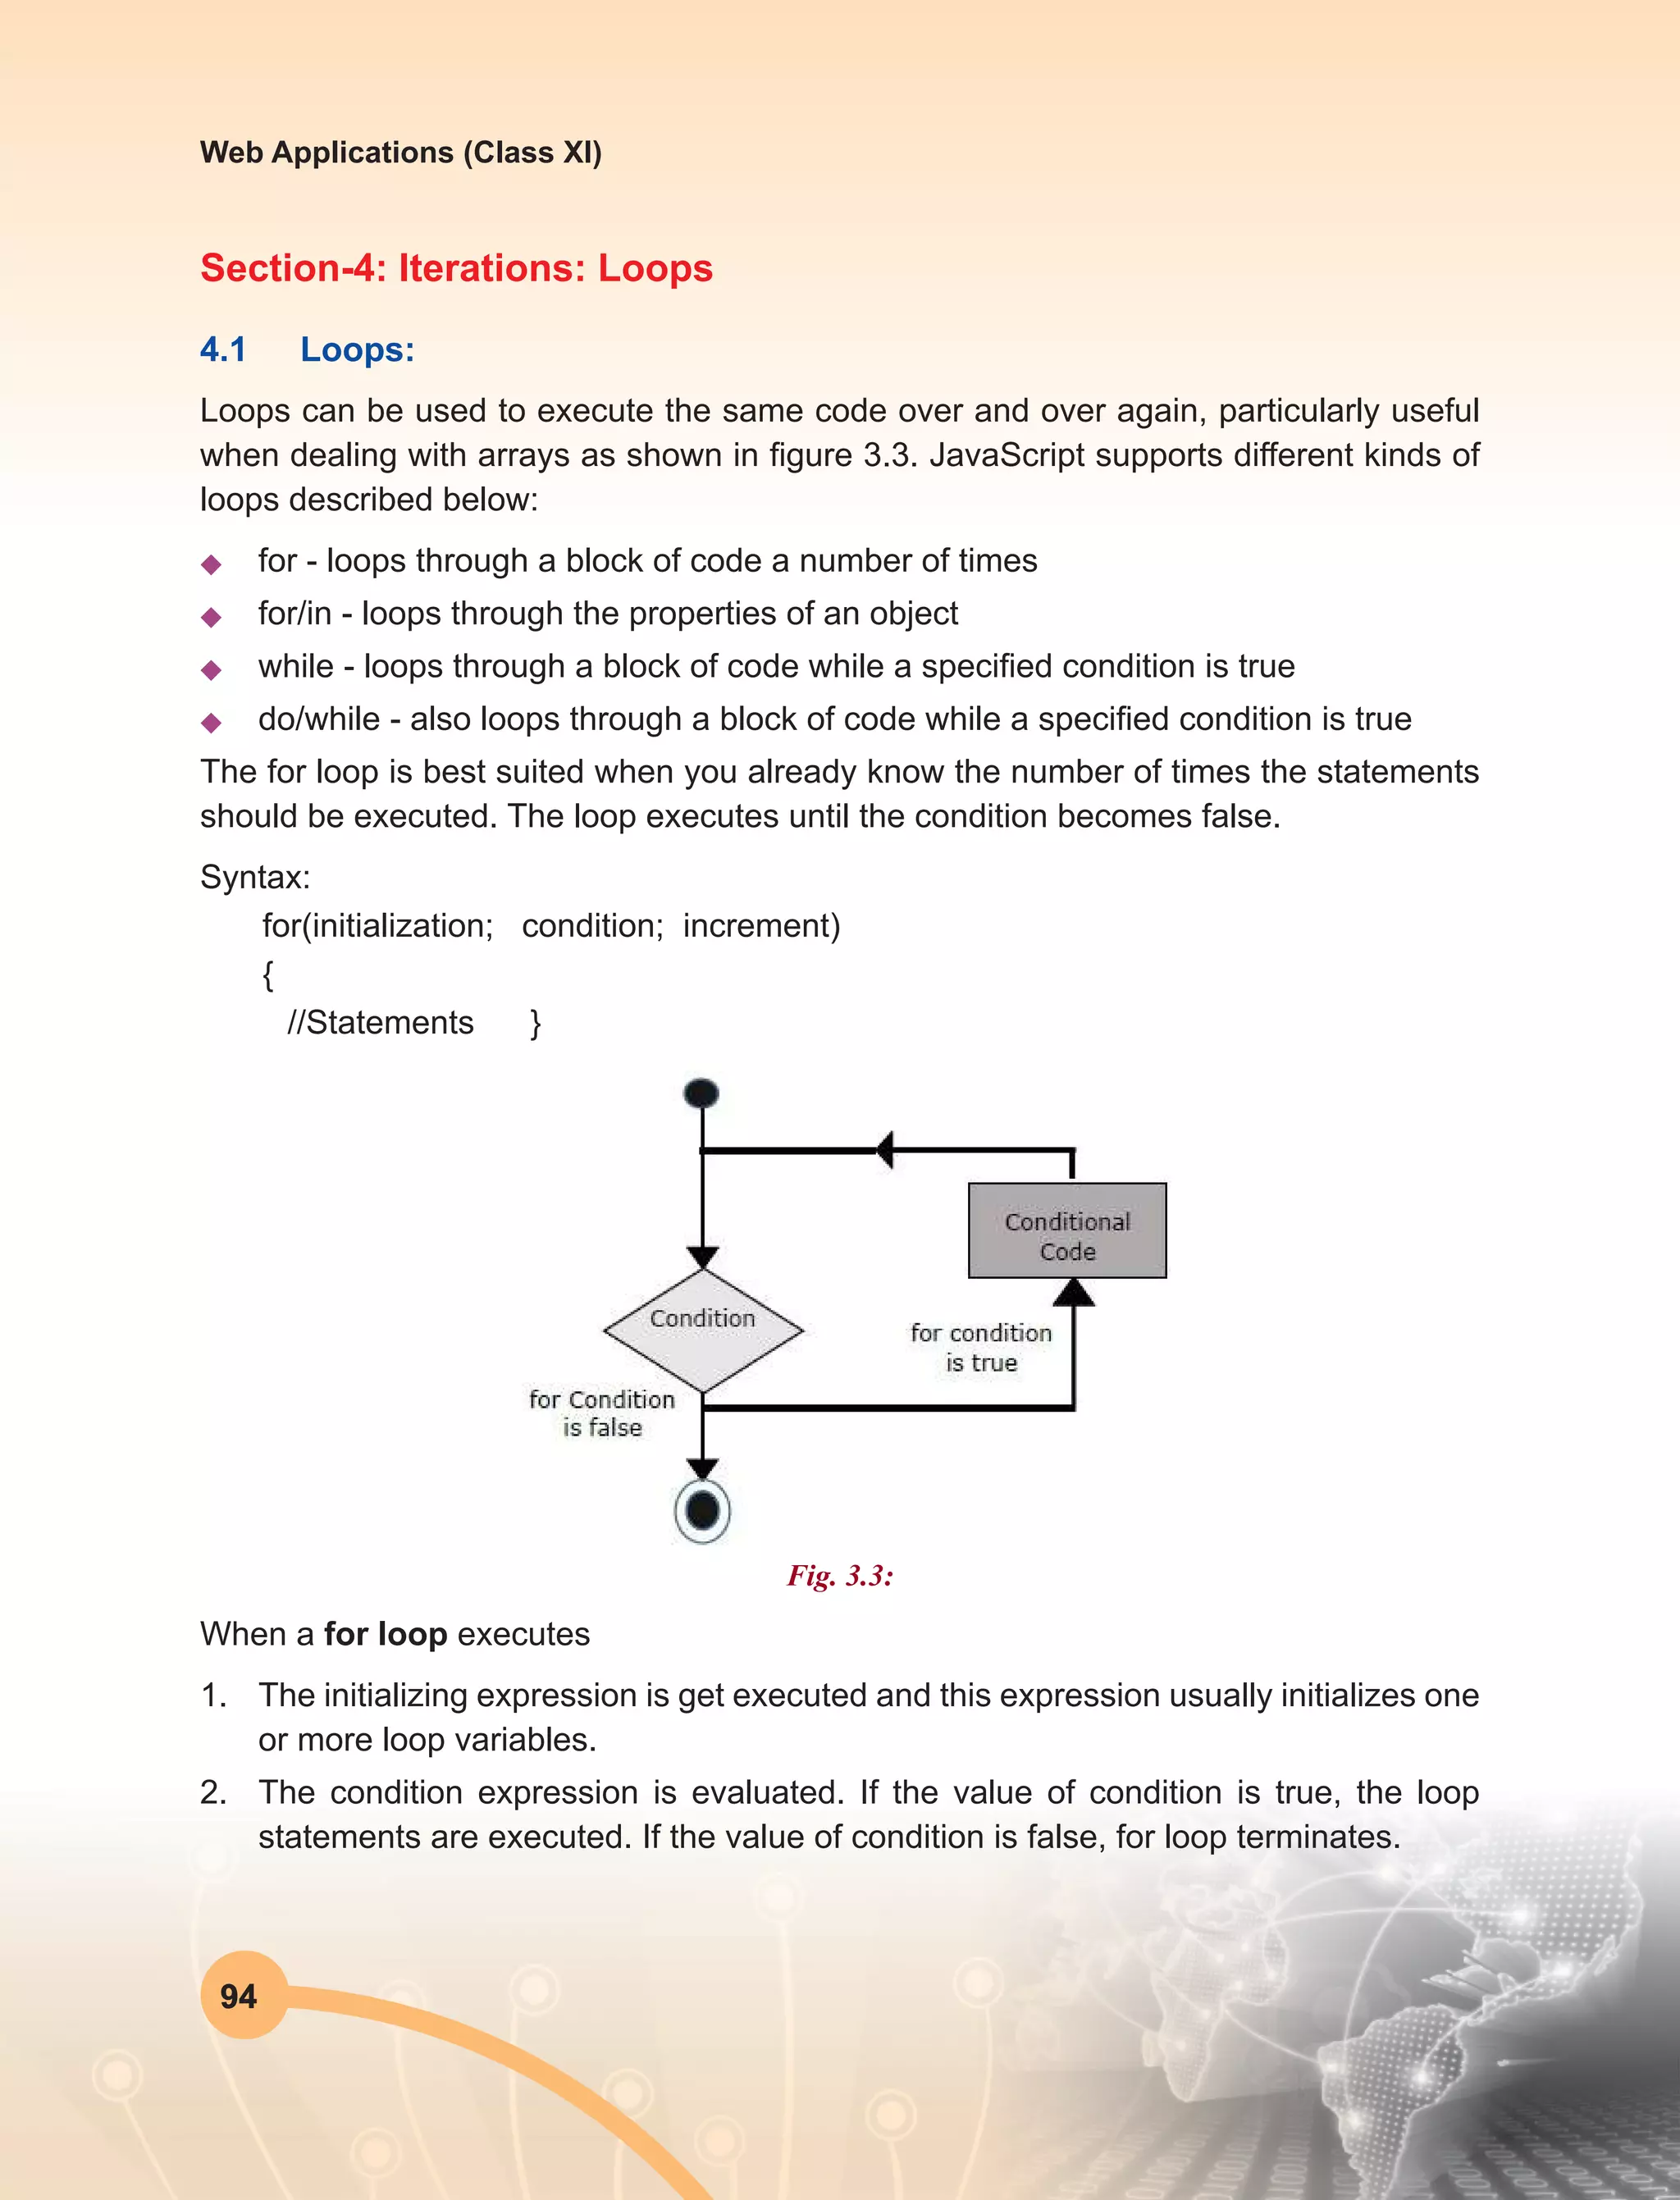
![95
Web Applications (Class XI)
3. The increment expression executes and increments the value by the specified step
value.
4. The statements execute, and control returns to step 2.
Example
<!DOCTYPE html>
<html>
<body>
<p id=”demo”></p>
<script>
var cars = [“BMW”, “MARUTI”, “HONDA”, “AUDI”];
var text = “”;
var i;
for (i = 0; i < cars.length; i++) {
text += cars[i] + “<br>”;
}
document.getElementById(“demo”).innerHTML = text;
</script>
</body>
</html>
Output: BMW
MARUTI
HONDA
AUDI
Example Explained
From the above example we can notice that statement 1 sets a variable before the loop
starts (var i = 0). Statement 2 defines the condition for the loop to run (i must be less than
4). Statement 3 increases a value (i++) each time the code block in the loop has been
executed. In JavaScript, we normally use statement 1 to initiate the variable used in the
loop (i = 0). Although, this is not always the case, JavaScript doesn’t care. Statement 1
is optional. We can initiate many values in statement 1 (separated by comma):](https://image.slidesharecdn.com/webapplicationxiit-1-160914162100/75/Web-Application-Class-XI-BOOK-1-103-2048.jpg)
![96
Web Applications (Class XI)
Example
for (i = 0, len = cars.length, text = “”; i < len; i++)
{
text += cars[i] + “<br>”;
}
Note: We can omit statement 1 when the values are set before the loop starts:
Example:
var i = 2;
var len = cars.length;
var text = “”;
for (; i < len; i++) {
text += cars[i] + “<br>”;
}
Statement 3 can be used for negative increment (i--), positive increment (i = i + 15), or
anything else. Statement 3 can also be omitted when we increment the values inside
the loop such as:
Example:
var i = 0;
var len = cars.length;
for (; i < len; ) {
text += cars[i] + “<br>”;
i++;
}
The for/in Loop: The JavaScript for/in statement loops through the properties of an
object explain below.](https://image.slidesharecdn.com/webapplicationxiit-1-160914162100/75/Web-Application-Class-XI-BOOK-1-104-2048.jpg)
![97
Web Applications (Class XI)
Example
<!DOCTYPE html>
<html>
<body>
<p id=”demo”></p>
<script>
var txt = “”;
var person = {fname:”John”, lname:”Doe”, age:25};
var x;
for (x in person) {
txt += person[x] + “ “;
}
document.getElementById(“demo”).innerHTML = txt;
</script>
</body>
</html>
Output: John Doe 25
The while Loop:
The While Loop is another commonly used loop in JavaScript. The purpose of the while loop is
to execute a block of statements over and over again until the condition fails. It is best suited in
a scenario where we don’t know in advanced as to how many times the loop will be executed
as shown in figure 3.4.
Fig. 3.4:](https://image.slidesharecdn.com/webapplicationxiit-1-160914162100/75/Web-Application-Class-XI-BOOK-1-105-2048.jpg)

![105
Web Applications (Class XI)
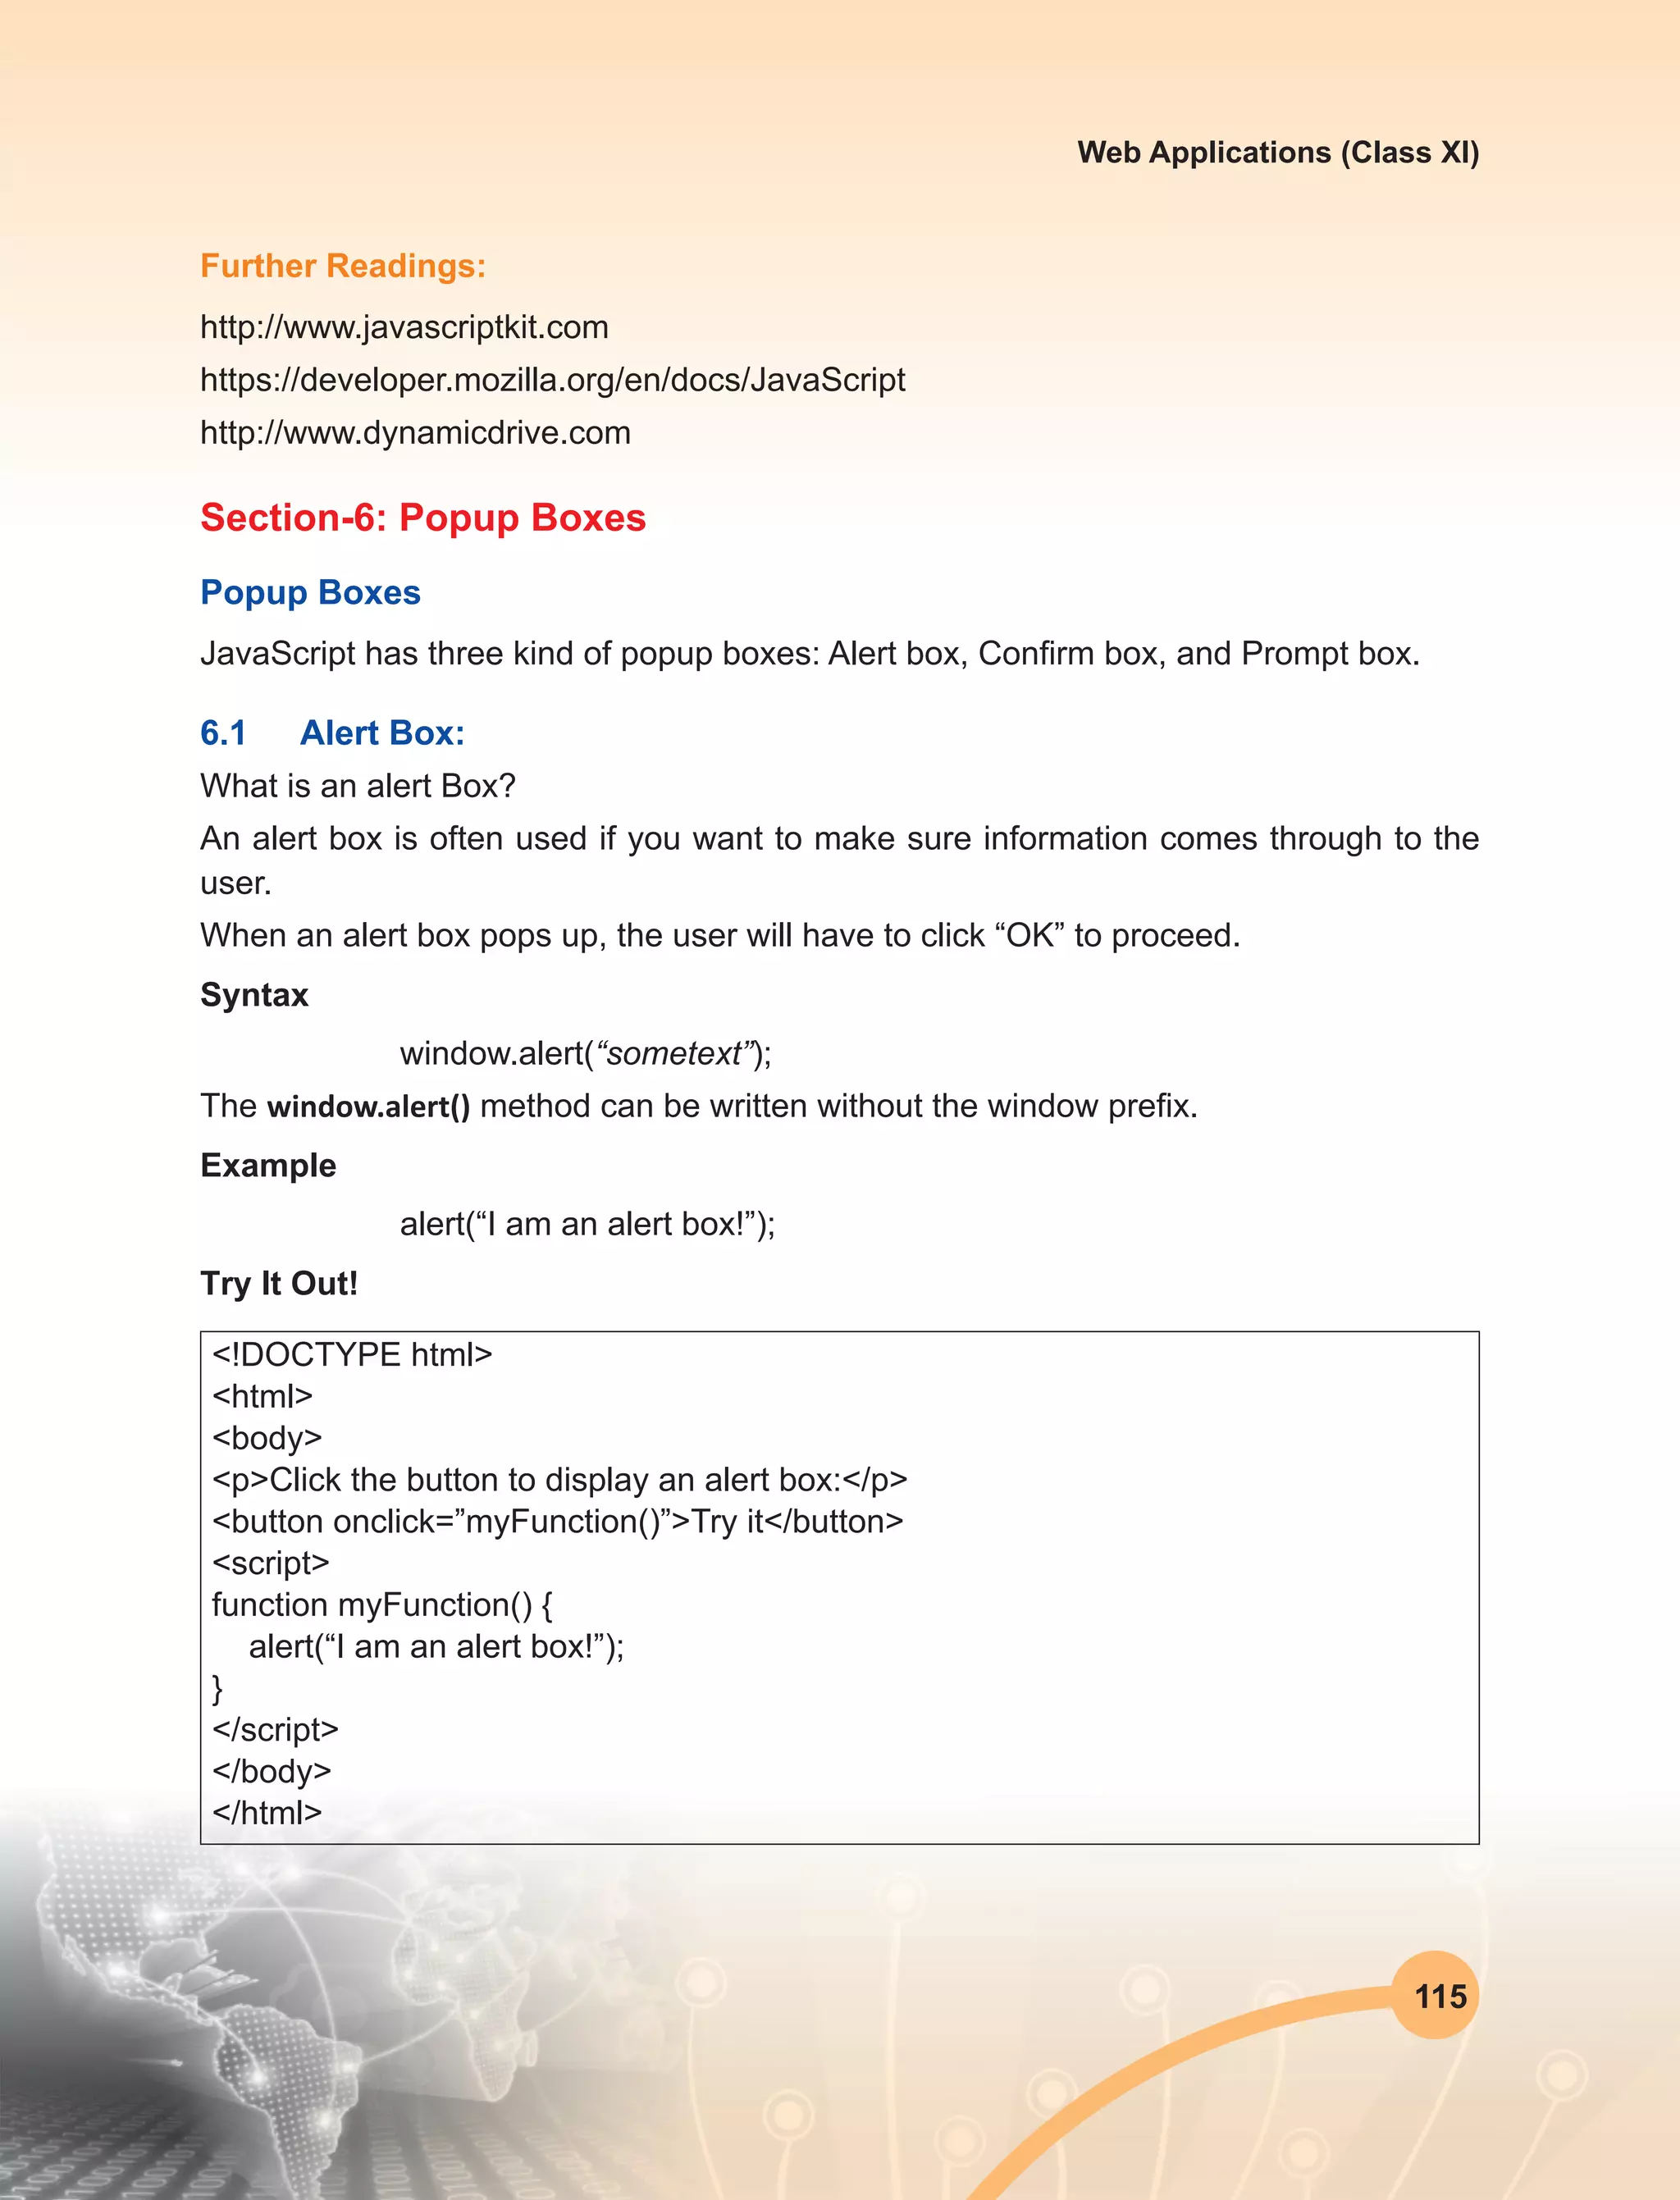
Further Readings:
1. http://www.javascriptkit.com
2. https://developer.mozilla.org/en/docs/JavaScript
3. http://www.dynamicdrive.com
Section-5: Window Object
The window object represents an open window in a browser. If a document contain
frames (<iframe> tags), the browser creates one window object for the HTML document,
and one additional window object for each frame. There is no public standard that applies
to the Window object, but all major browsers support it.
5.1 Window Object Properties
Properties Description
closed Returns the Boolean variable indicating whether the window has
been closed or not.
defaultStatus Read/write property that reflects the default window status bar
message that appears.
document Returns the document object reference to the current document
object.
frames Returns all <iframe> elements in the current window.
An array referencing all of the frames in the current window,
including IFRAME elements.
If the current page is contained in a frame itself and you wish to
access another sibling frame, navigate up towards the topmost
frameset document first using the parent property of window, for
example:
parent.frames[0] //access first frame within parent frameset.
history Reference to the History object of JavaScript, which contains
information on the URLs, the visitor has visited within the window.](https://image.slidesharecdn.com/webapplicationxiit-1-160914162100/75/Web-Application-Class-XI-BOOK-1-113-2048.jpg)
![107
Web Applications (Class XI)
Properties Description
pageXOffset,
pageYOffset
- Supported in:
Firefox/Opera/
Safari, but NOT IE.
Returns an integer representing the pixels the current document
has been scrolled from the upper left corner of the window,
horizontally and vertically, respectively.
You can also use window.scrollX and window.scrollY.
screenX, screenY
- Supported in:
Firefox/Opera/
Safari, but NOT IE.
Specifies the x and y coordinates of the window relative to the
user’s monitor screen.
Note: IE+ equivalents are “window.screenLeft” and “window.
screenTop”
screenLeft,
screenTop
- IE only properties
Specifies the x and y coordinates of the window relative to the
user’s monitor screen.
5.2 Window Object Methods
In the following table “[ ]” surrounding a parameter within the square brackets means the
parameter is optional. You can ignore it.
Methods Description
alert(msg) Displays an Alert dialog box with the desired message and OK
button.
blur() Removes focus from the window in question, sending the window
to the background on the user’s desktop.
clearInterval(ID) Clears the timer set using var ID=setInterval().
clearTimeout(ID) Clears the timer set using var ID=setTimeout().
close() Closes a window.
confirm(msg) Displays a Confirm dialog box with the specified message and
OK and Cancel buttons.
Returns either true or false, depending on the button, that the
user has clicked on, for example:
var yourstate=window.confirm(“Are you sure you are ok?”) if
(yourstate) //Boolean variable. Sets to true if user pressed “OK”
versus “Cancel.” window.alert(“Good!”)](https://image.slidesharecdn.com/webapplicationxiit-1-160914162100/75/Web-Application-Class-XI-BOOK-1-115-2048.jpg)
![108
Web Applications (Class XI)
Methods Description
find(string,
[casesensitive],
[backward])
- Firefox only
property
Searches for the “string” within the page, and returns string or
false, accordingly.
“casesensitive” is a Boolean denoting whether search is case
sensitive. “backwards” is a Boolean which when set to true,
searches the page backwards.
Final two optional parameters must be set together or none at
all.
focus() Sets focus to the window, bringing it to the forefront on the
desktop.
home()
- Firefox only
property
Navigates the window to the homepage as designated by the
user’s browser setting.
moveBy(dx, dy) Moves a window by the specified amount in pixels.
moveTo(x, y) Moves a window to the specified coordinate values, in pixels. The
following opens a window and centers it on the user’s screen
open(URL,
[name], [features],
[replace])
Opens a new browser window.
“Name” argument specifies a name that you can use in the target
attribute of your <a> tag.
“Features” allows you to show/hide various aspects of the window
interface.
“Replace” is a Boolean argument that denotes whether the URL
loaded into the new window should add to the window’s history
list.
print() Prints the contents of the window or frame.
prompt(msg,
[input])
Displays a Prompt dialog box with a message.
Optional “input” argument allows you to specify the default input
(response) that gets entered into the dialog box.
This function returns the string the user has entered such as:
var yourname=window.prompt(“please enter your name”)
alert(yourname)](https://image.slidesharecdn.com/webapplicationxiit-1-160914162100/75/Web-Application-Class-XI-BOOK-1-116-2048.jpg)
![109
Web Applications (Class XI)
Methods Description
resizeBy(dx, dy) Resizes a window by the specified amount in pixels.
resizeTo(x y) Resizes a window to the specified pixel values. The following
will resize the current window to be maximized on the screen in
browsers with no security hang ups over such an operation (IE
does and will do nothing):
window.resizeTo(screen.availWidth, screen.availHeight)
scrollBy(dx, dy) Scrolls a window by the specified amount in pixels.
scrollTo(x, y) Scrolls a window to the specified pixel values.
setTimeout(“func”,
interval, [args])
Calls the specified function reference (func) or JavaScript
statement(s) once after the “interval” parameter has expired, in
milliseconds (ie: 1000=after 1 second).
This method returns a unique ID which can be passed
into clearTimeout(id) to clear the timer.
stop() Stops the window from loading. NS4/NS6+ exclusive method.
Use the optional “args” to pass any number of arguments to the
function.
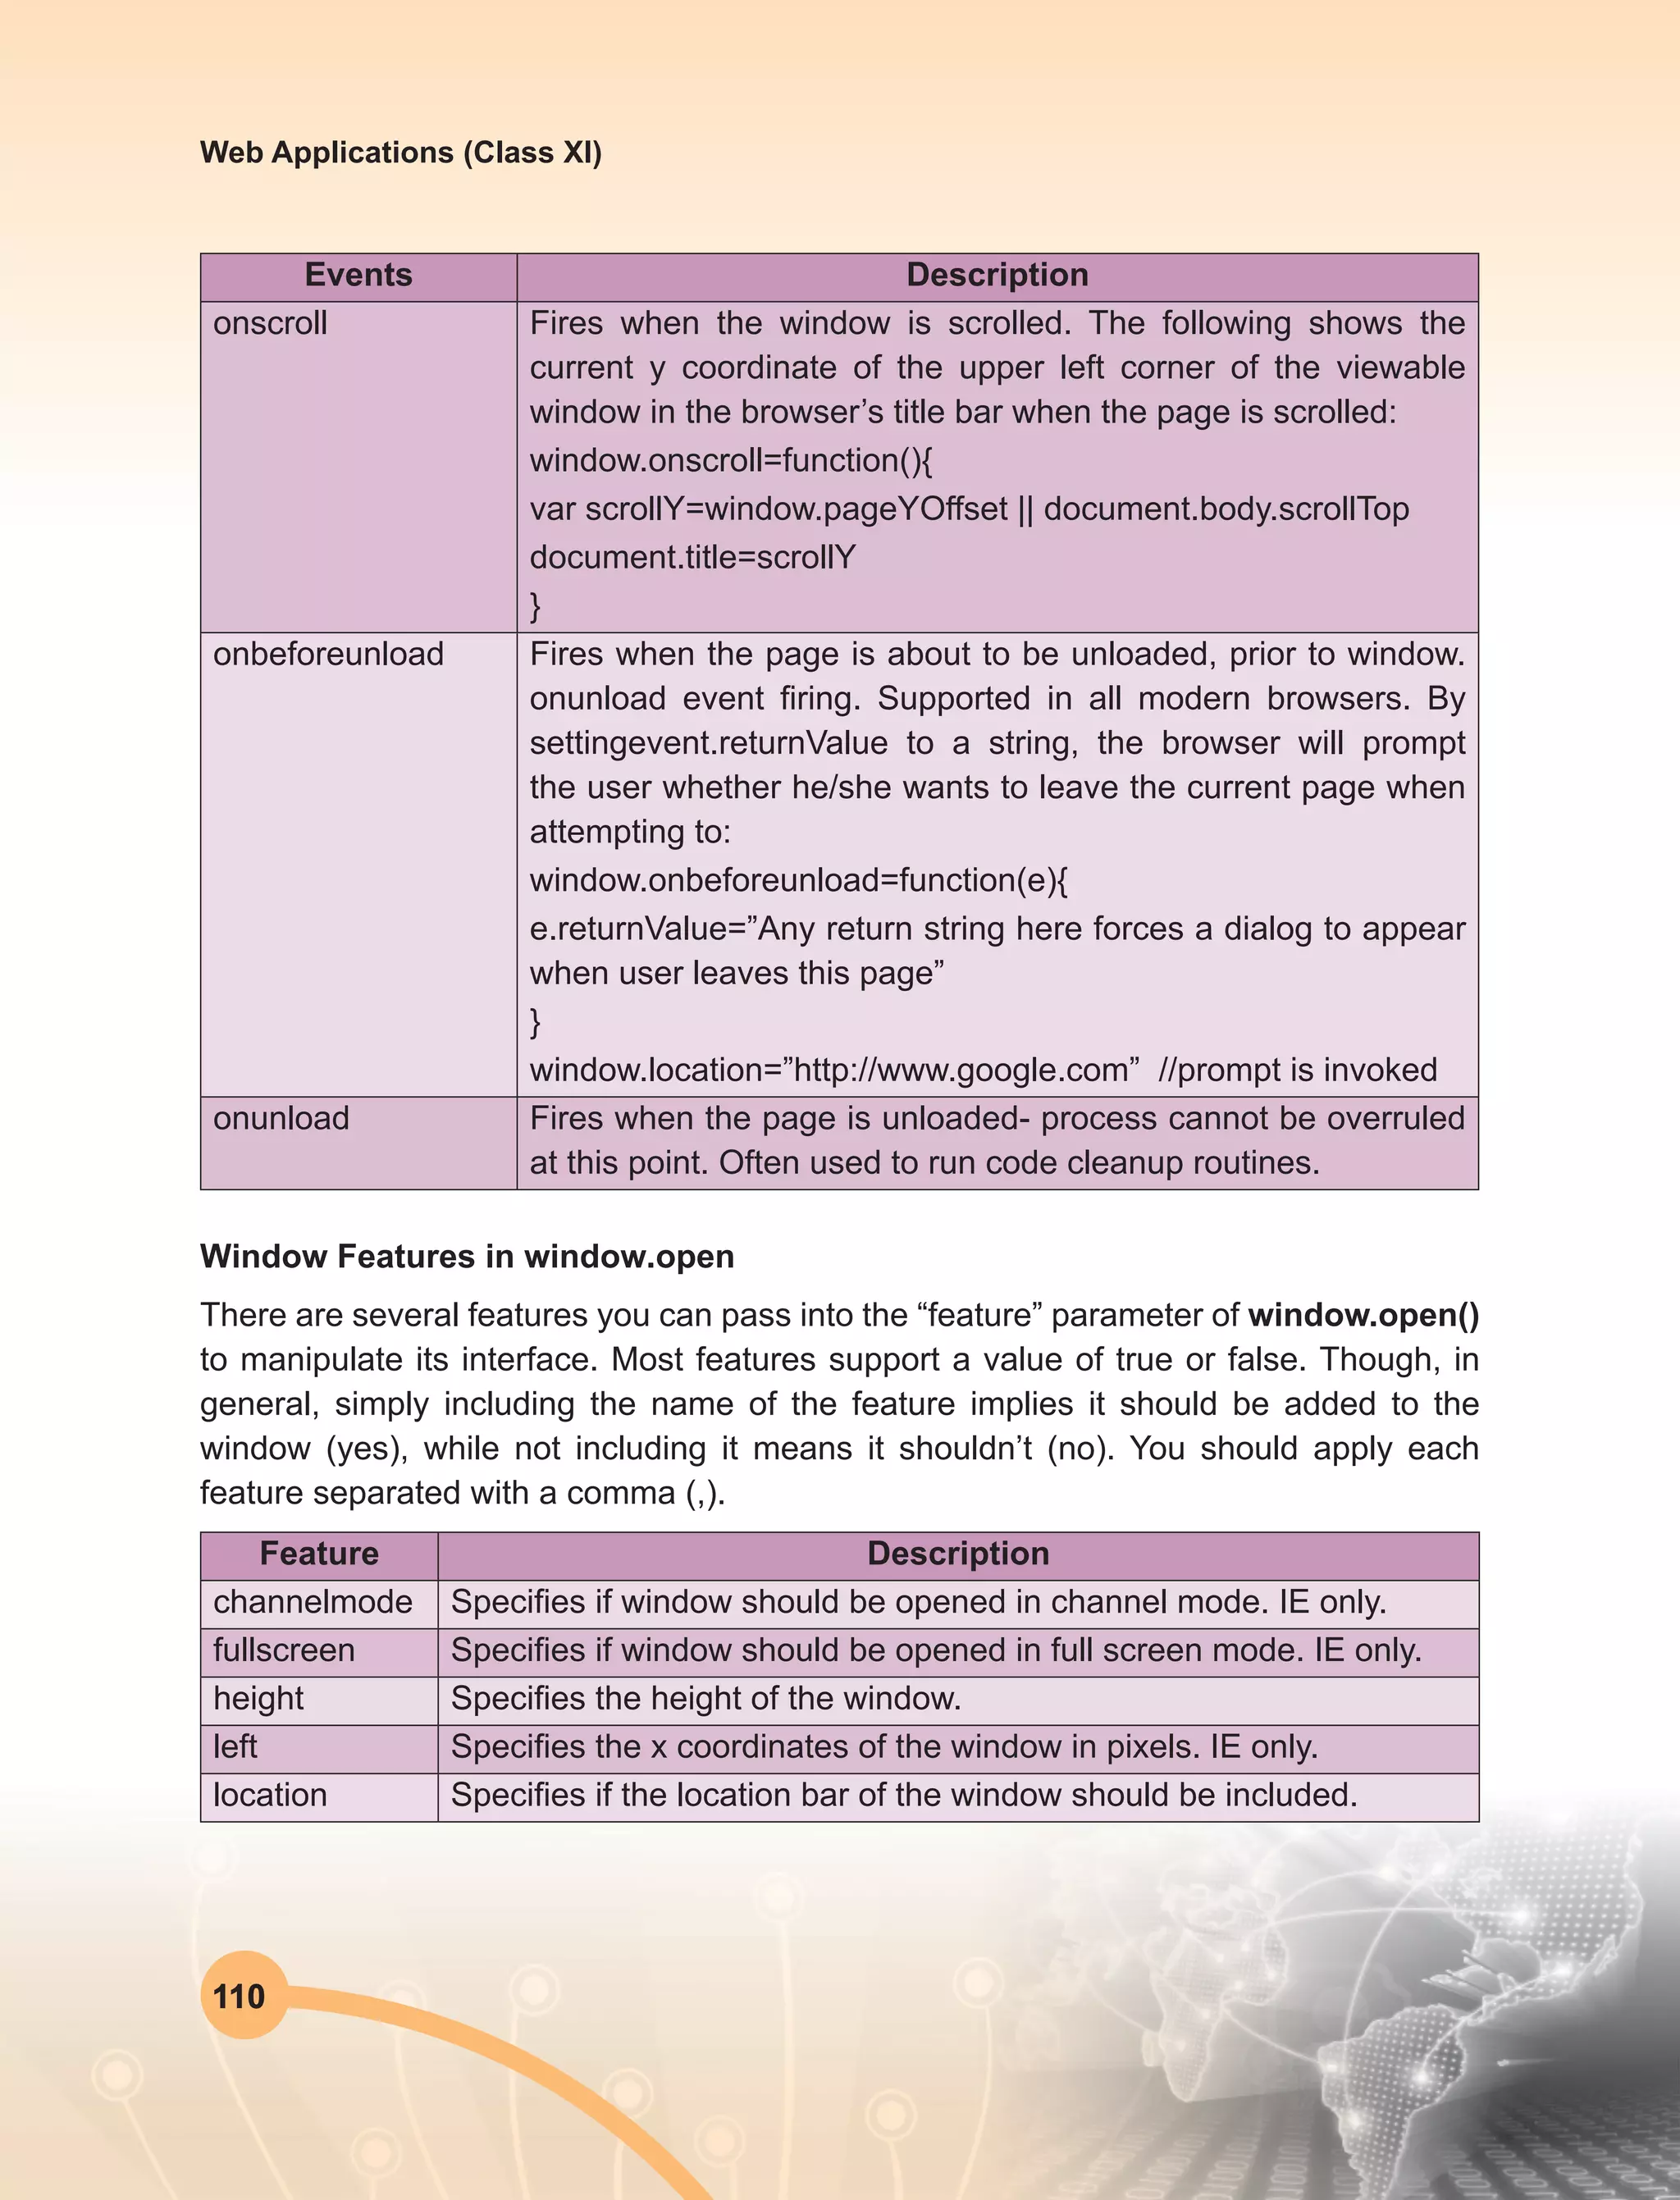
5.3 Window Object Events
Events Description
onblur Fires when the window loses focus.
onerror Fires when a JavaScript error occurs. By returning true inside
this event, JavaScript errors on the page (if any) are suppressed,
with no error messages popping up.
onfocus Fires when the focus is set on the current window.
onload Fires when the page has finished loading, including images. This
is a popular event to use to run some JavaScript once everything
on the page has loaded/ is available:
window.onload=function(){
runsomefunction()
}
onresize Fires when the window is resized.](https://image.slidesharecdn.com/webapplicationxiit-1-160914162100/75/Web-Application-Class-XI-BOOK-1-117-2048.jpg)

![119
Web Applications (Class XI)
</html>
4. Check the output generated from the following code and analyze the result
<!DOCTYPE html>
<html>
<body>
<p id=”demo”>Display the result here.</p>
<script>
var firstName = “Greg”;
if (firstName === “John”) {
document.getElementById(“demo”).innerHTML = “Hello John!”;
}
</script>
</body>
</html>
5. Check the output generated from the following code and analyze the result
<!DOCTYPE html>
<html>
<body>
<p id=”demo”></p>
<script>
var i;
for (i = num1; i < num2; i++) {
document.getElementById(“demo”).innerHTML += i + “<br>”;
}
</script>
</body>
</html>
6. Check the output generated from the following code and analyze the result
<!DOCTYPE html>
<html>
<body>
<p id=”demo”></p>
<script>
var text = “”;
var food = [“Pizza”, “Beans”, “Tacos”, “Fish”, “Chicken”];](https://image.slidesharecdn.com/webapplicationxiit-1-160914162100/75/Web-Application-Class-XI-BOOK-1-127-2048.jpg)
![120
Web Applications (Class XI)
var i;
for () {
text += “I love “ + food[i] + “<br>”;
}
document.getElementById(“demo”).innerHTML = text;
</script>
</body>
</html>
7. Check the output generated from the following code and analyze the result
<!DOCTYPE html>
<html>
<body>
<p id=”demo”></p>
<script>
function myFunction() {
document.getElementById(“demo”).innerHTML = “Hello World!”;
}
// Call the function here
</script>
</body>
</html>
8. Check the output generated from the following code and analyze the result
<!DOCTYPE html>
<html>
<body>
<p id=”demo”></p>
<script>
function myFunction() {
// Add code here
}
document.getElementById(“demo”).innerHTML = myFunction();
</script>
</body>](https://image.slidesharecdn.com/webapplicationxiit-1-160914162100/75/Web-Application-Class-XI-BOOK-1-128-2048.jpg)
![122
Web Applications (Class XI)
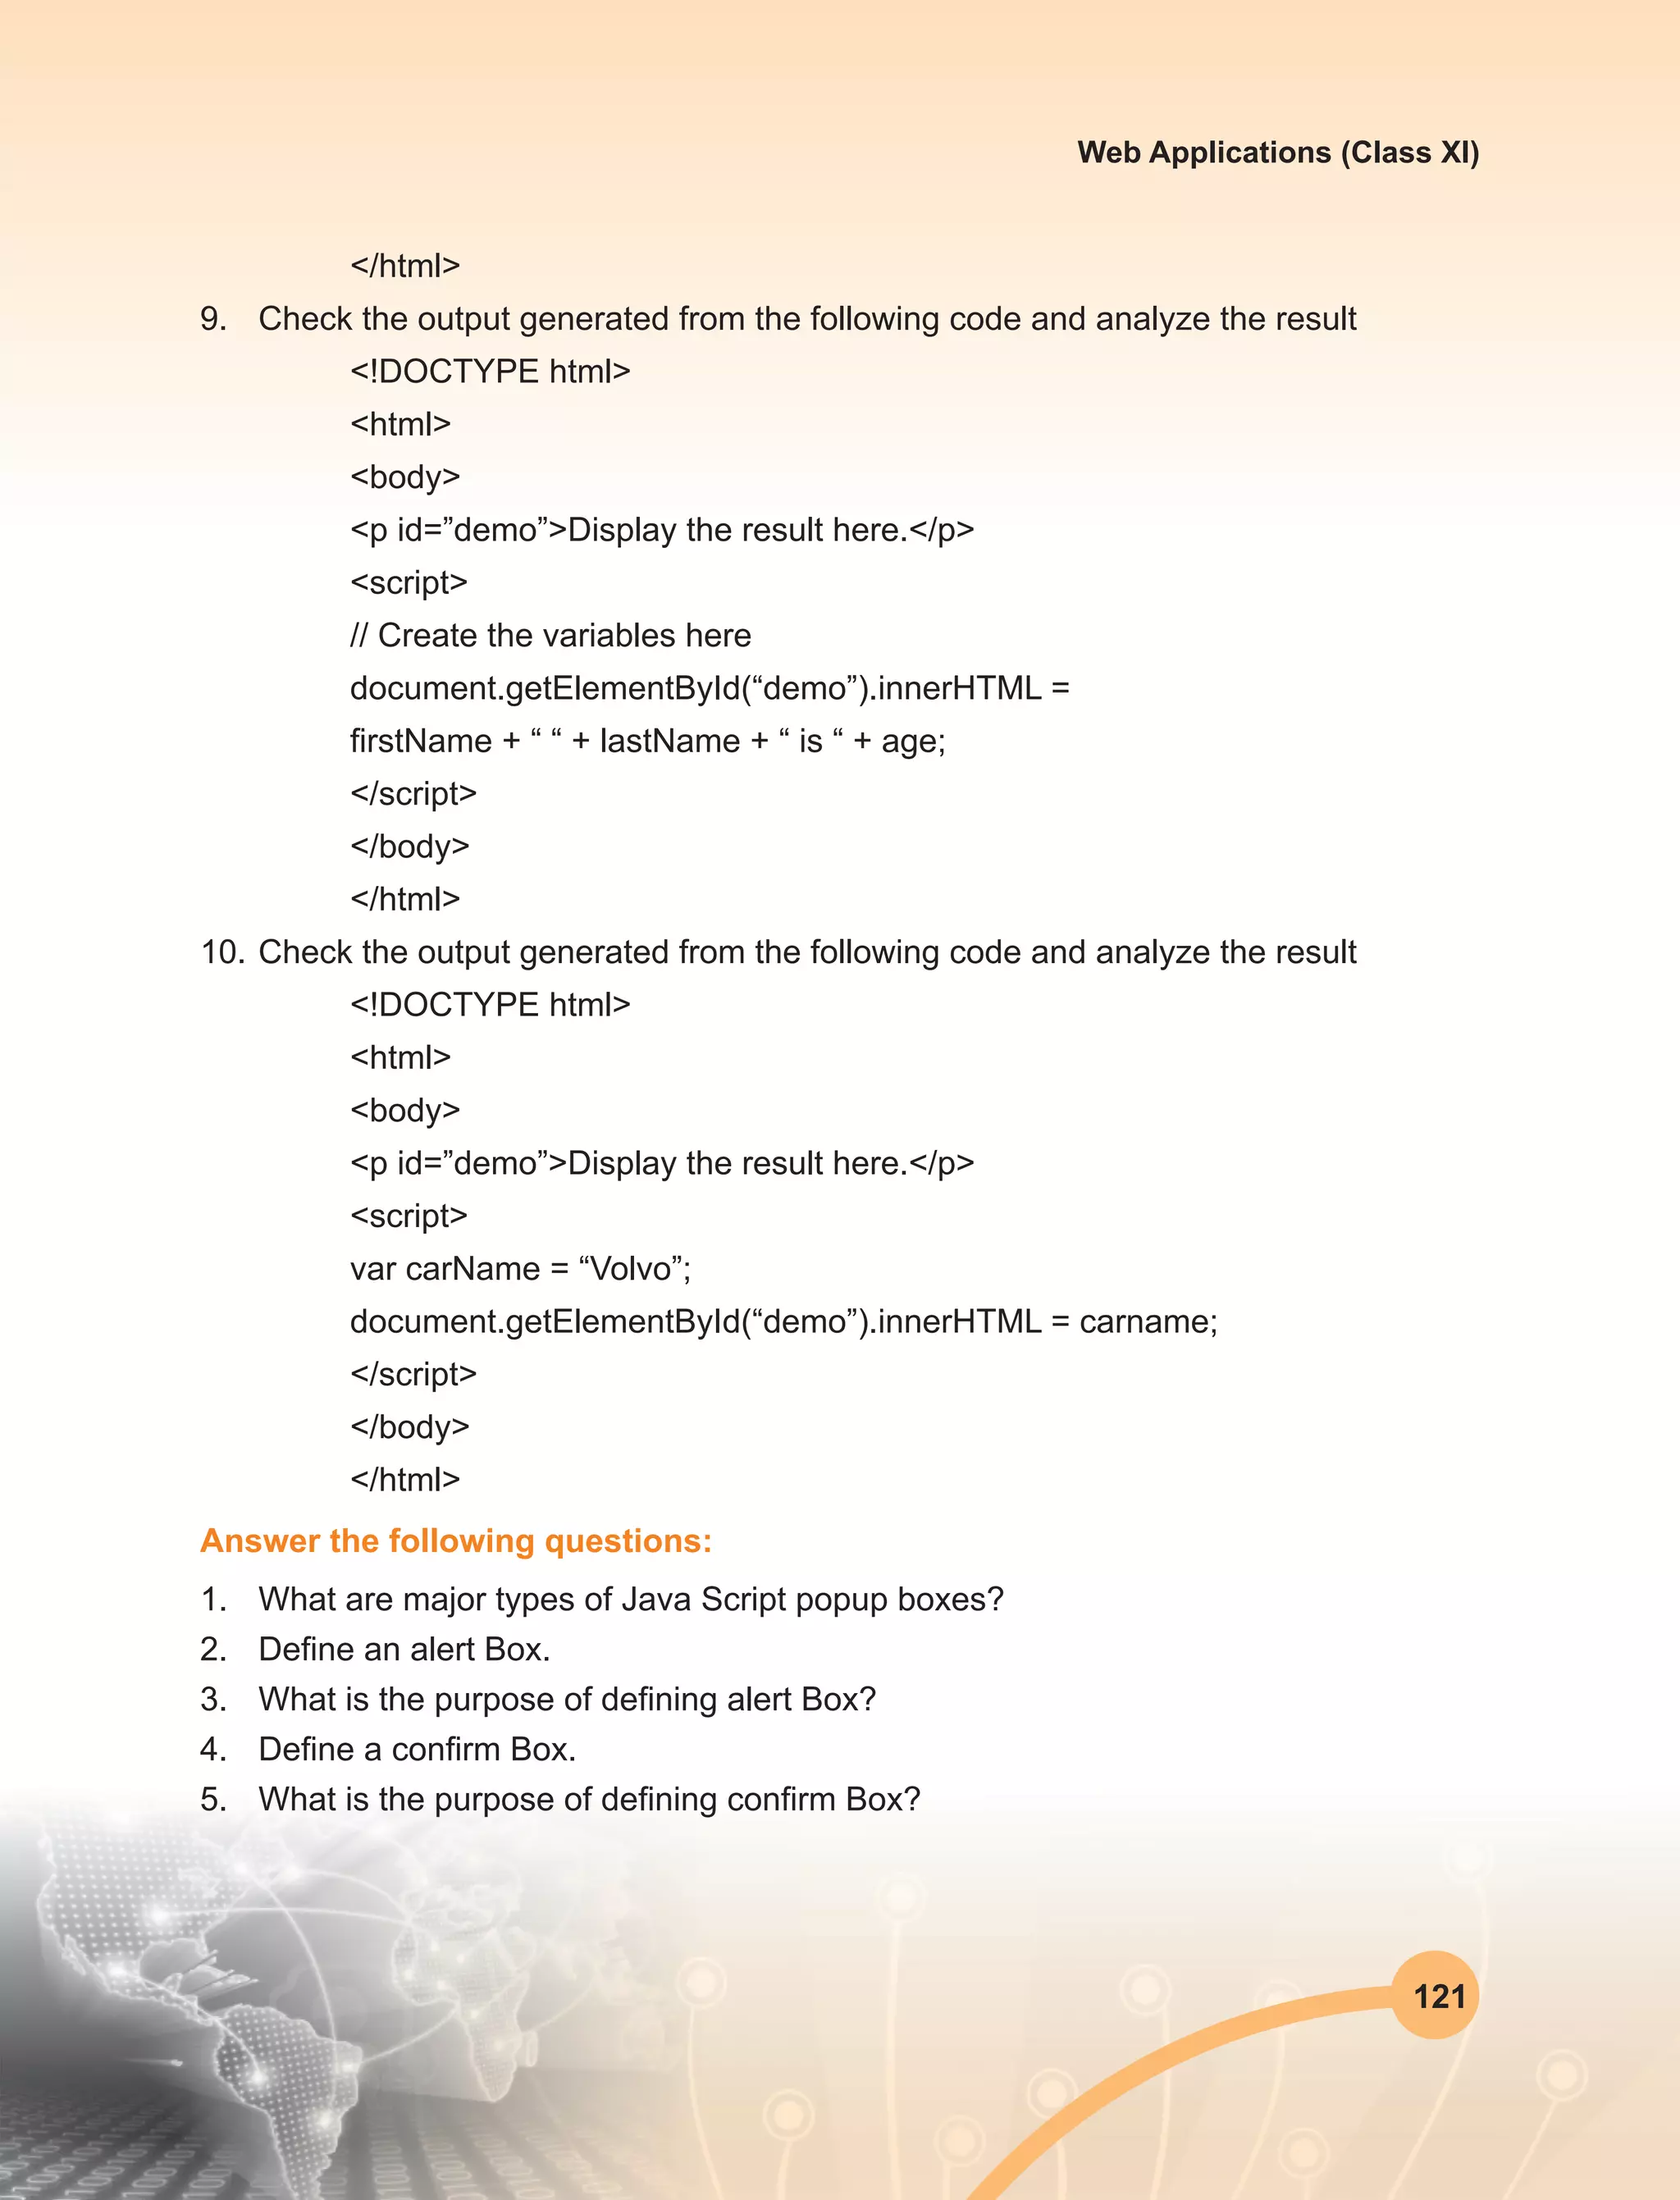
6. Define an prompt Box.
7. What is the purpose of defining prompt Box?
Fill in the blanks:
1. When a prompt box pops up, the user will have to click ................... to proceed after
entering an input value.
2. When an alert box pops up, the user will have to click ................... to proceed after
entering an input value.
3. When a confirm box pops up, the user will have to click ................... to proceed after
entering an input value.
4. When a prompt box pops up, the user will have to click ................... to proceed after
entering an input value.
Further Readings:
1. http://www.javascriptkit.com
2. https://developer.mozilla.org/en/docs/JavaScript
3. http://www.dynamicdrive.com
Section-7: Arrays
7.1 Arrays
JavaScript arrays are used to store multiple values in a single variable. Arrays in
JavaScript are actually a special type of object. They work similar to regular objects but
they have one special property called ‘length’. The length of the array (size of the array)
is always one more than the highest index in the array. The traditional way of creating
arrays is as follows:
Syntax:
var a = new Array();
a[0] = “dog”;
a[1] = “cat”;
a[2] = “hen”;
a.length
Output: 3](https://image.slidesharecdn.com/webapplicationxiit-1-160914162100/75/Web-Application-Class-XI-BOOK-1-130-2048.jpg)
![123
Web Applications (Class XI)
A more convenient notation can be used while dealing with arrays.
Example:
var a = [“Apple”, “Mangoes”, “Orange”, “Banana”];
a.length
Output: 4
Note: Leaving a trailing comma at the end of an array literal is inconsistent across
browsers, so don’t do it. The length of the array is one more than the highest index.
However, the array.length isn’t necessarily the number of items in the array.
Example:
var a = [“dog”, “cat”, “hen”];
a[100] = “fox”;
a.length
Output: 101
If we query a non-existent array index, we get undefined result shown as below.
Example: typeof a[90]
Output: undefined
If we take the above example into account, we can iterate over an array using the
following:
for(var i = 0; i < a.length; i++)
{
// Do something with a[i]
}
Example:](https://image.slidesharecdn.com/webapplicationxiit-1-160914162100/75/Web-Application-Class-XI-BOOK-1-131-2048.jpg)
![124
Web Applications (Class XI)
<!DOCTYPE html>
<html>
<body>
<p id=”demo”></p>
<script>
var cars = [“Audi”, “Volvo”, “BMW”];
document.getElementById(“demo”).innerHTML = cars[0];
</script>
</body>
</html>
Output: Audi
<!DOCTYPE html>
<html>
<body>
<p id=”demo”></p>
<script>
var cars = [
“Audi”,
“Volvo”,
“BMW” ];
document.getElementById(“demo”).innerHTML = cars[0];
</script>
</body>
</html>
Output: Audi
Arrays Using the JavaScript Keyword new
var cars = new Array(“Audi”, “Maruti”, “BMW”);](https://image.slidesharecdn.com/webapplicationxiit-1-160914162100/75/Web-Application-Class-XI-BOOK-1-132-2048.jpg)
![125
Web Applications (Class XI)
<!DOCTYPE html>
<html>
<body>
<p id=”demo”></p>
<script>
var cars = new Array(“Saab”, “Volvo”, “BMW”);
document.getElementById(“demo”).innerHTML = cars[0];
</script>
</body>
</html>
Output: Audi
7.2 Arrays & Objects
Arrays are a special type of objects. The typeof operator in JavaScript returns “object”
for arrays. Arrays use numbers to access its elements. Consider the following example:
<!DOCTYPE html>
<html>
<body>
<p id=”demo”></p>
<script>
var person = [“John”, “Doe”, 46];
document.getElementById(“demo”).innerHTML = person[0];
</script>
</body>
</html>
Output: In this example person[0] returns John
Objects can also use names to access its members. In the above example, person.
firstName returns John. We can declare the object alternatively such as:
var person = {firstName:”John”, lastName:”Doe”, age:46};](https://image.slidesharecdn.com/webapplicationxiit-1-160914162100/75/Web-Application-Class-XI-BOOK-1-133-2048.jpg)
![126
Web Applications (Class XI)
The strength of JavaScript arrays are the built-in array properties and methods:
Examples
var x = cars.length; // The length property returns the number of elements in cars
var y = cars.sort(); // The sort() method sort cars in alphabetical order
The length Property
The length property of an array returns the length of an array (the number of array
elements).
Example
var fruits = [“Banana”, “Orange”, “Apple”, “Mango”];
fruits.length; // the length of fruits is 4
Adding Array Elements
The easiest way to add a new element to an array is using the push method:
Example
var fruits = [“Banana”, “Orange”, “Apple”, “Mango”];
fruits.push(“Lemon”); // adds a new element (Lemon) to fruits
<!DOCTYPE html>
<html>
<body>
<p>The push method appends a new element to an array.</p>
<button onclick=”myFunction()”>Try it</button>
<p id=”demo”></p>
<script>
var fruits = [“Banana”, “Orange”, “Apple”, “Mango”];
document.getElementById(“demo”).innerHTML = fruits;
function myFunction() {
fruits.push(“Lemon”)
document.getElementById(“demo”).innerHTML = fruits;
}
</script>
</body>
</html>](https://image.slidesharecdn.com/webapplicationxiit-1-160914162100/75/Web-Application-Class-XI-BOOK-1-134-2048.jpg)
![127
Web Applications (Class XI)
Output: The push method appends a new element to an existing array every time you
execute the program.
New element can also be added to an array using the length property:
Example
var fruits = [“Banana”, “Orange”, “Apple”, “Mango”];
fruits[fruits.length] = “Lemon”; // adds a new element (Lemon) to fruits
Looping Array Elements
The best way to loop through an array, is using with the help of for loop:
Example
<!DOCTYPE html>
<html>
<body>
<p>The best way to loop through an array is using a standard for loop:</p>
<button onclick=”myFunction()”>Try it</button>
<p id=”demo”></p>
<script>
function myFunction() {
var index;
var text = “<ul>”;
var fruits = [“Banana”, “Orange”, “Apple”, “Mango”];
for (index = 0; index < fruits.length; index++) {
text += “<li>” + fruits[index] + “</li>”;
}
text += “</ul>”;
document.getElementById(“demo”).innerHTML = text;
}
</script>
</body>
</html>](https://image.slidesharecdn.com/webapplicationxiit-1-160914162100/75/Web-Application-Class-XI-BOOK-1-135-2048.jpg)
![128
Web Applications (Class XI)
7.3 Objects
JavaScript objects are simply collections of name-value pairs. The “name” part is a
JavaScript string, while the value can be any JavaScript value including more objects.
There are two basic ways to create an empty object:
var obj = new Object( ); and
var obj = { };
These are semantically equivalent, the second is called object literal syntax, and is more
convenient. Once created, an object’s properties can again be accessed in one of two
ways:
obj.name = “Simon”;
var name = obj.name;
obj[“name”] = “Simon”;
var name = obj[“name”];
These are also semantically equivalent. The second method has the advantage that the
name of the property is provided as a string, which means it can be calculated at run-
time. It can also be used to set and get properties with names that are reserved words:
obj.for = “Simon”; // Syntax error, because ‘for’ is a reserved word
obj[“for”] = “Simon”; // works fine
Object literal syntax can be used to initialise an object :
var obj = {
name: “Carrot”,
“for”: “Max”,
details: {
color: “orange”,
size: 12
}
}
Attribute access can be chained together:
To find the color of the given object
obj.details.color //output orange](https://image.slidesharecdn.com/webapplicationxiit-1-160914162100/75/Web-Application-Class-XI-BOOK-1-136-2048.jpg)
![129
Web Applications (Class XI)
To get the size of the given object
obj[“details”][“size”] //output is 12
Arrays and string come with a number of methods summarized as follows:
substring()
Extracts the characters from a string,
between two specified indices
concat() Joins two or more strings, and returns a copy to the joined strings
join() Joins all elements of an array into a string
pop() Removes and returns the last item.
push() Push adds one or more items to the end.
reverse() Reverses the order of an element in an array
shift() Removes the first element of an array and returns that element
slice() Returns a sub-array.
sort() Takes an optional comparison function.
splice()
Modify an array by deleting a section and replacing it with more
items.
unshift() Prep ends items to the start of the array.
Section-7: Exercise Questions
Perform the following activities in Lab:
S. No. Activities
1. Write a simple JavaScript program to join all elements of the following array
into a string.
Sample Input array : myColor = [“Red”, “Green”, “White”, “Black”];
Expected Output :
“Red,Green,White,Black”
“Red,Green,White,Black”
“Red+Green+White+Black”
2. Write a JavaScript program which accepts a number as input and insert
dashes (-) between each two even numbers. For example if you accept 025468
the output should be 0-254-6-8.](https://image.slidesharecdn.com/webapplicationxiit-1-160914162100/75/Web-Application-Class-XI-BOOK-1-137-2048.jpg)
![130
Web Applications (Class XI)
S. No. Activities
3. Write a JavaScript program to sort the items of a given array in ascending order.
Sample Input array : var arr1 = [ 3, 8, 7, 6, 5, -4, 3, 2, 1 ];
Sample Output : -4,-3,1,2,3,5,6,7,8
4. Write a JavaScript program to add items in an blank array and display the
items.
Sample Input Screen :
5. Write a JavaScript program which prints the elements of the following array.
Note : Use nested for loops.
Sample Input array : var a = [[1, 2, 1, 24], [8, 11, 9, 4], [7, 0, 7, 27], [7, 4, 28,
14], [3, 10, 26, 7]];
Sample Output :
“row 0”
“ 1”
“ 2”
“ 1”
“ 24”
“row 1”
------
Answer the following questions:
1. What is an Array? Explain the purpose of defining array.
2. What are major types of arrays?
3. Explain the procedure to access an array.
4. Write a JavaScript program to find the most frequent item of an array.
Sample Input array : var arr1=[3, ‘a’, ‘a’, ‘a’, 2, 3, ‘a’, 3, ‘a’, 2, 4, 9, 3];
Sample Output : a ( 5 times )
5. Write a JavaScript program which accept a string as input and swap the case of
each character. For example if you input ‘The Quick Brown Fox’ the output should
be ‘tHE qUICK bROWN fOX’.](https://image.slidesharecdn.com/webapplicationxiit-1-160914162100/75/Web-Application-Class-XI-BOOK-1-138-2048.jpg)

![139
Web Applications (Class XI)
Q. 3: Give the output of the following code segment:
<BODY>
<SCRIPT LANGUAGE=”JavaScript”>
var sum = new Array(6);
var Total = 0;
sum[0] = 0;
for(var icount = 1; icount < 4; icount++)
{
Total += icount;
sum[icount] = Total;
document.write(sum[icount]+”<br>”);
}
document.write(Total);
</SCRIPT>
</BODY>
Q. 4: (a) Explain the functions and arrays in javascript with example?
(b) How the forms are handled in javascript?Explain.
Q. 5: How can javascript make a website easier to use?That is, are there certain
javascript techniques that make it easier for people to use a website?
Q. 6: How do you convert numbers between different bases in javascript?
Q. 7: How do we get javascript on a web page explain?
Q. 8: Write a program in javascript using various data types to find the round off integer
values?
Q. 9: Write the program in javascript to solve the given polynomial:
Q. 10: Design a home page of your school. Include some images/pictures and other
events of an academic calendar for session 2013-2014. Also include some audio/
video features to make your web-site more interactive.](https://image.slidesharecdn.com/webapplicationxiit-1-160914162100/75/Web-Application-Class-XI-BOOK-1-147-2048.jpg)


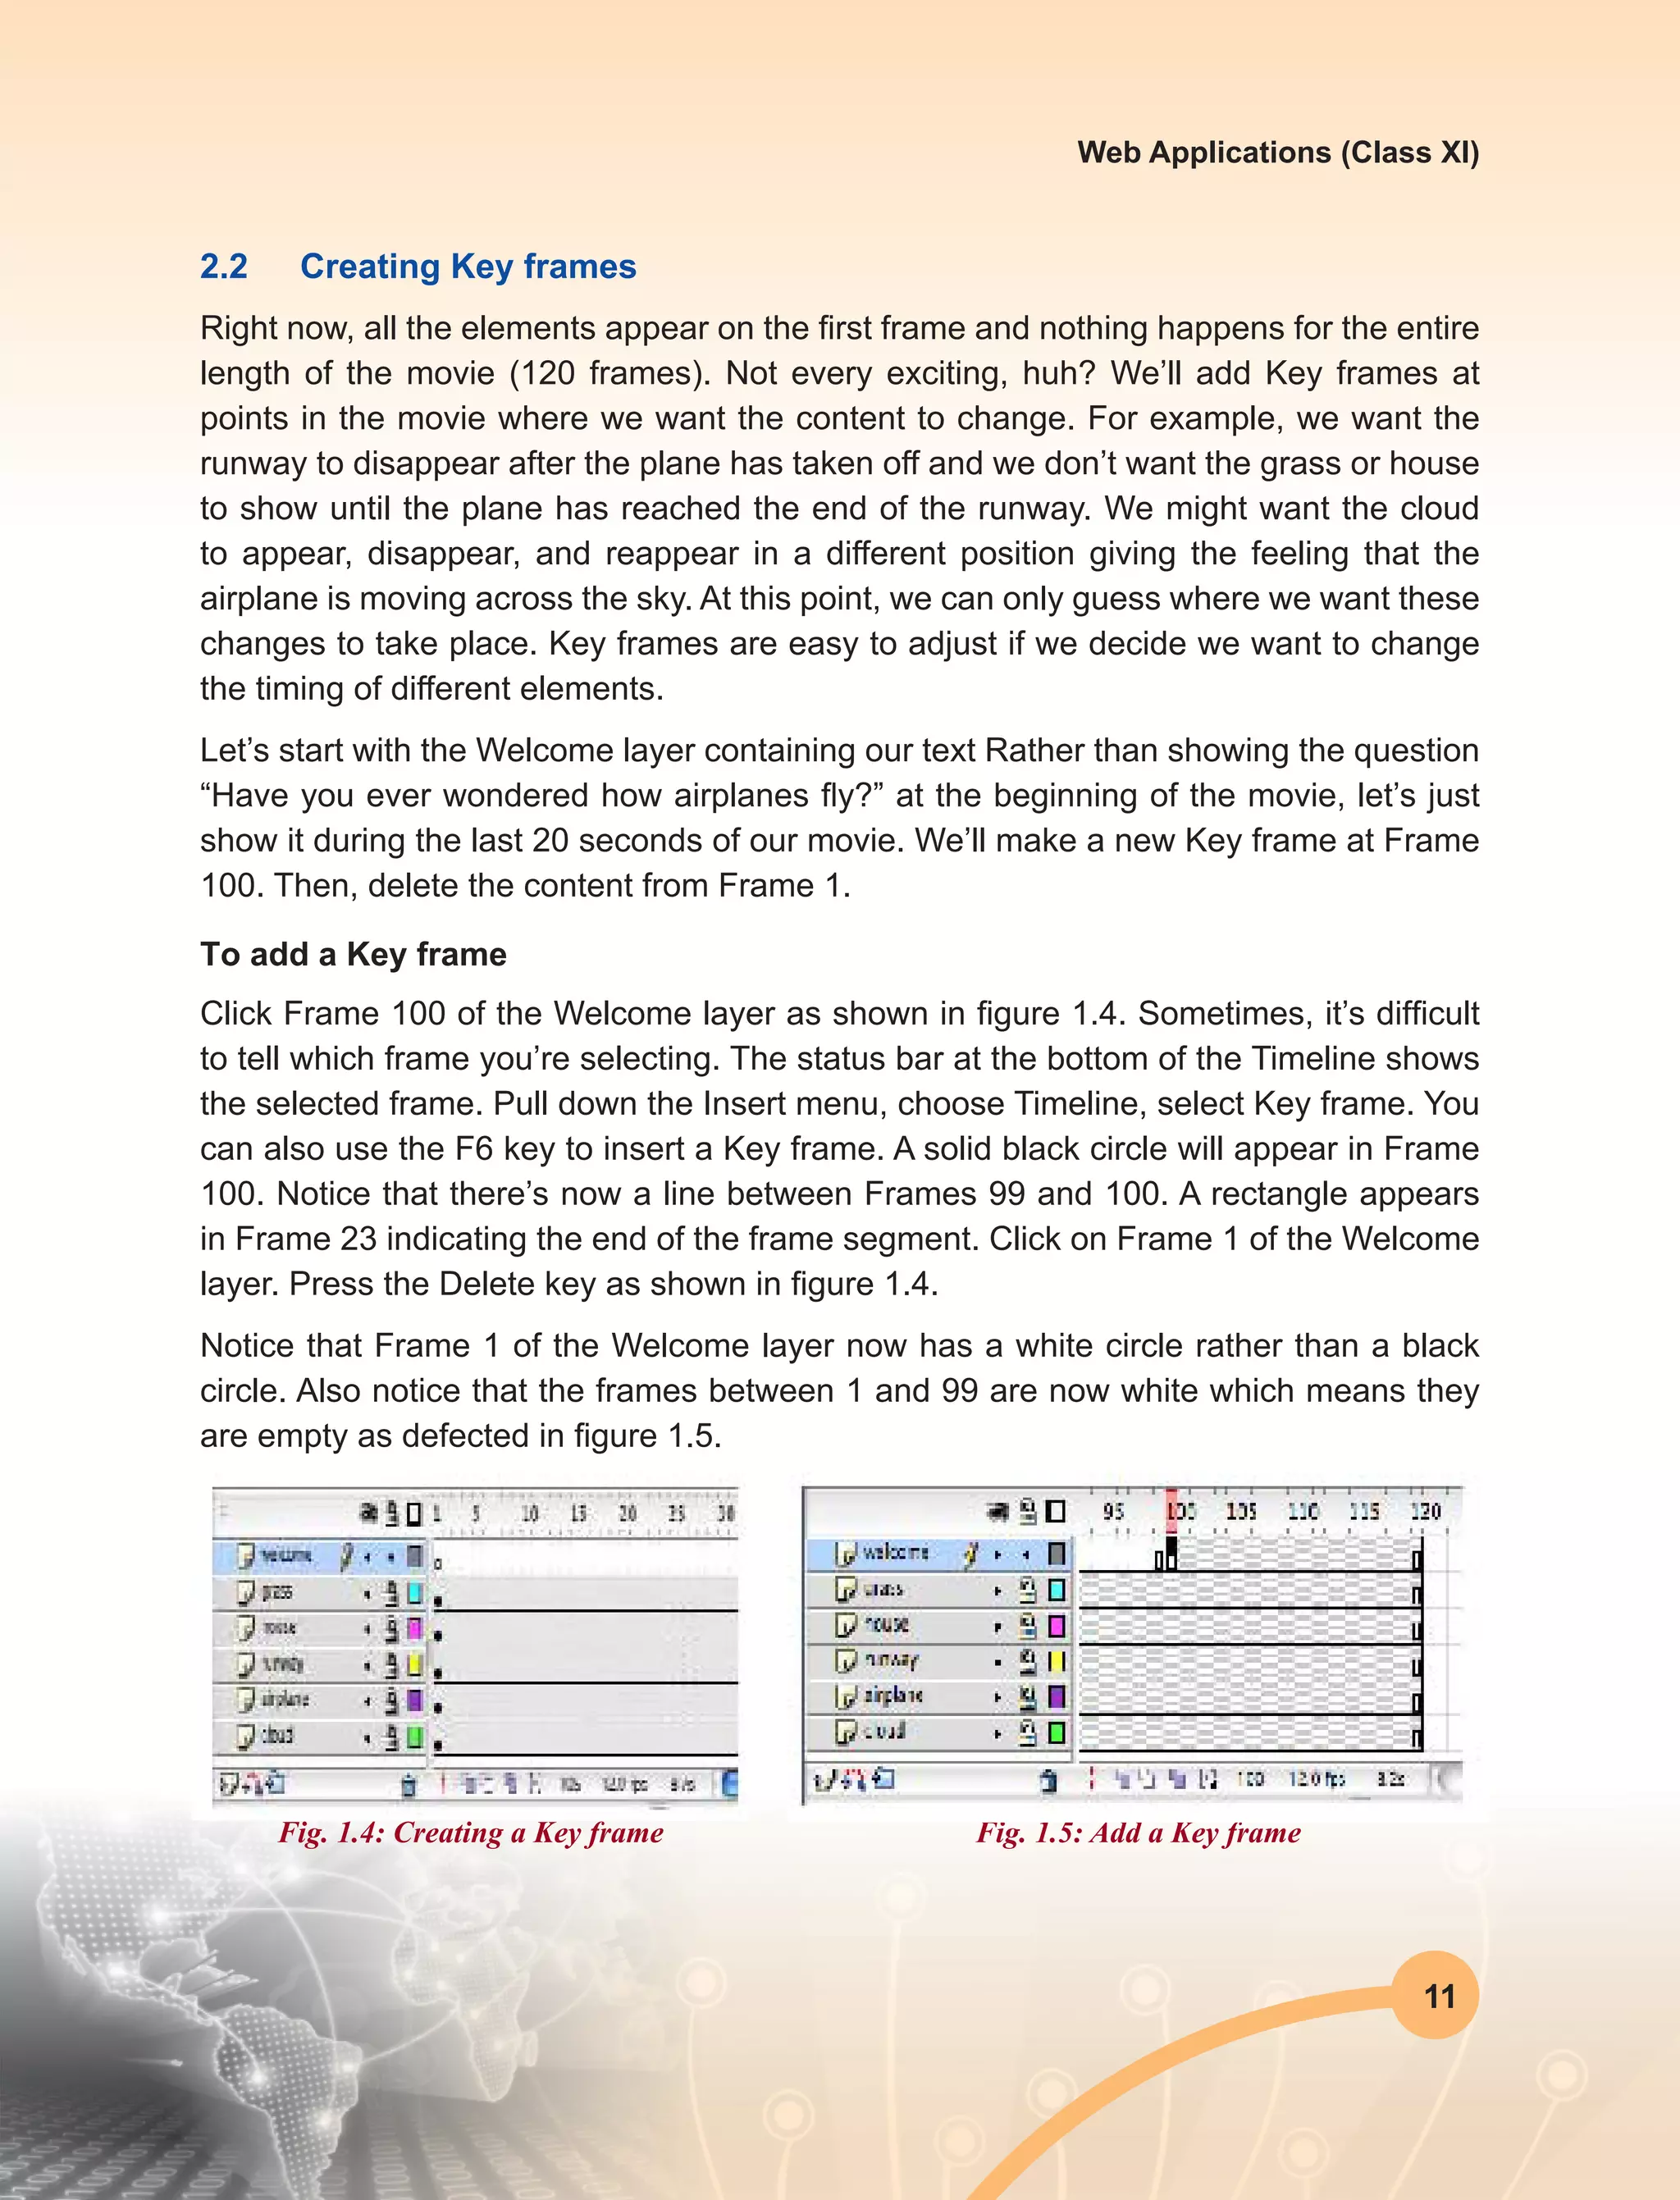
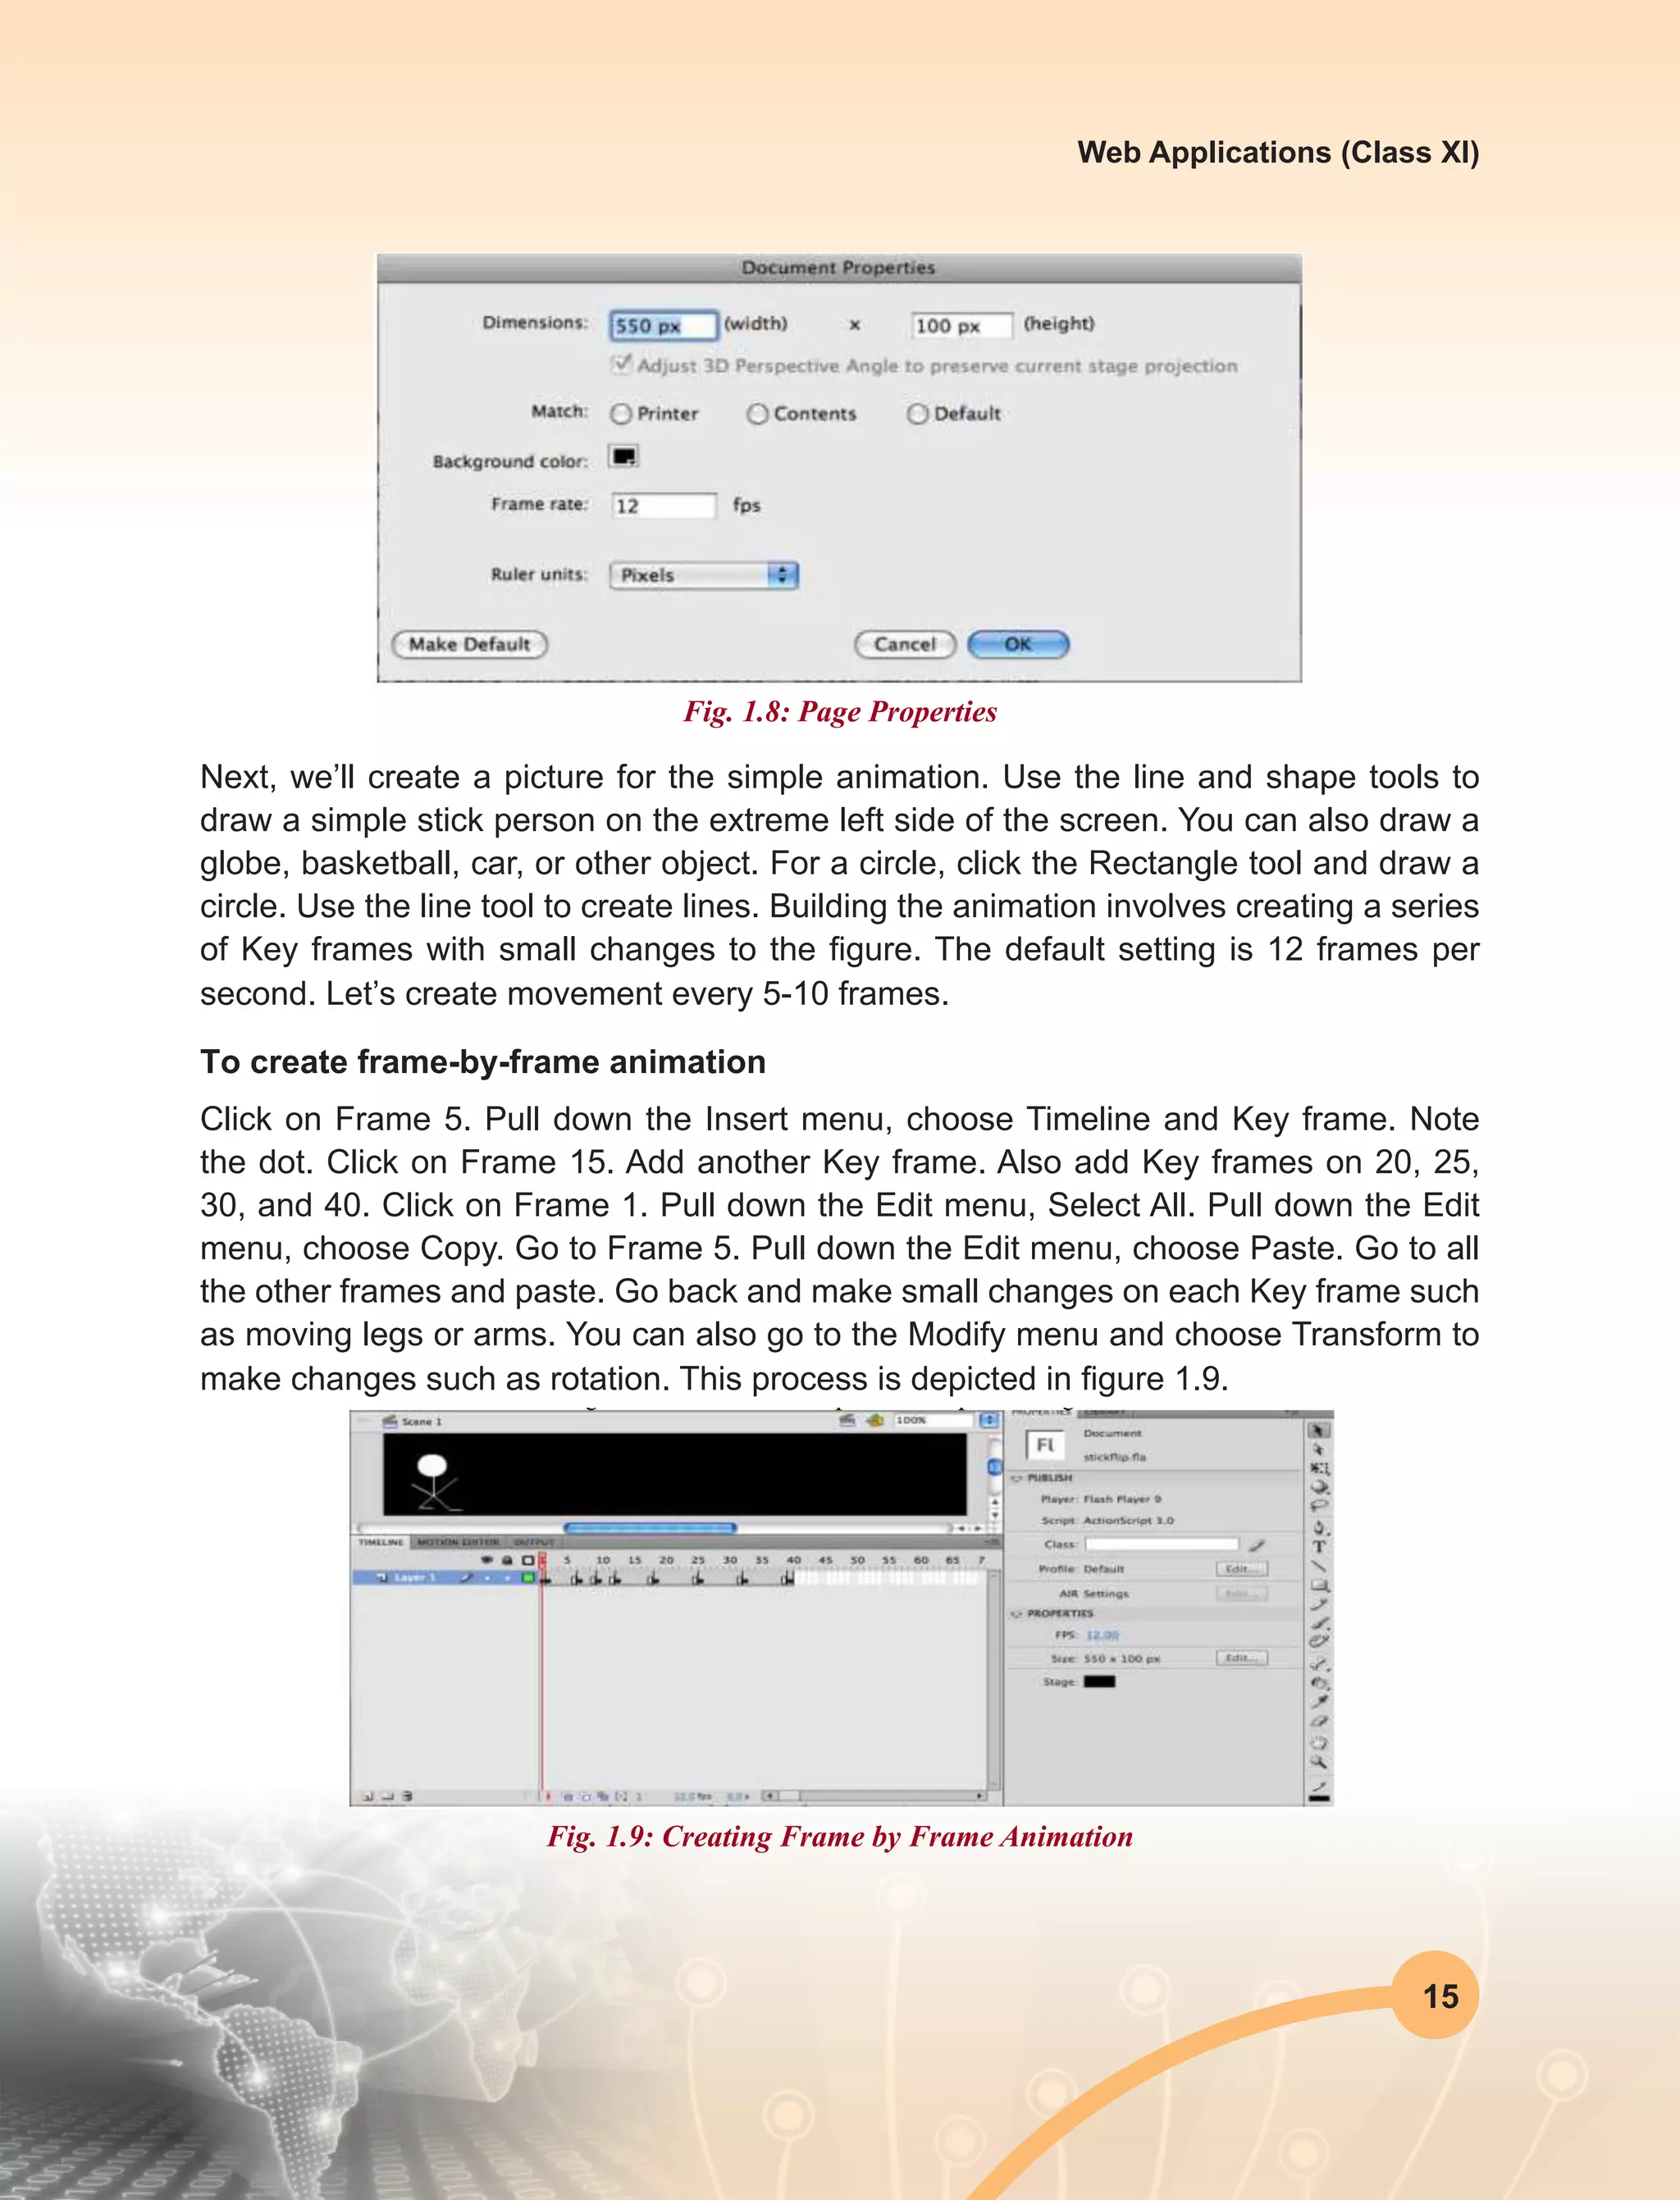
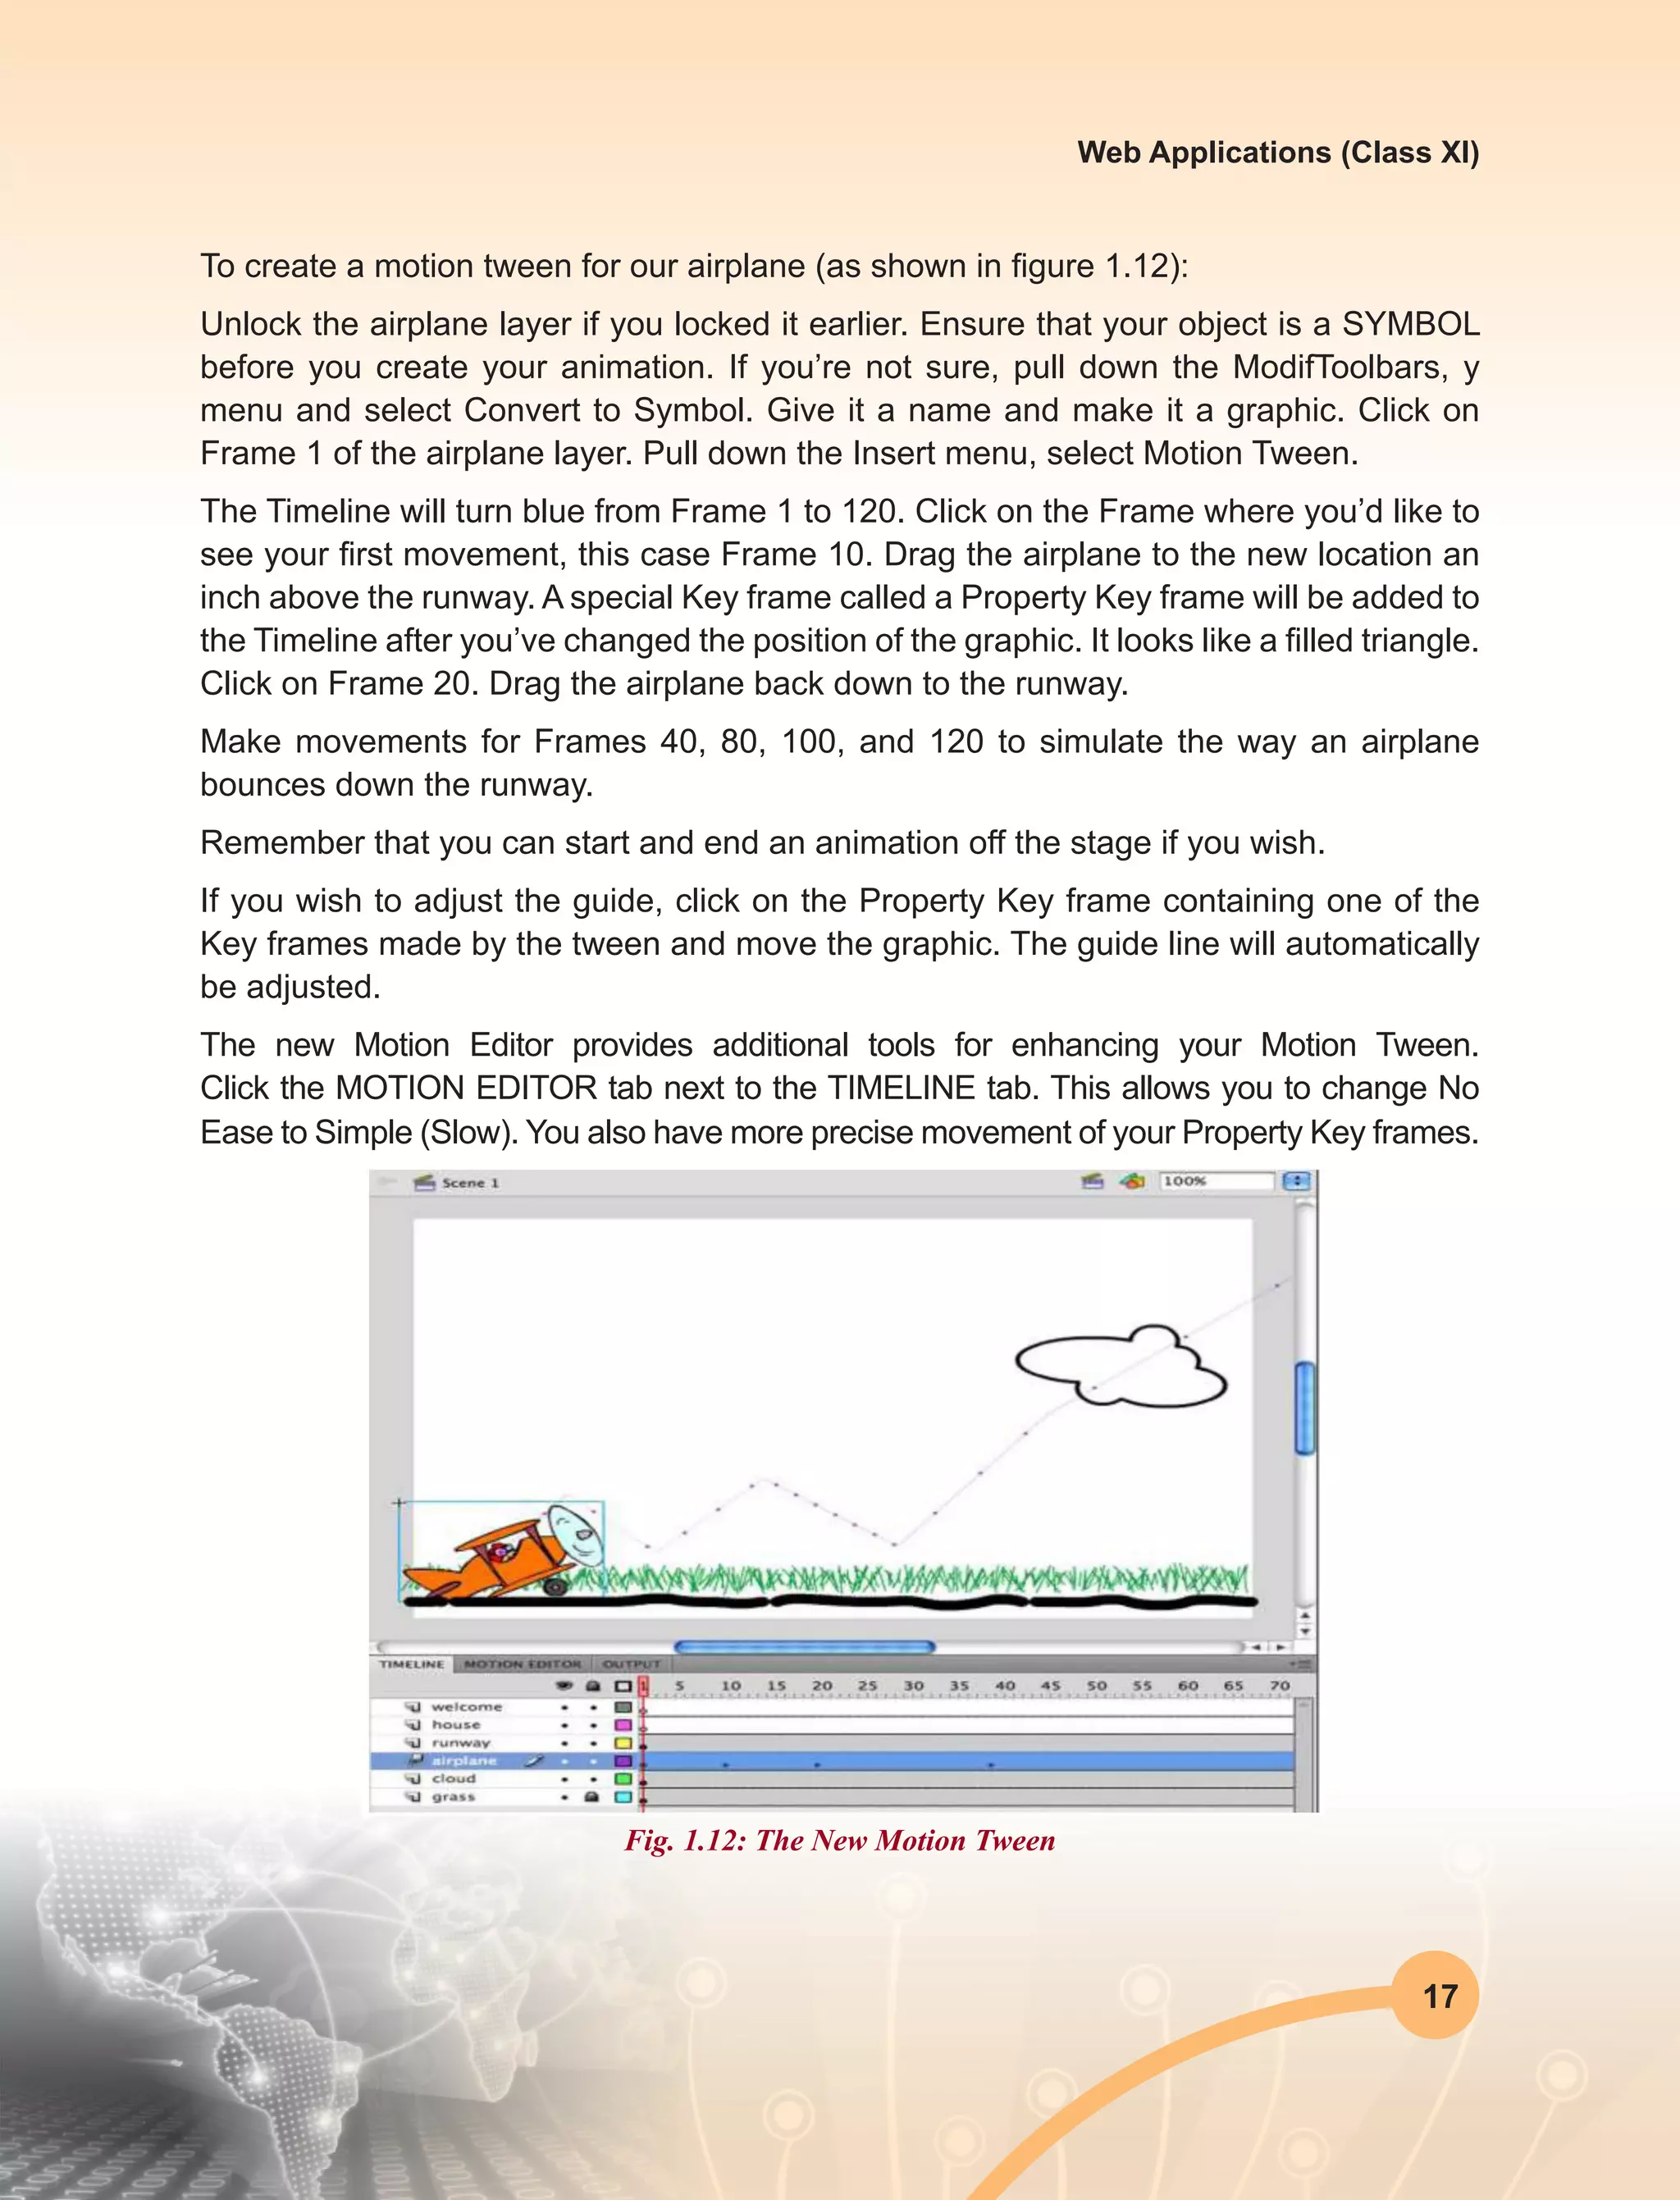
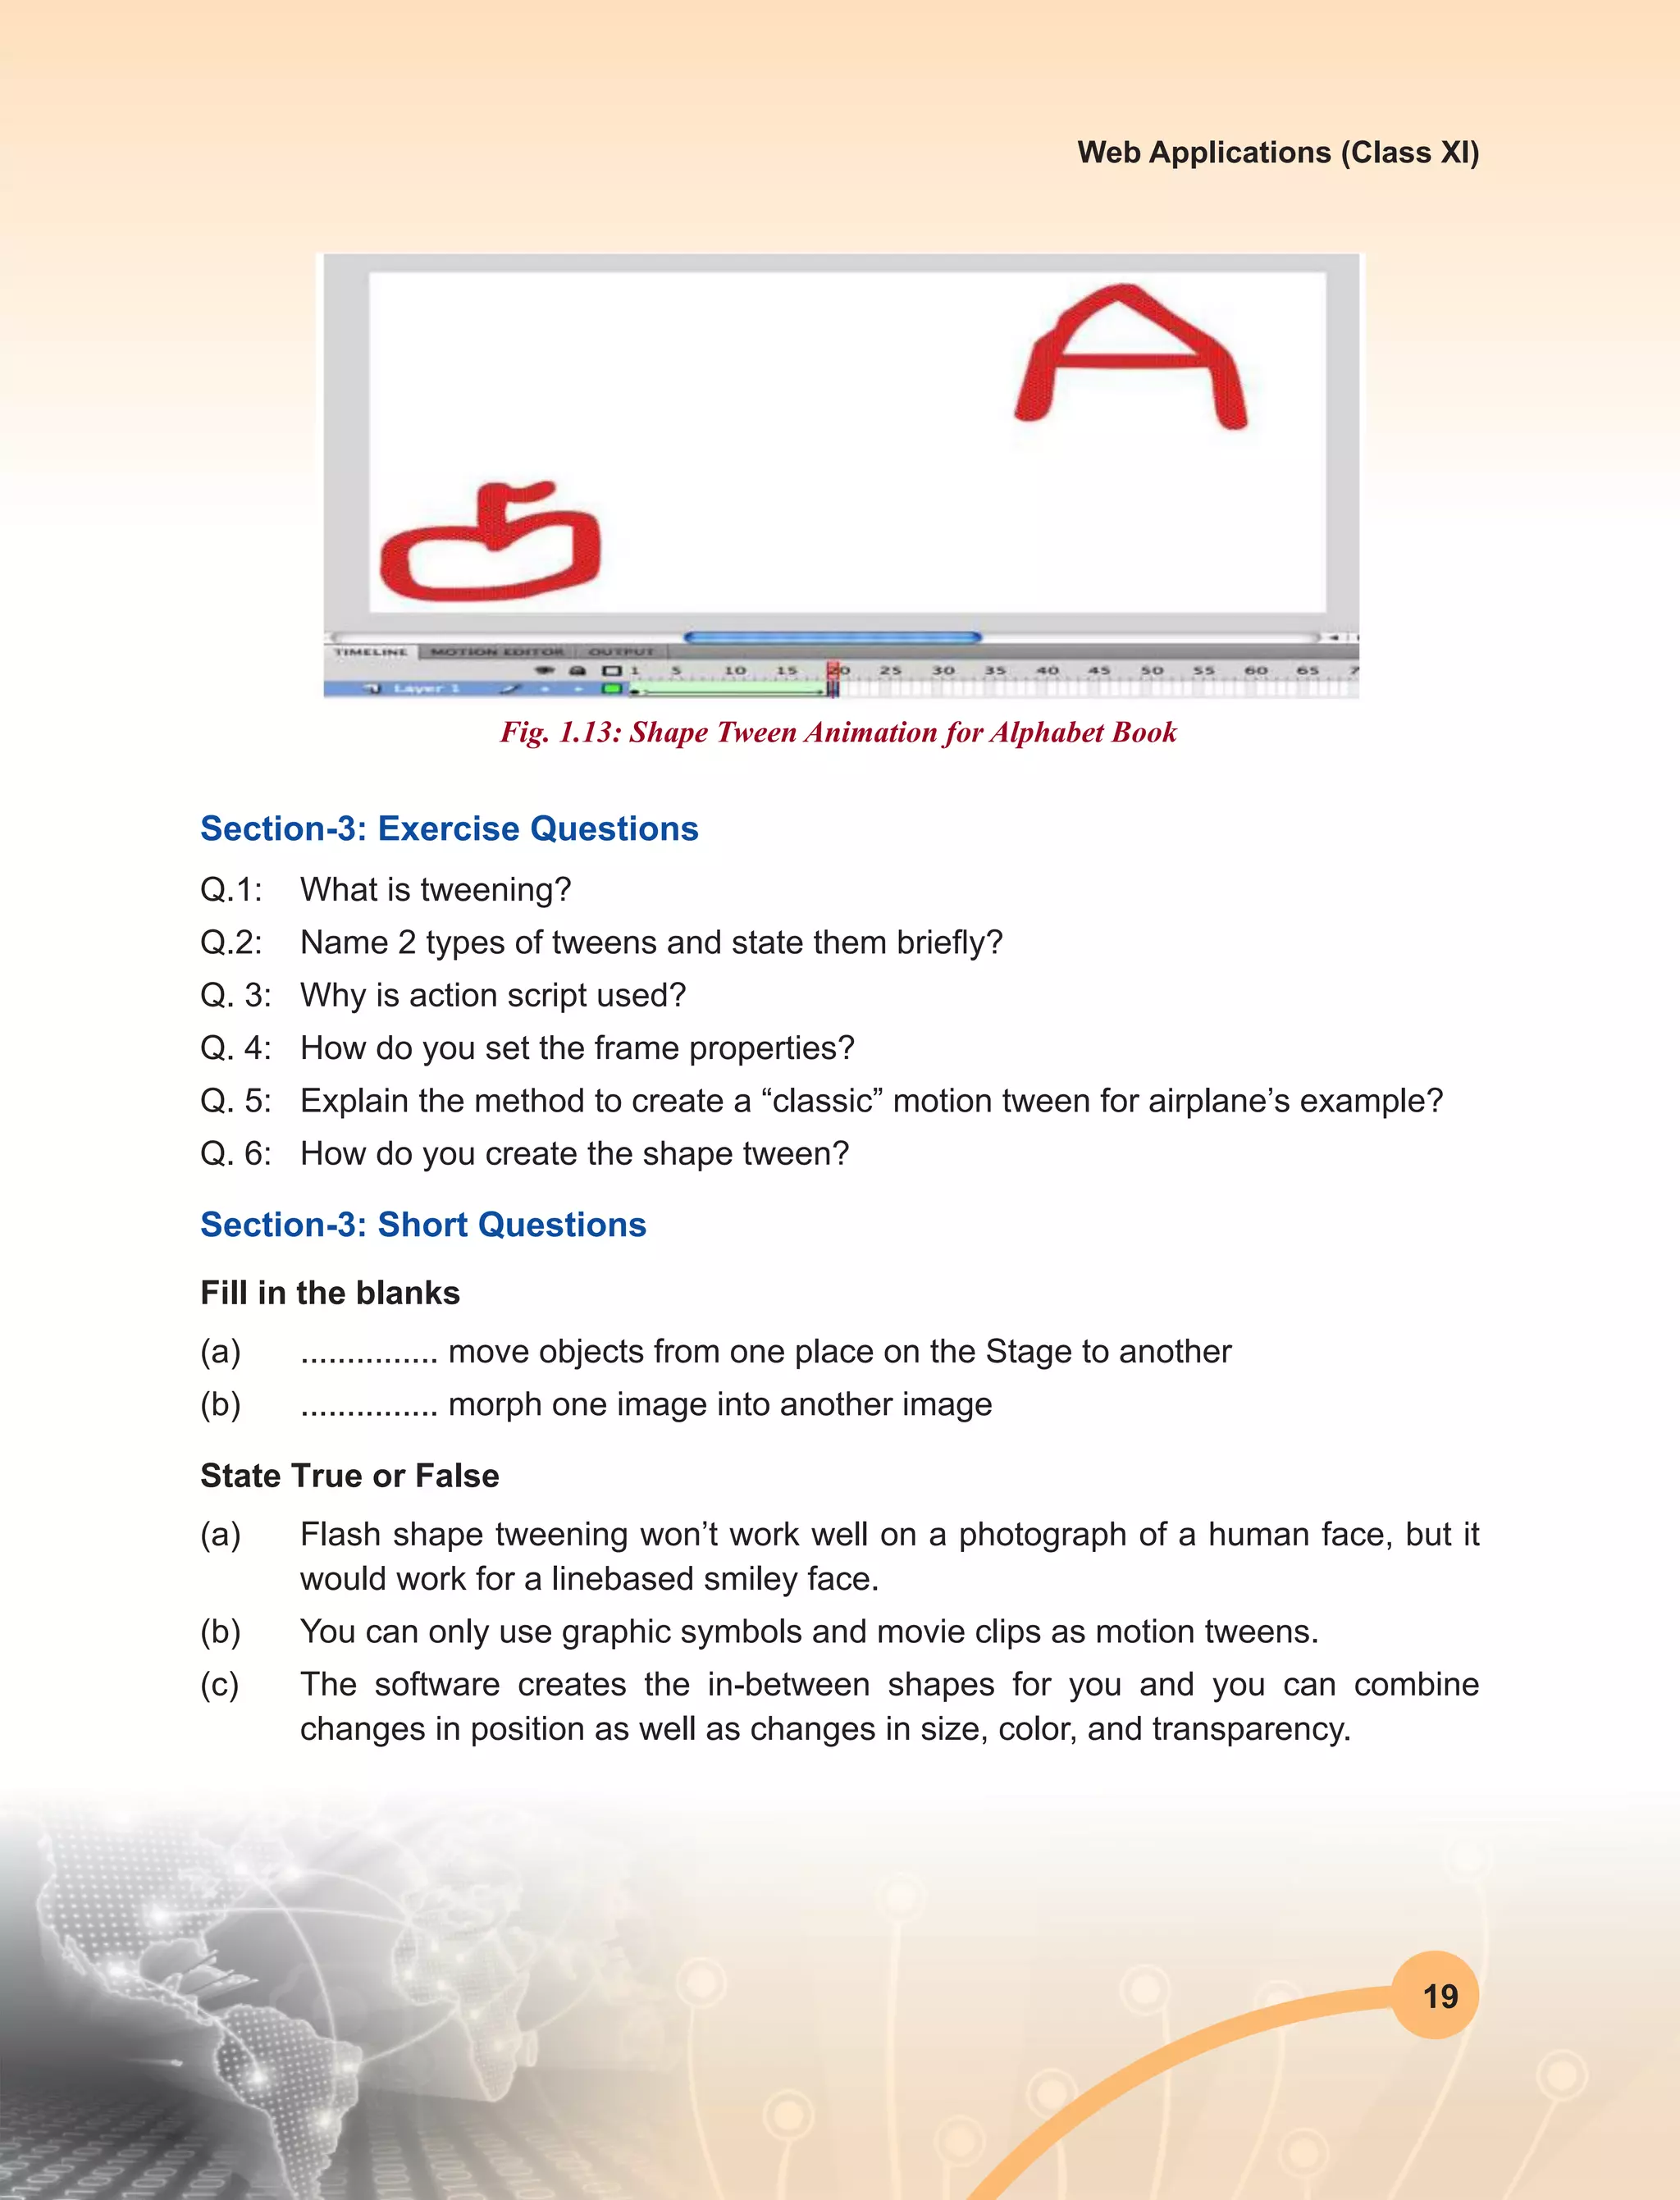
This document discusses animation concepts and tools. It defines animation as giving life to objects that cannot move on their own by specifying their movement over time. The history of animation is traced from early experiments in the 19th century to modern computer animation. Types of animation include procedural, representation, stochastic, behavioral, 2D and 3D. Traditional animation methods like key frames, cel animation and rotoscoping are described. Computer animation techniques include key framing, motion capture and simulation. Popular hardware used includes SGI, PCs and Macintosh. Software tools discussed are 3D Studio Max, LightWave3D, Adobe Premiere, Alias/Wavefront, Animator Studio and Elastic Reality.