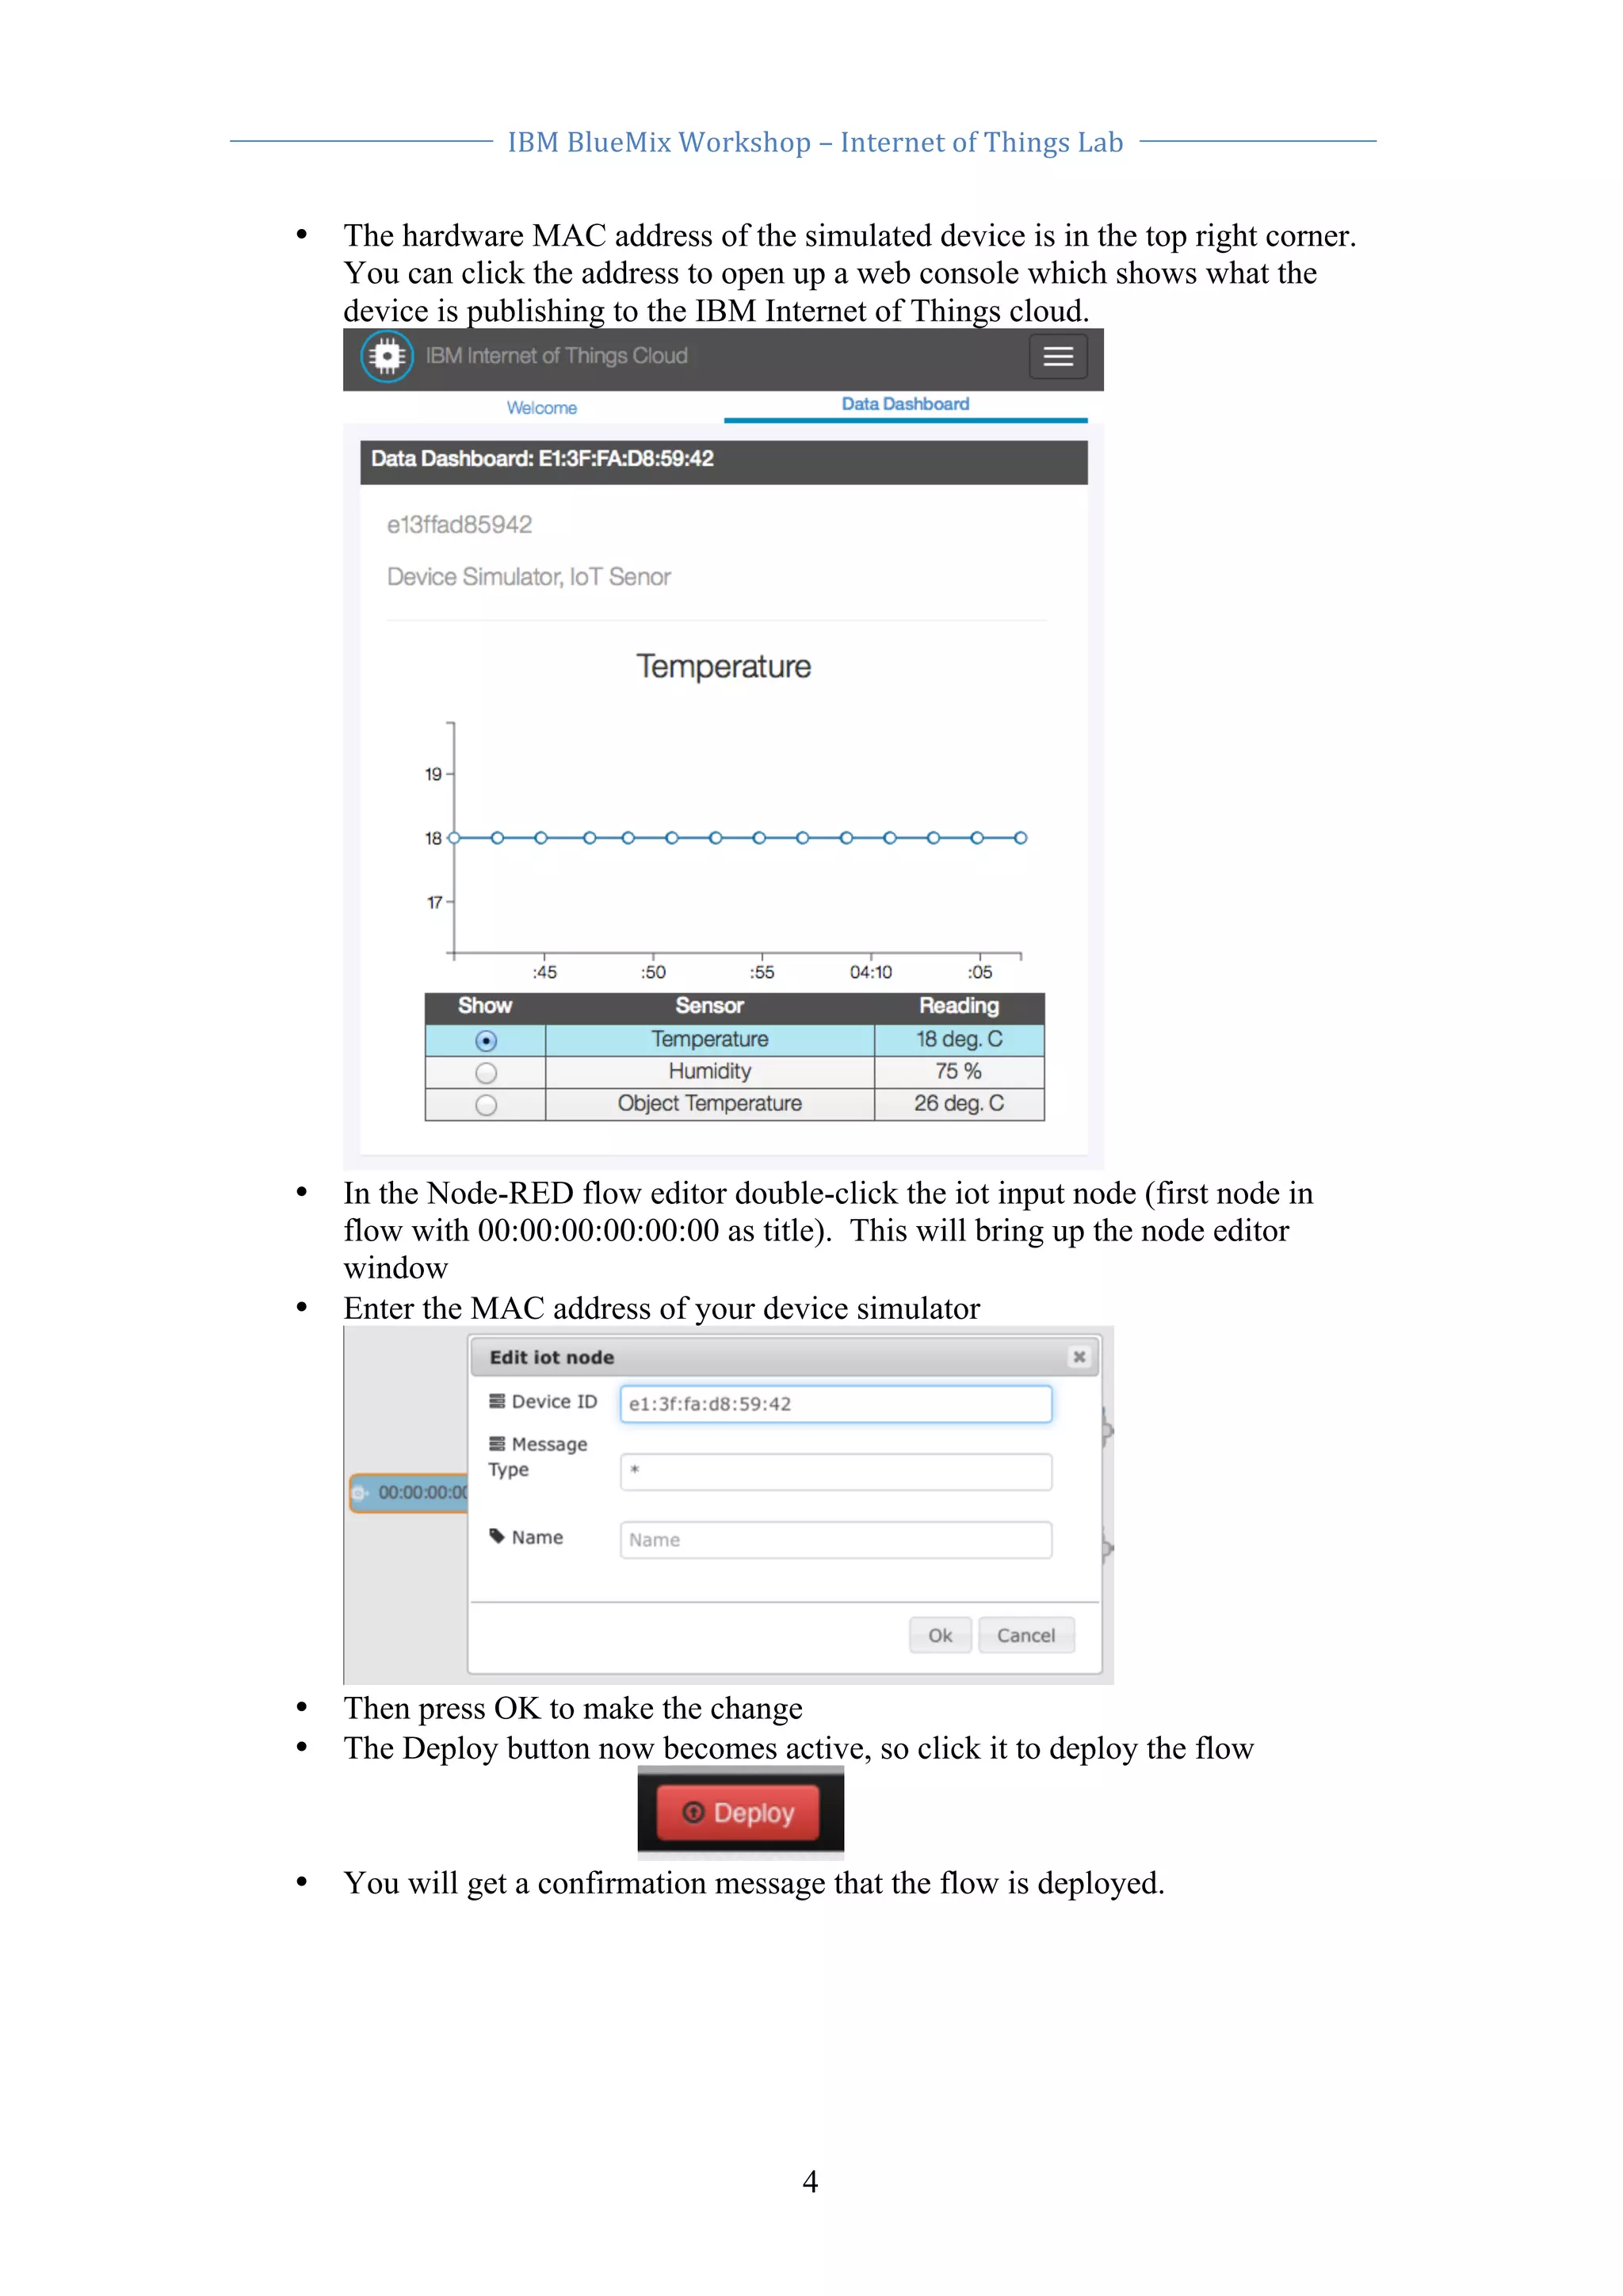
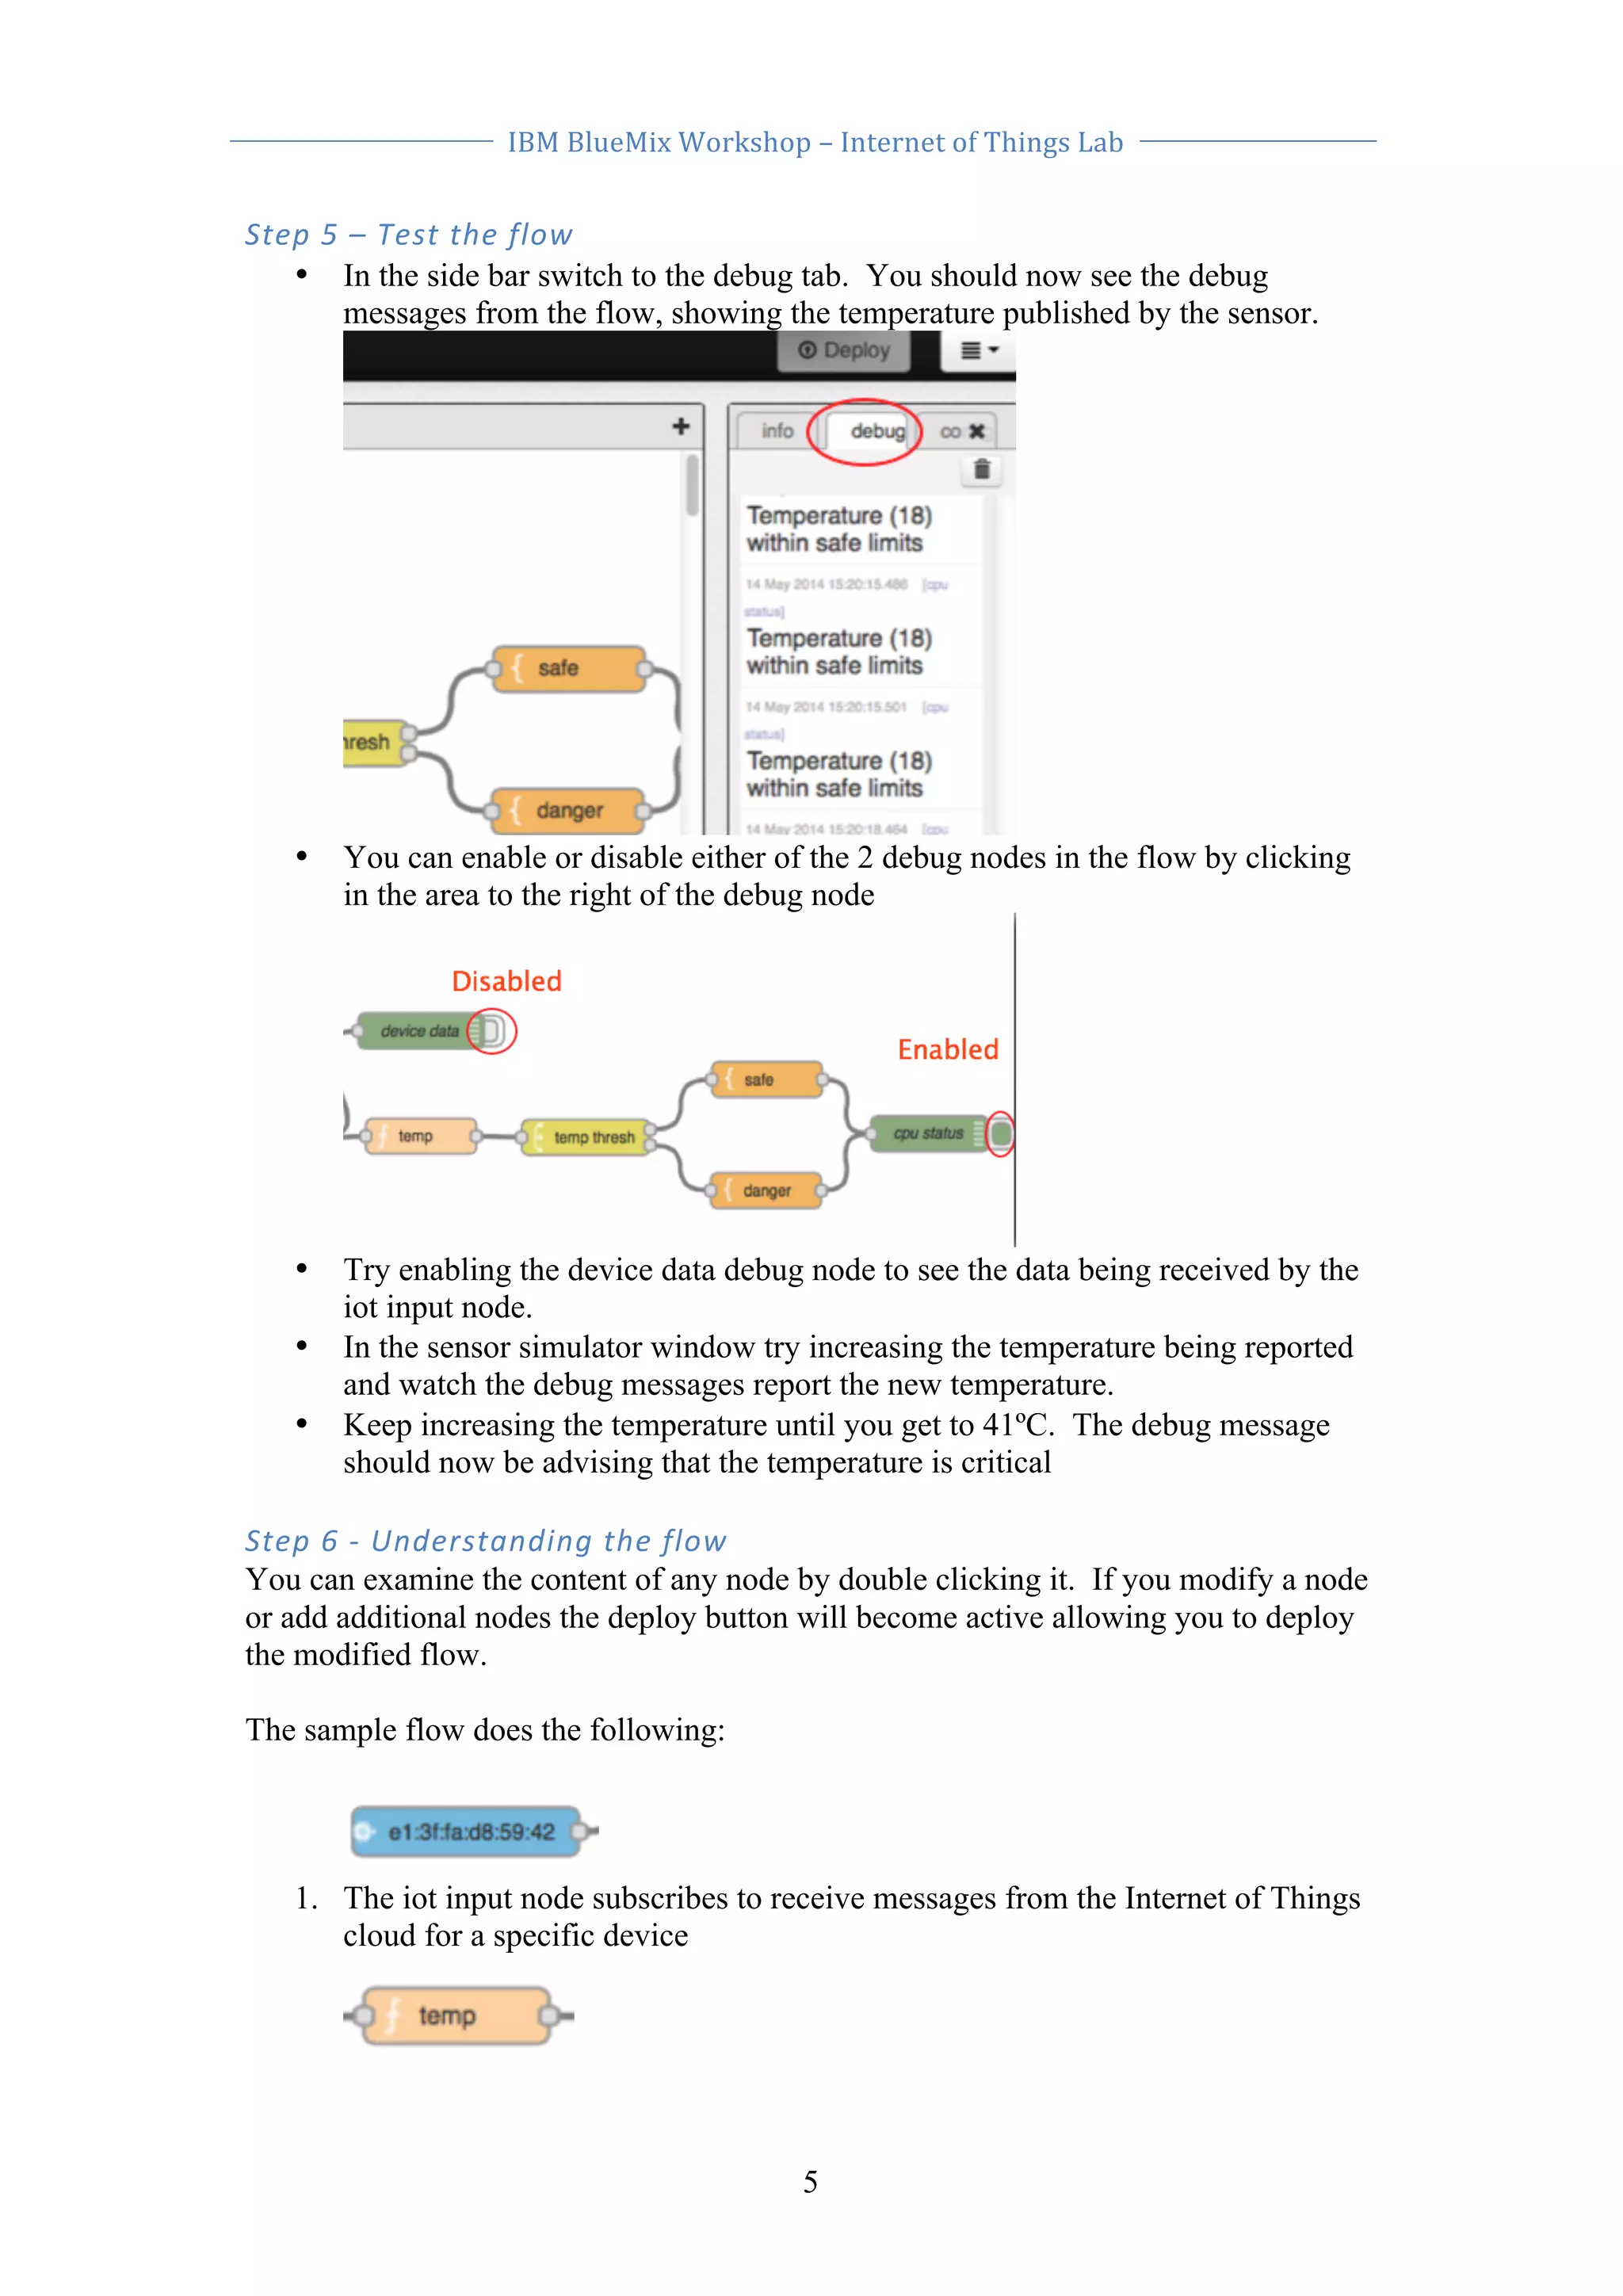
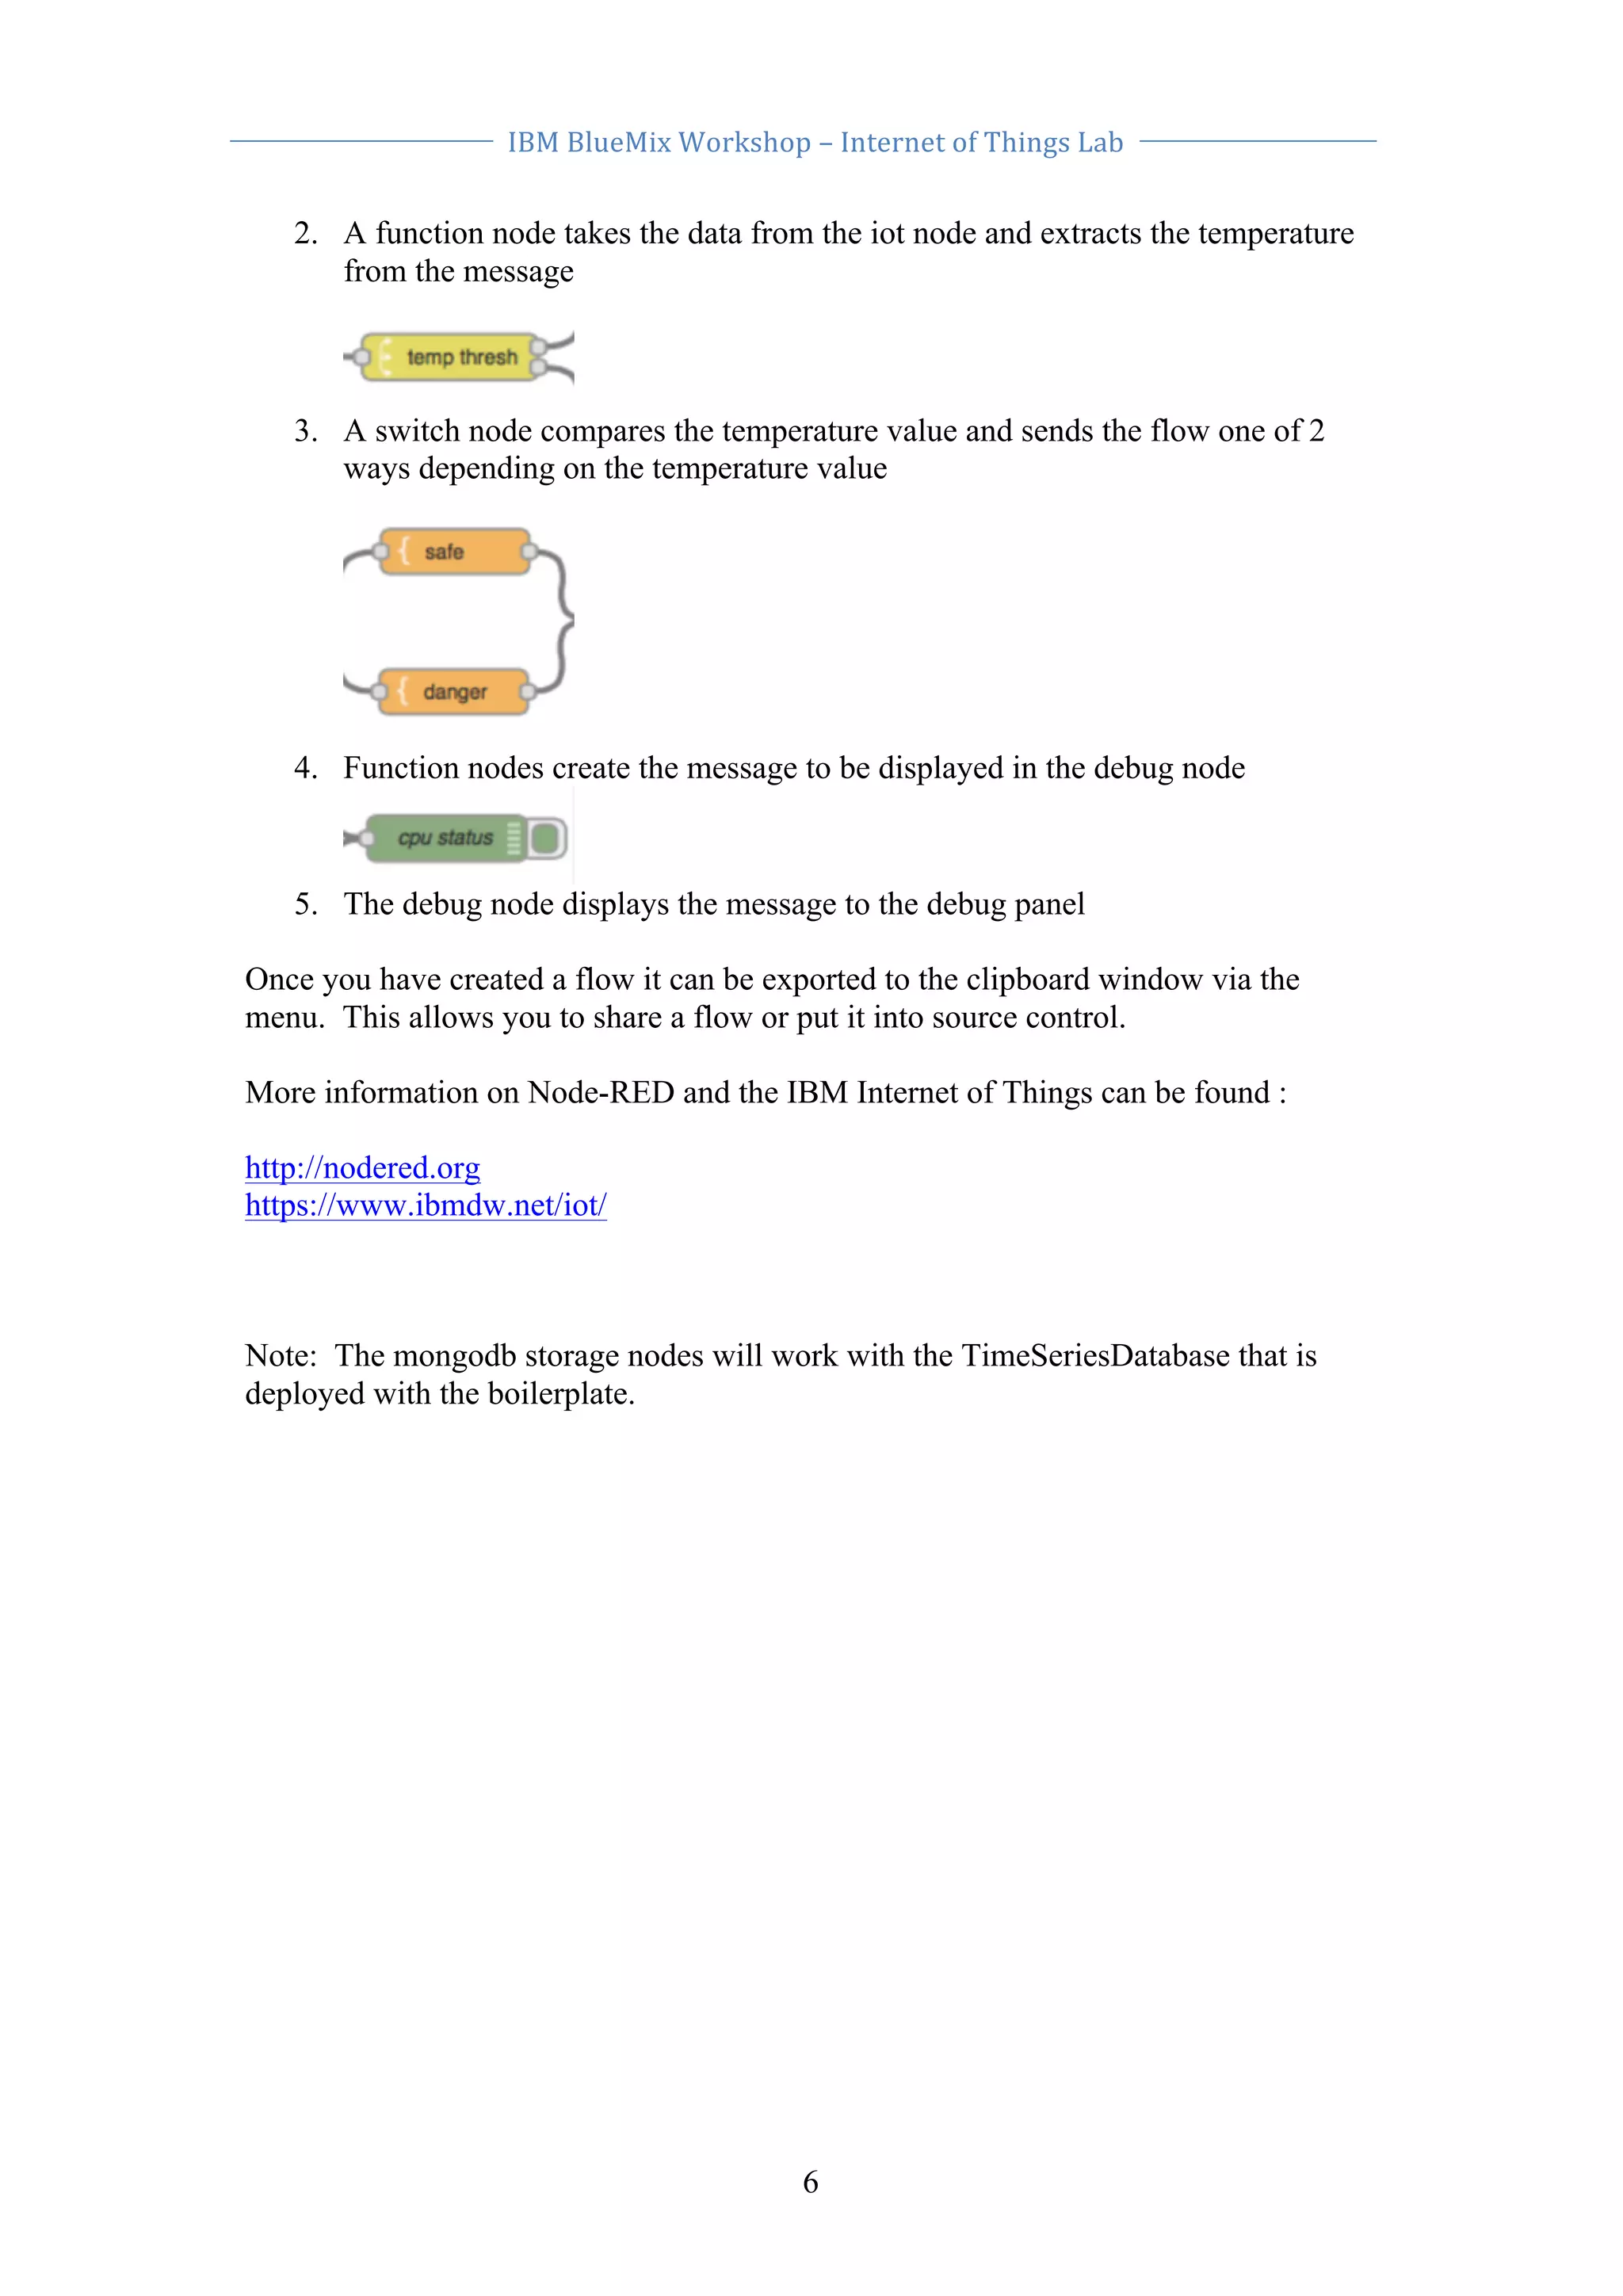
The document describes steps for building a sample application using Node-RED to process temperature readings from a simulated IoT device published to IBM Cloud. The sample flow checks readings against a threshold and reports if the temperature is safe or critical. Users deploy the boilerplate, import the sample flow, configure it for the simulated device, test it by changing the reported temperature, and review how the flow works.
![IBM
BlueMix
Workshop
–
Internet
of
Things
Lab
Step
2
–
Launch
the
Node-‐RED
flow
editor
• When the application is deployed and is running click the route to open the
2
deployed application
• The Node-RED application will open in your browser. Select the ‘Got to your
Node-RED flow editor’ button
Step
3
–
Import
the
sample
flow
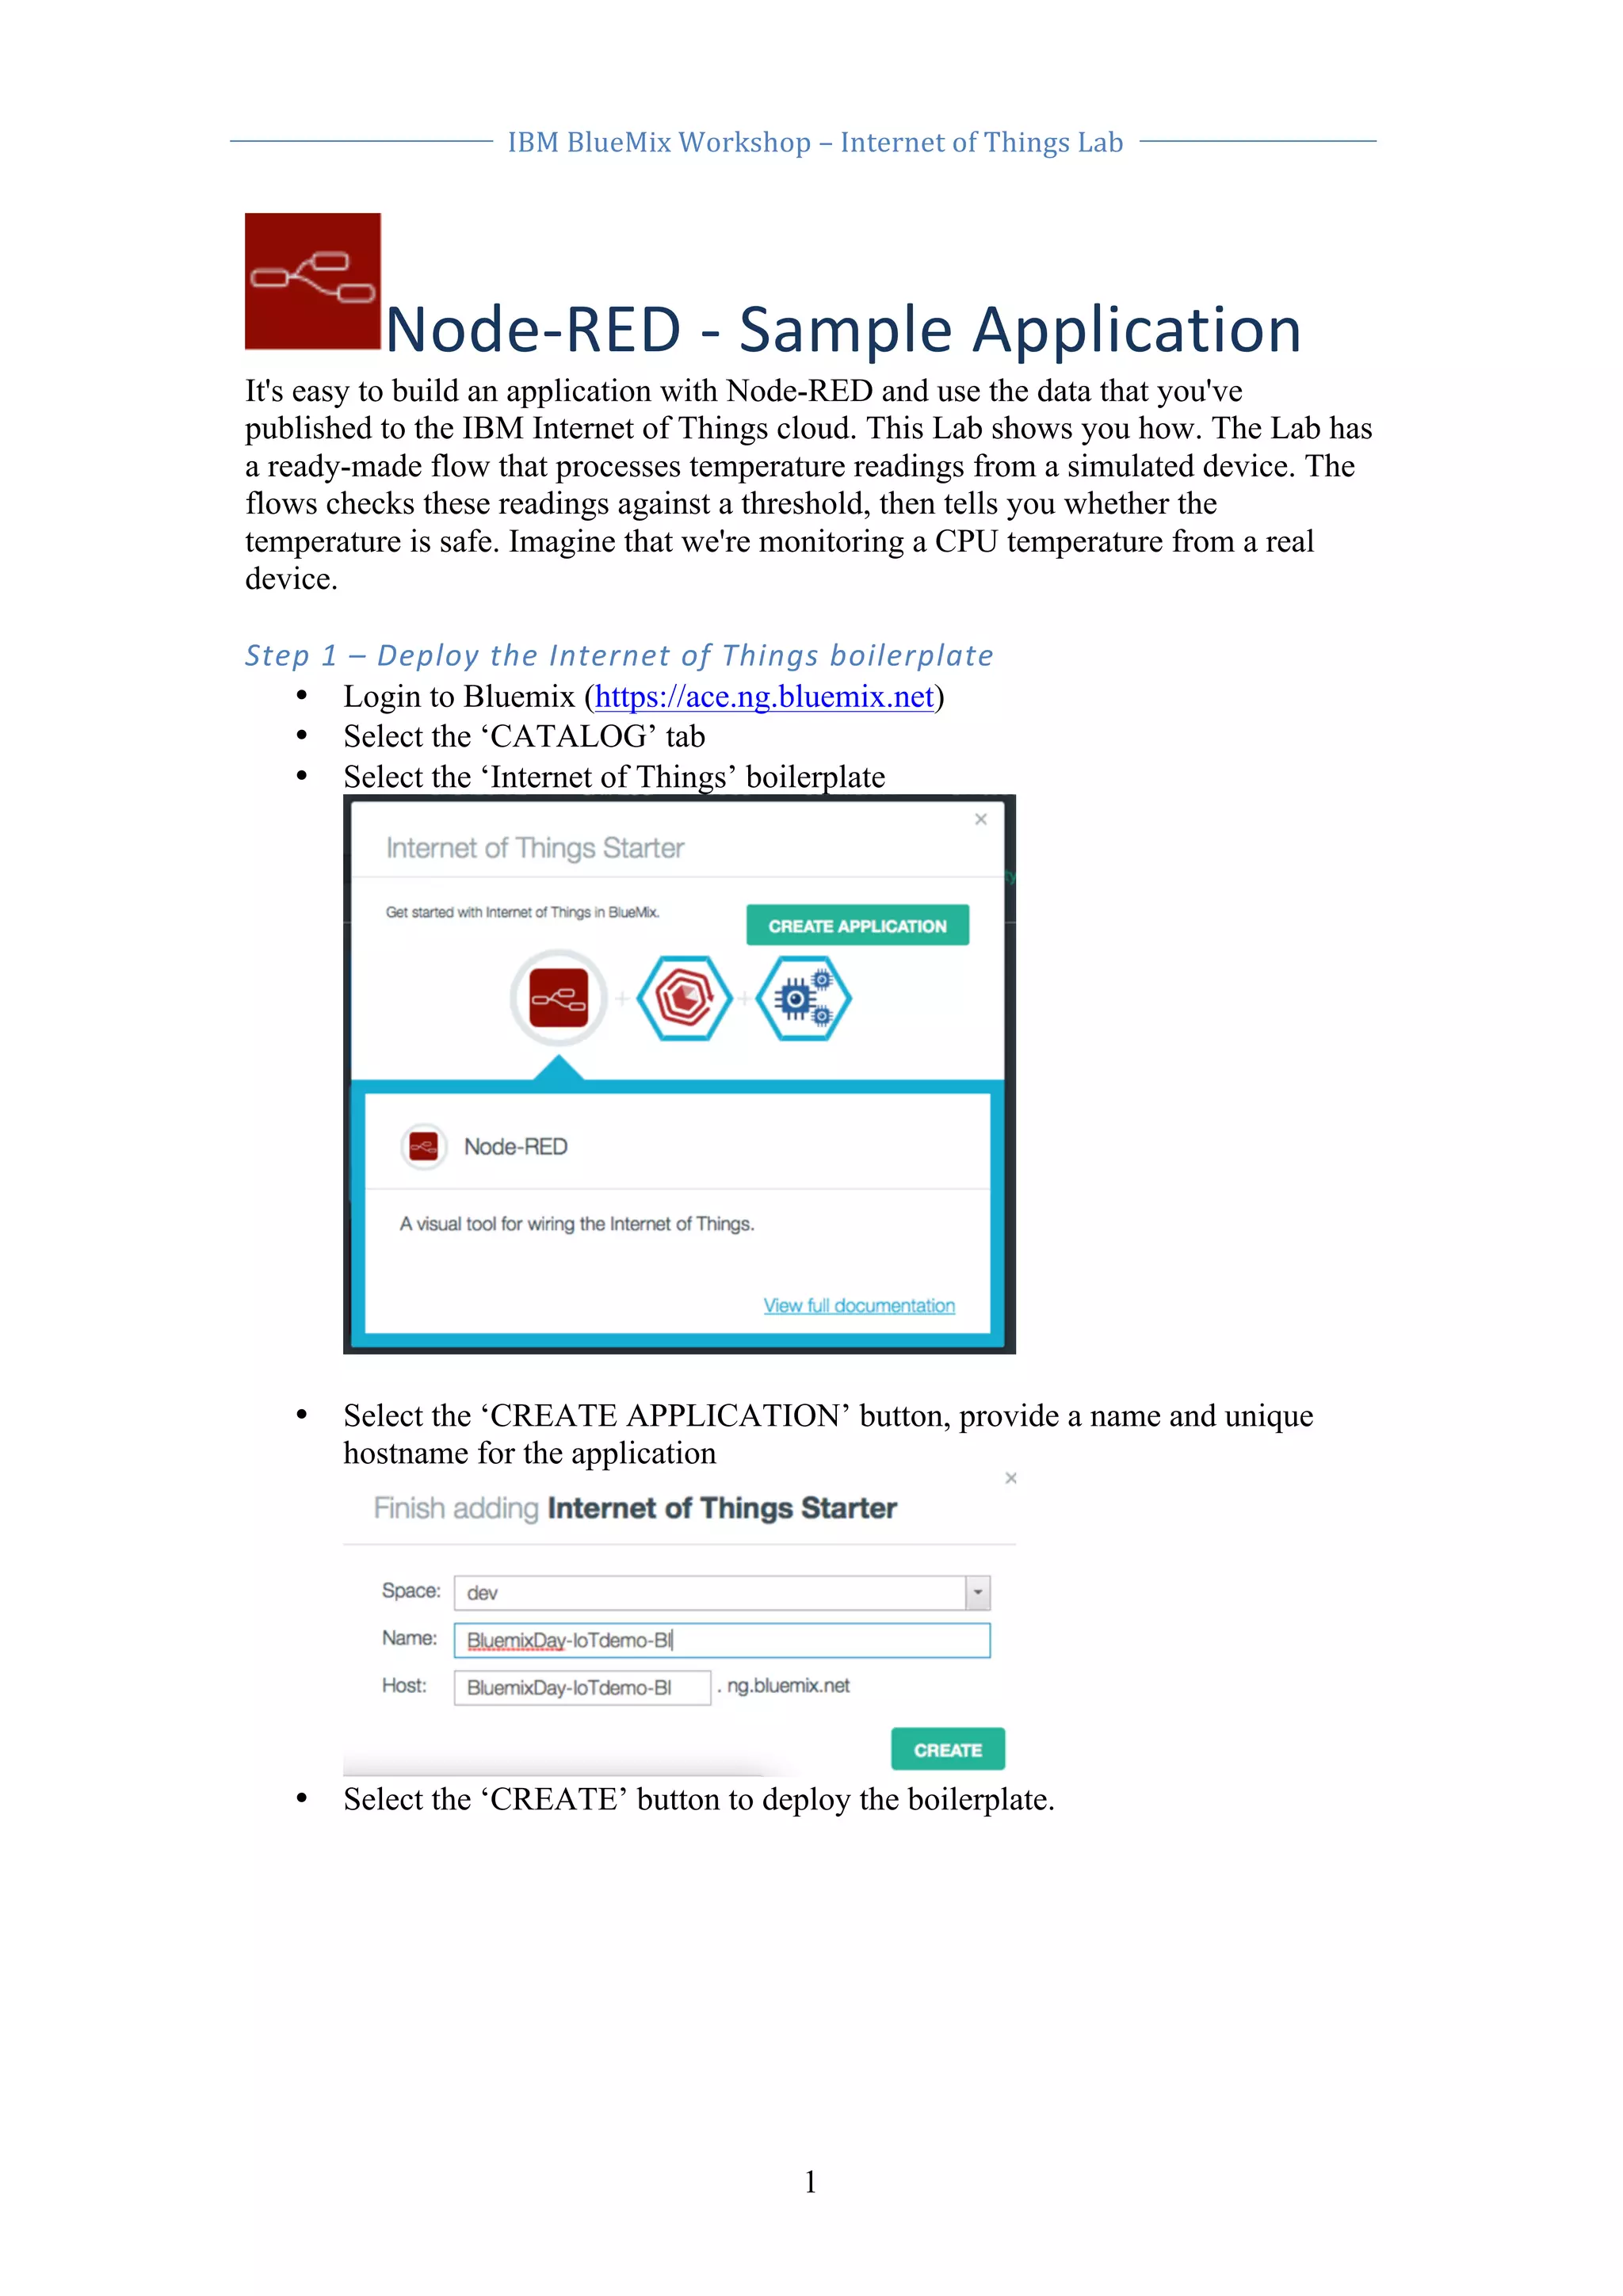
This step imports the sample flow to the Node-RED editor. Node-RED flows can be
imported and exported as JSON text, so to import the flow you are going to copy the
flow below and import it to Node-RED
------------------------------Select below this line-----------------------------------------------
[{"id": "f9a7b43b.065848","type": "iot","name": "","deviceId":
"00:00:00:00:00:00","messageType": "*","x": 155,"y": 239,"z":
"65624723.9a9db8","wires": [["9db76969.624898","9e041be9.61fbe8"]]},
{"id": "9db76969.624898","type": "function","name": "temp","func":
"return {payload:msg.payload.d.temp};","outputs": 1,"x": 318.5,"y":
237,"z": "65624723.9a9db8","wires": [["2b6f31bc.d490ce"]]}, {"id":
"2b6f31bc.d490ce","type": "switch","name": "temp thresh","property":
"payload","rules": [{"t": "lte","v": "40"},{"t": "gt","v":
"40"}],"checkall": "true","outputs": 2,"x": 467.5,"y": 238,"z":
"65624723.9a9db8","wires": [["34b29de.fcb4d62"],
["bb90881b.446f78"]]},{"id": "10cf85ac.ef307a","type":
"debug","name": "cpu status","active": true,"complete": "false","x":
778.5,"y": 235,"z": "65624723.9a9db8","wires": []},{"id":
"9e041be9.61fbe8","type": "debug","name": "device data","active":
false,"complete": "false","x": 318.5,"y": 148,"z": "65624723.9a9db8",
"wires": []},{"id": "34b29de.fcb4d62","type": "template","name":
"safe","template": "Temperature ({{payload}}) within safe limits",
"x": 631.5,"y": 189,"z": "65624723.9a9db8","wires": [[
"10cf85ac.ef307a"]]},{"id": "bb90881b.446f78","type": "template",
"name": "danger","template": "Temperature ({{payload}}) critical",
"x": 630.5,"y": 283,"z": "65624723.9a9db8","wires":
[["10cf85ac.ef307a"]]}]
------------------------------Select above this line-----------------------------------------------
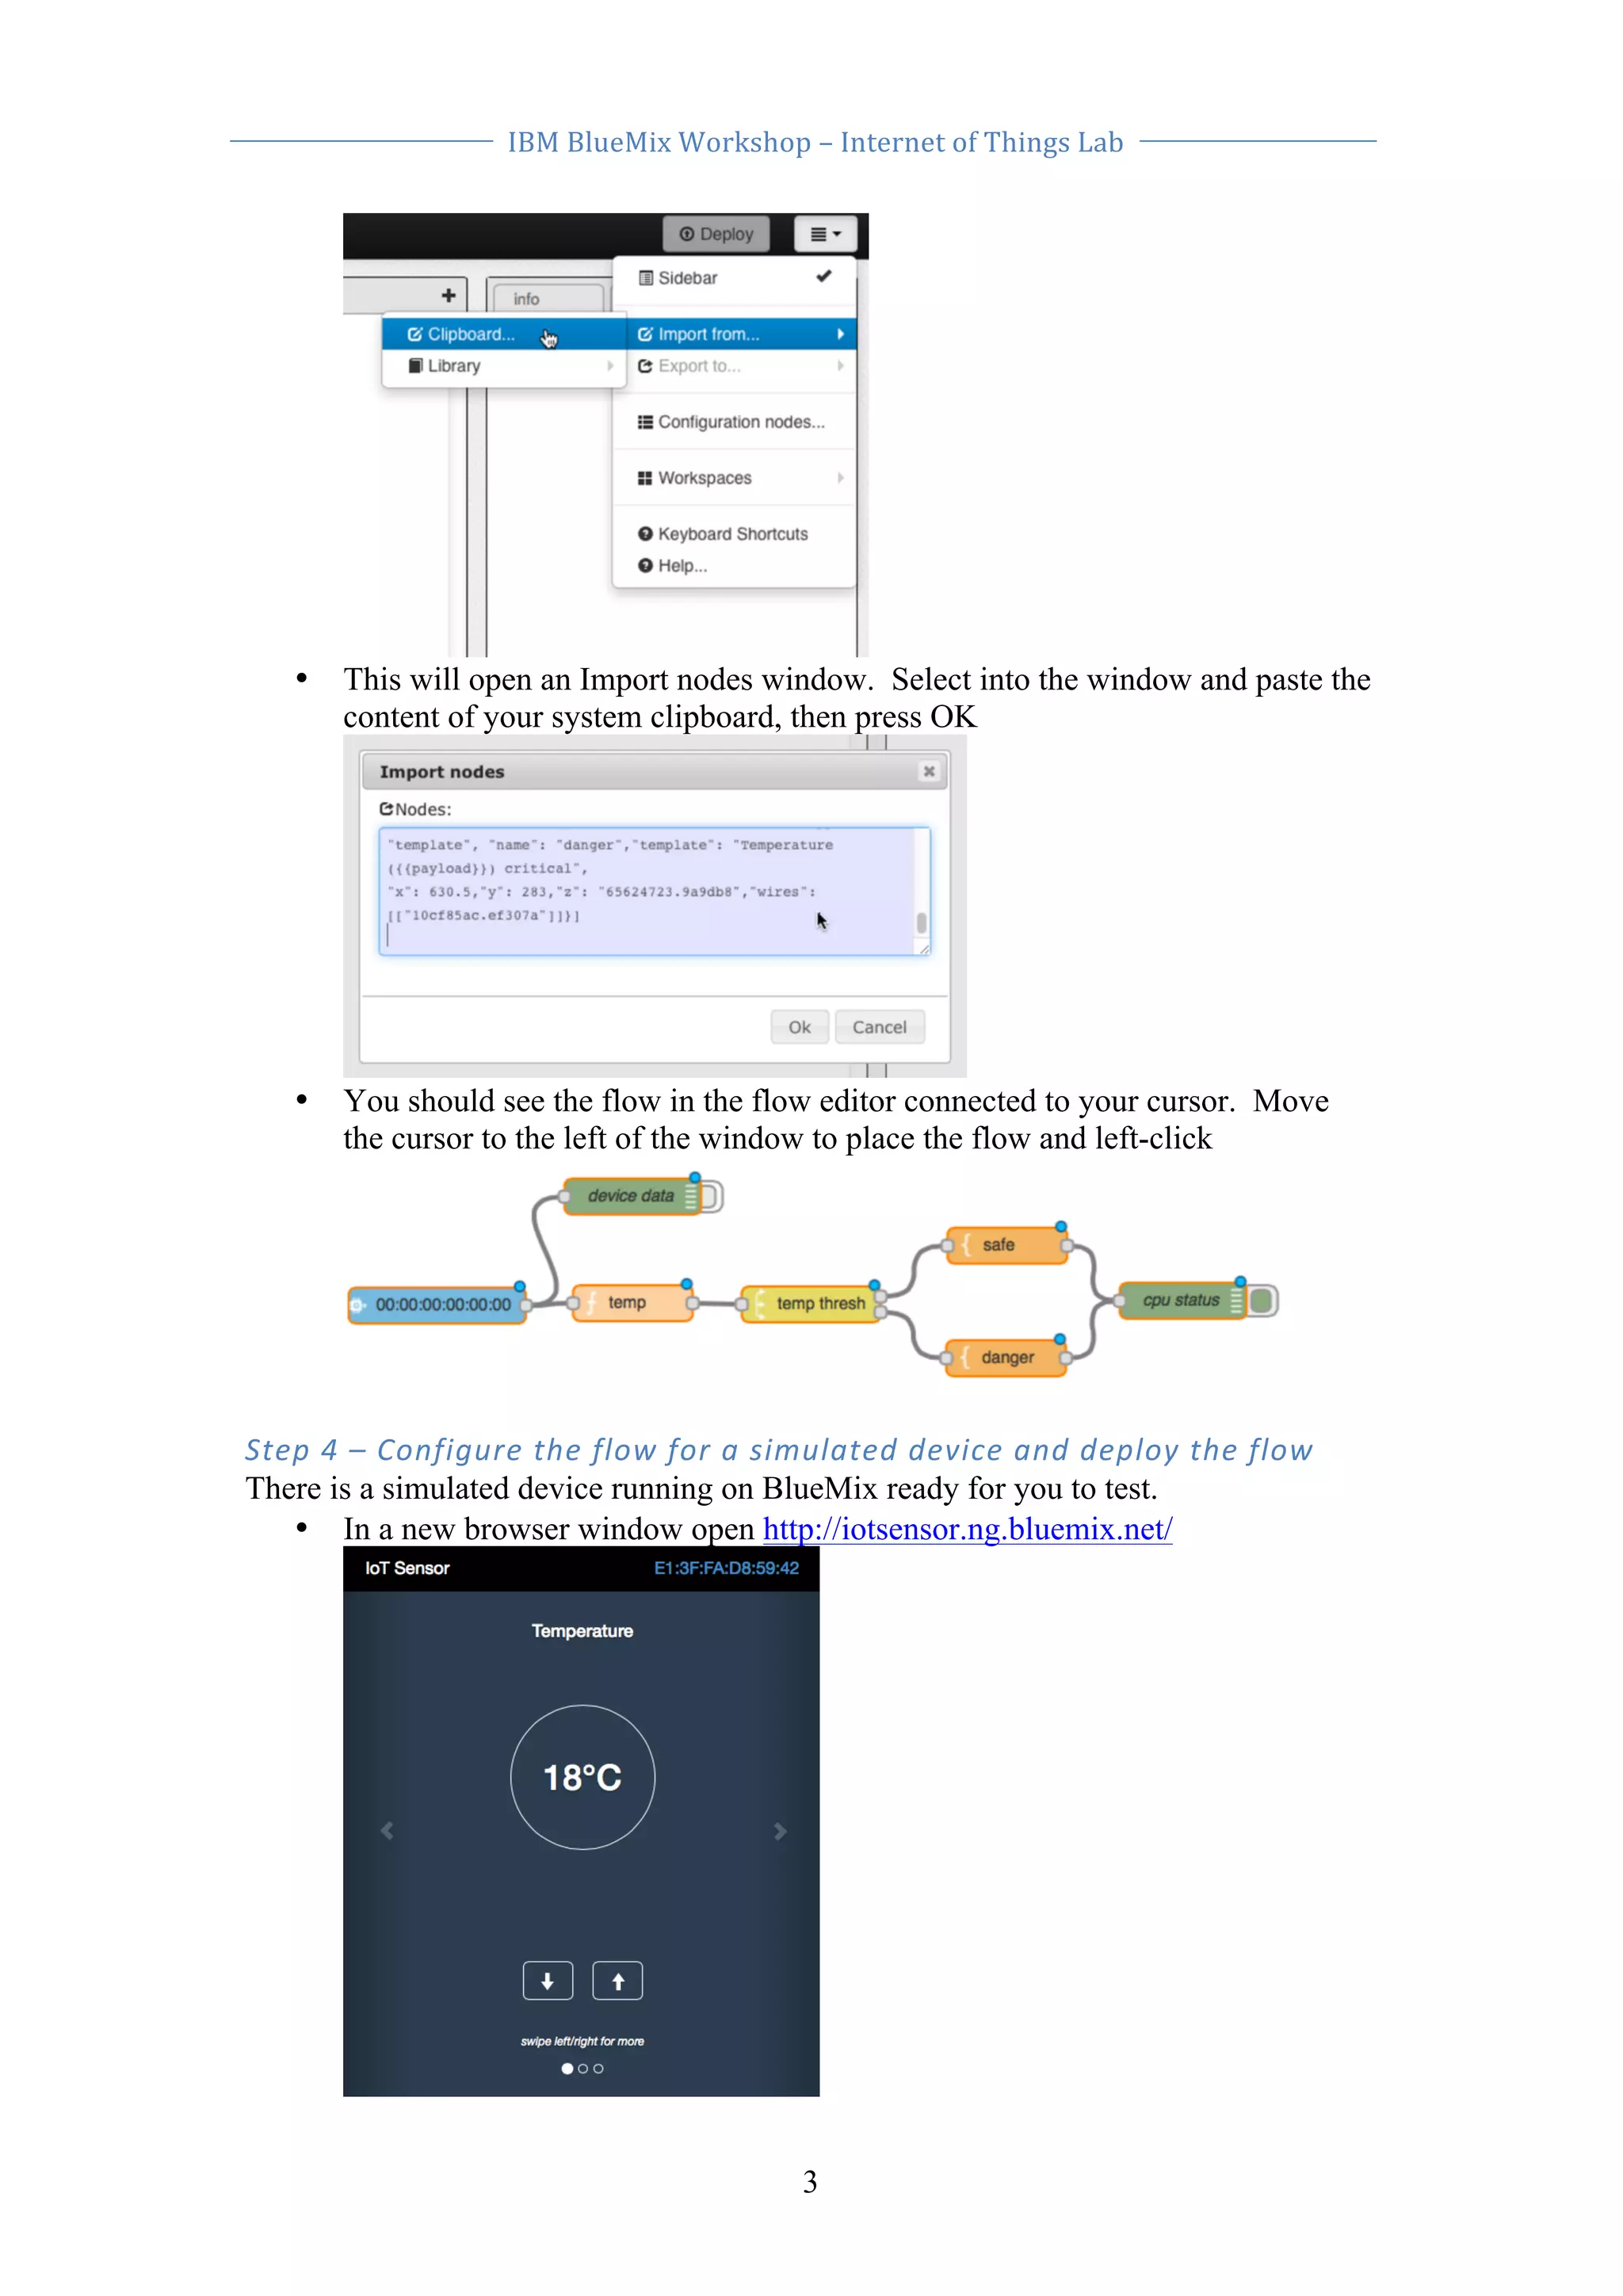
• Select the text above and copy to you system clipboard
• In the Node-RED flow editor select the menu (upper right of screen). Select
‘Import from…’ then ‘Clipboard…’](https://image.slidesharecdn.com/9bonusinternetofthings-141212164158-conversion-gate02/75/Internet-of-Things-exercise-on-IBM-Bluemix-2-2048.jpg)


![Computer Networks 01[1 using all terms].pptx](https://cdn.slidesharecdn.com/ss_thumbnails/computernetworks011-251214040533-327dd9f8-thumbnail.jpg?width=640&height=640&fit=bounds)


