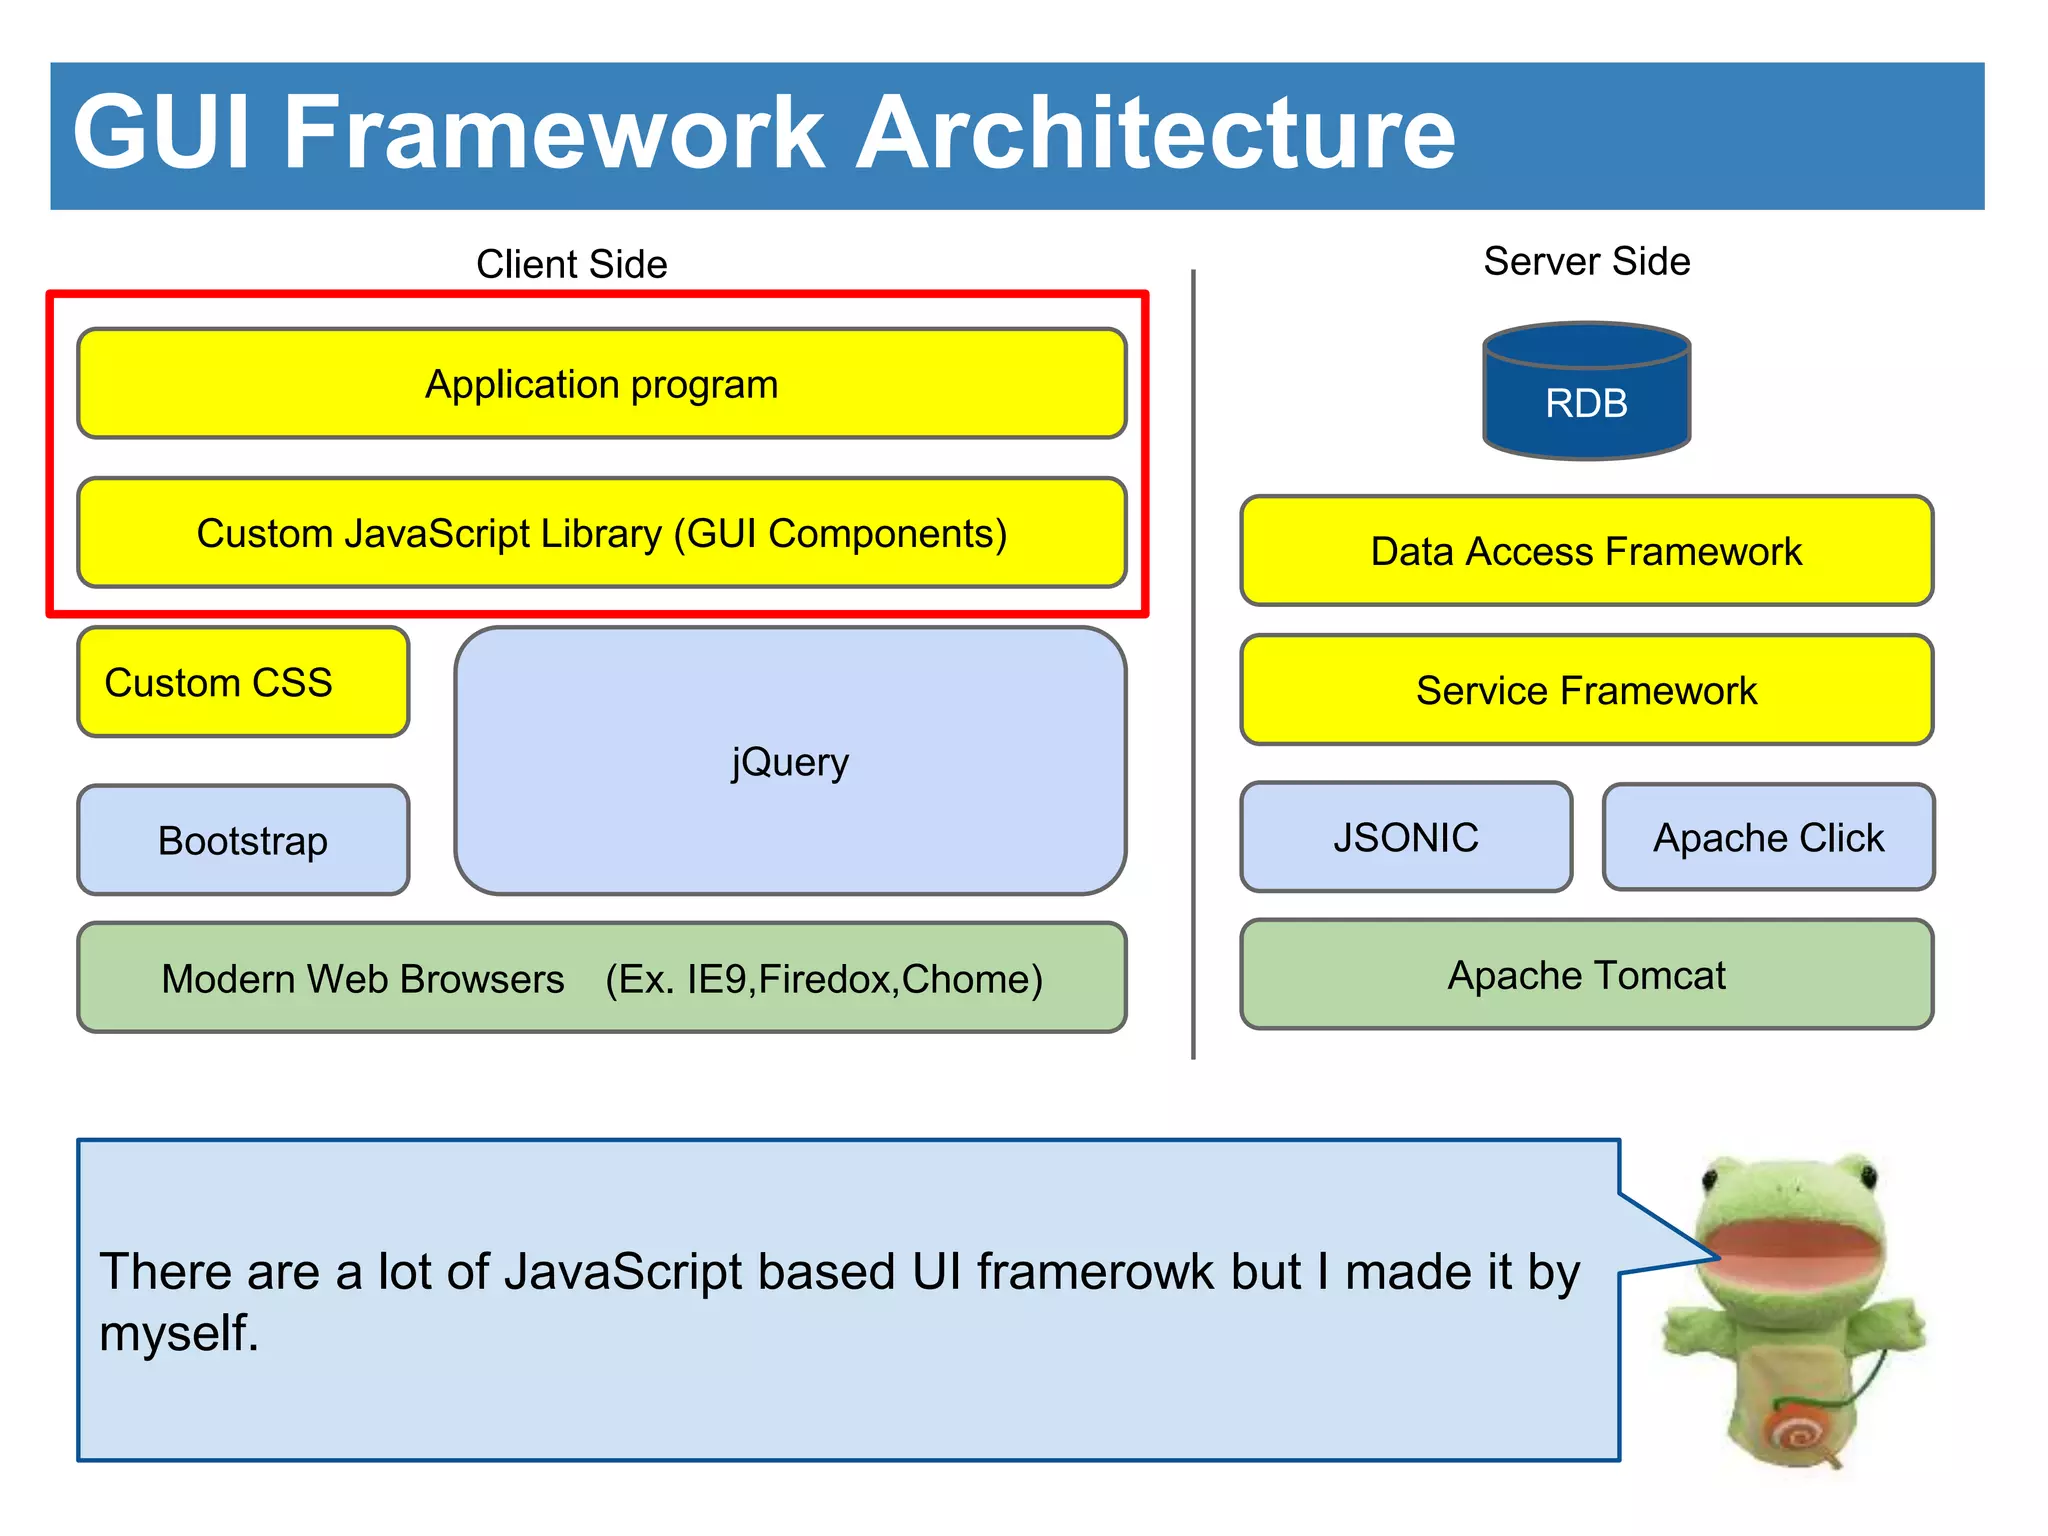
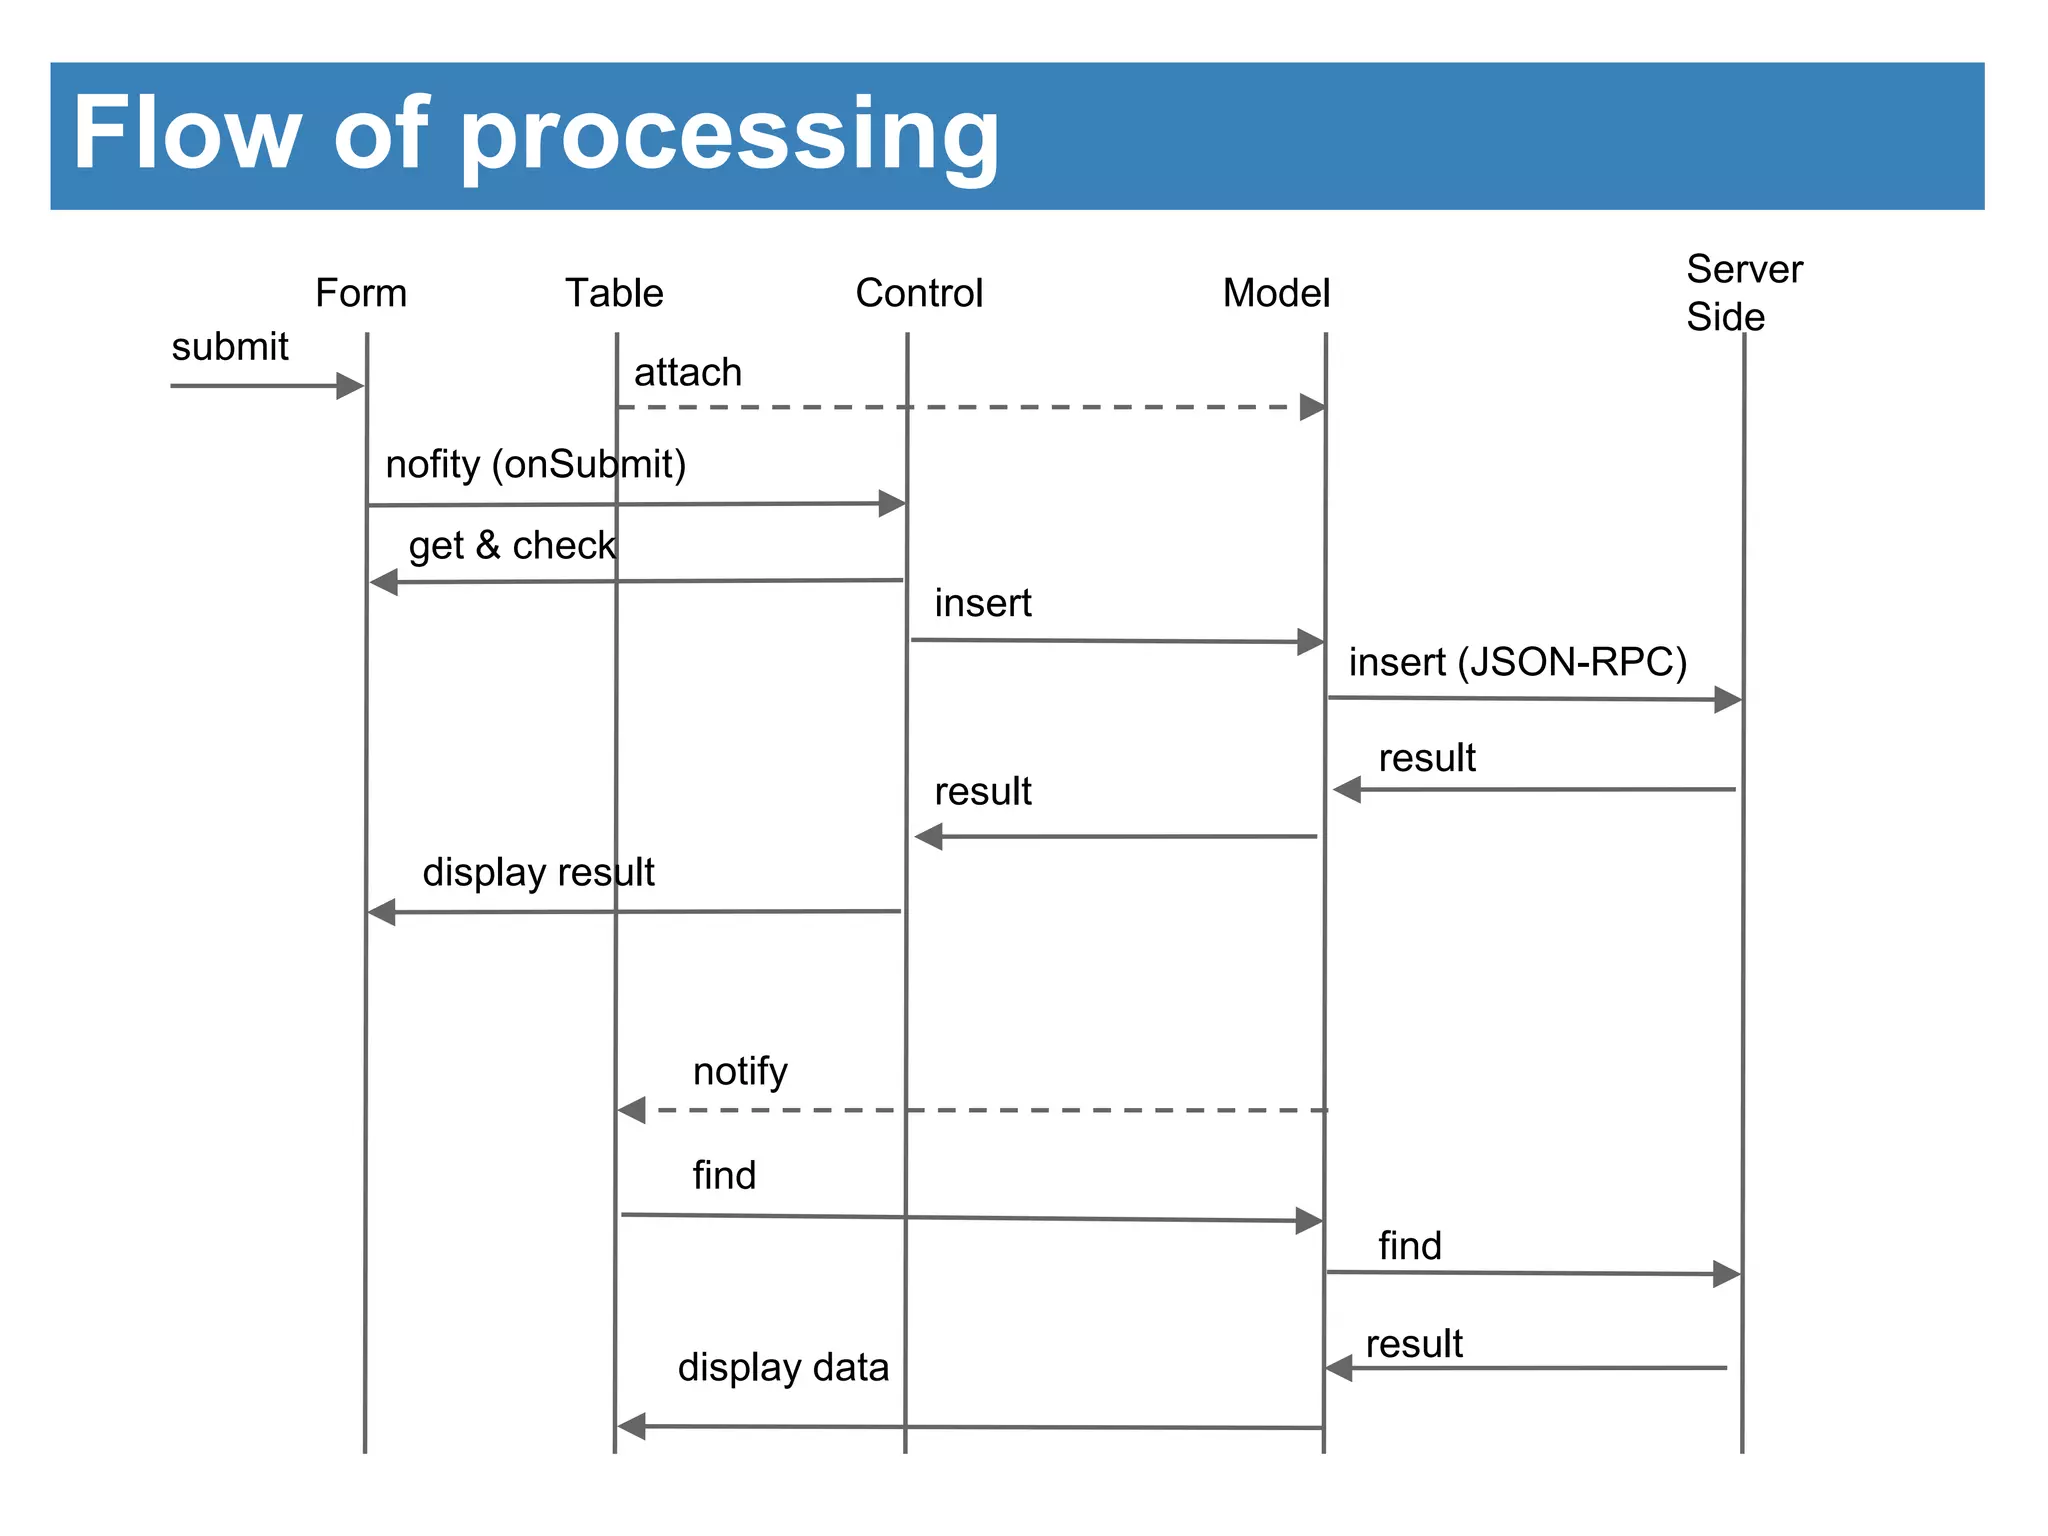
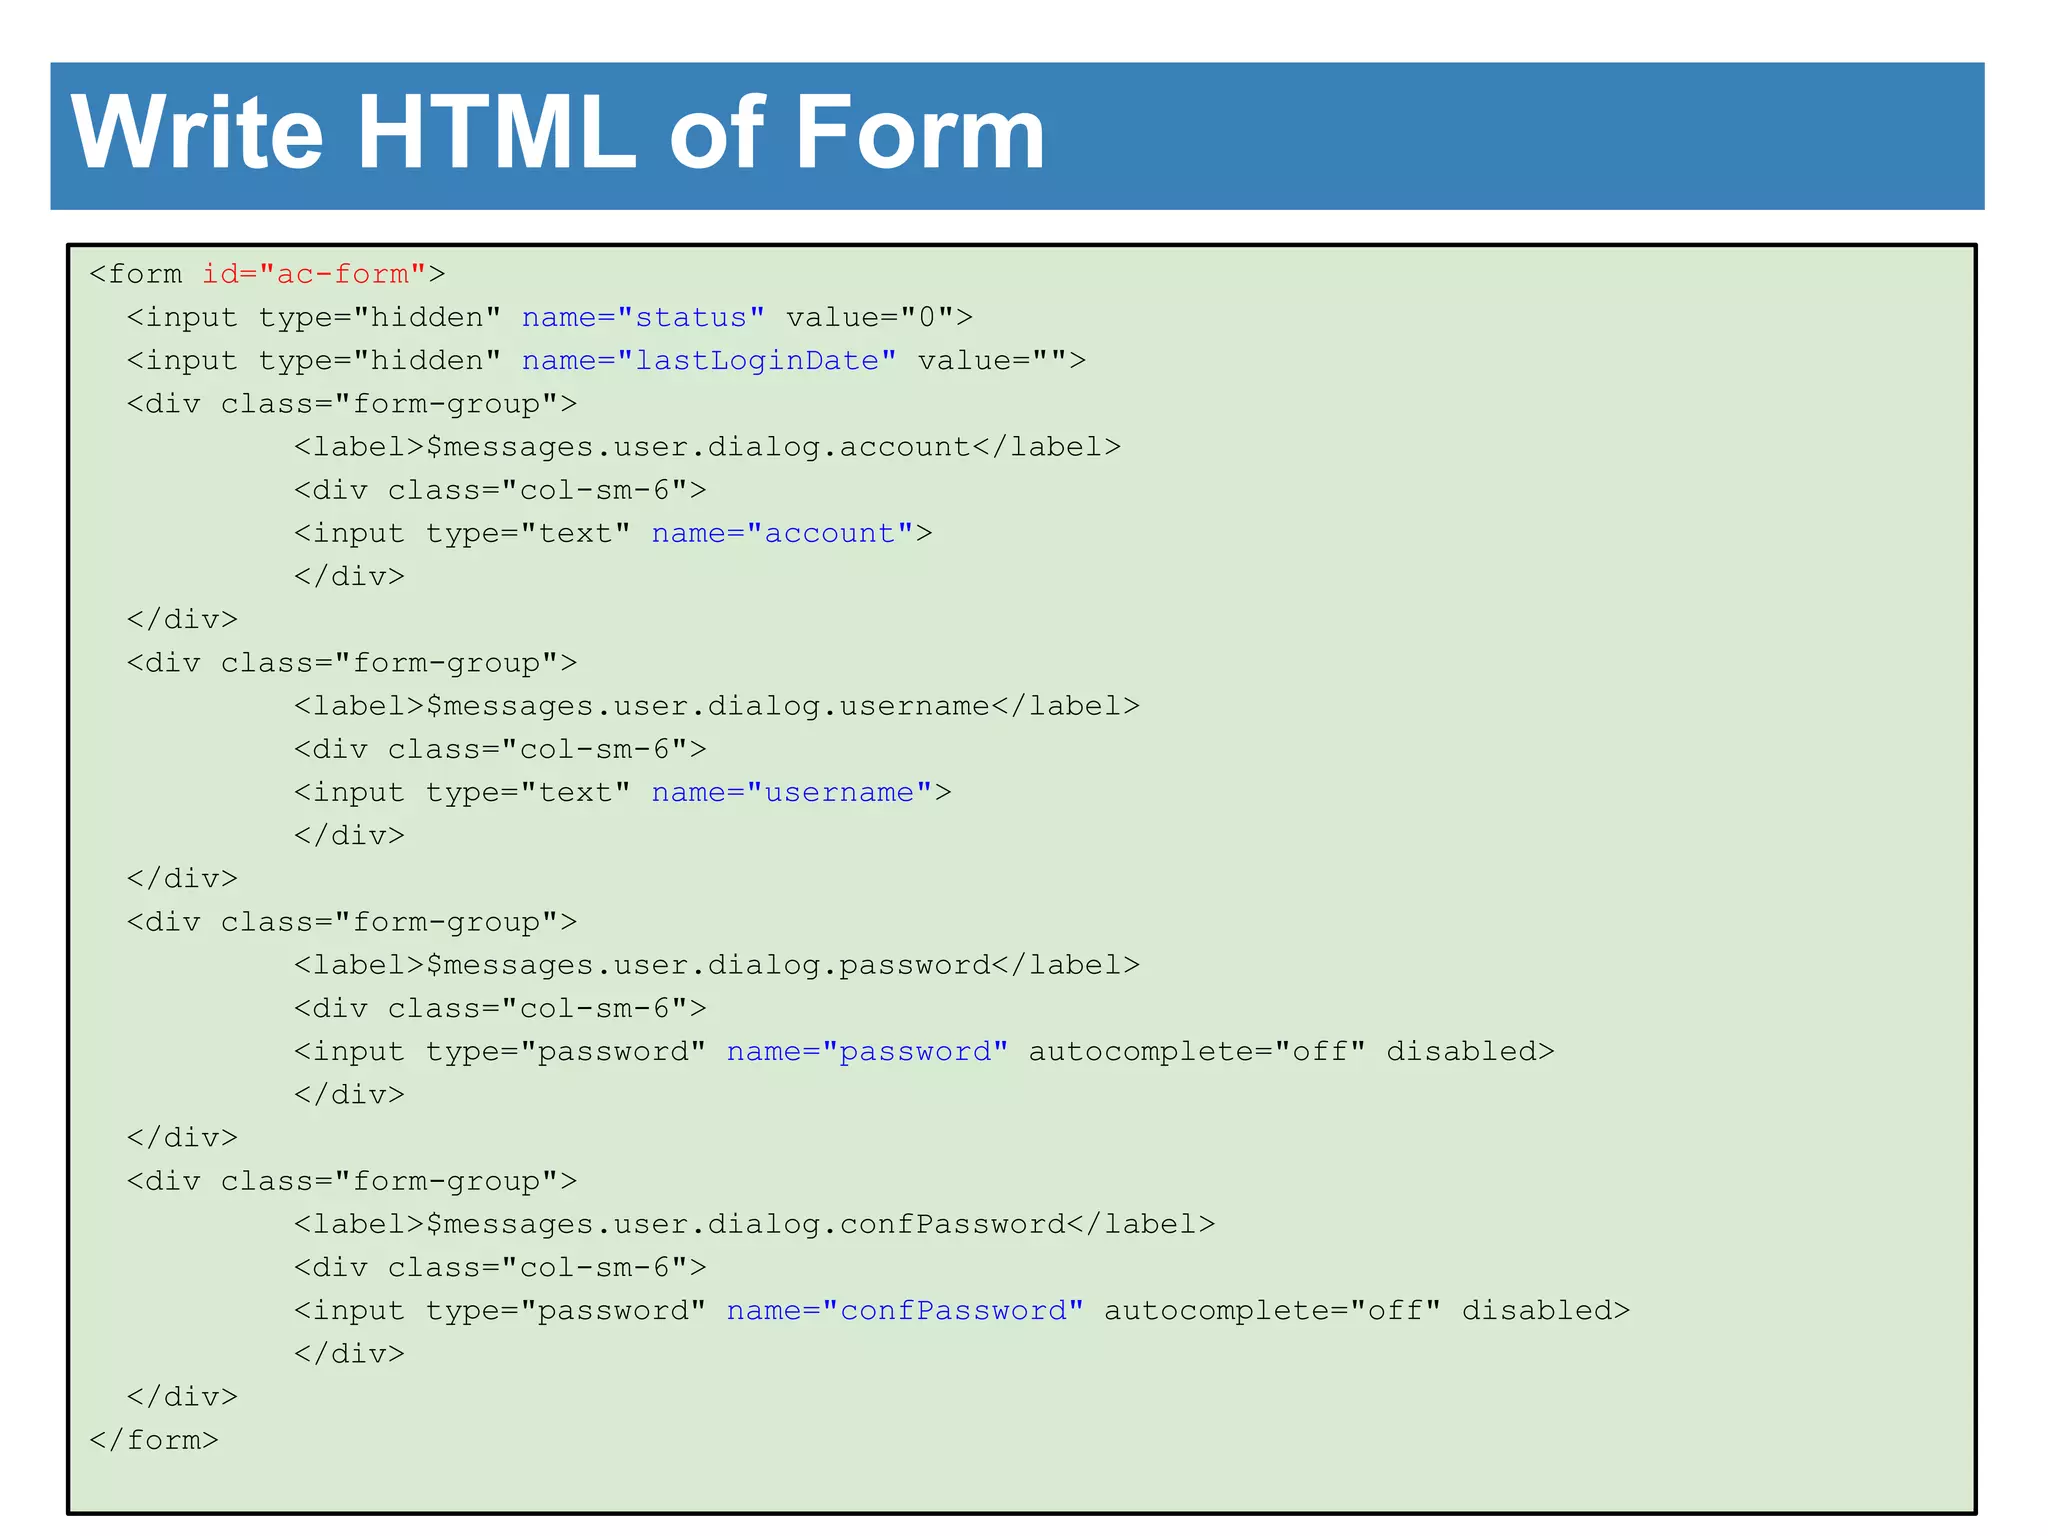
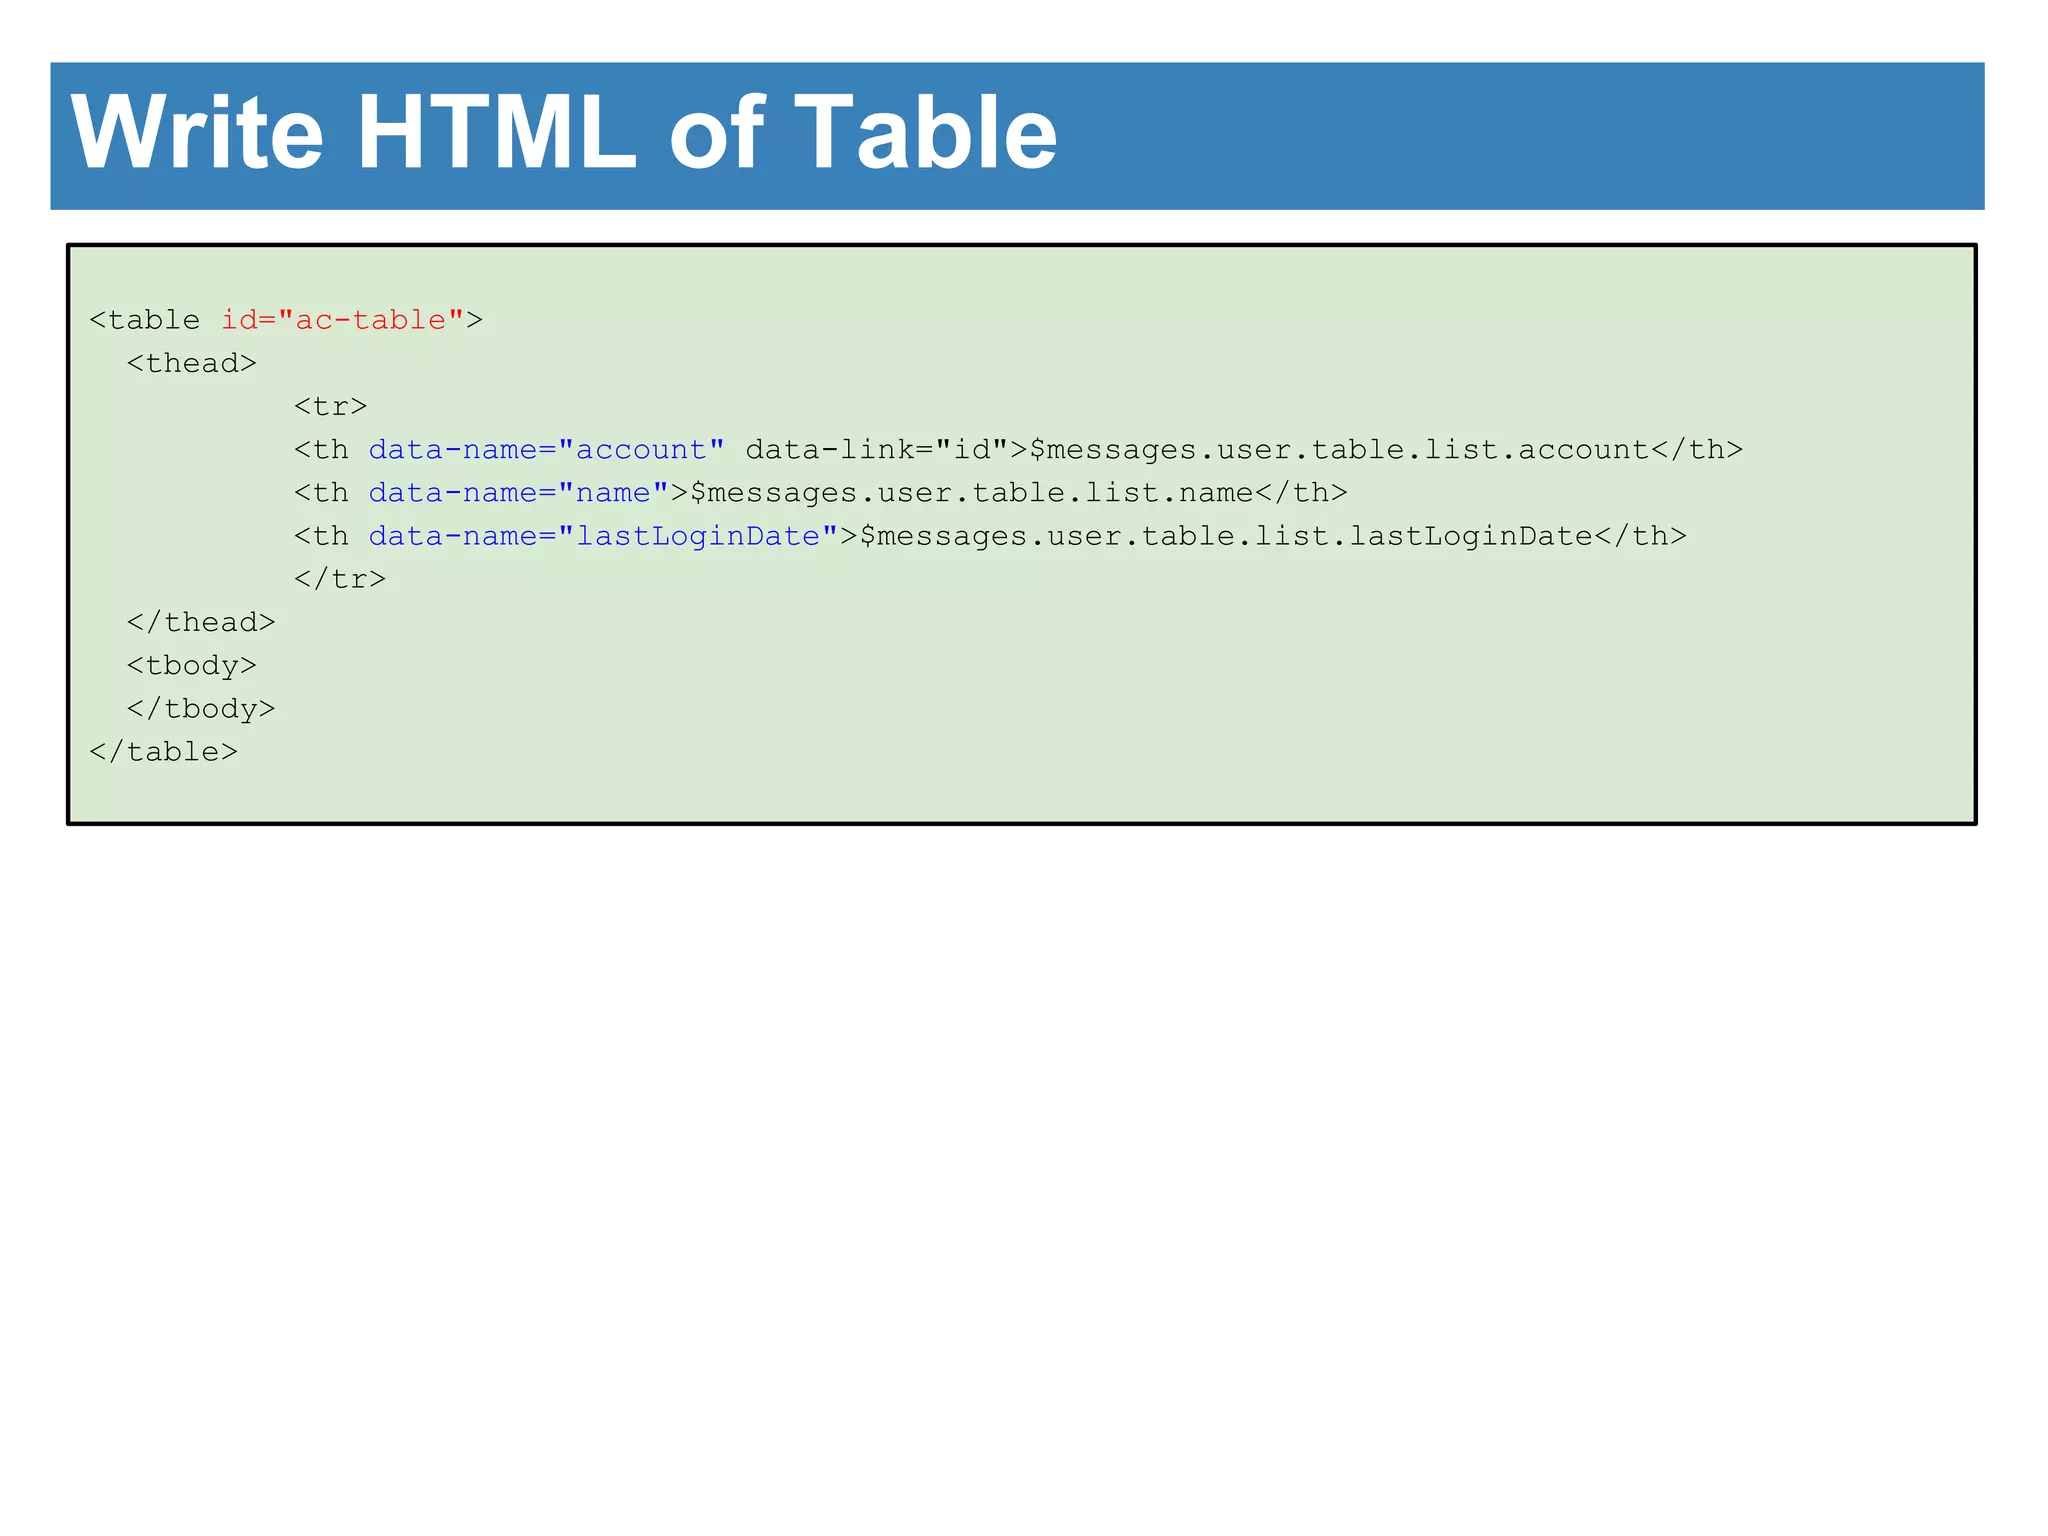
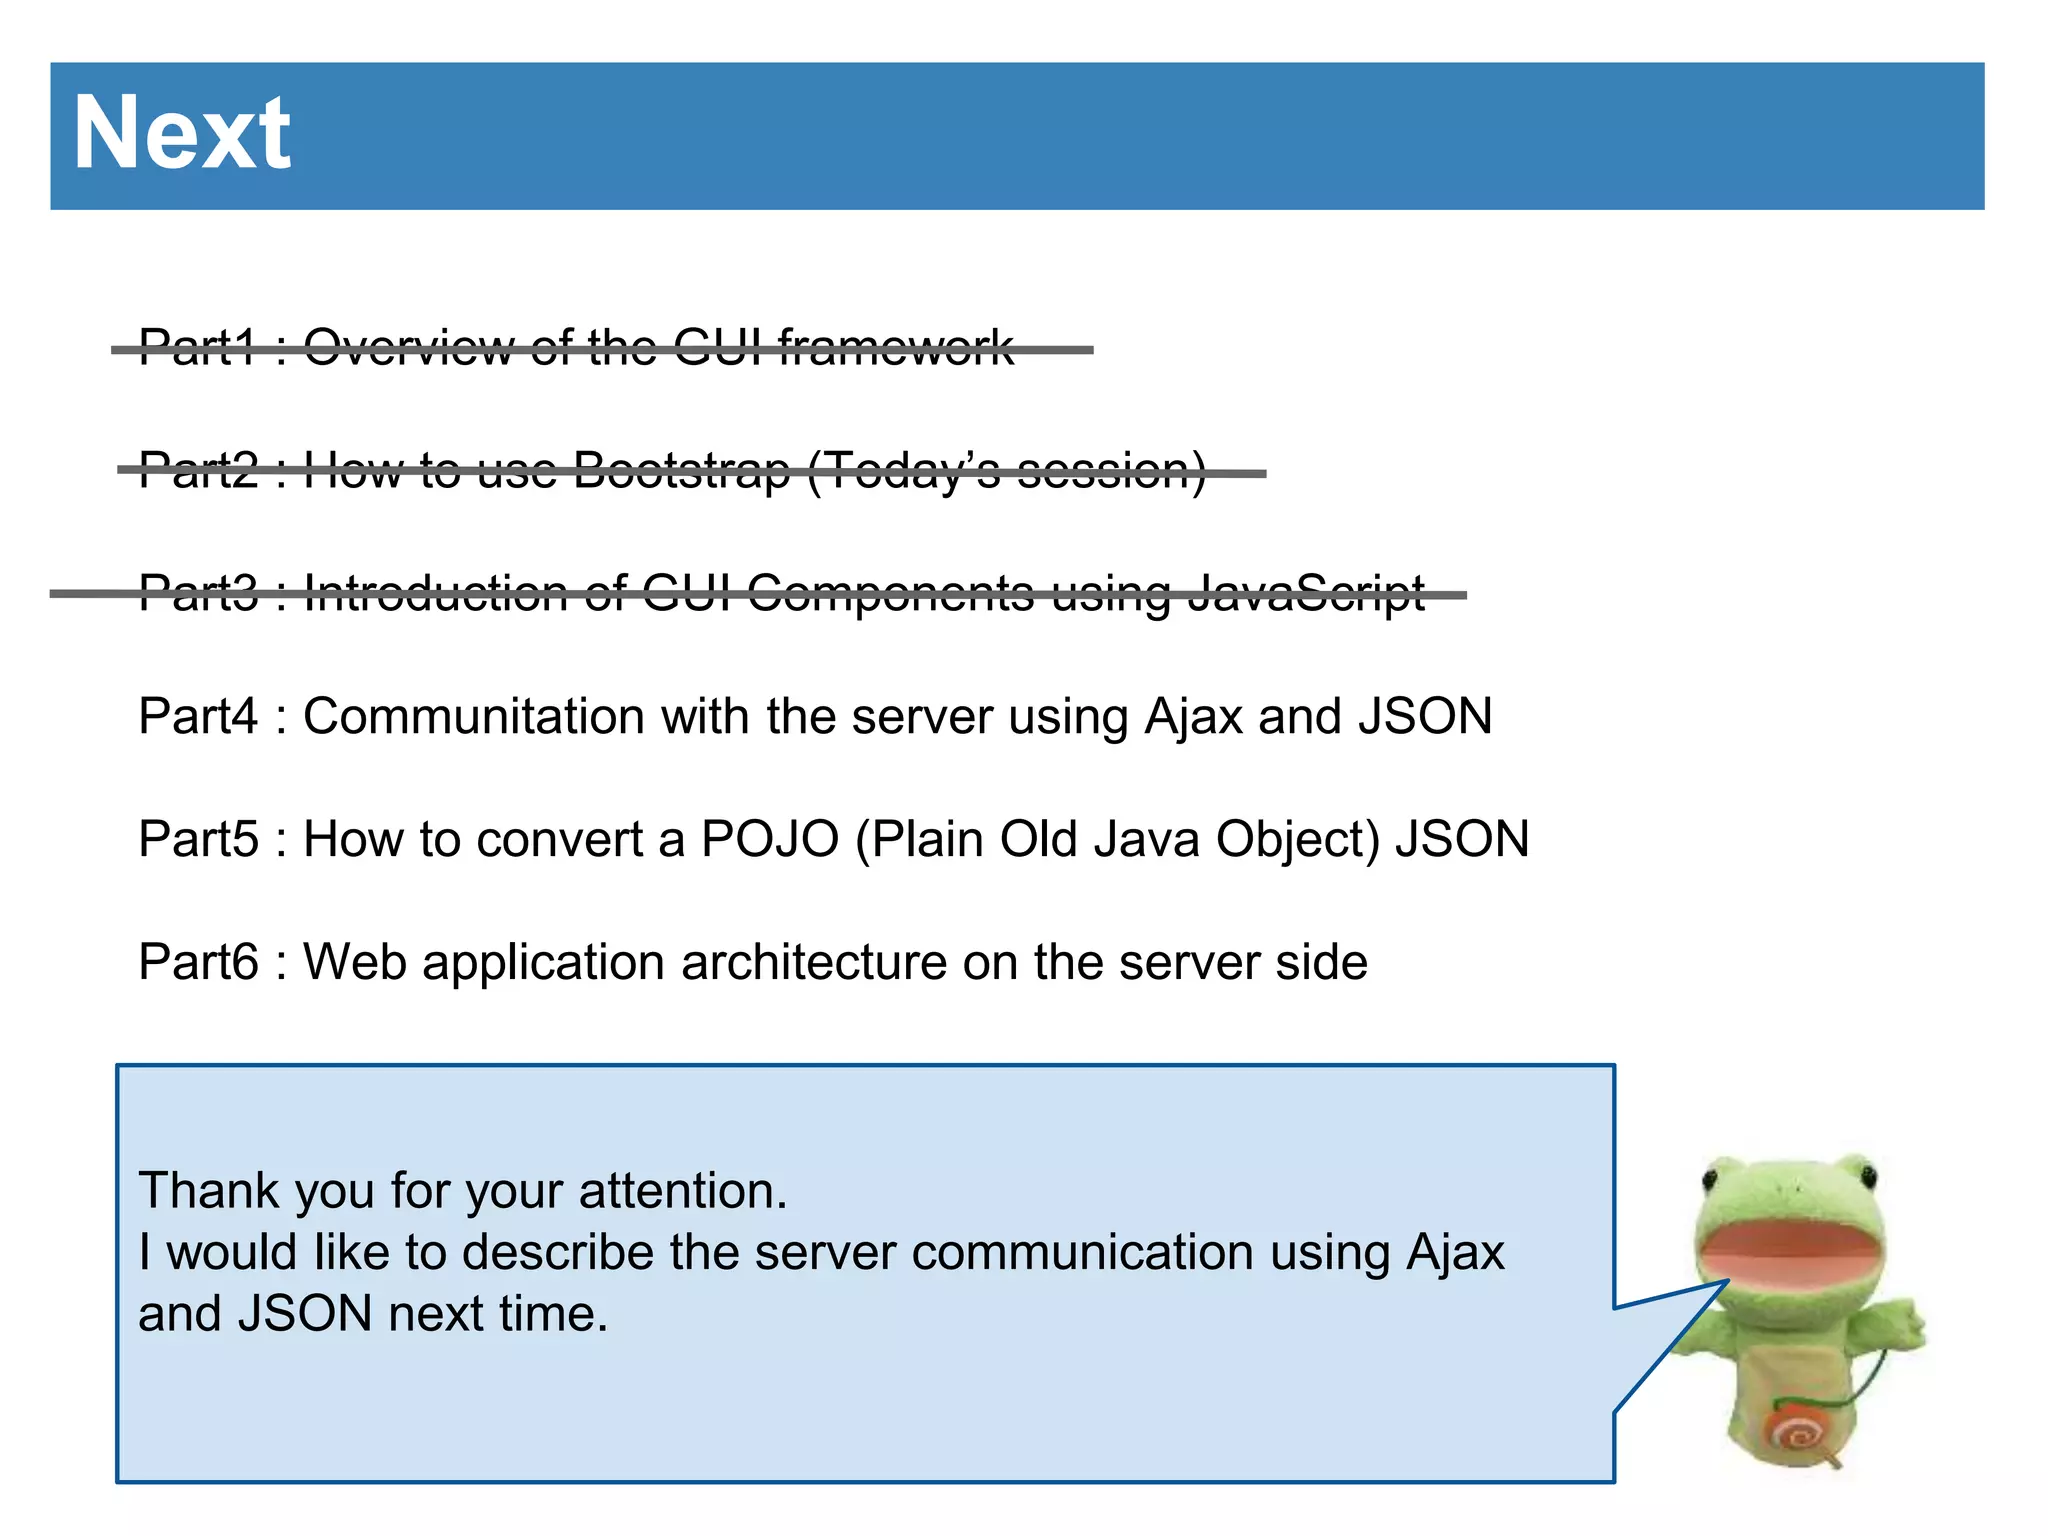
The document discusses the introduction of GUI components using JavaScript. It describes the architecture of the GUI framework including custom JavaScript and CSS libraries. It then discusses the benefits of the framework including separation of design and control, simple interfaces, and ease of data handling. Code examples are provided to demonstrate how to write HTML for a form and table and the corresponding JavaScript to initialize components and handle form submission and displaying data in the table. The next session will cover communication with the server using Ajax and JSON.

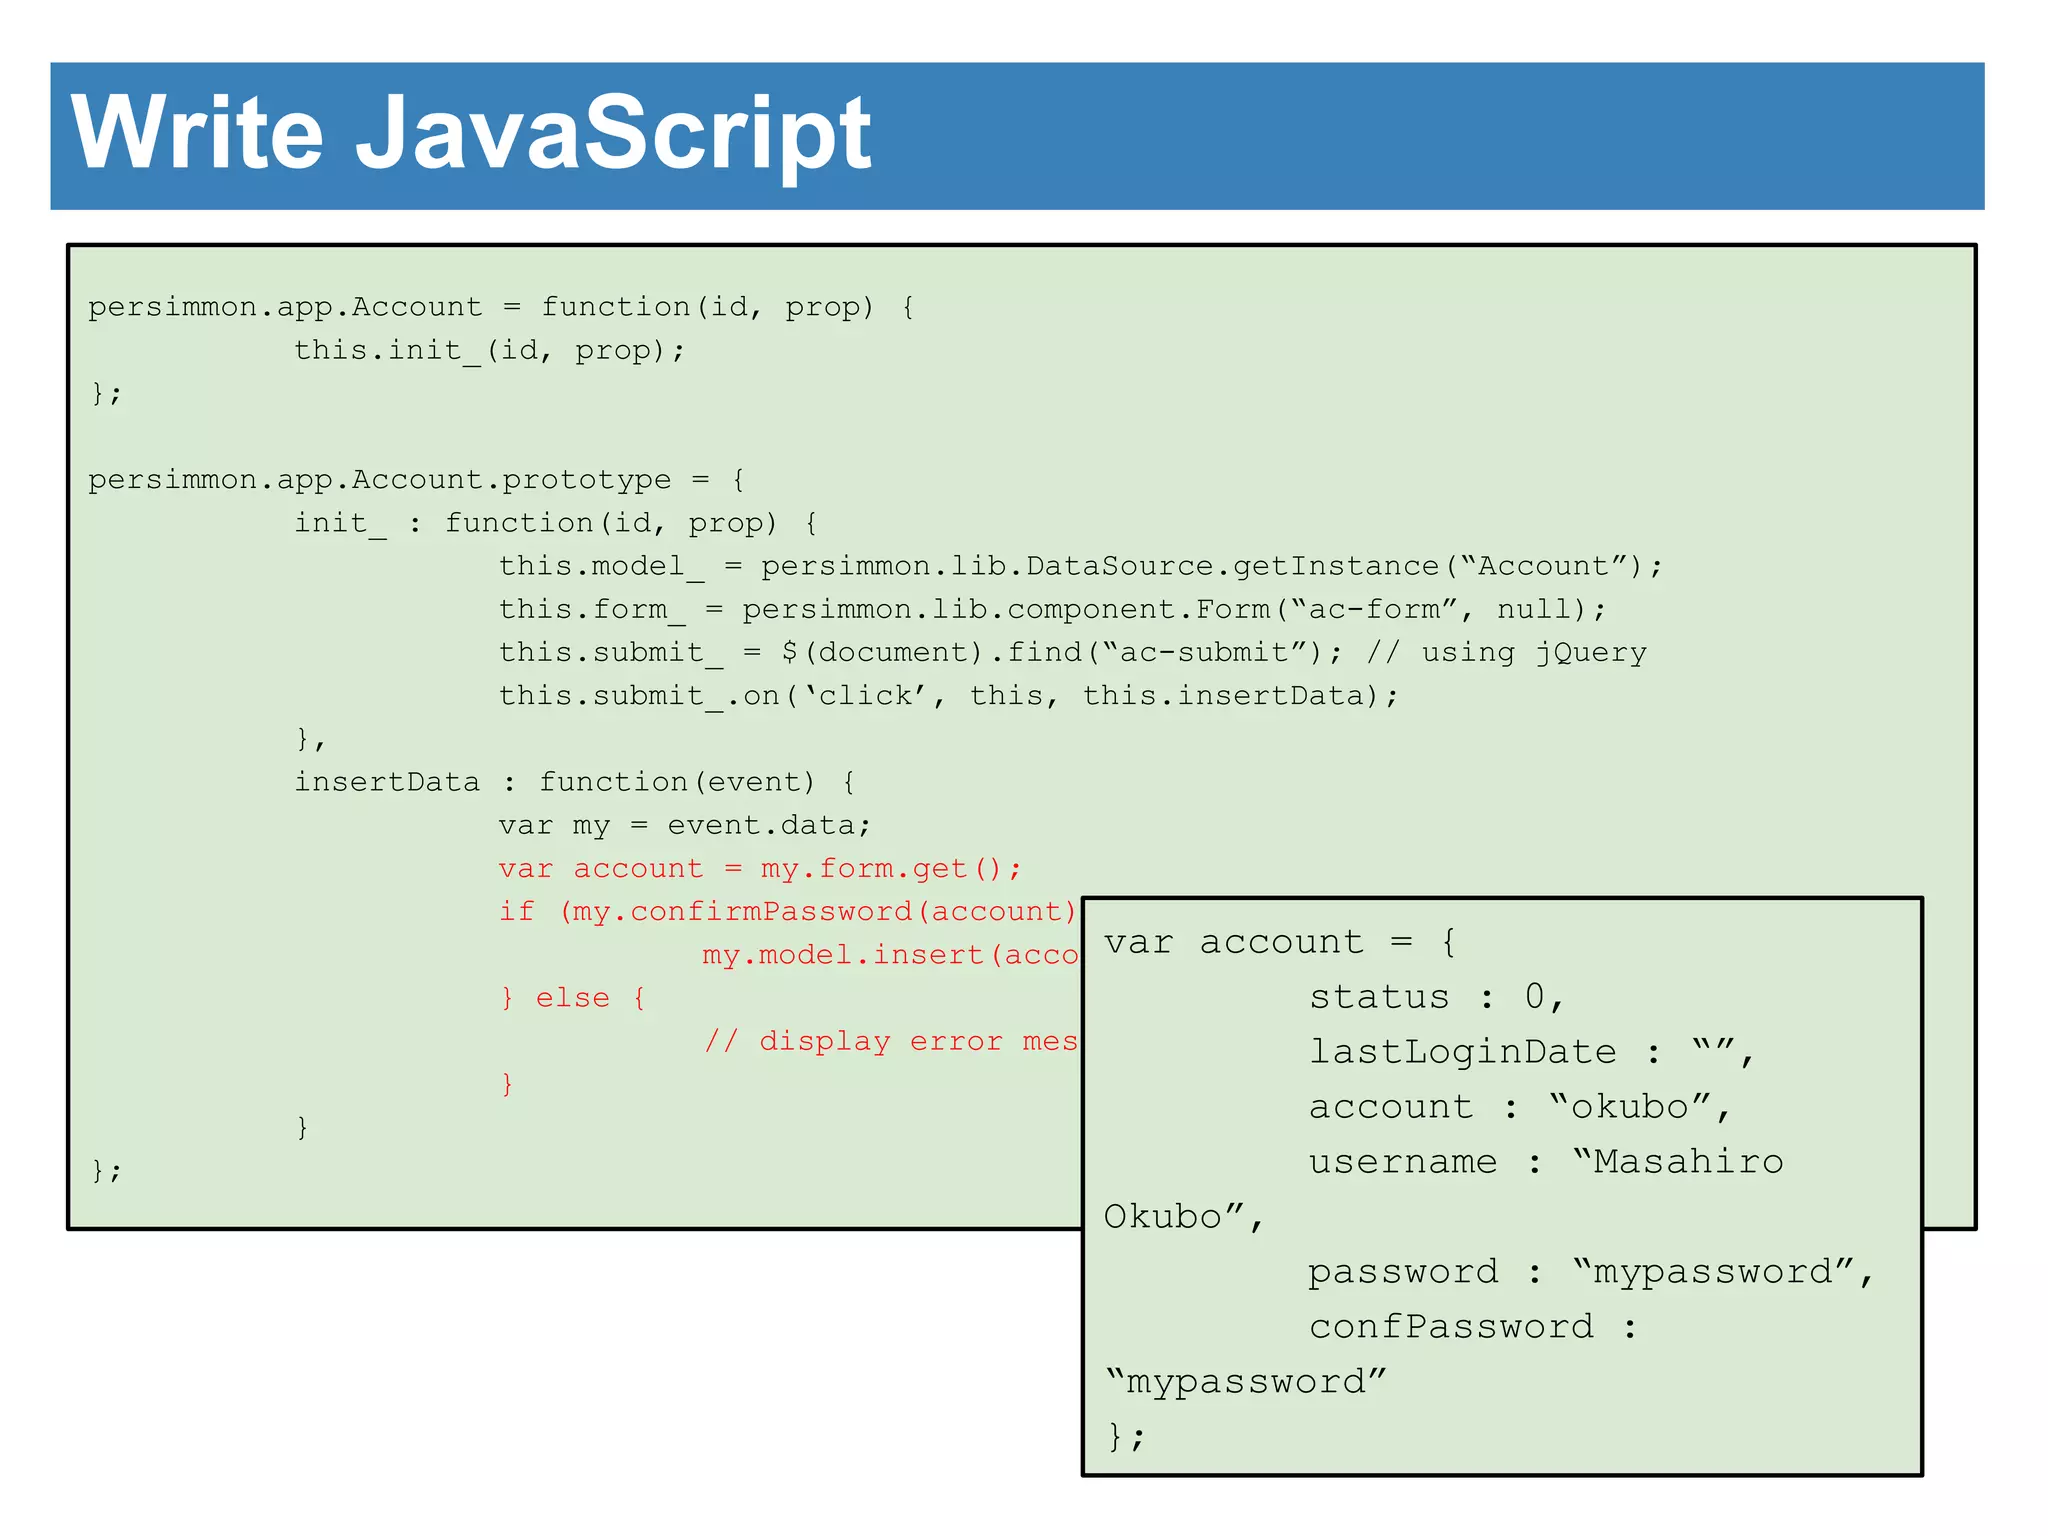
![Write JavaScript
persimmon.app.Account = function(id, prop) {
this.init_(id, prop);
};
persimmon.app.Account.prototype = {
init_ : function(id, prop) {
this.model_ = persimmon.lib.DataSource.getInstance(“Account”);
this.form_ = persimmon.lib.component.Form(“ac-form”, null);
this.submit_ = $(document).find(“ac-submit”); // using jQuery
this.submit_.on(‘click’, this, this.insertData);
this.table_ = persimmon.lib.Table(“ac-table”,
{
source : this.model,
order : [ { name : “account”, ascending : true } ],
rows : 10
});
this.table_.refresh(); // display data
},
insertData : function(event) {
var my = event.data;
var account = my.form.get();
if (my.confirmPassword(account)) {
my.model.insert(account);
} else {
// display error message.
}
}
};](https://image.slidesharecdn.com/implementationofguiframeworkpart3okubo-141029233345-conversion-gate01/75/Implementation-of-GUI-Framework-part3-9-2048.jpg)


![Java Web Programming [8/9] : JSF and AJAX](https://cdn.slidesharecdn.com/ss_thumbnails/javaweb-module8-130106070914-phpapp02-thumbnail.jpg?width=640&height=640&fit=bounds)