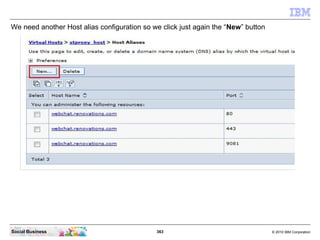
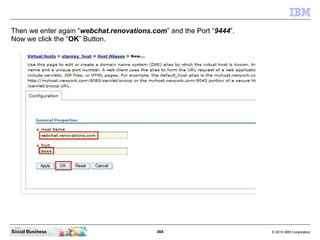
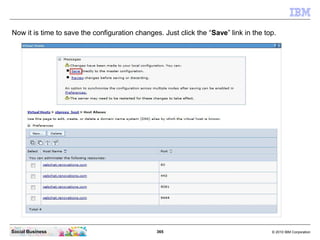
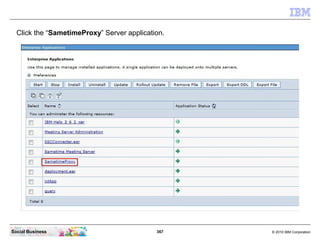
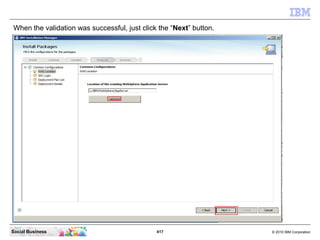
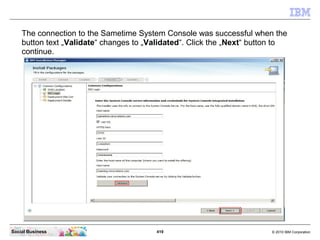
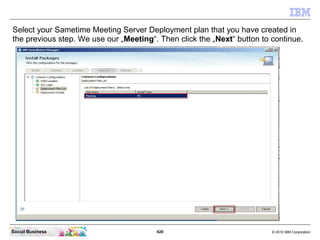
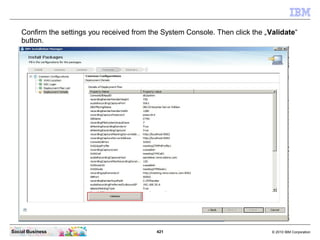
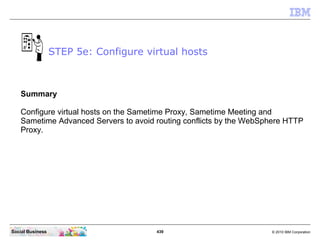
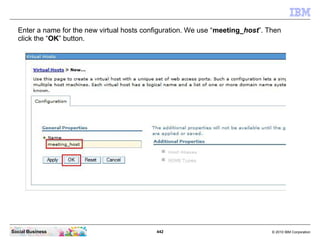
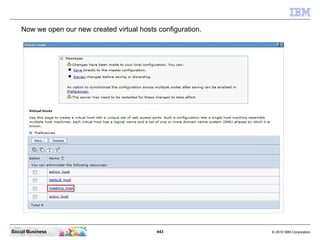
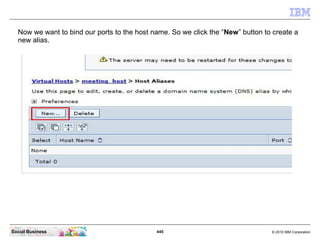
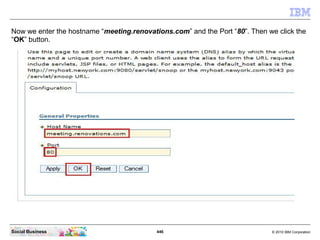
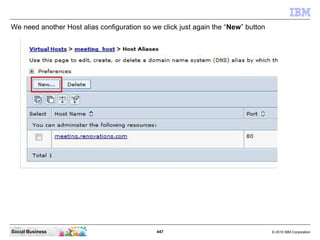
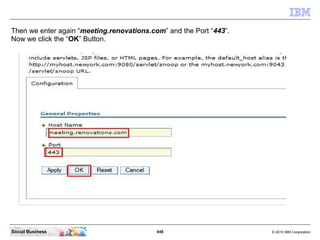
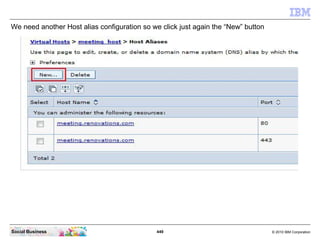
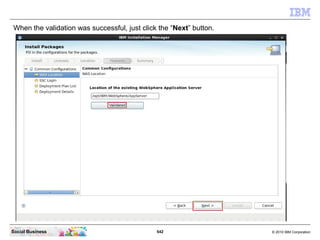
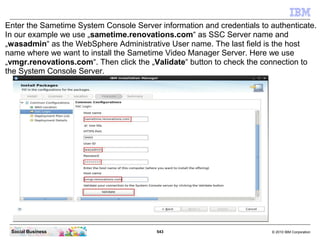
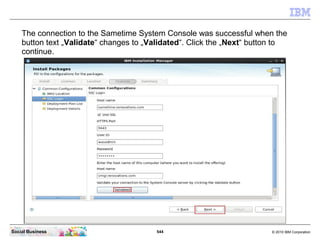
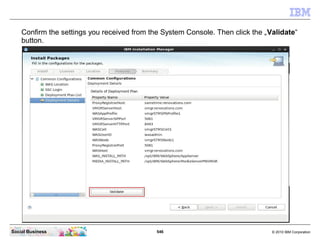
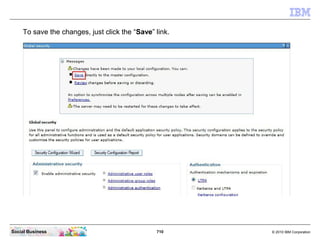
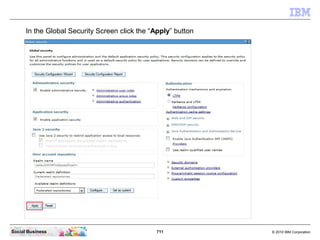
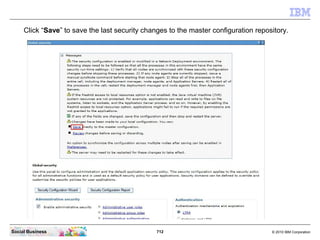
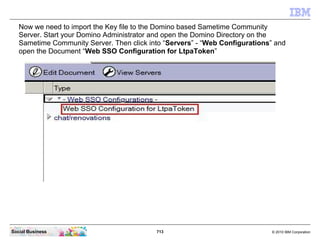
Download as PDF, PPTX

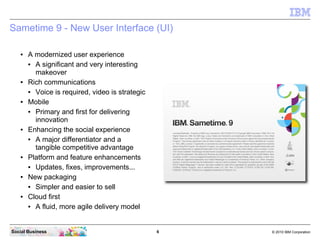
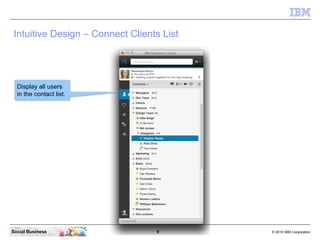
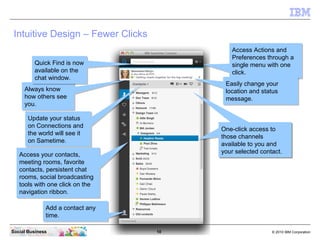
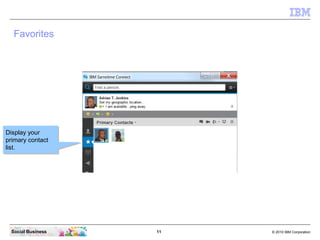
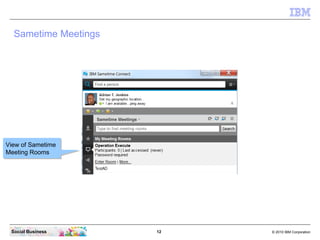
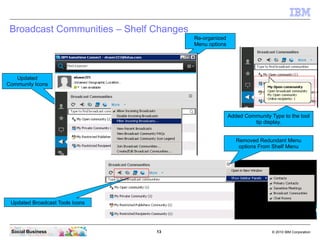
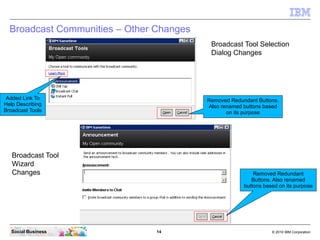
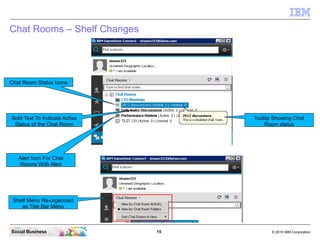
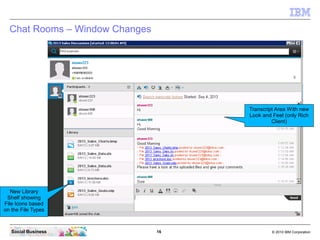

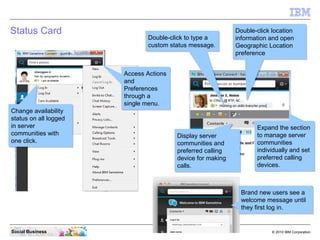
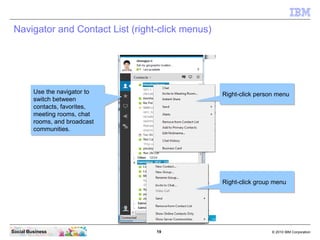
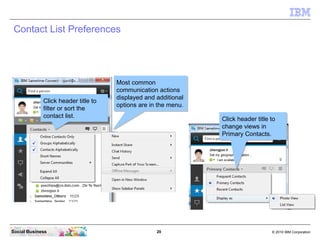
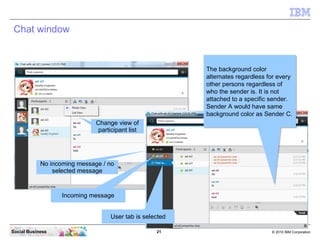
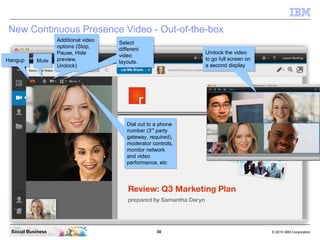


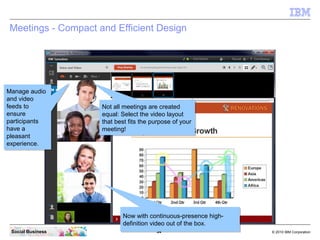
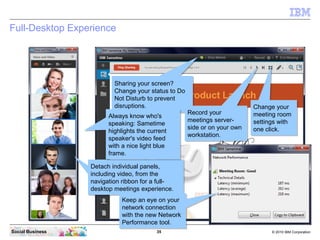
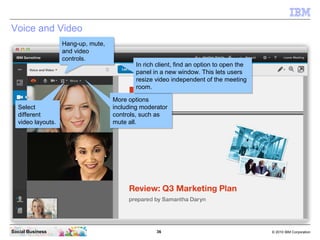


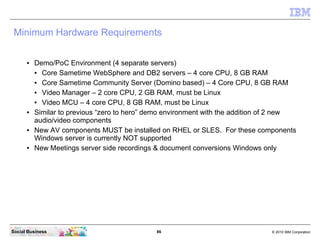

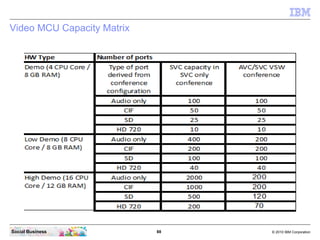
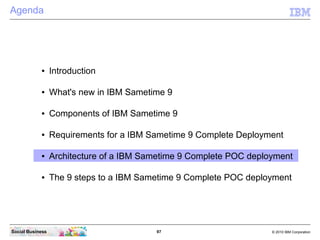
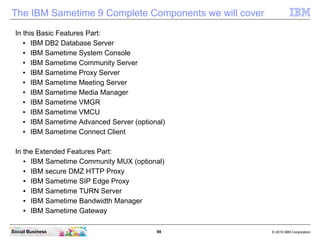

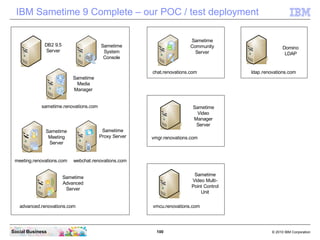


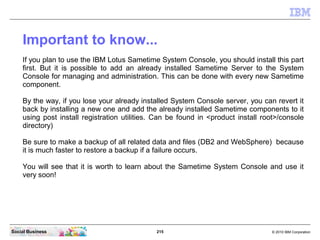
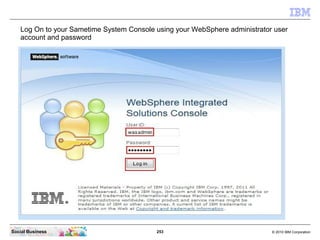
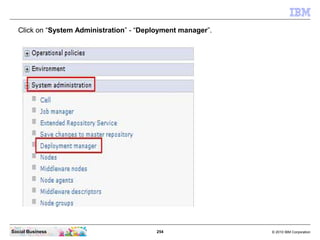
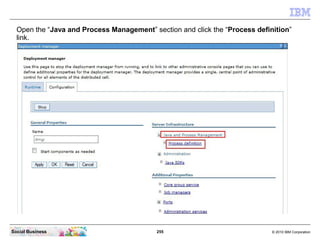


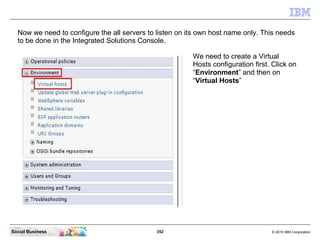
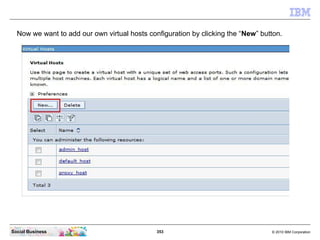
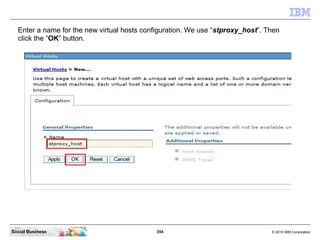


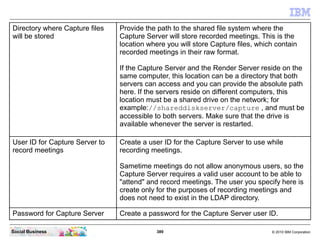
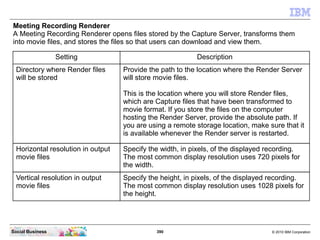
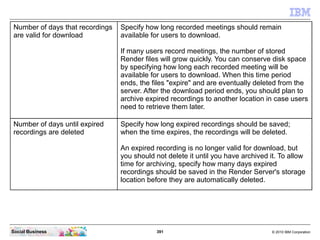
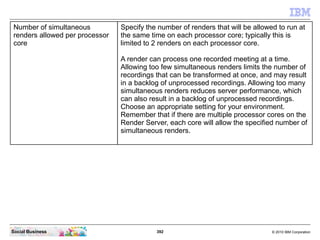
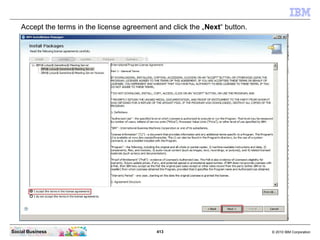
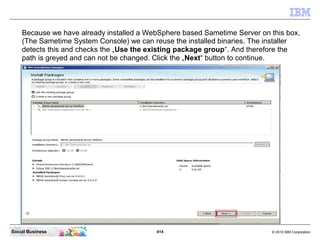
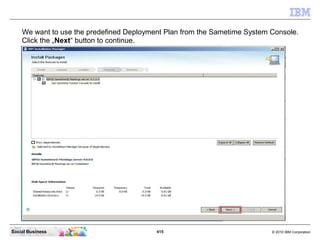
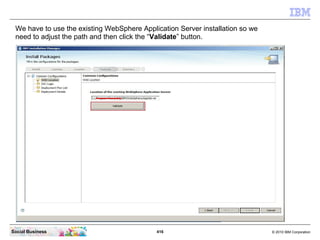


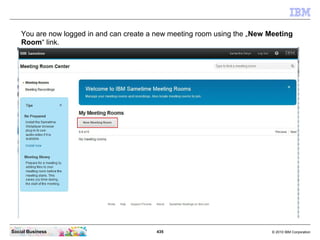
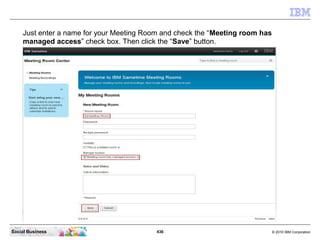
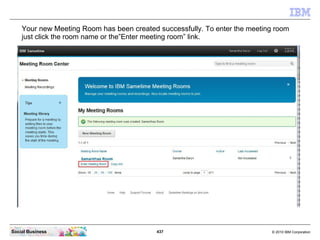
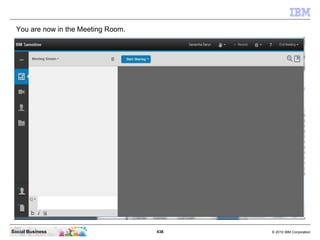


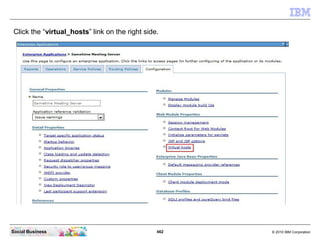
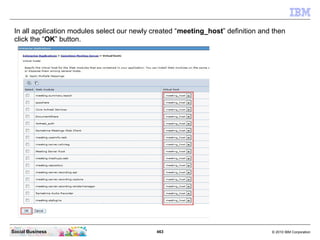
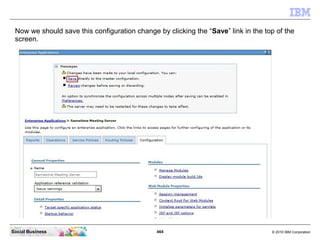
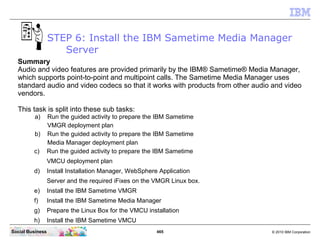

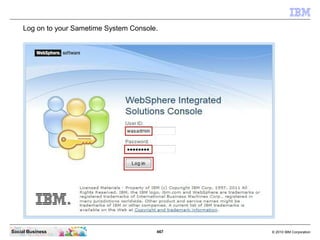
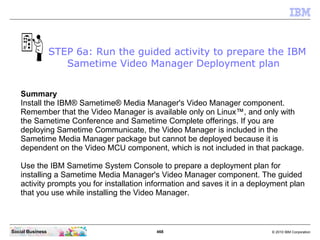
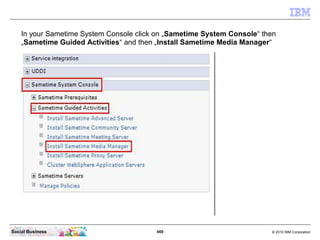
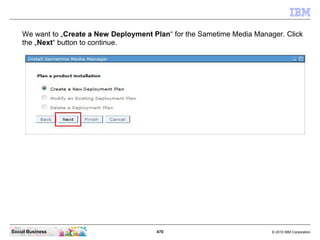


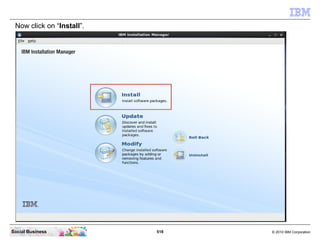
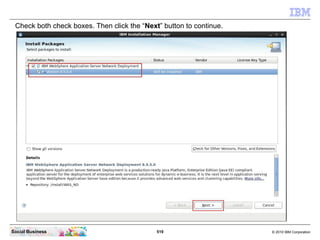
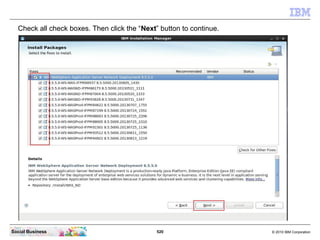
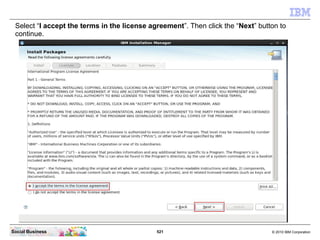
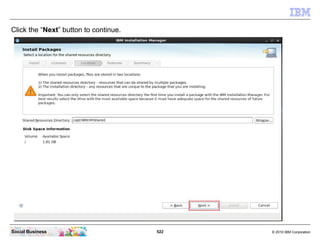
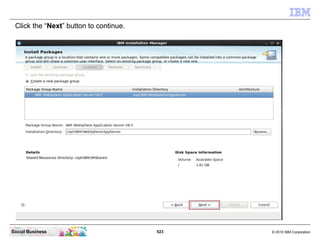
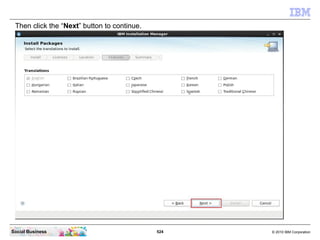
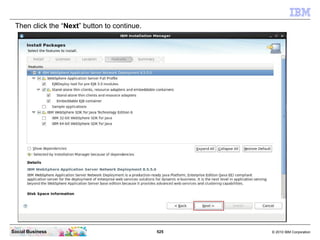
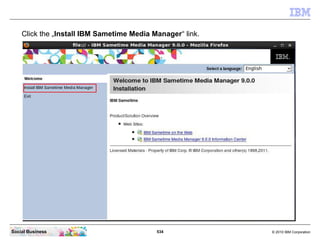
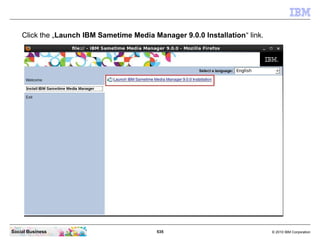
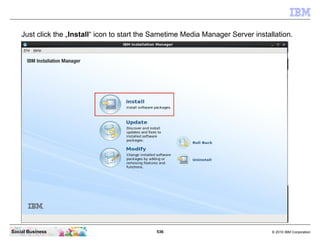
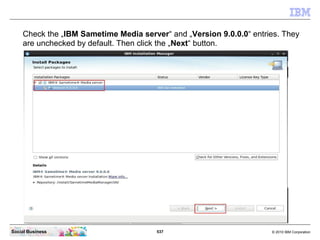


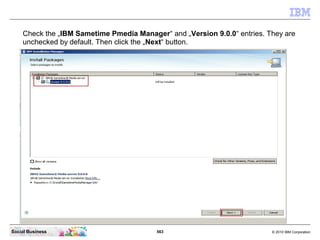
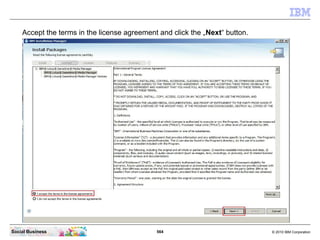
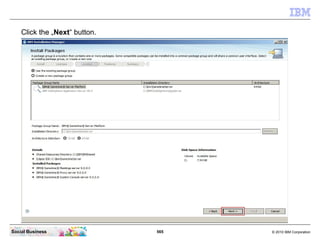


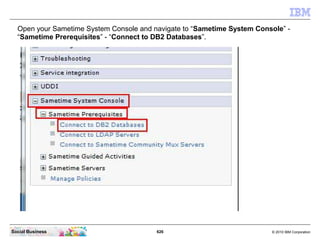

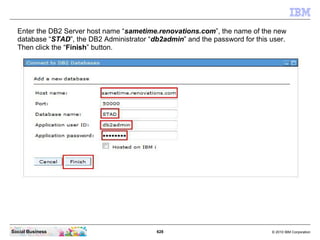
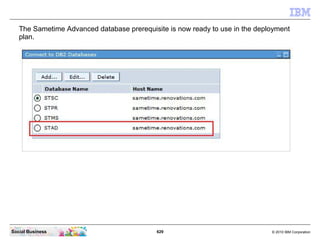
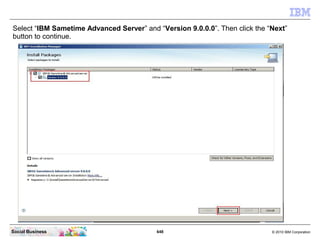
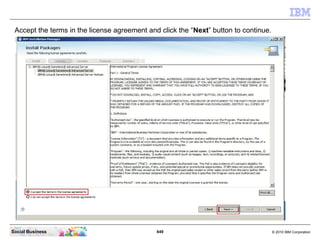

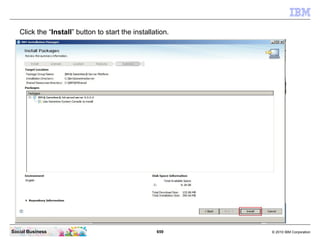
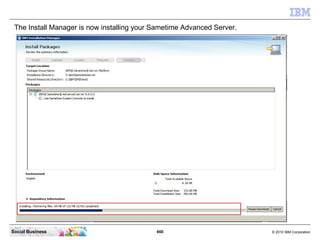
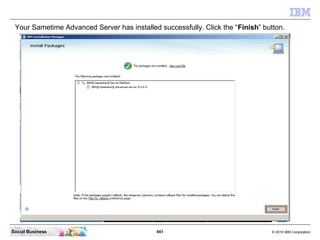
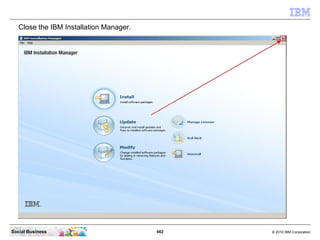
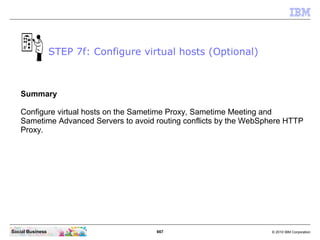

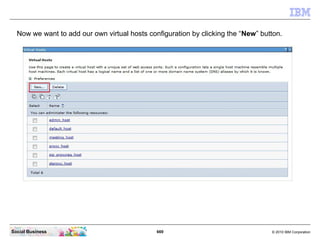
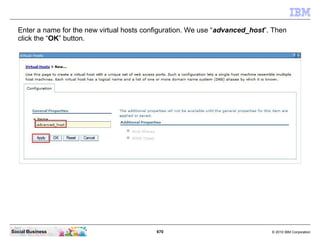
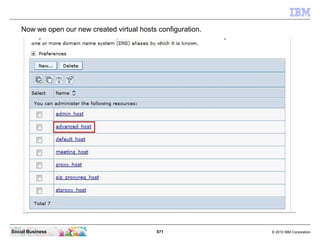


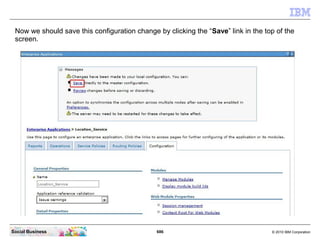
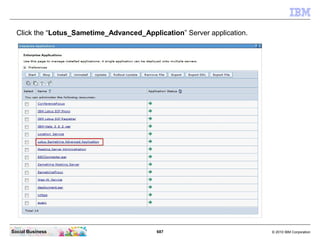
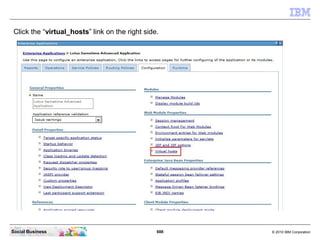
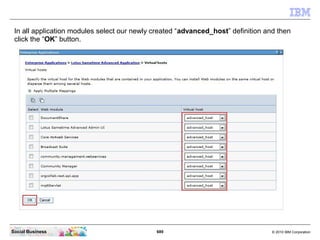
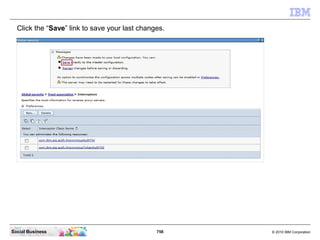
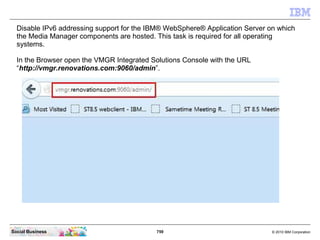
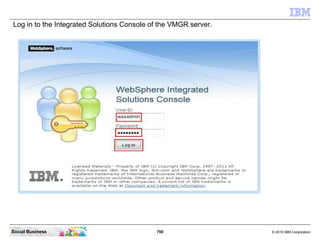
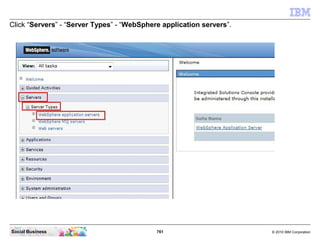


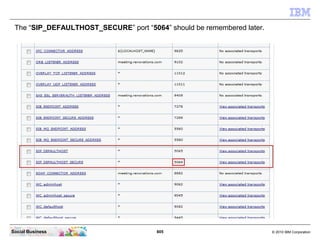
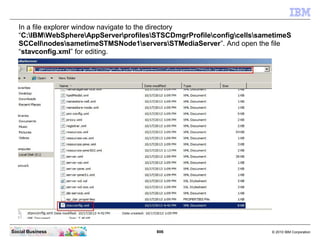
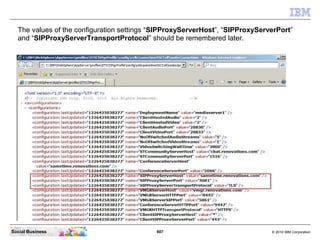
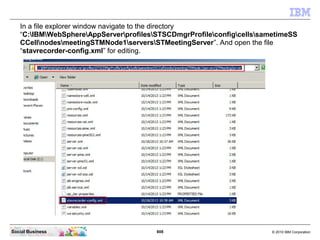


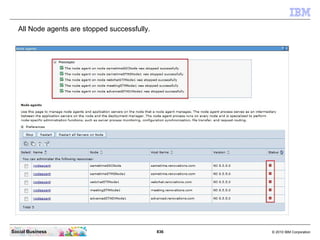
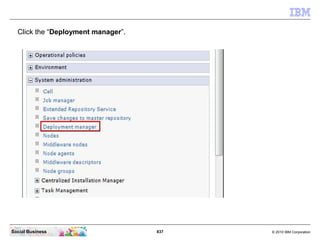

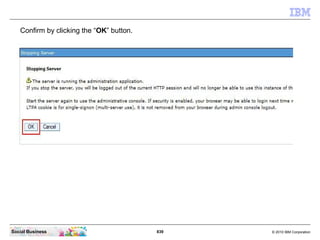
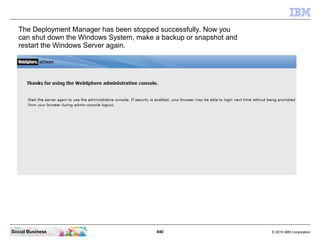

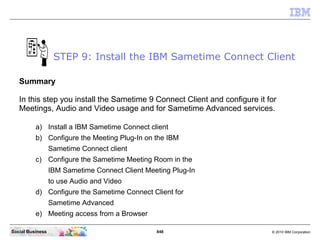
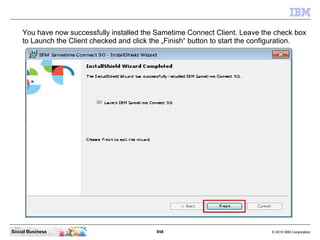
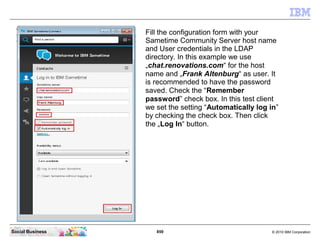
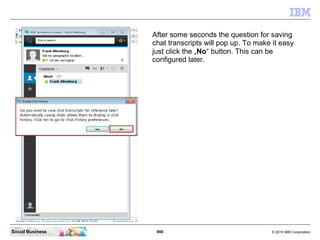


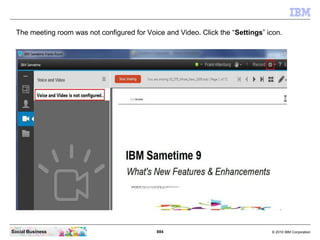
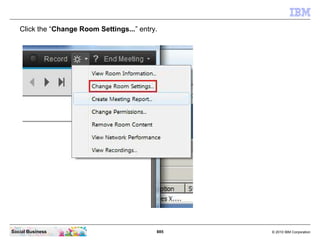
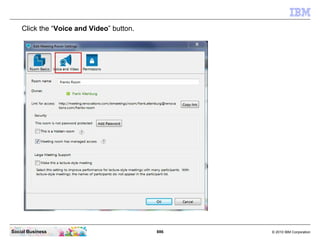
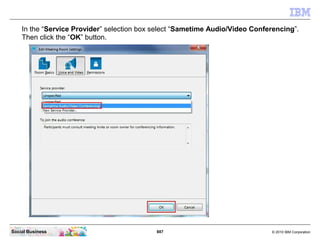
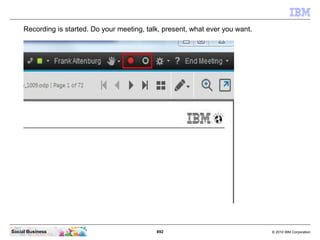
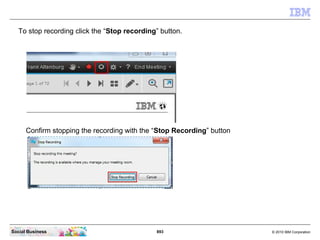
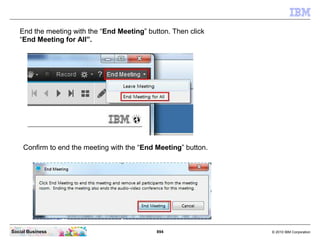
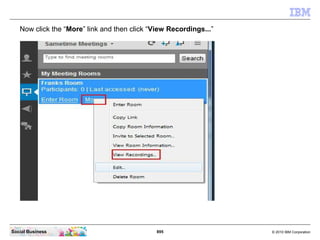


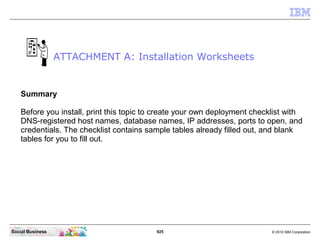


This document serves as a guide for implementing IBM Sametime 9, focusing on a quick setup for small deployments, including proof of concepts and technology trials. It outlines key features, components, and architecture of the product, emphasizing a modernized user interface and enhanced communication capabilities. The author, Frank Altenburg, shares insights drawn from extensive experience and official documentation, while encouraging users to seek IBM services for larger infrastructures.


![20260201 [FOSDEM] gomodjail - library sandboxing for Go modules.pdf](https://cdn.slidesharecdn.com/ss_thumbnails/20260201fosdemgomodjail-librarysandboxingforgomodules-260201225659-76609ec4-thumbnail.jpg?width=640&height=640&fit=bounds)


![谷歌留痕技术教程[ 𝙩𝙤𝙥 𝟮𝟯𝟯. 𝙘 𝙤𝙢 ]](https://cdn.slidesharecdn.com/ss_thumbnails/top233-260130173900-2eb784f9-thumbnail.jpg?width=640&height=640&fit=bounds)


