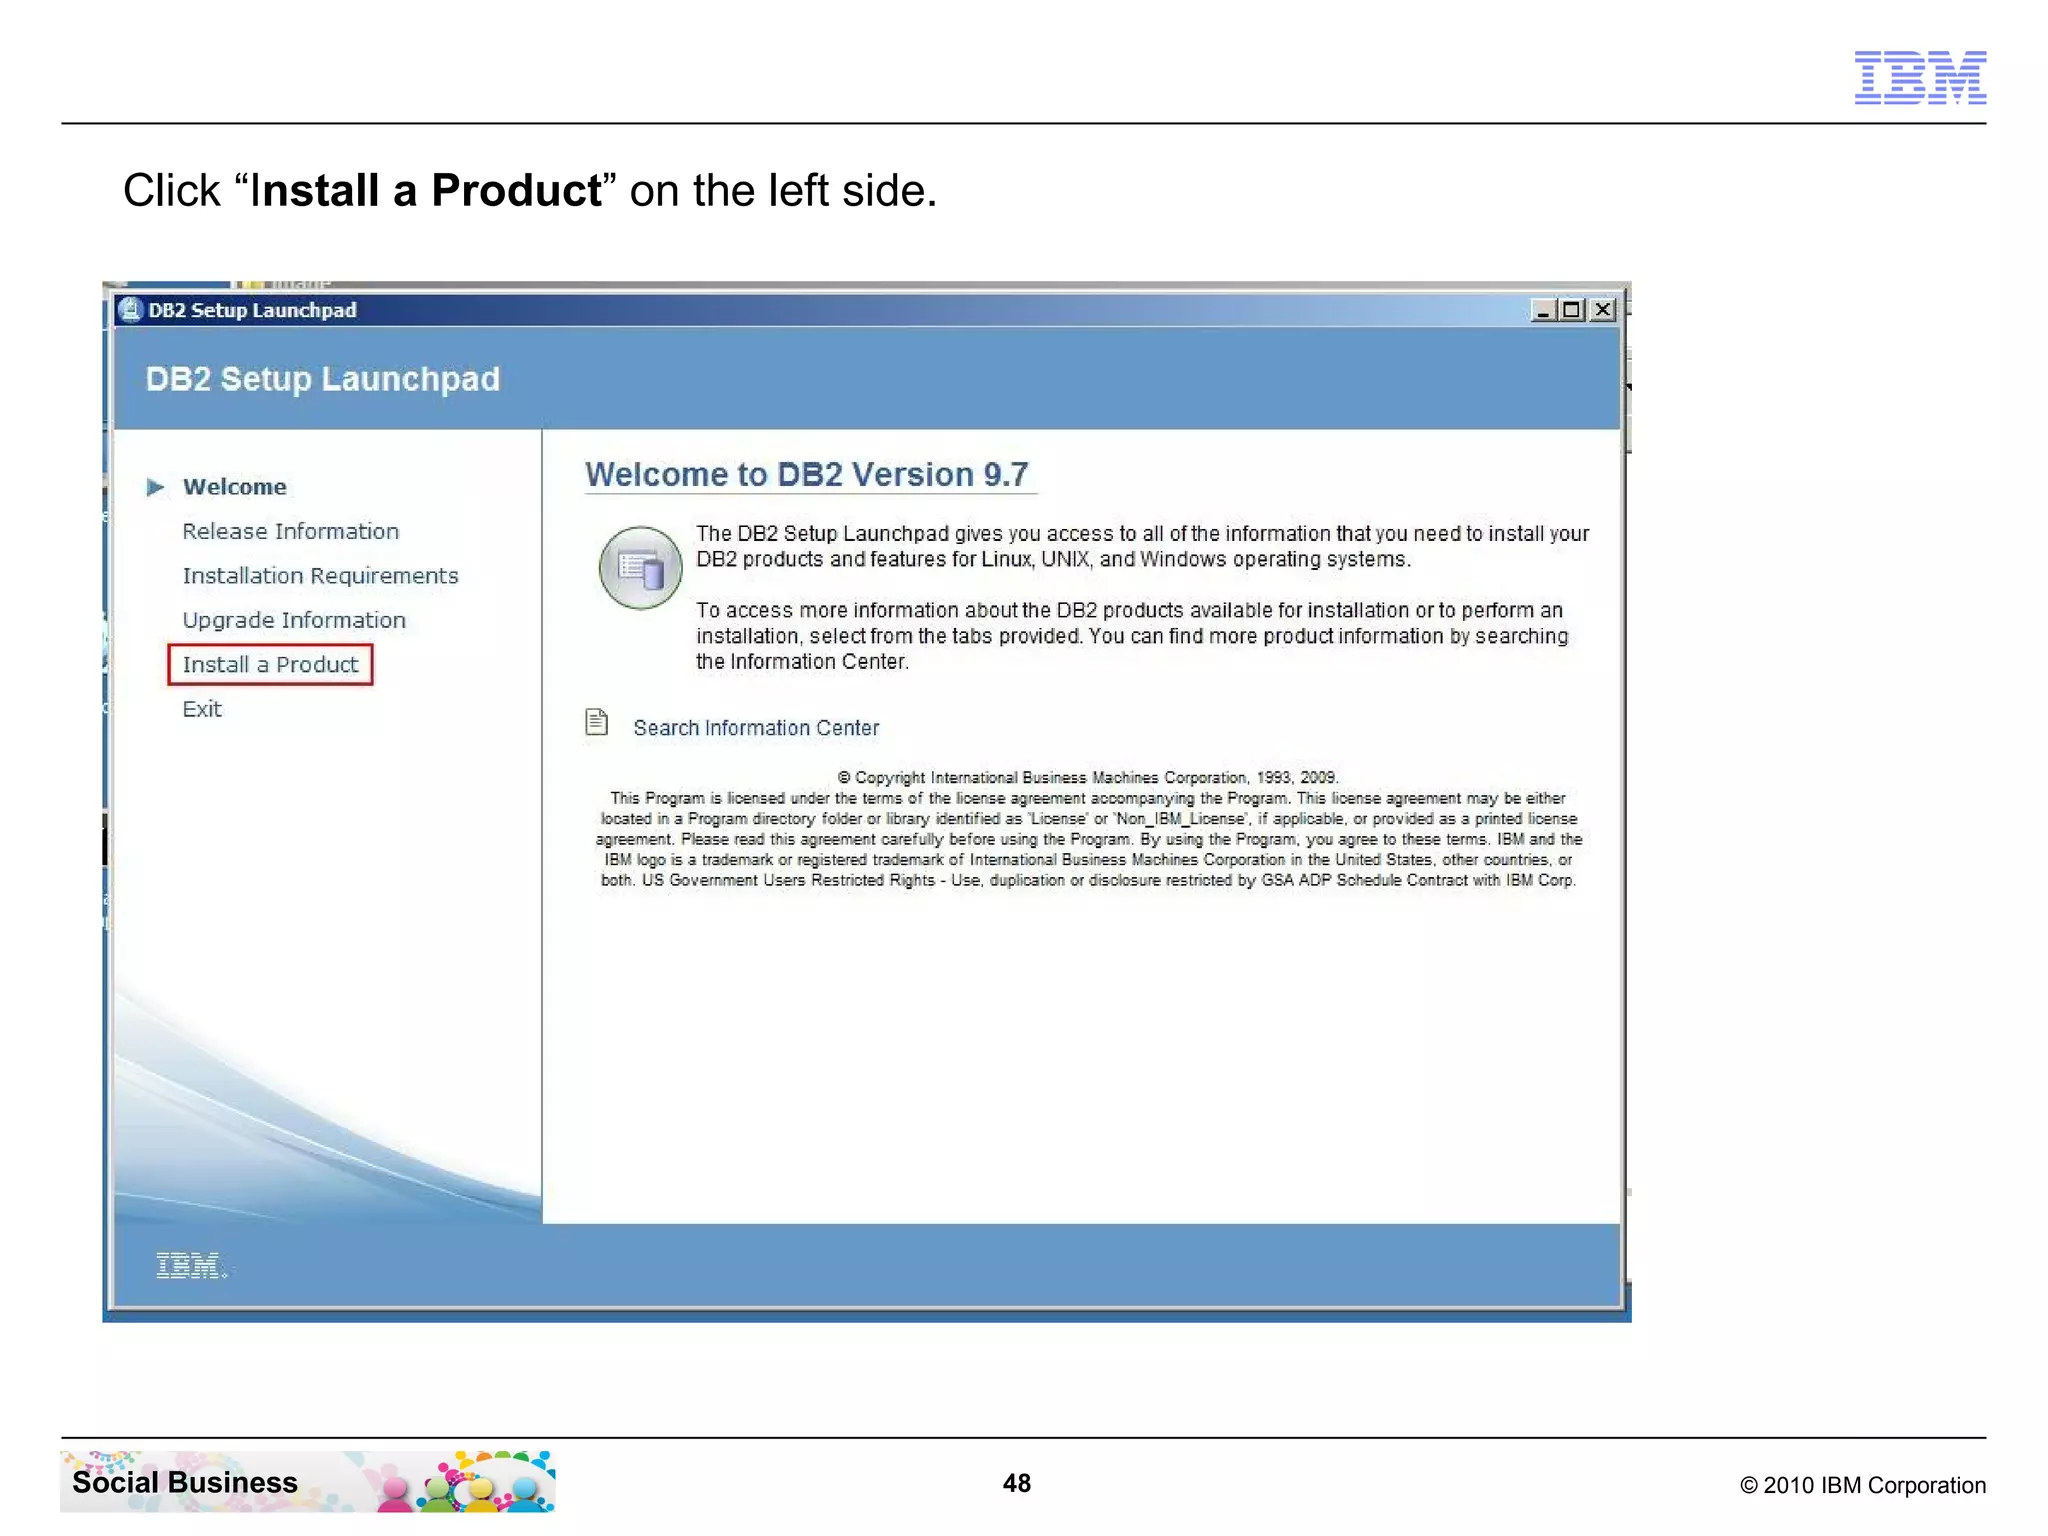
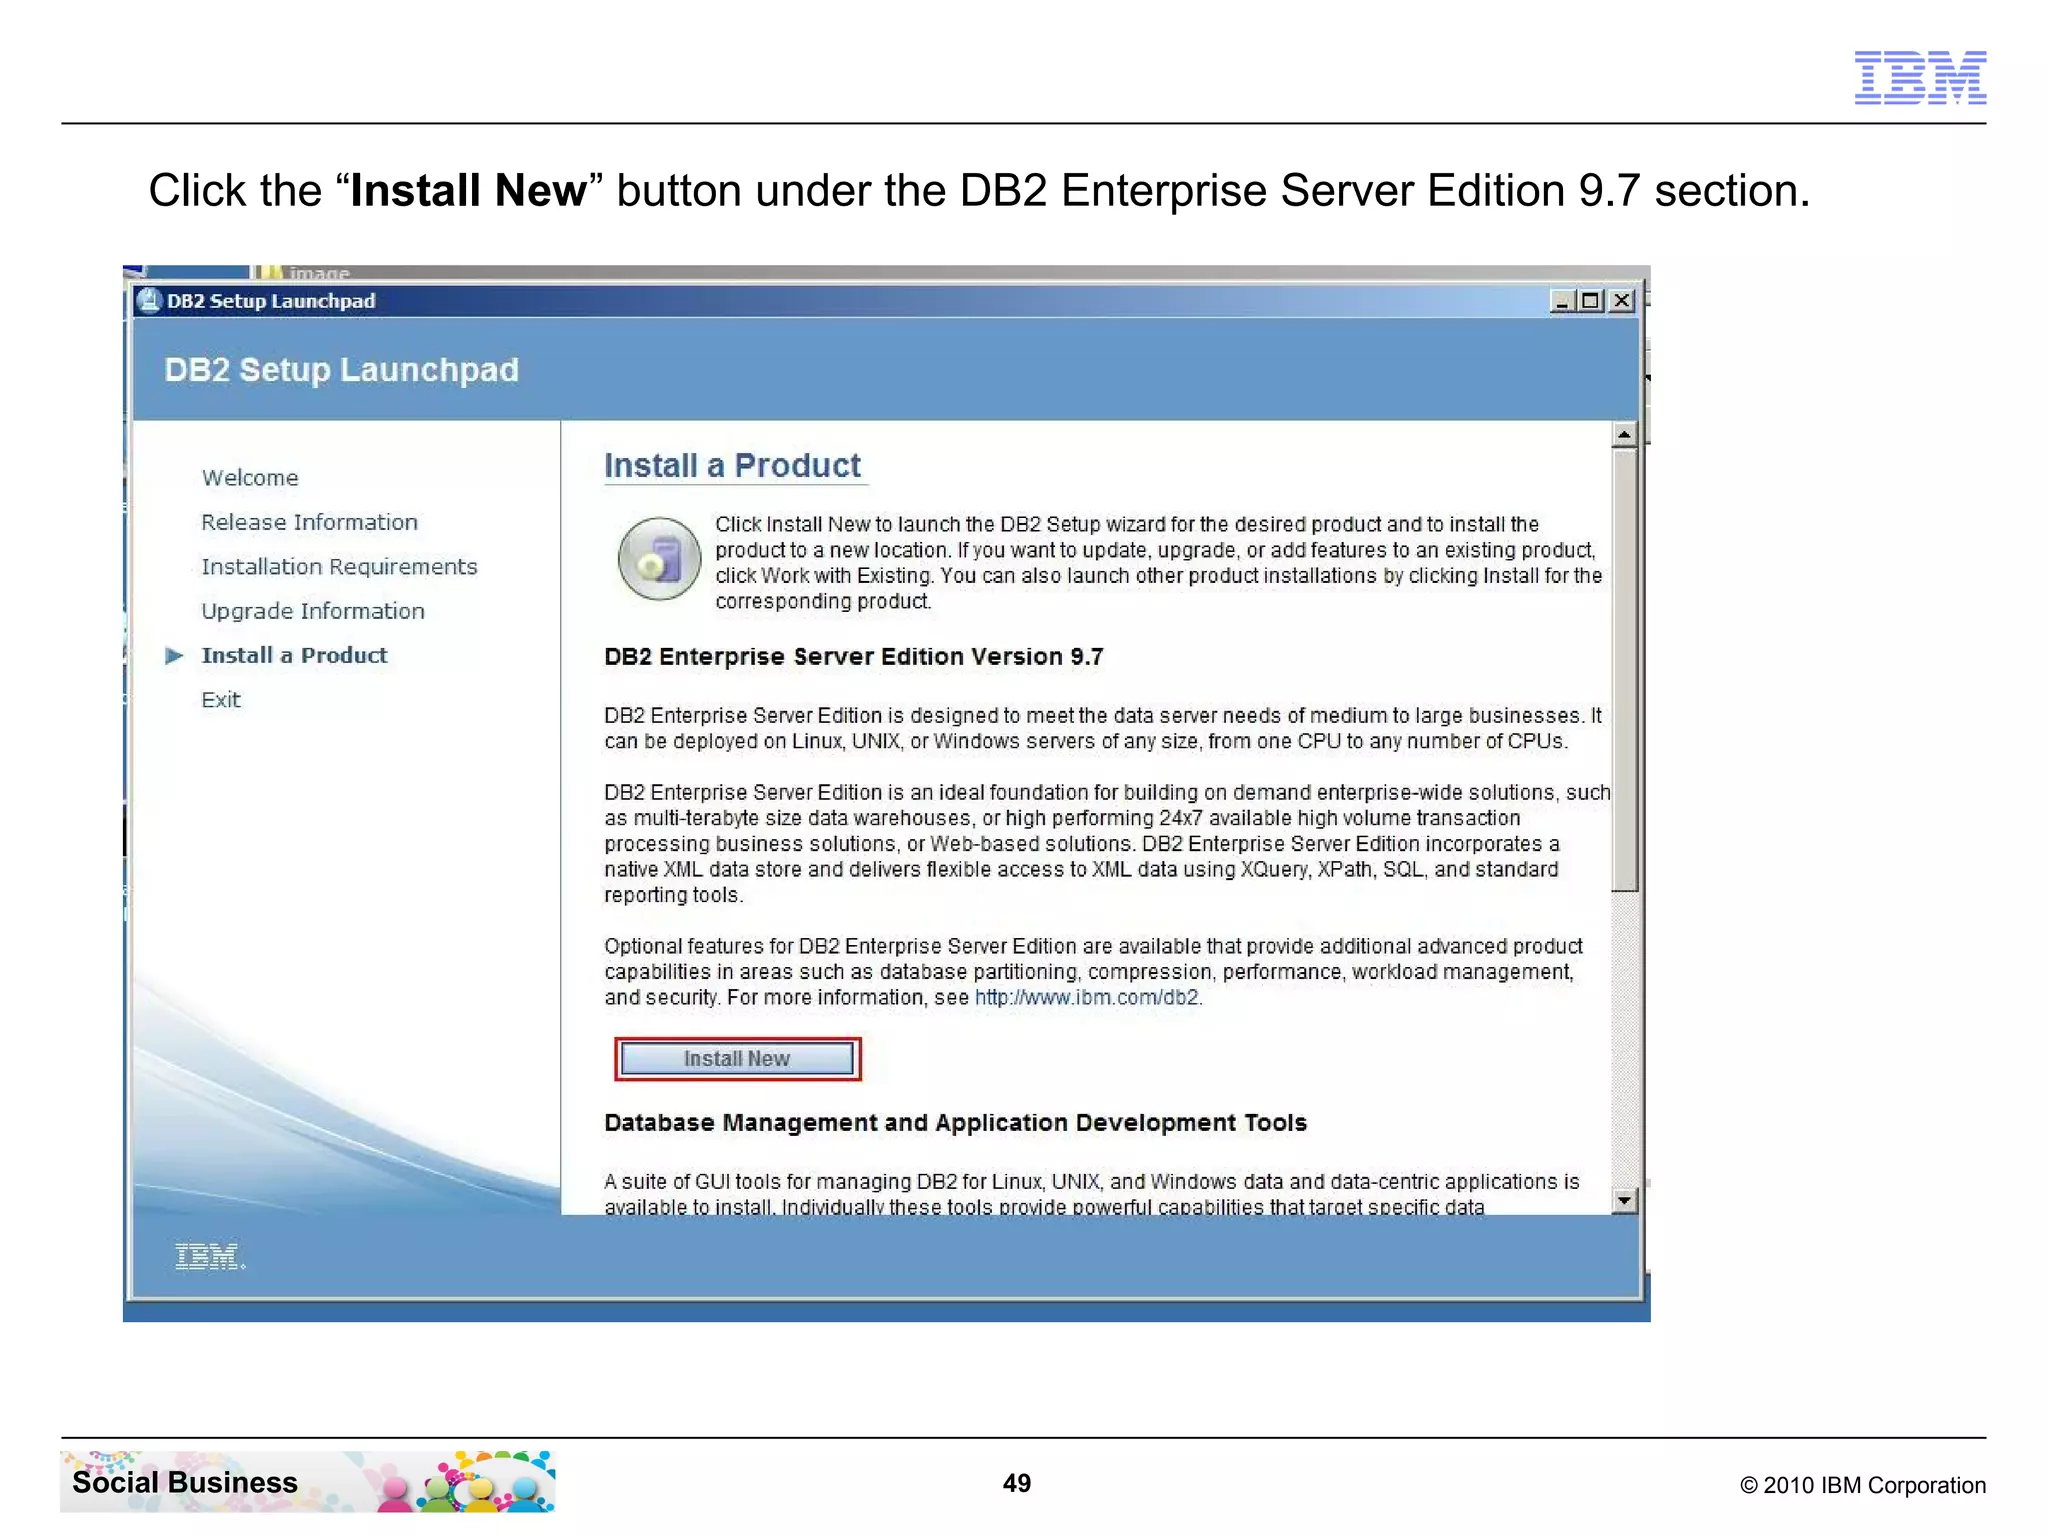
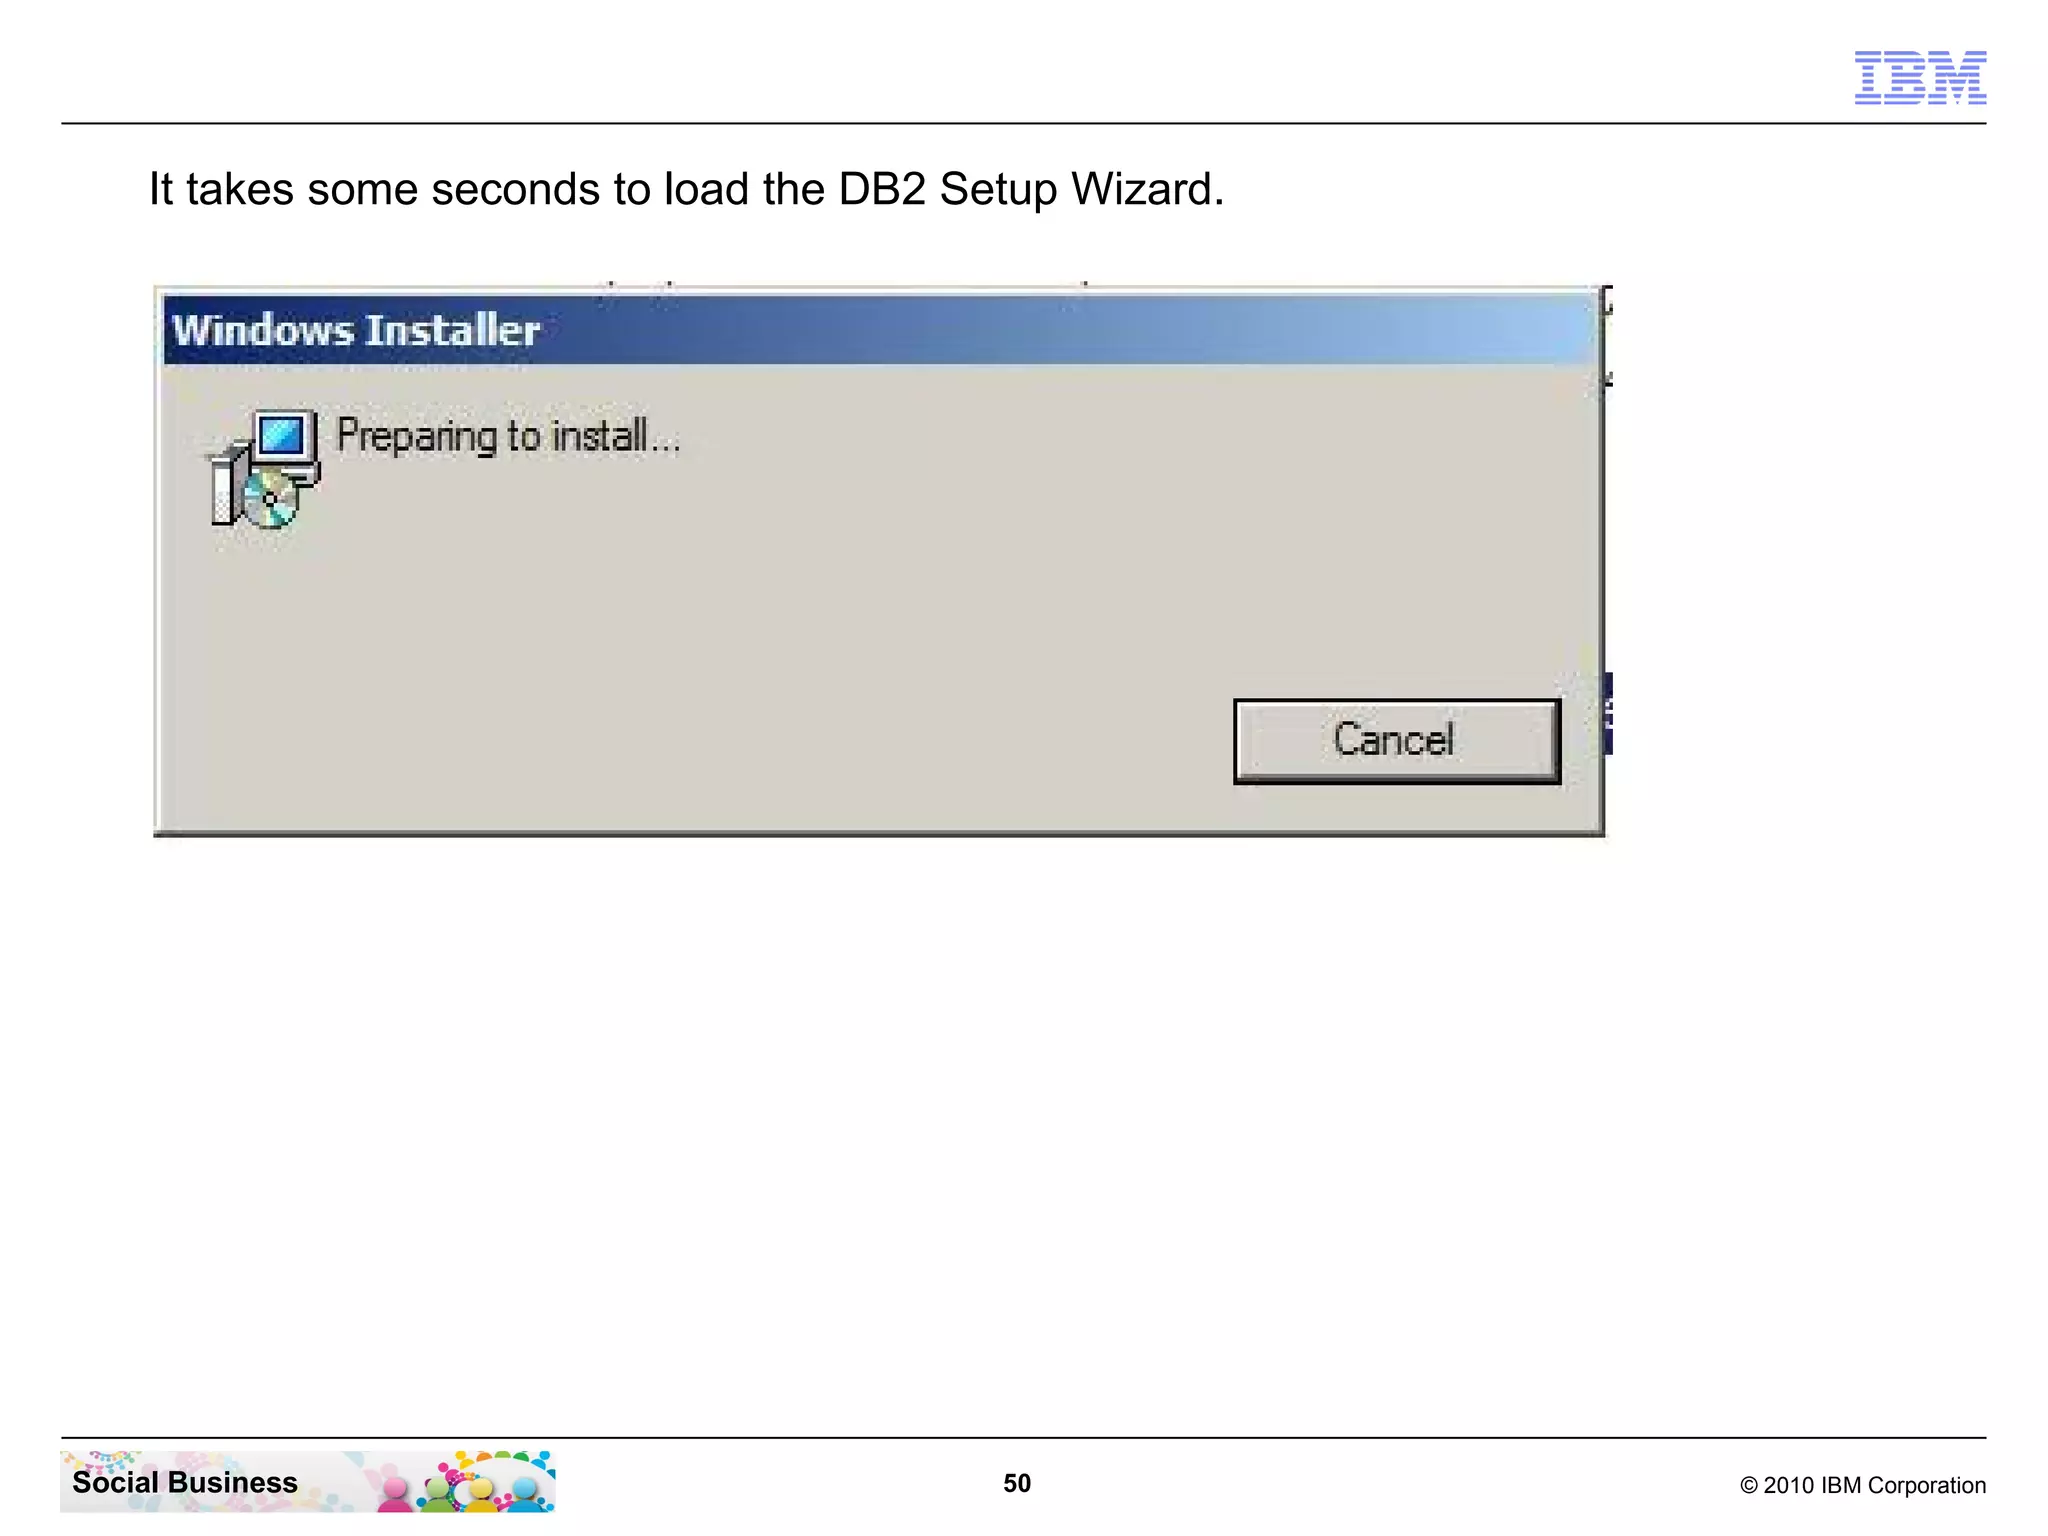
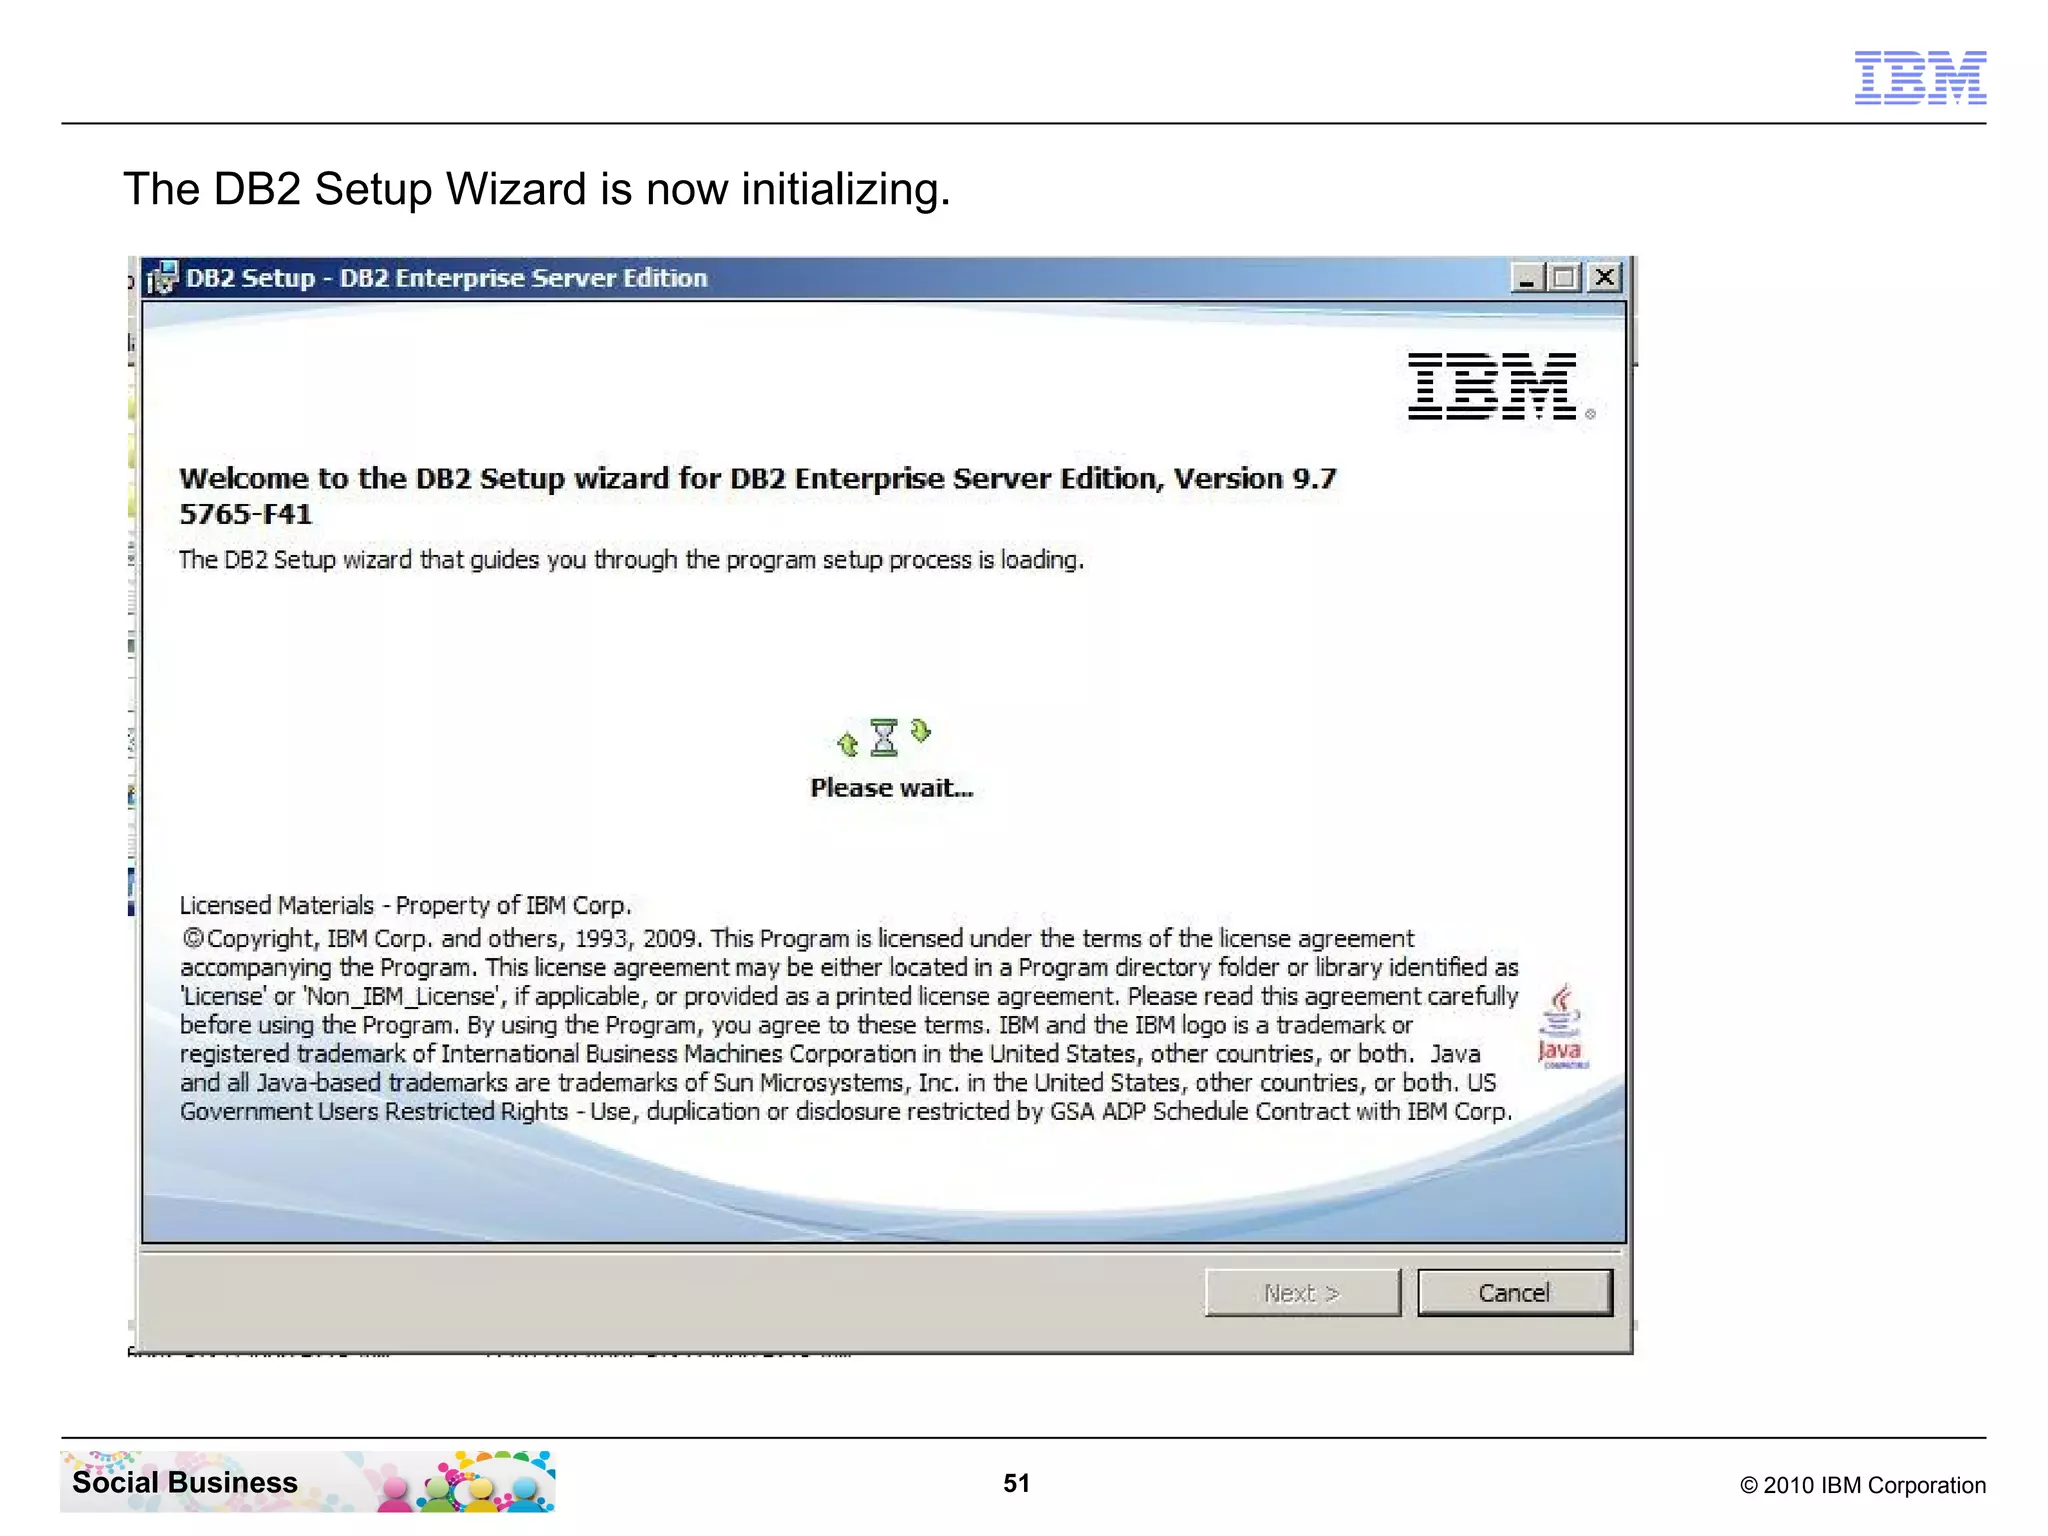
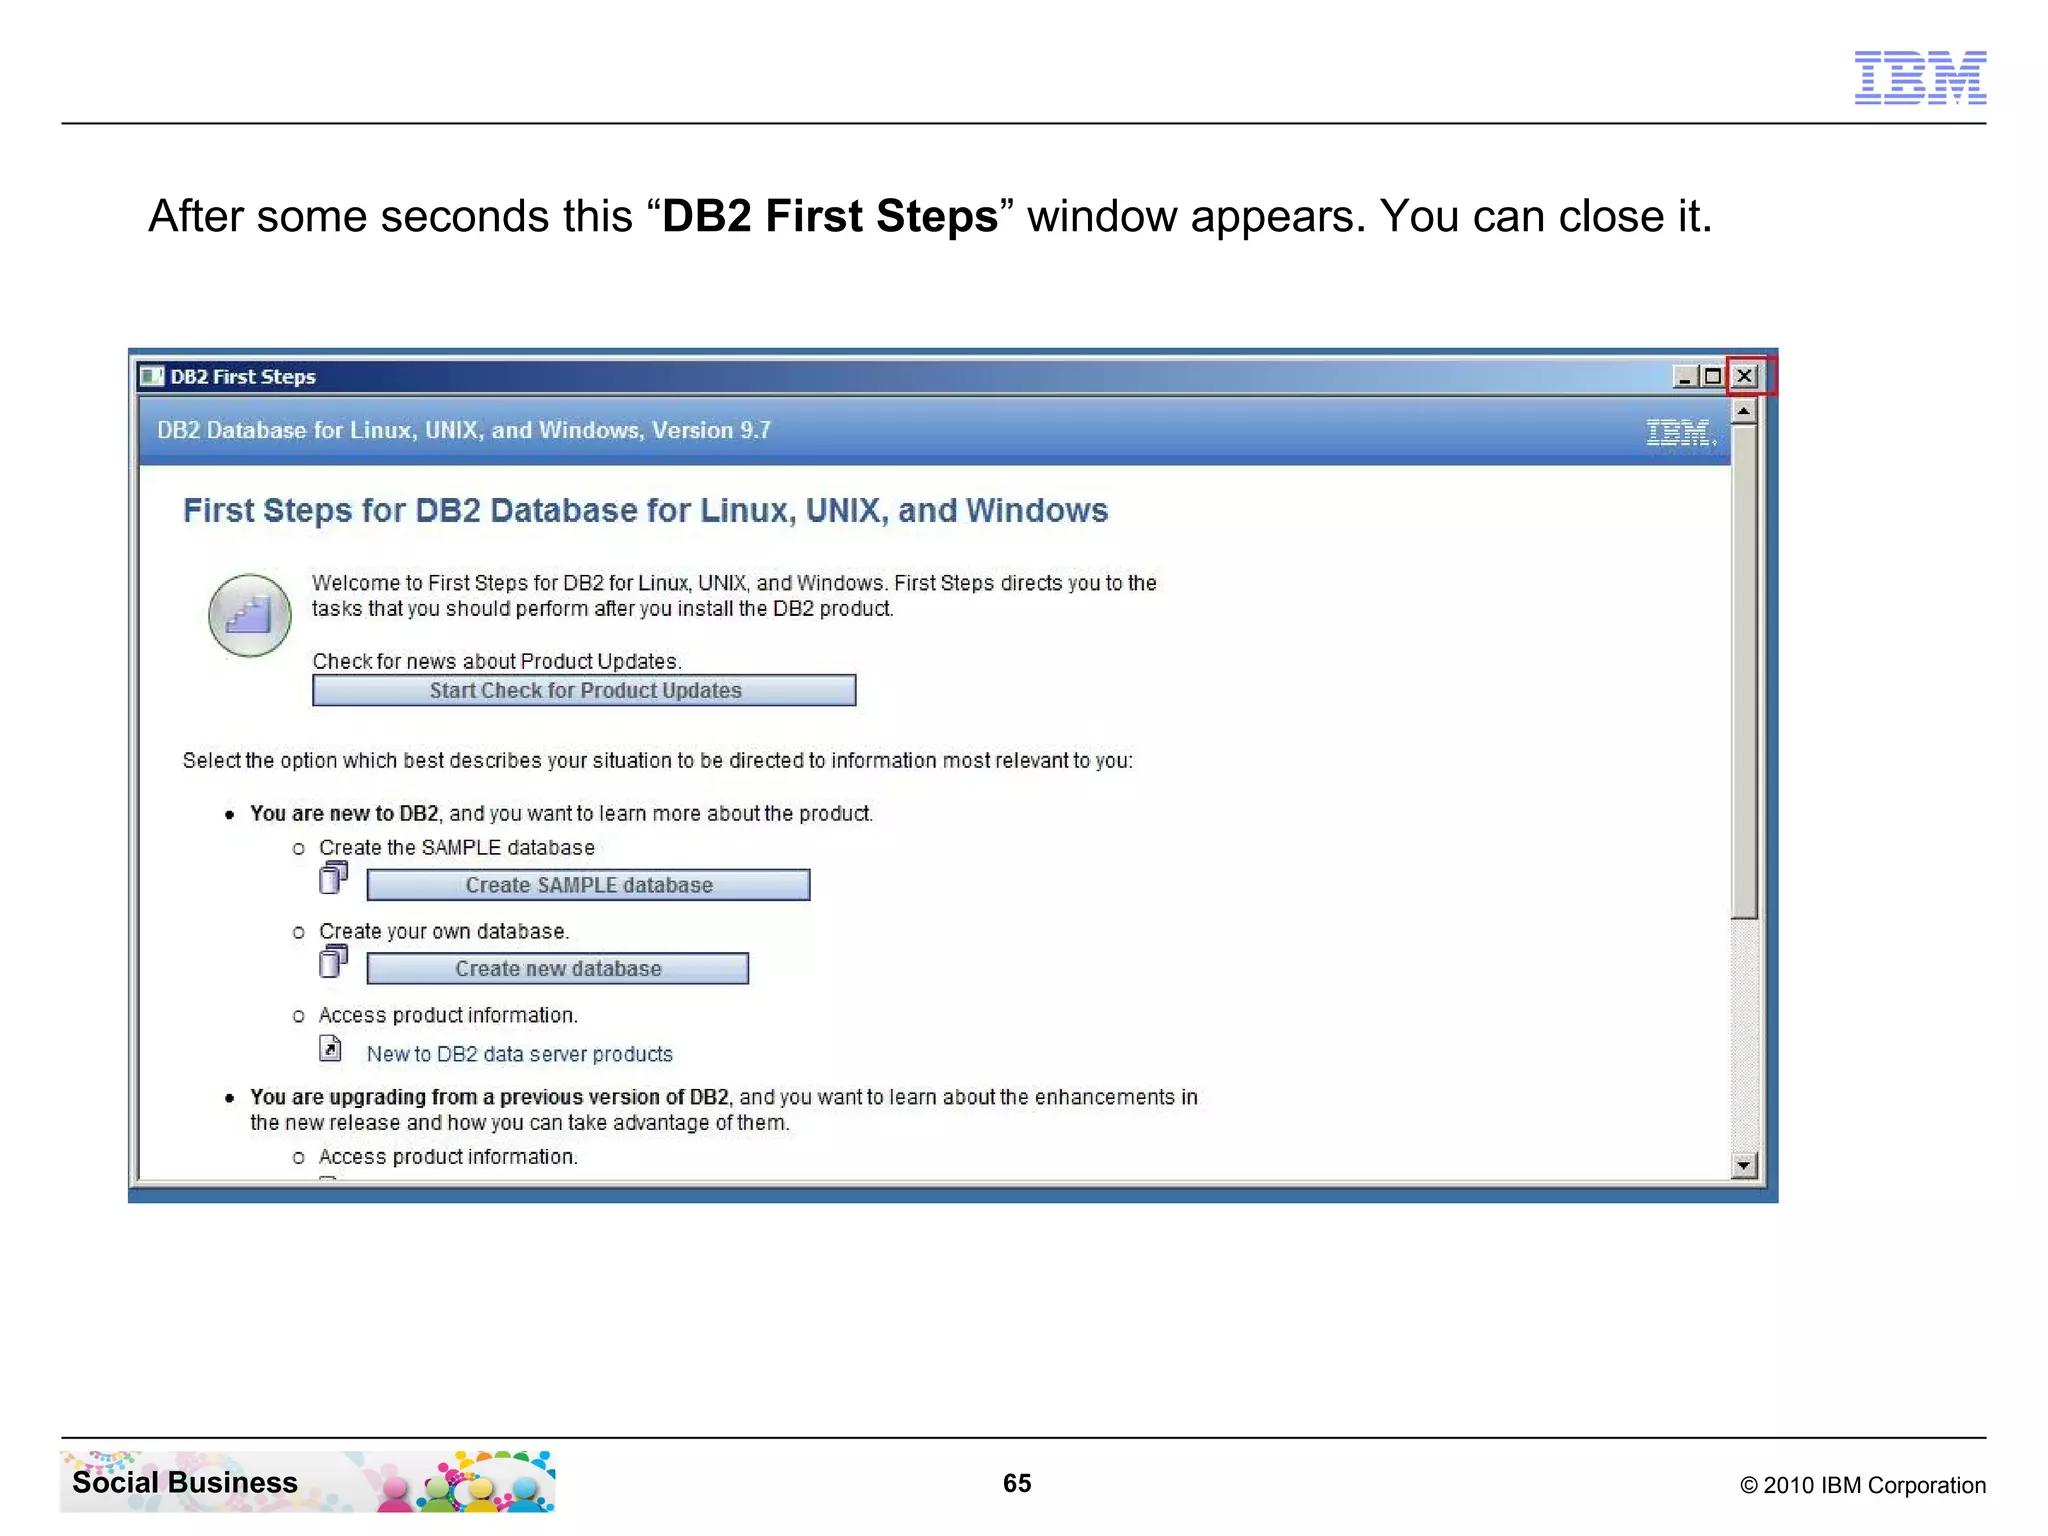
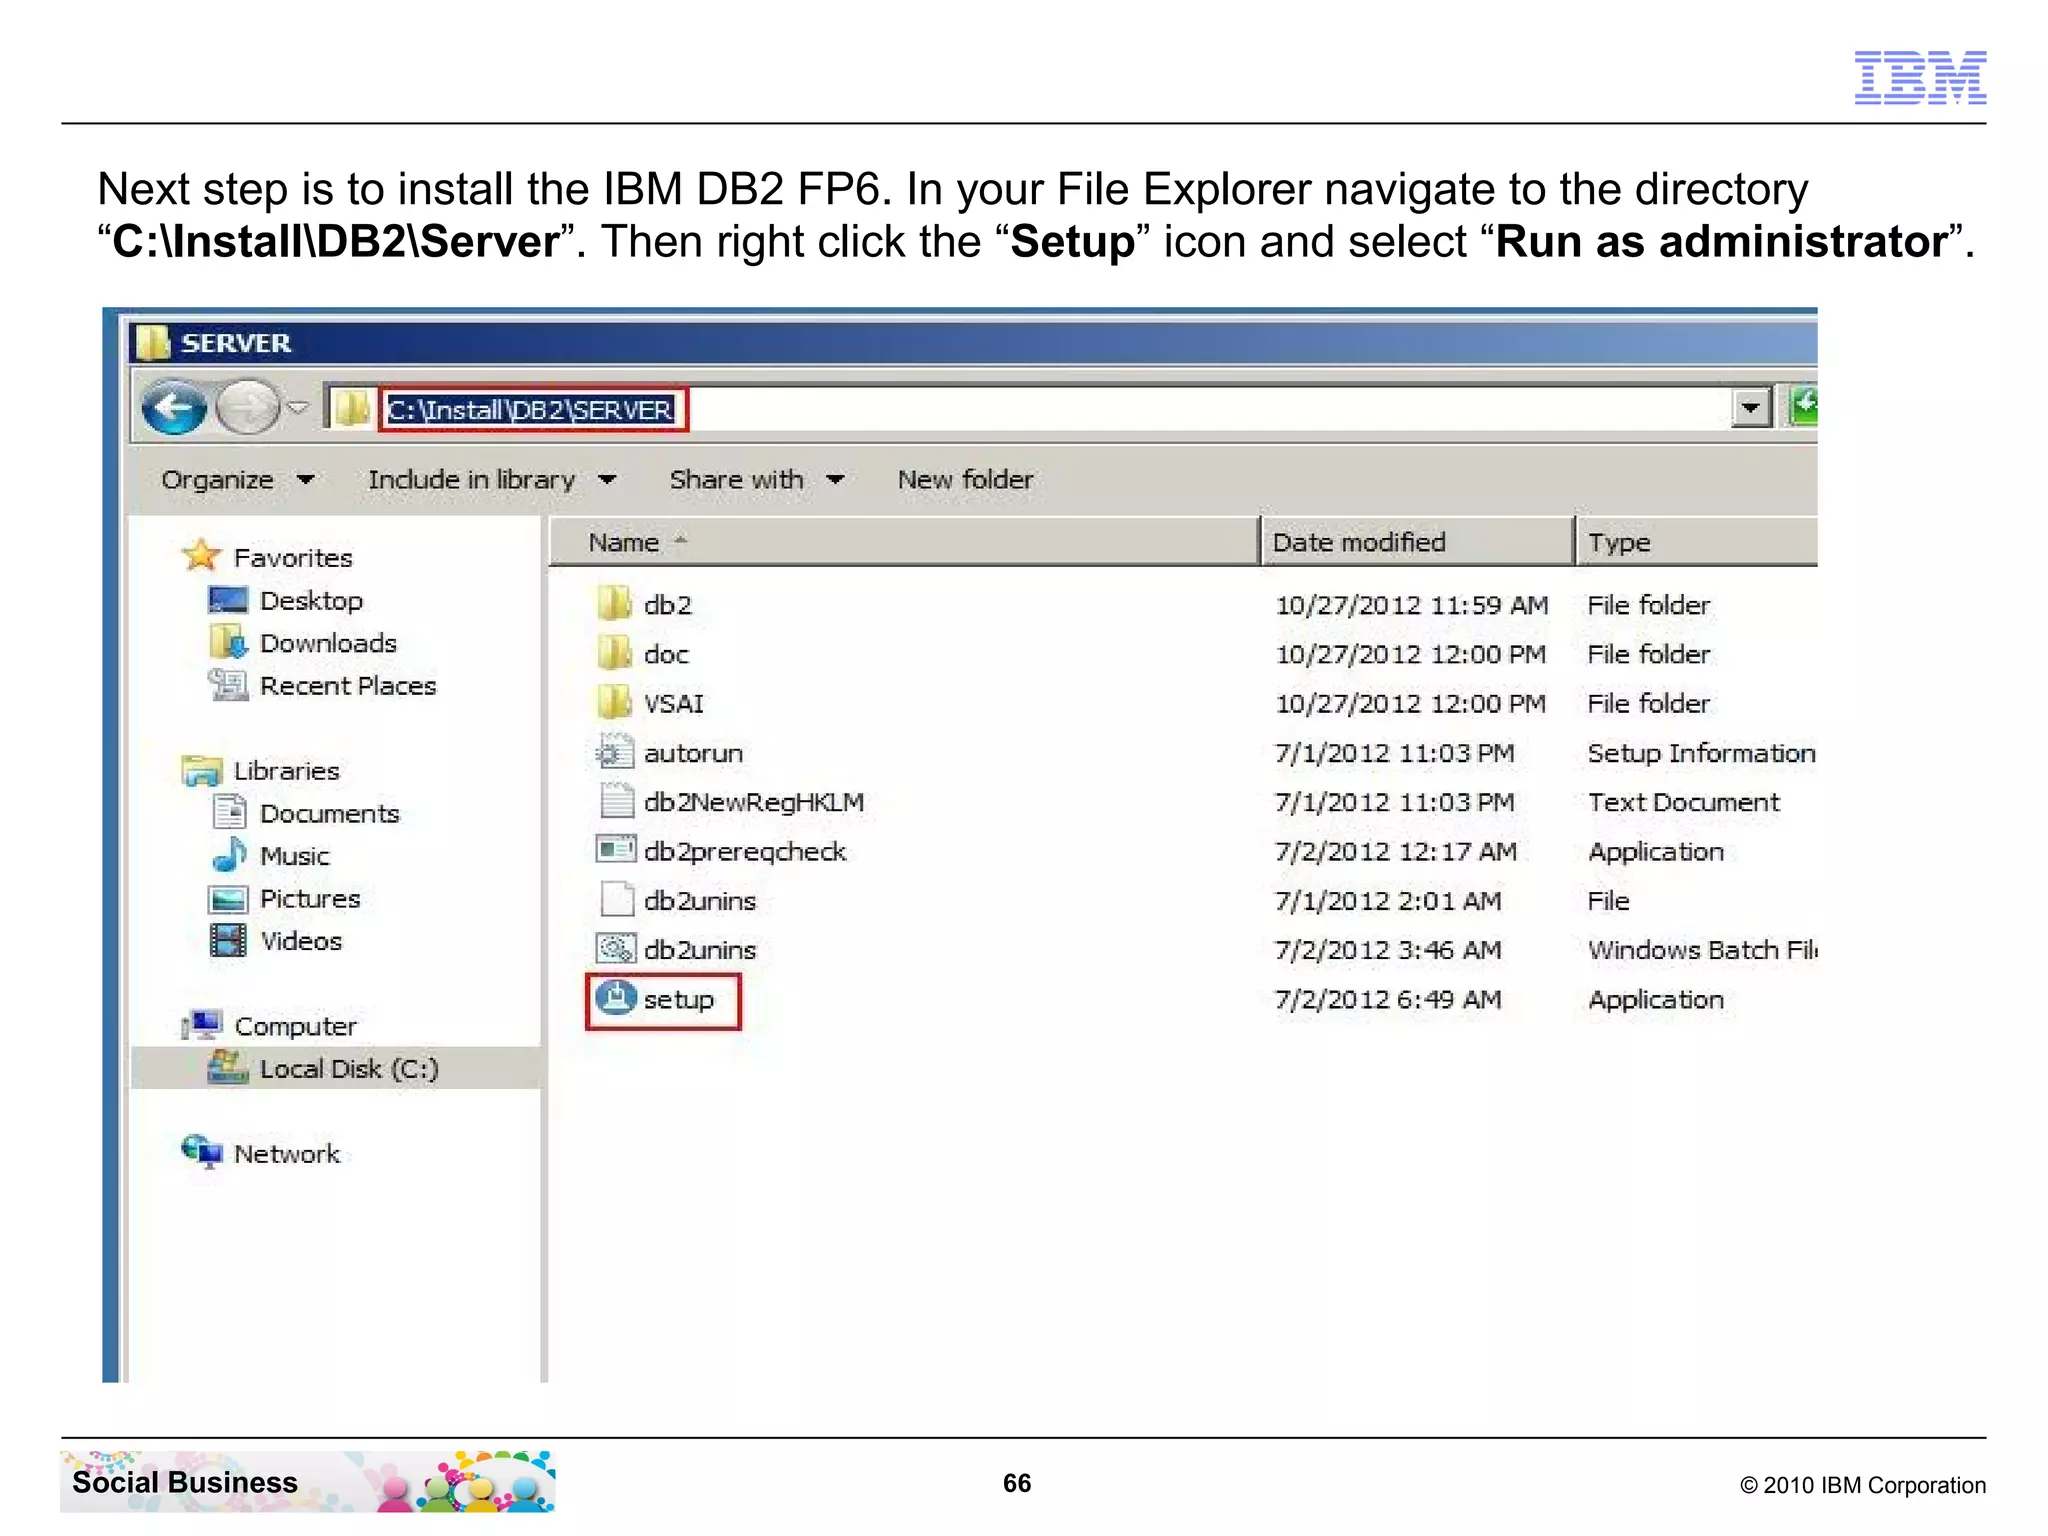
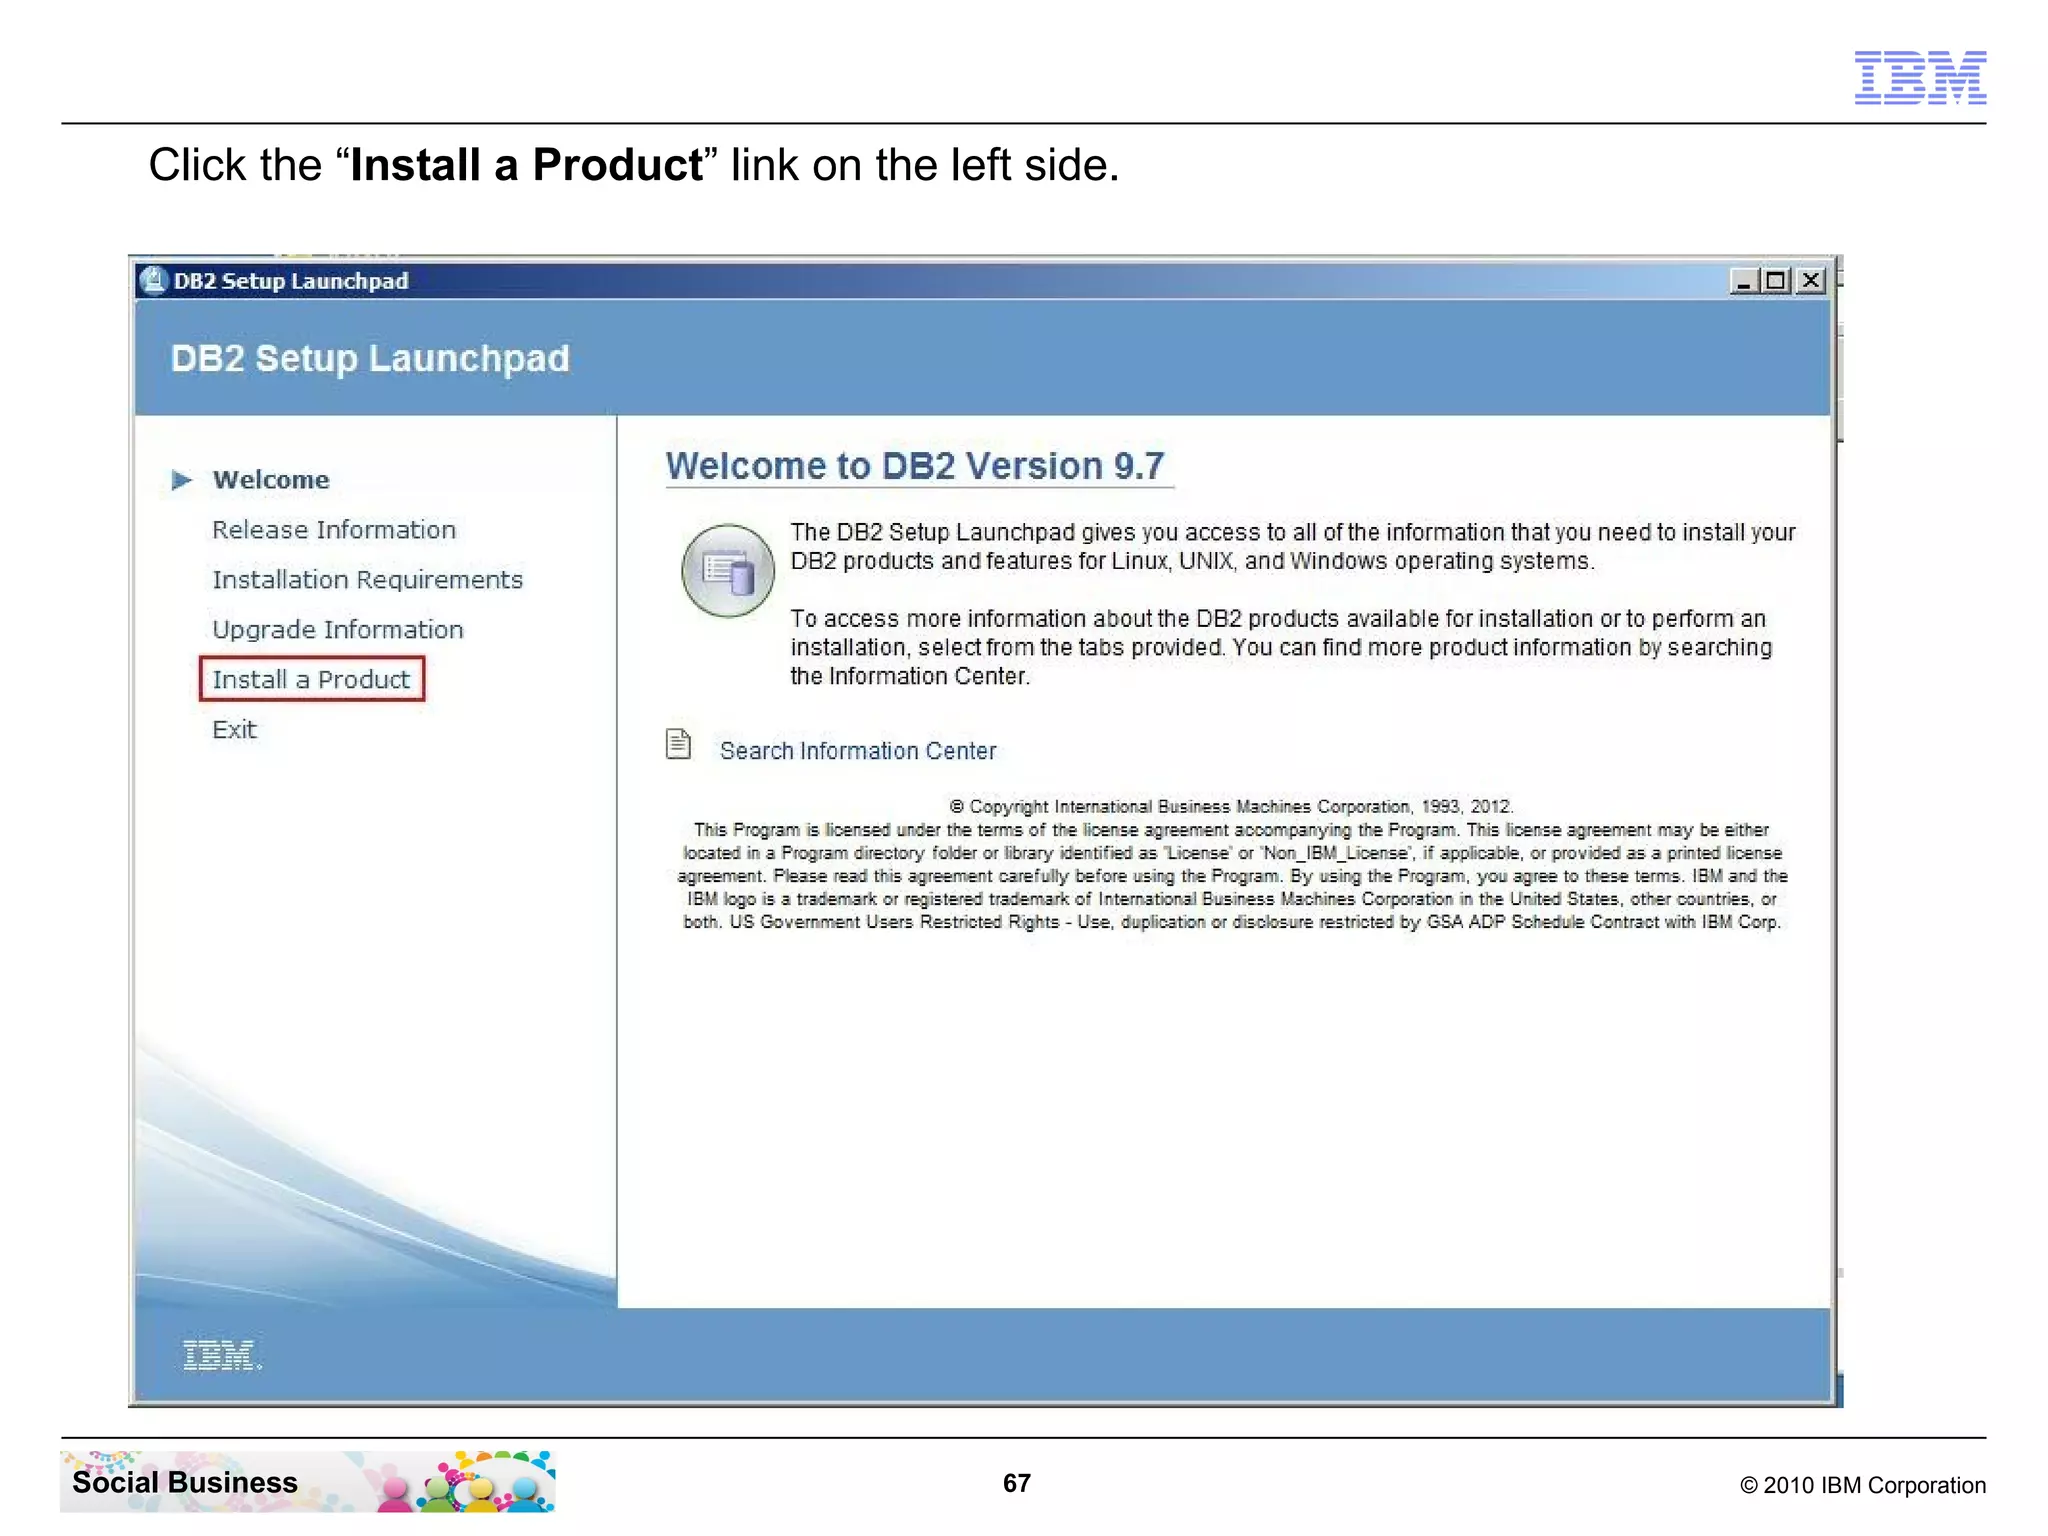
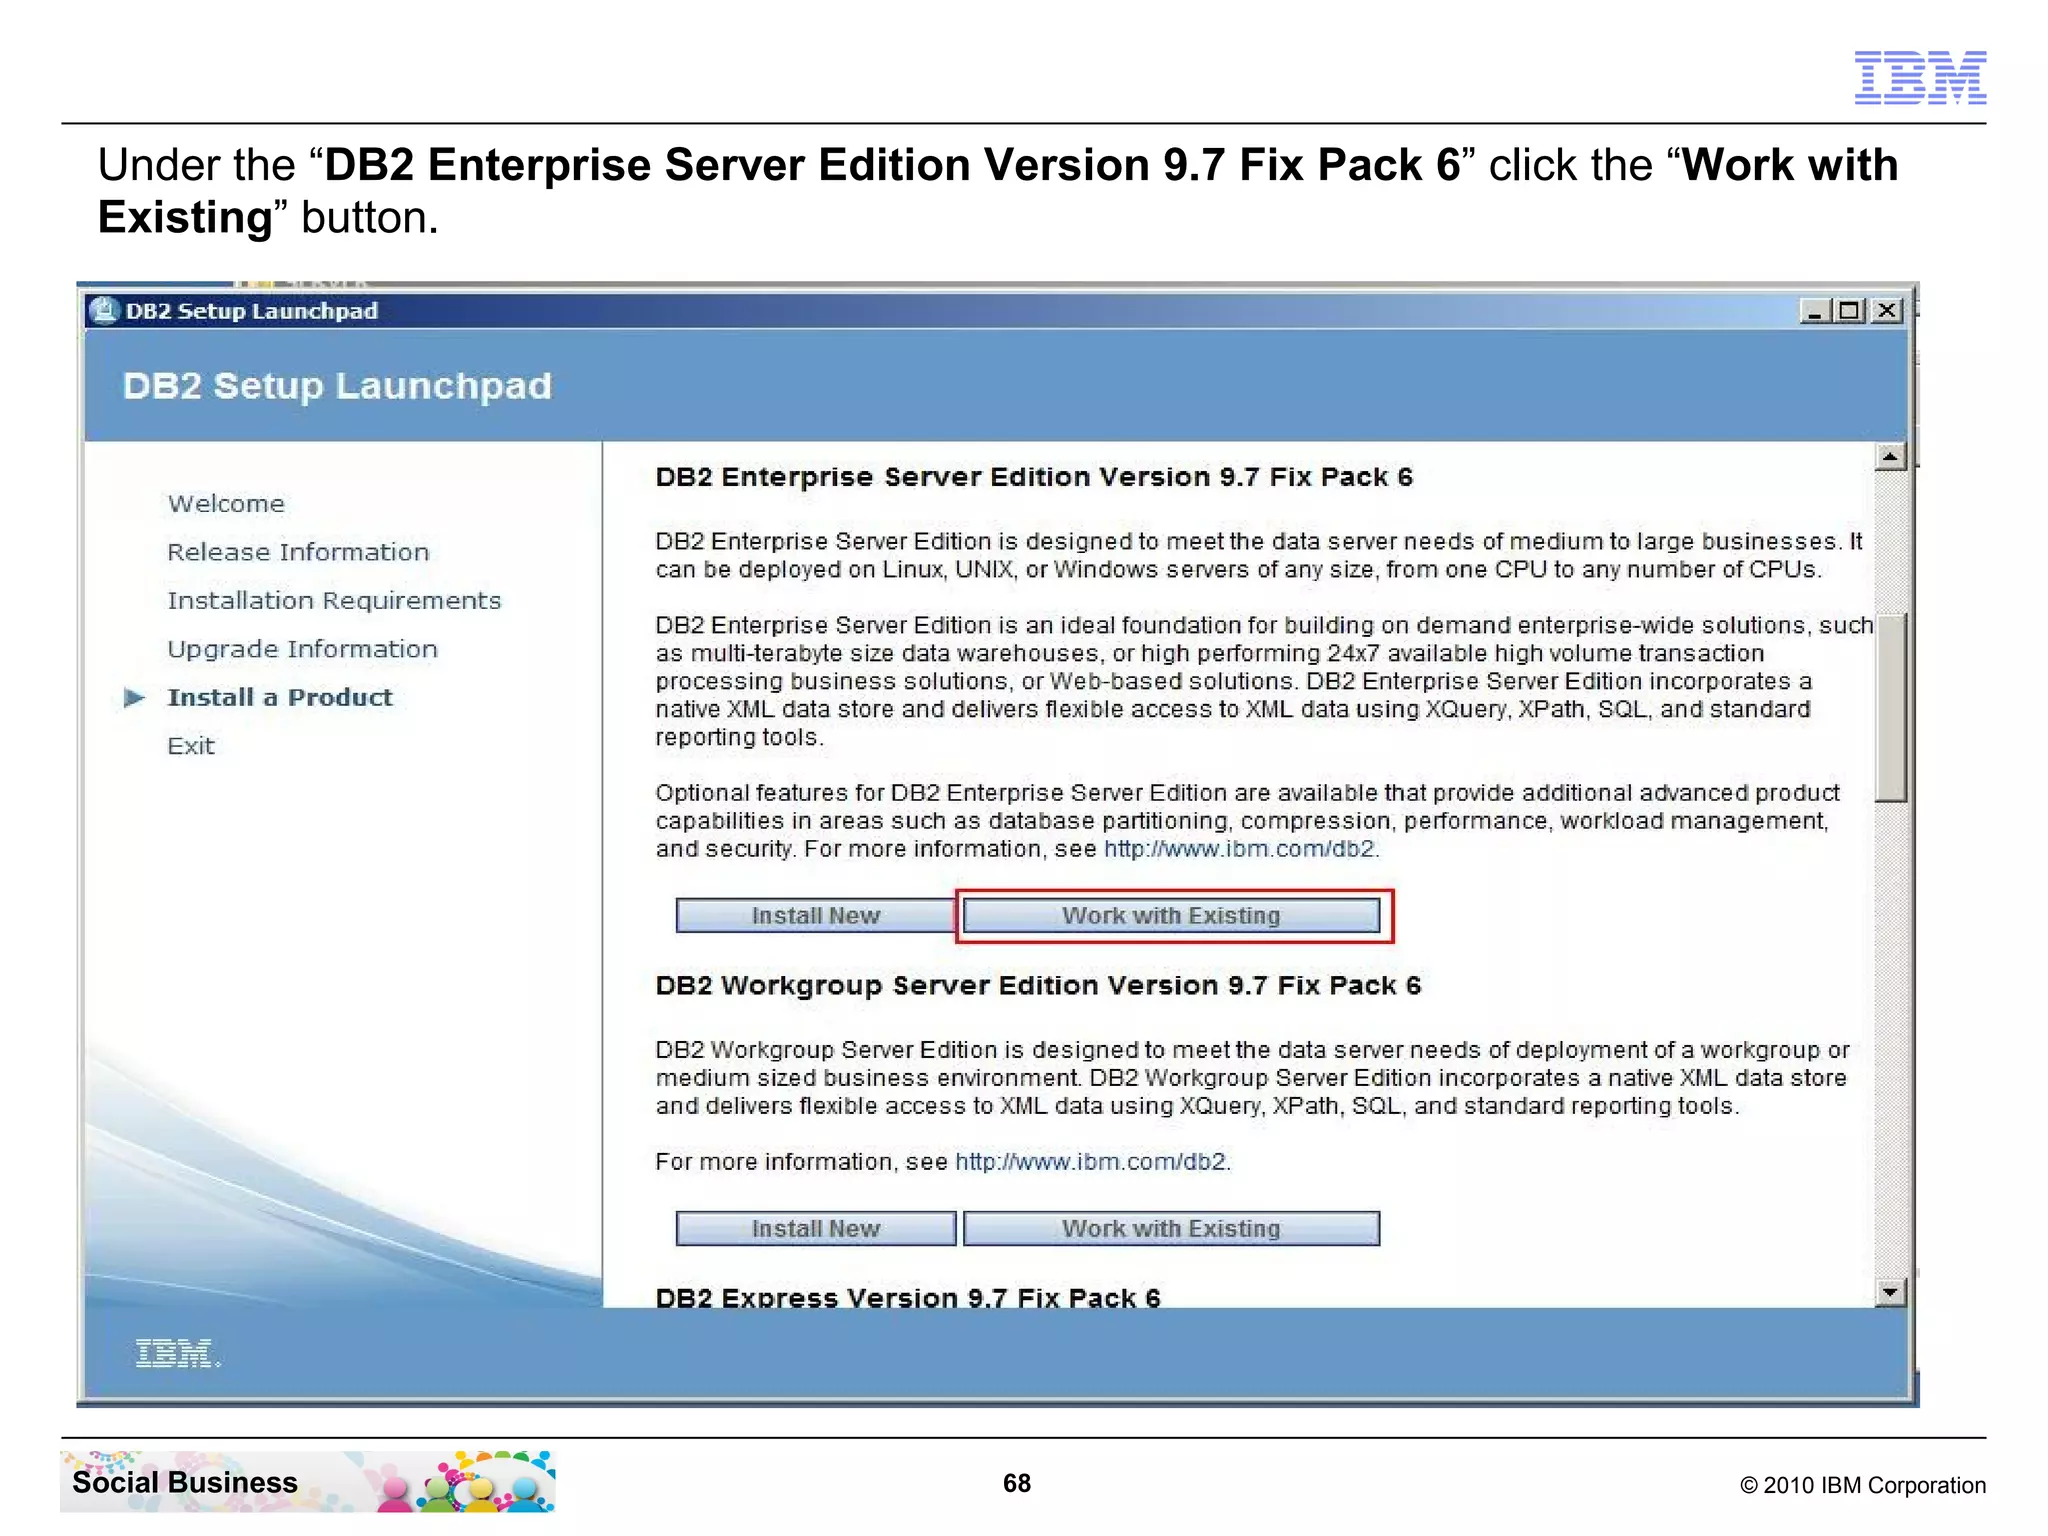
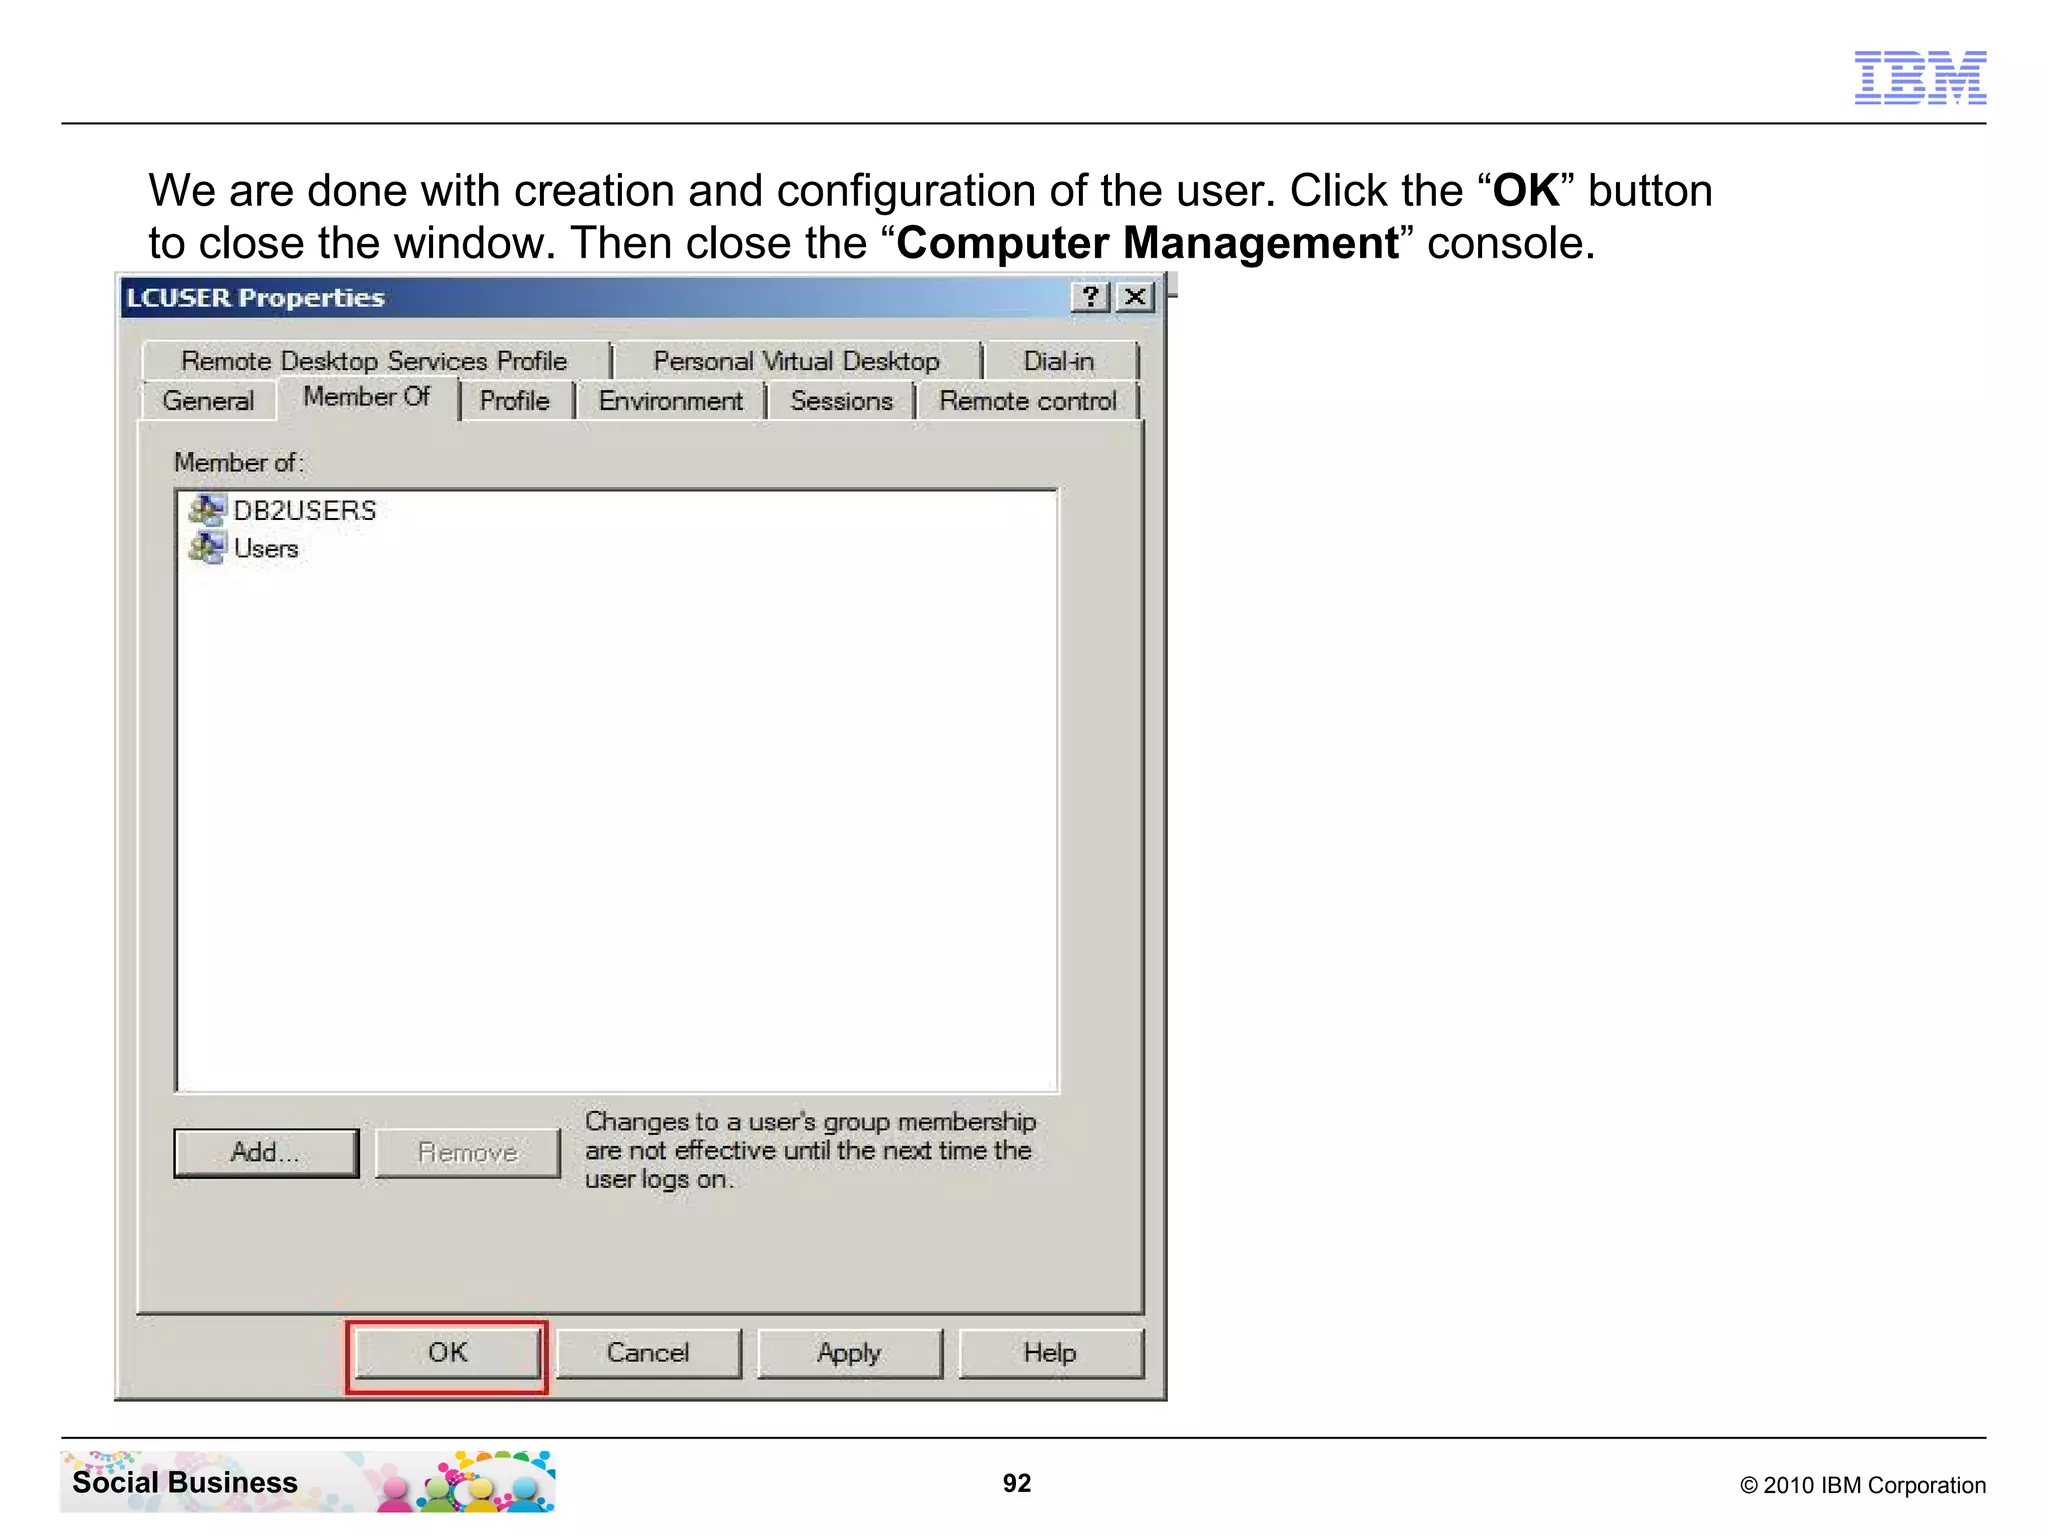
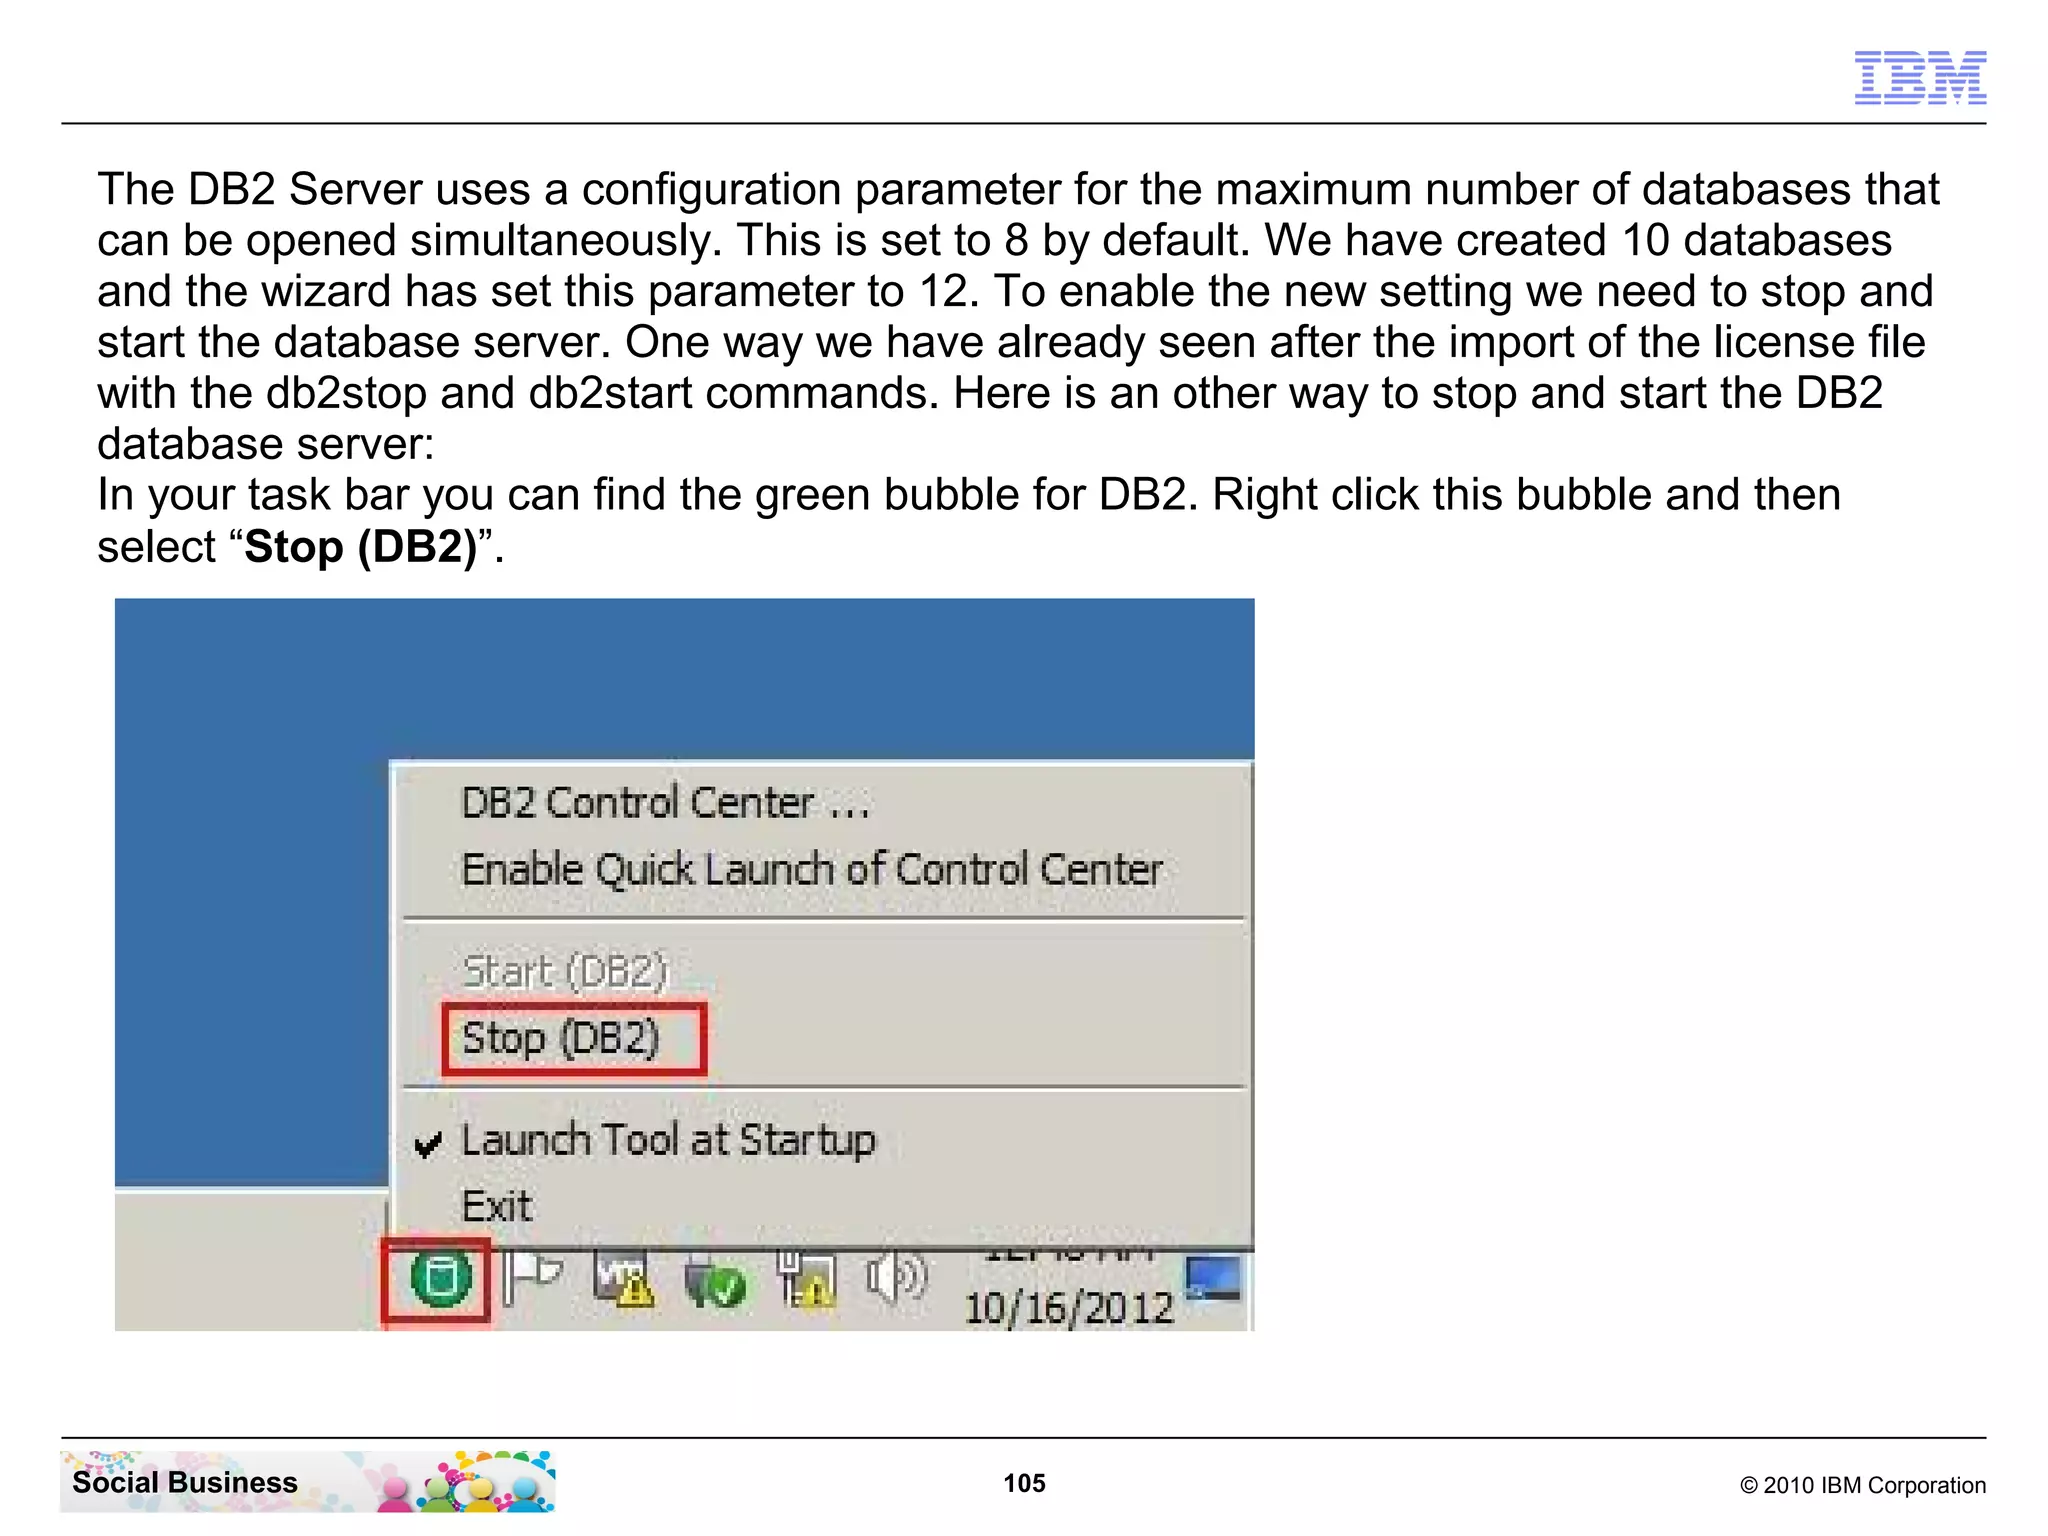
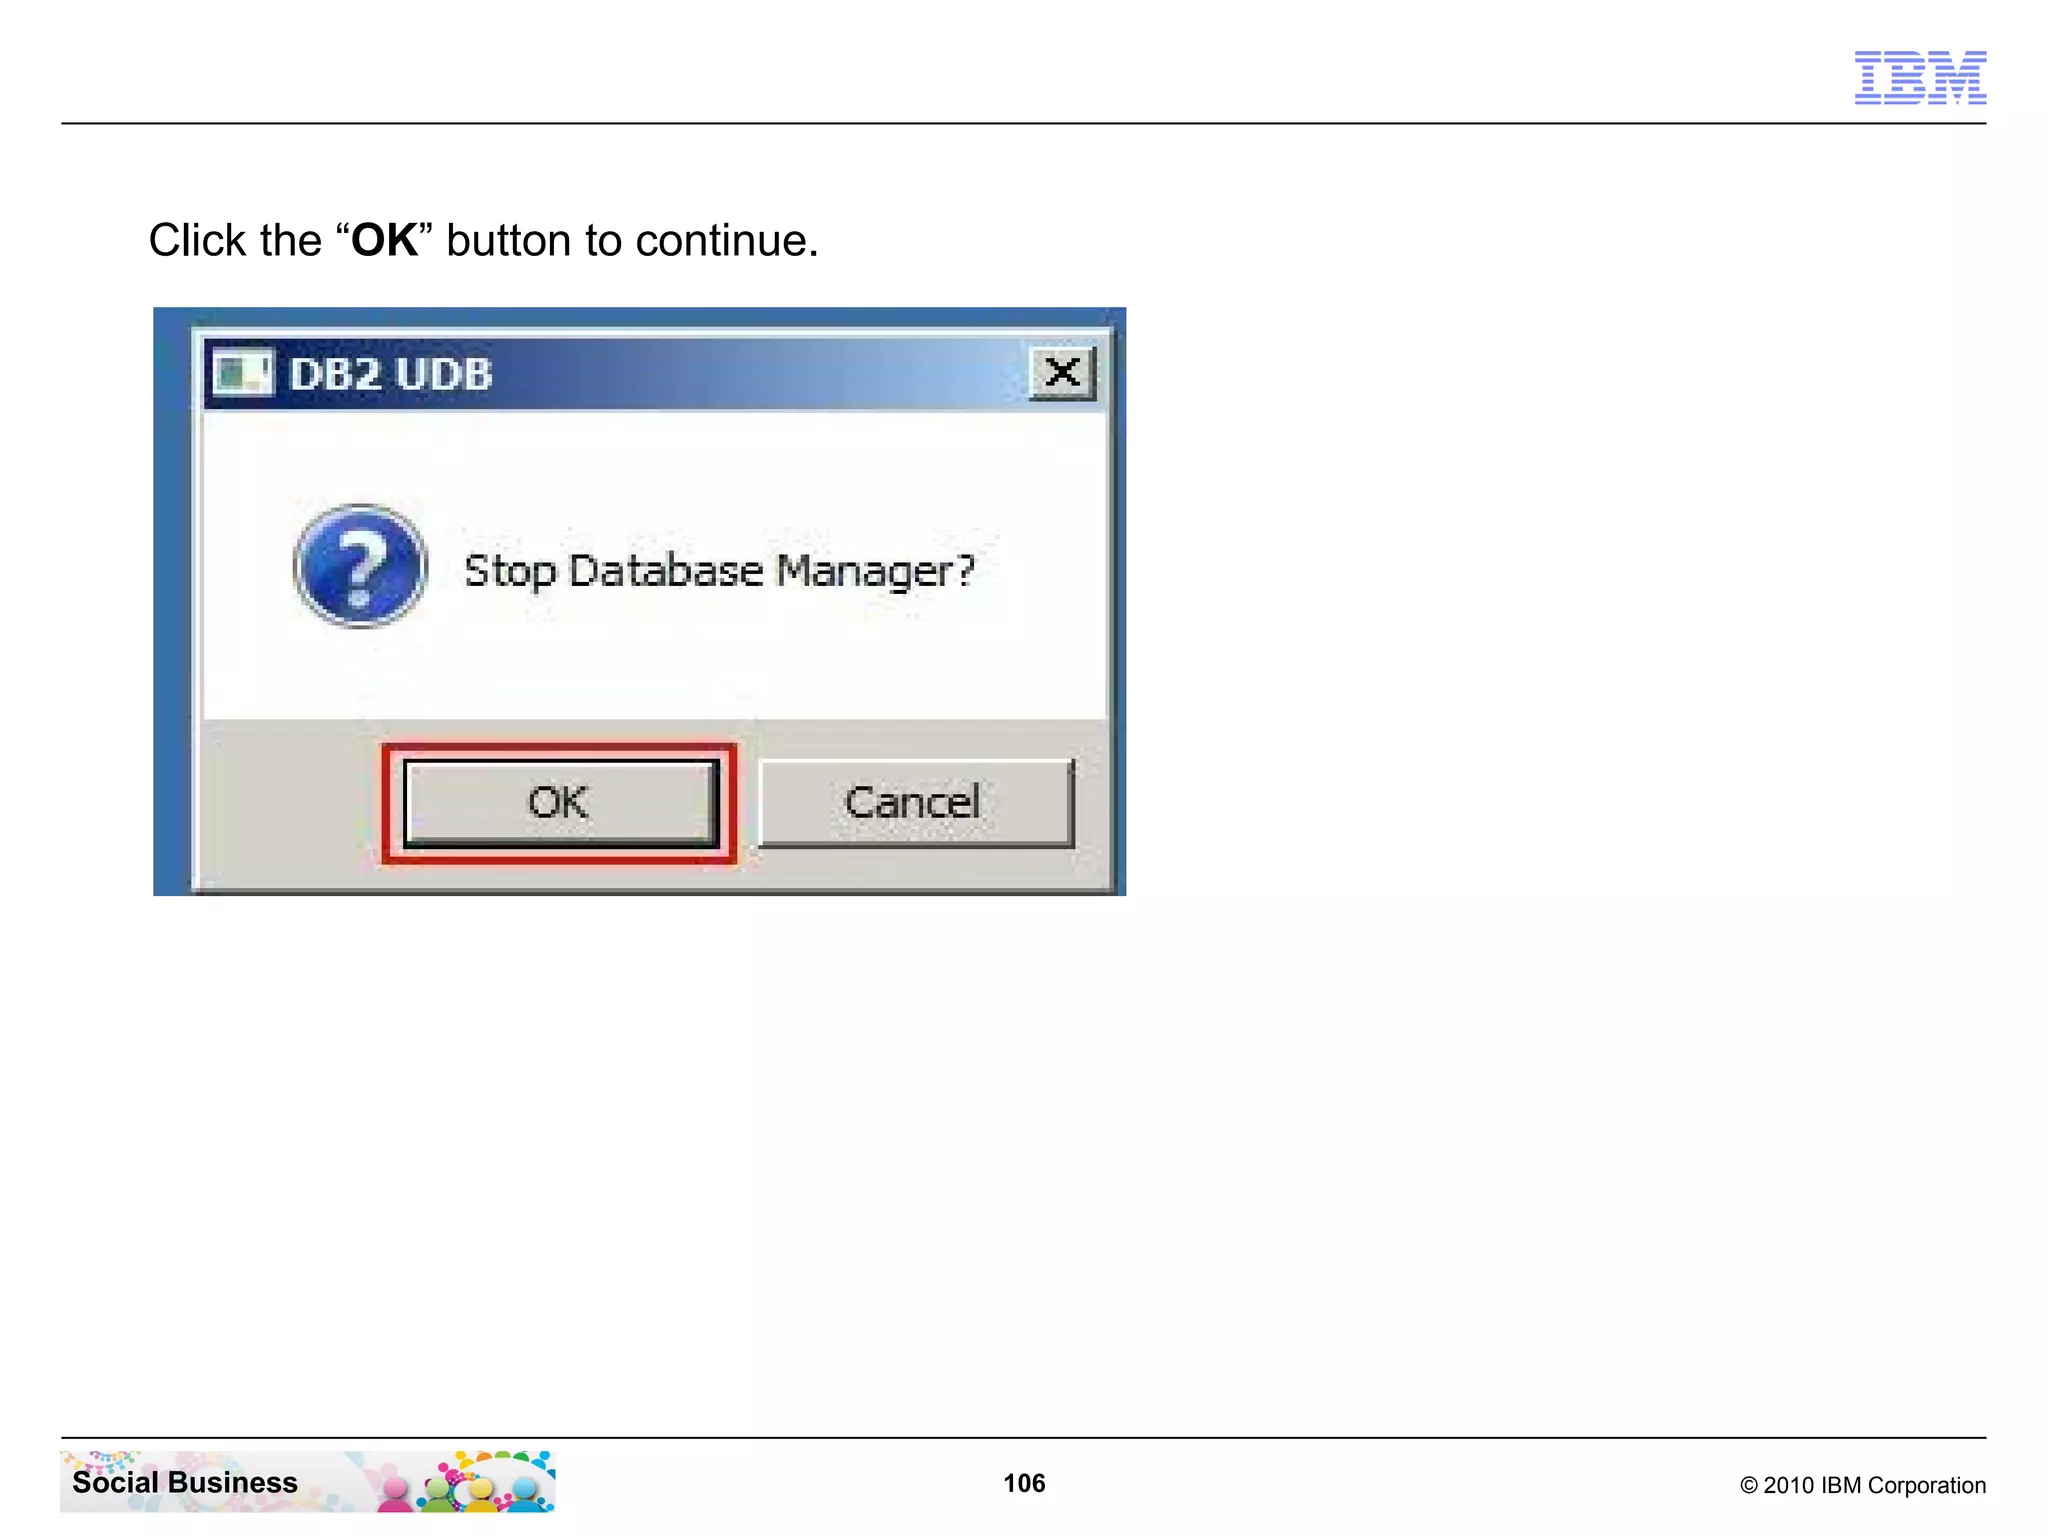
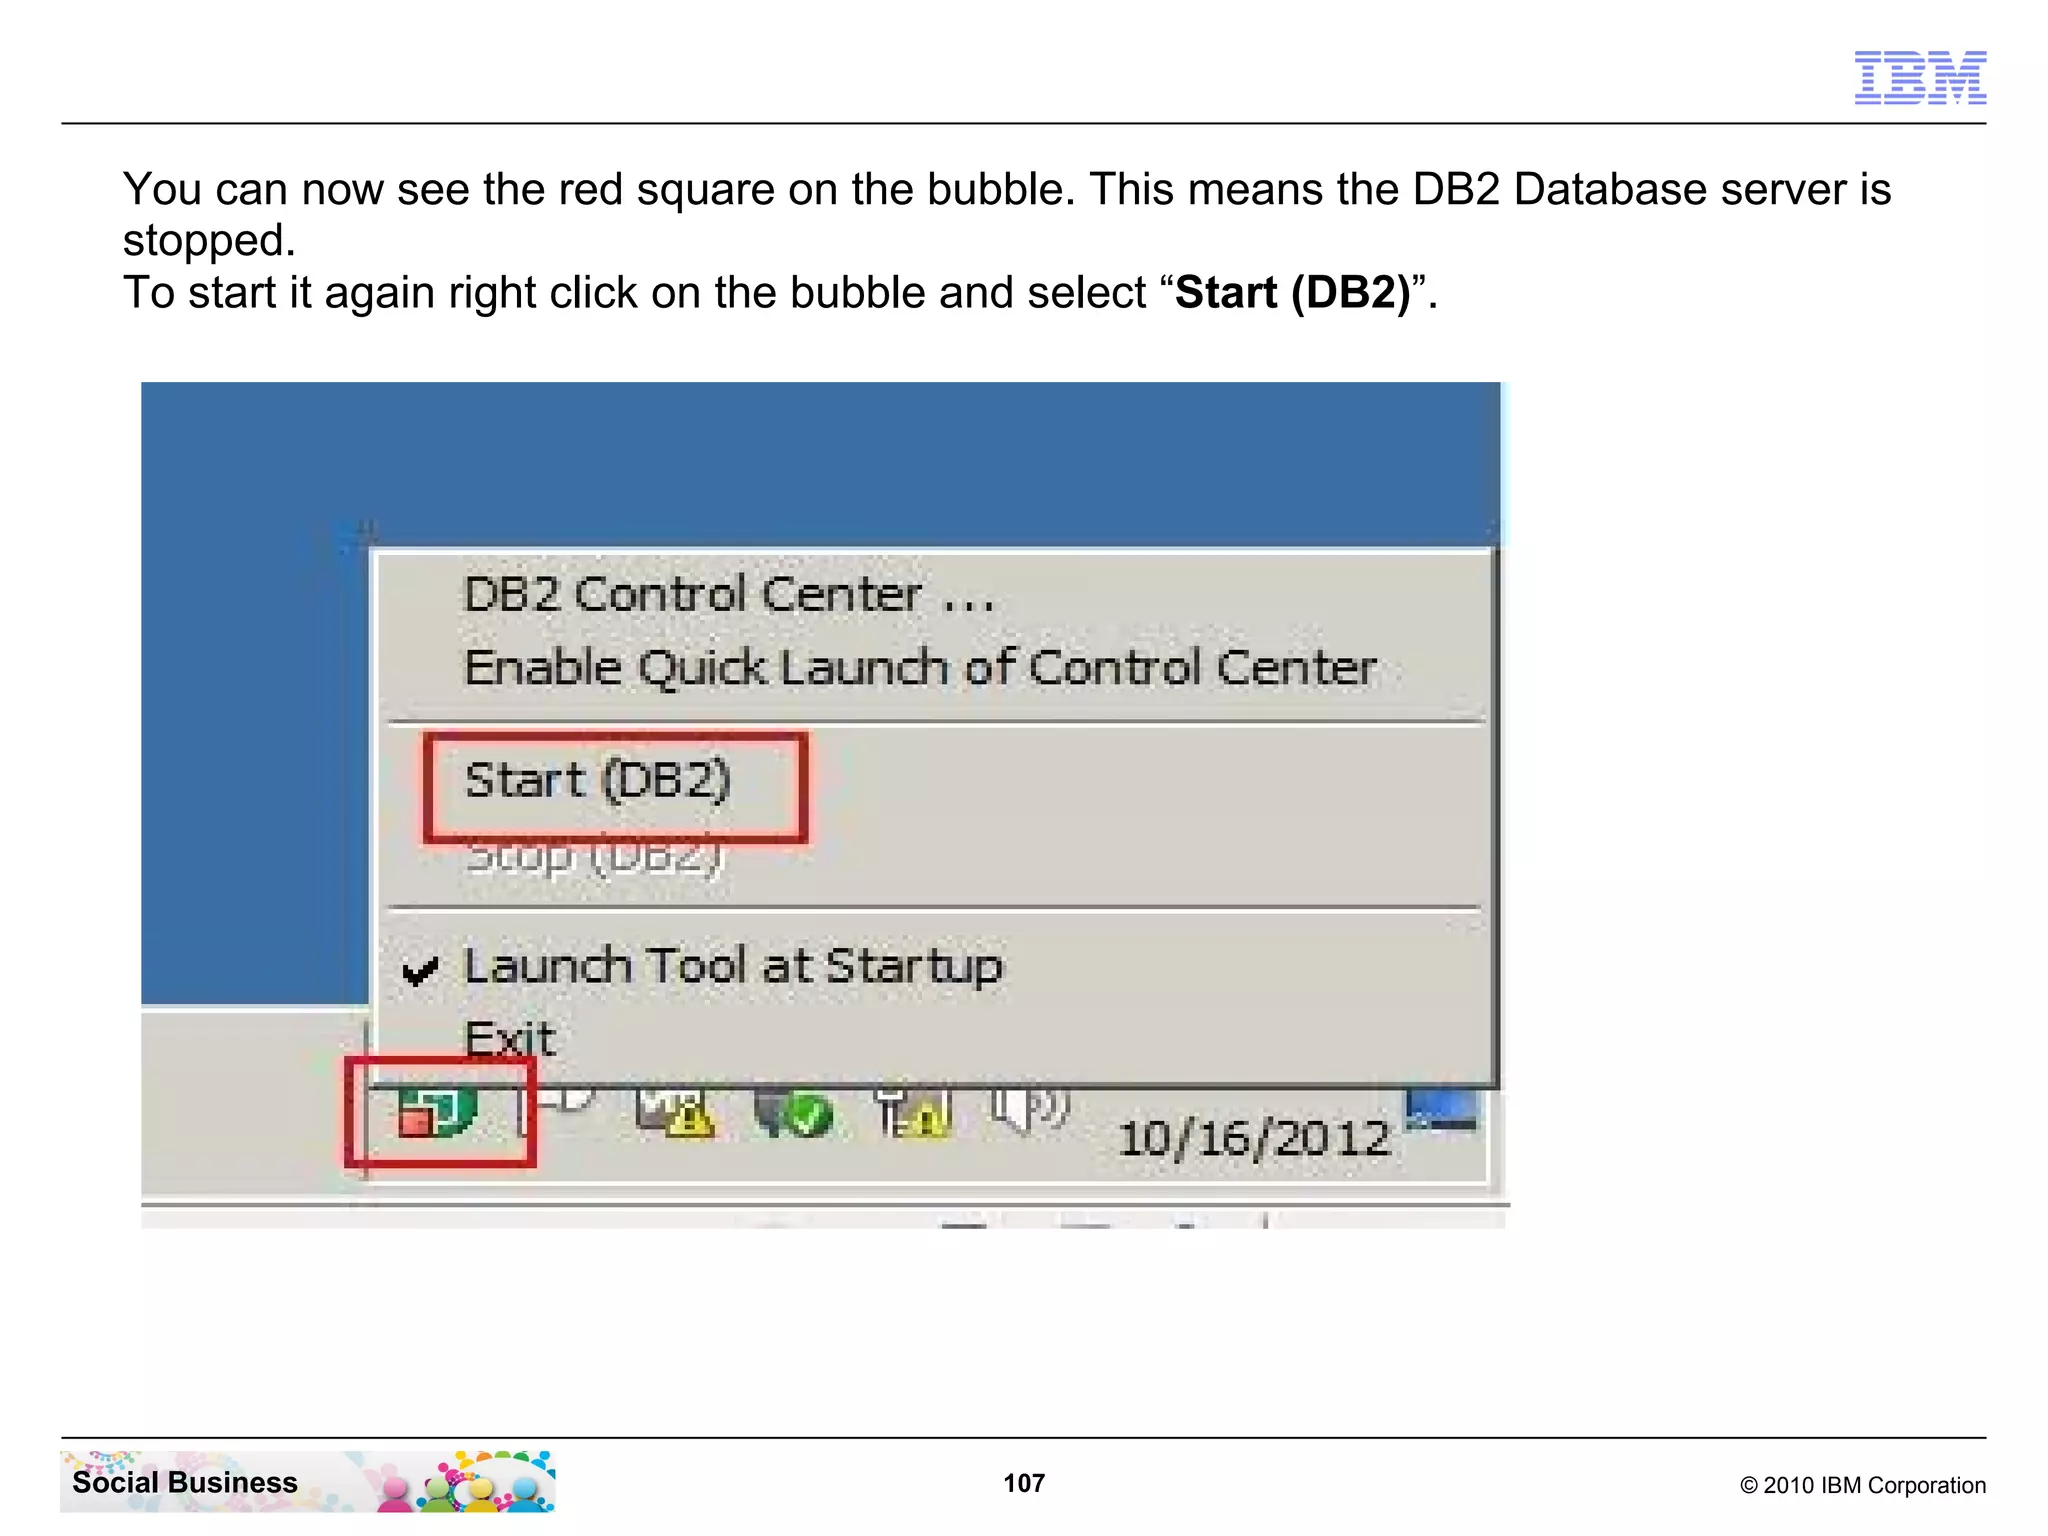
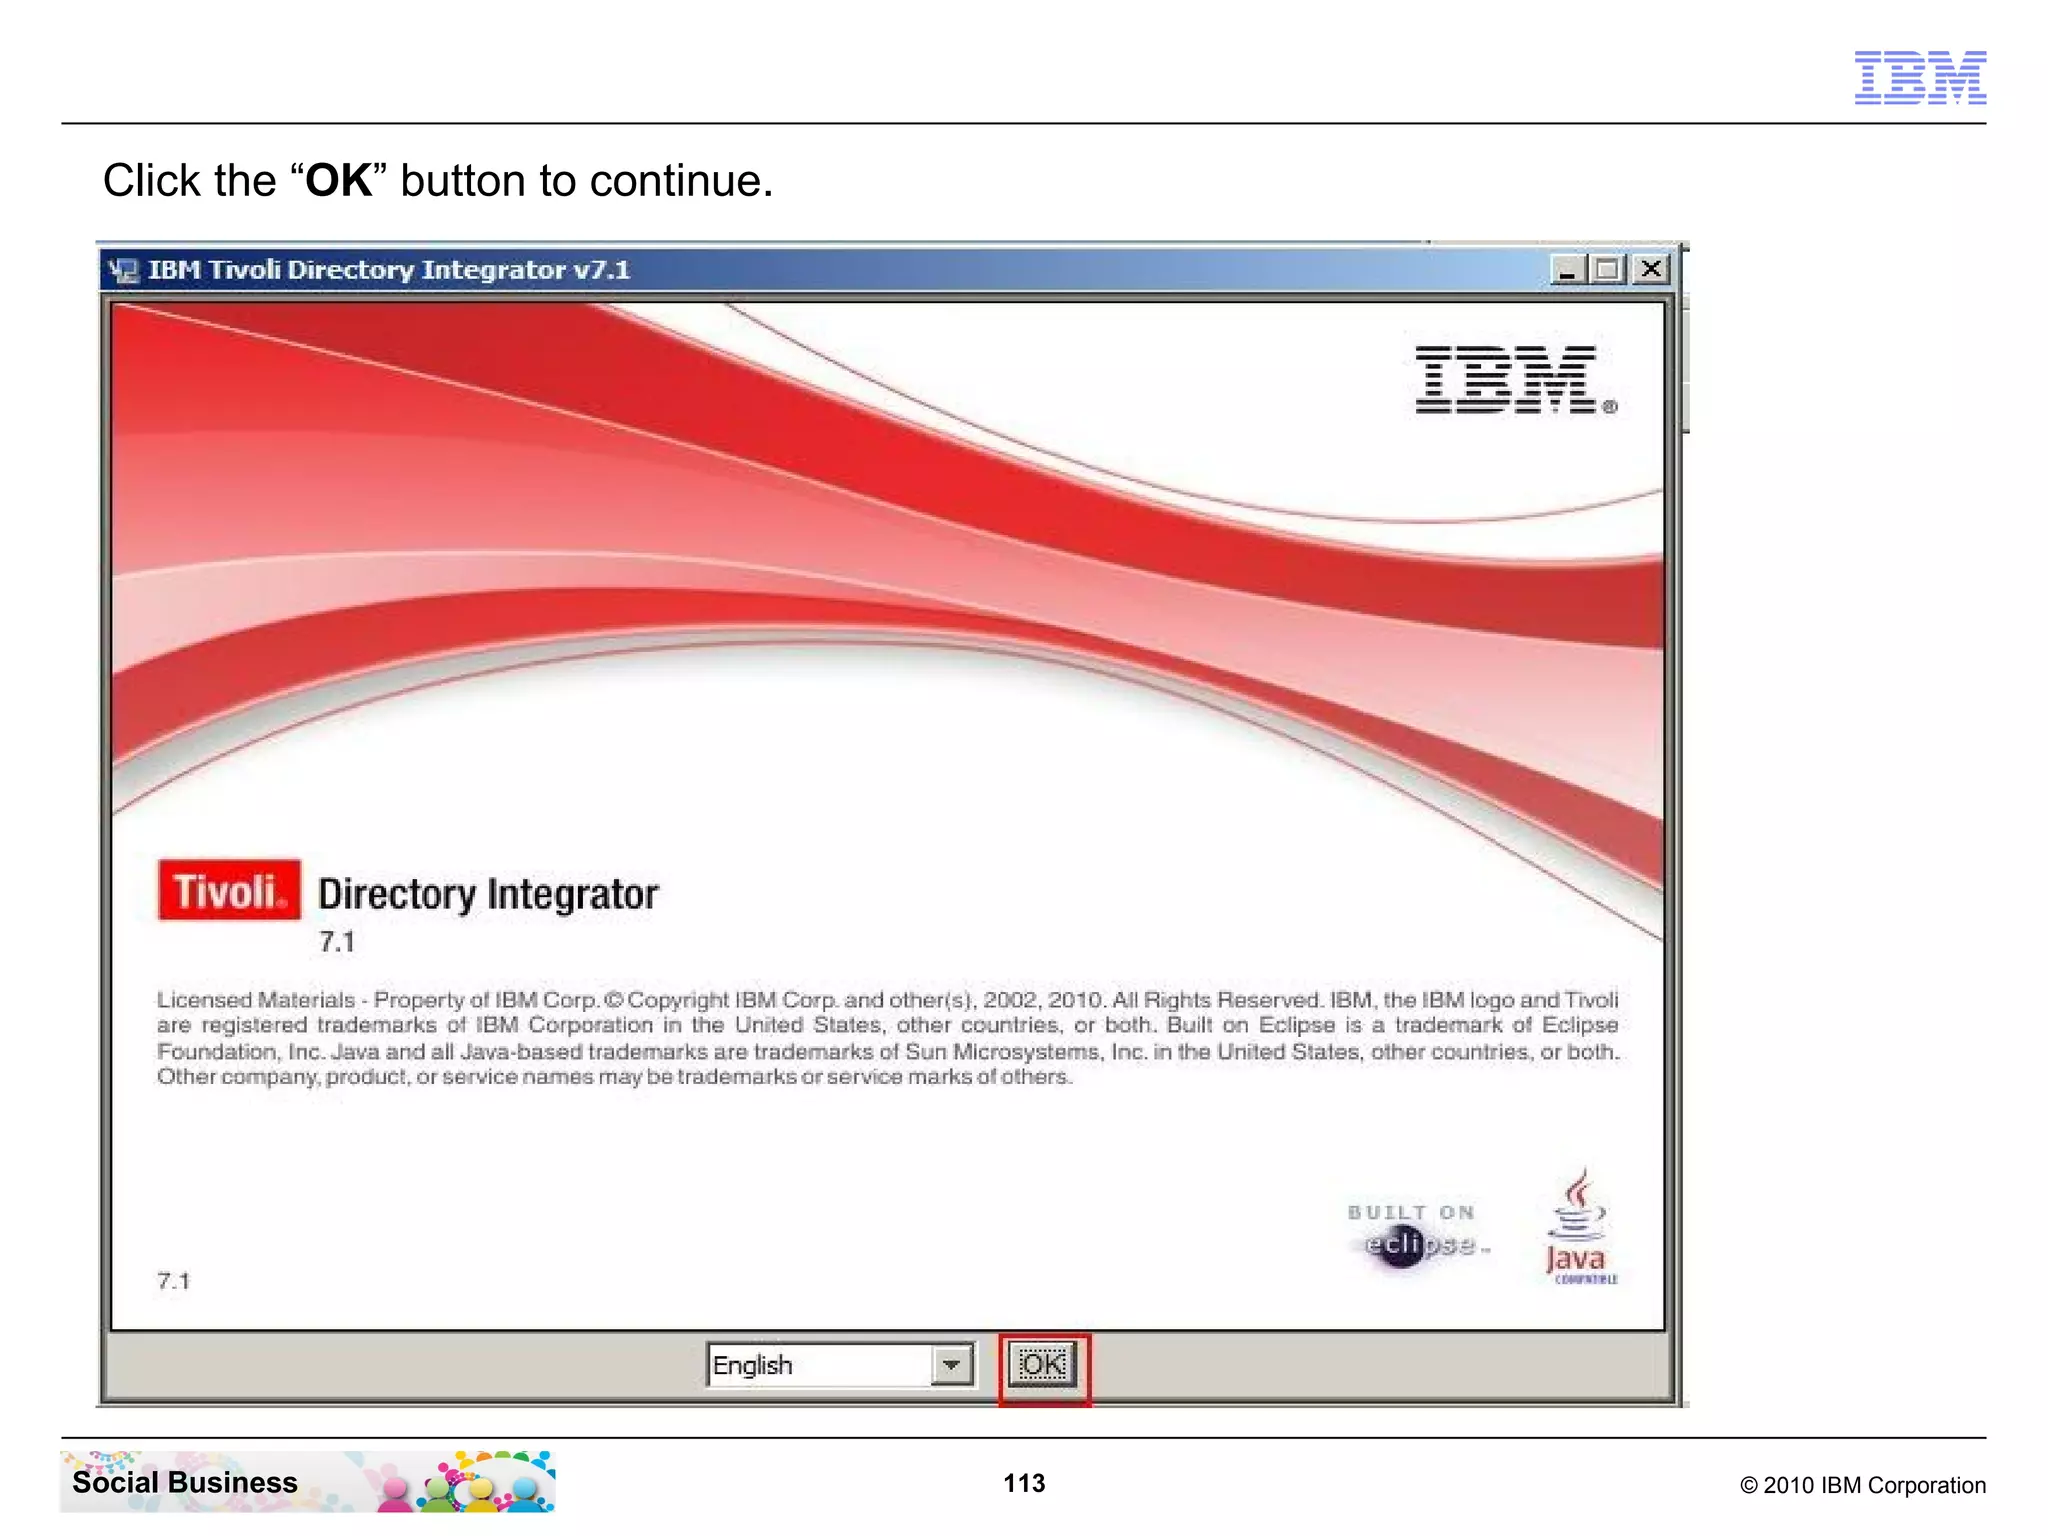
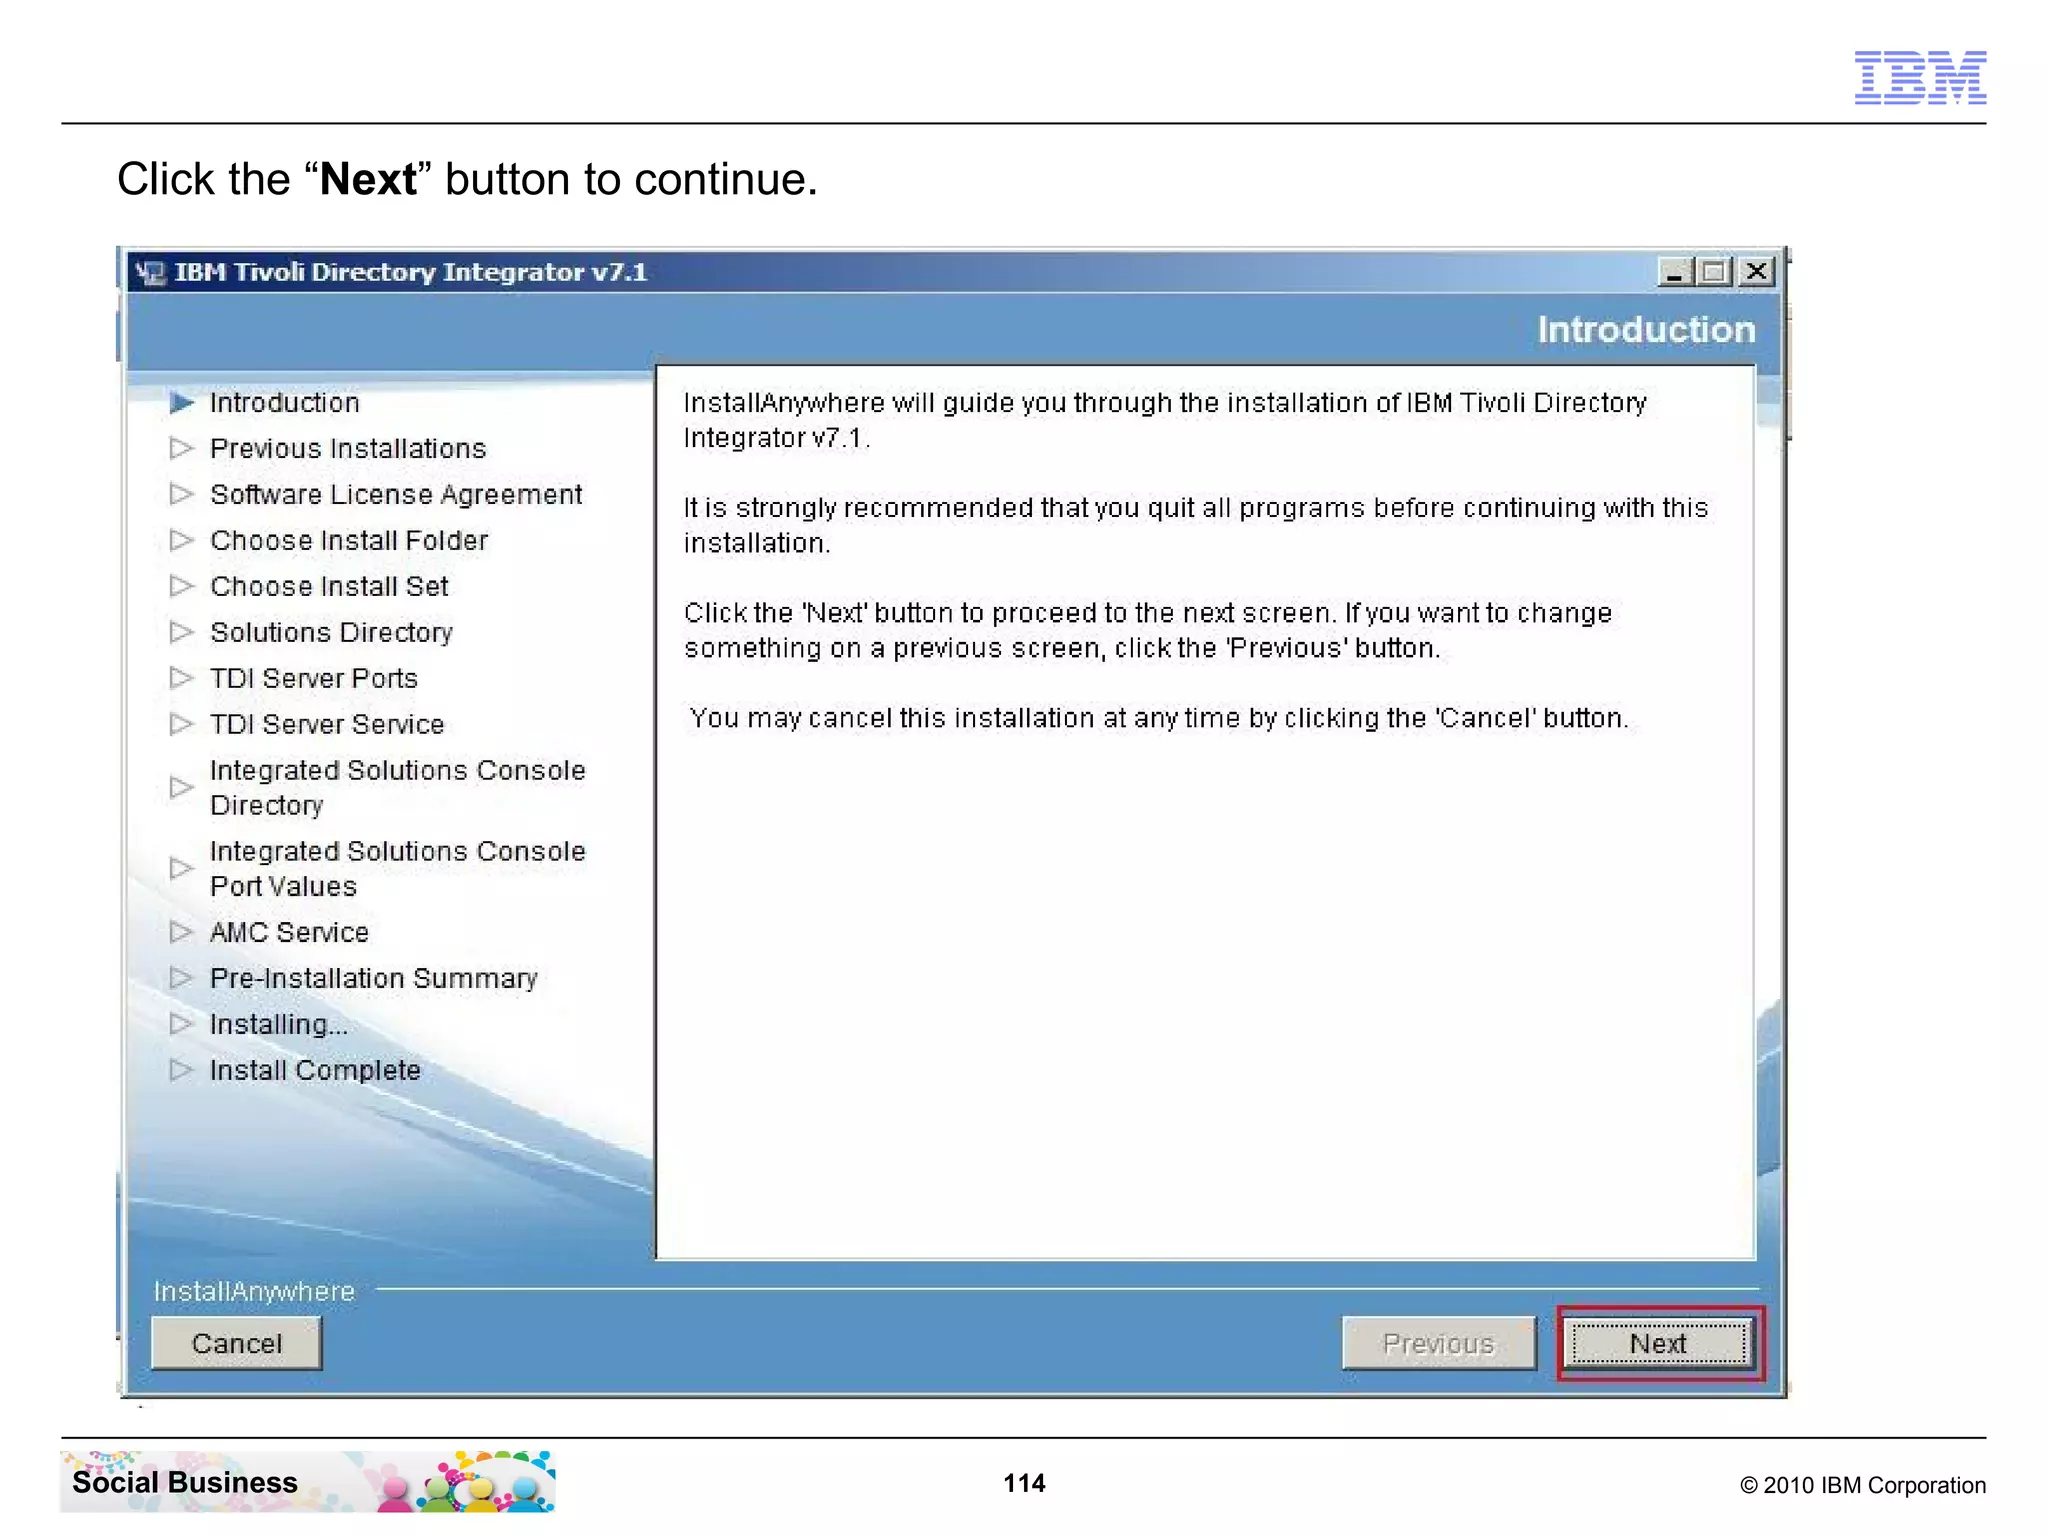
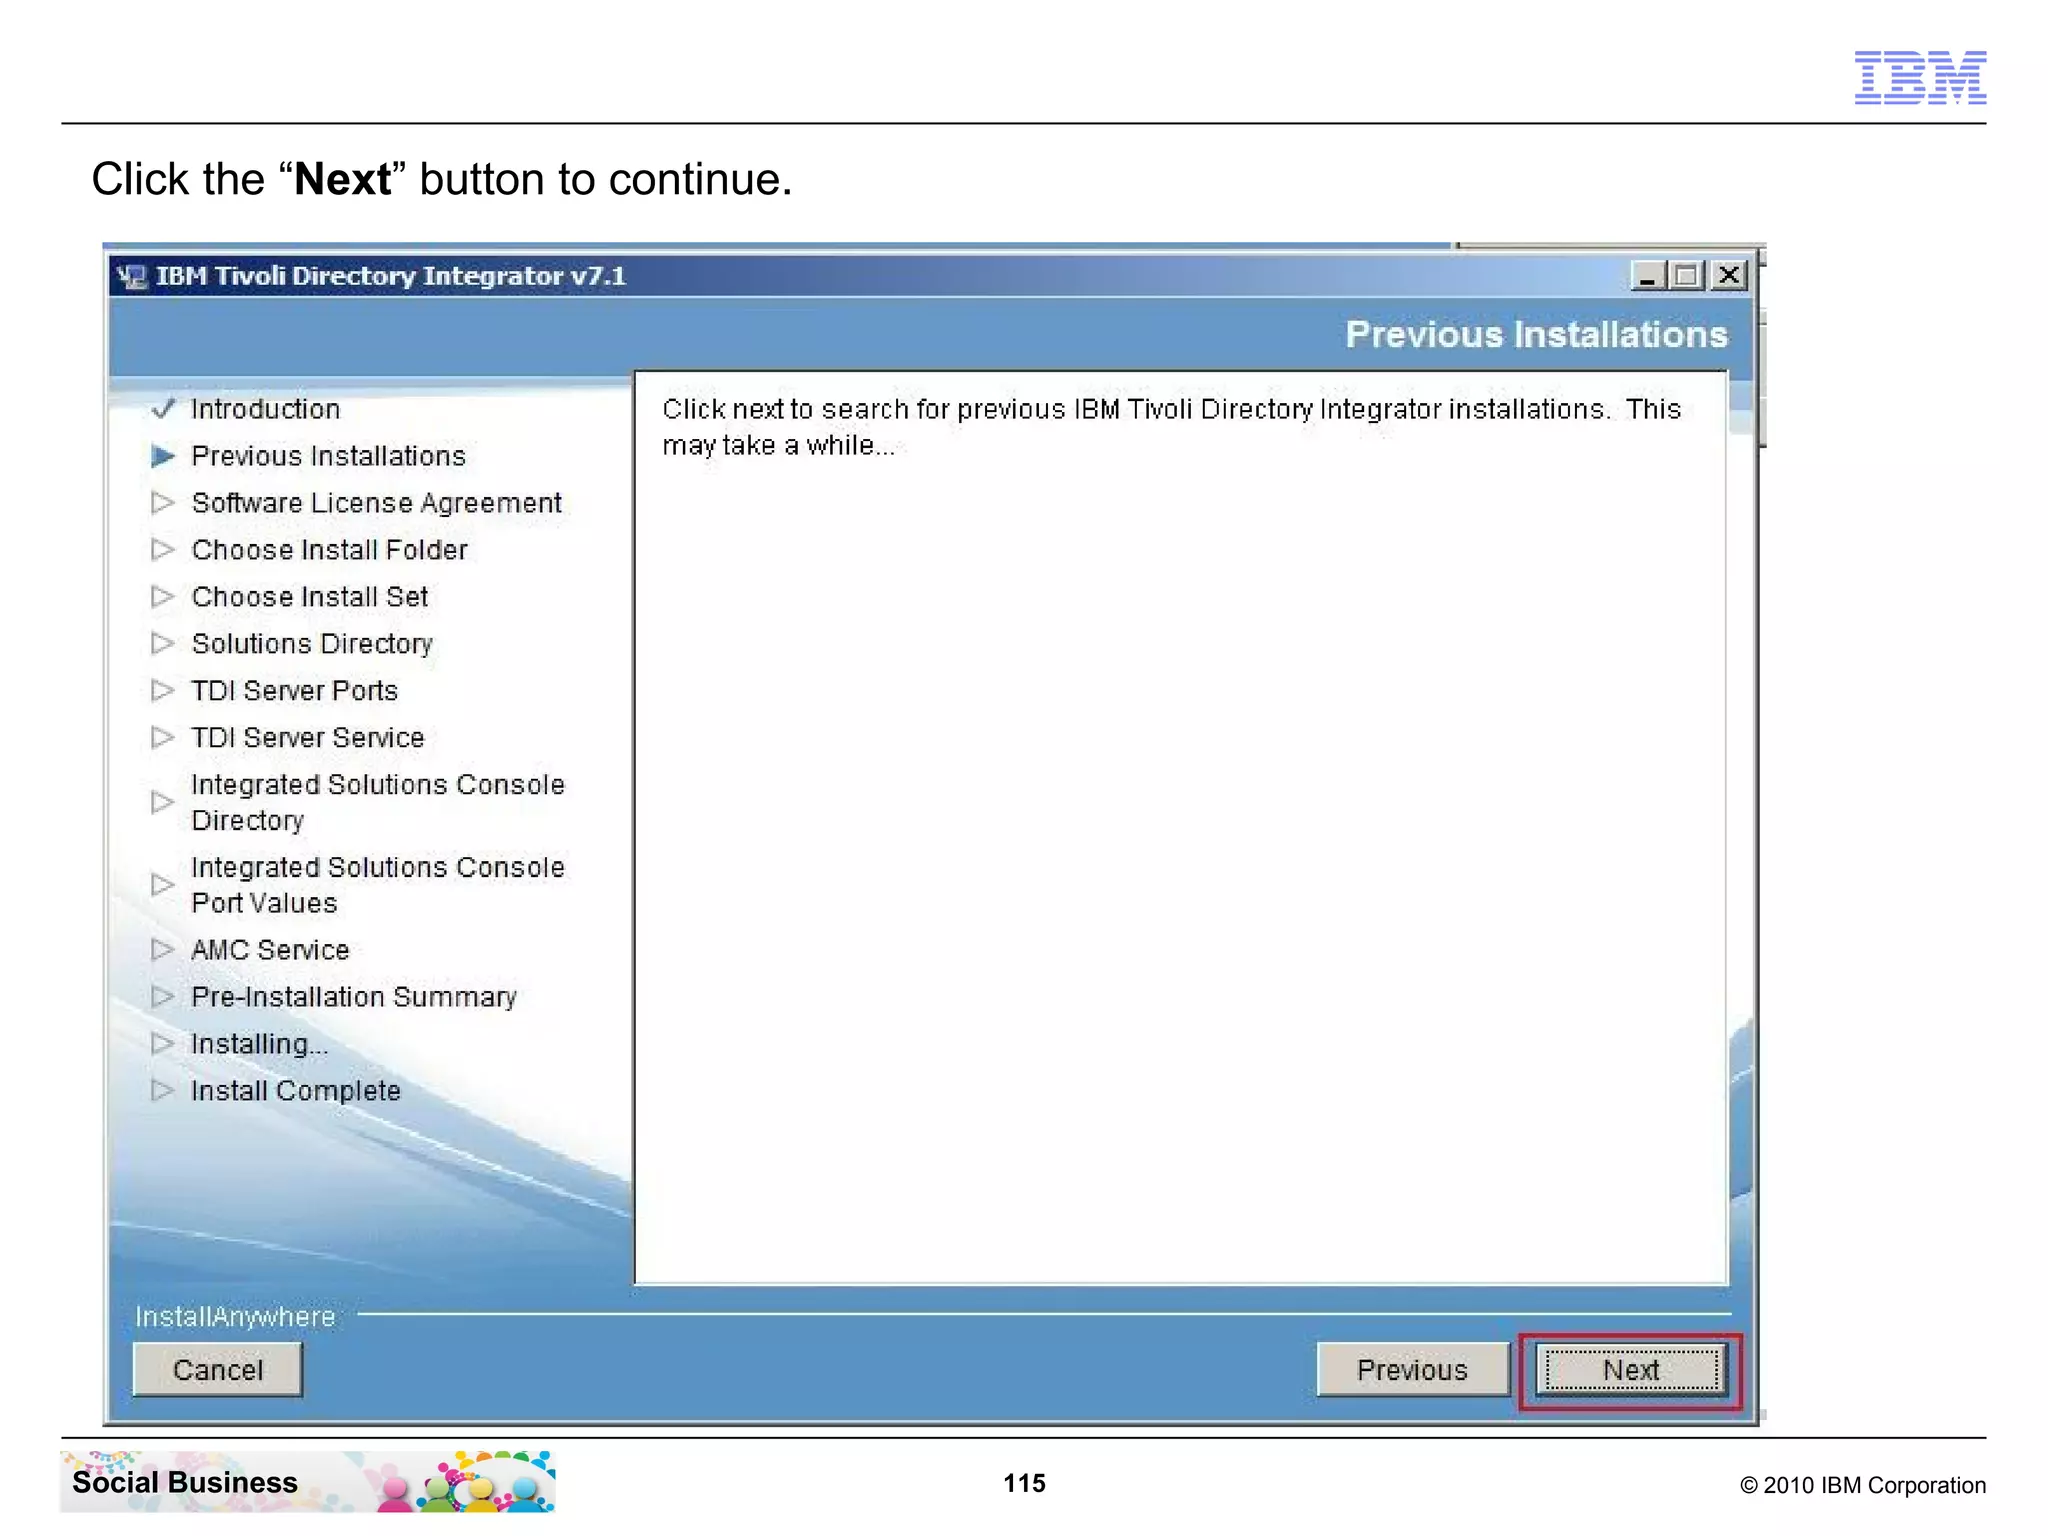
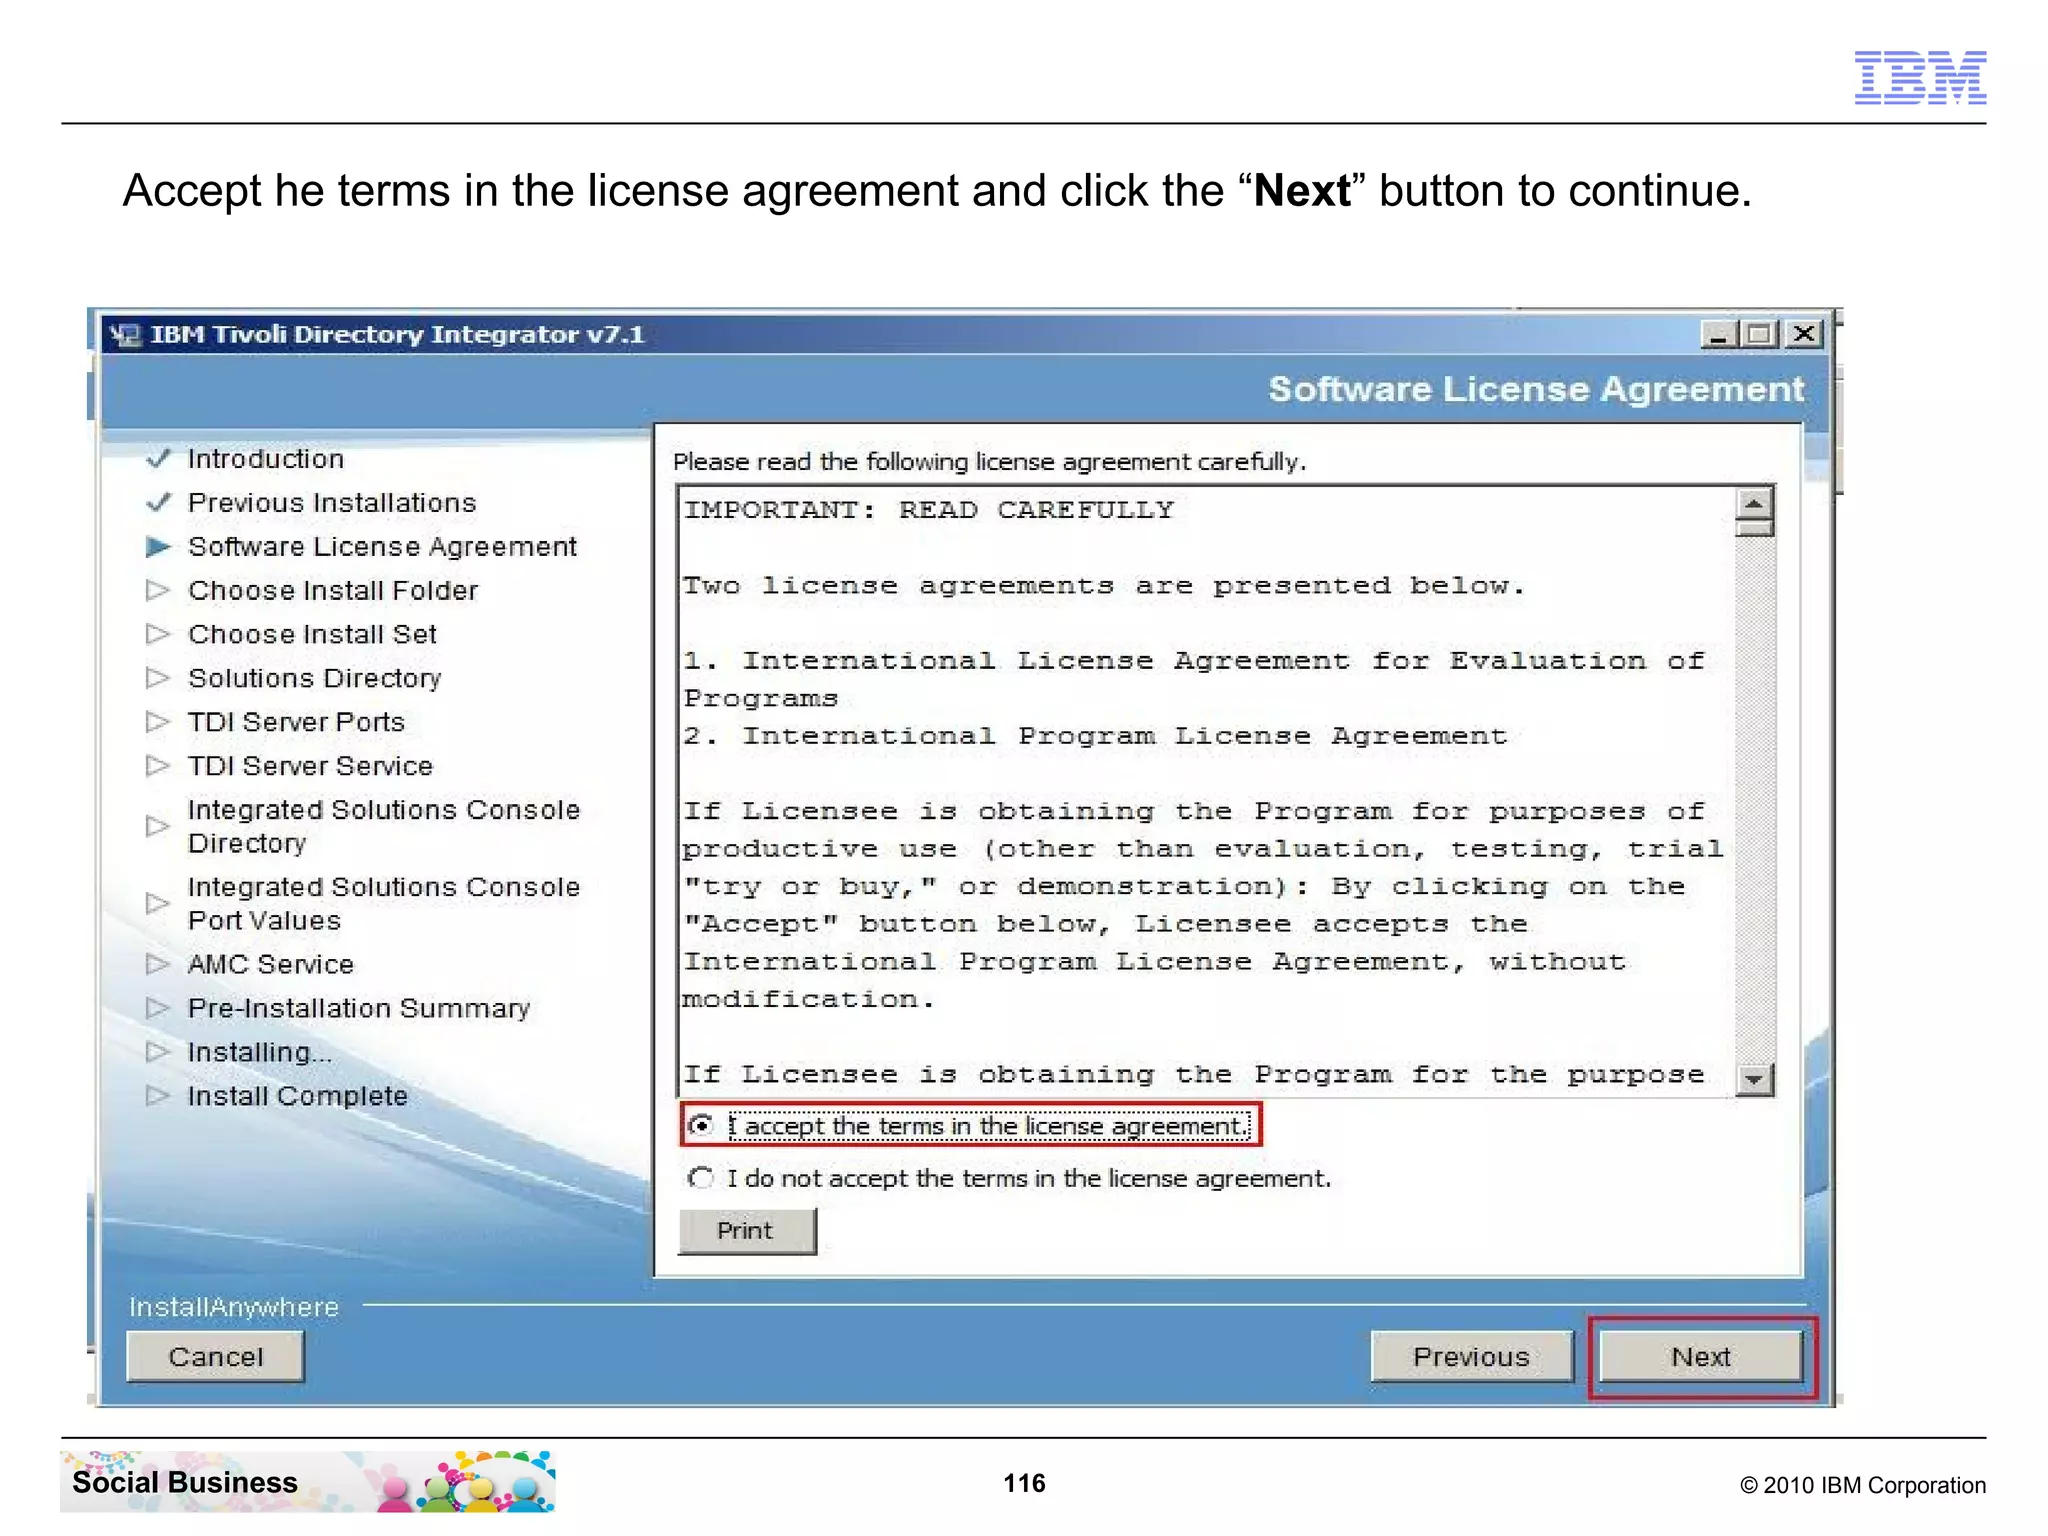
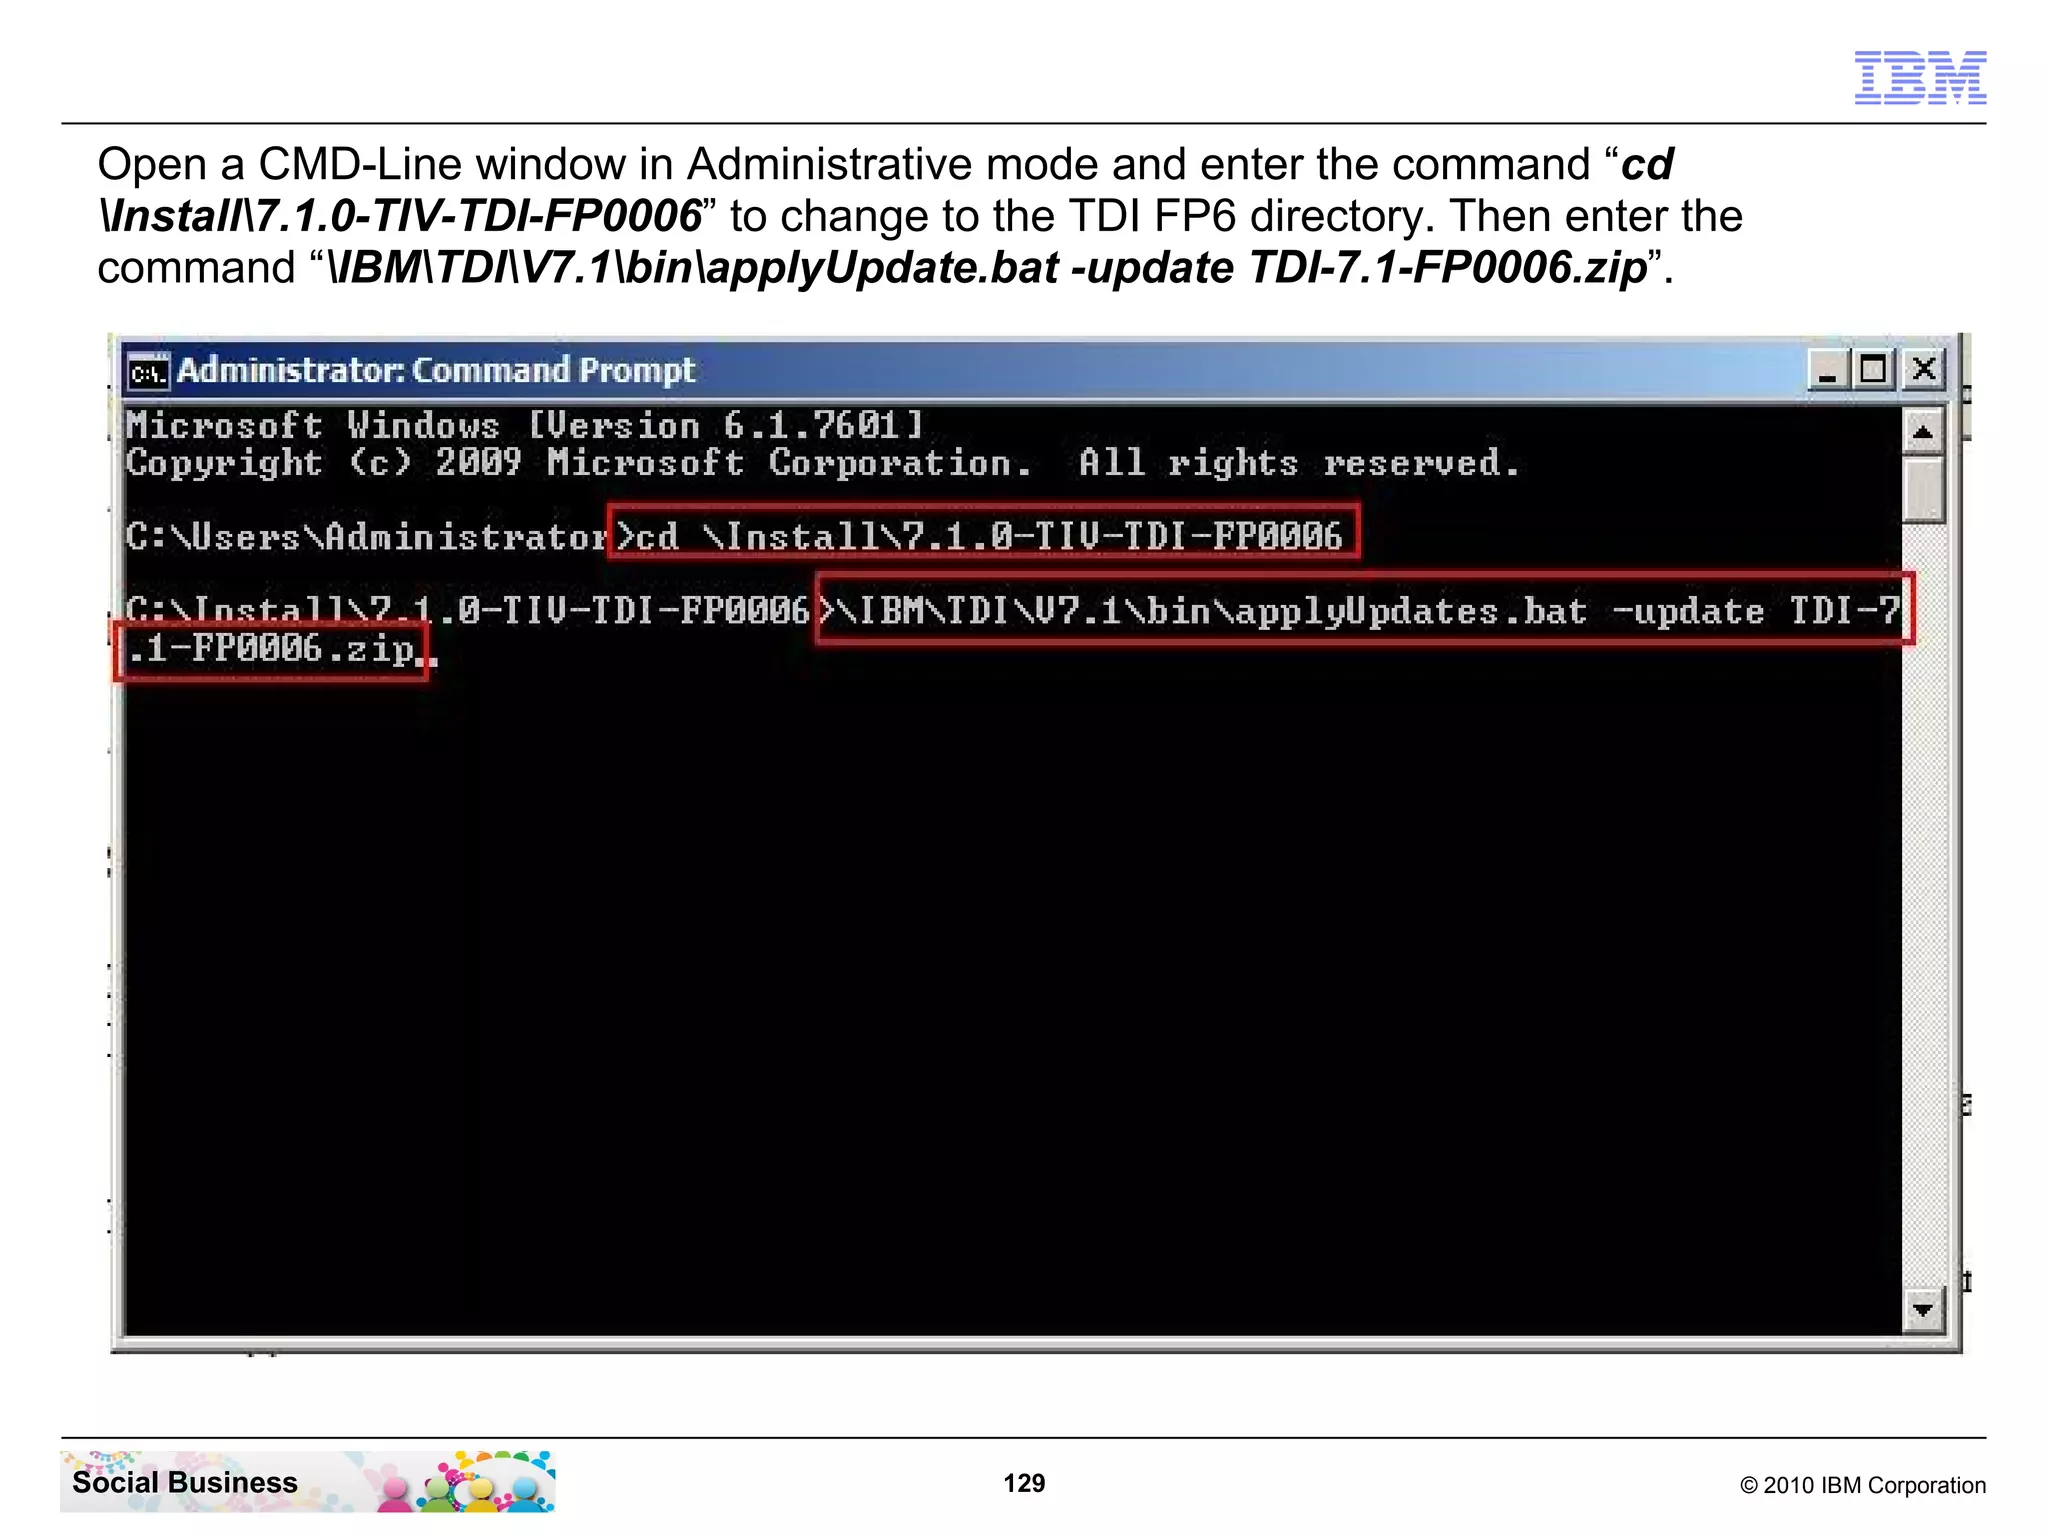
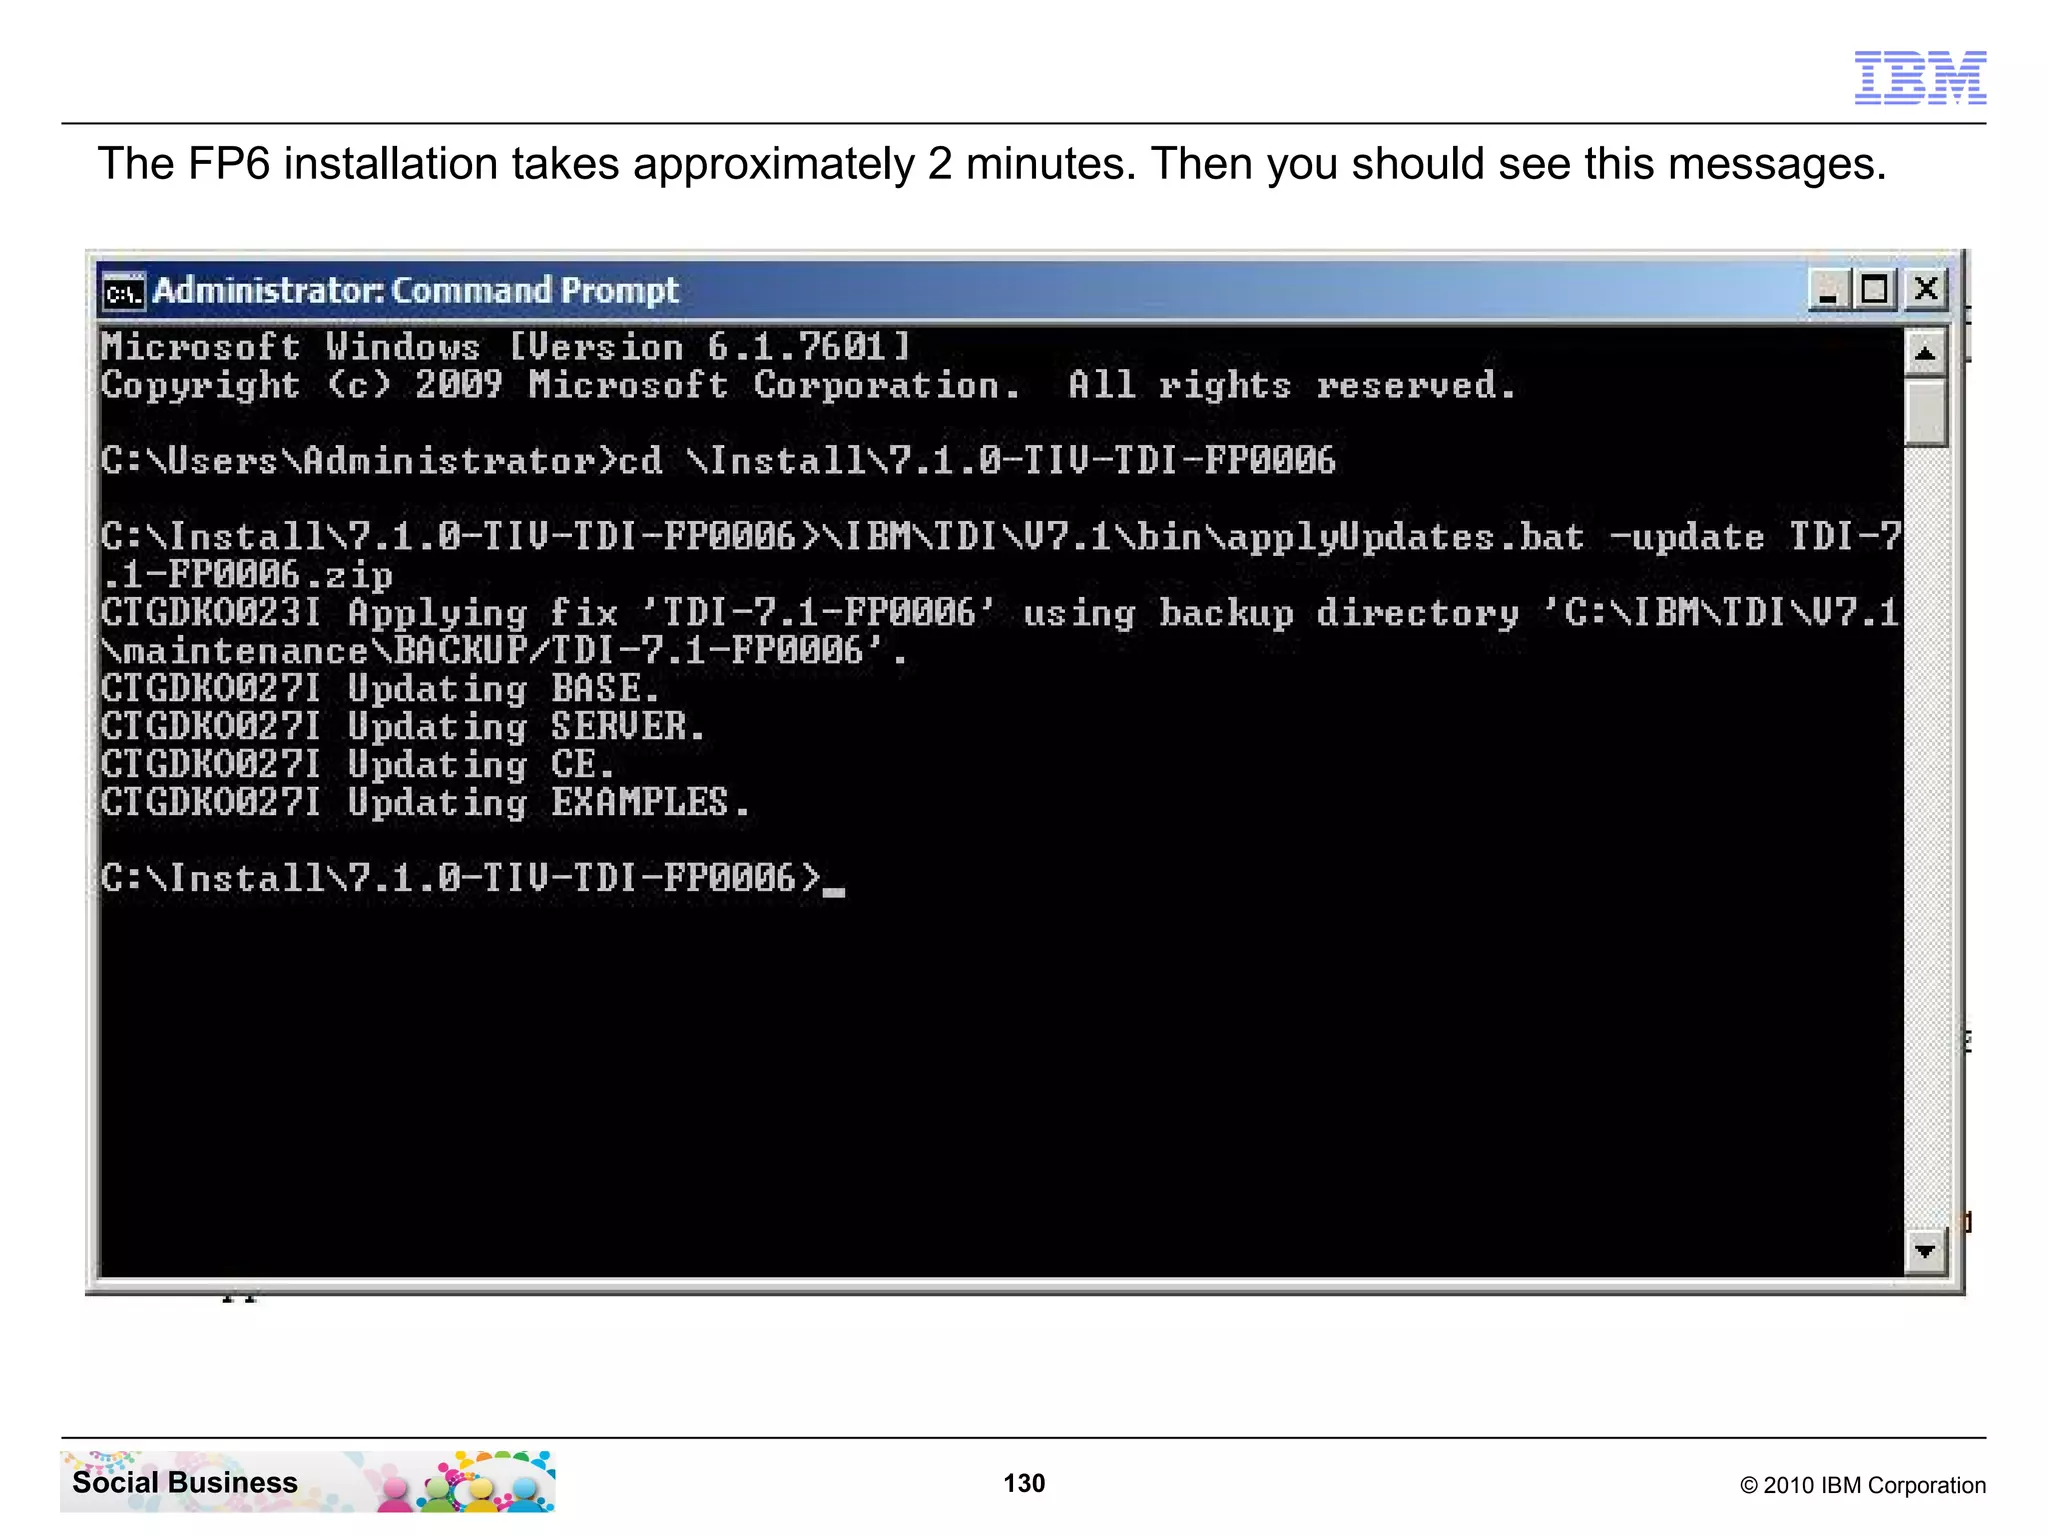
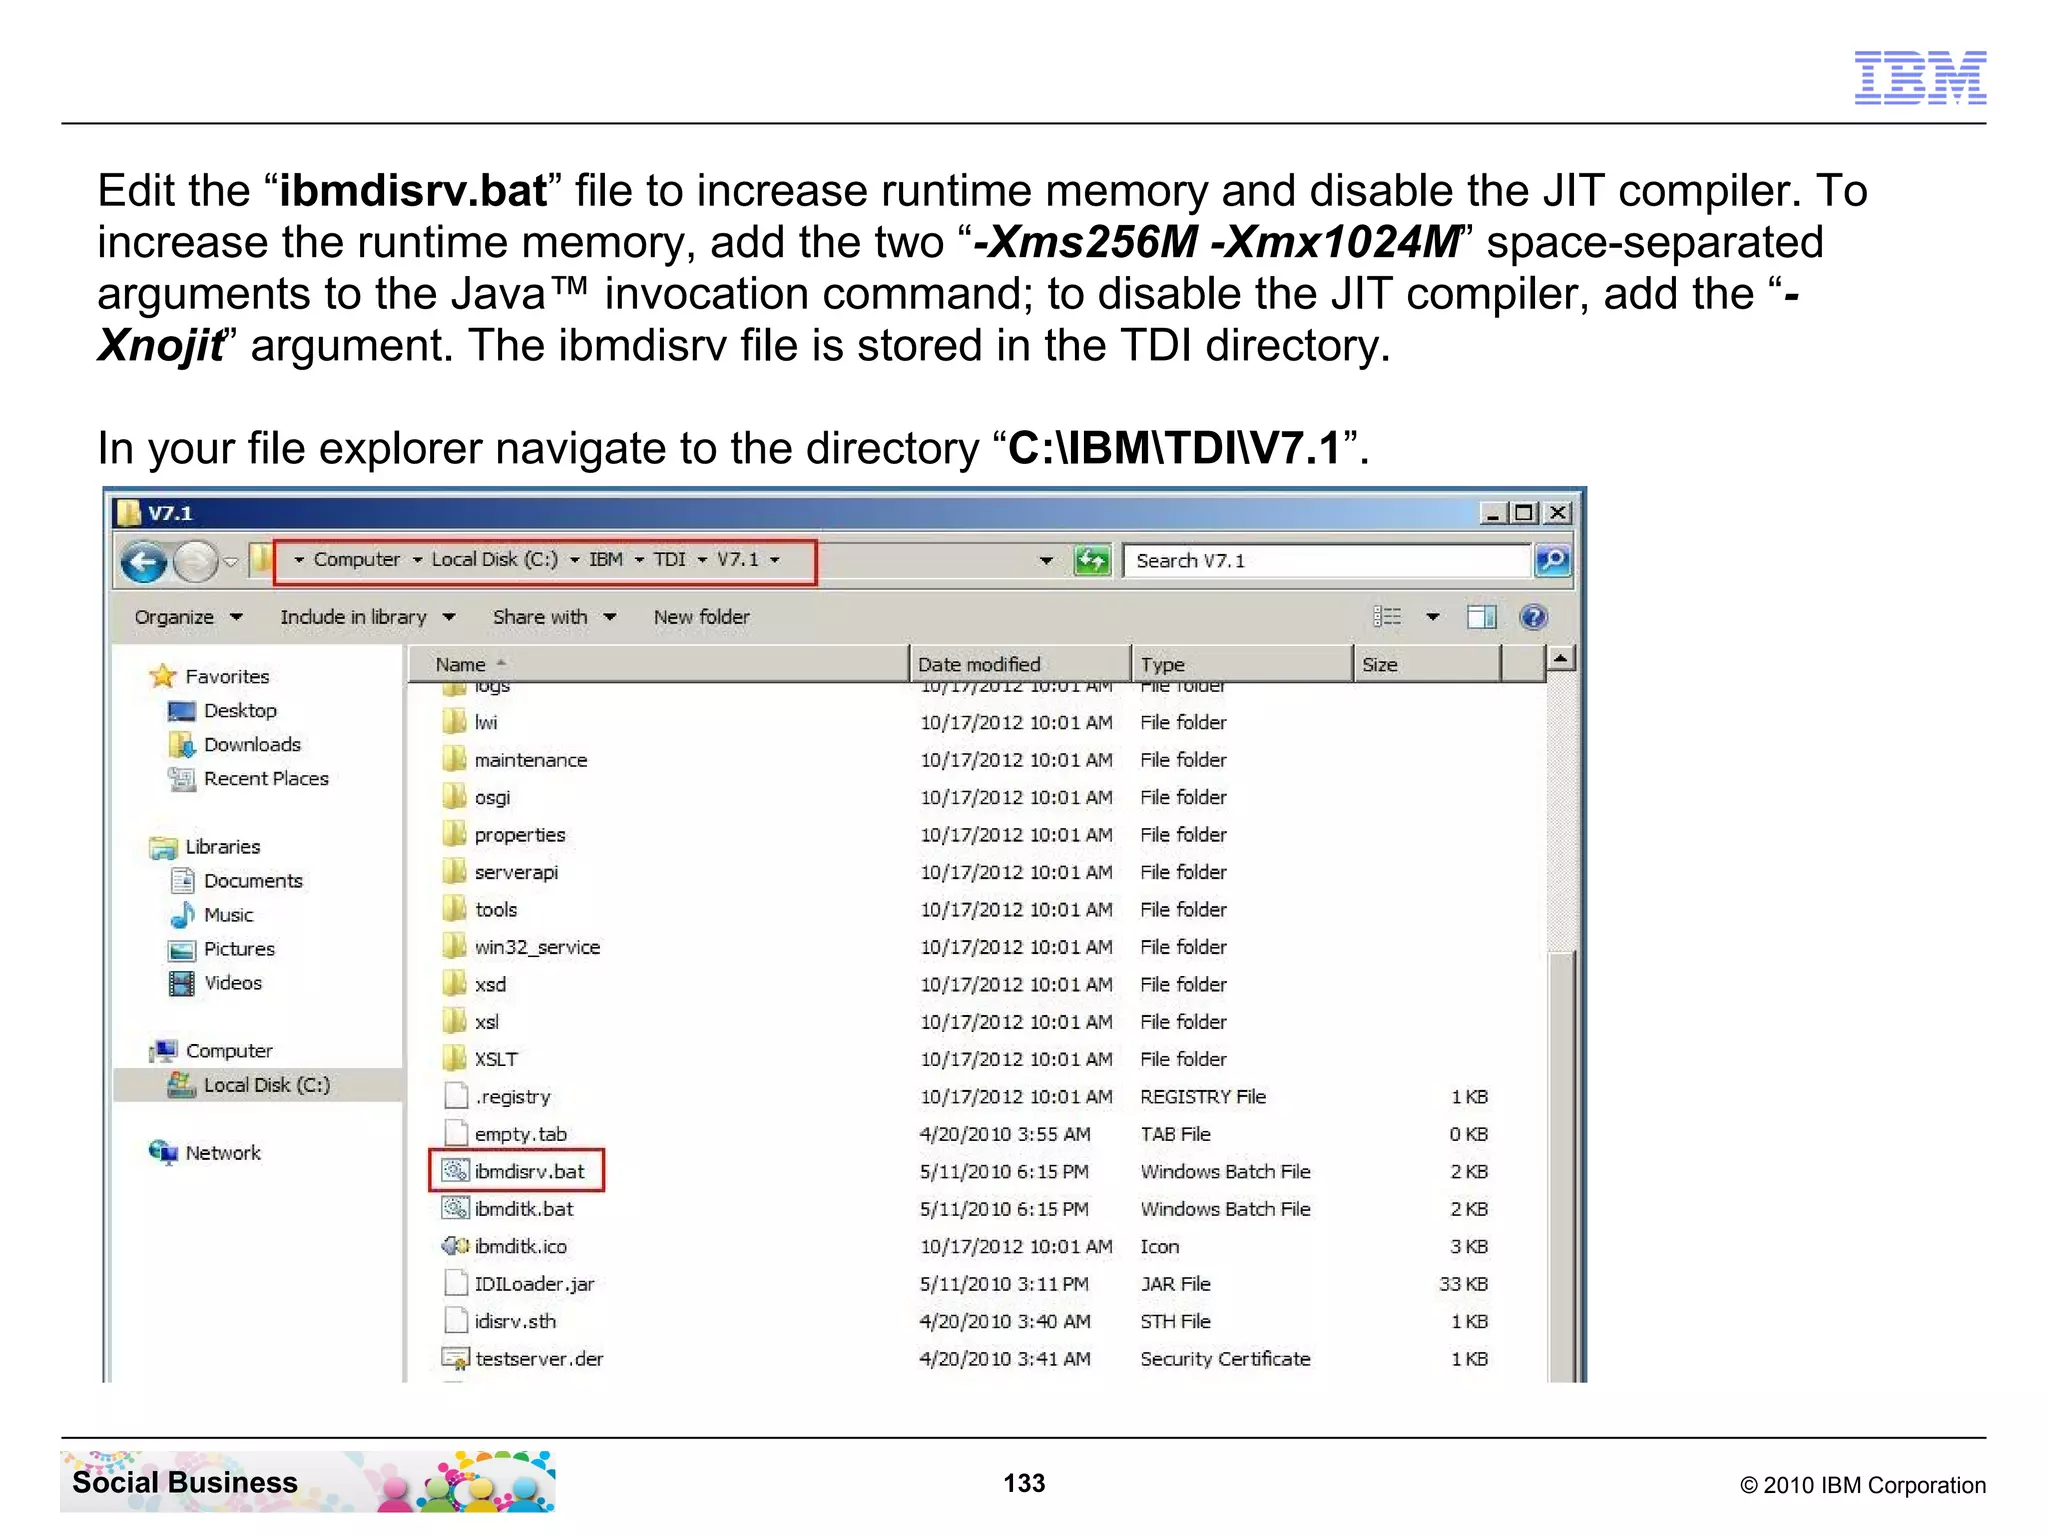
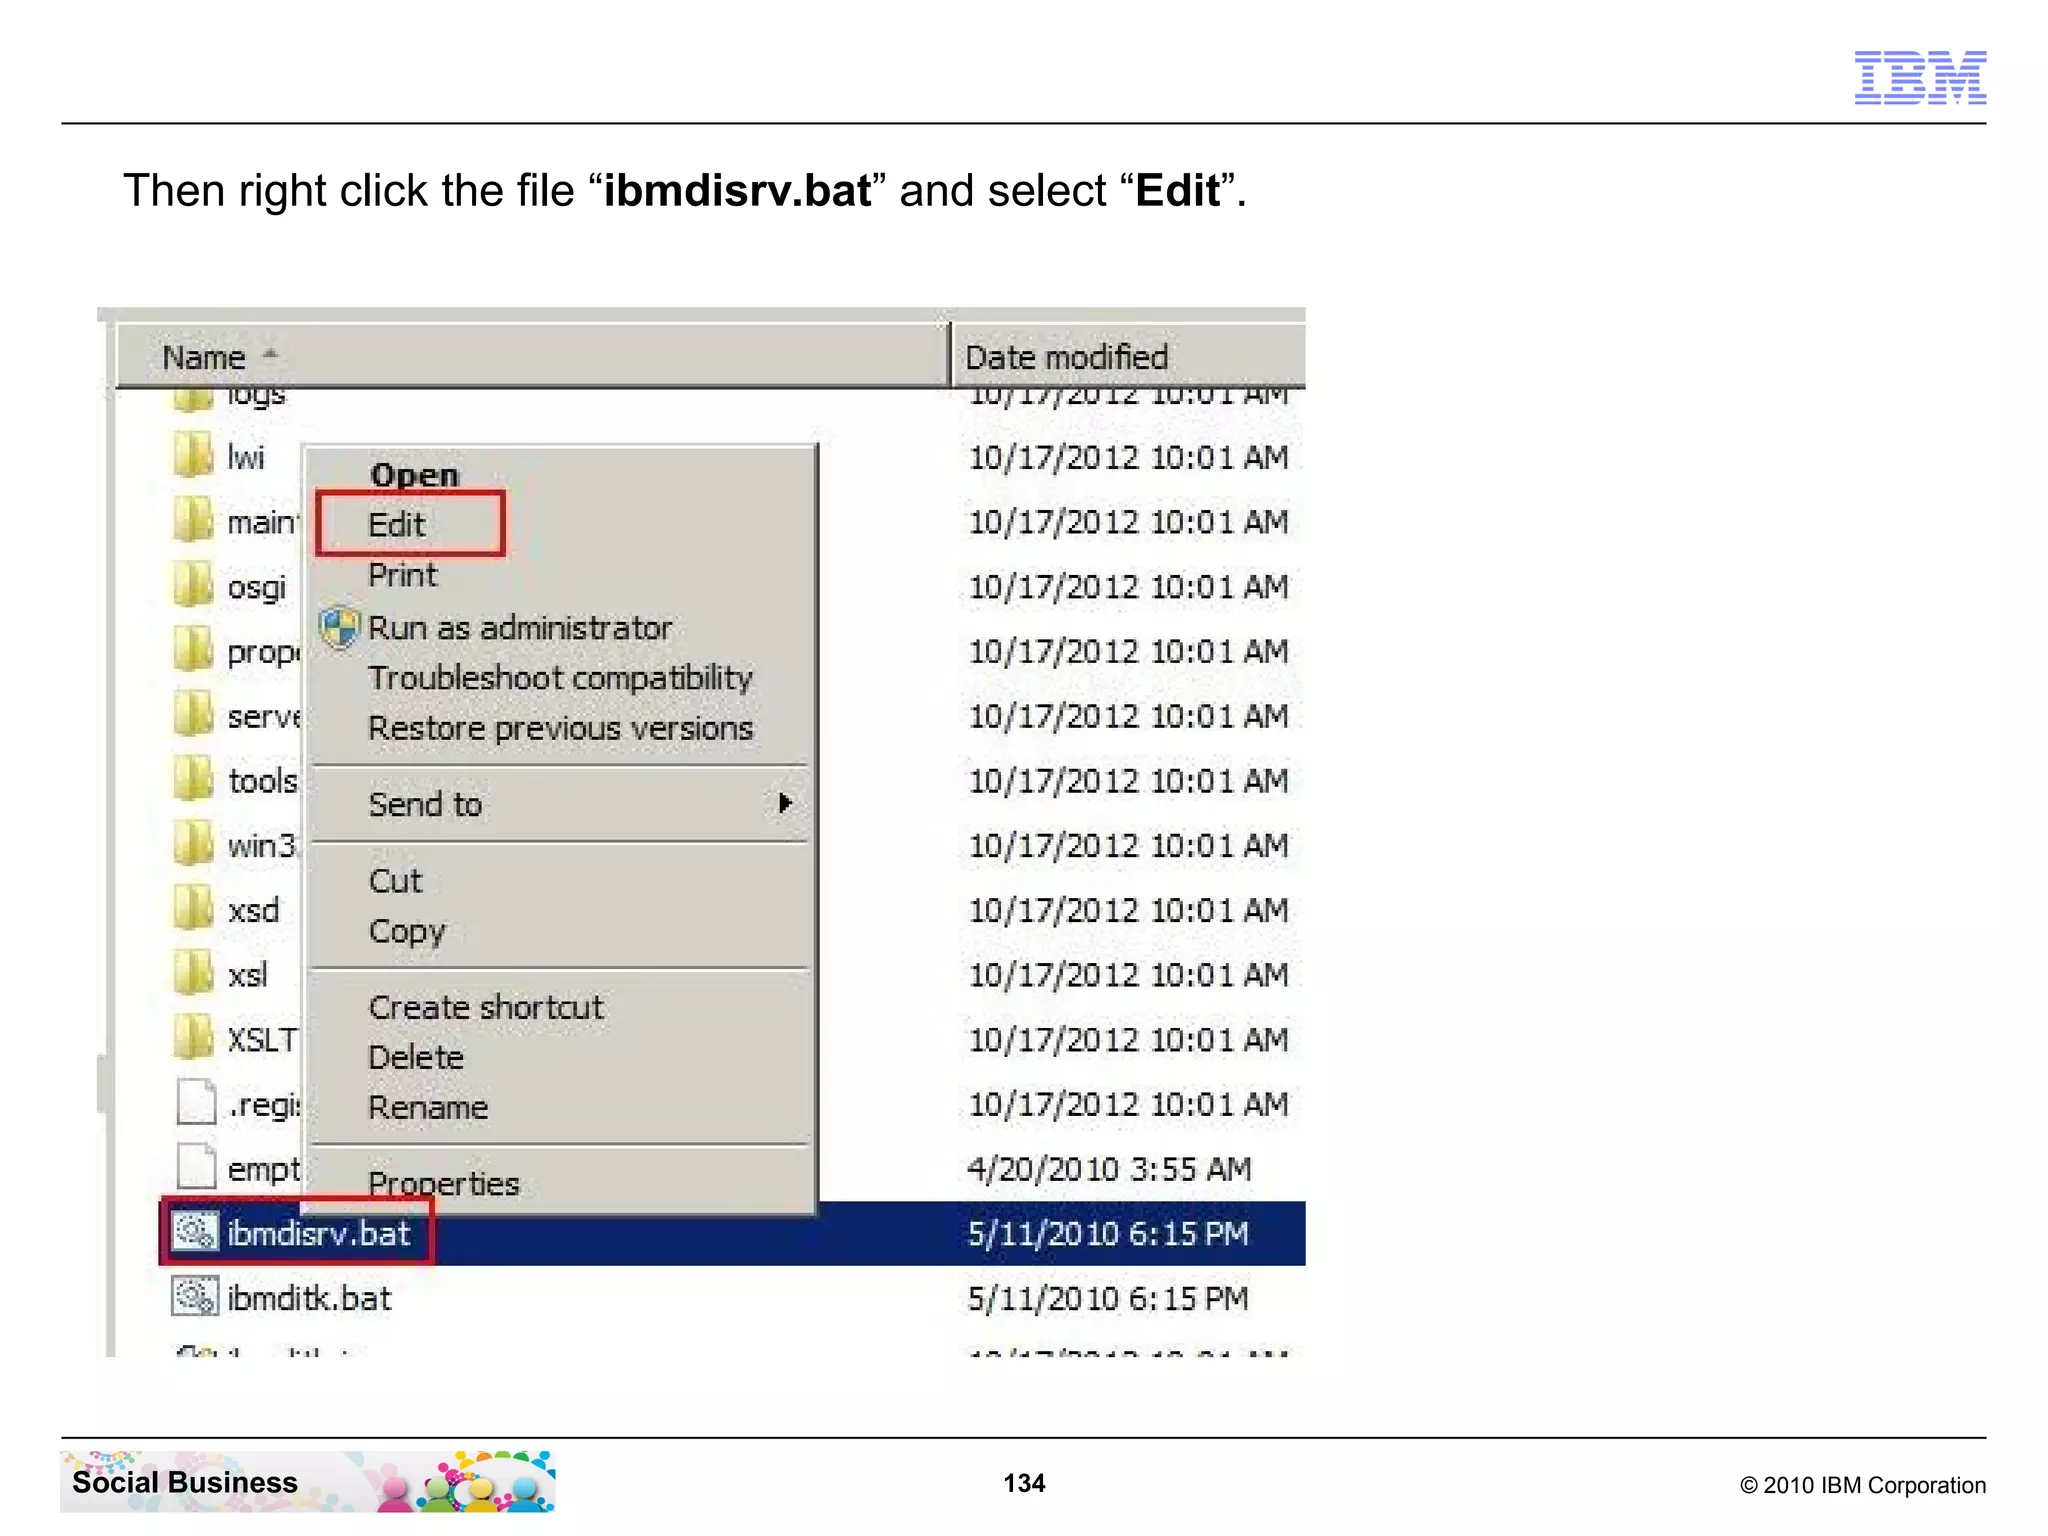
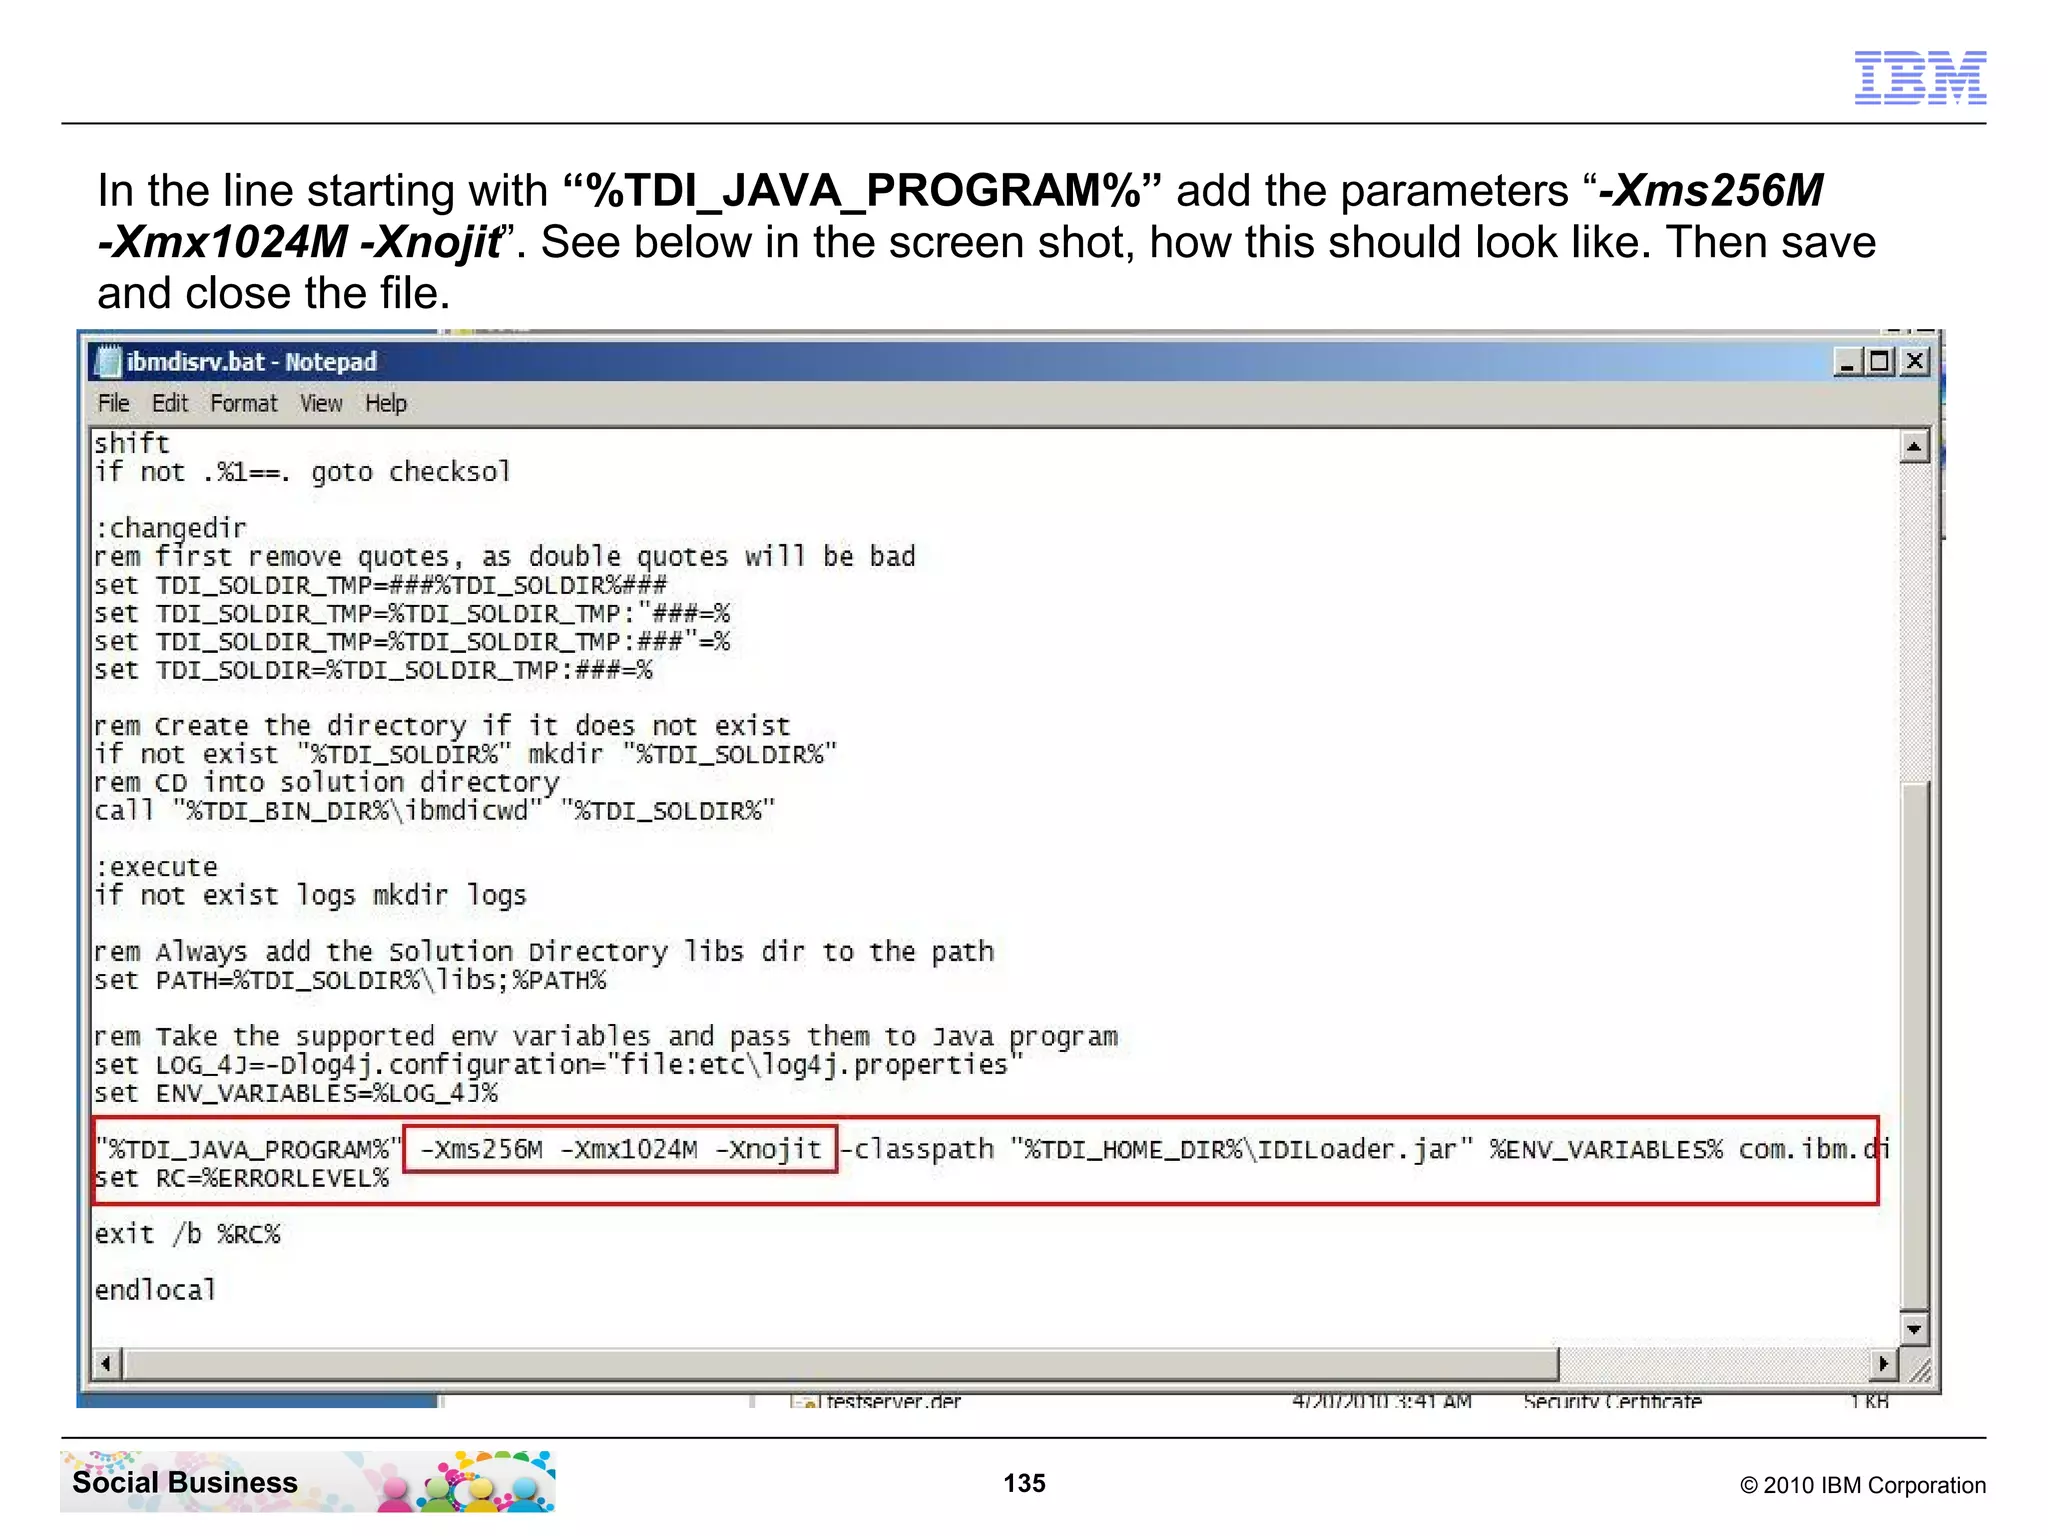
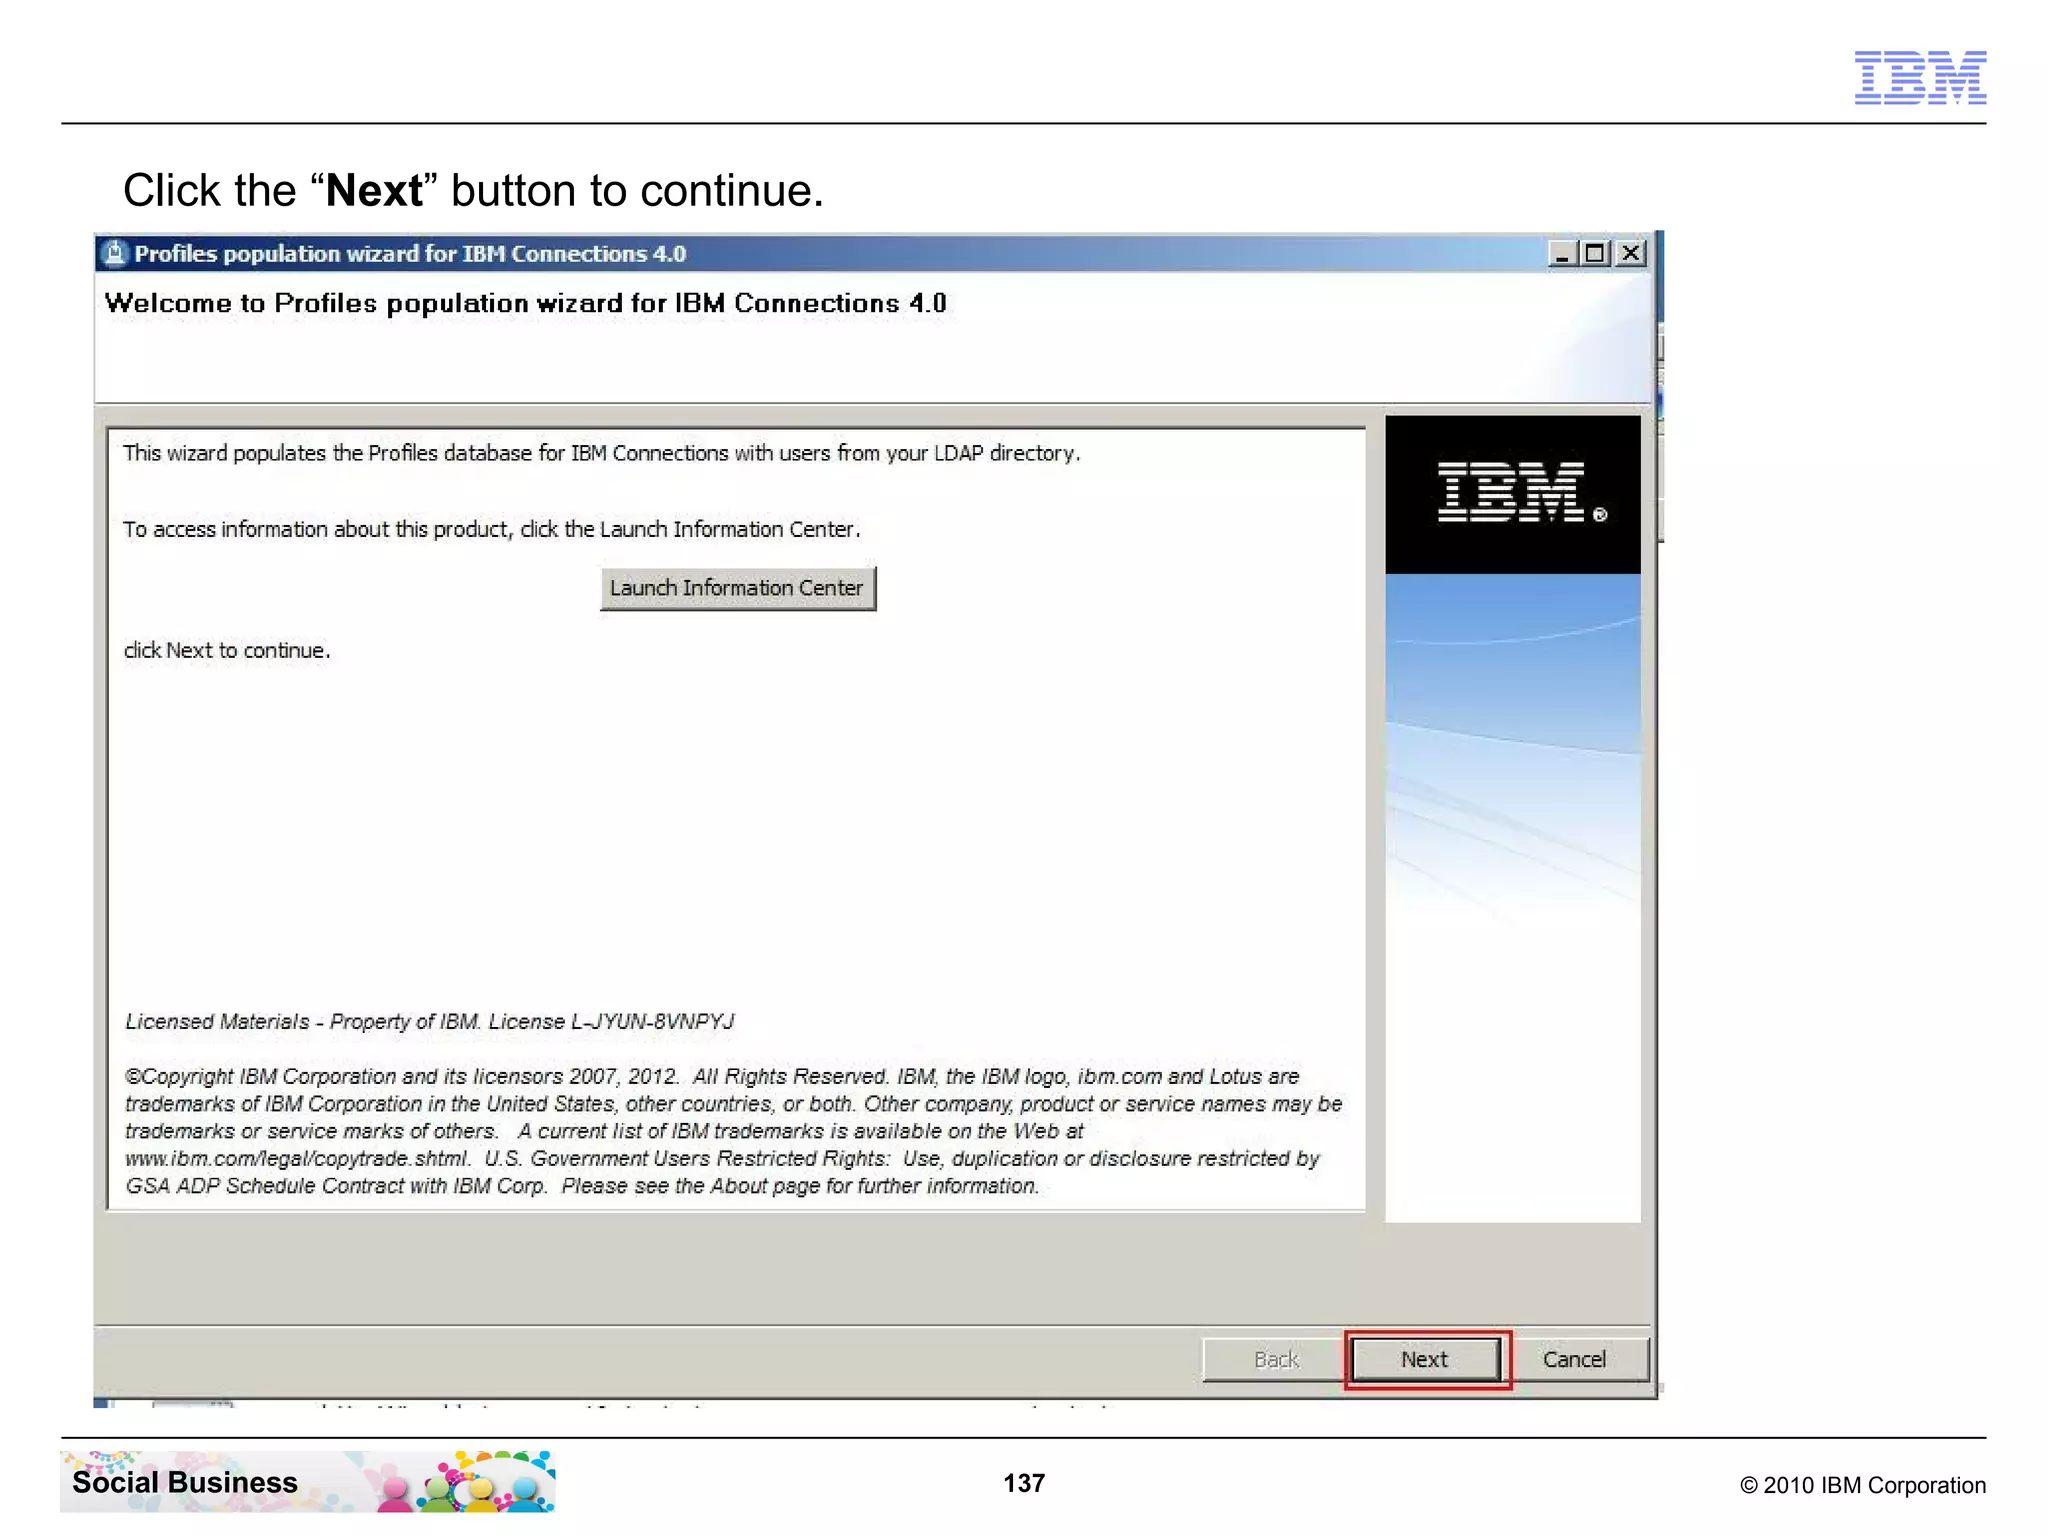
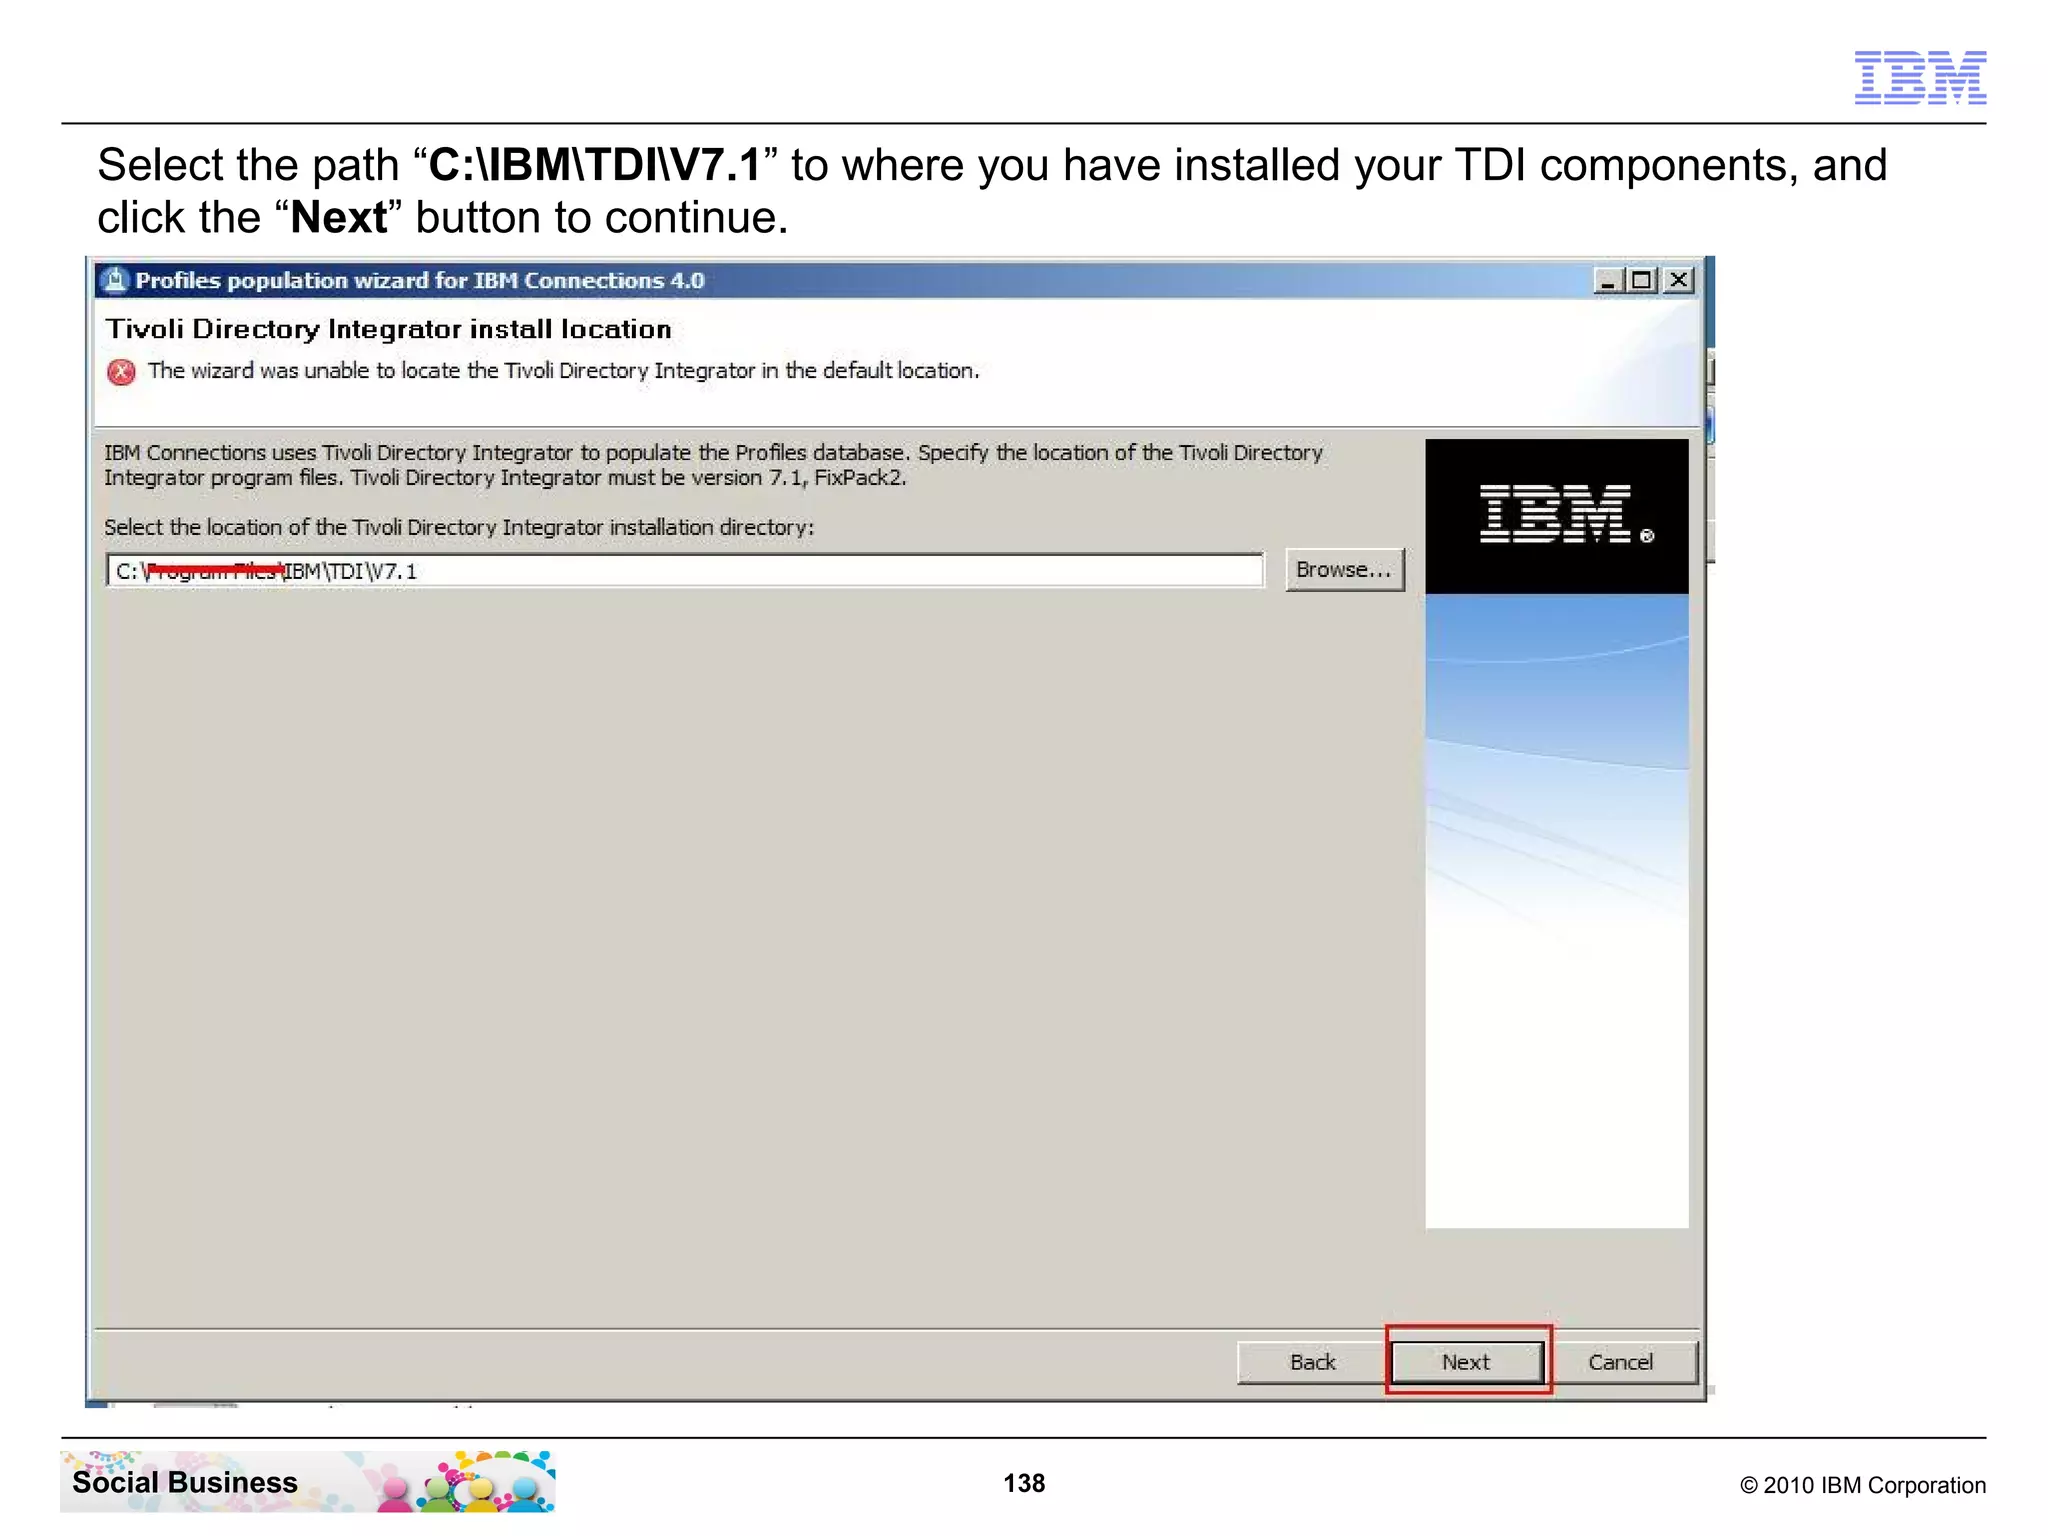
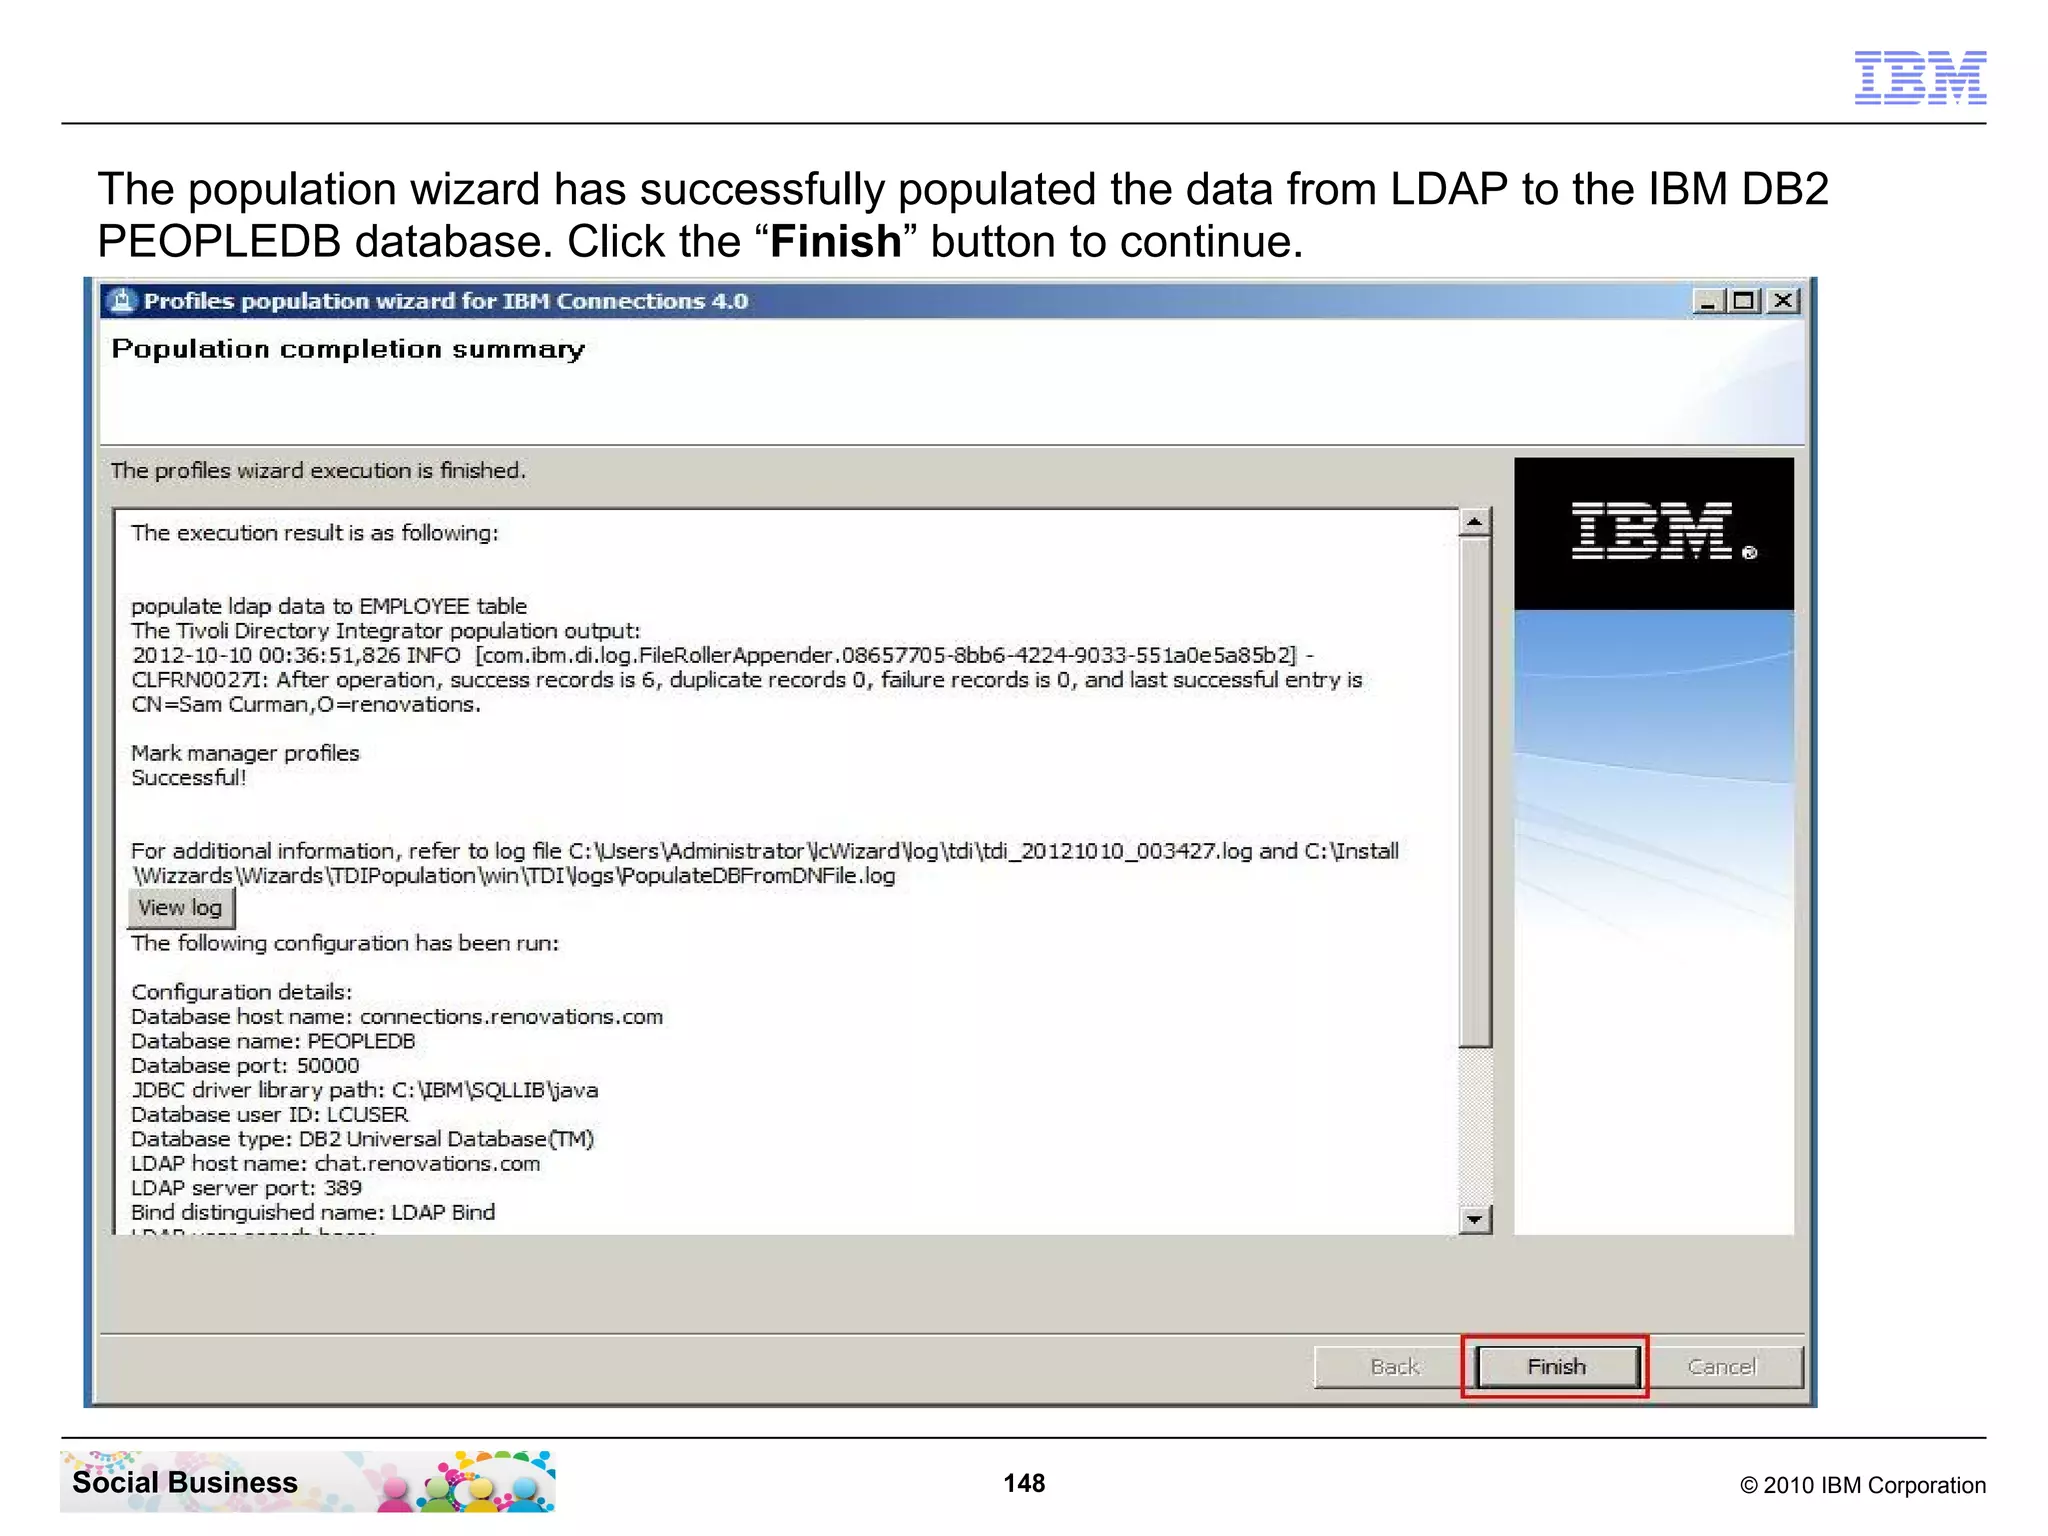
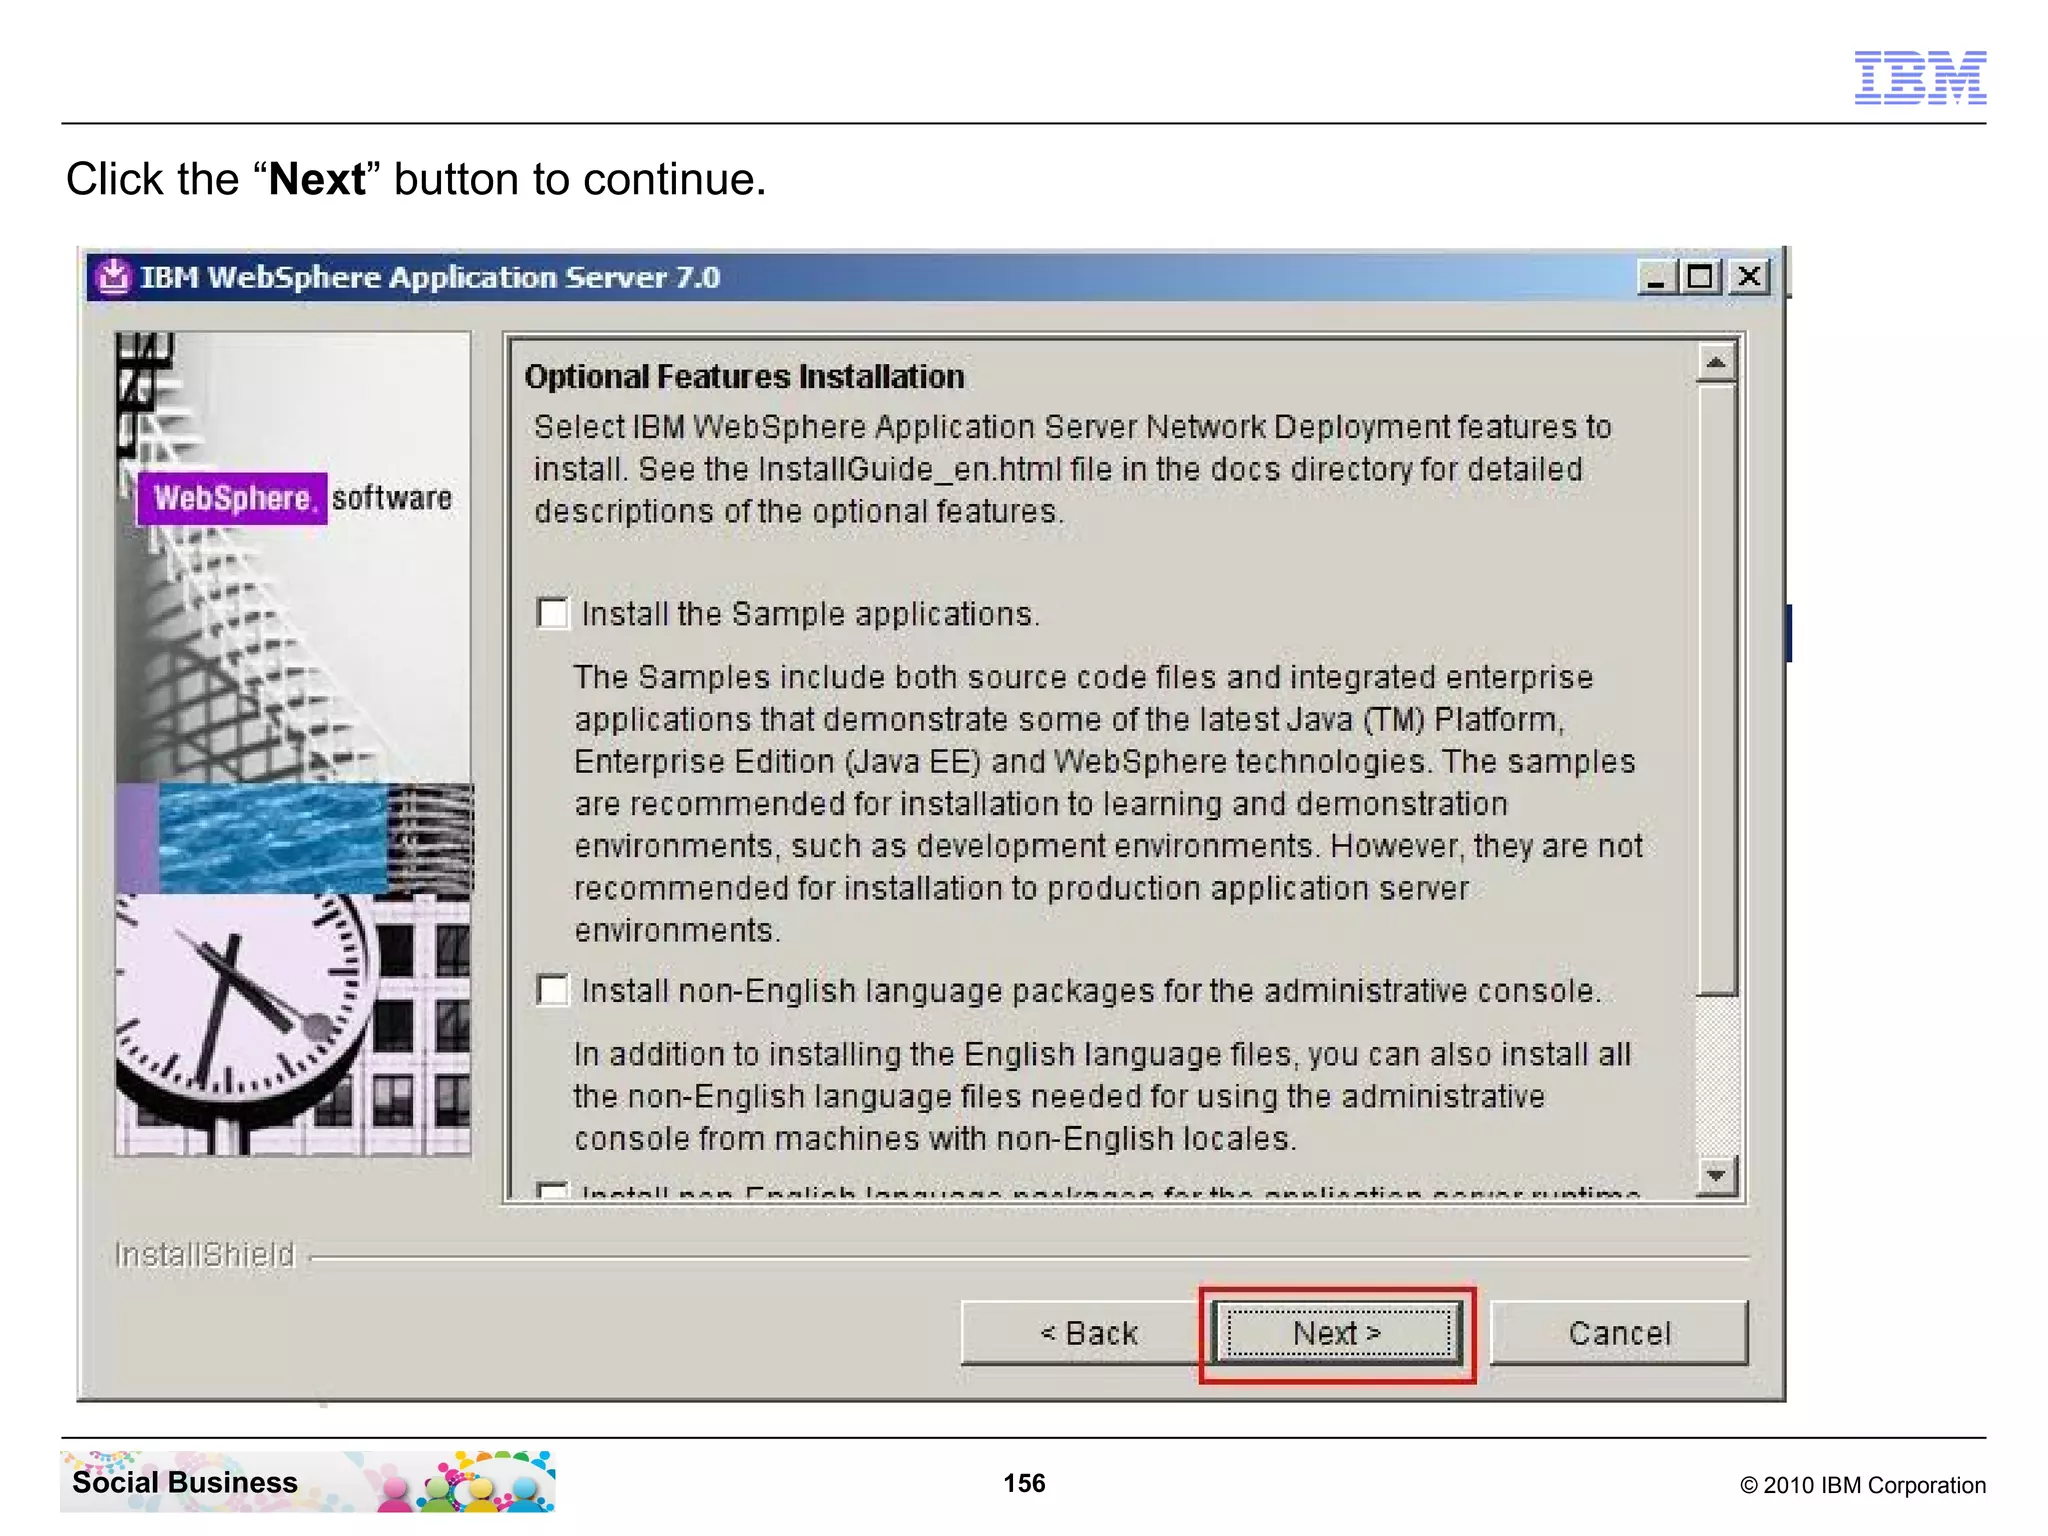
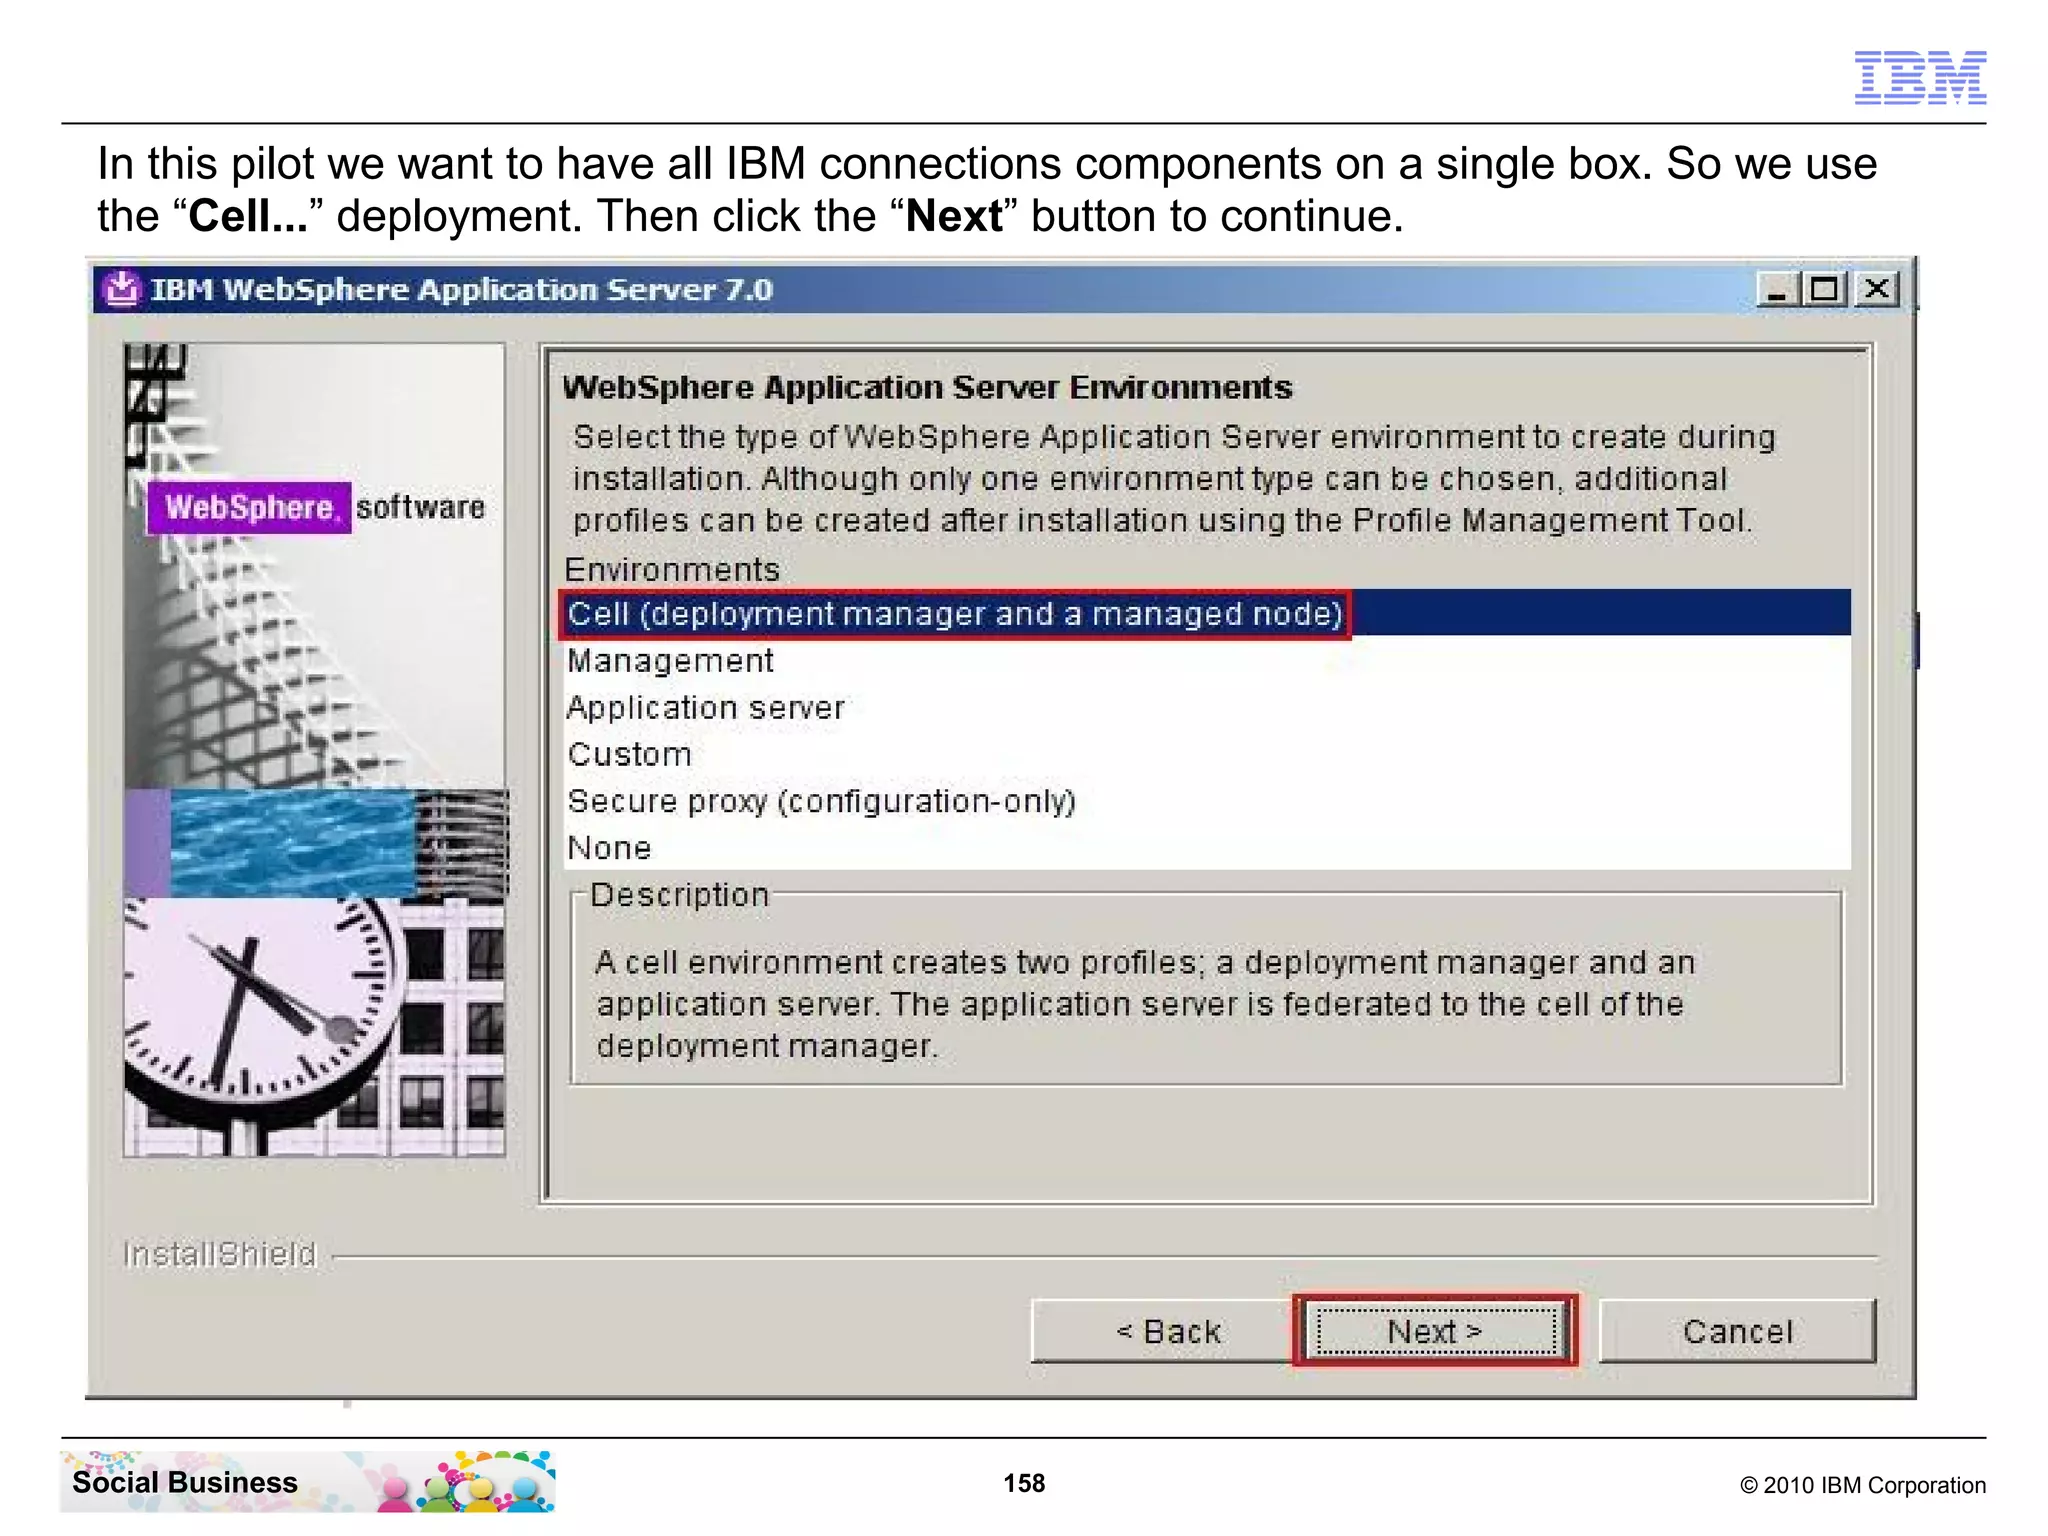
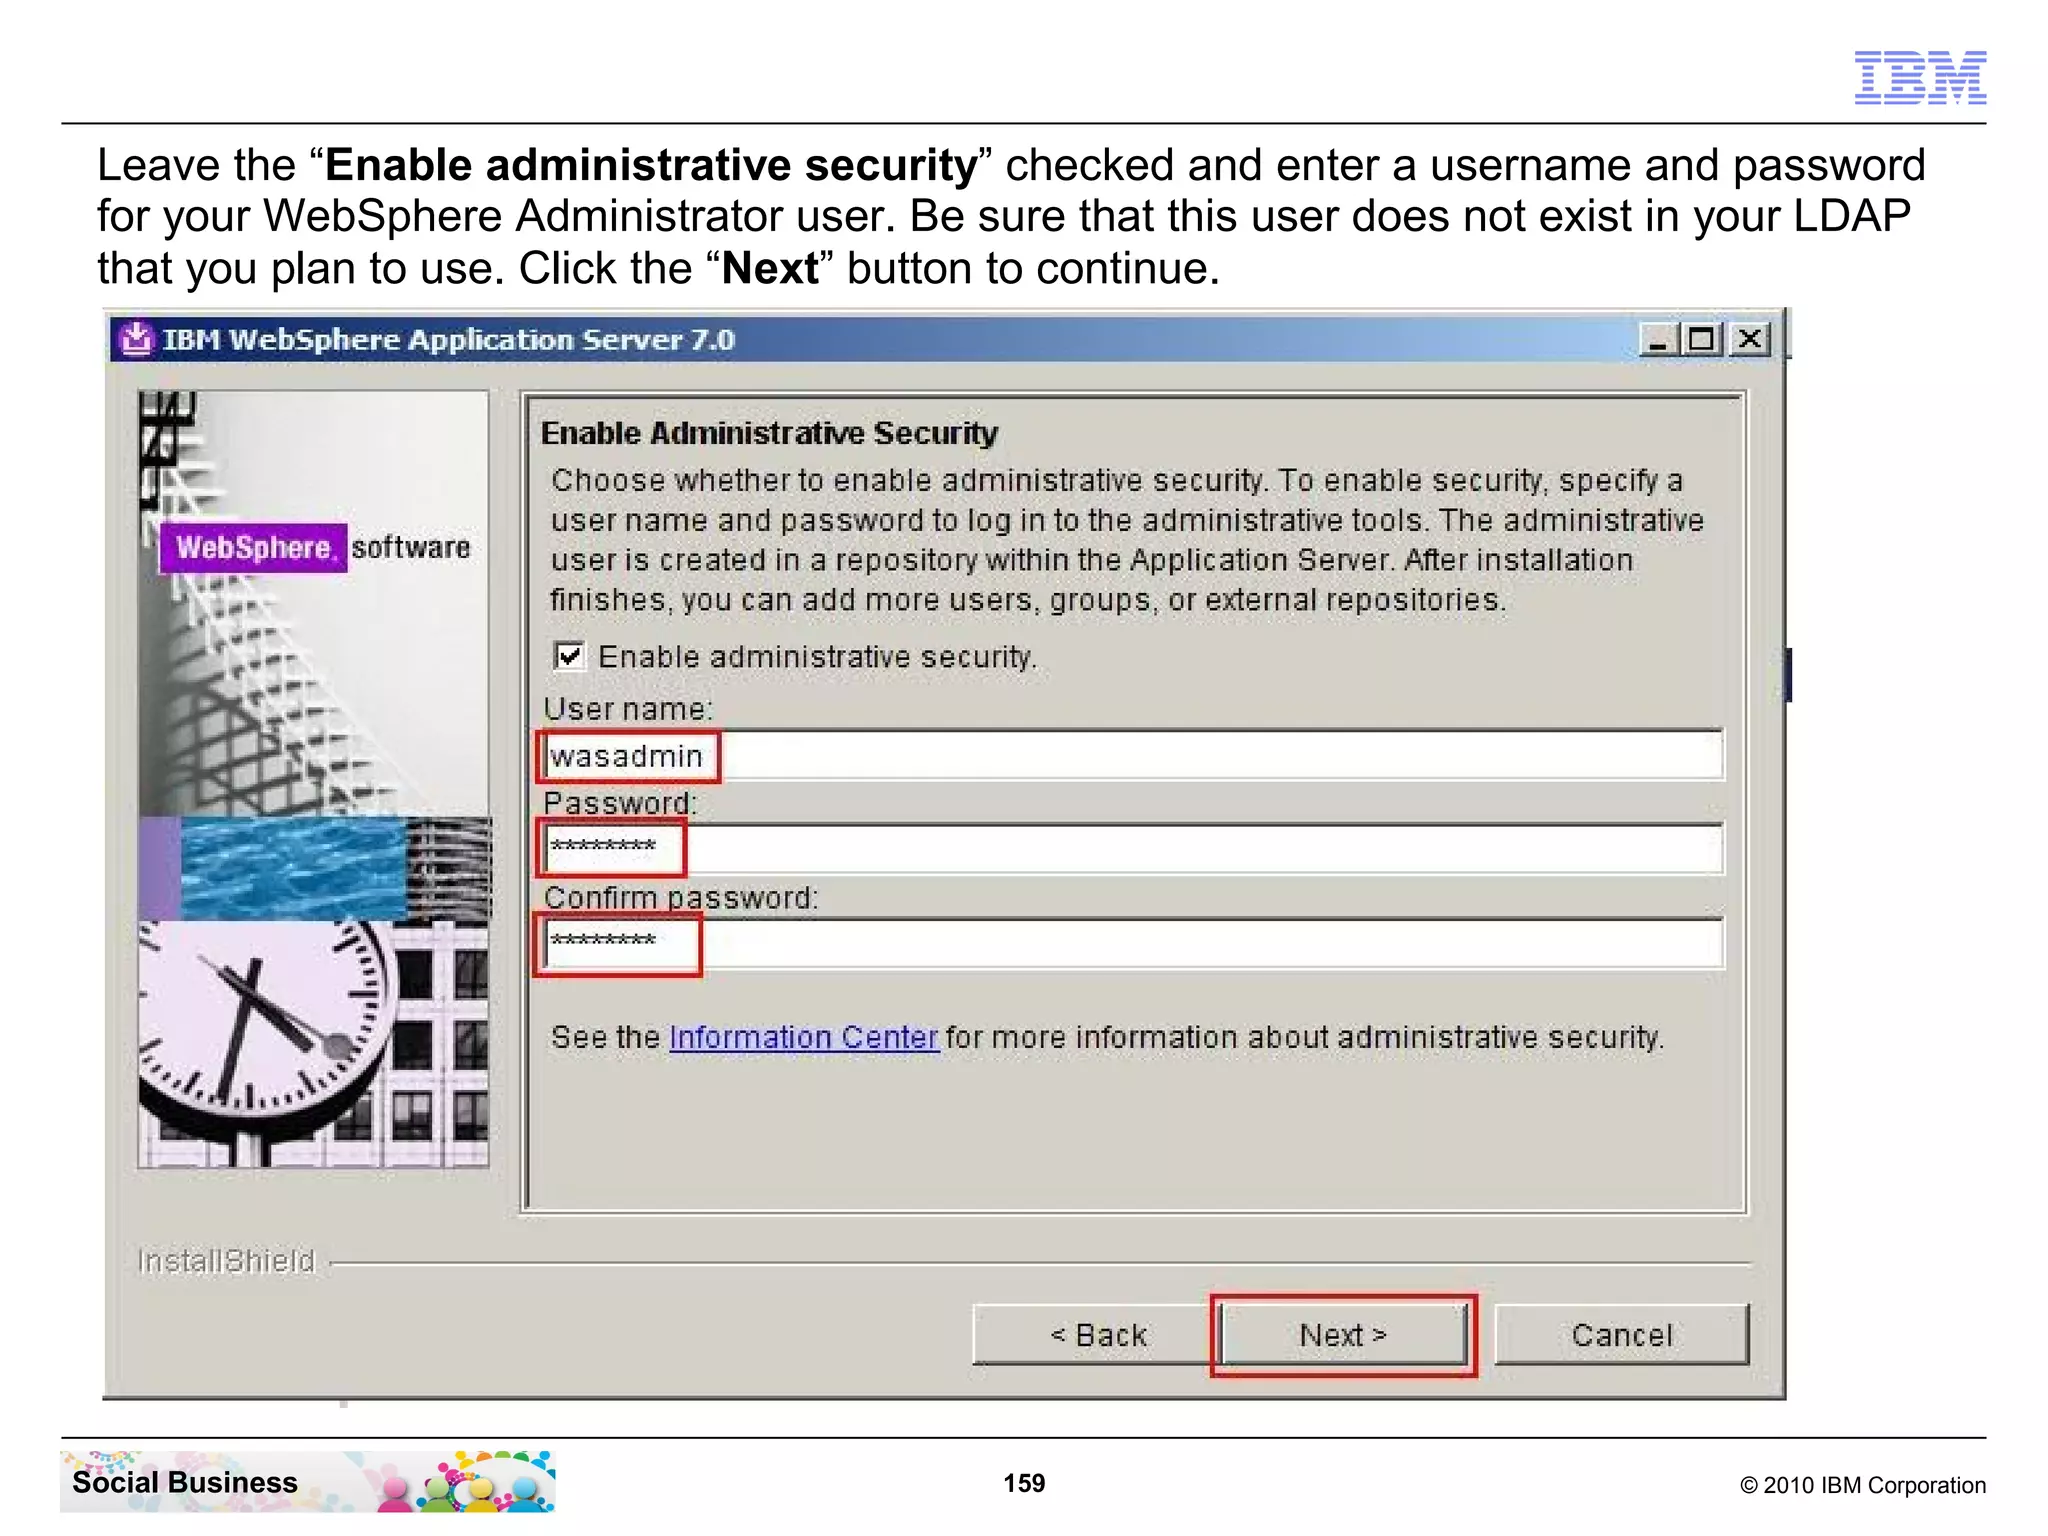
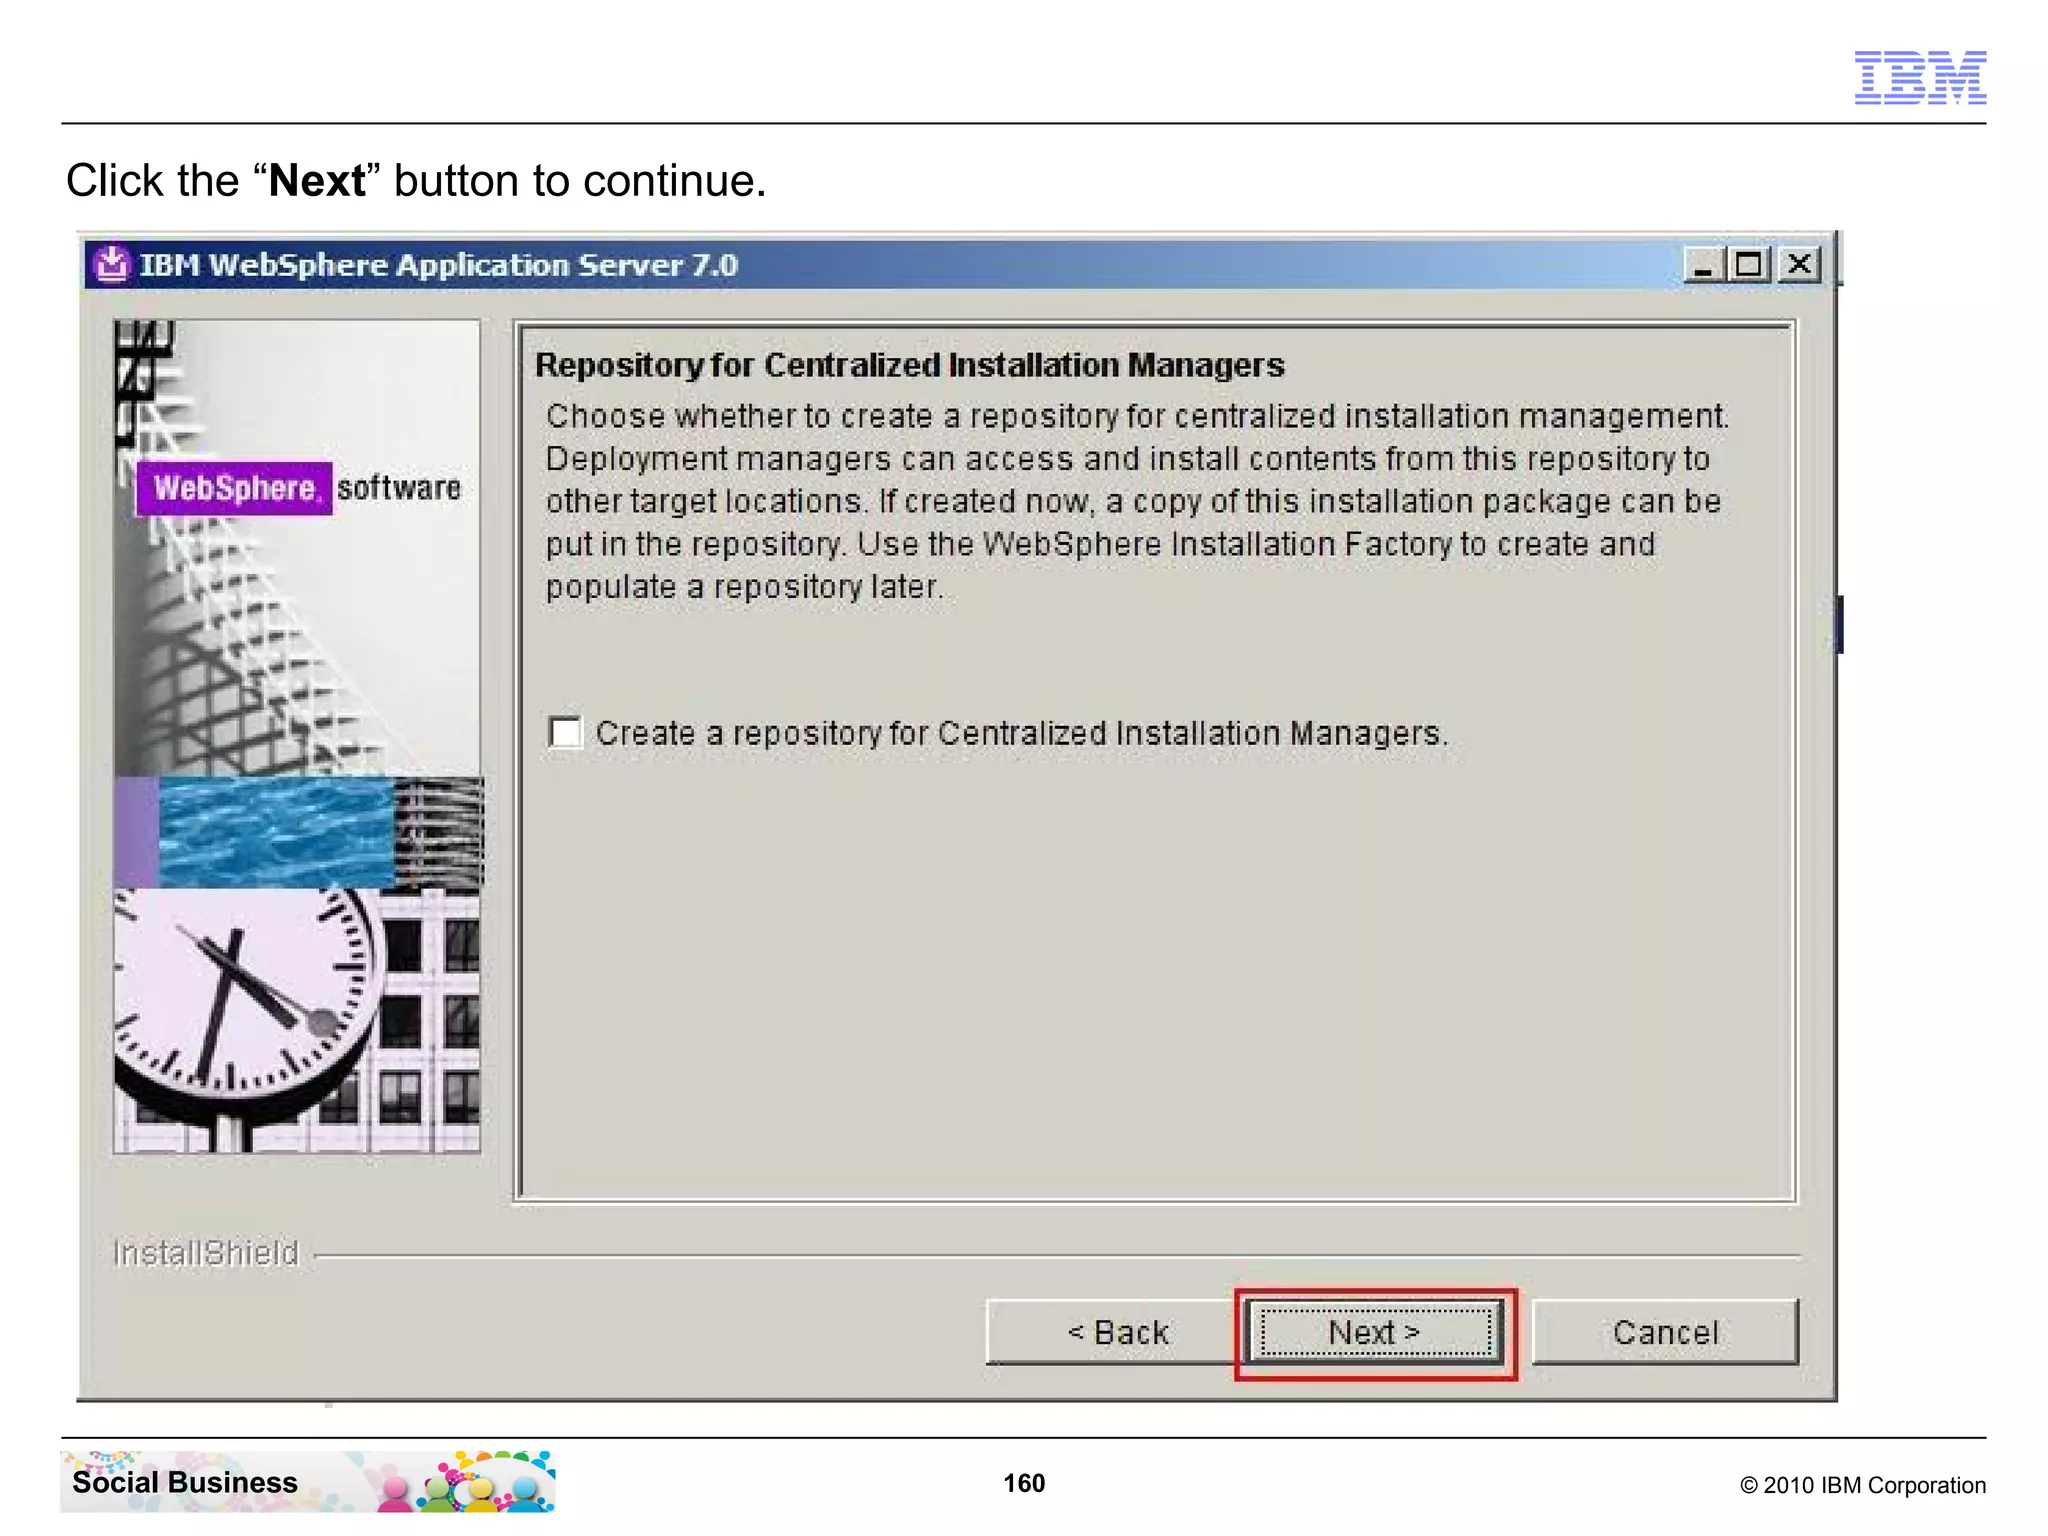
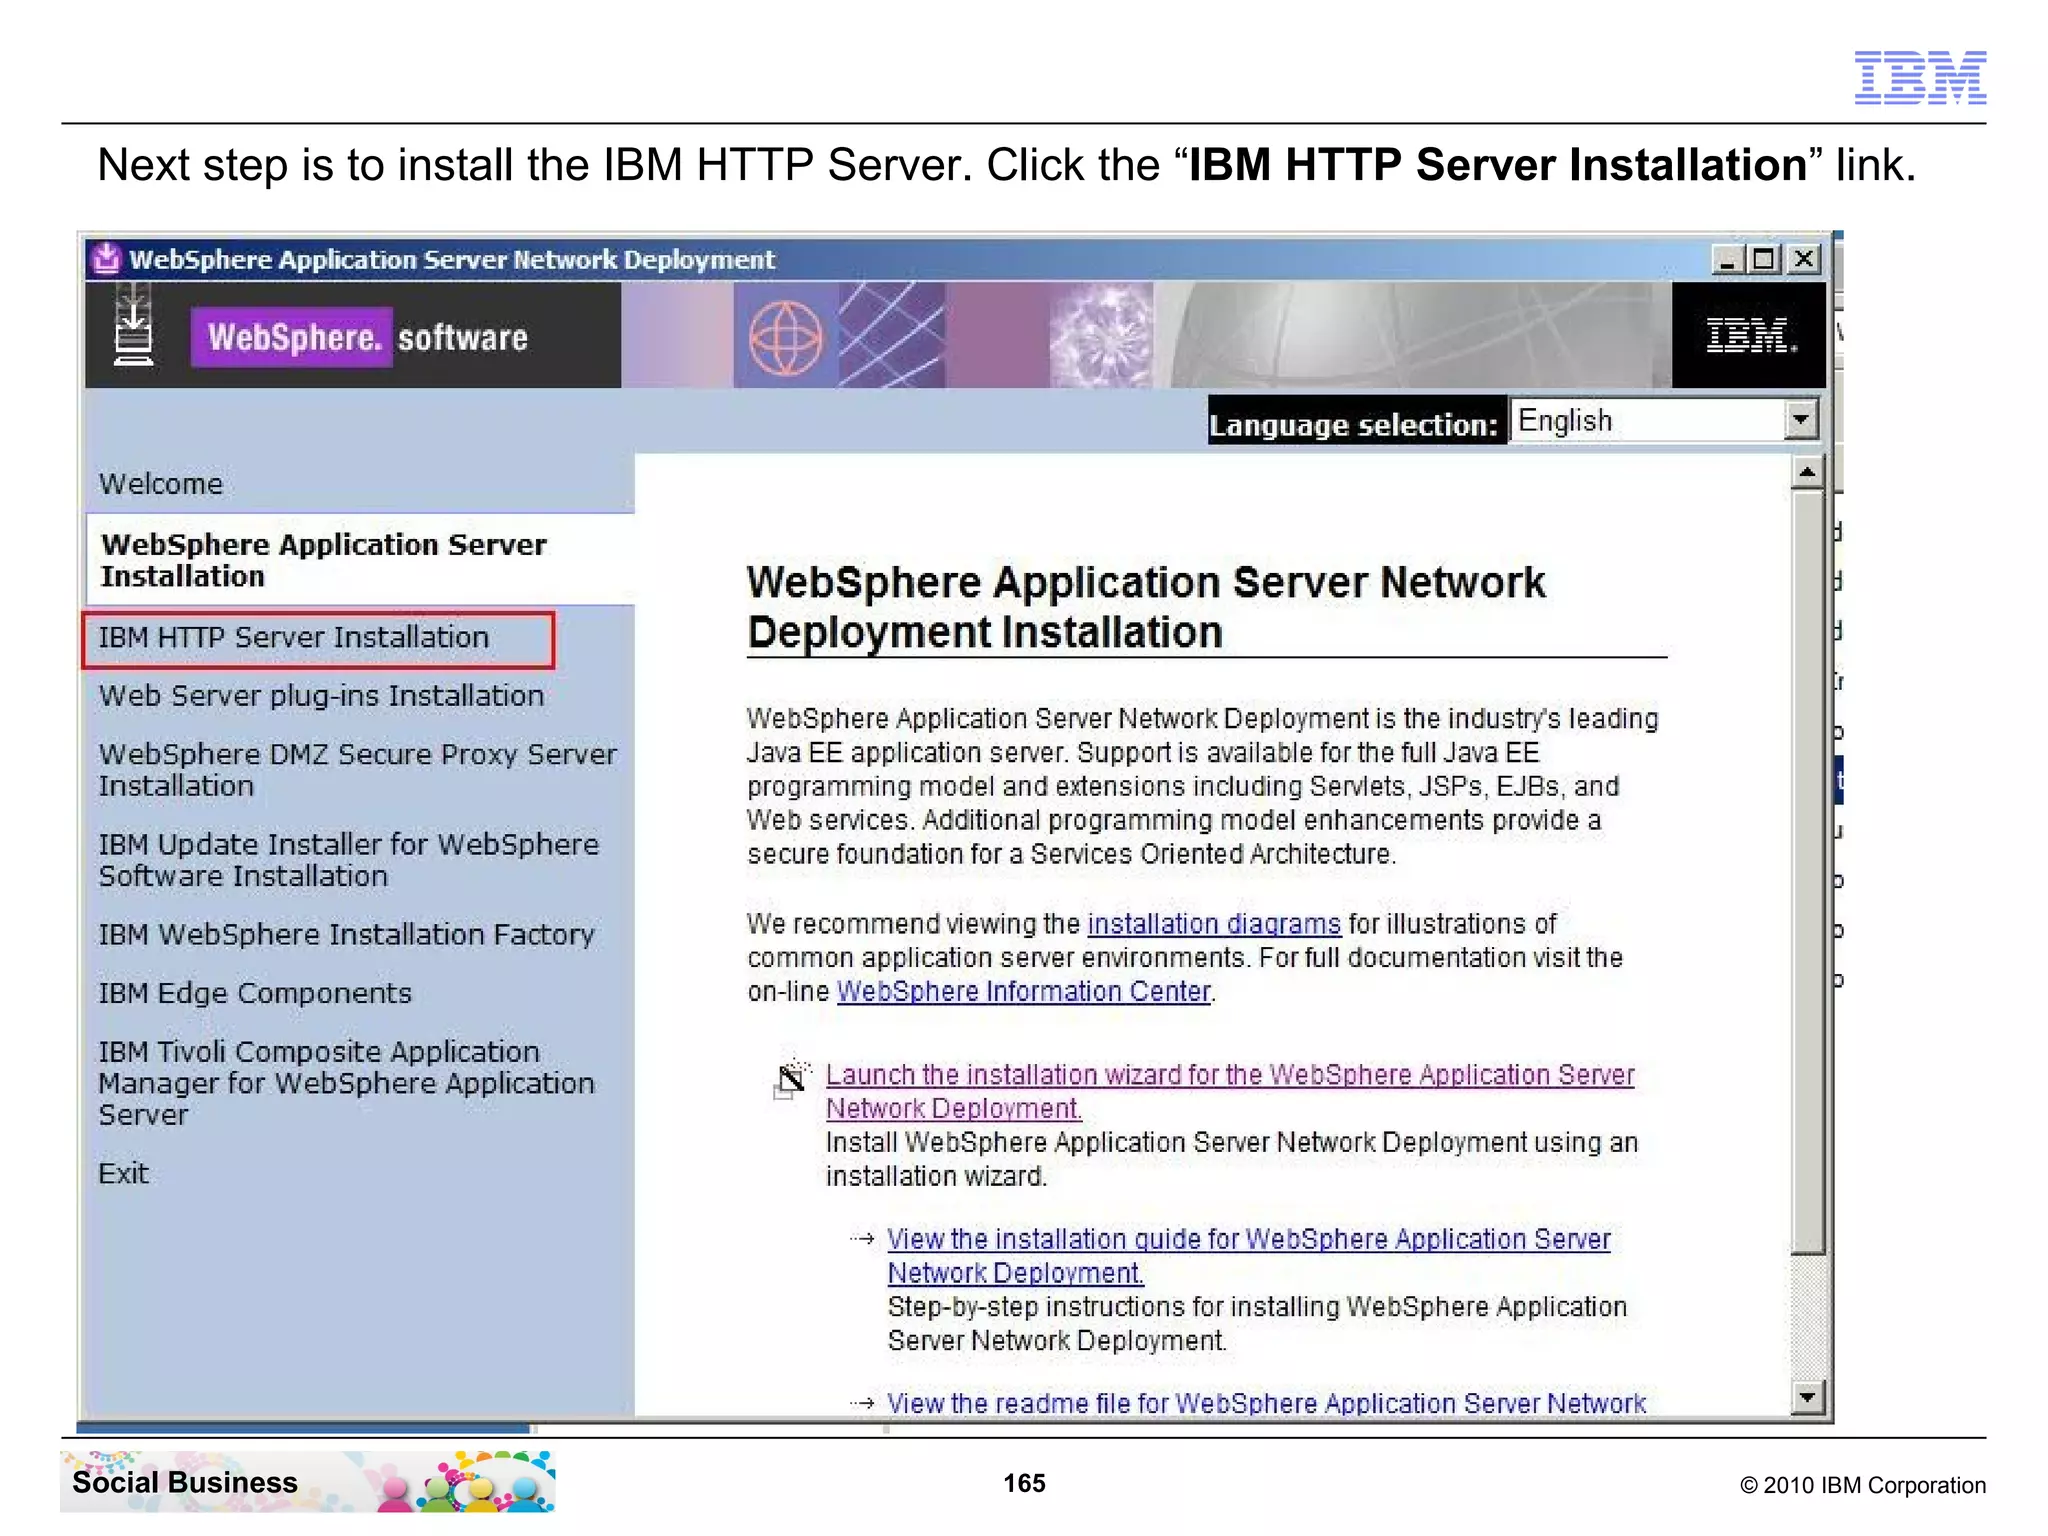
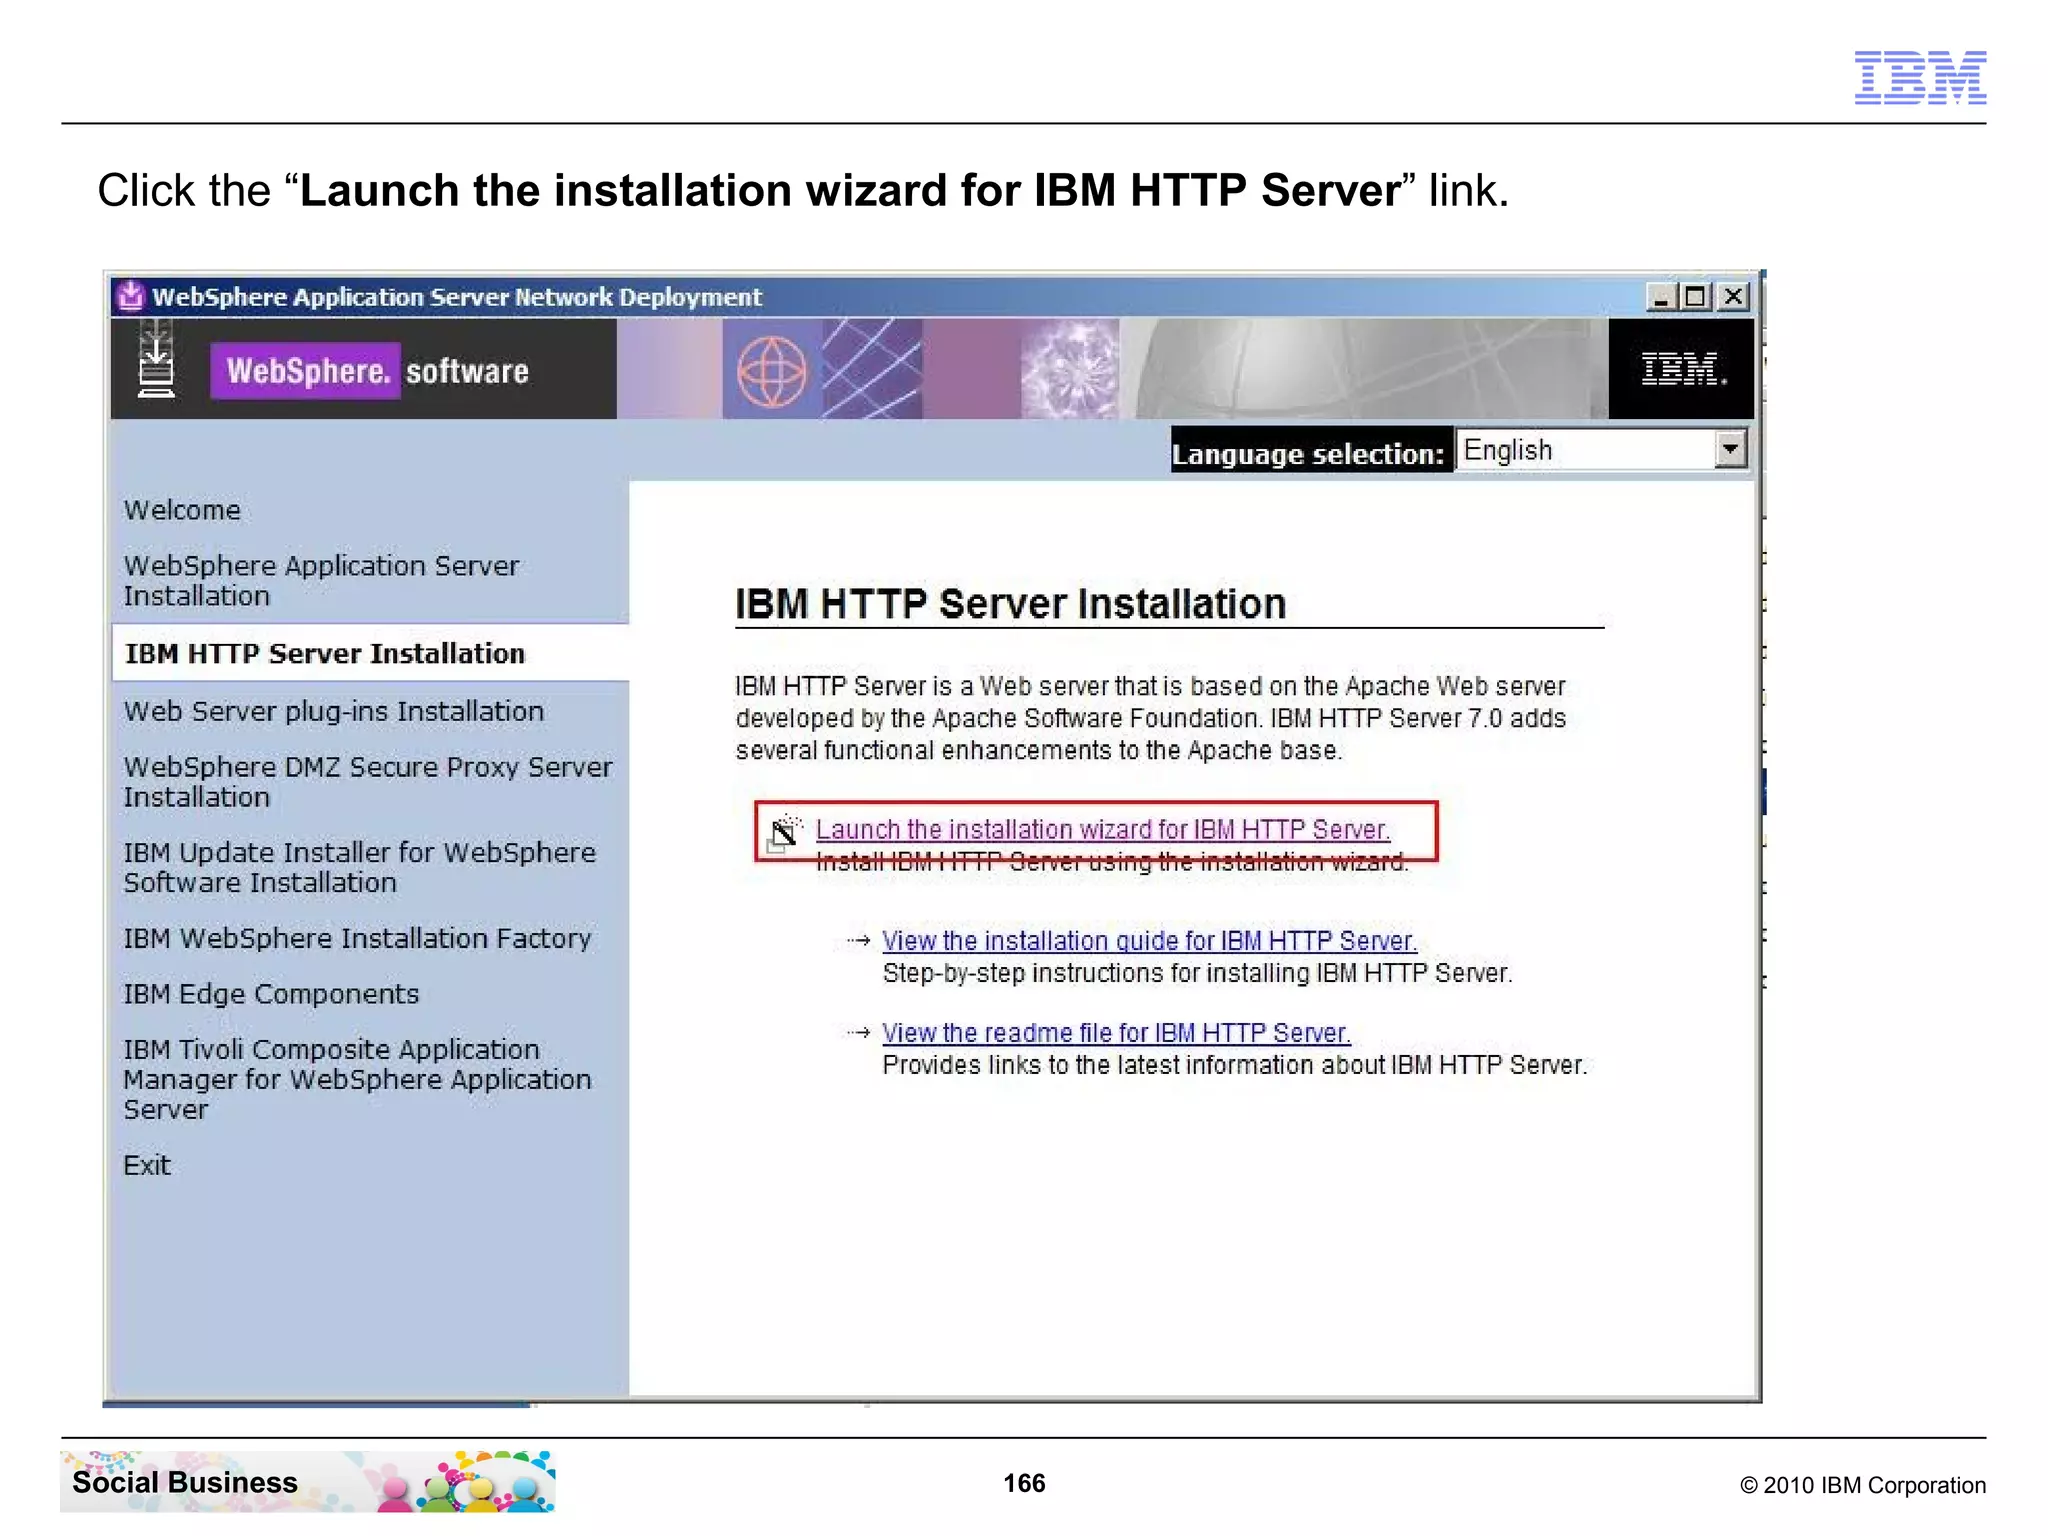
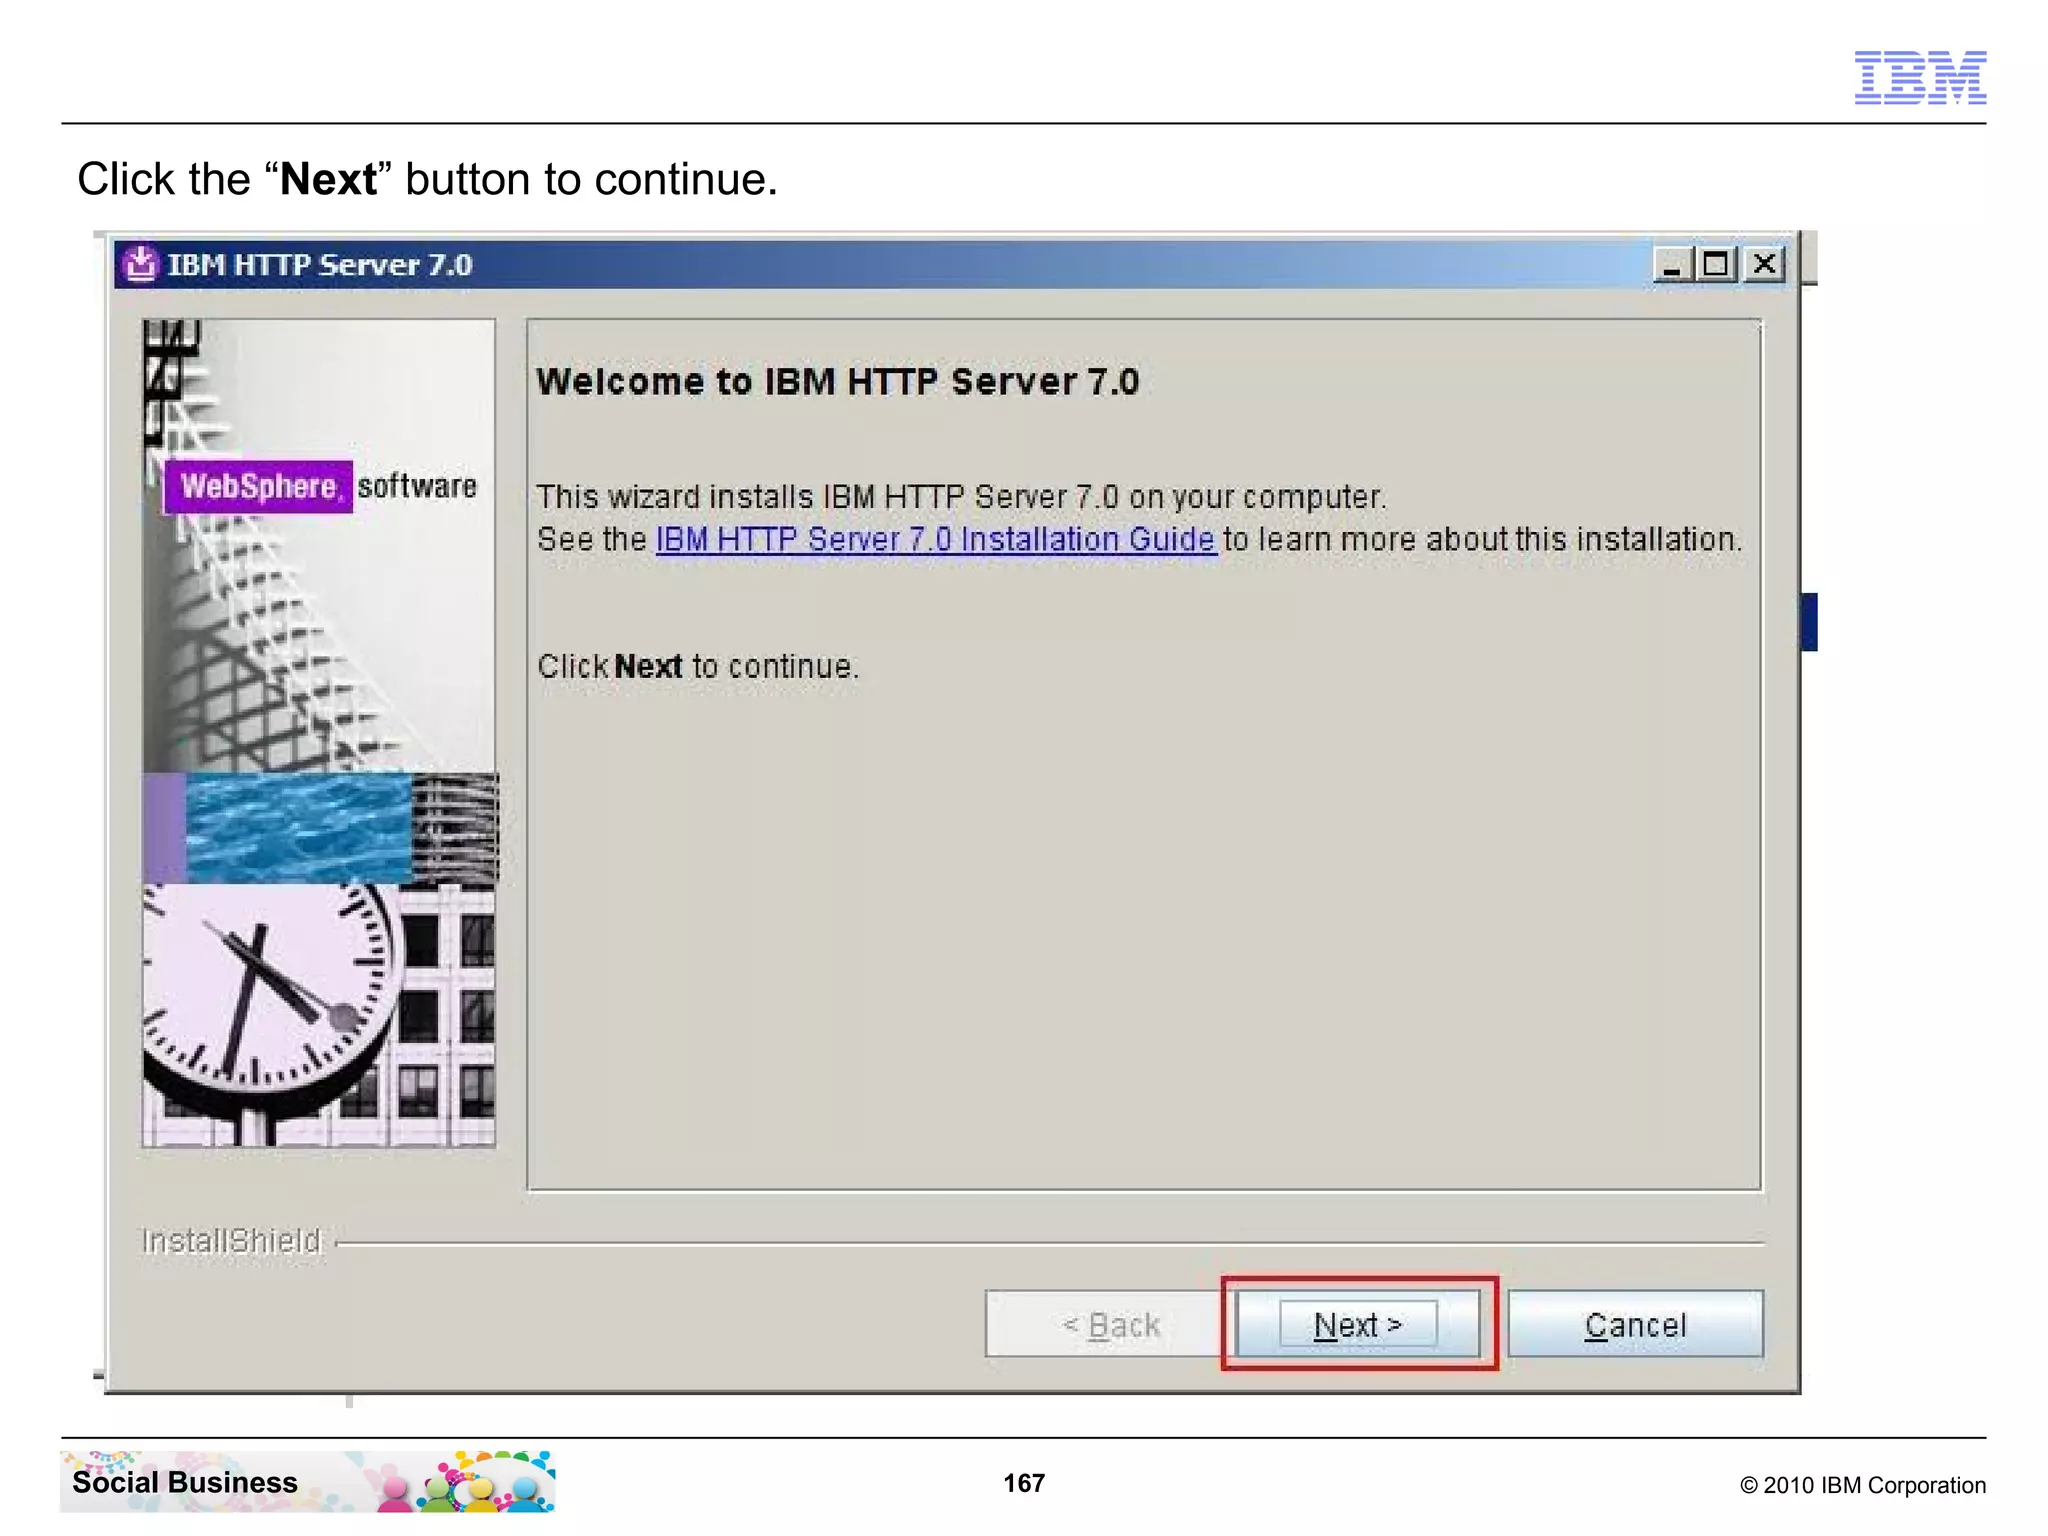
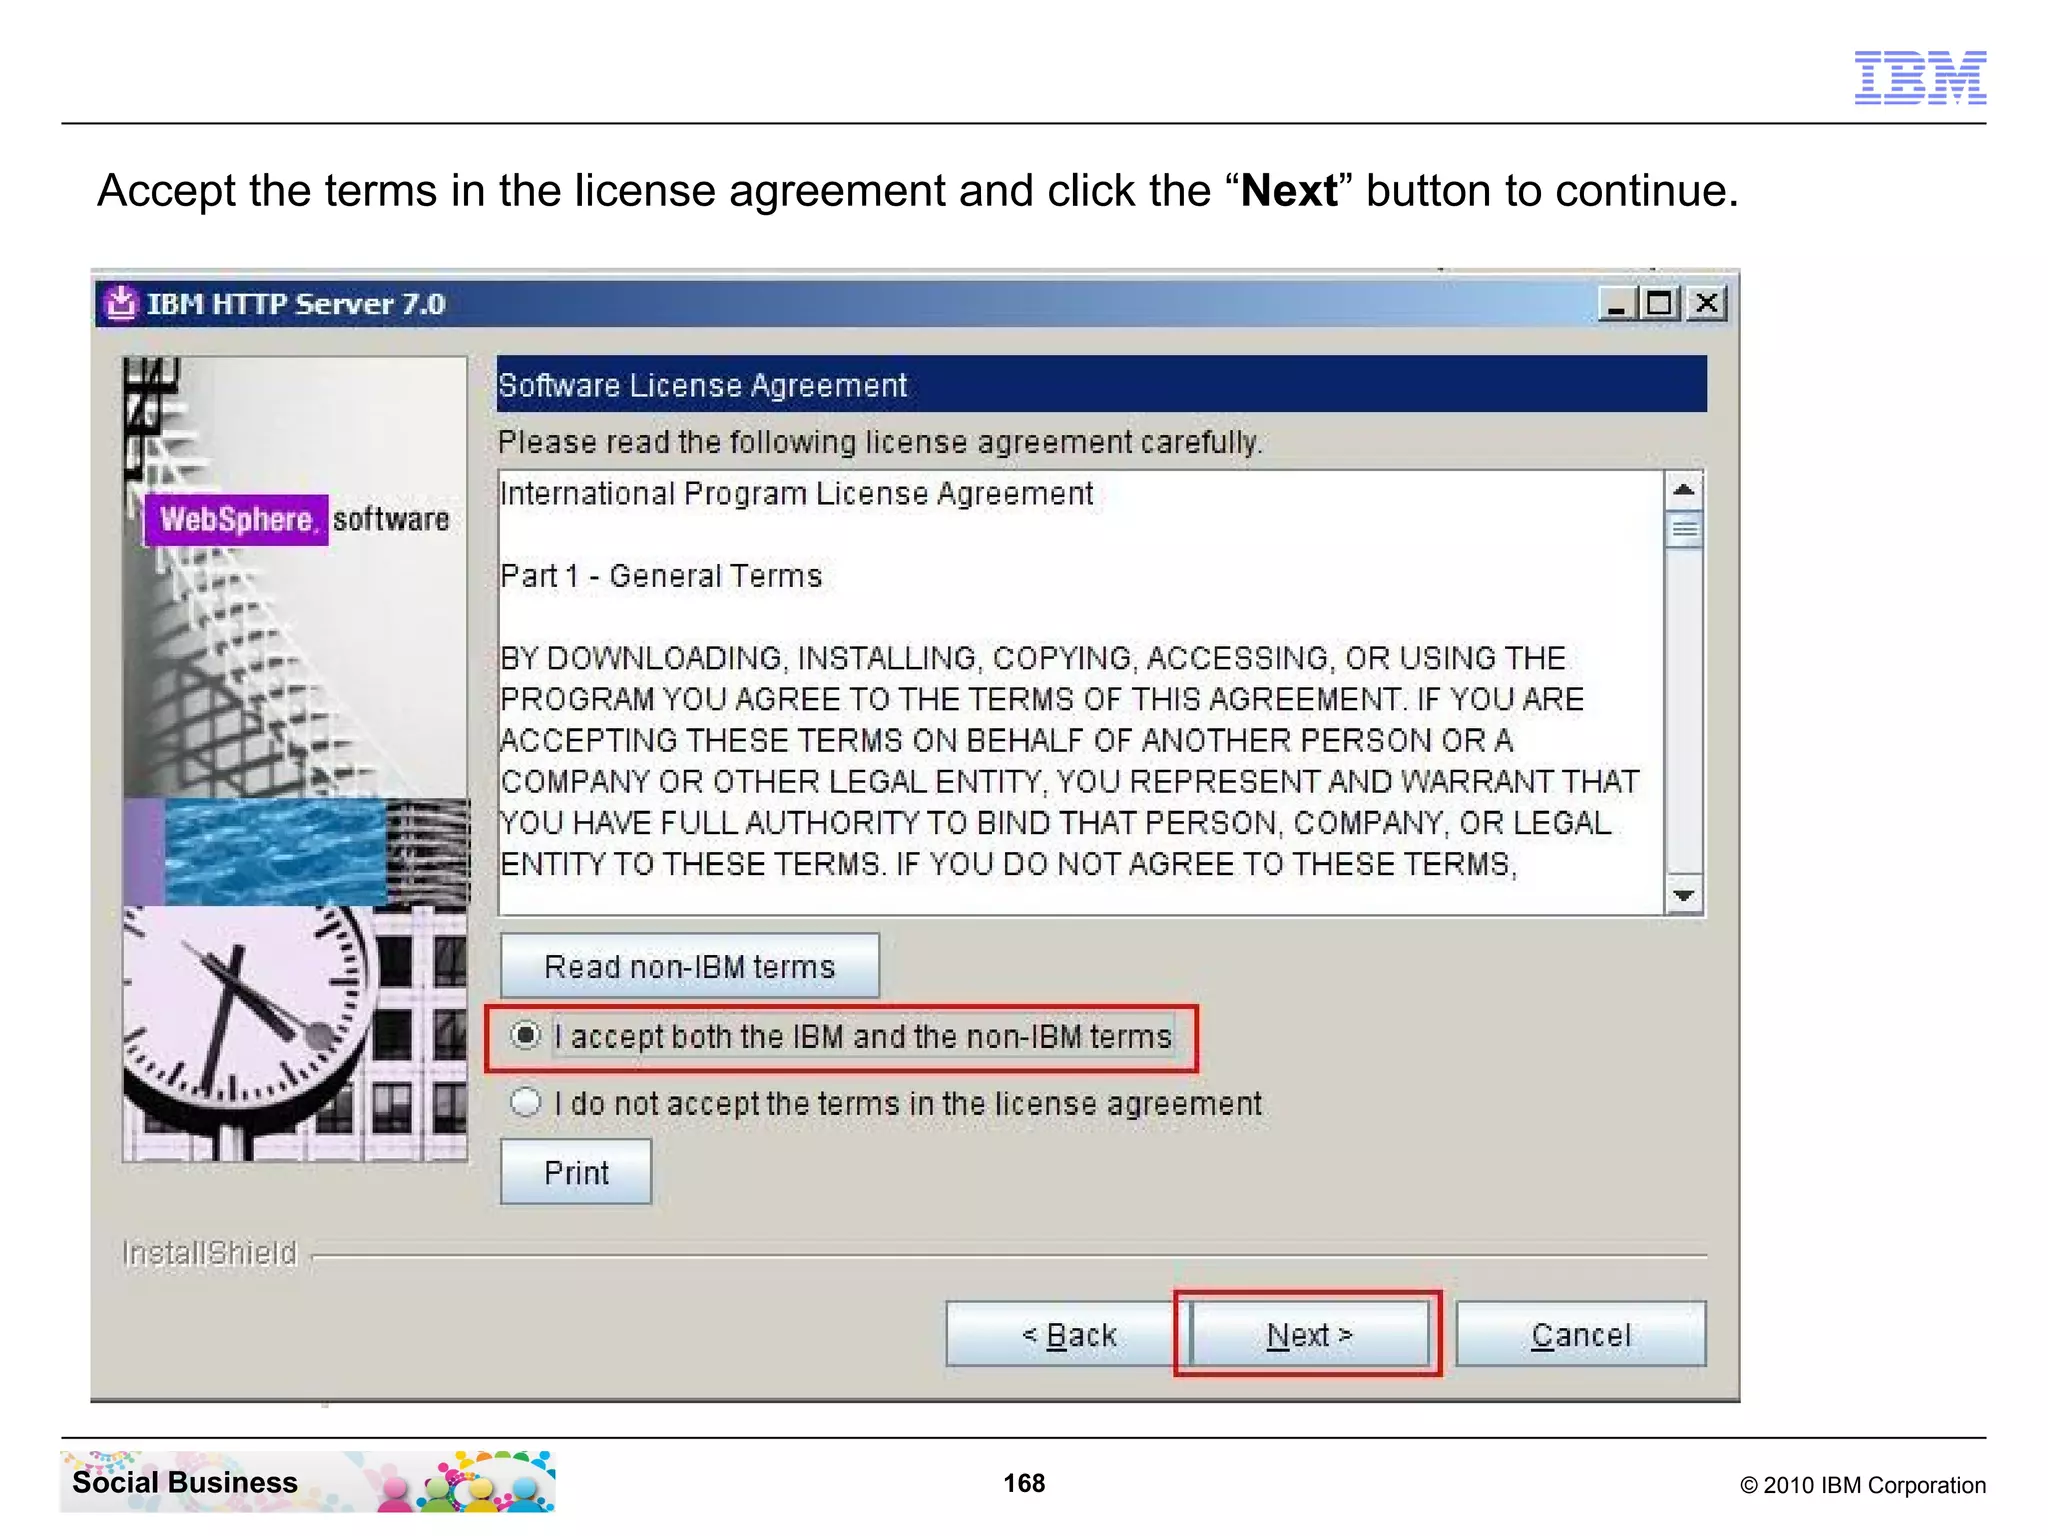
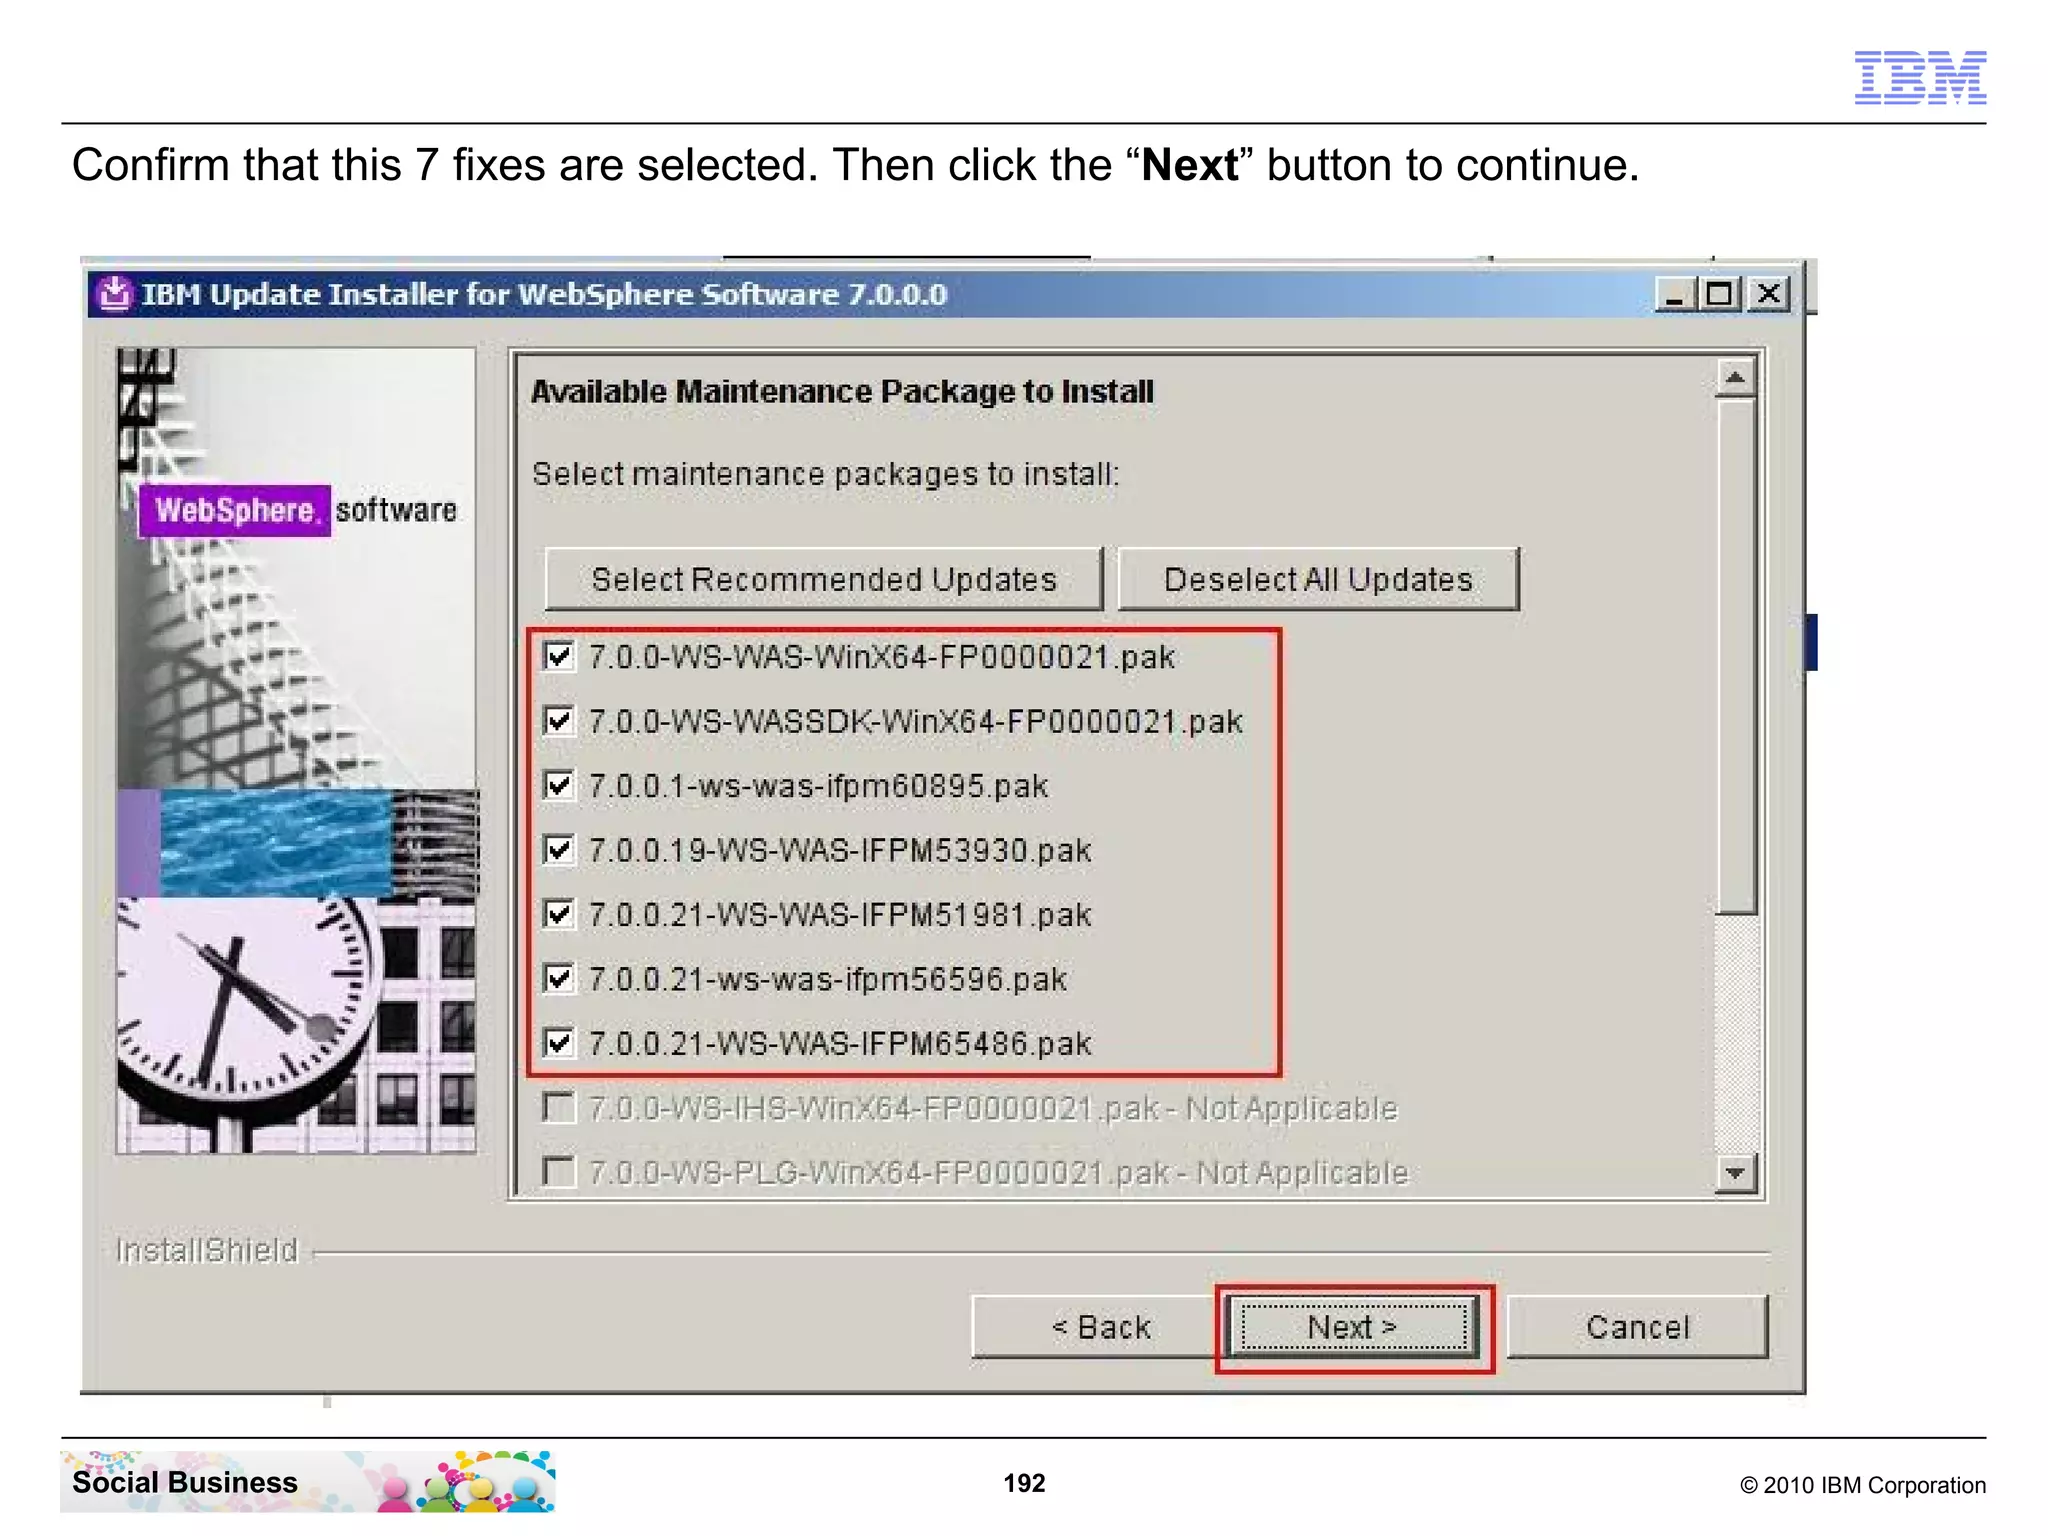
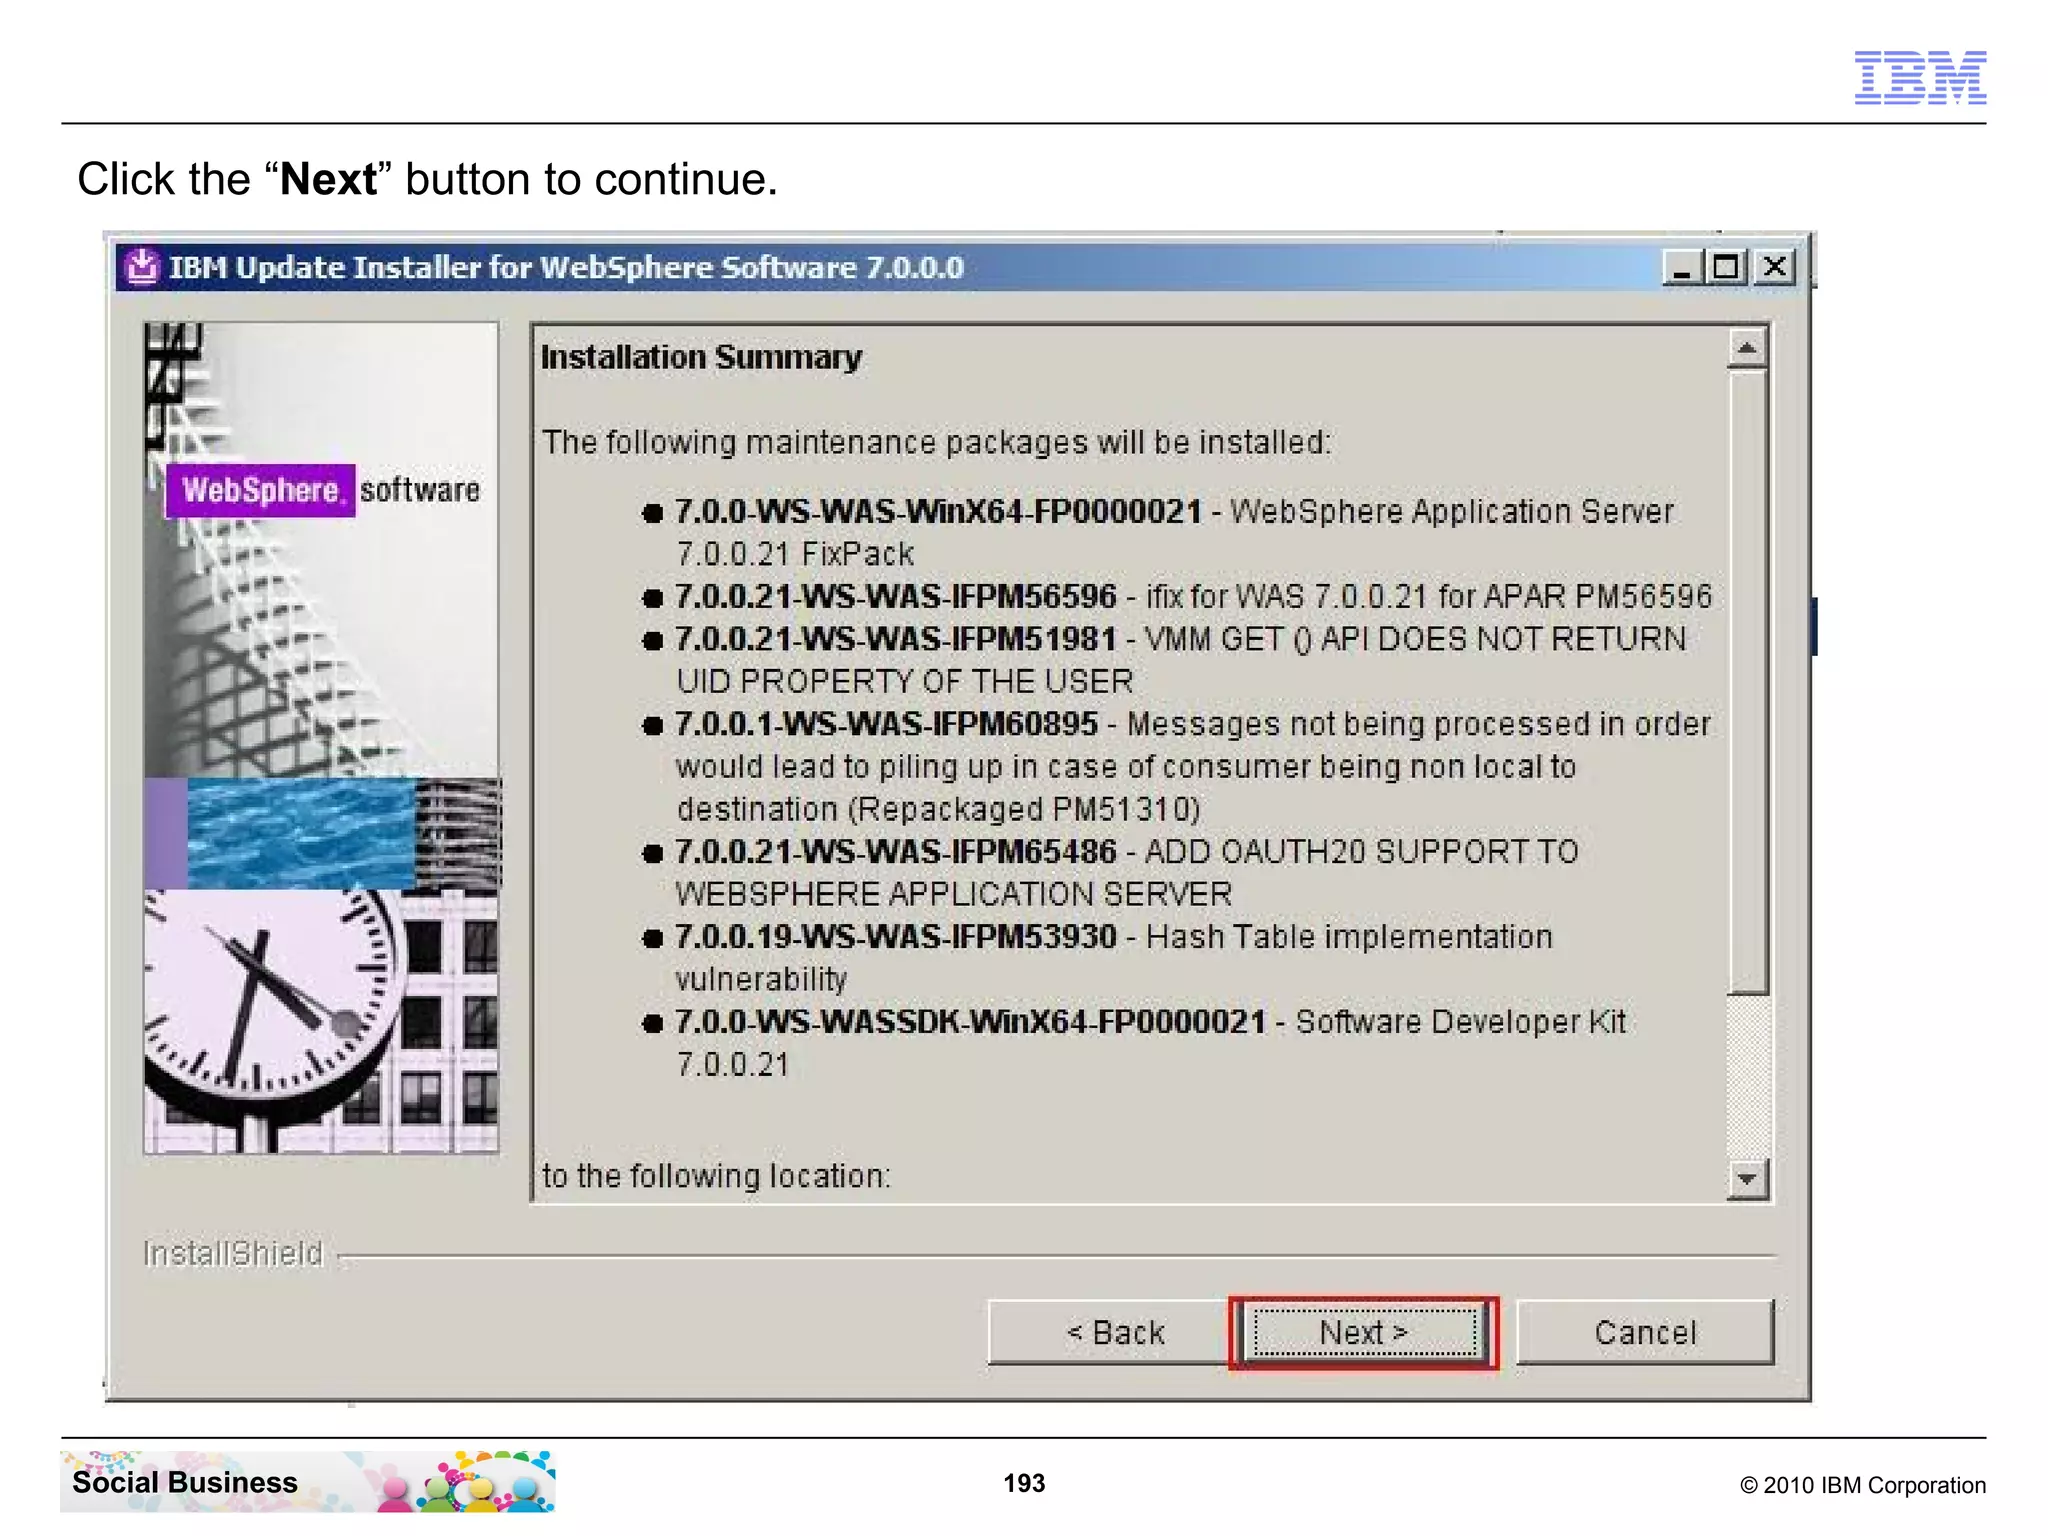
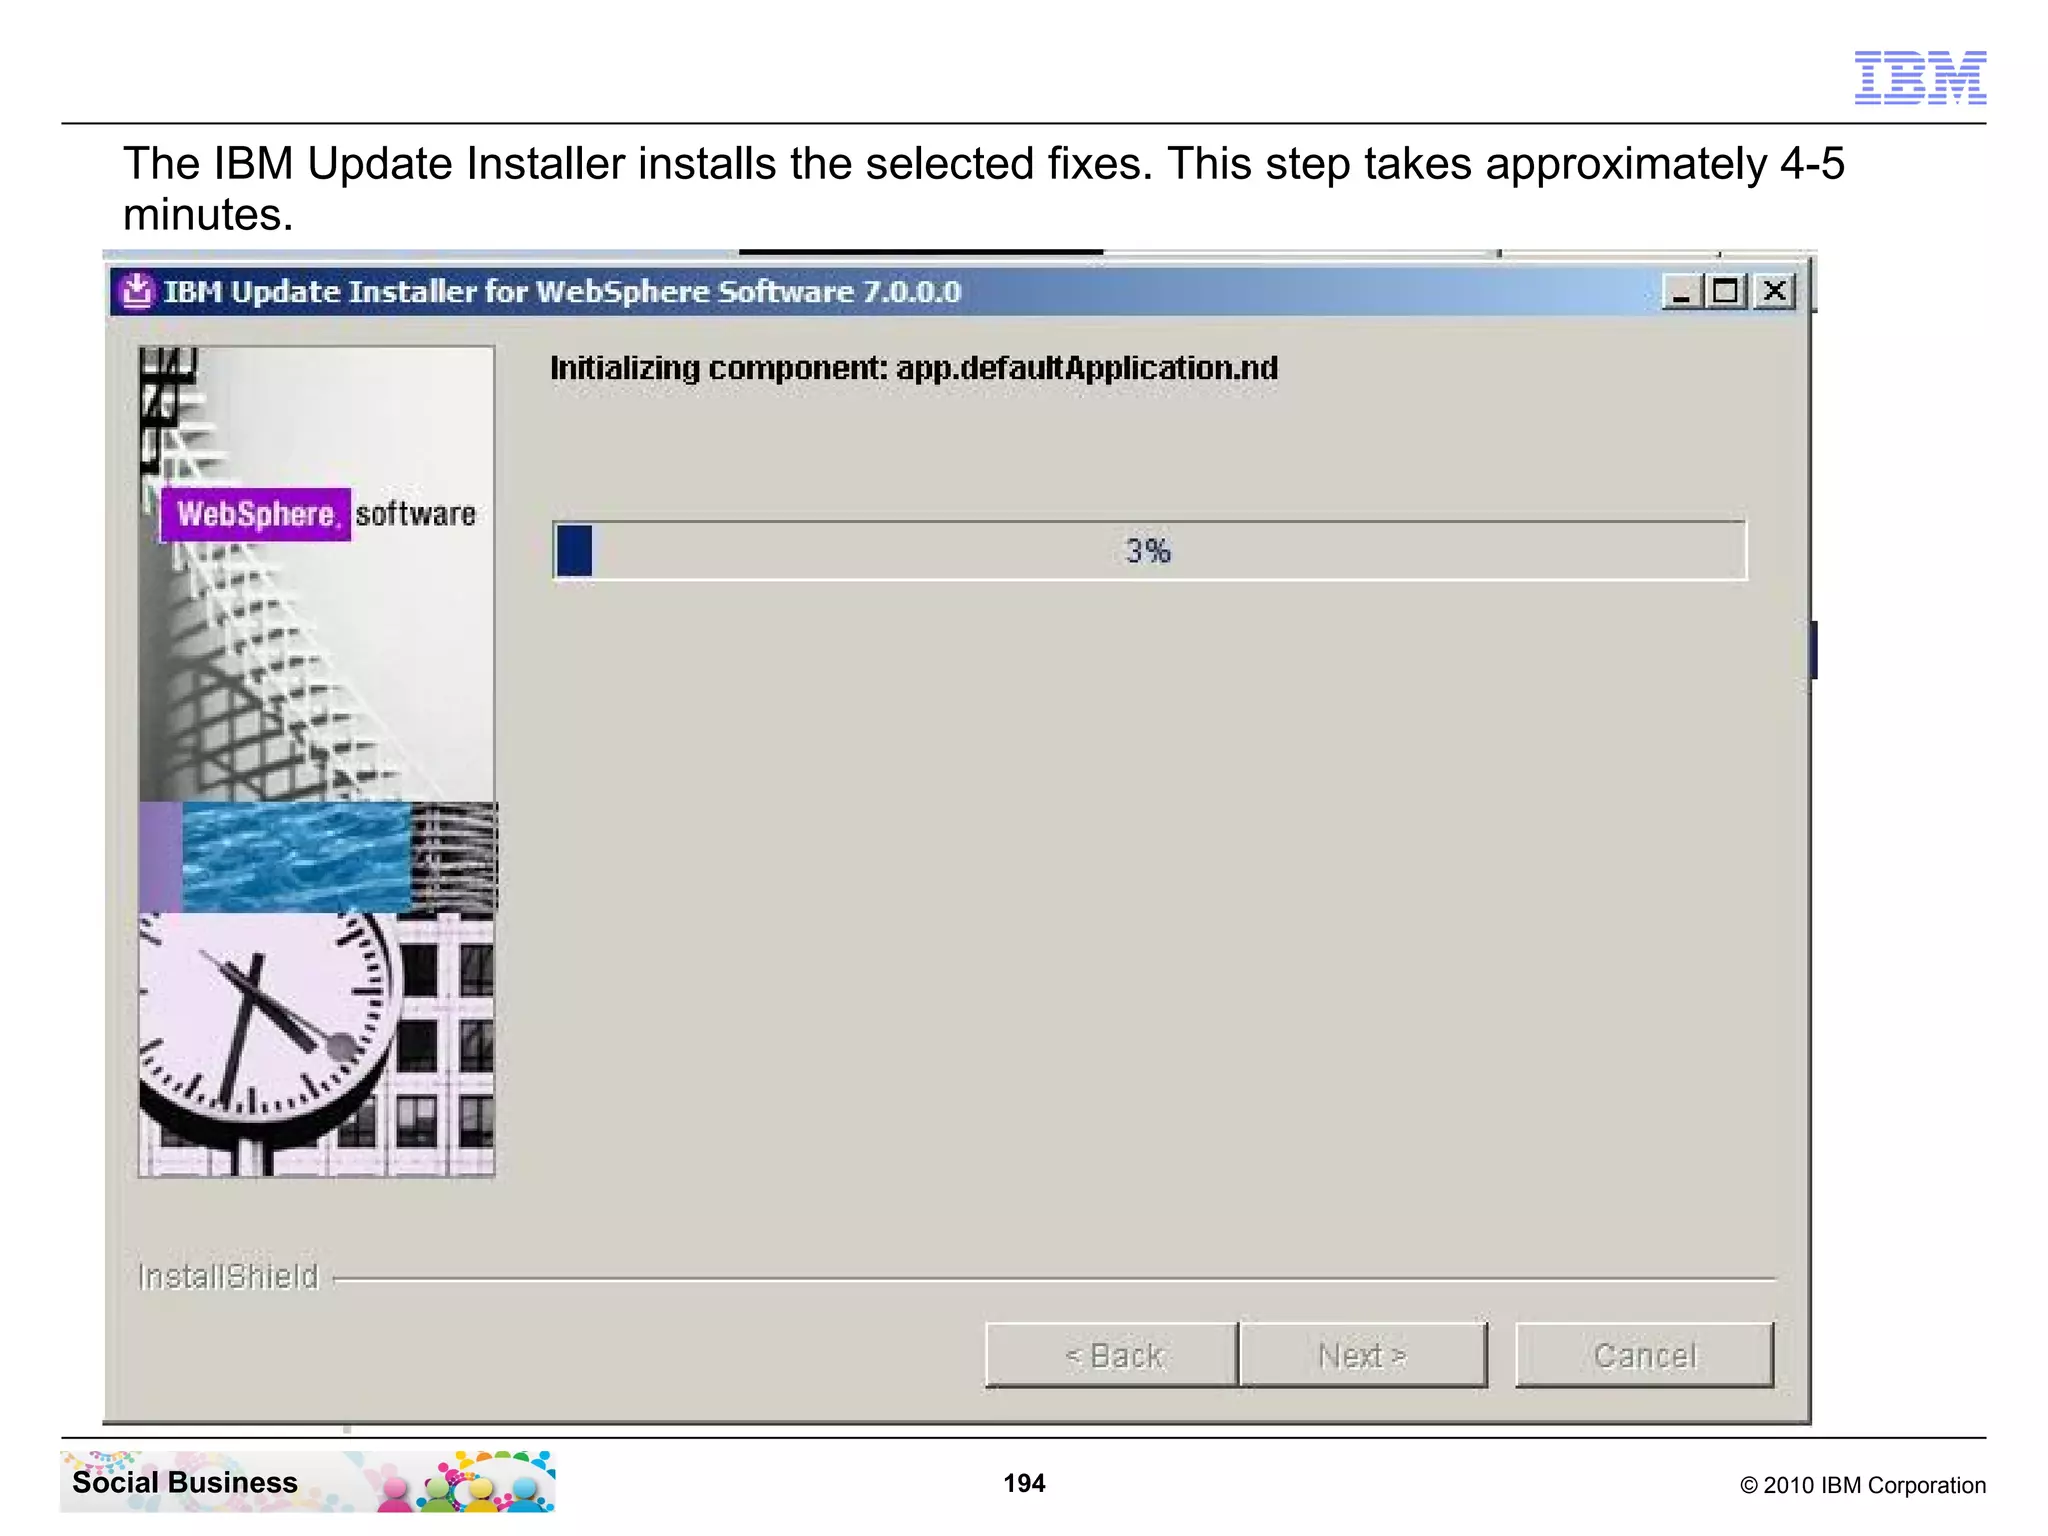
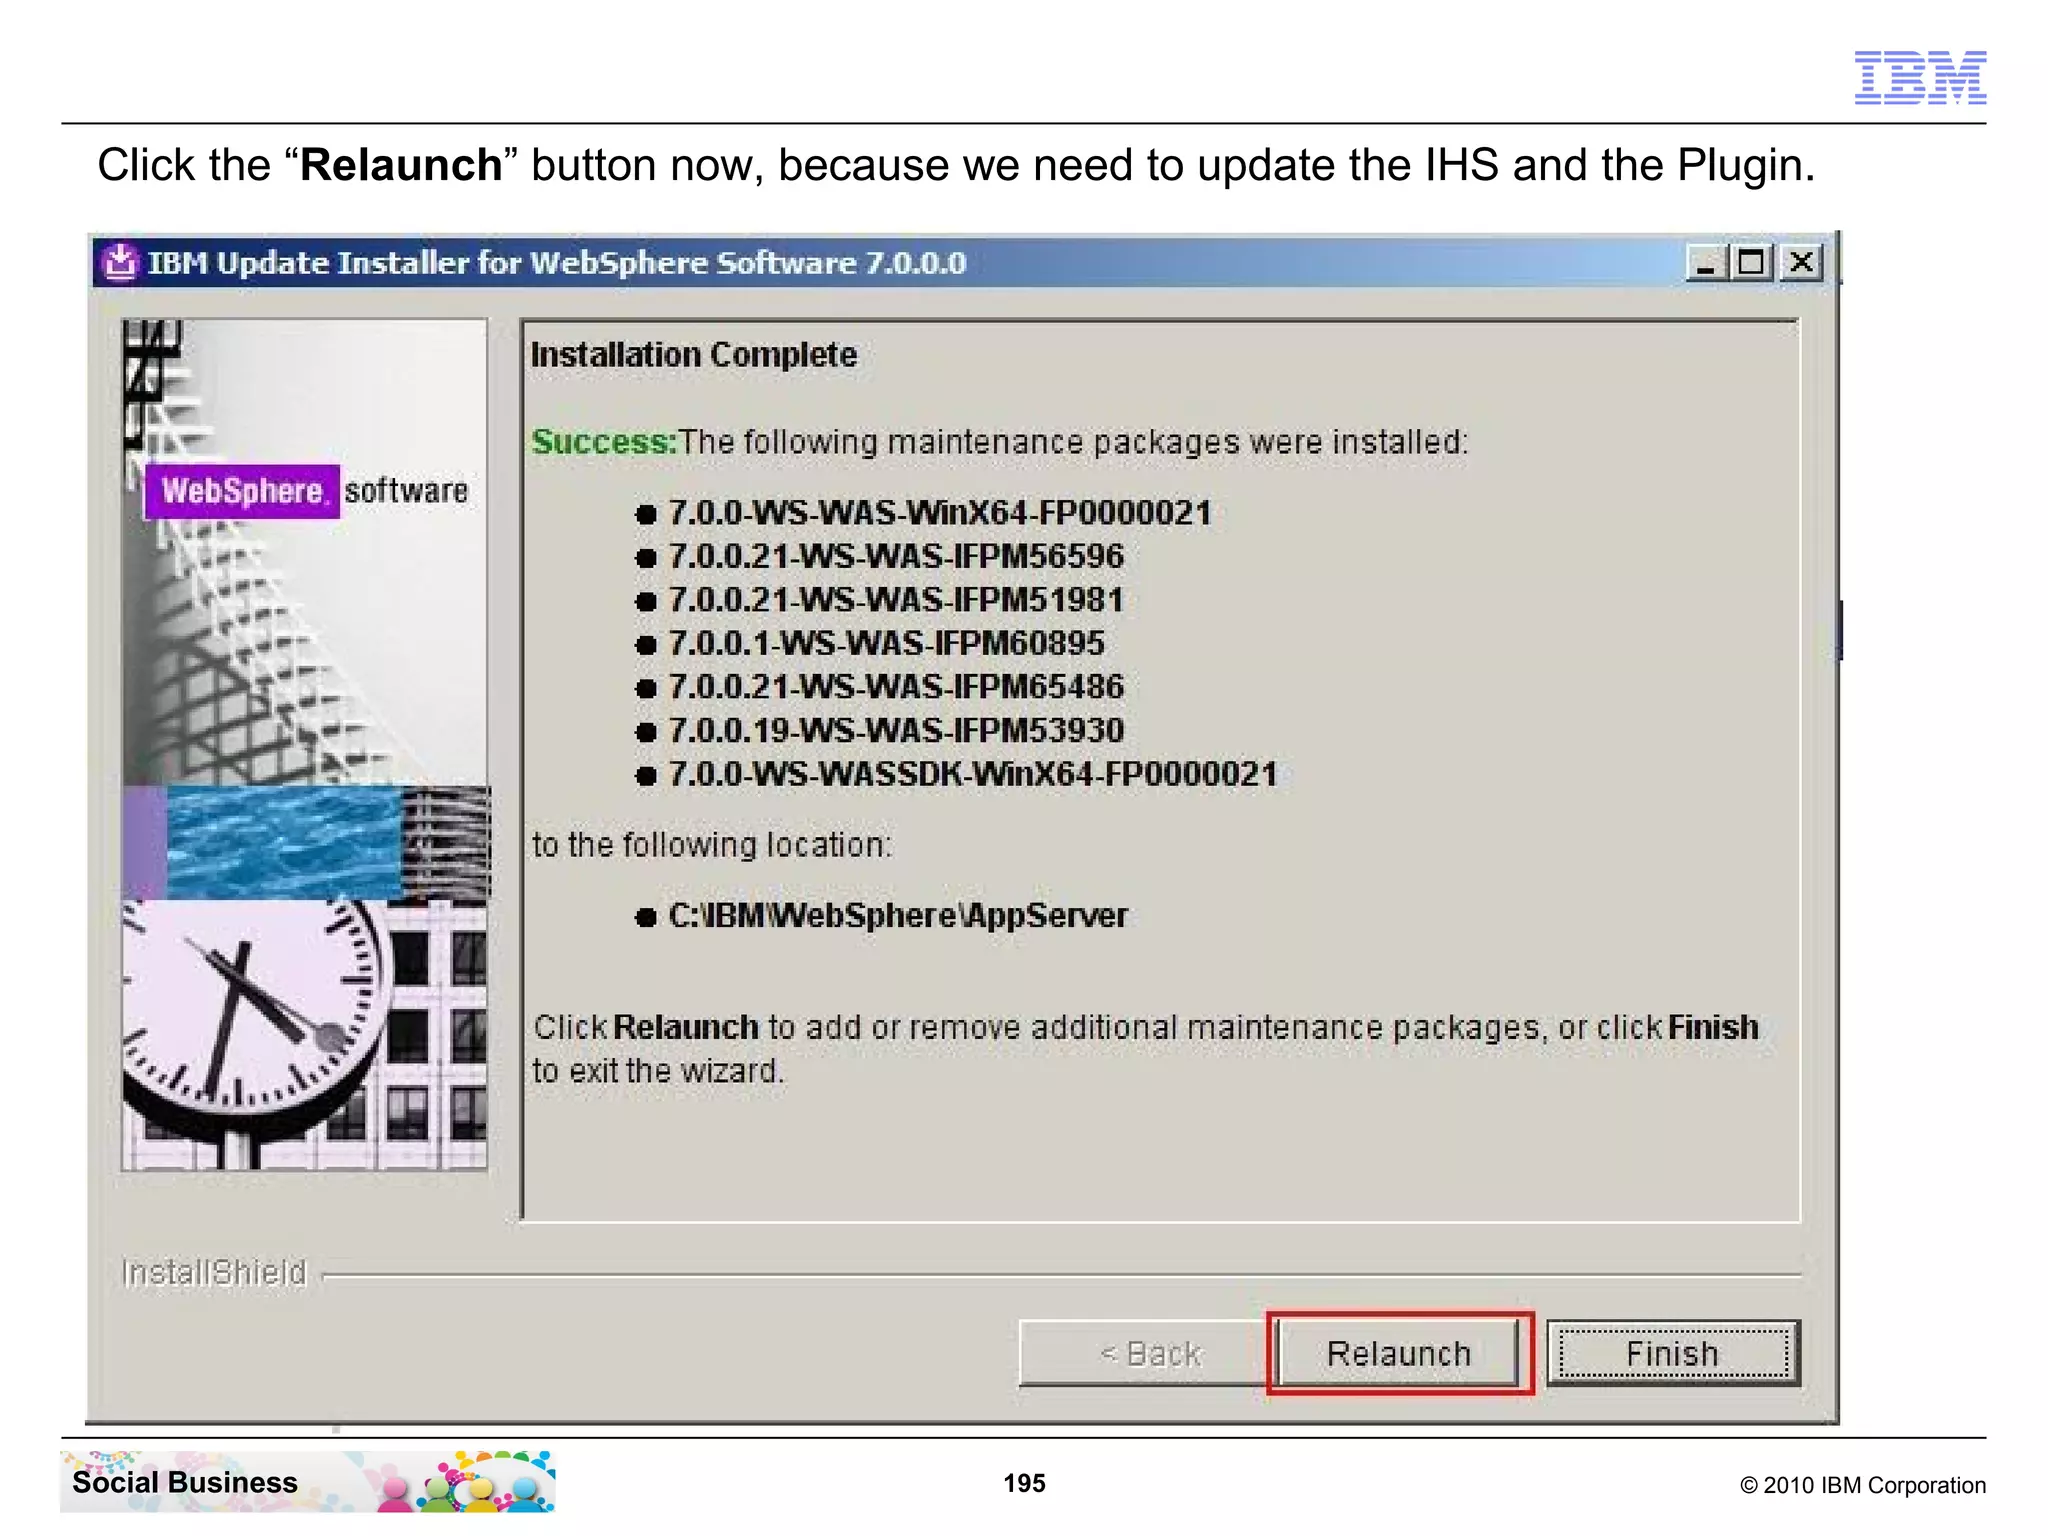
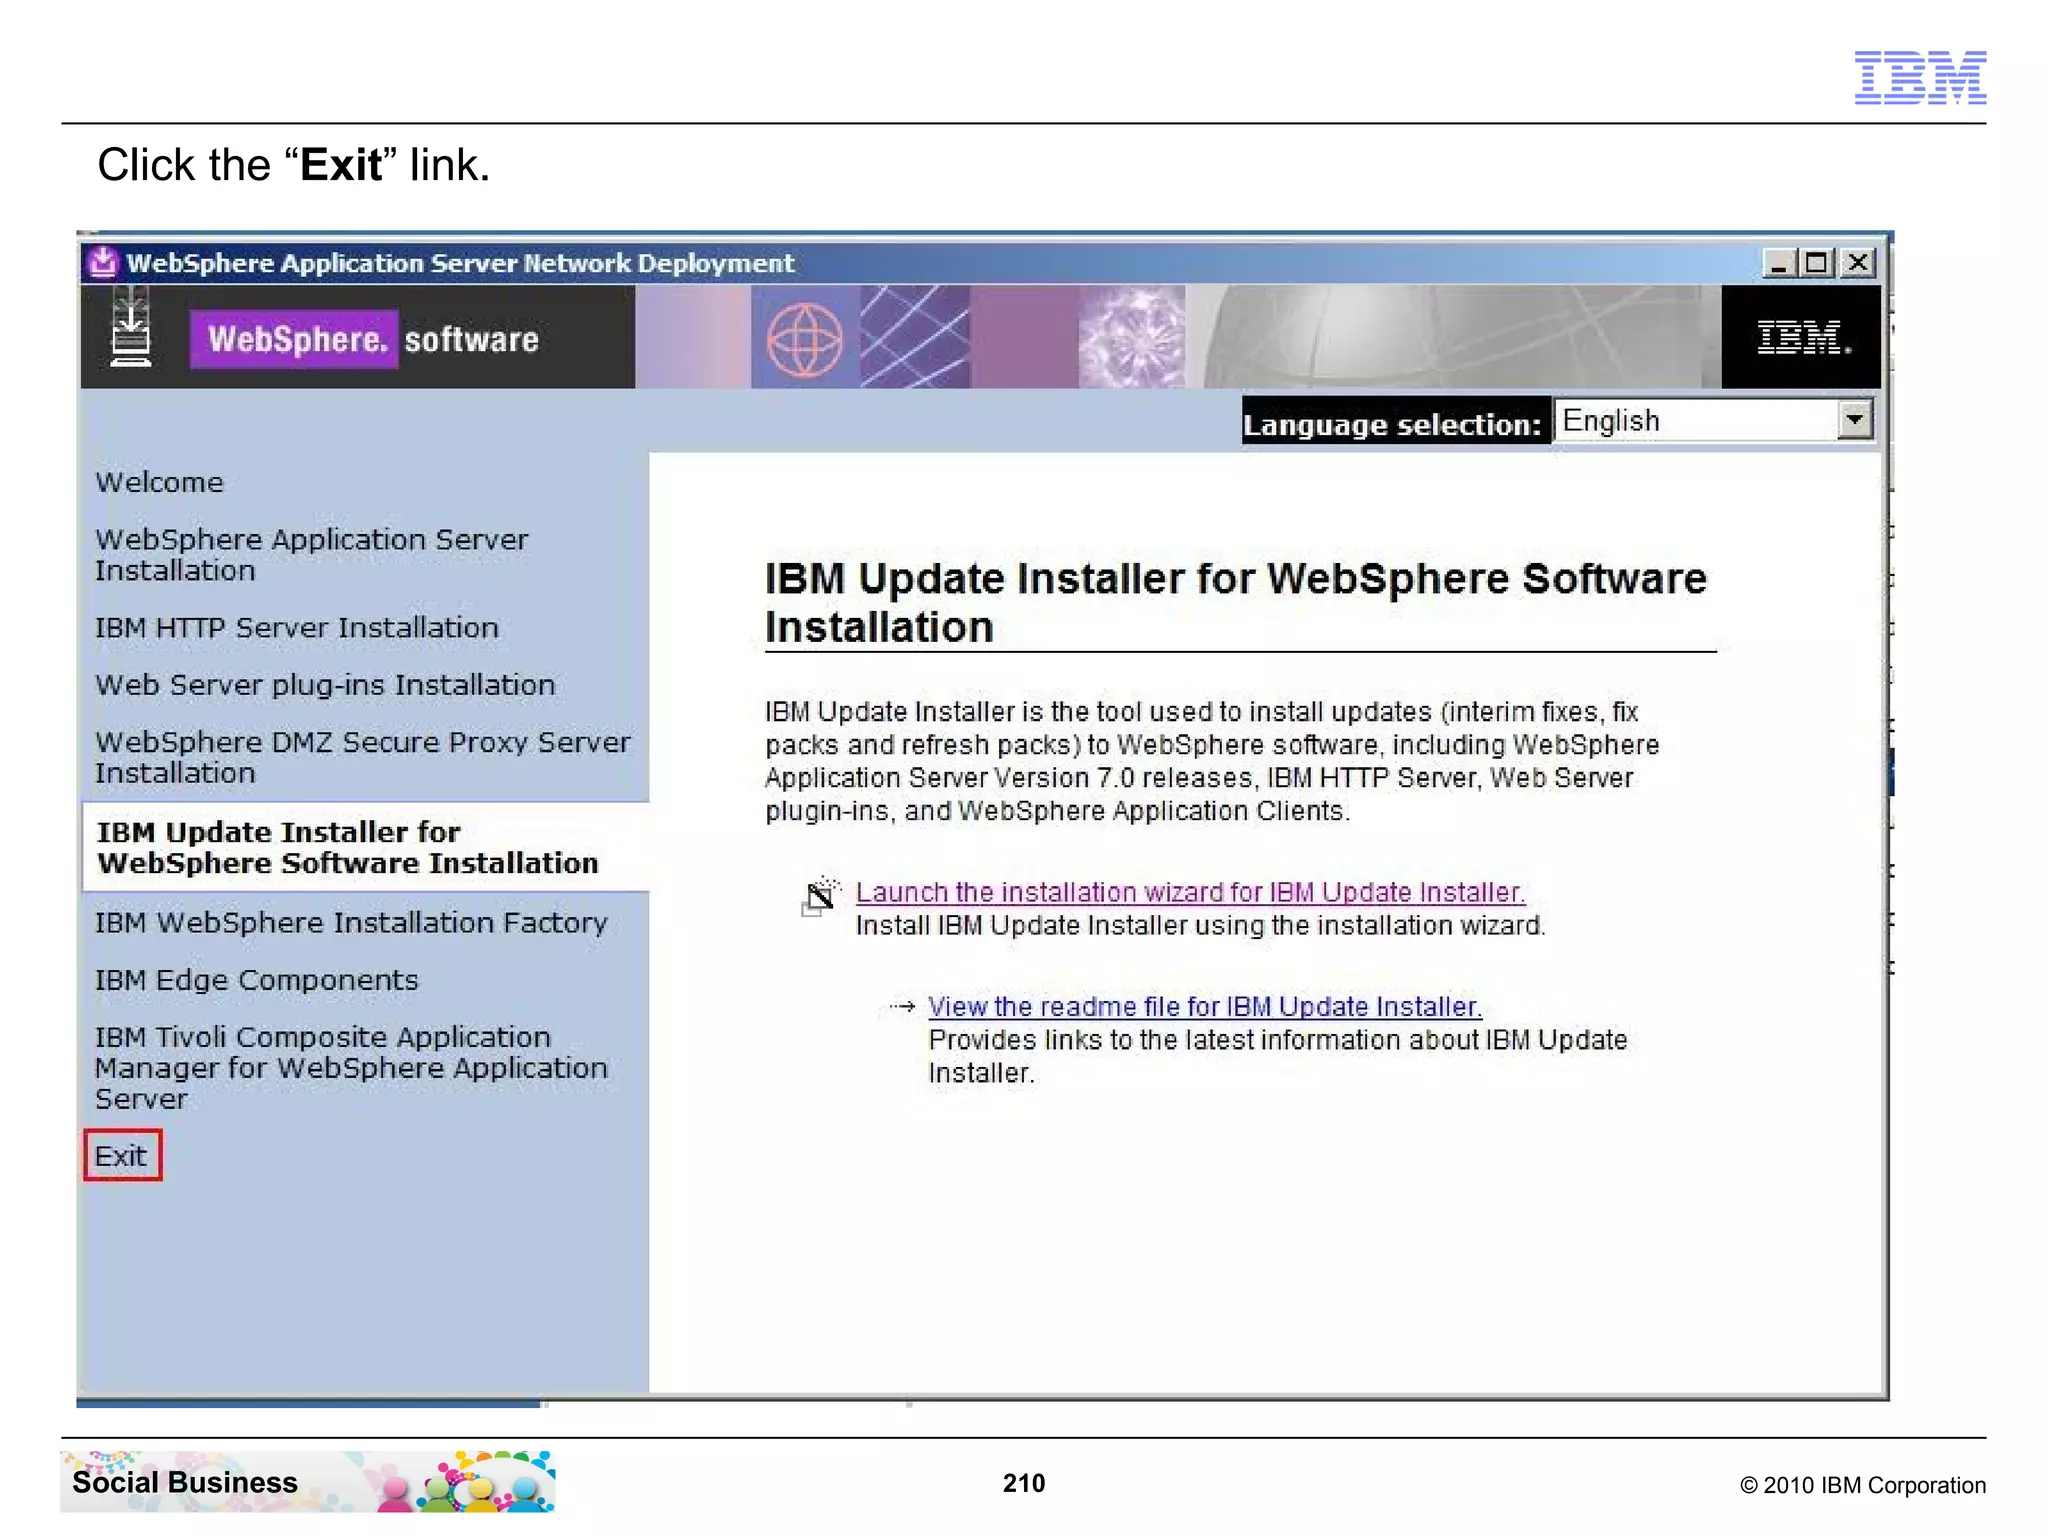
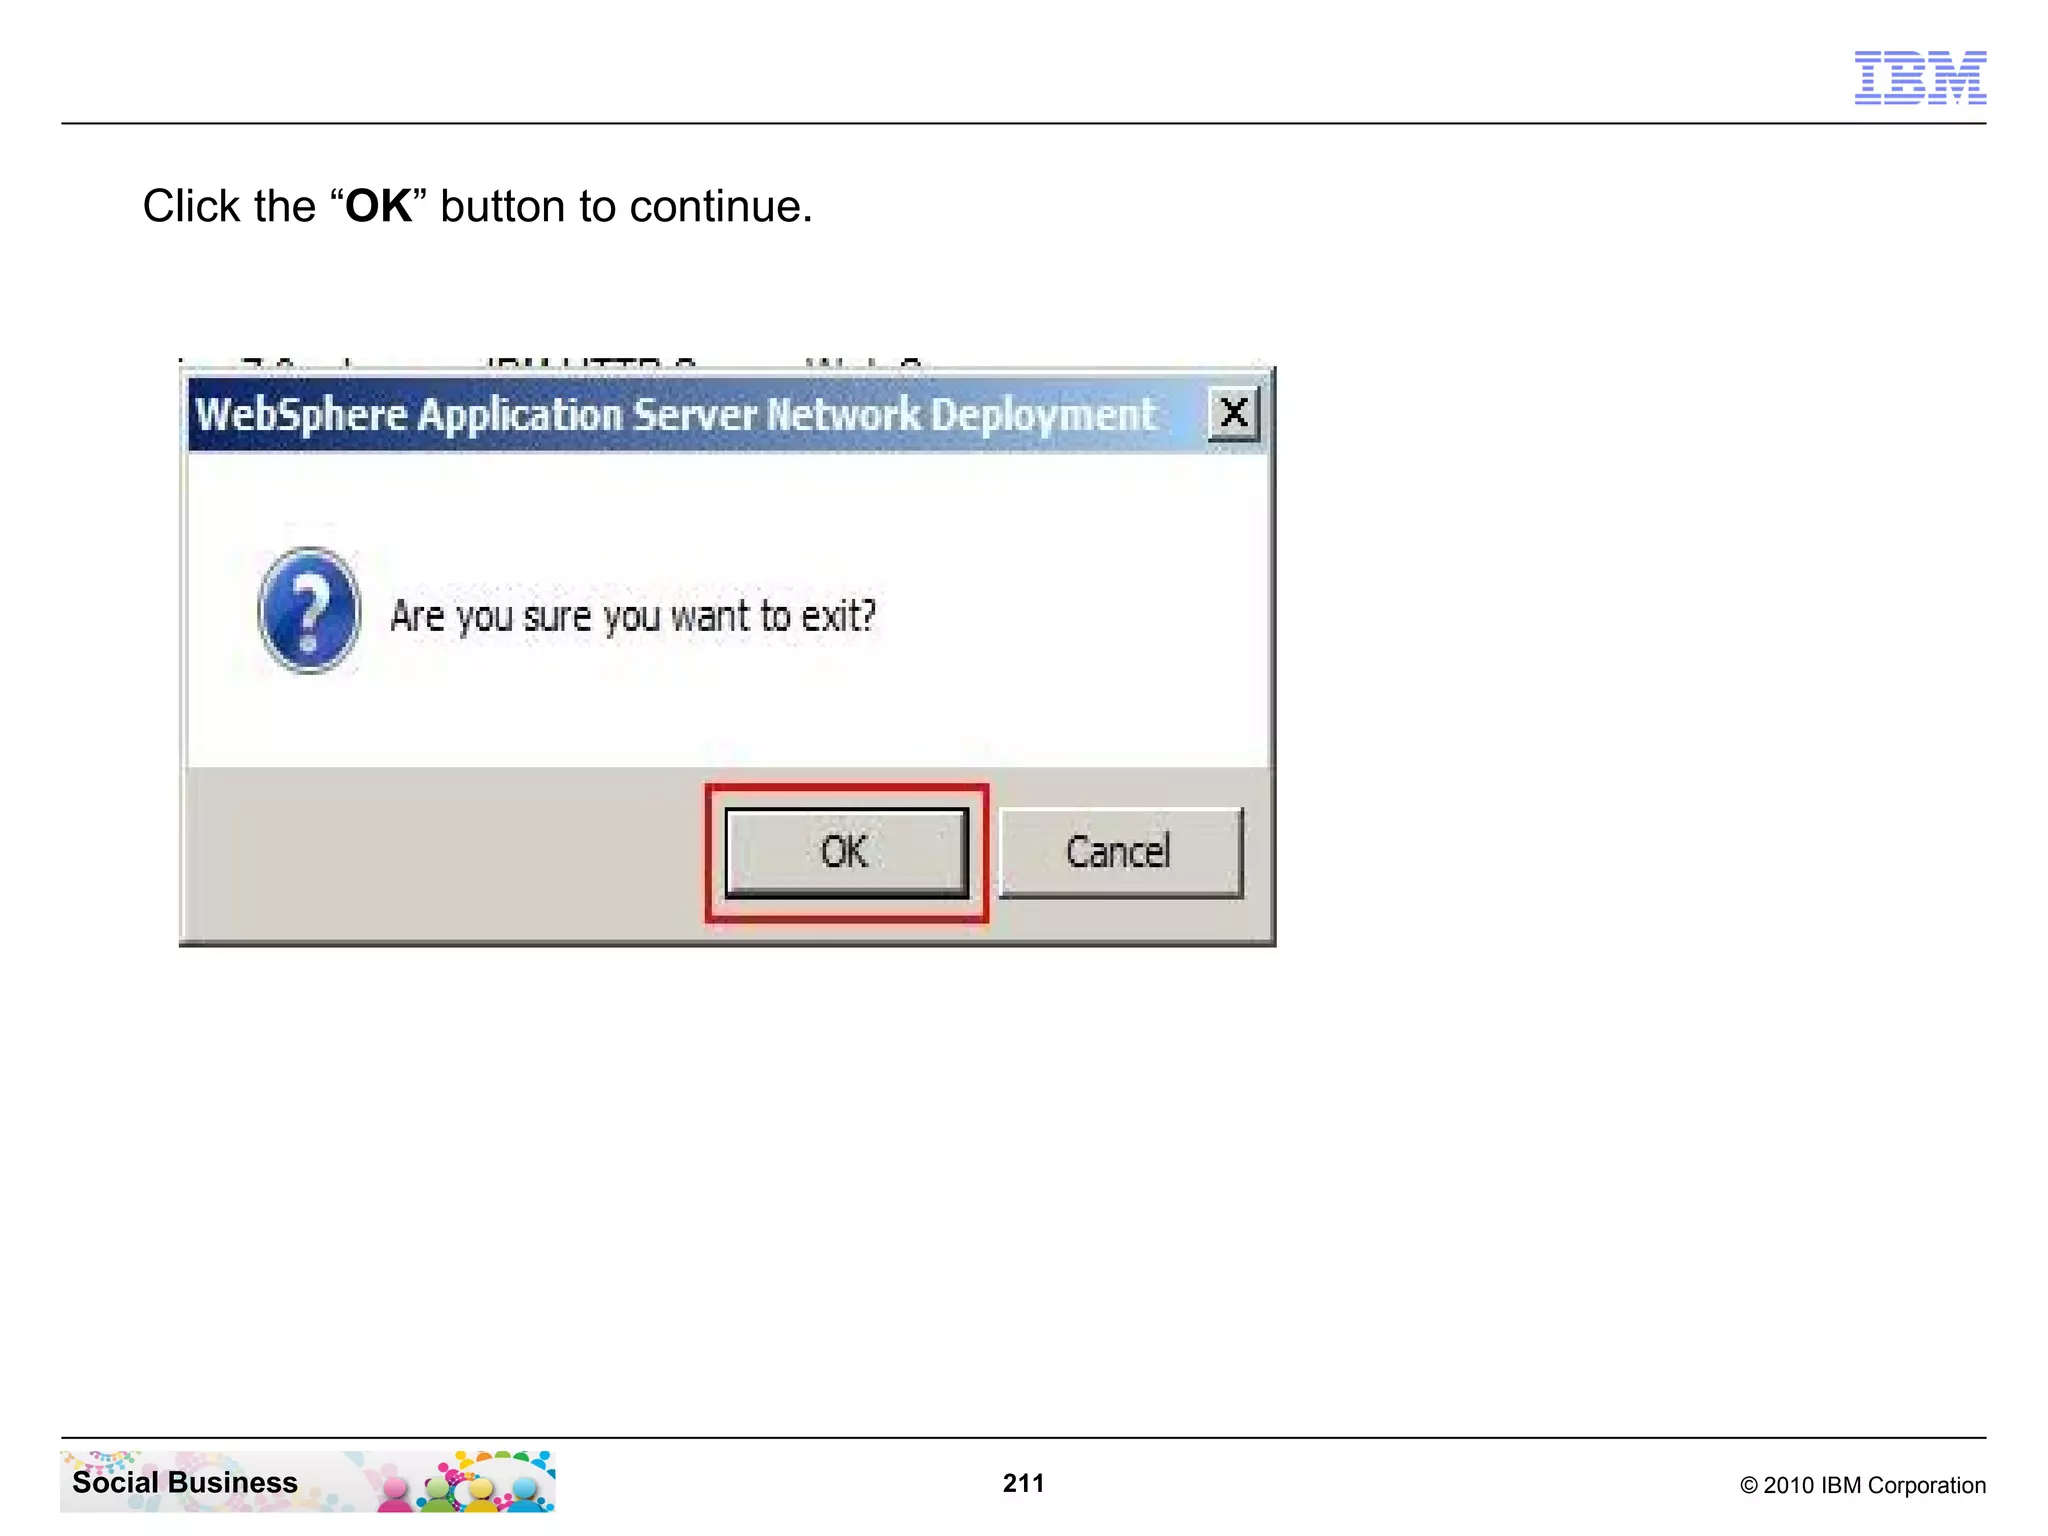
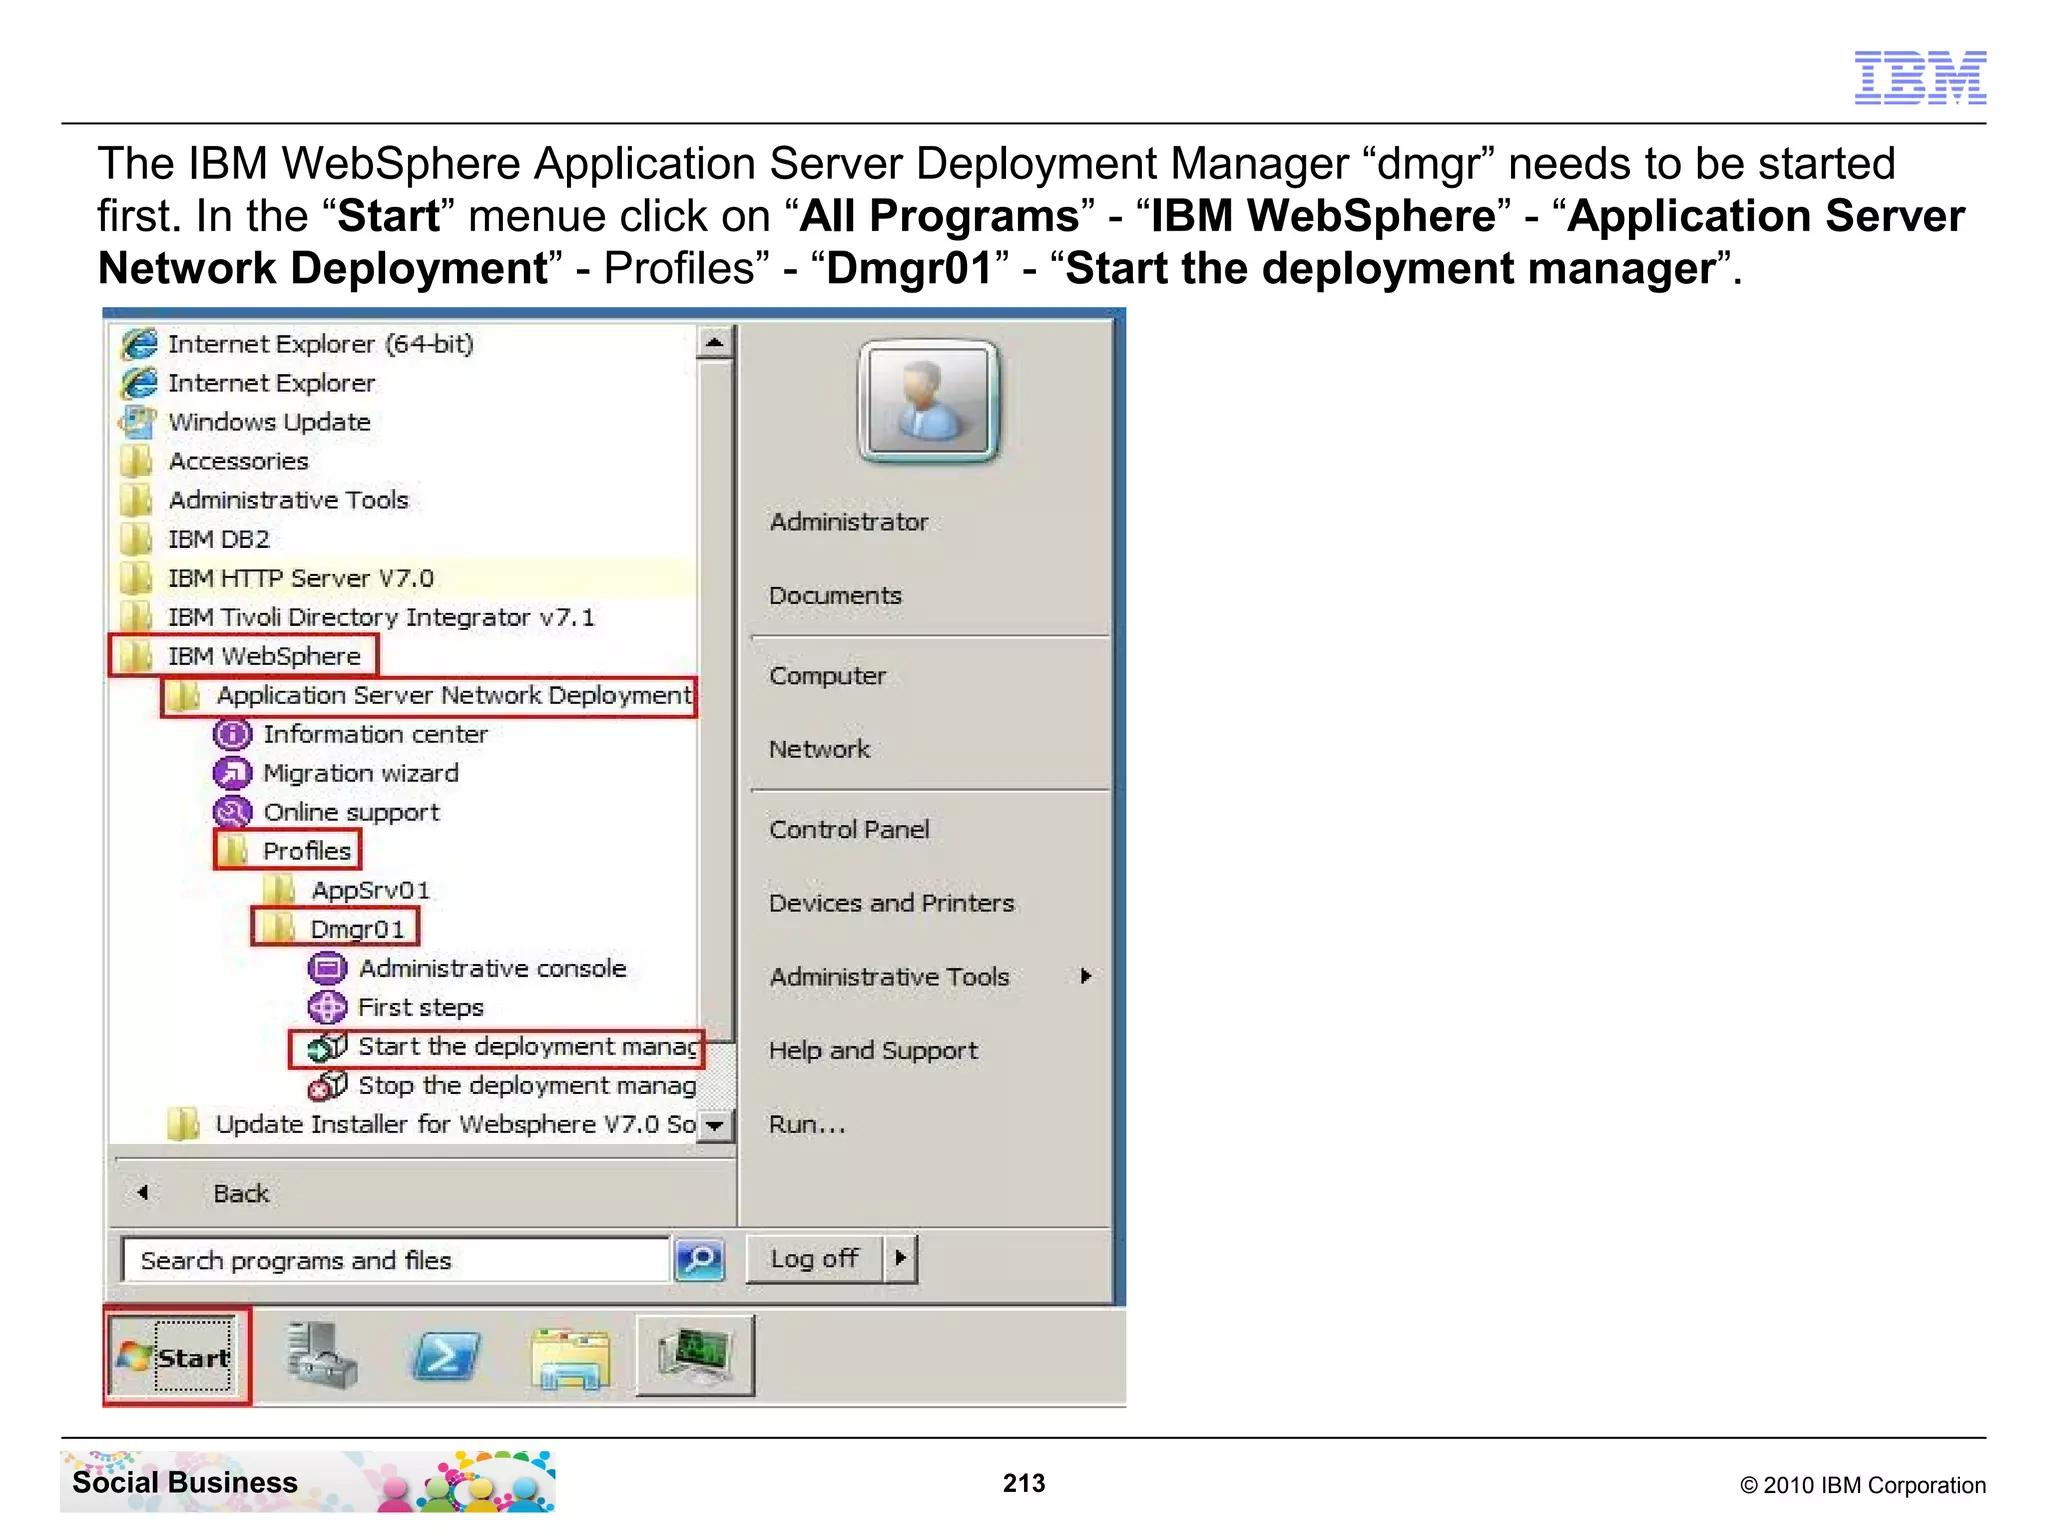
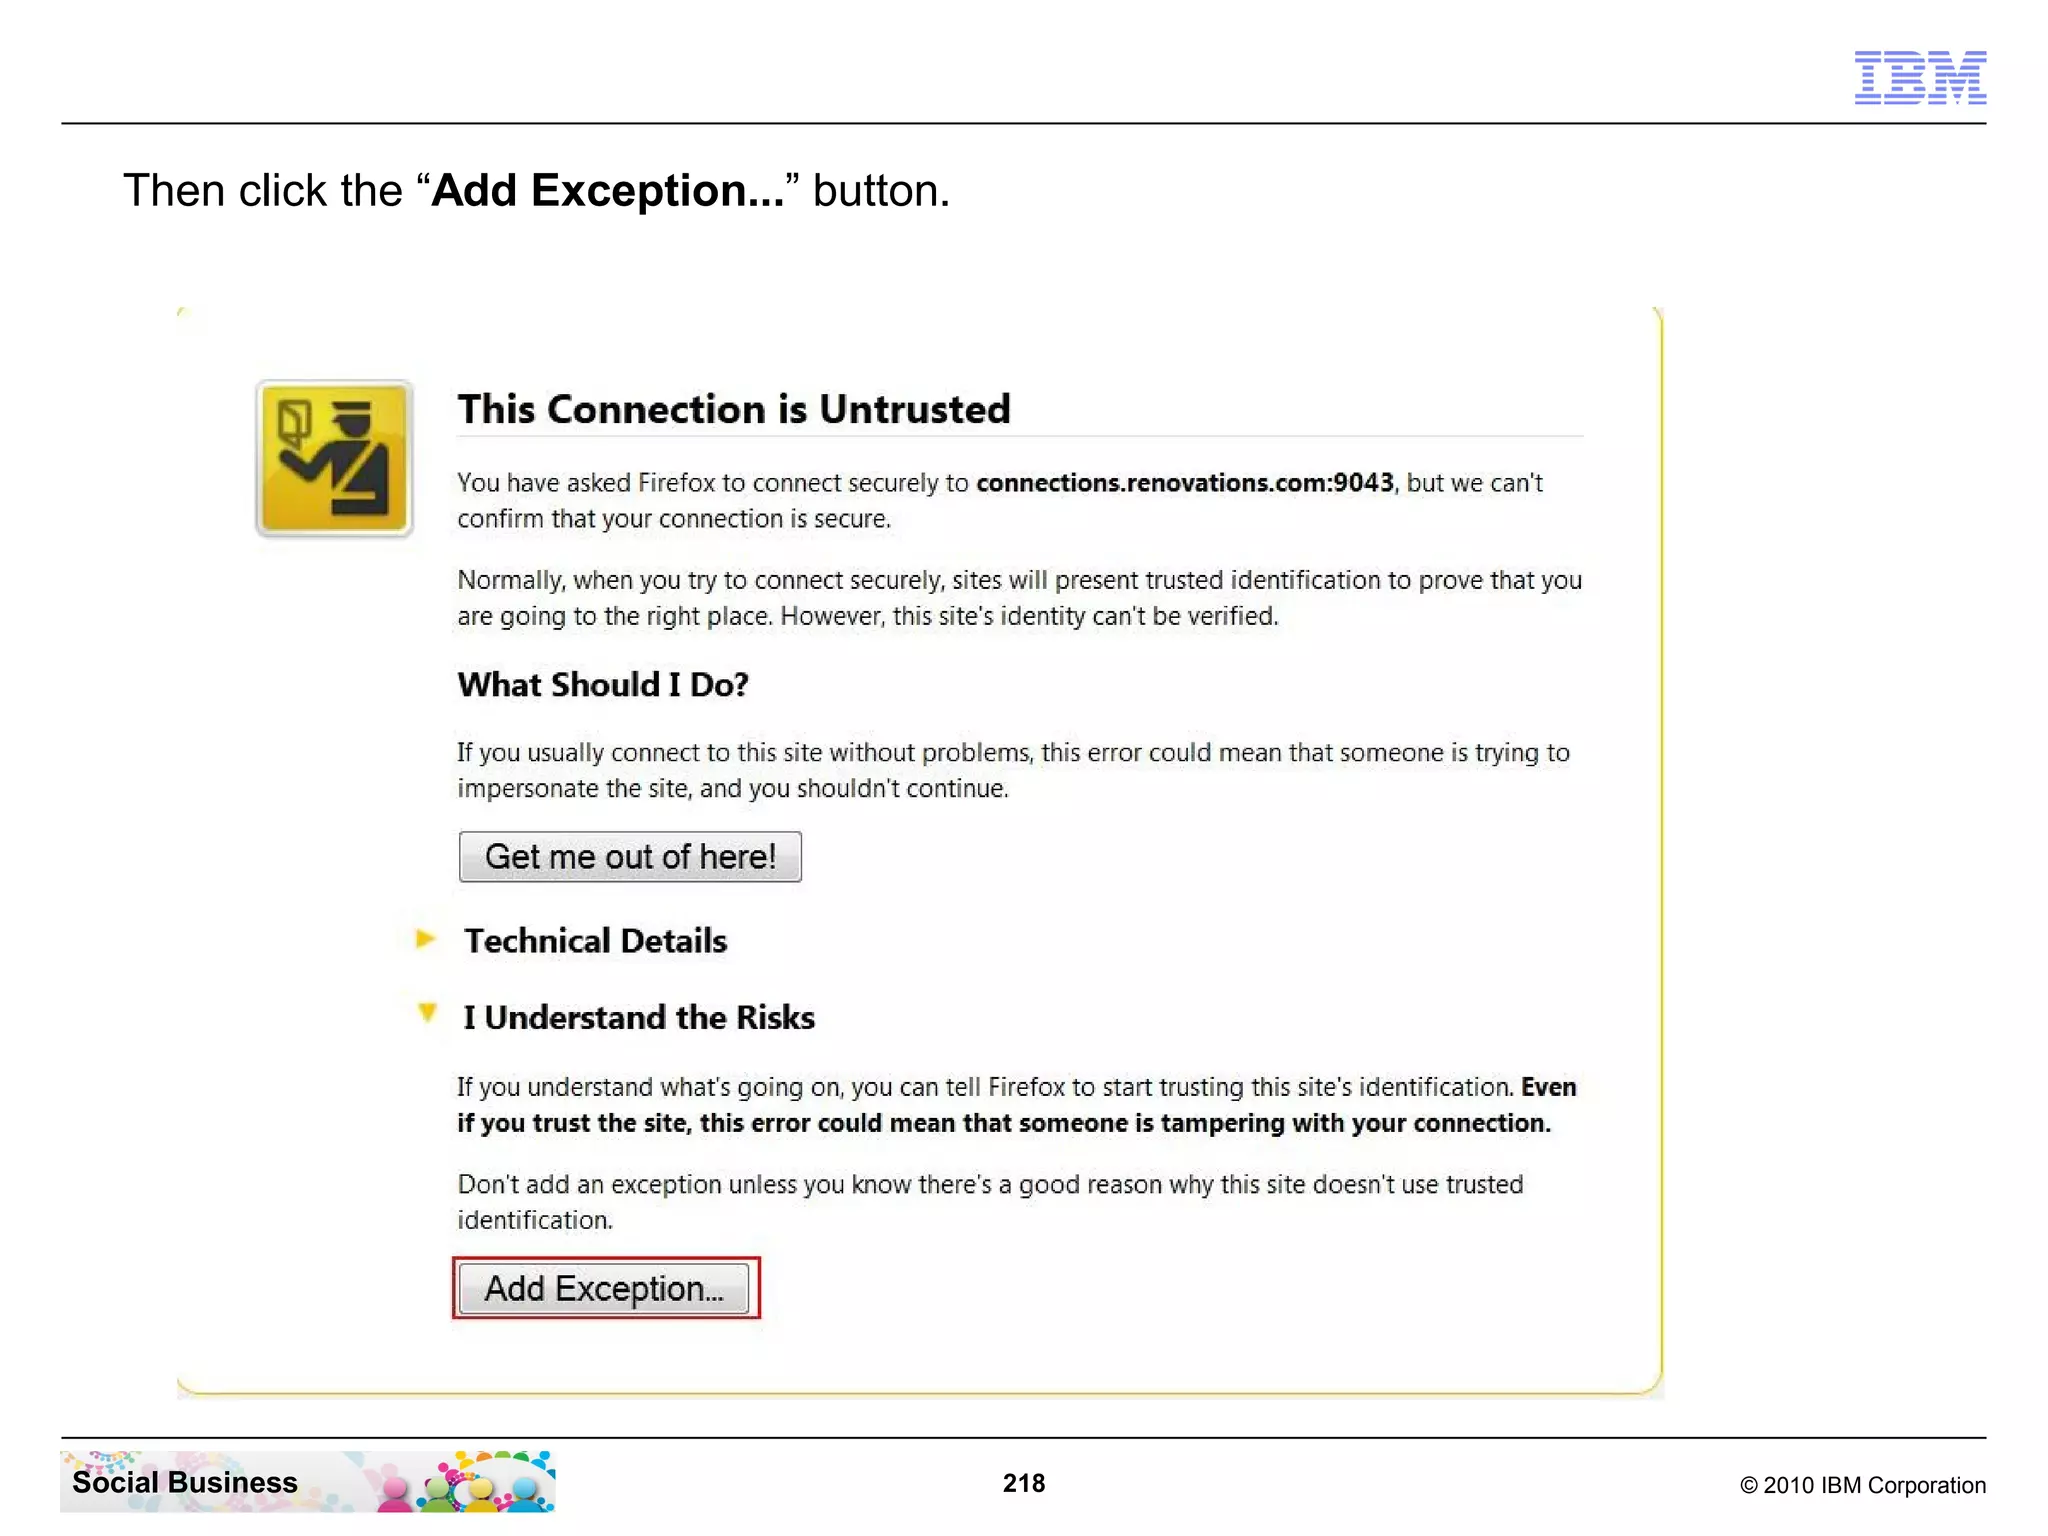
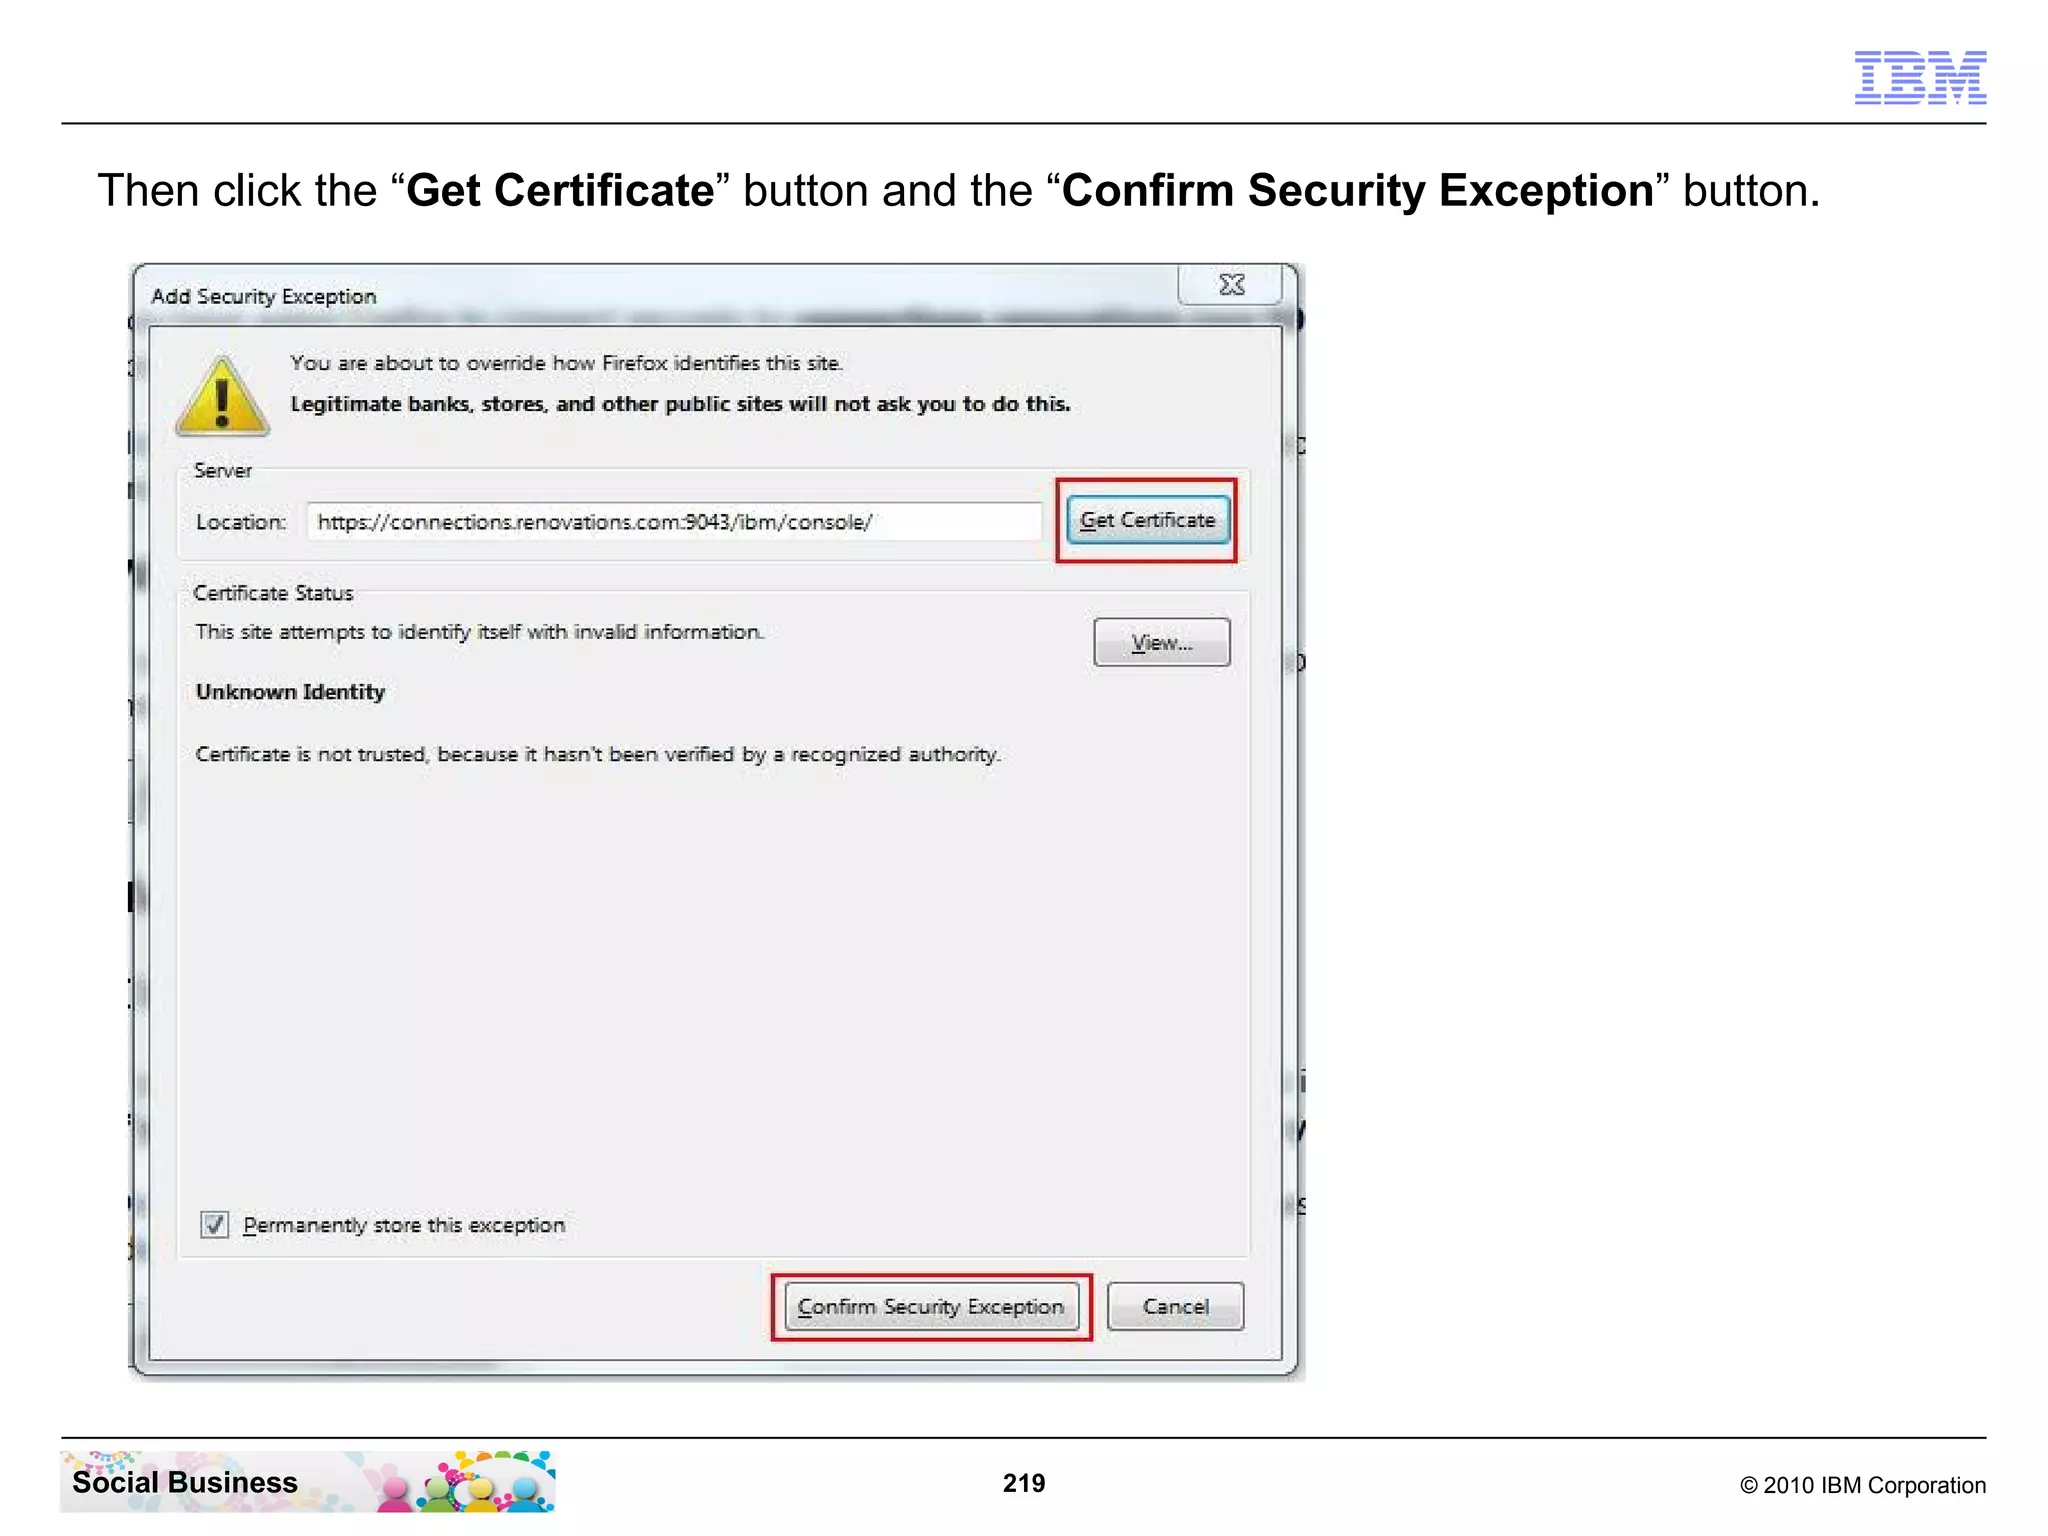
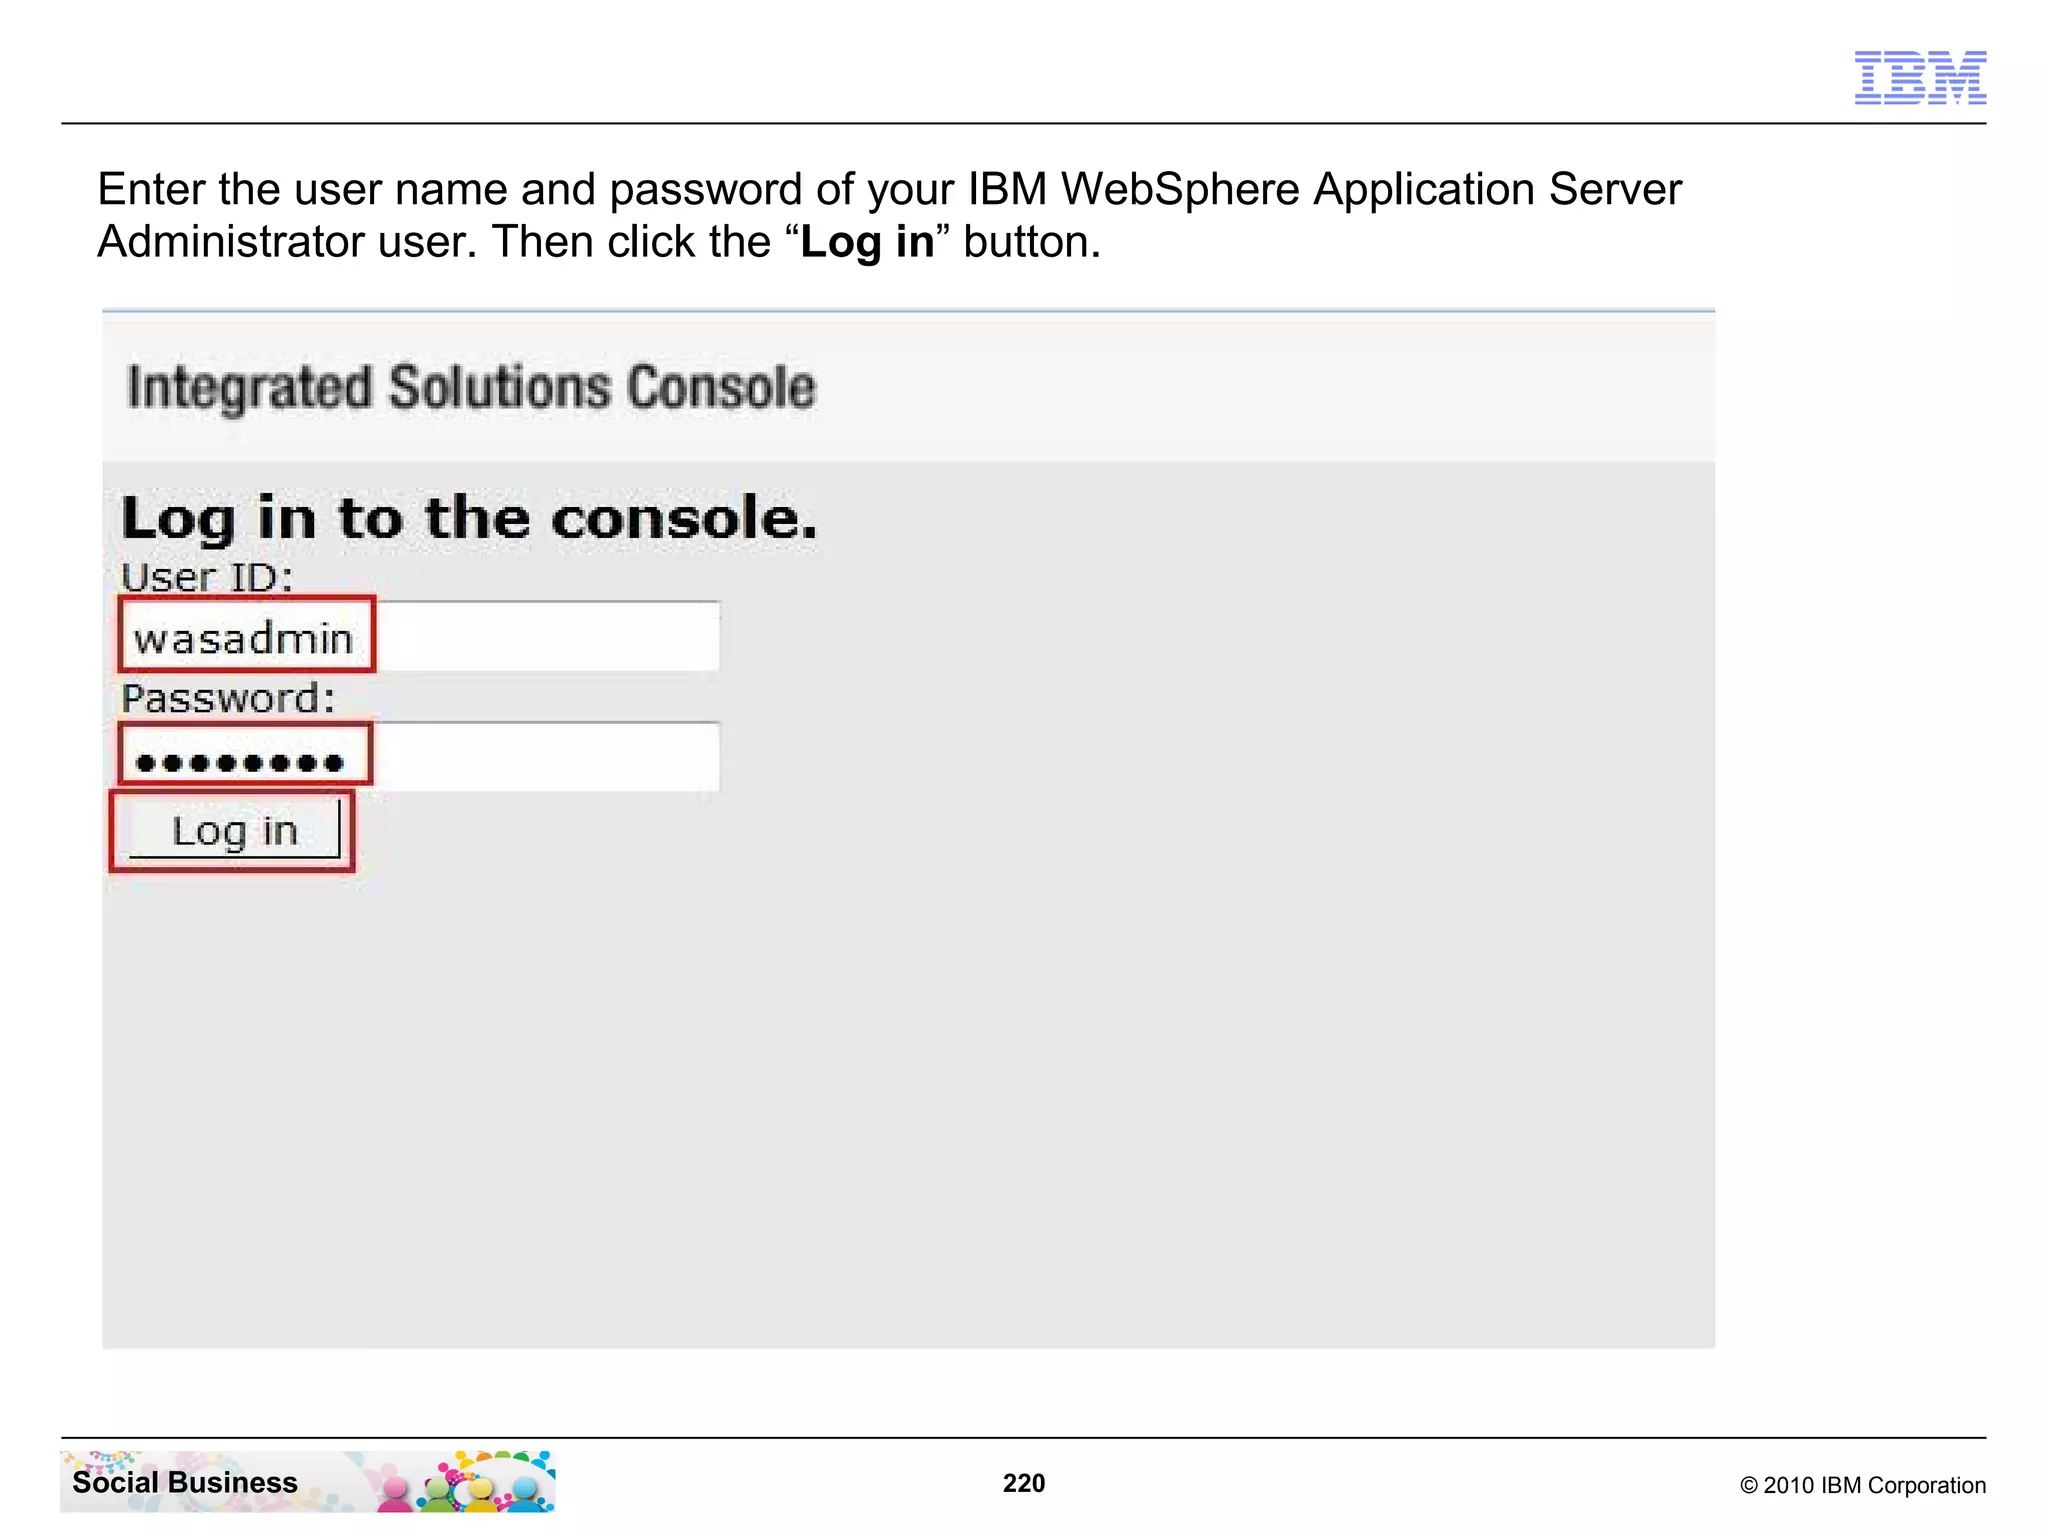
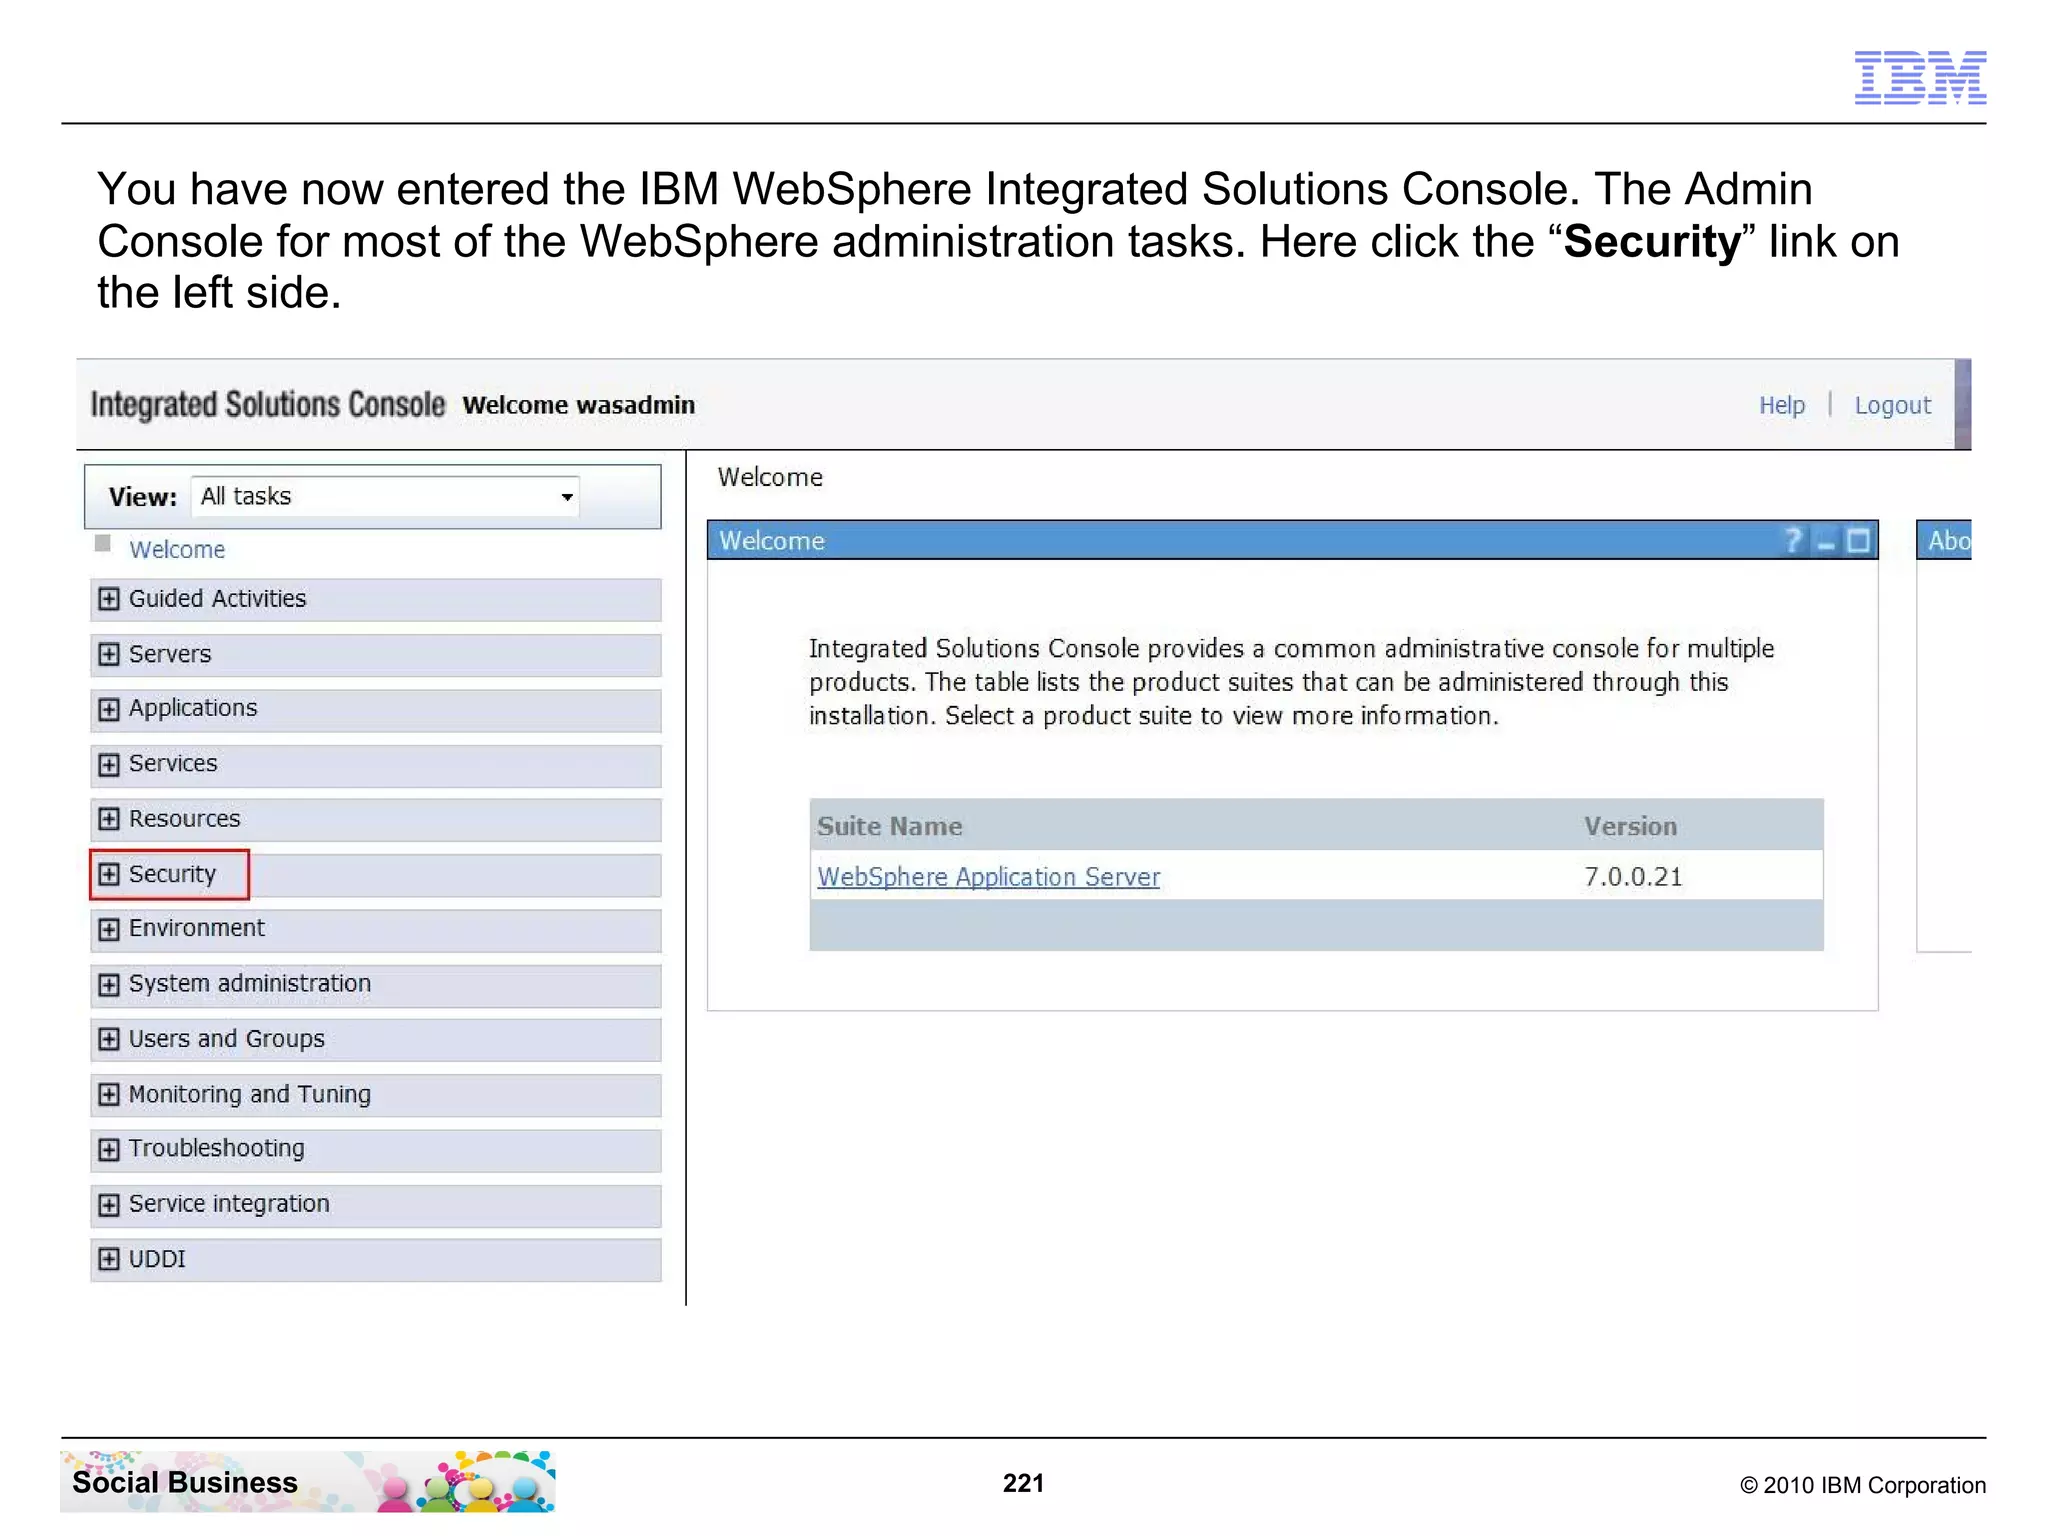
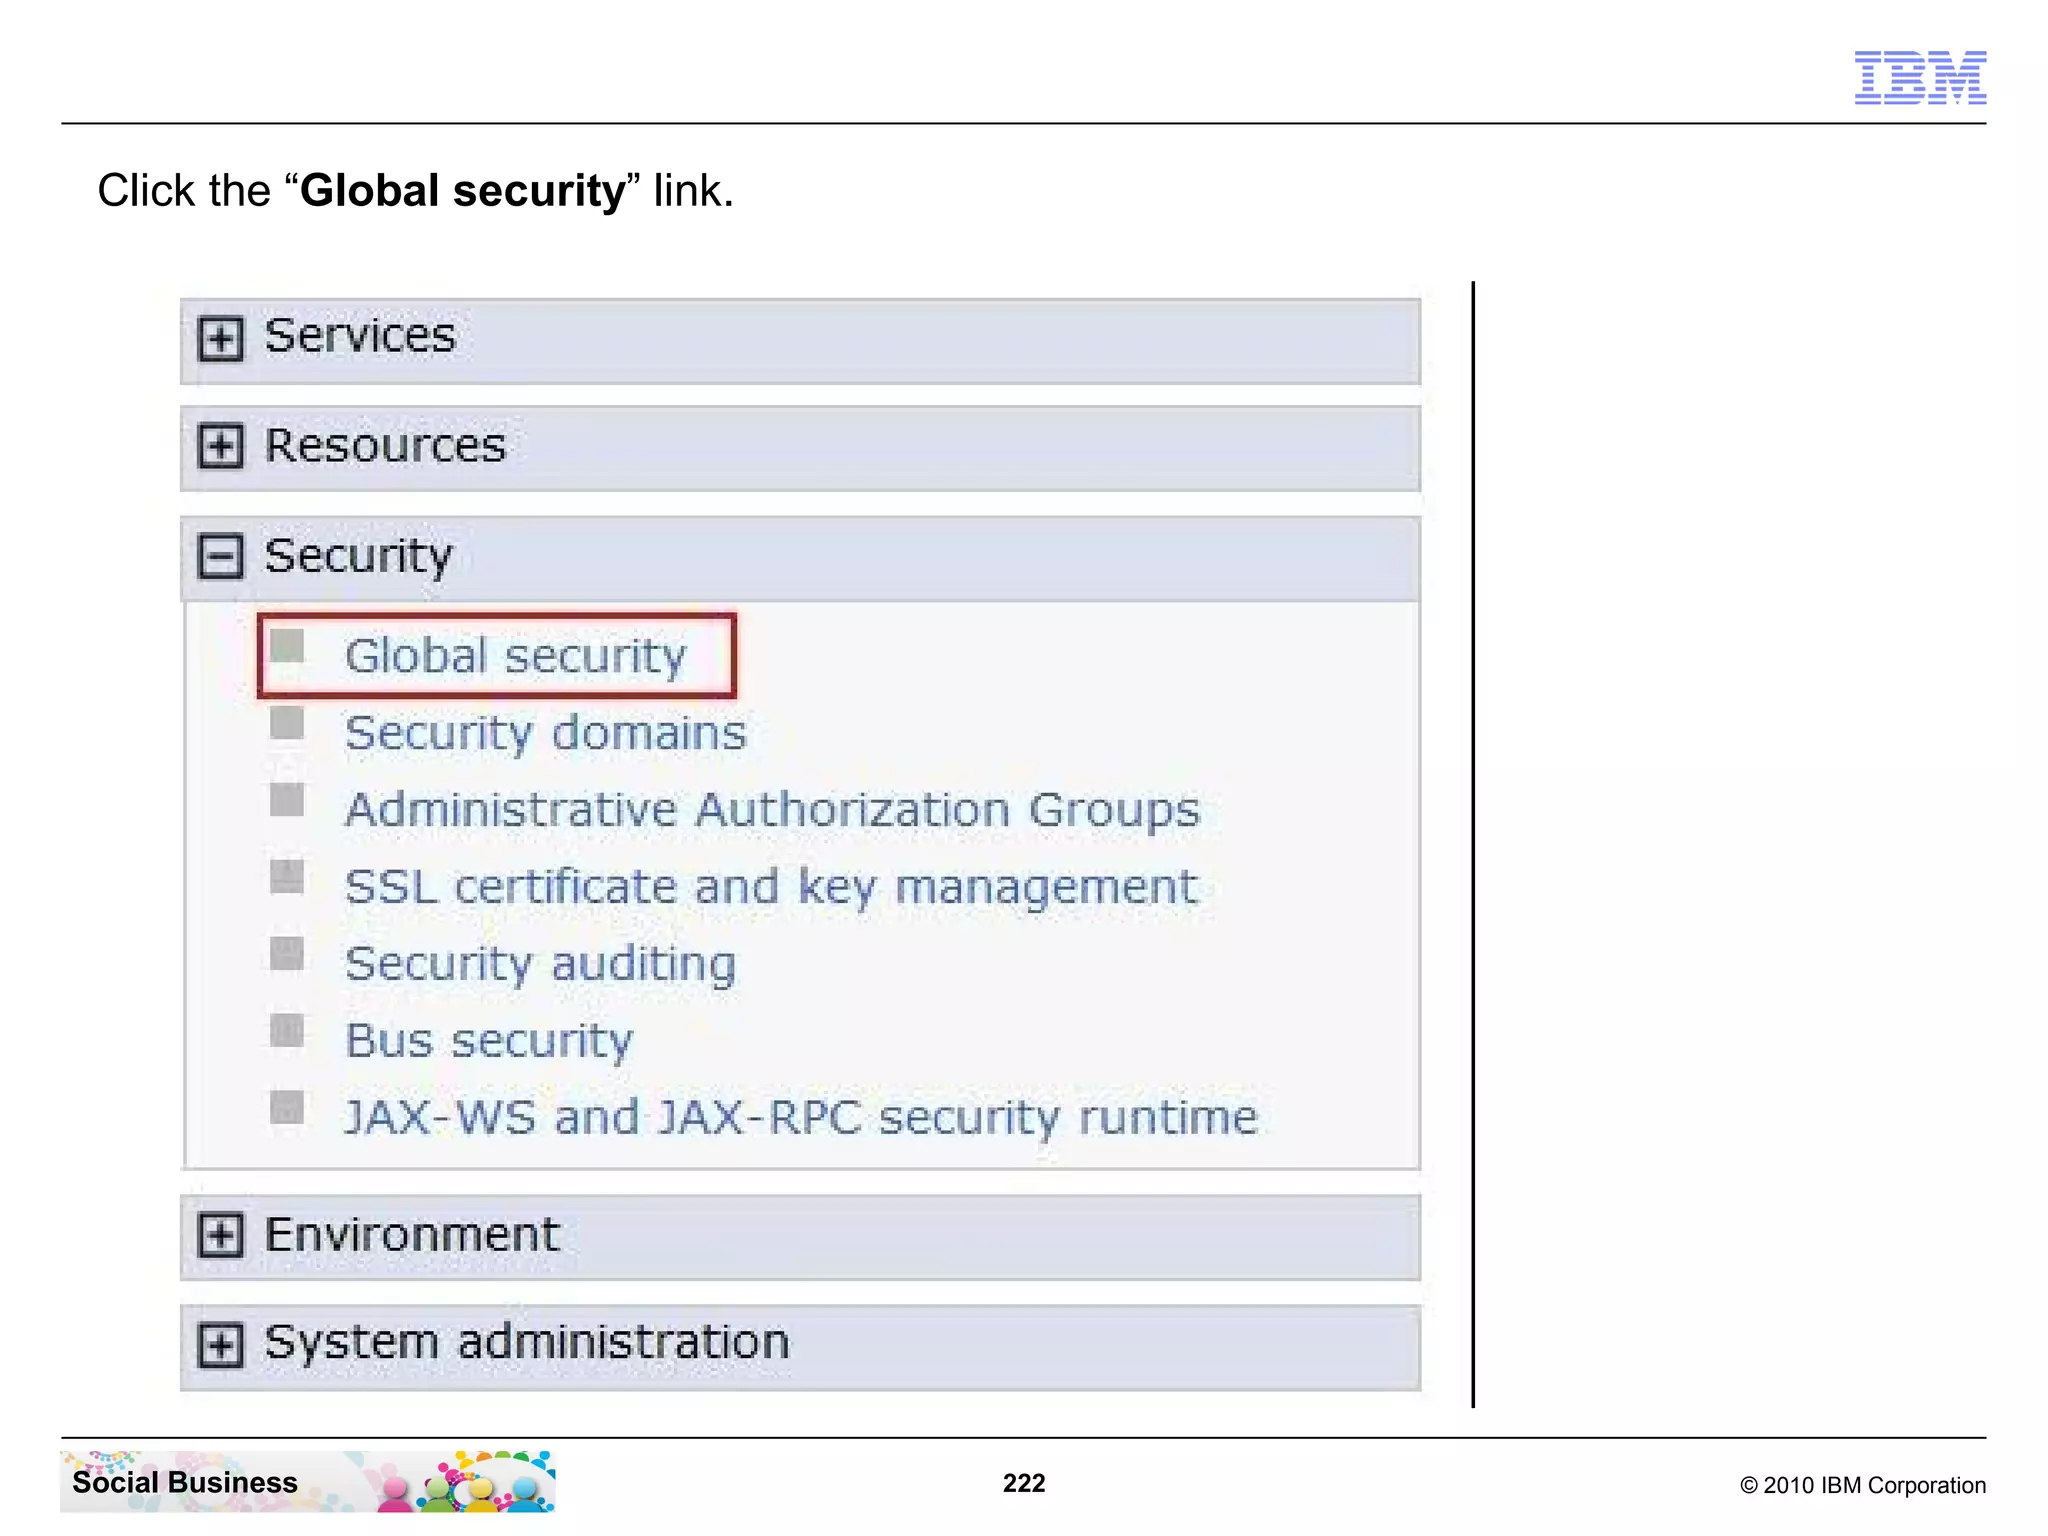
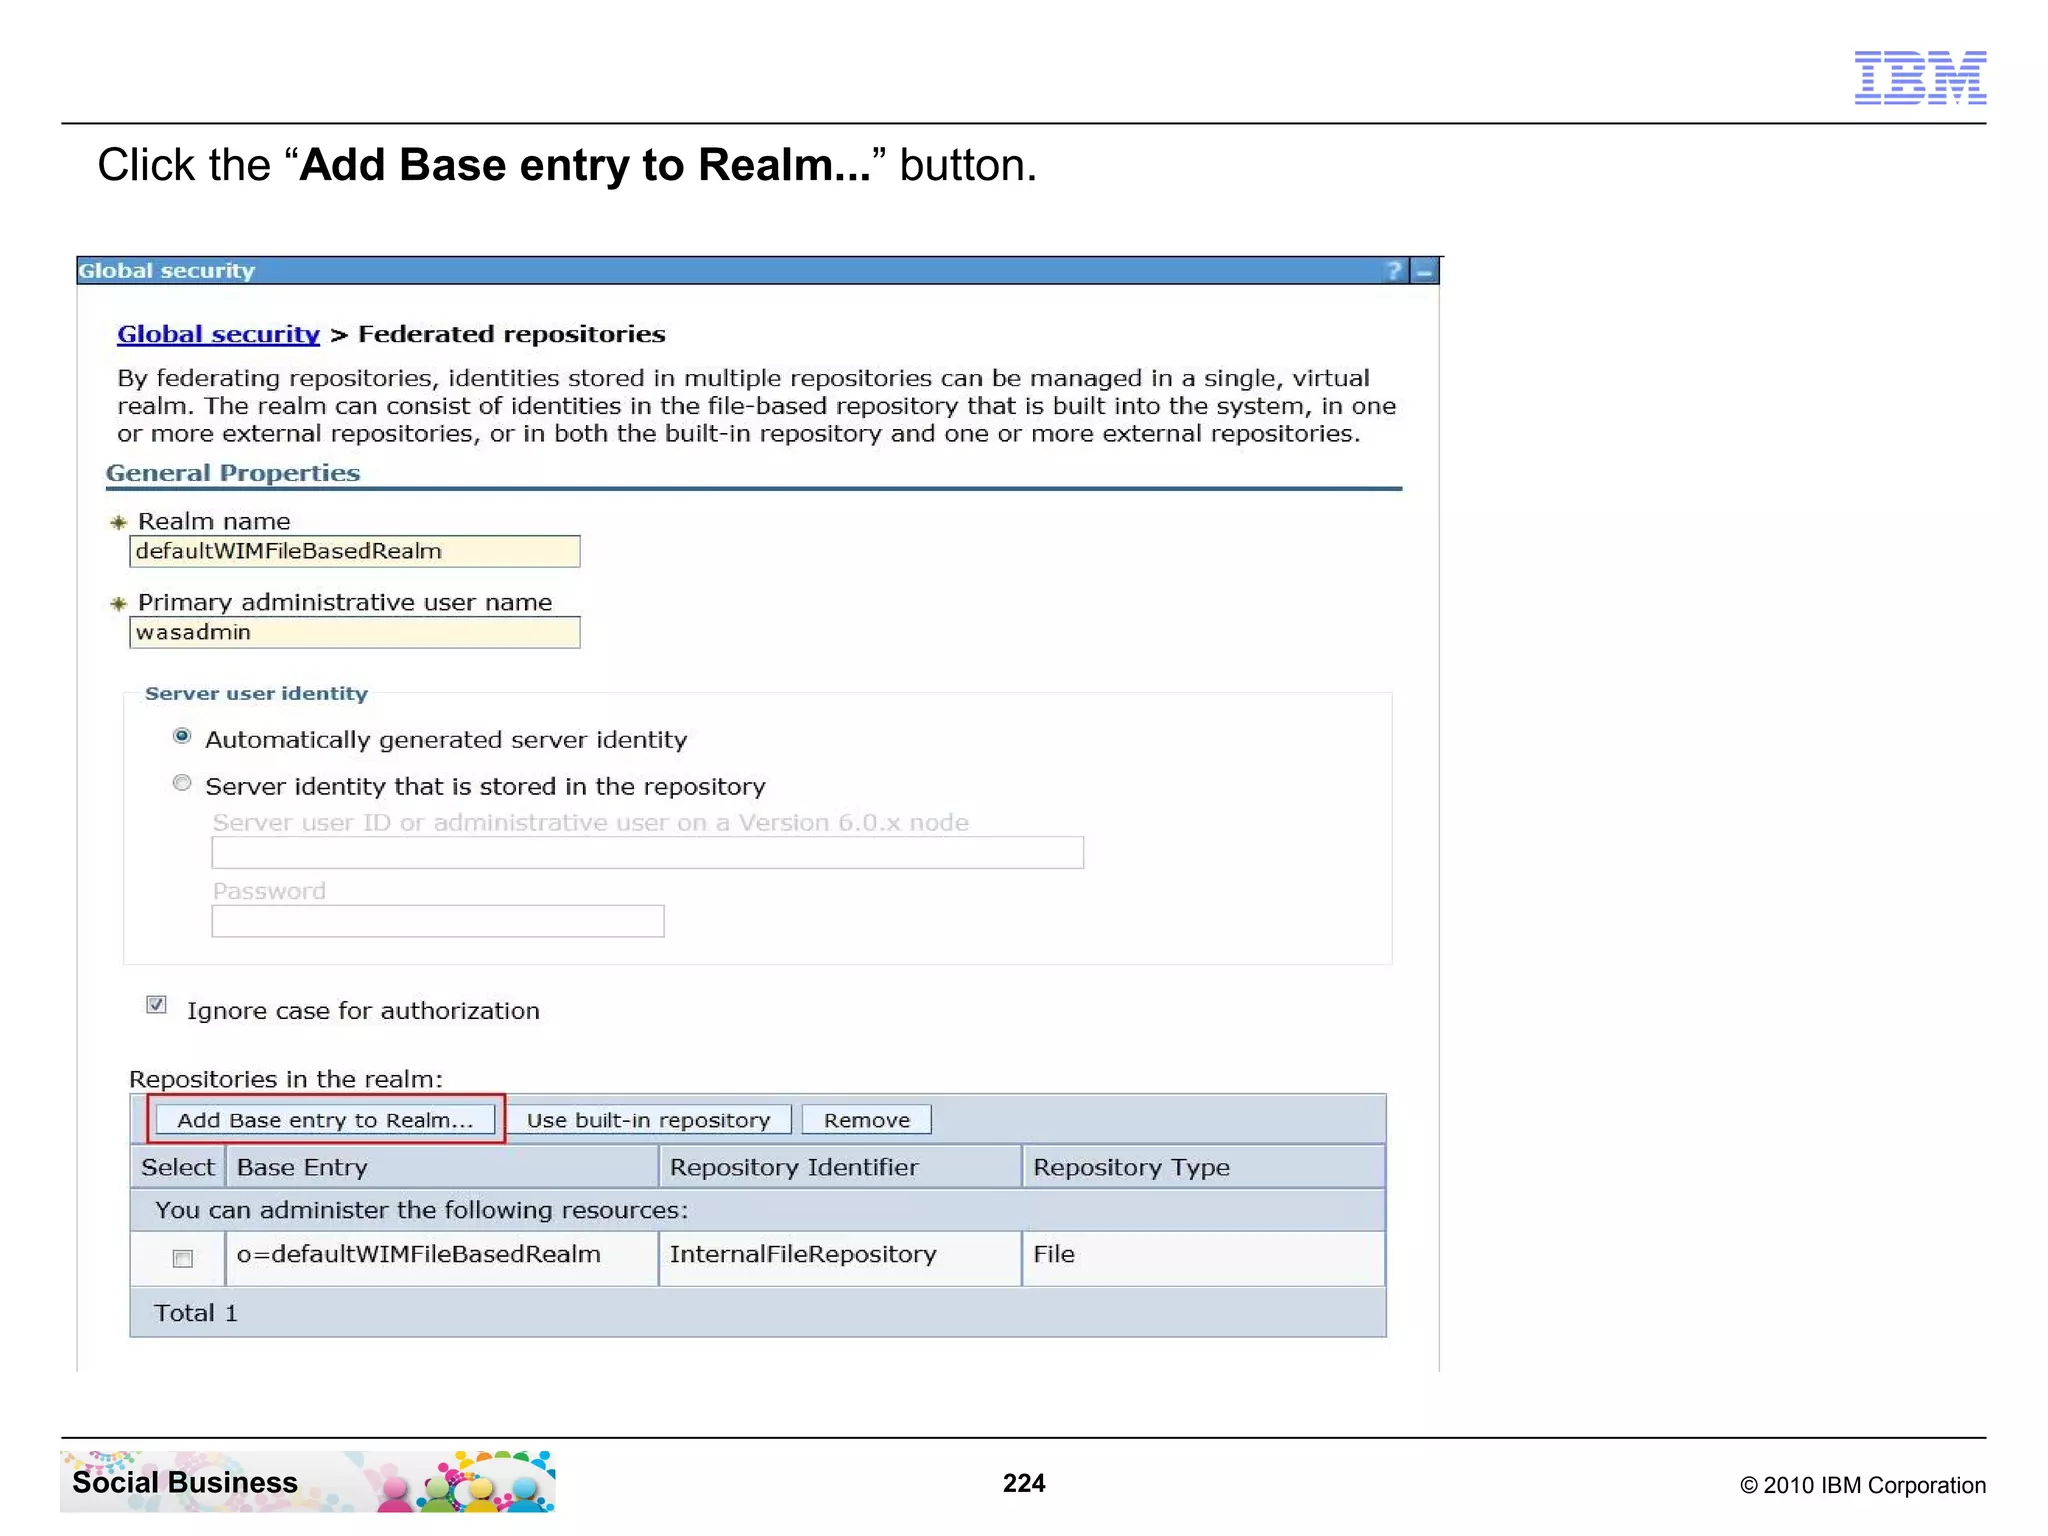
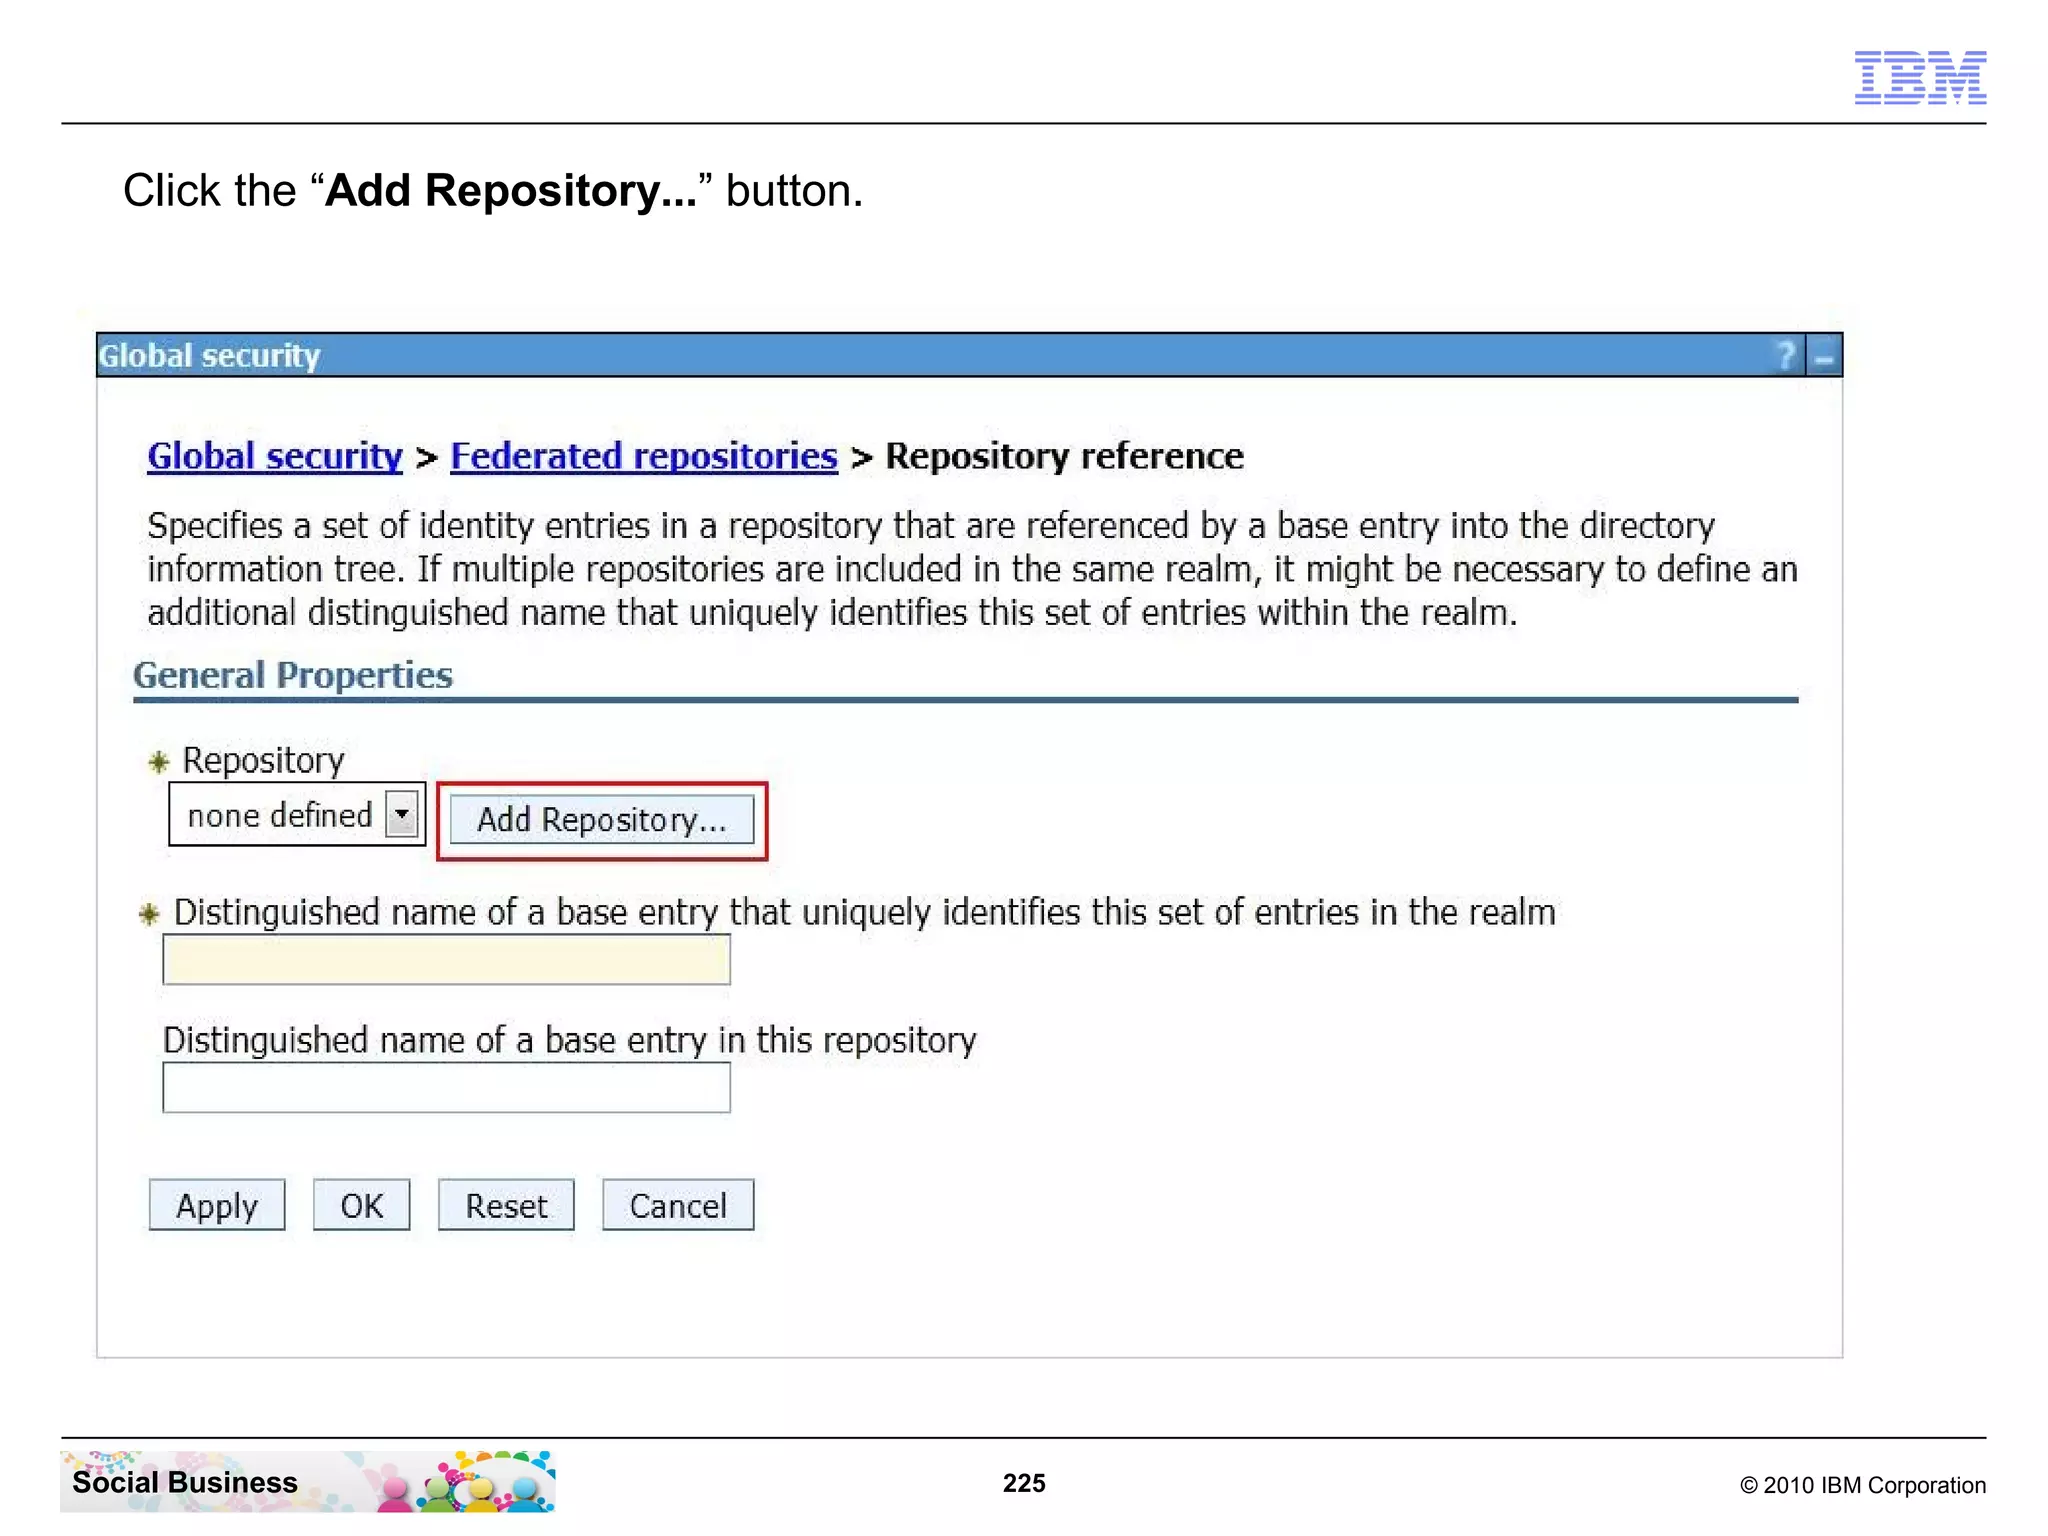
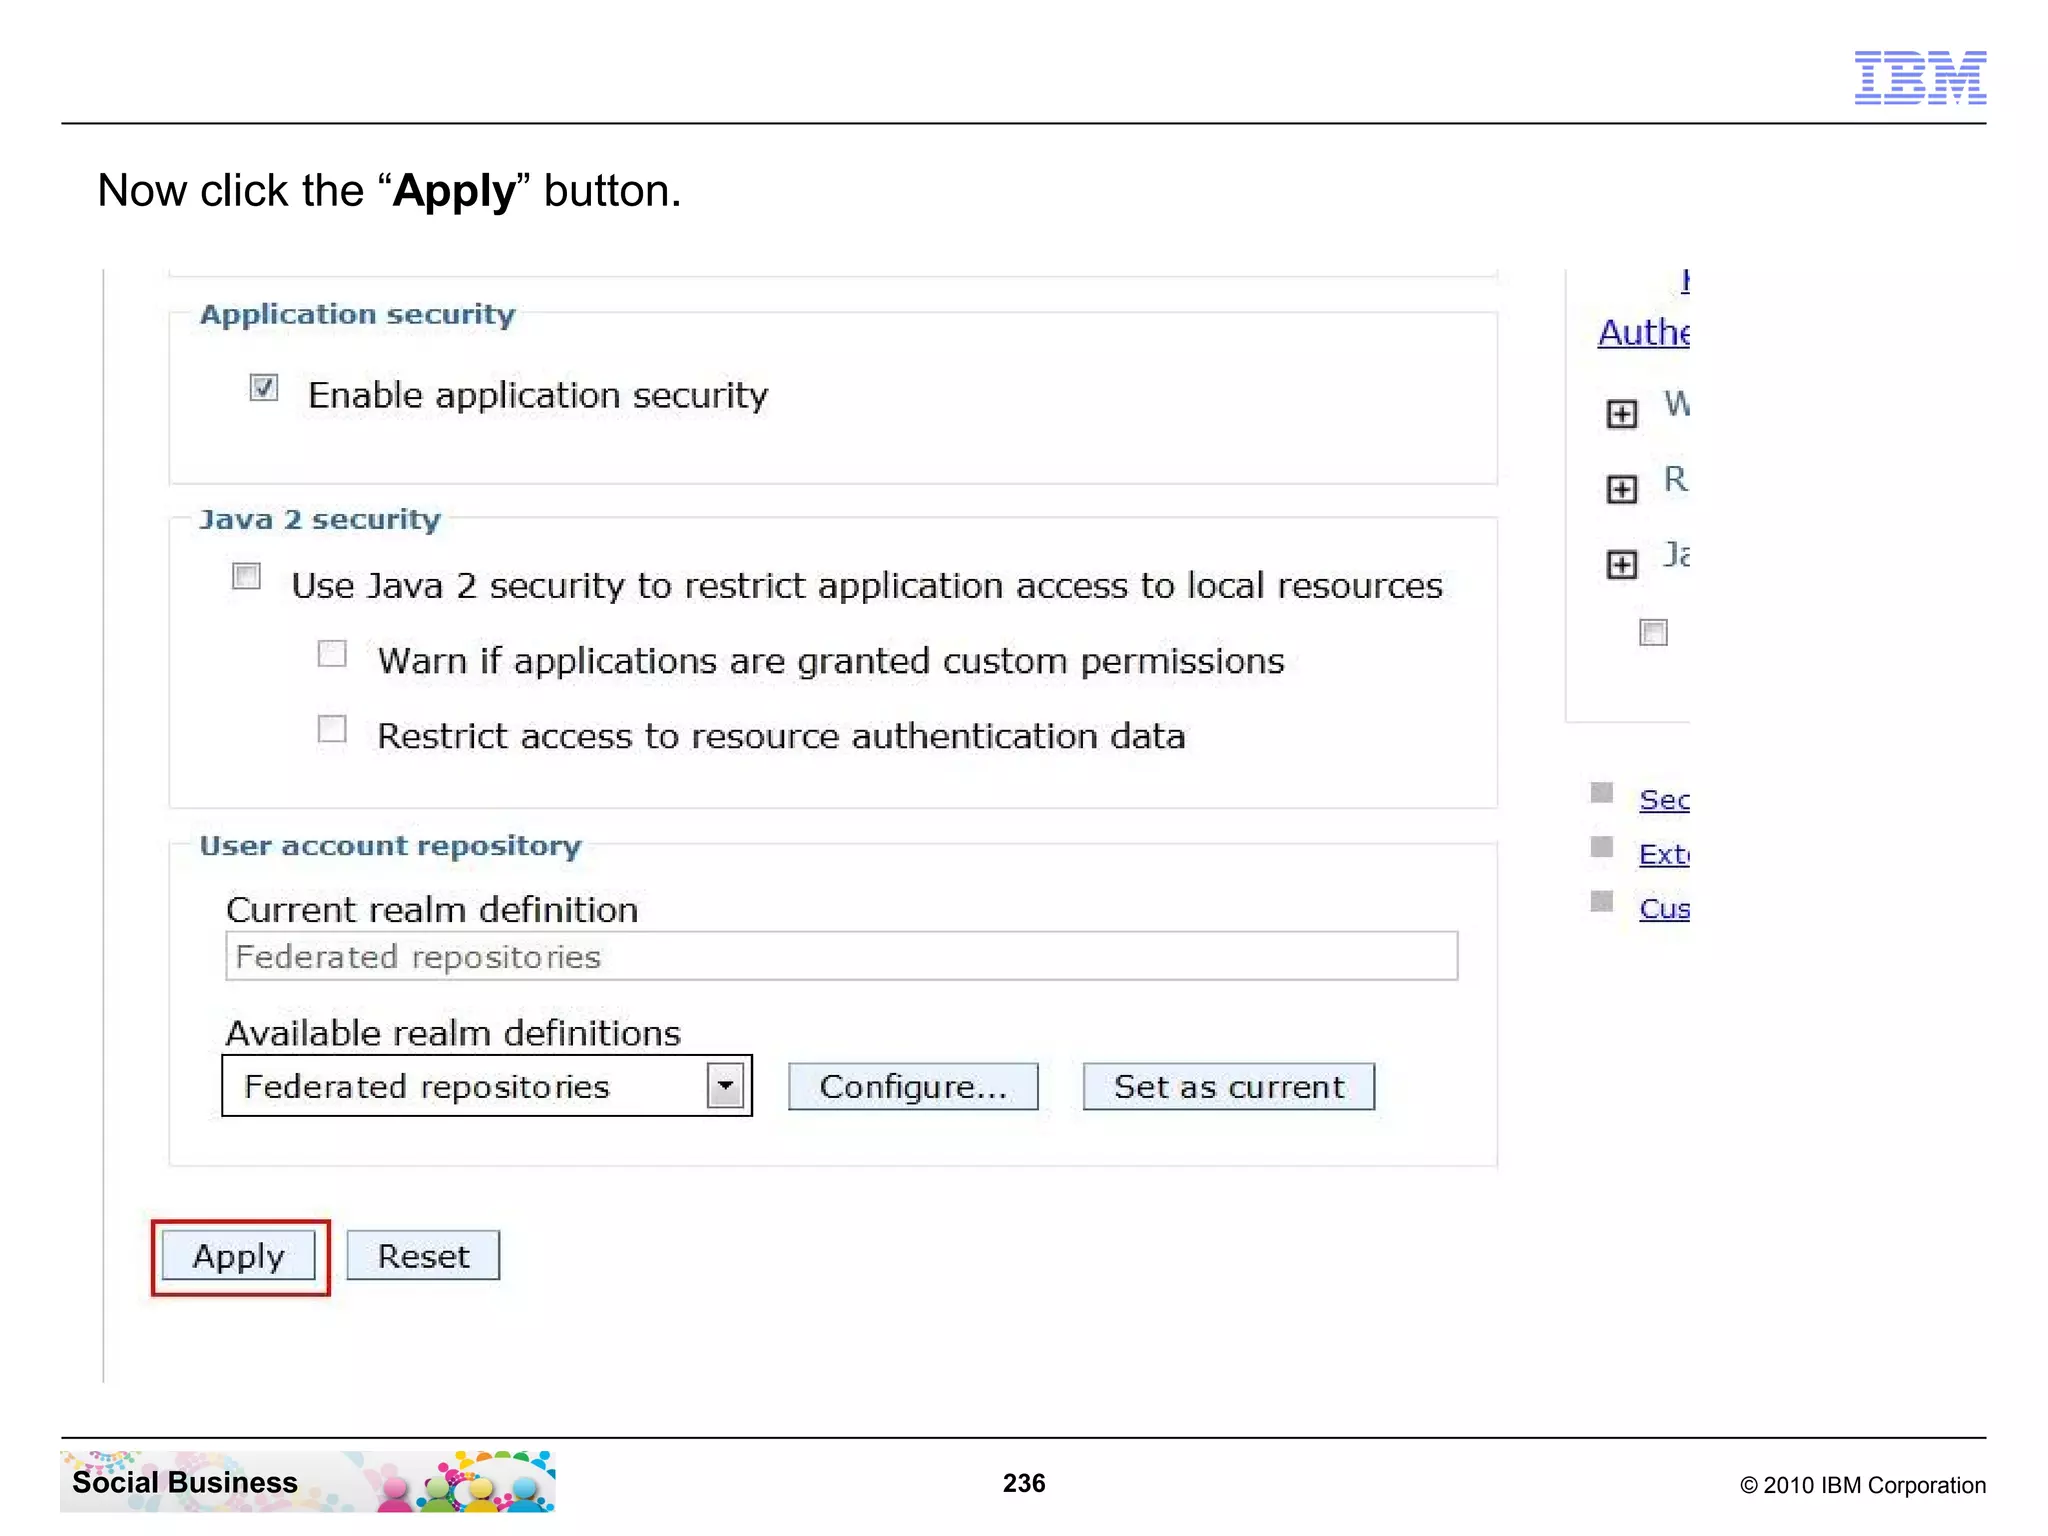
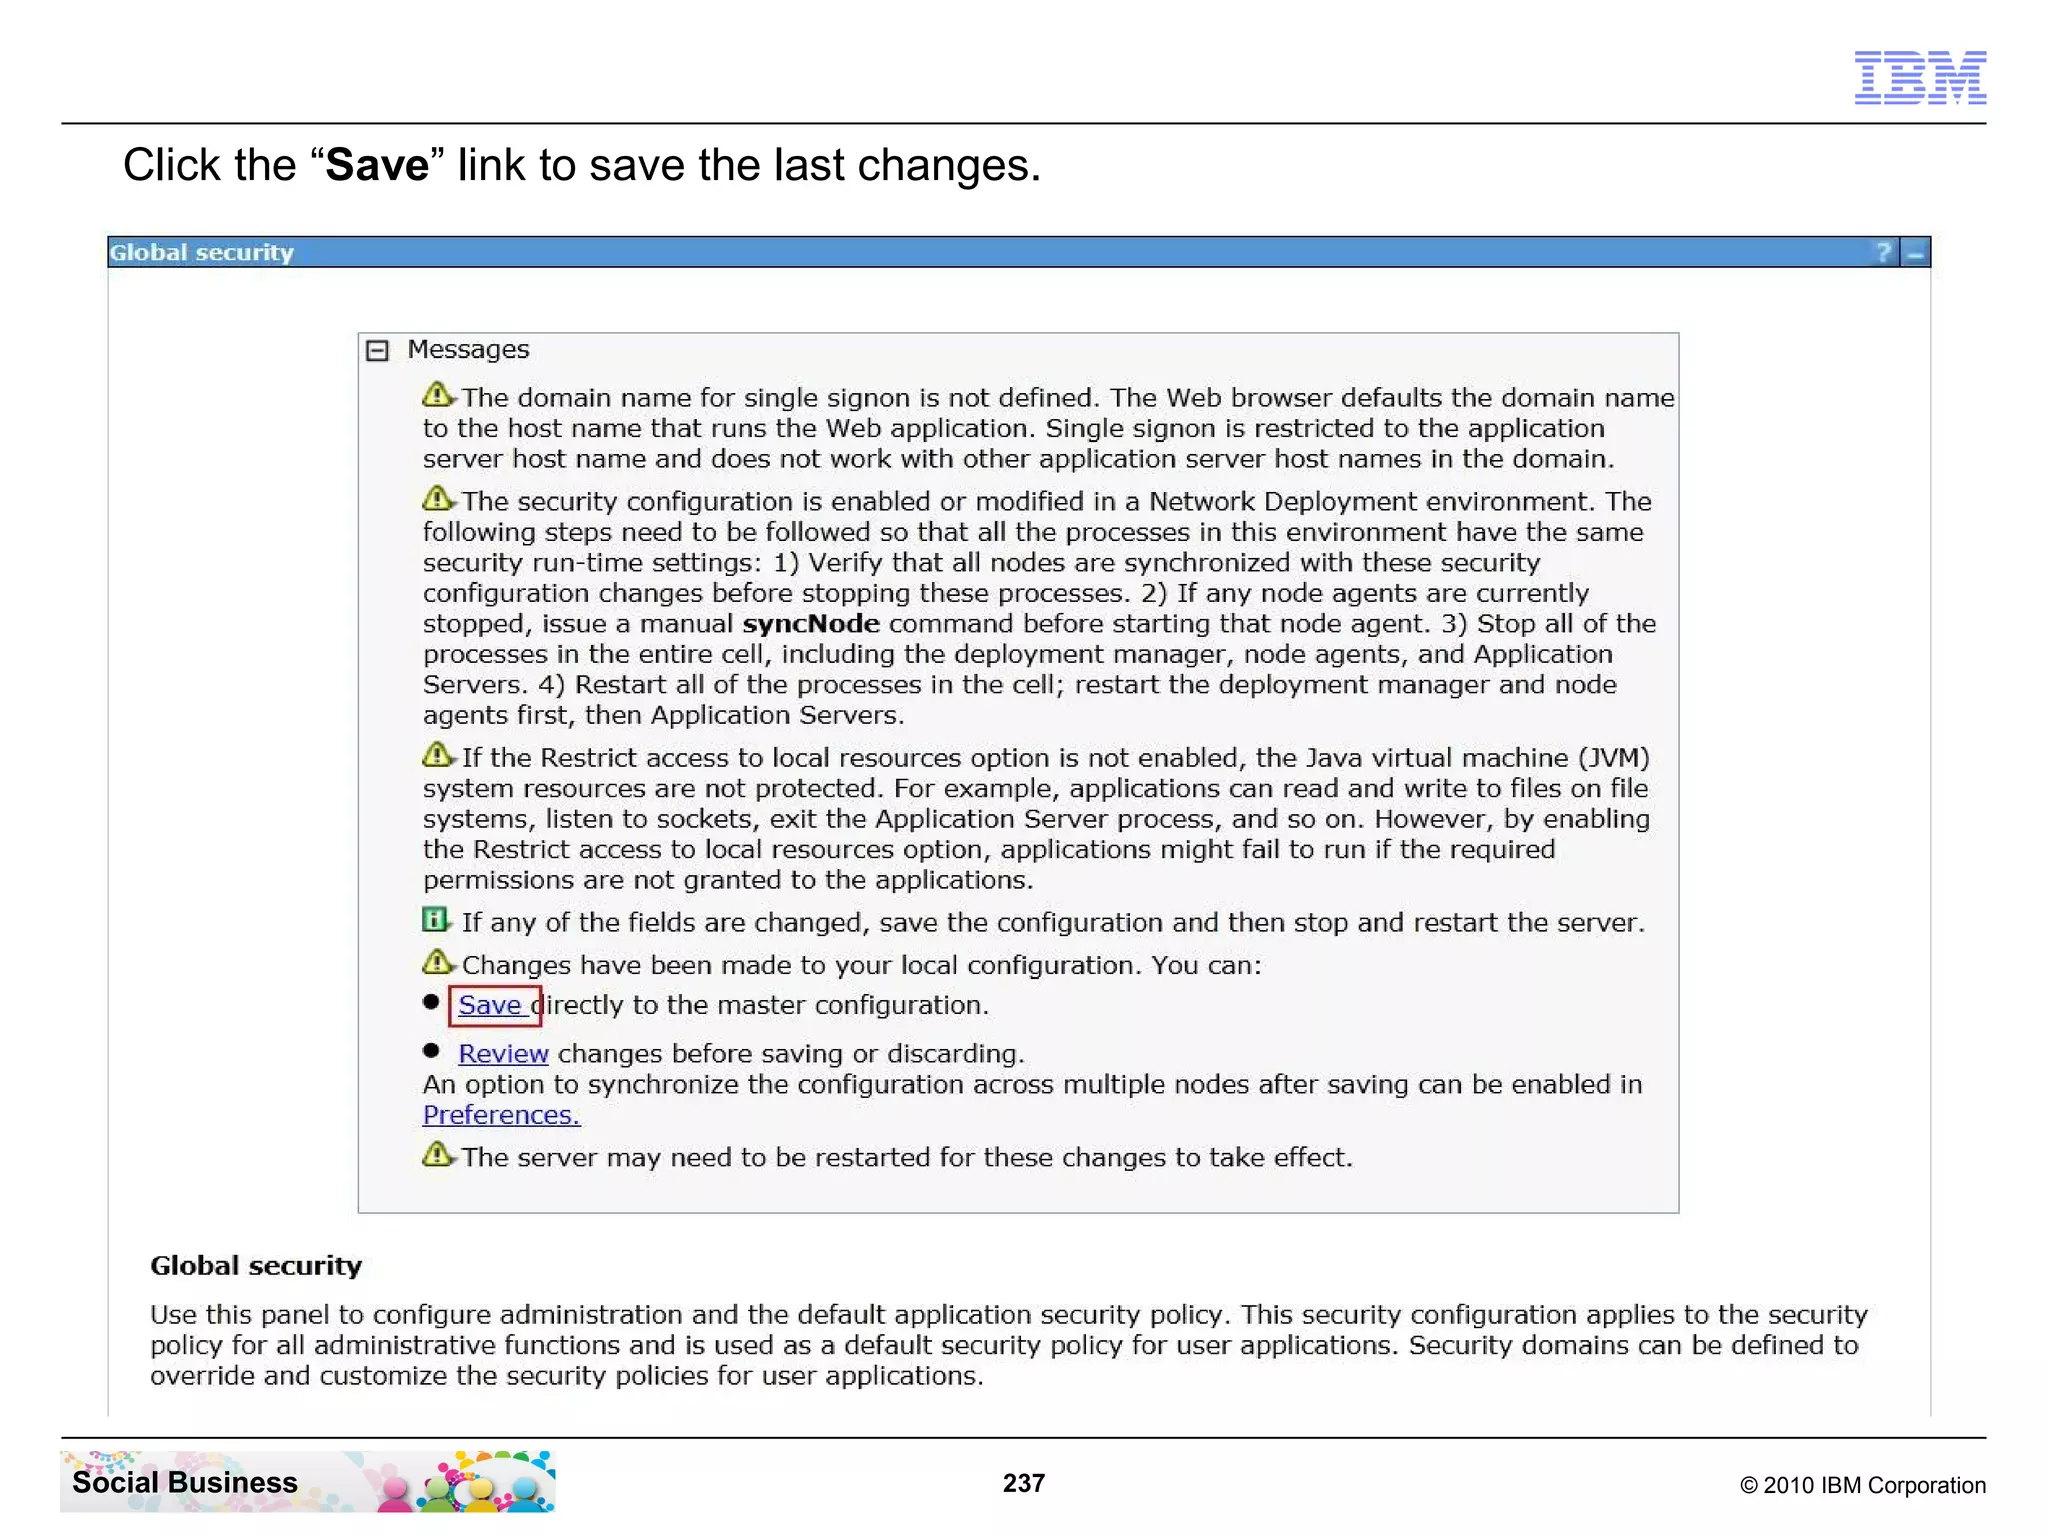
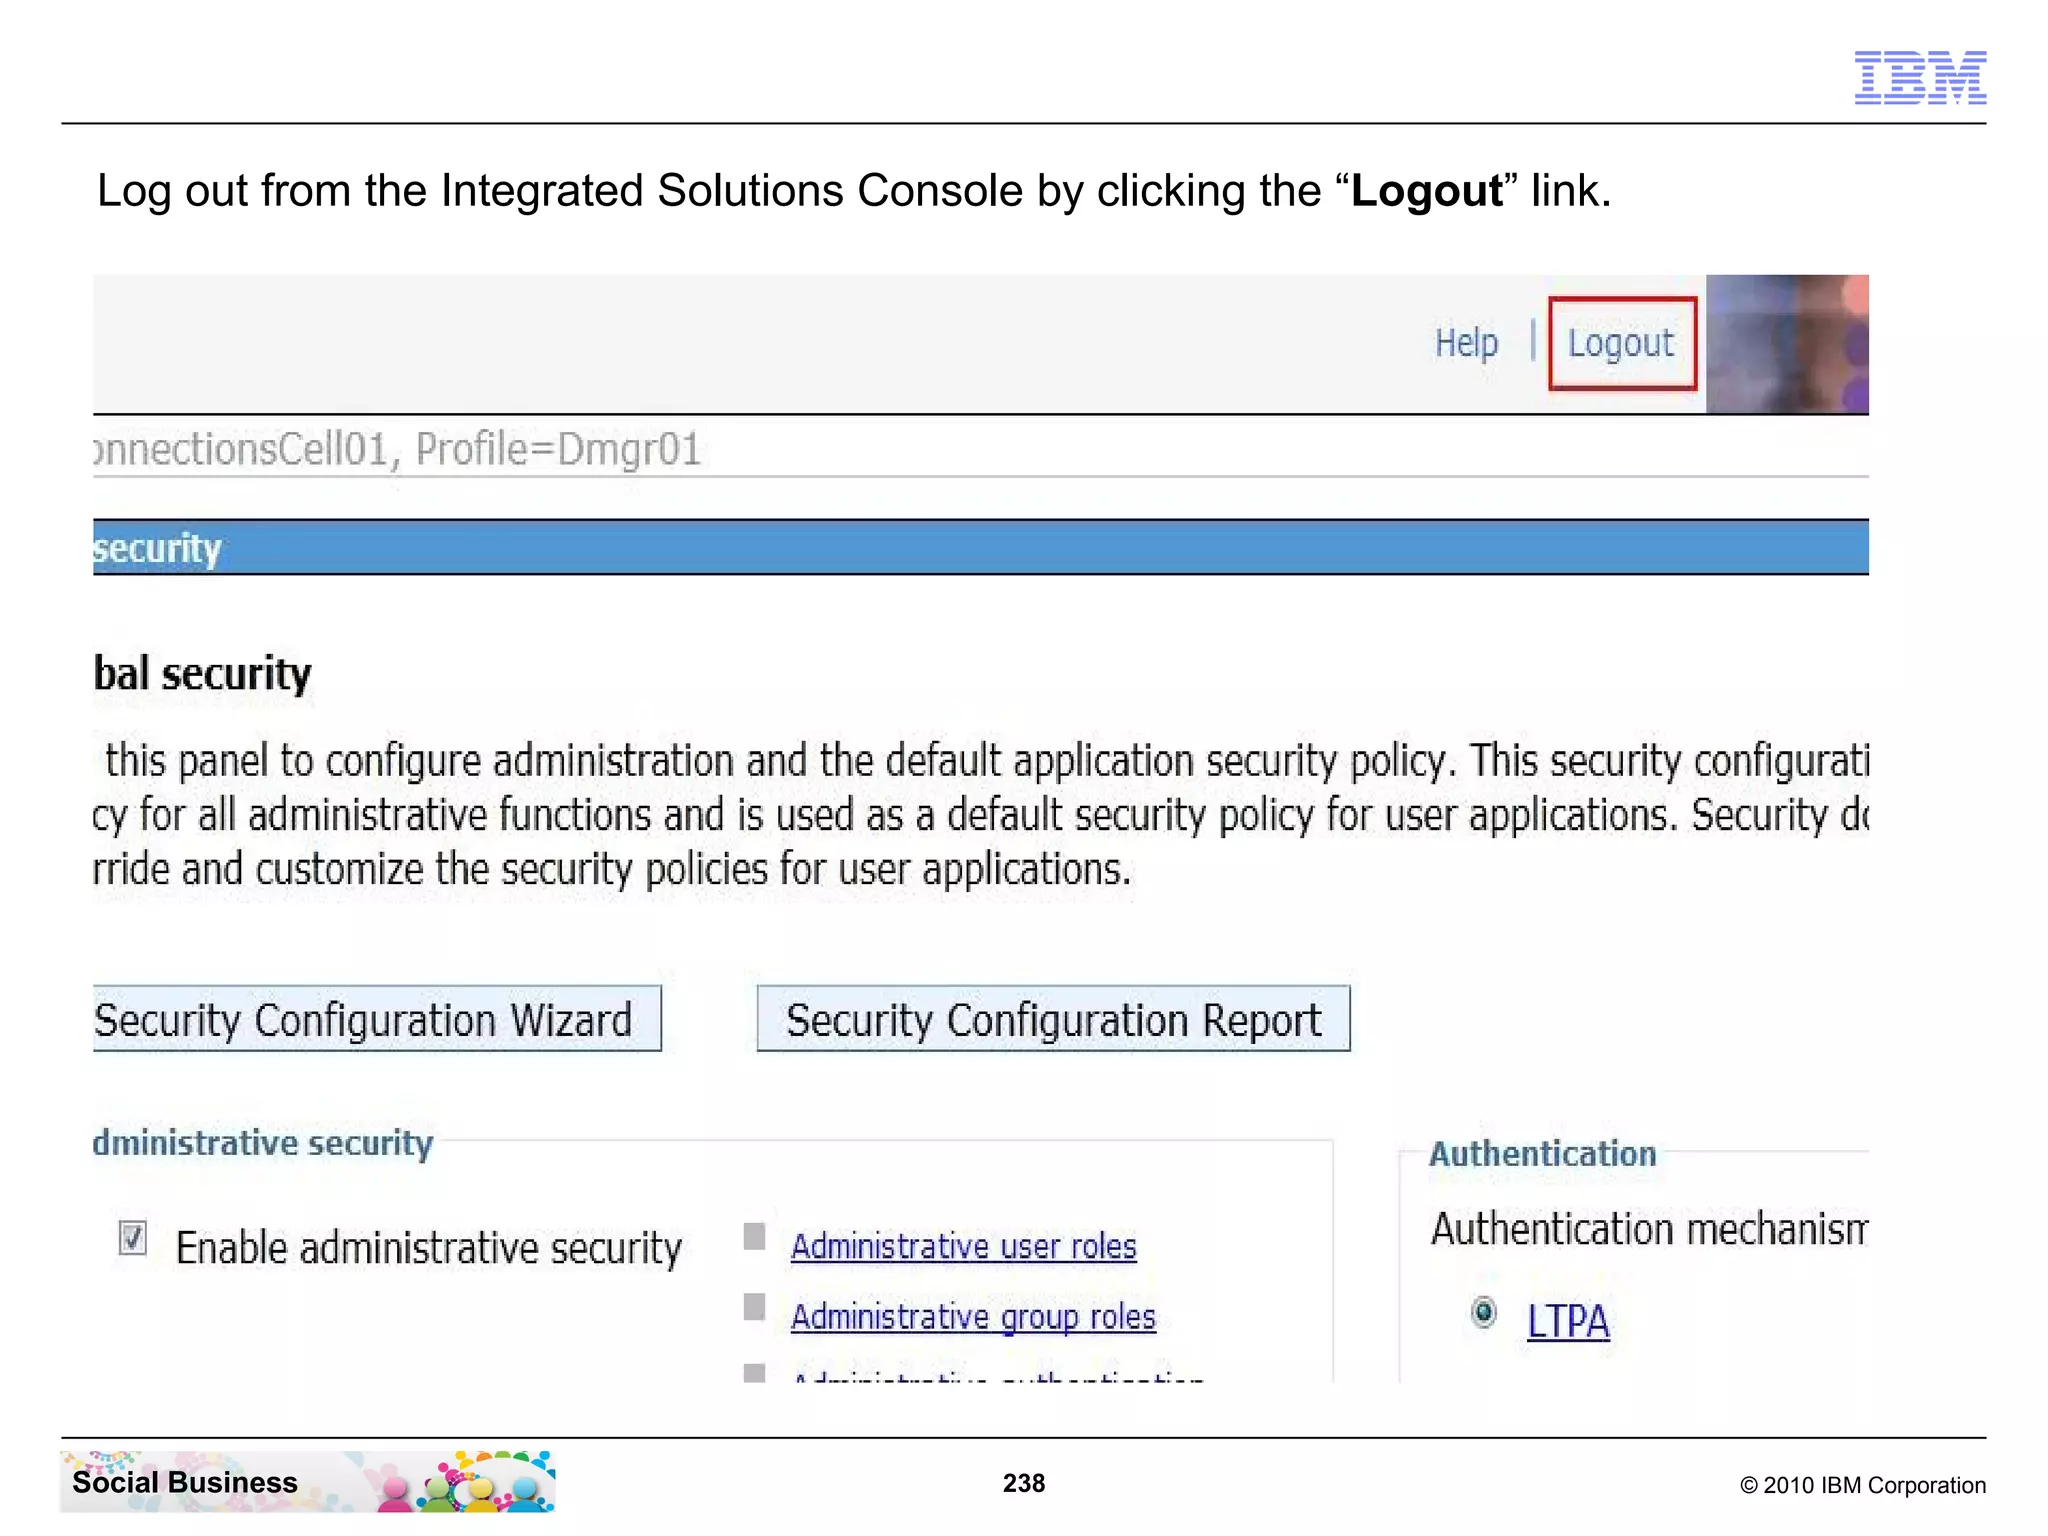
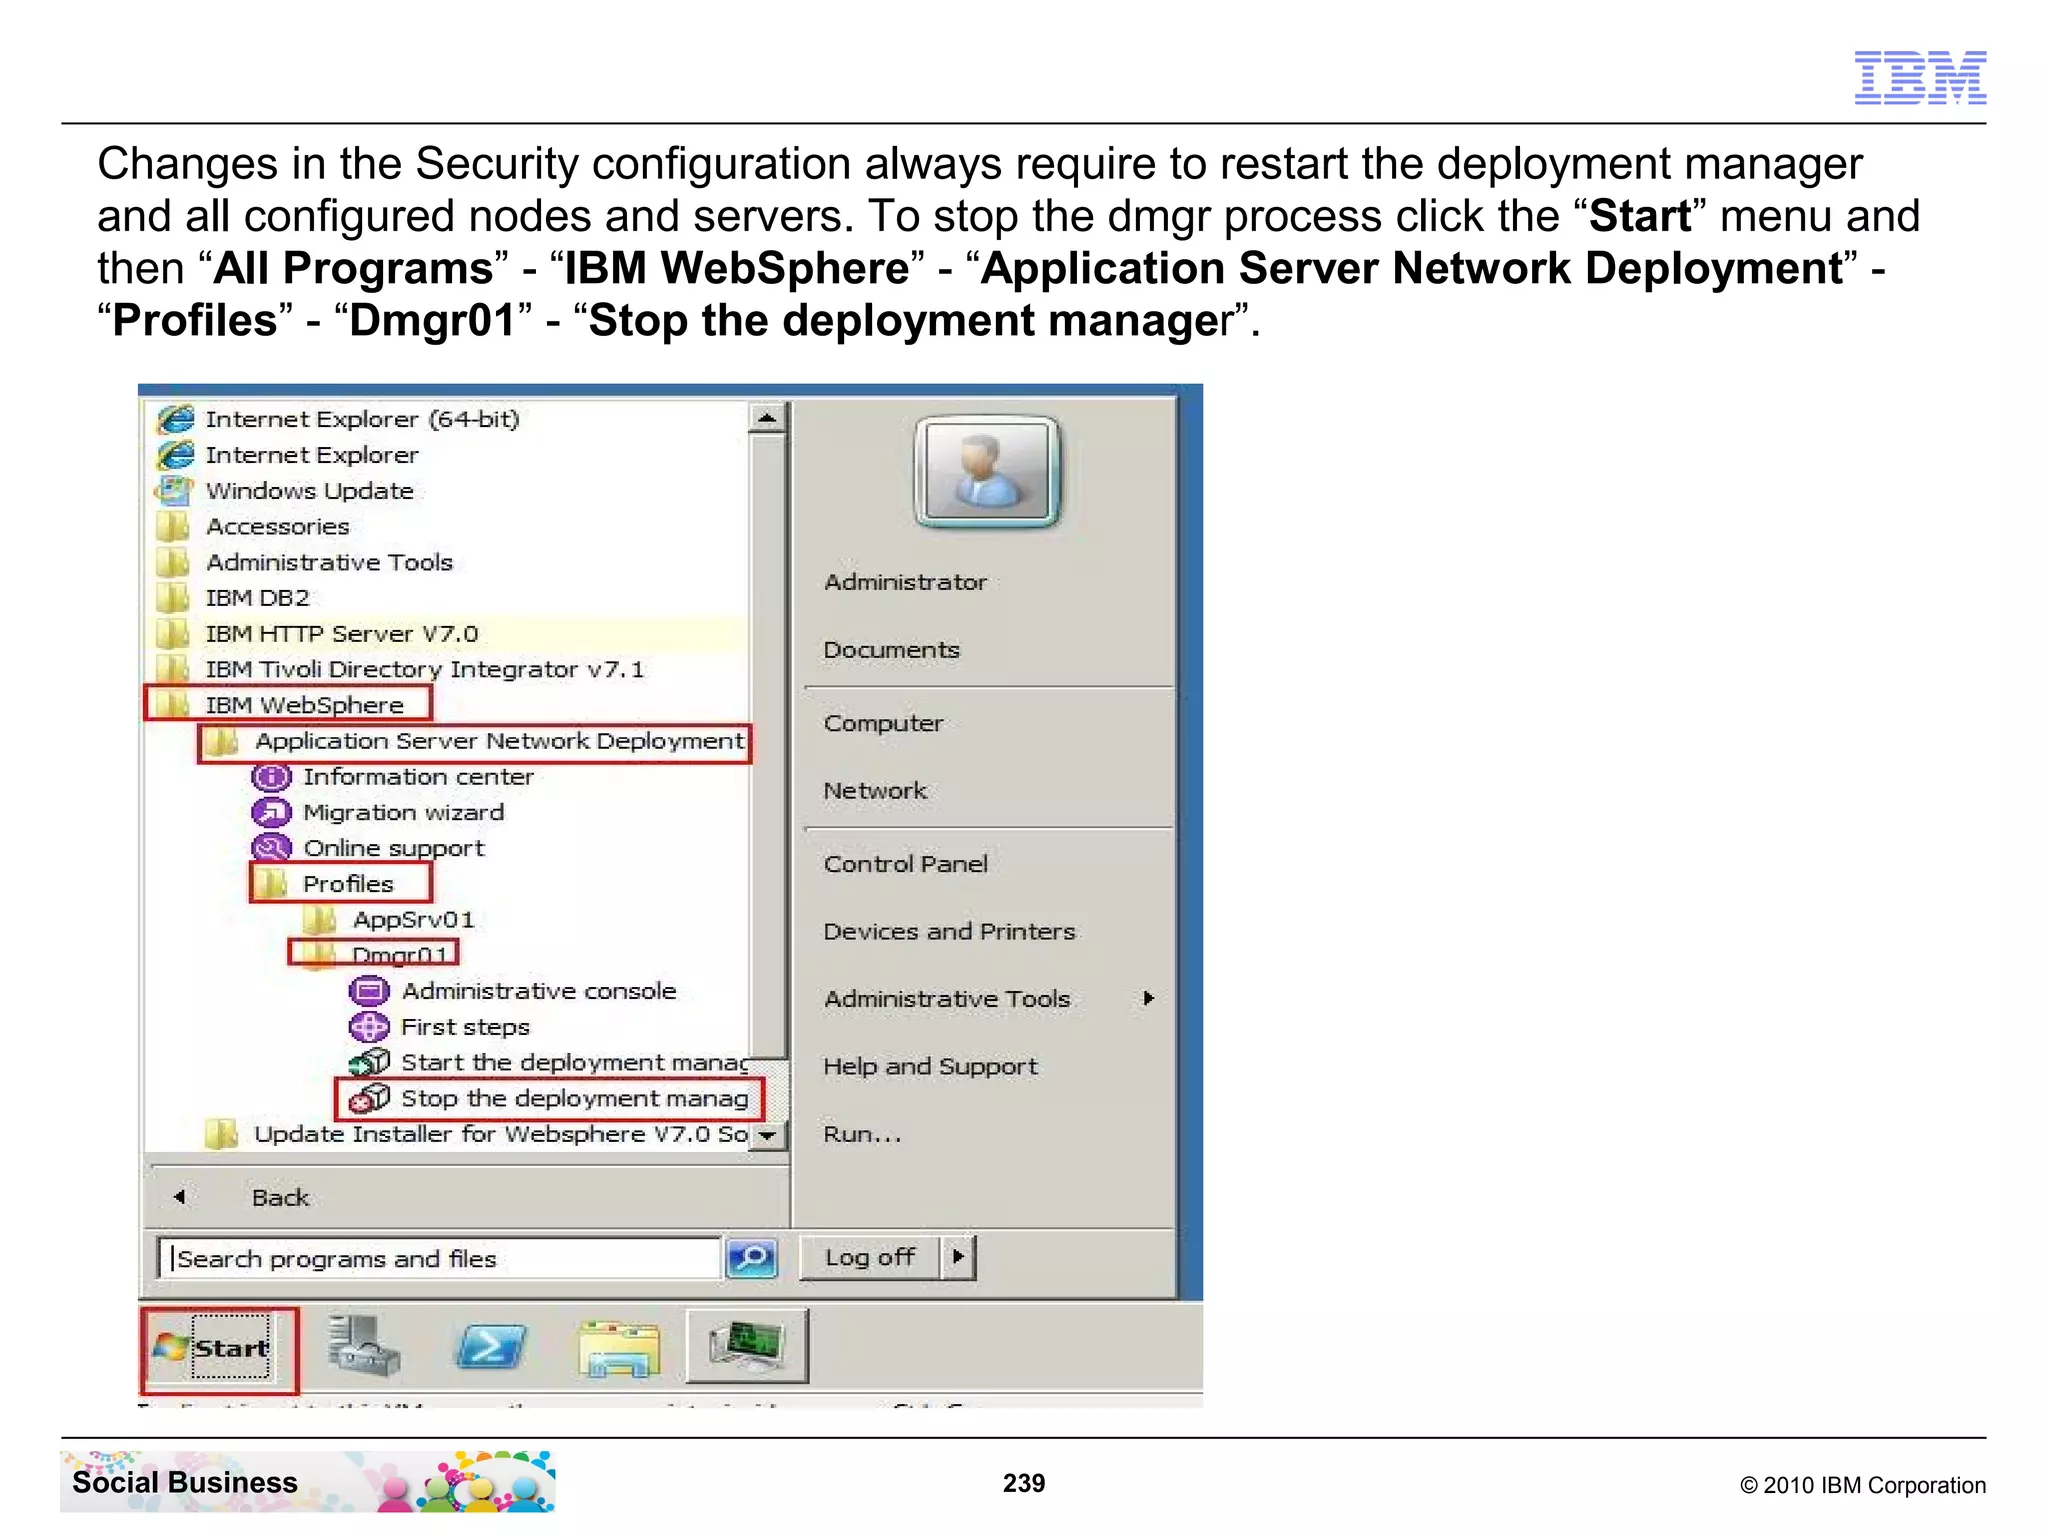
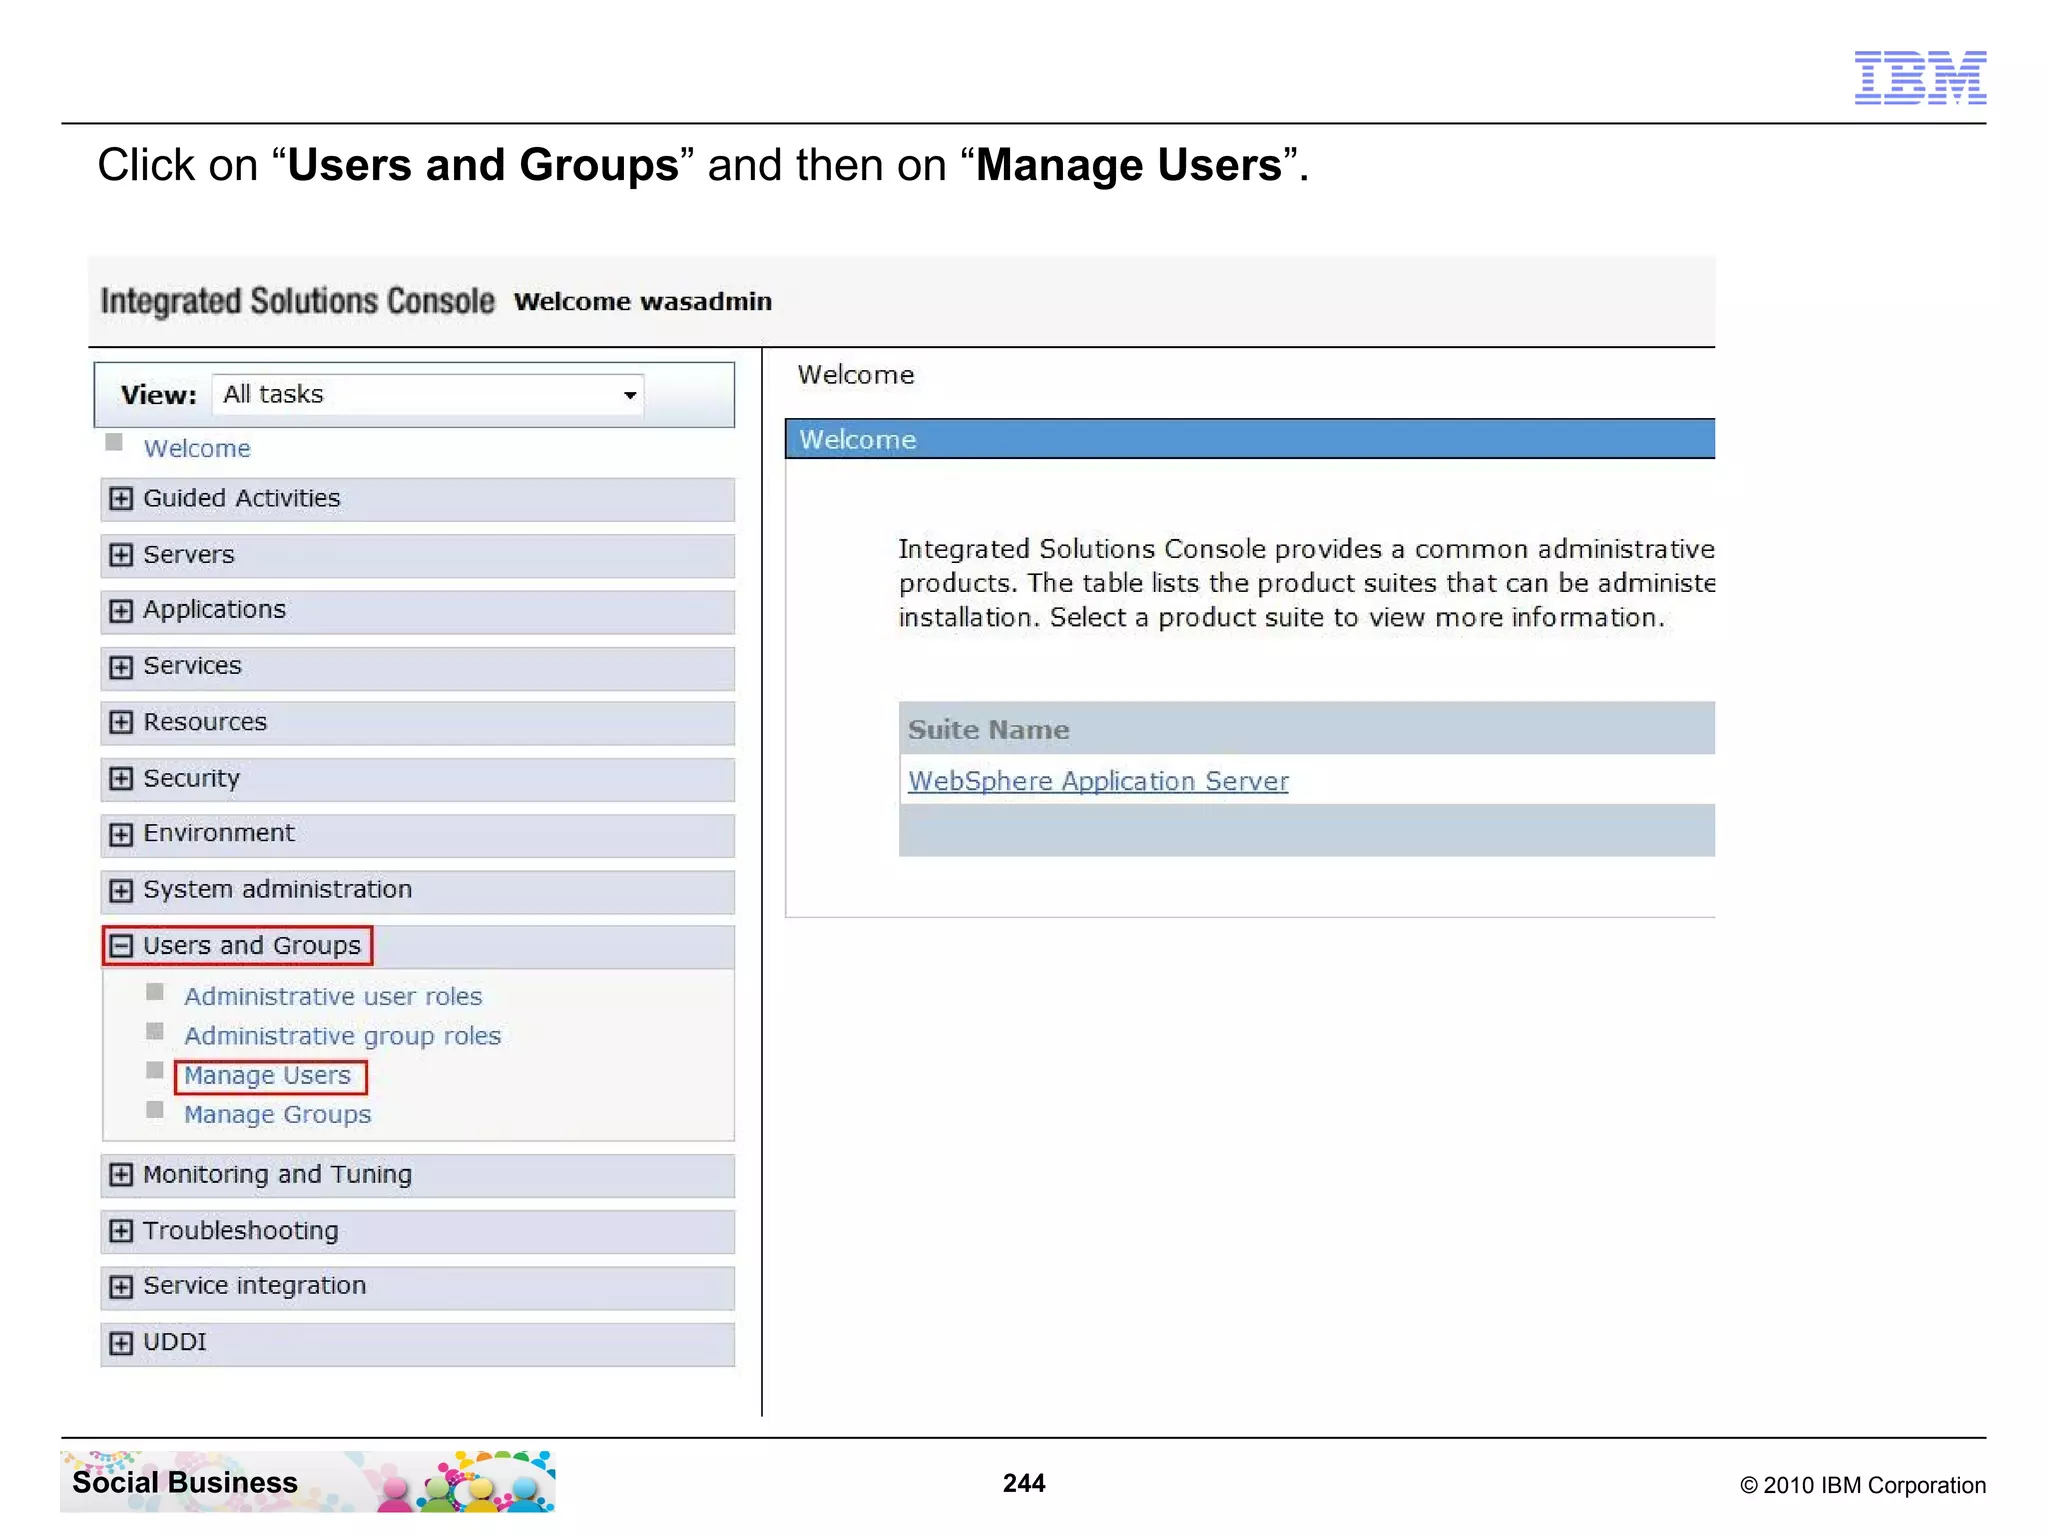
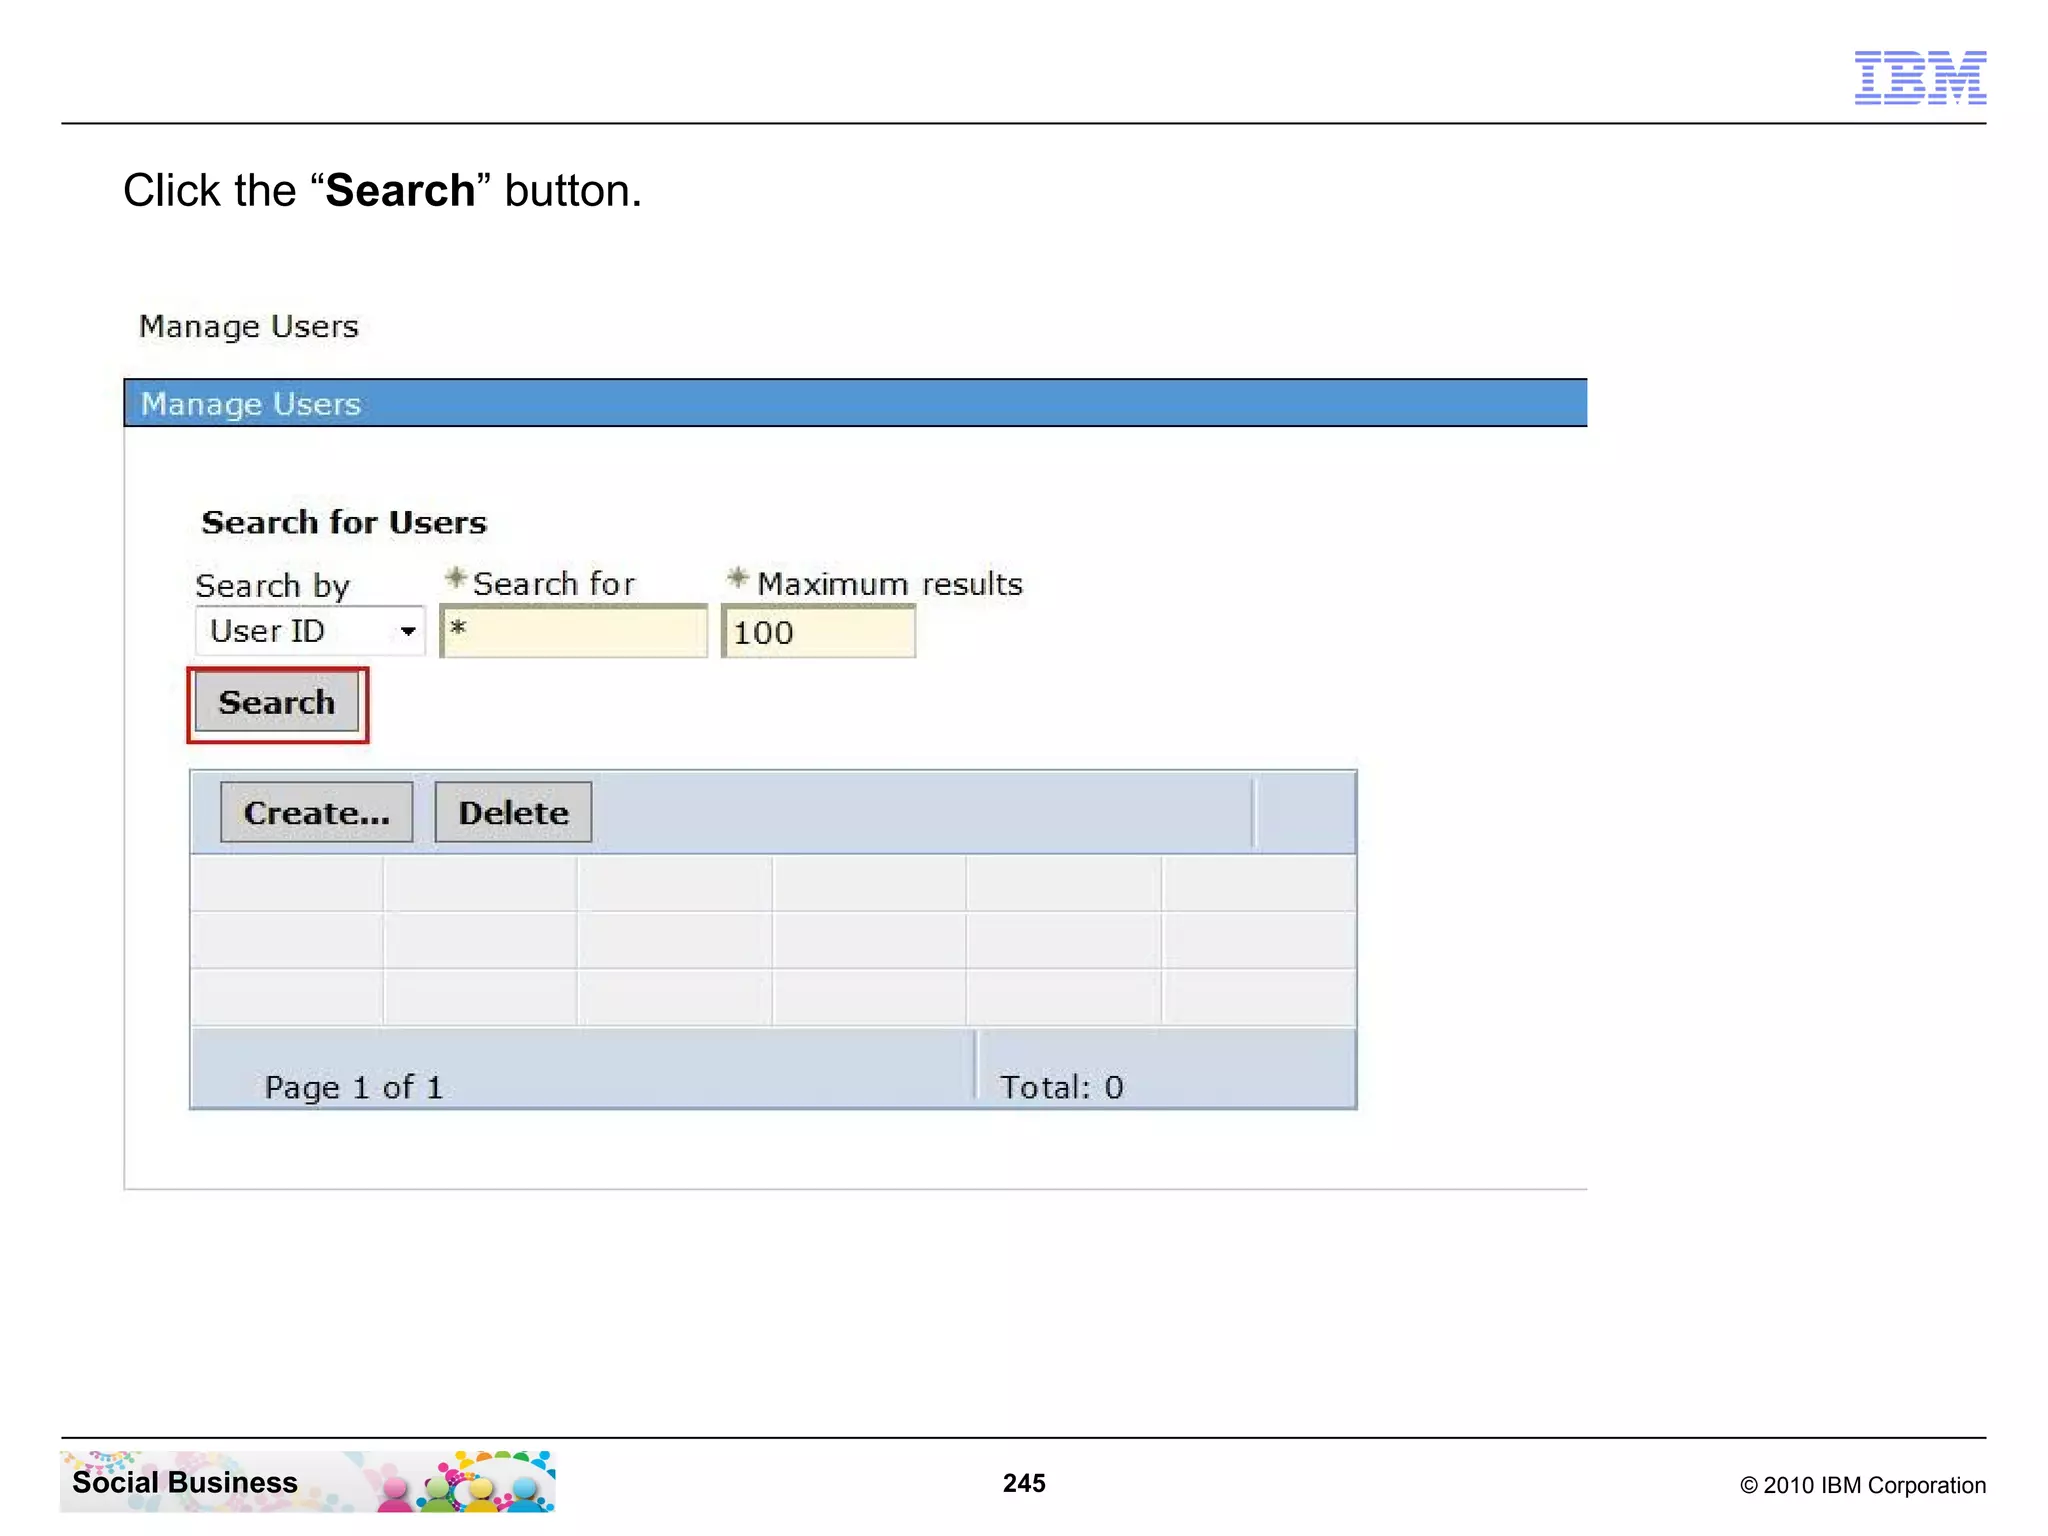
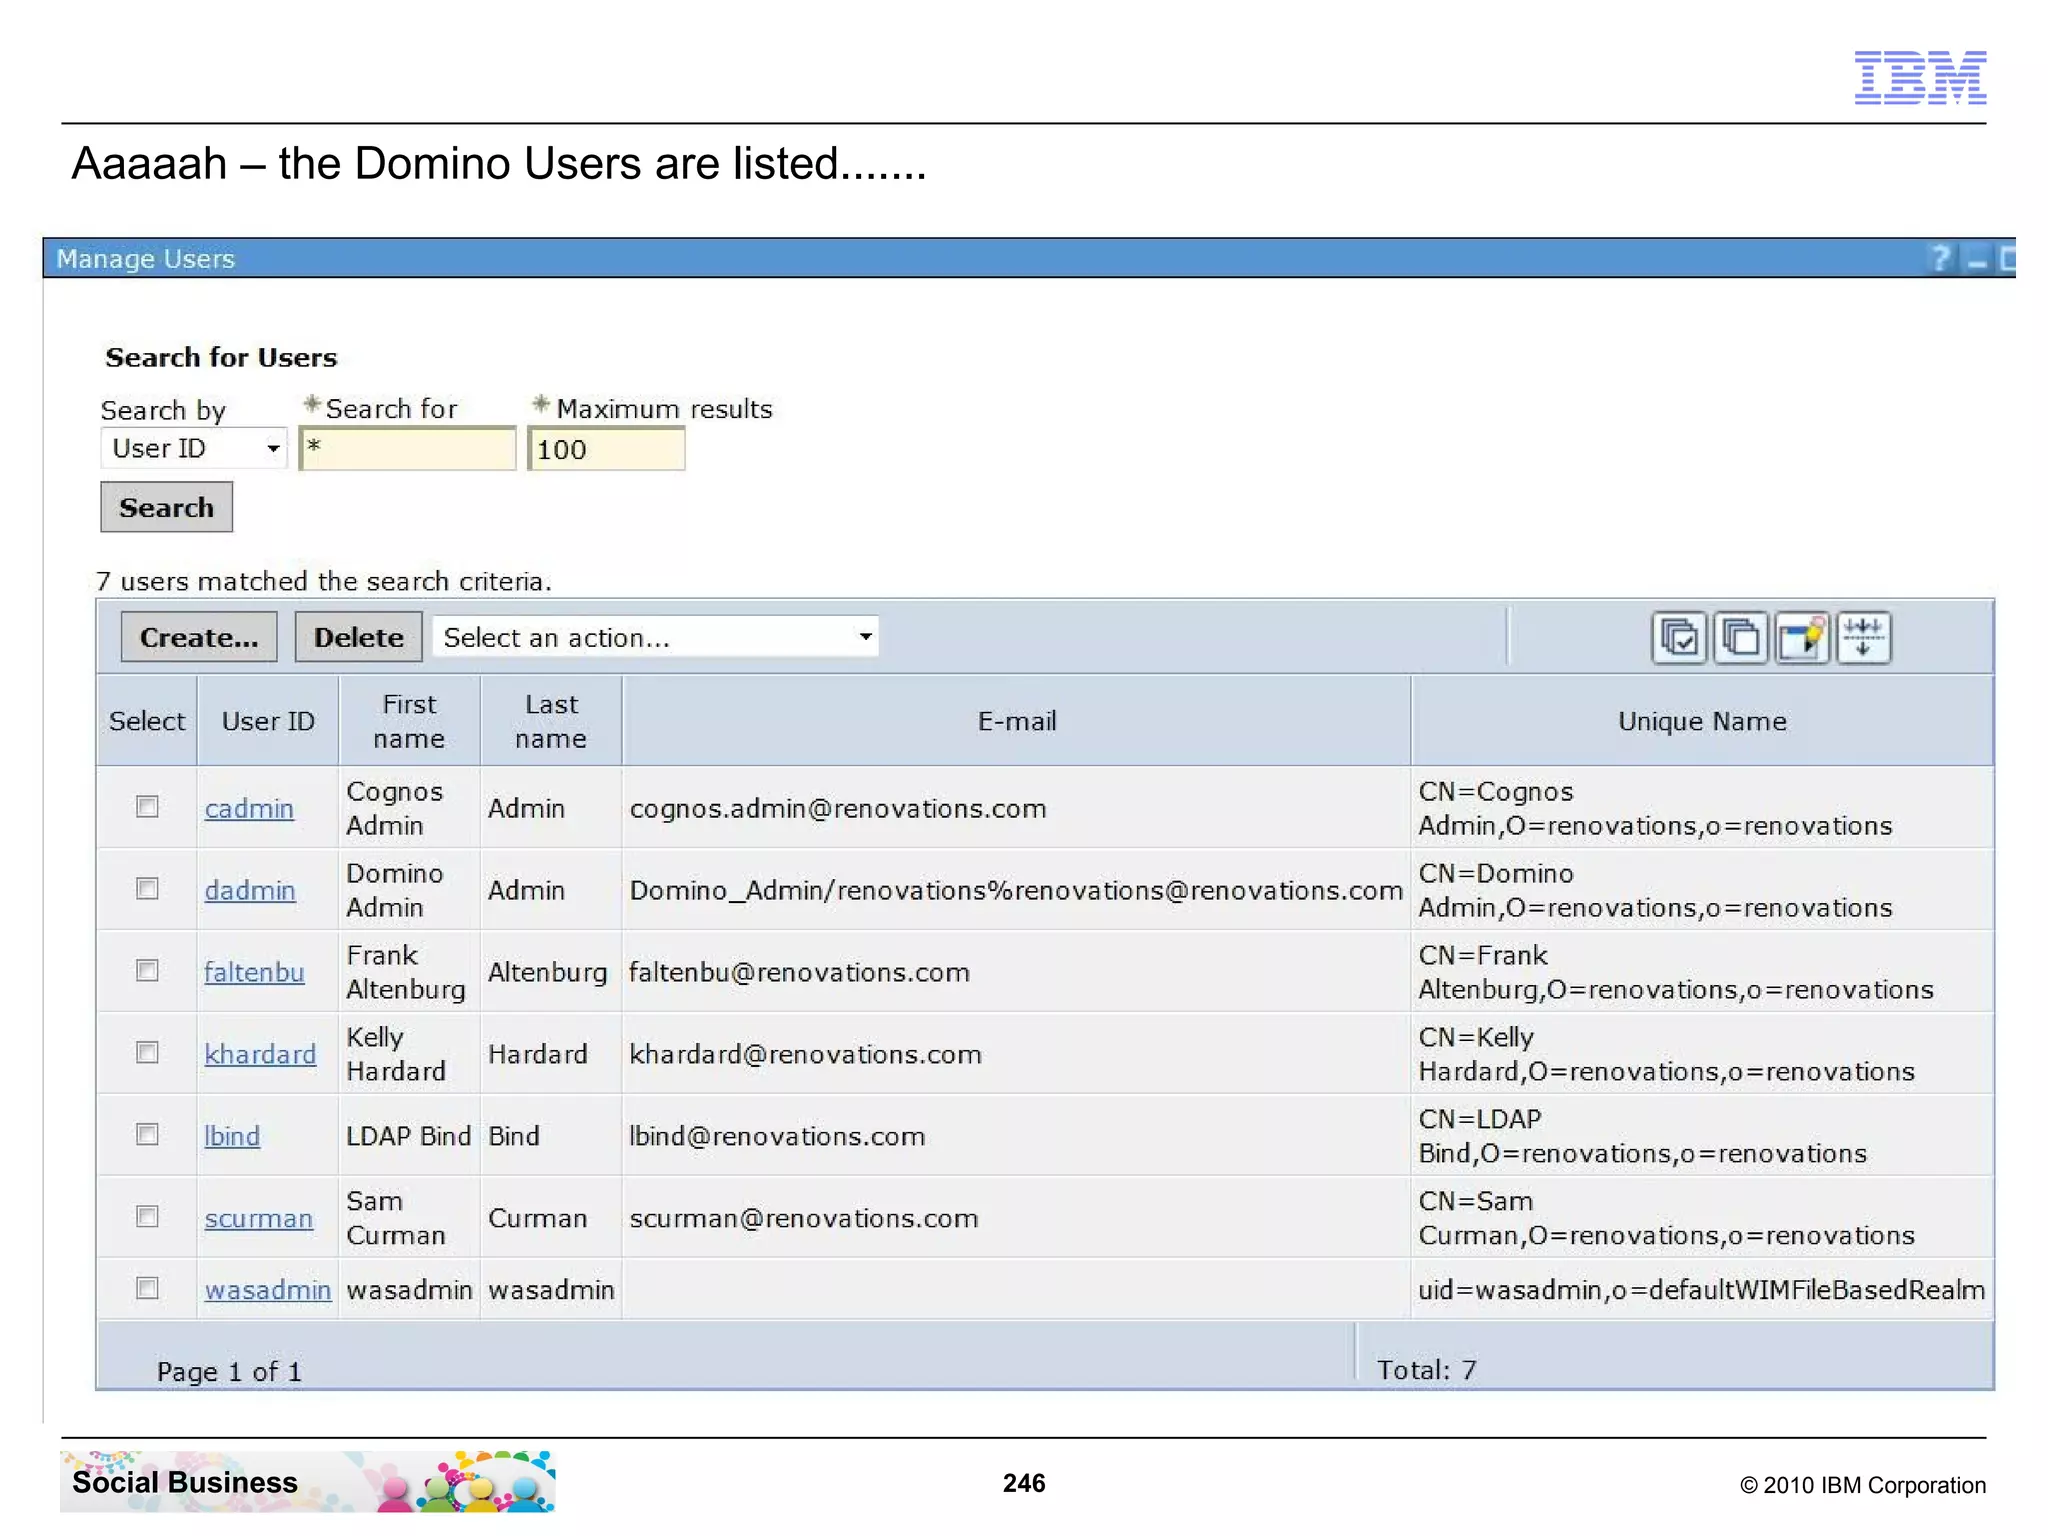
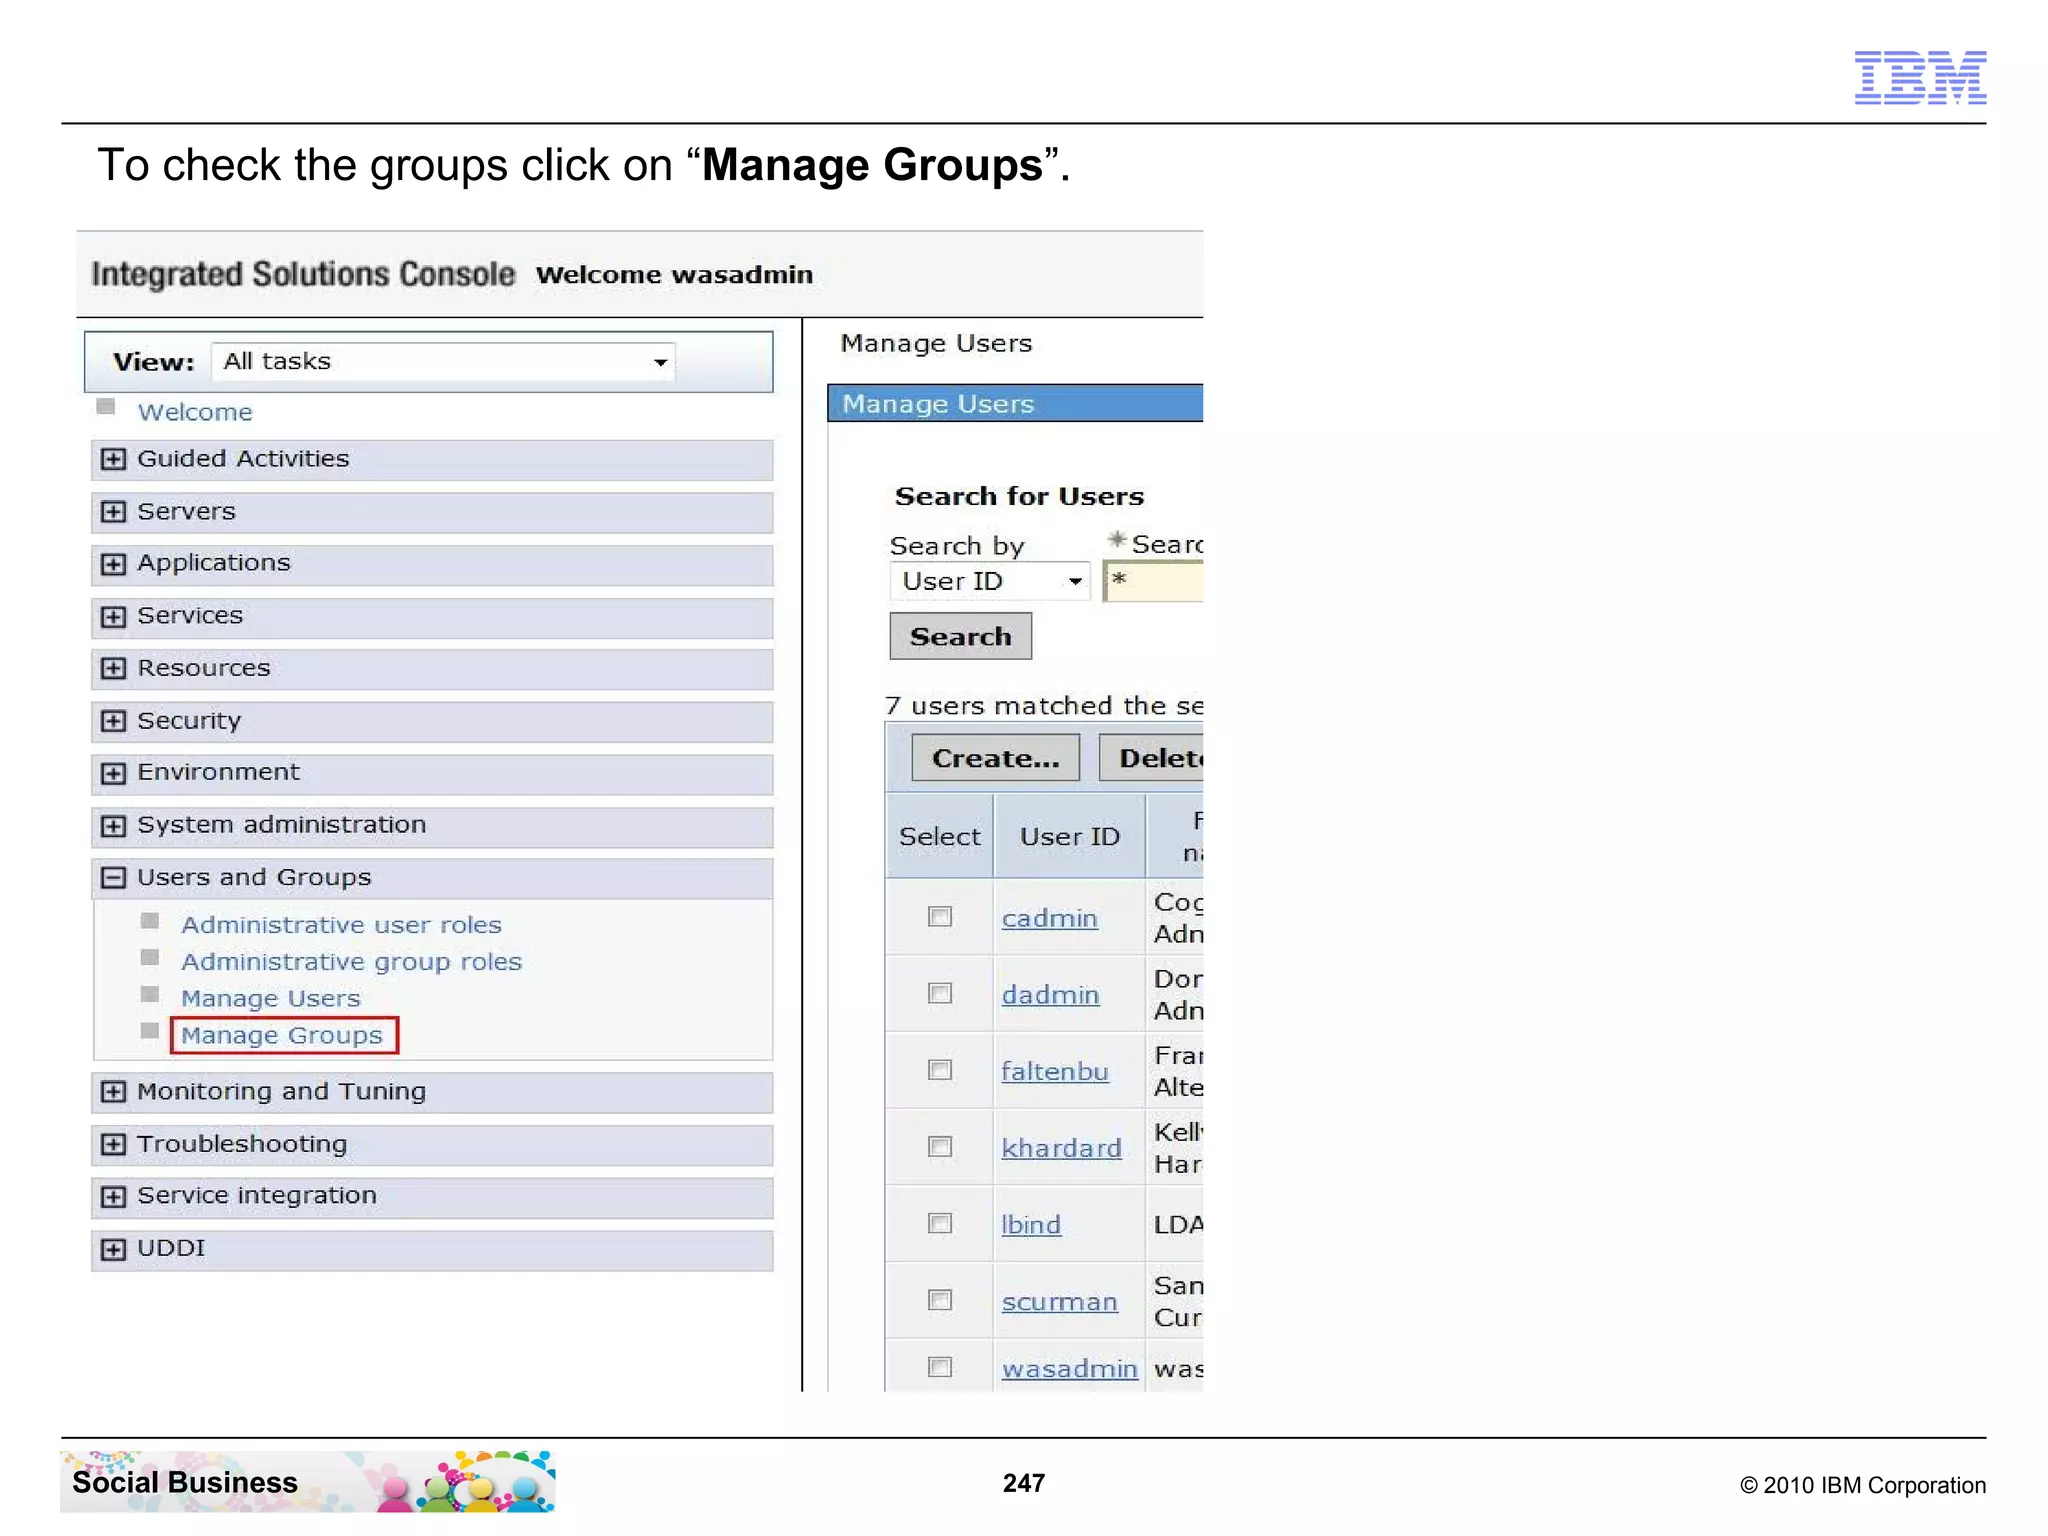
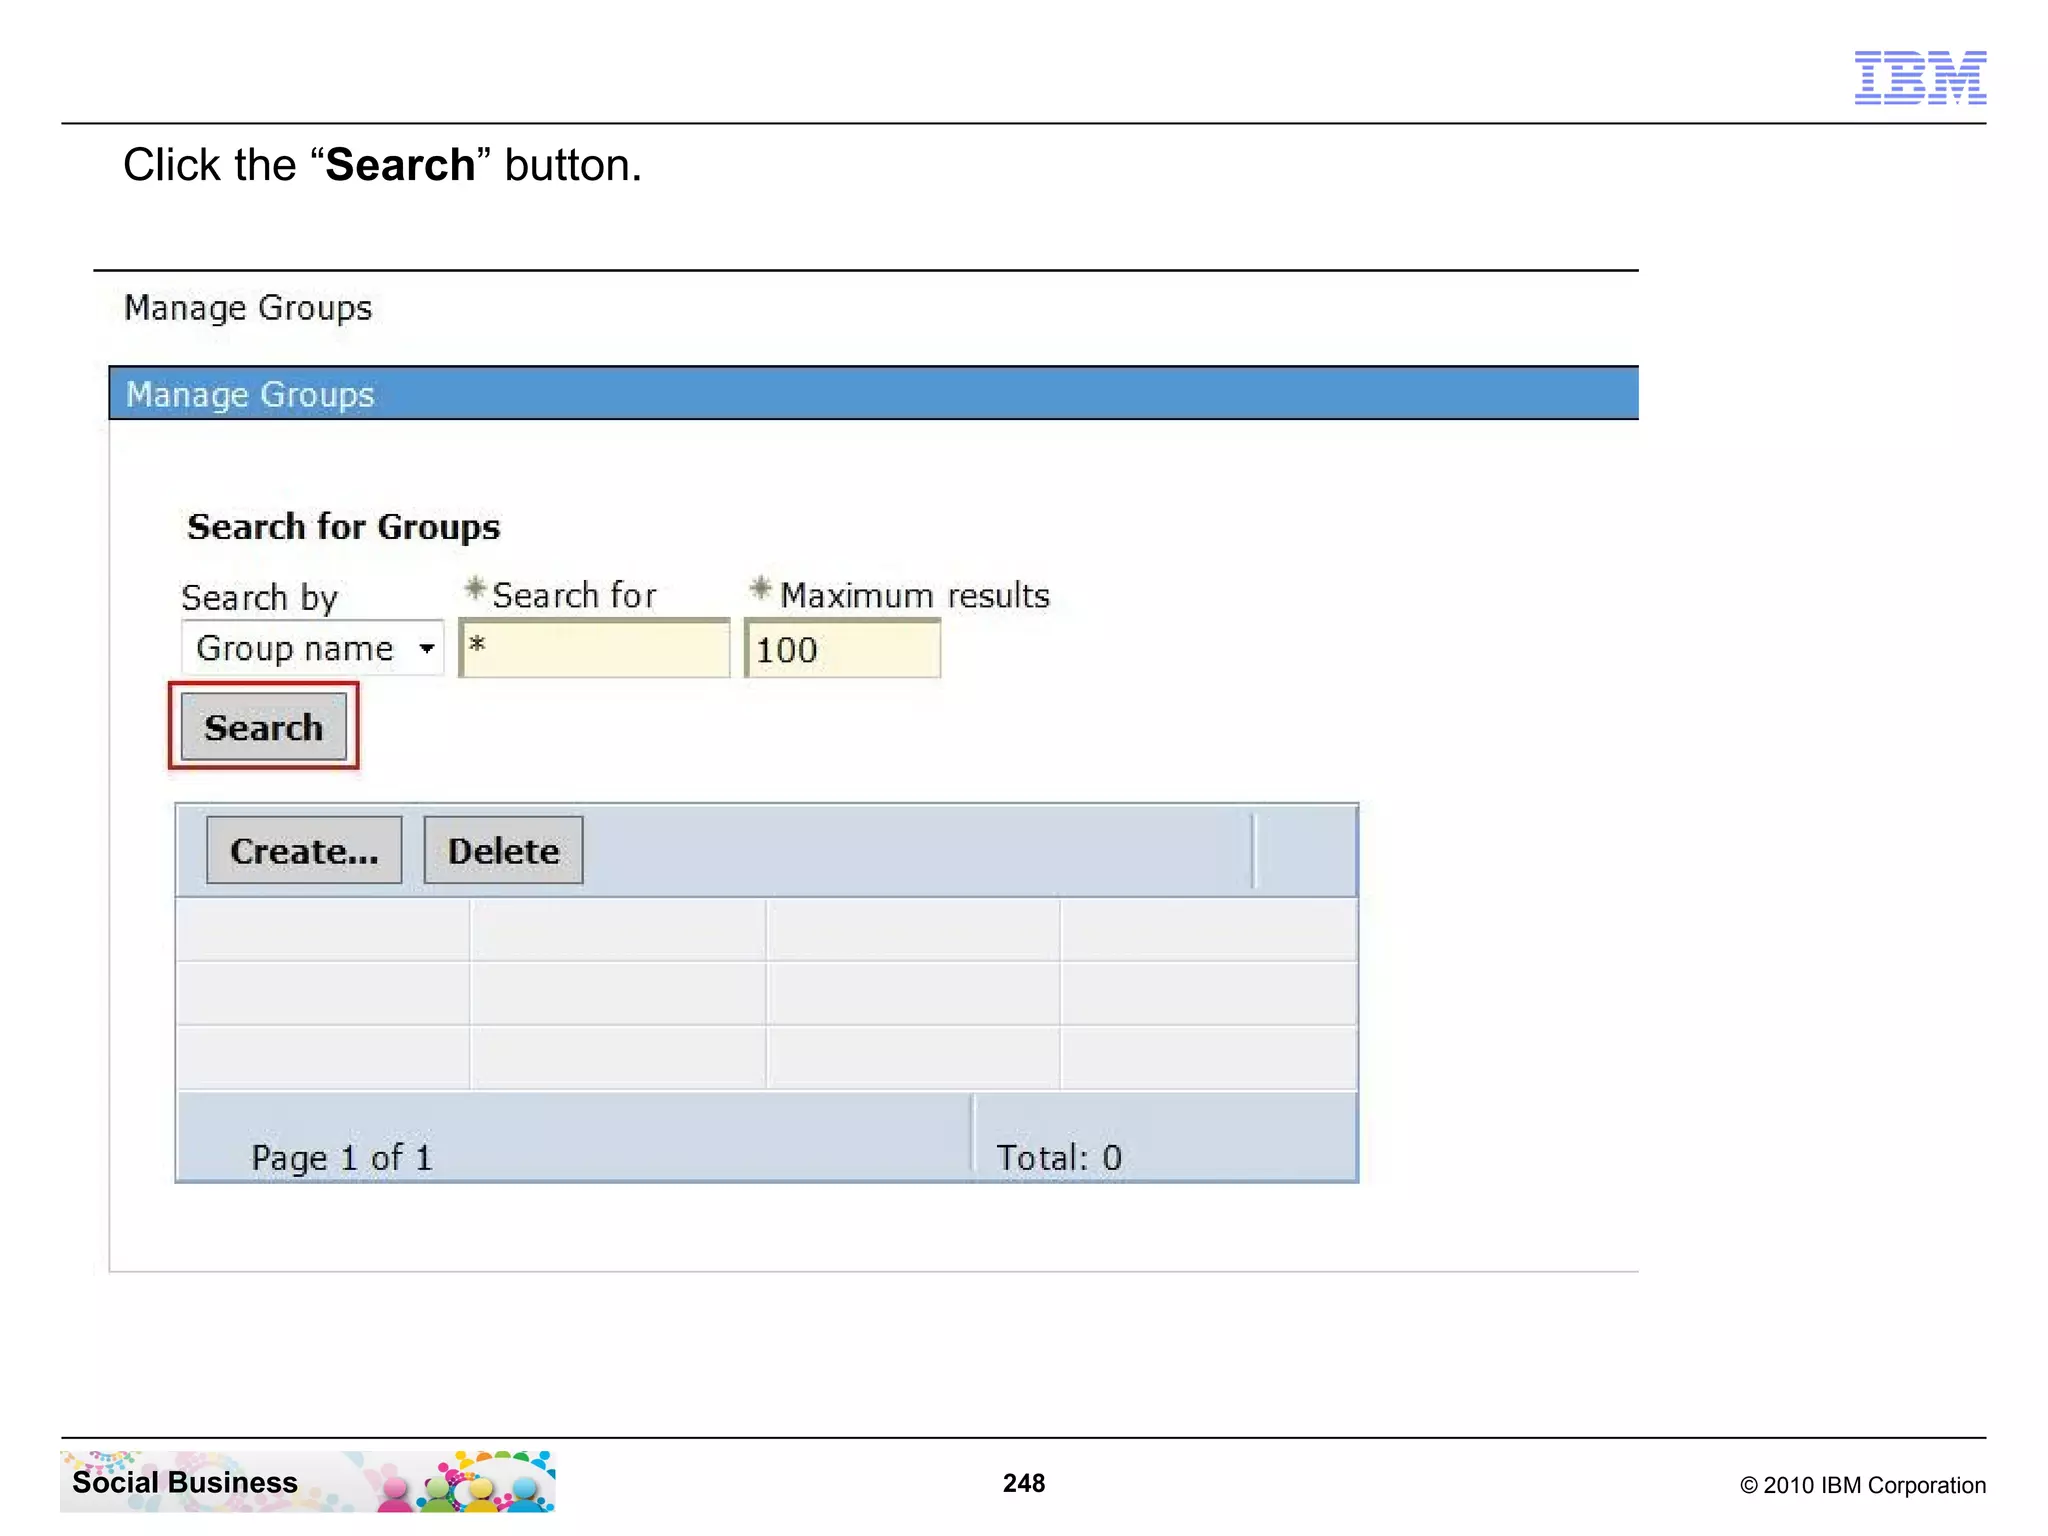
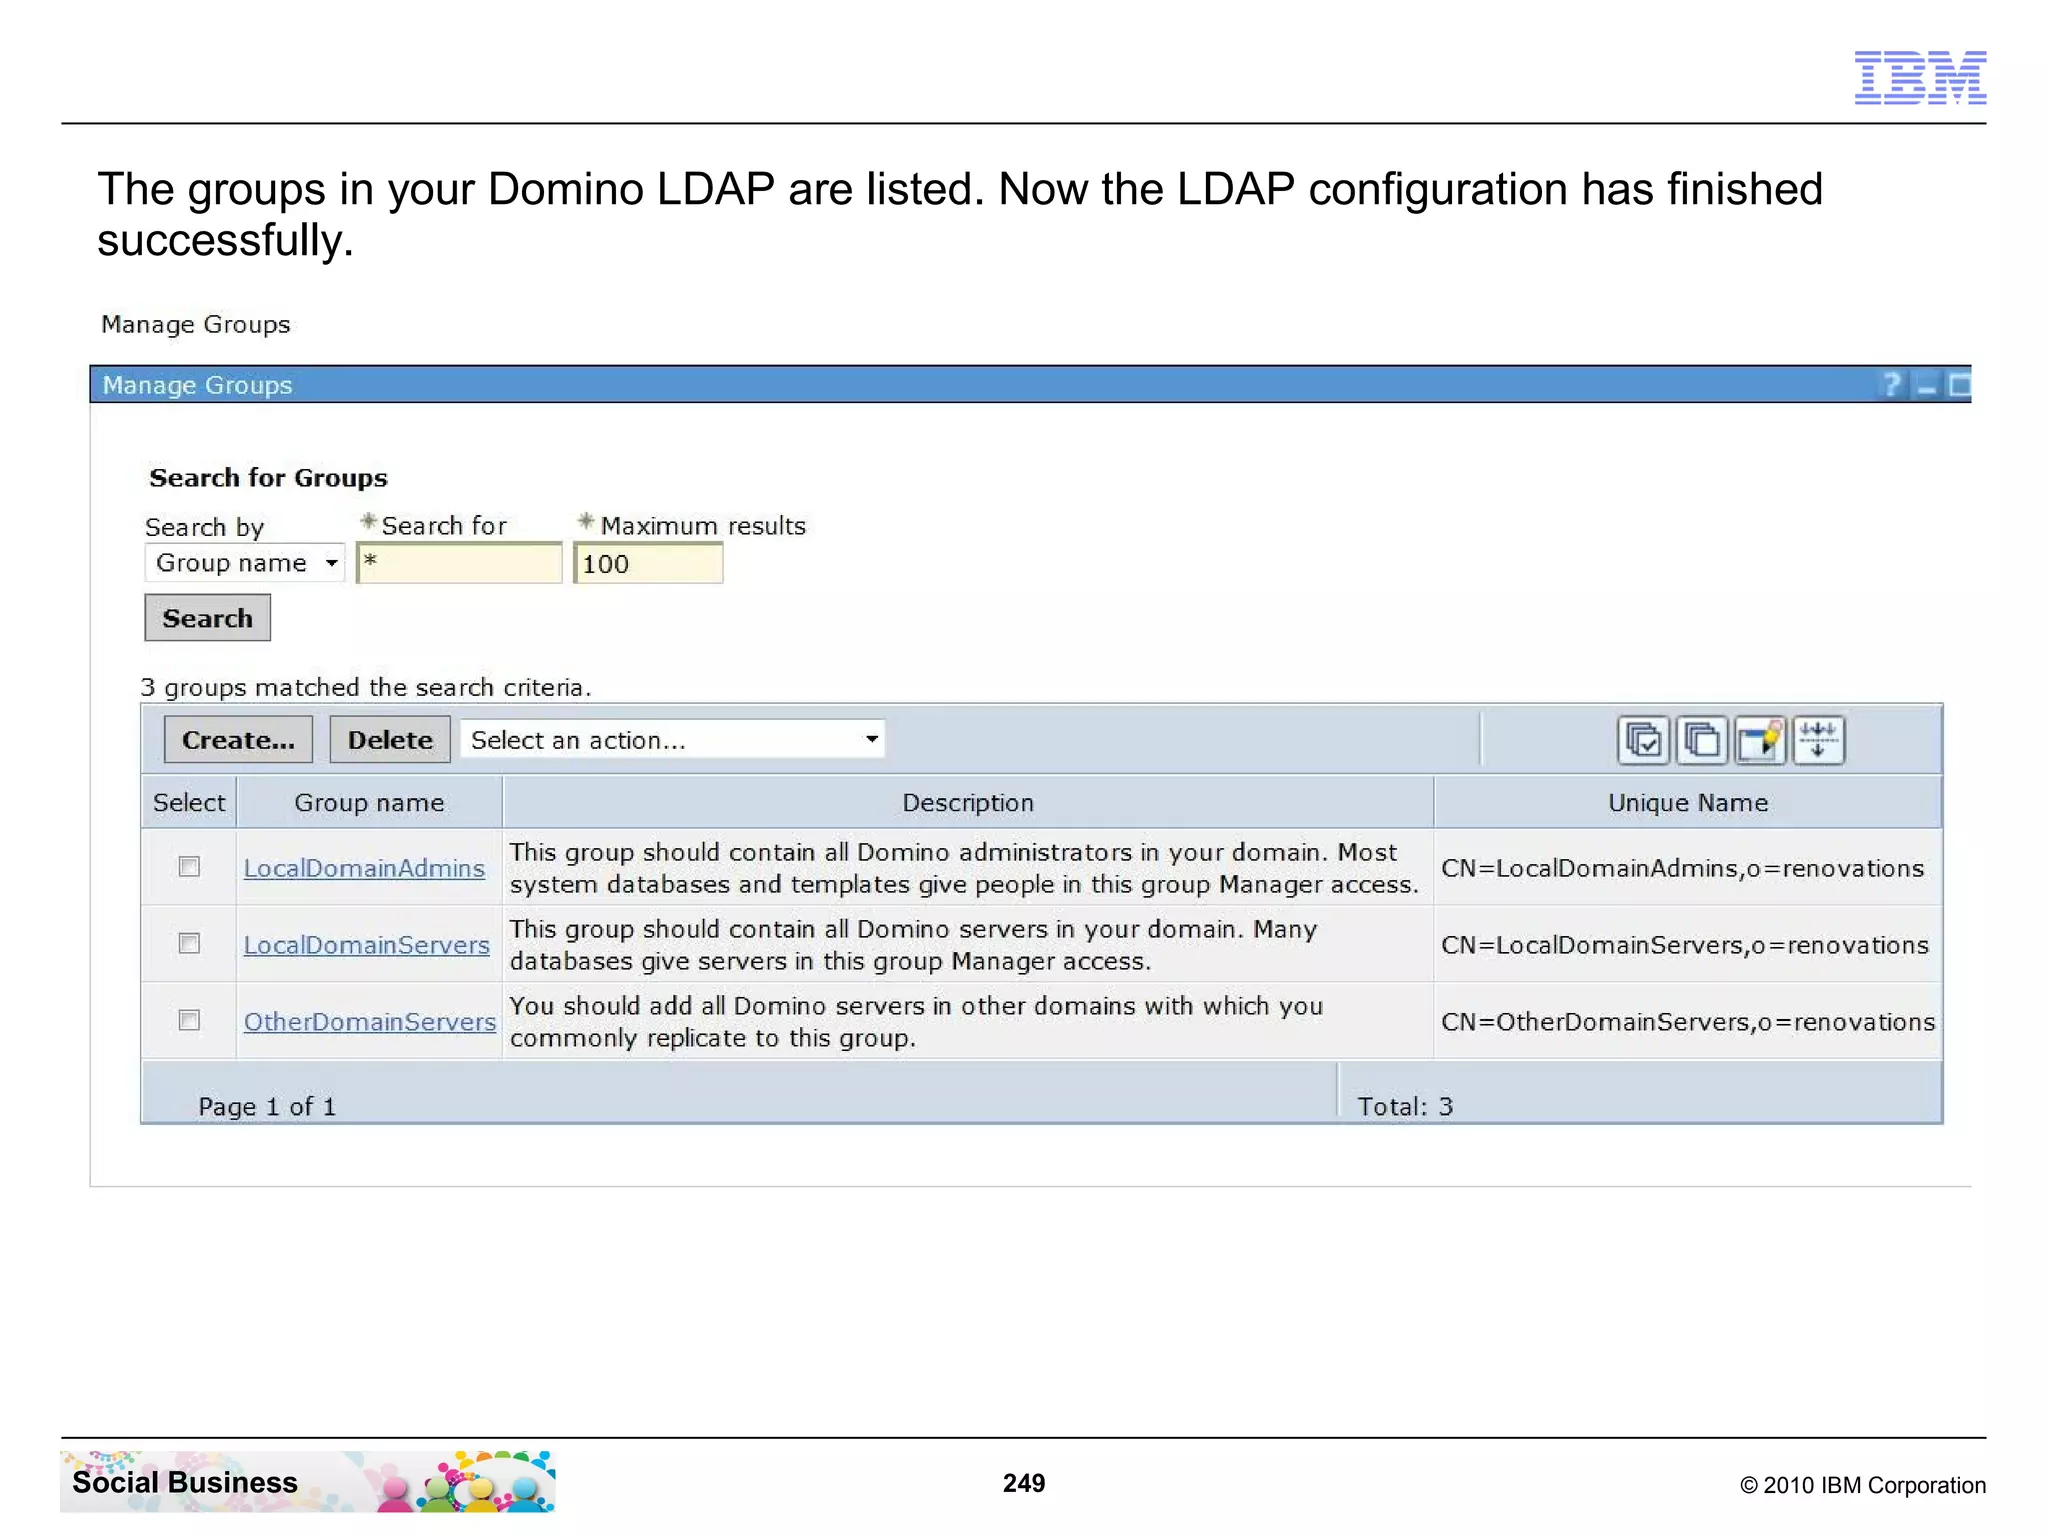
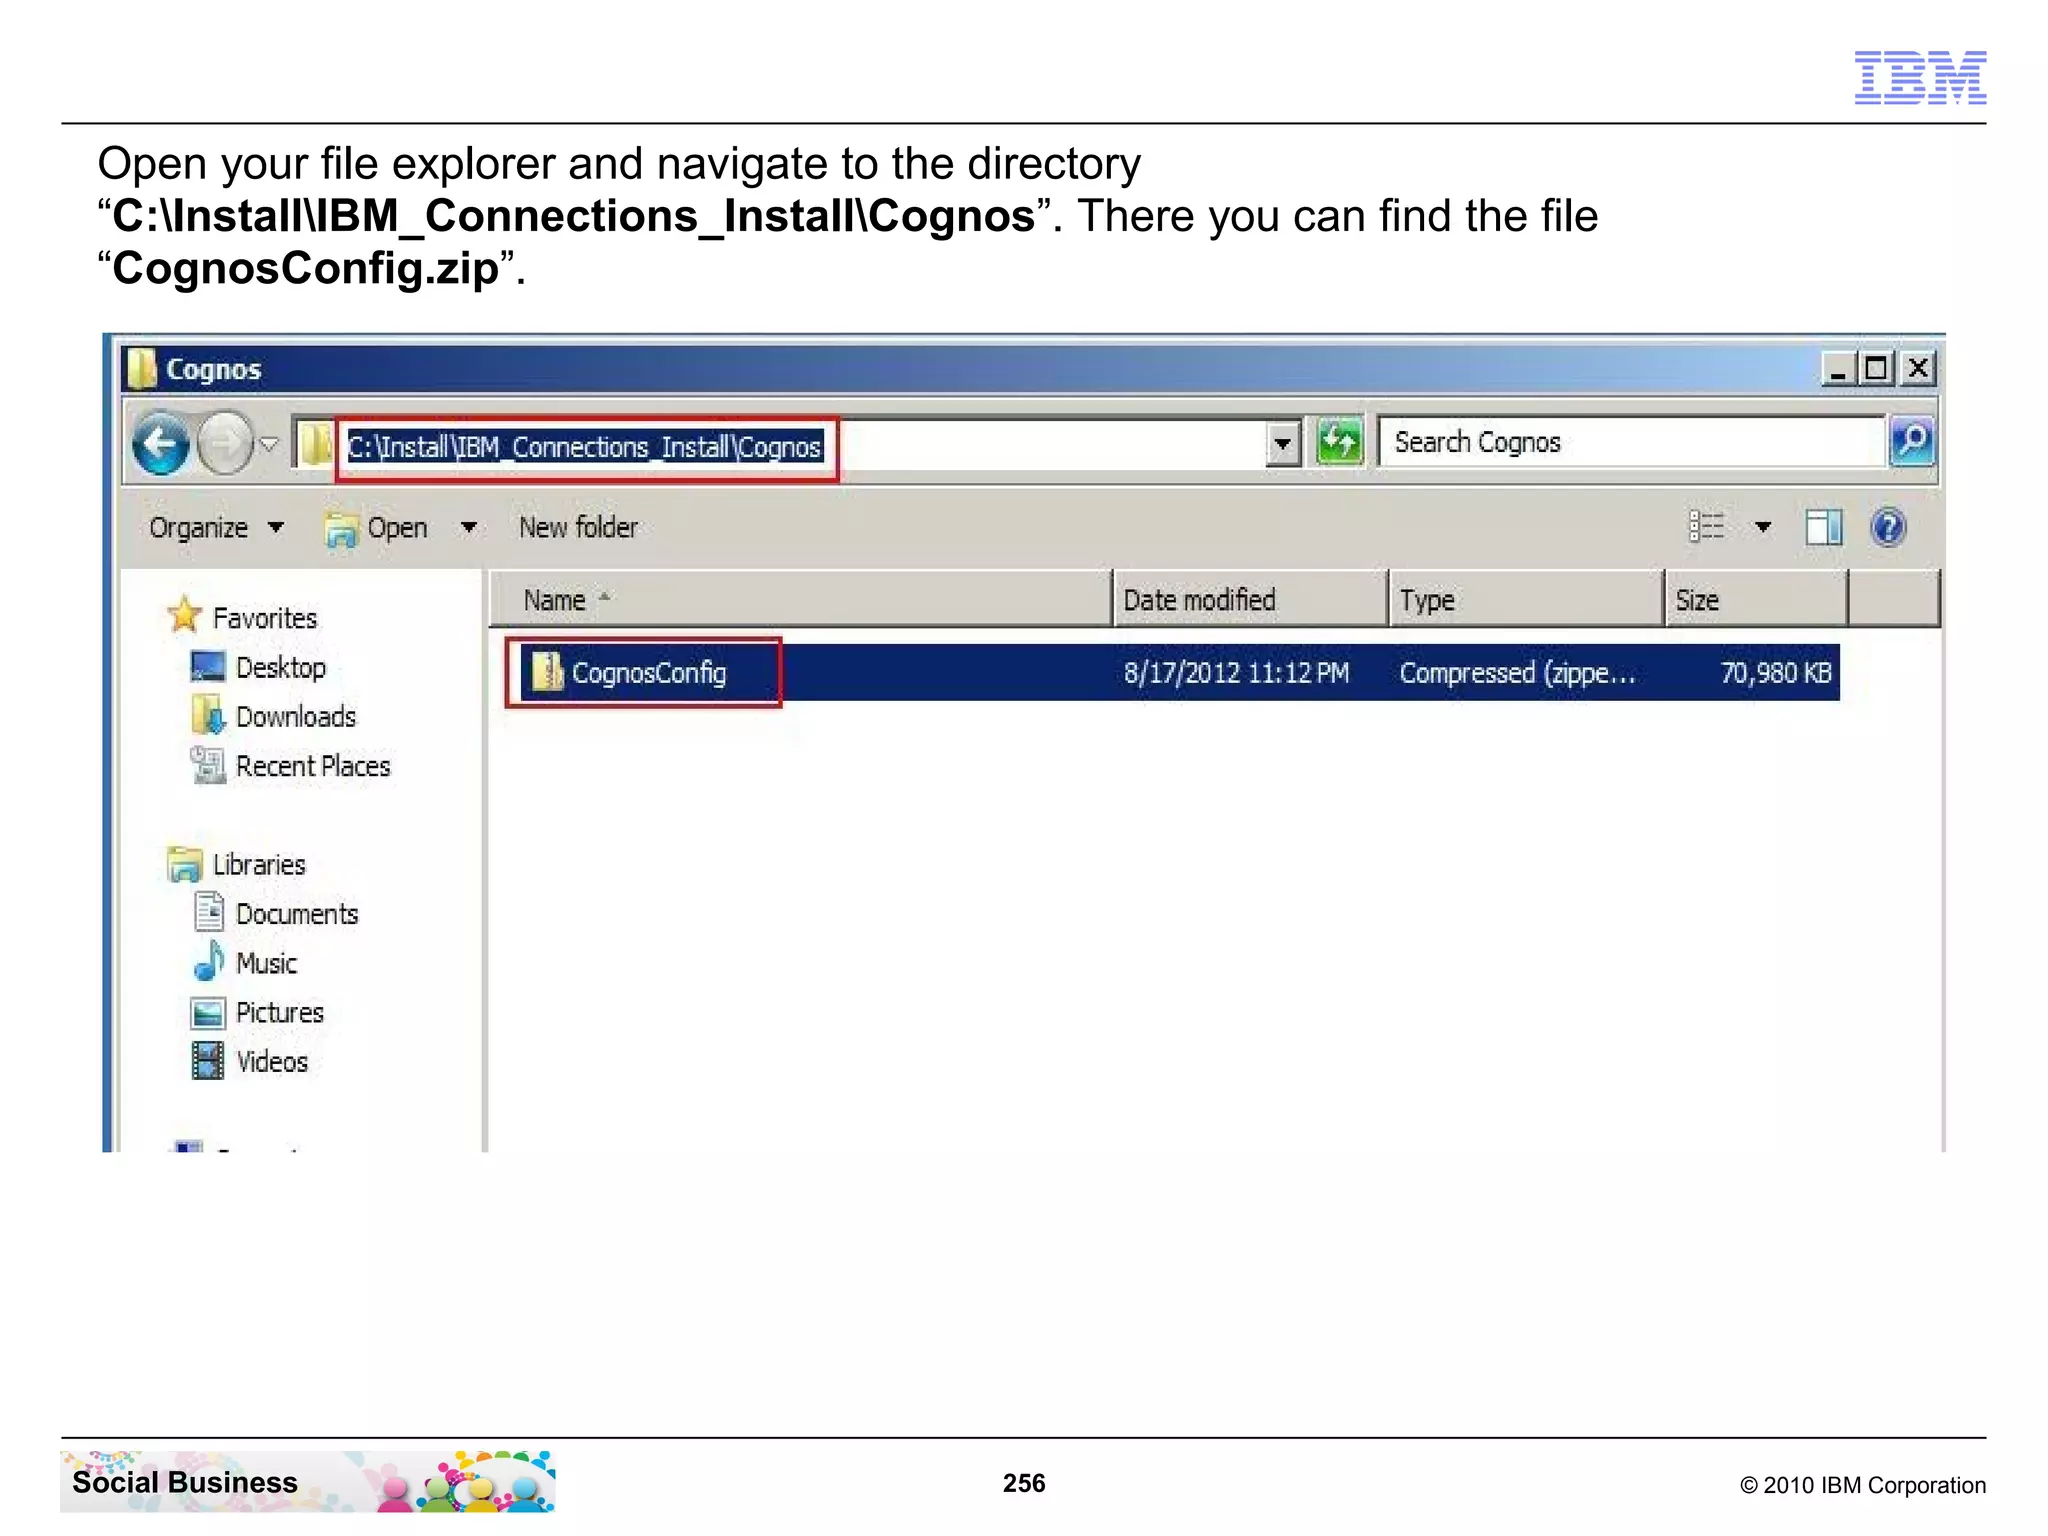
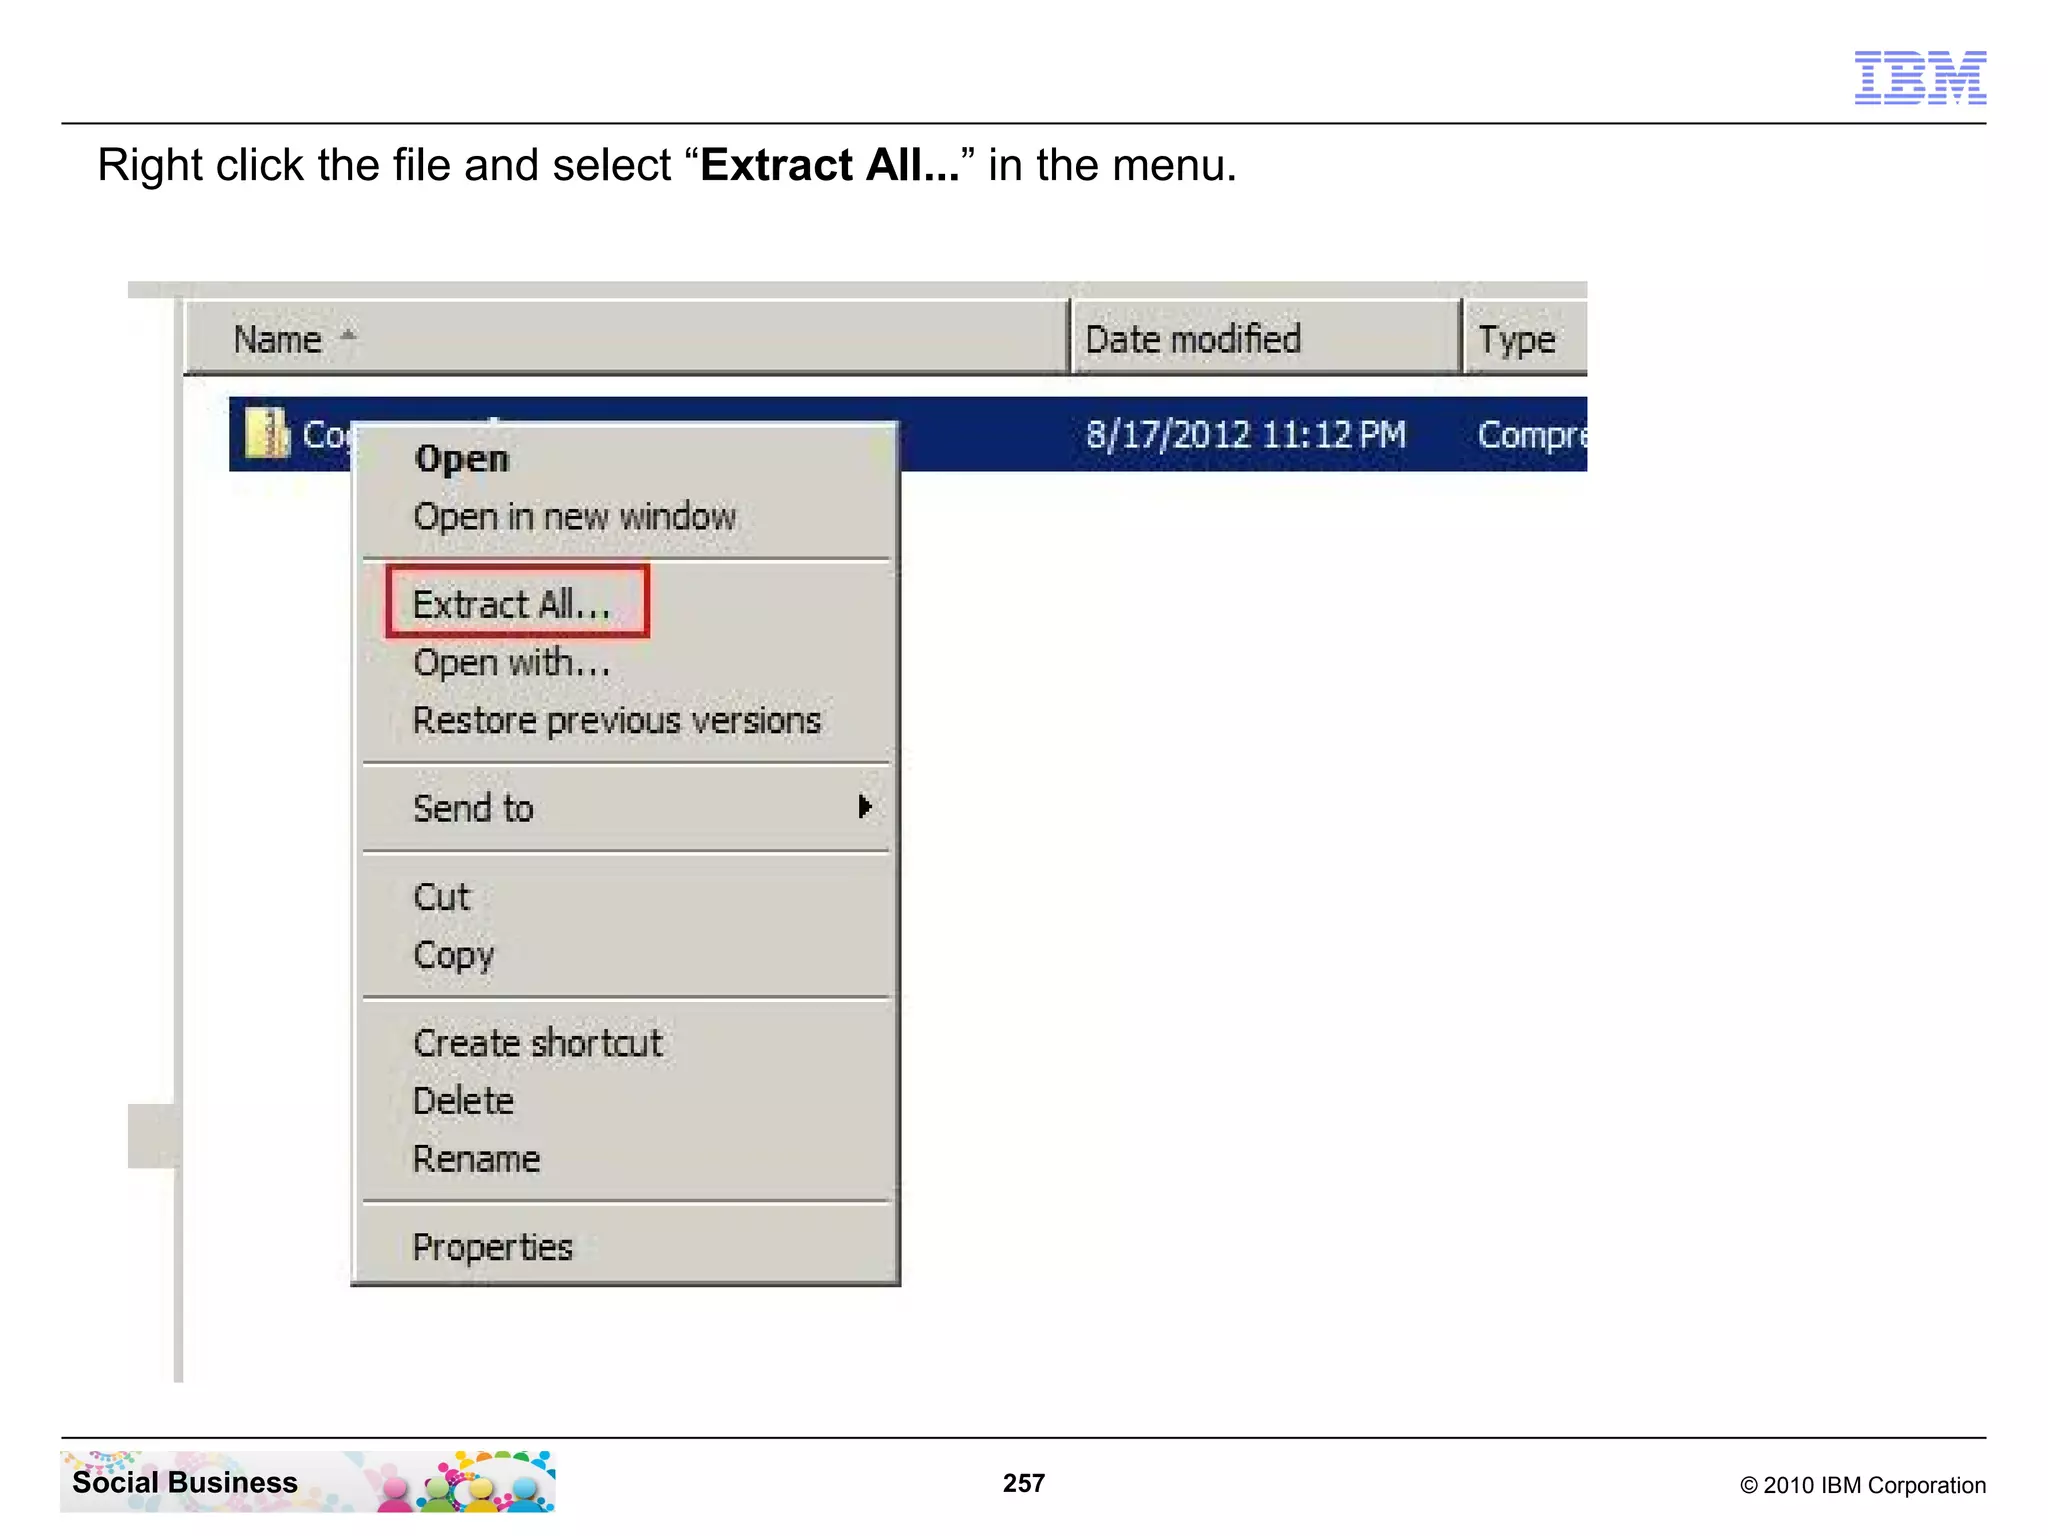
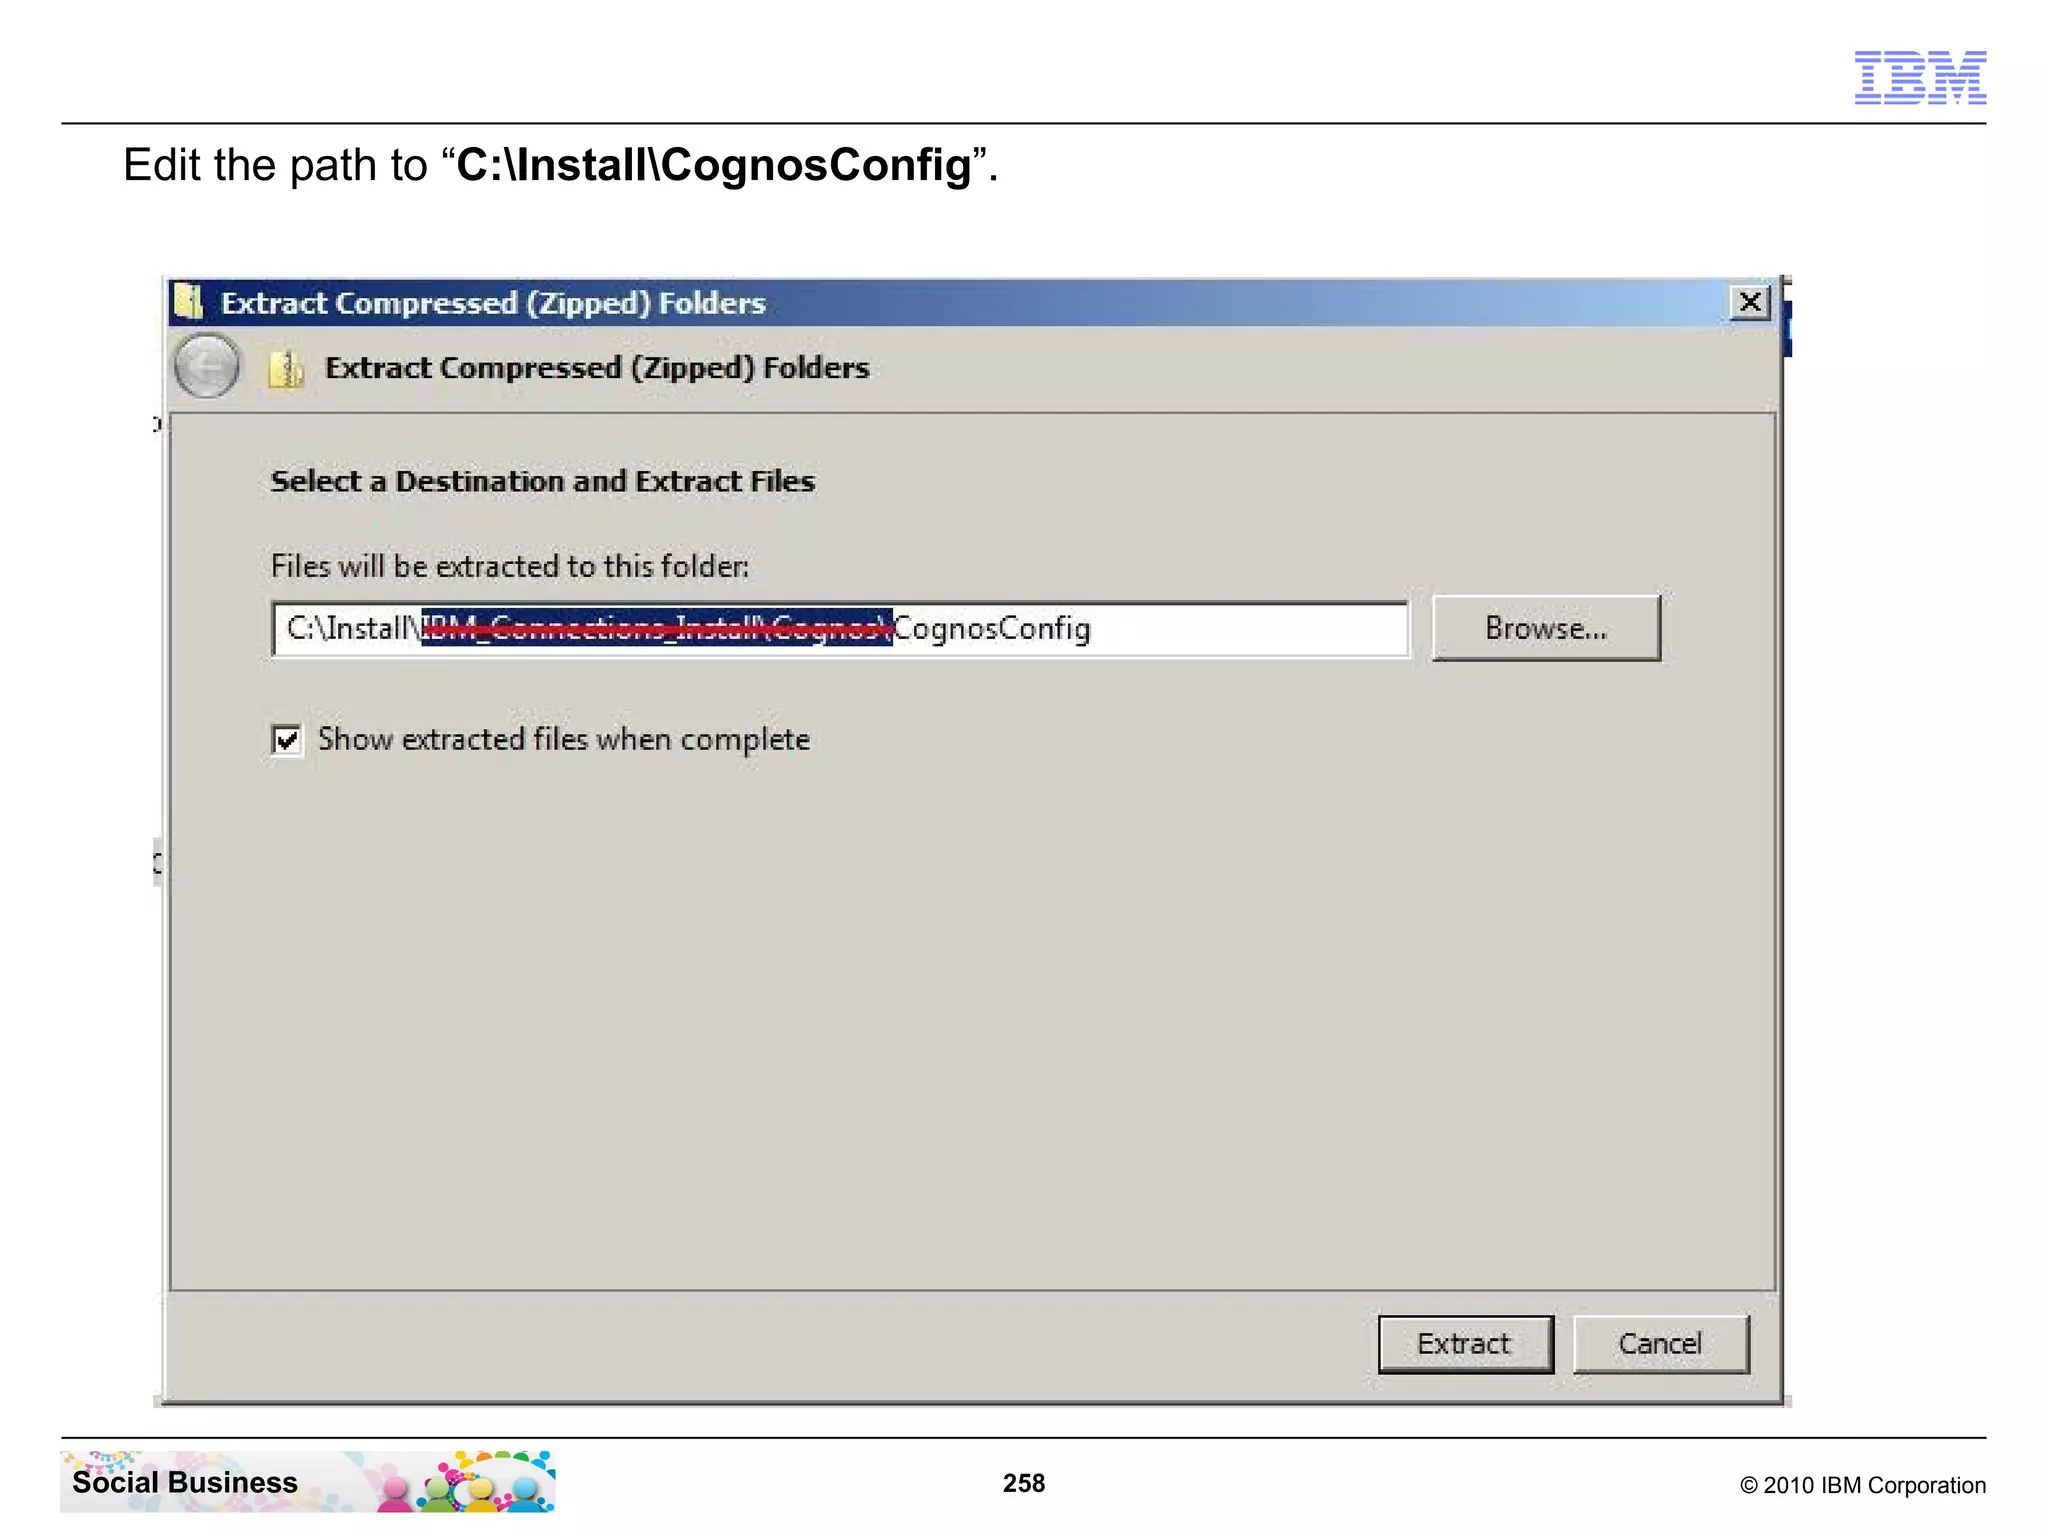
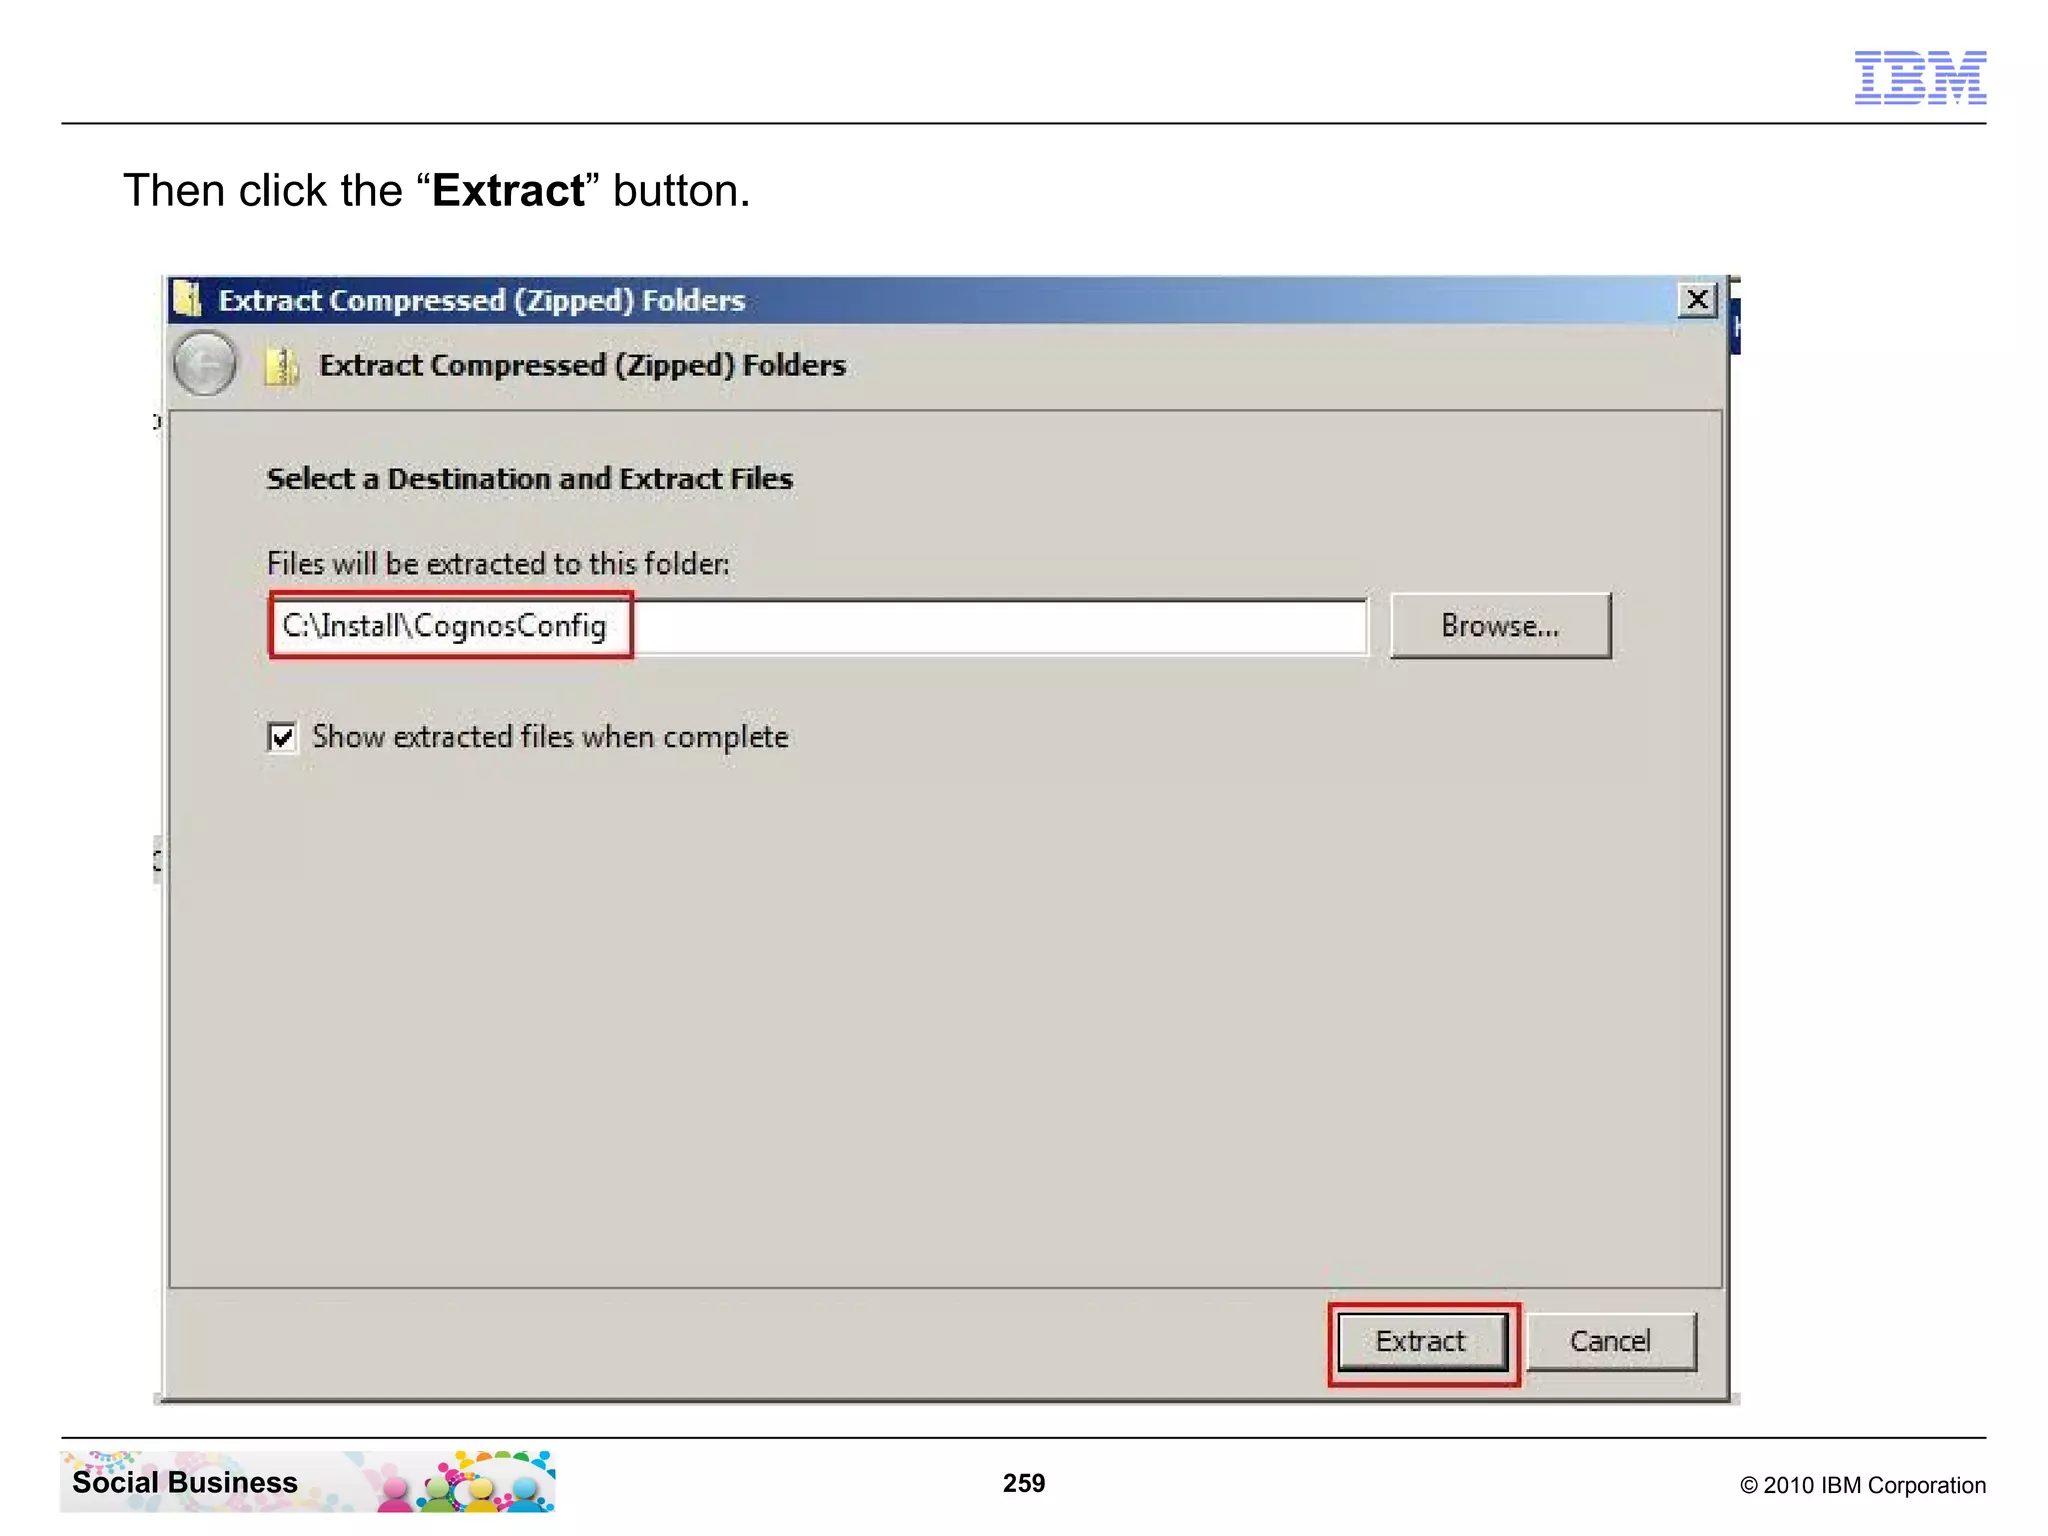
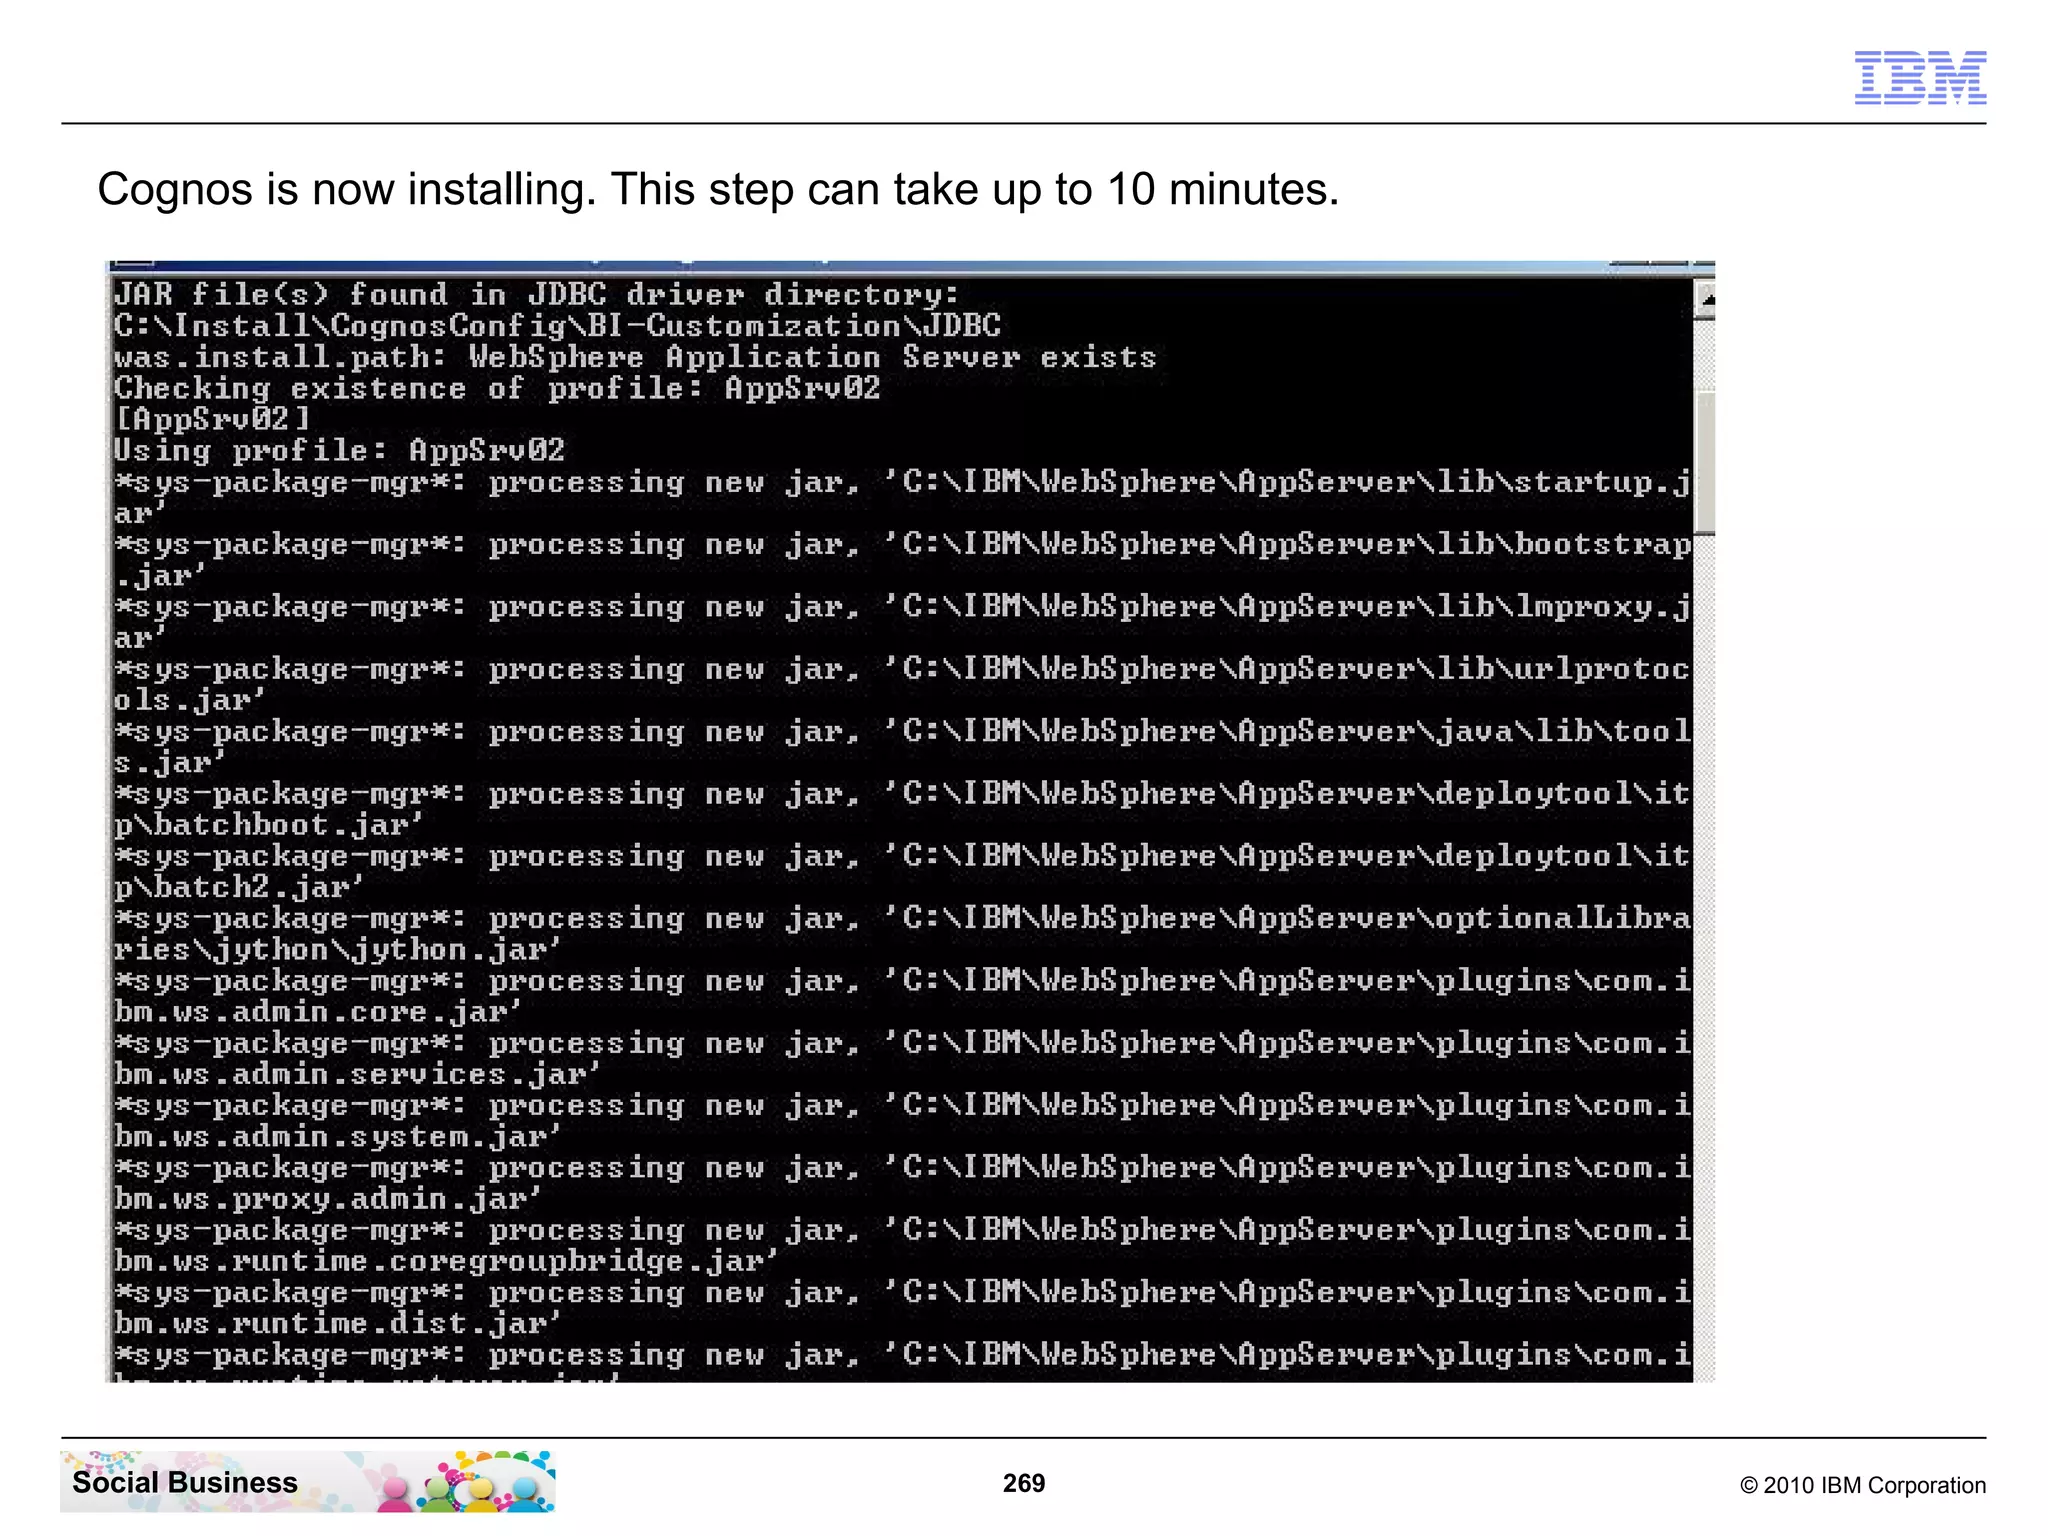
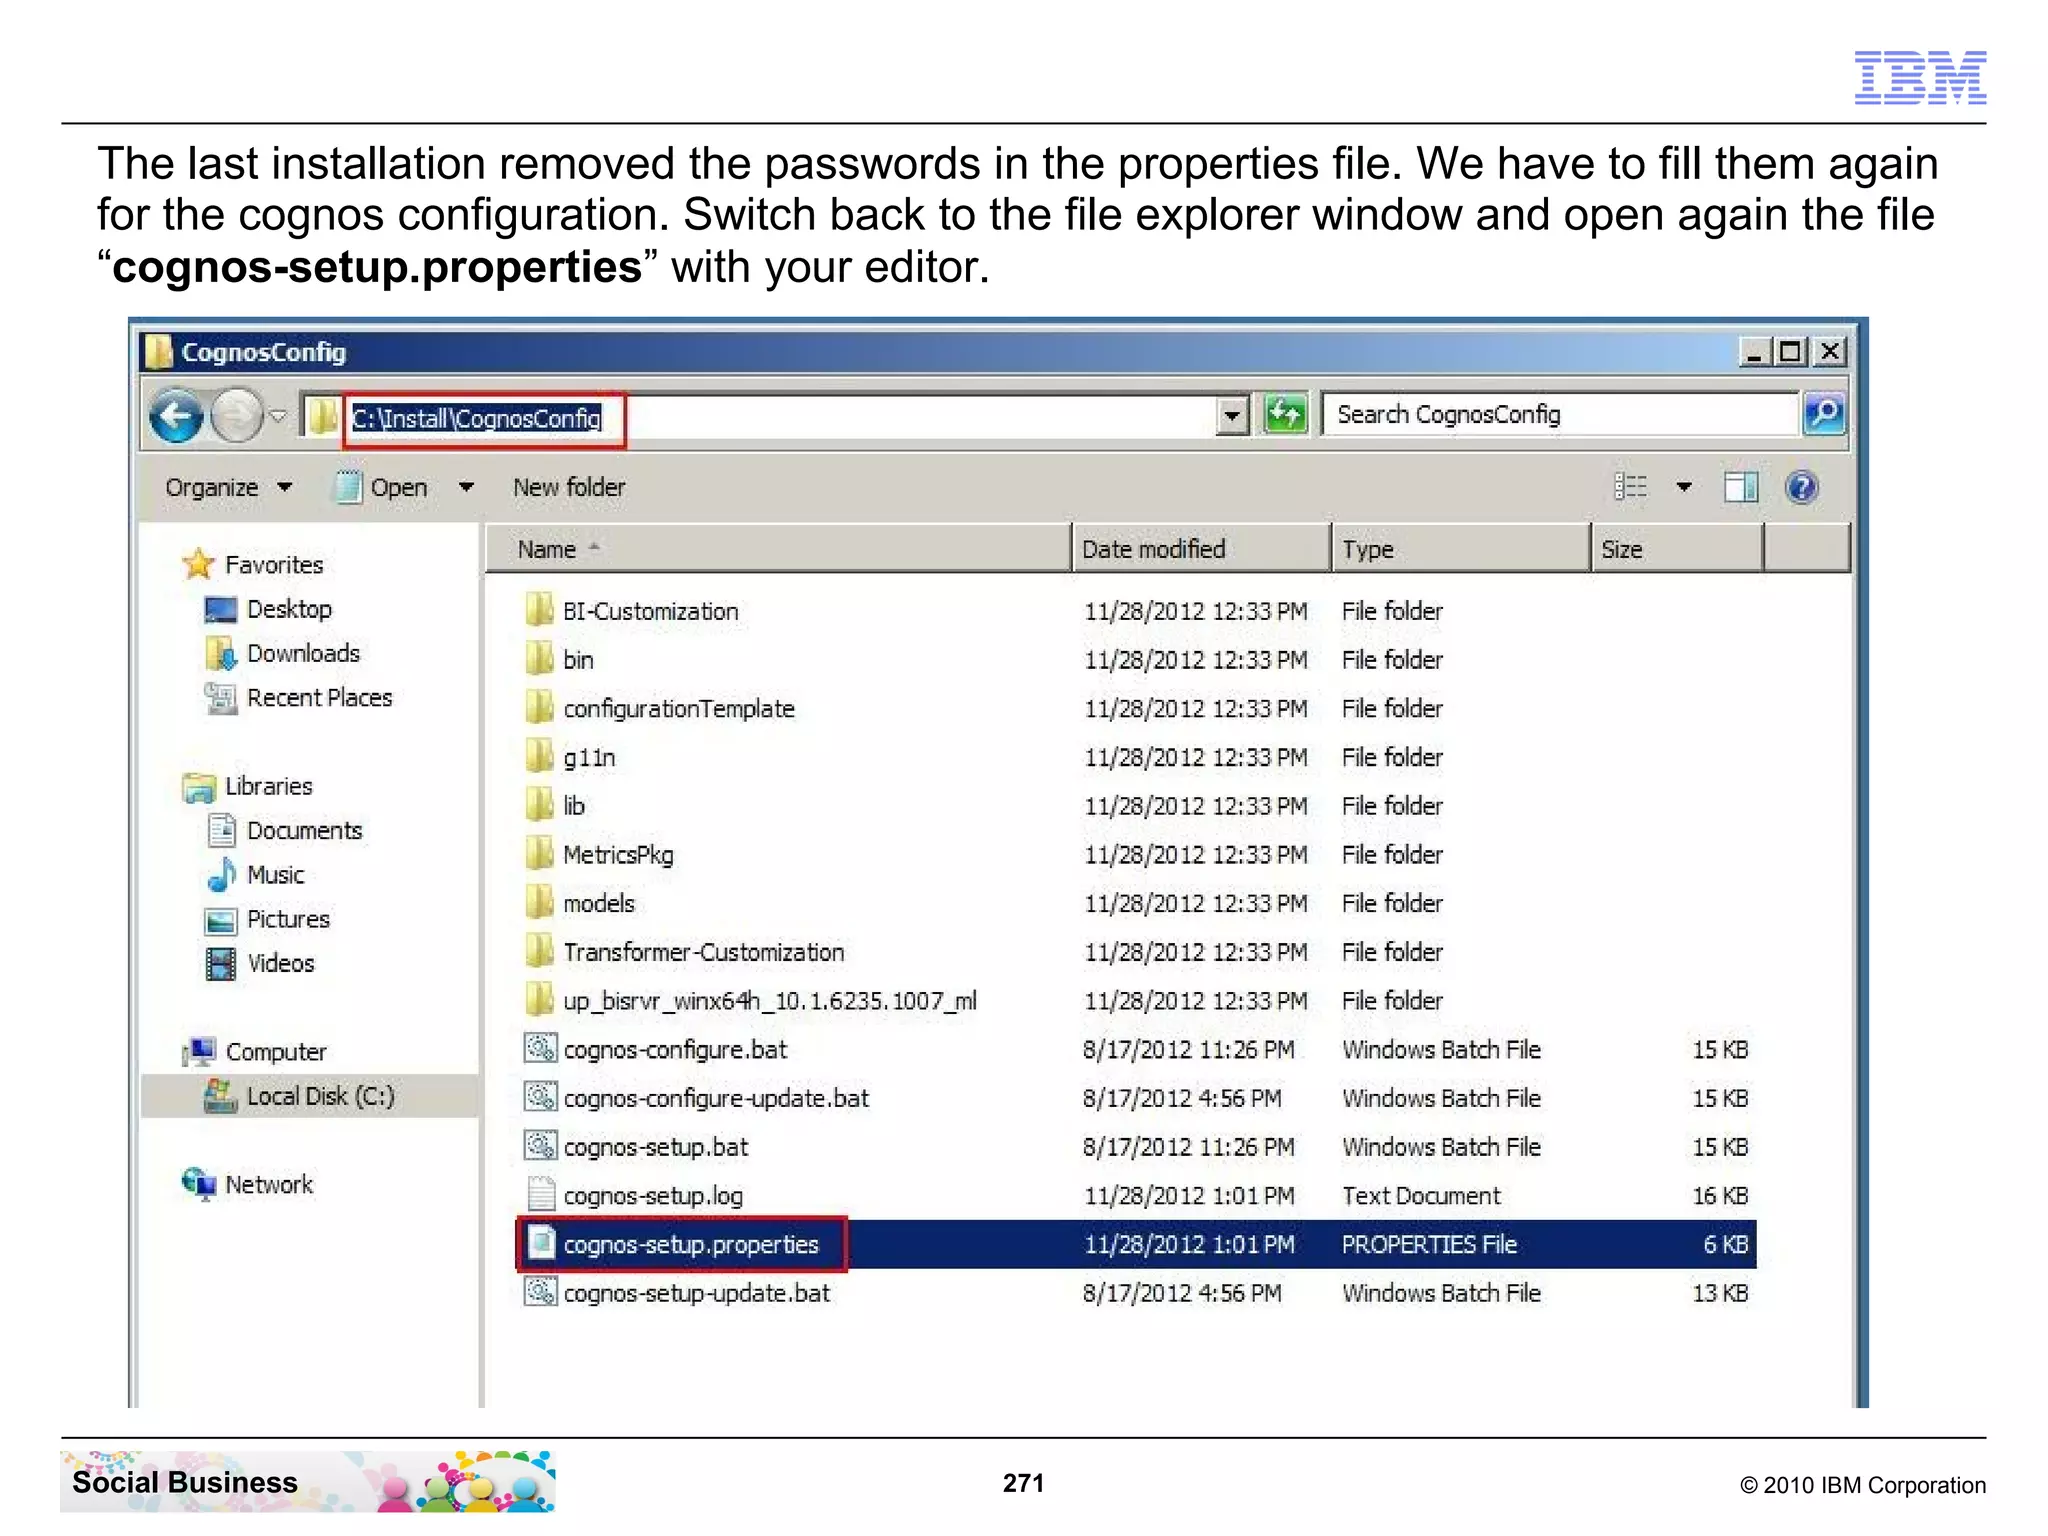
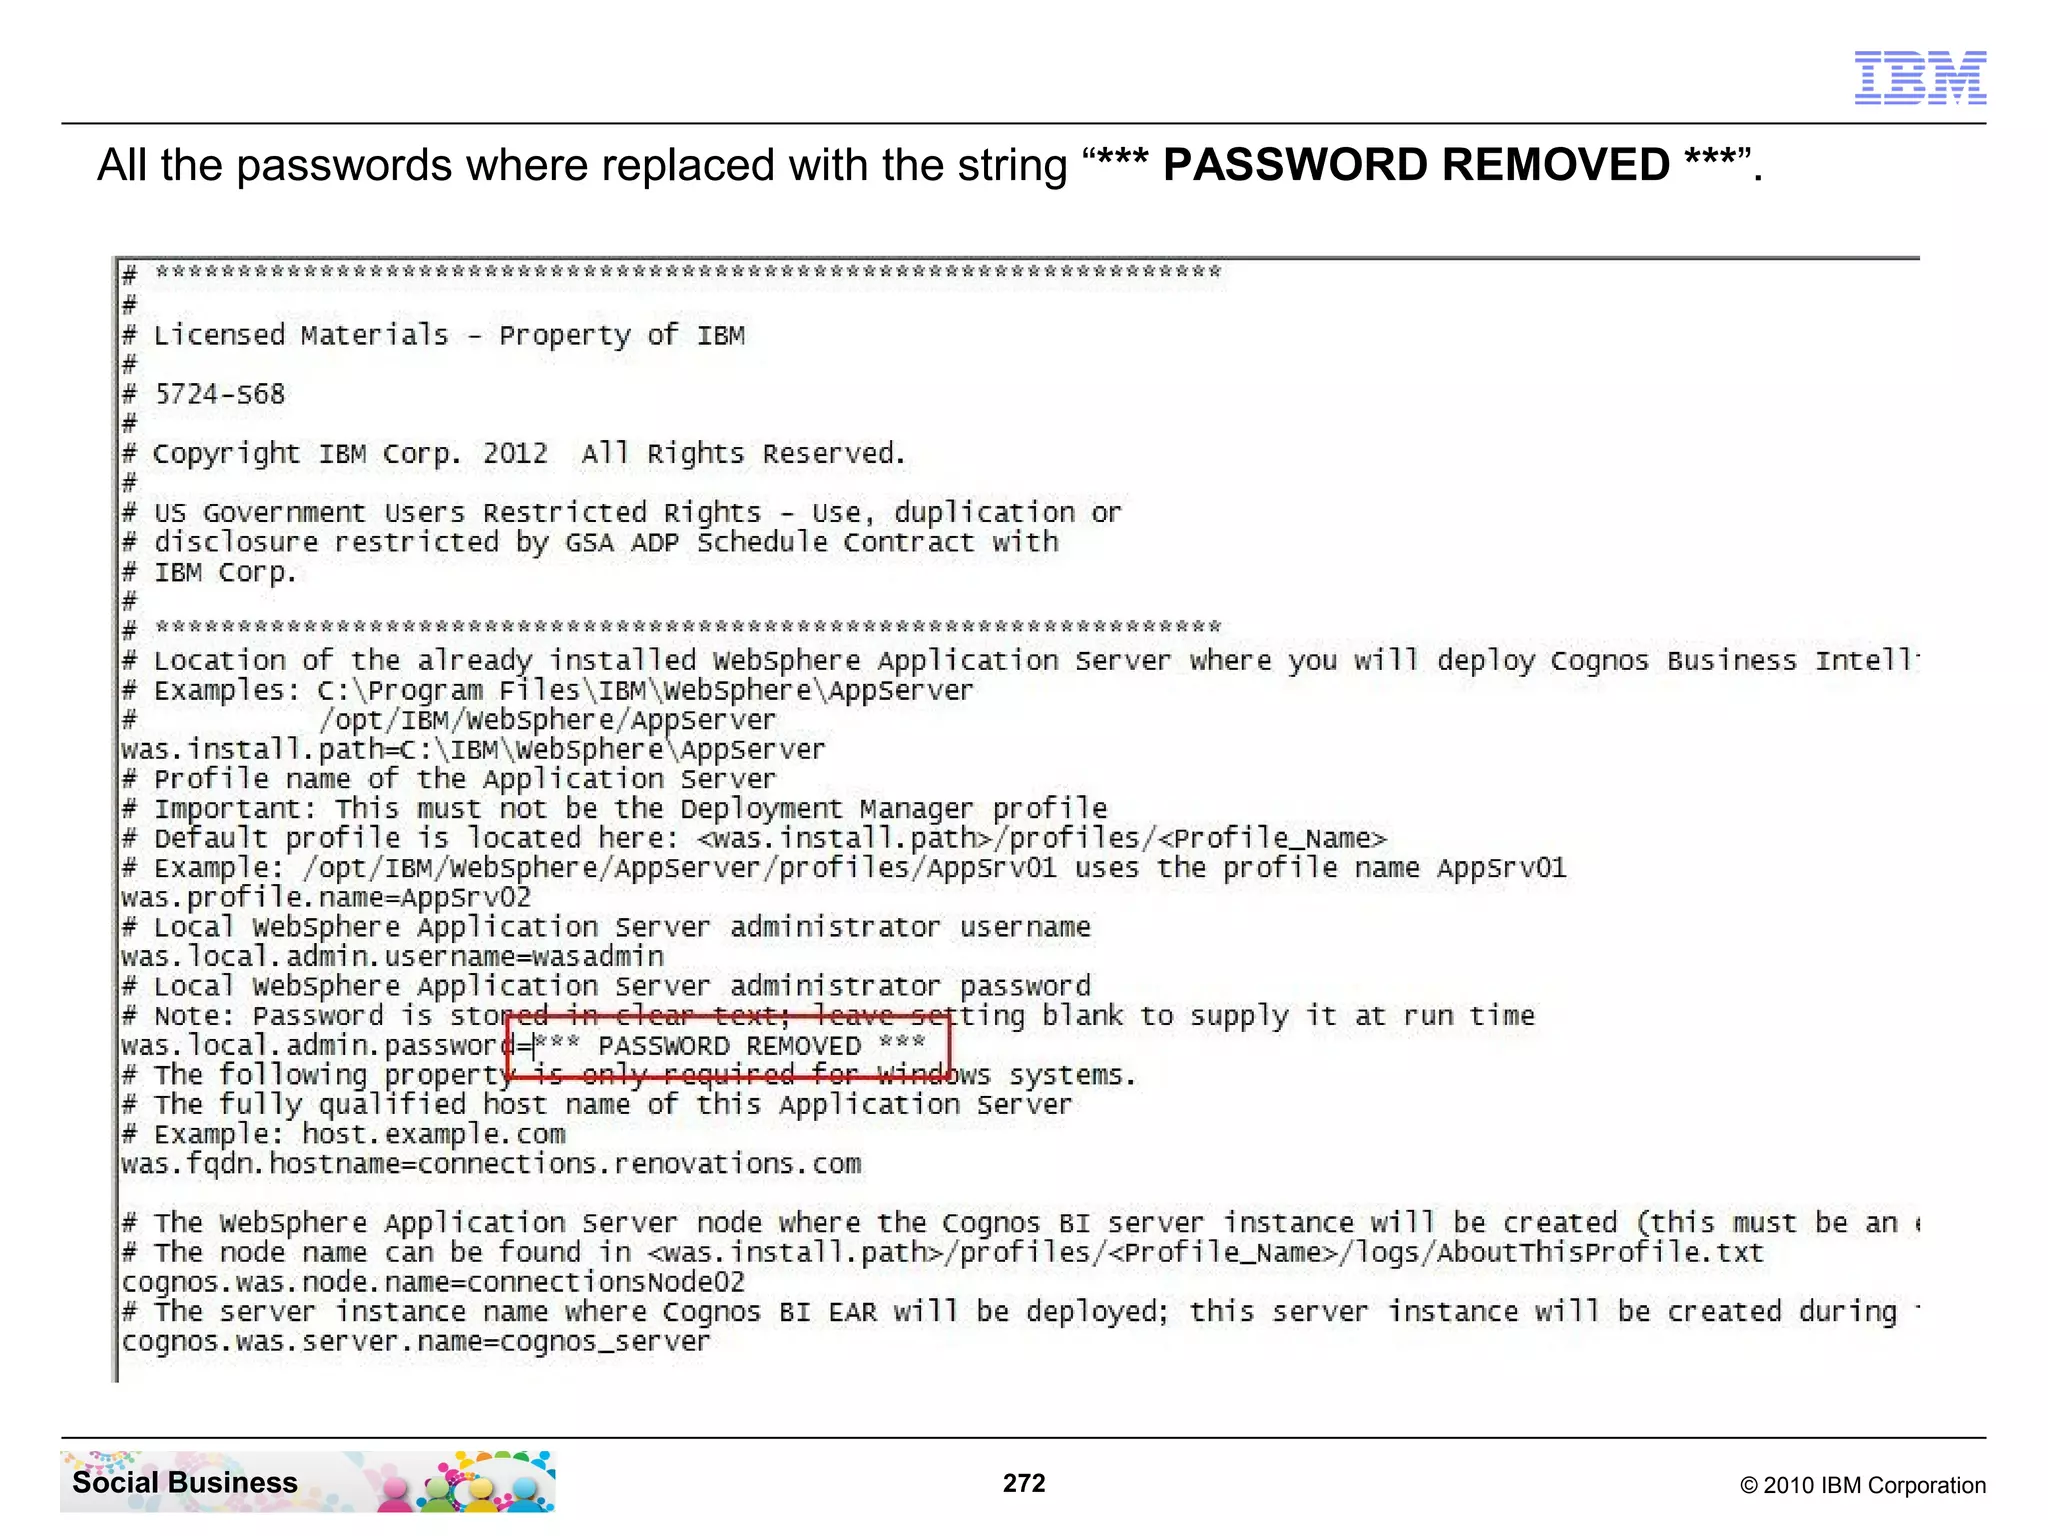
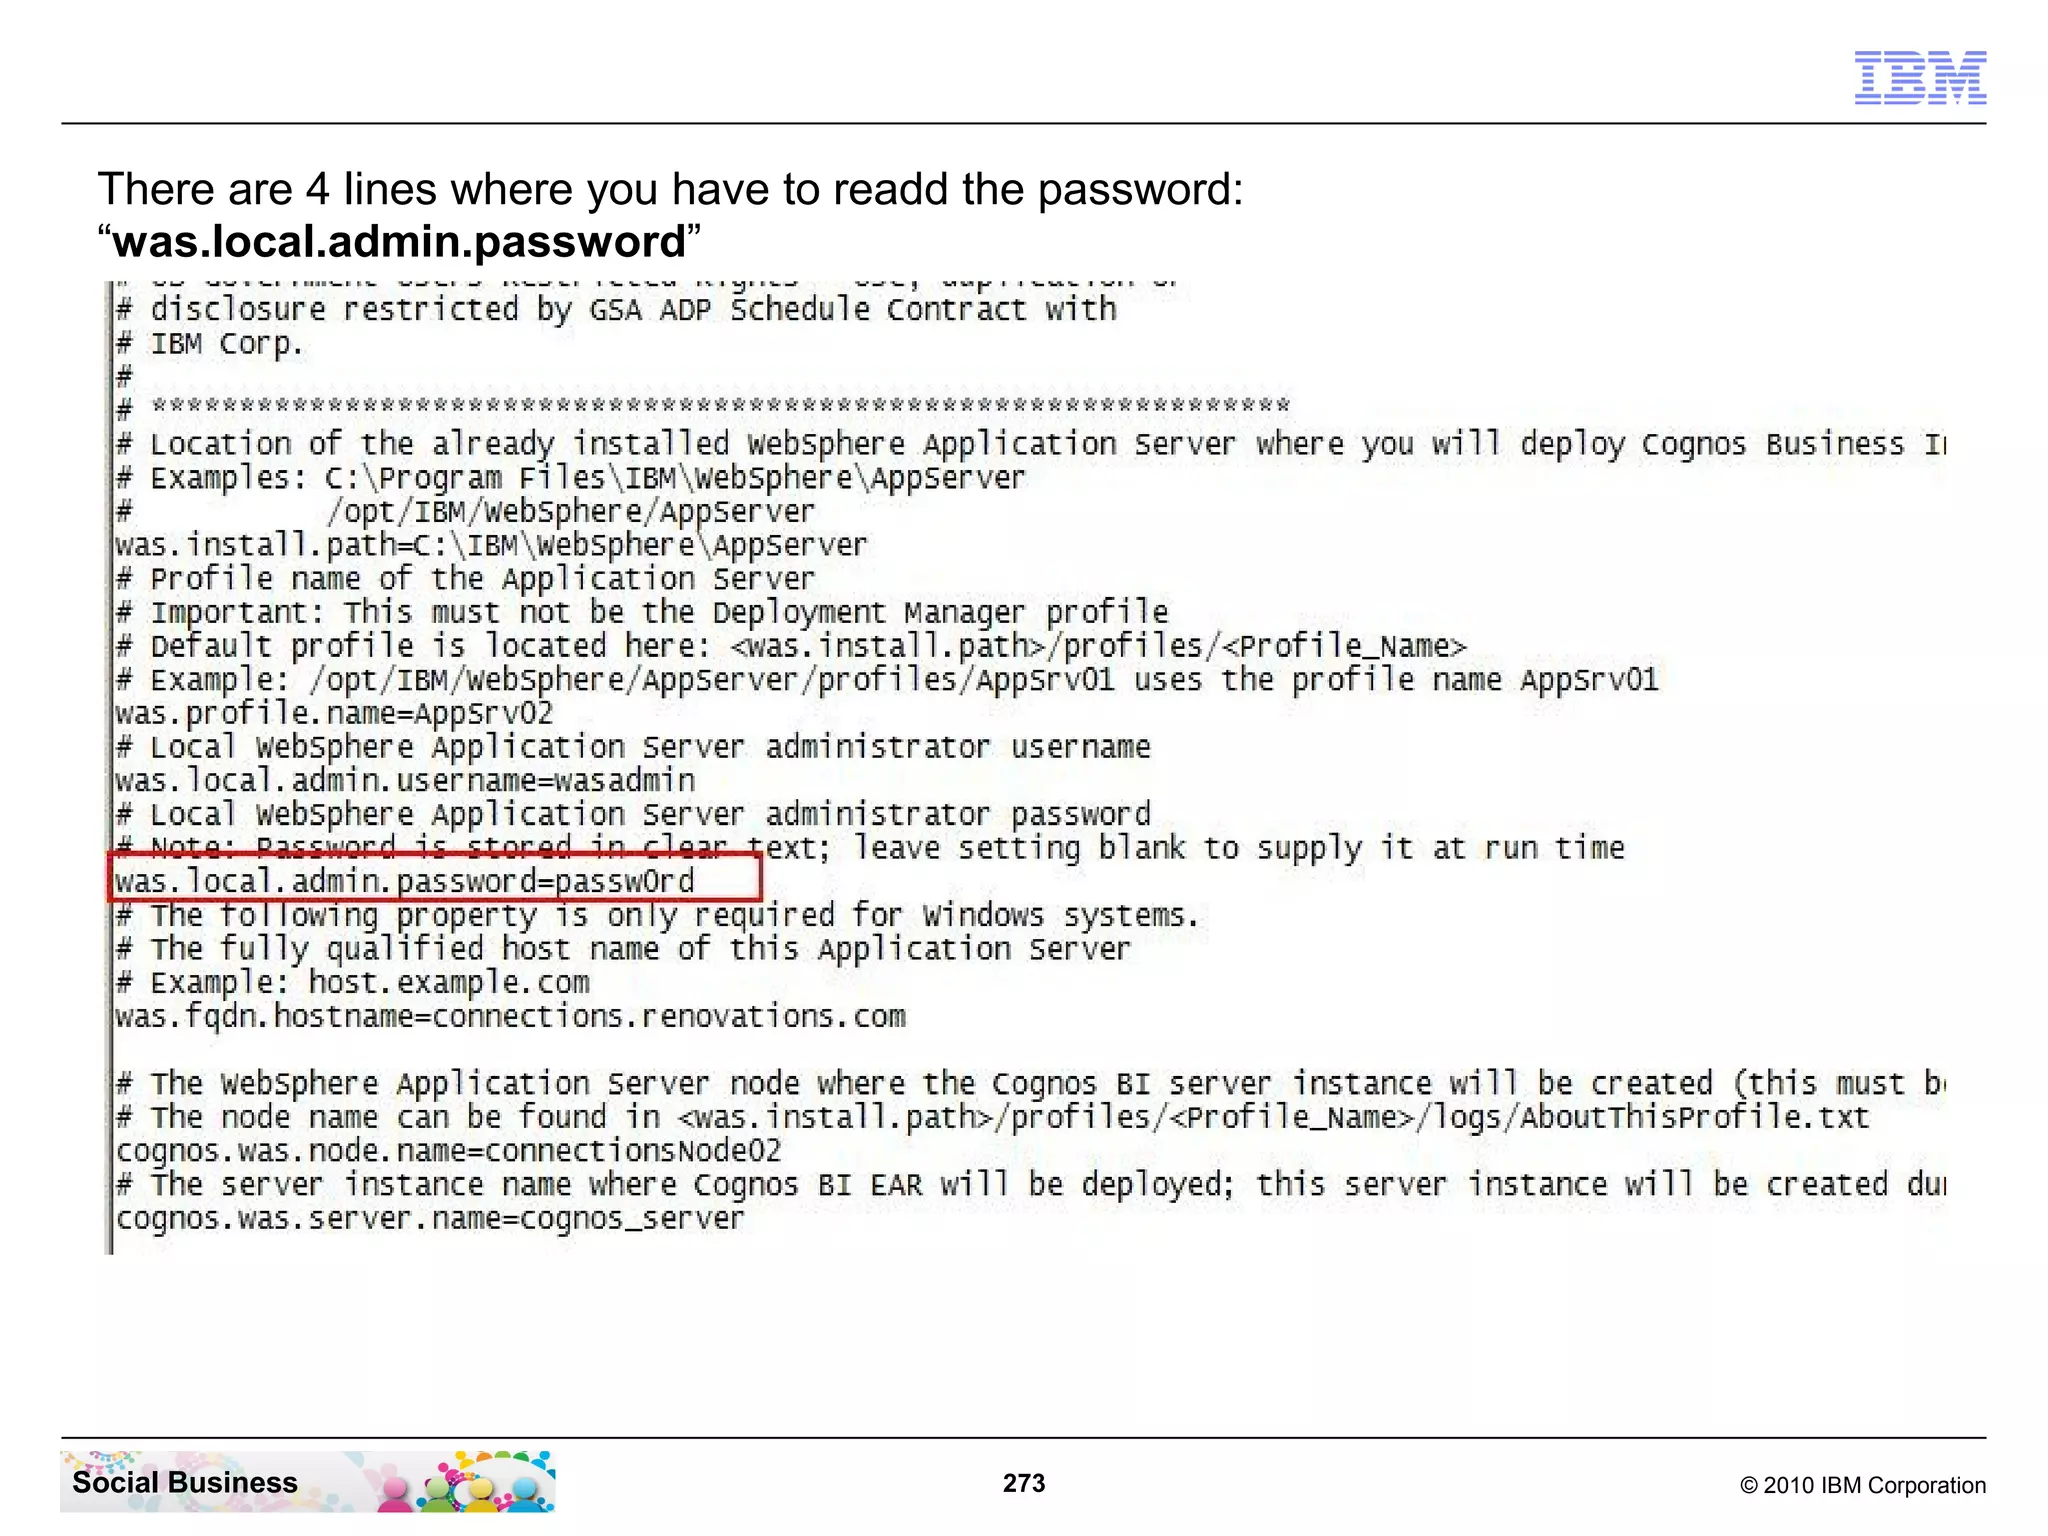
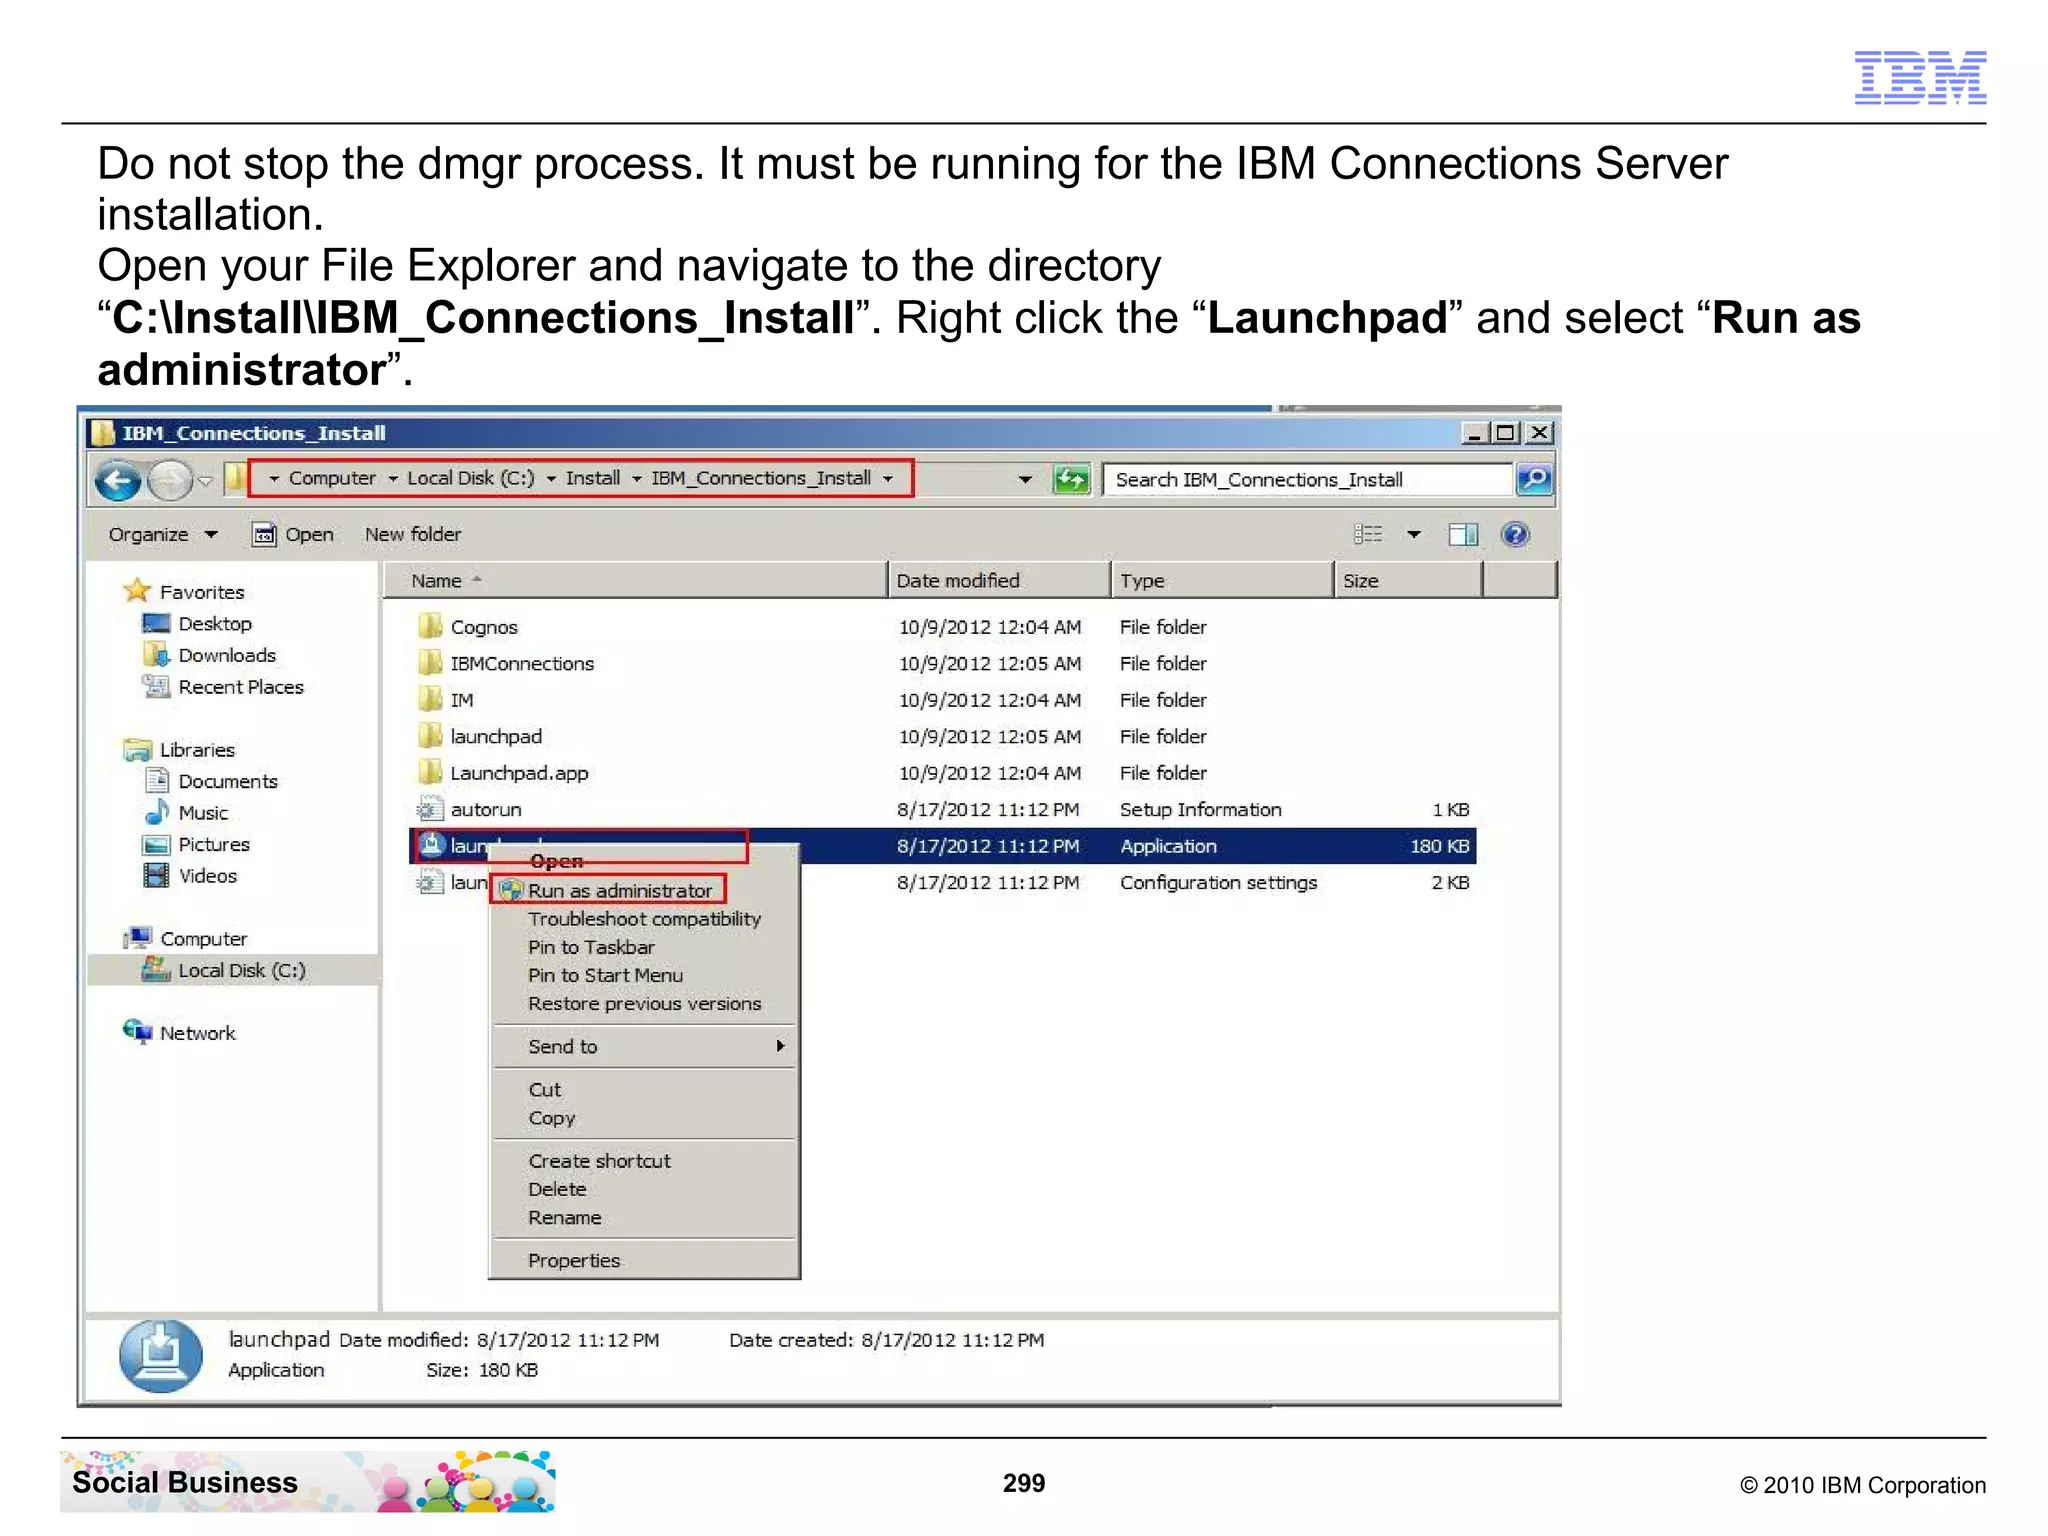
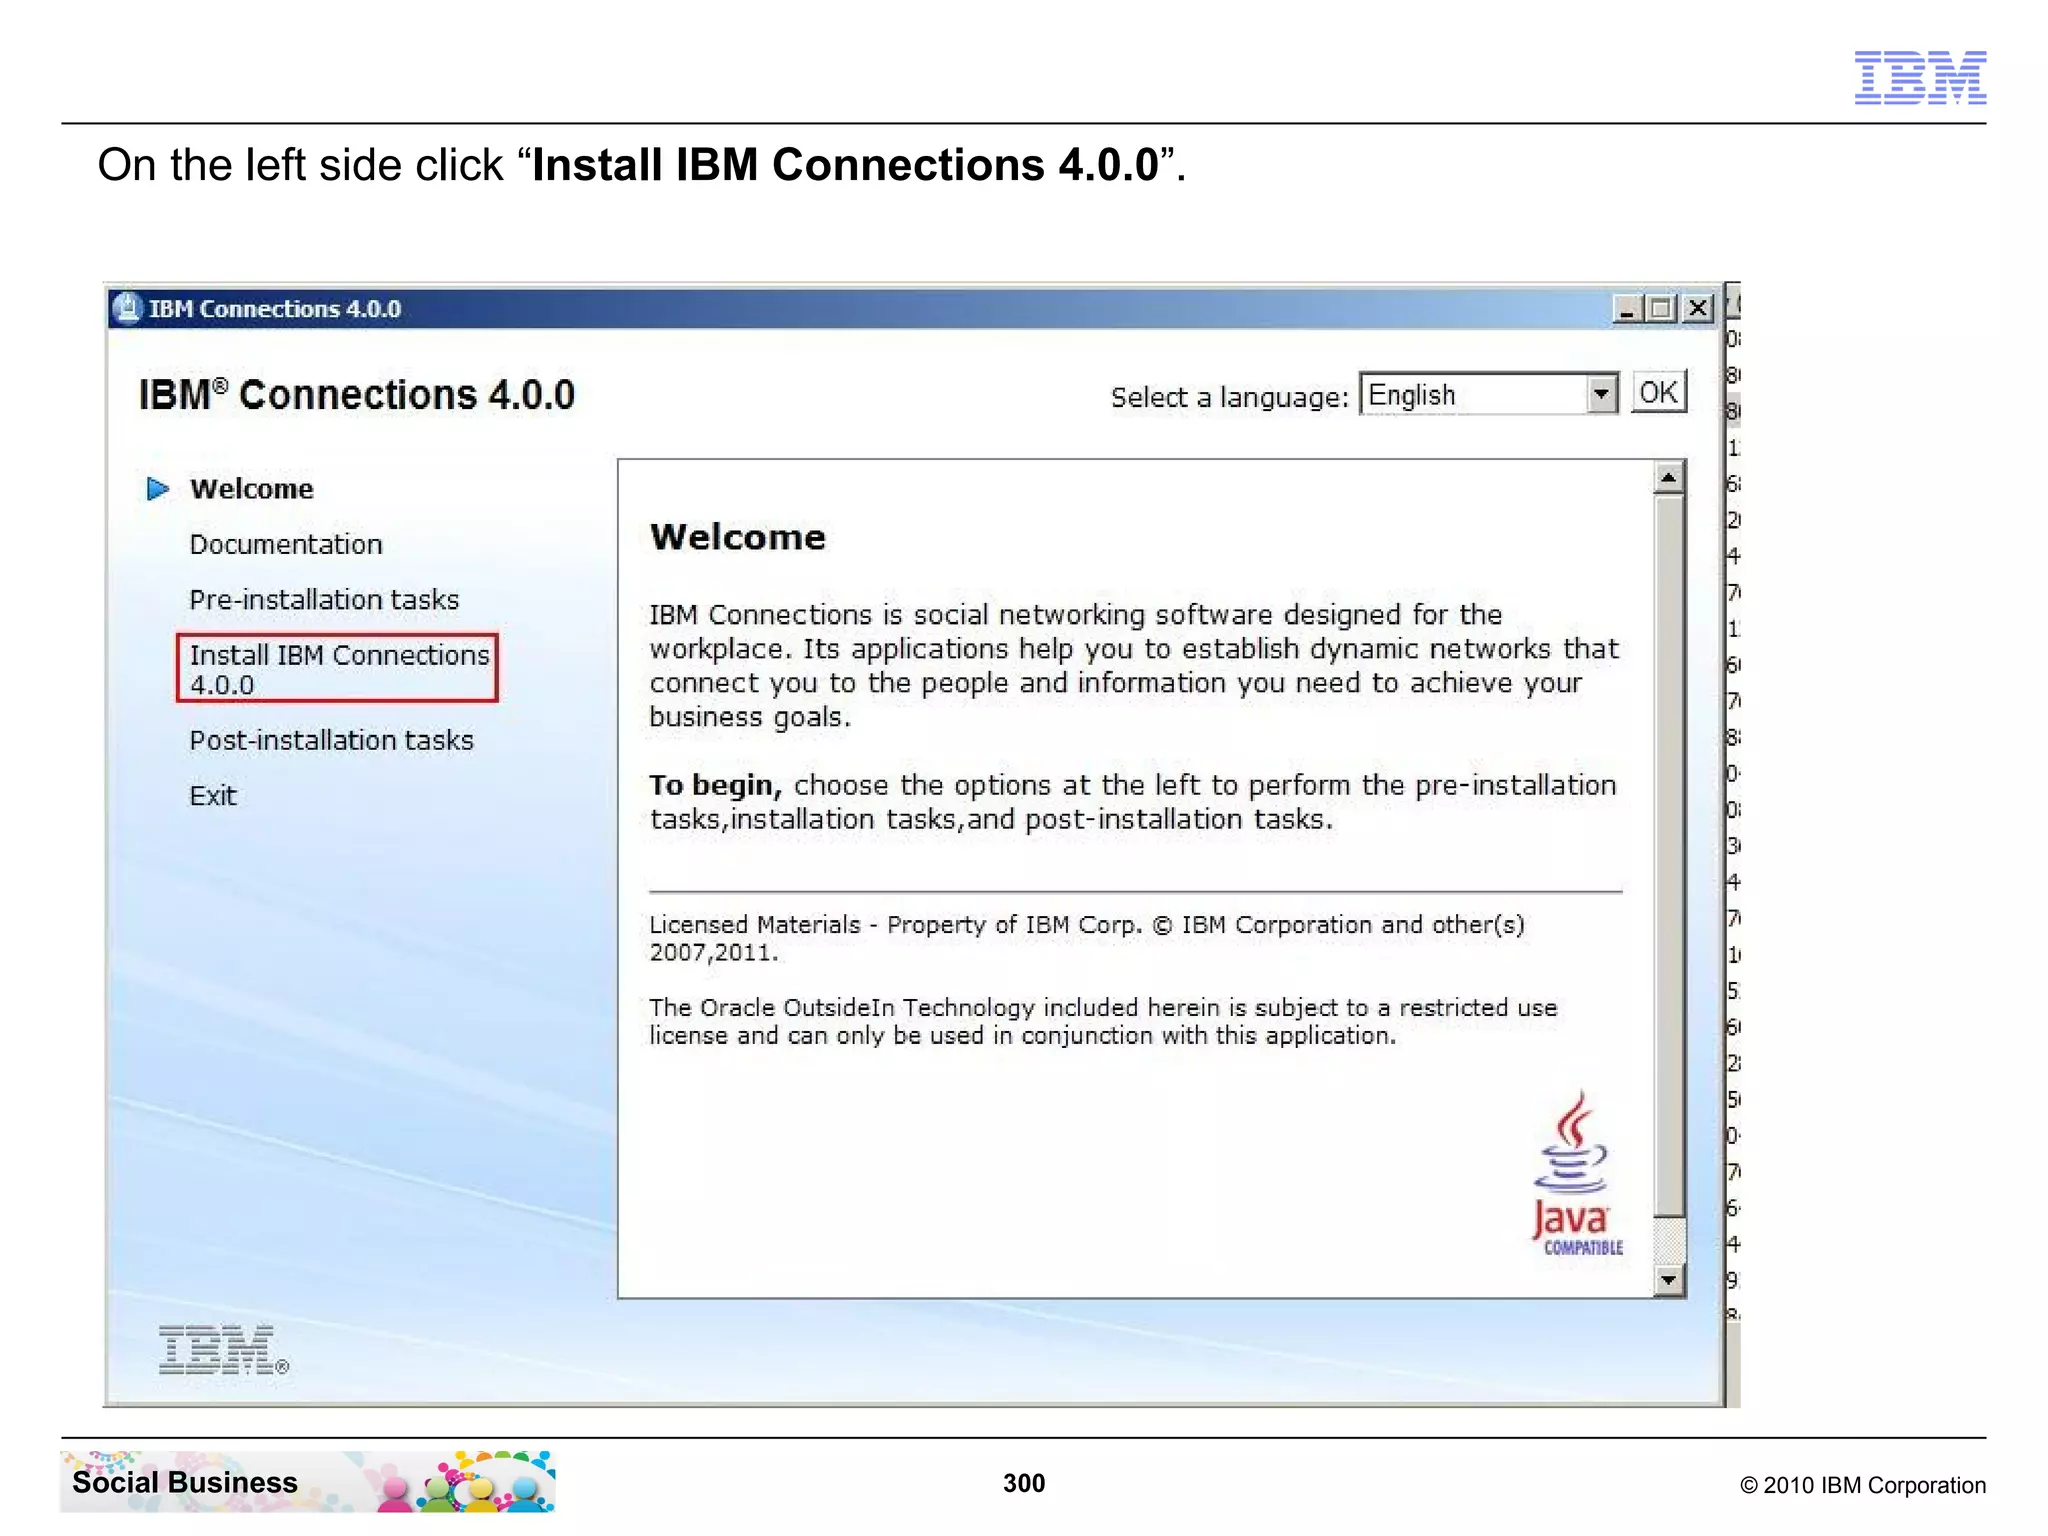
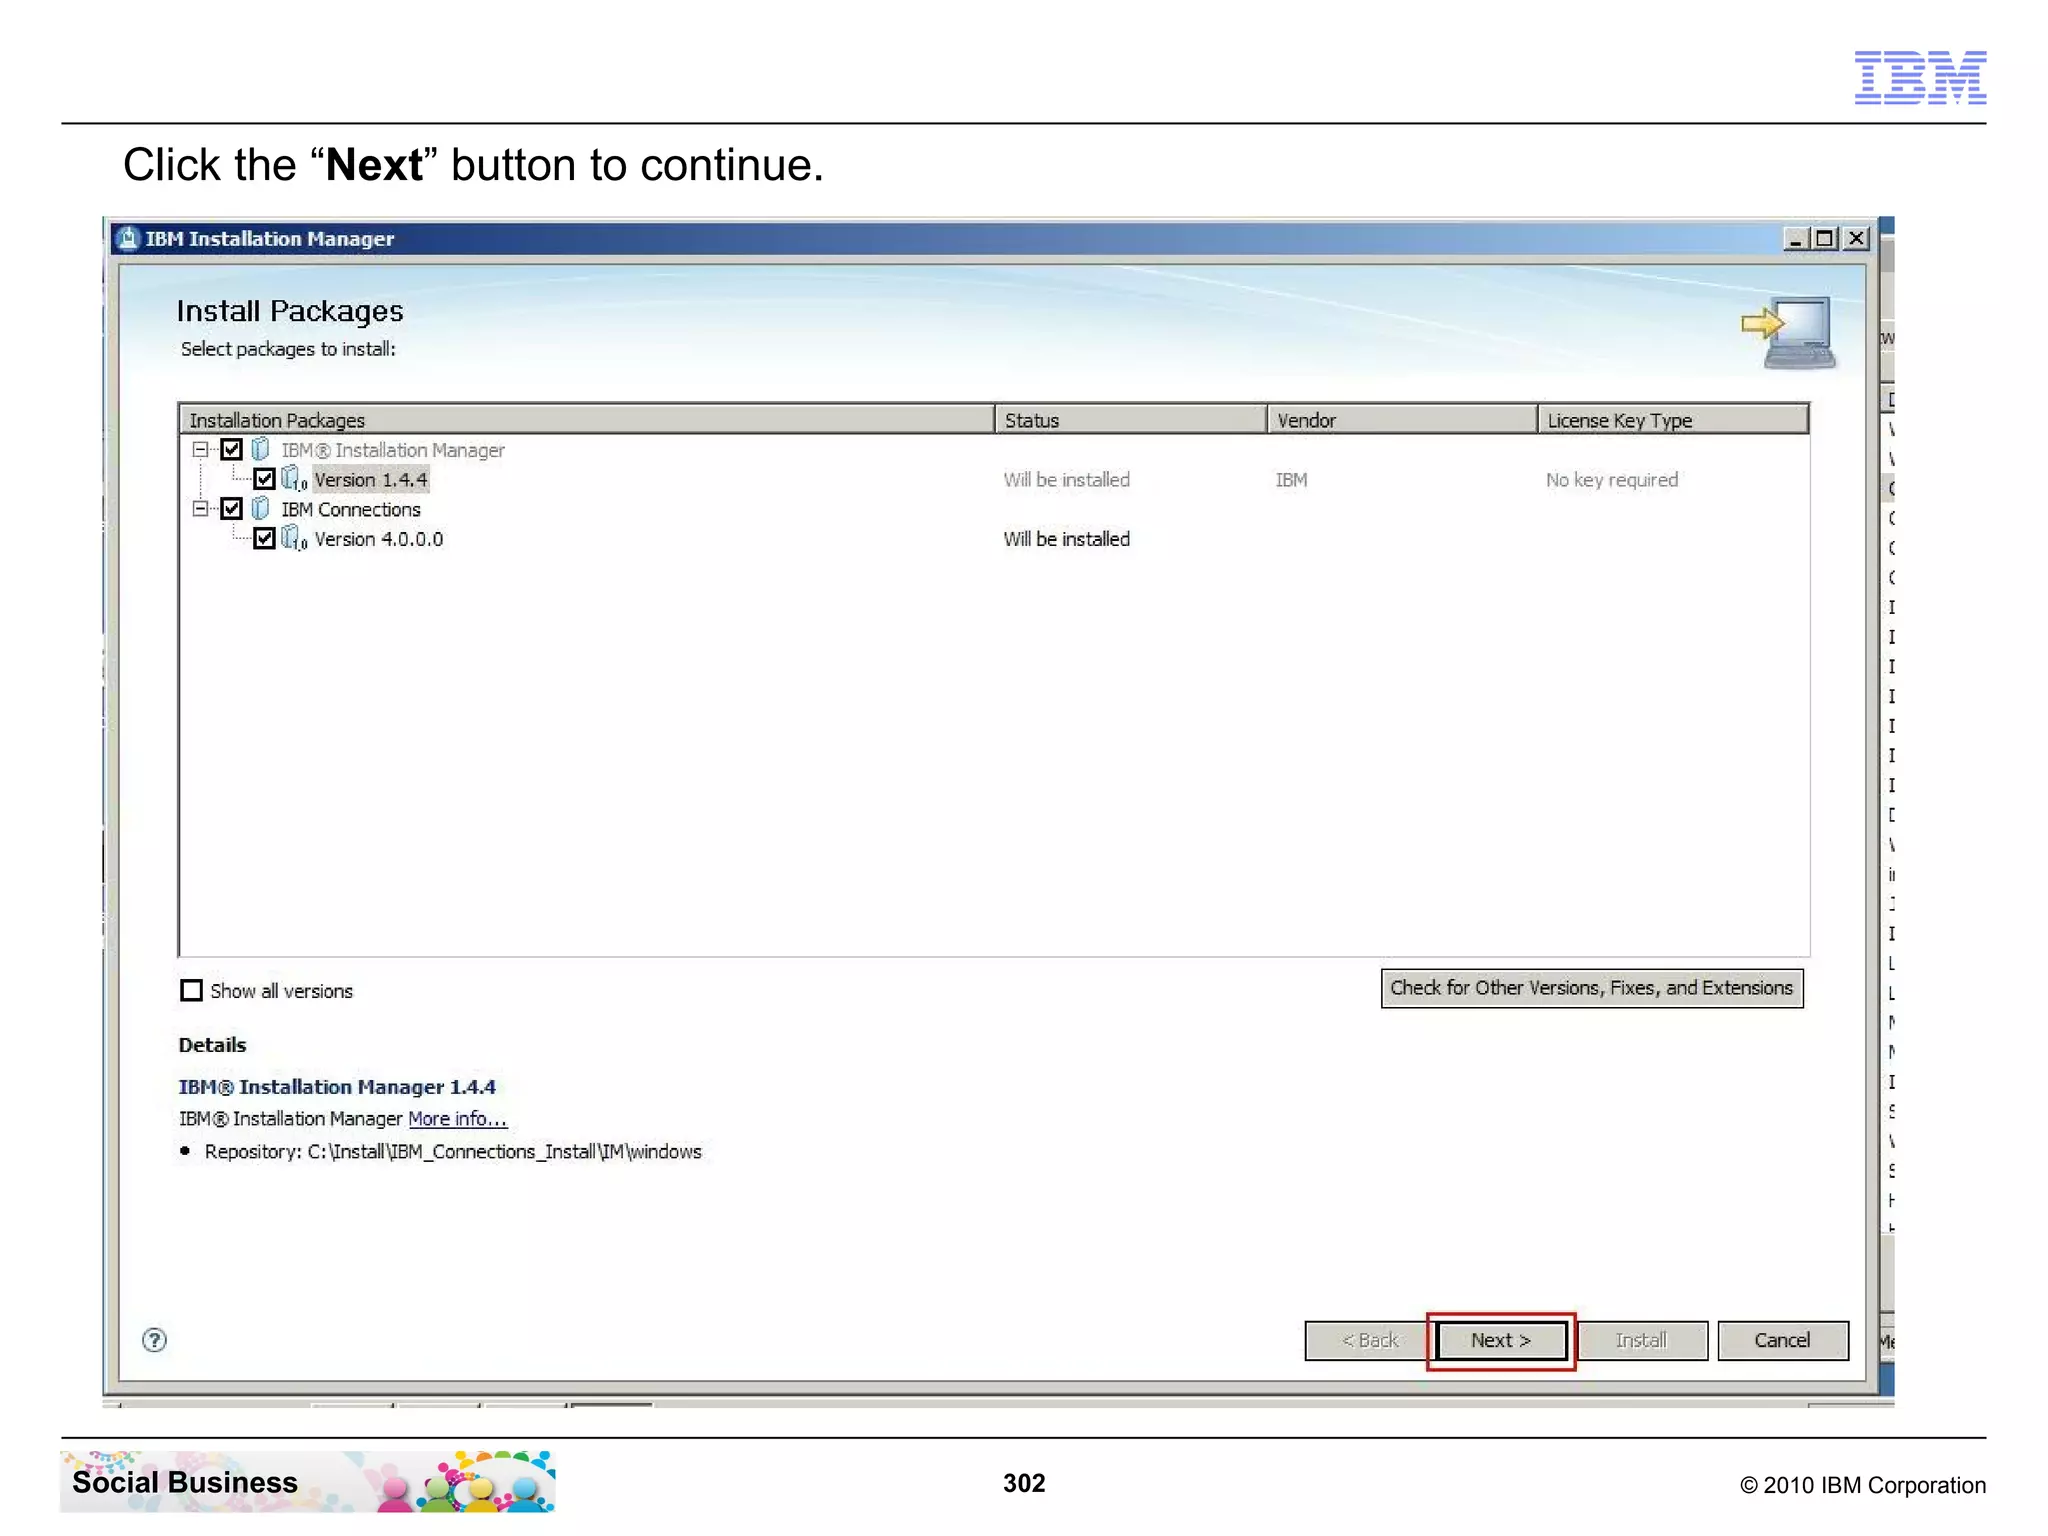
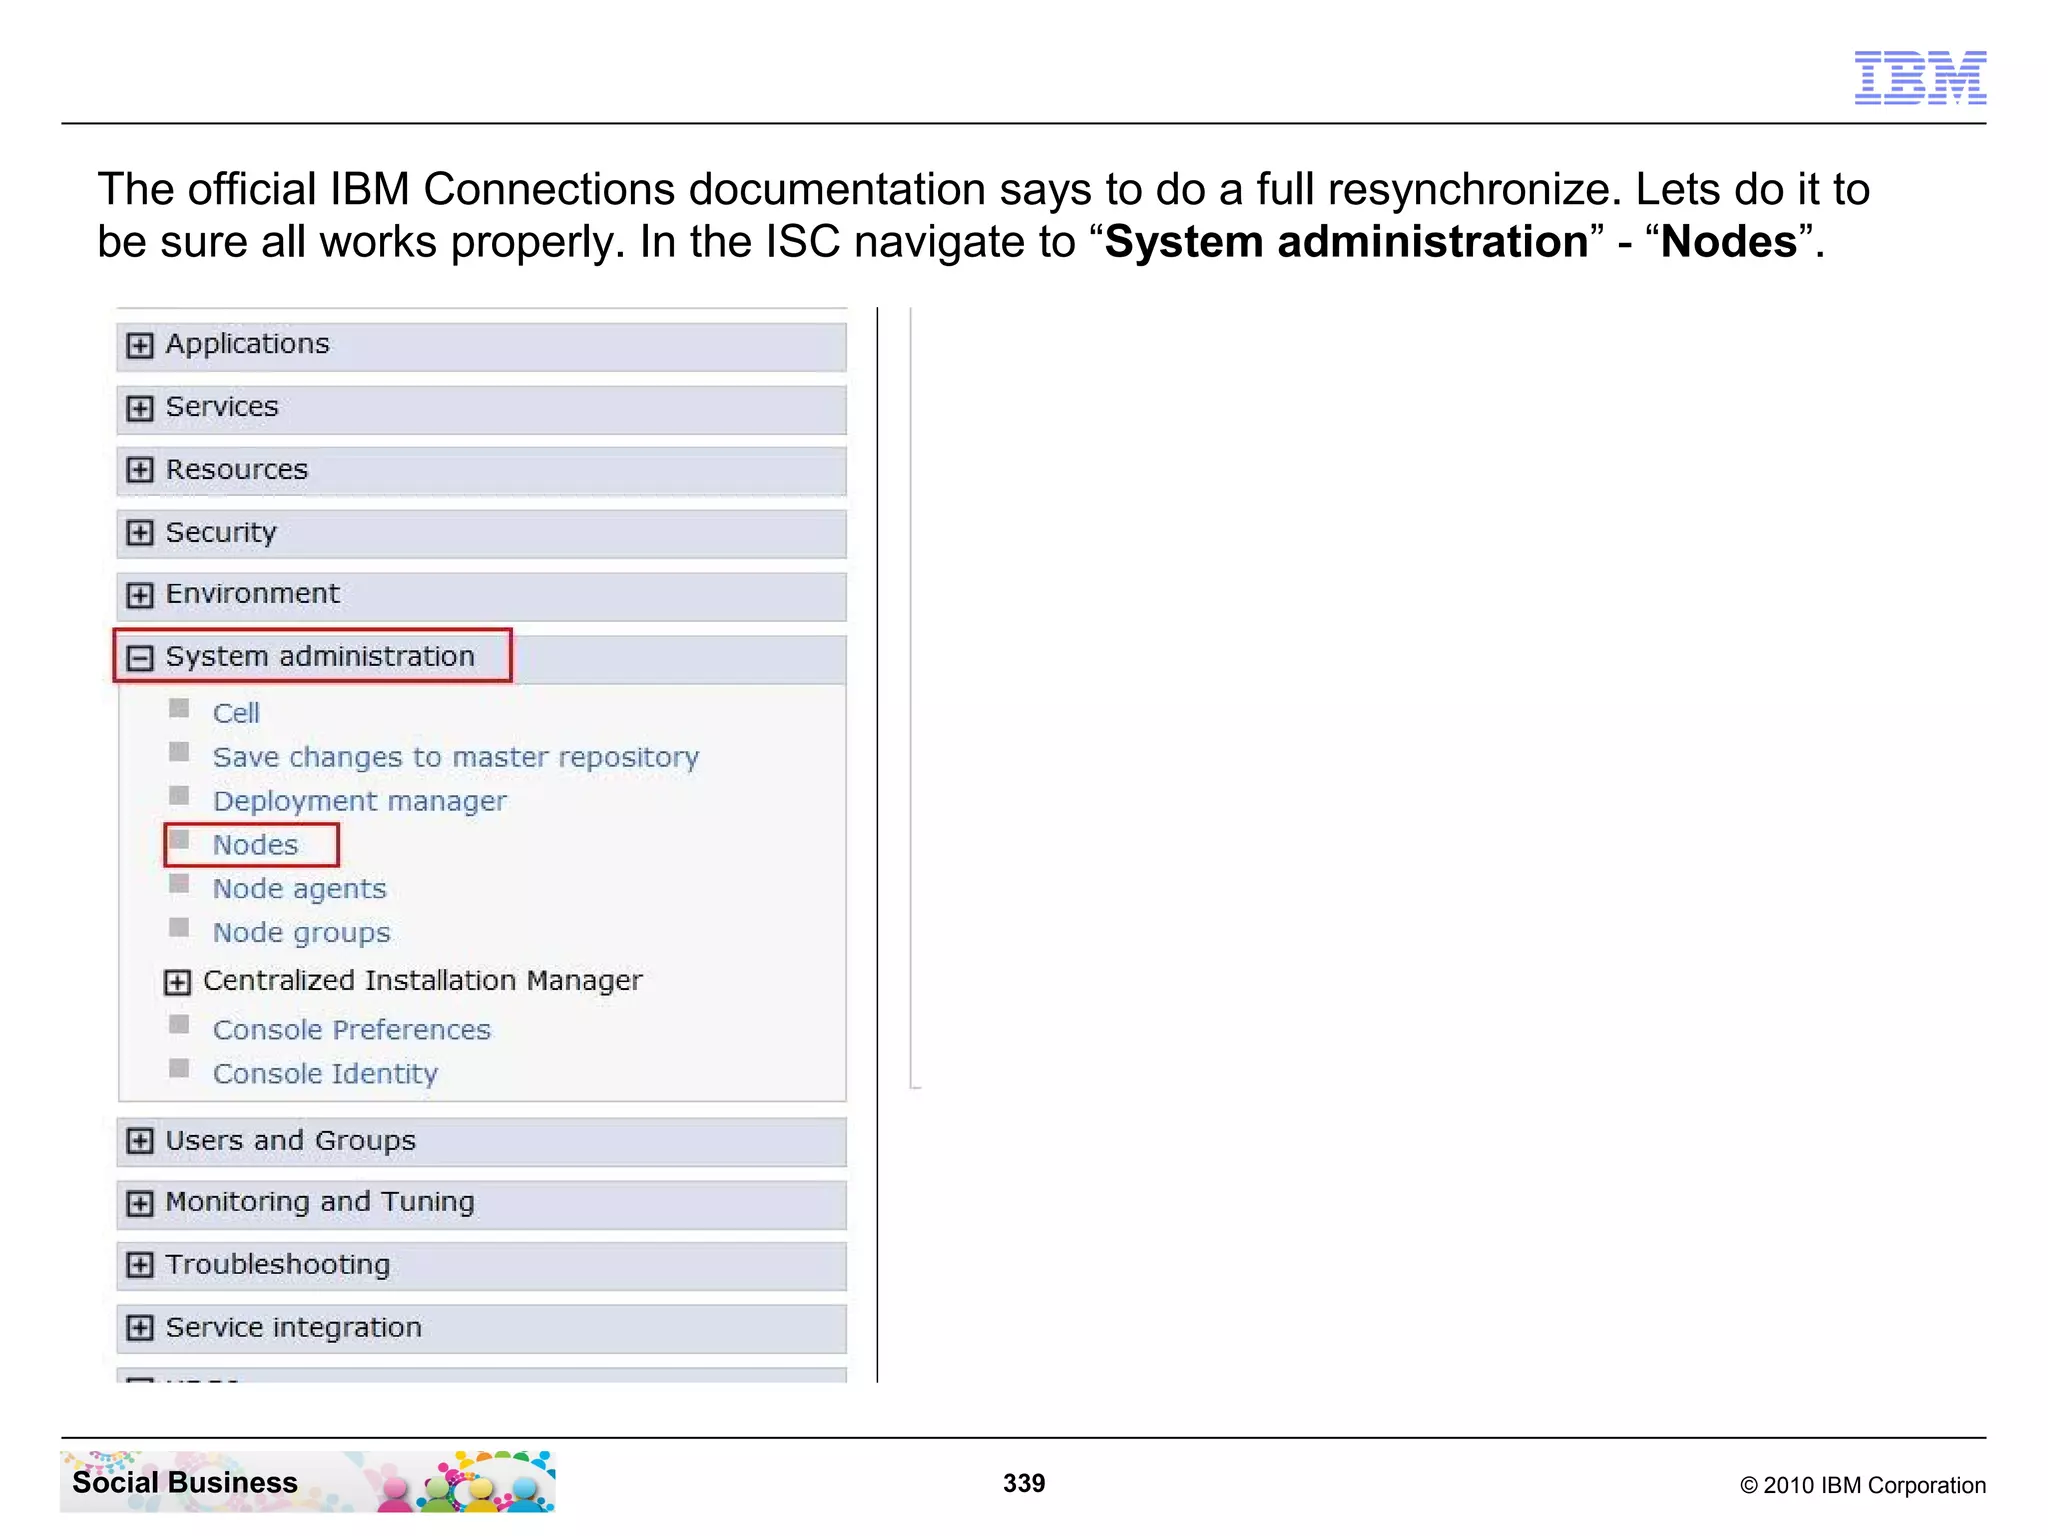
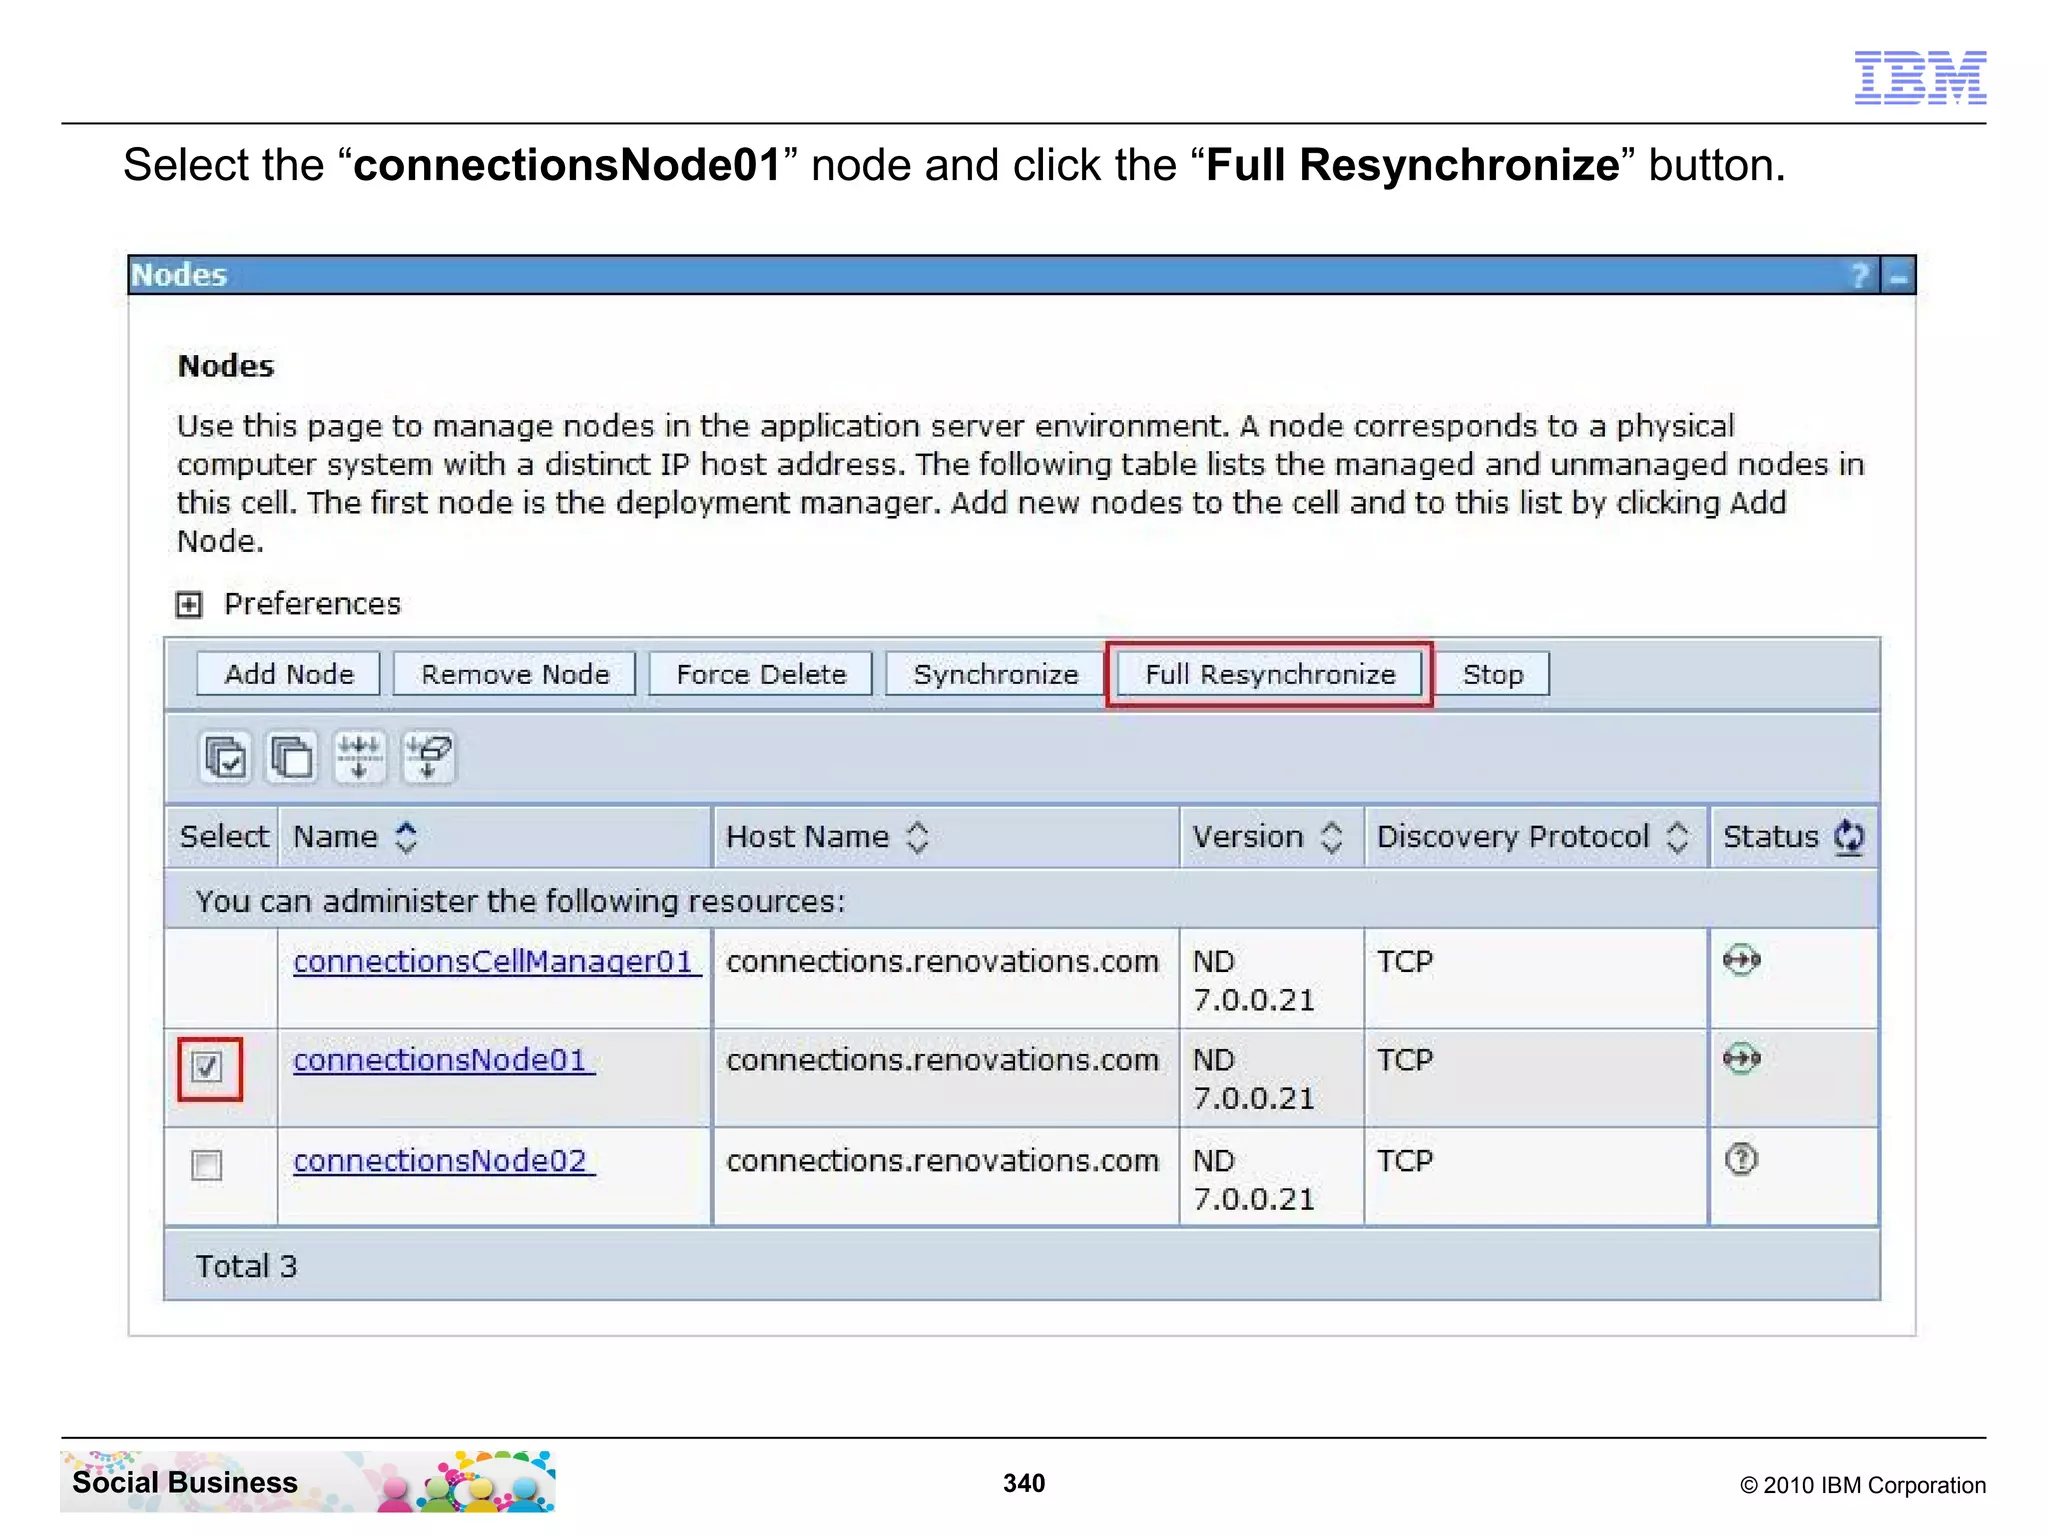
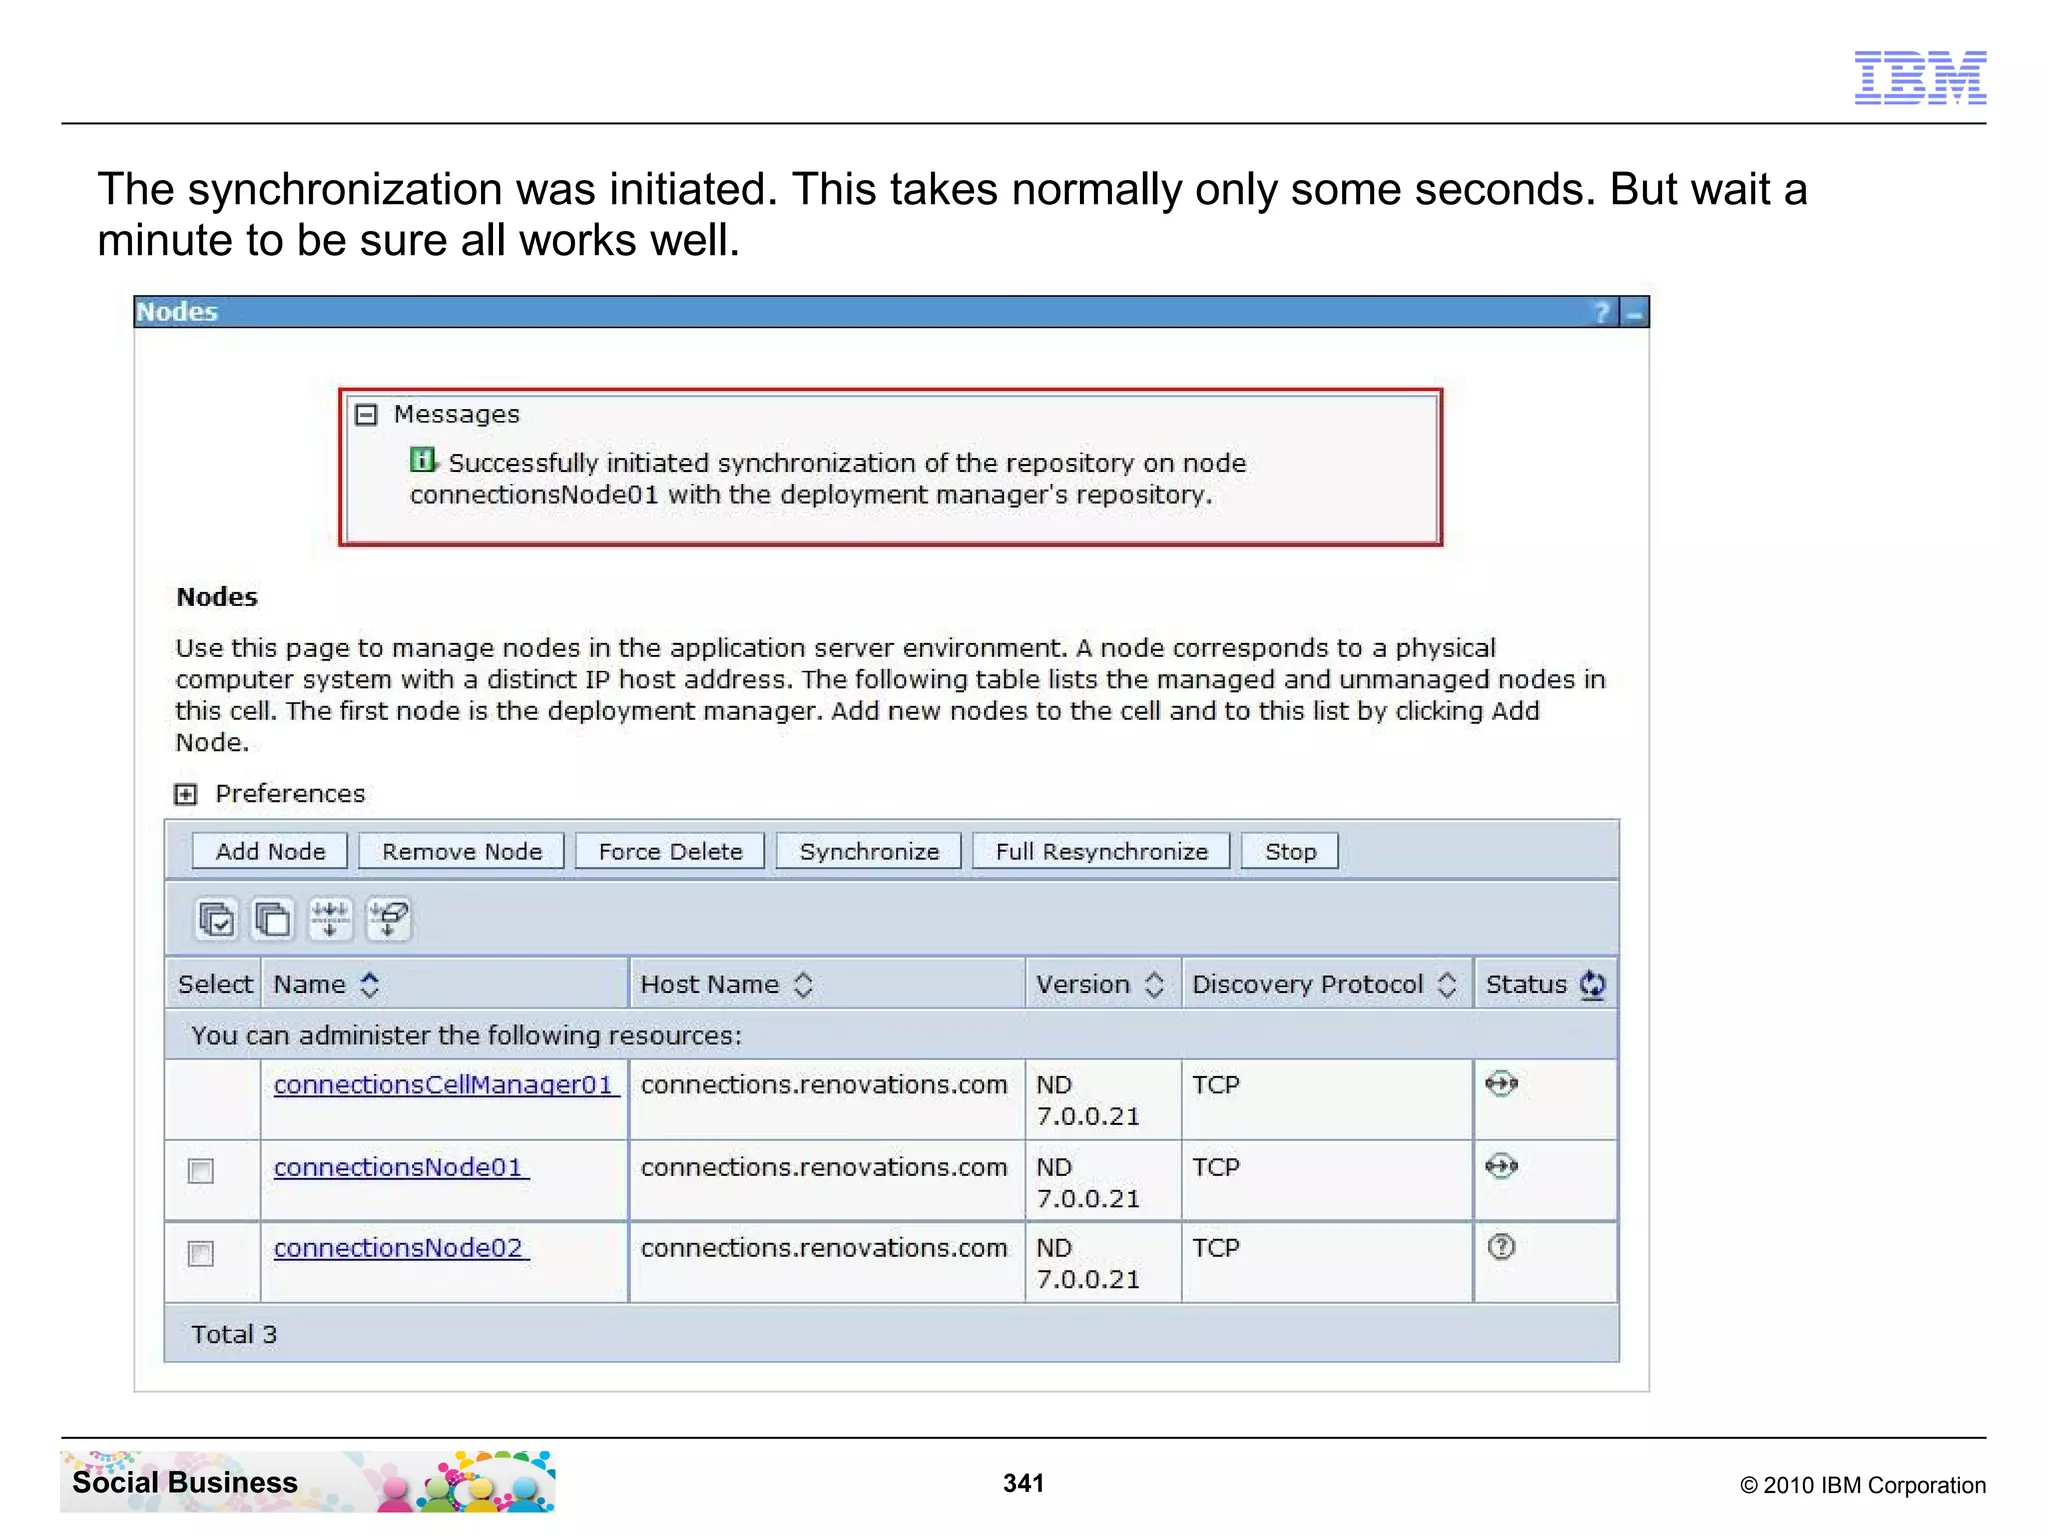
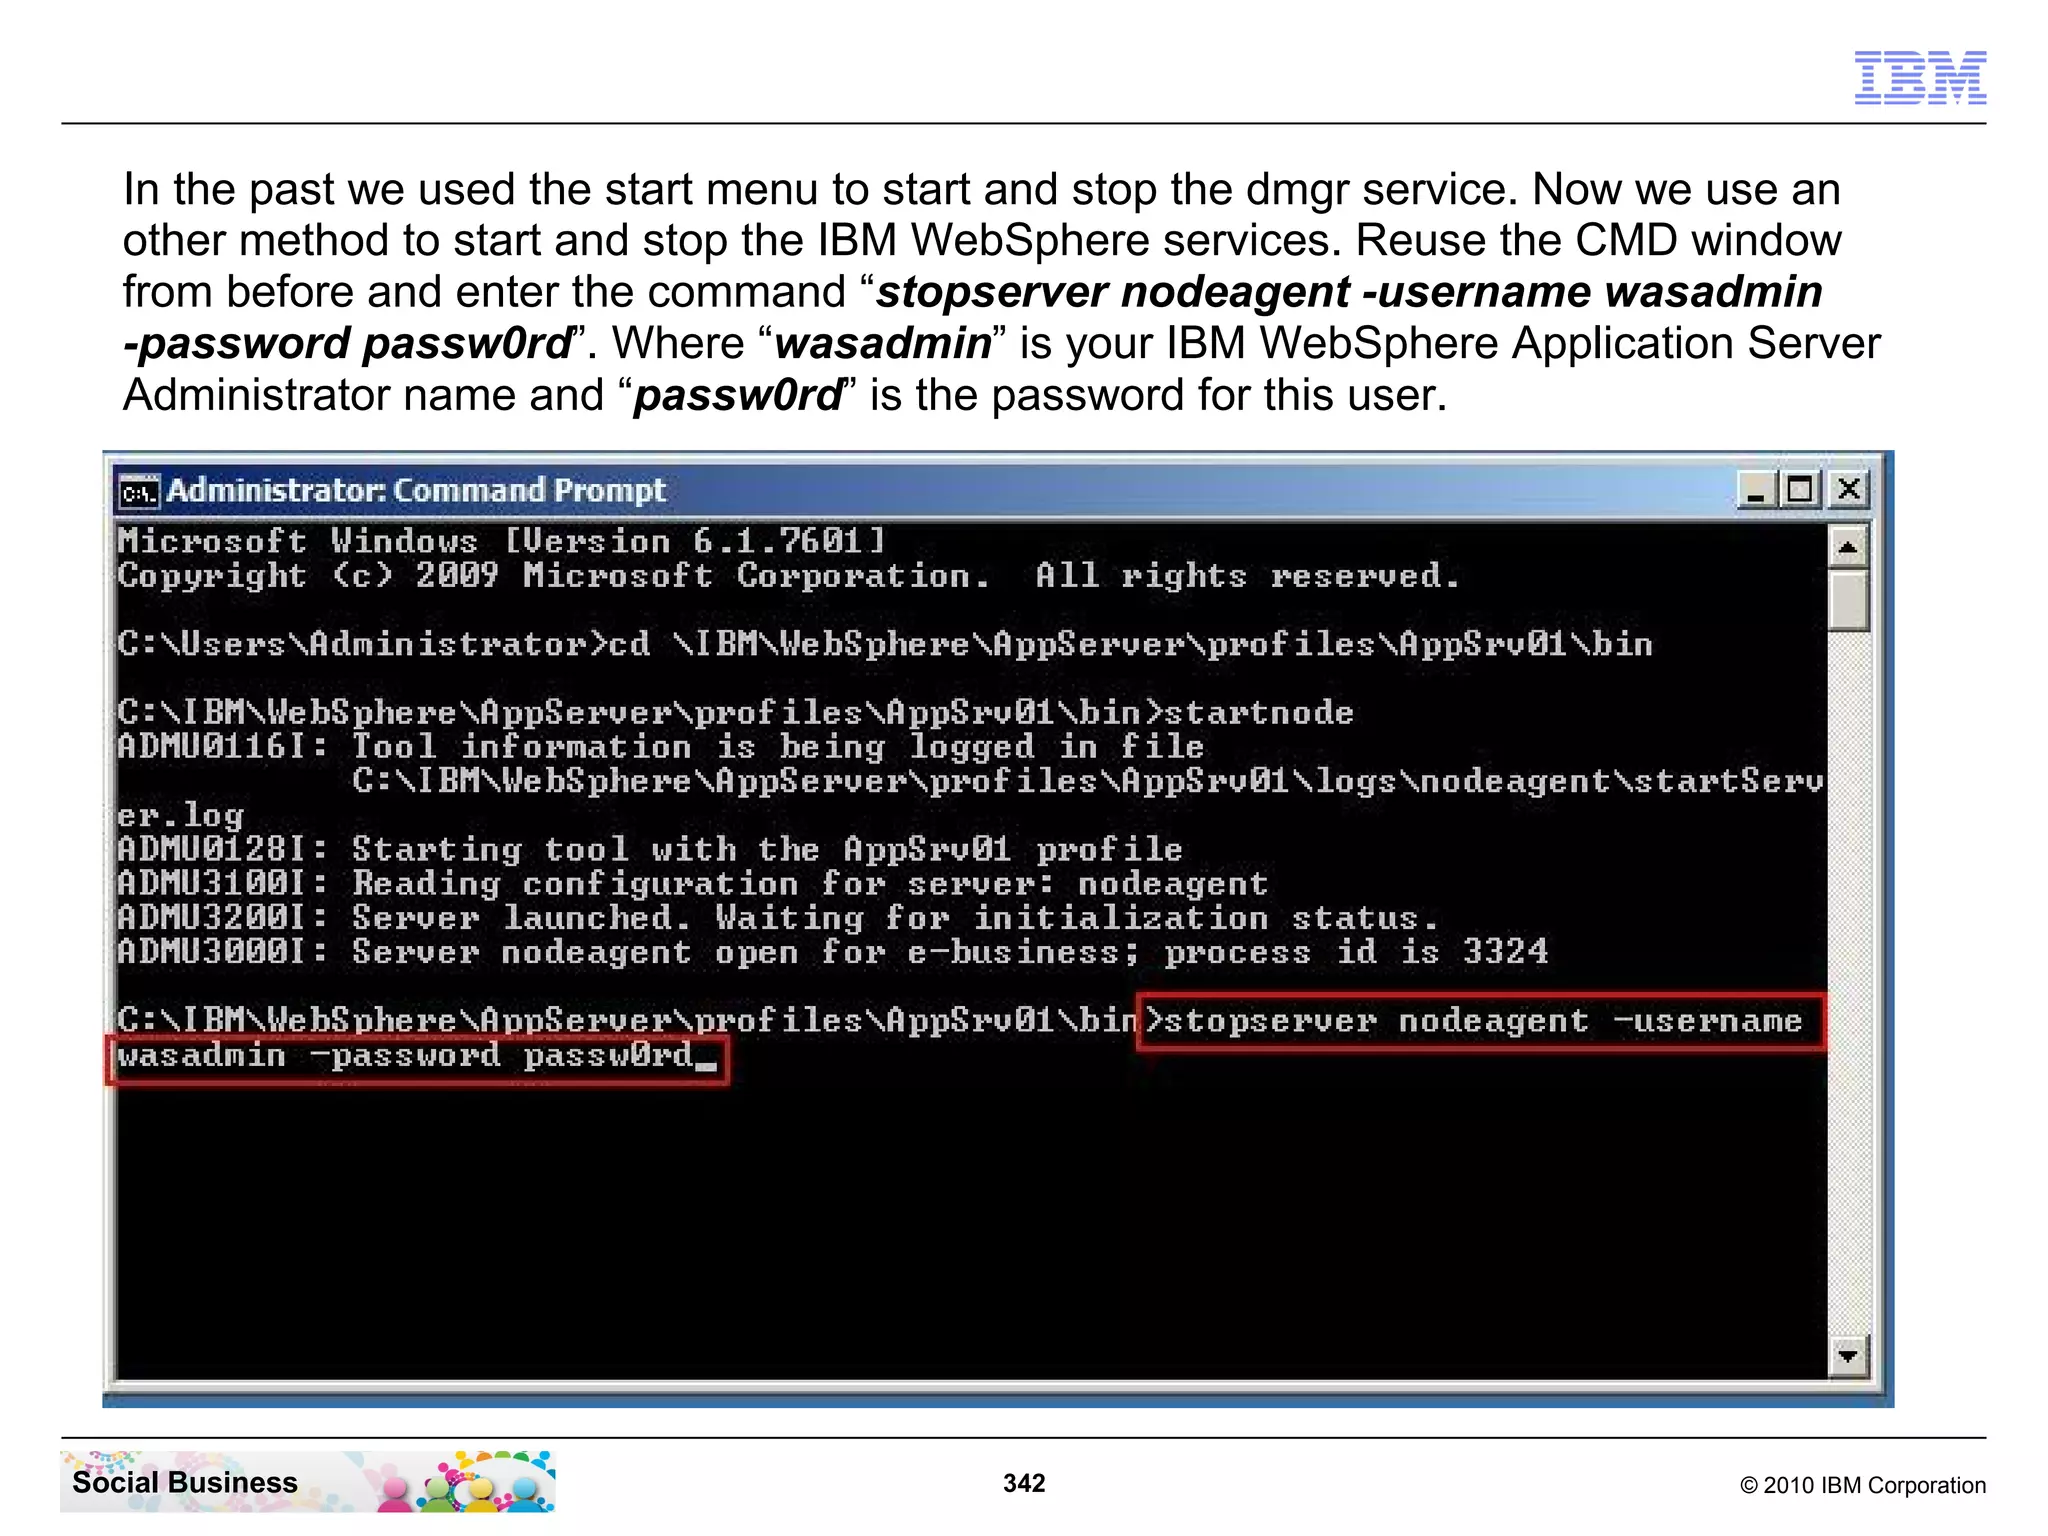
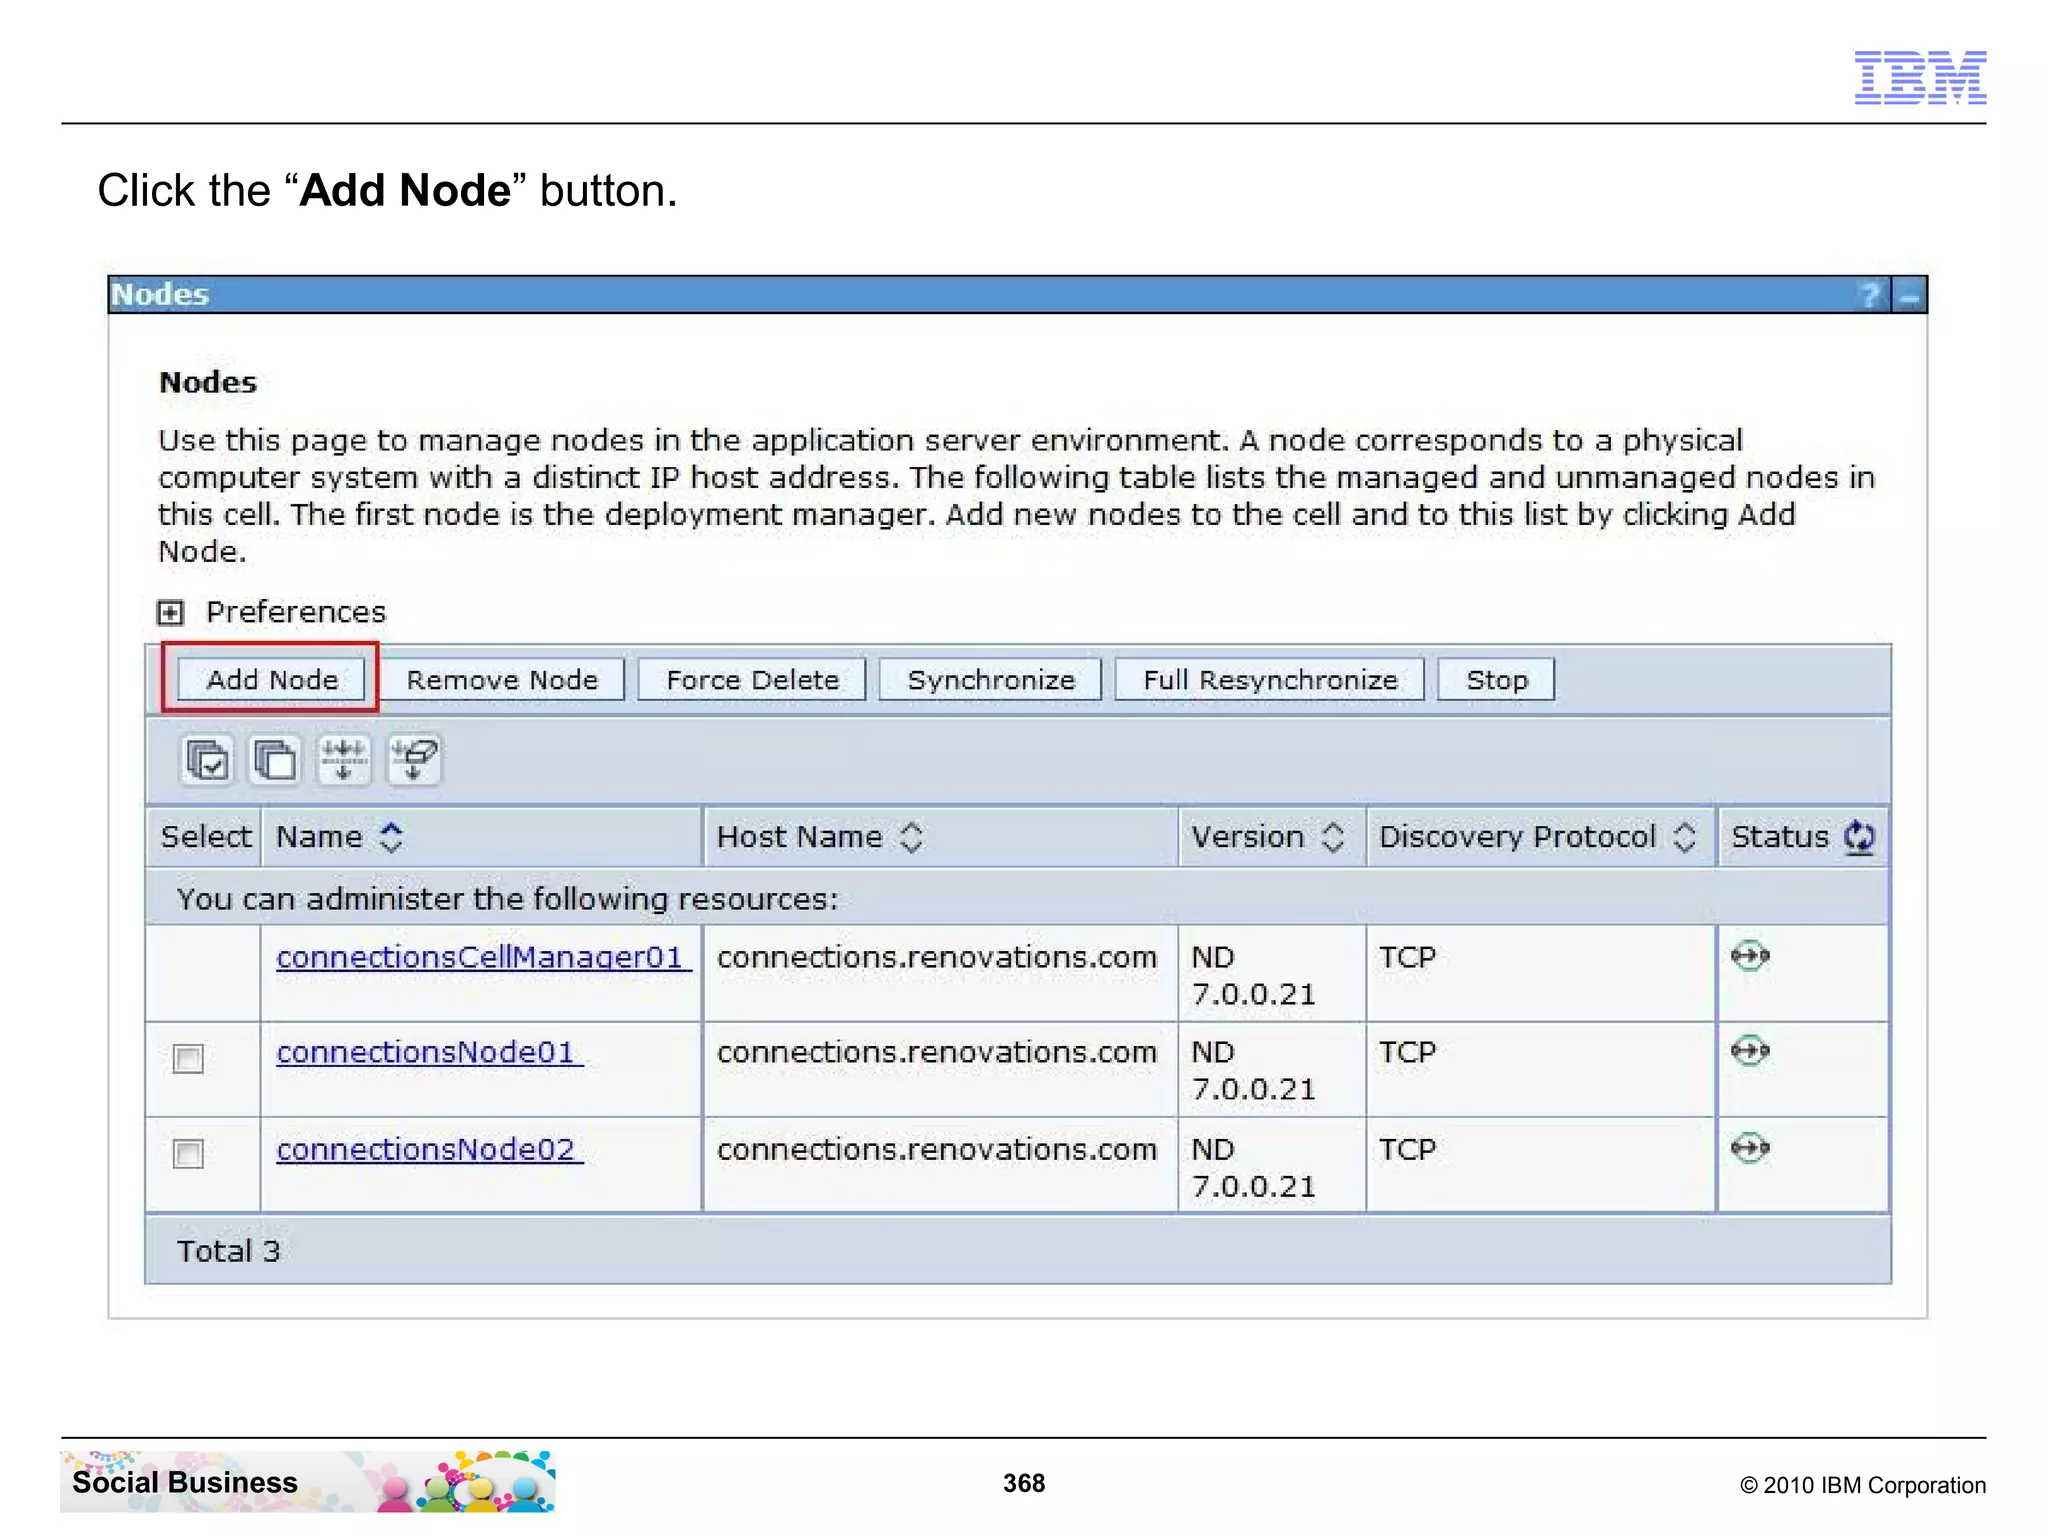
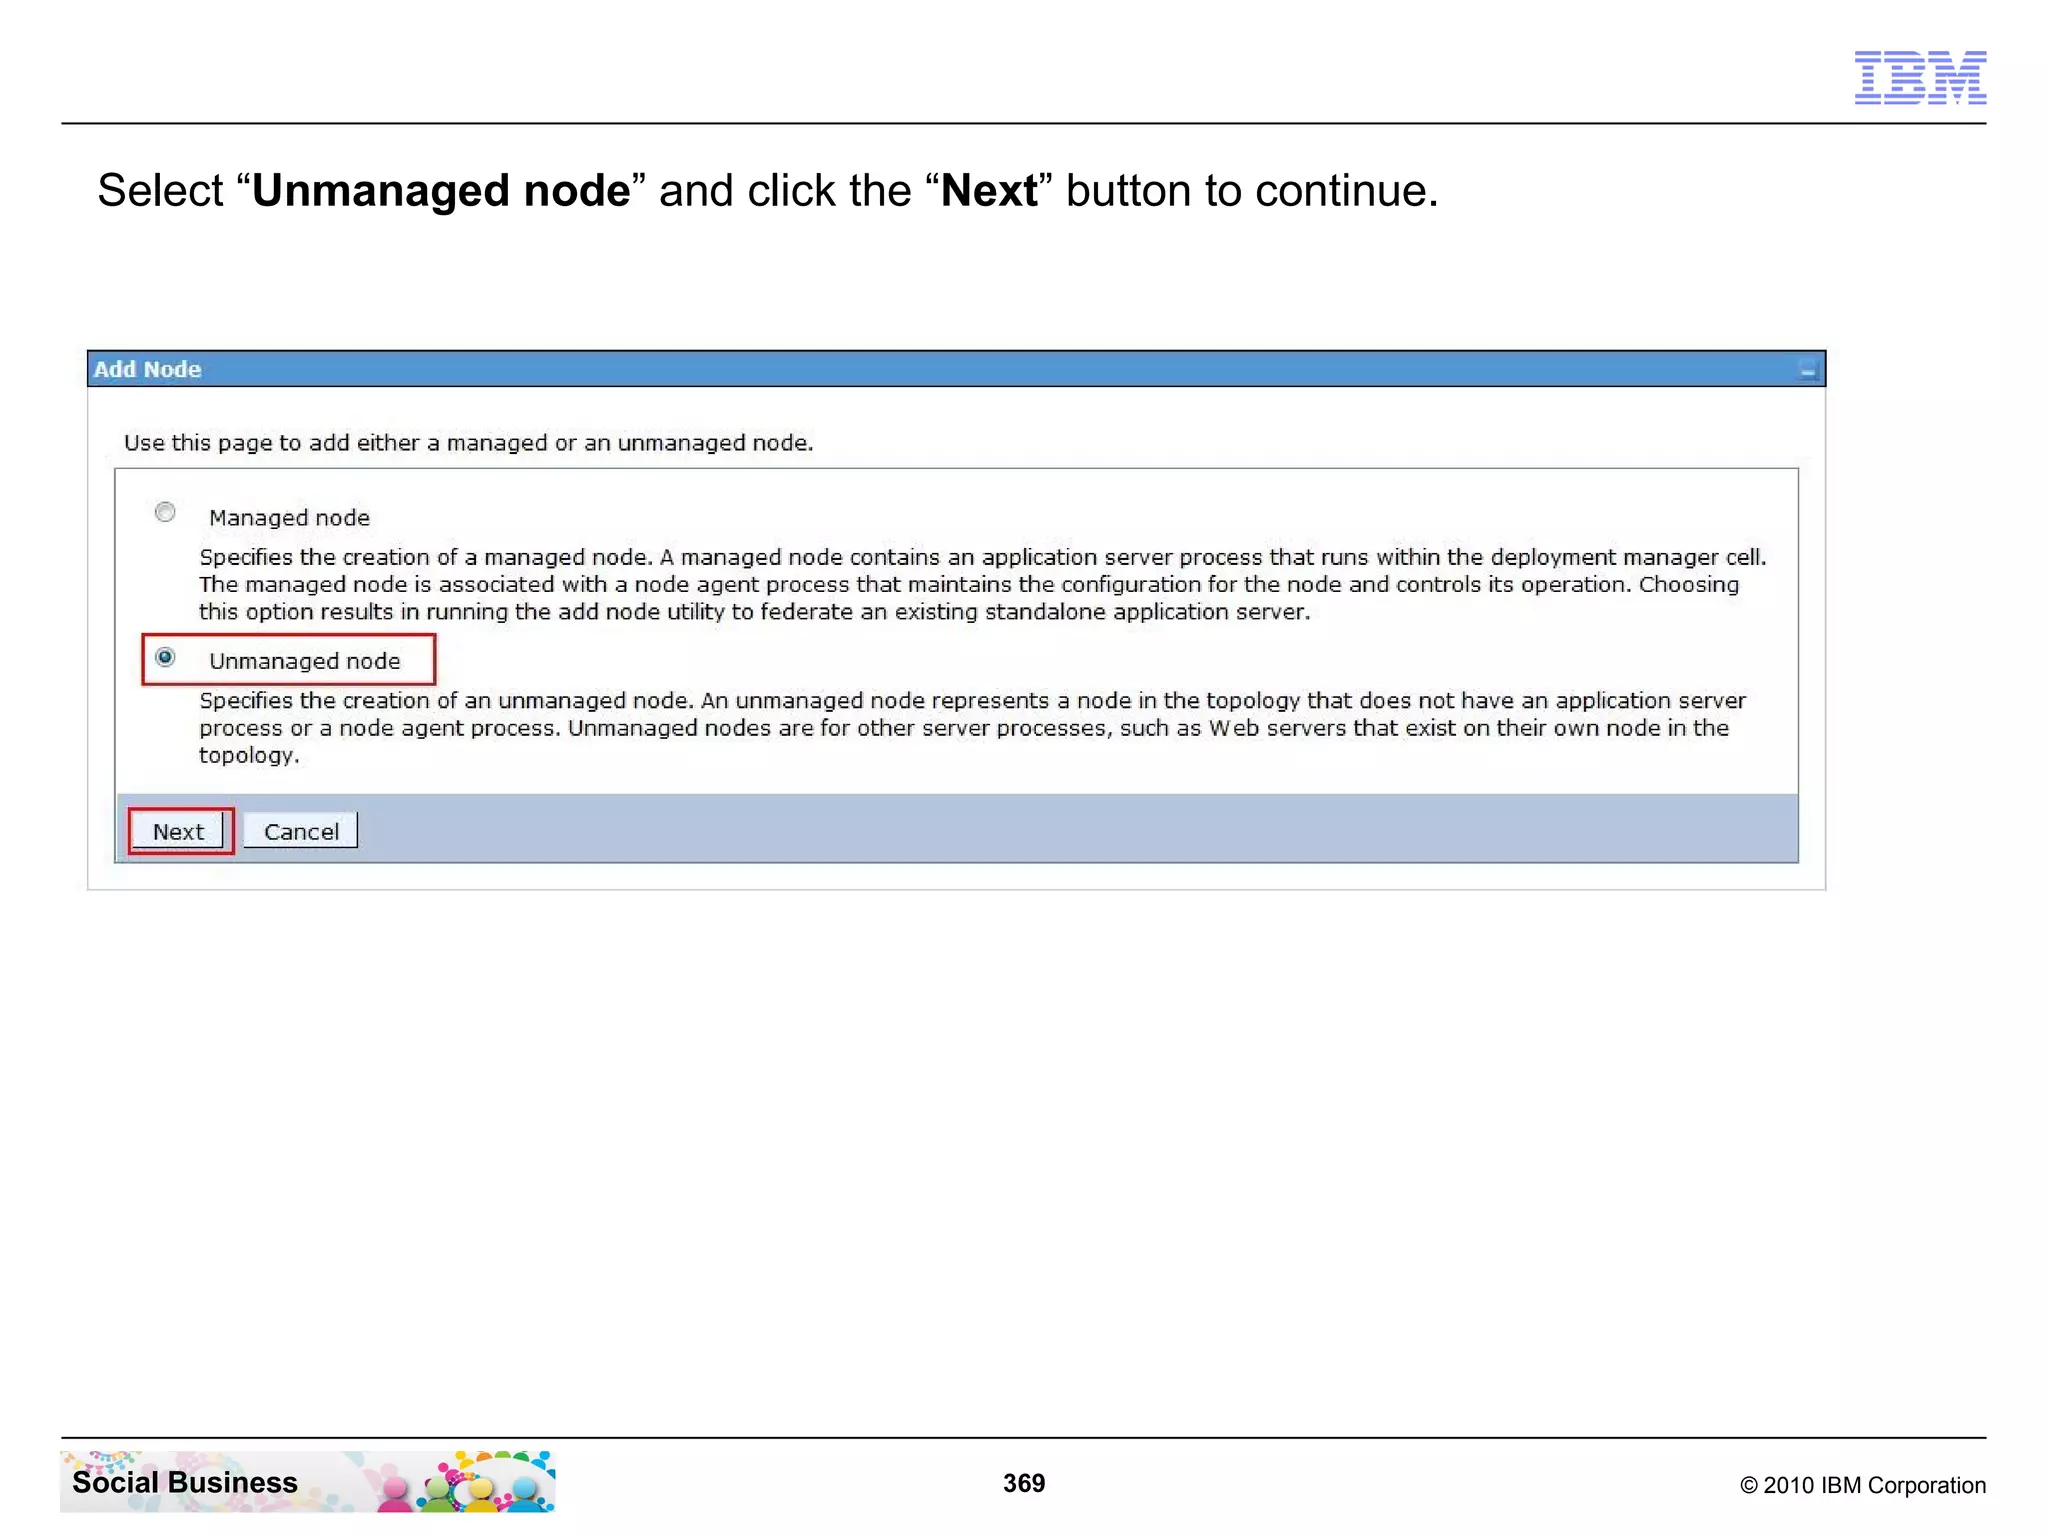
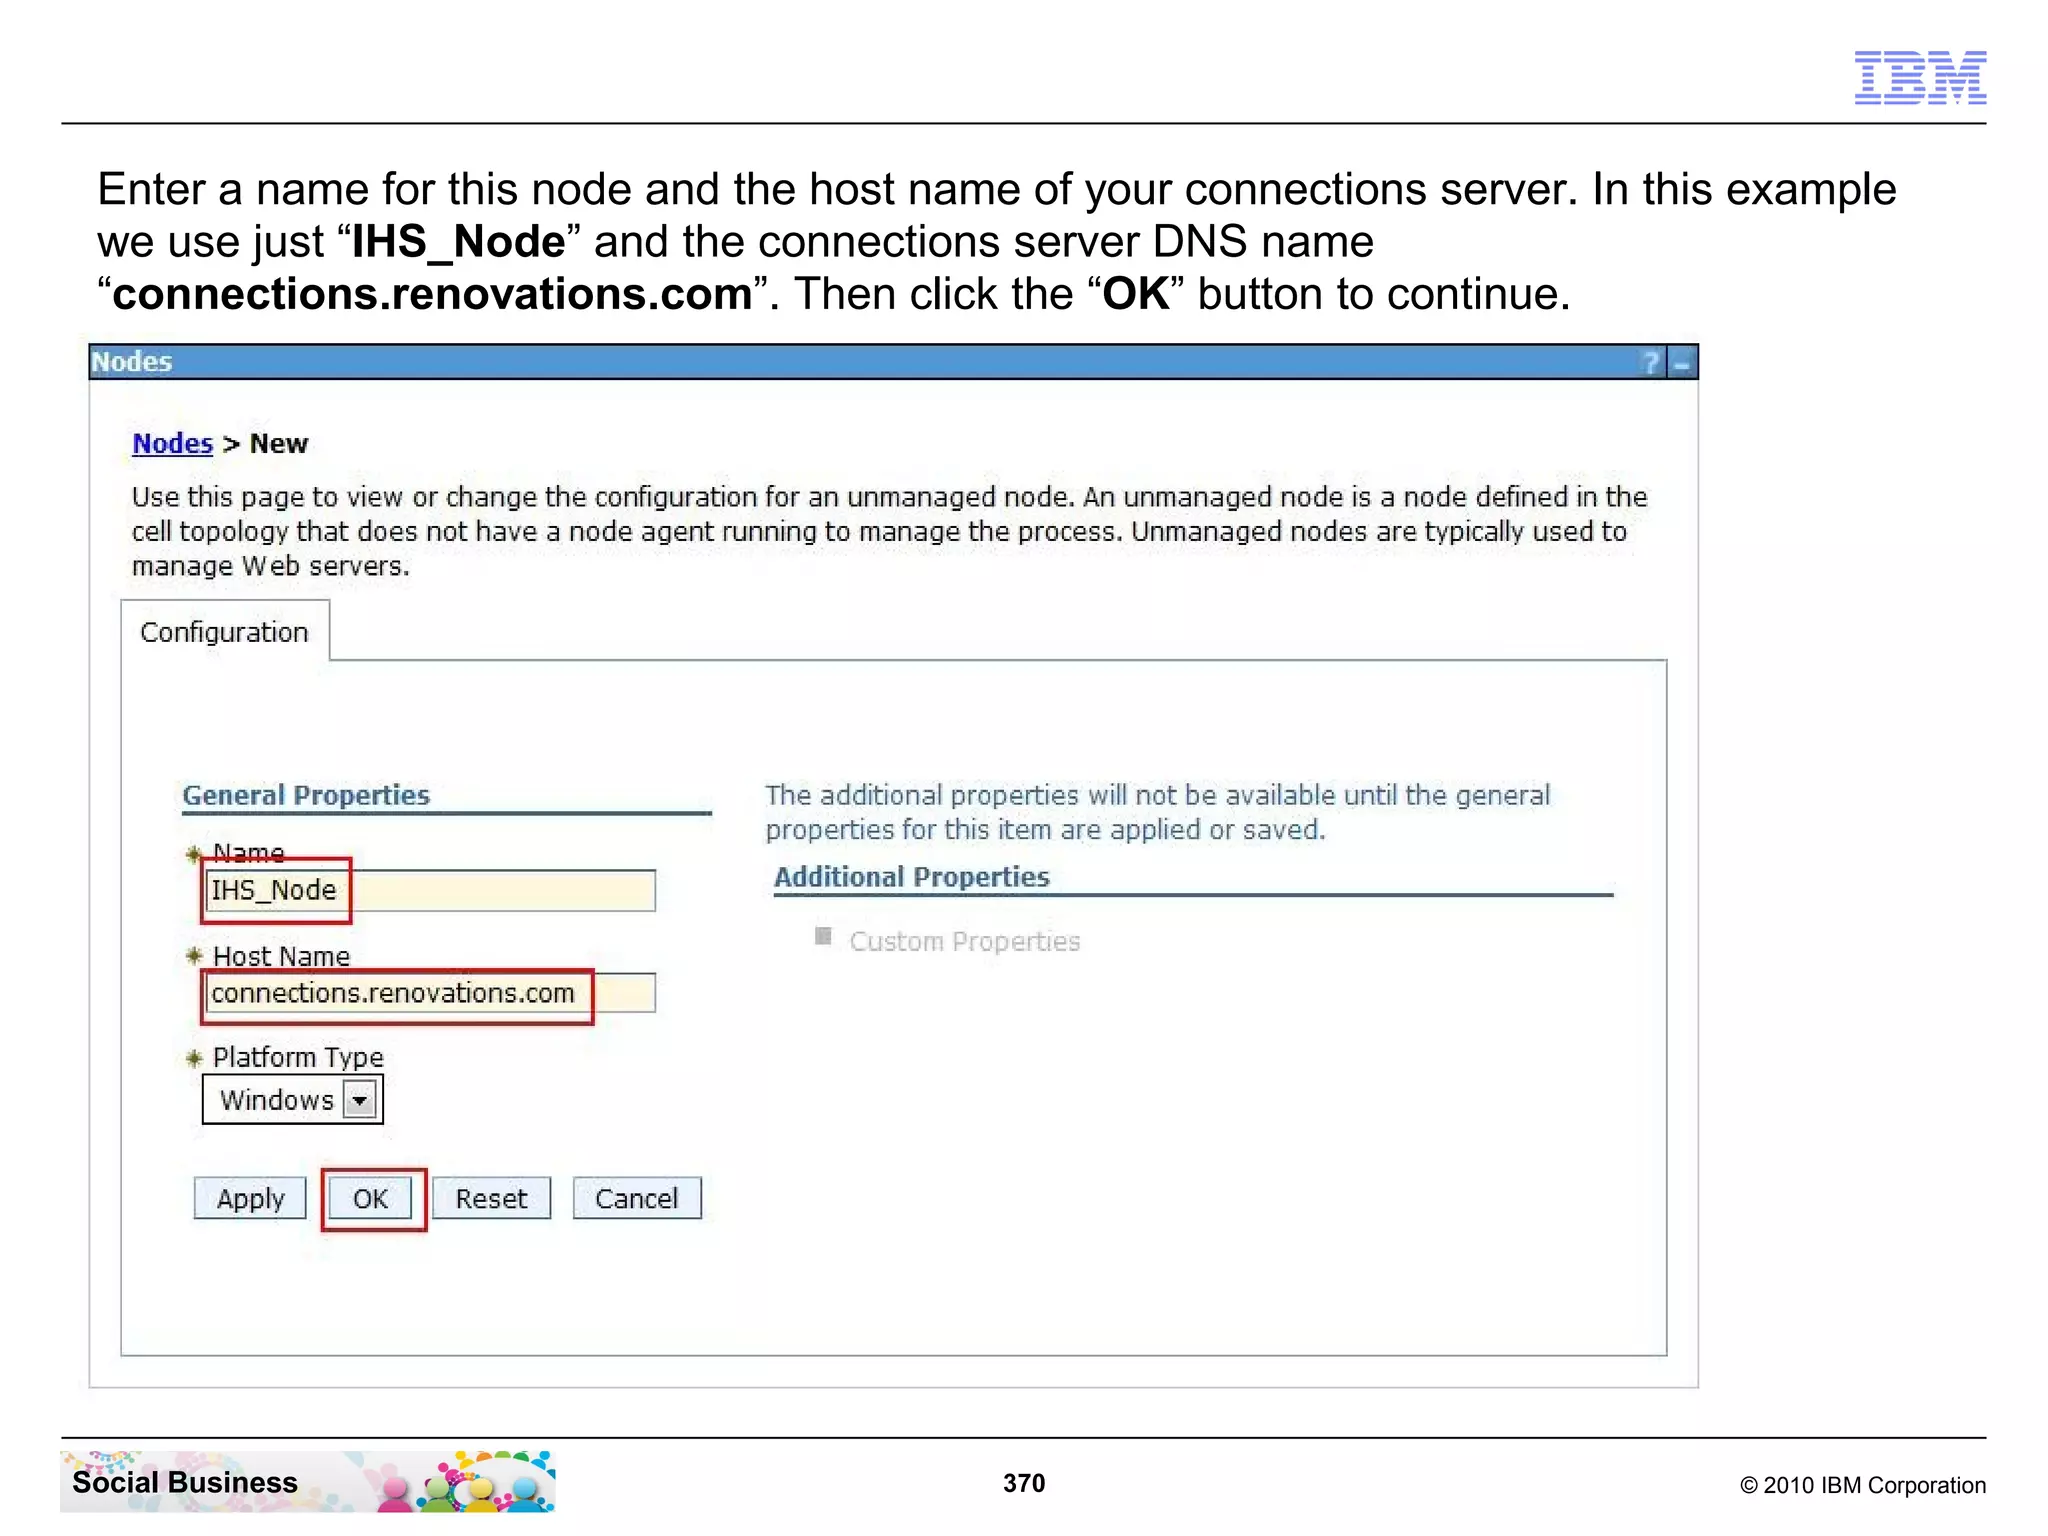
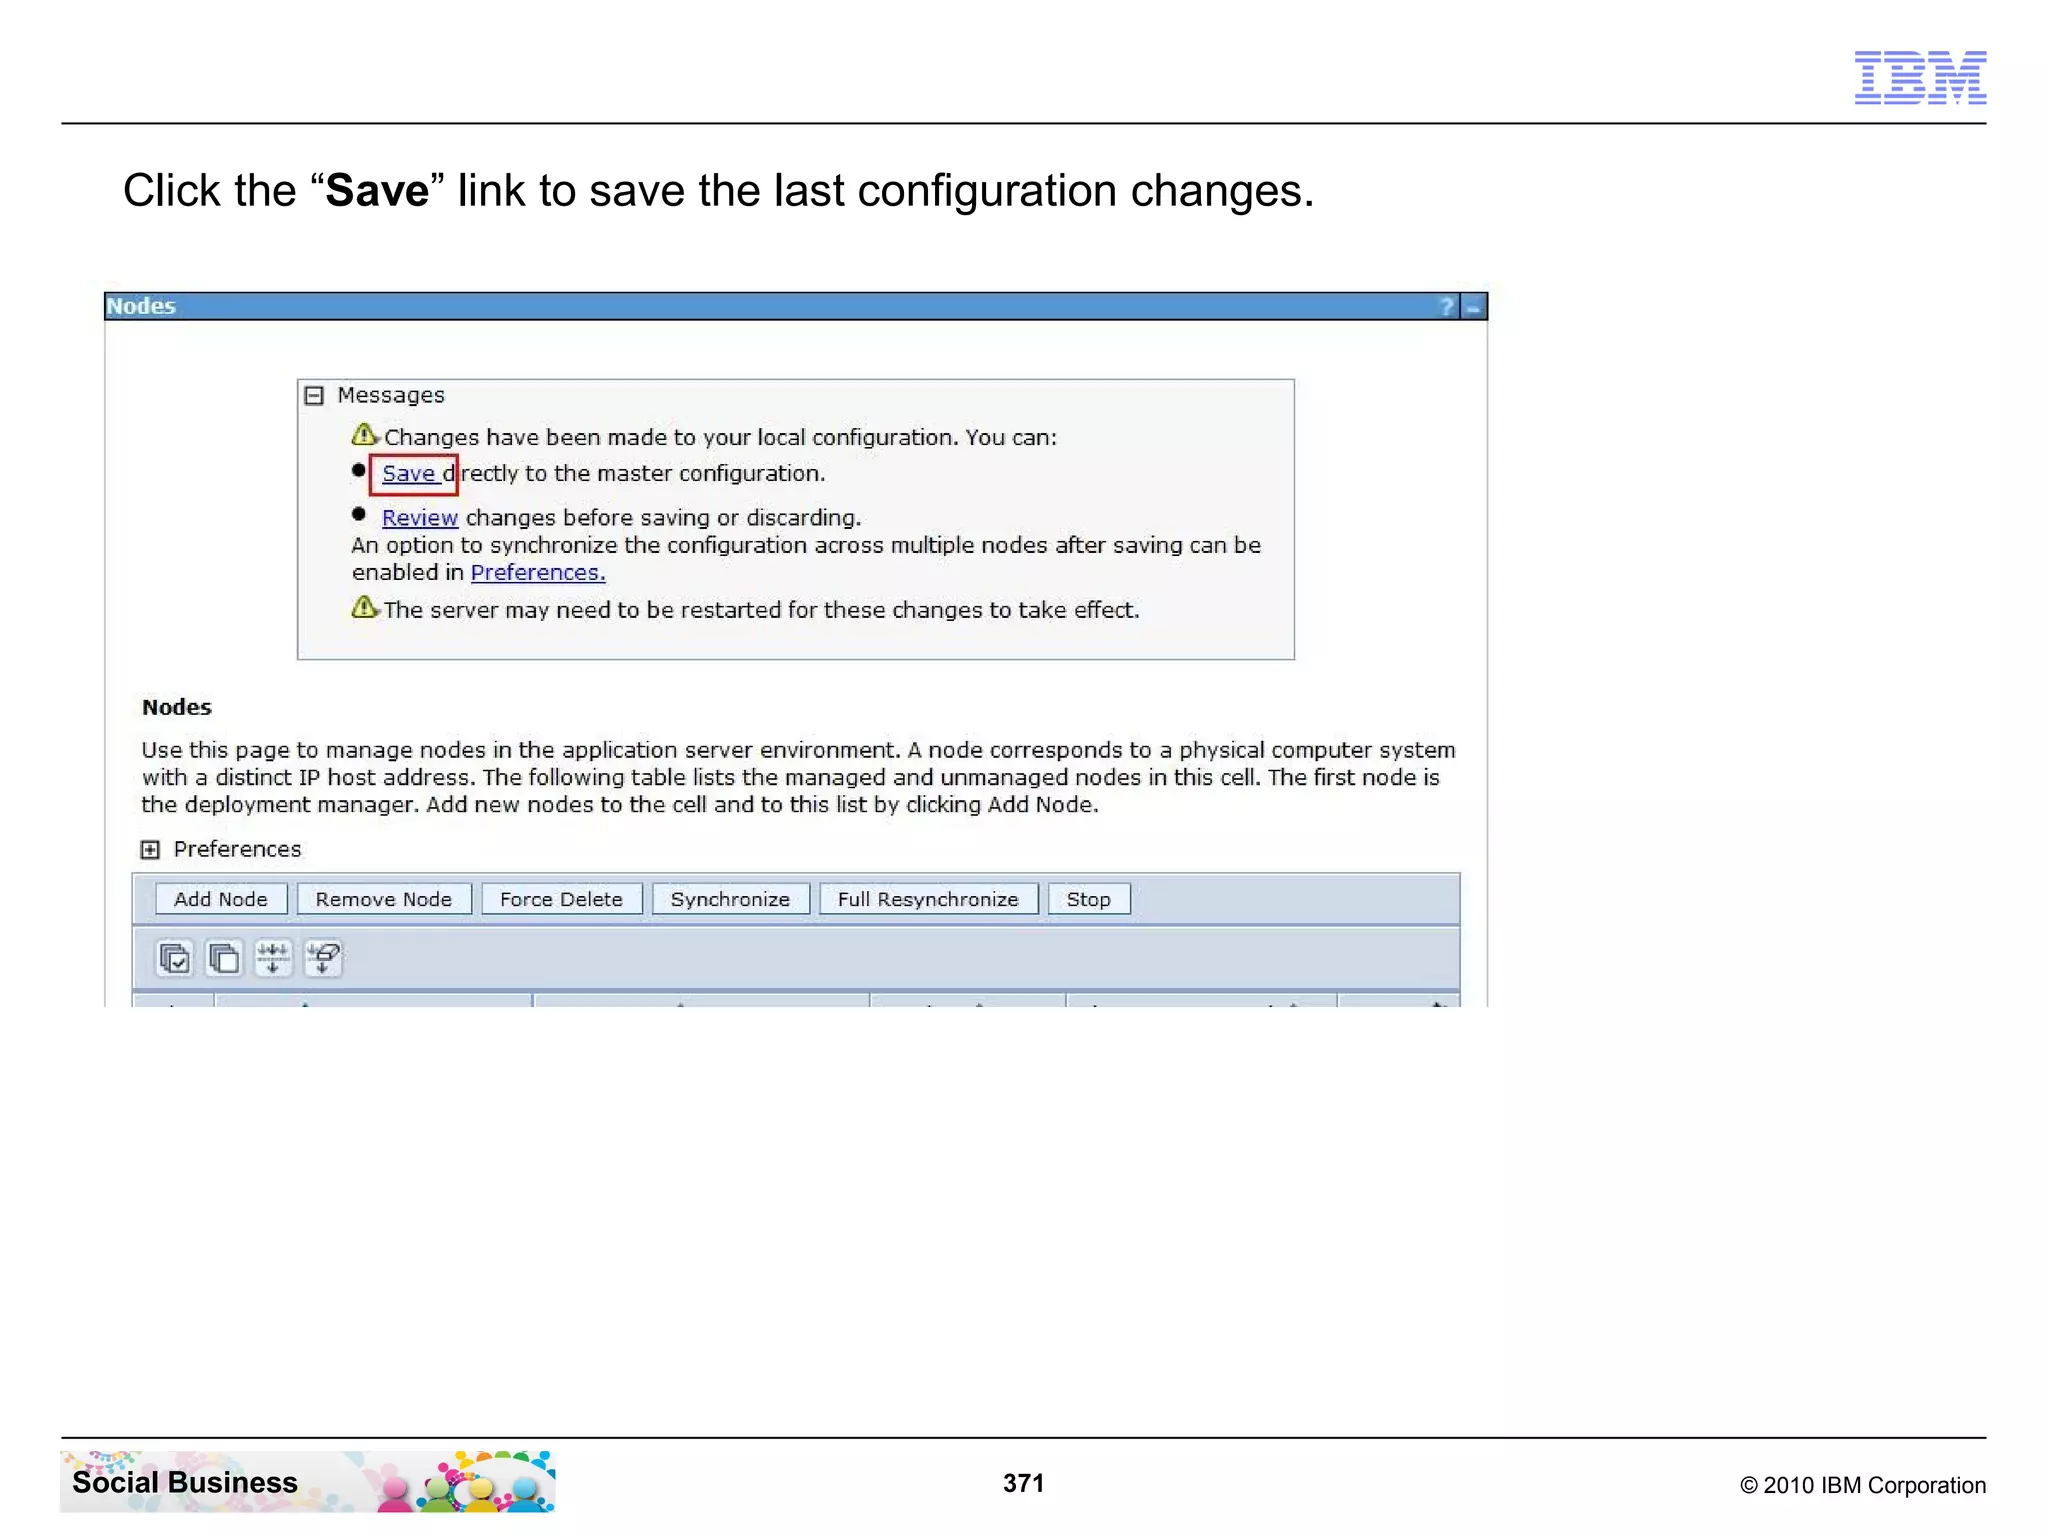
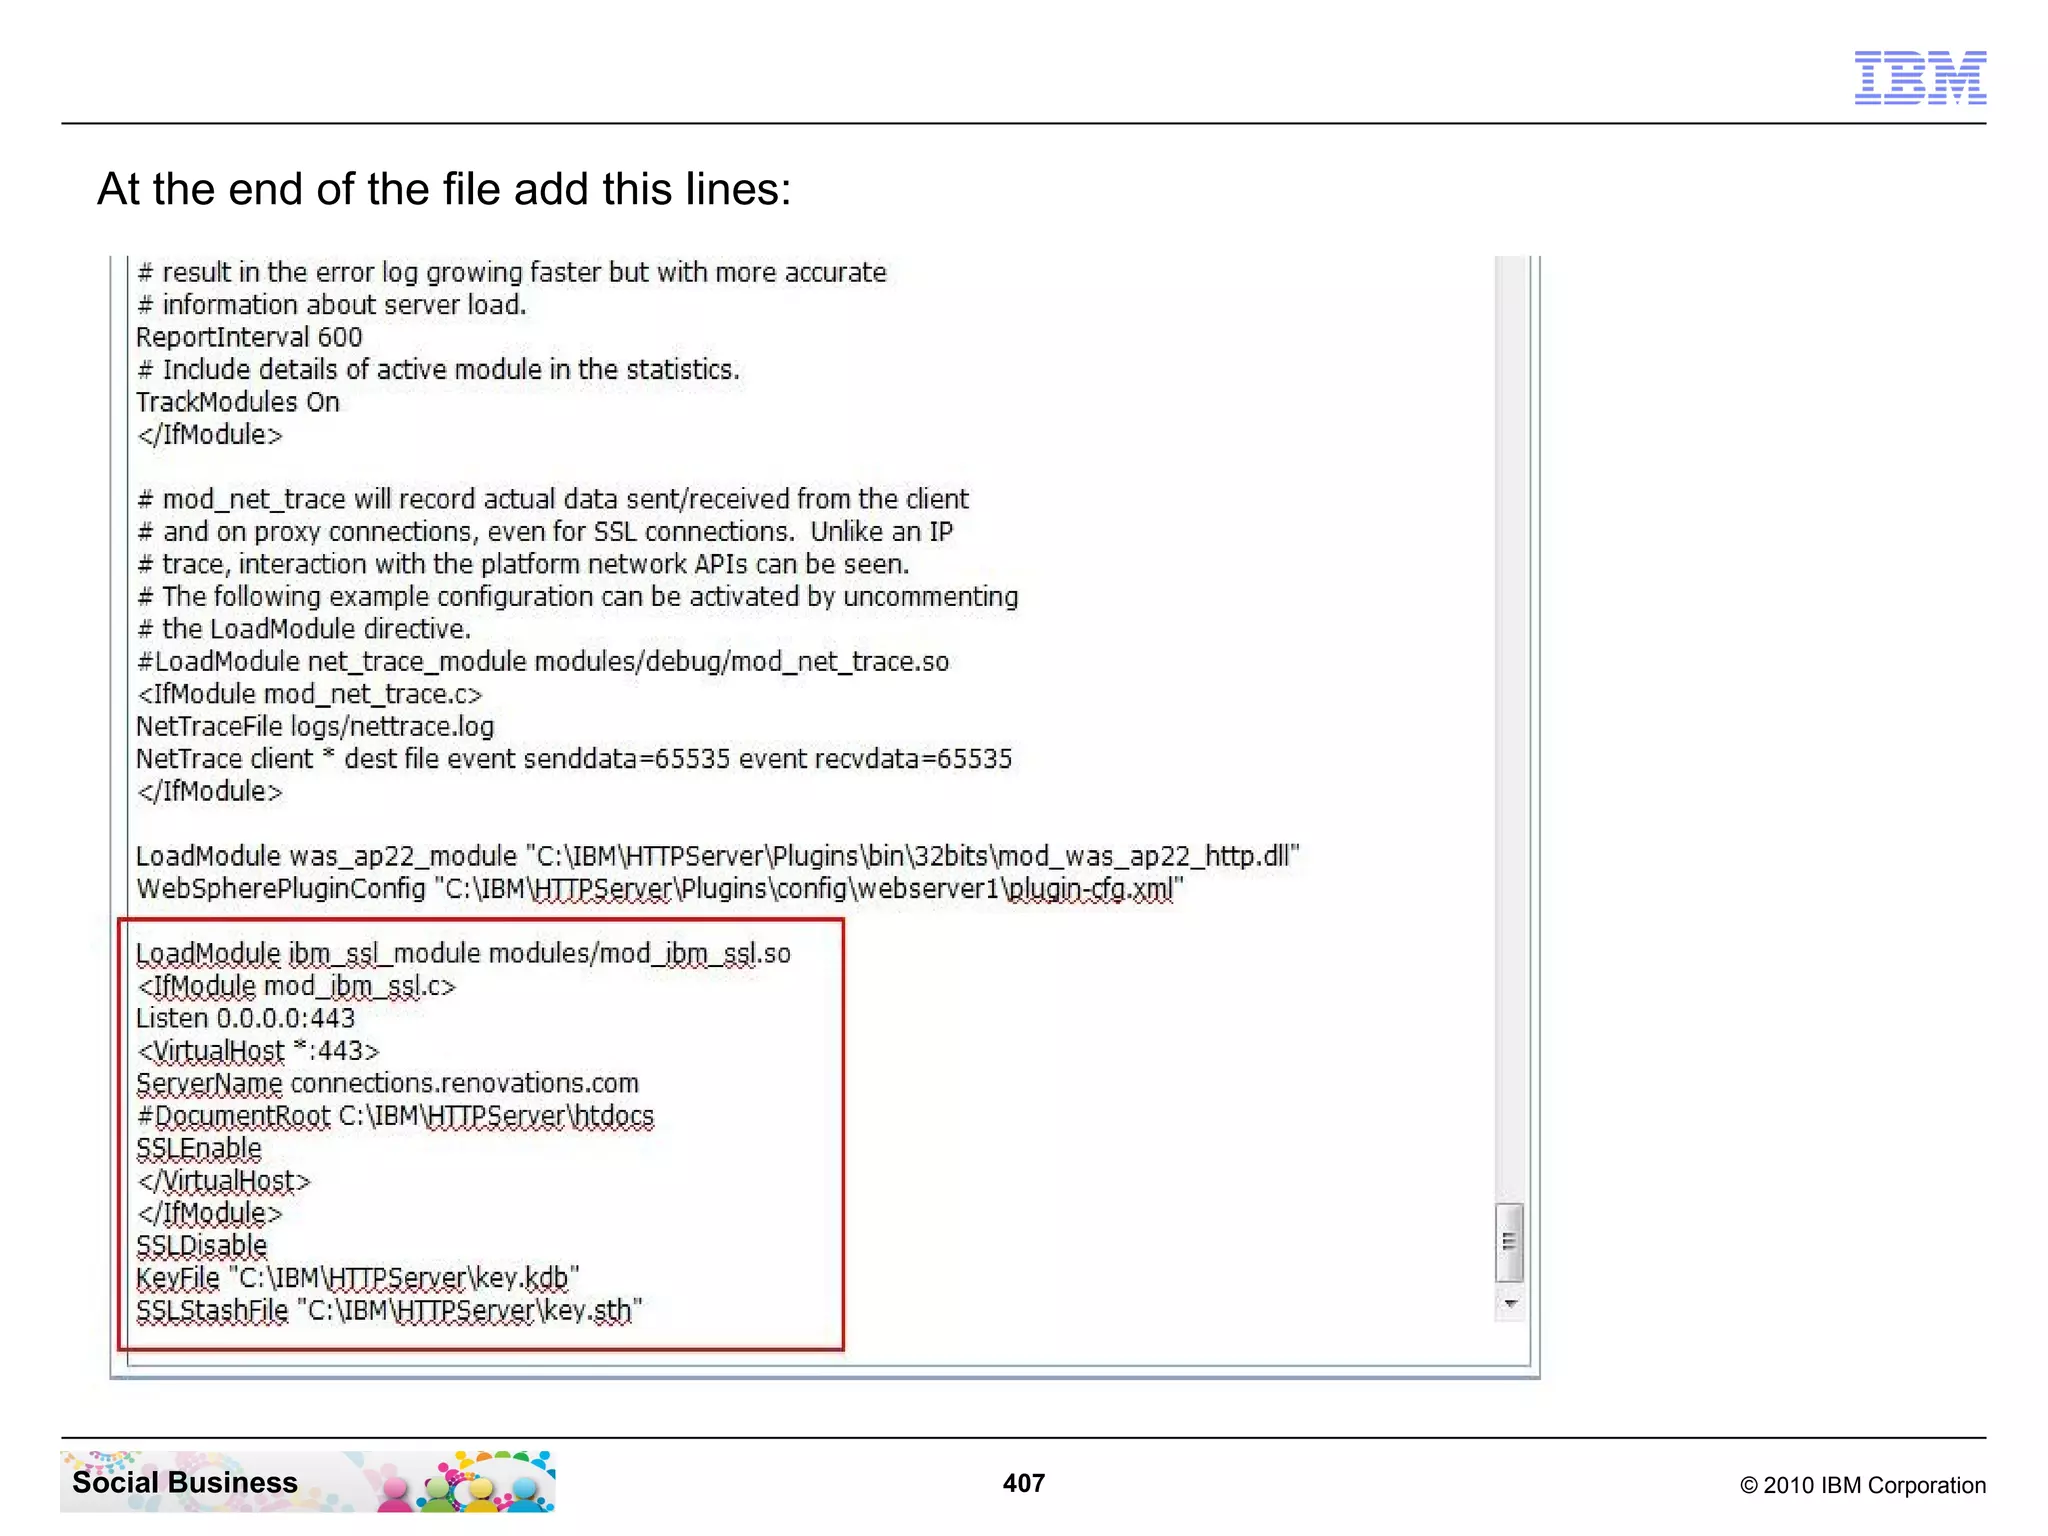
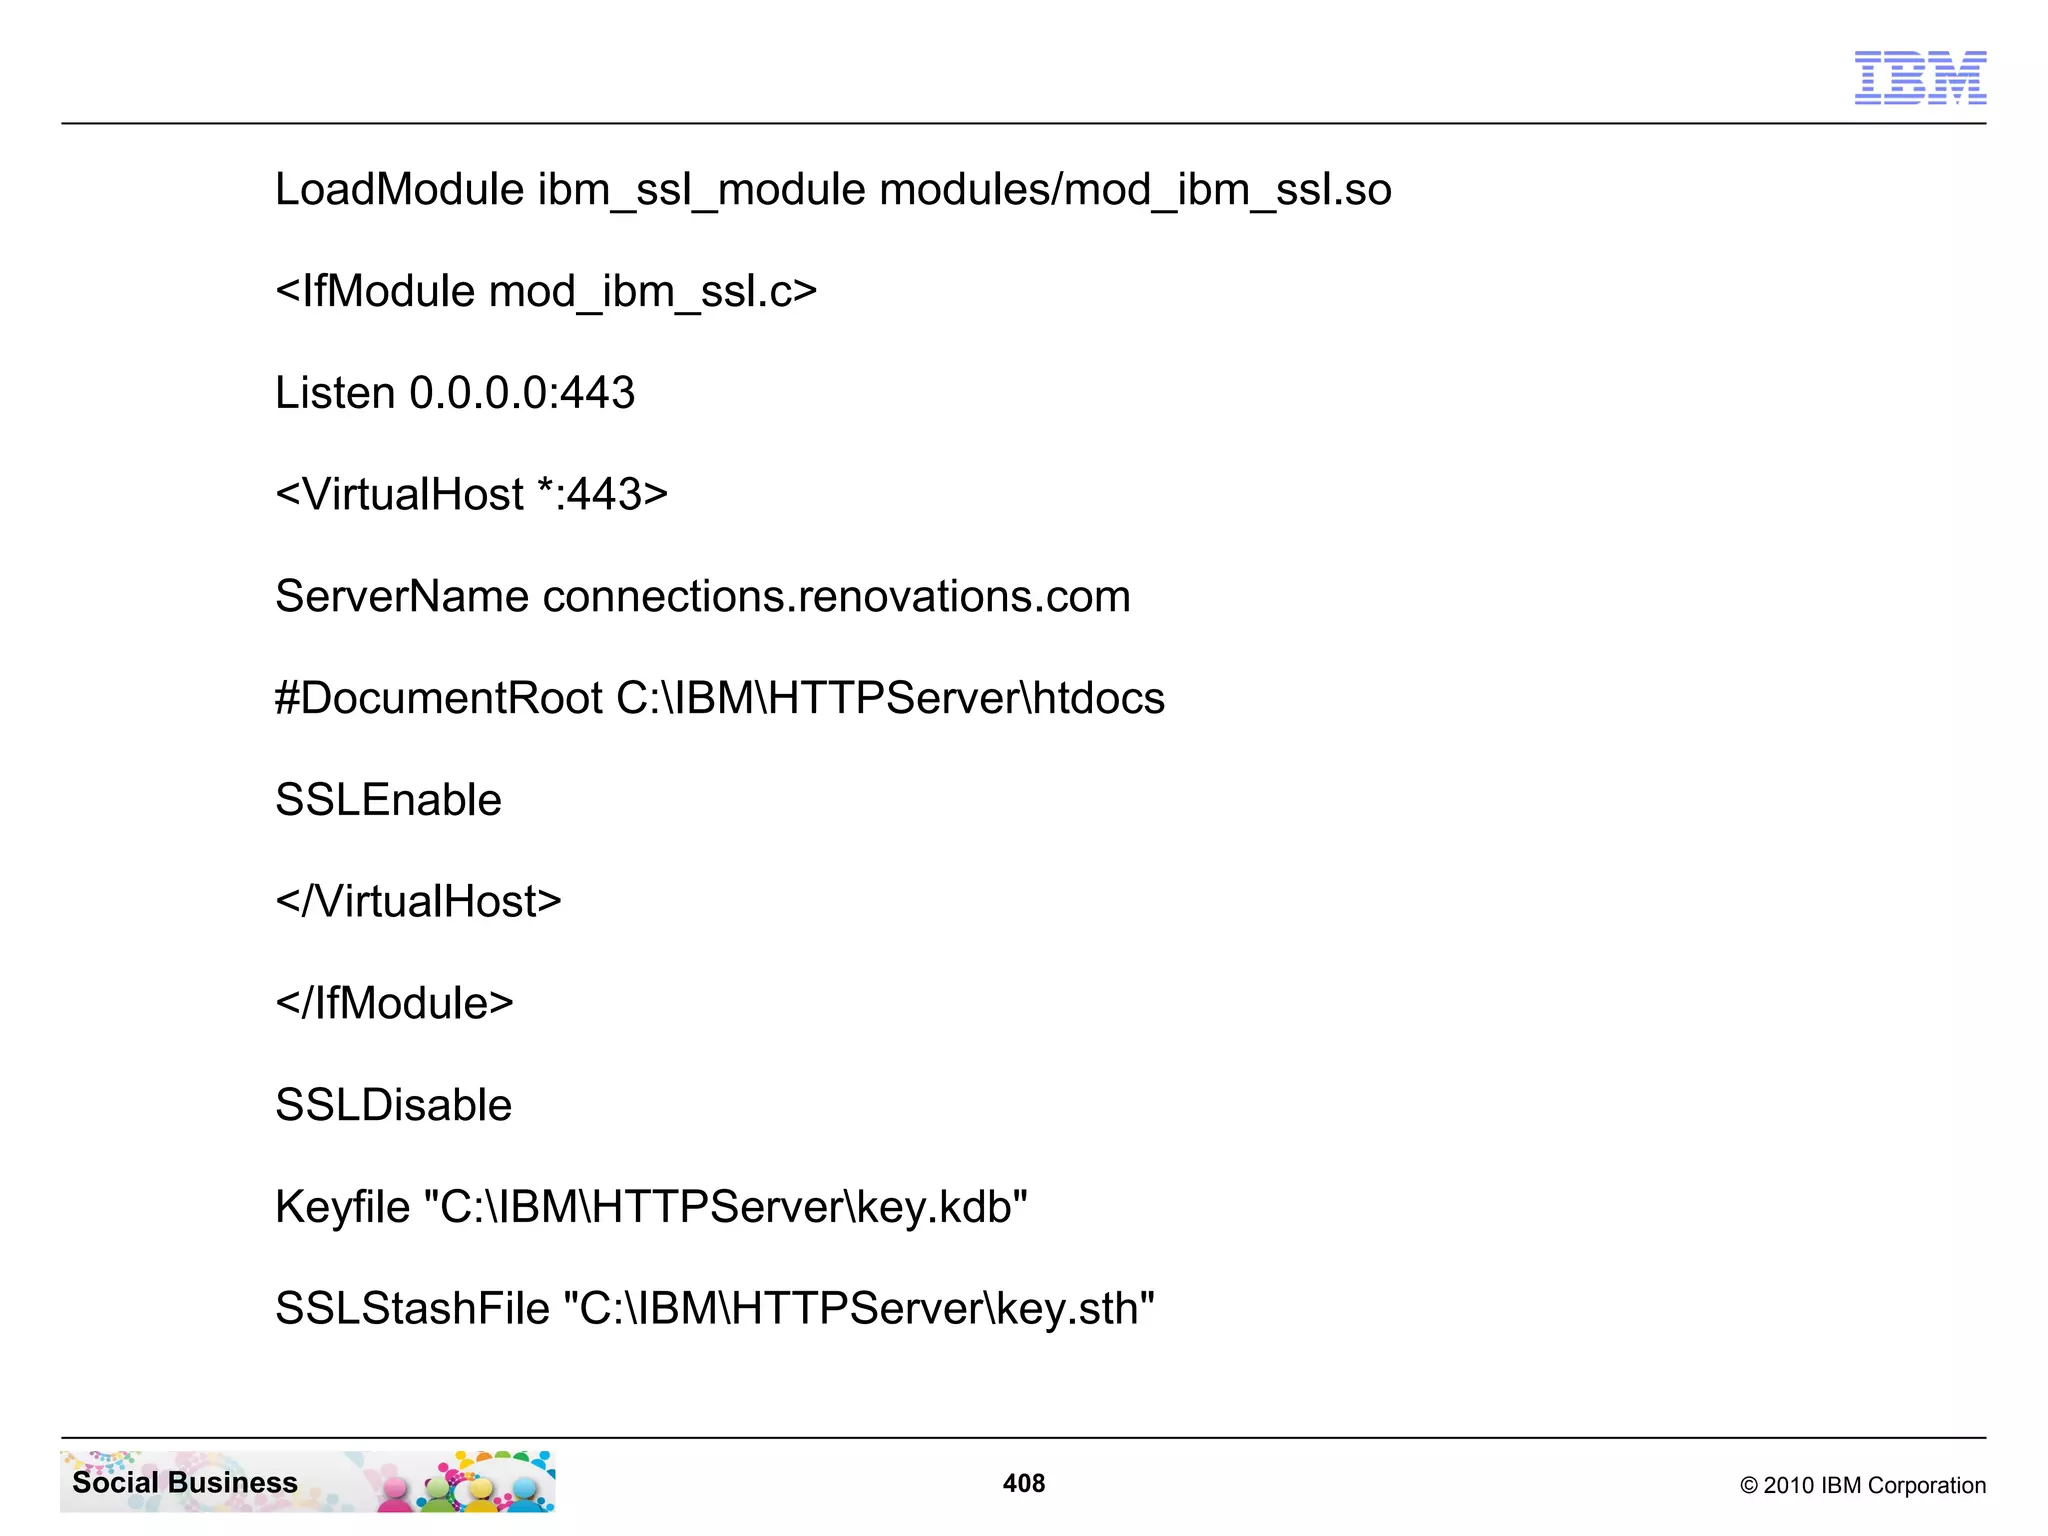
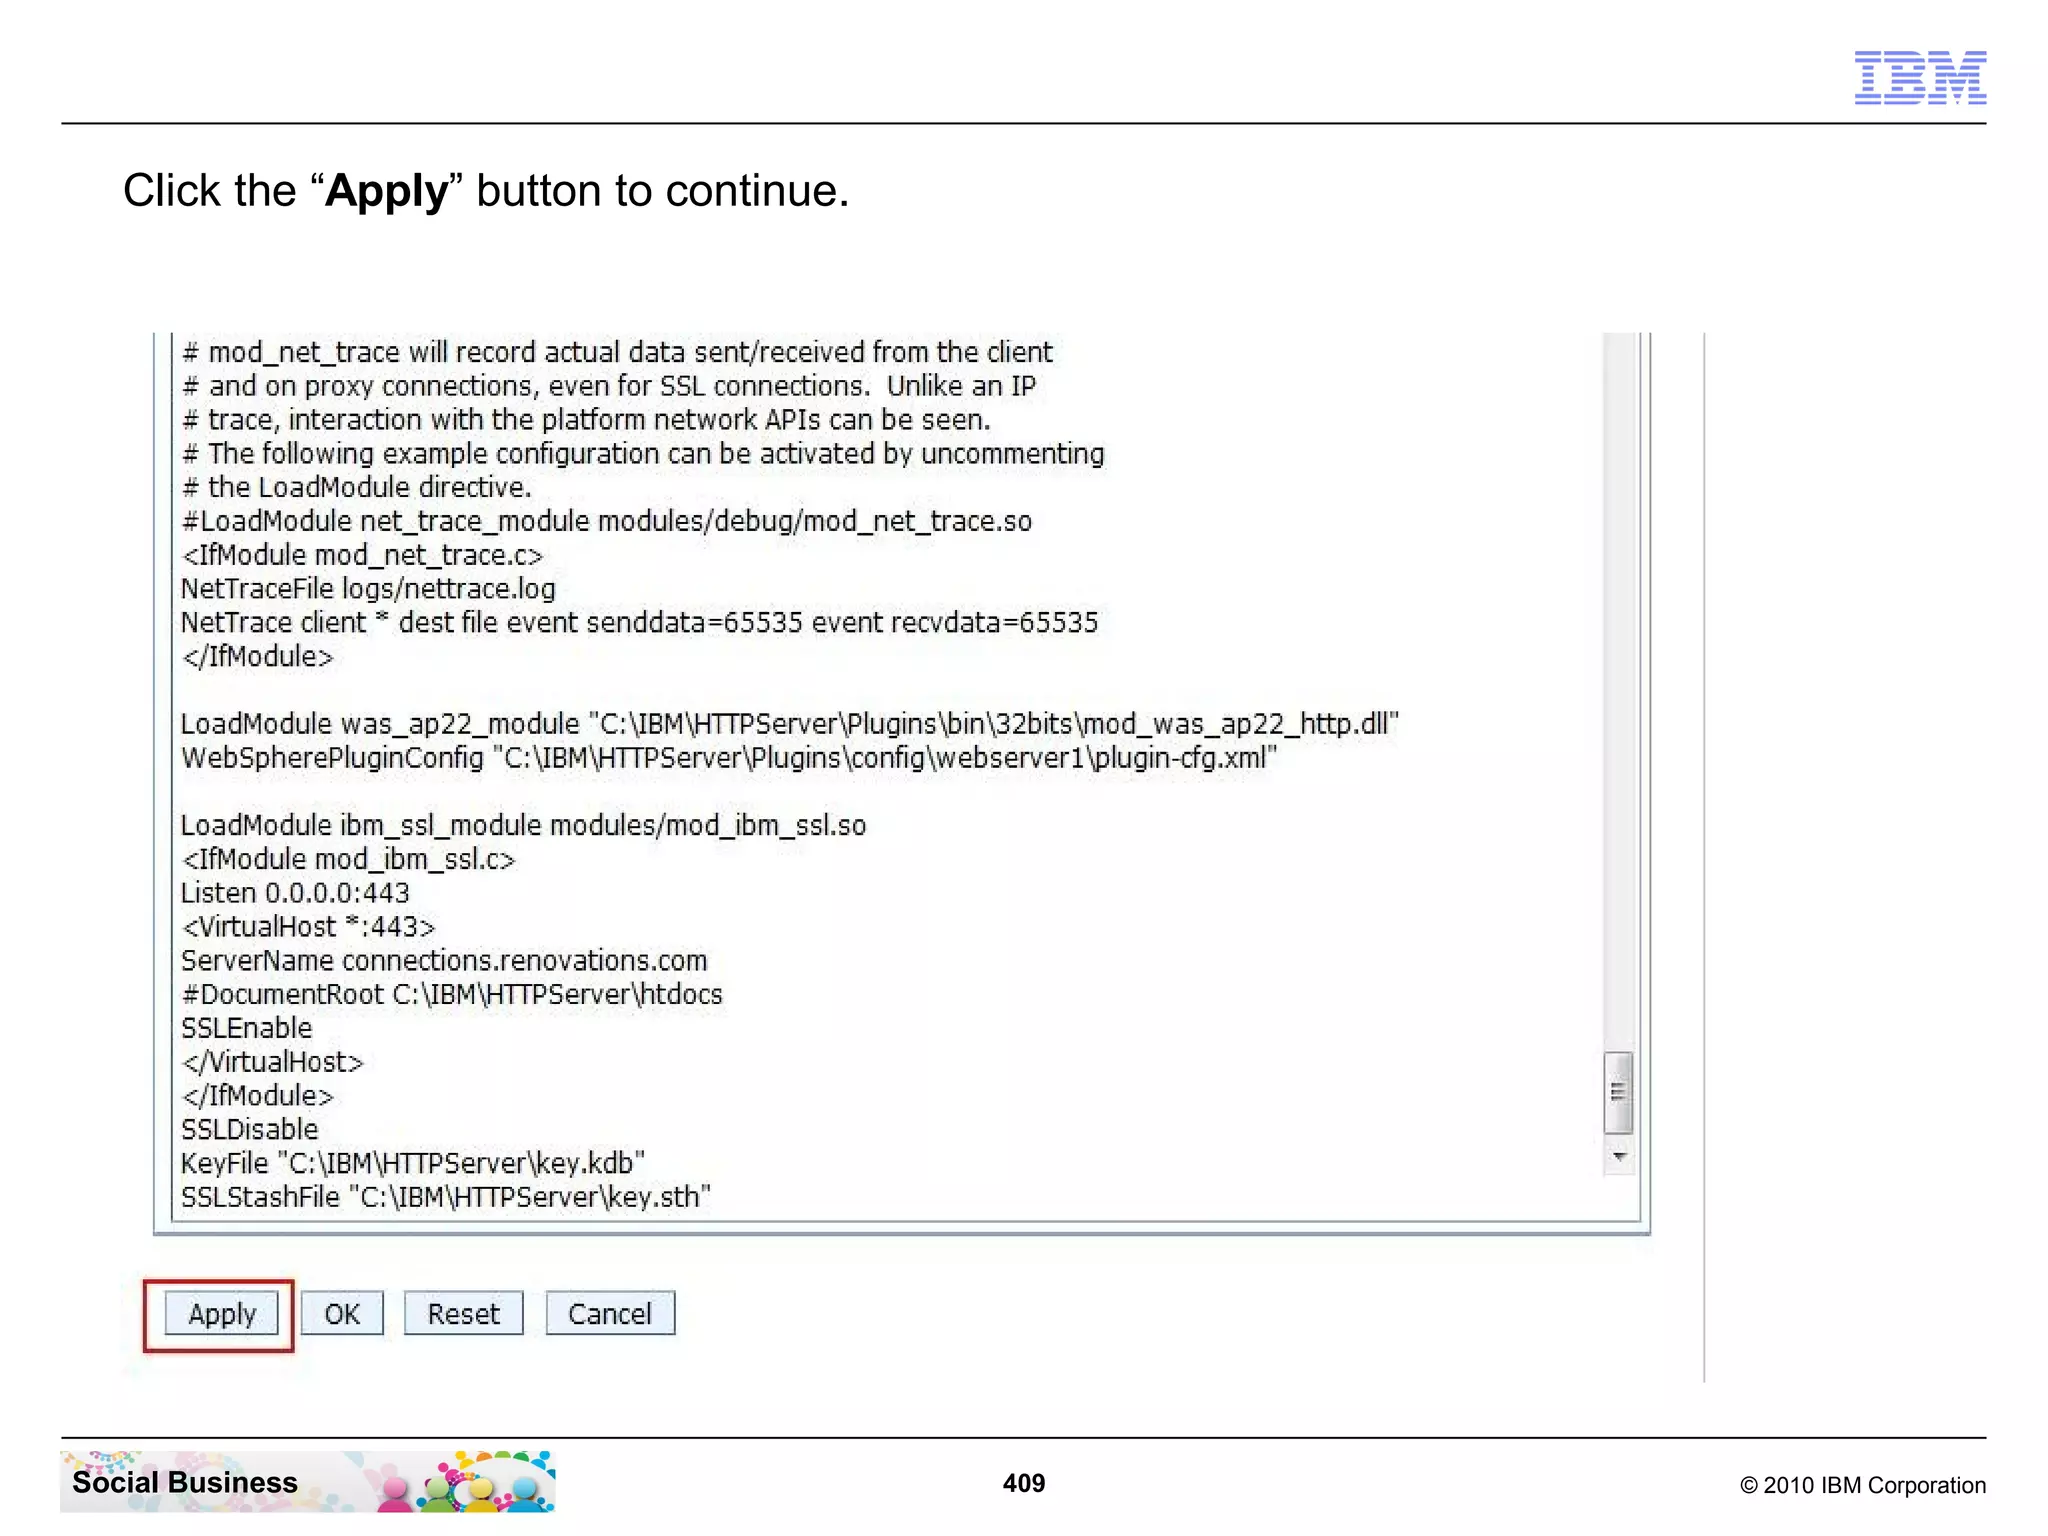
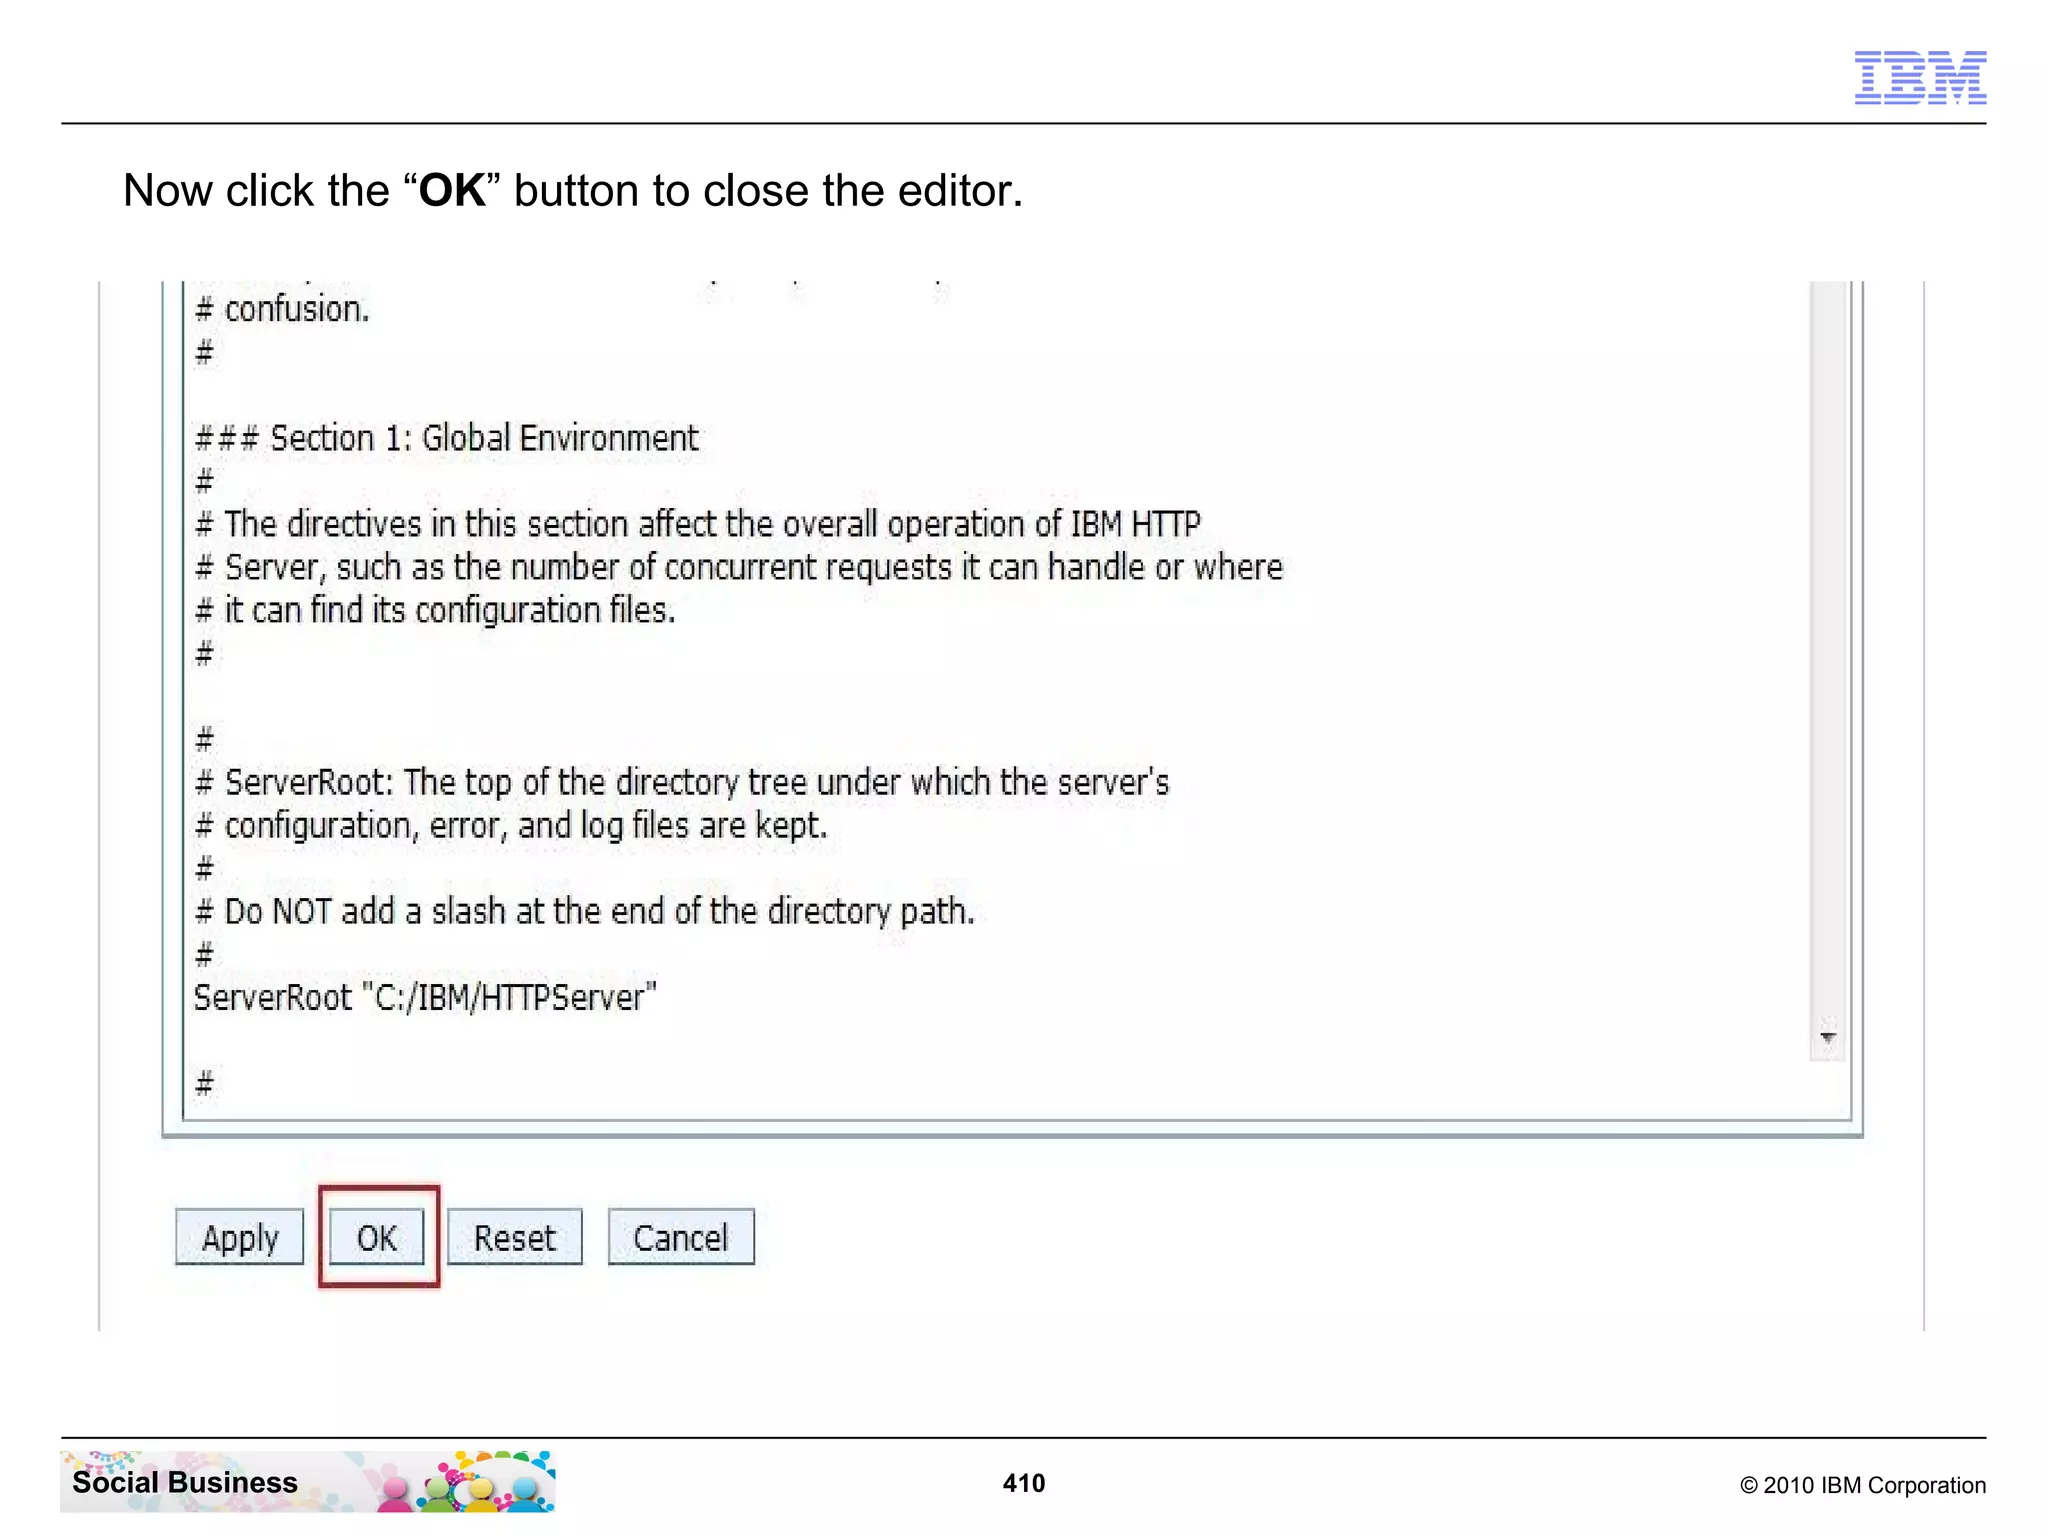
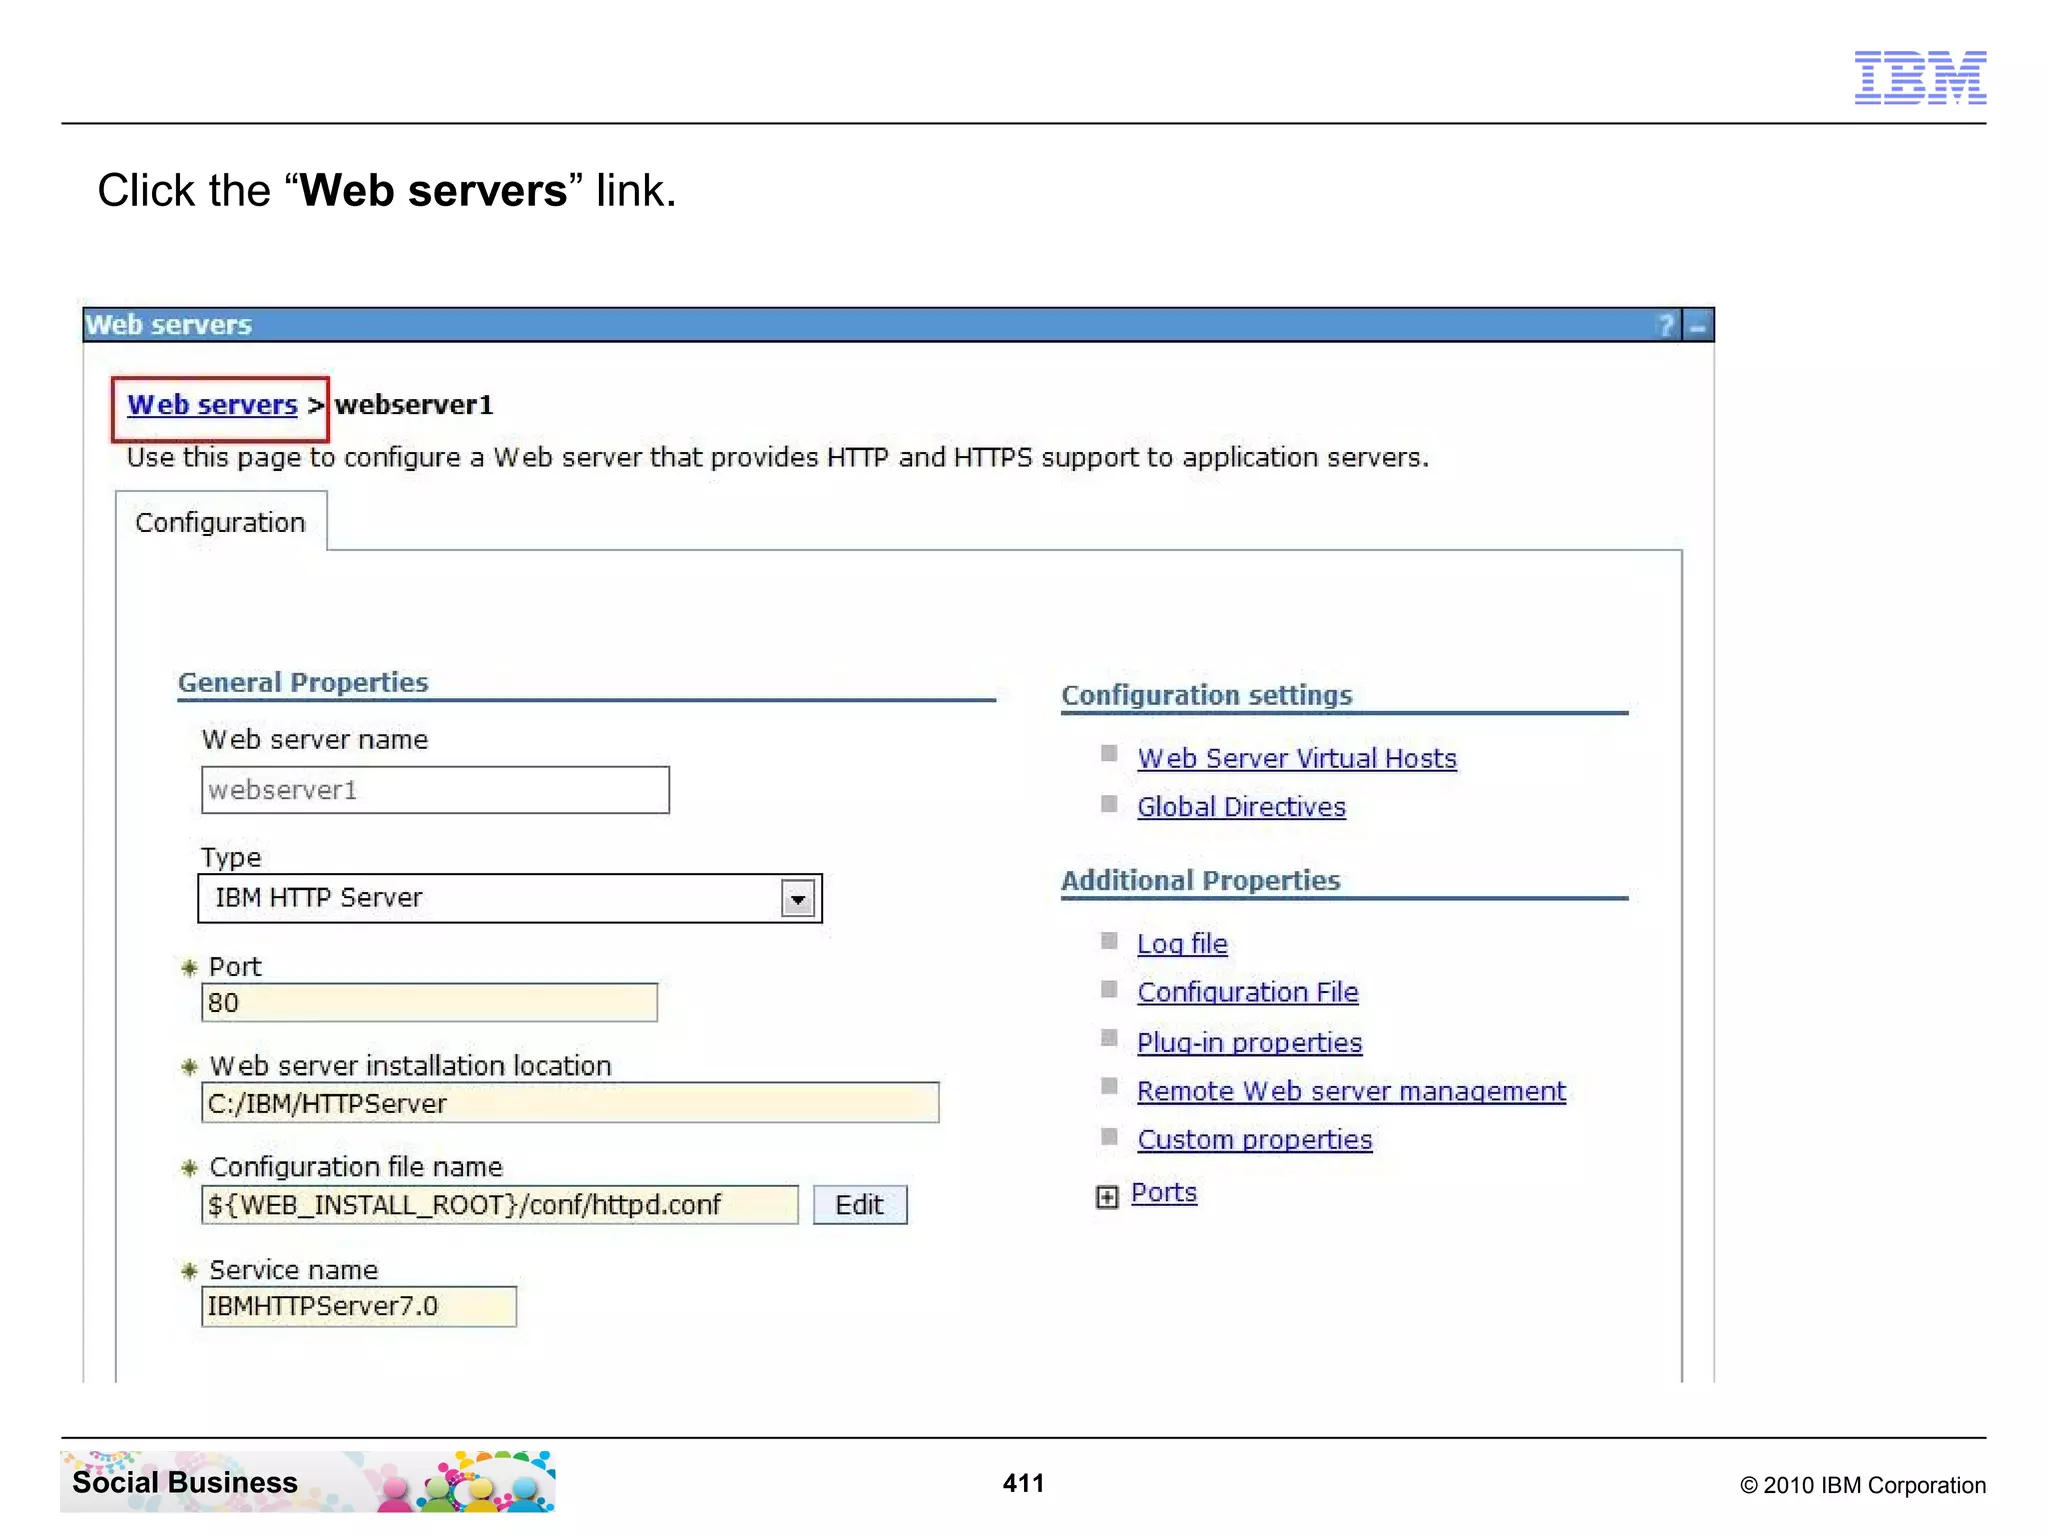
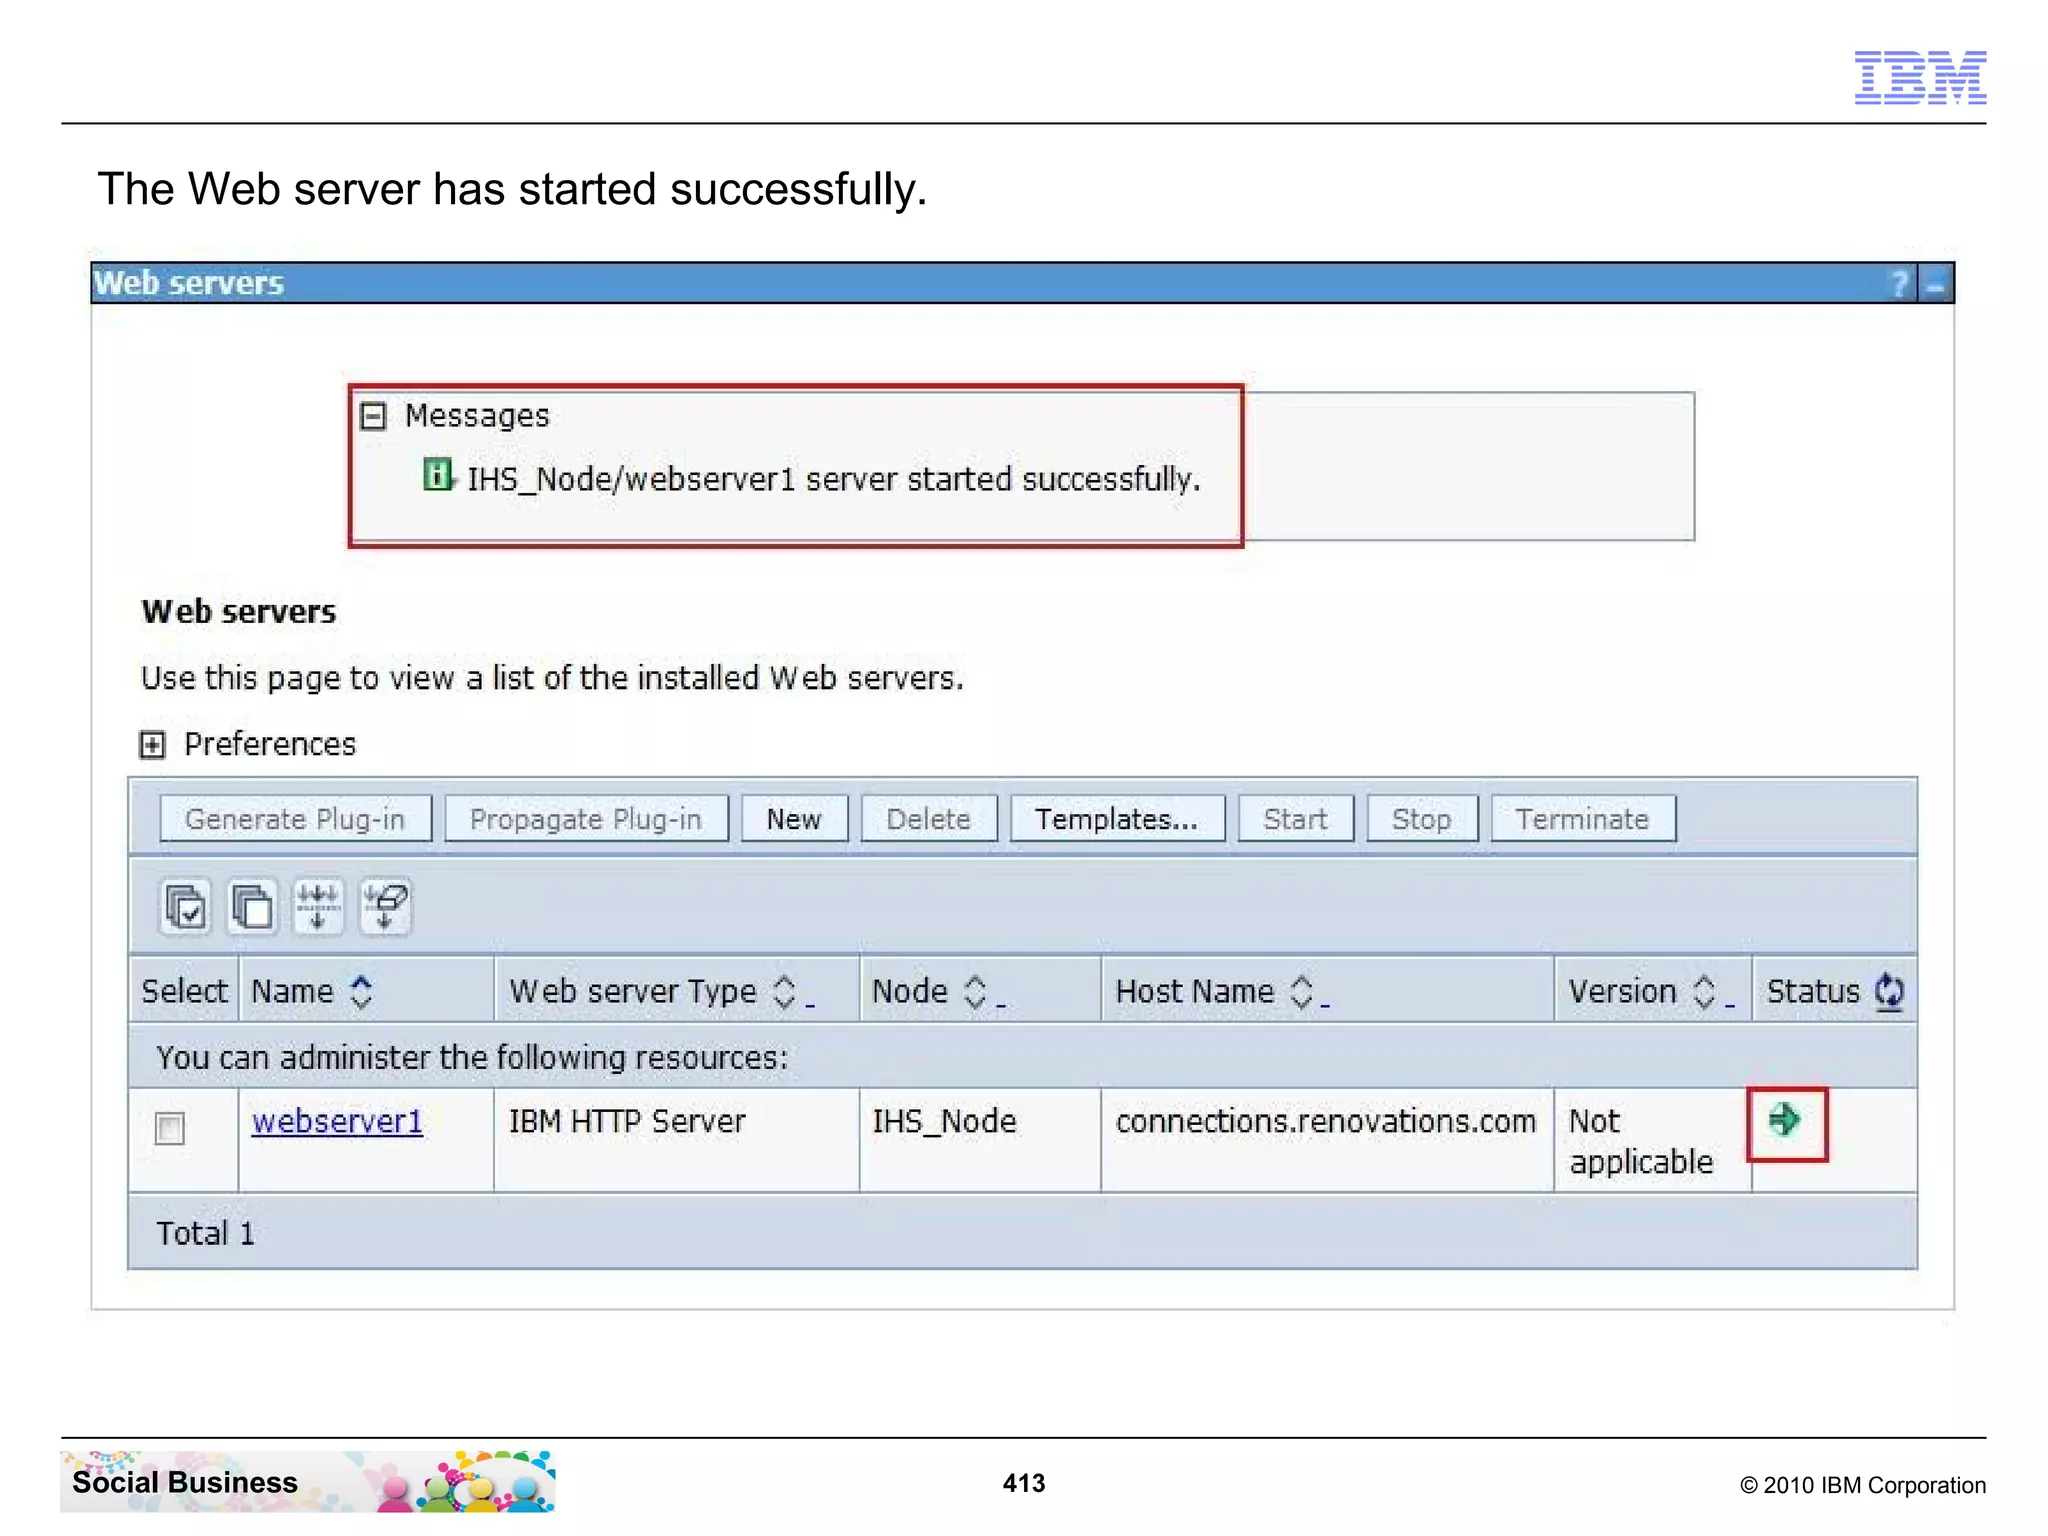
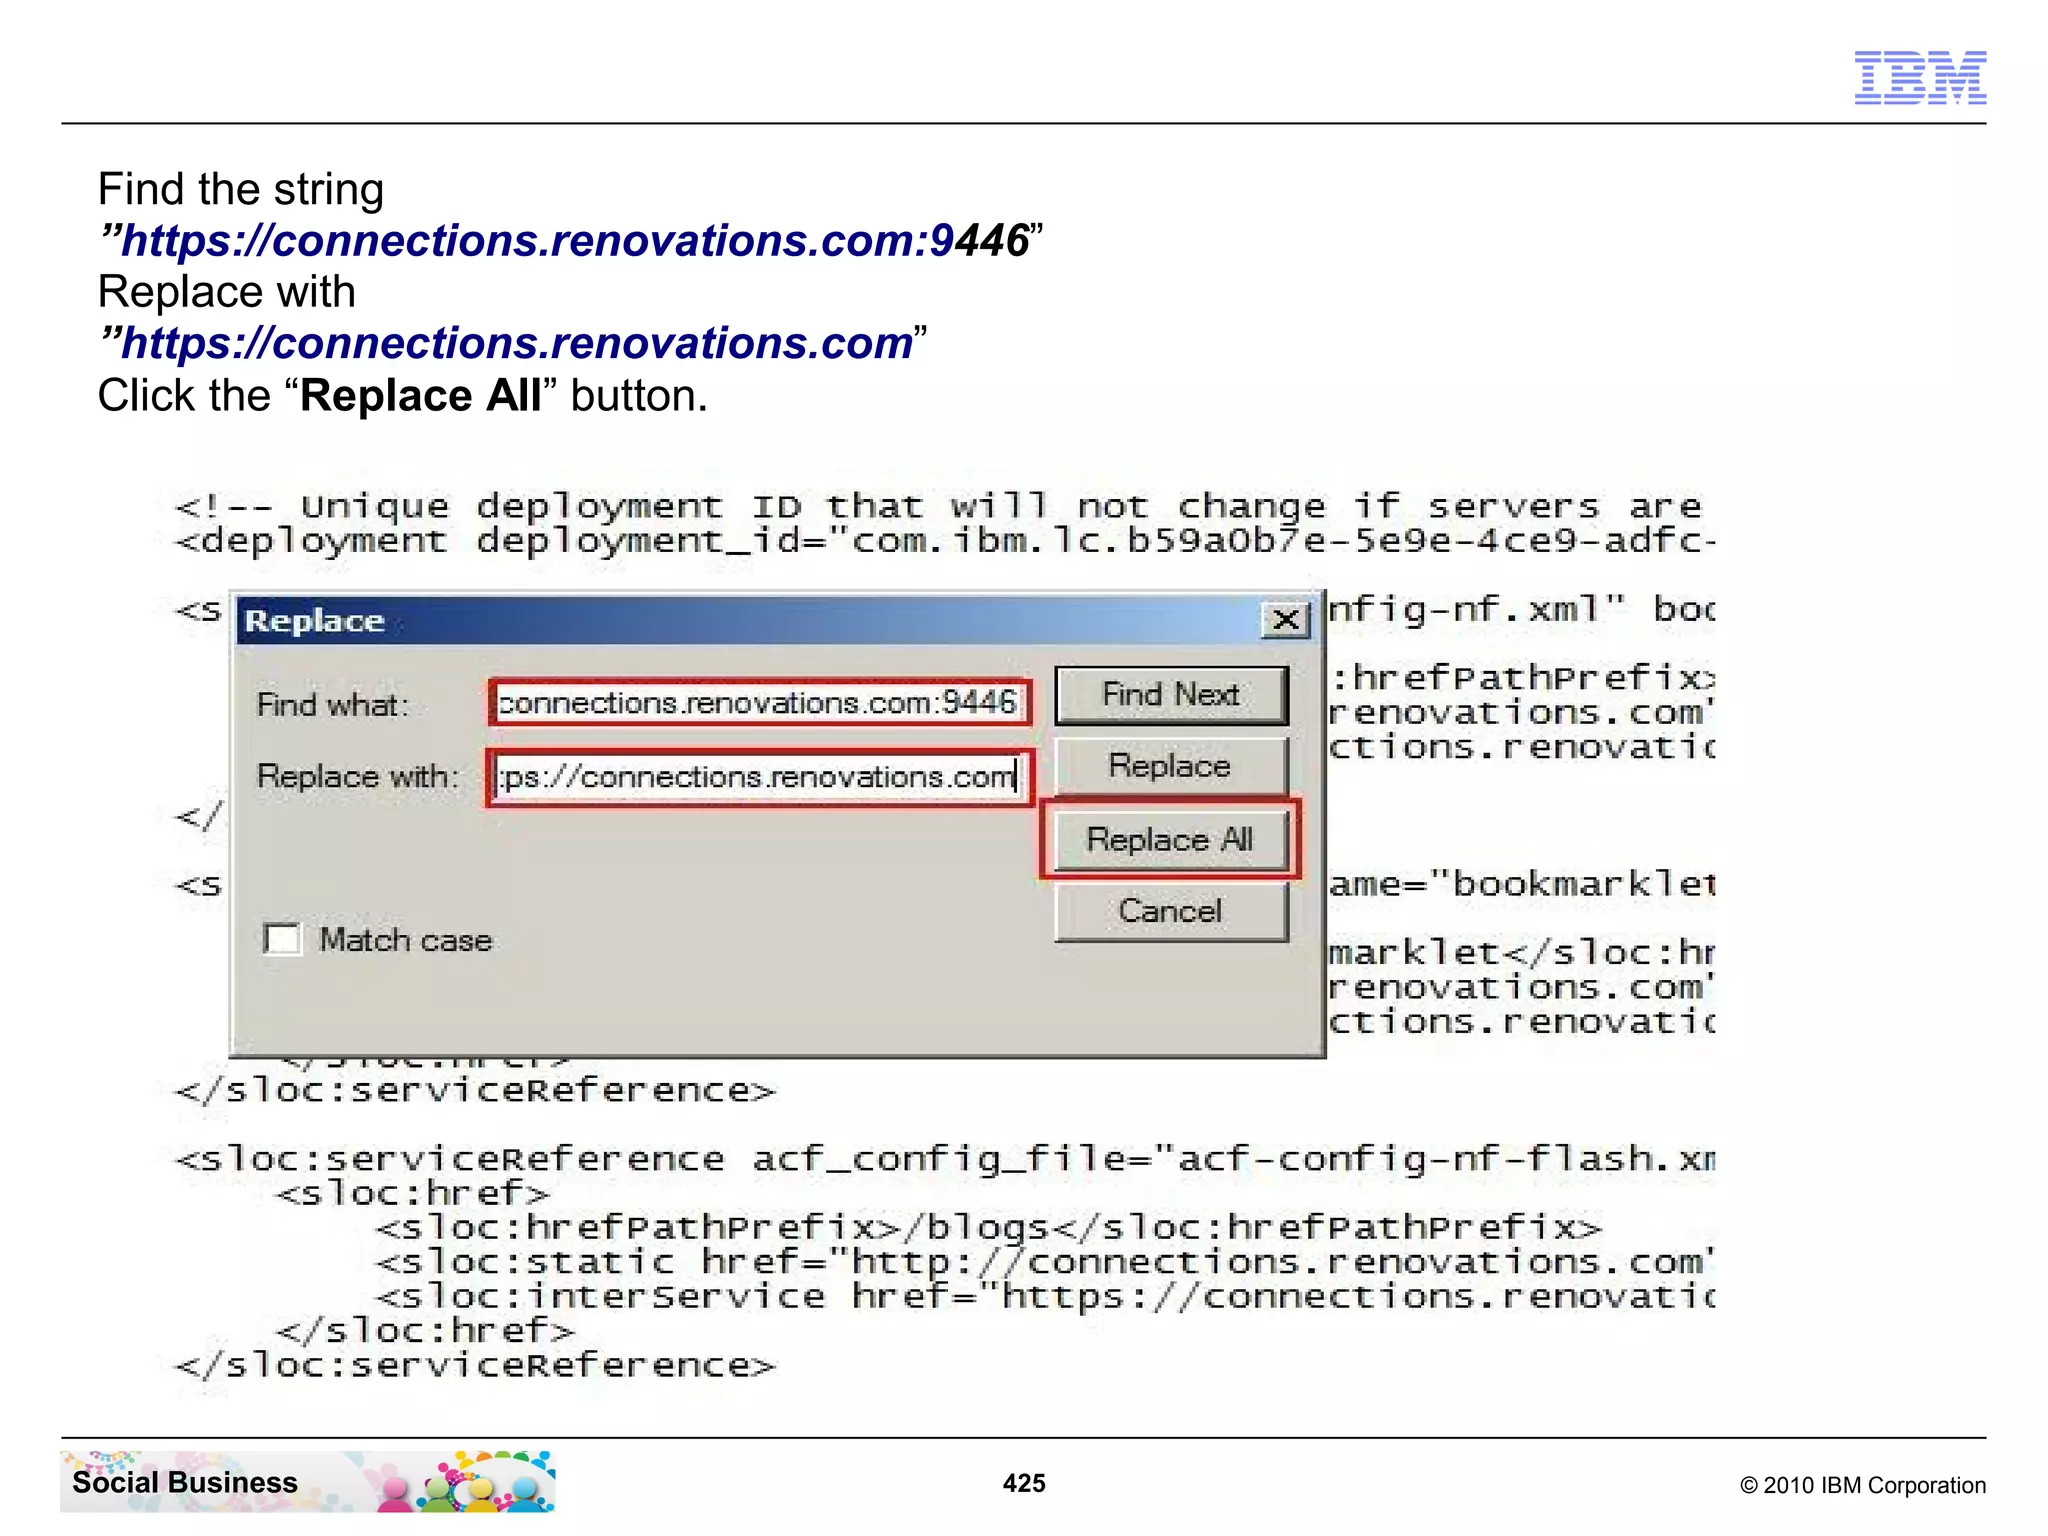
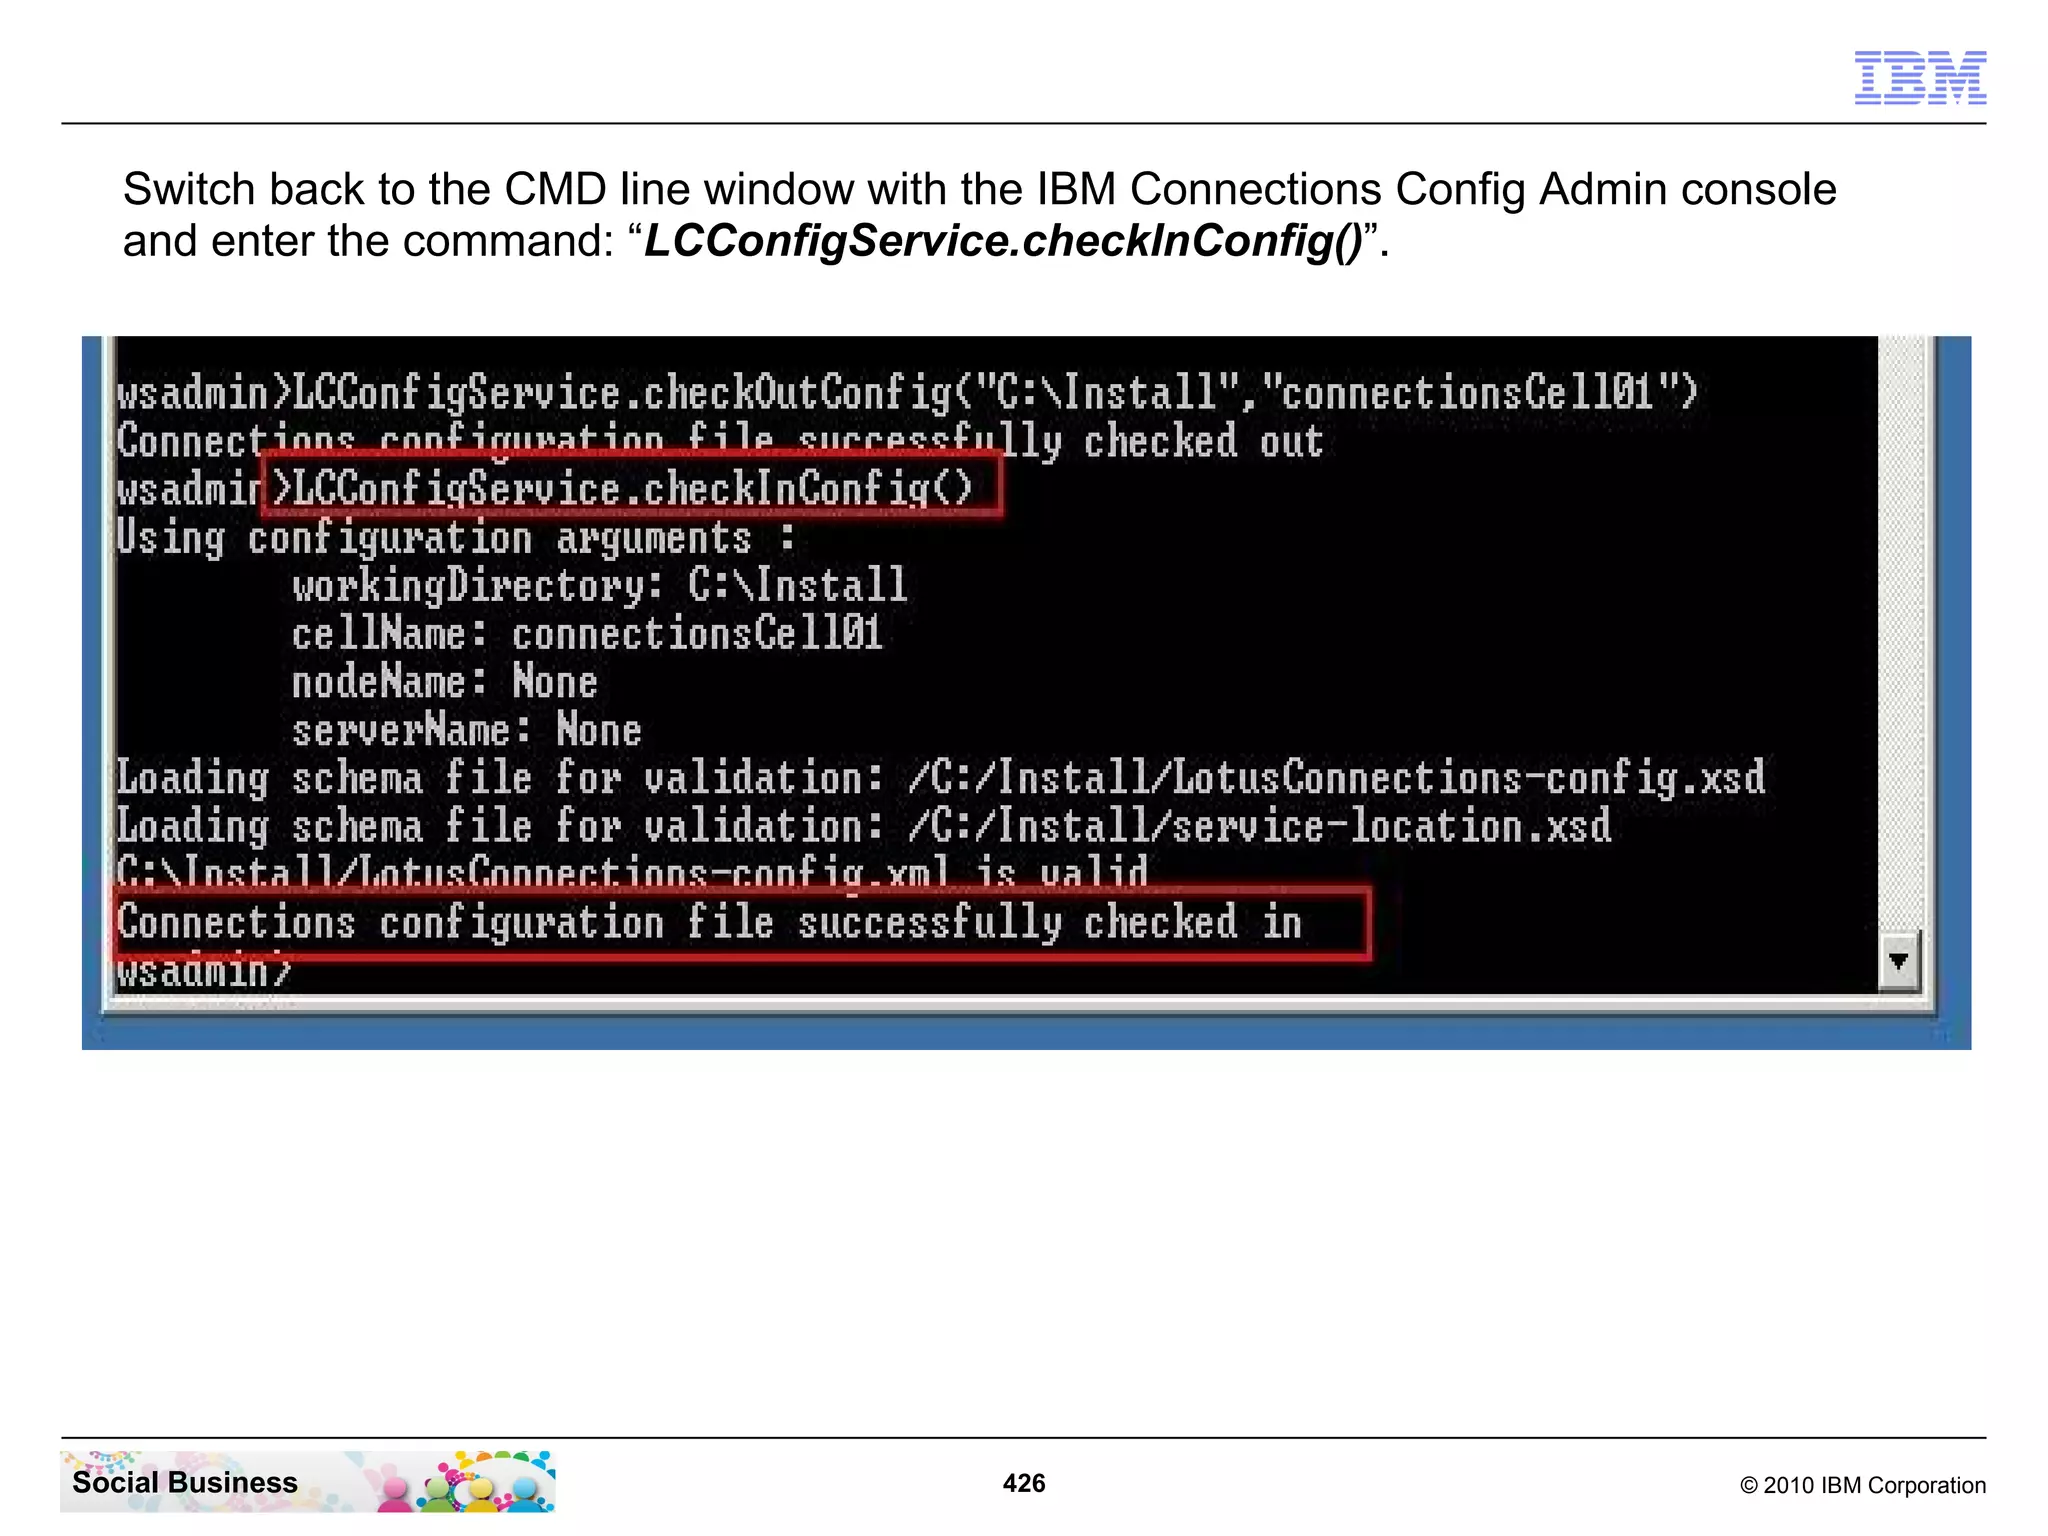
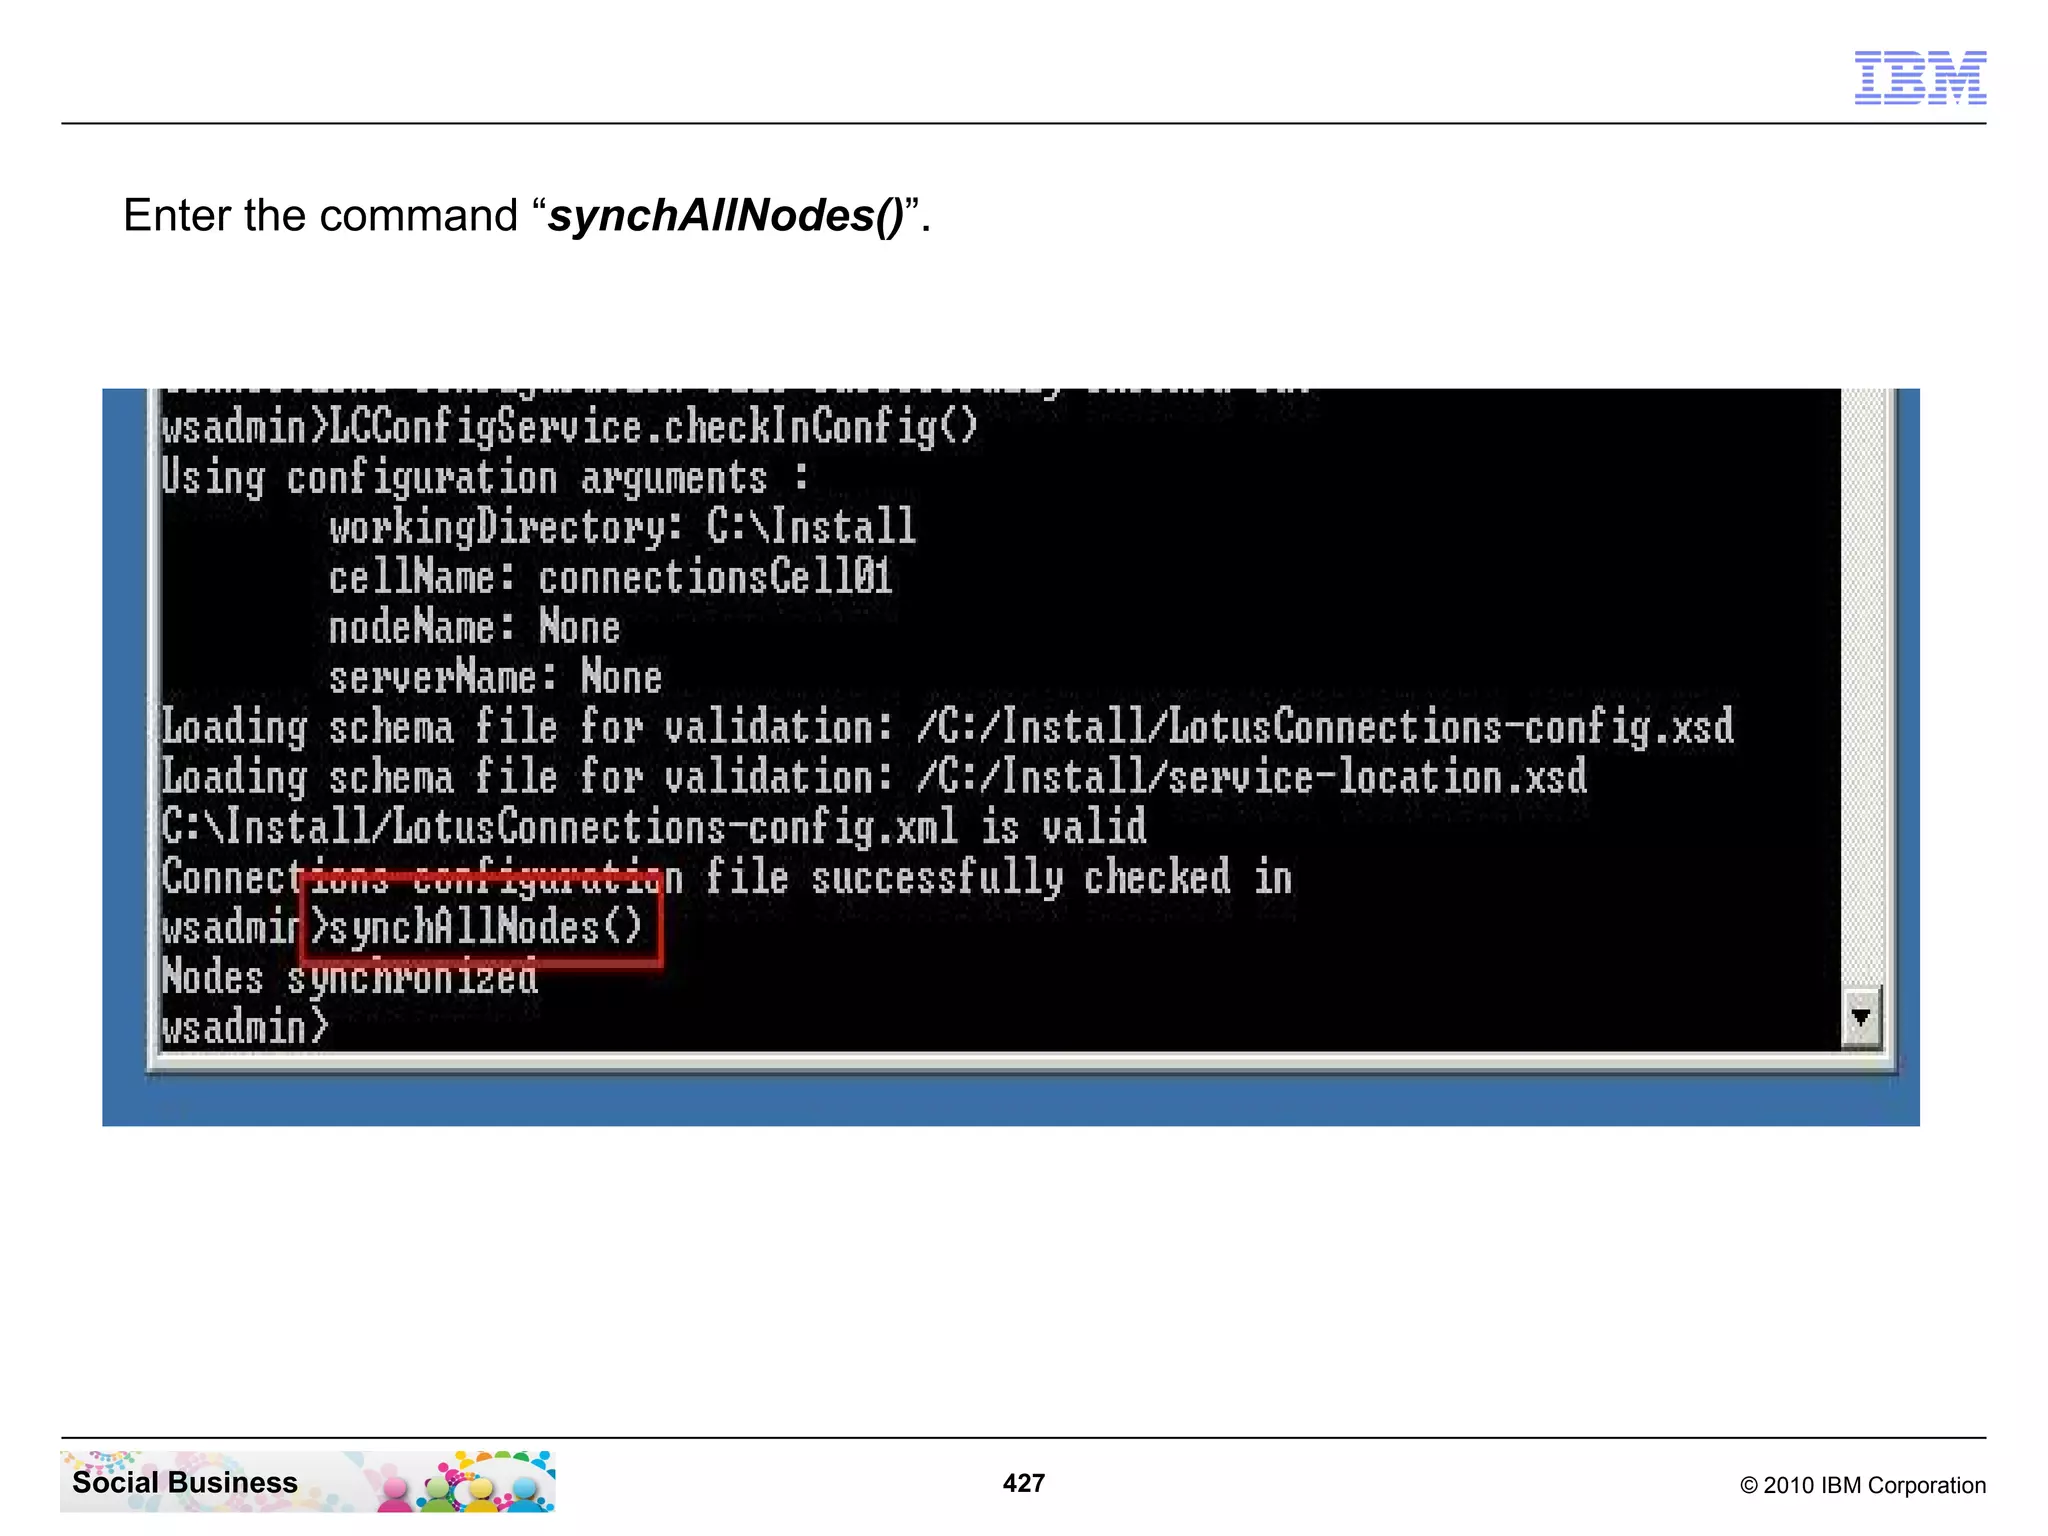
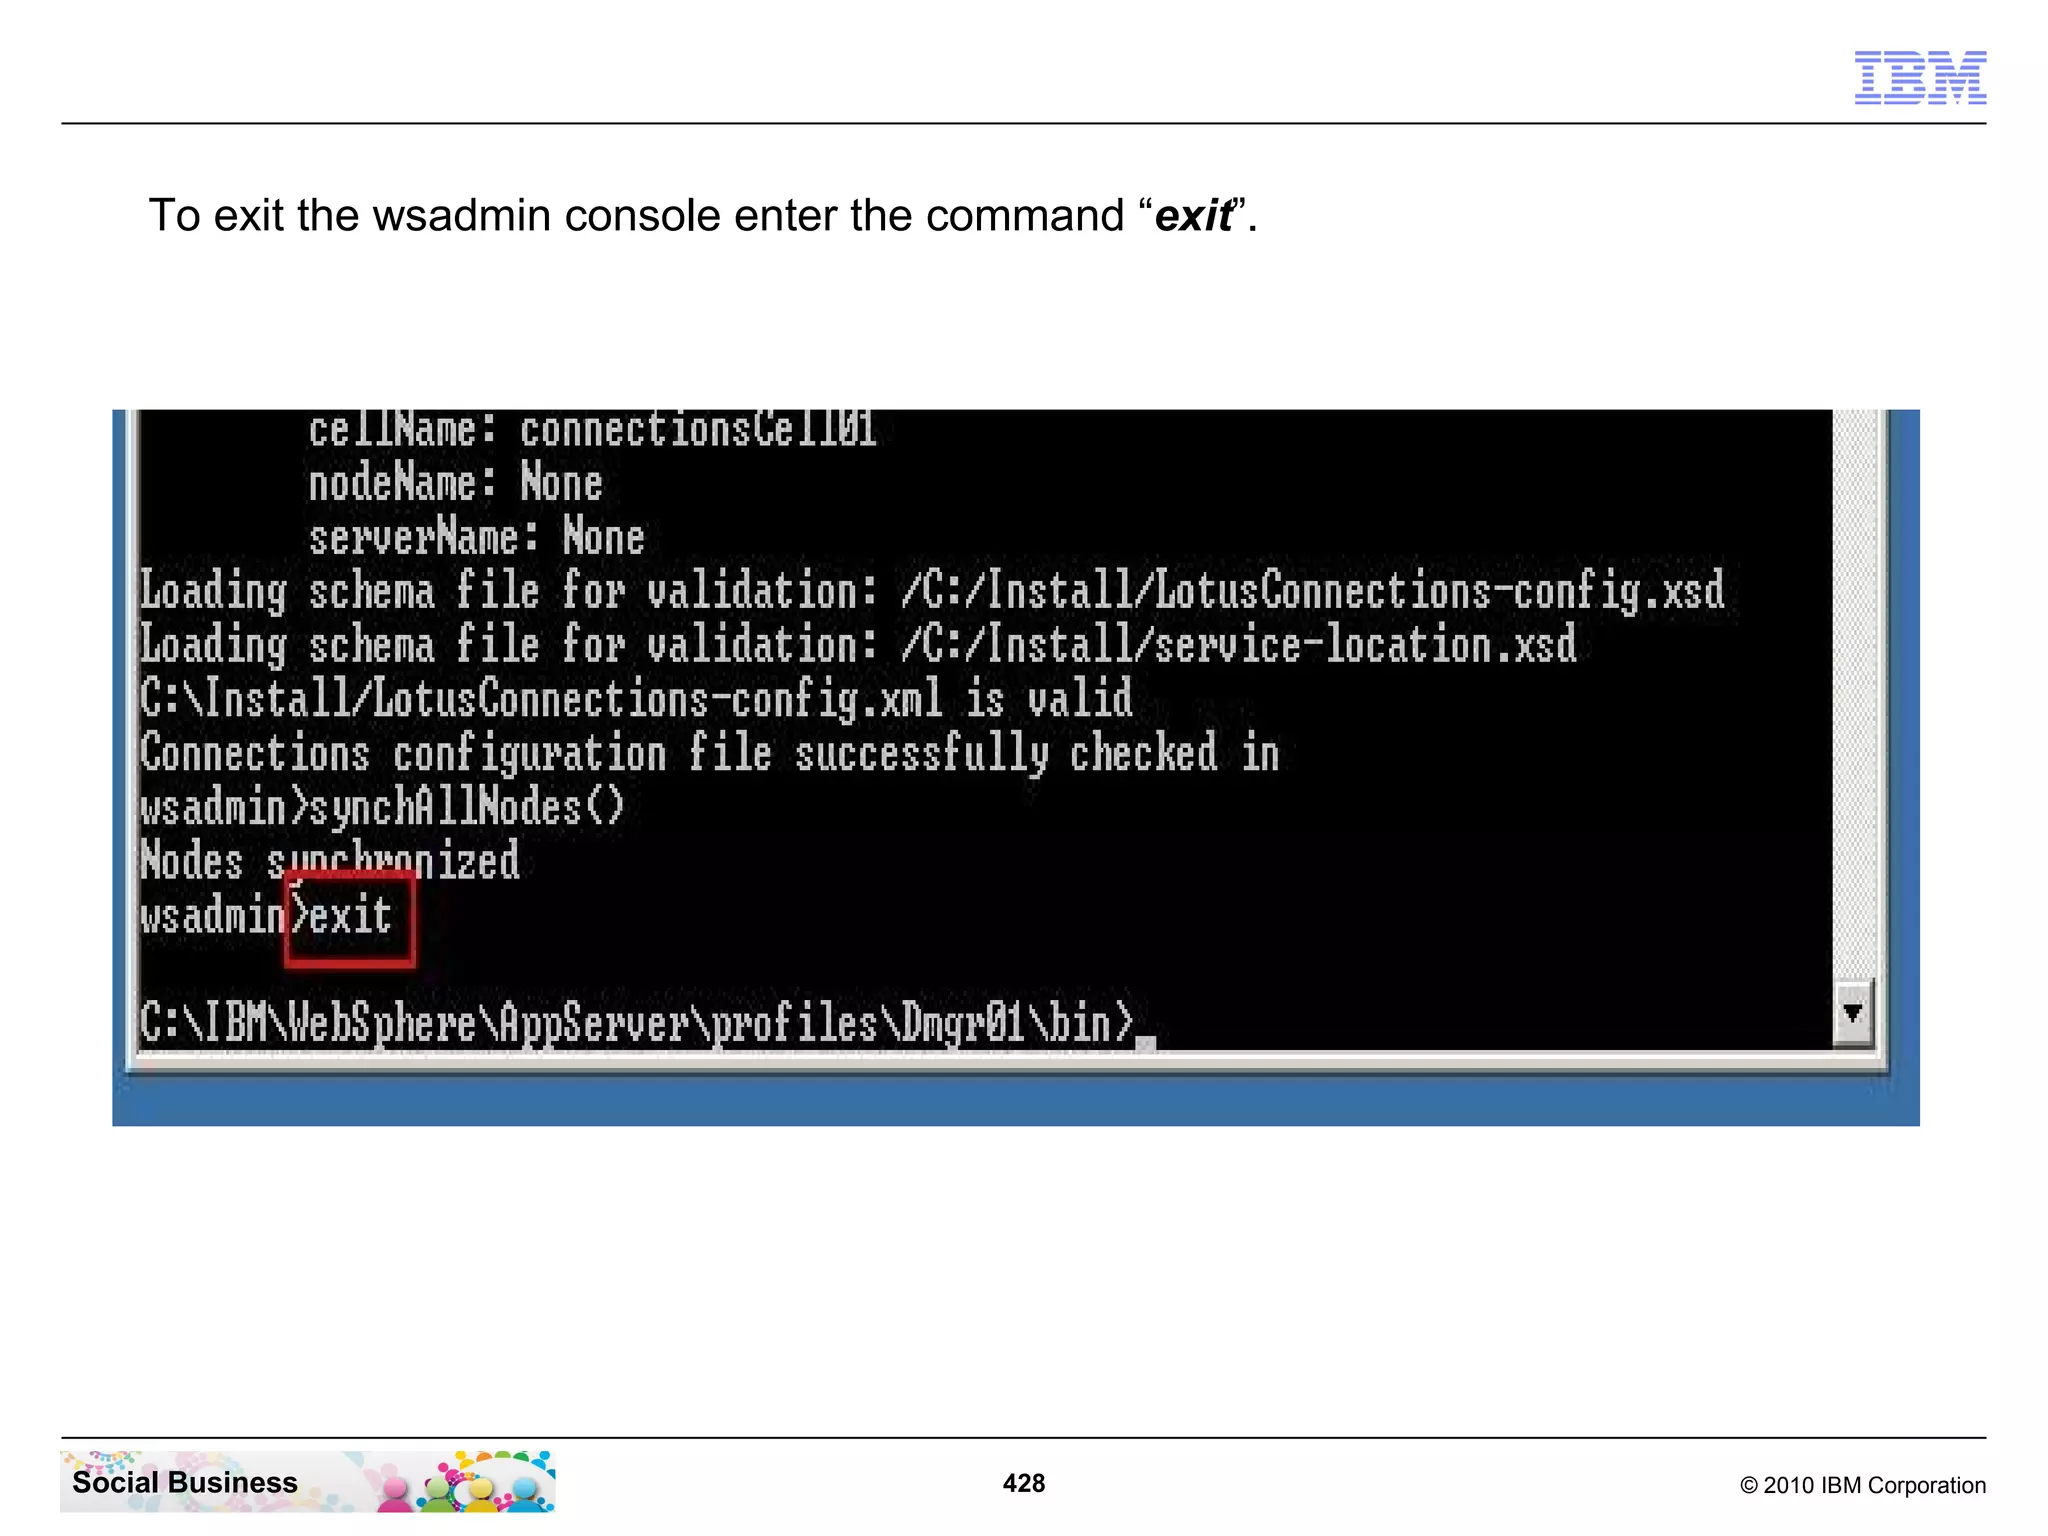
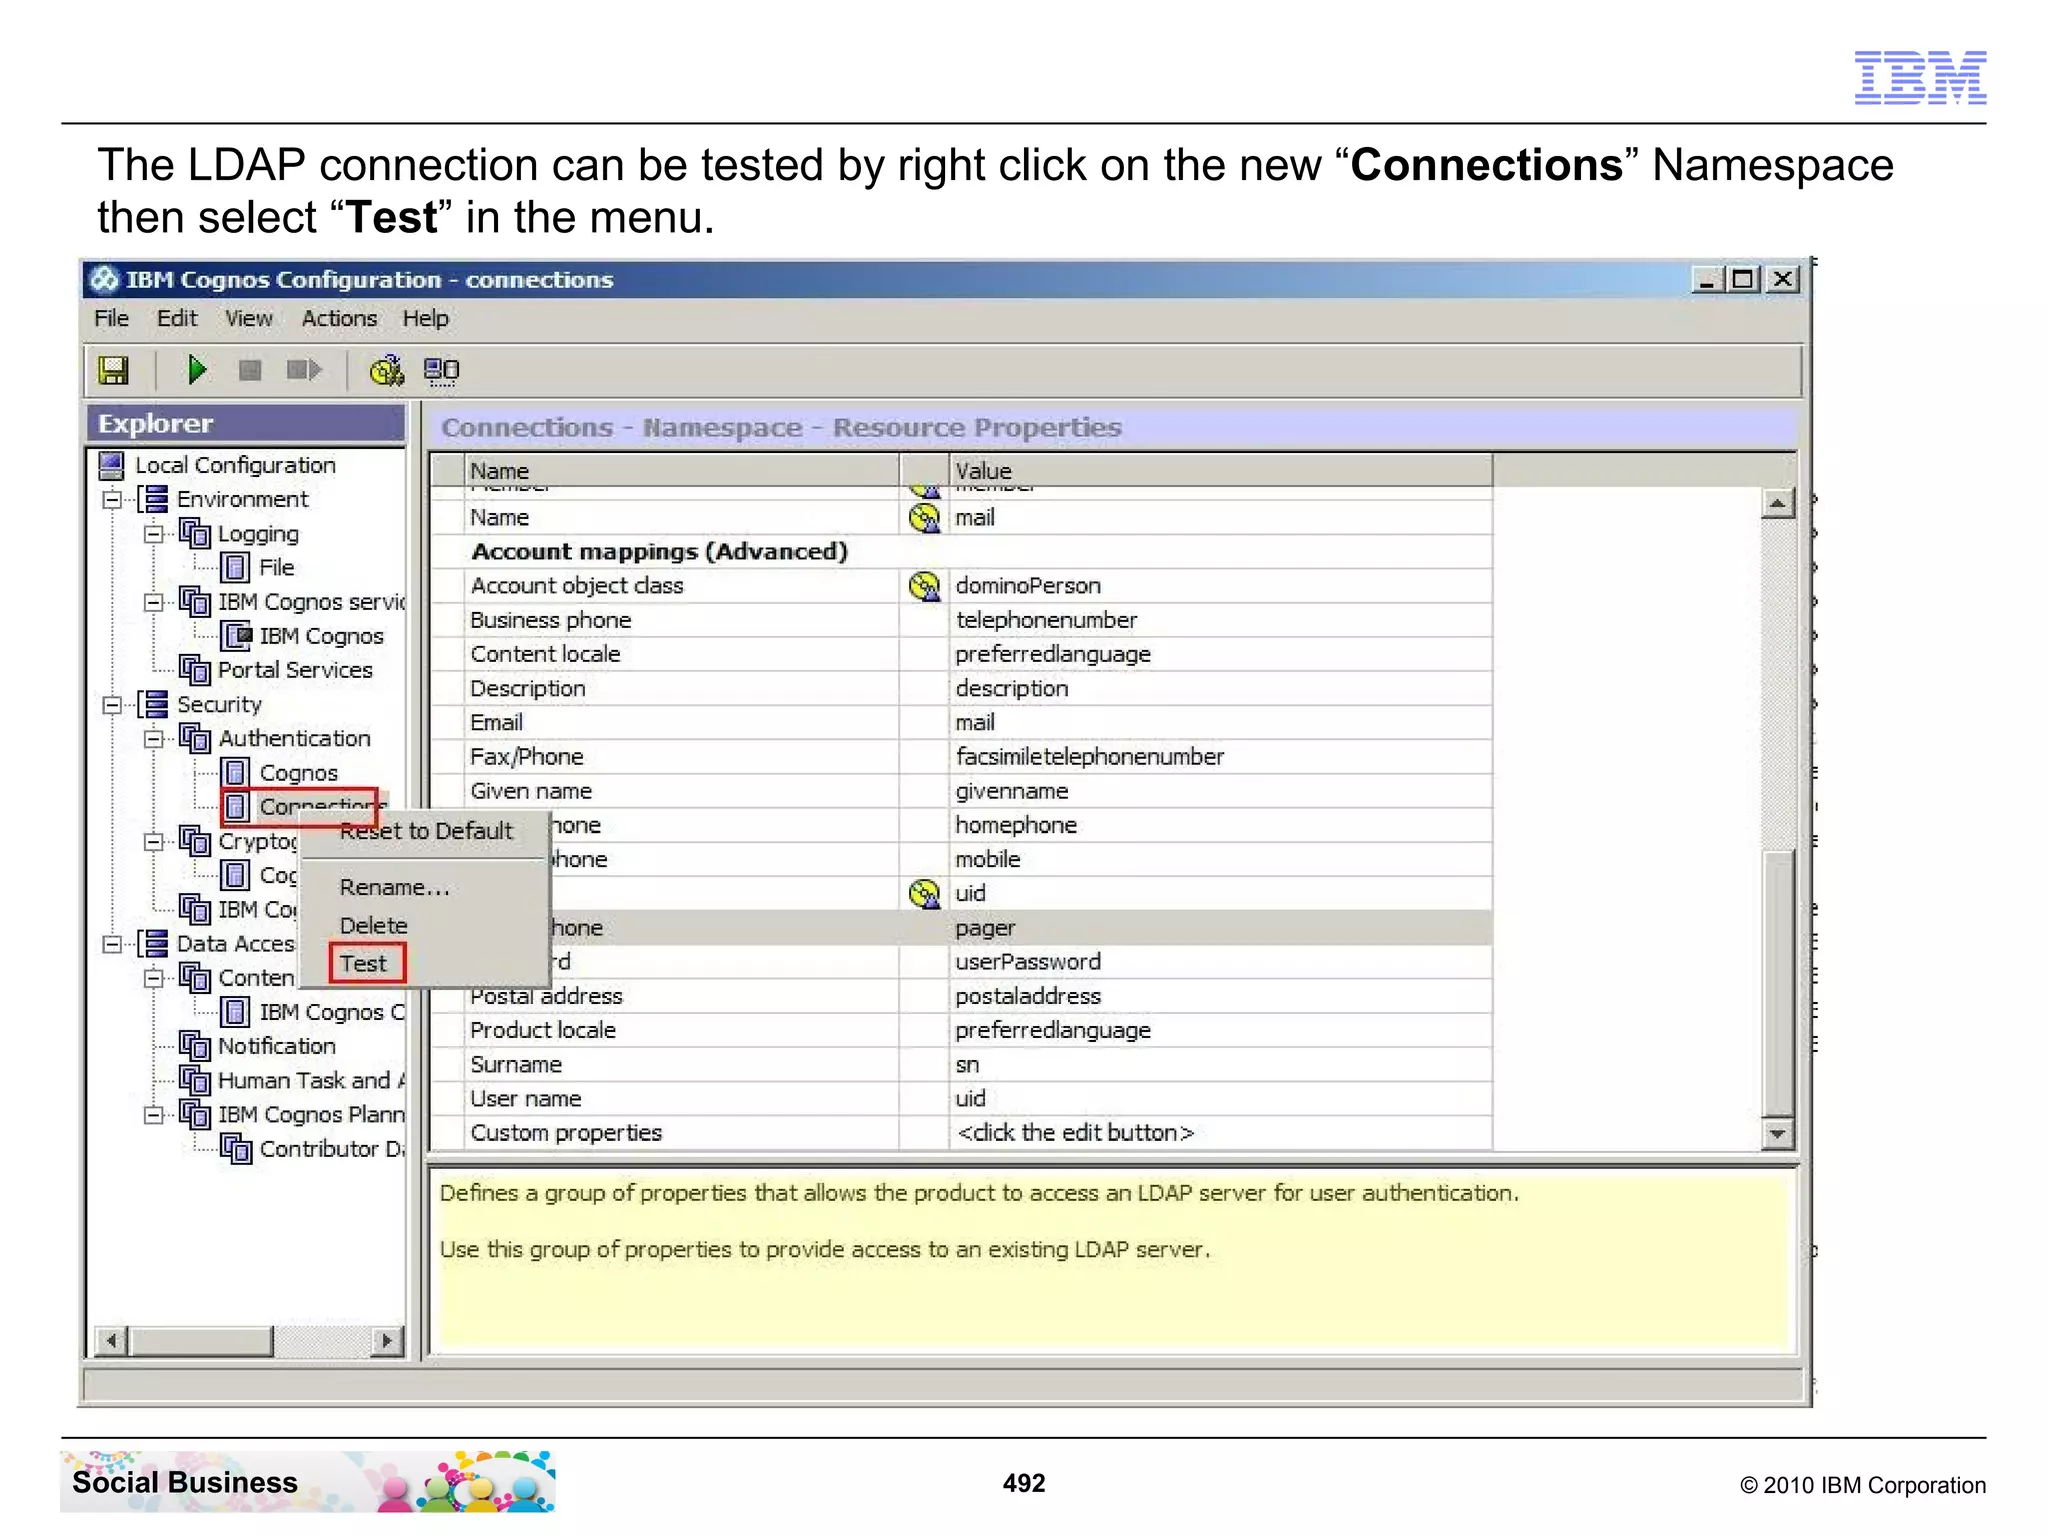
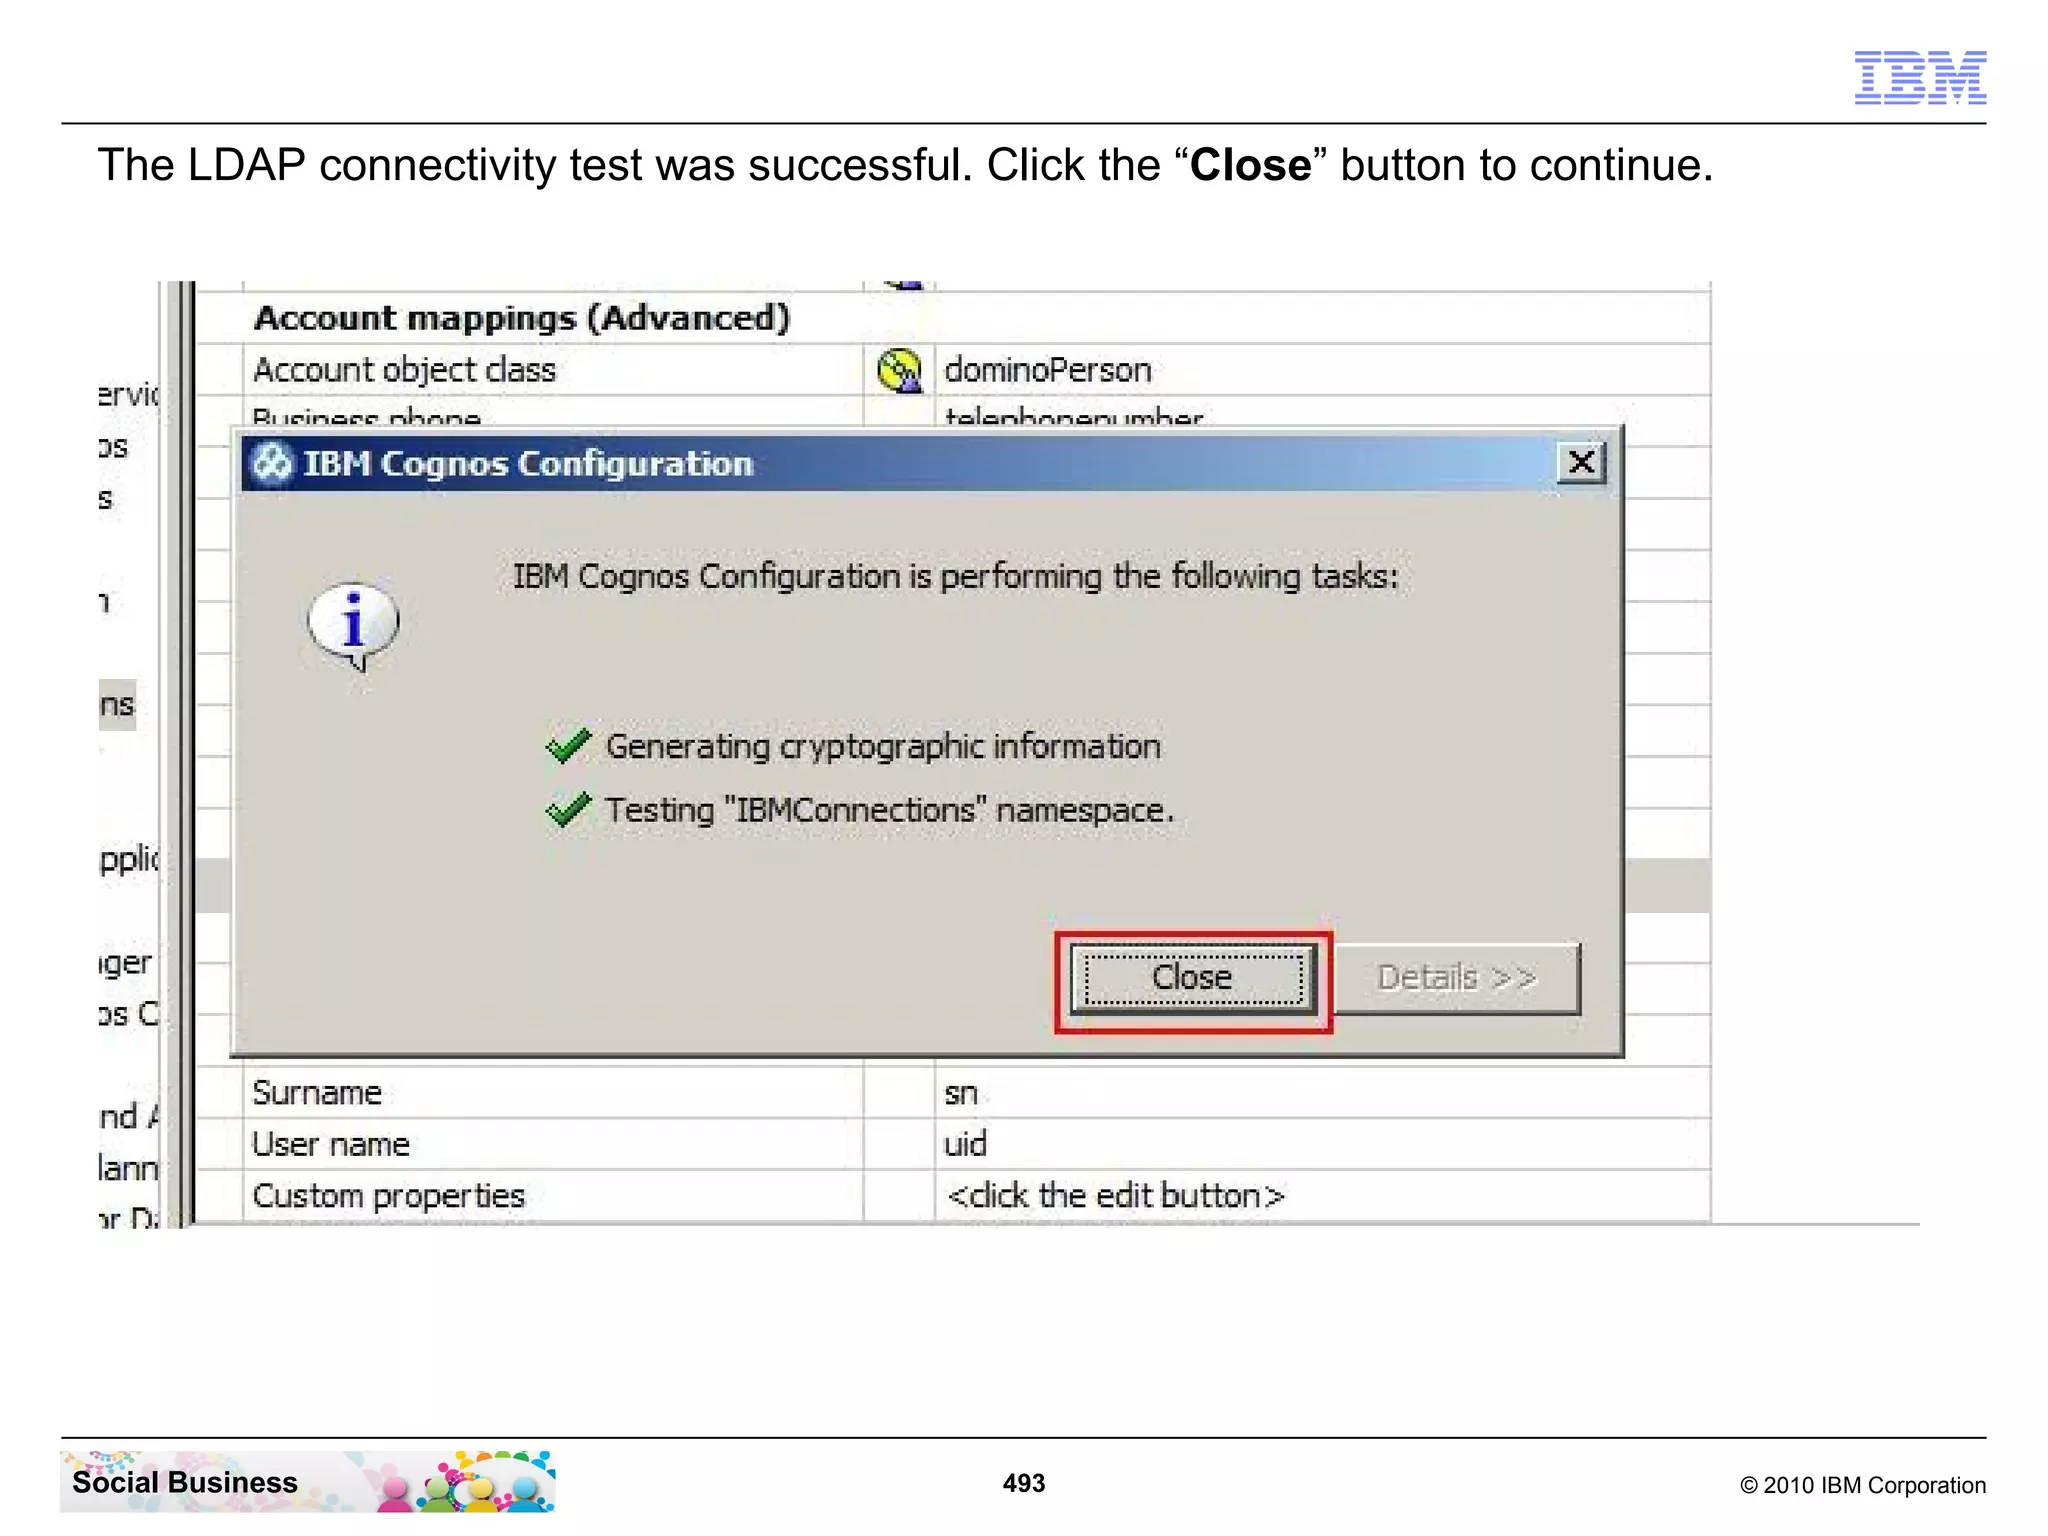
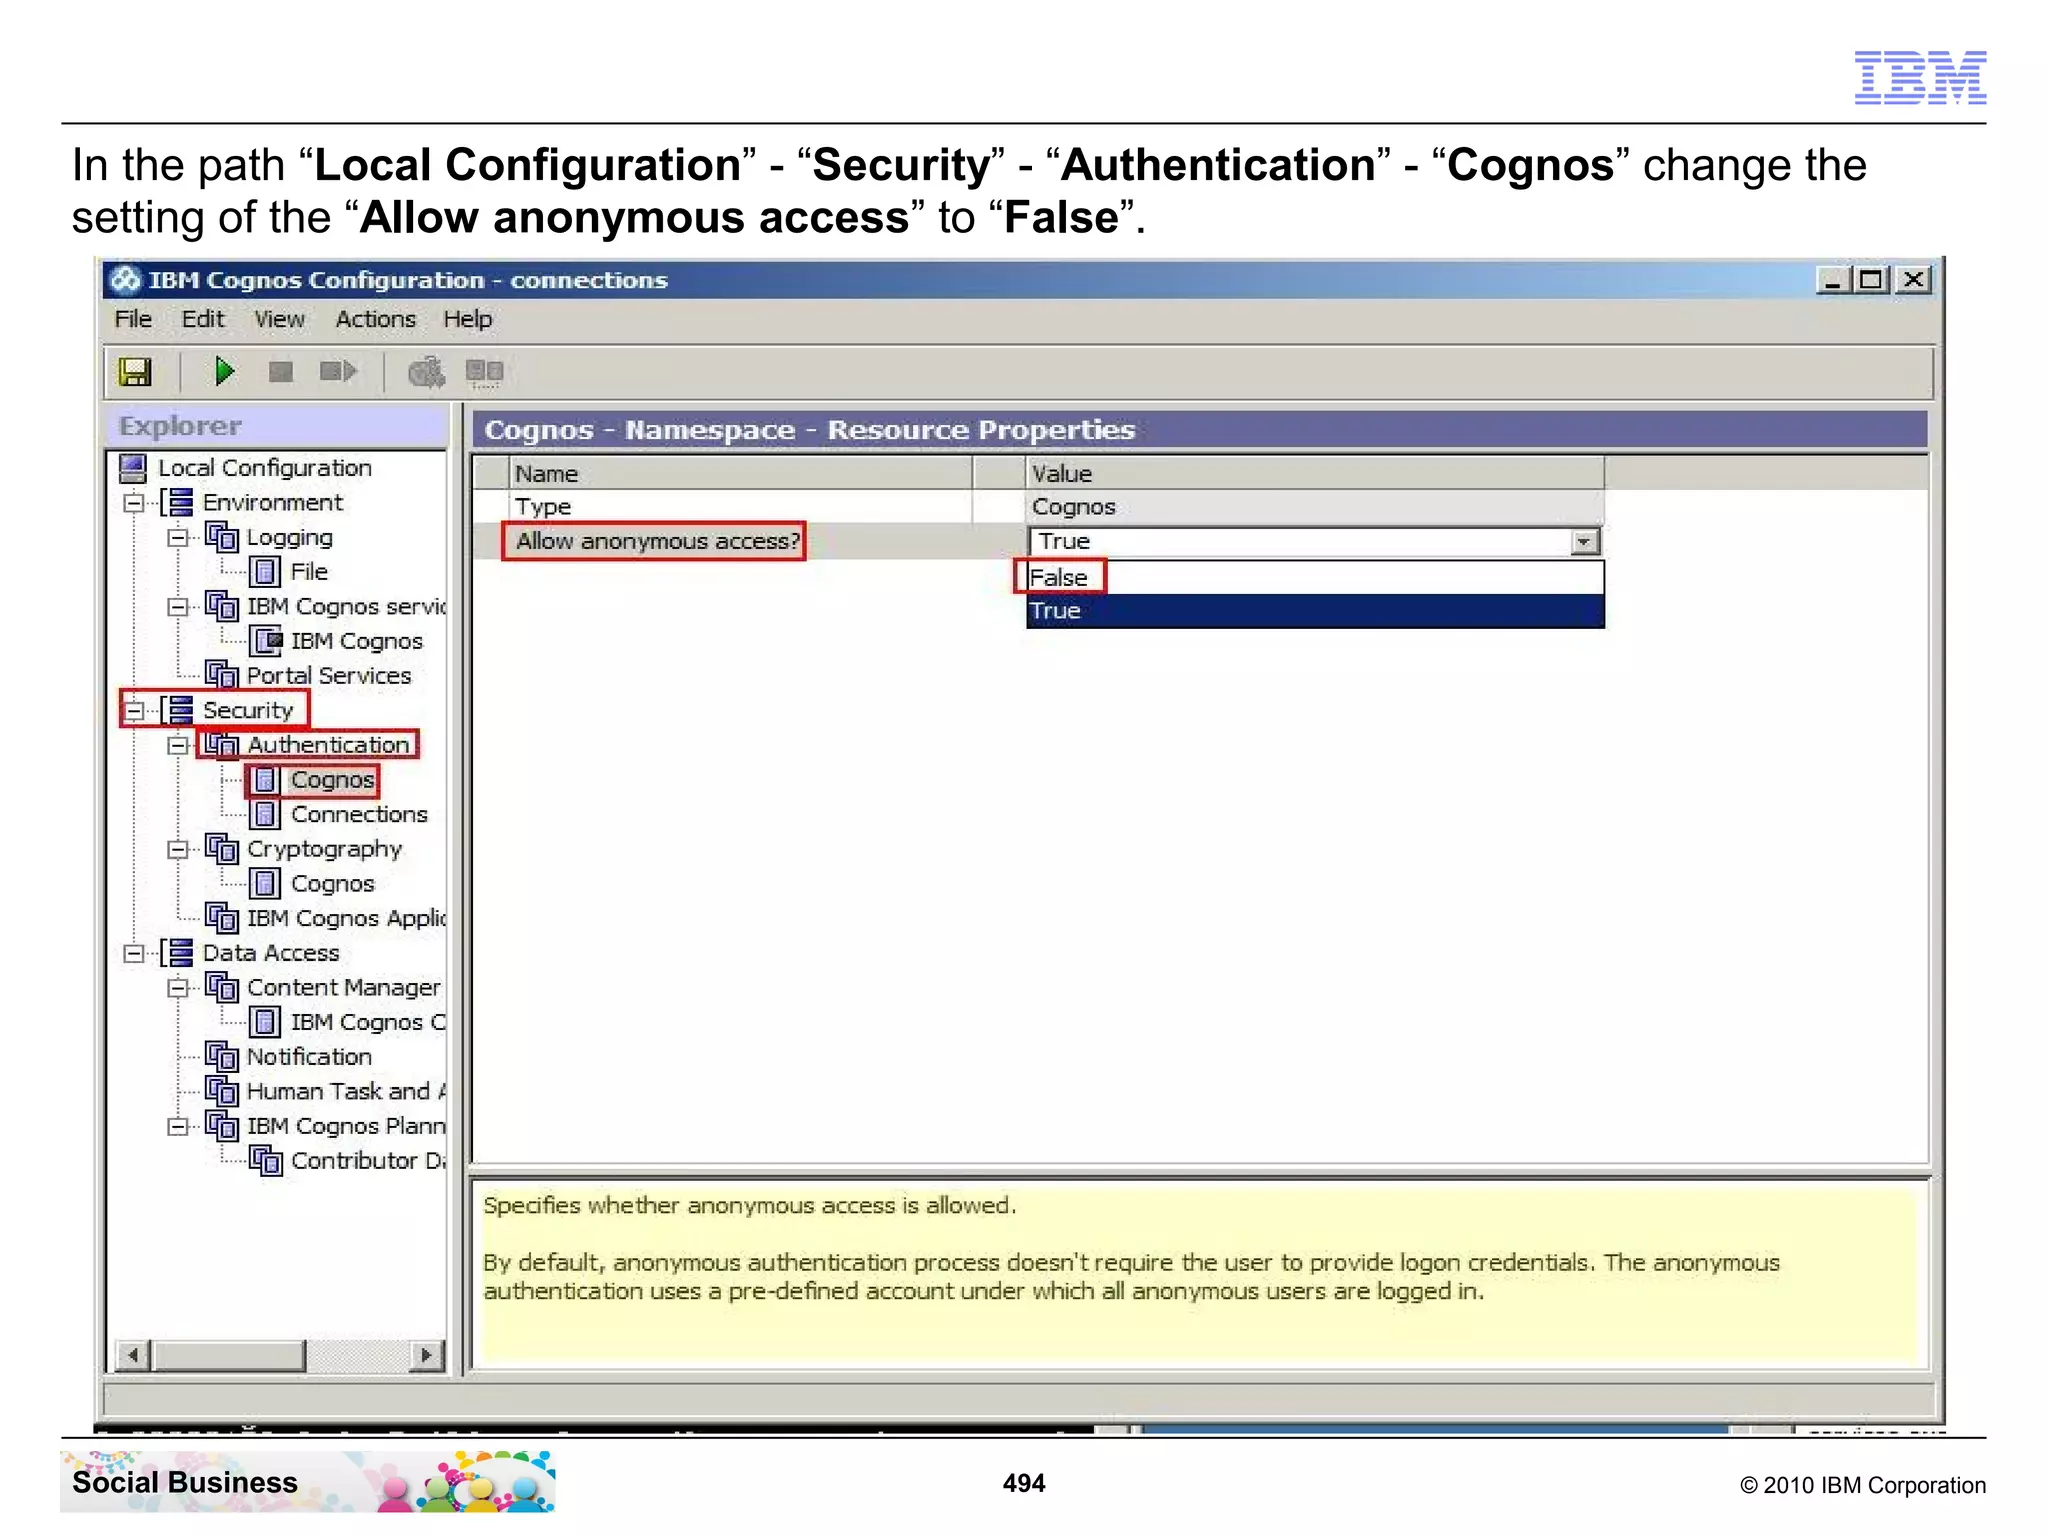
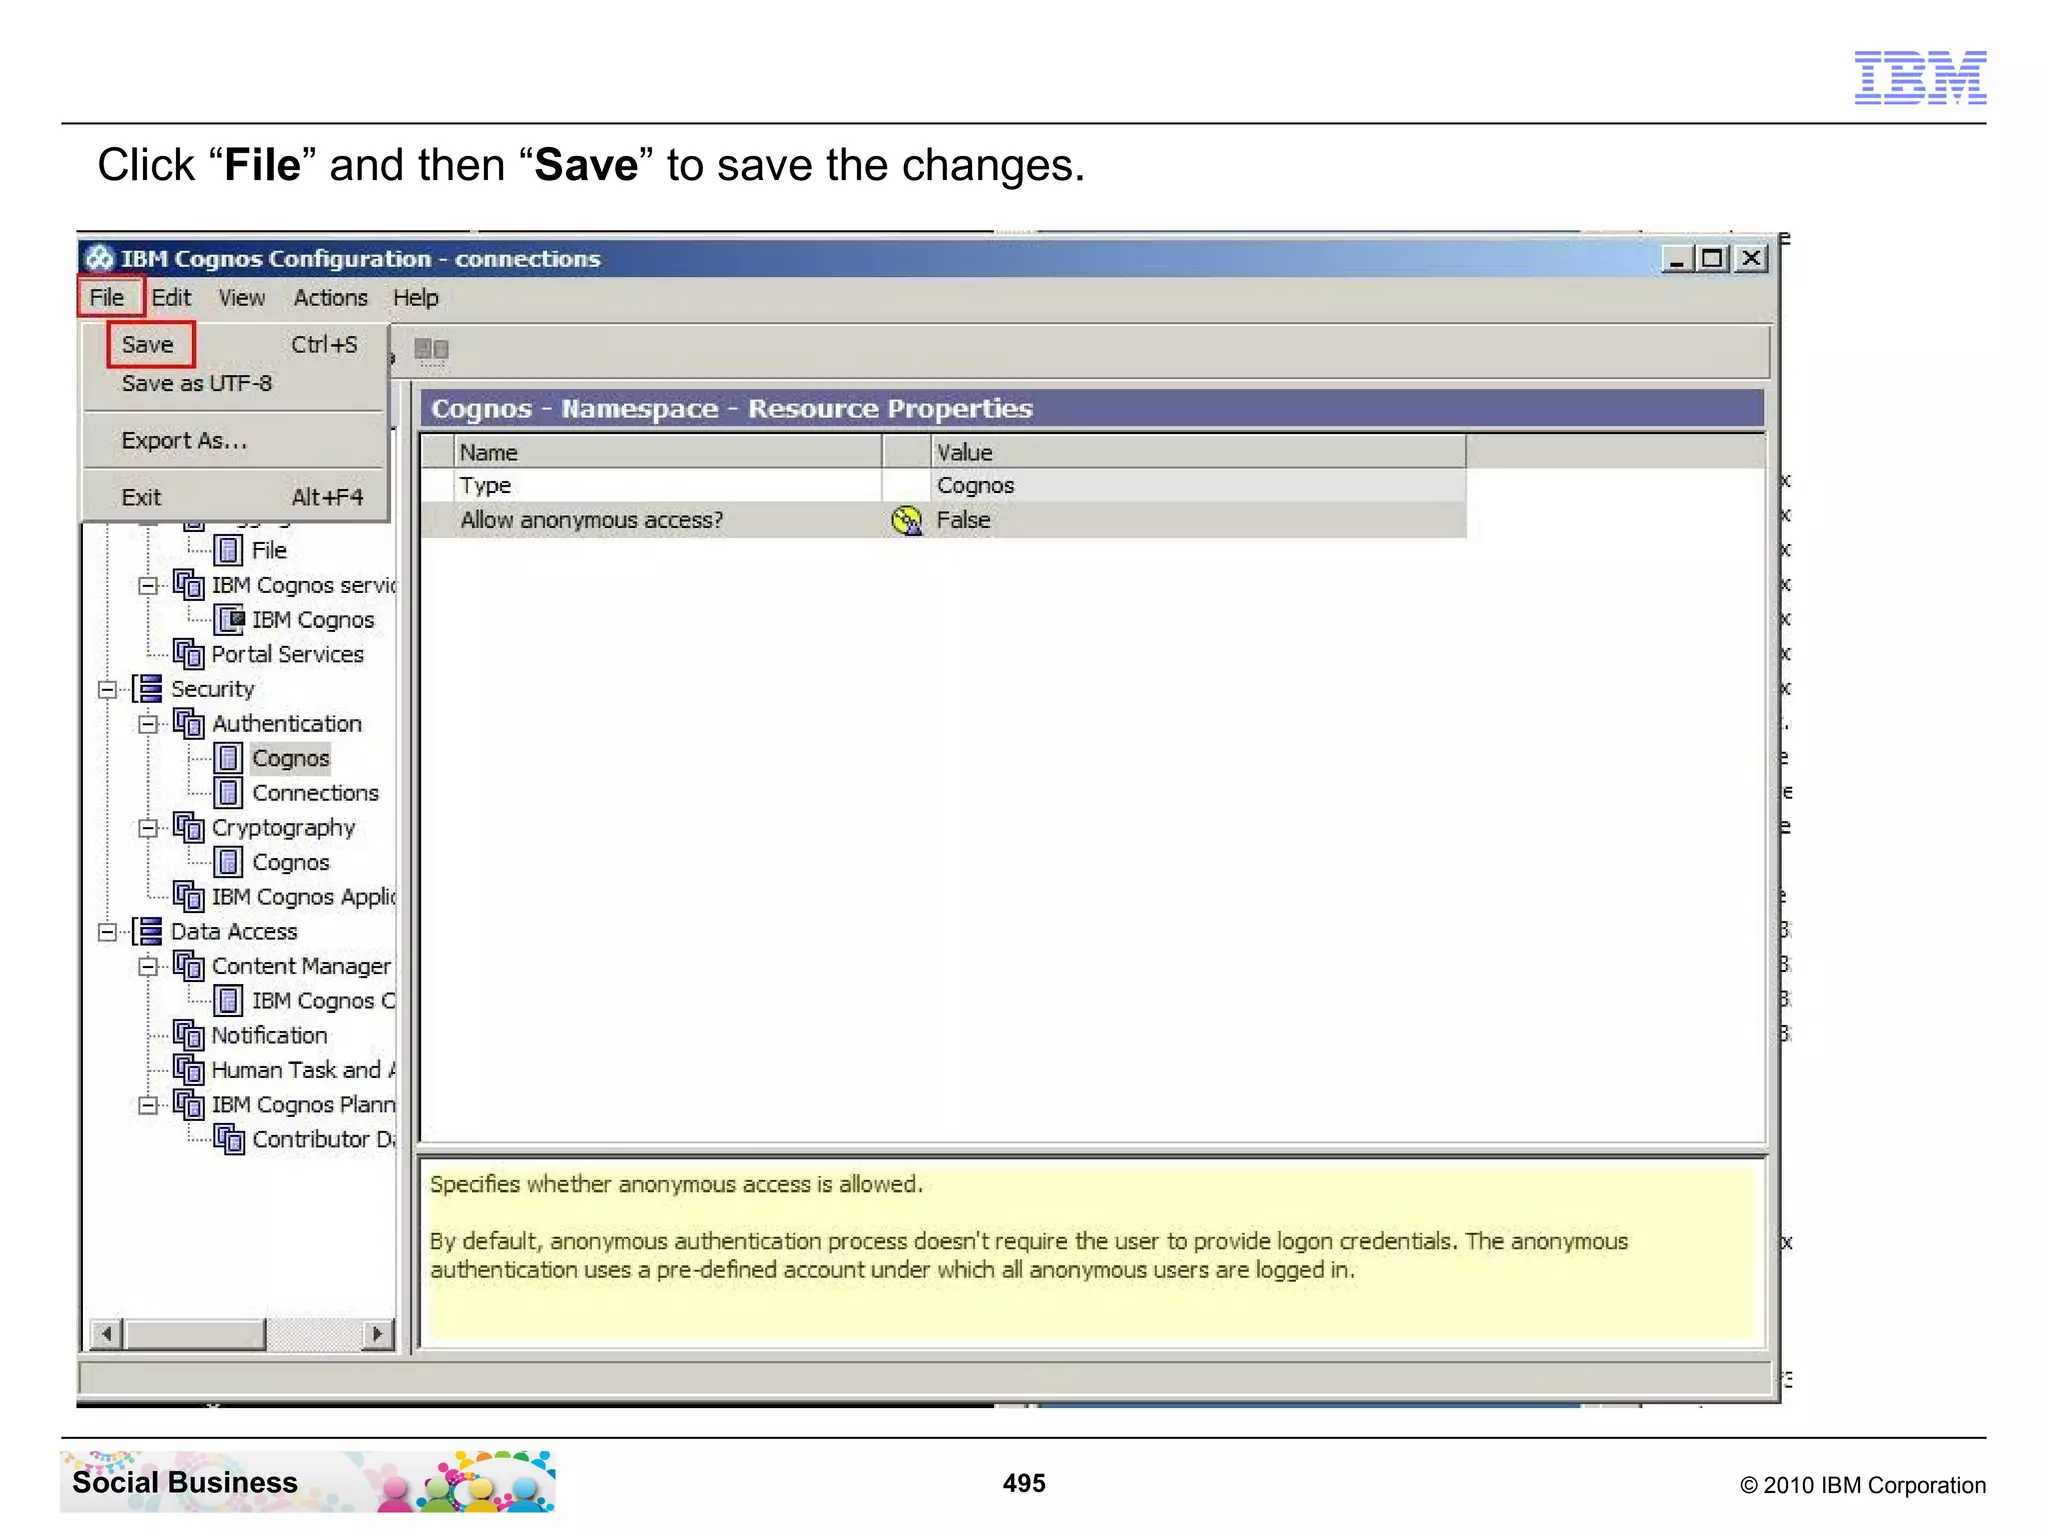
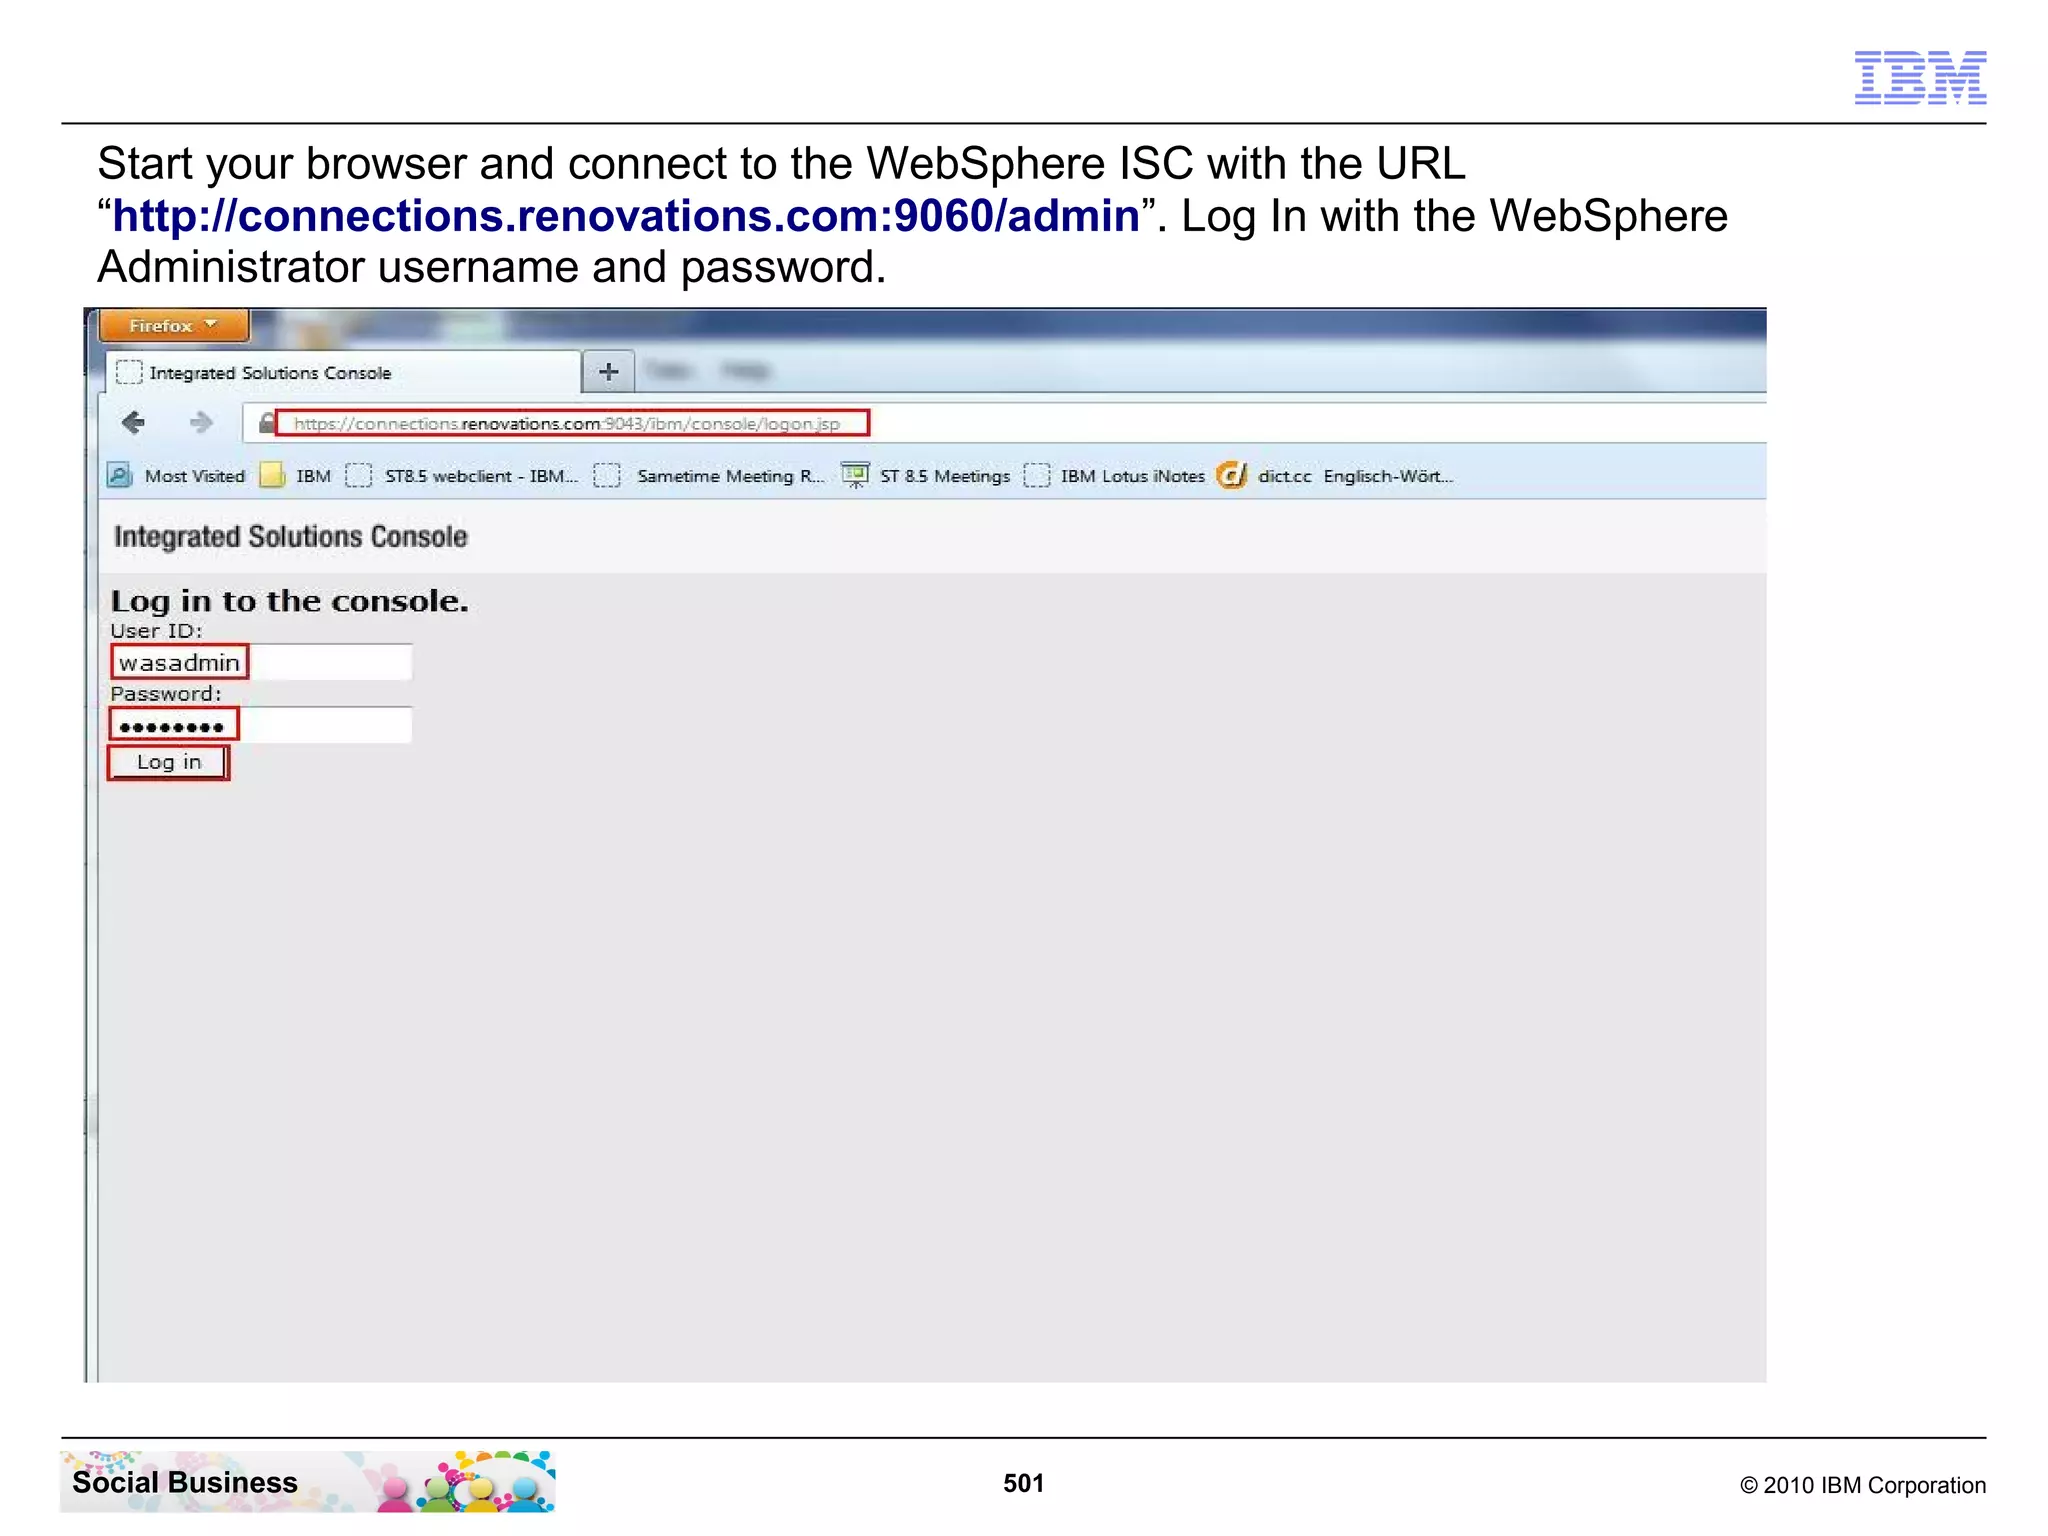
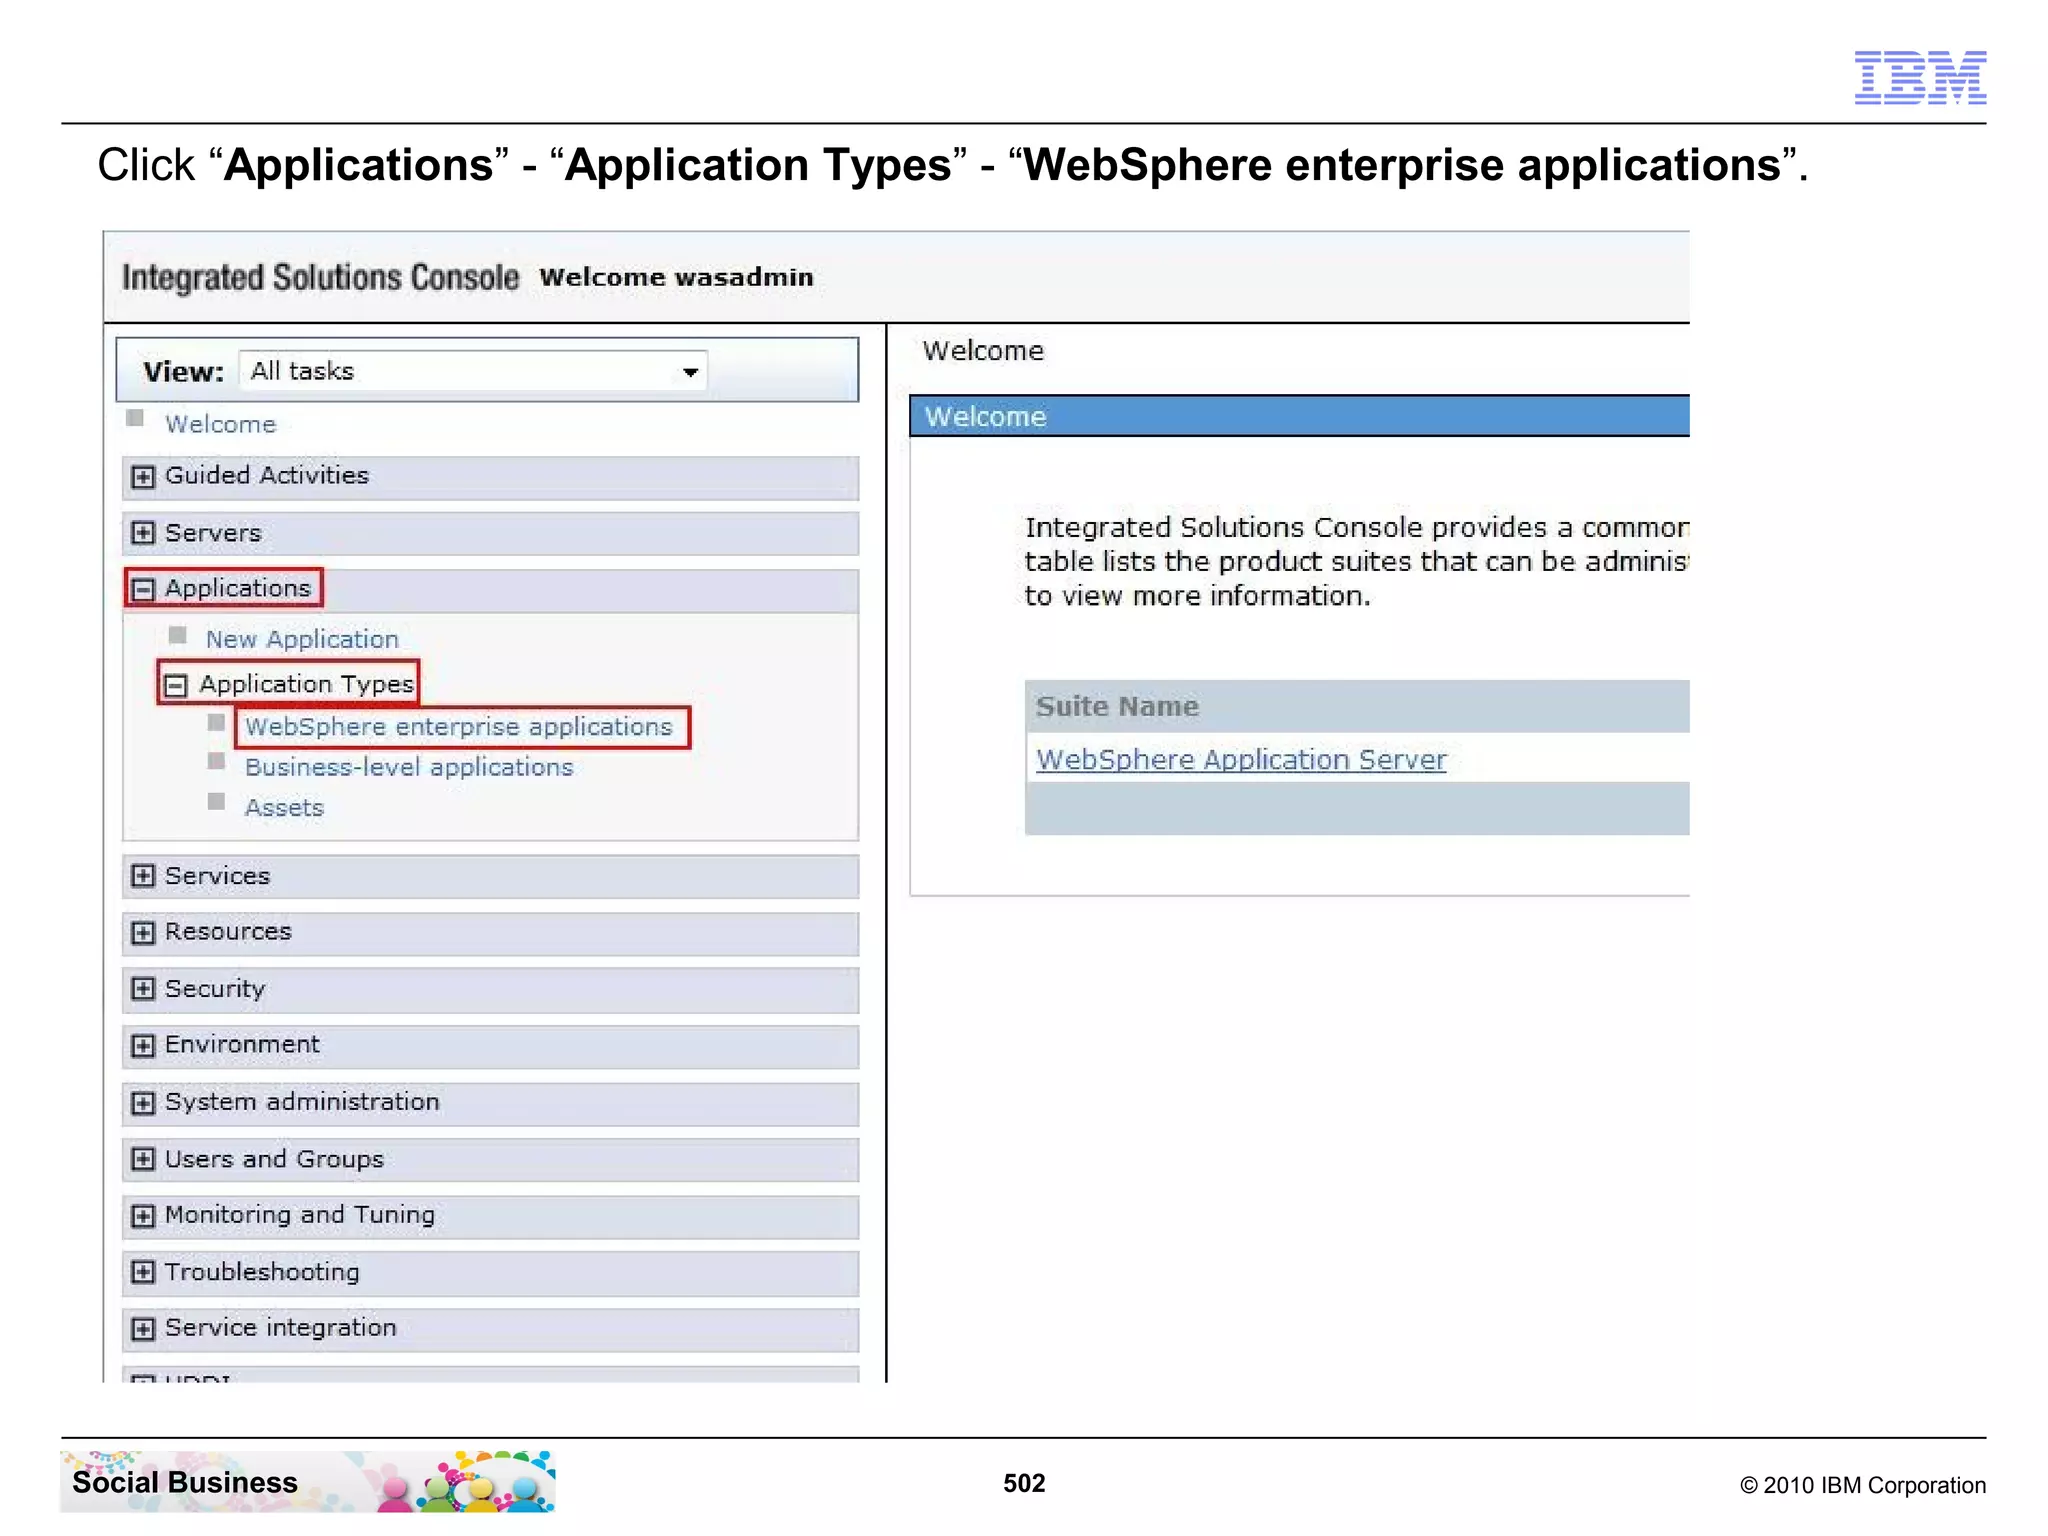
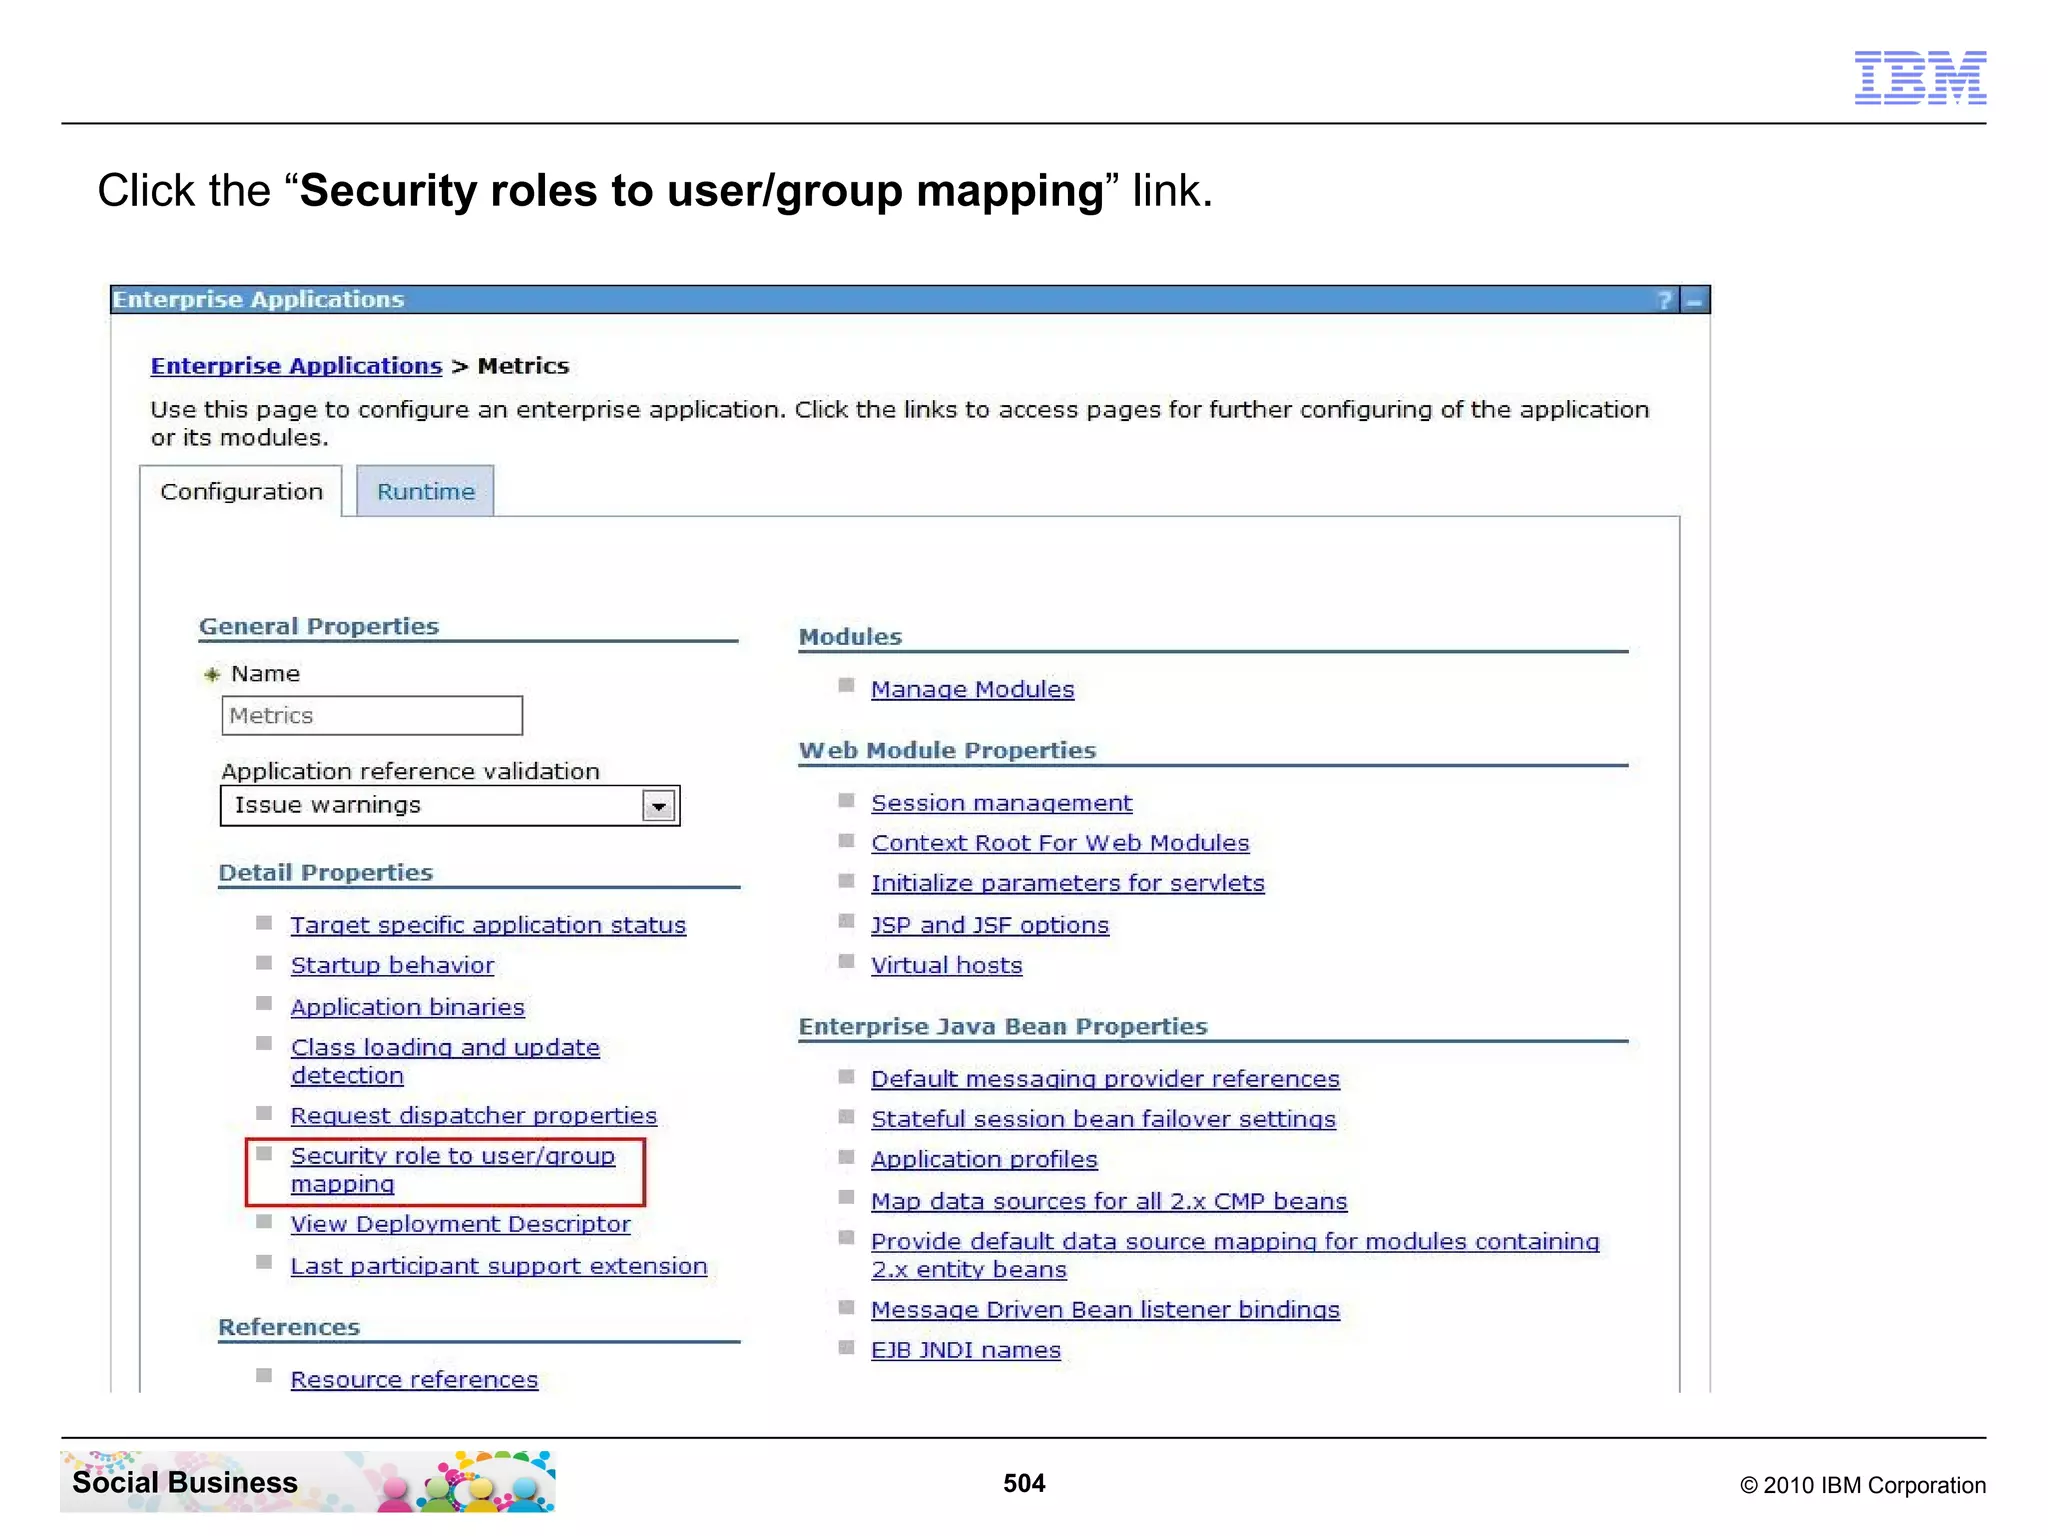
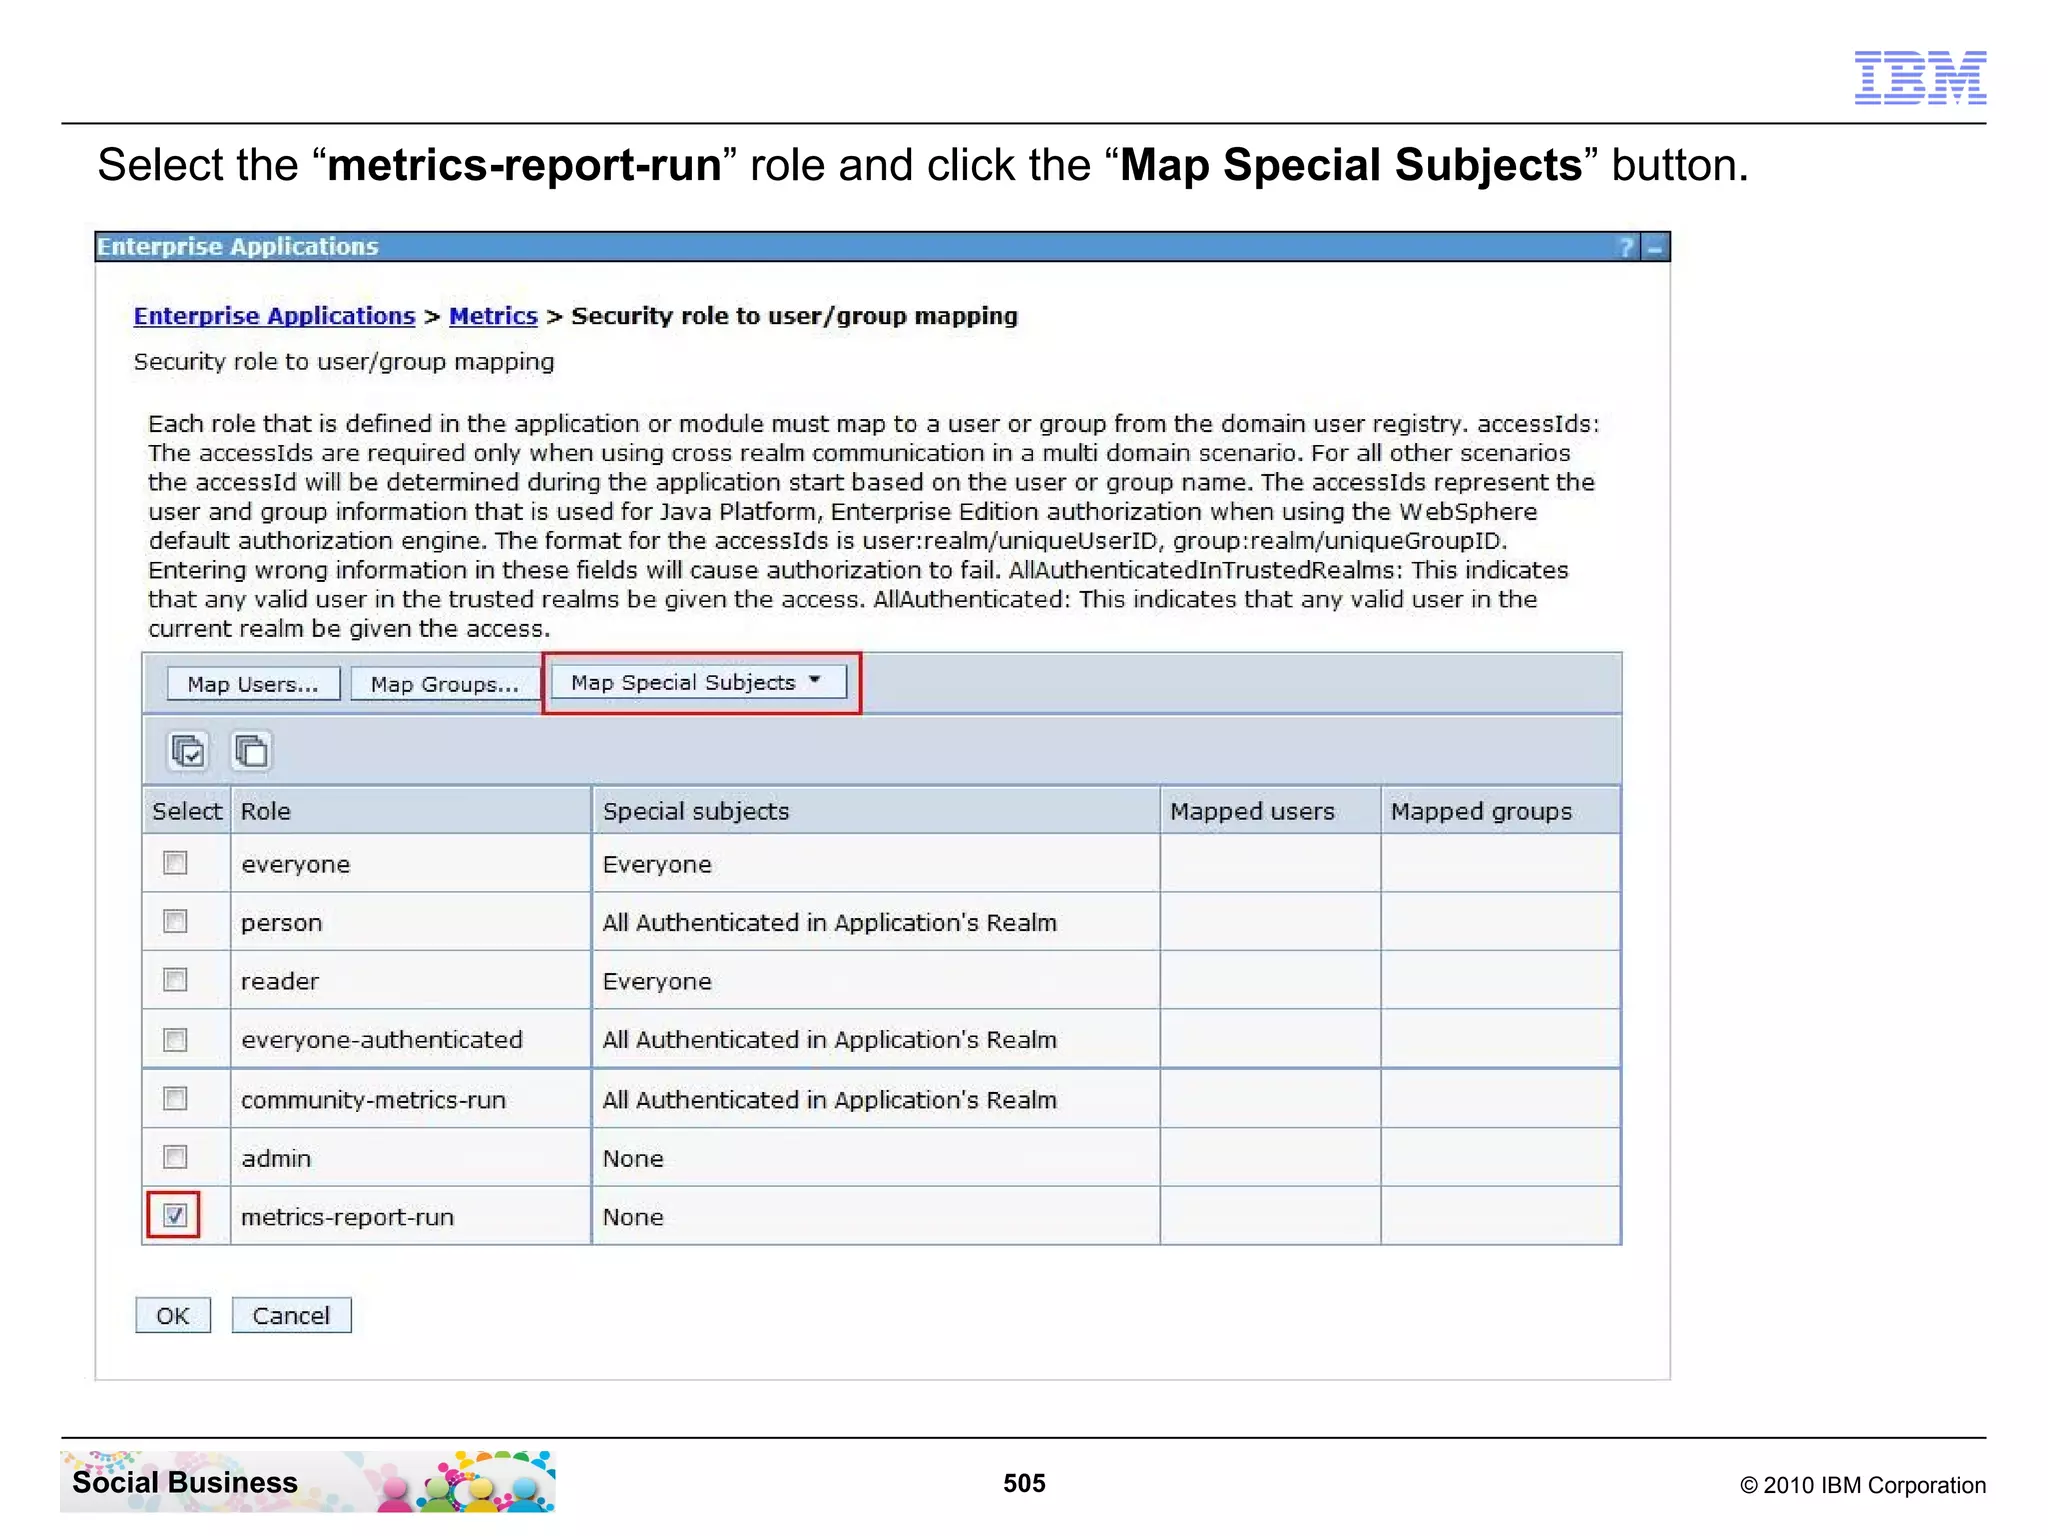
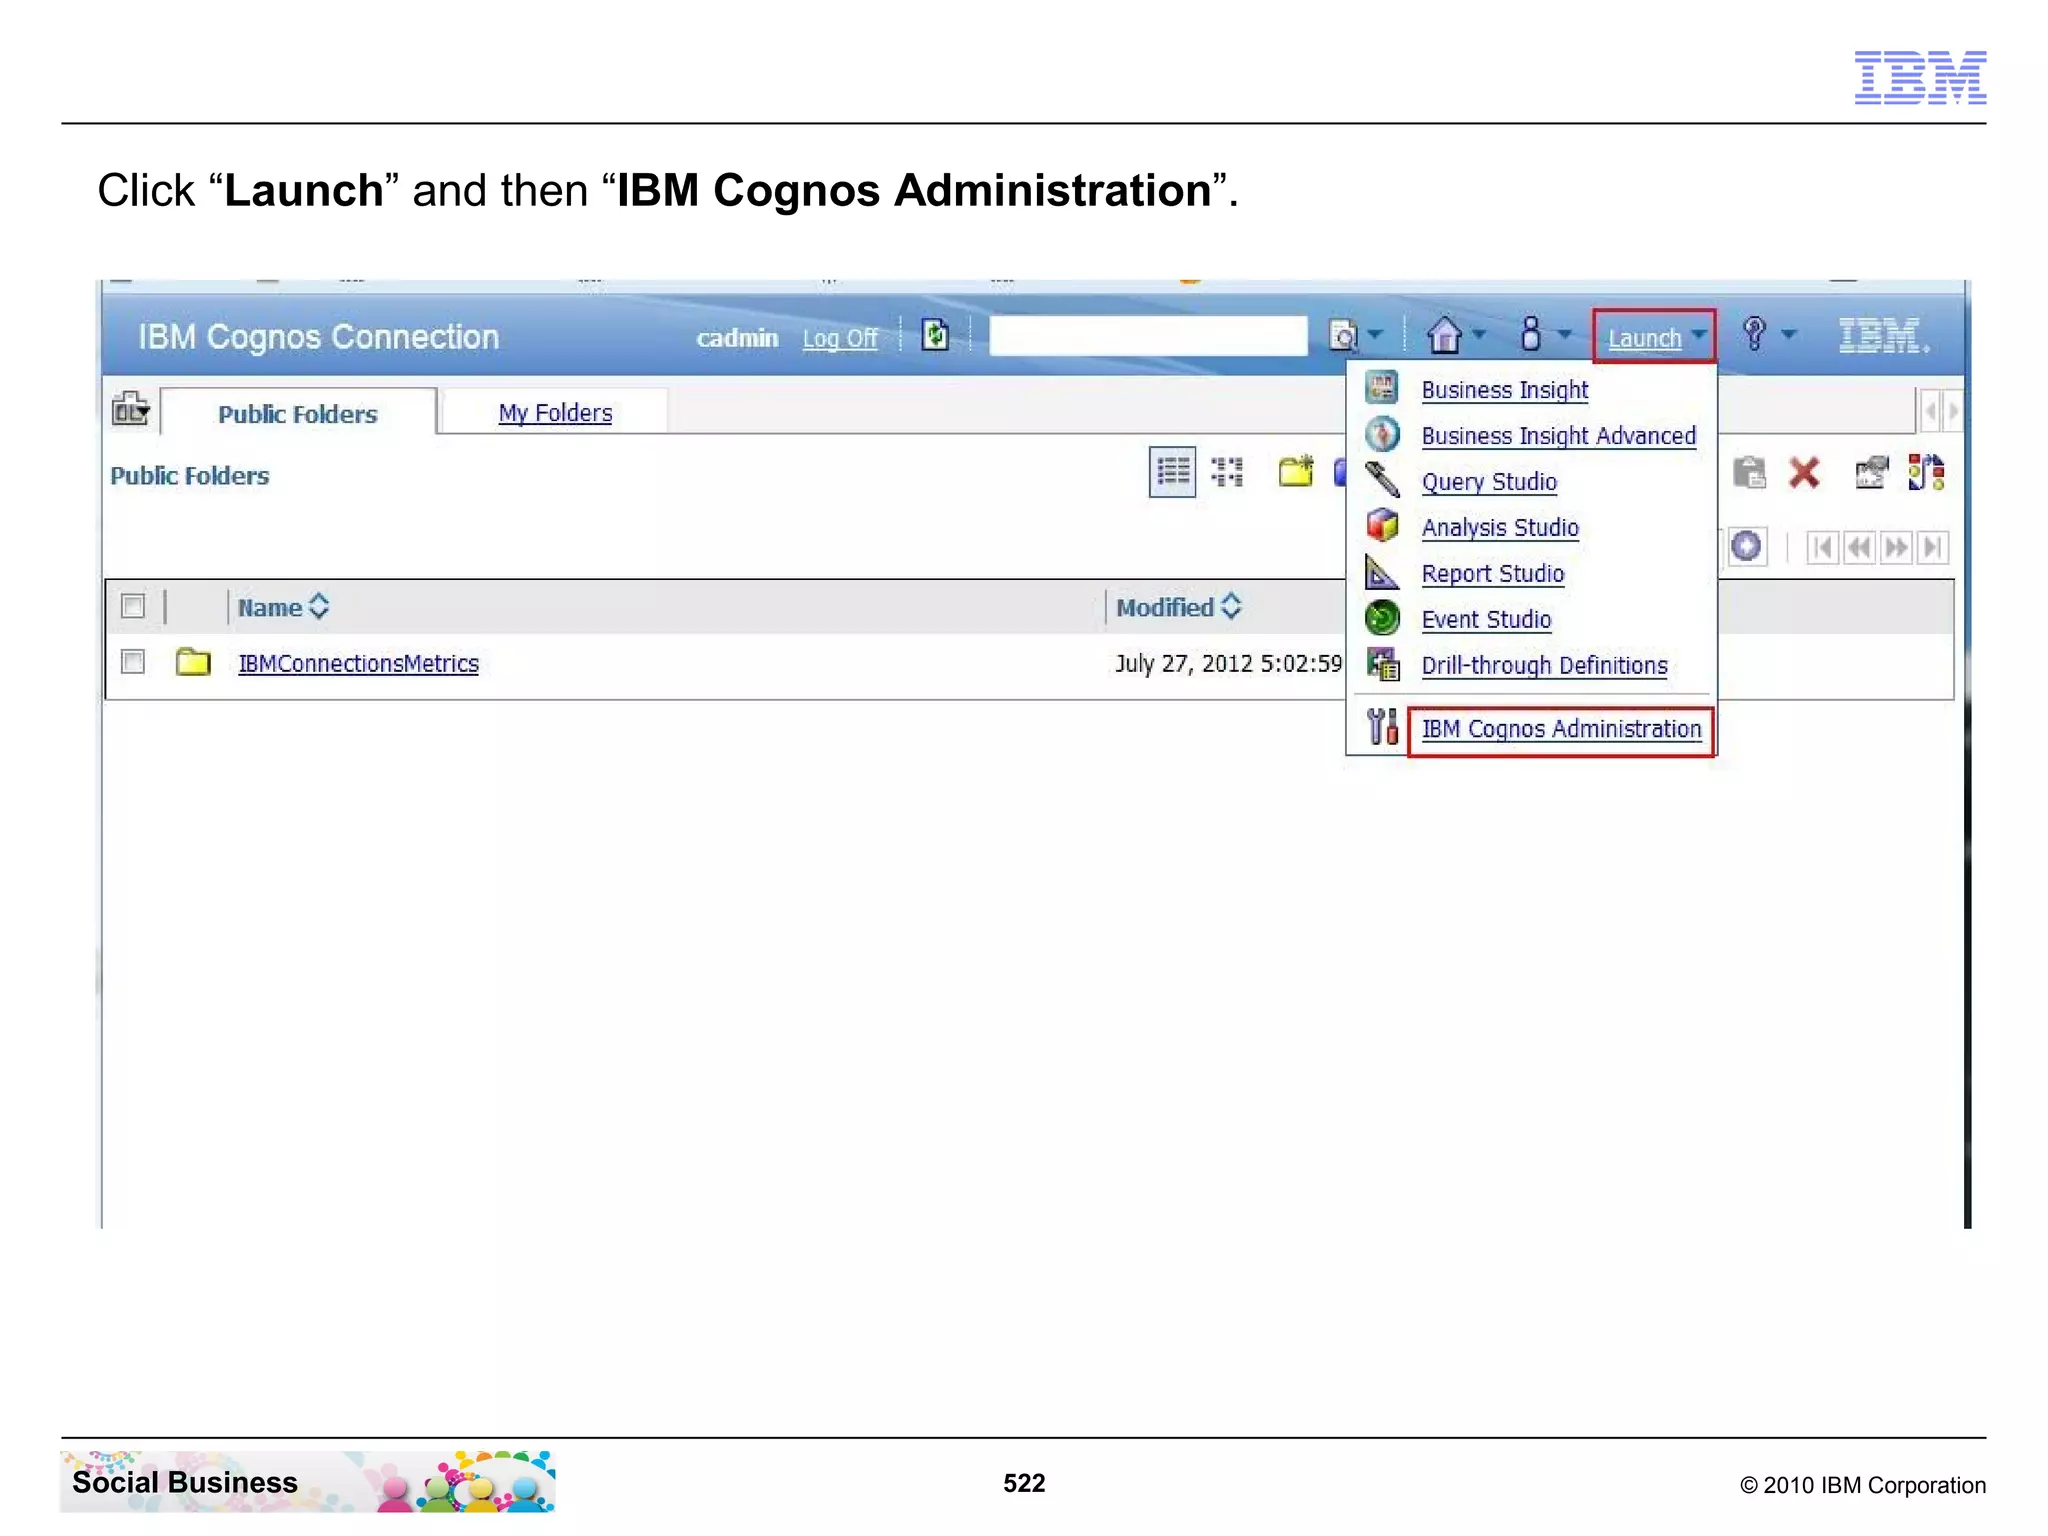
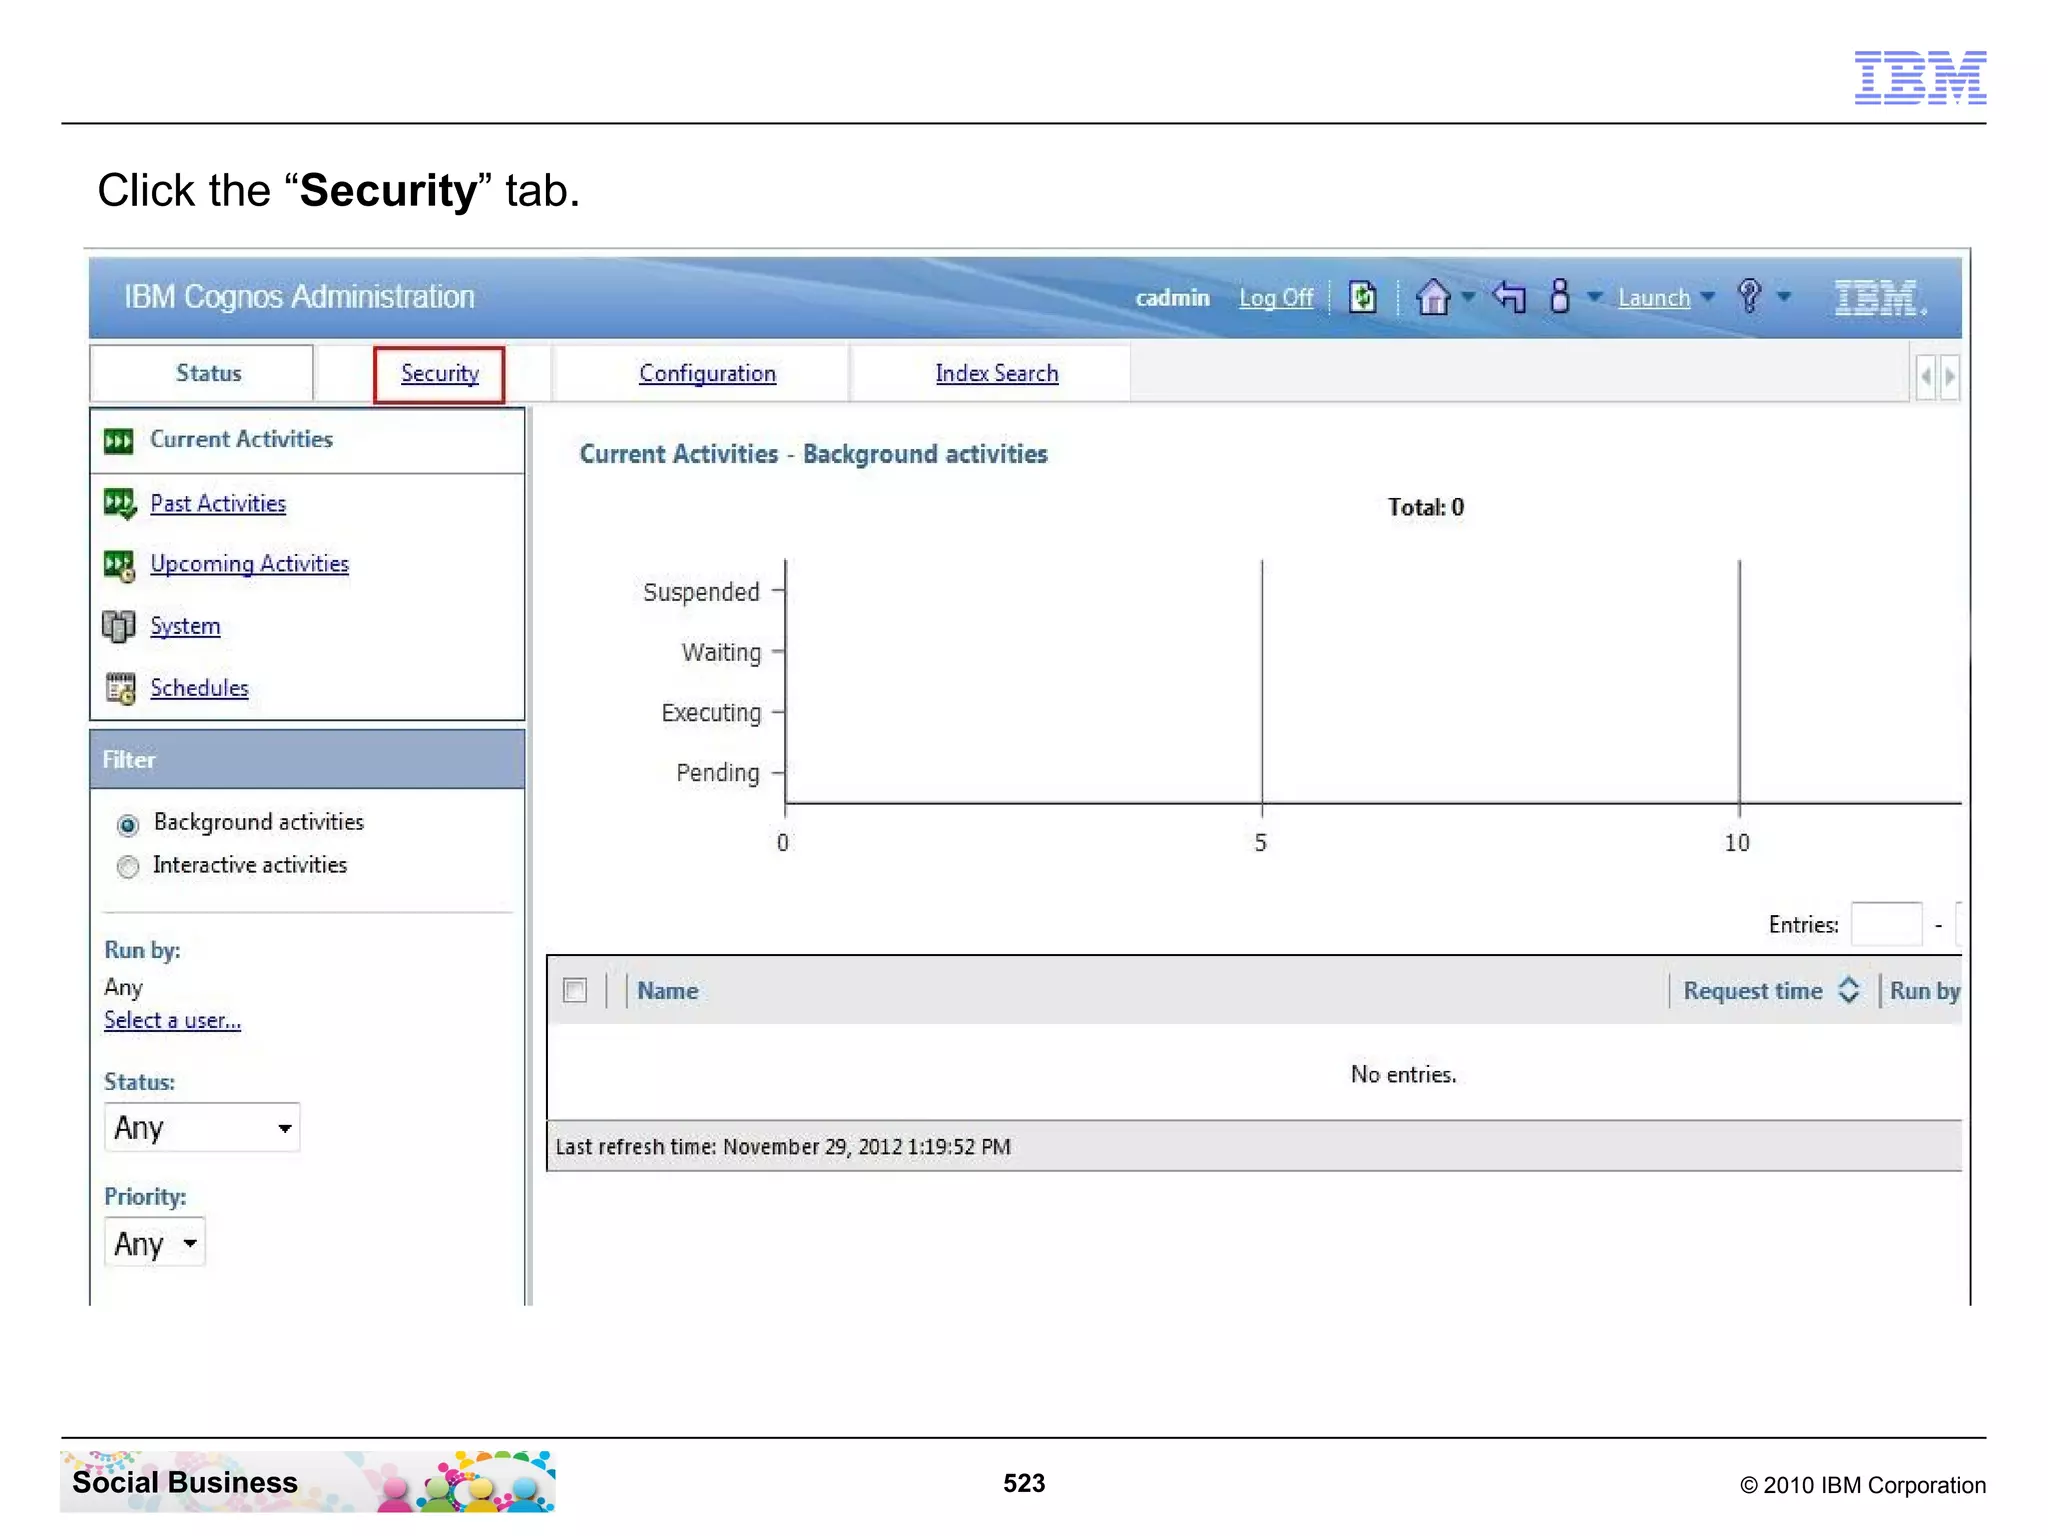
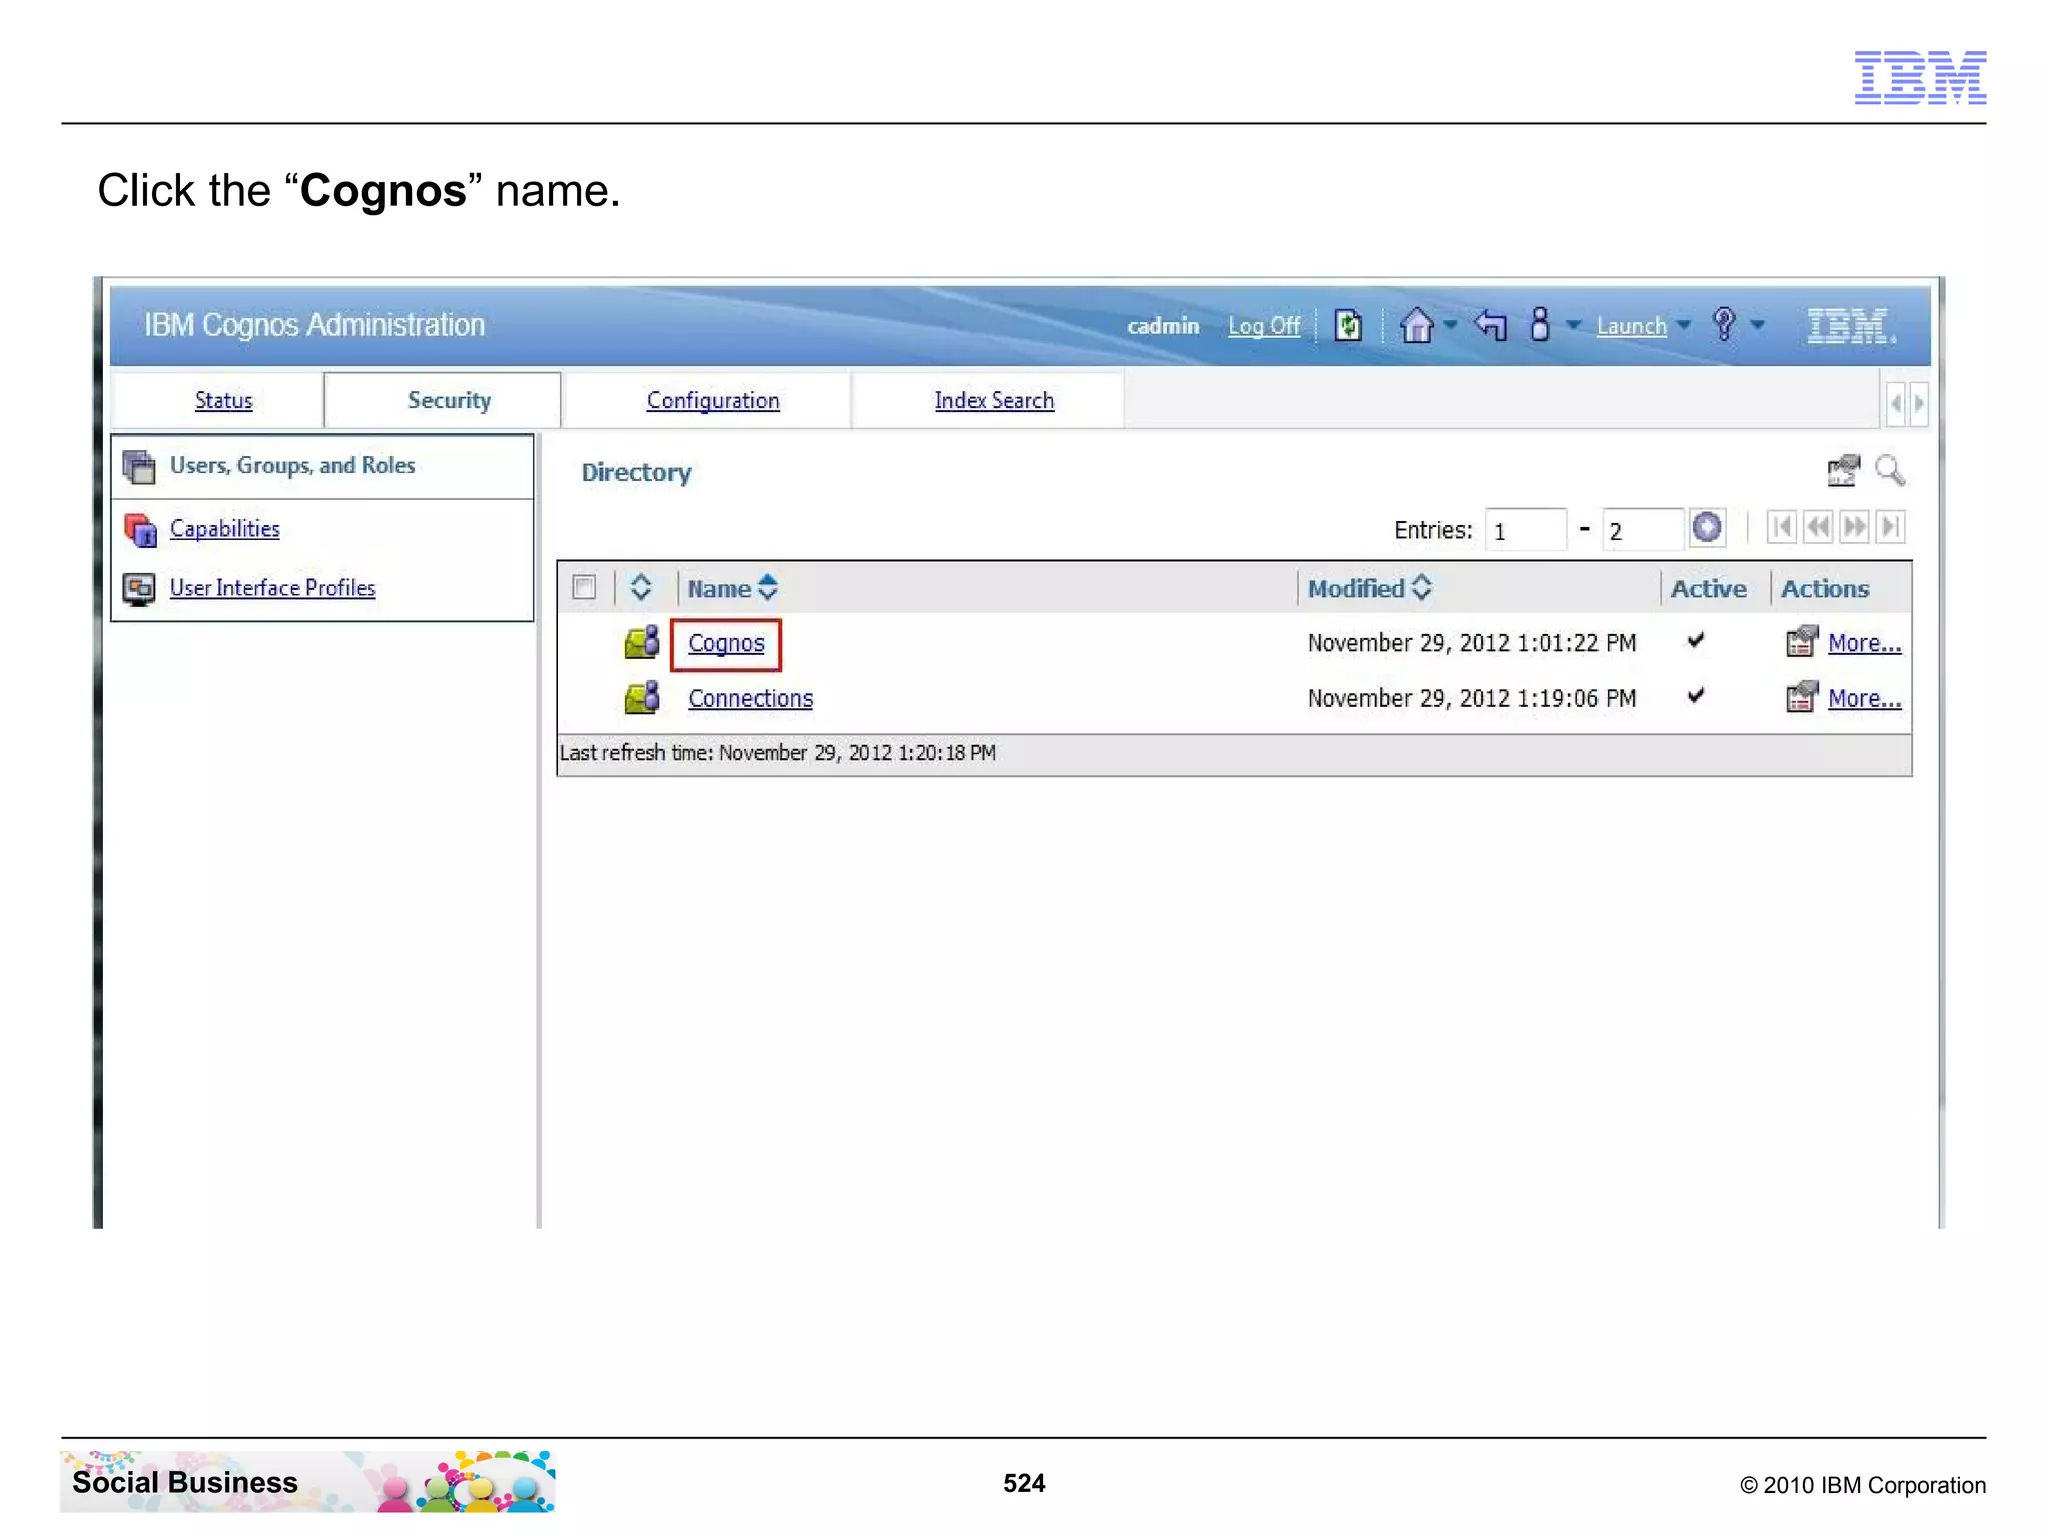
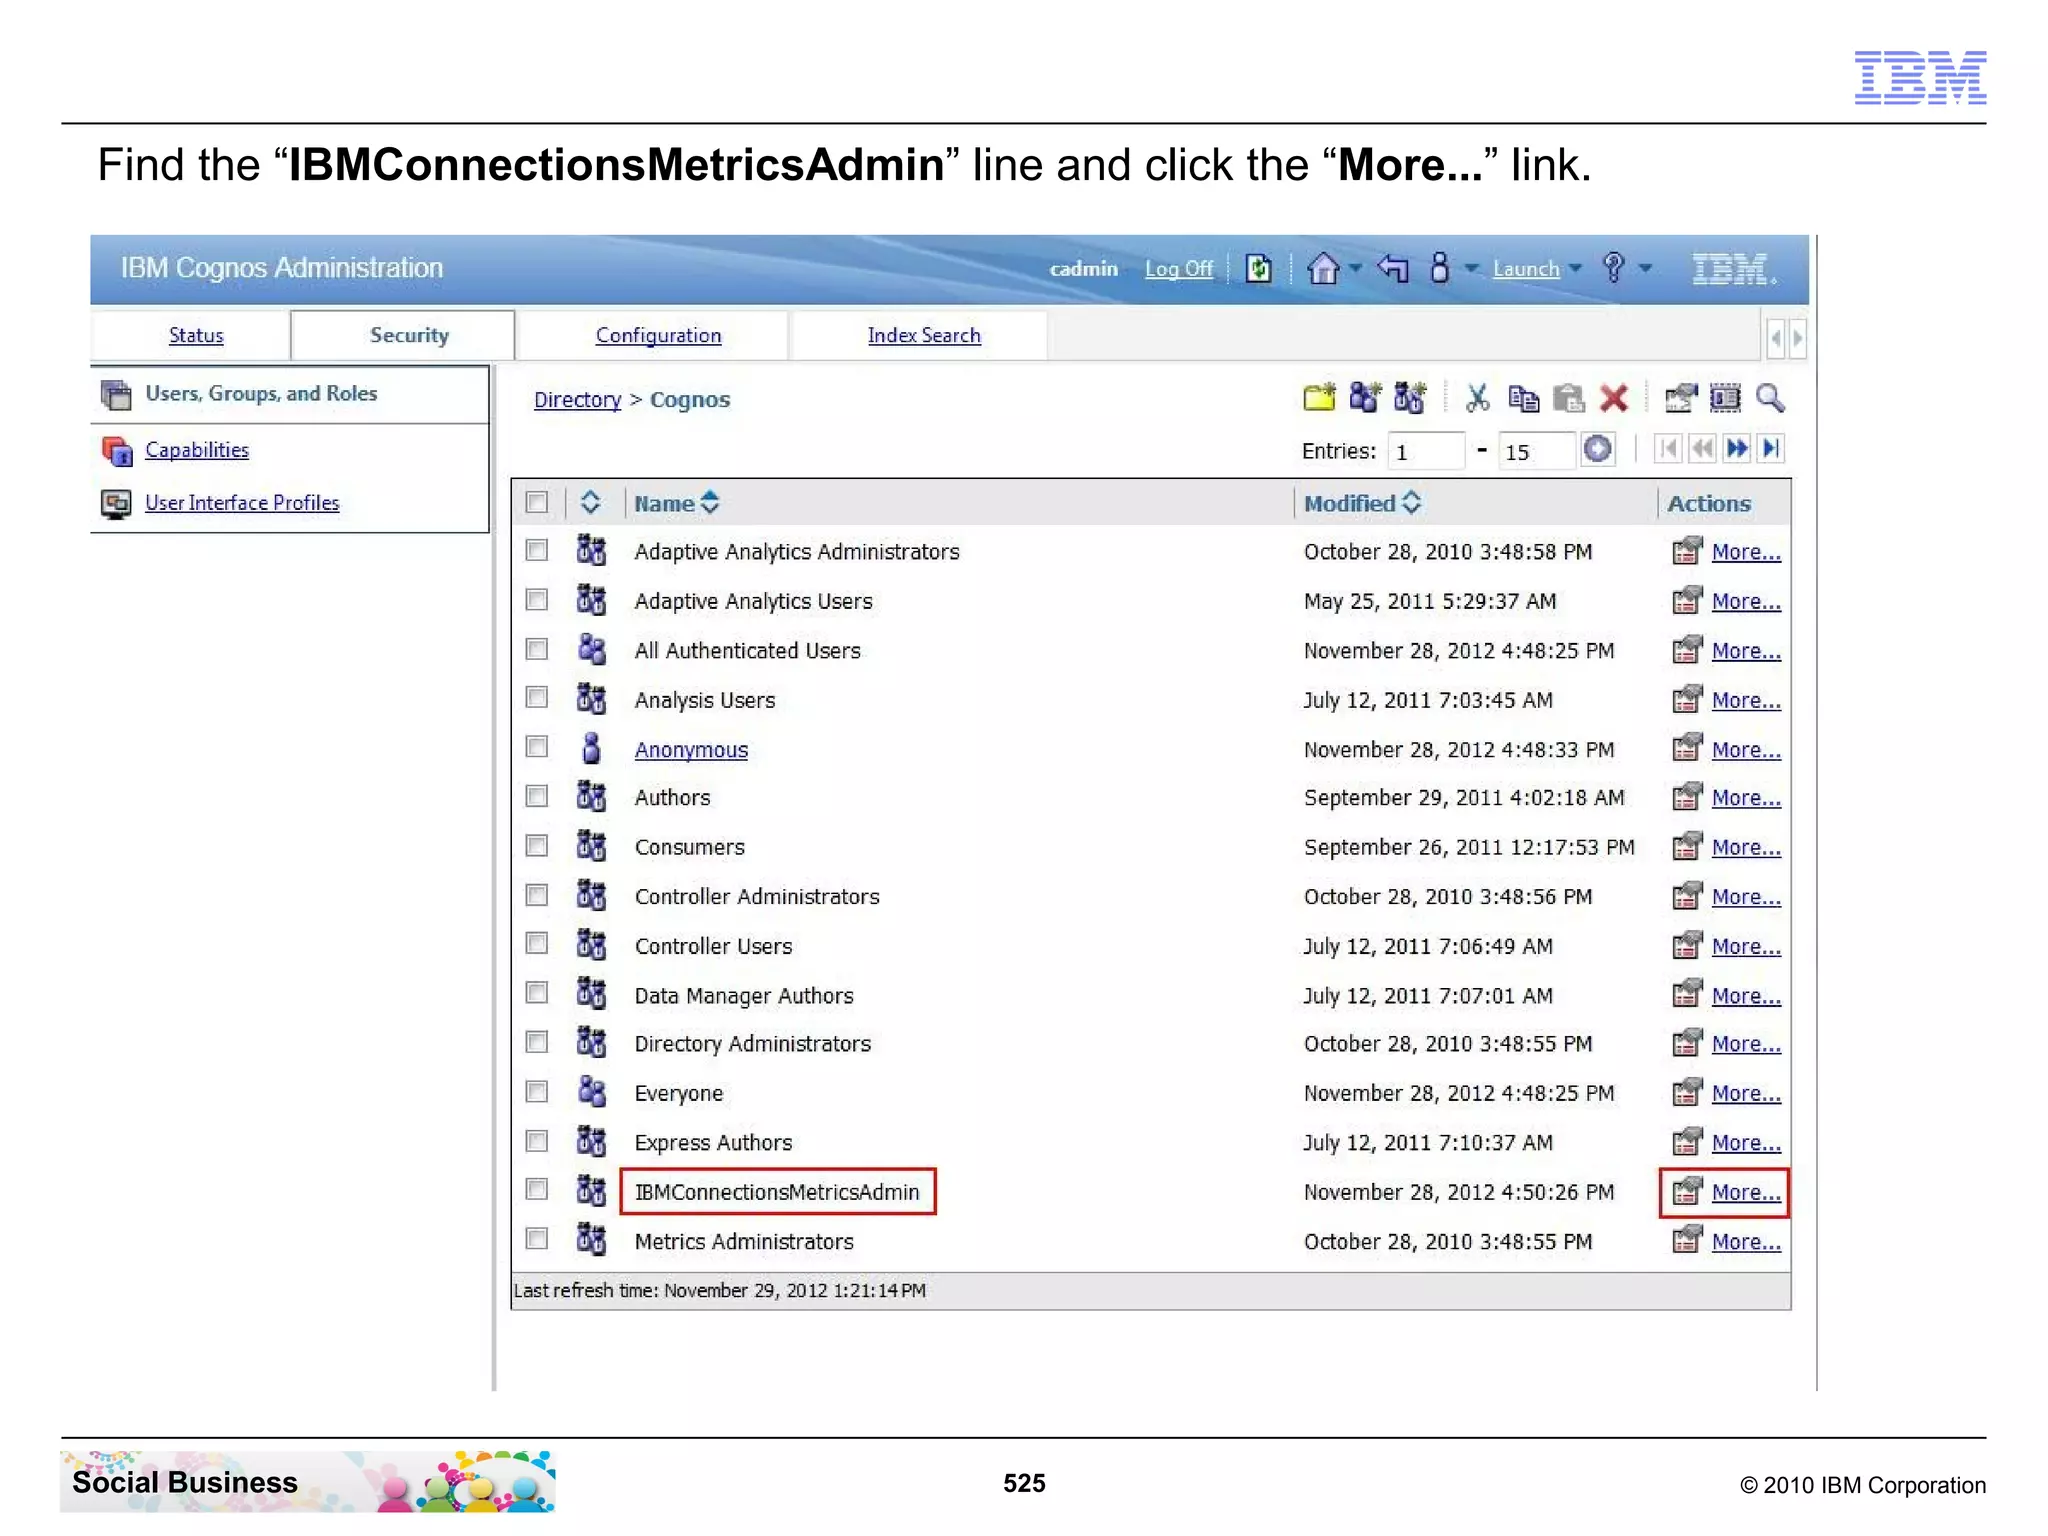
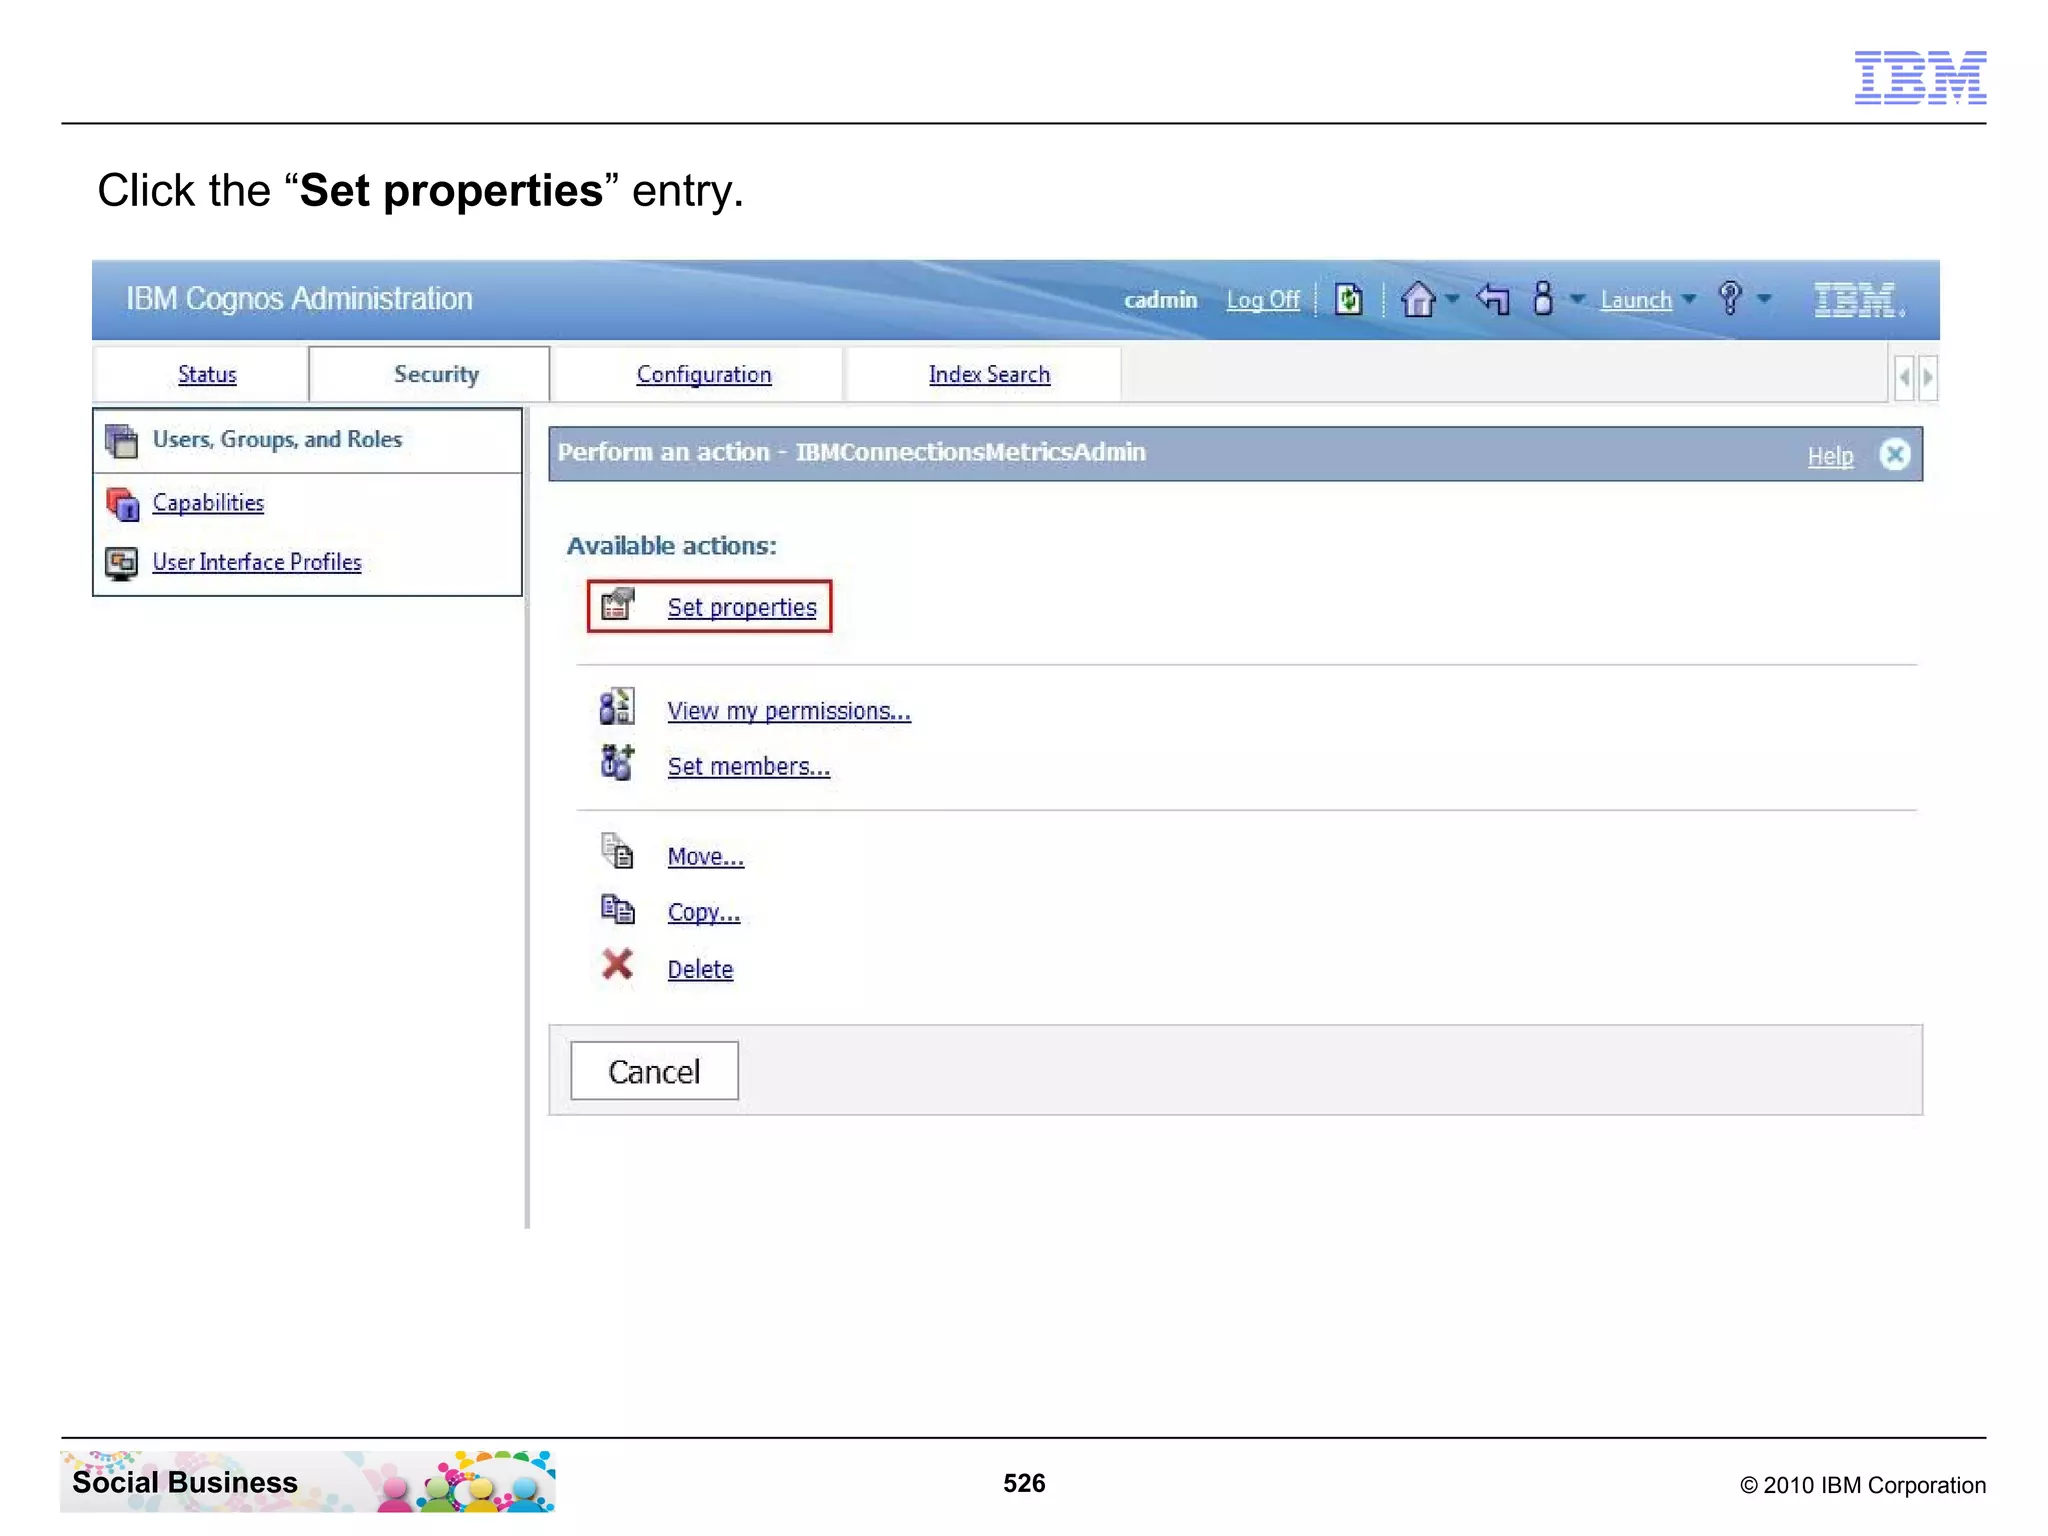
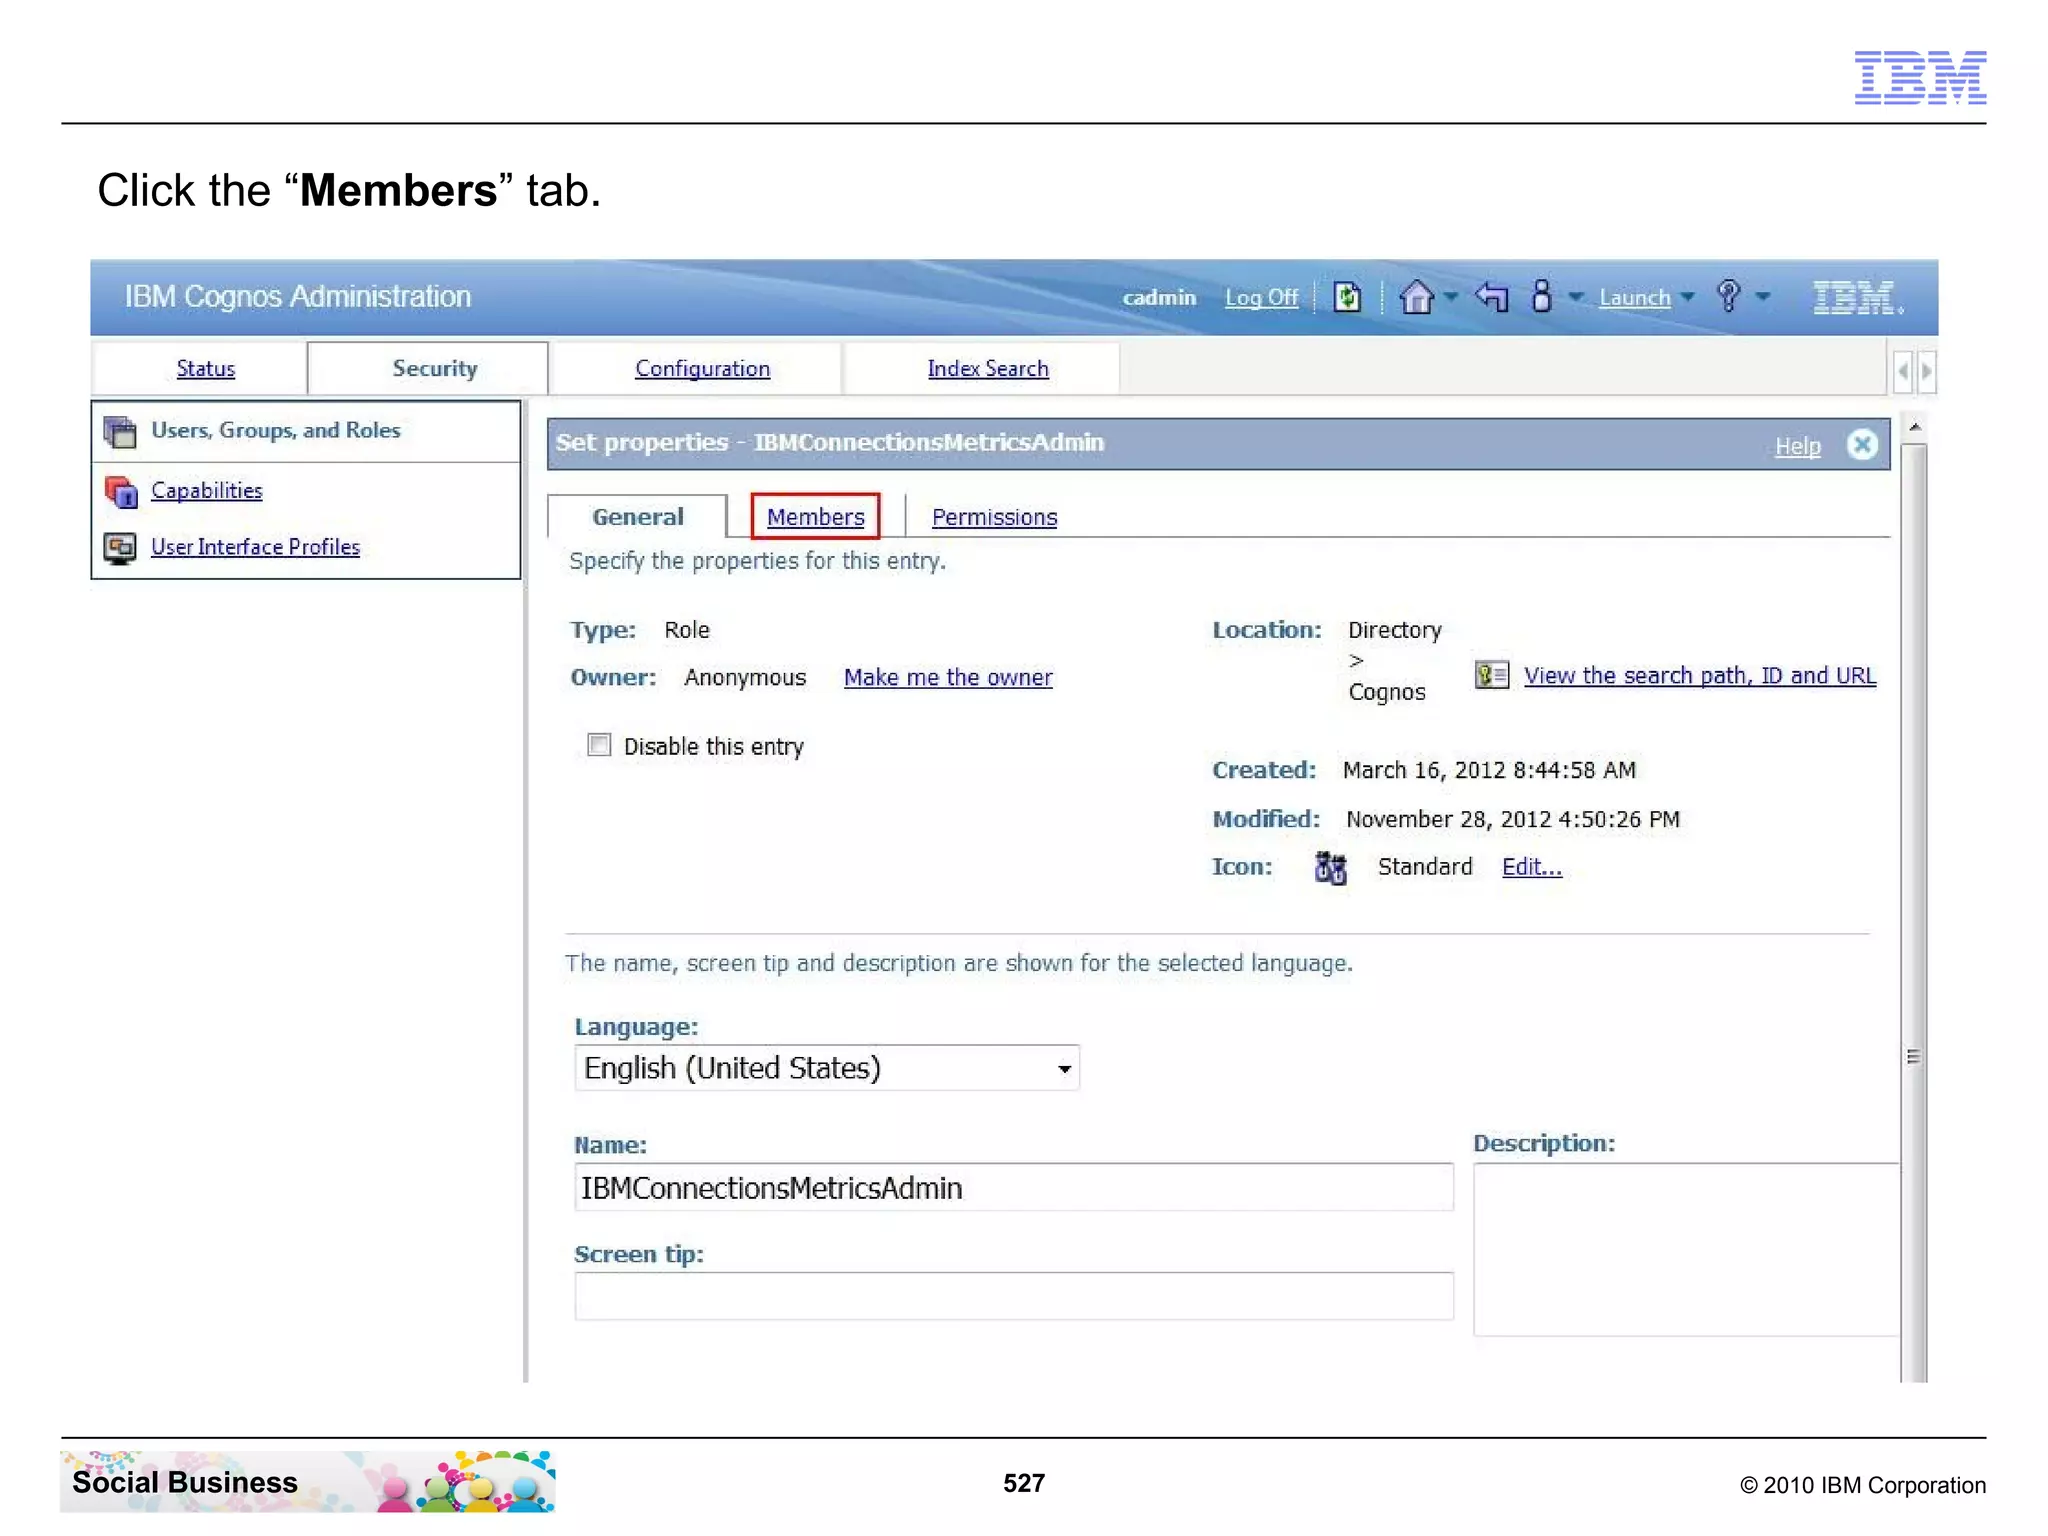
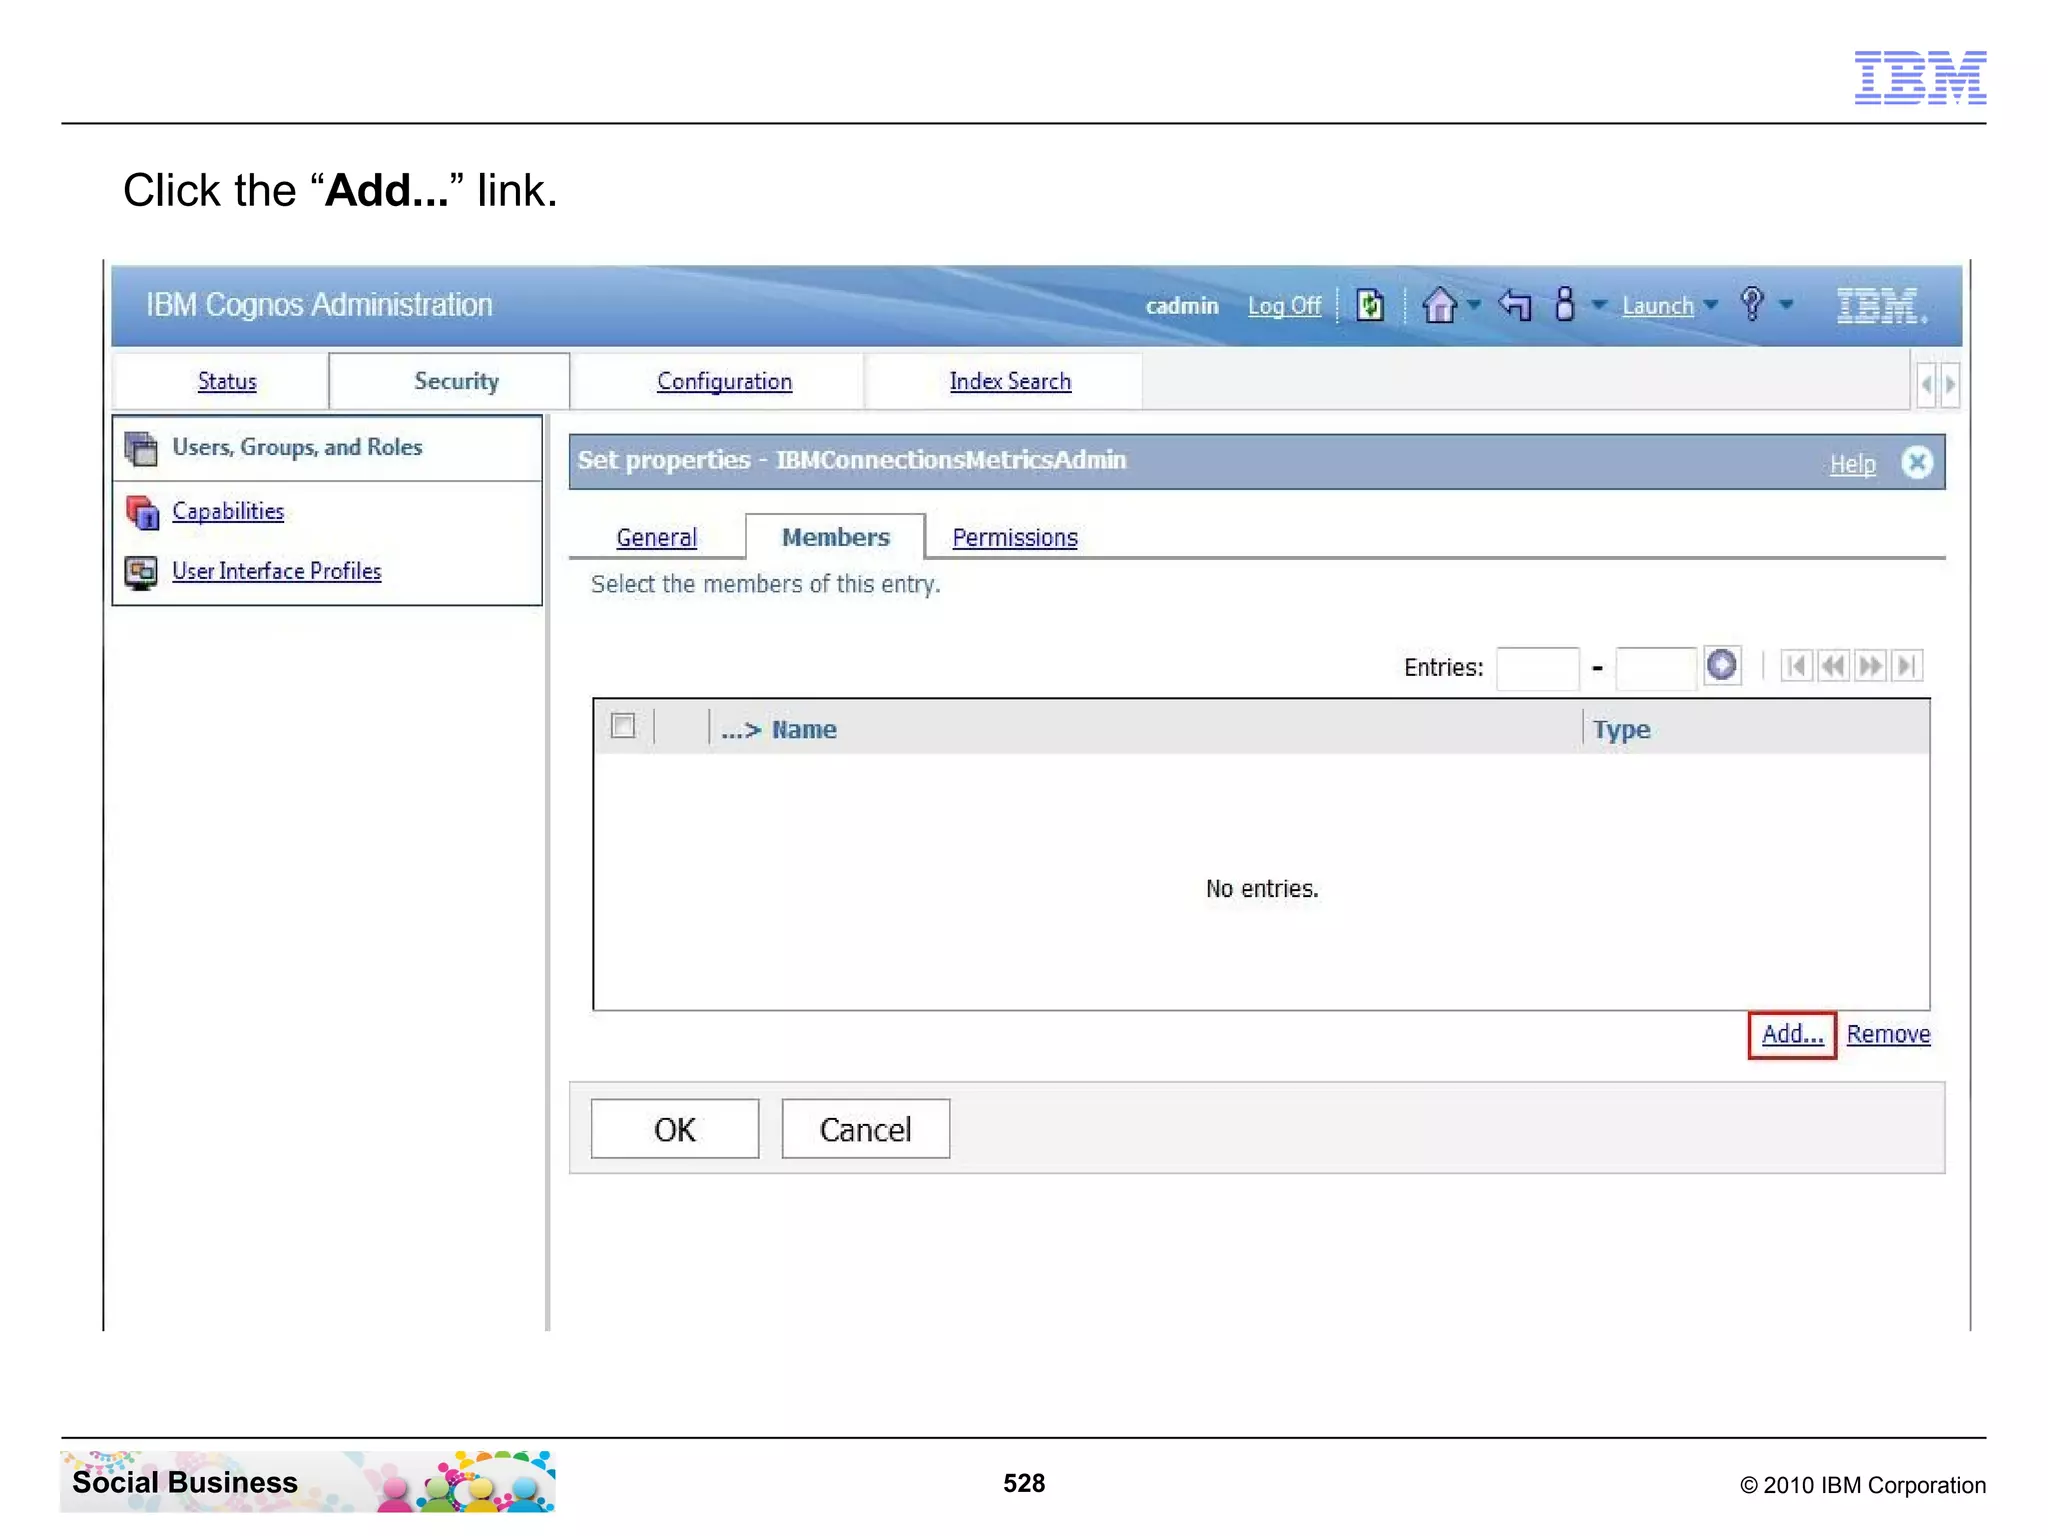
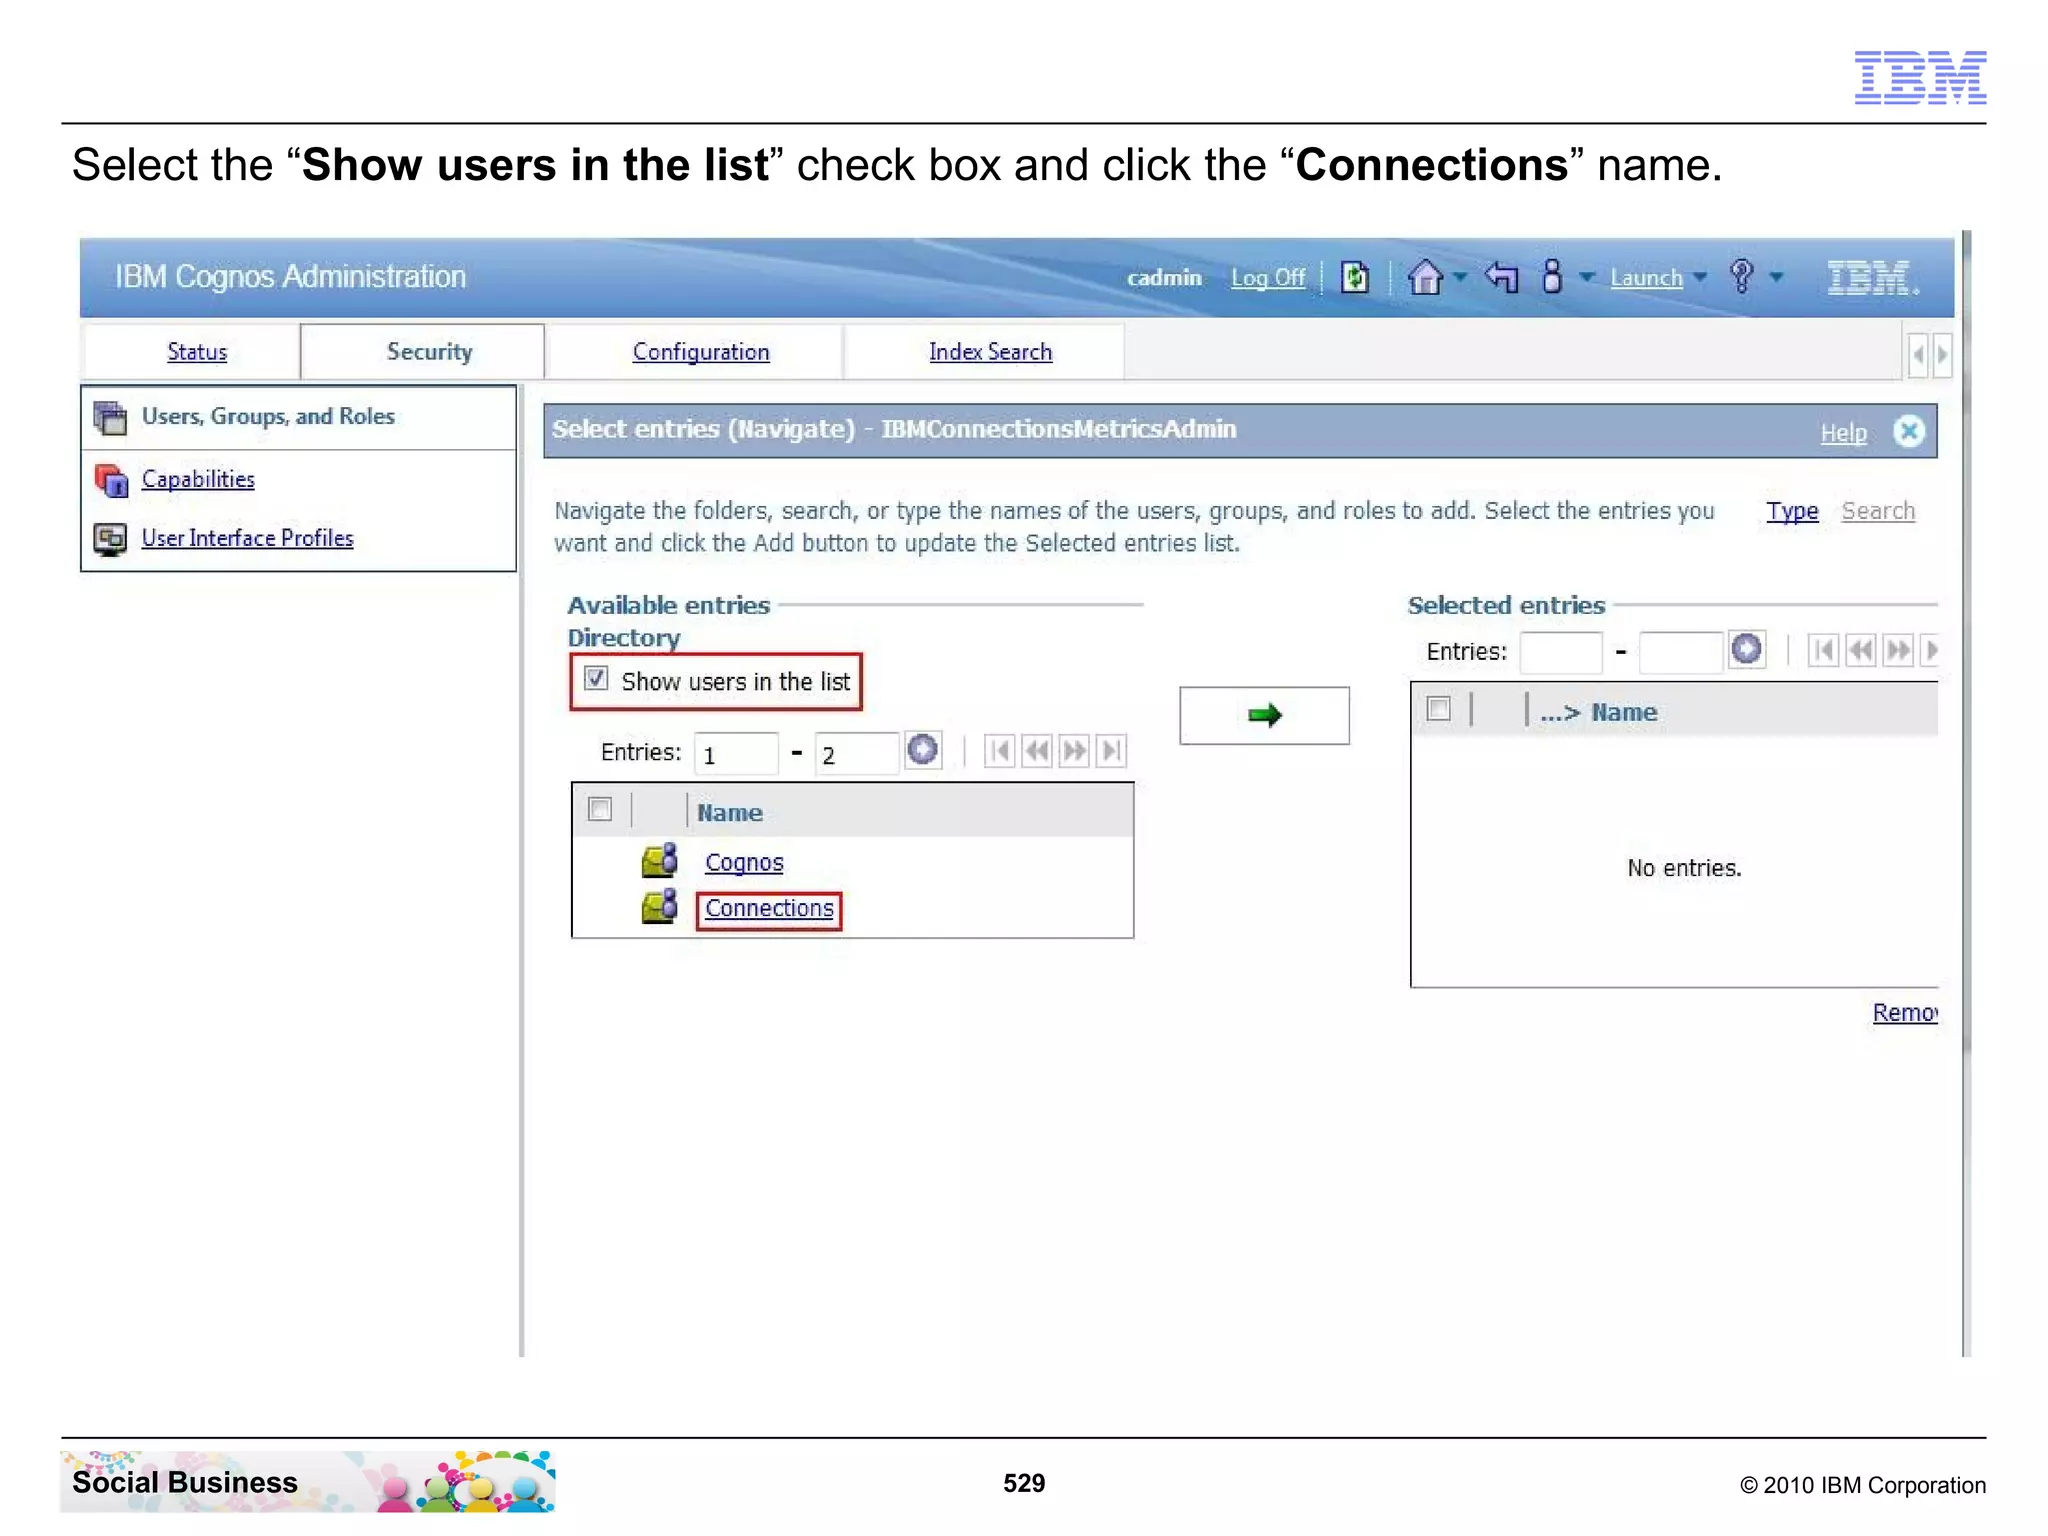
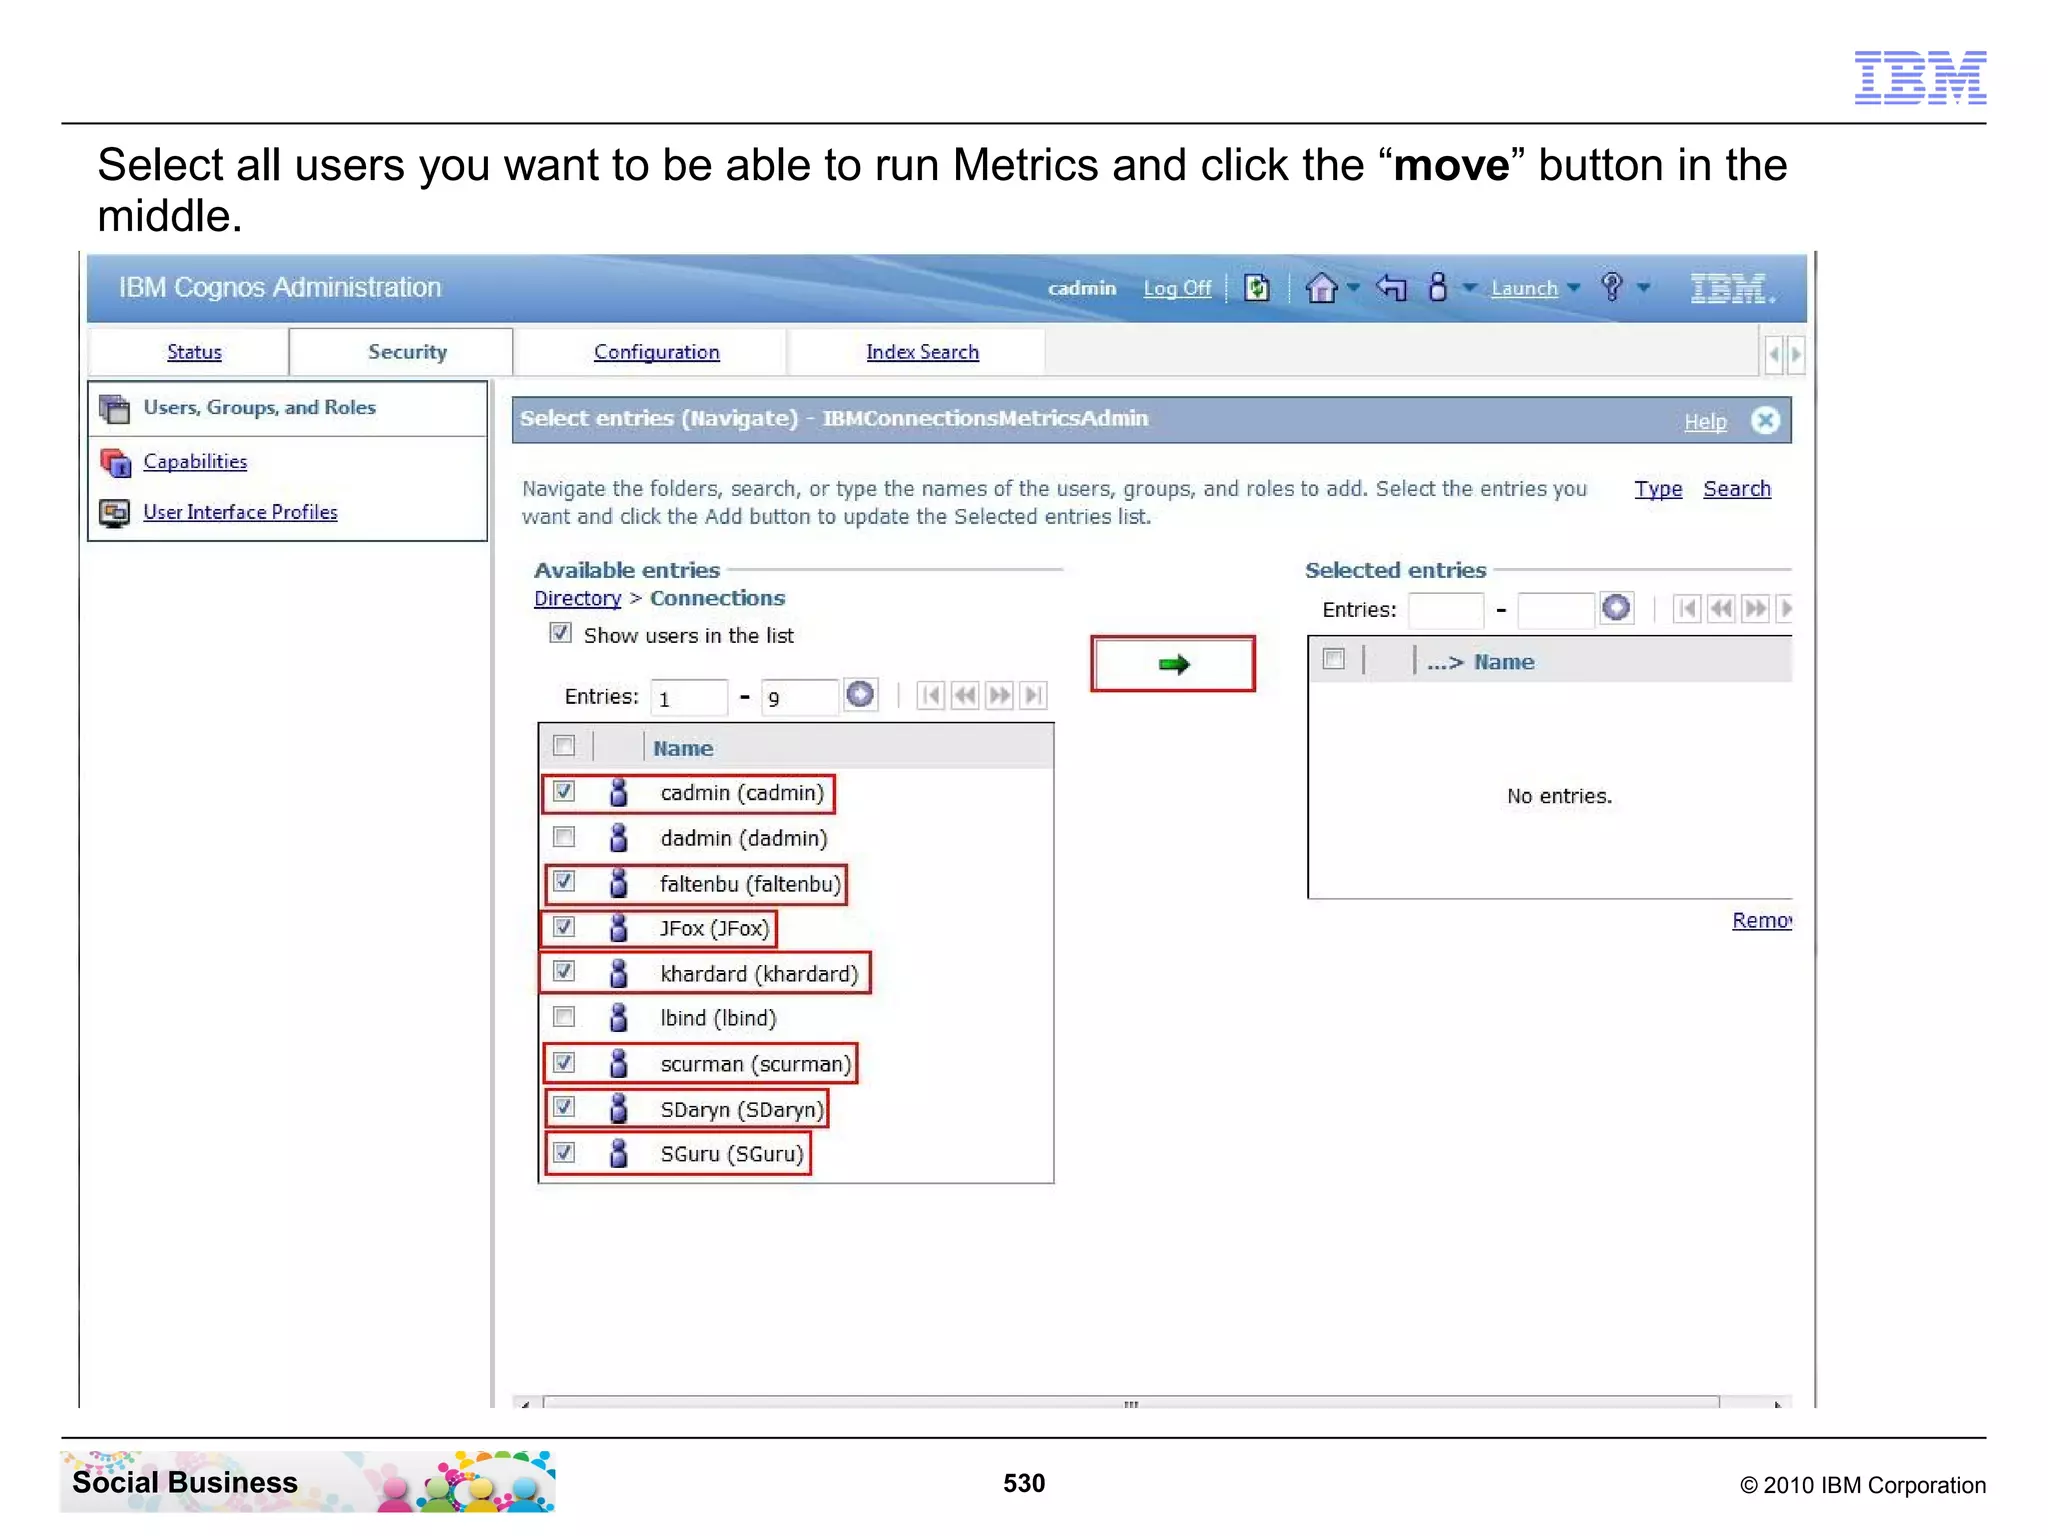
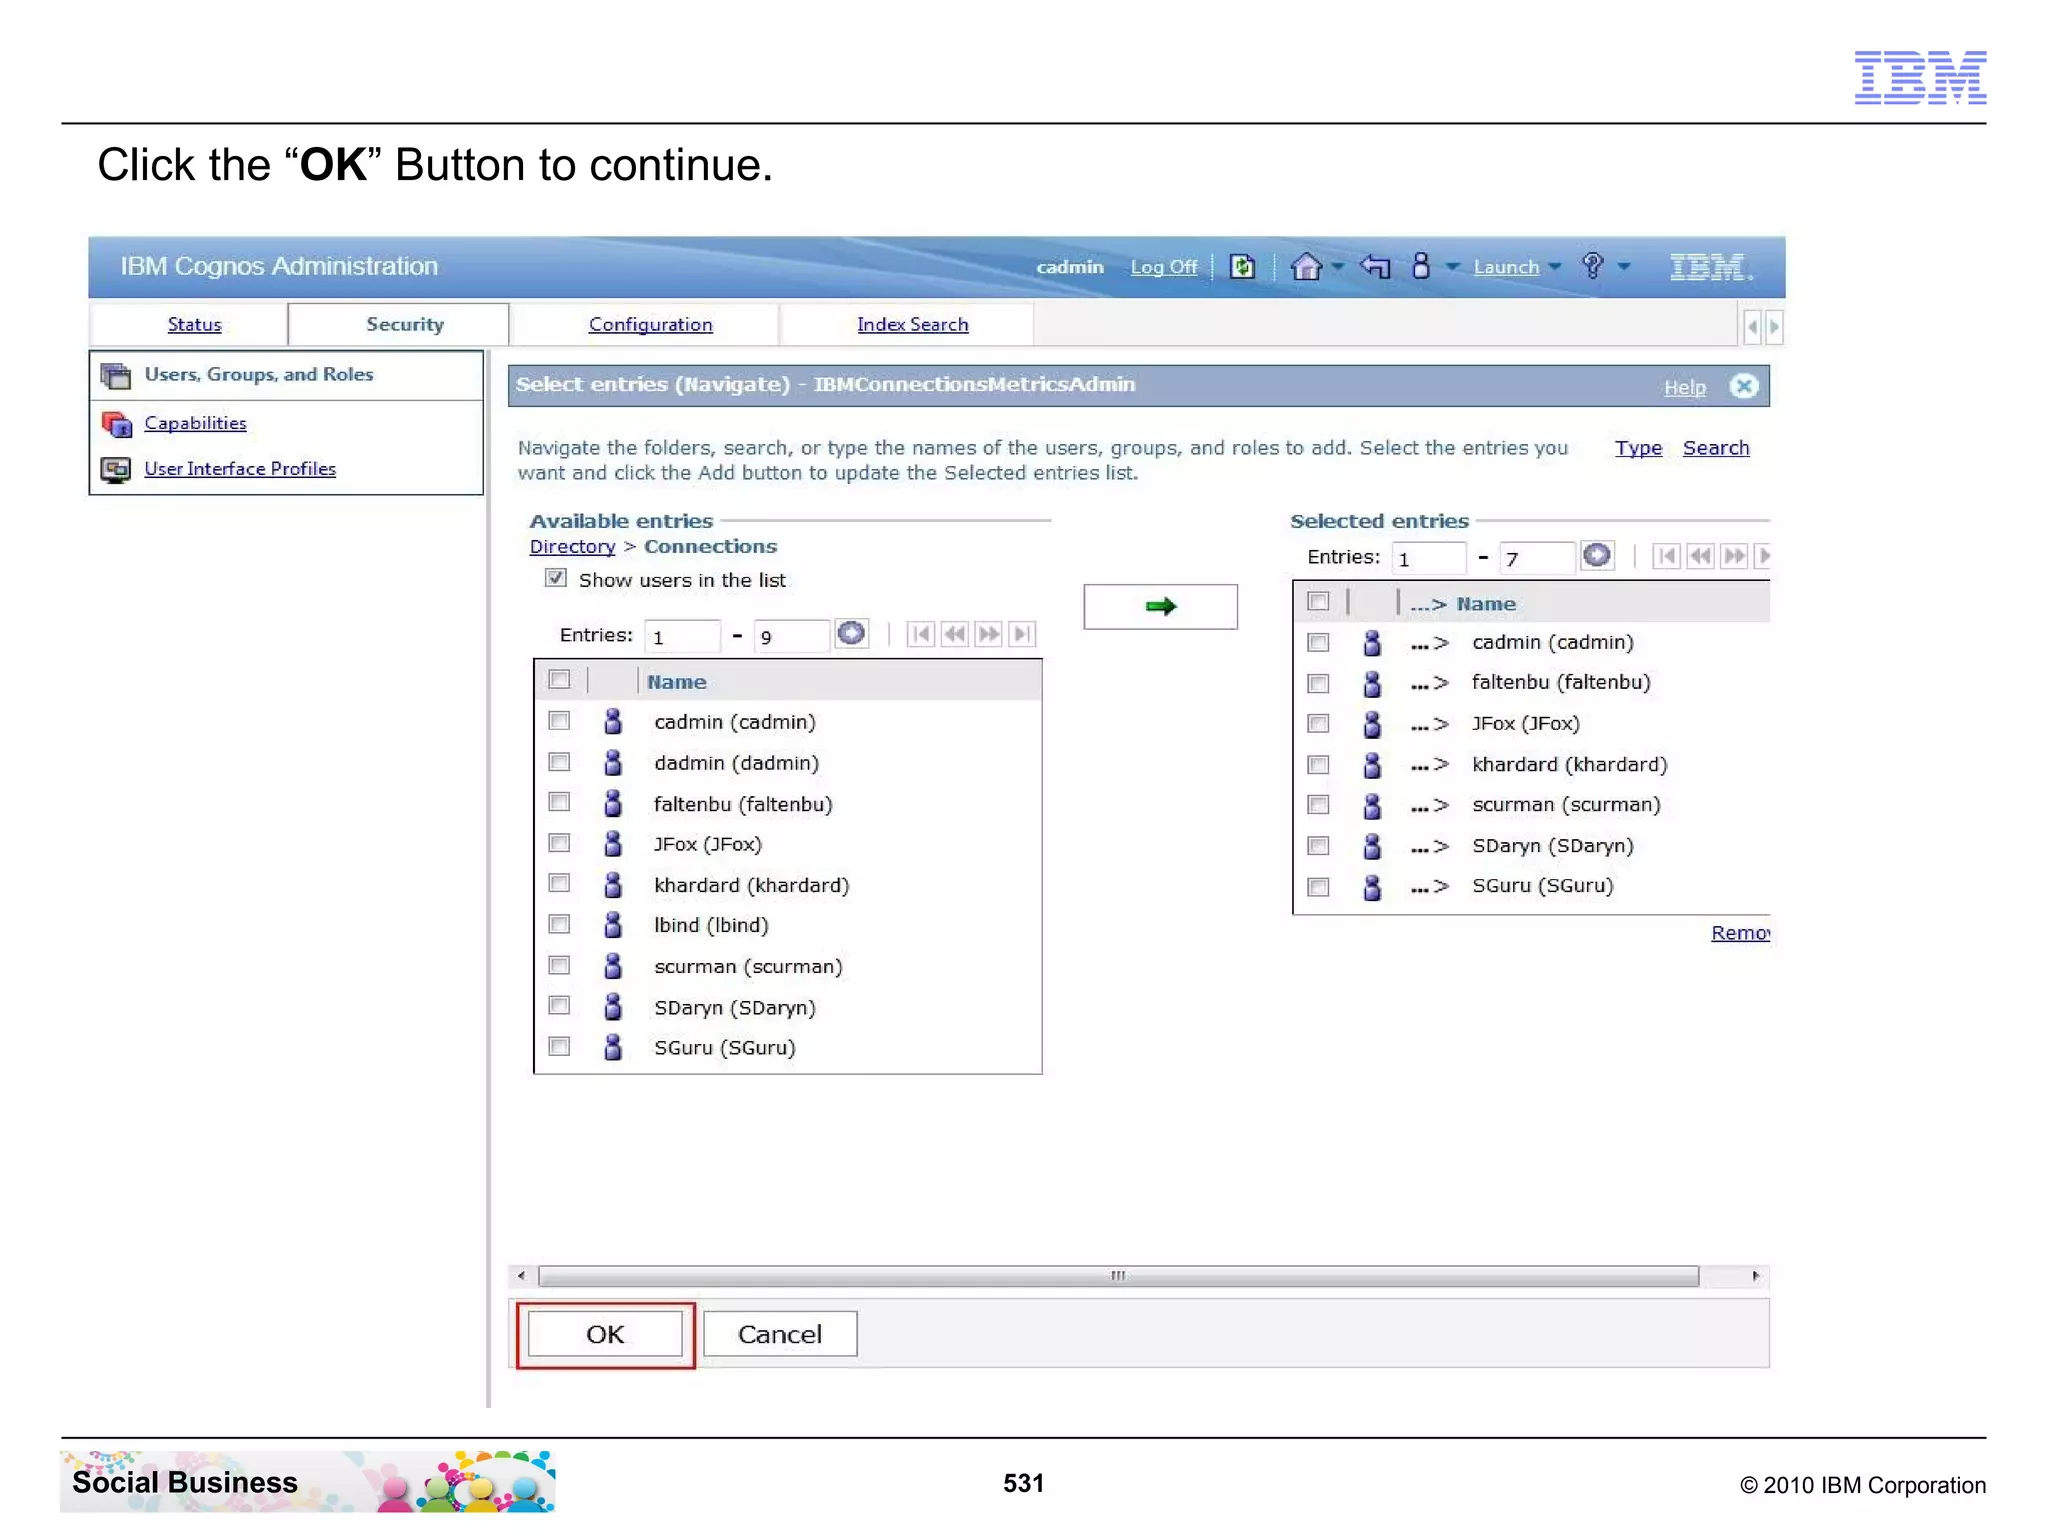
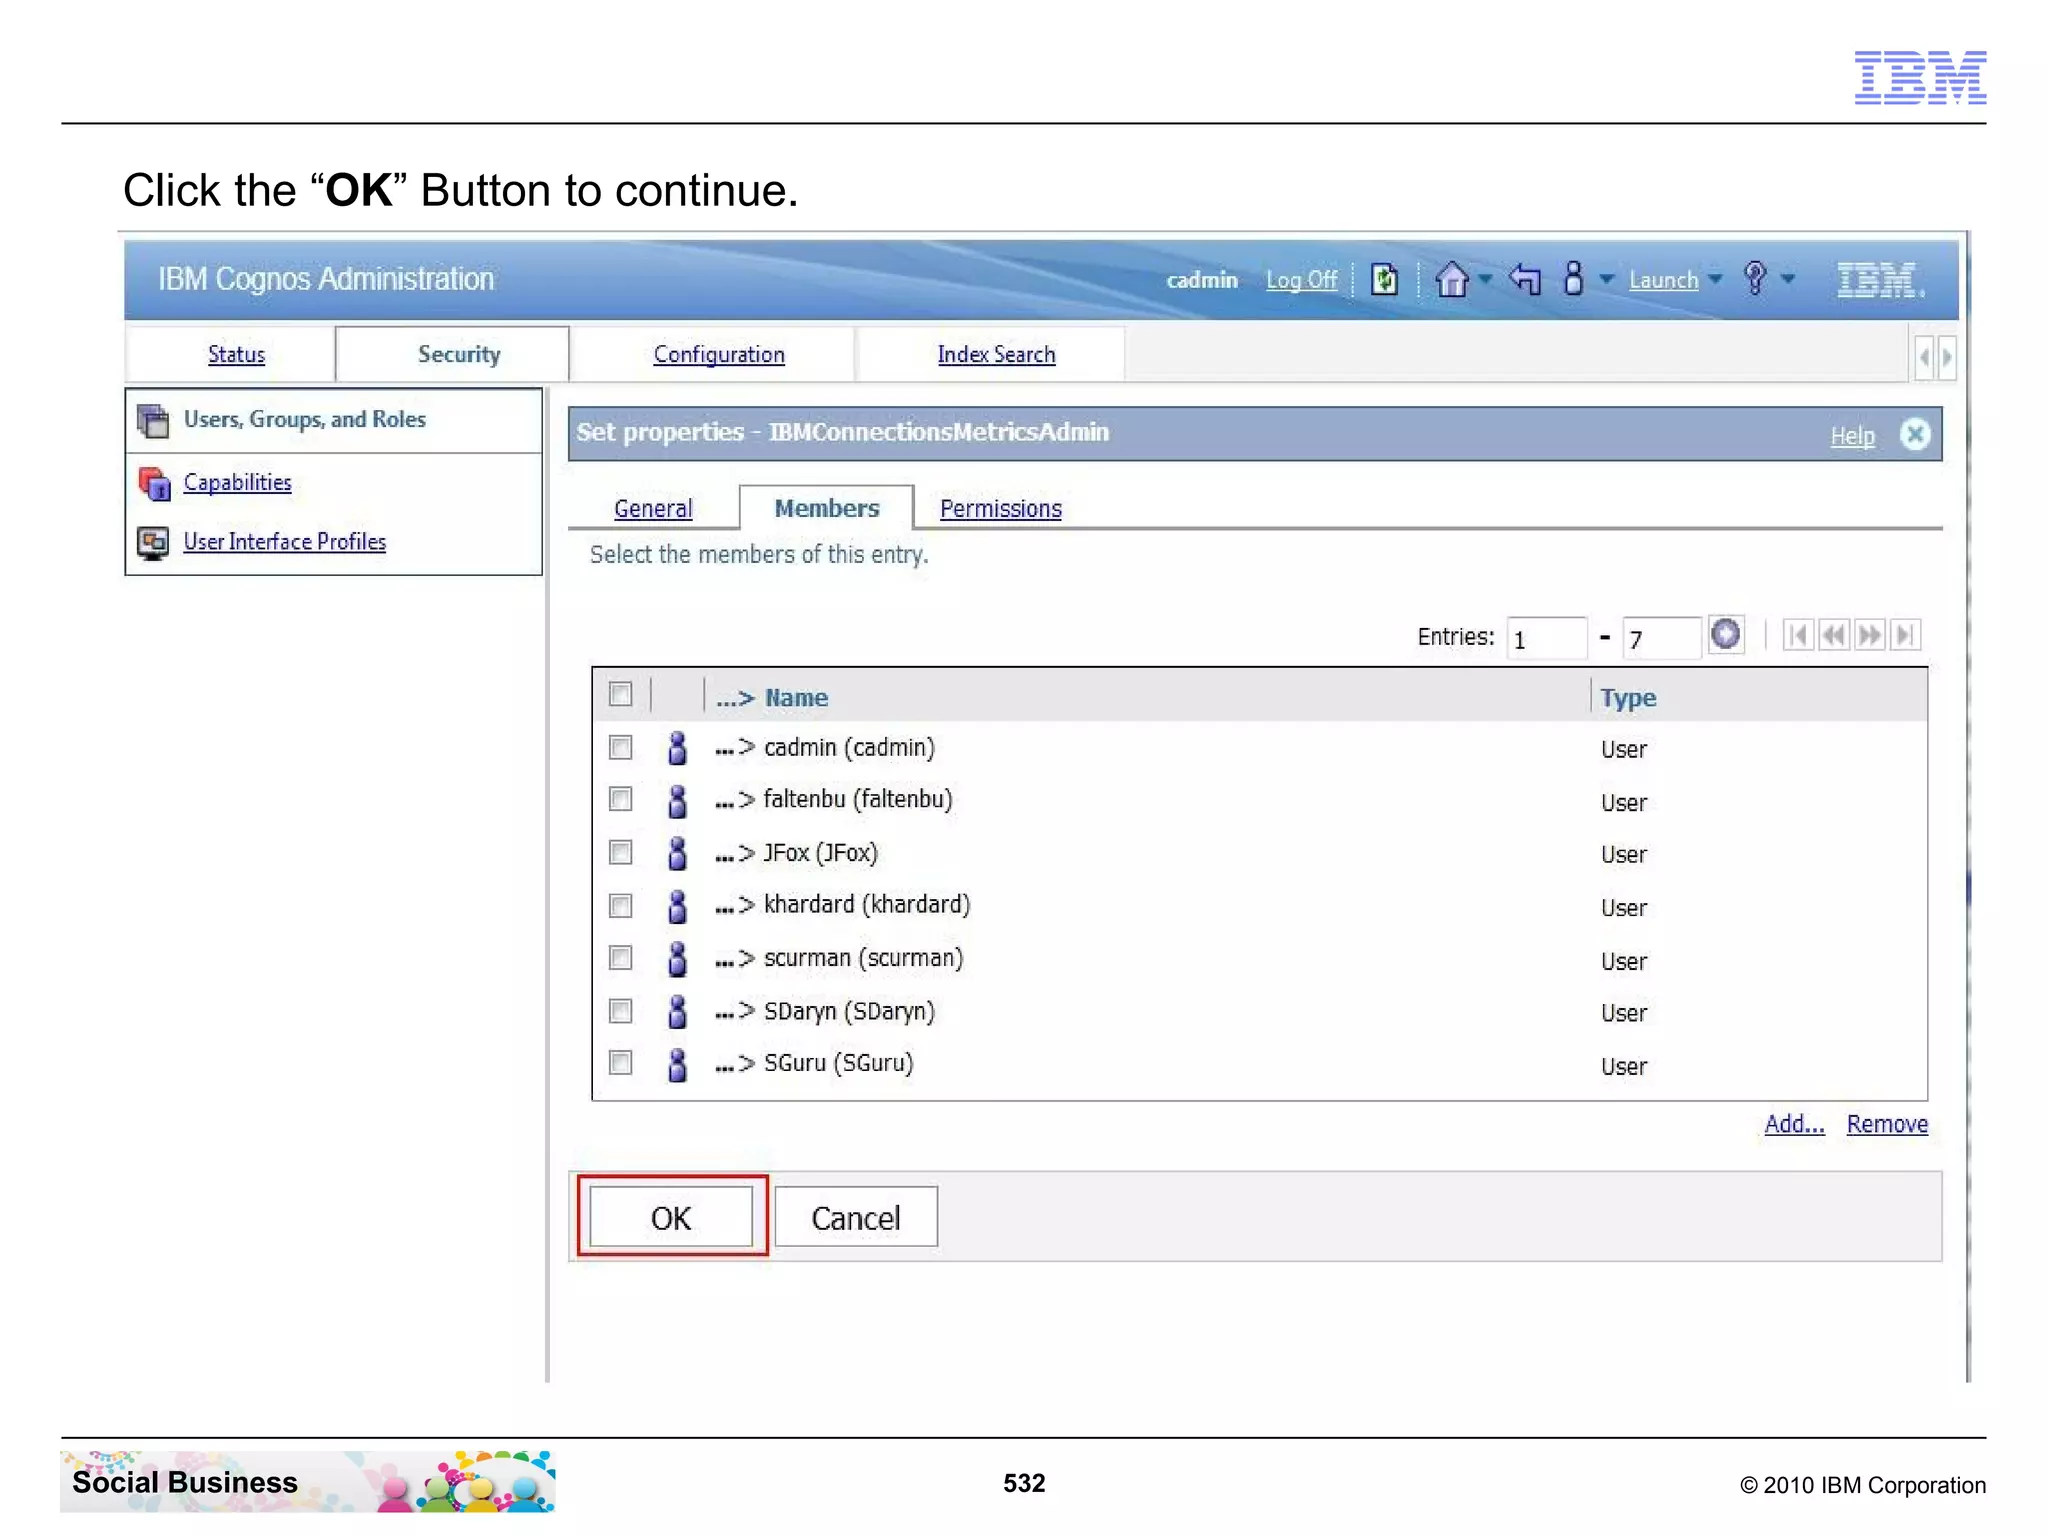
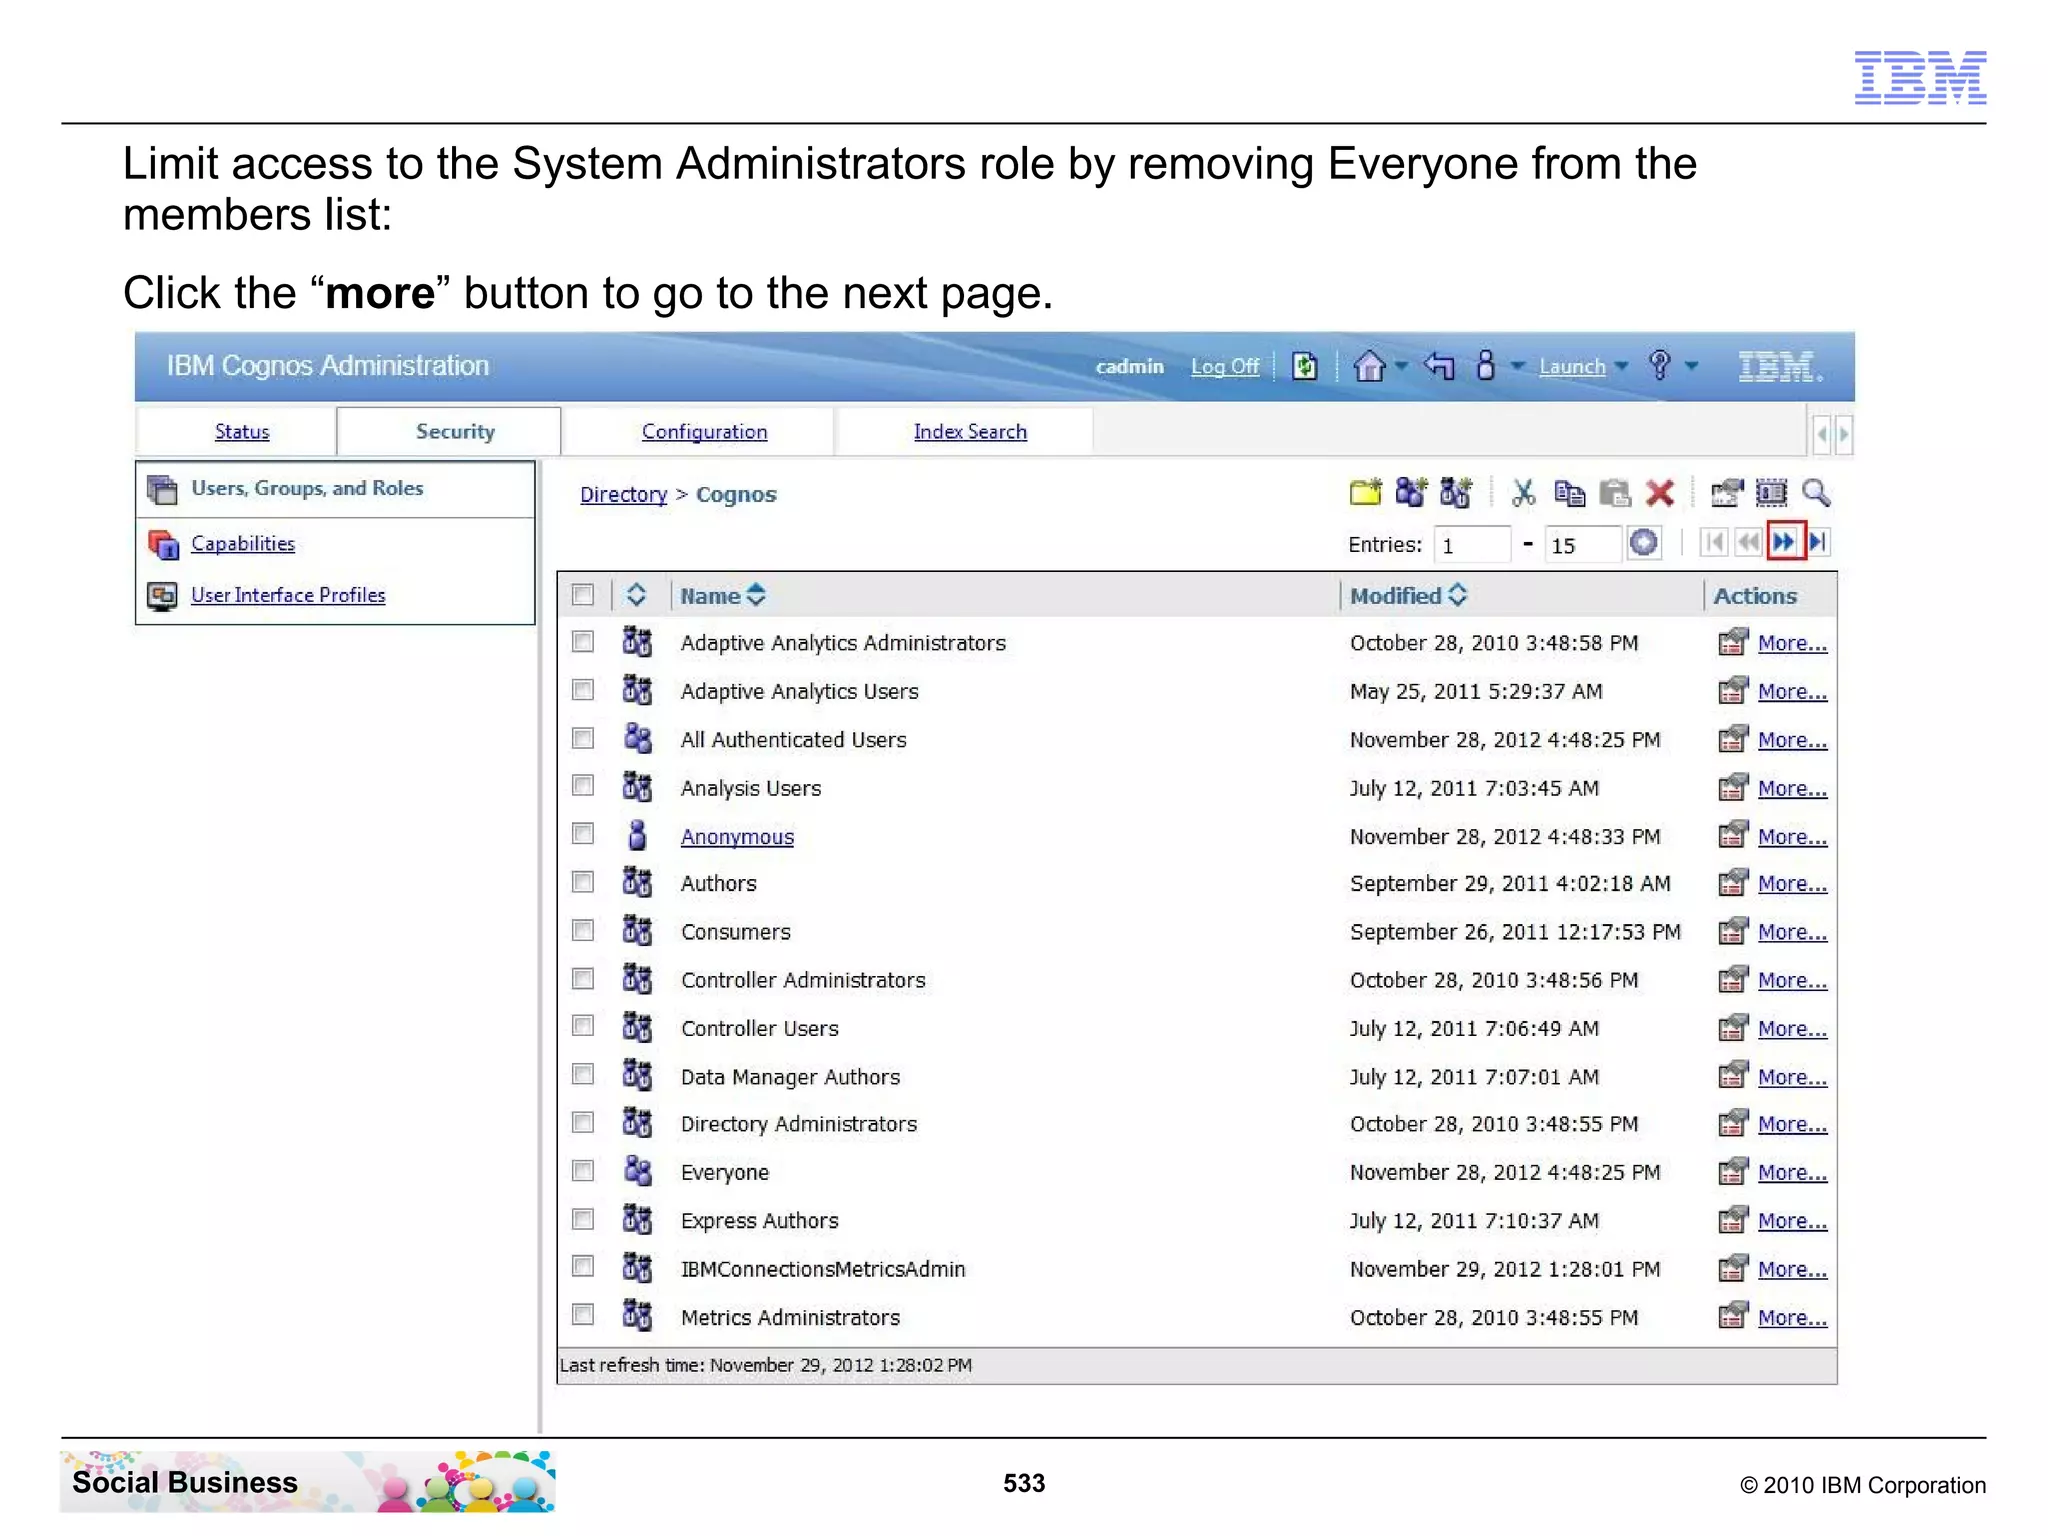
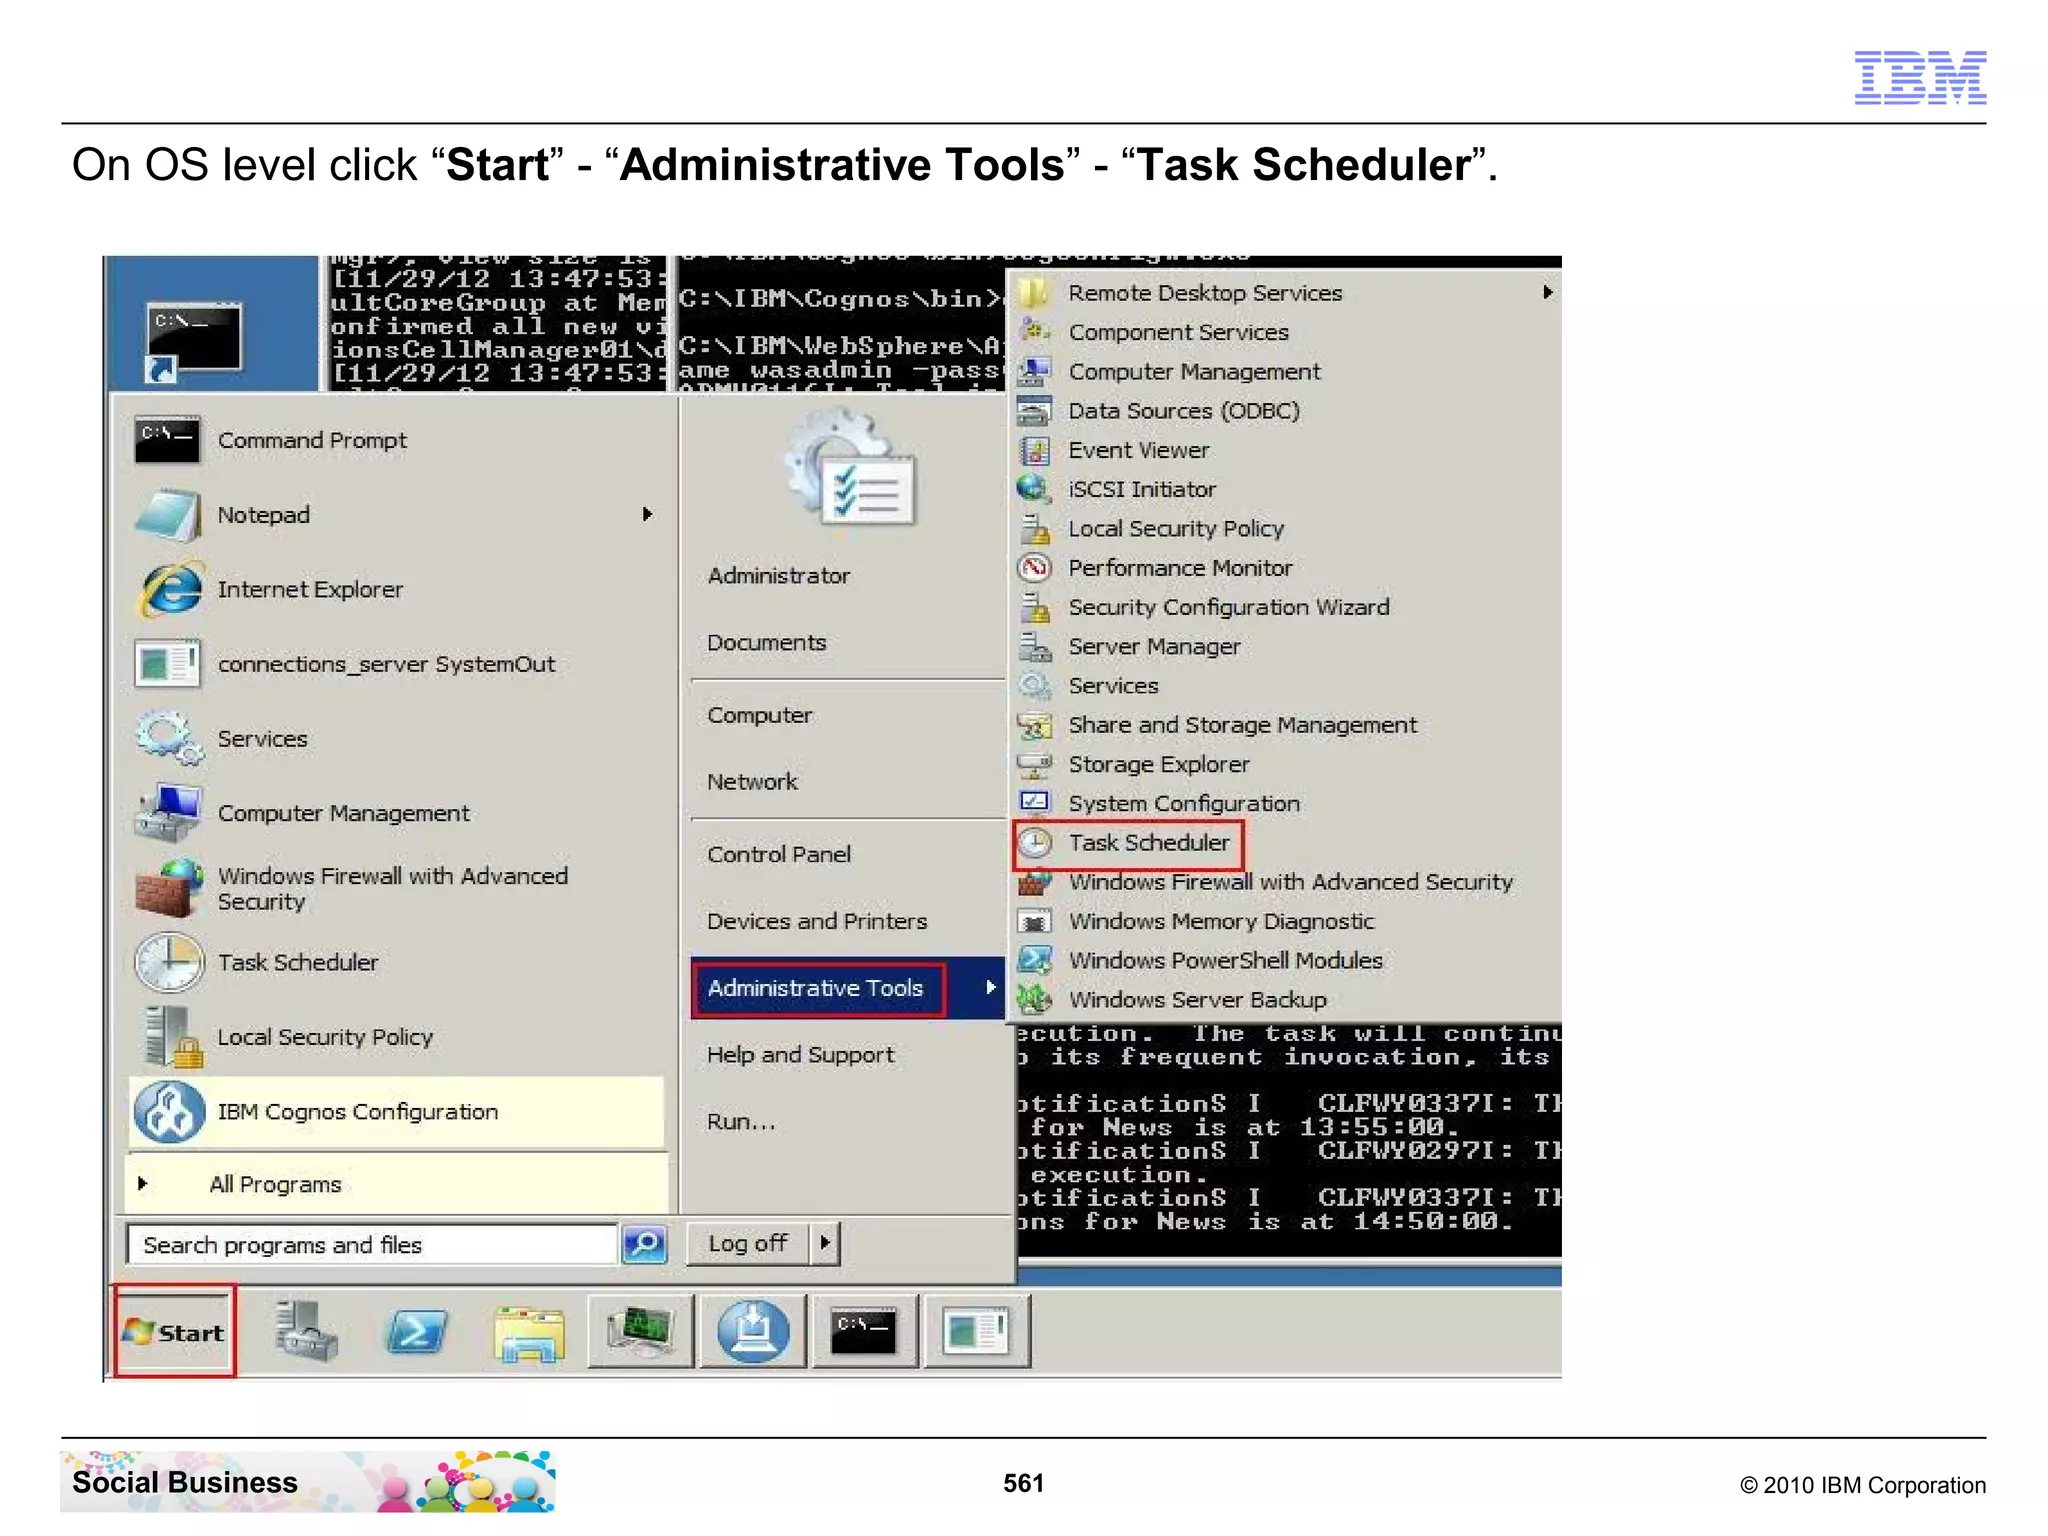
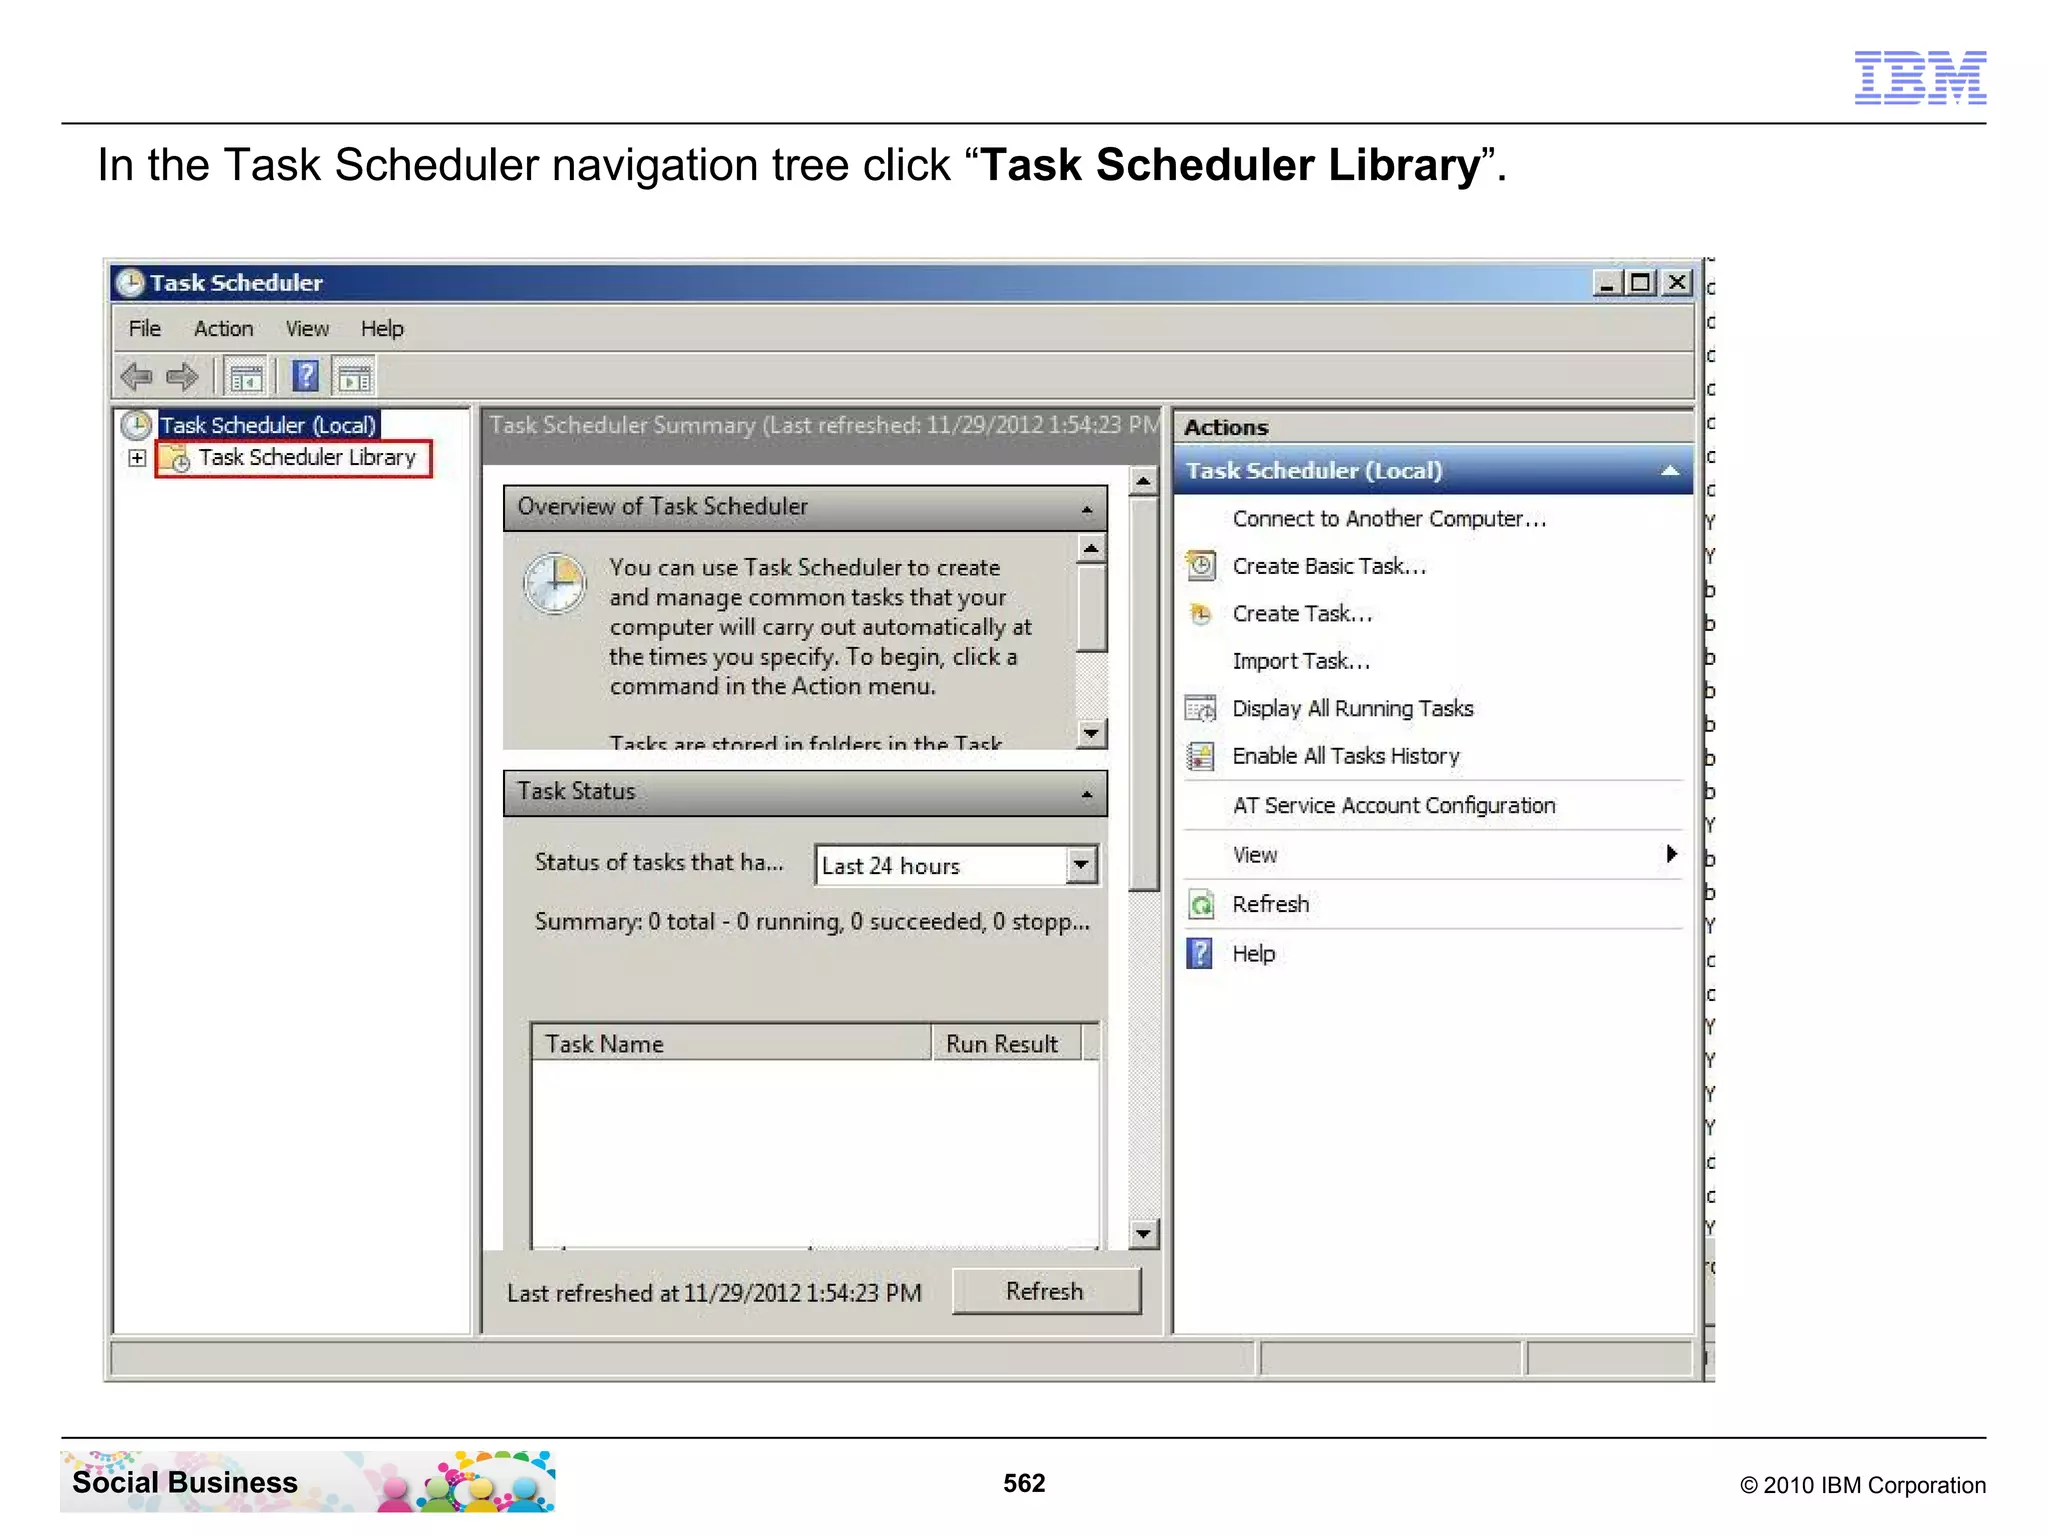
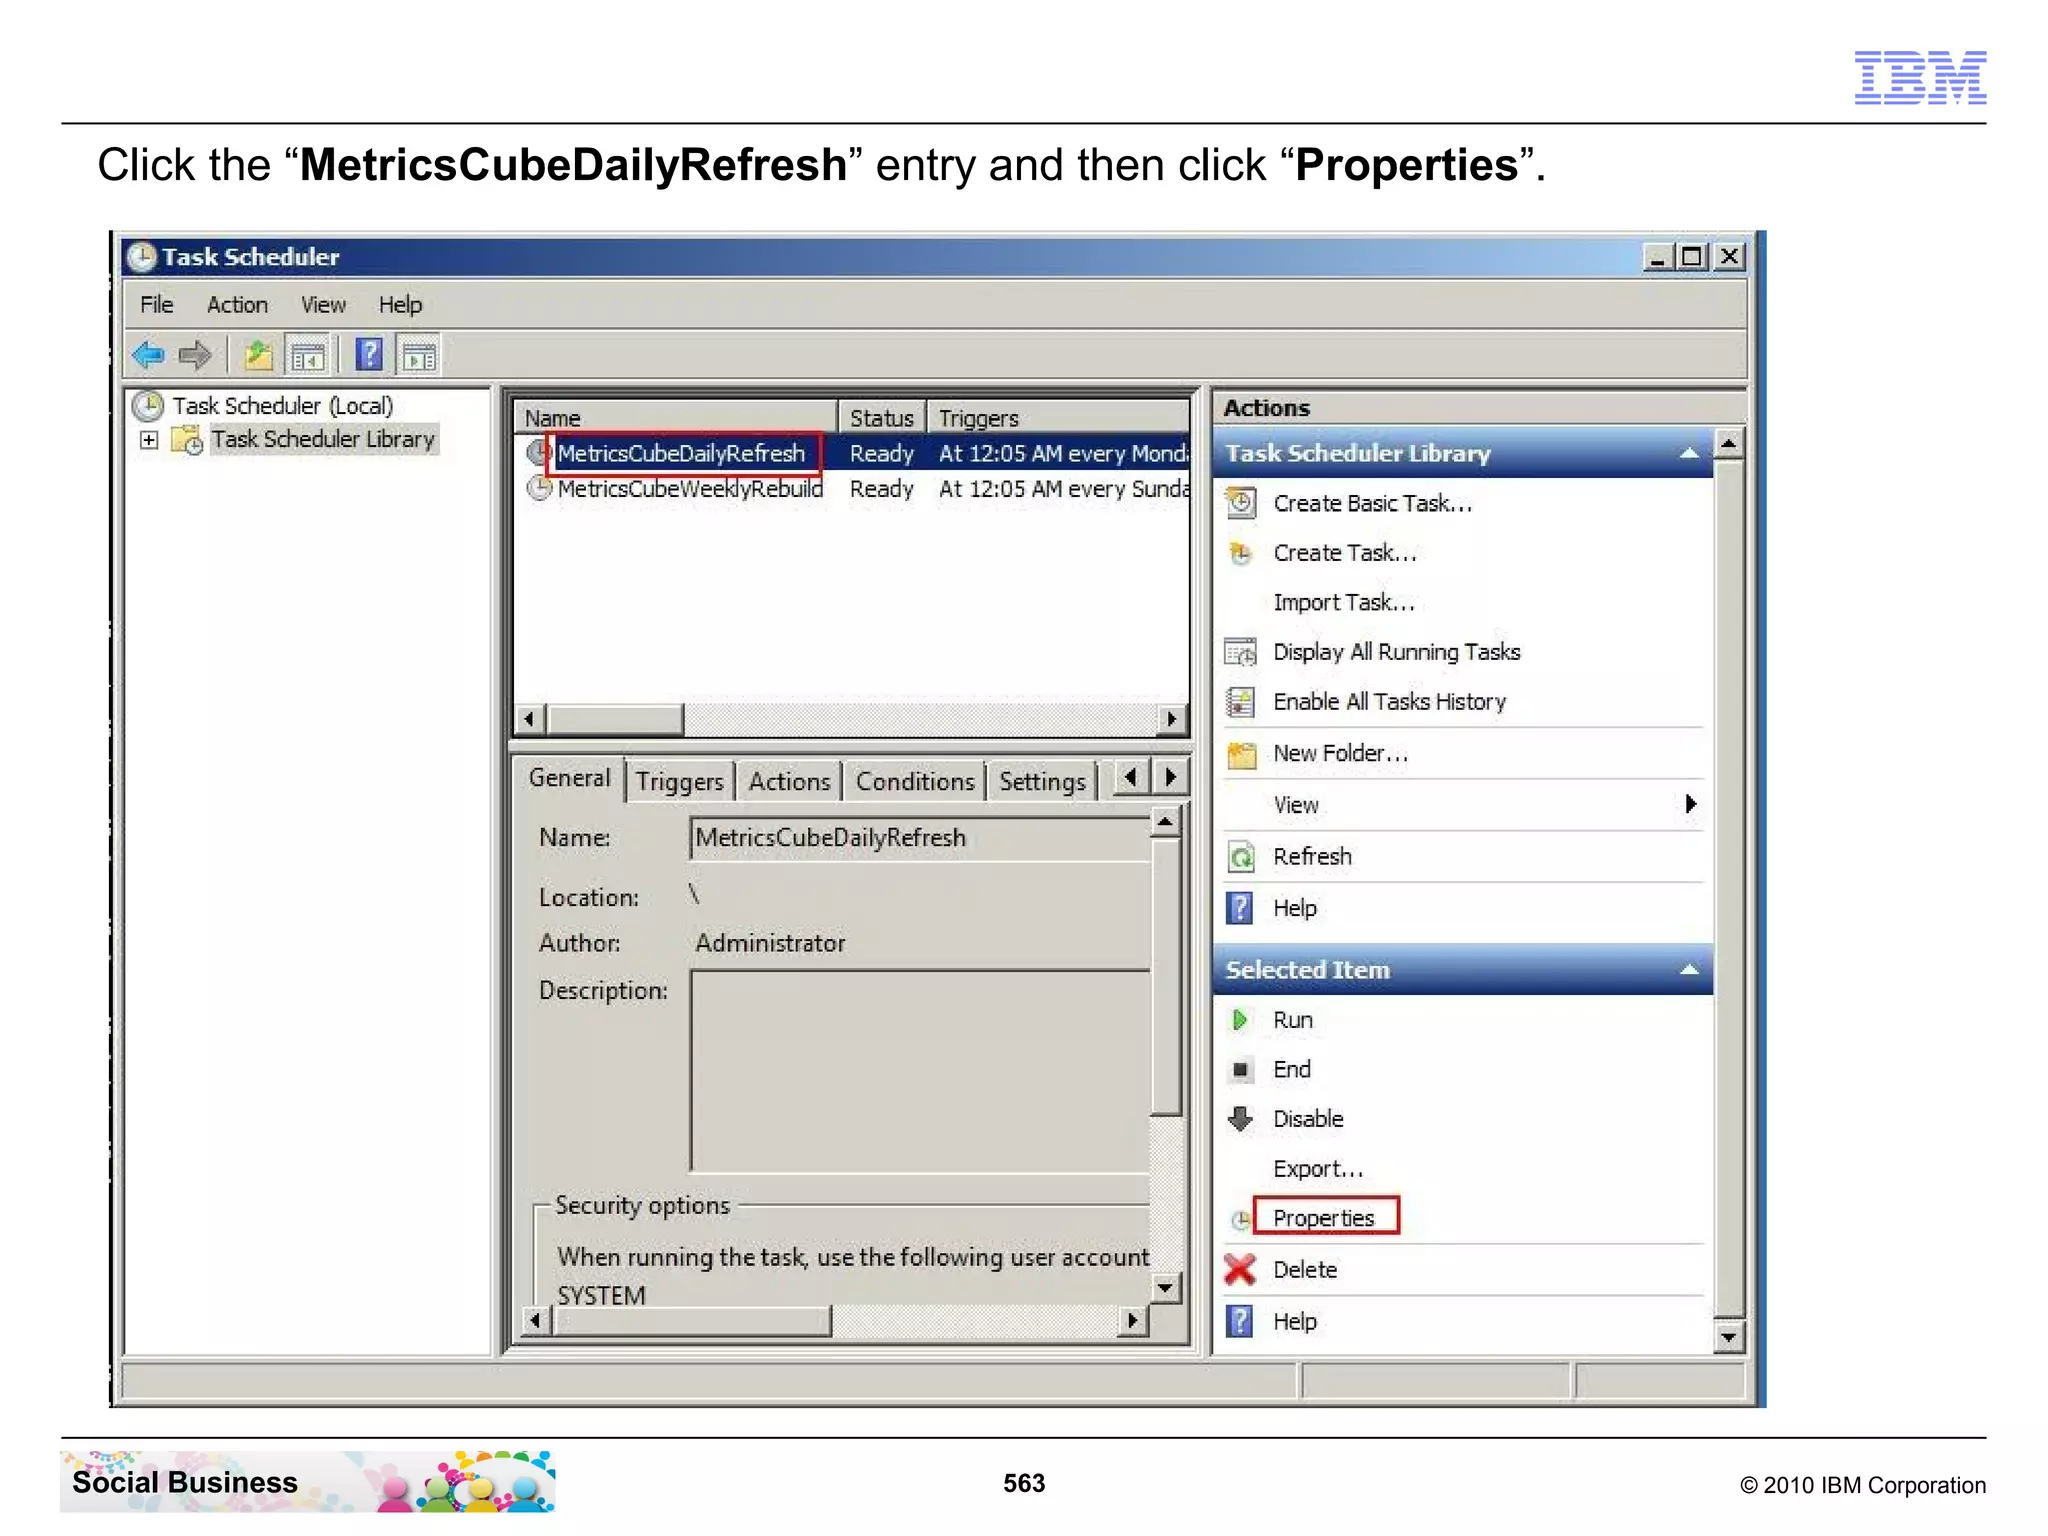
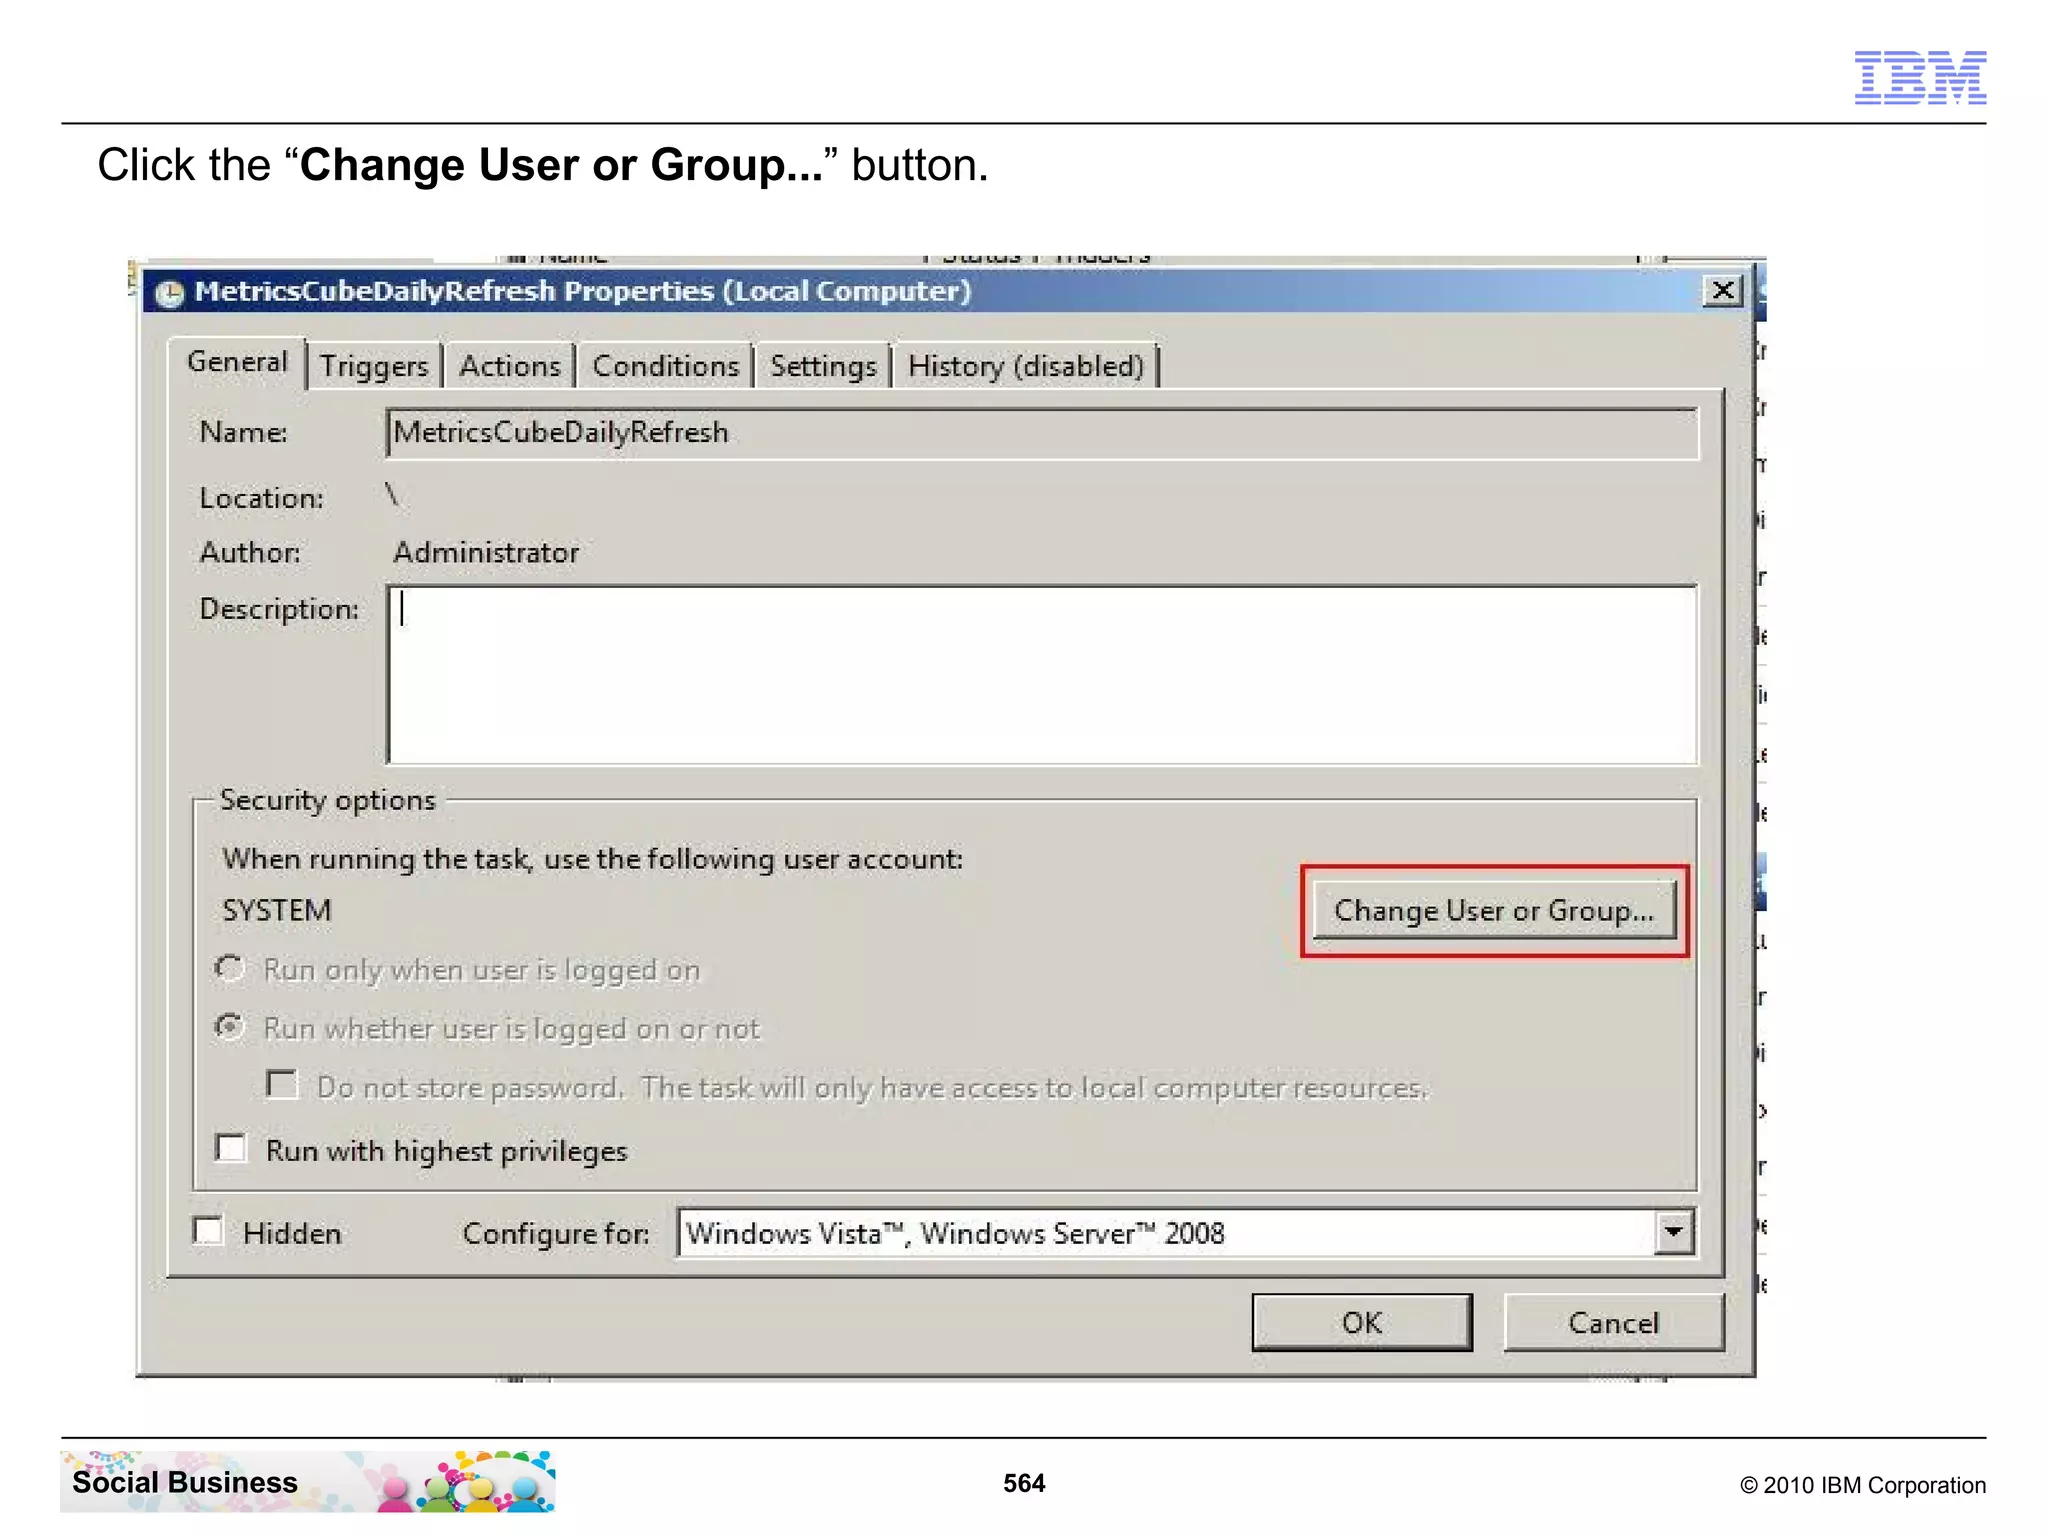
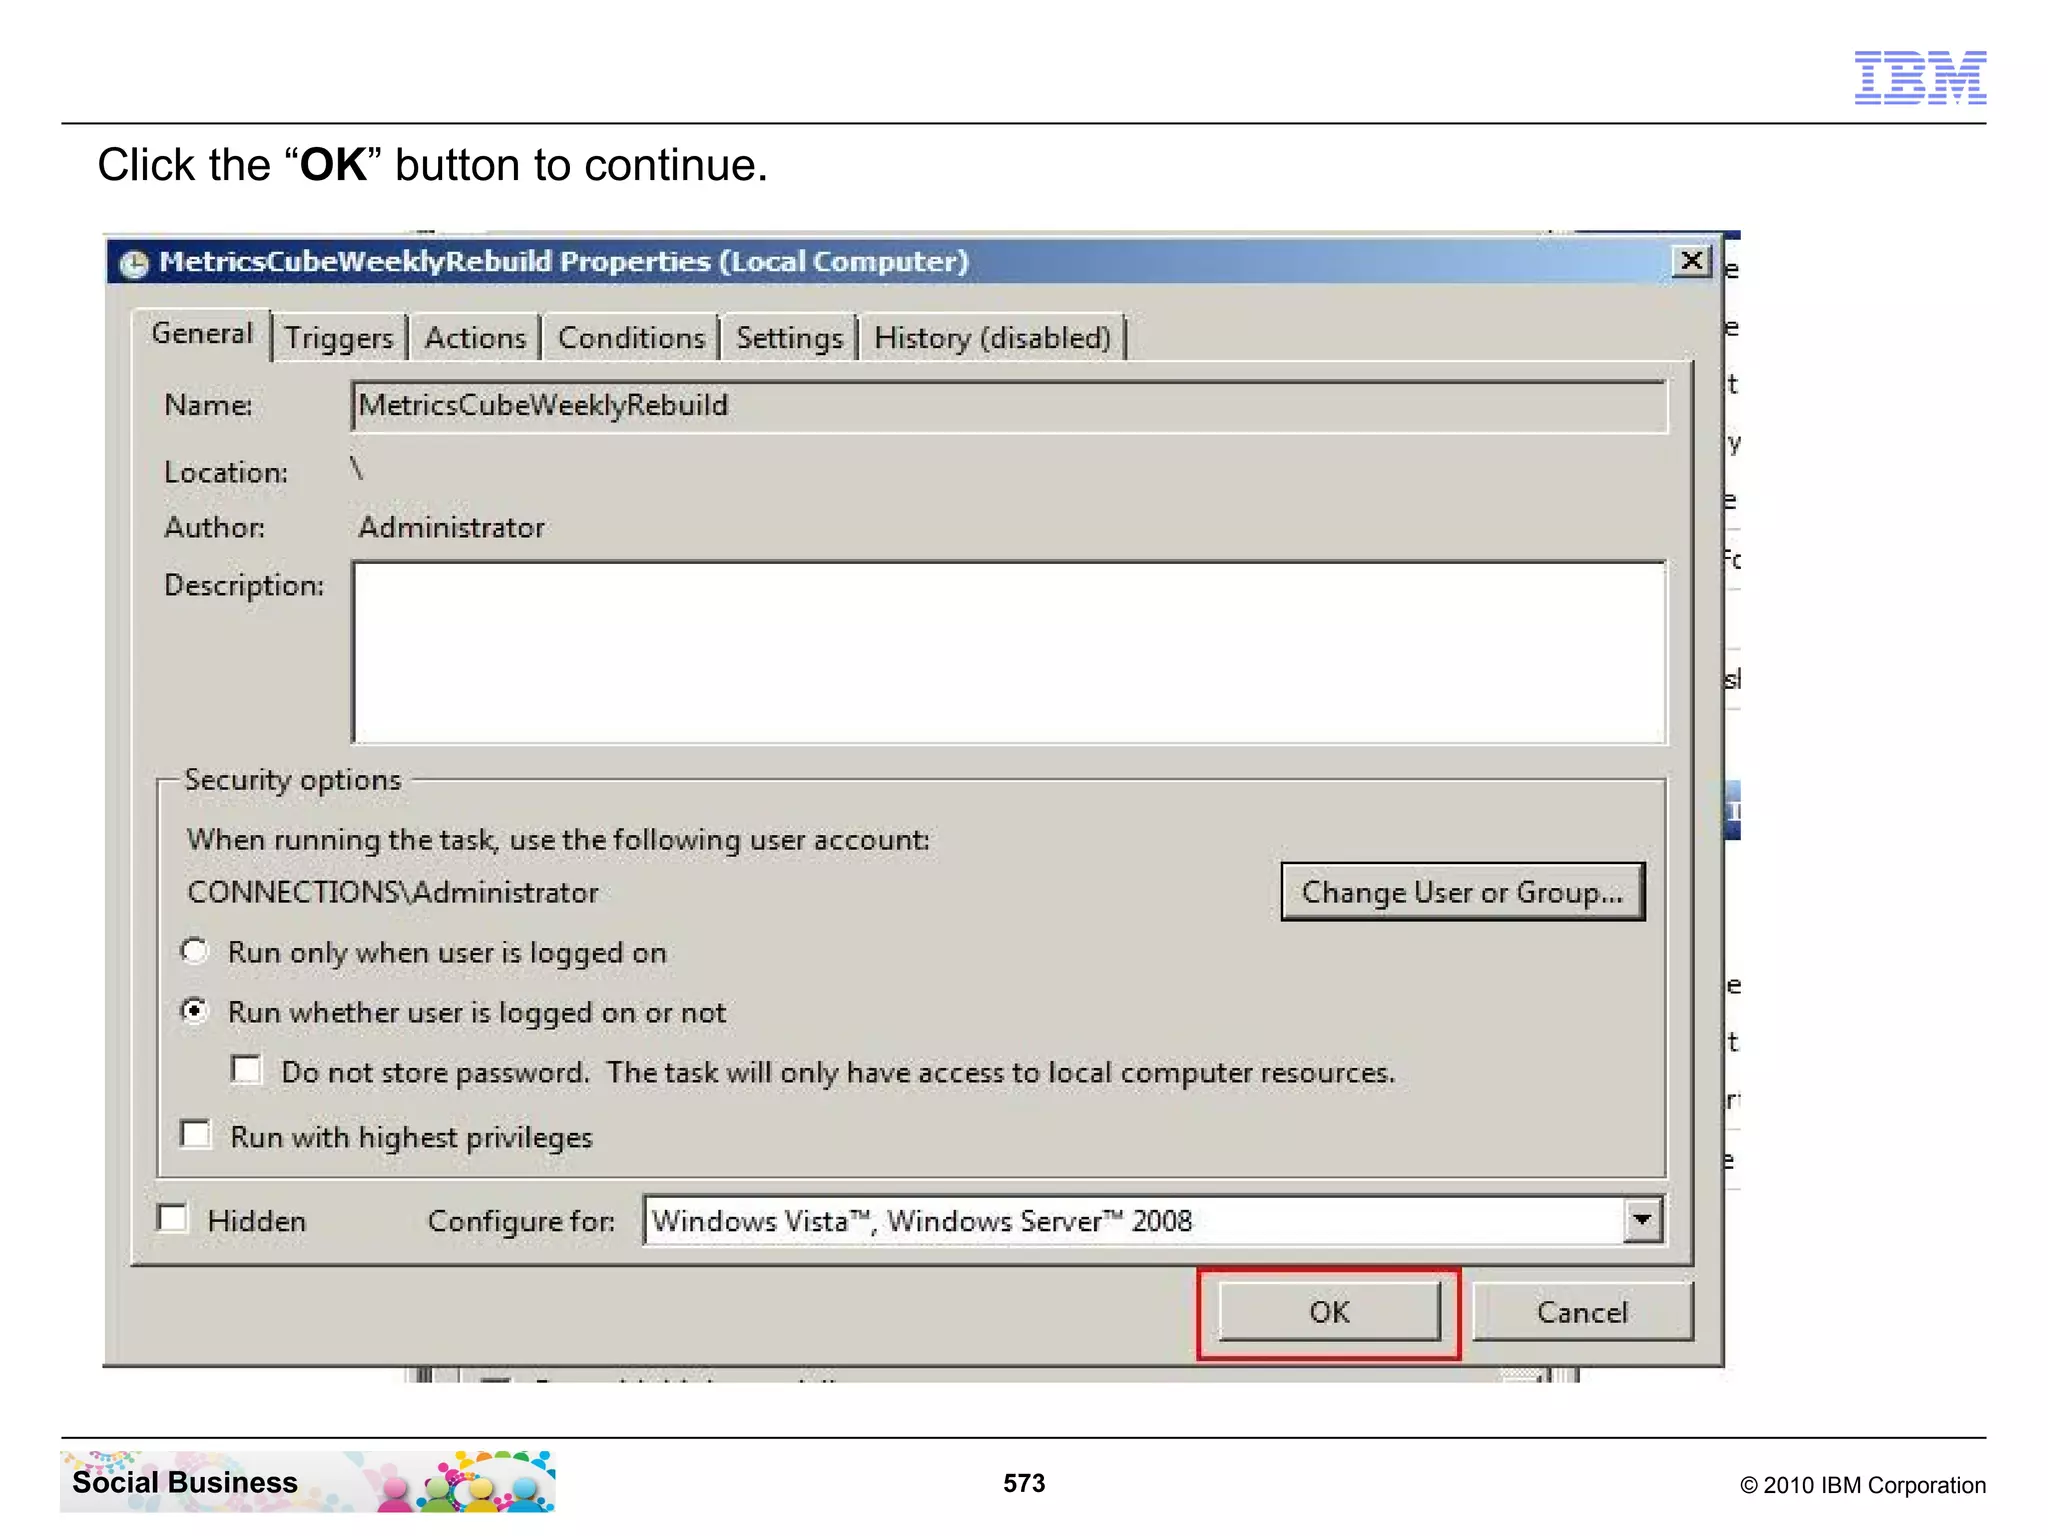
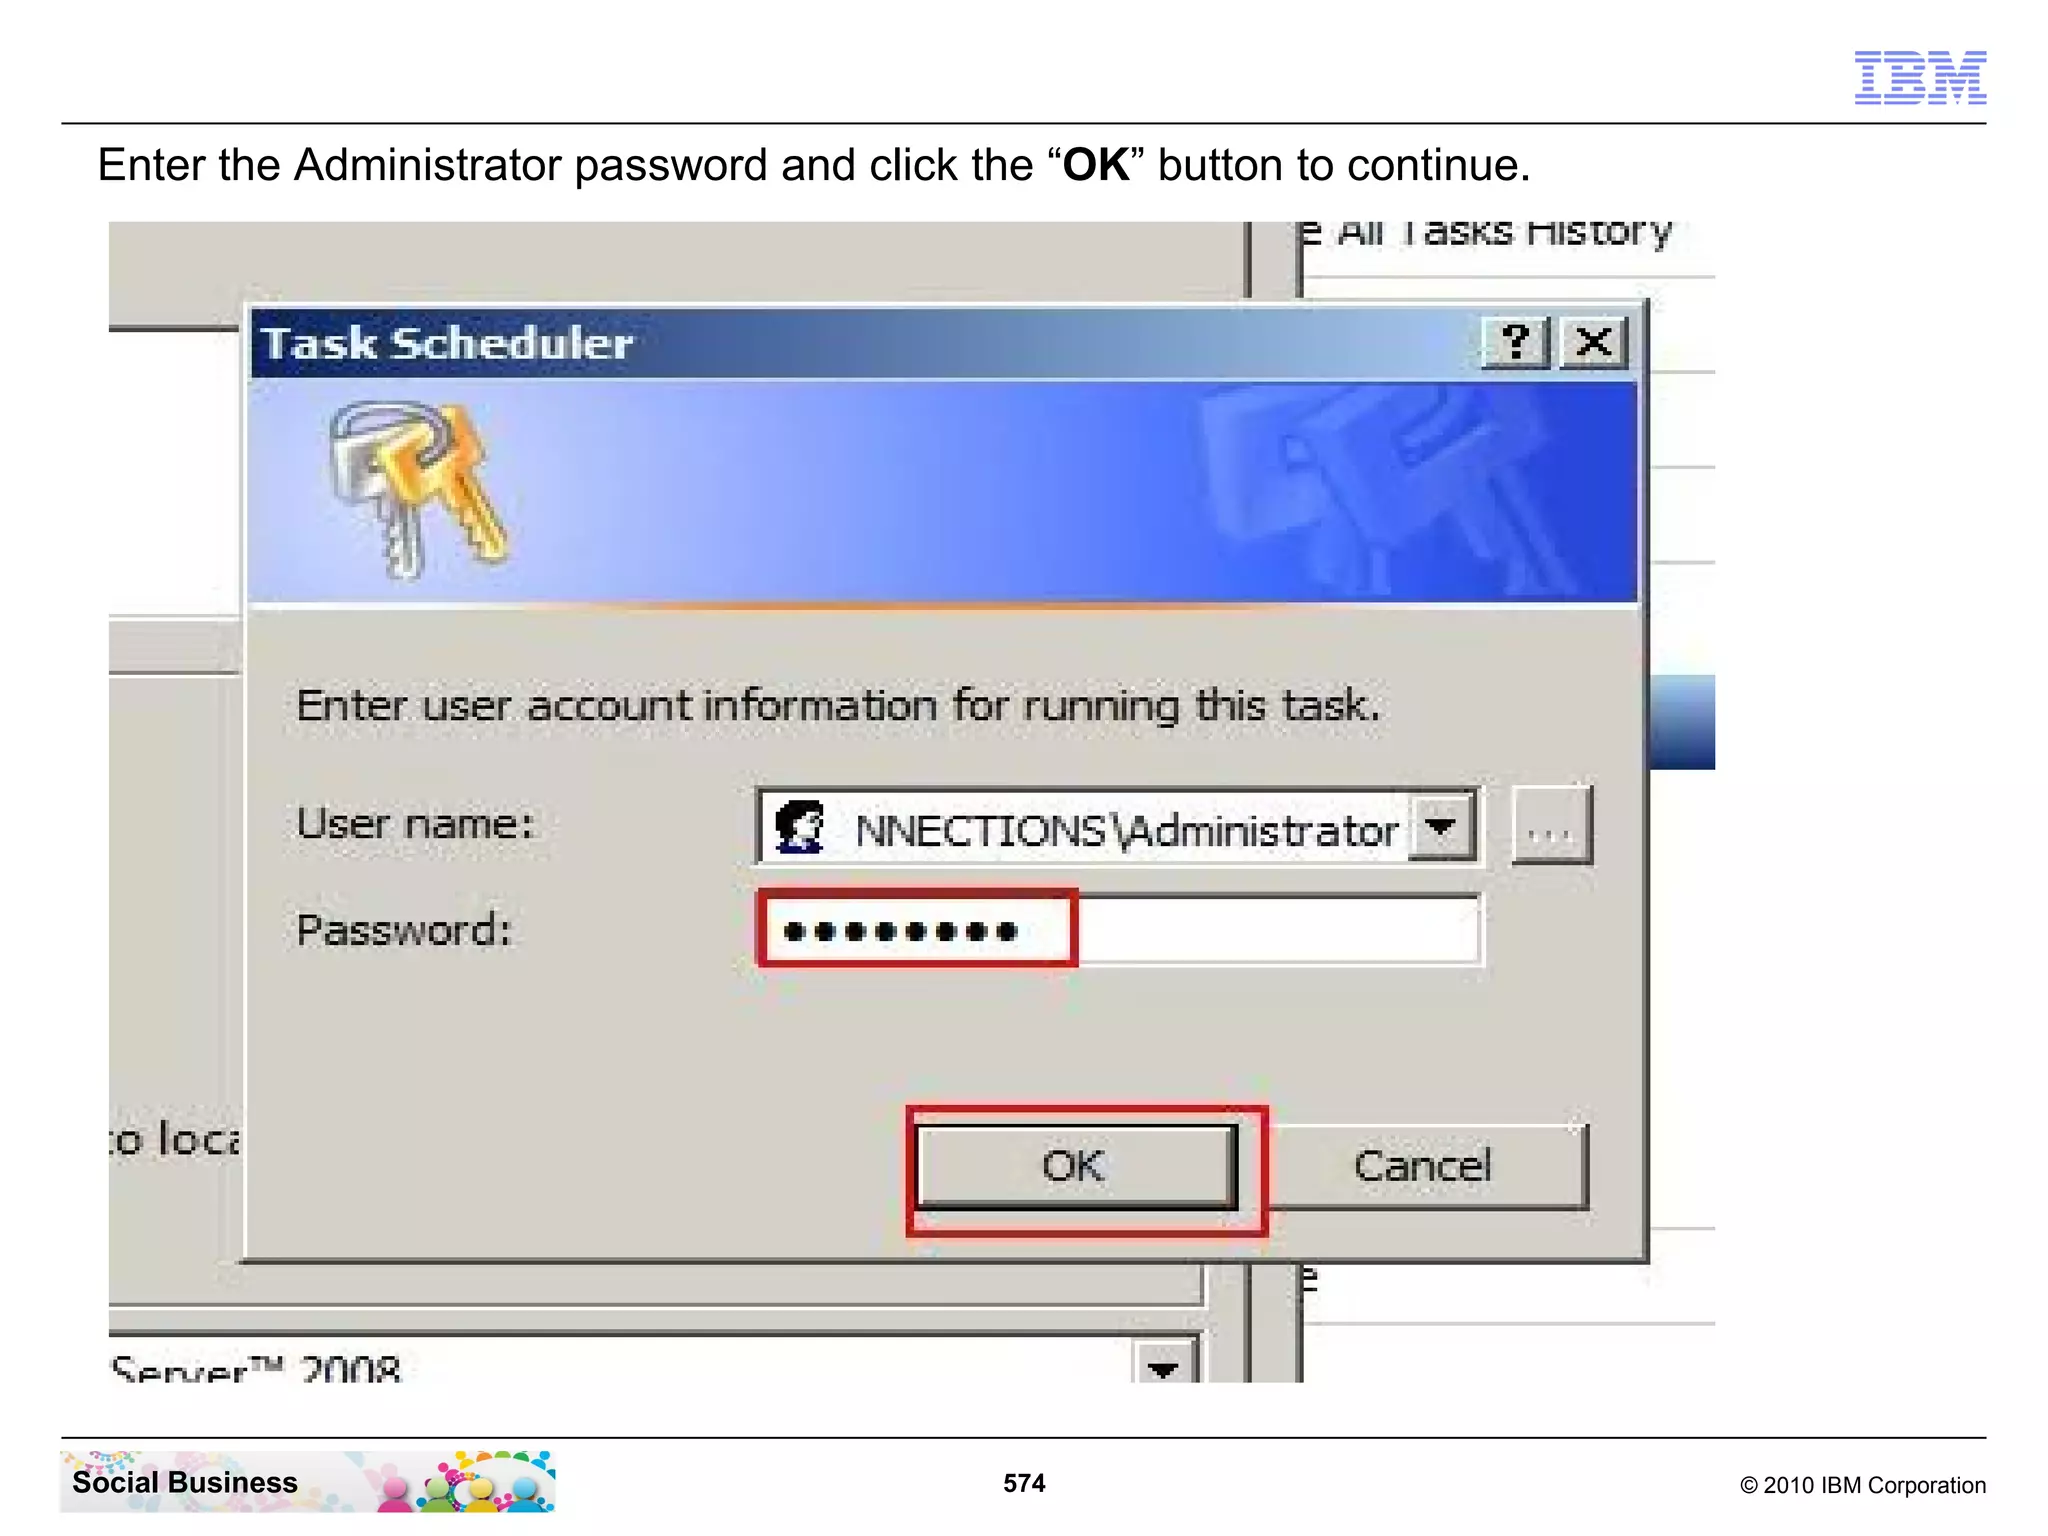
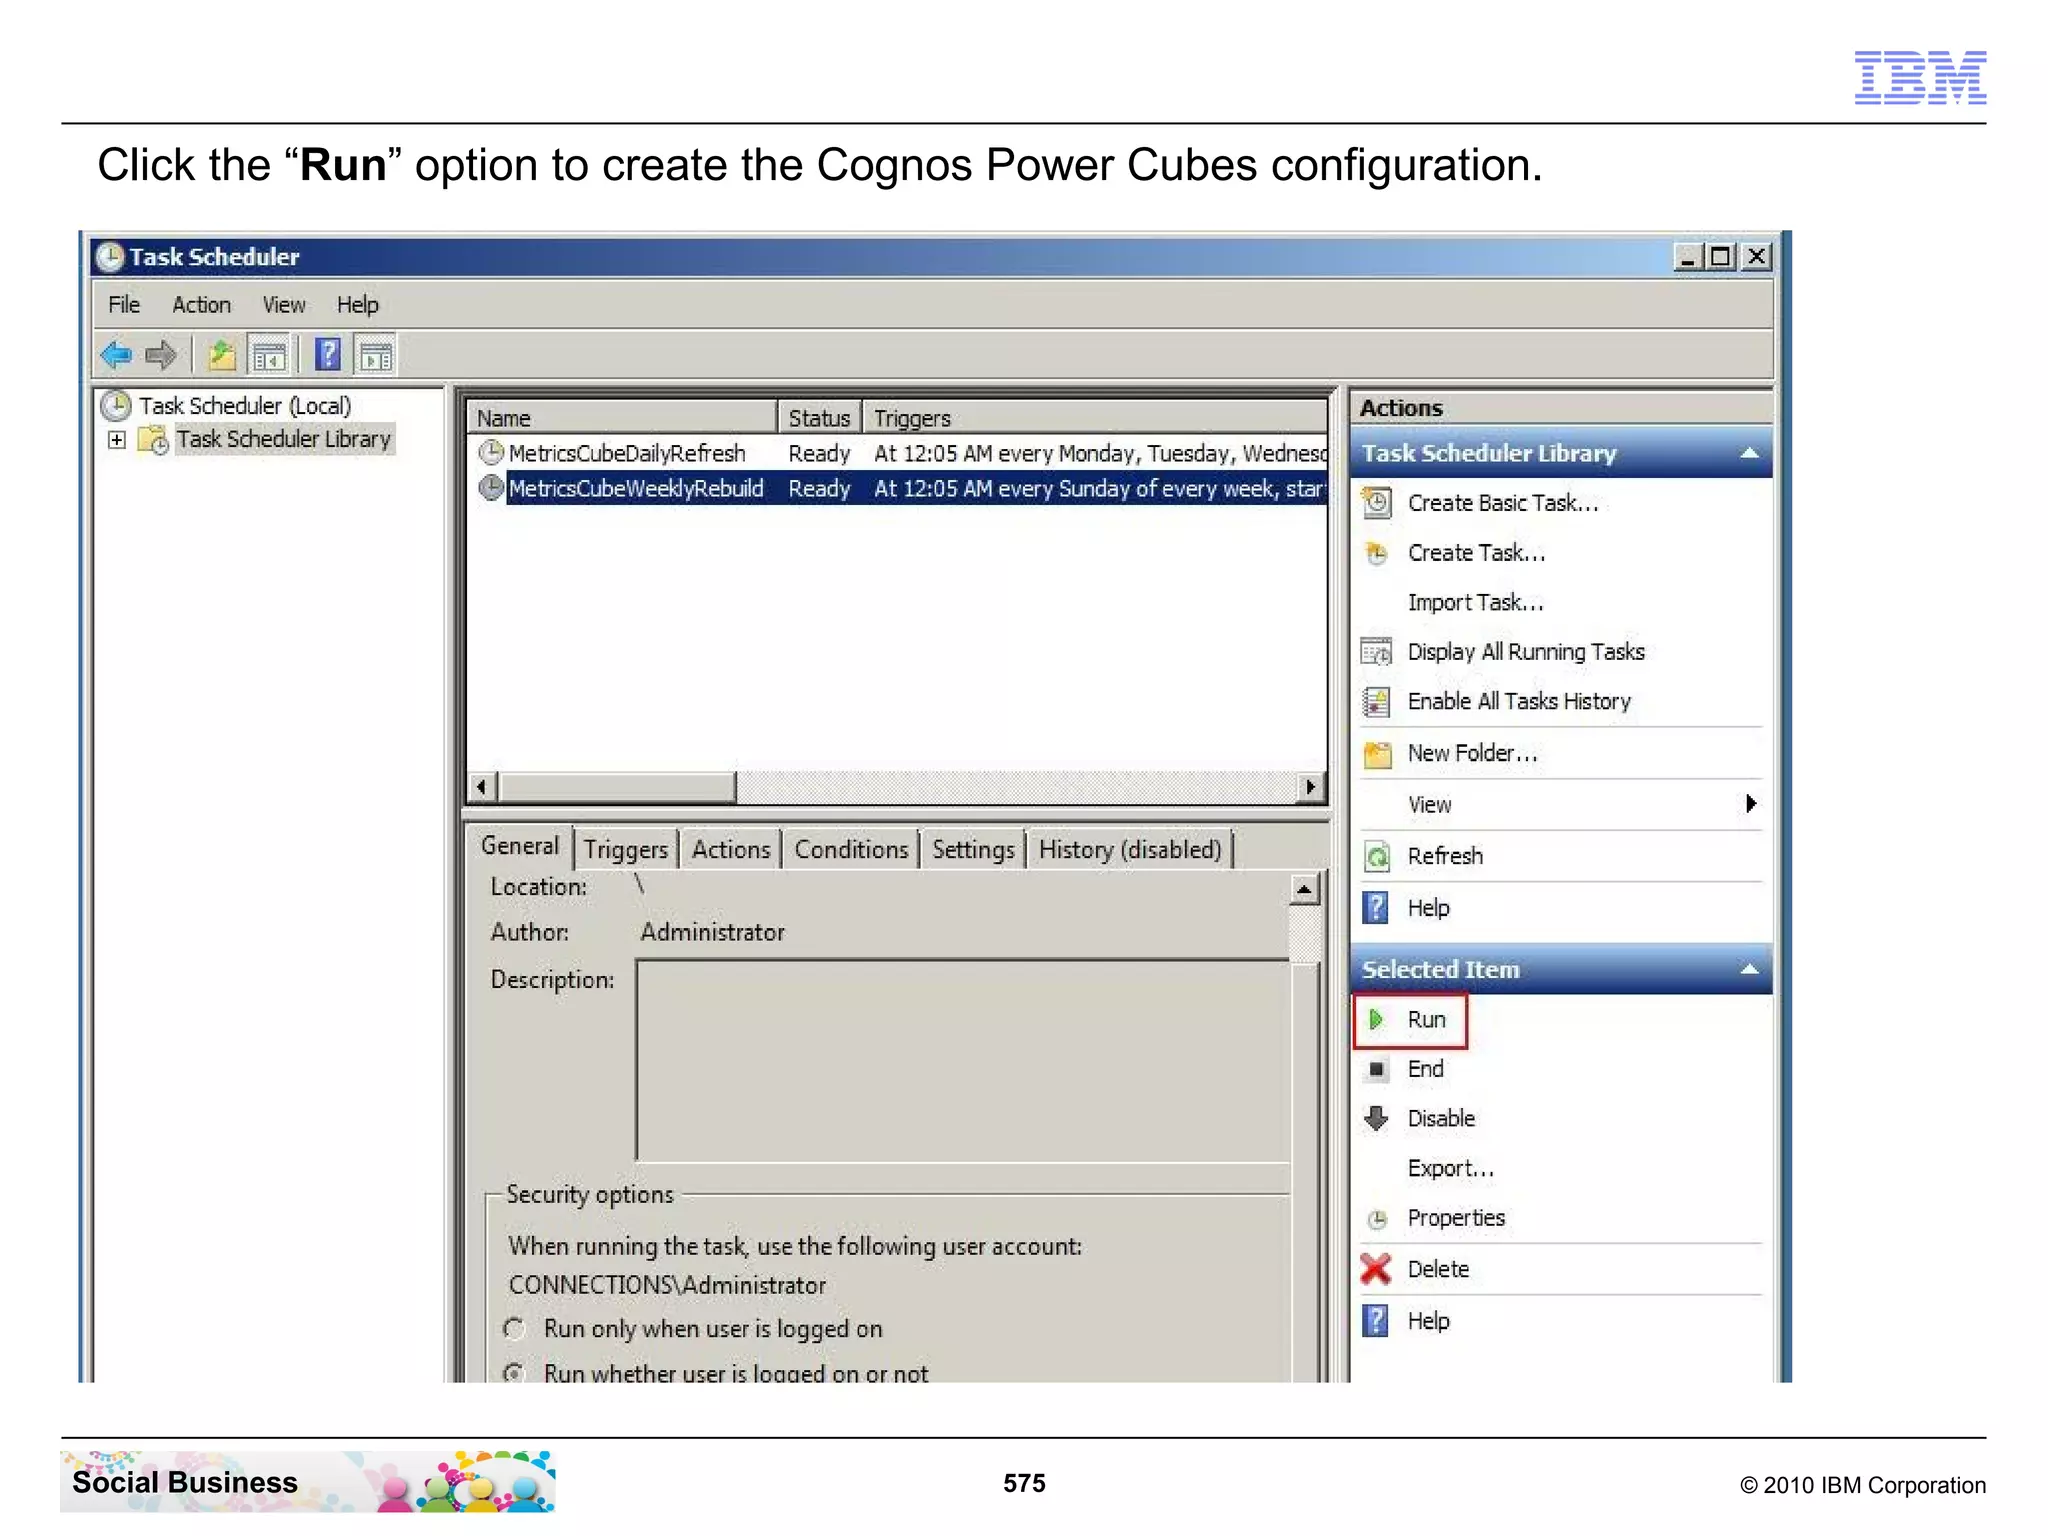
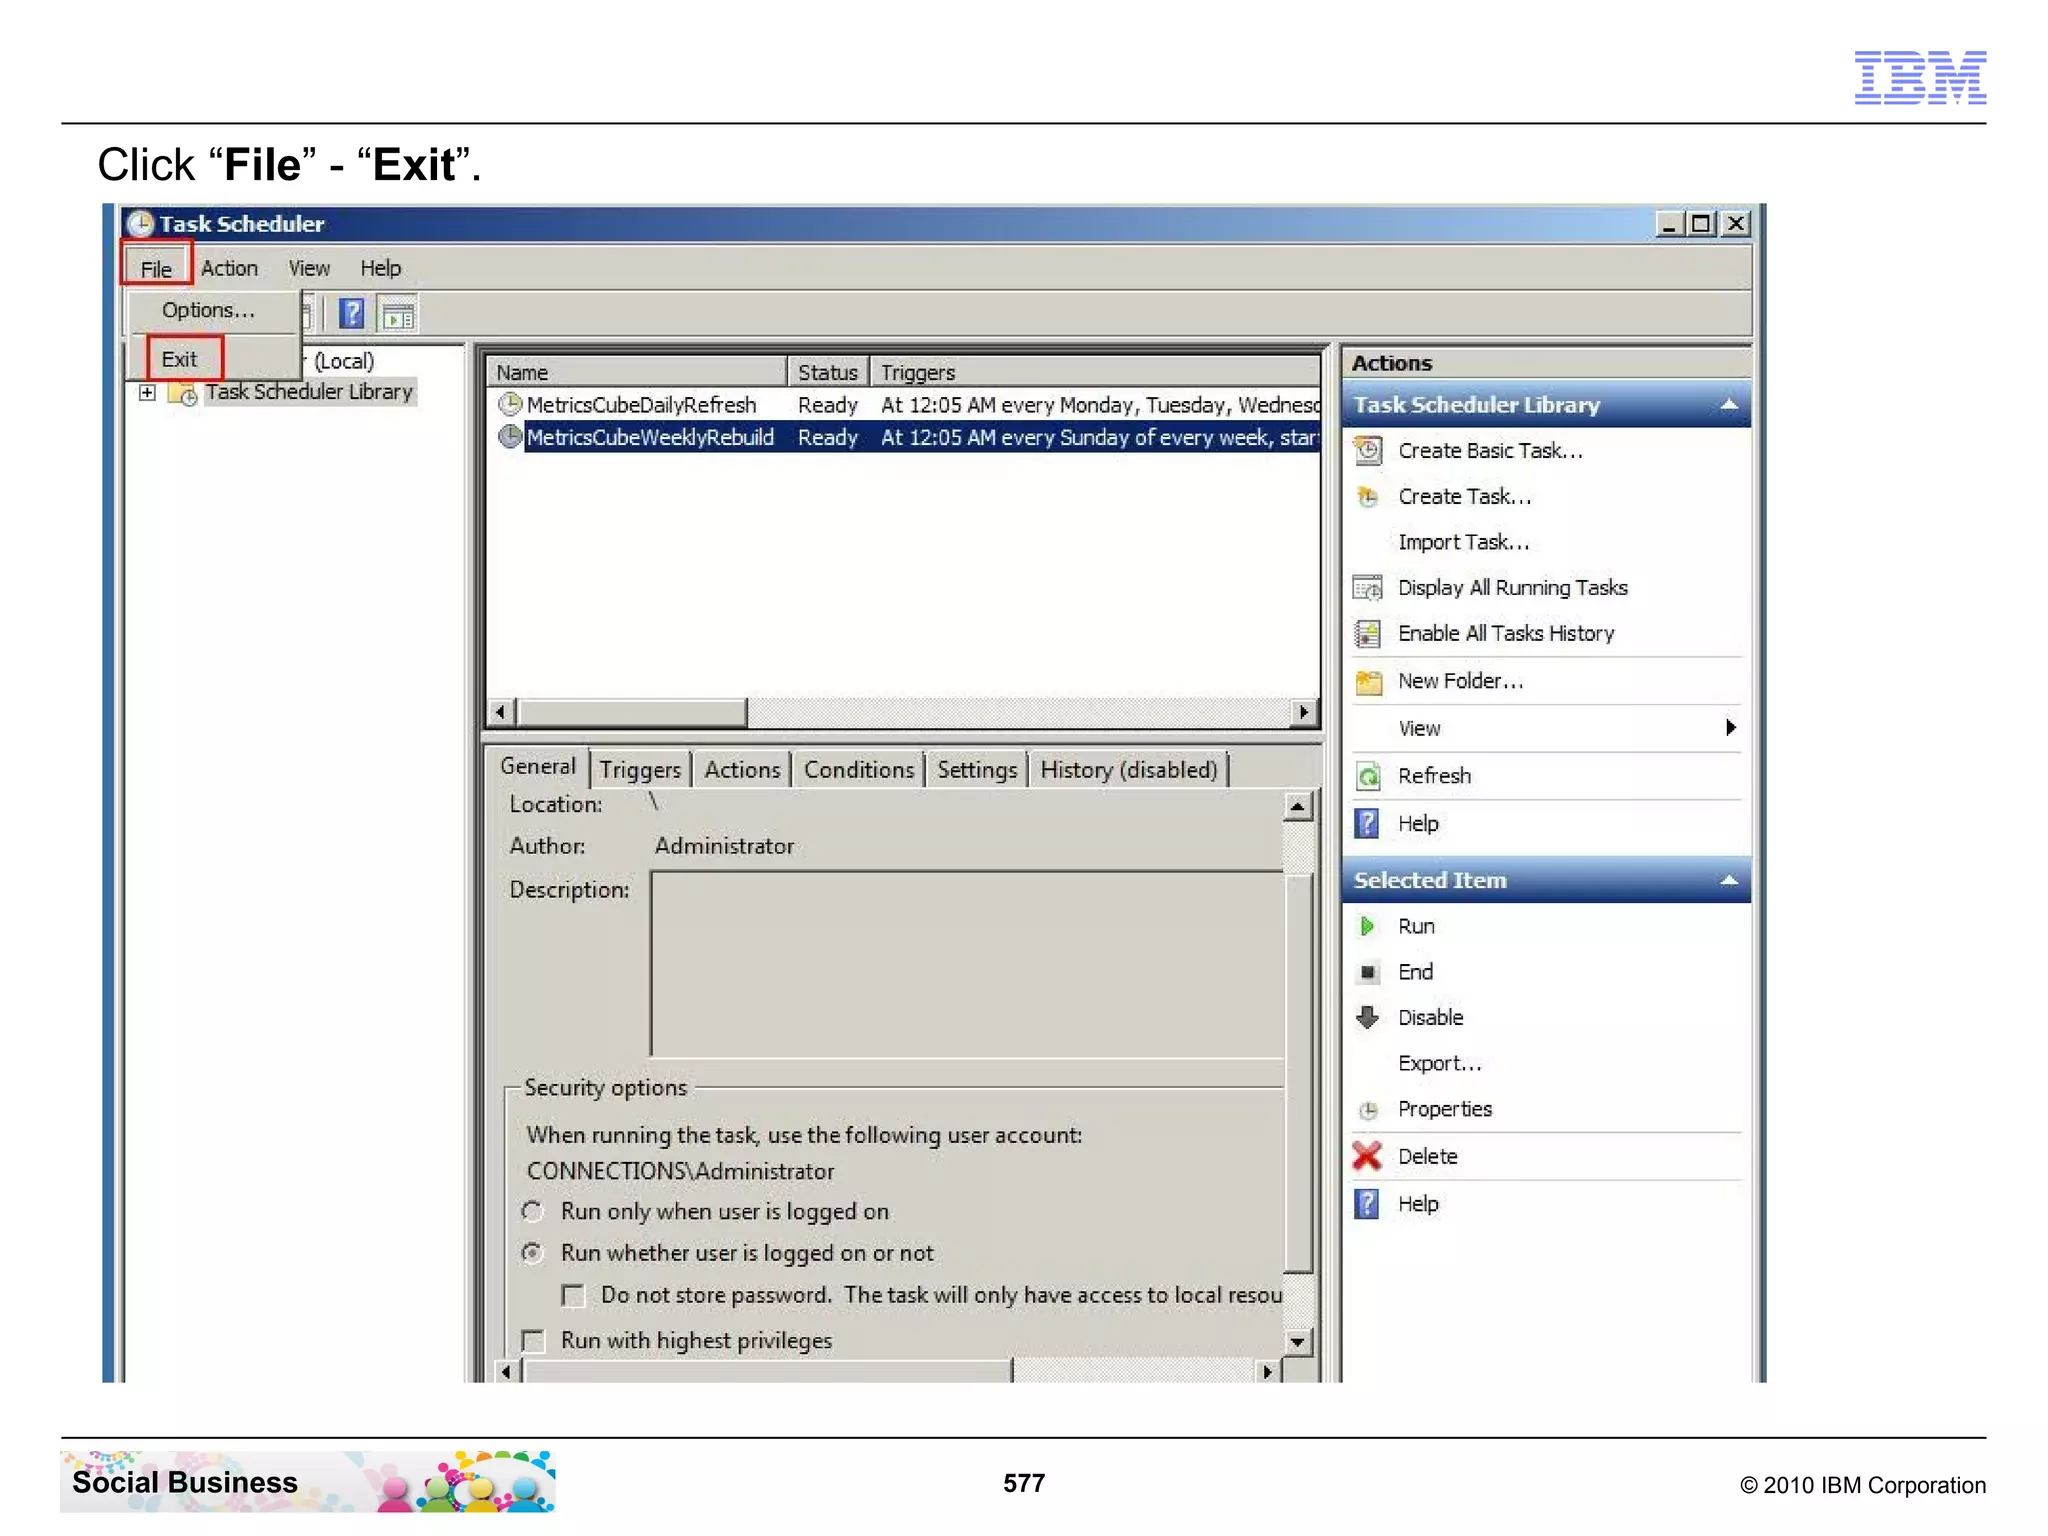
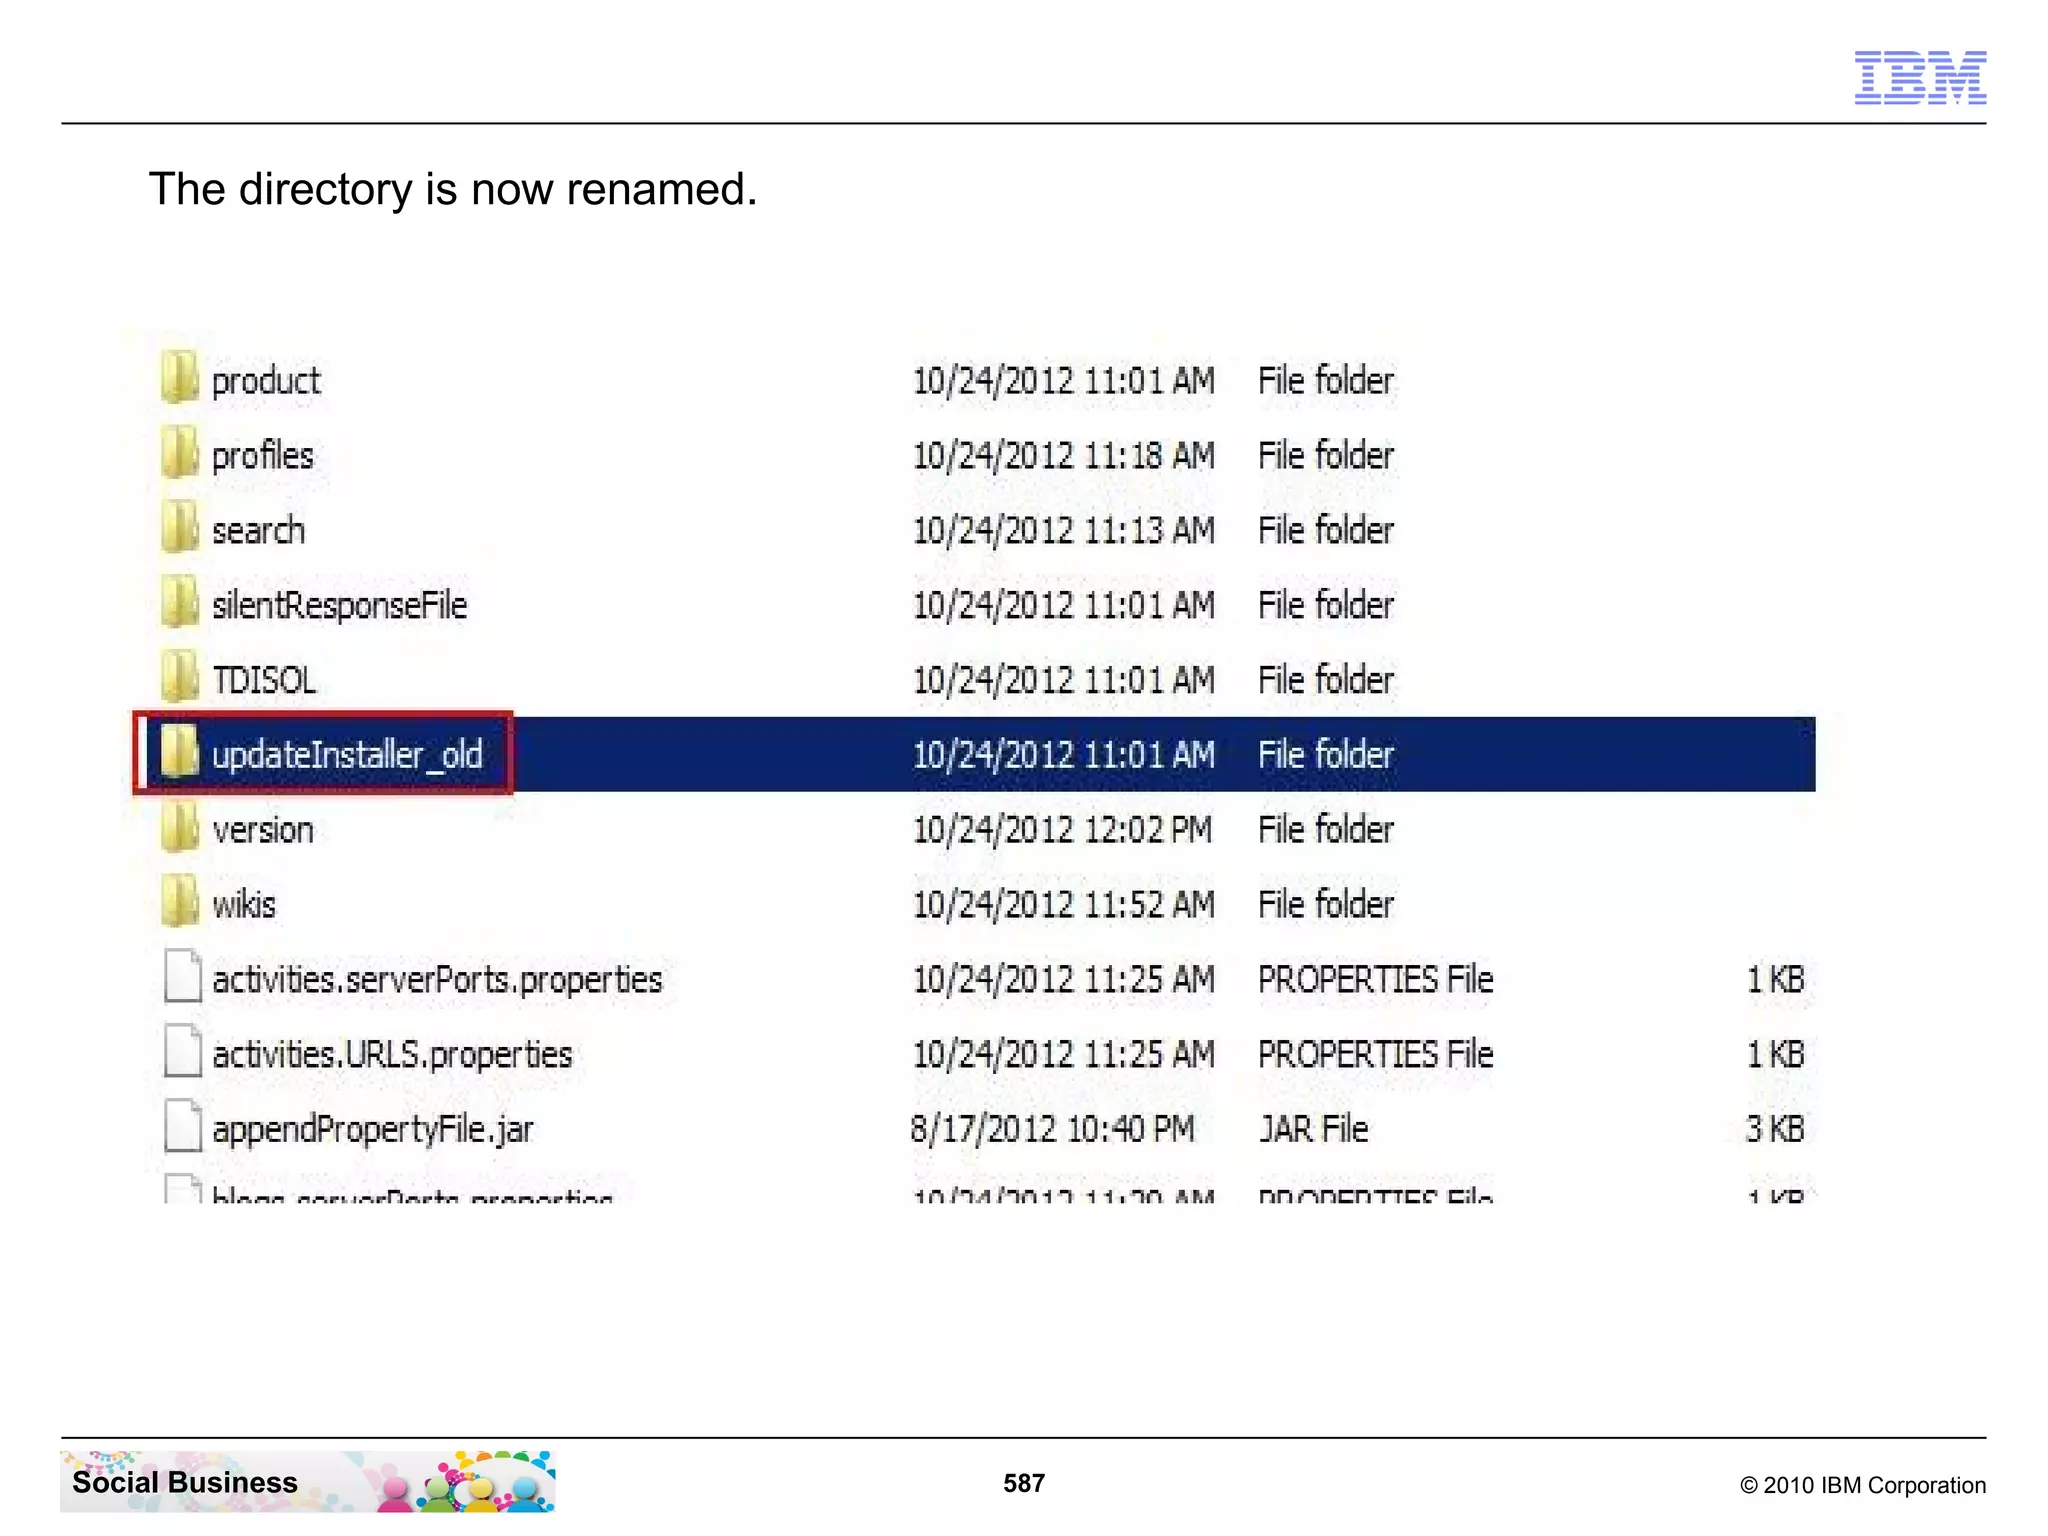
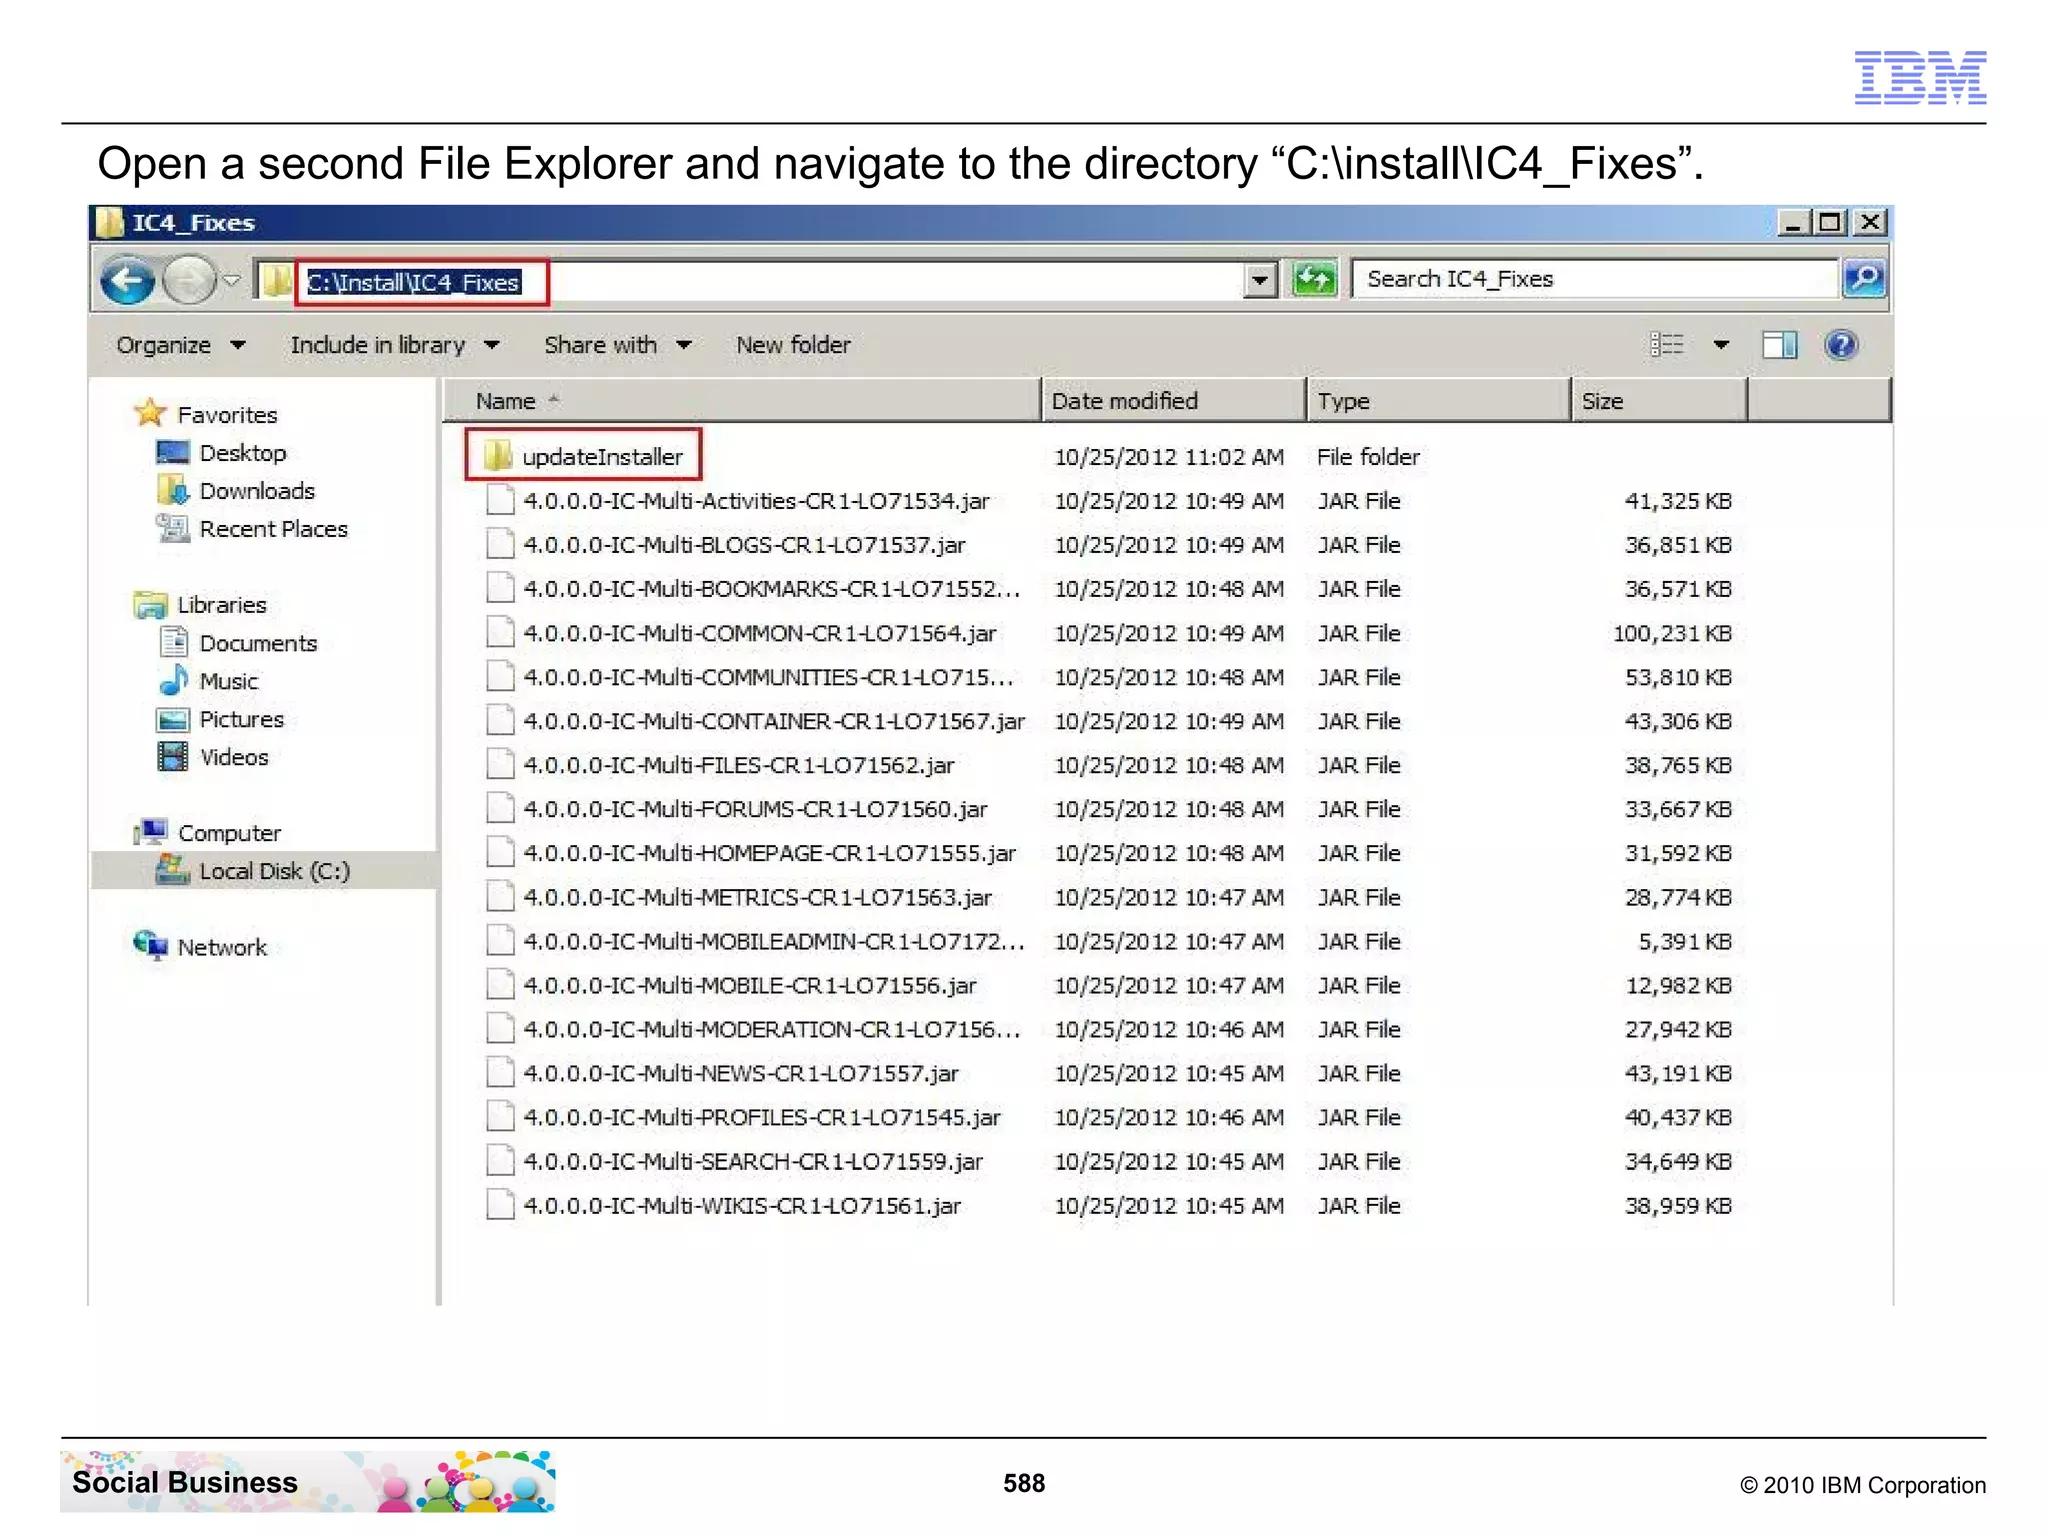
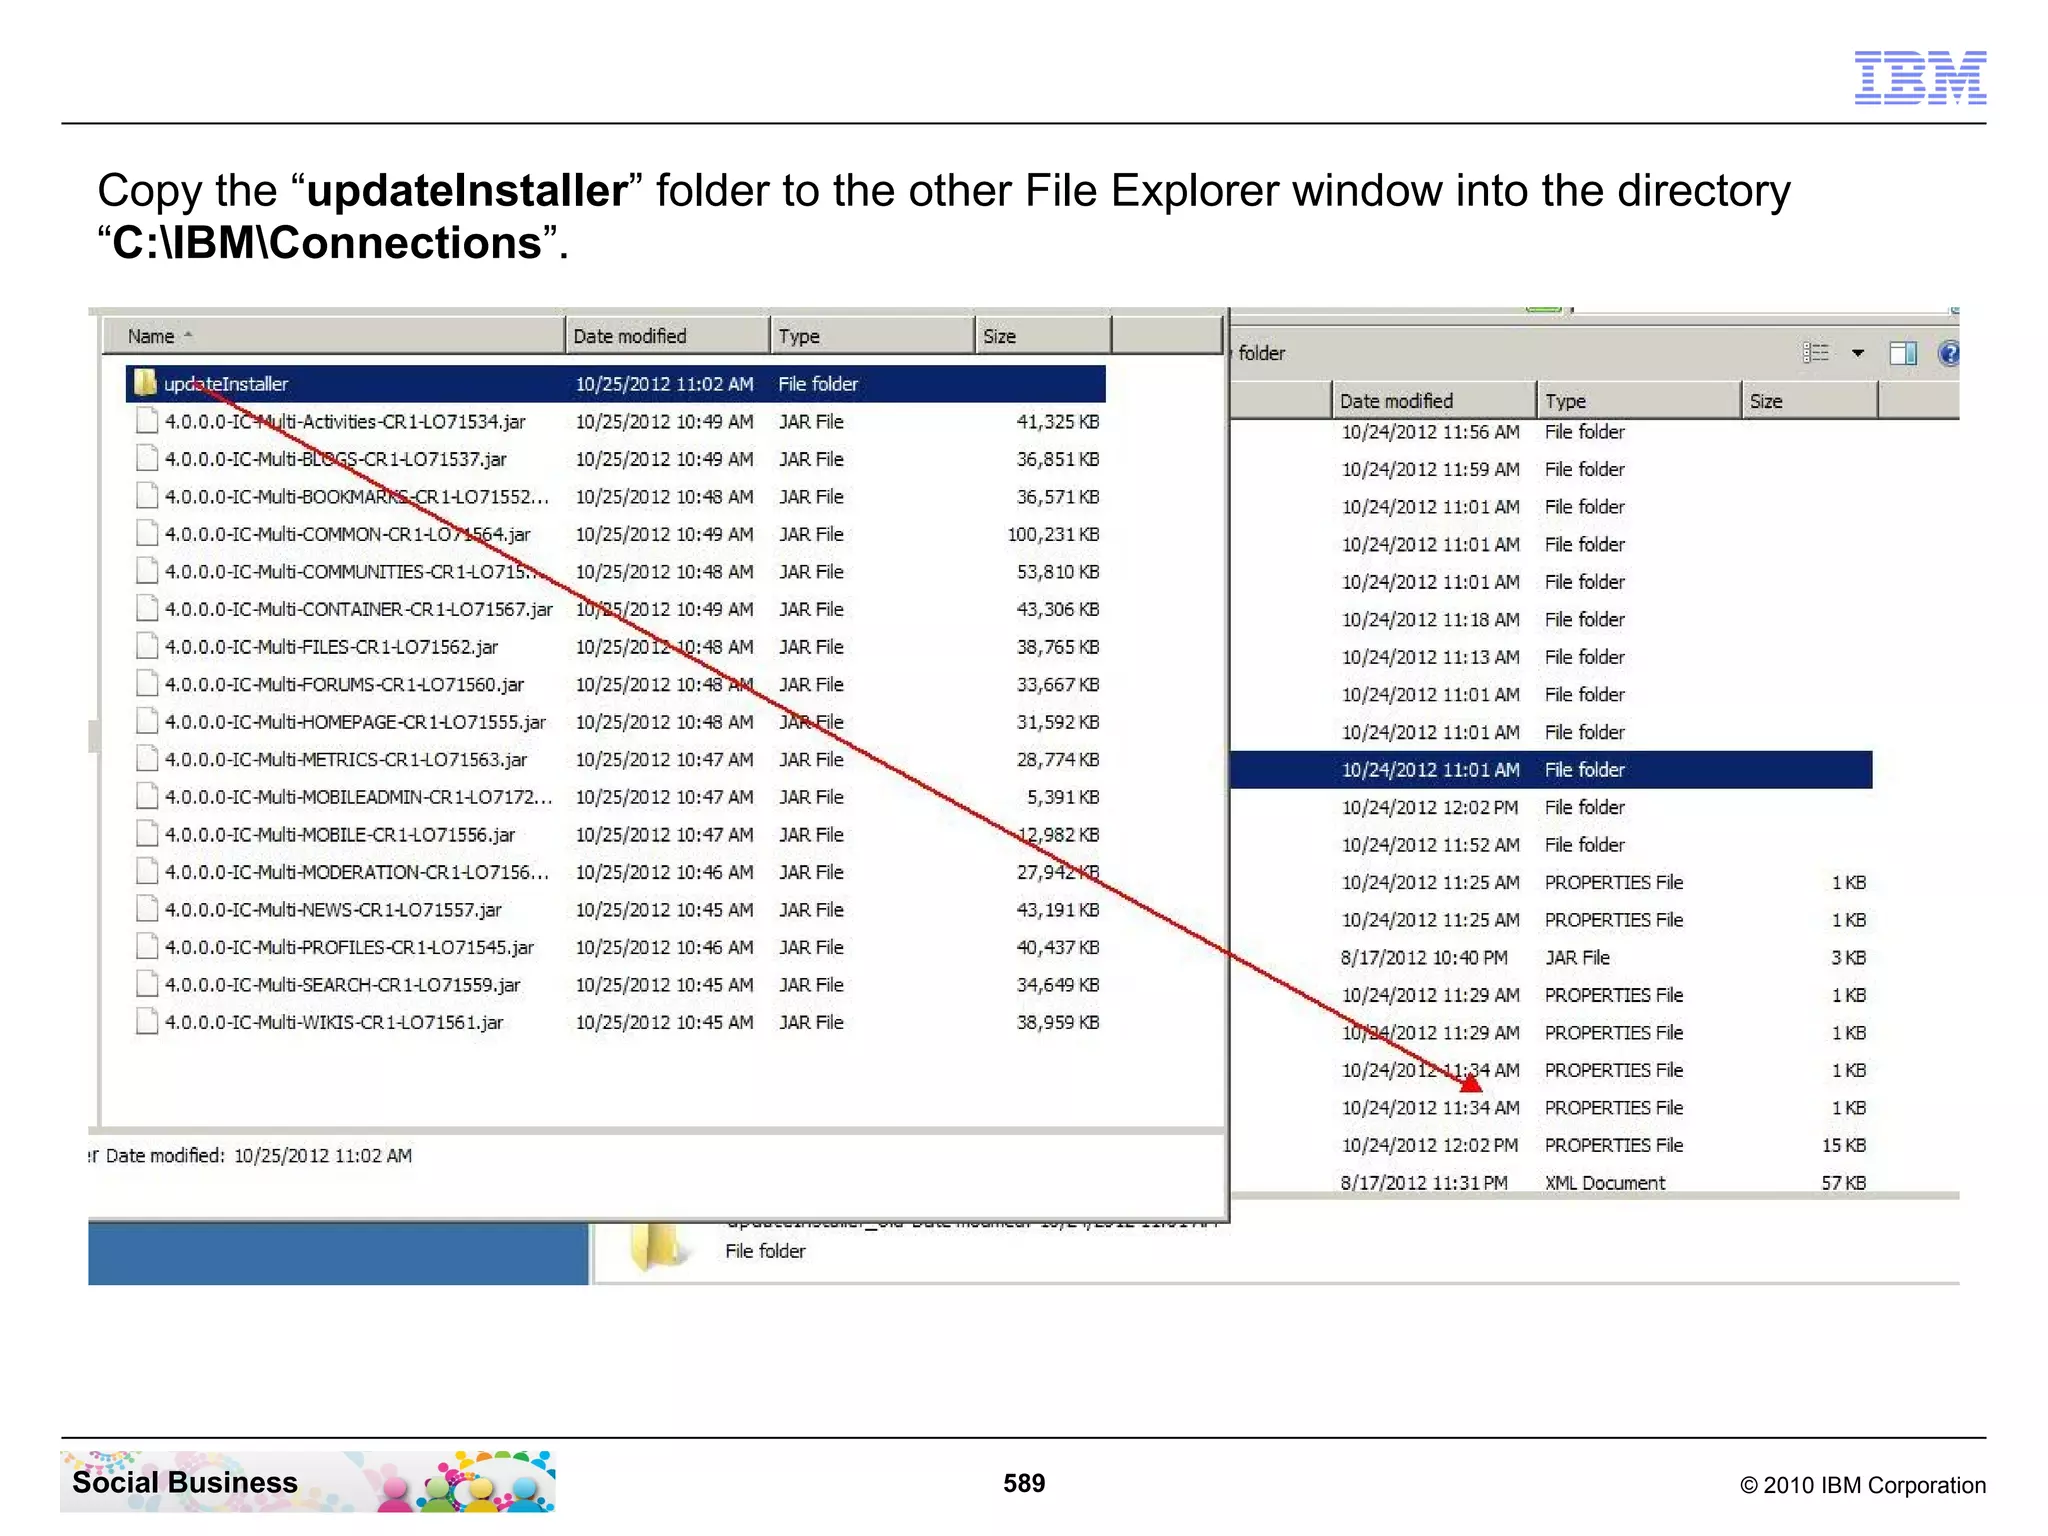
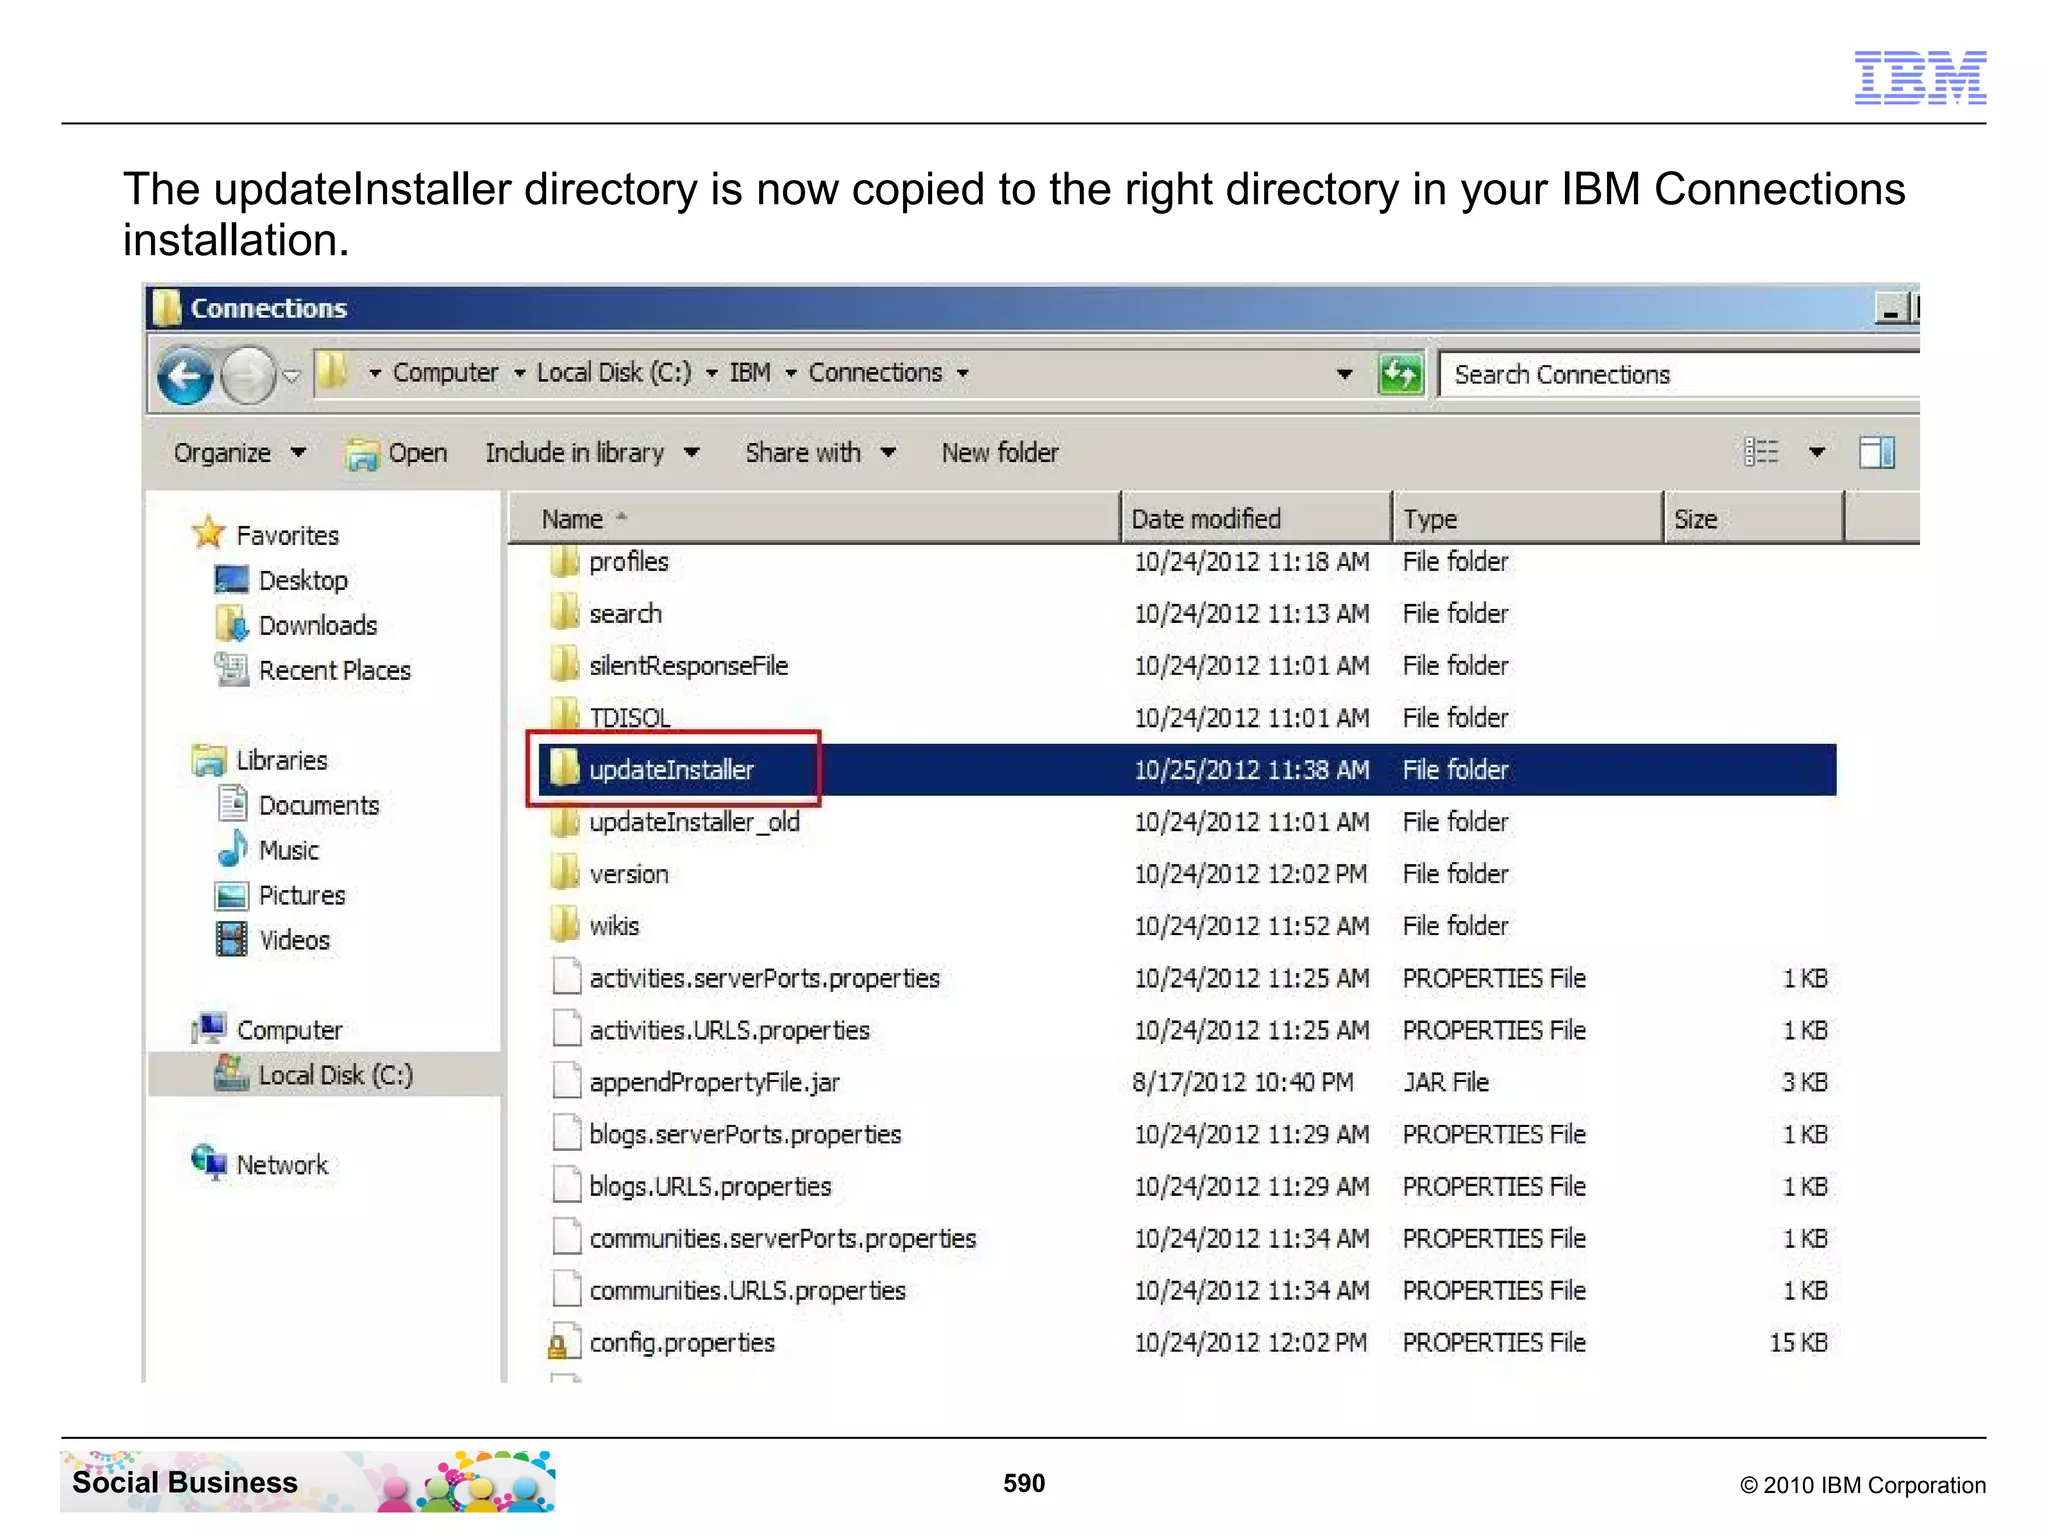
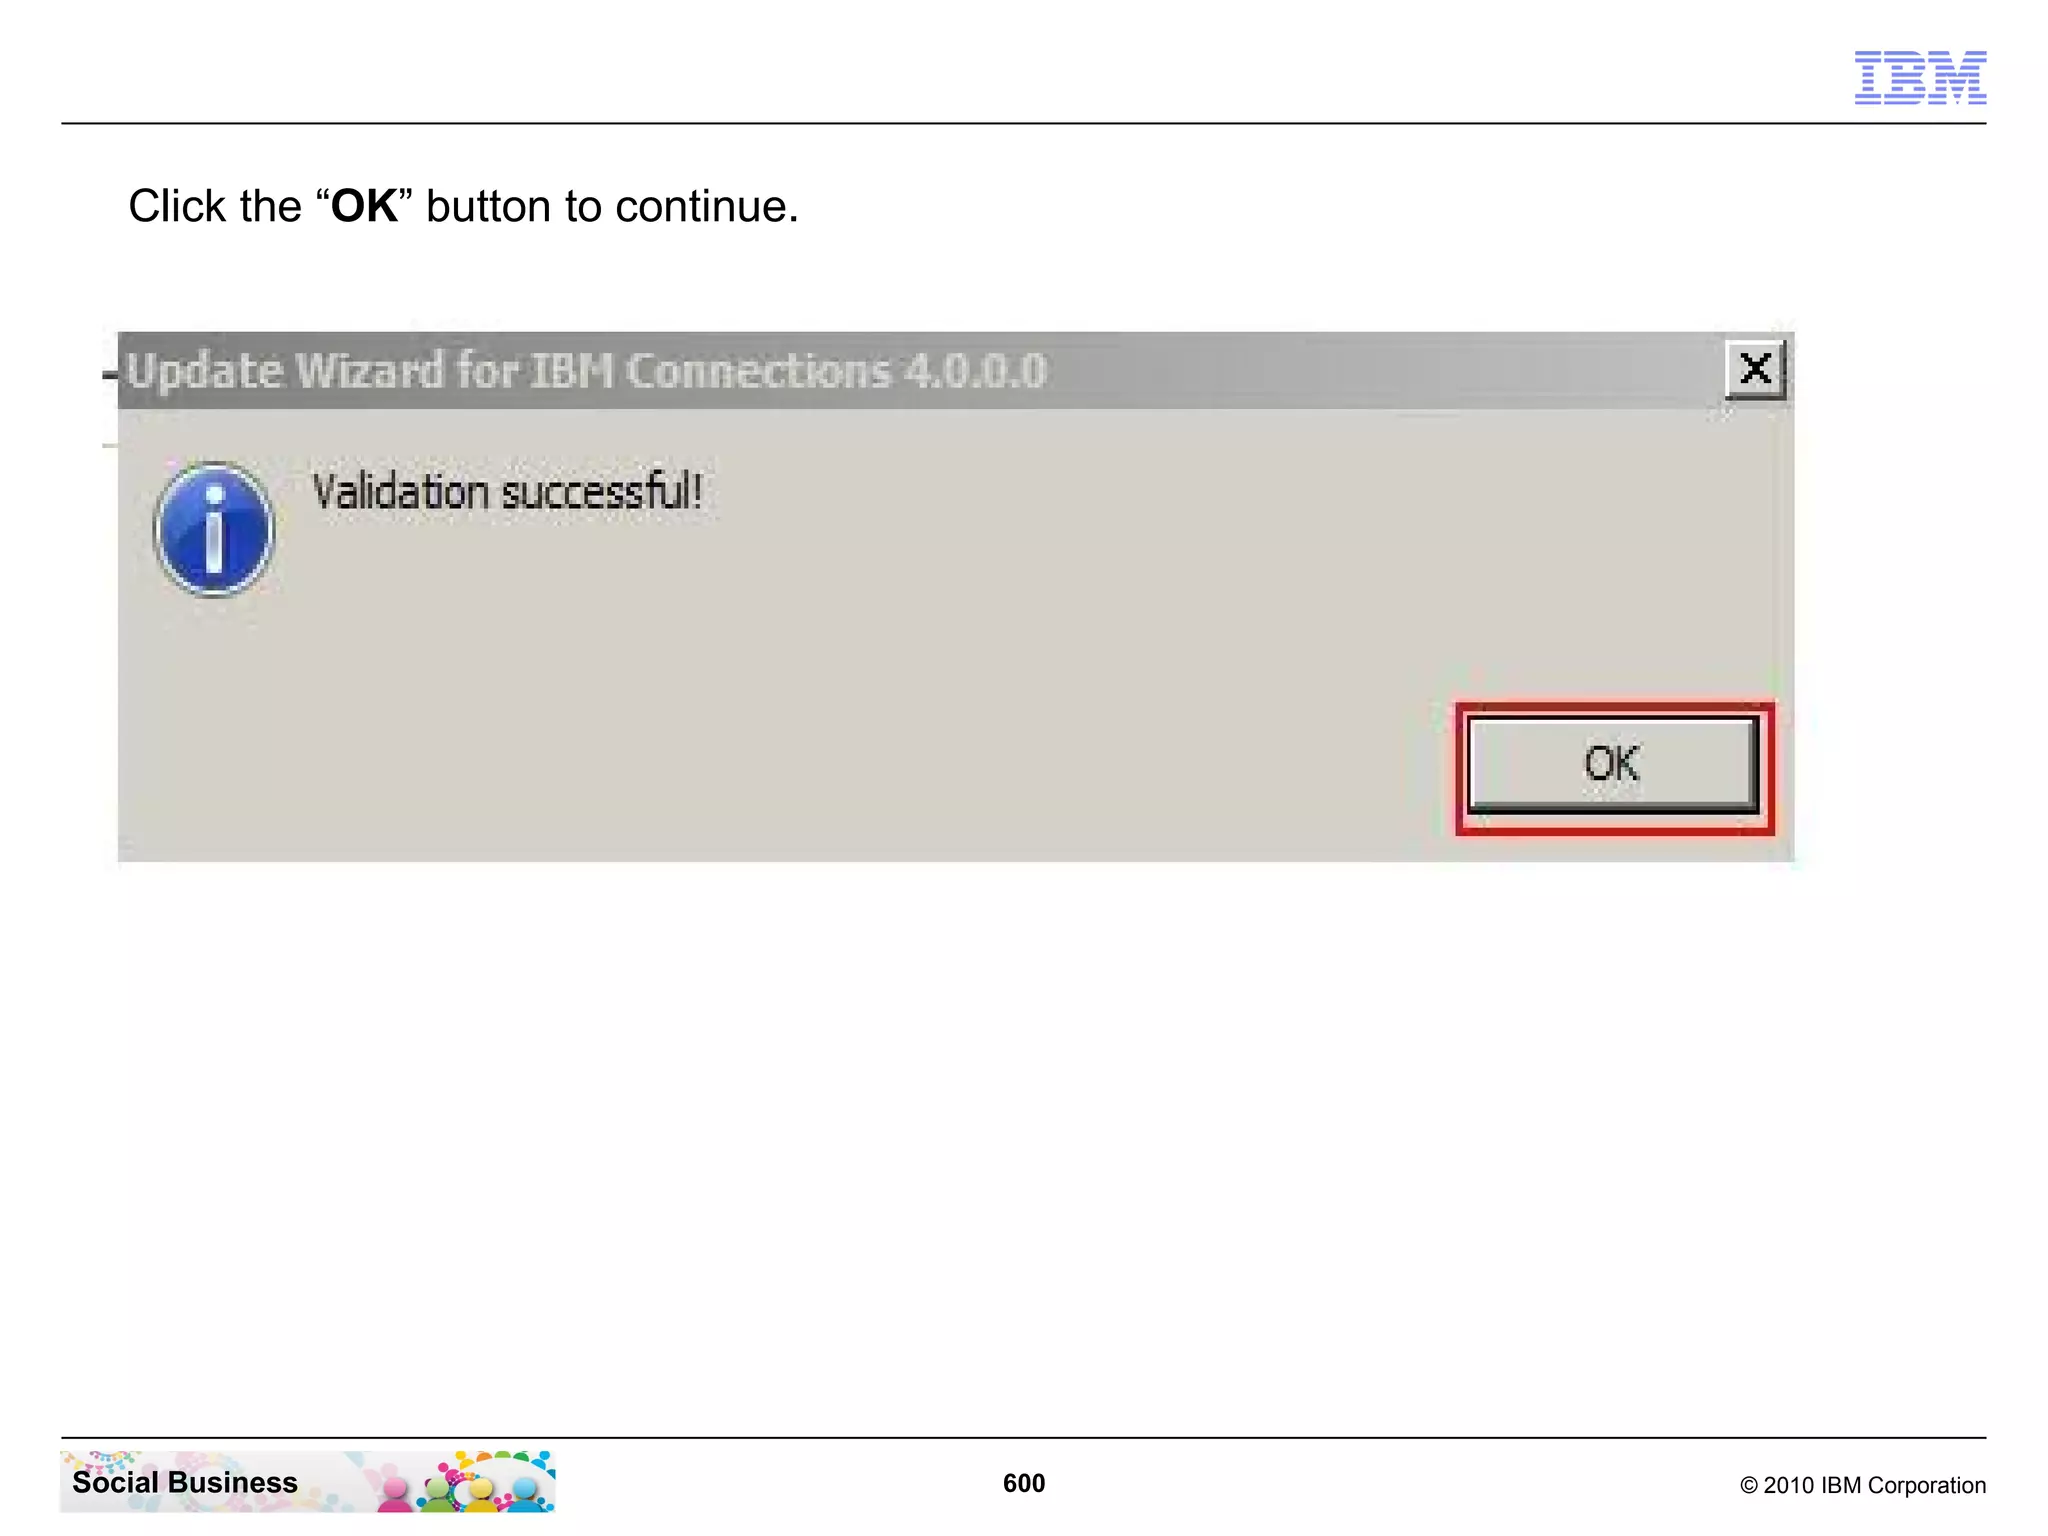
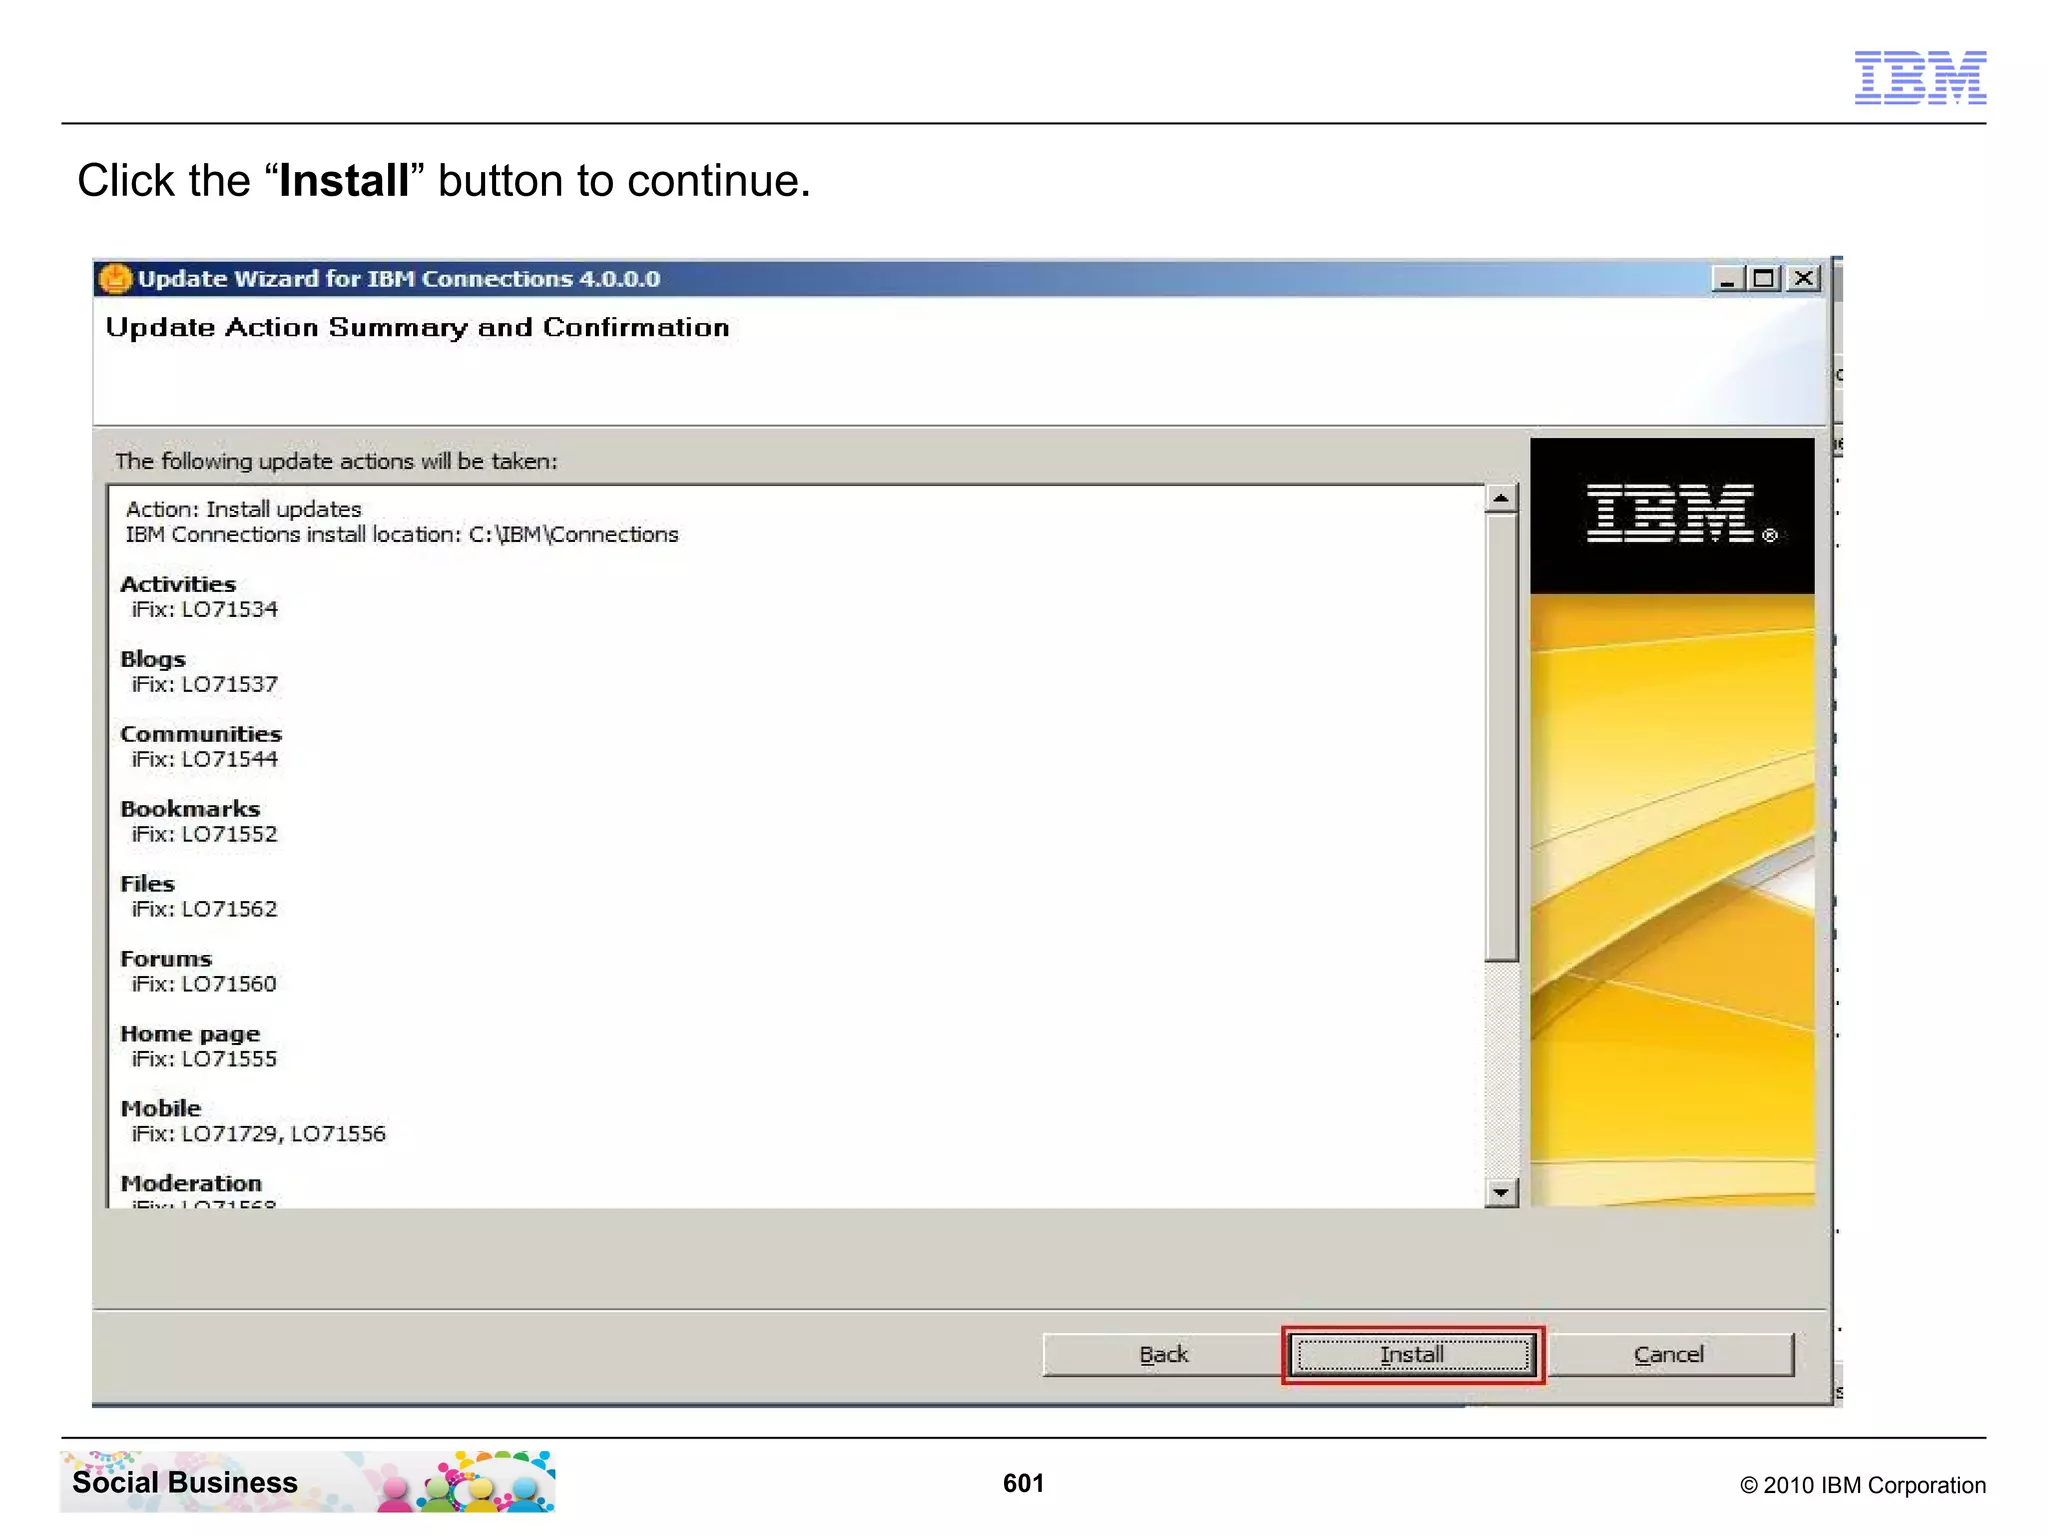
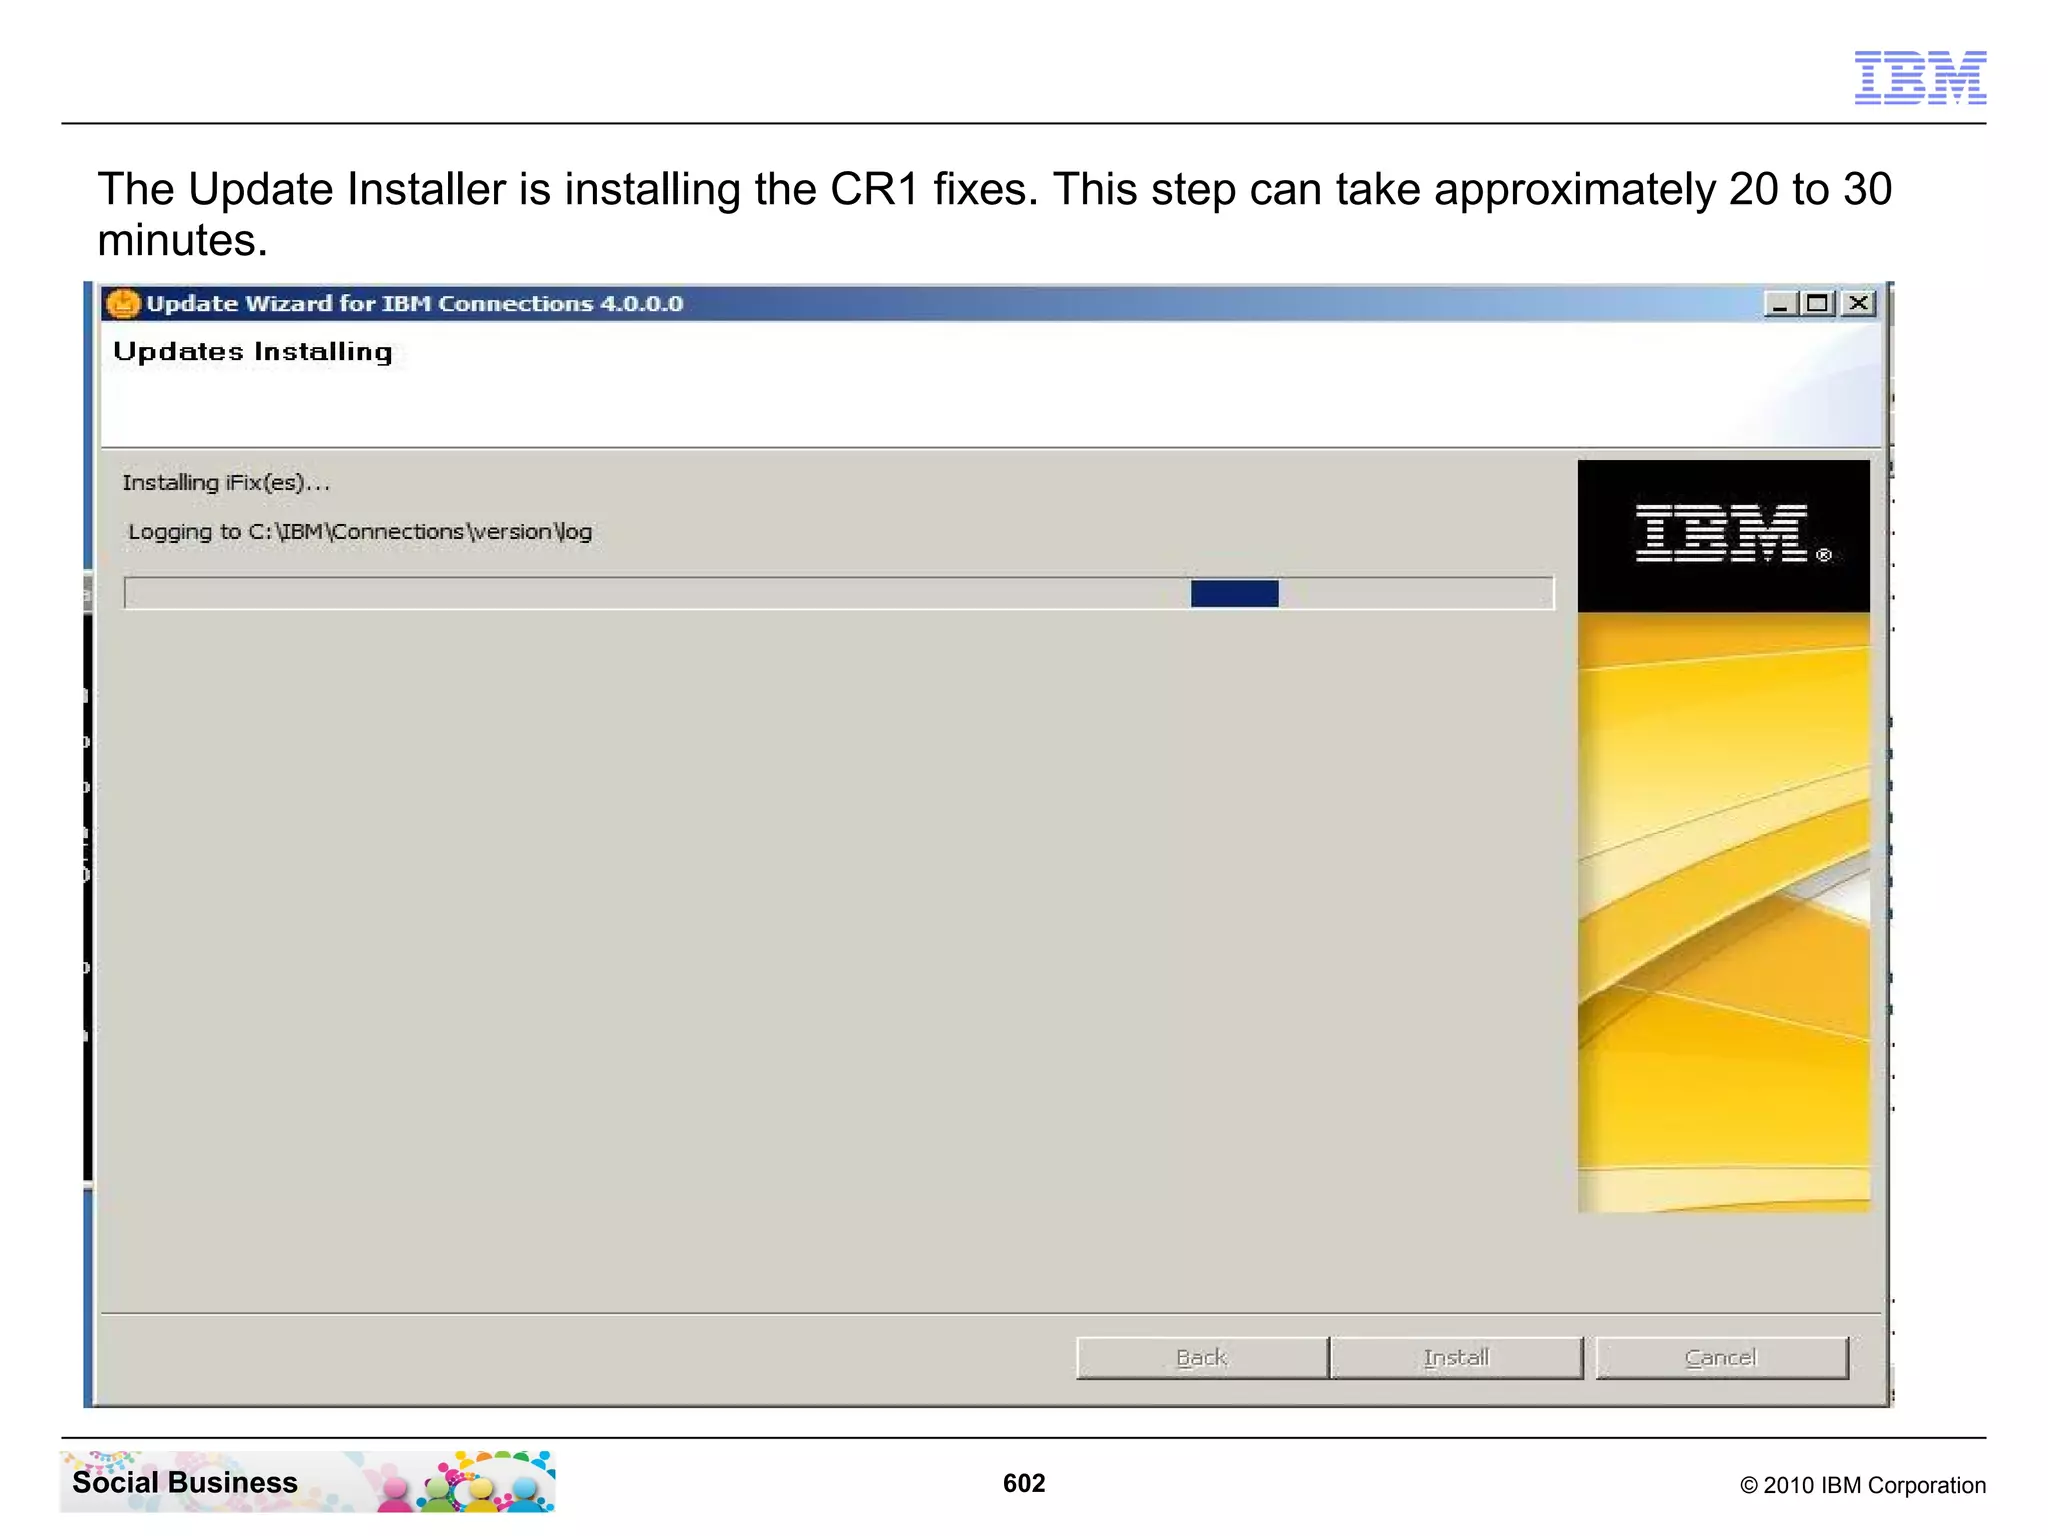
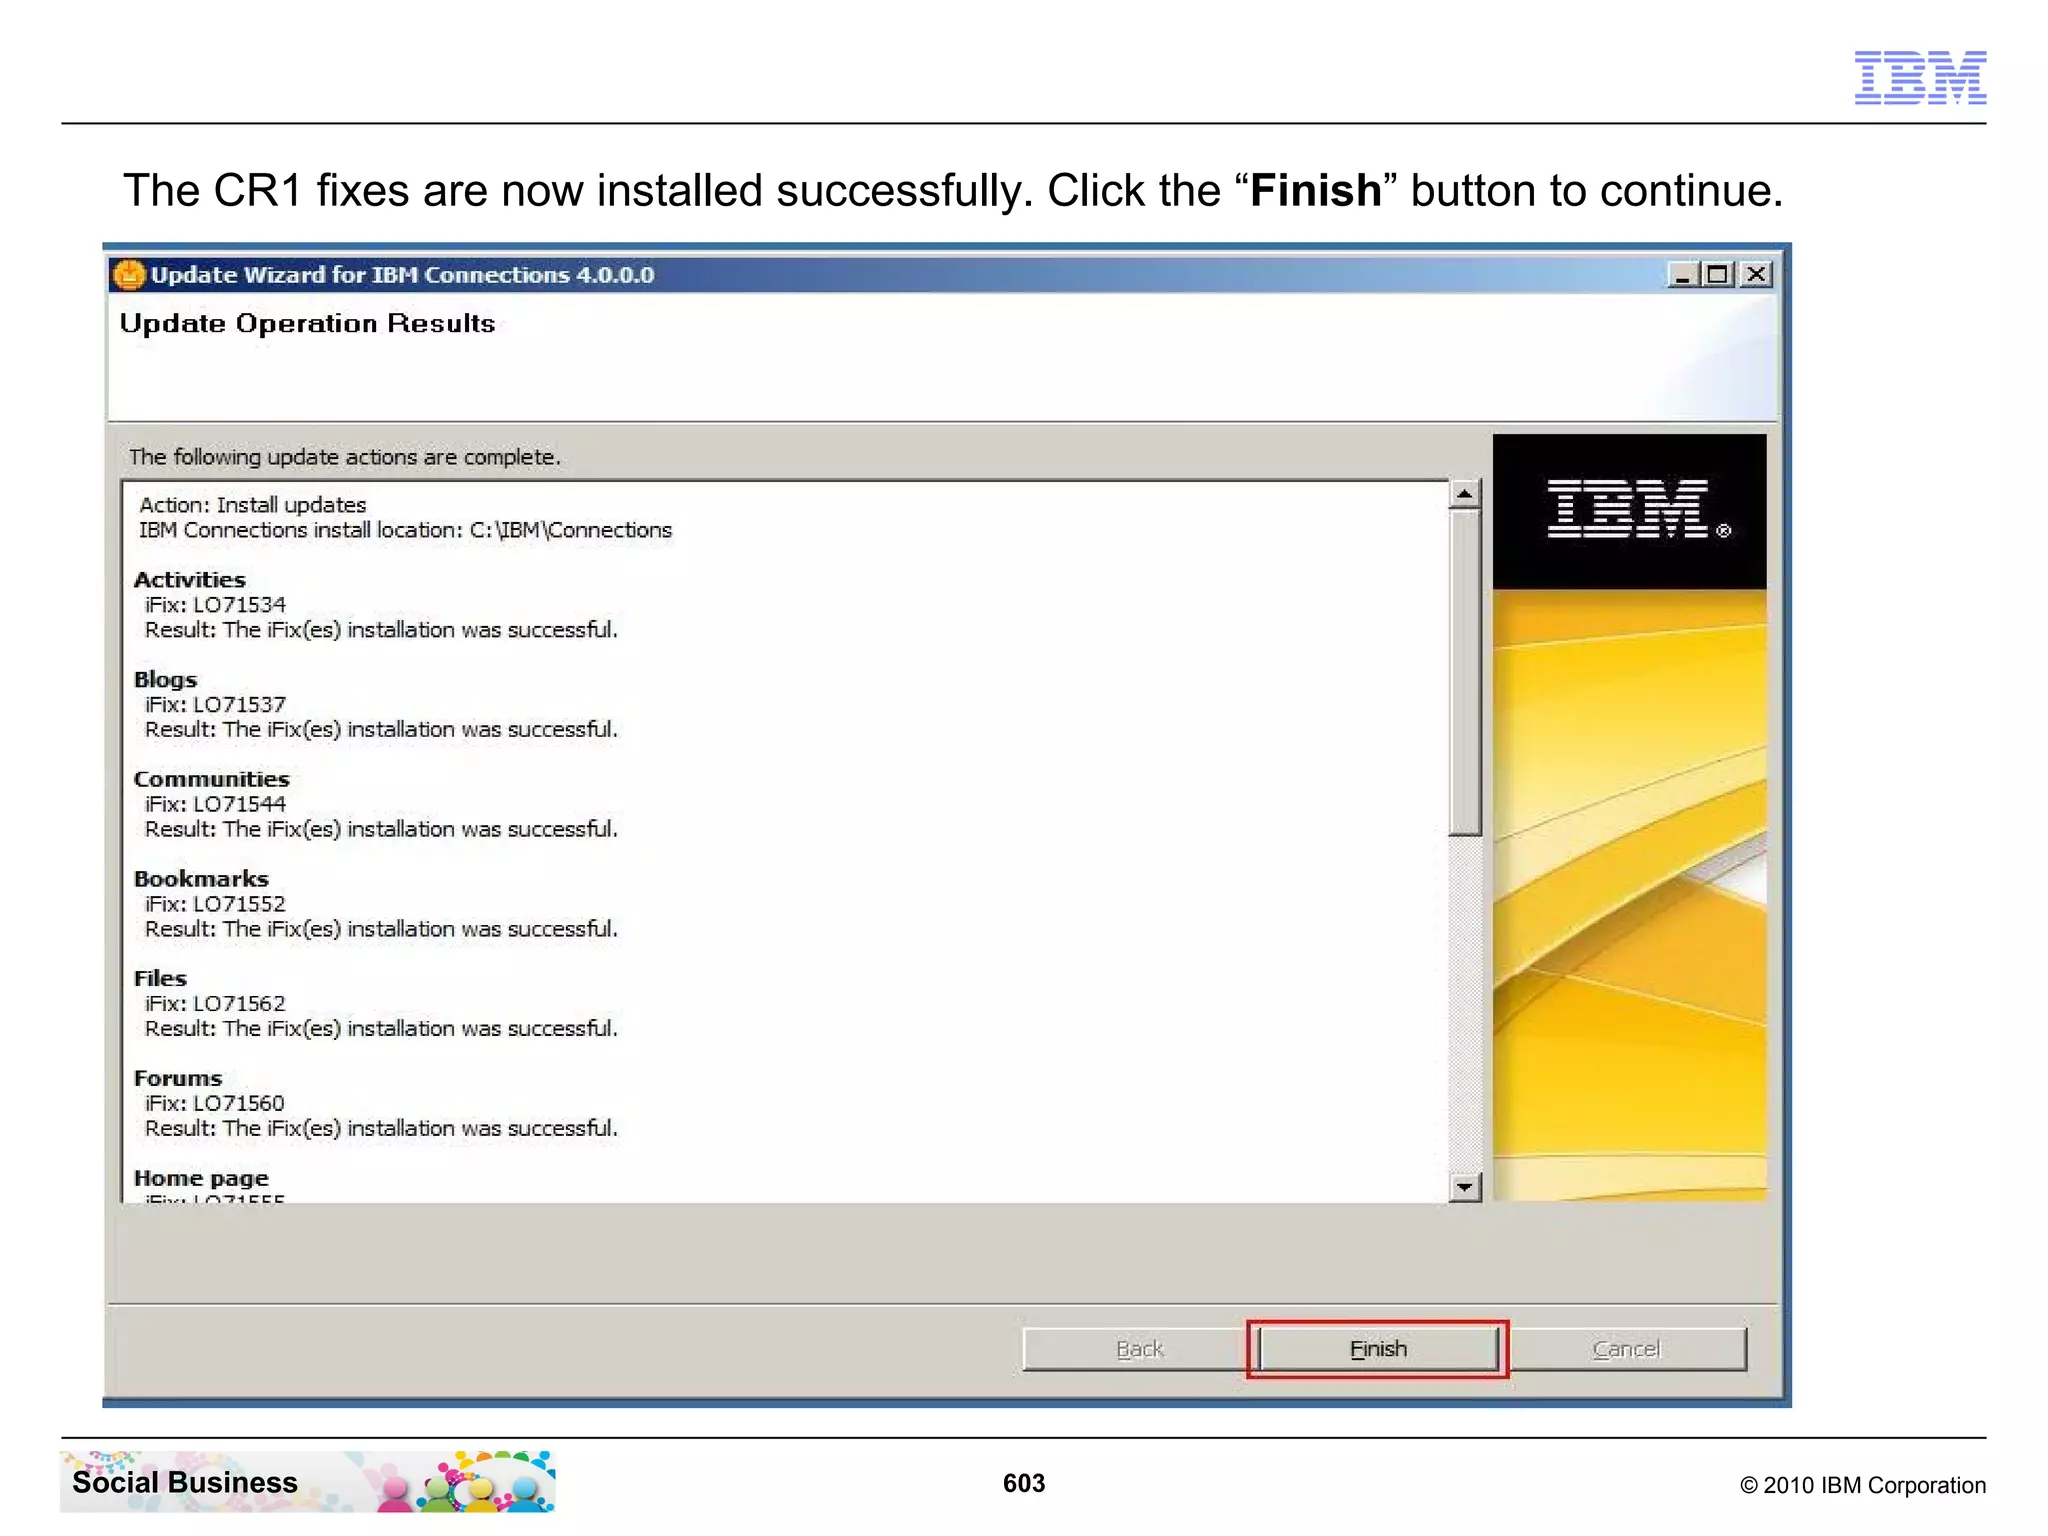
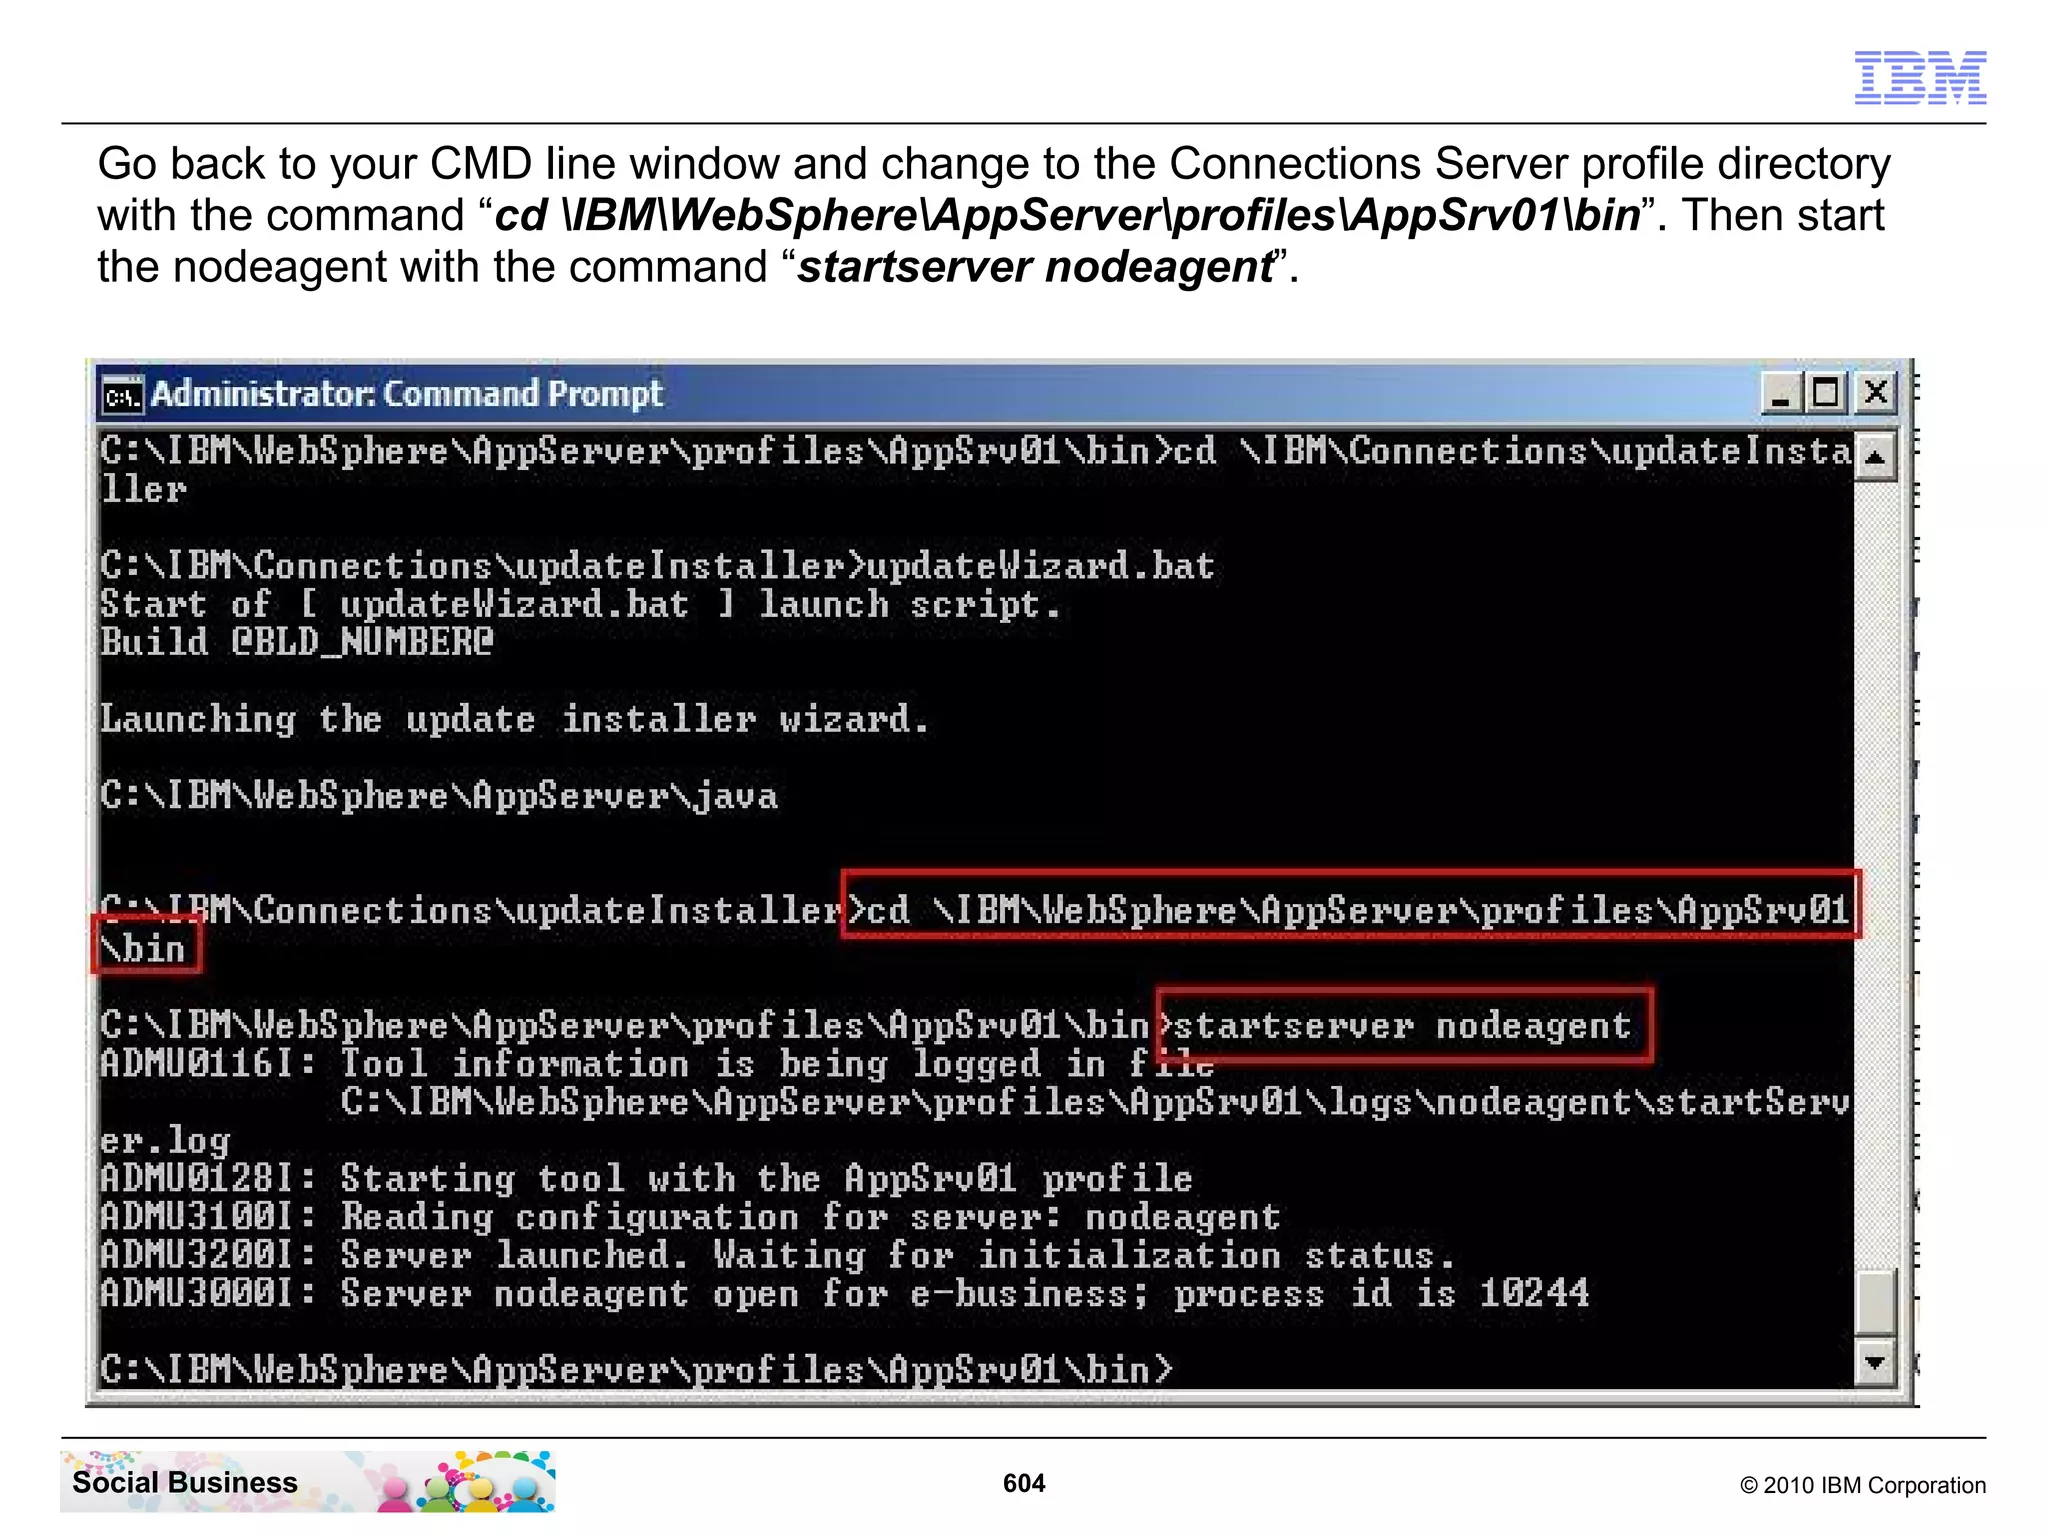
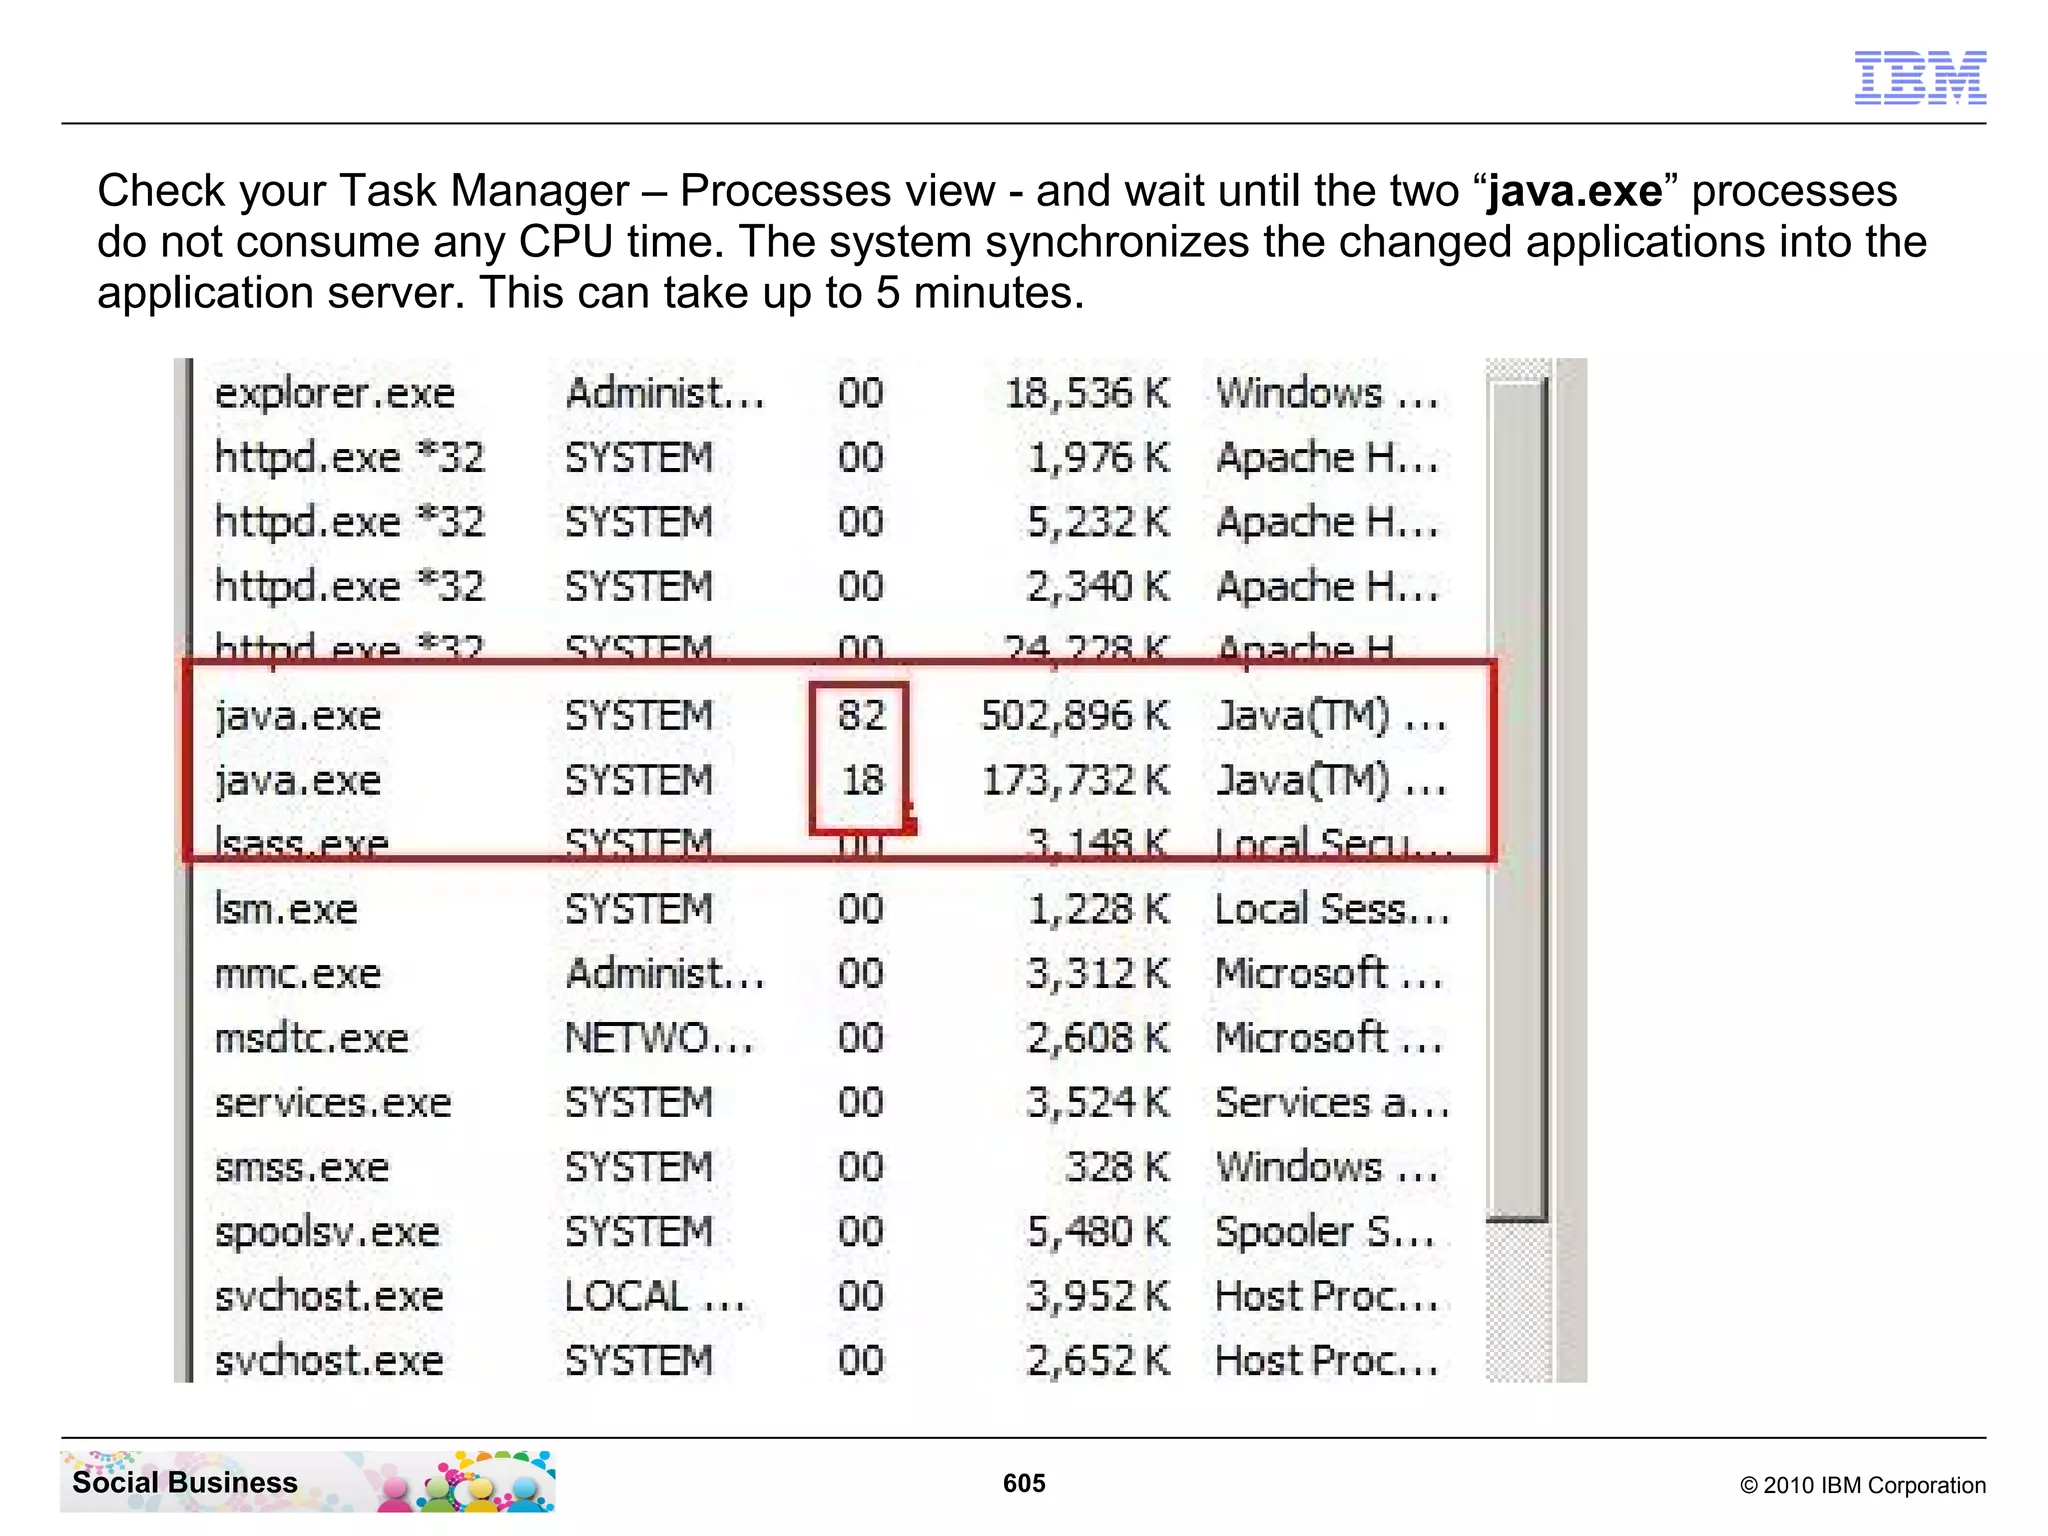
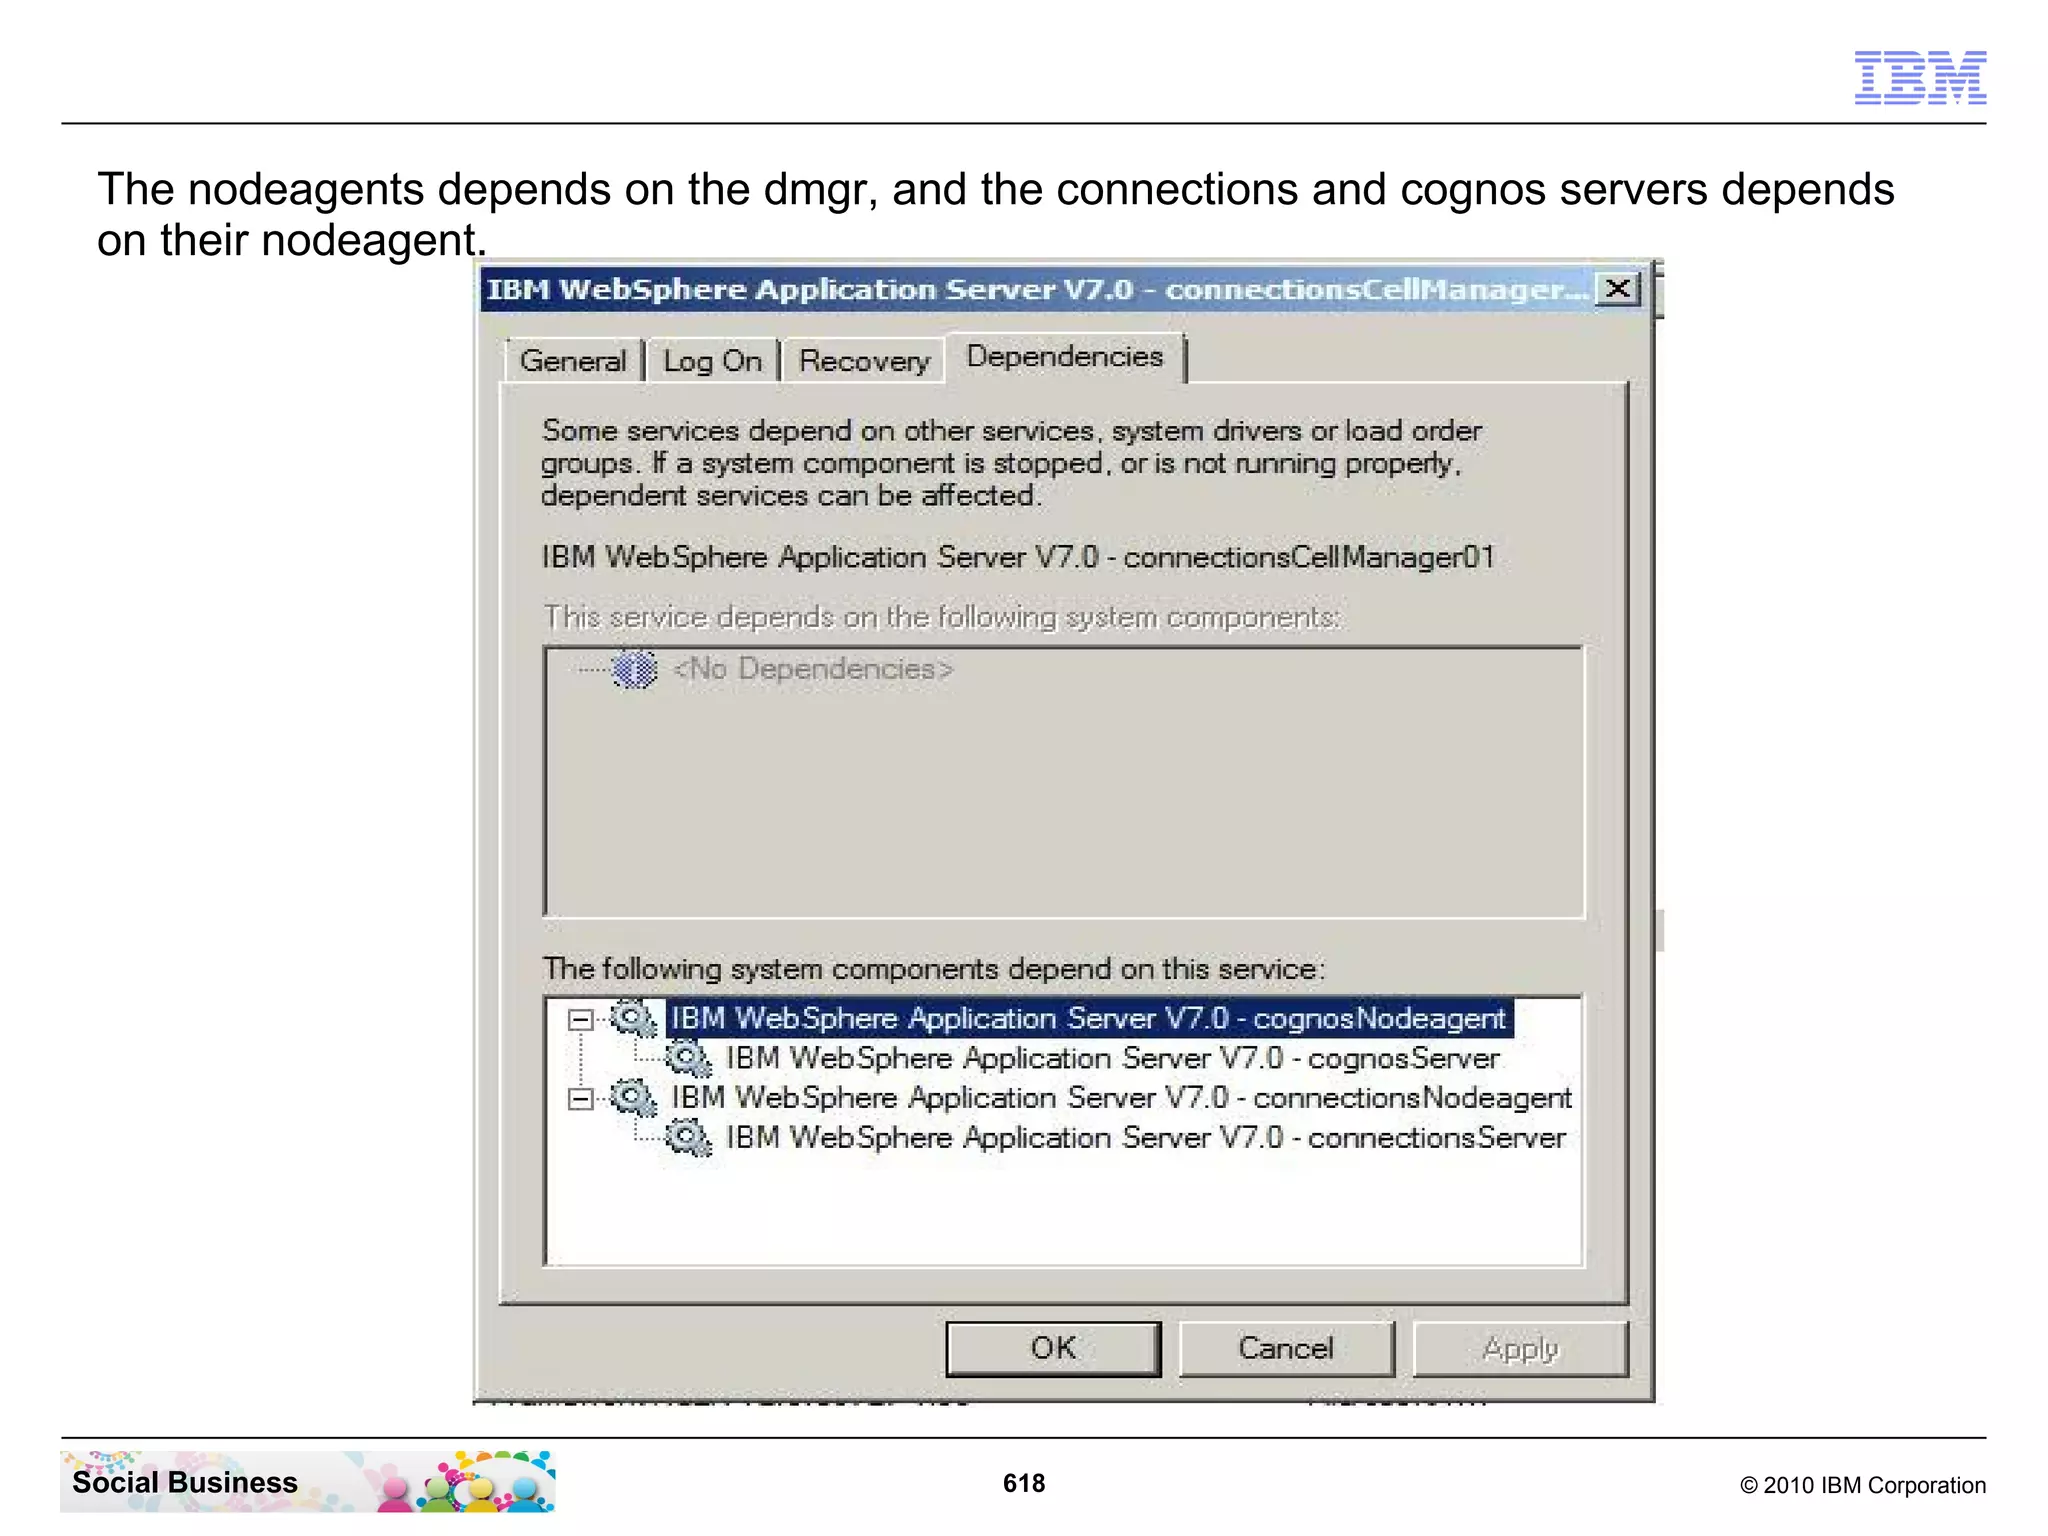
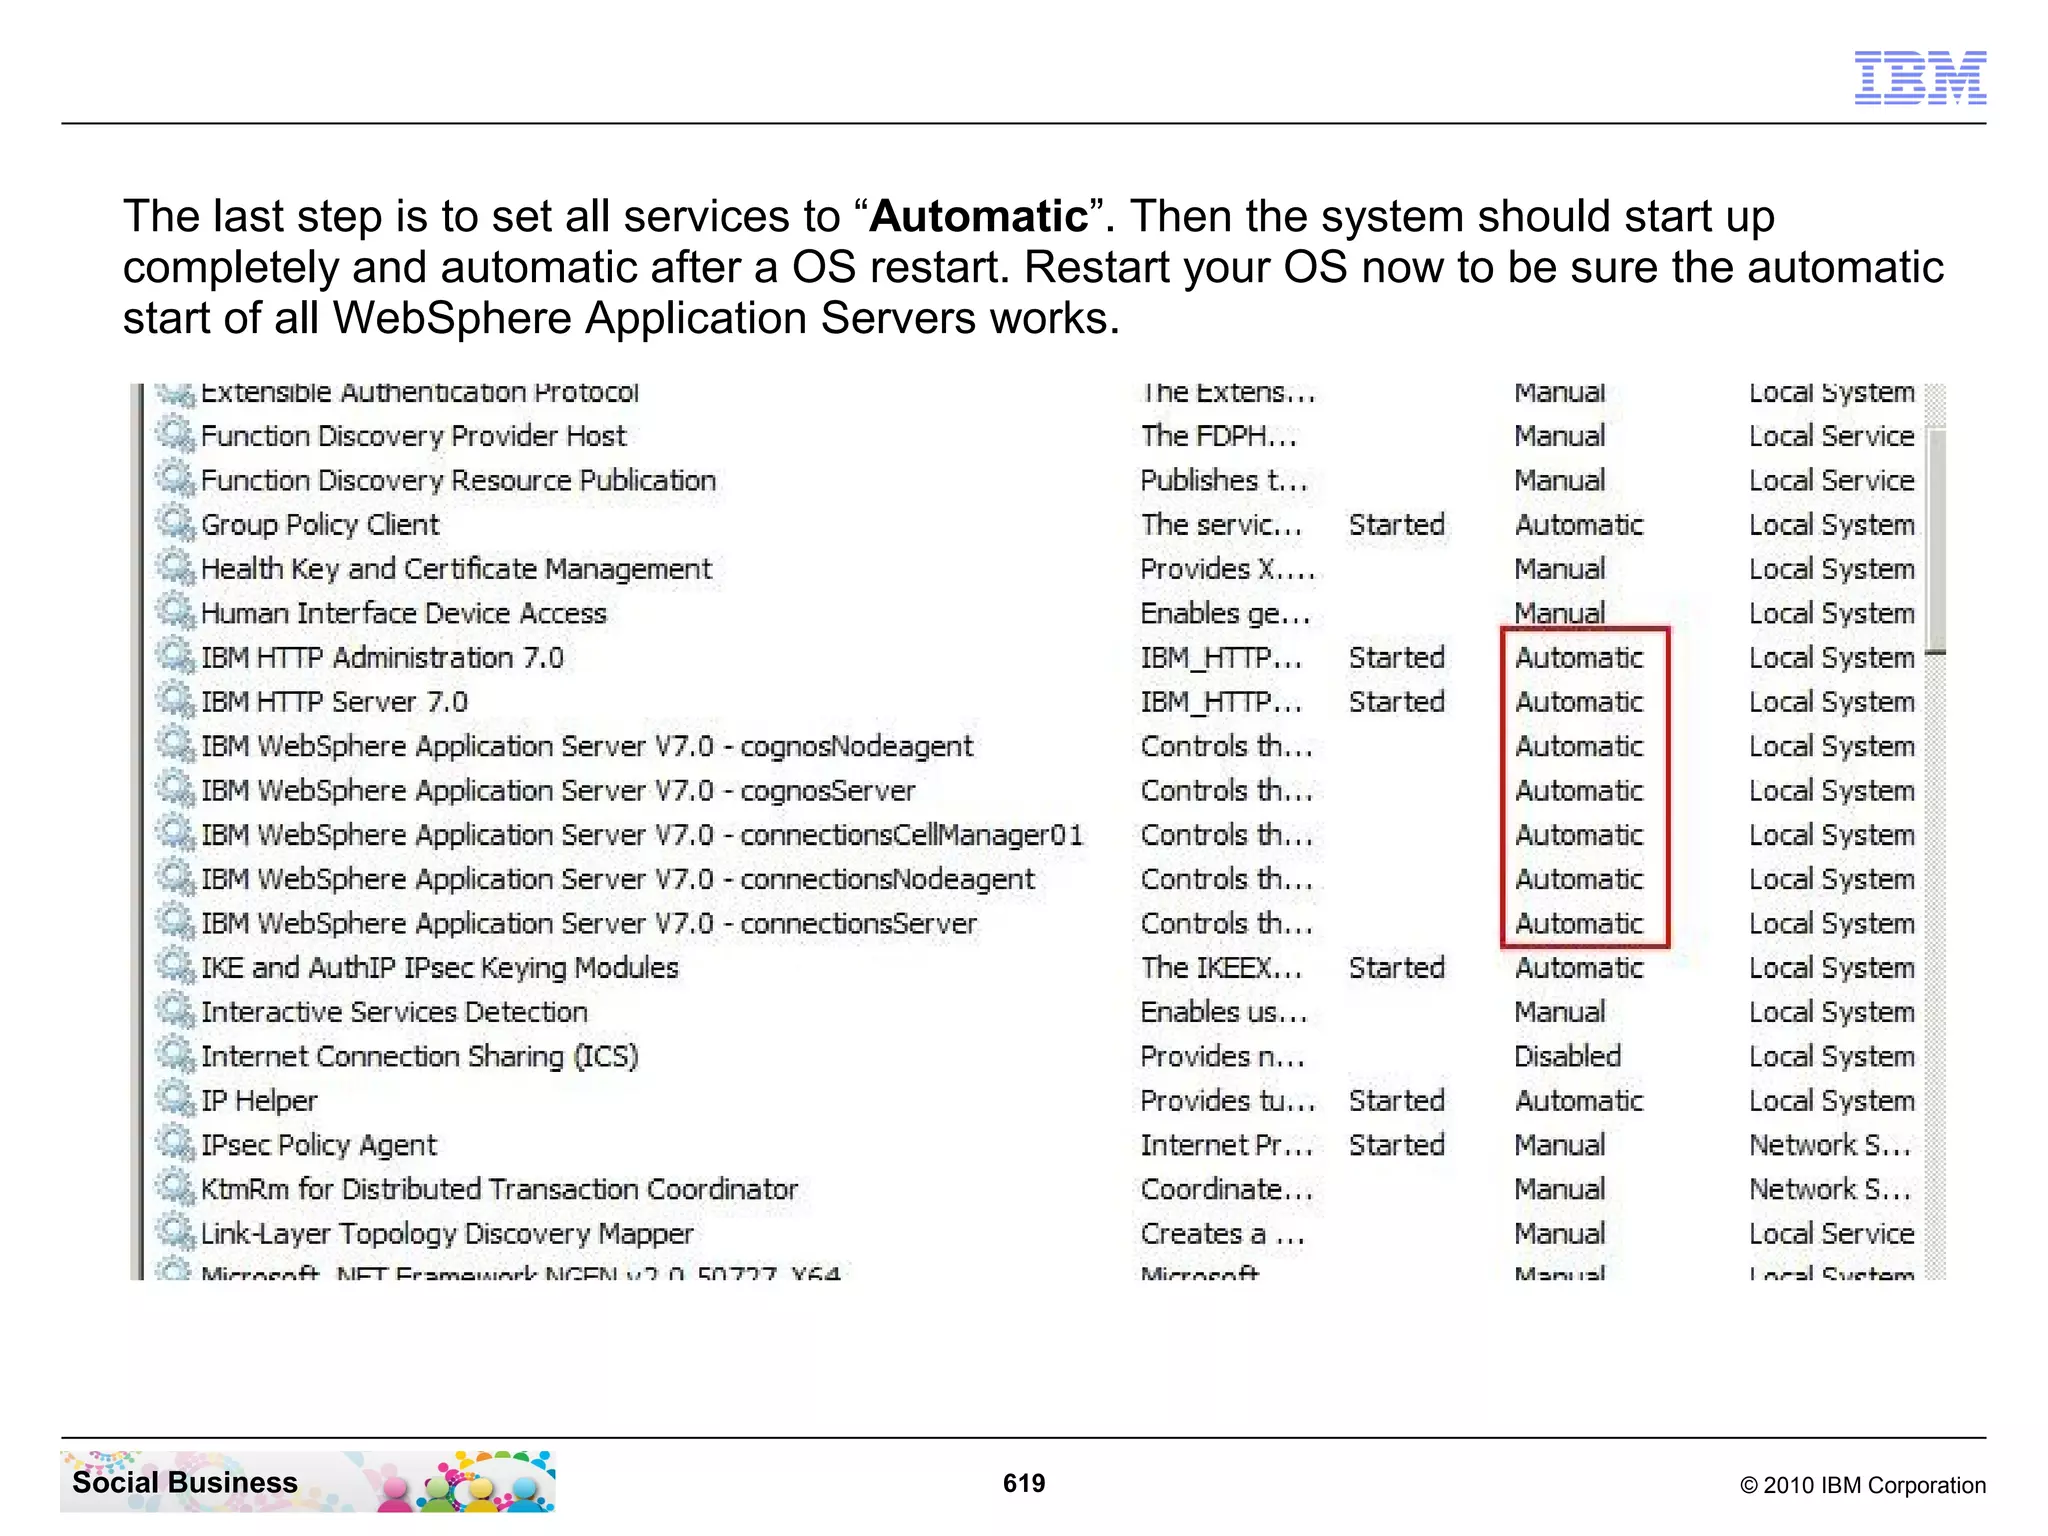
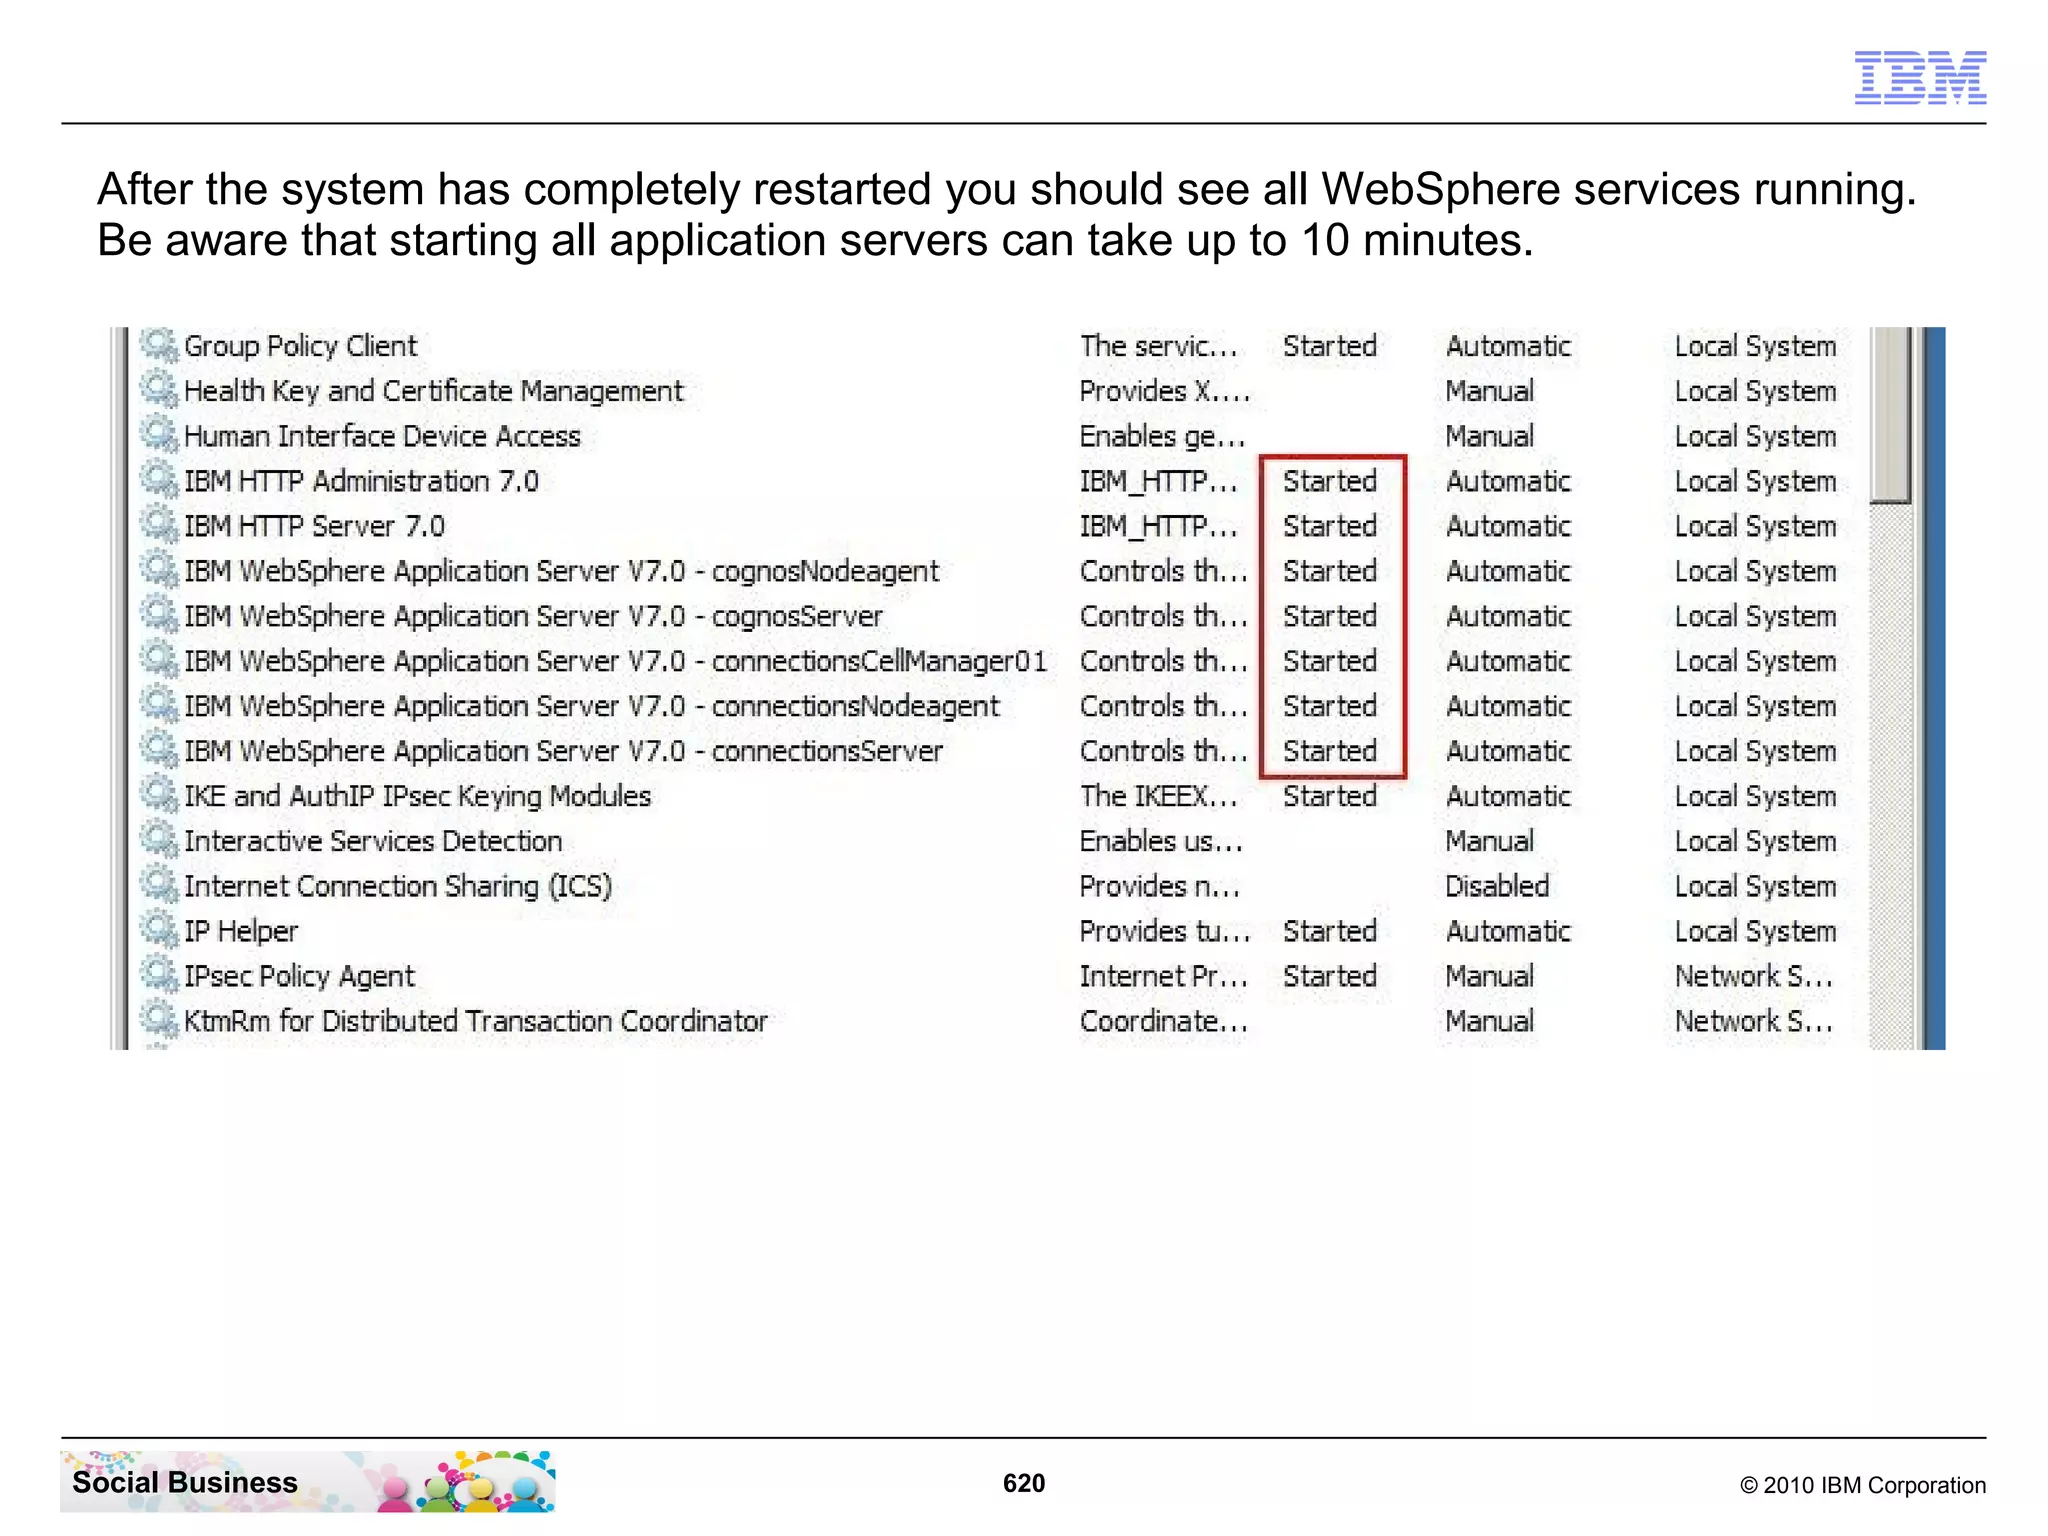
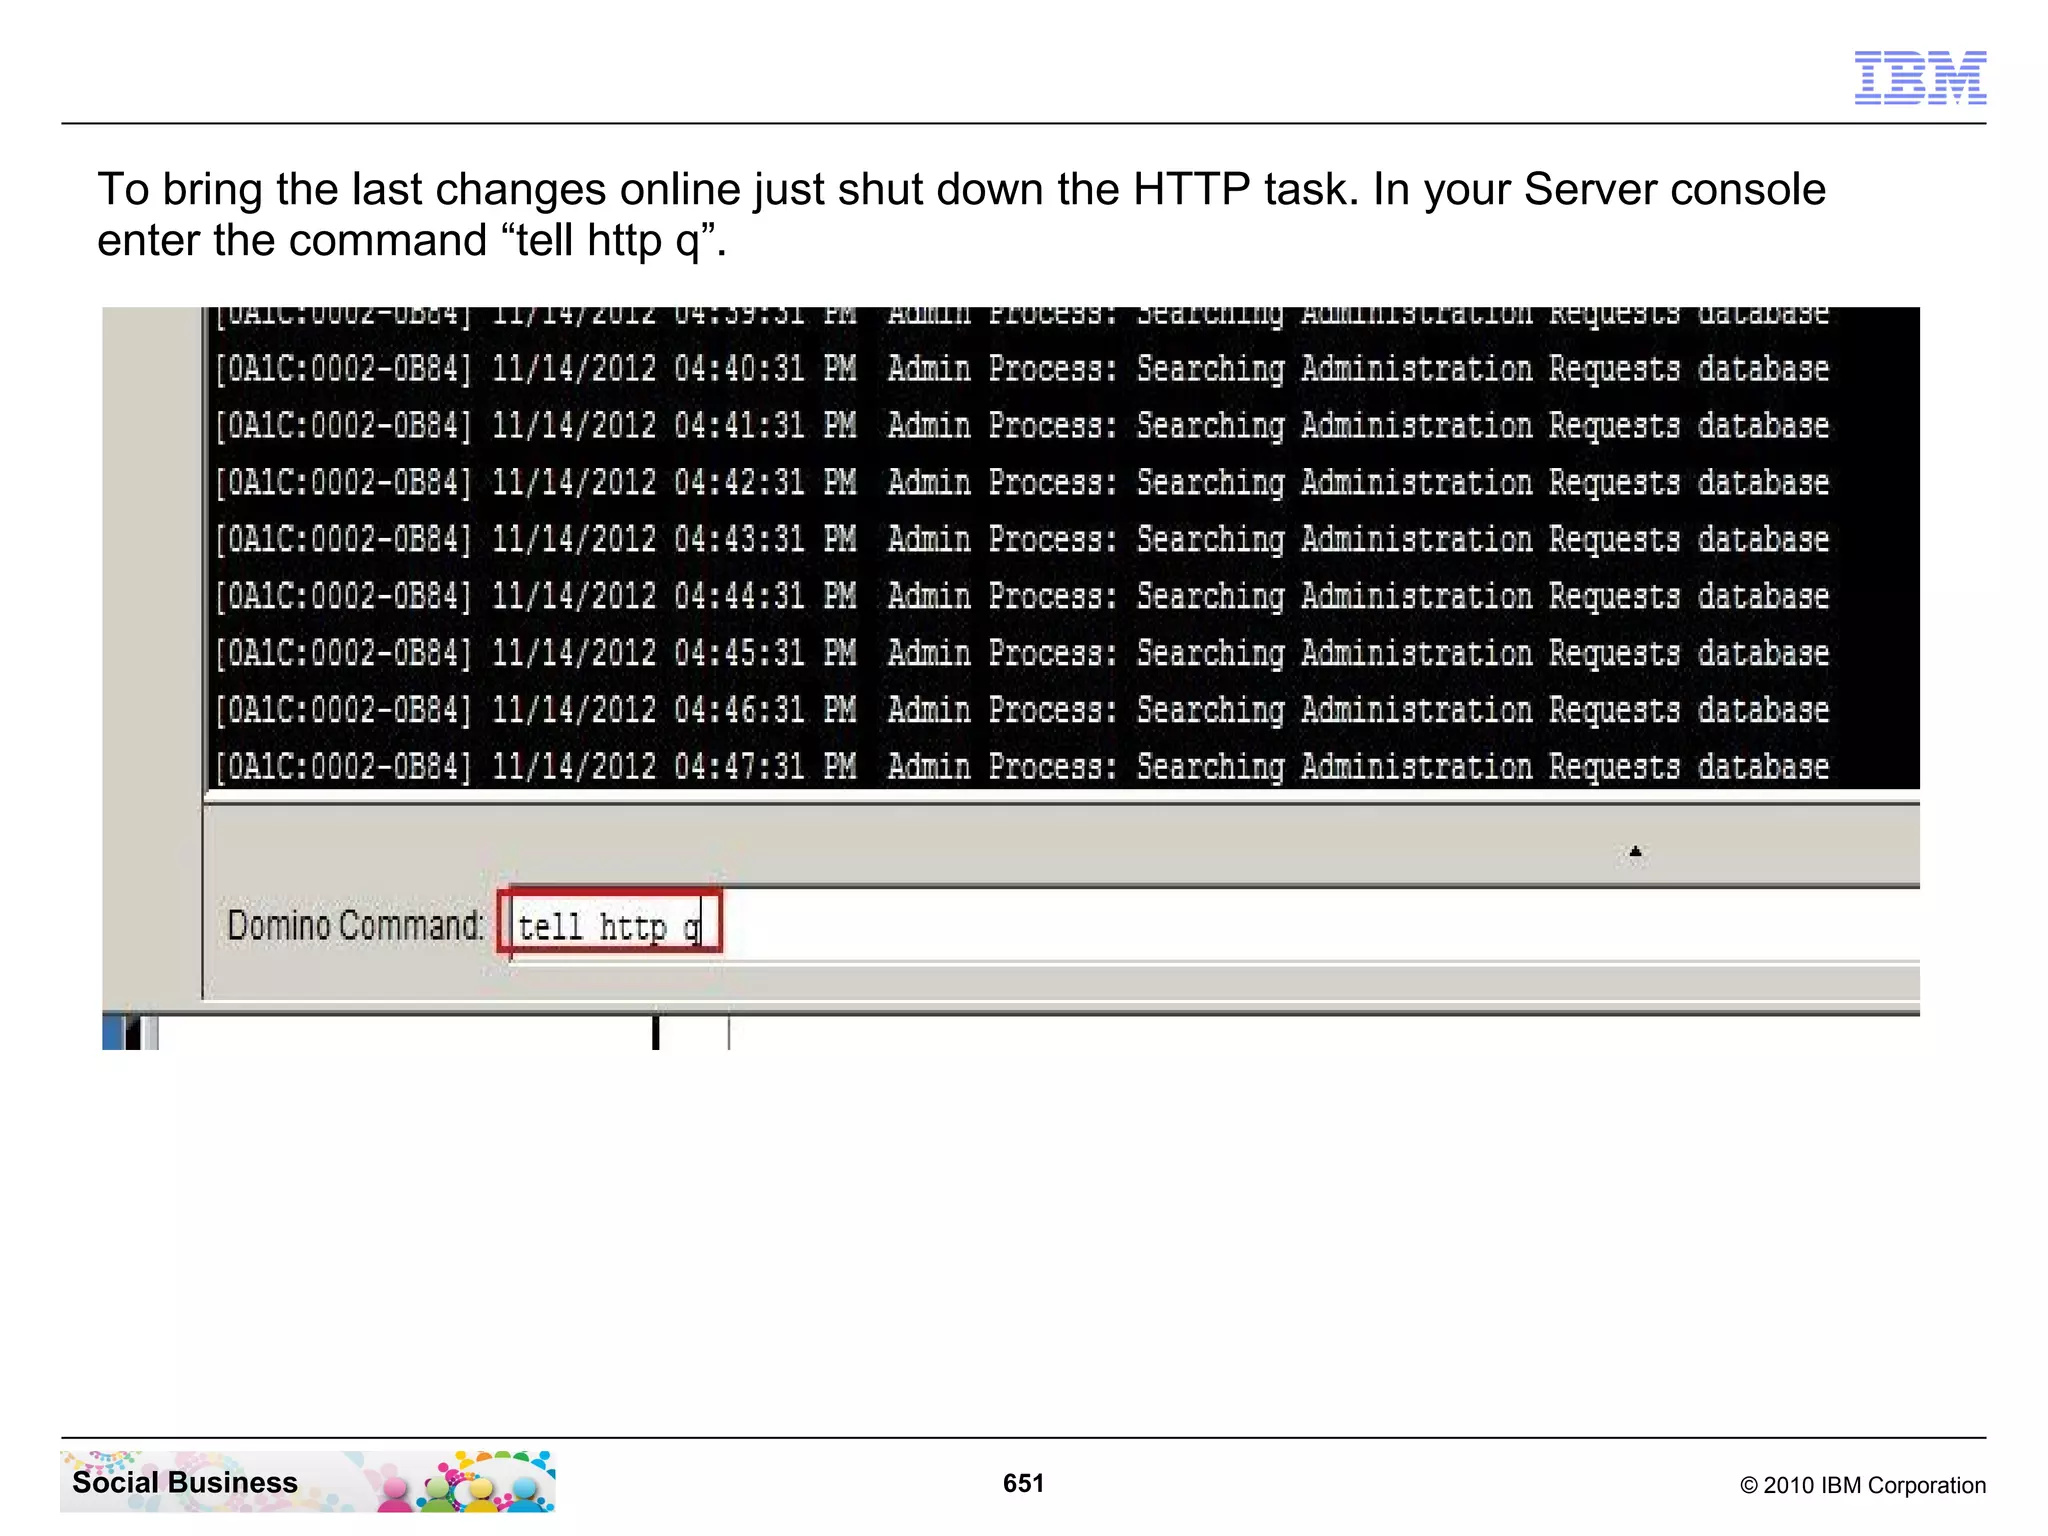
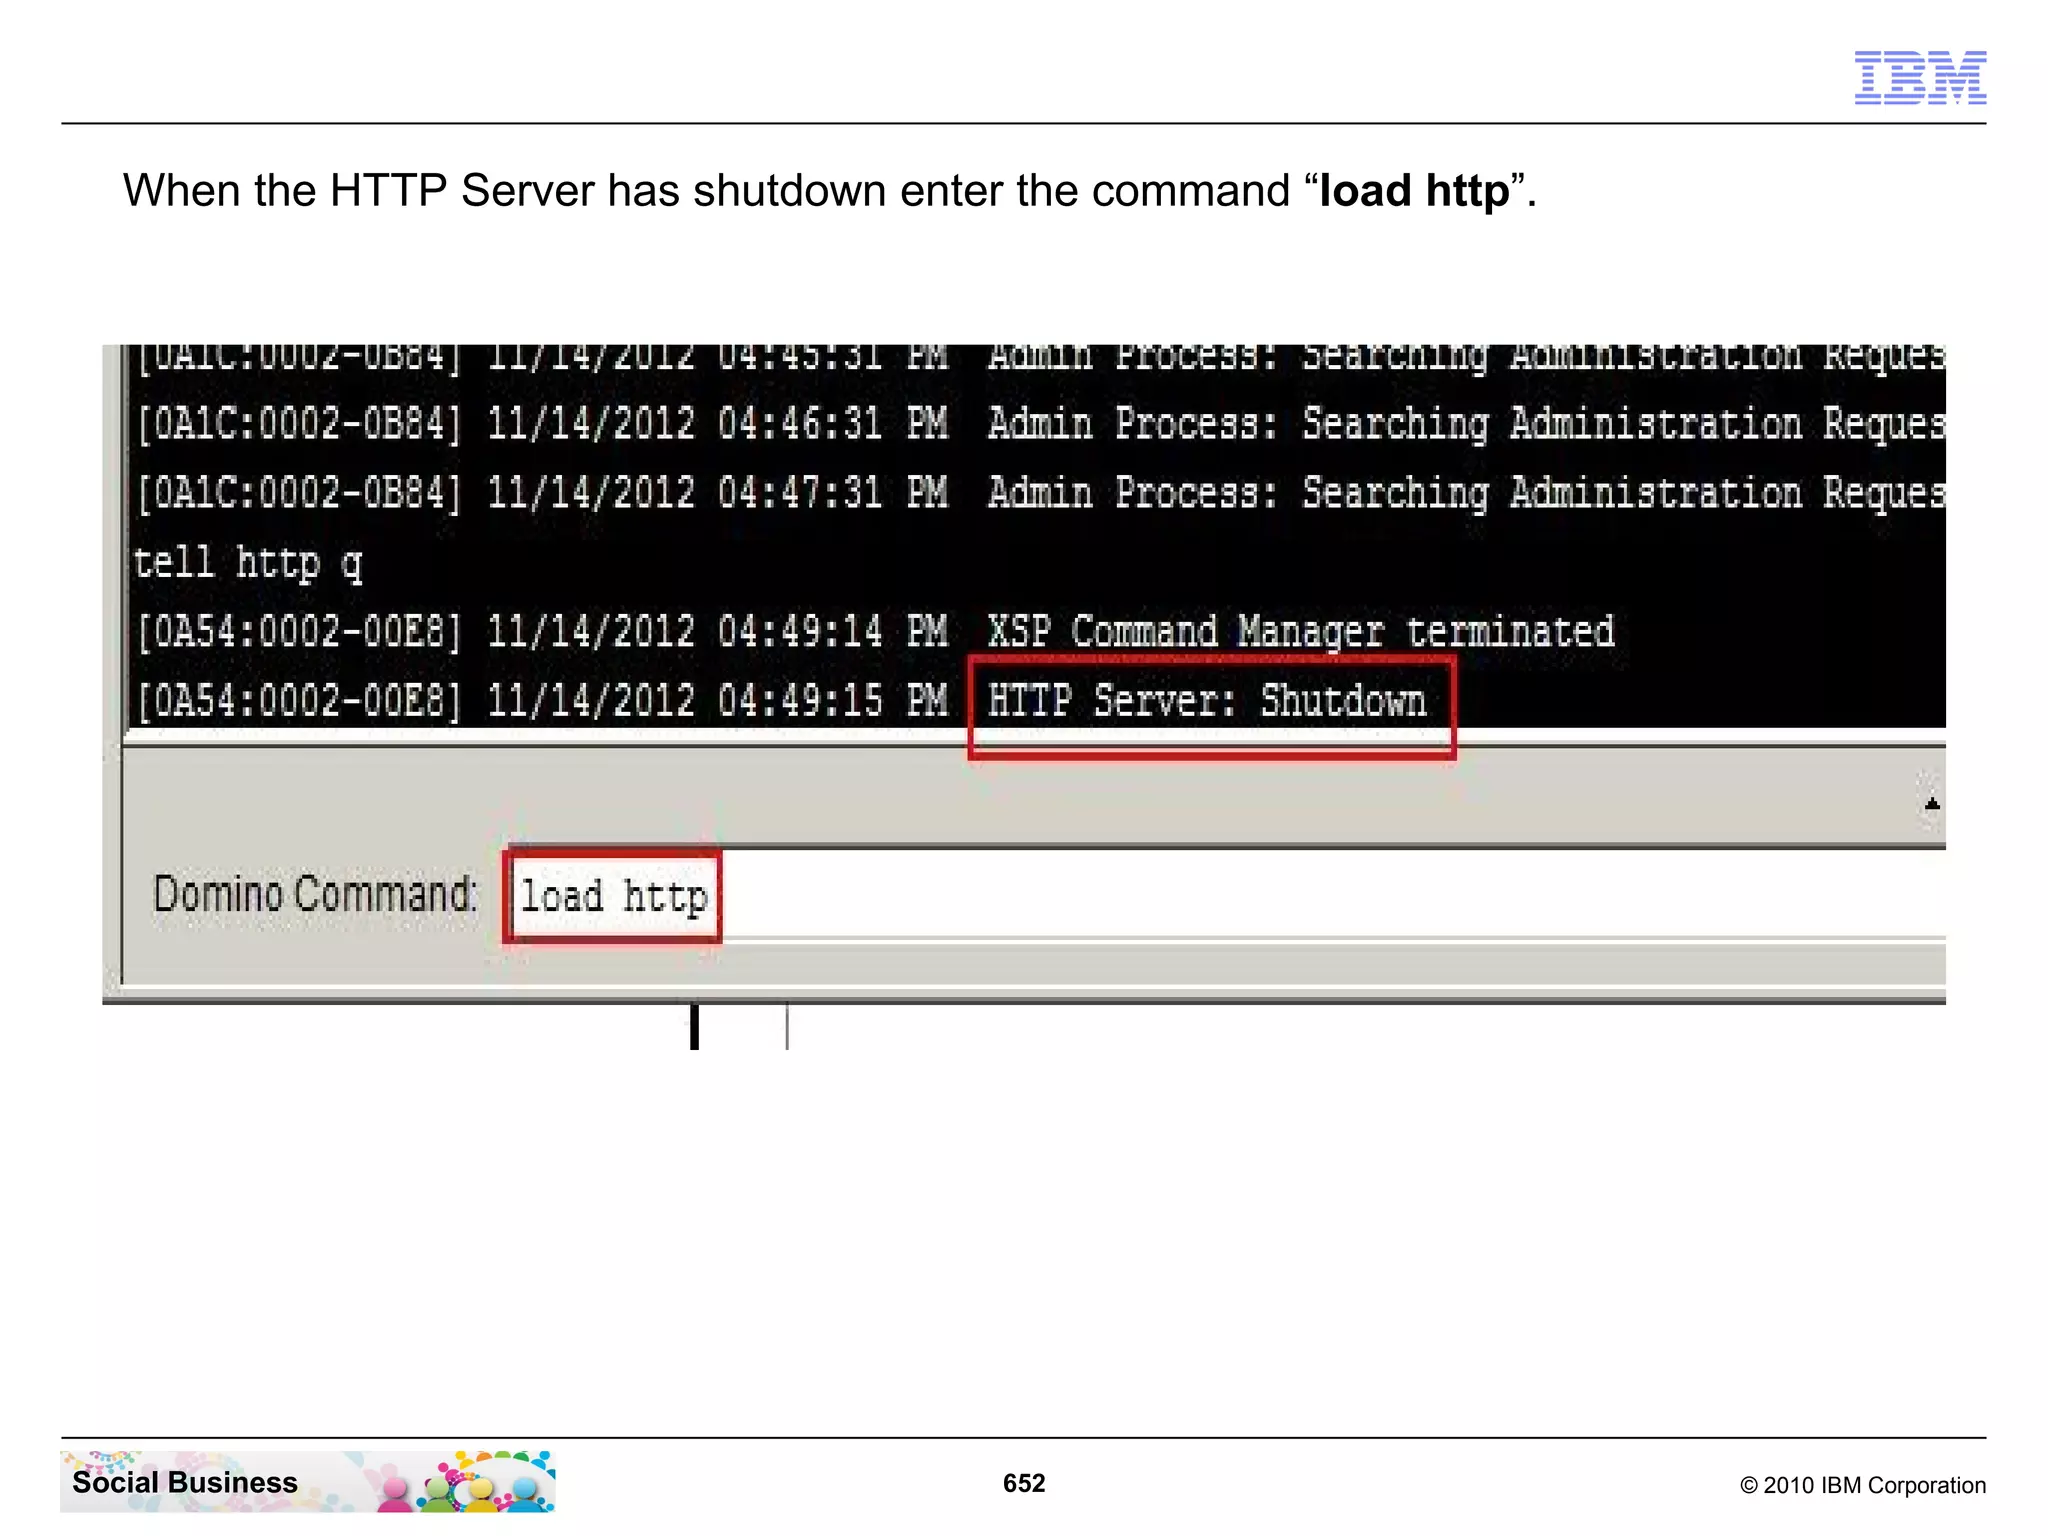
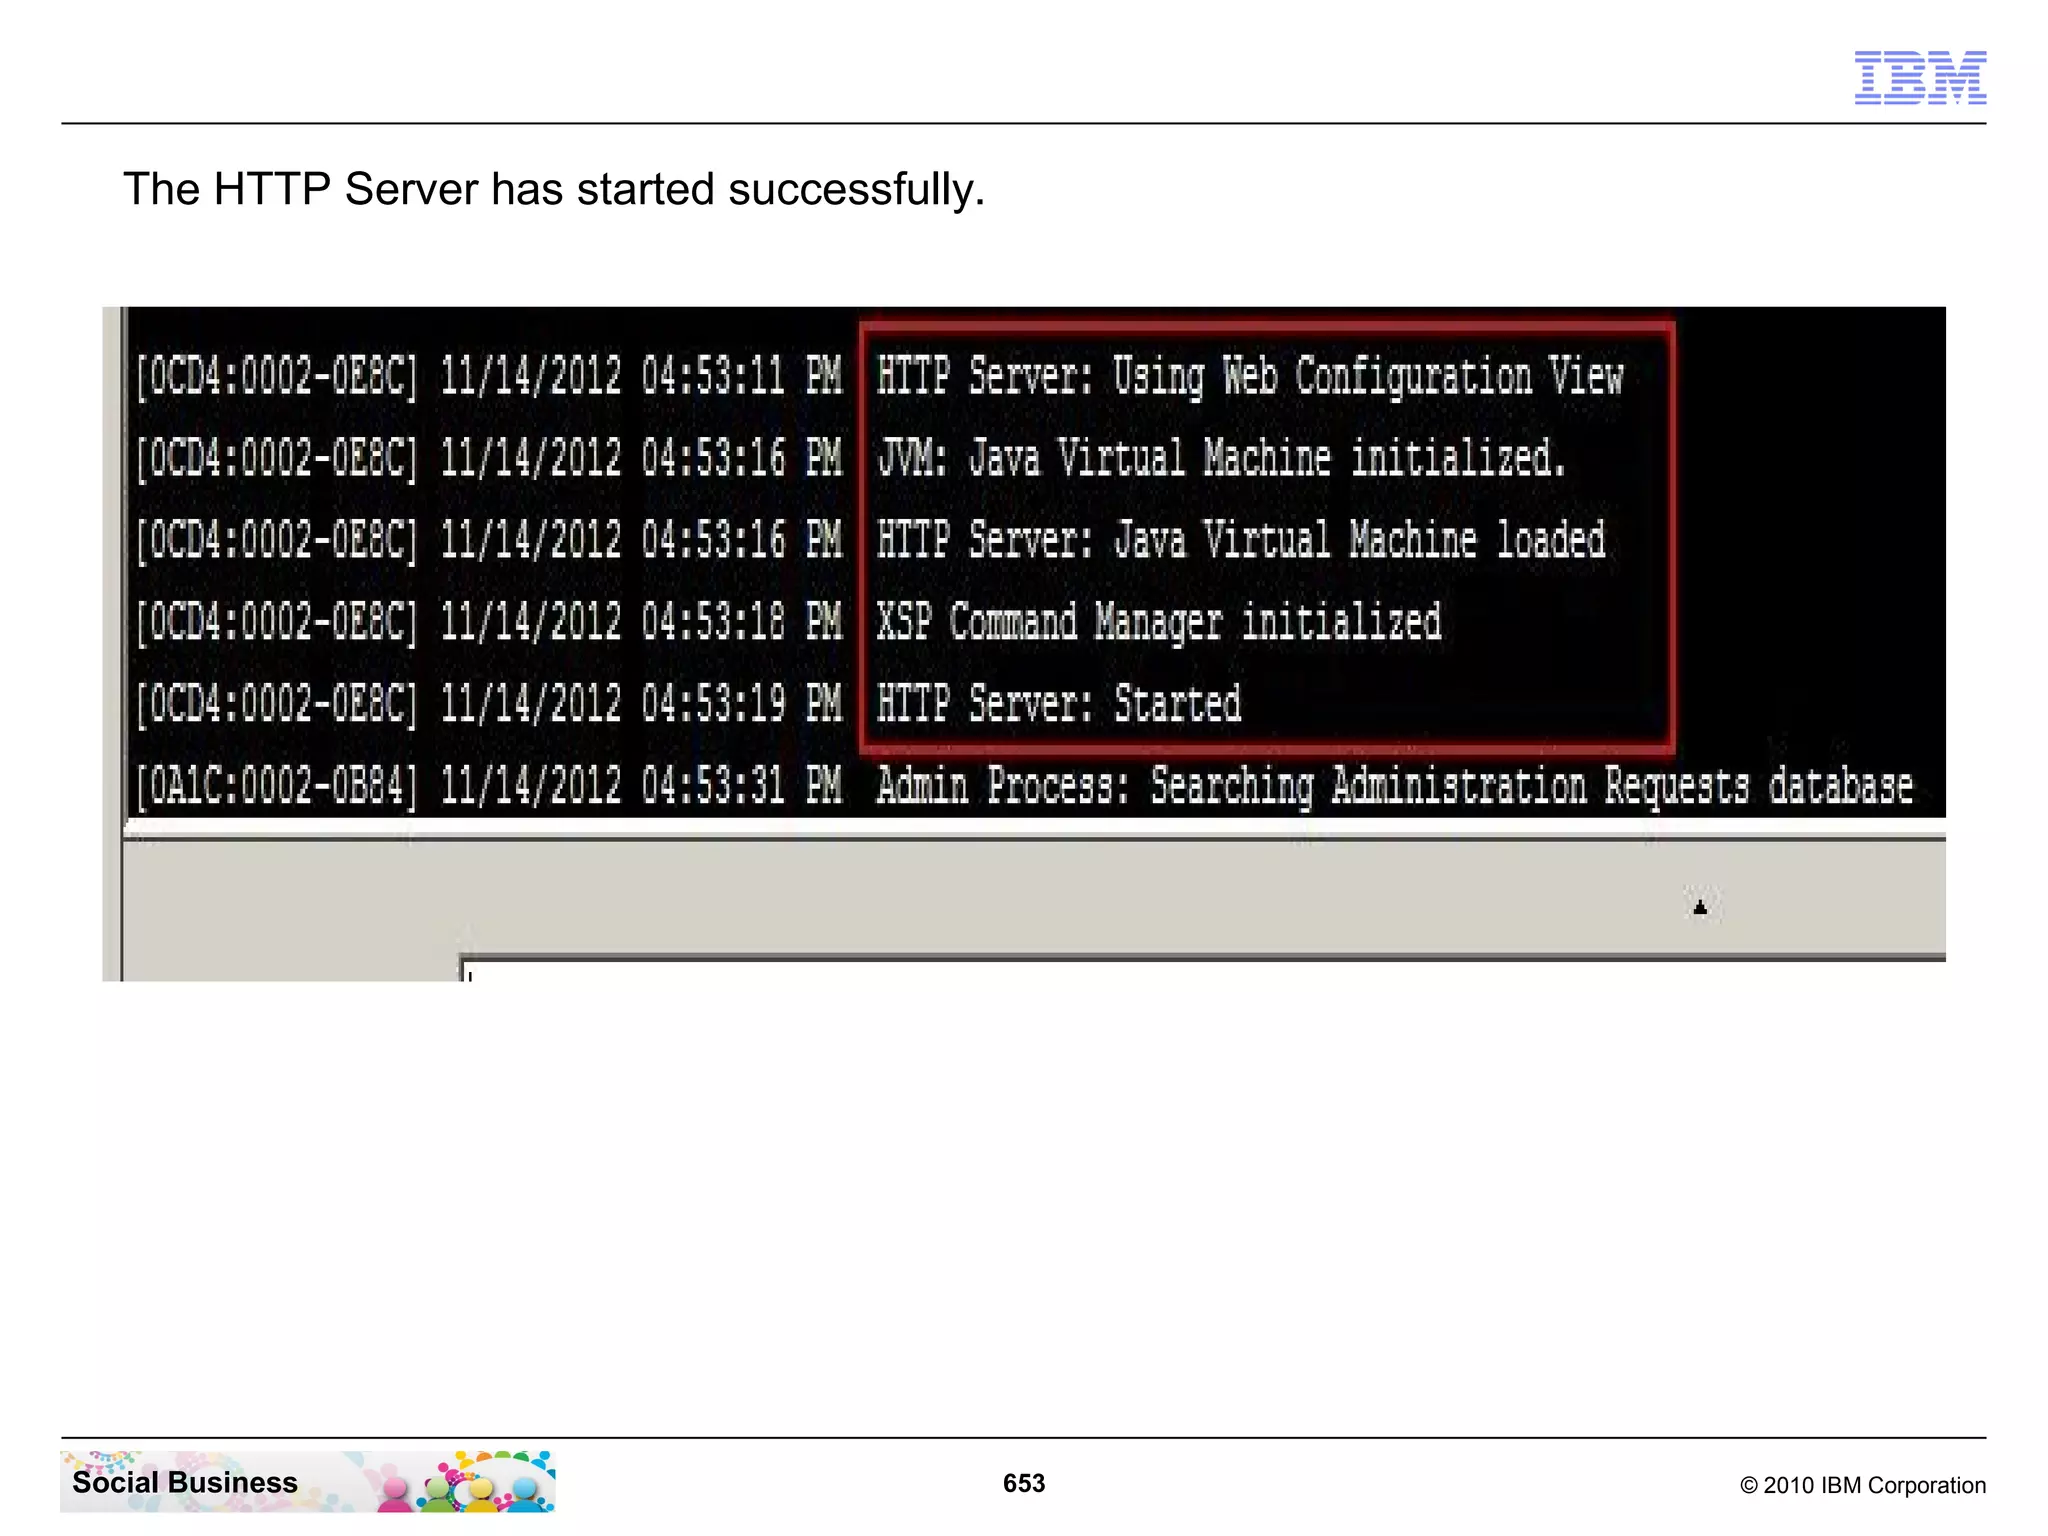
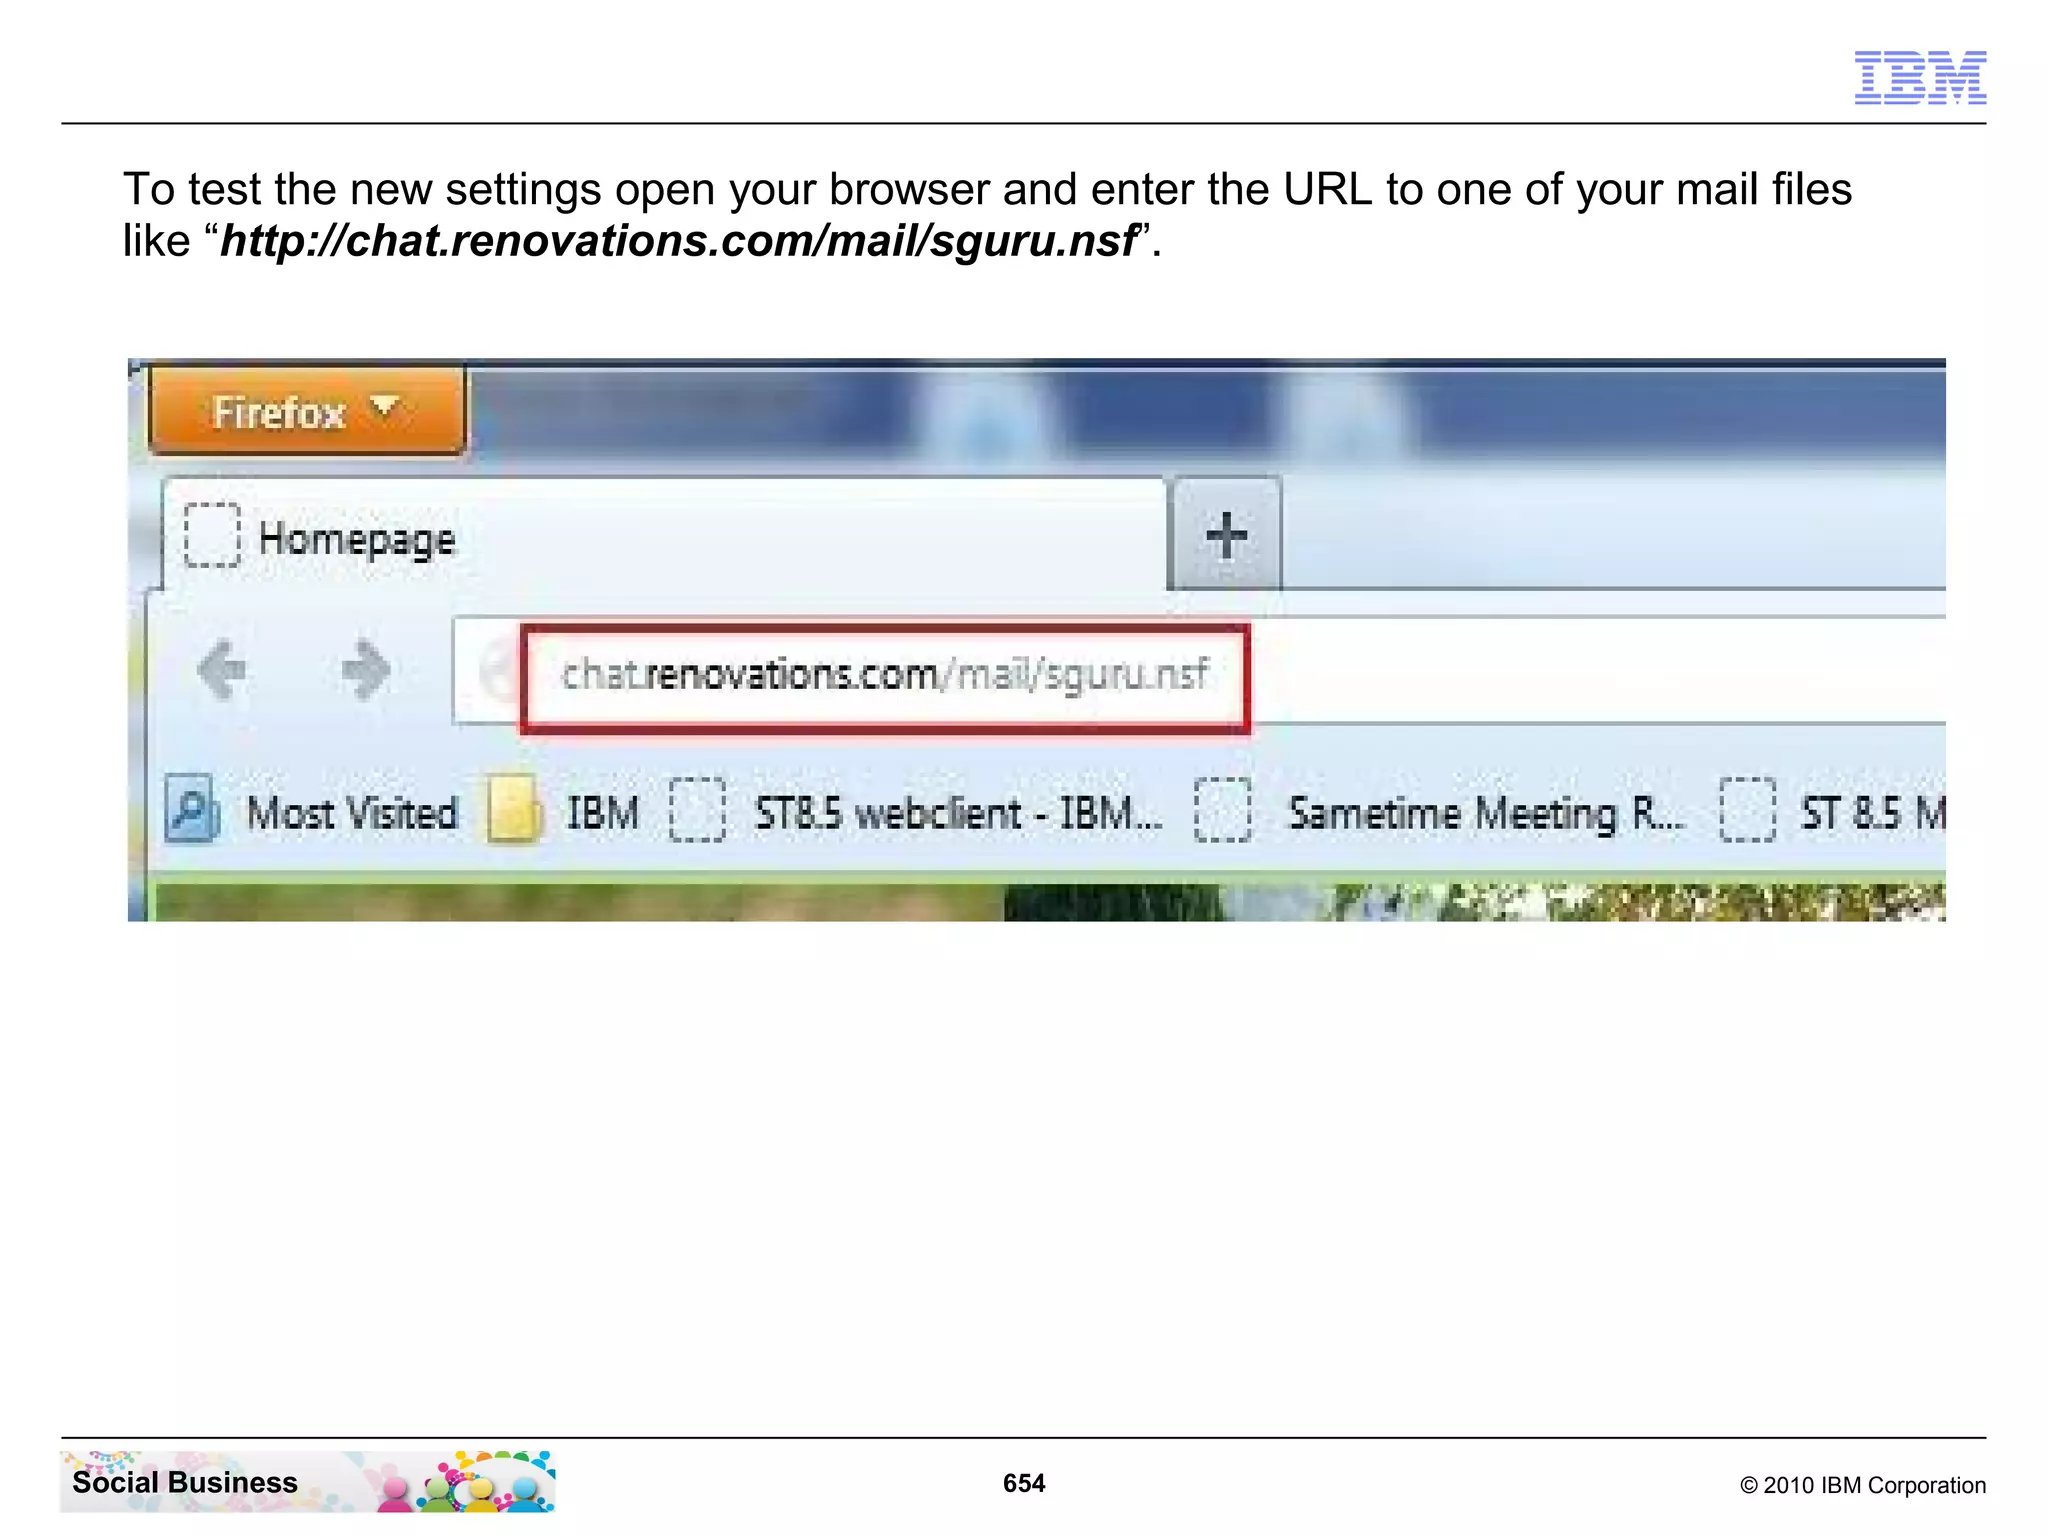
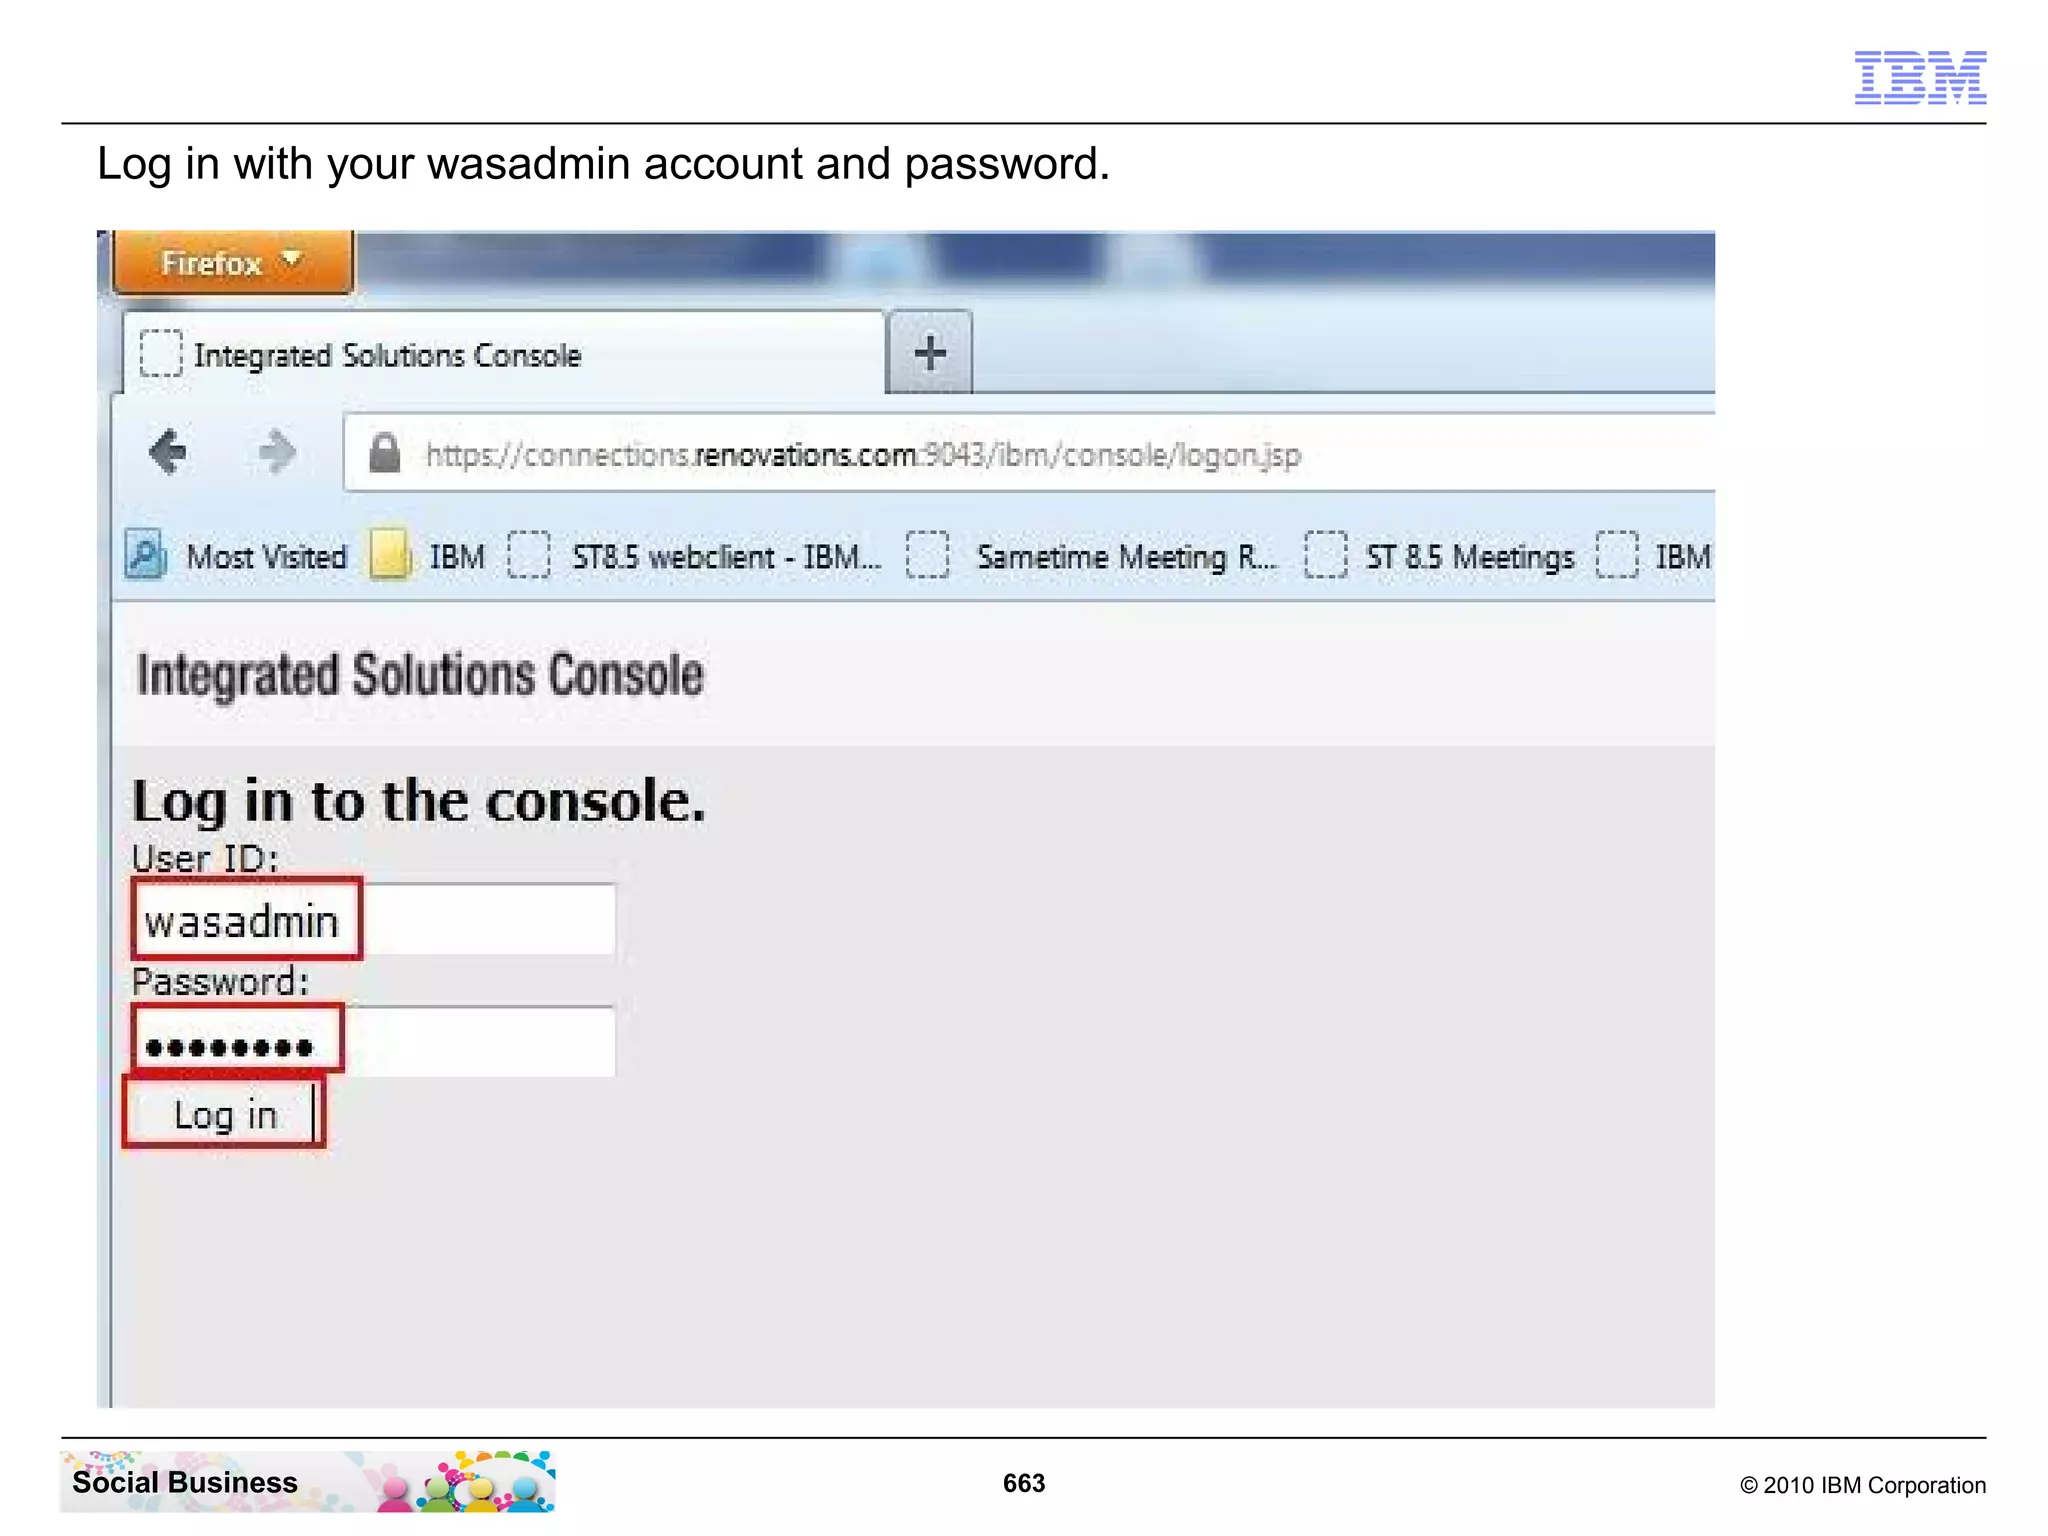
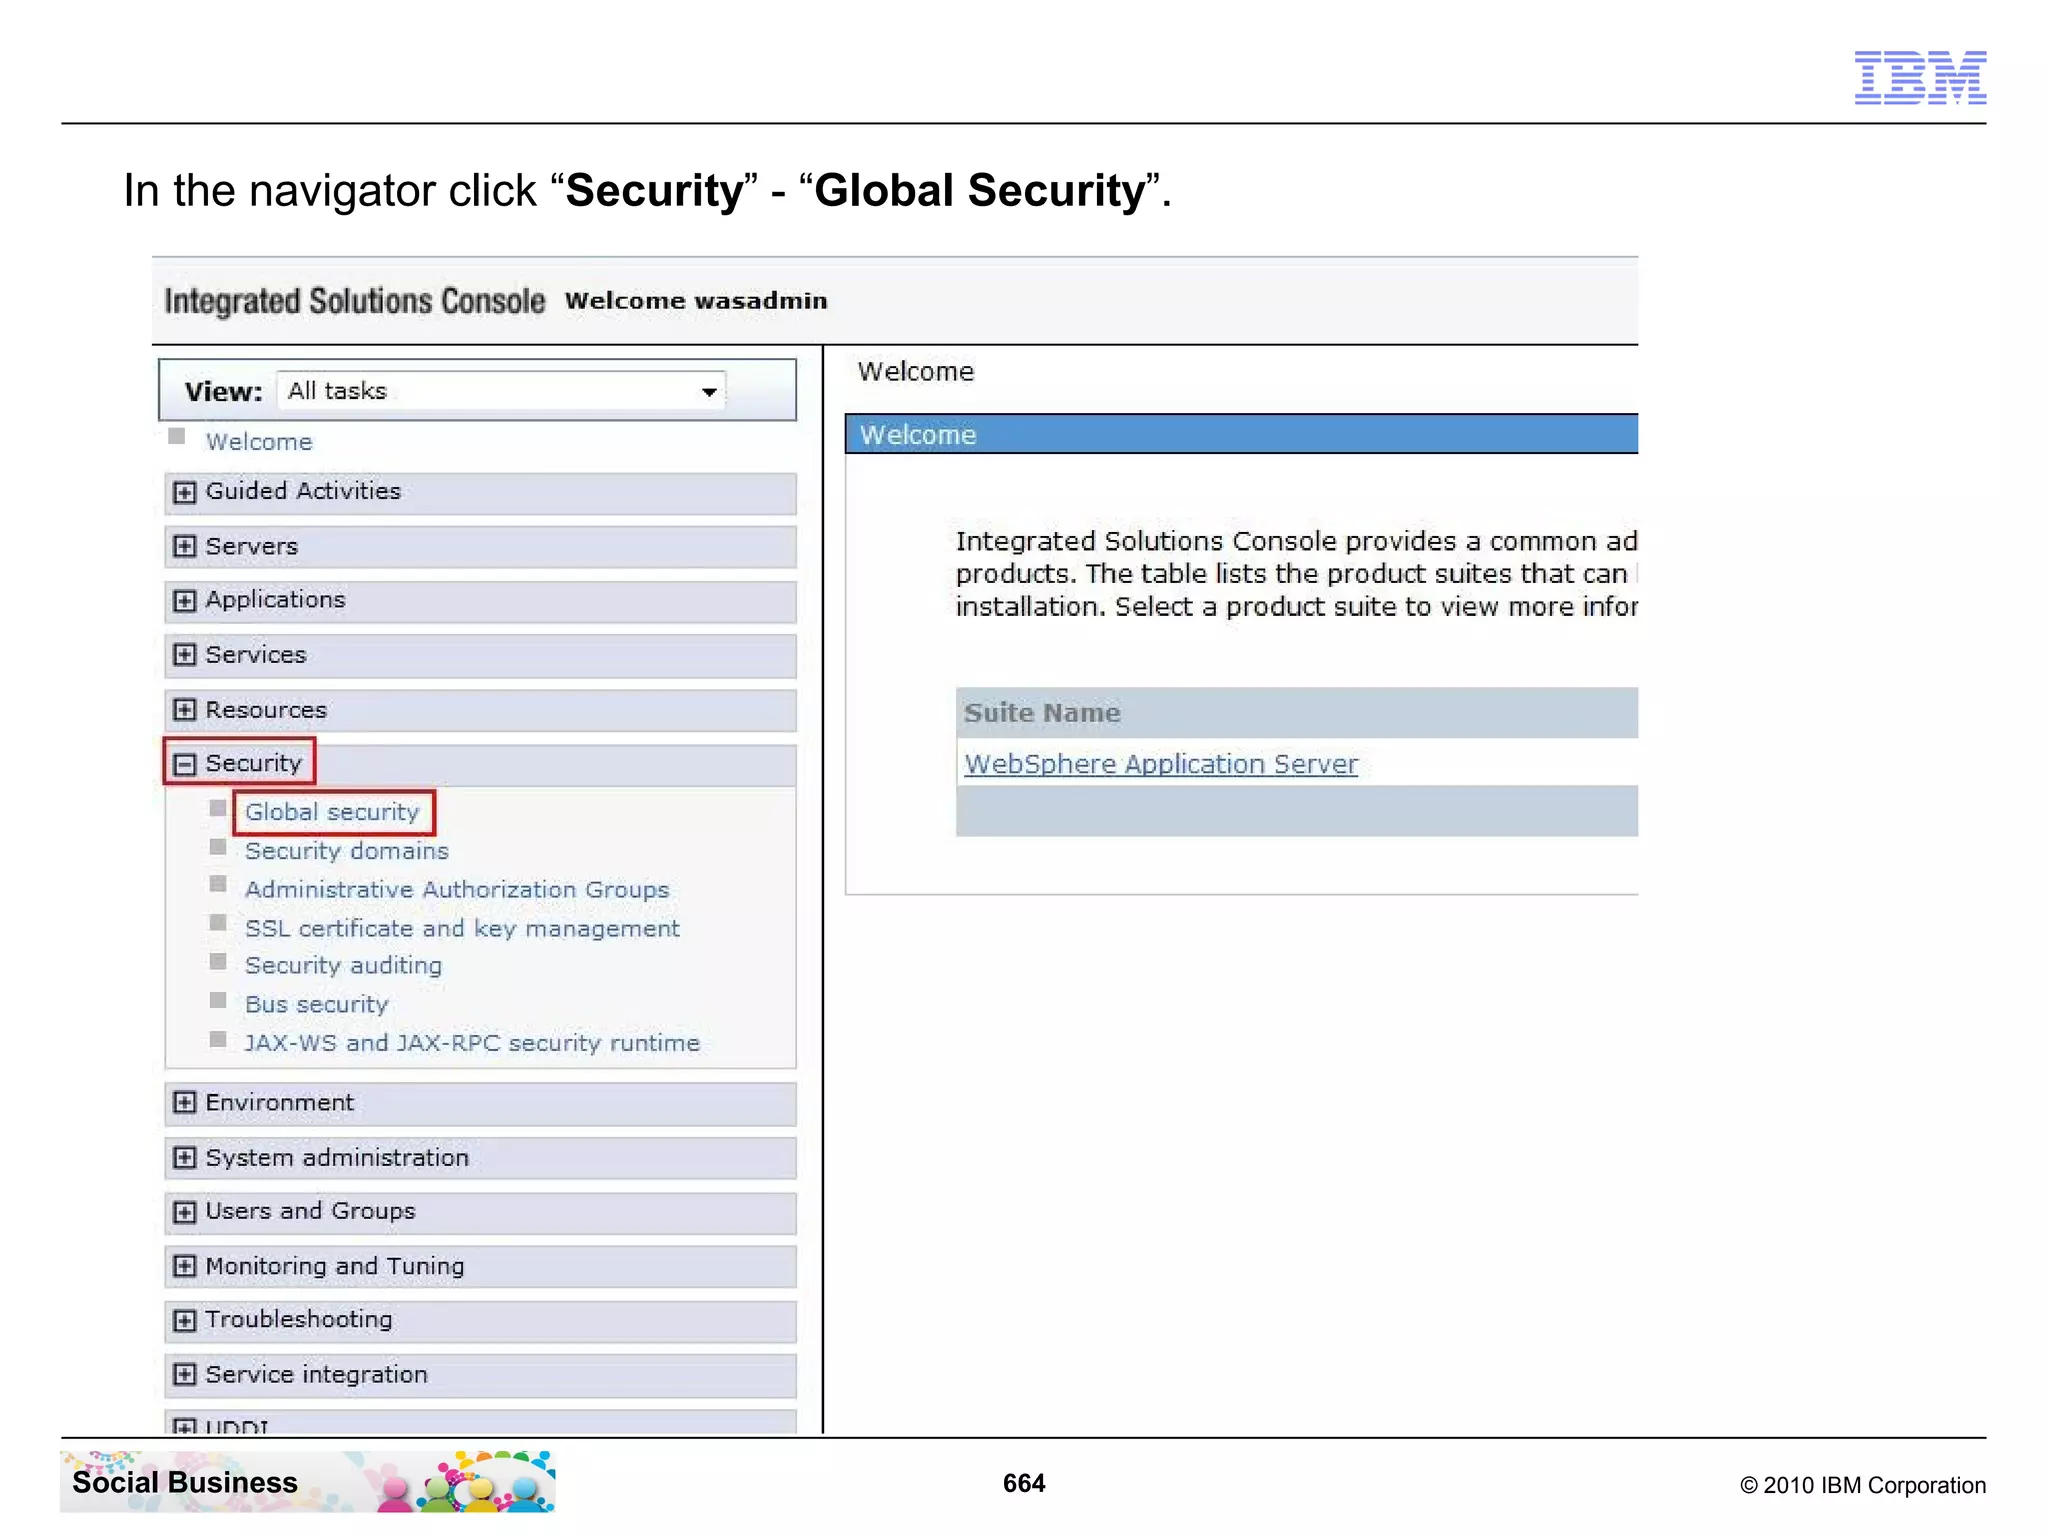
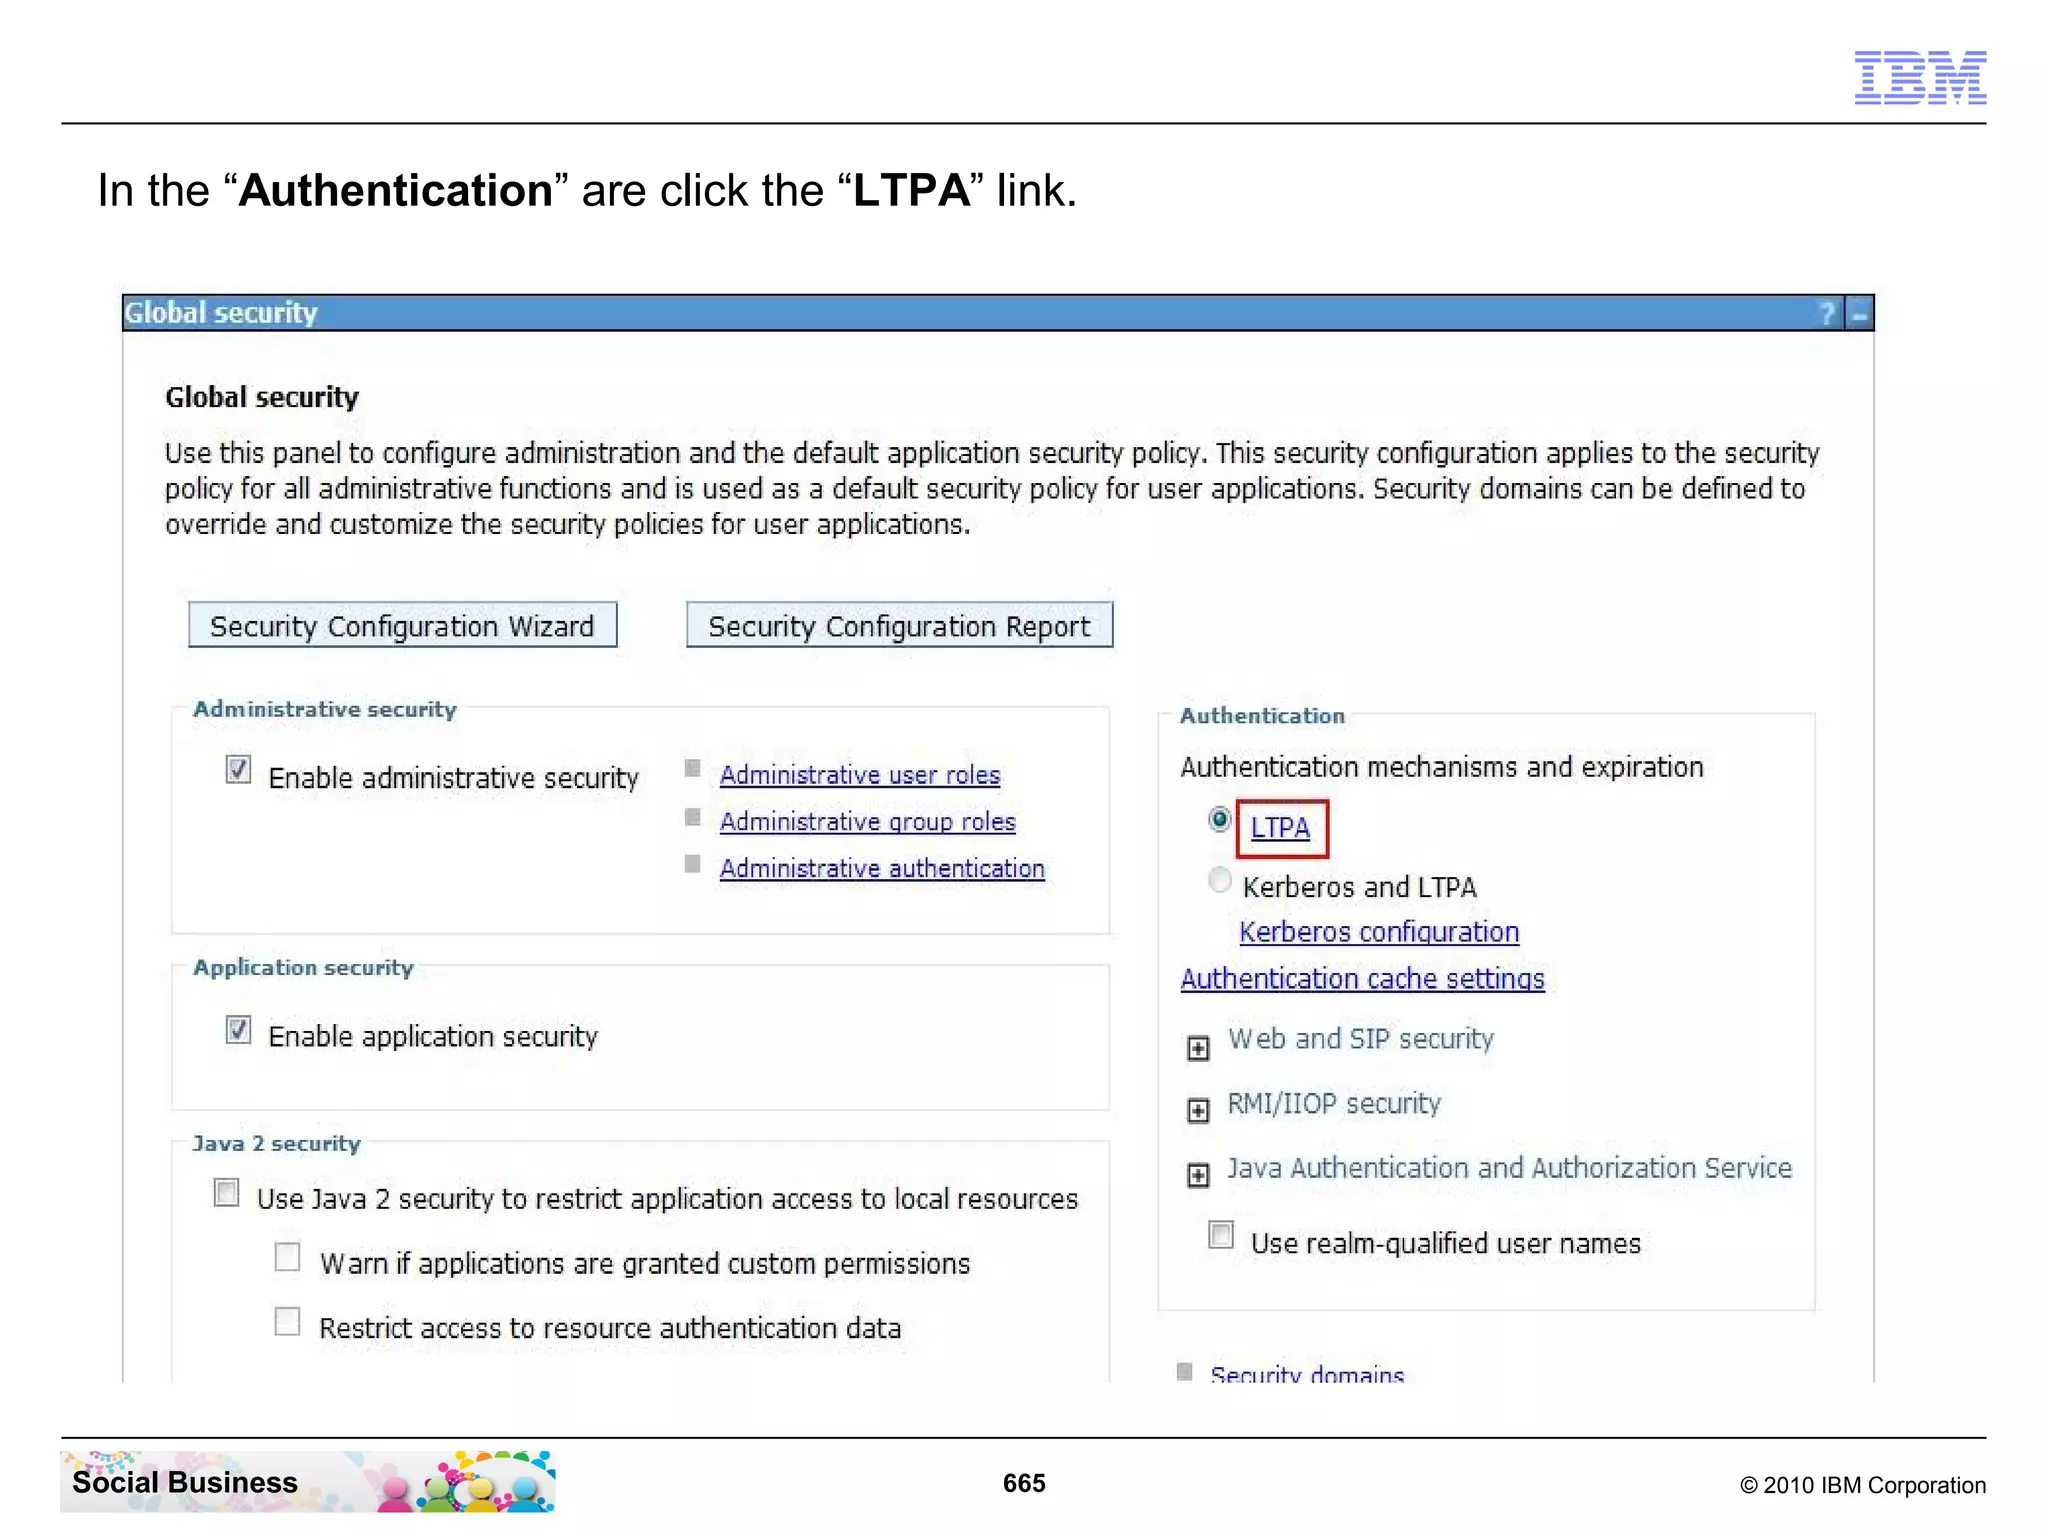
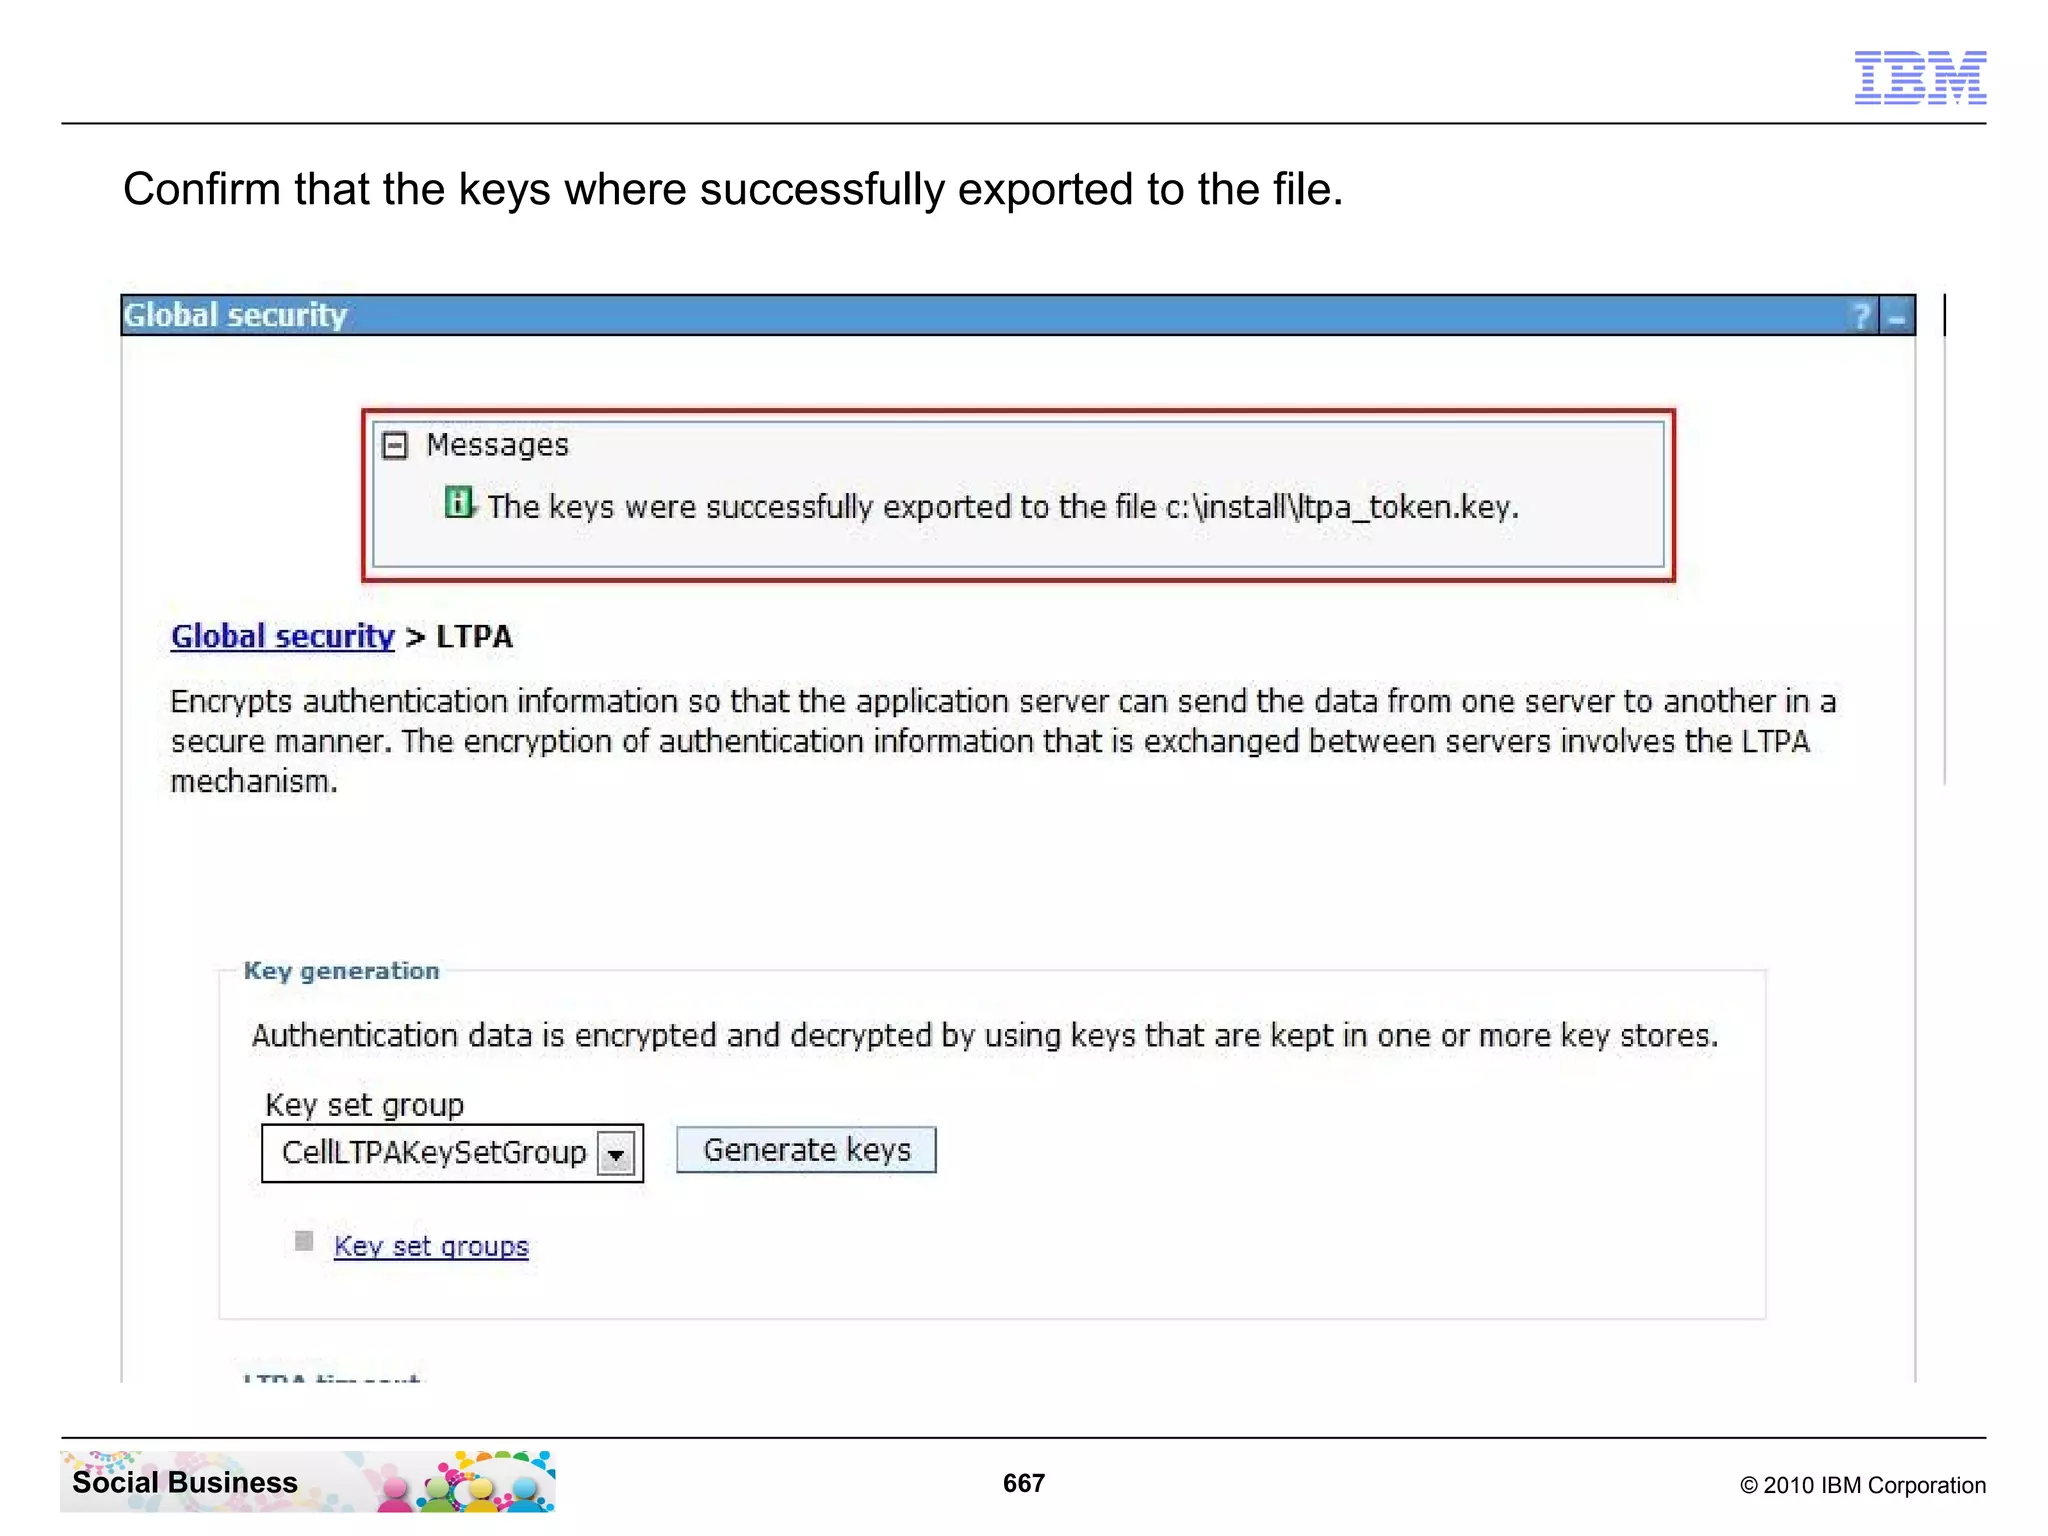
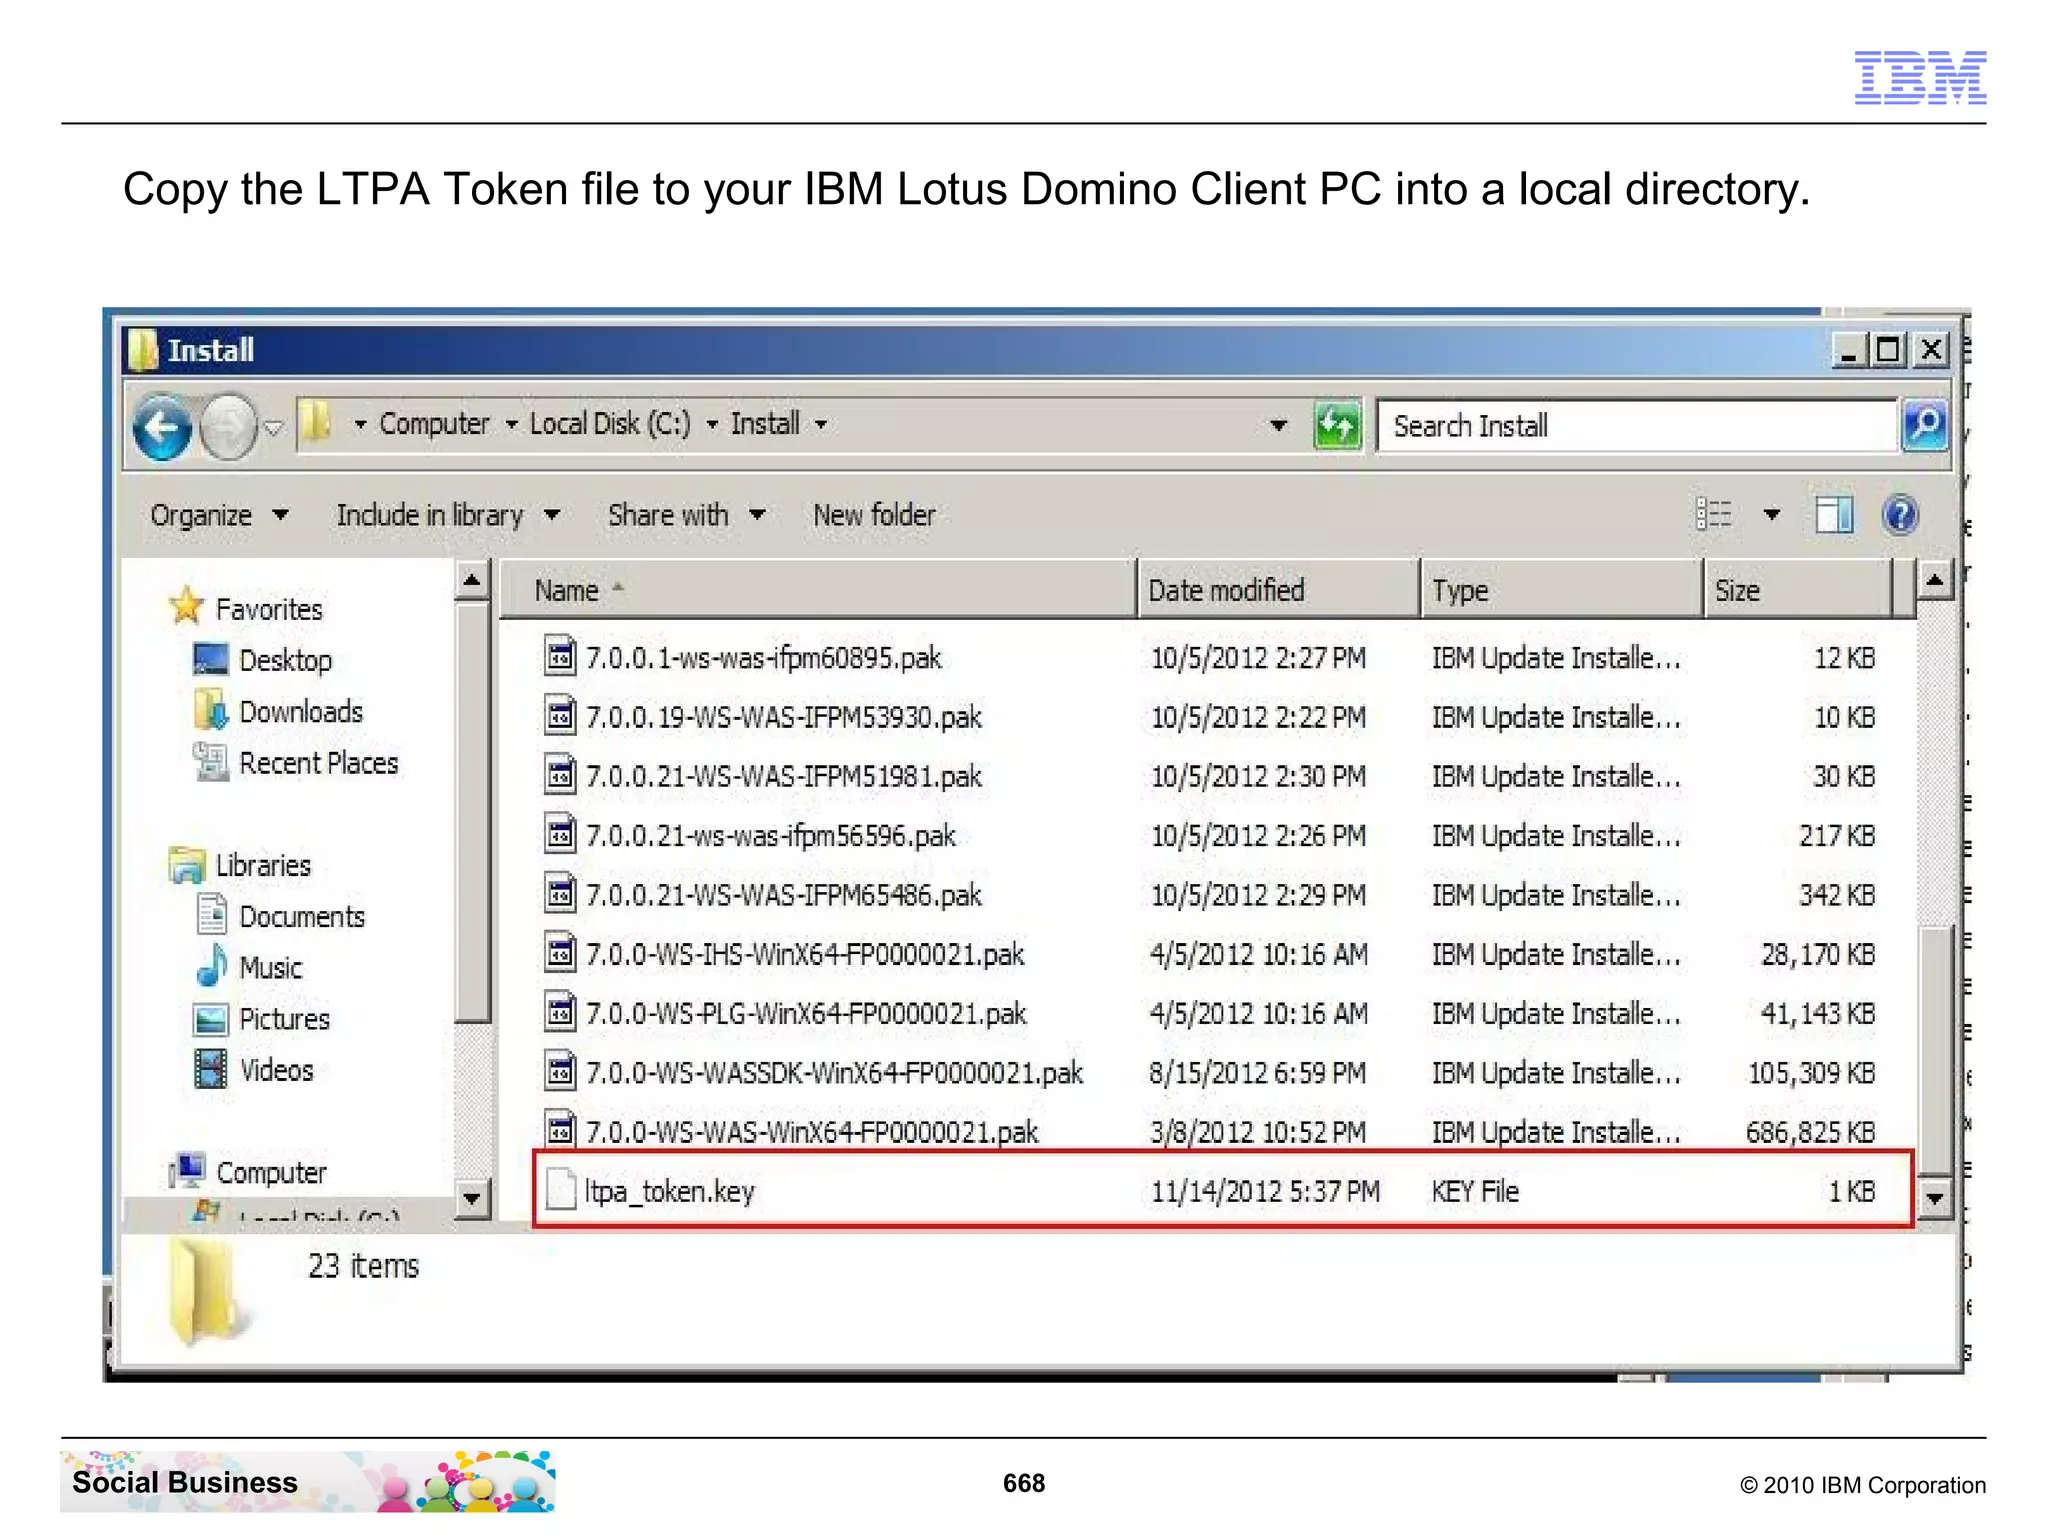
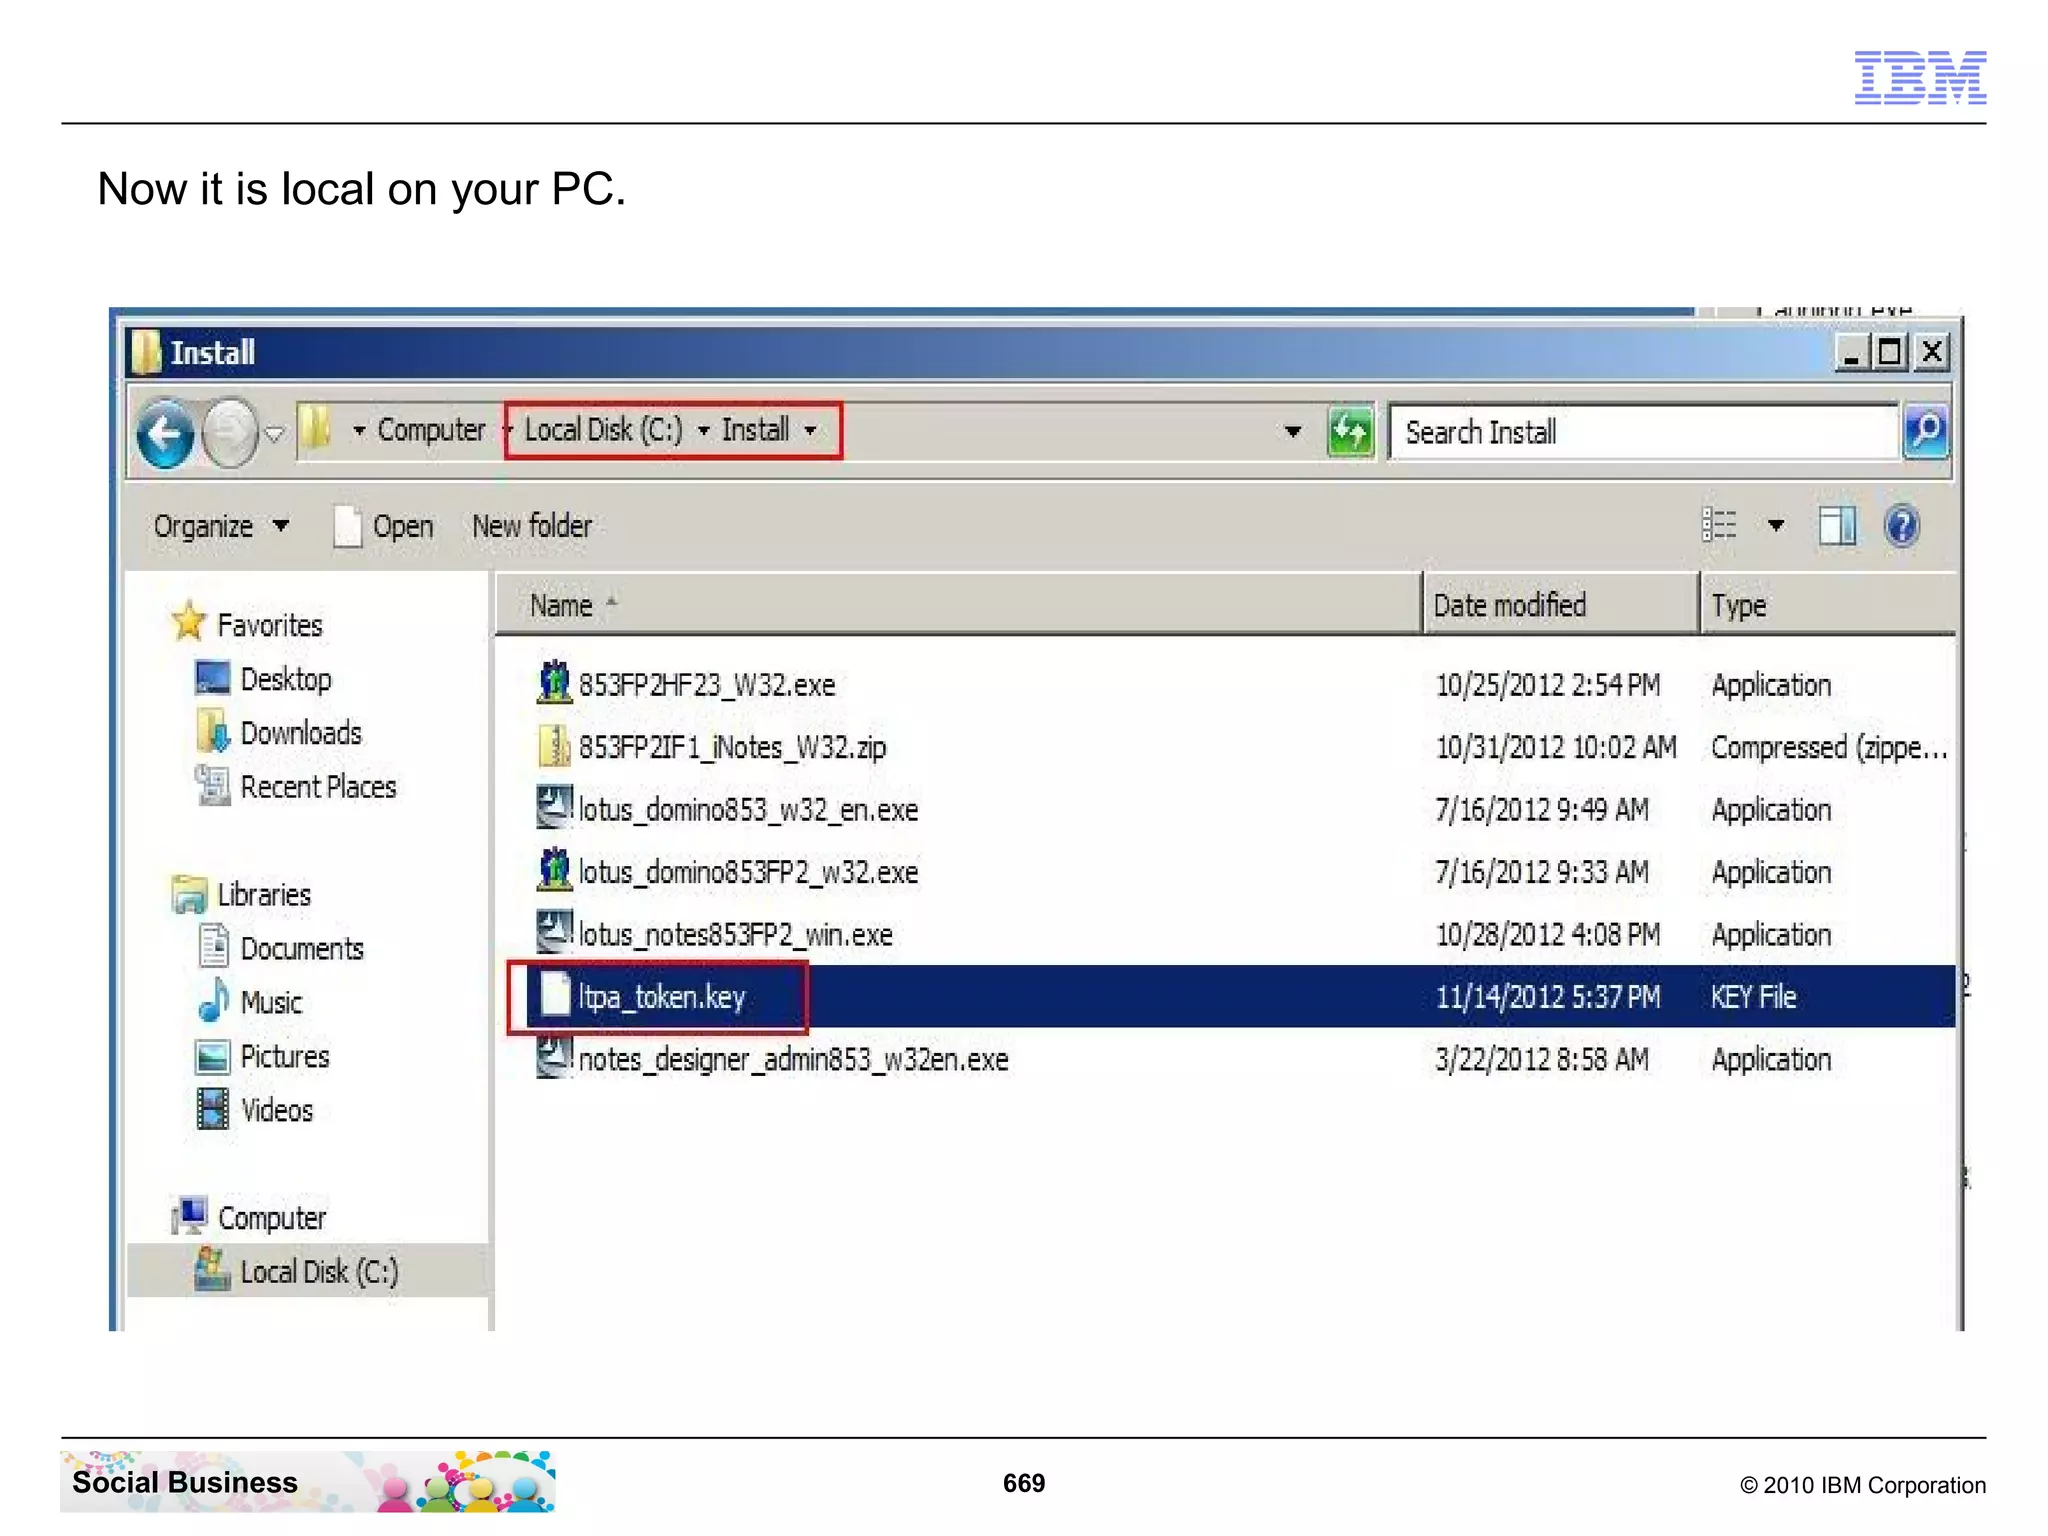
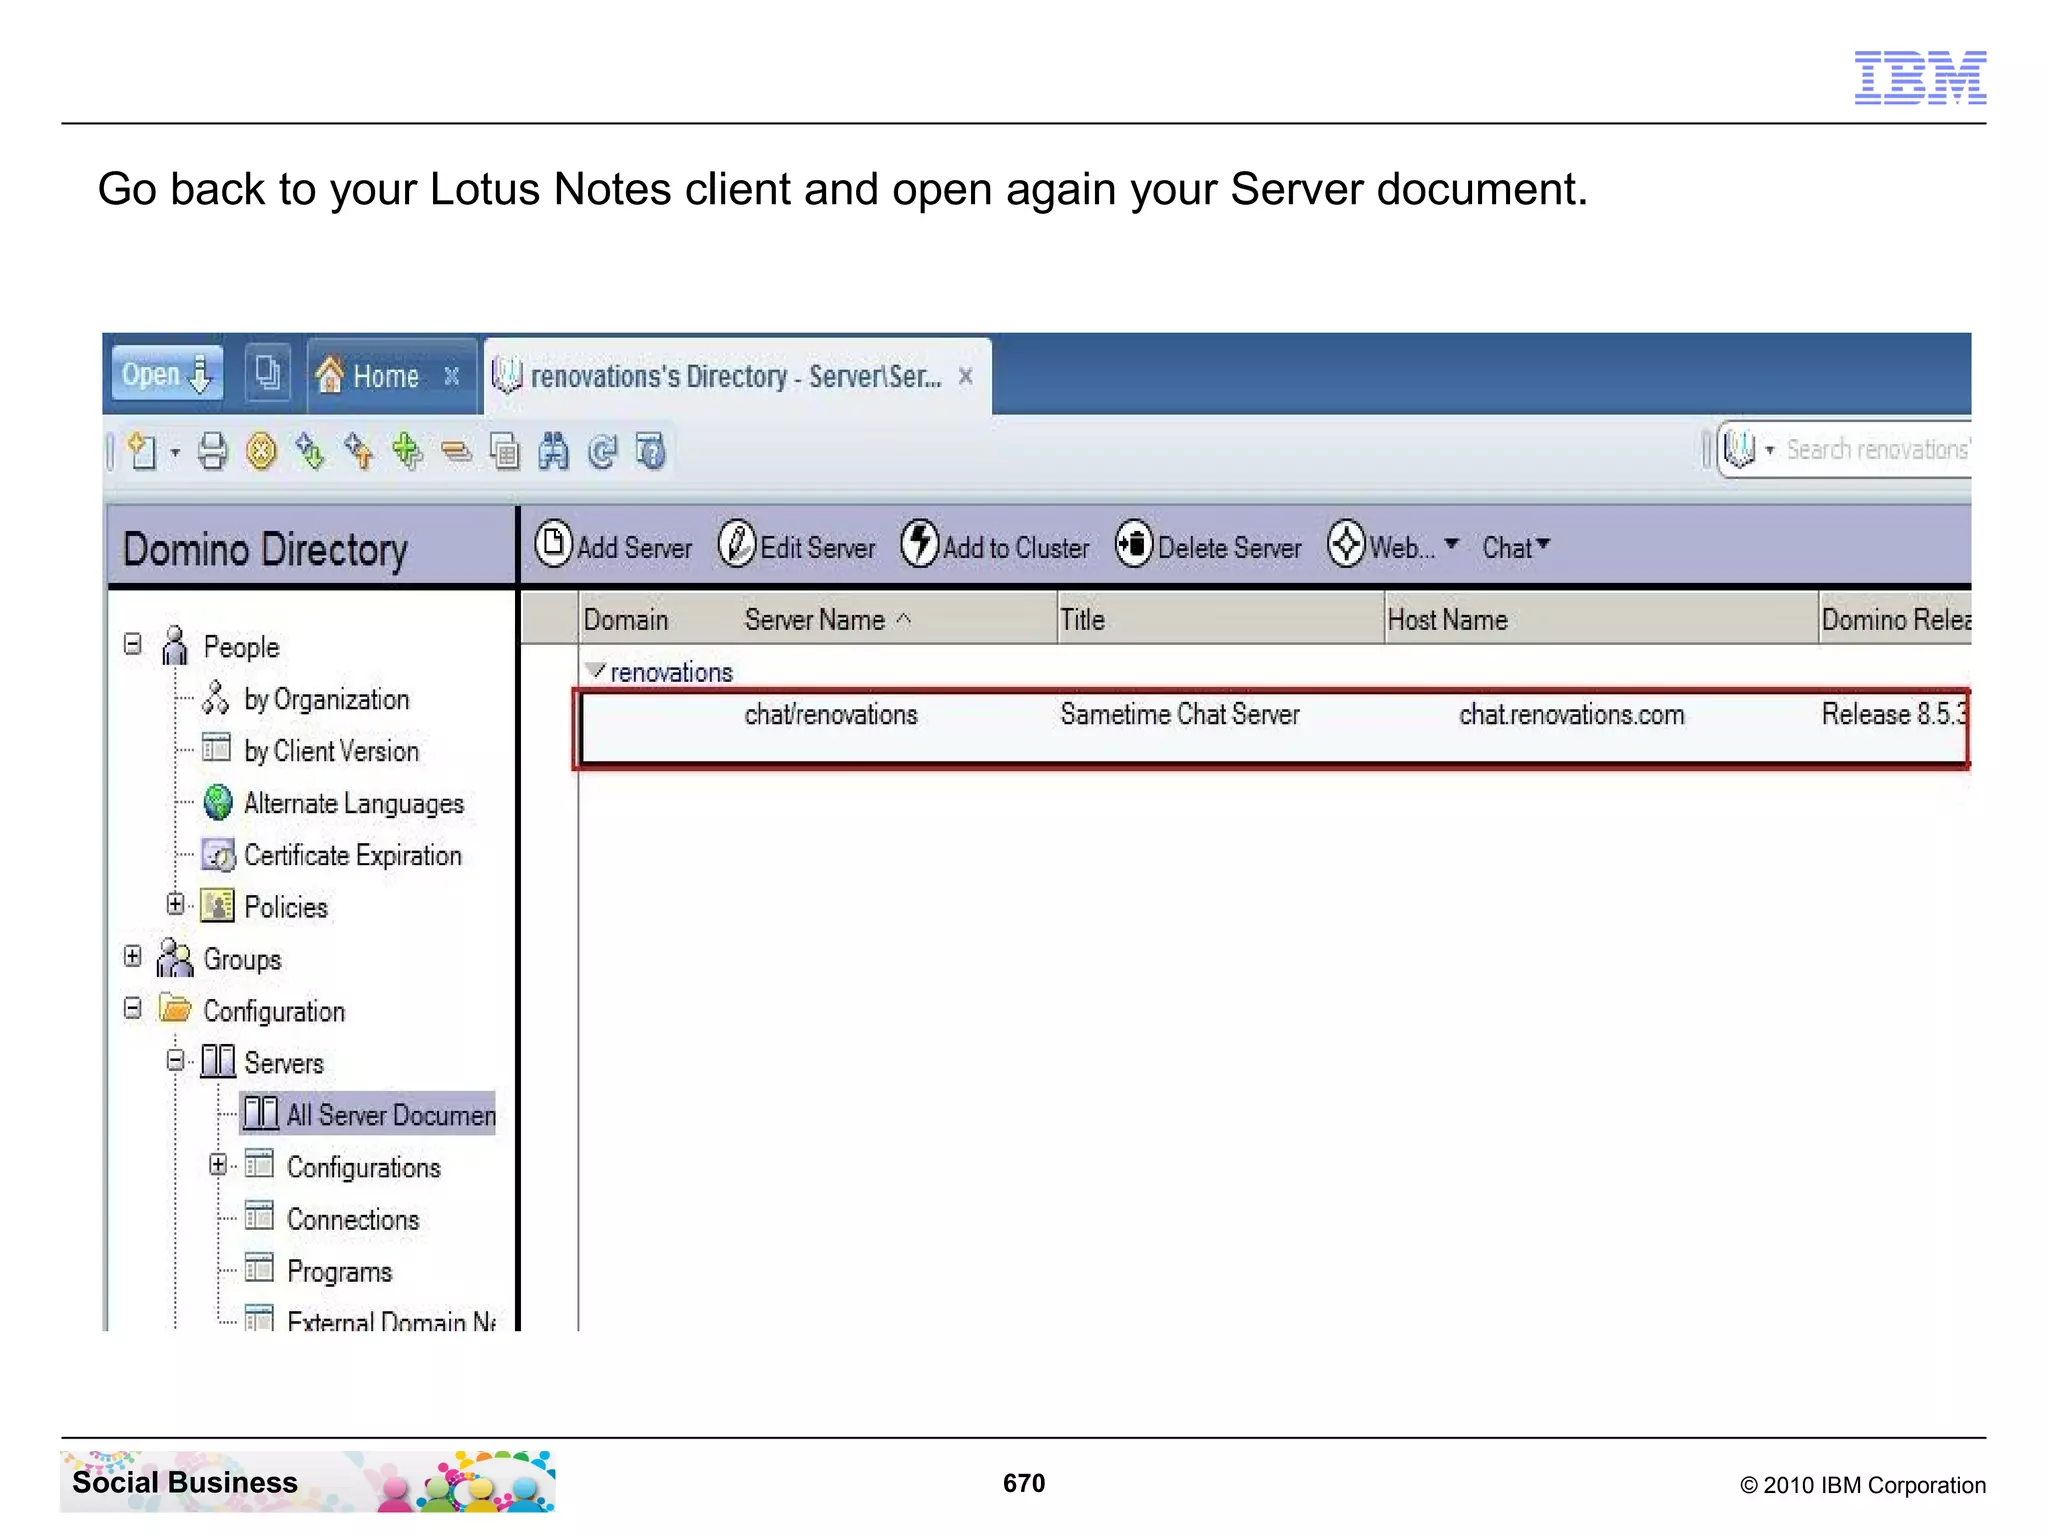
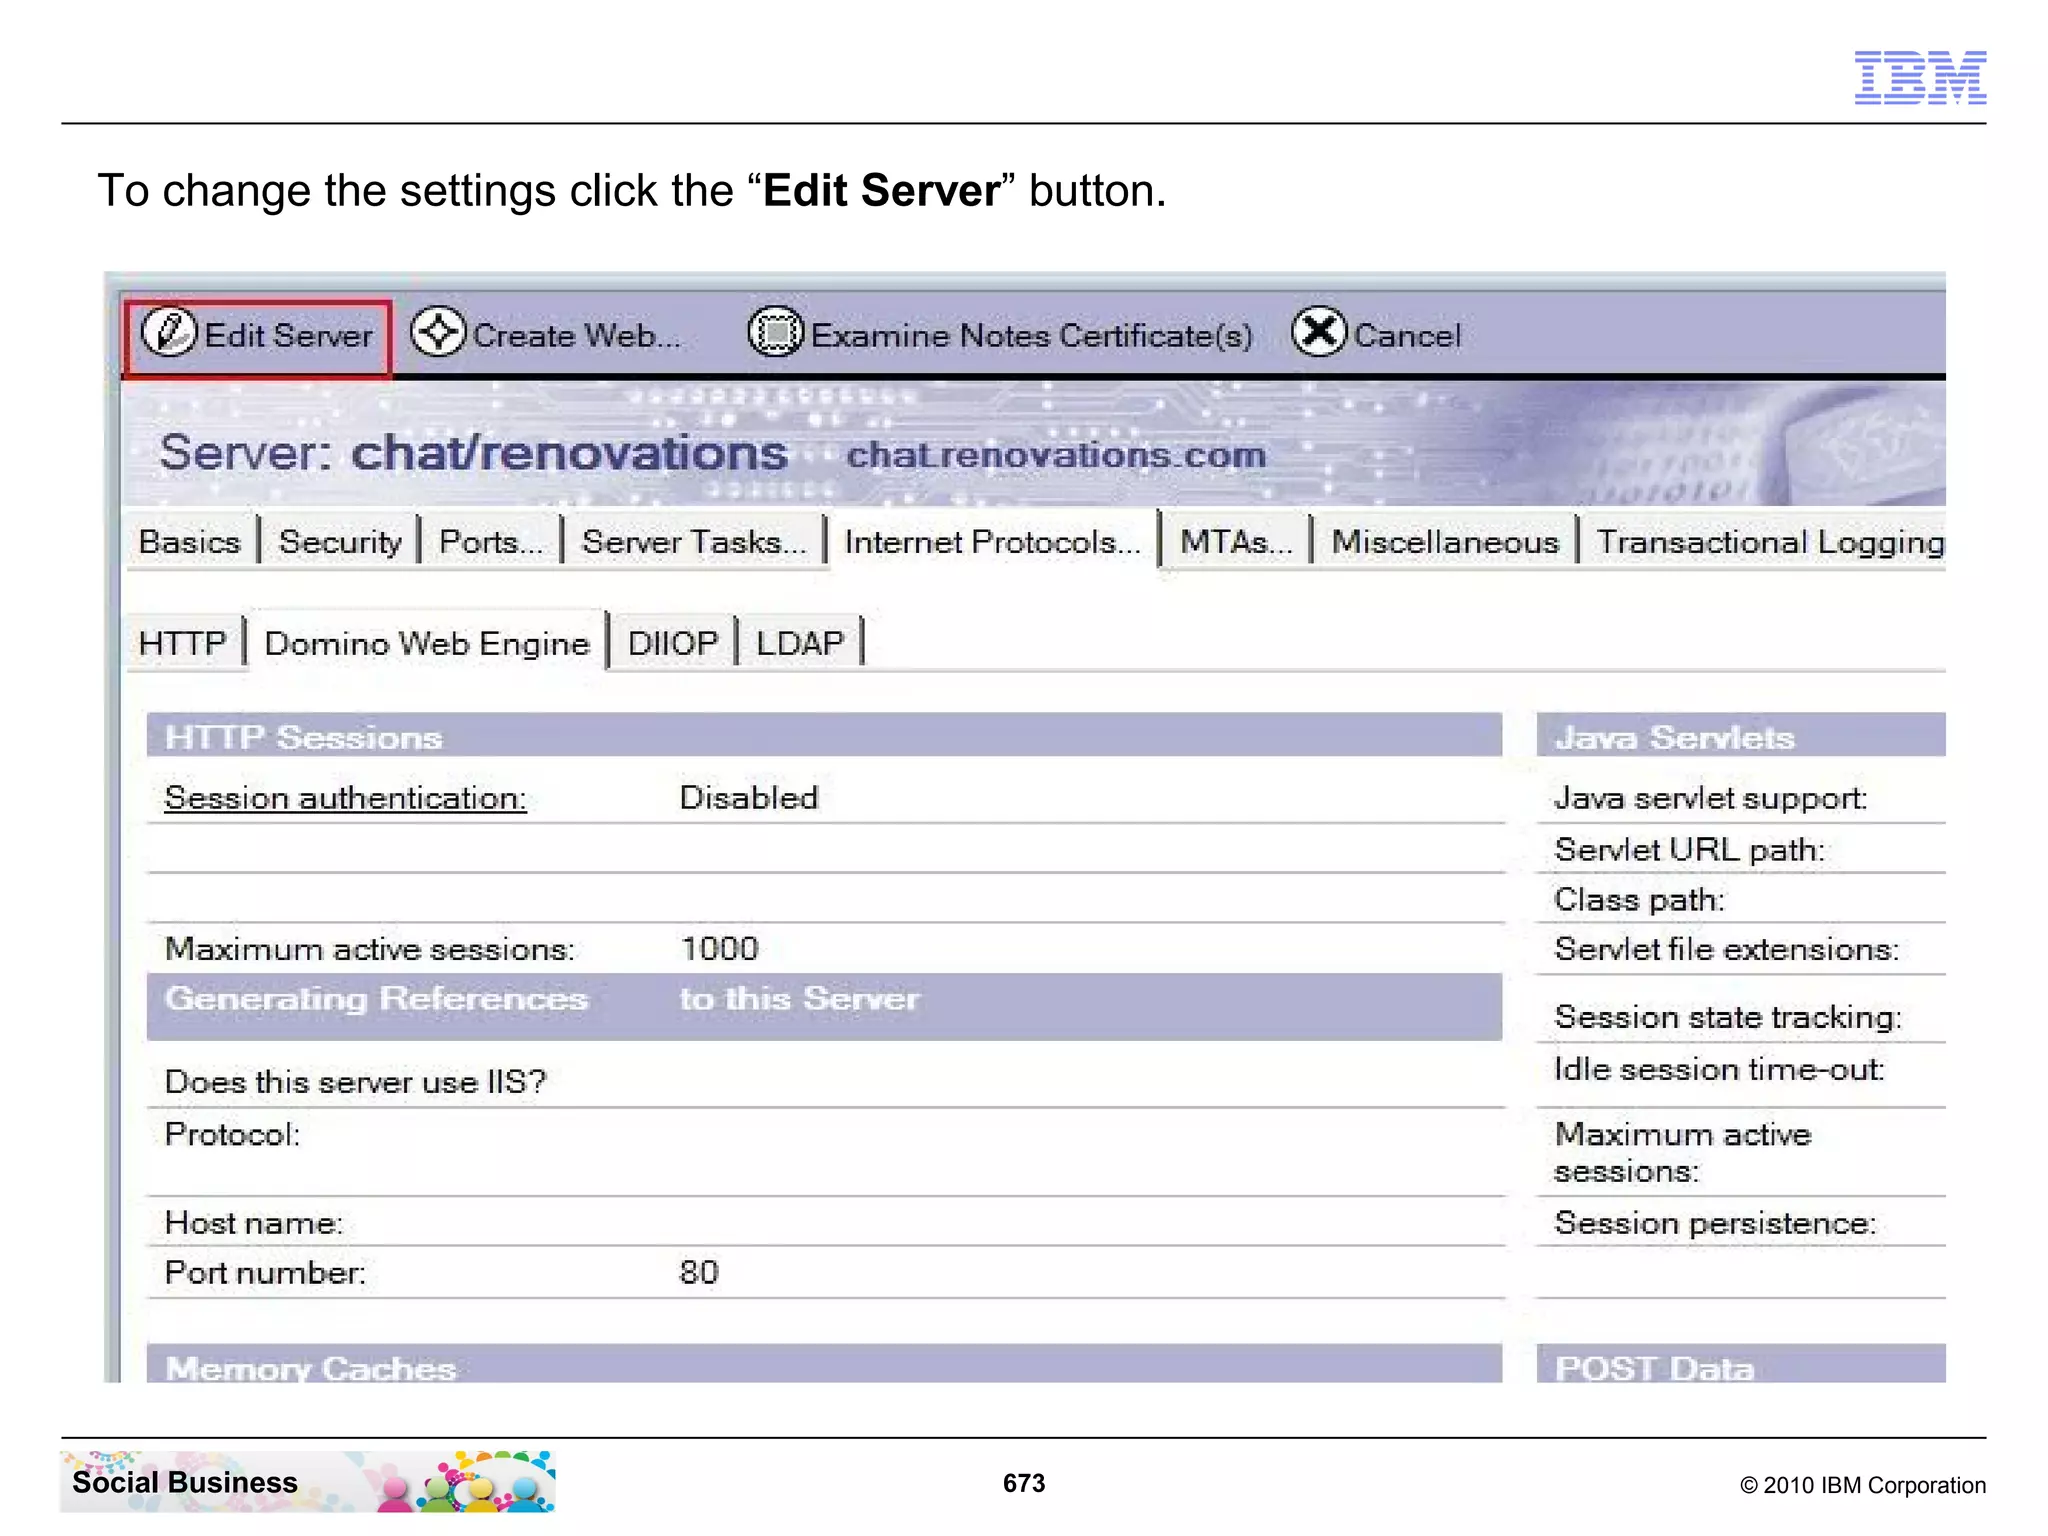
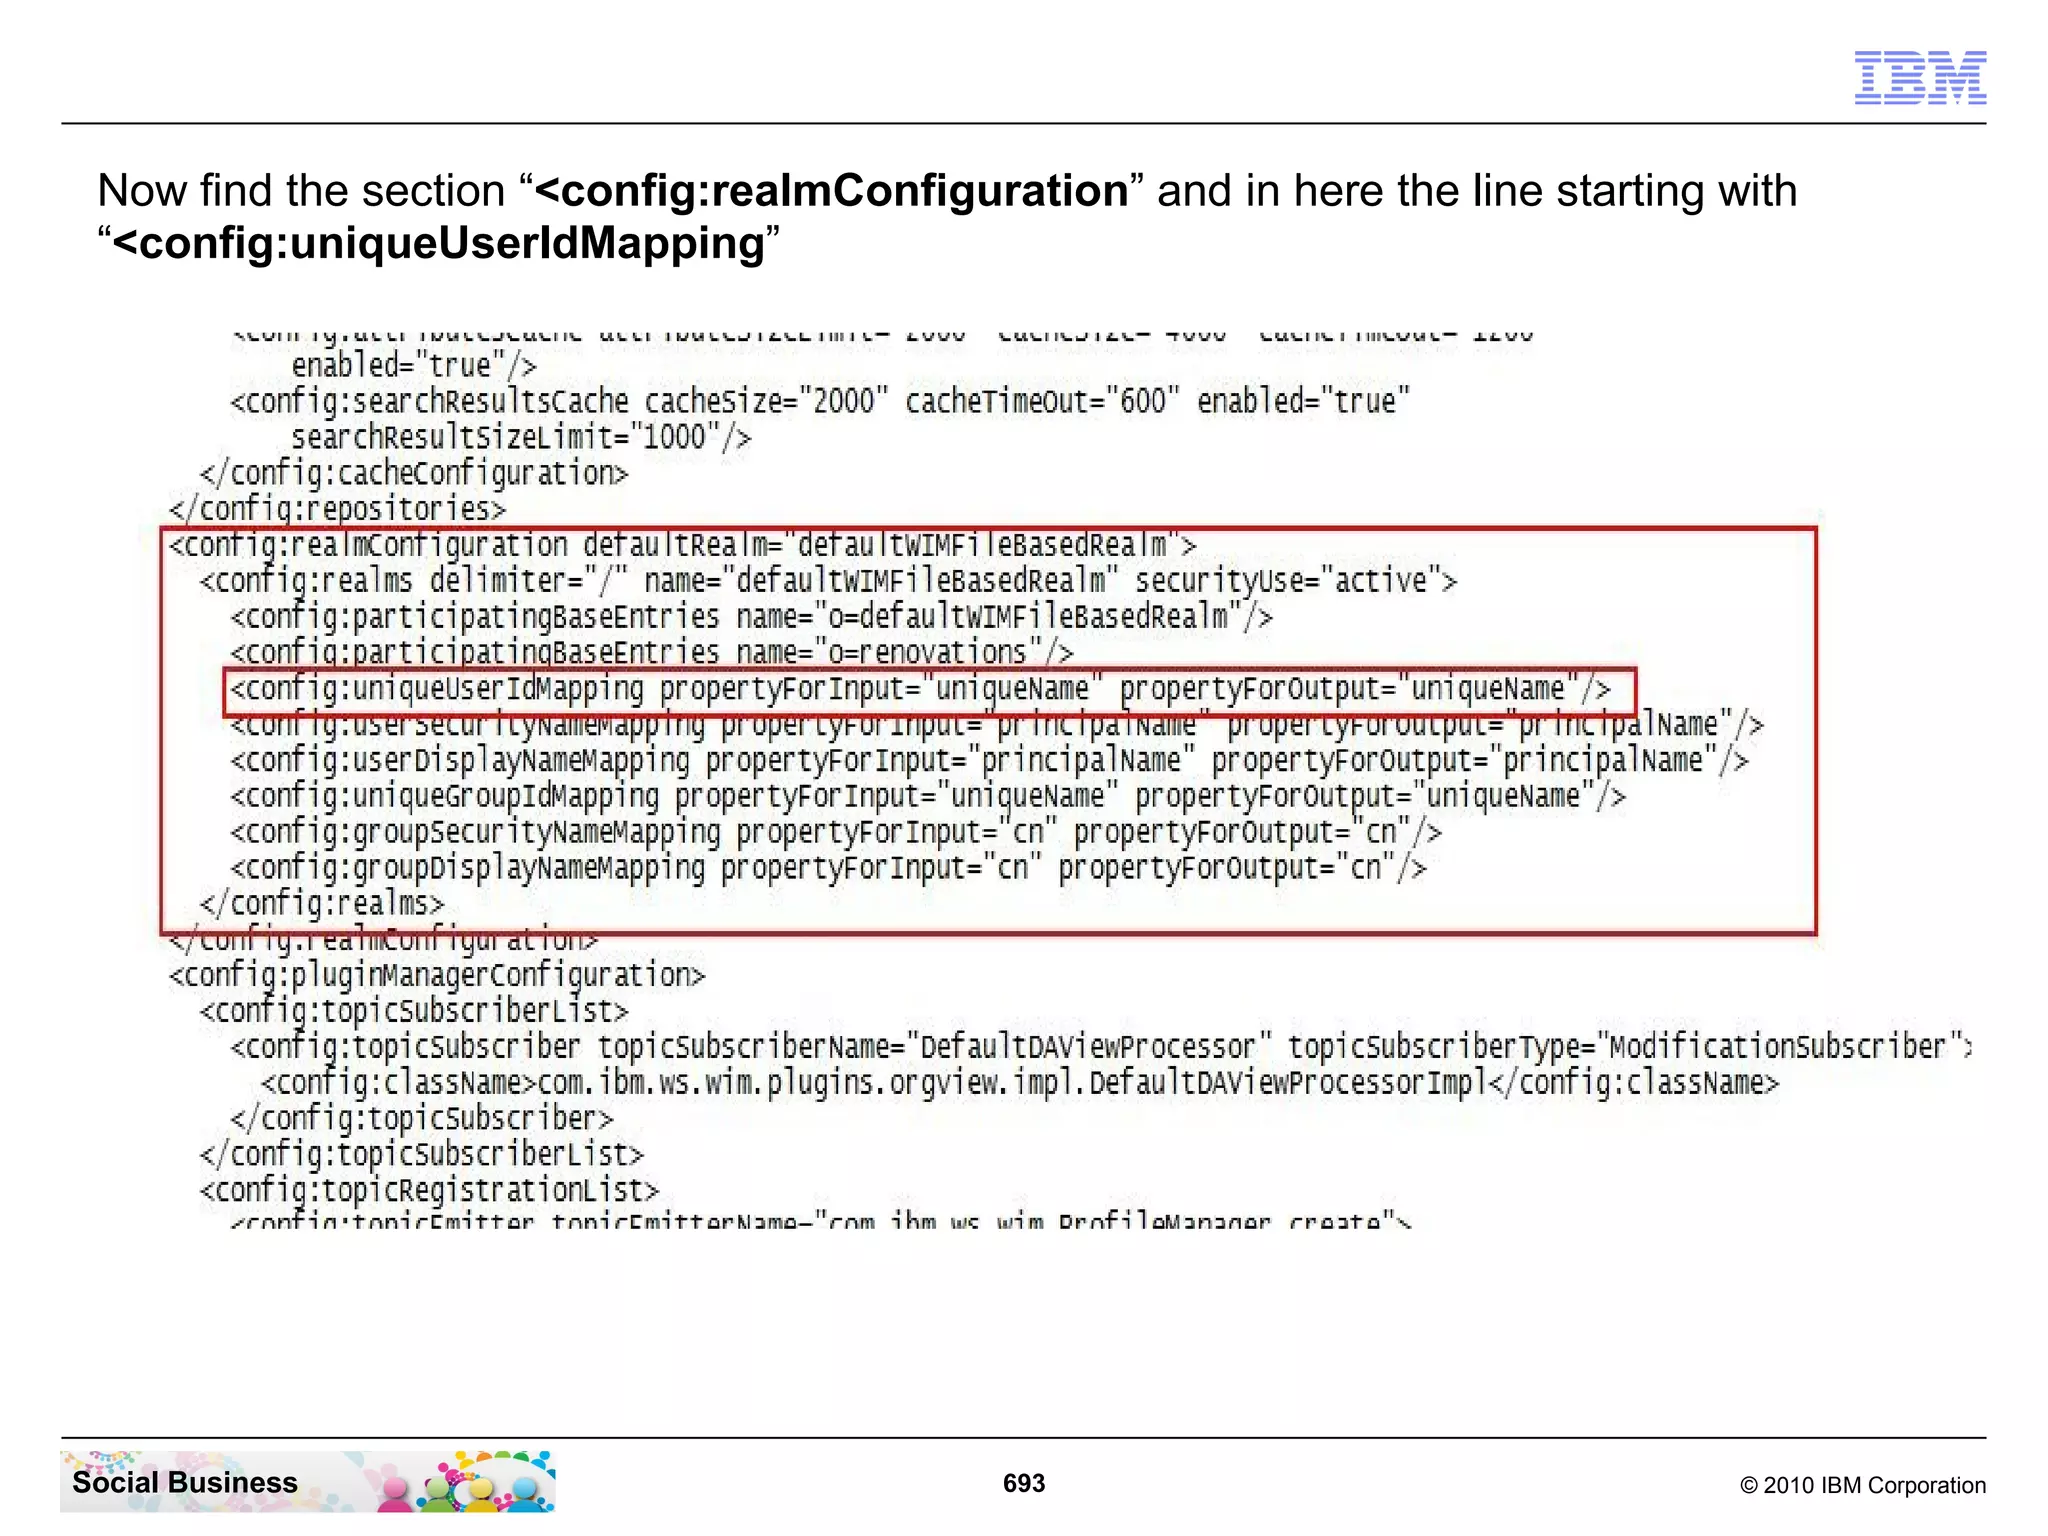
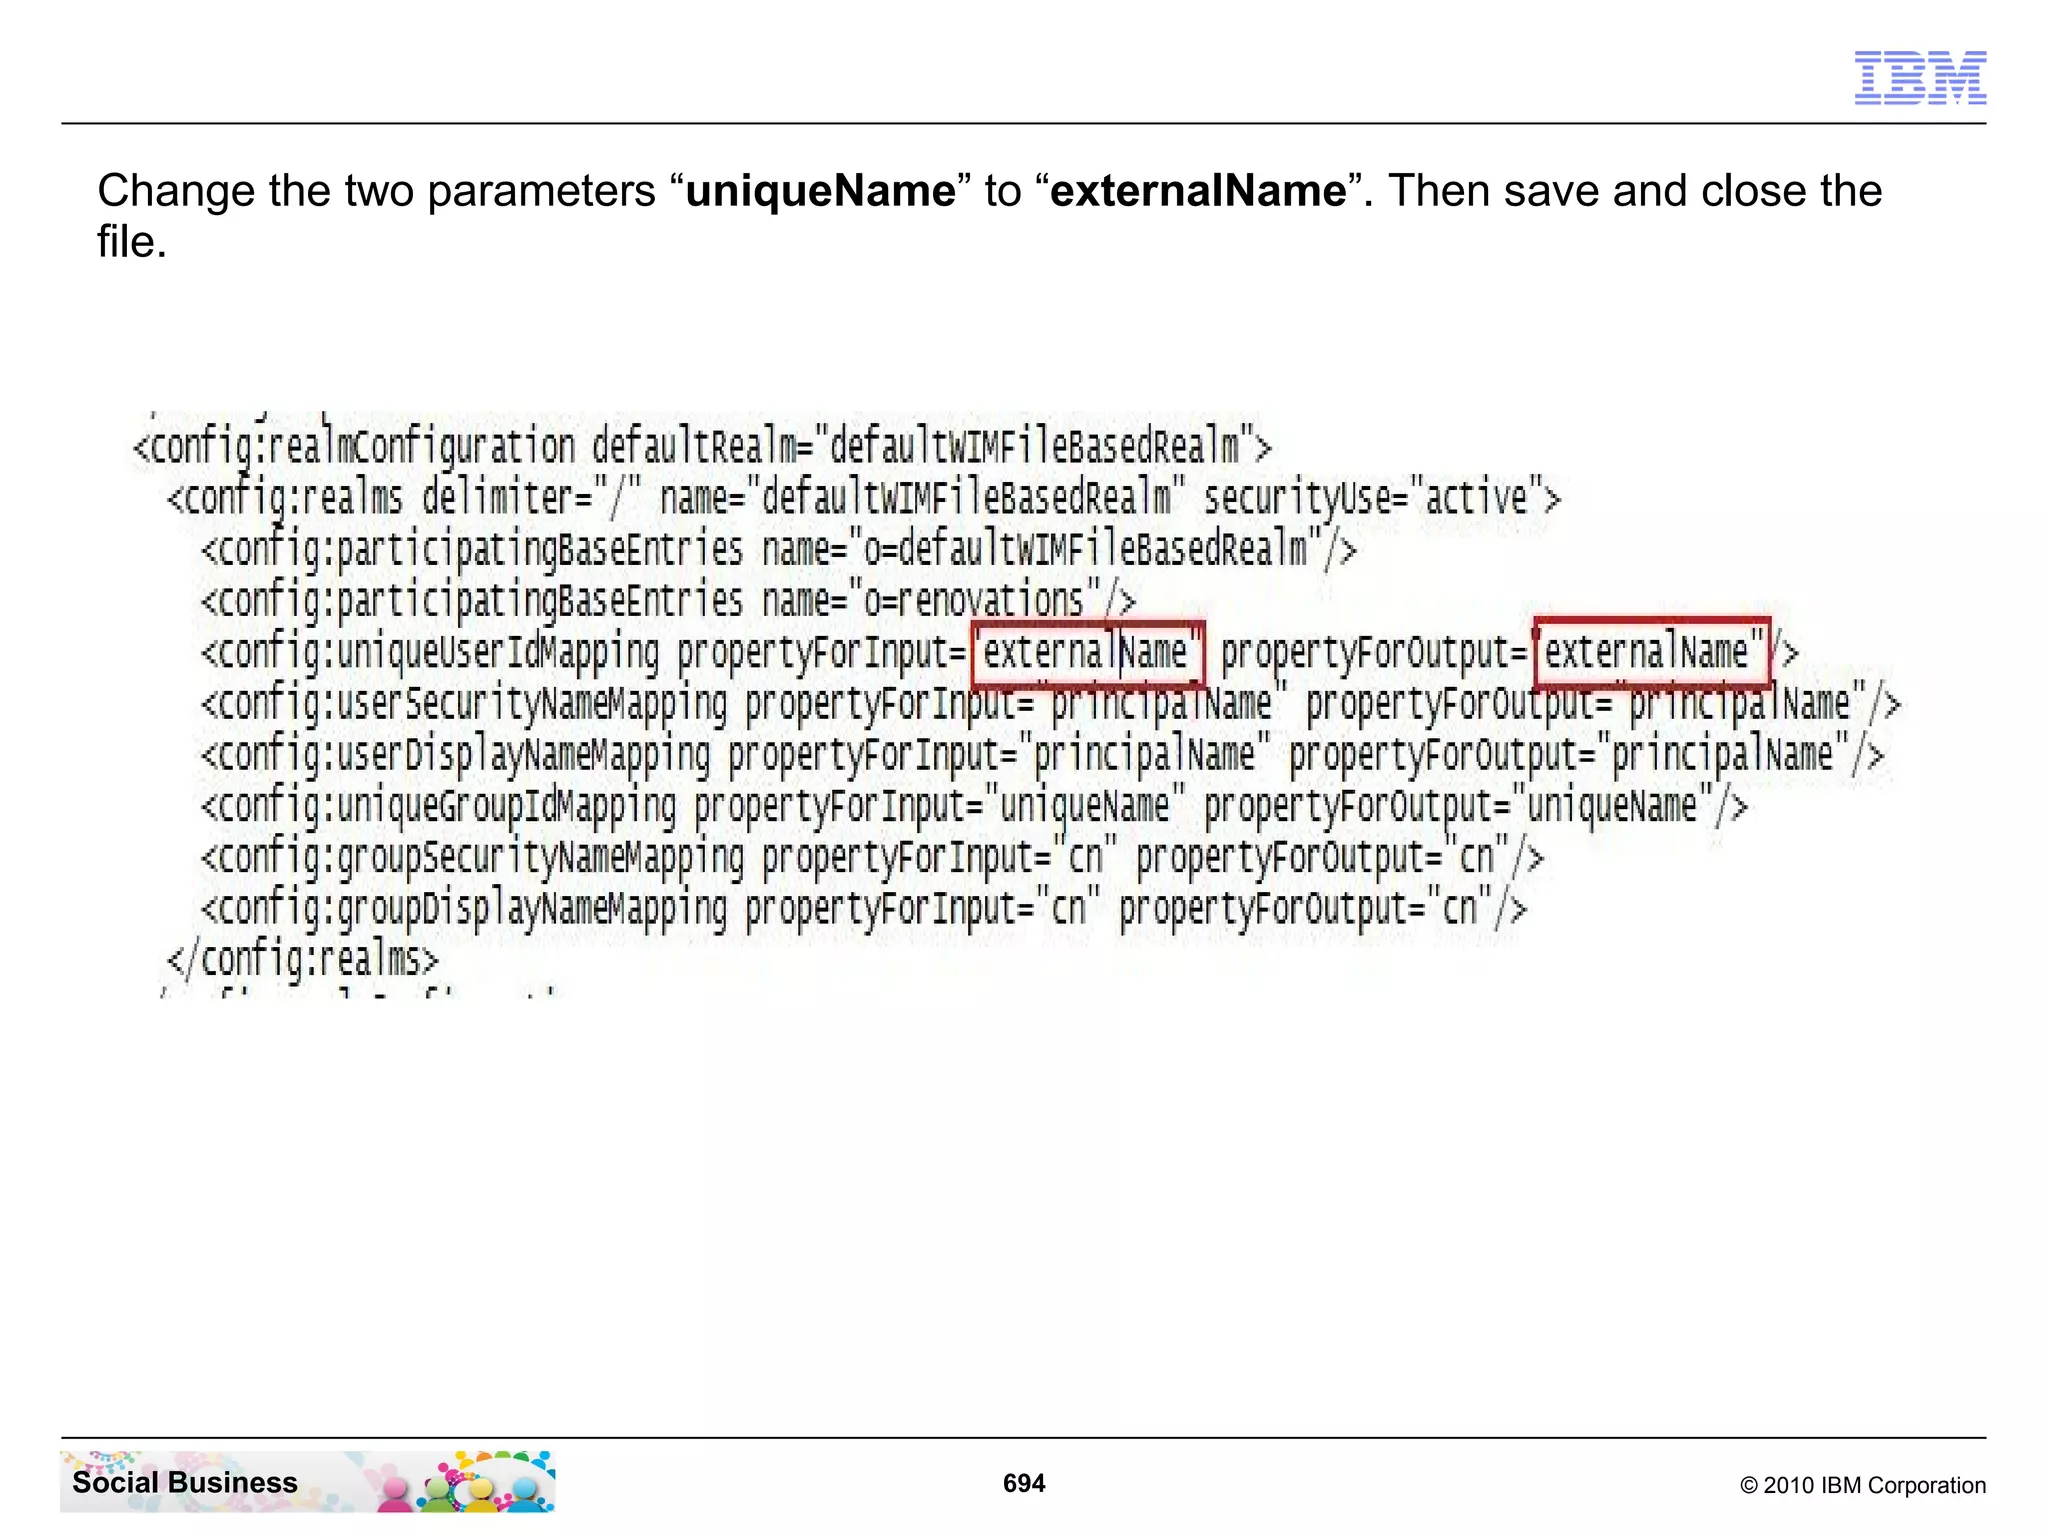
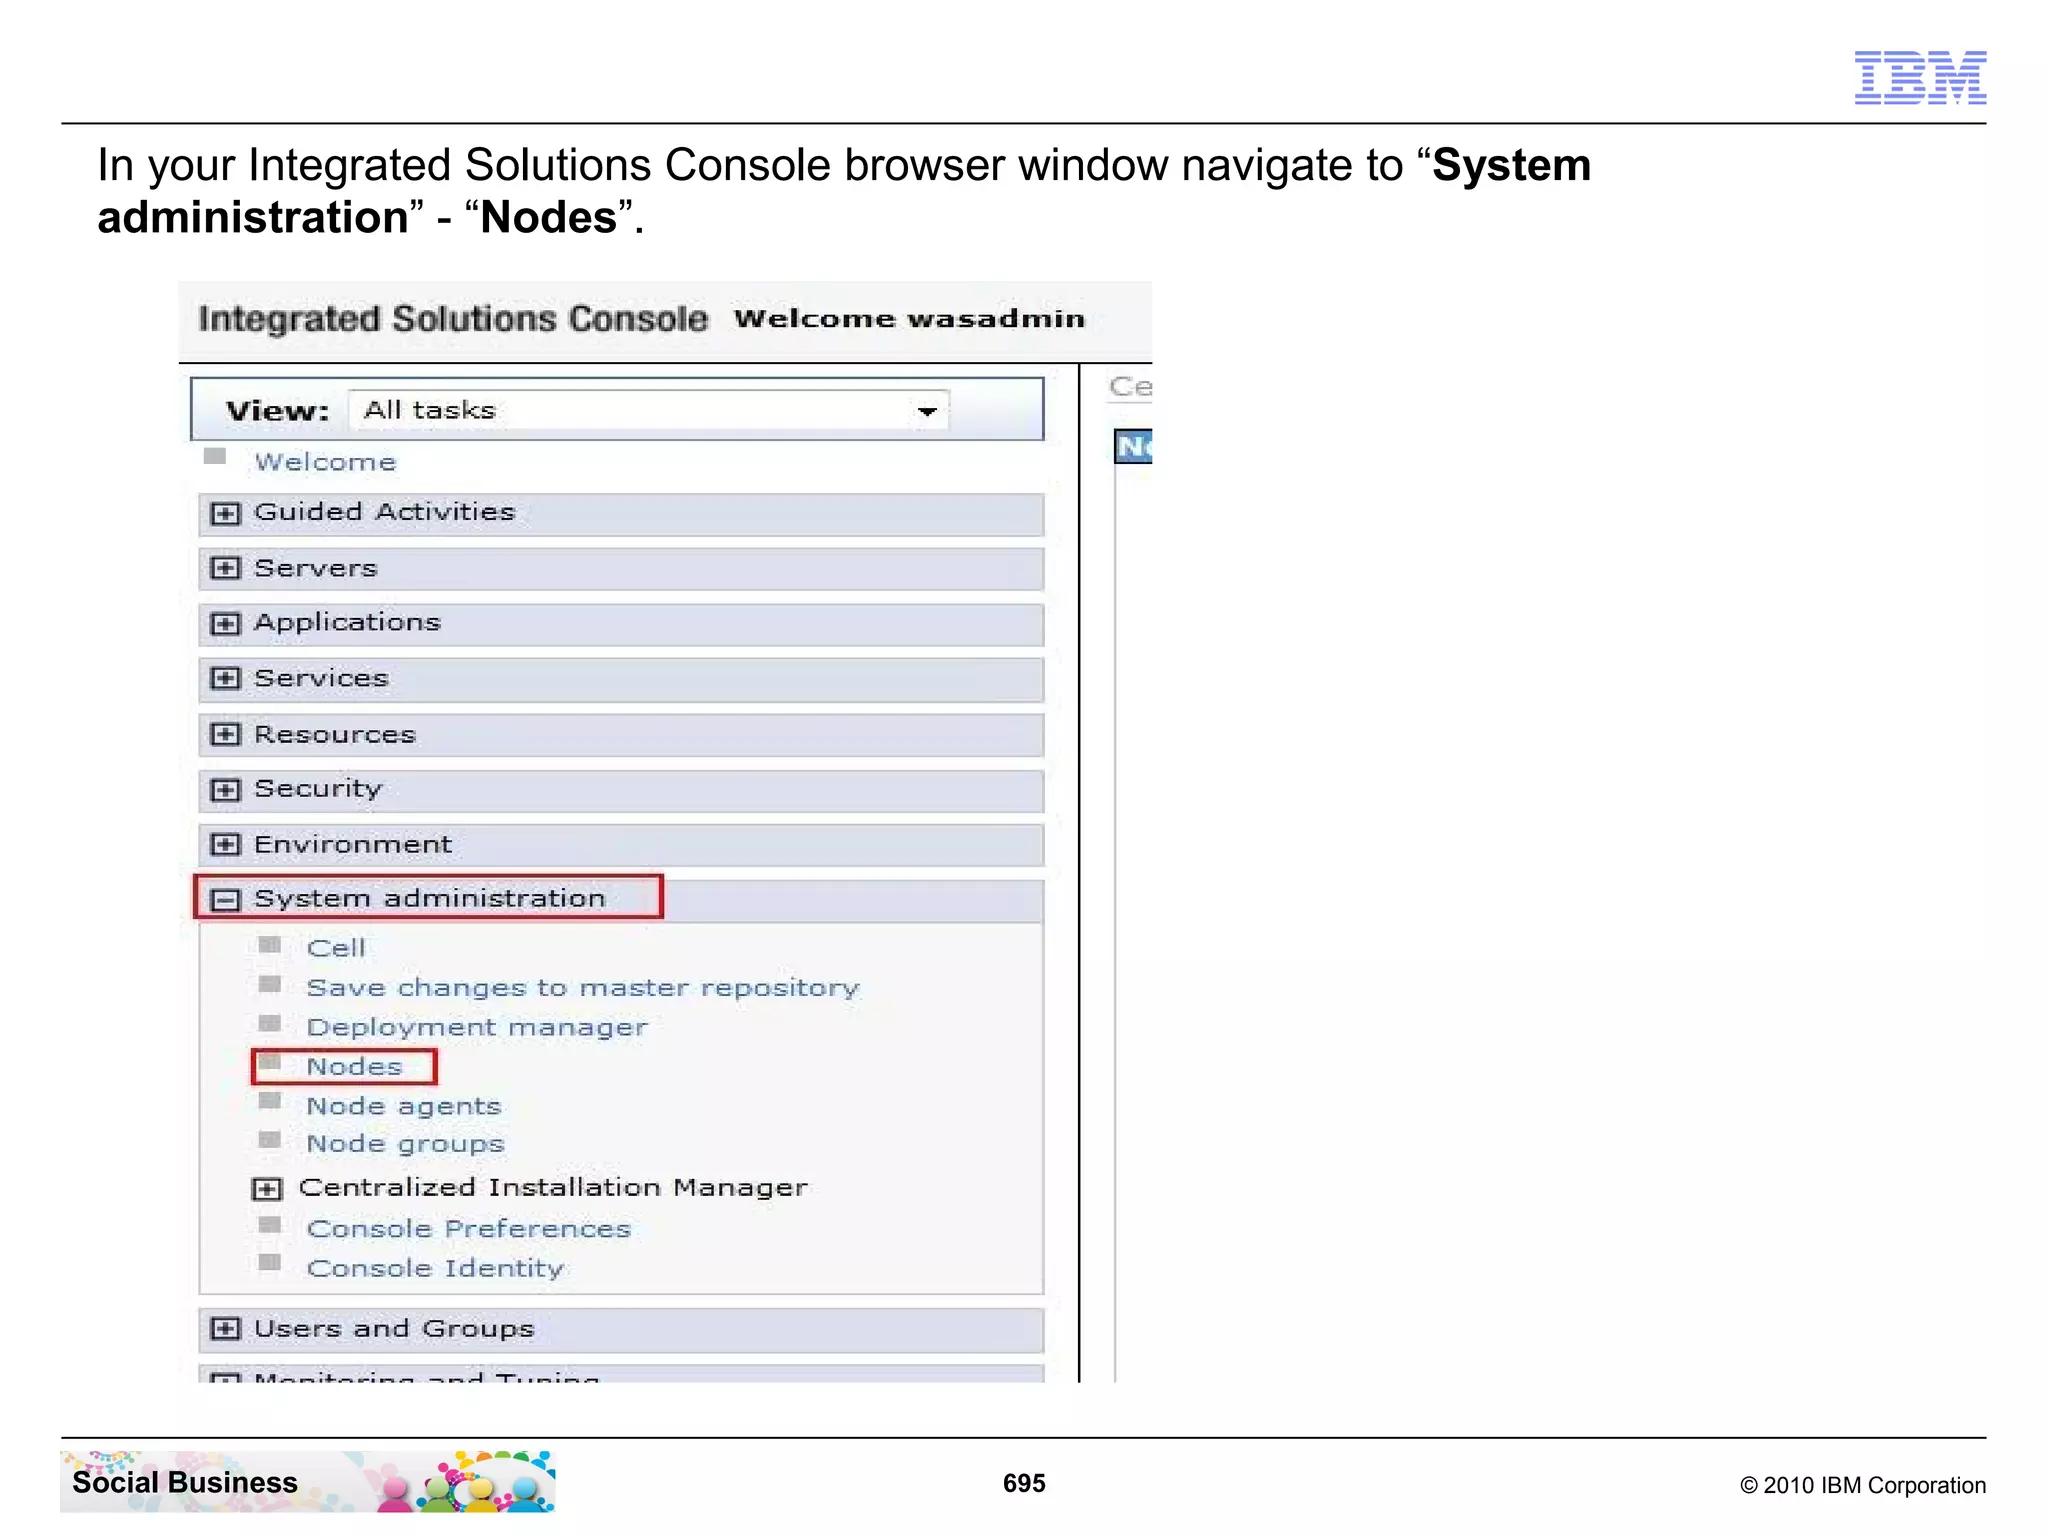
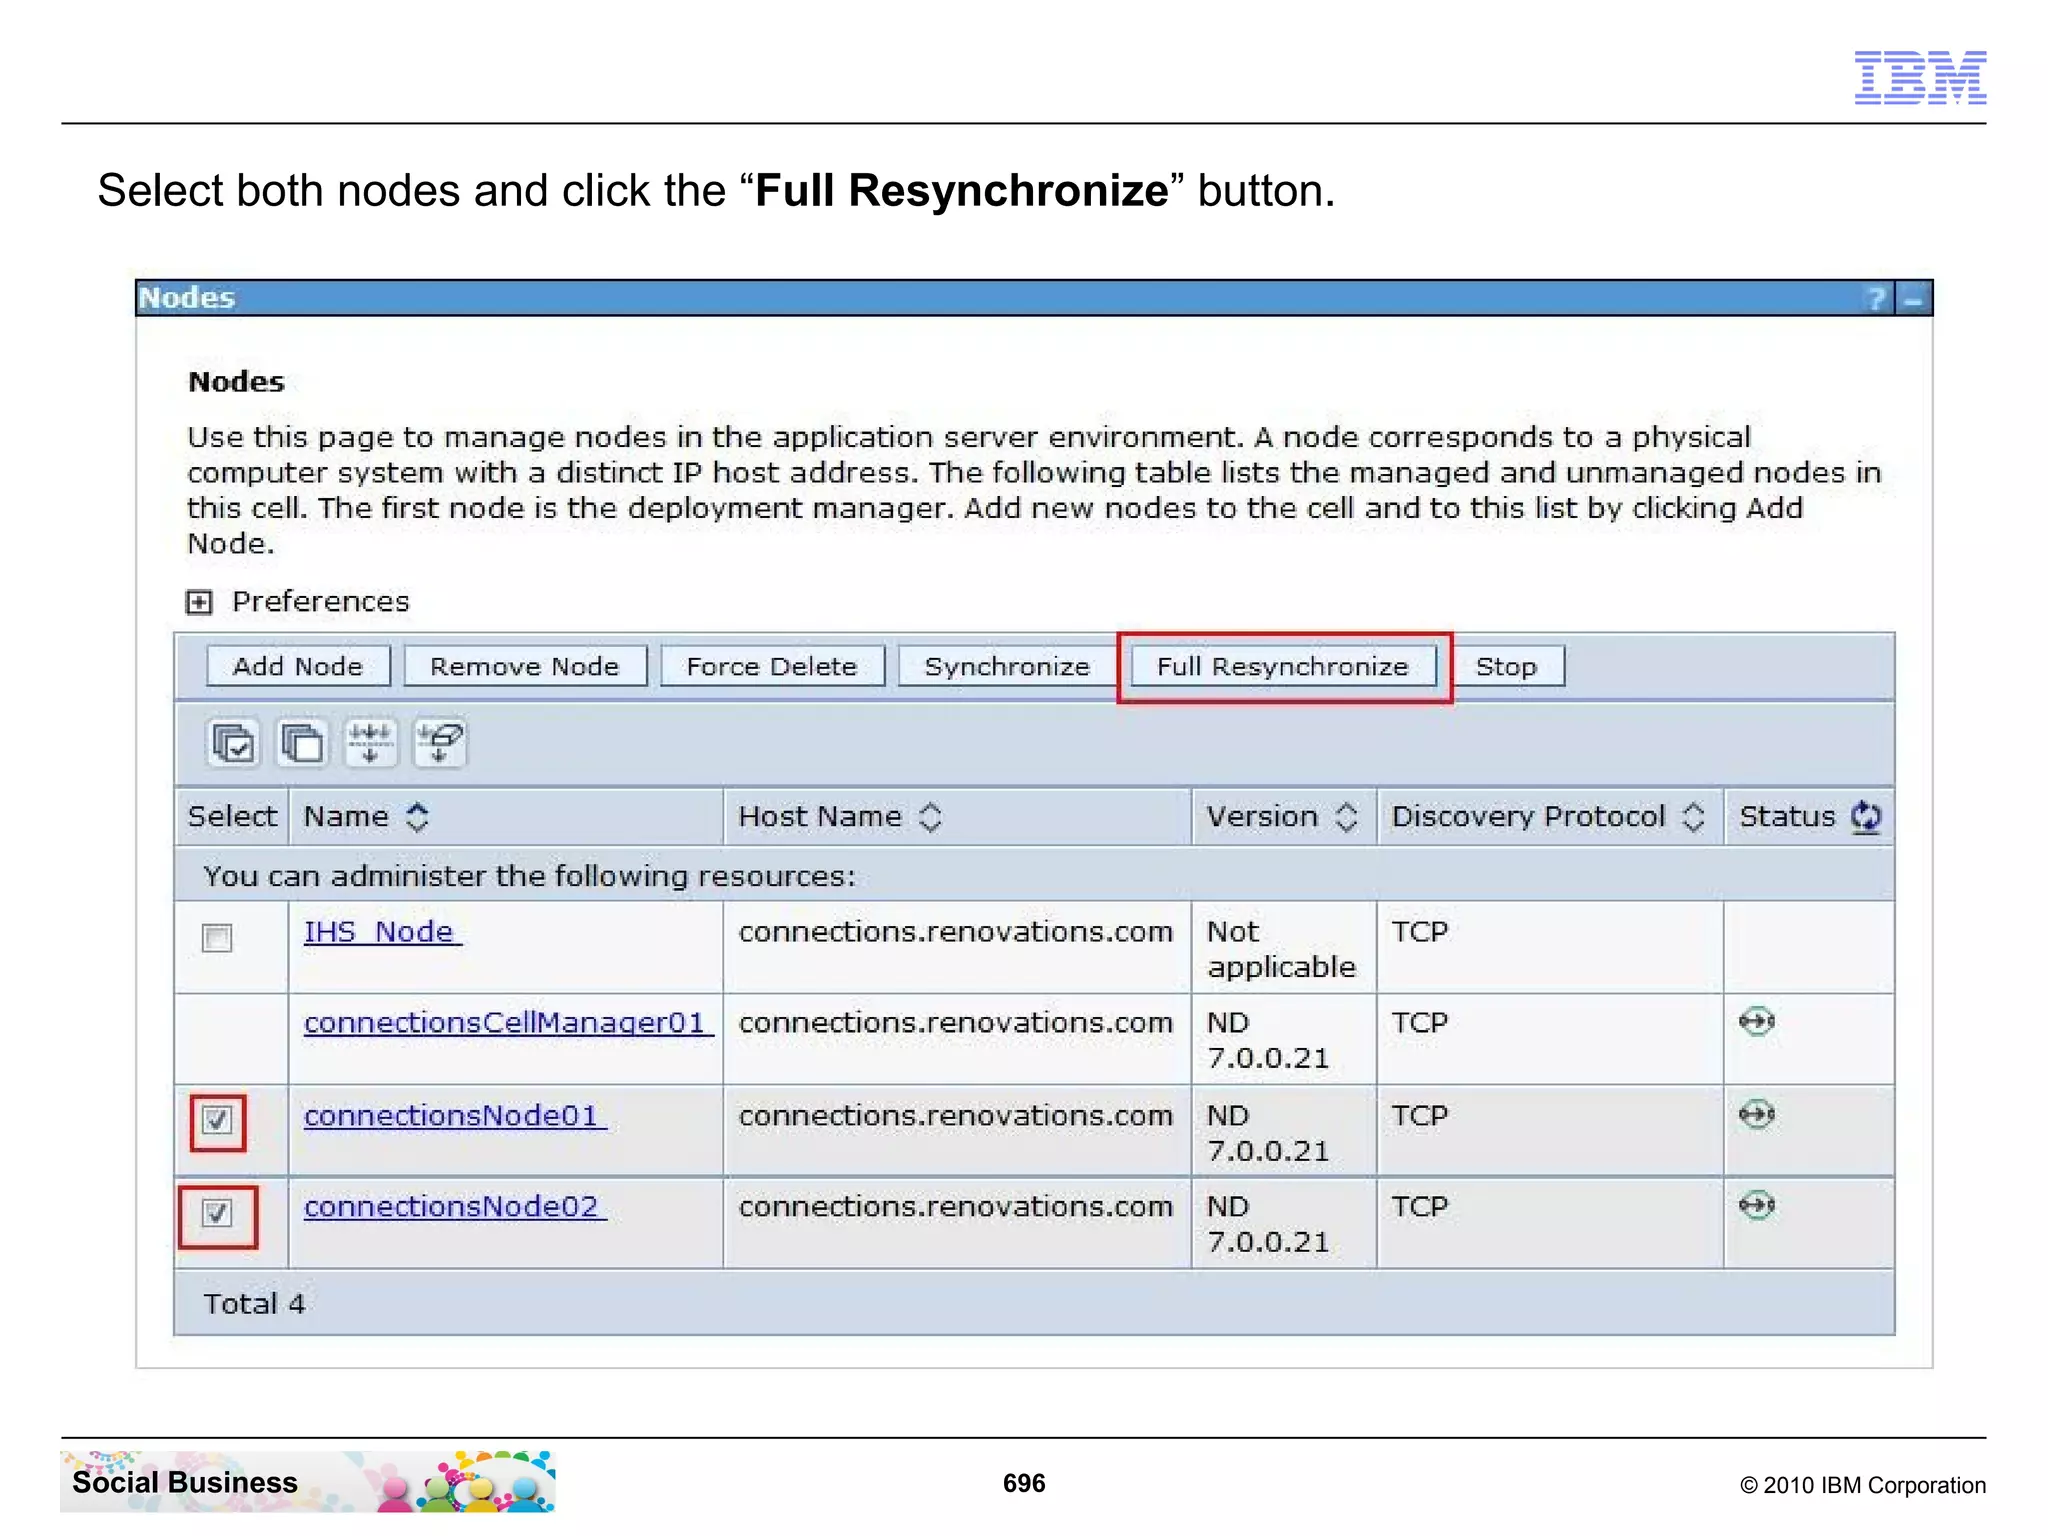
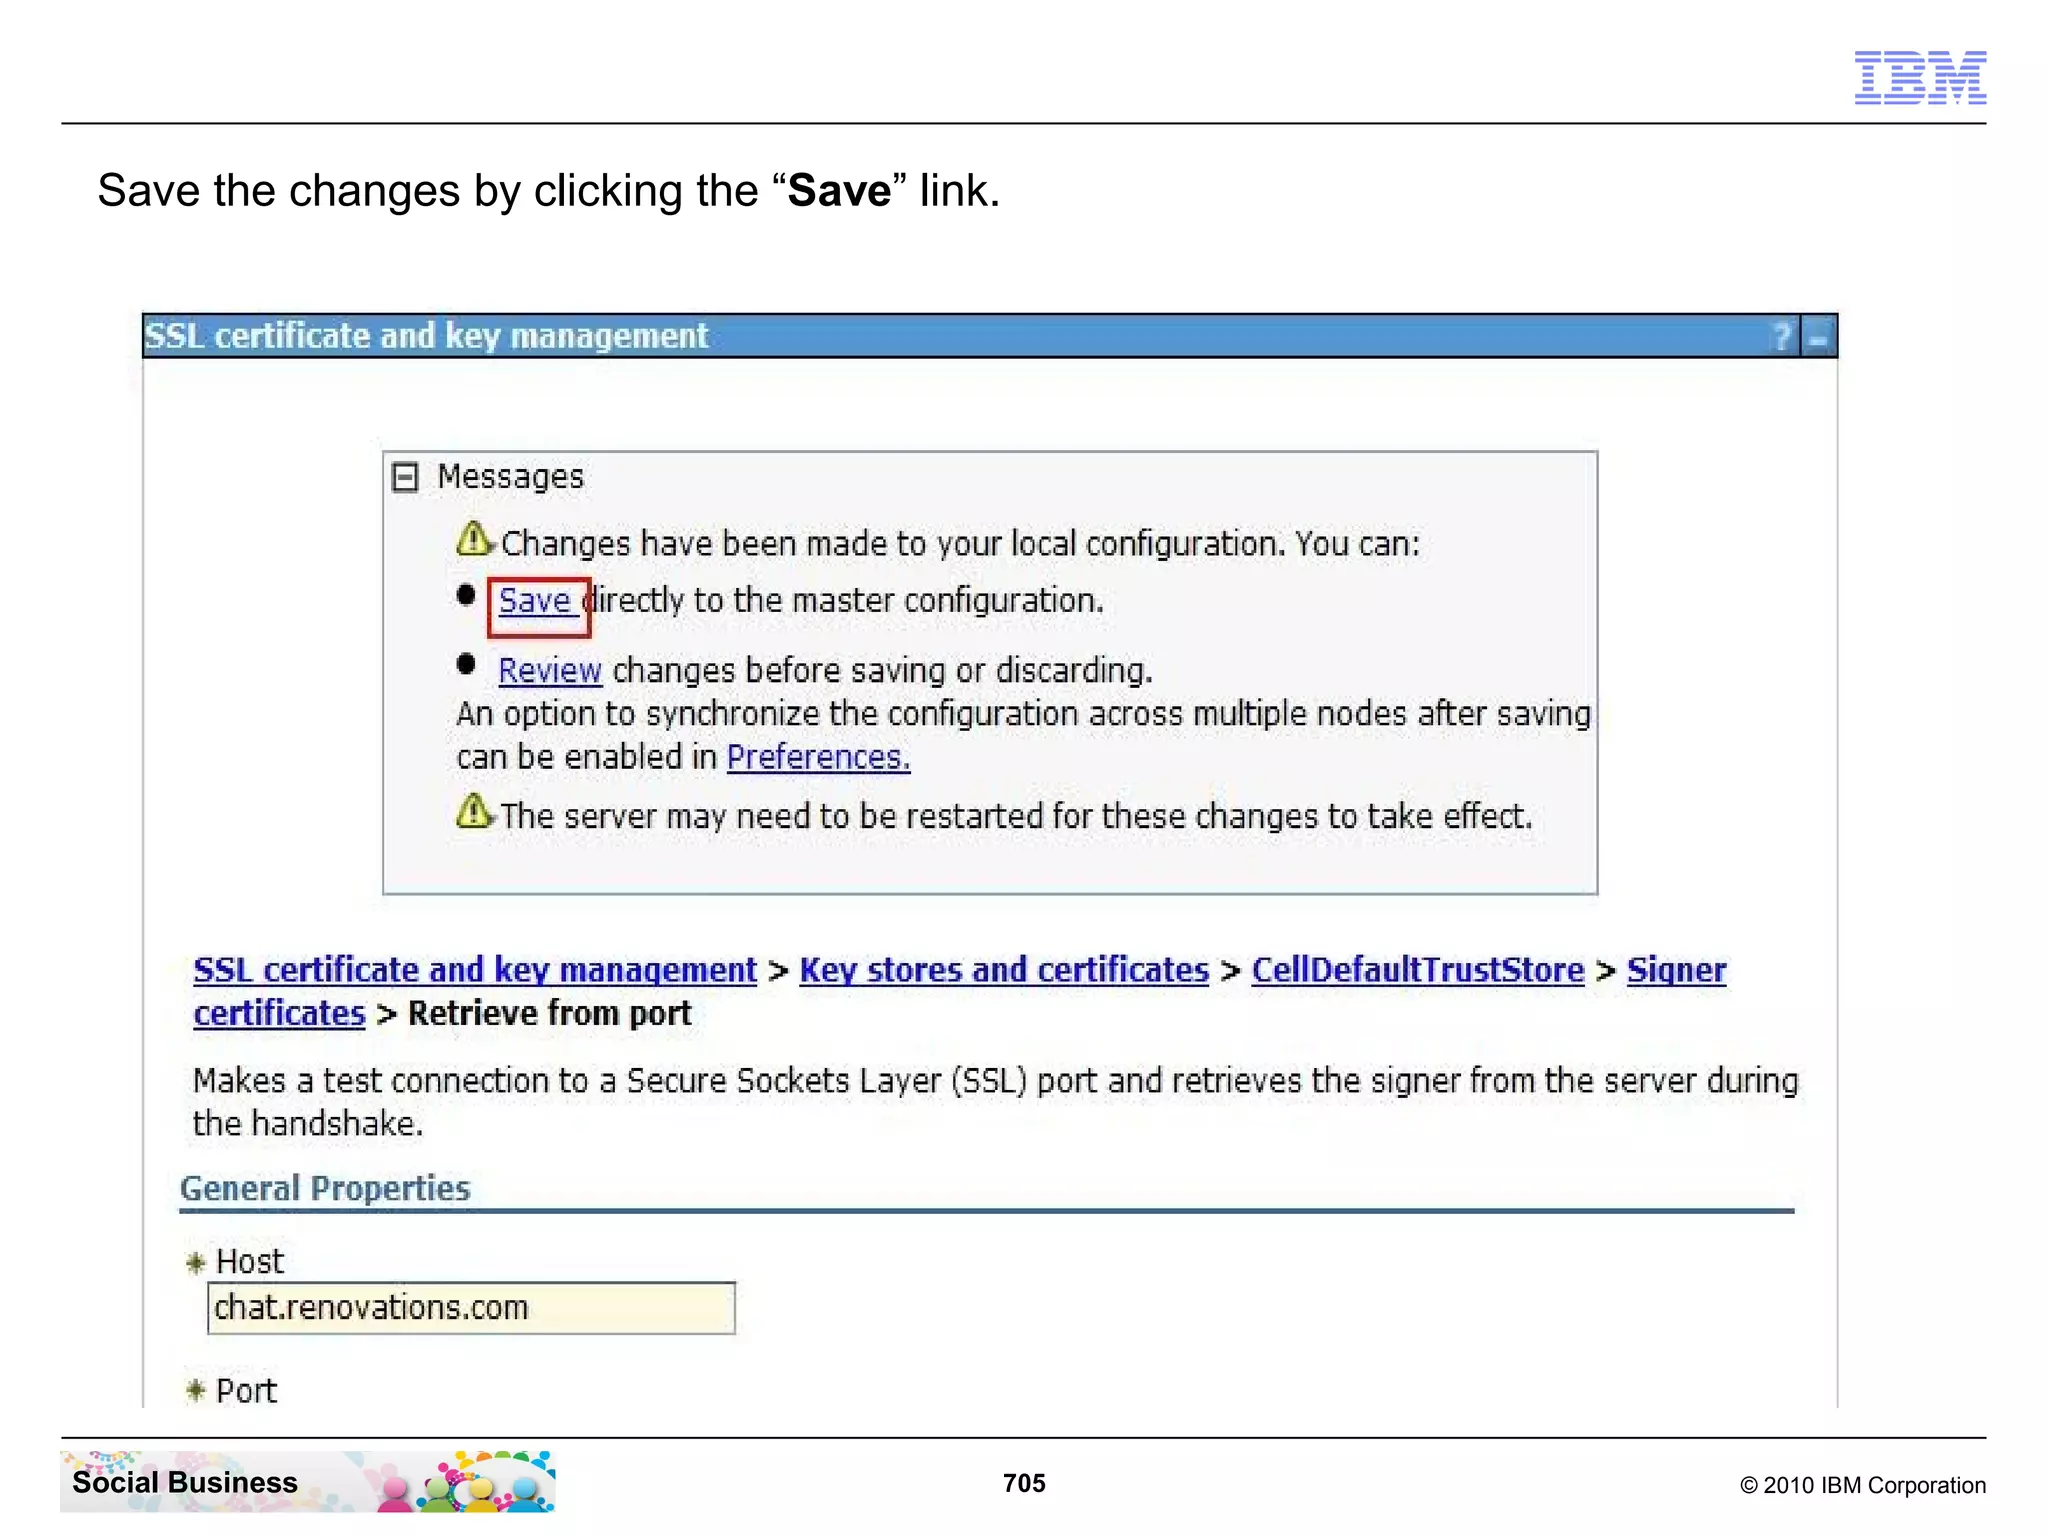
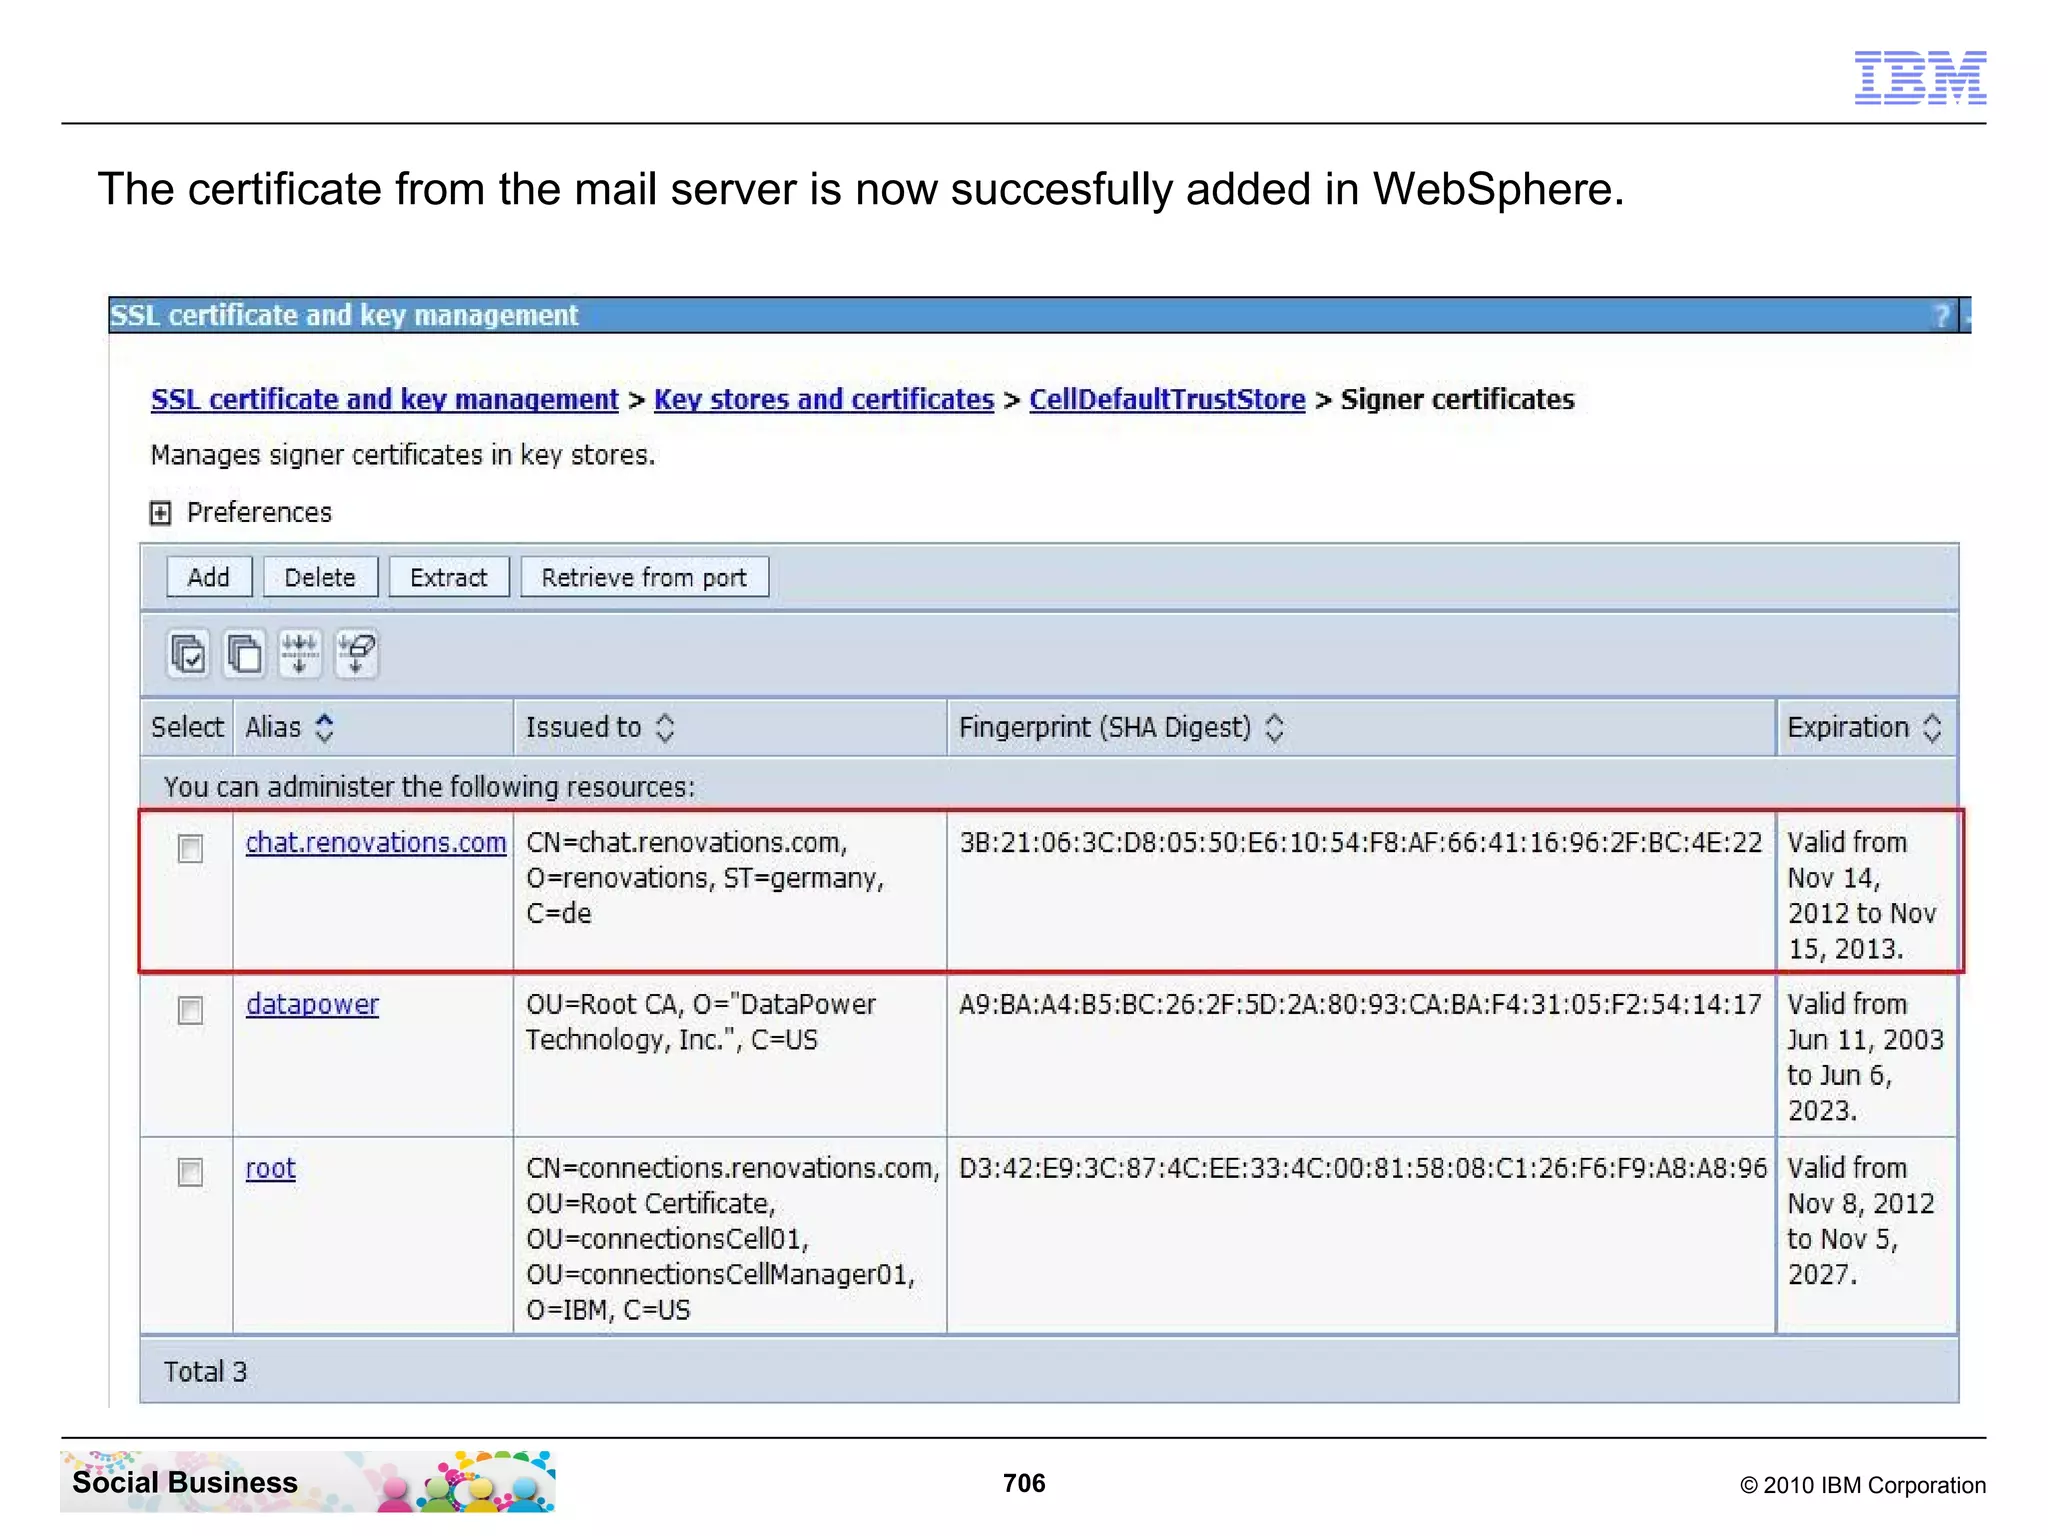
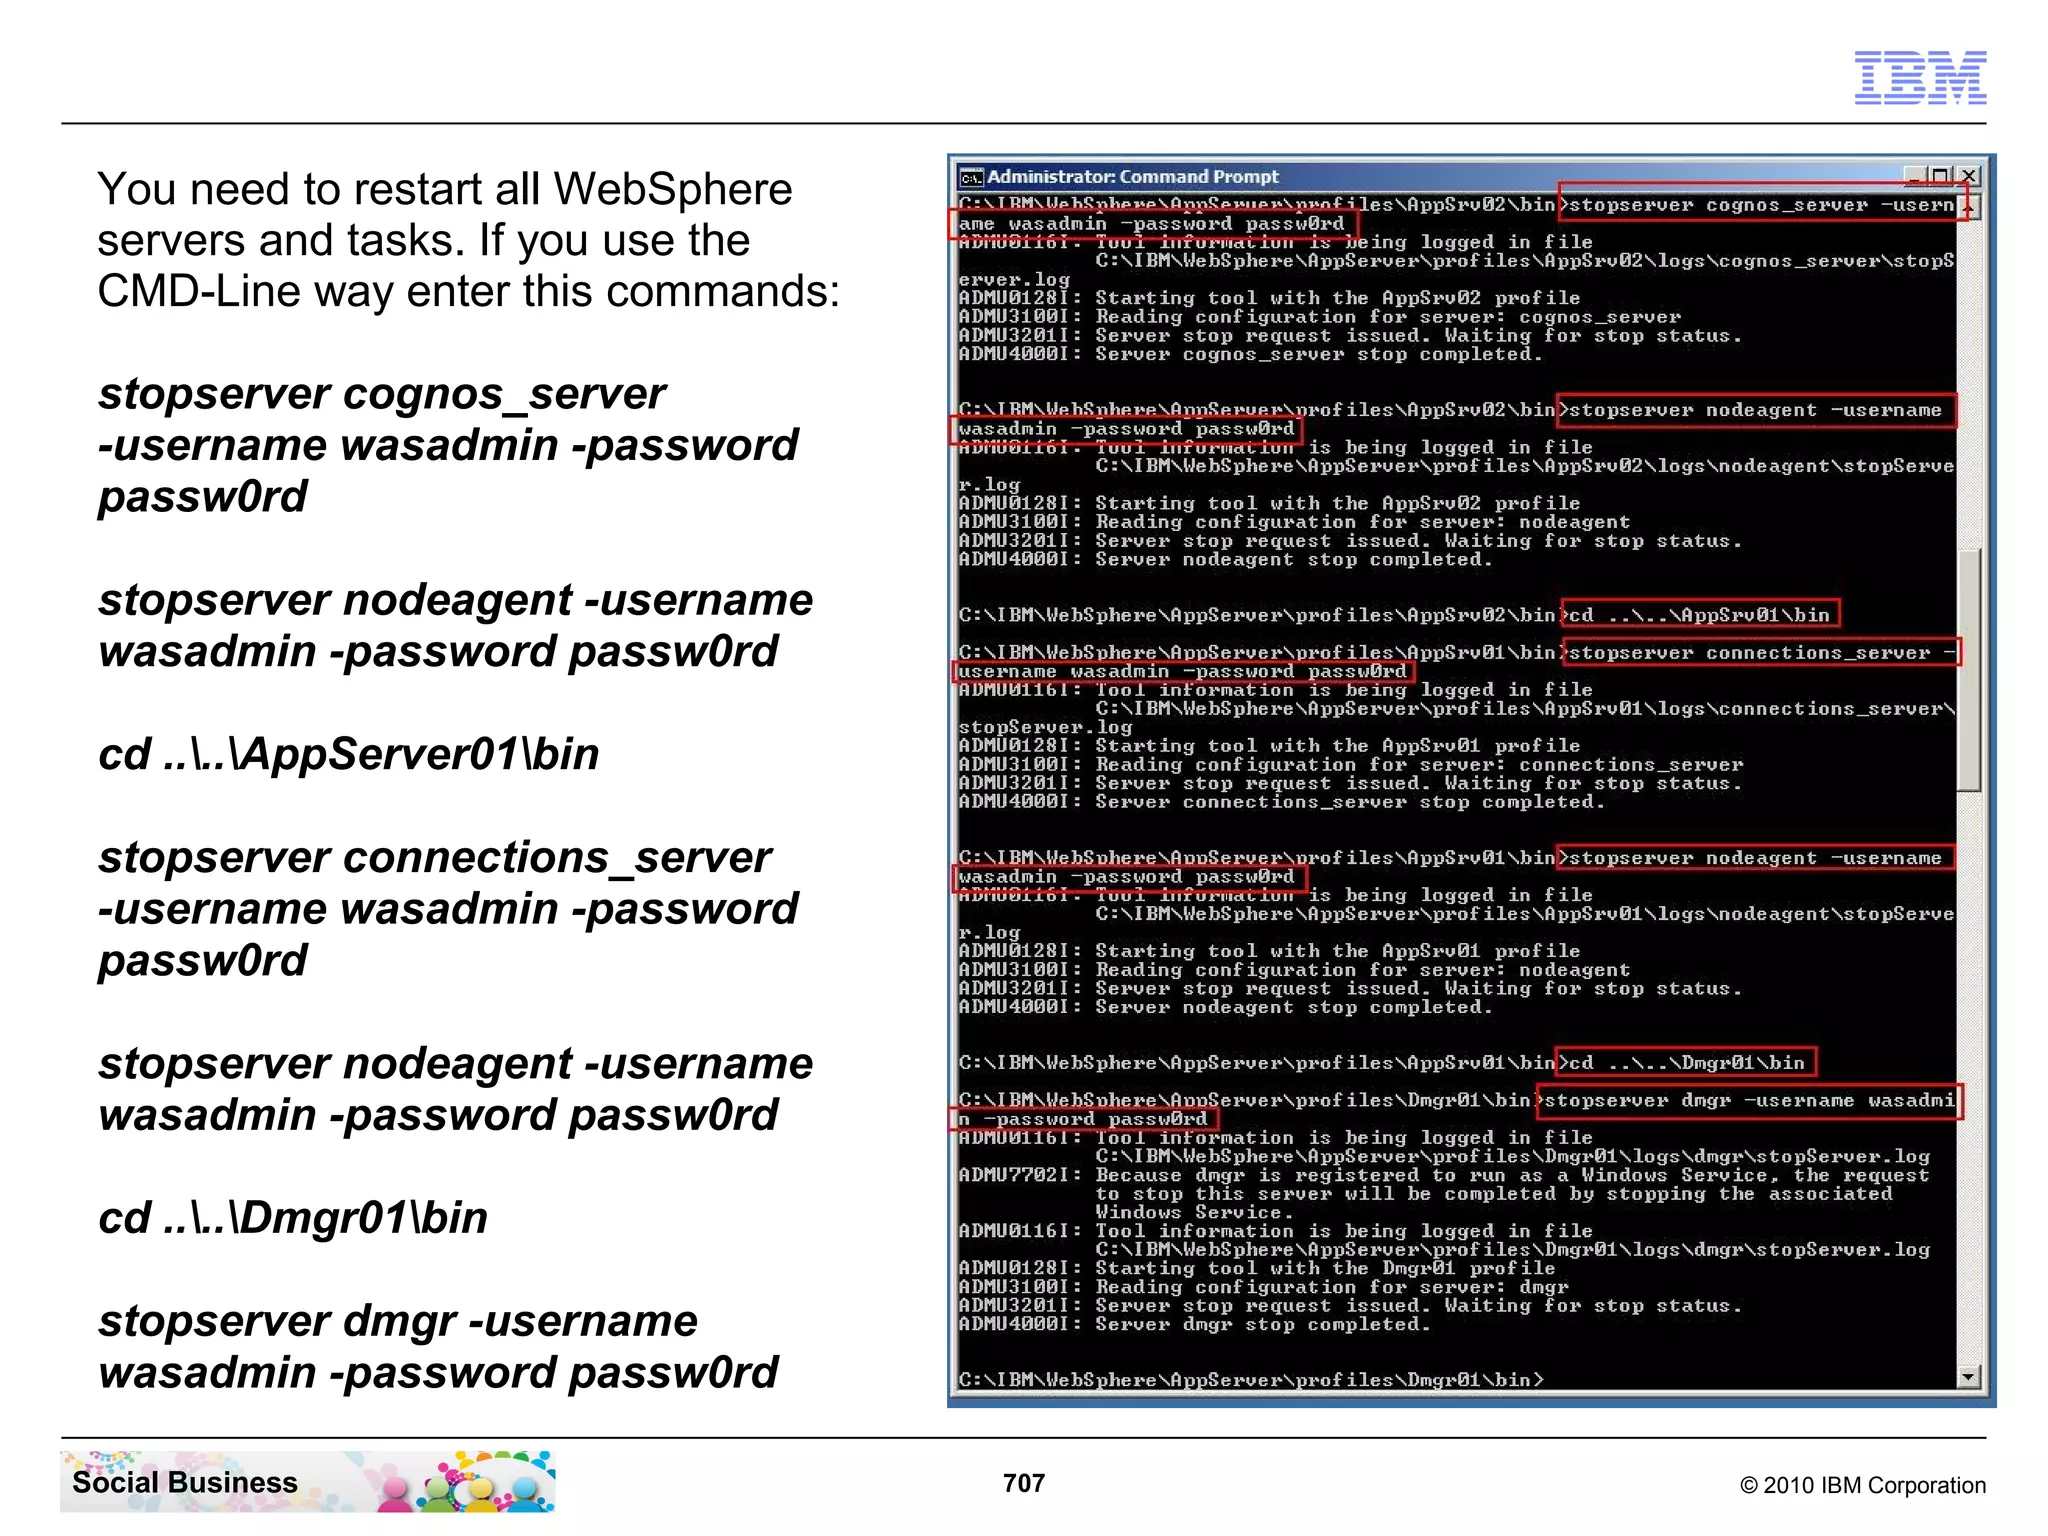
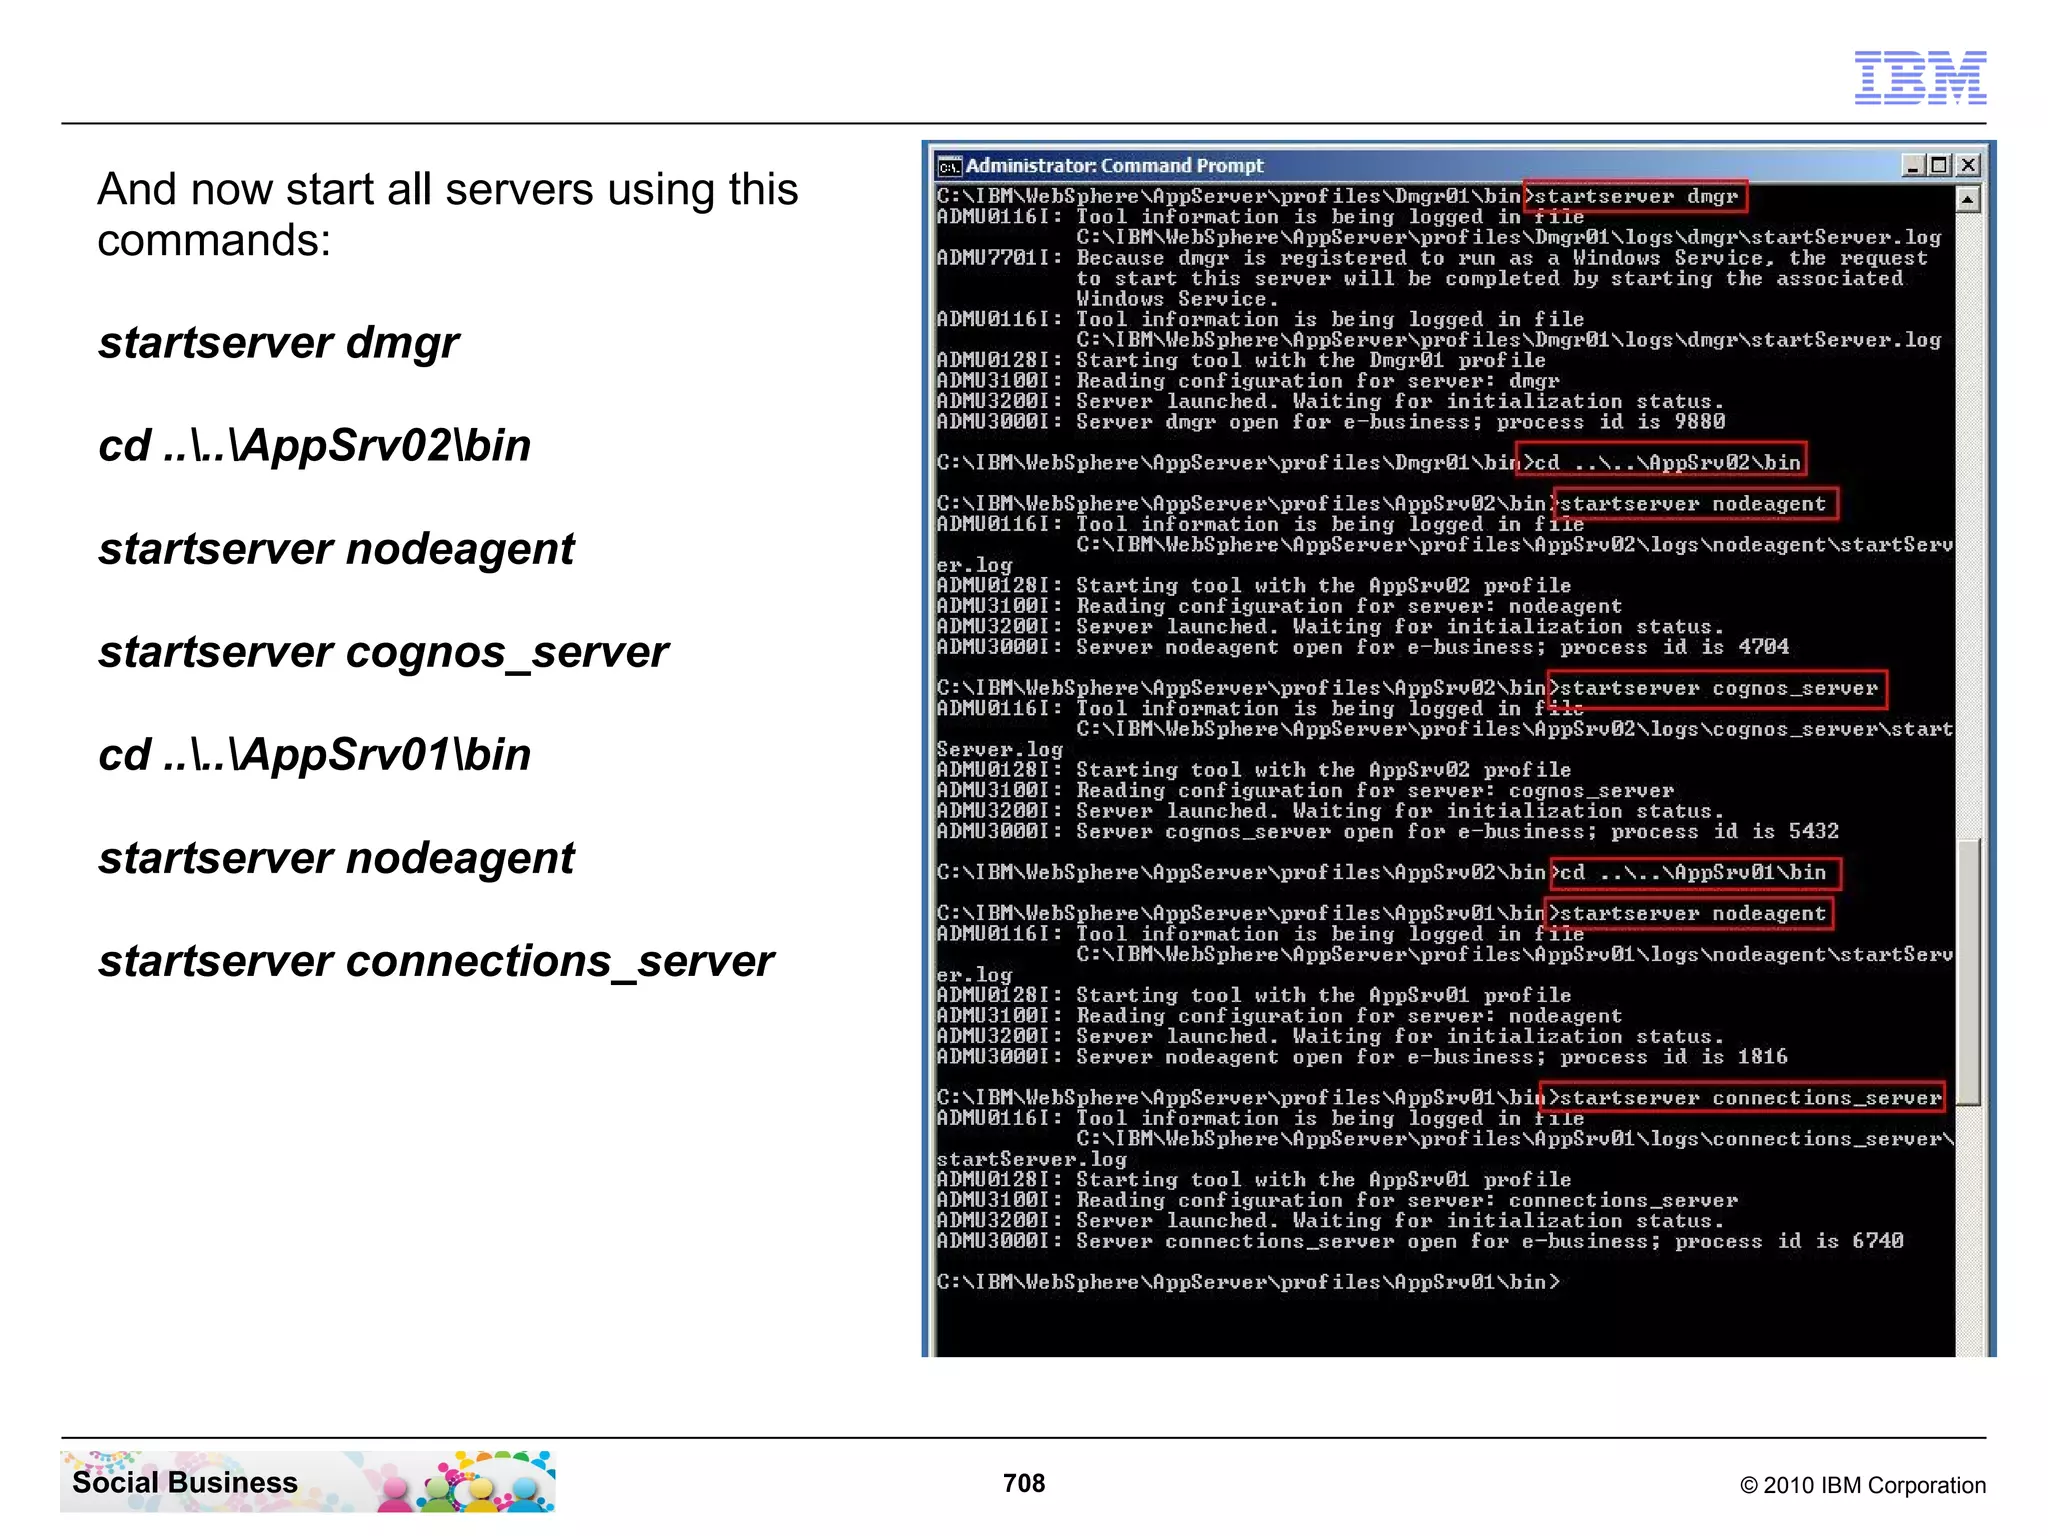
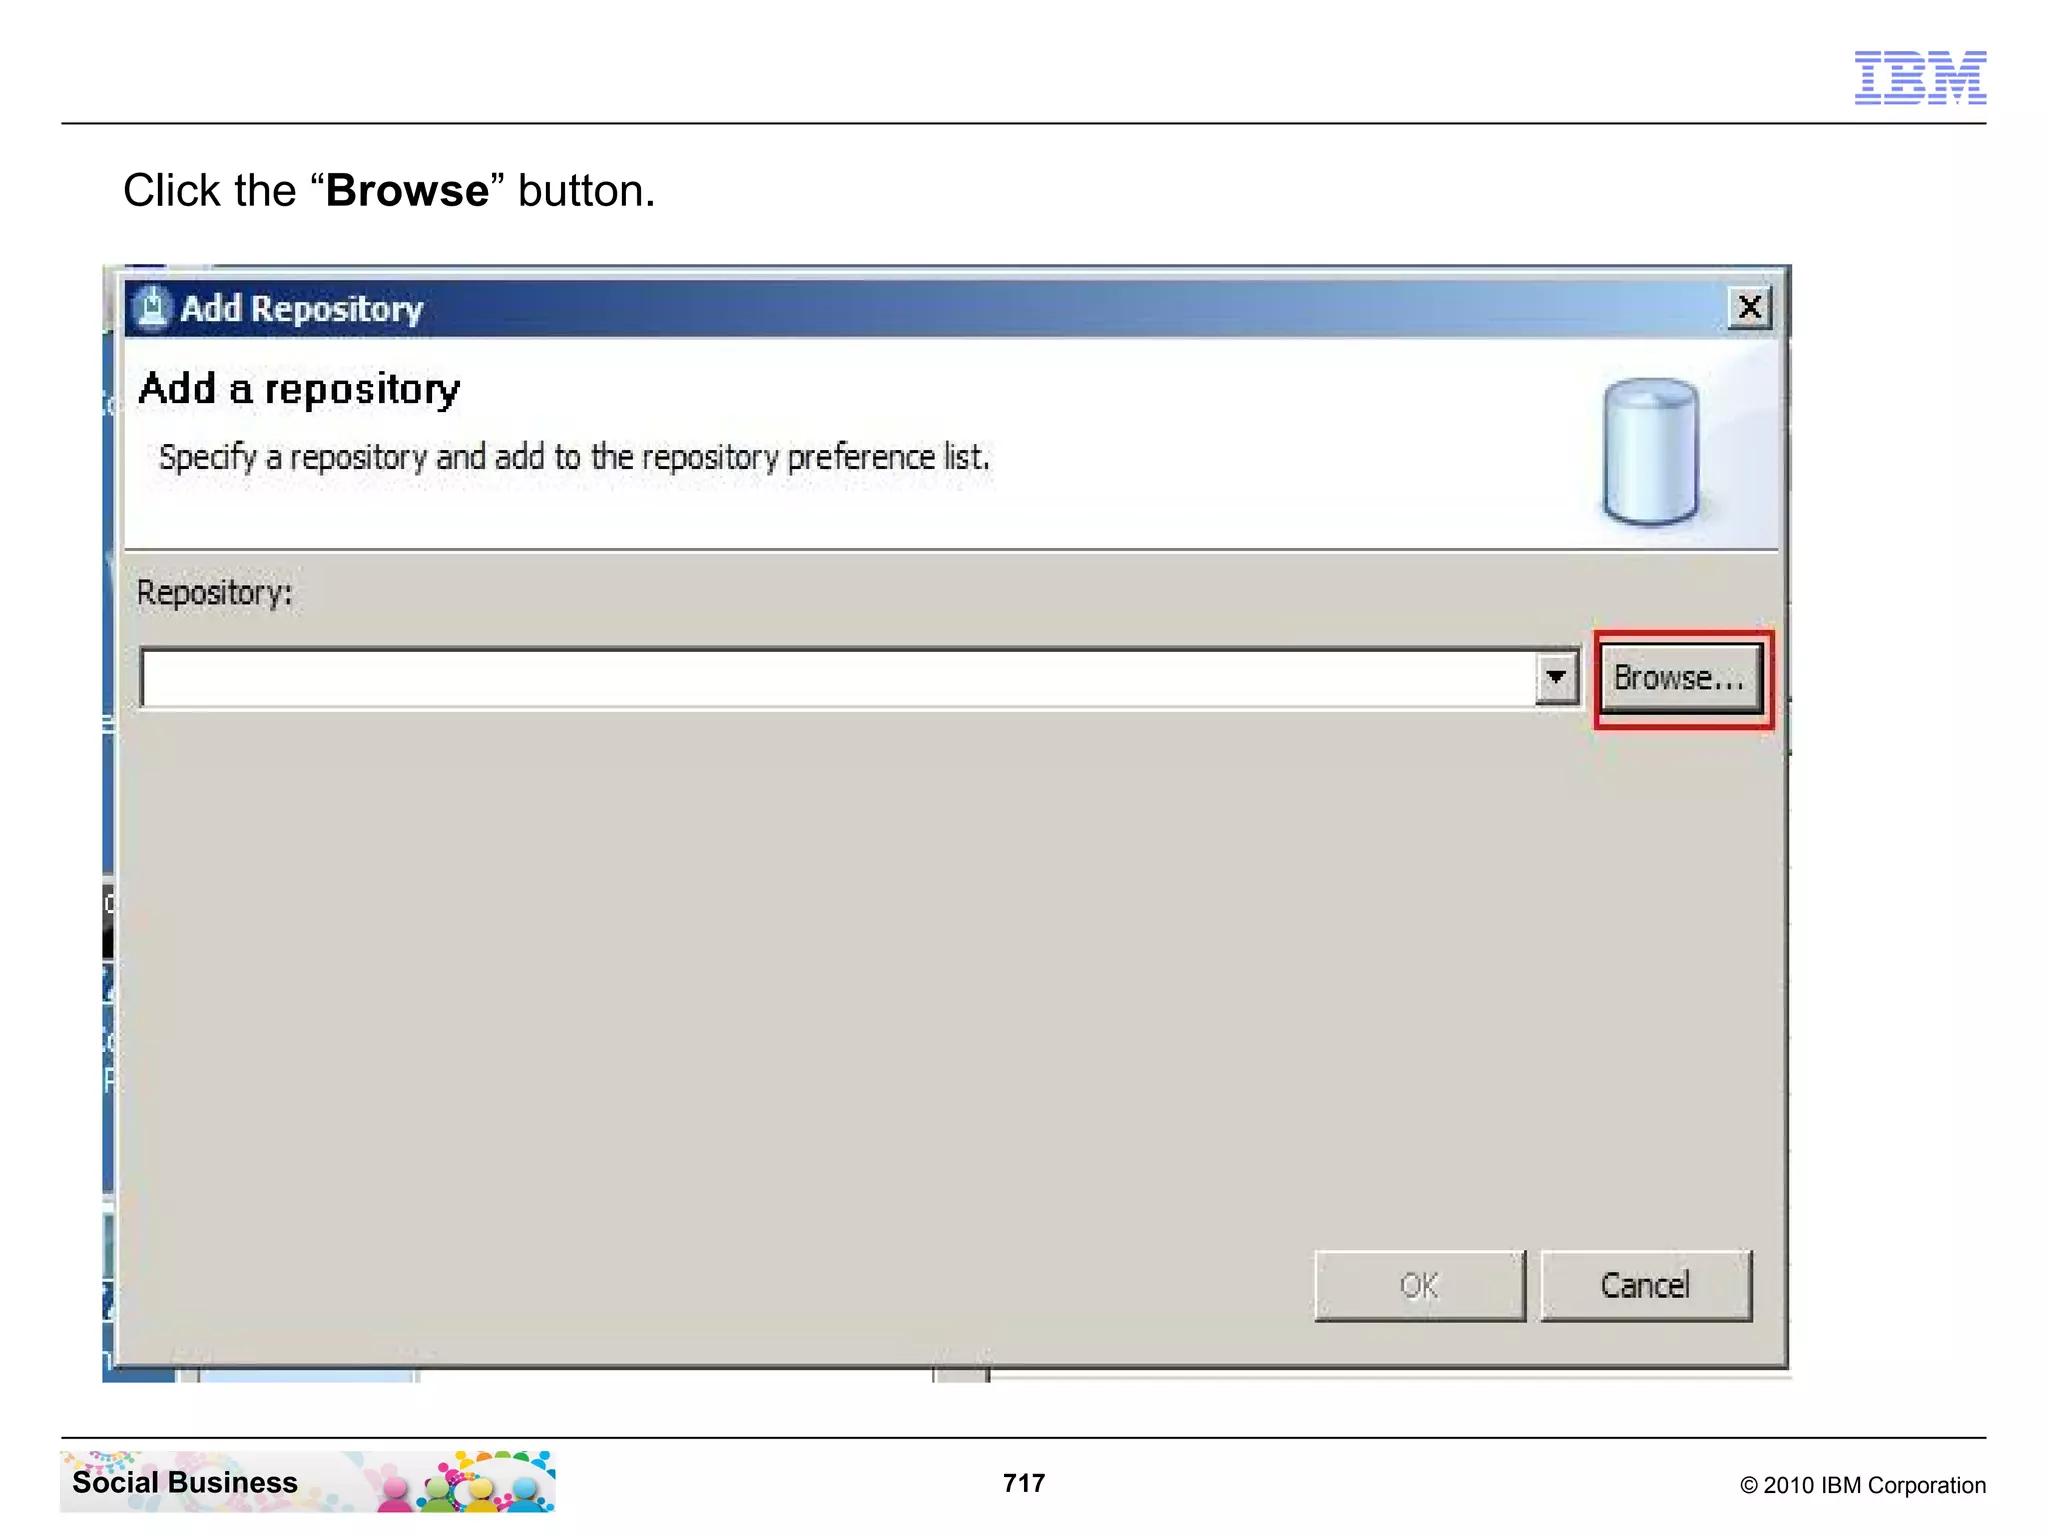
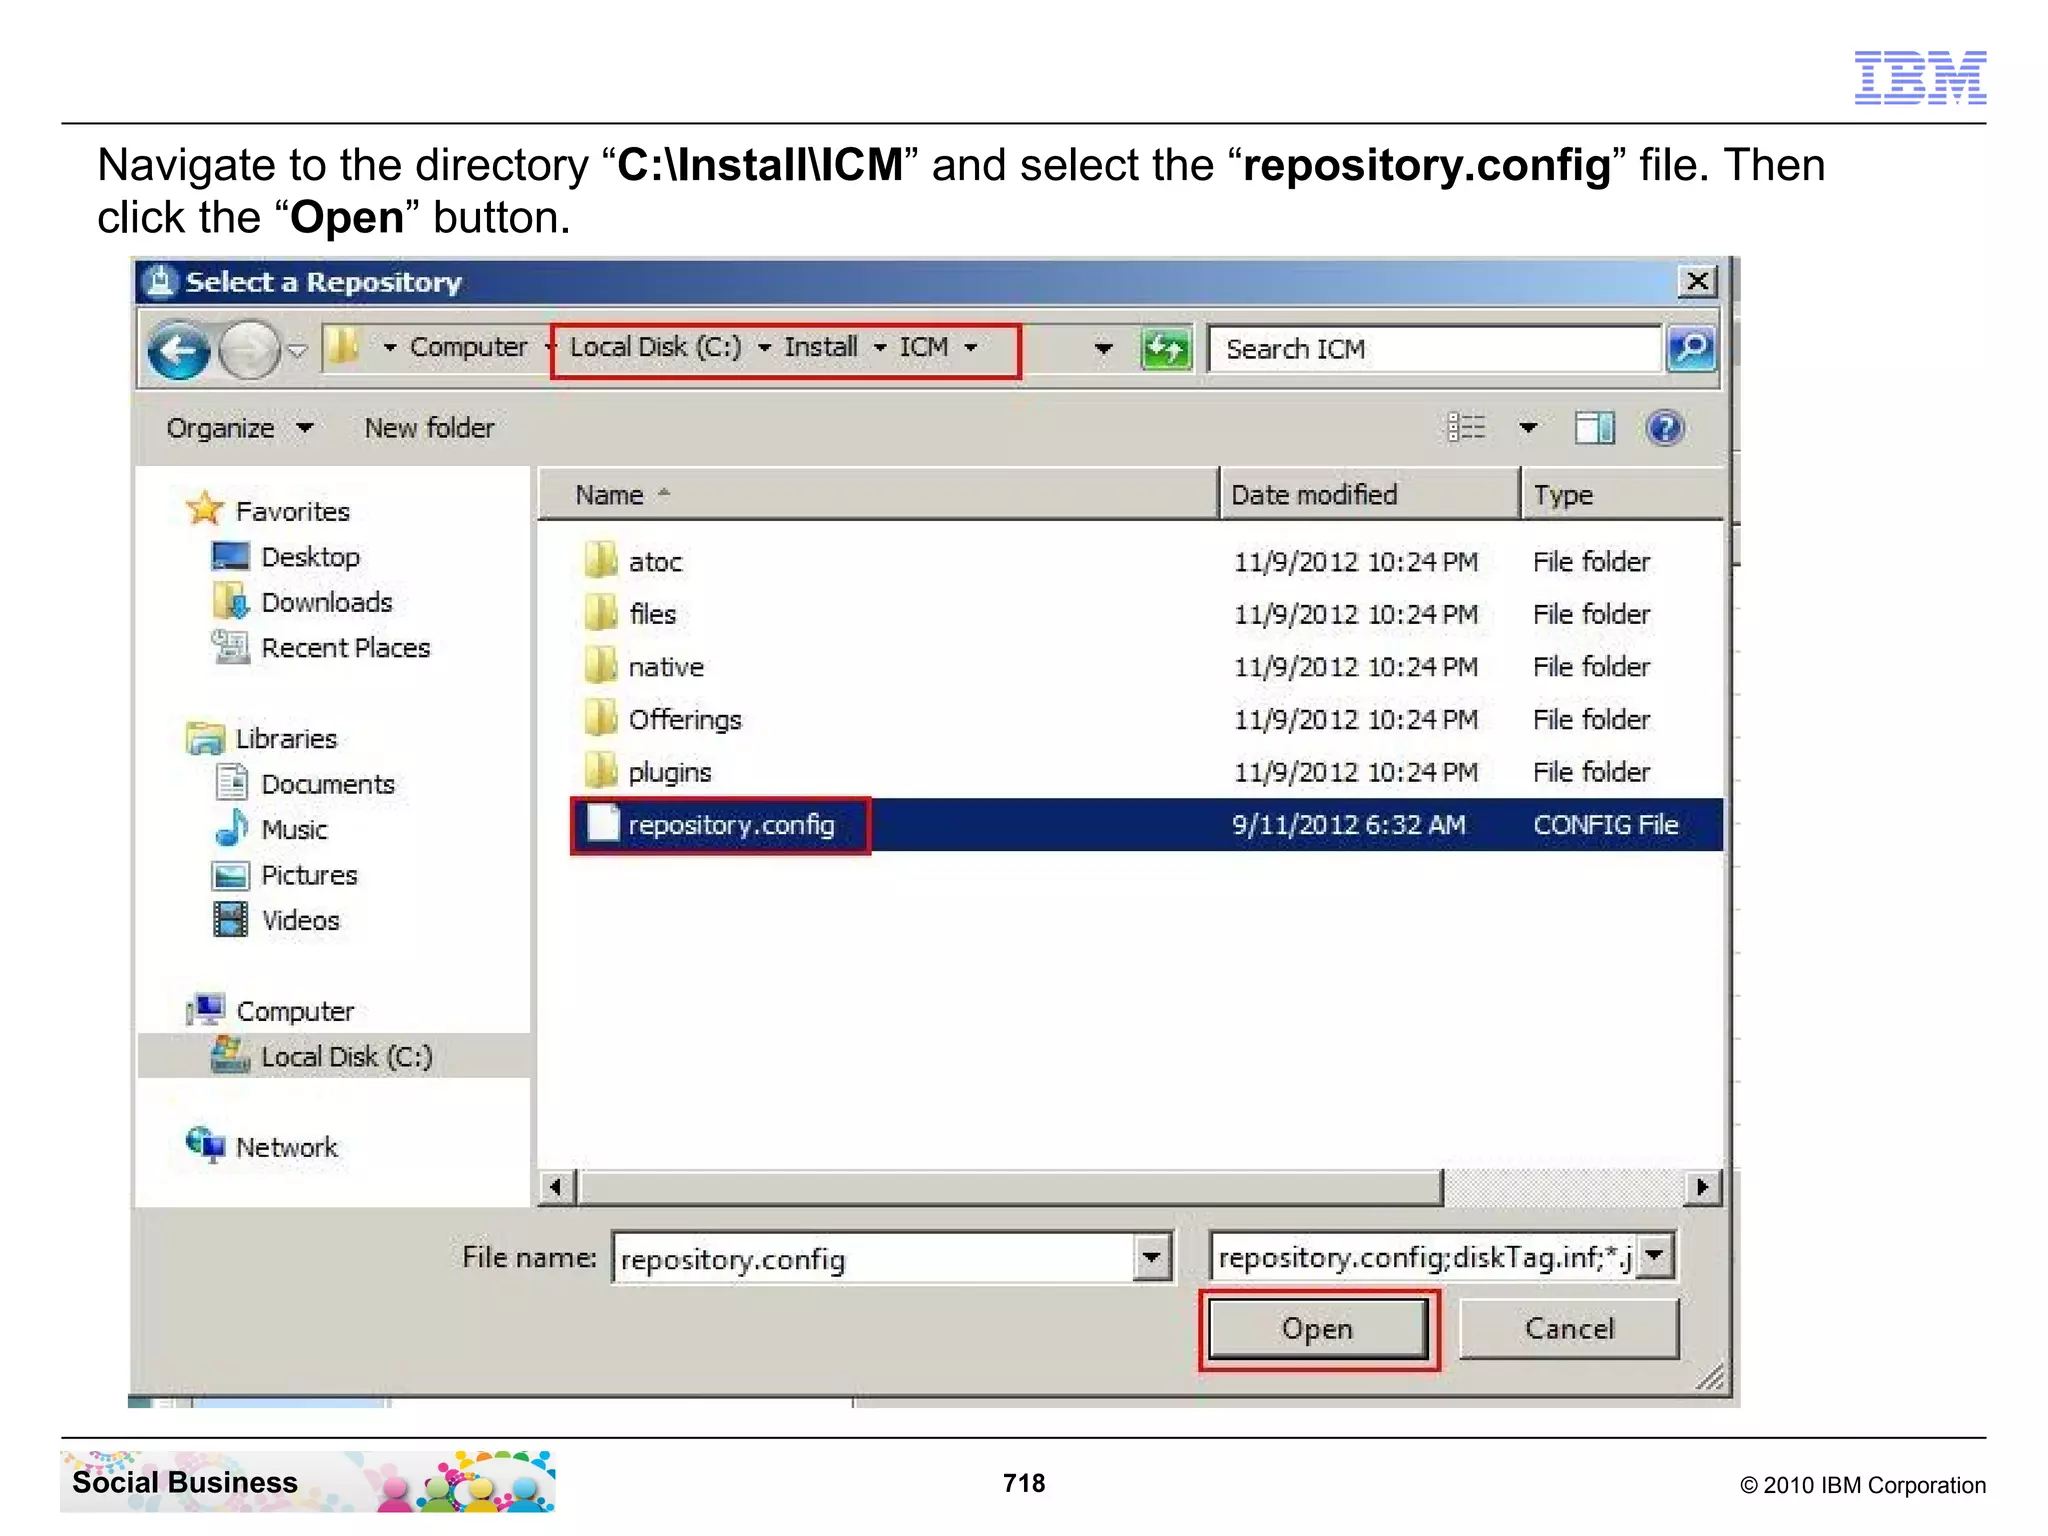
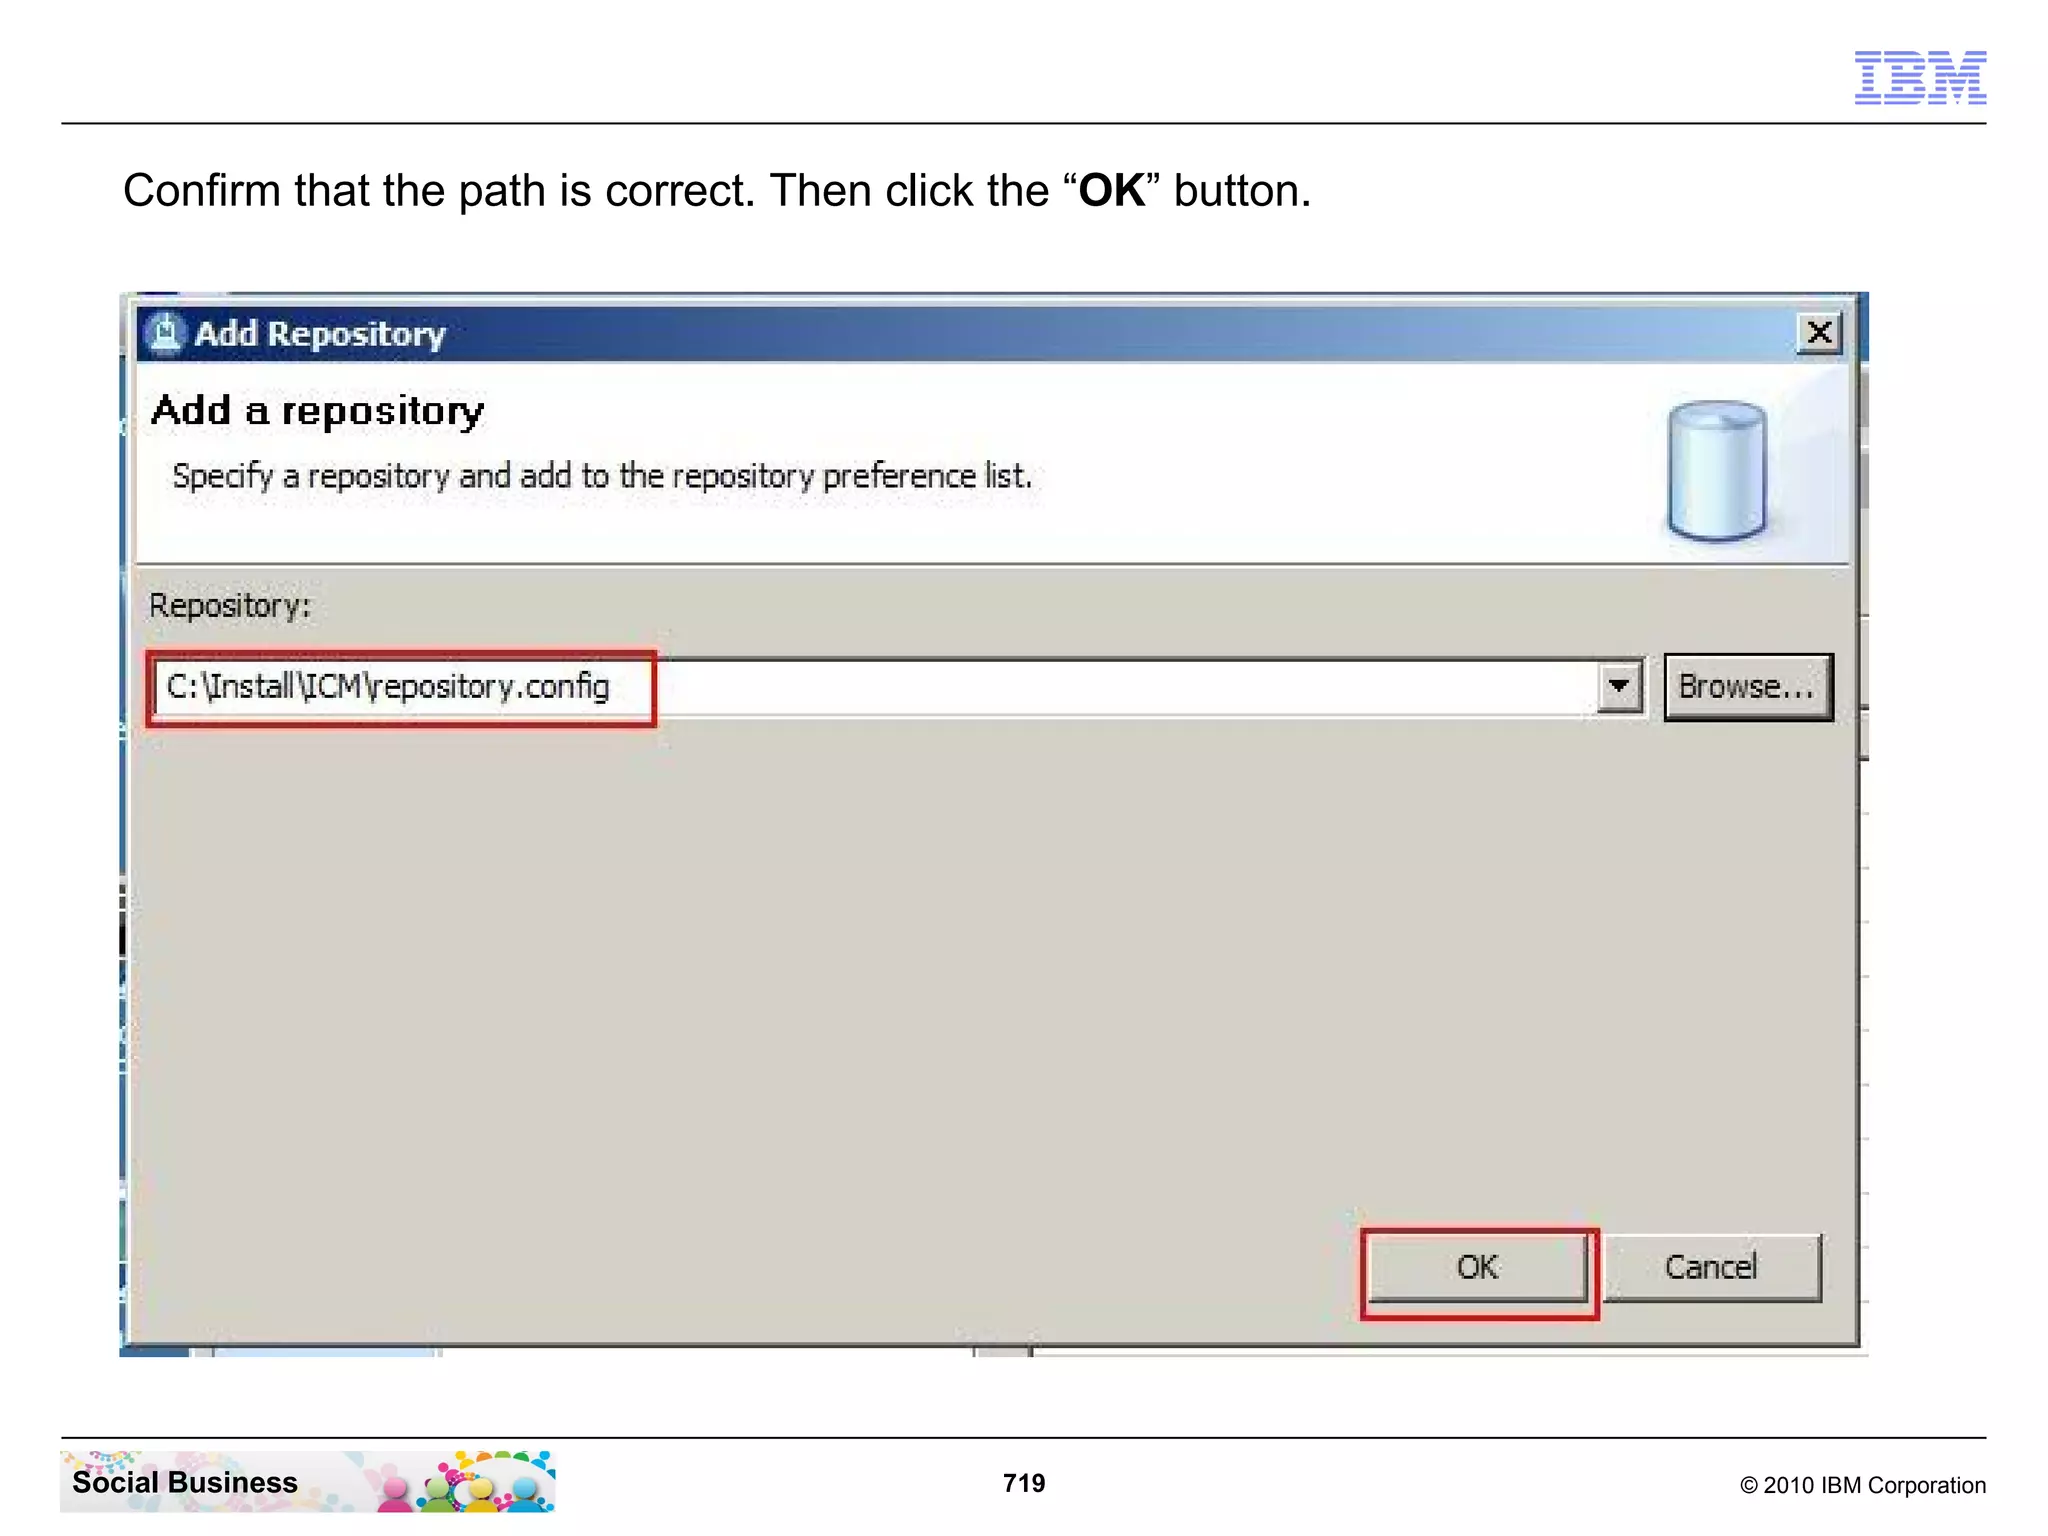
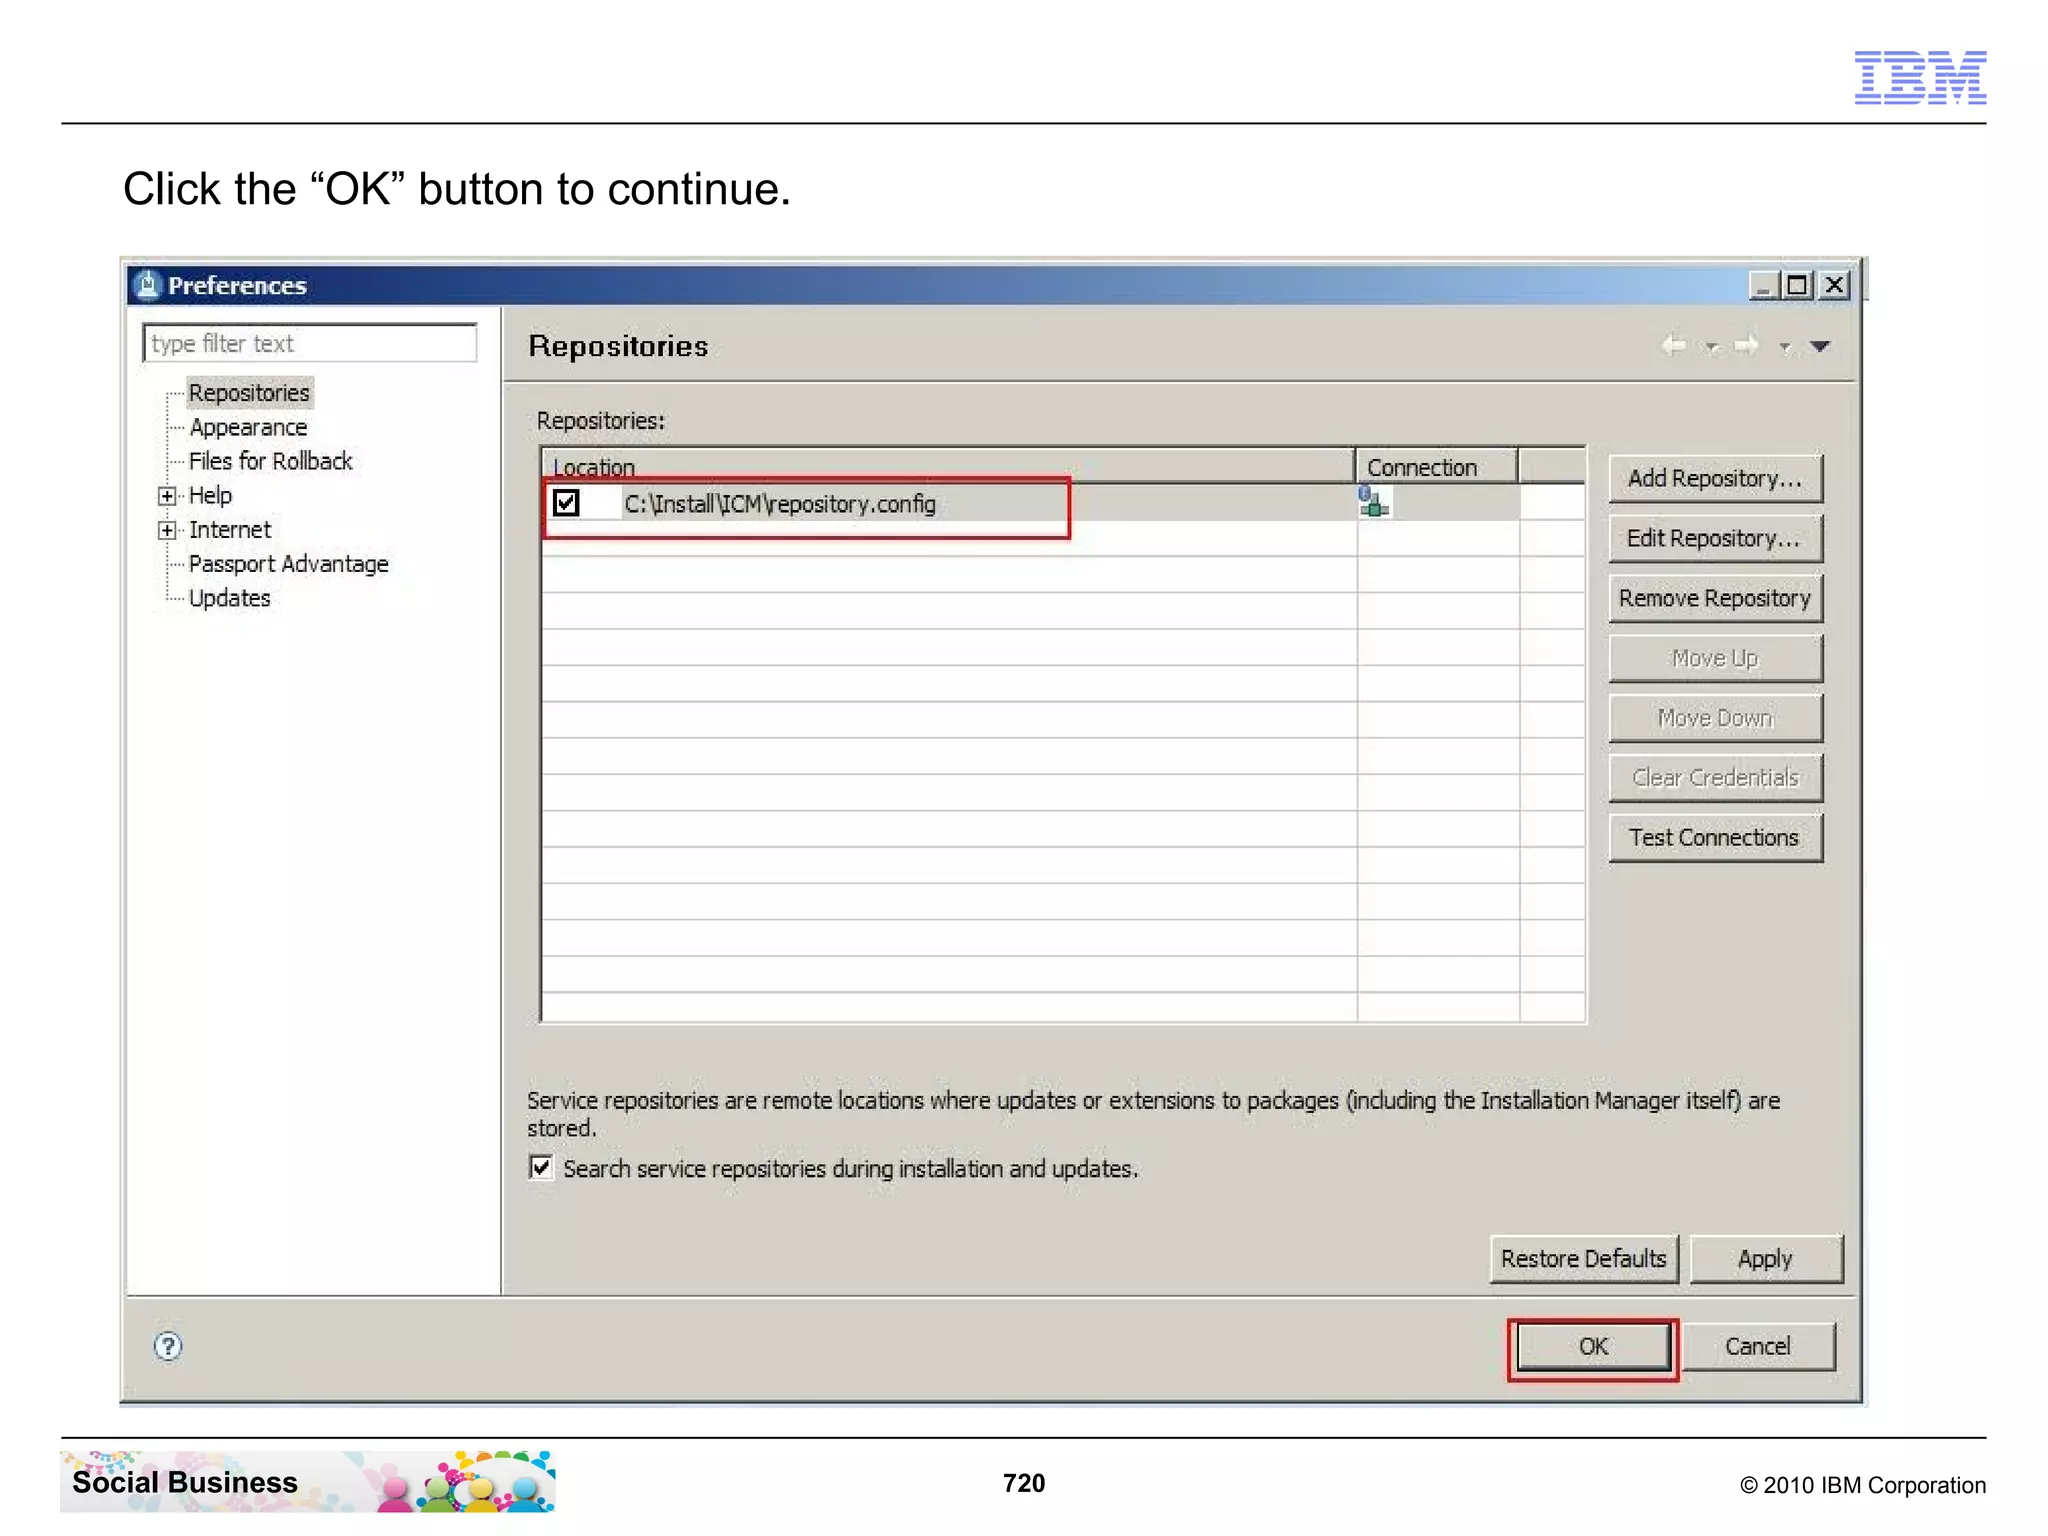
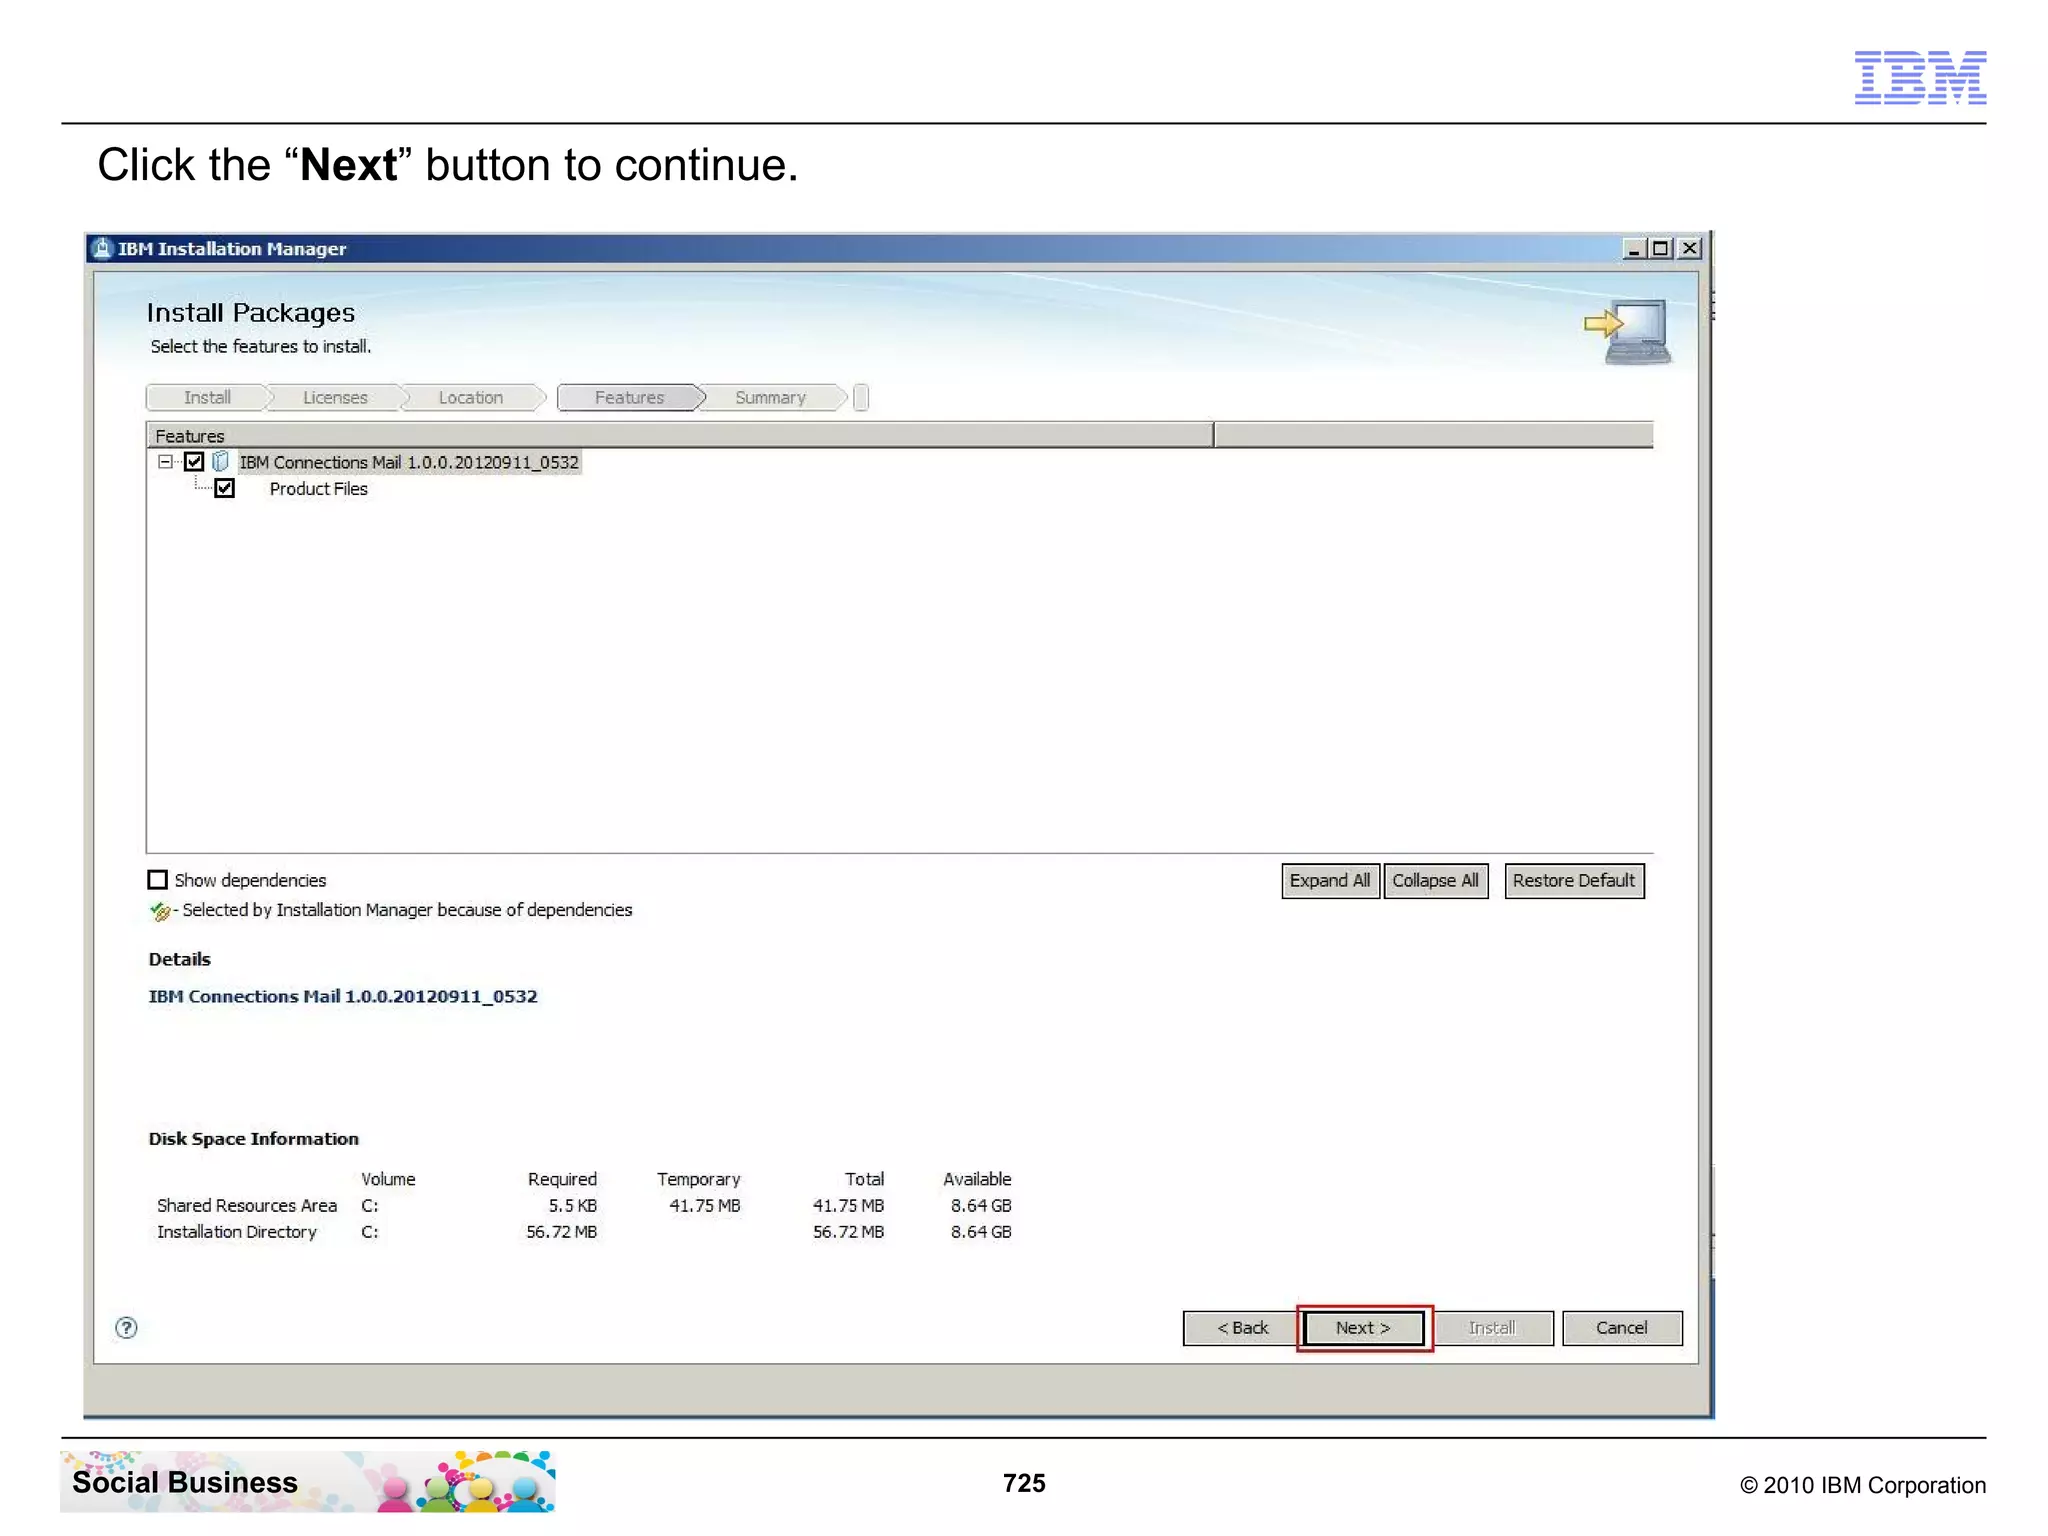
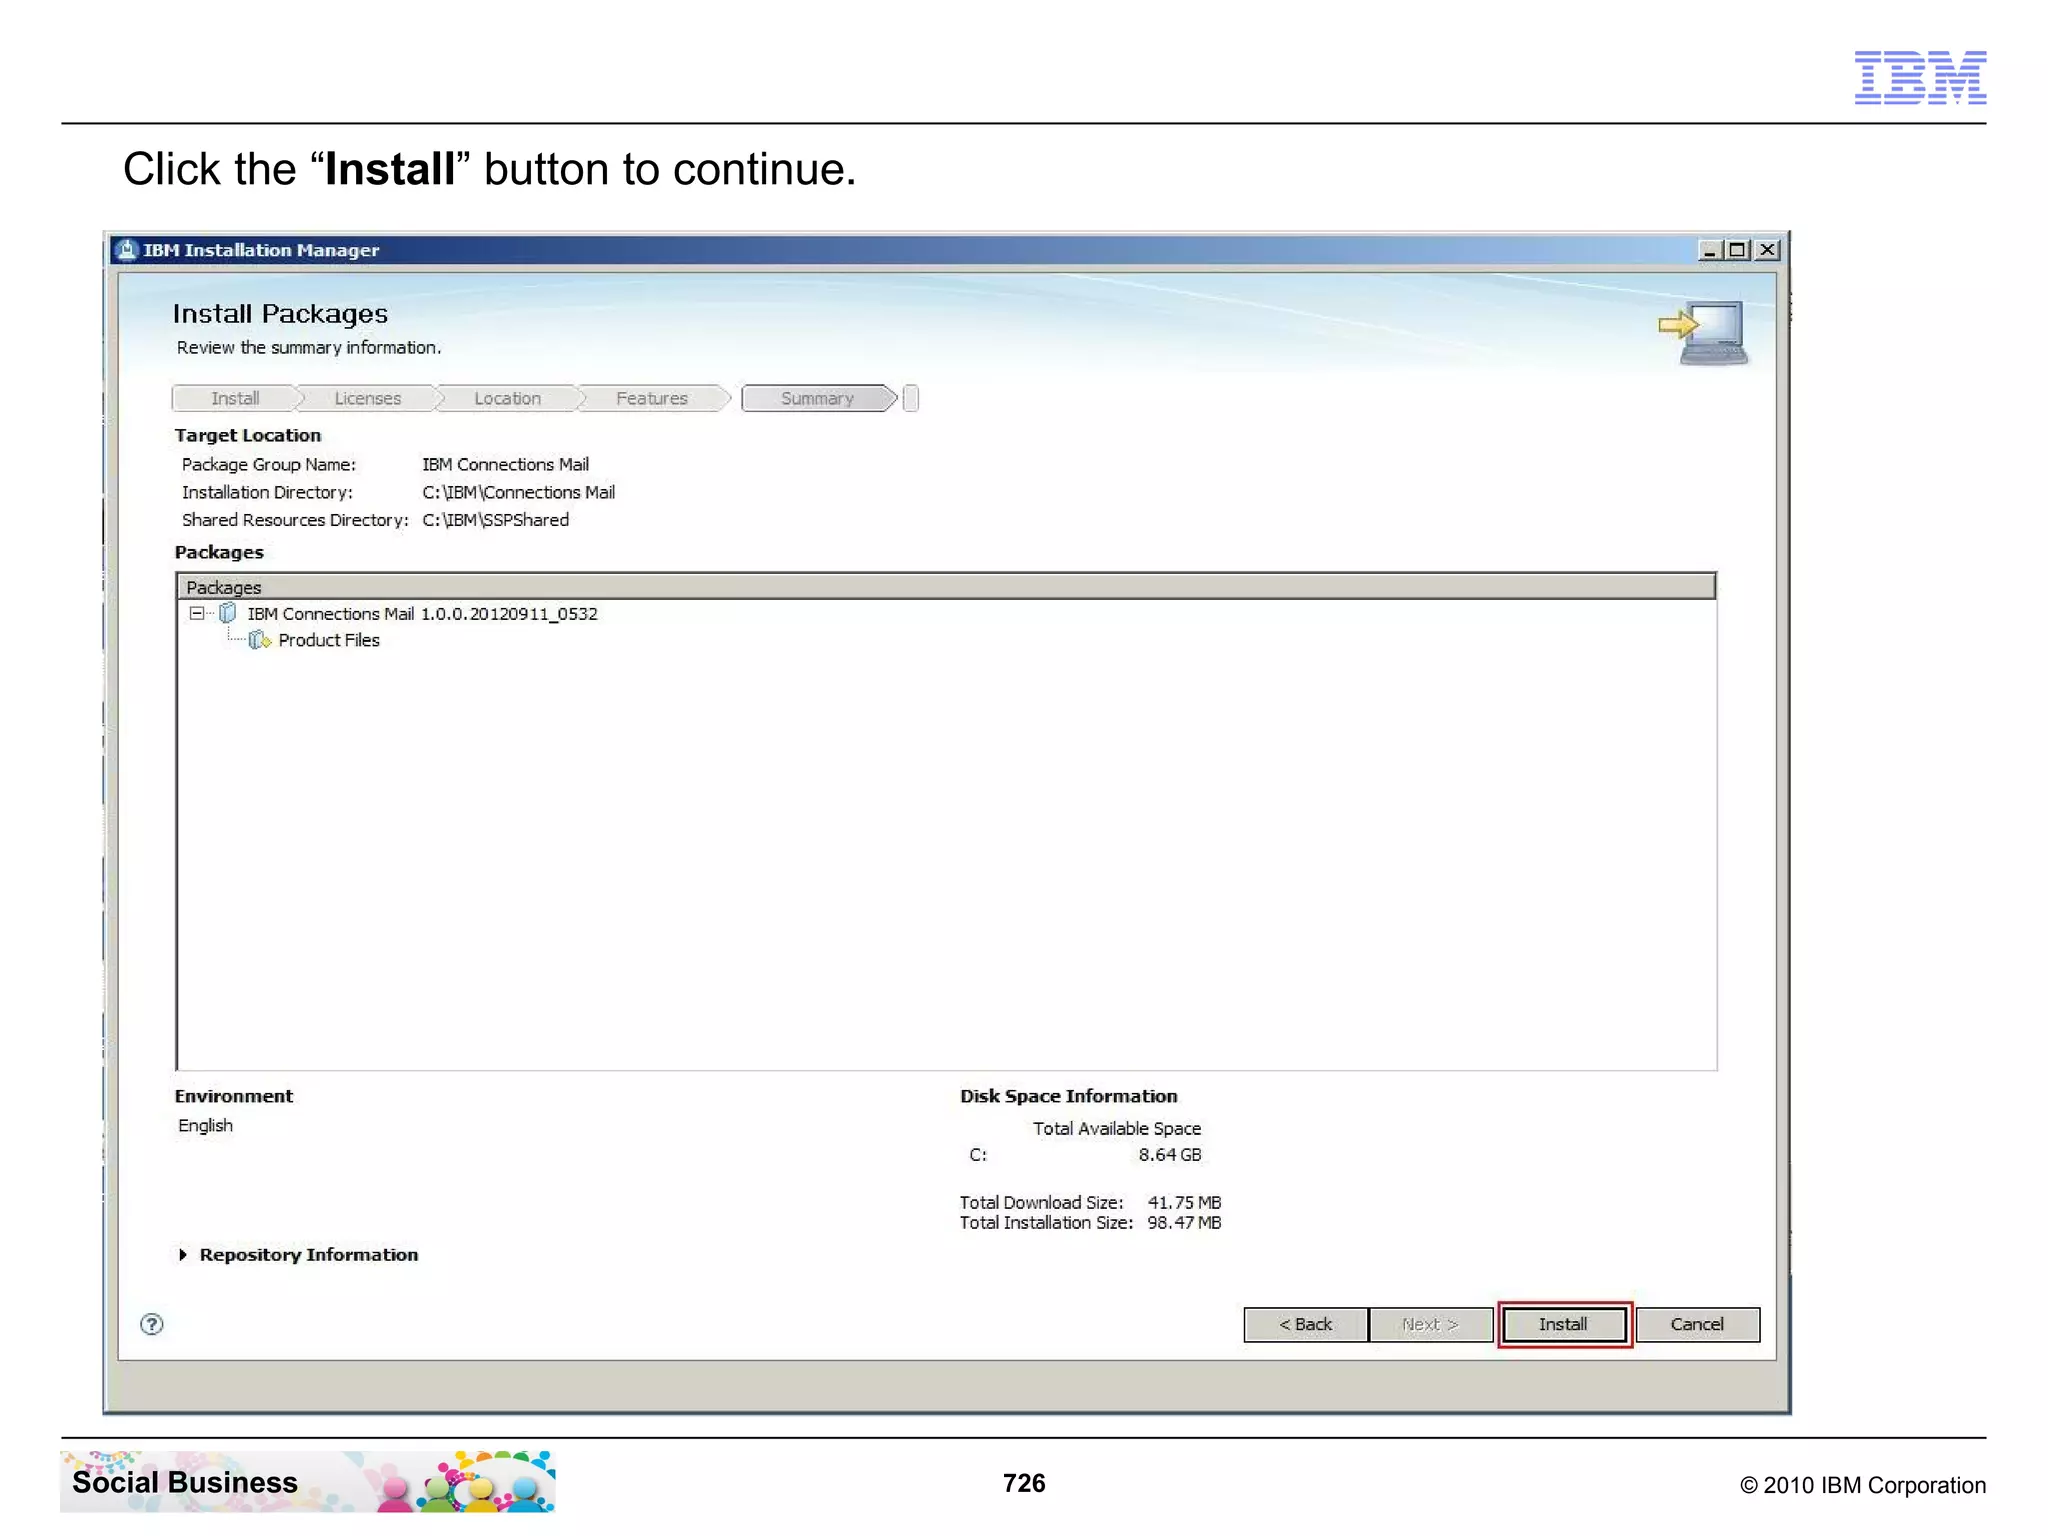
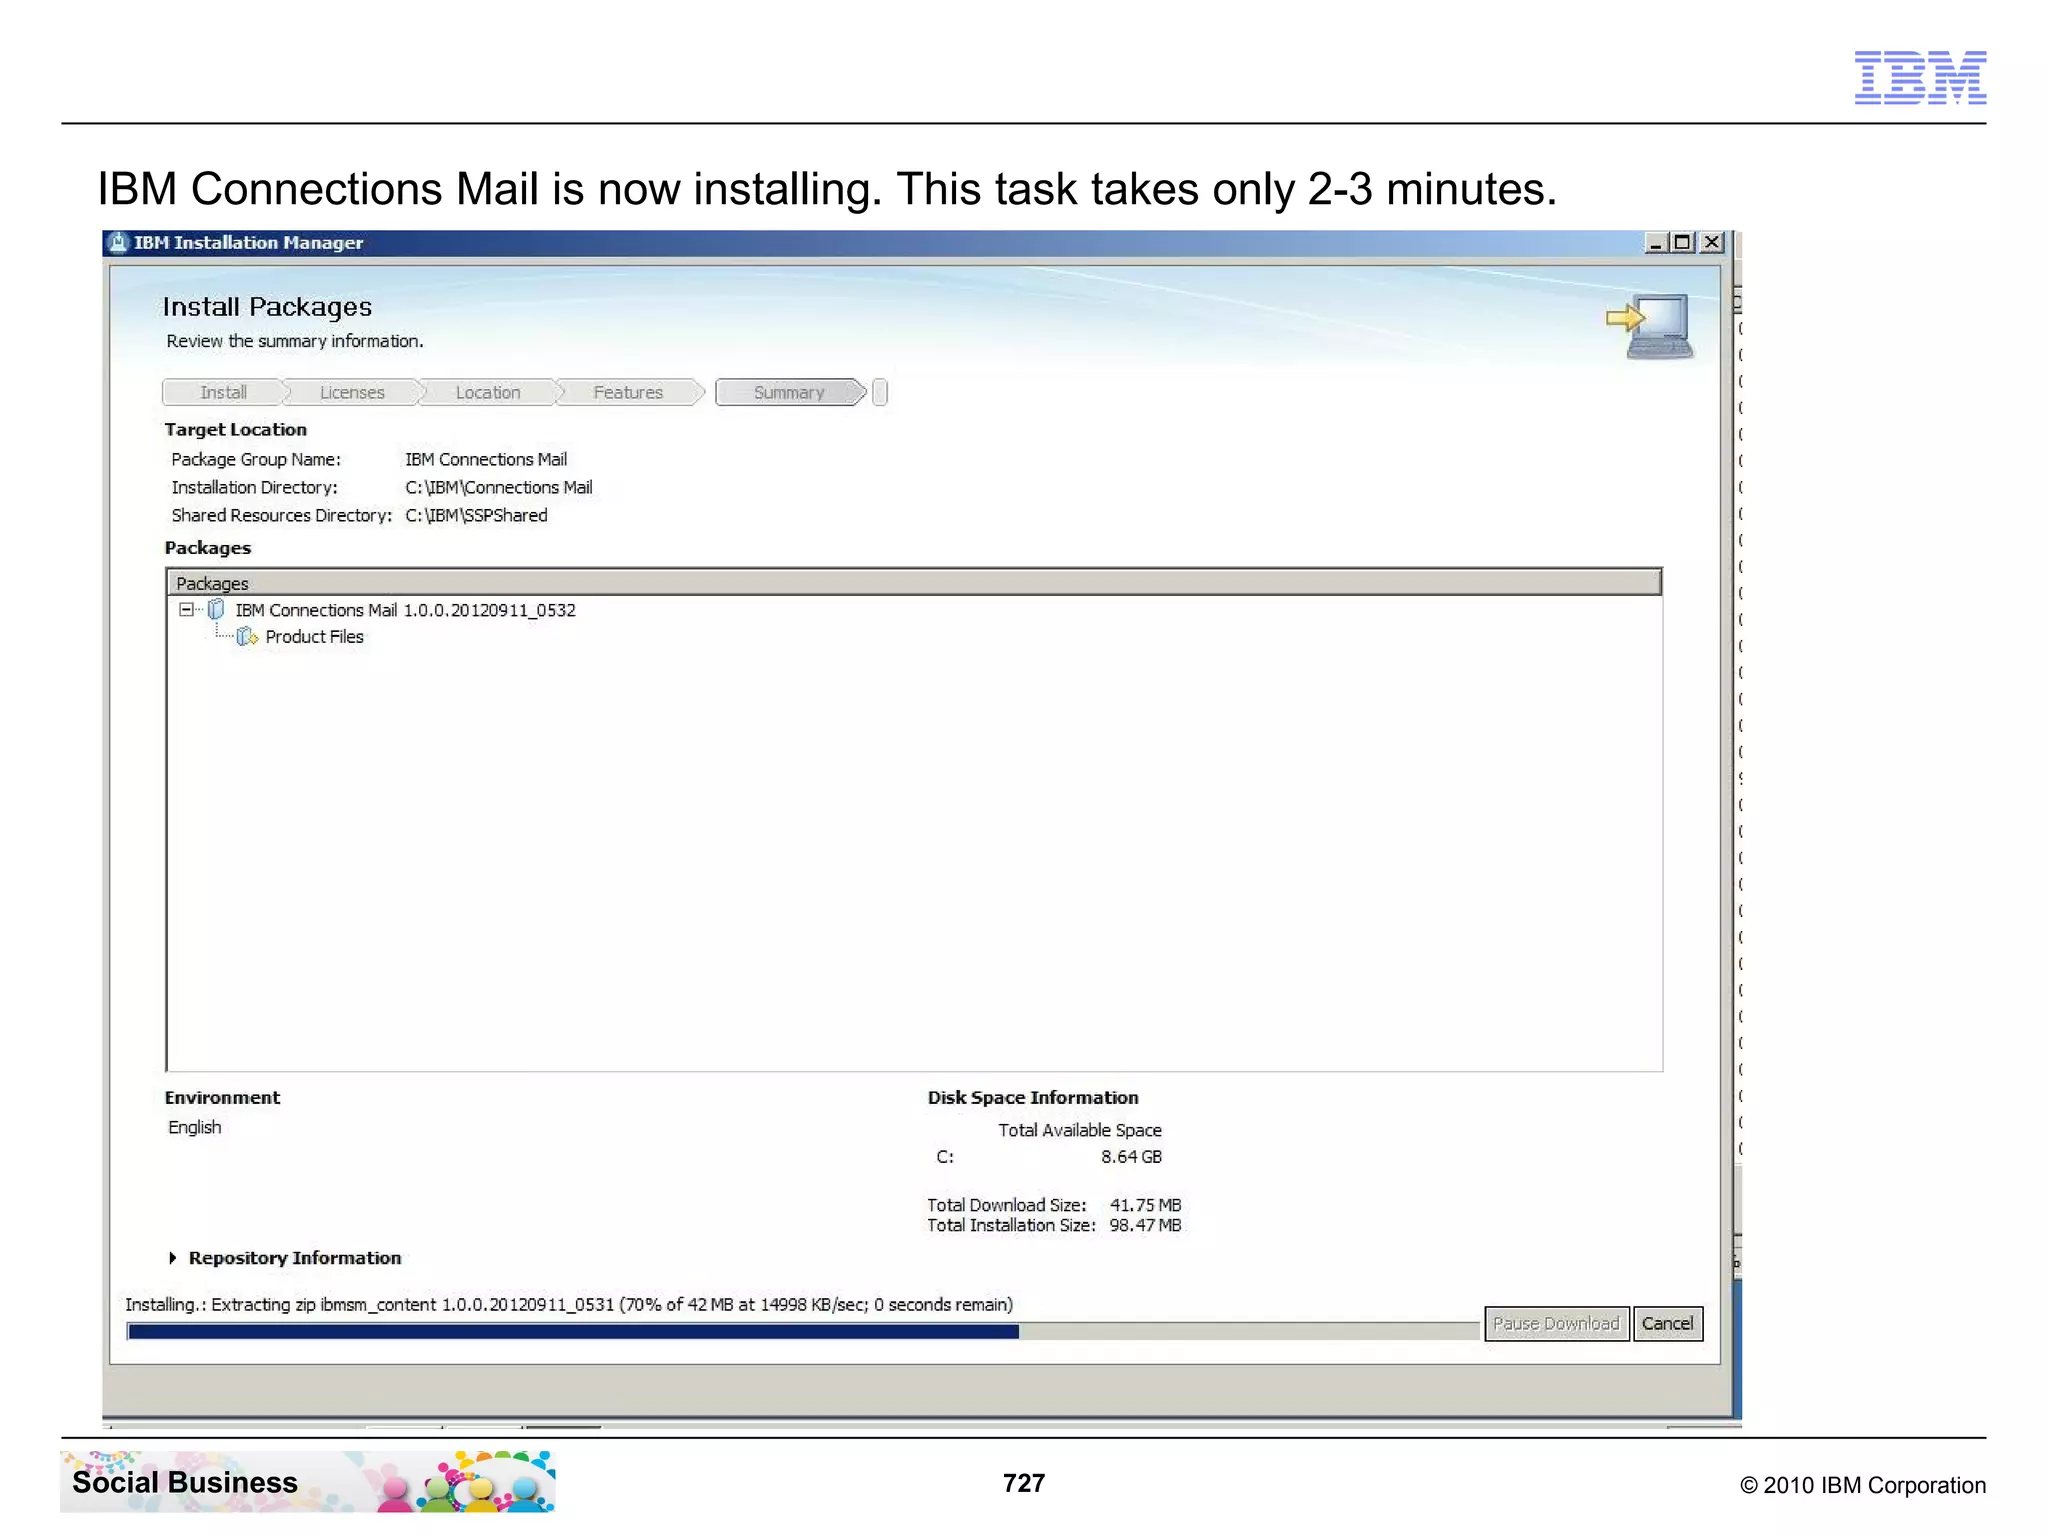
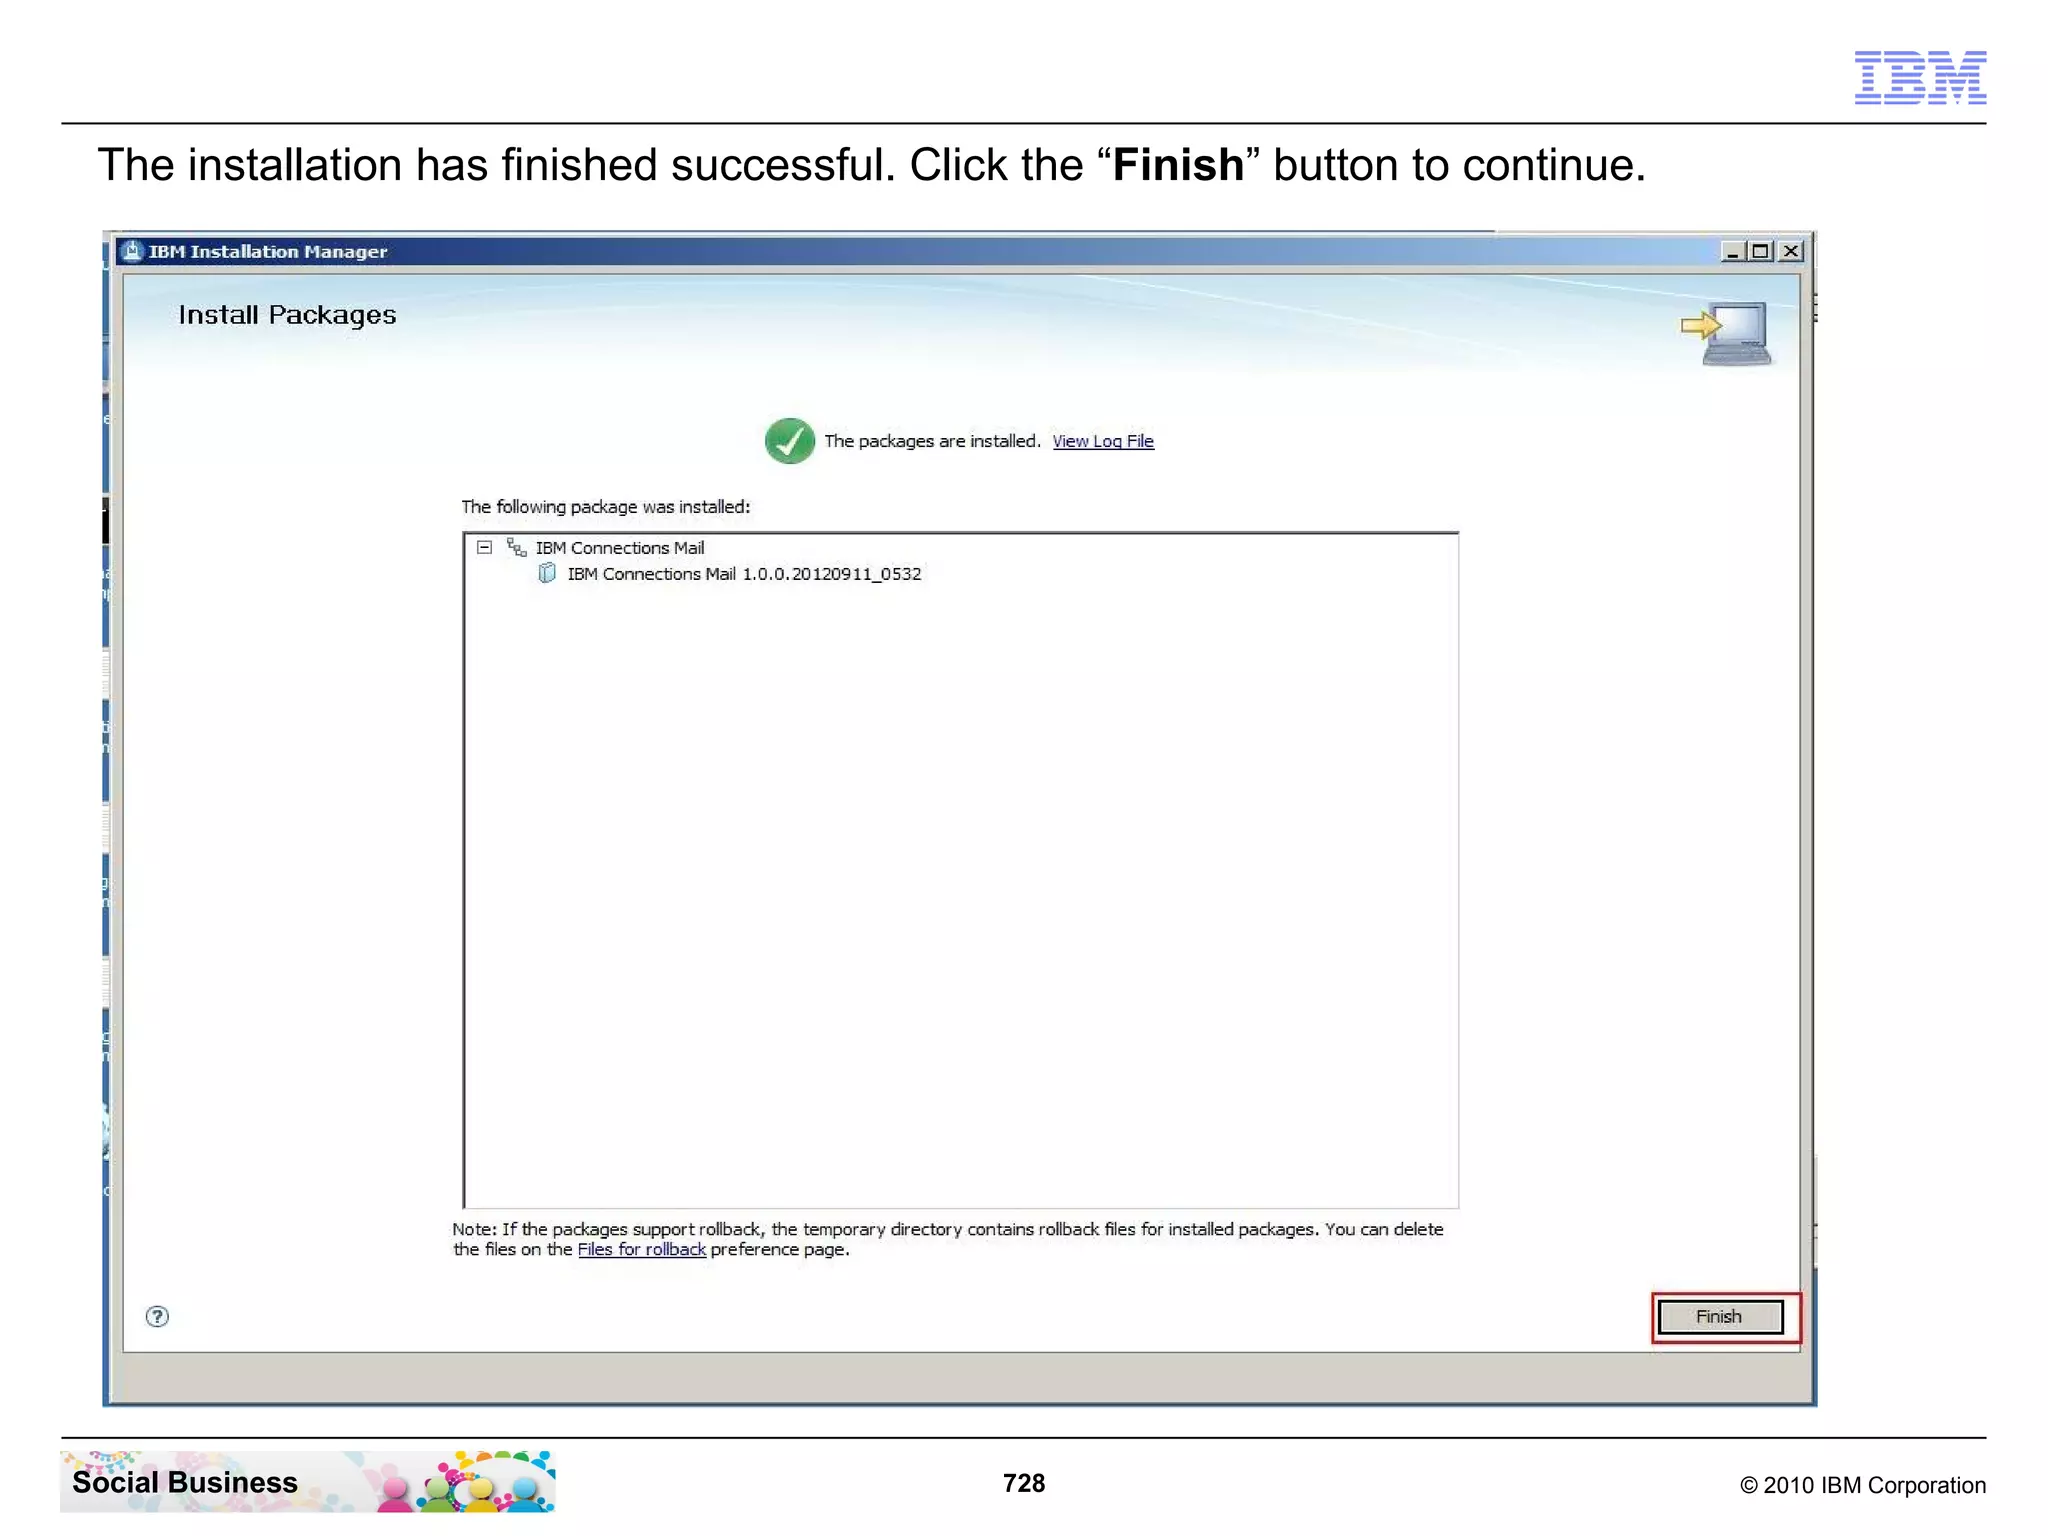
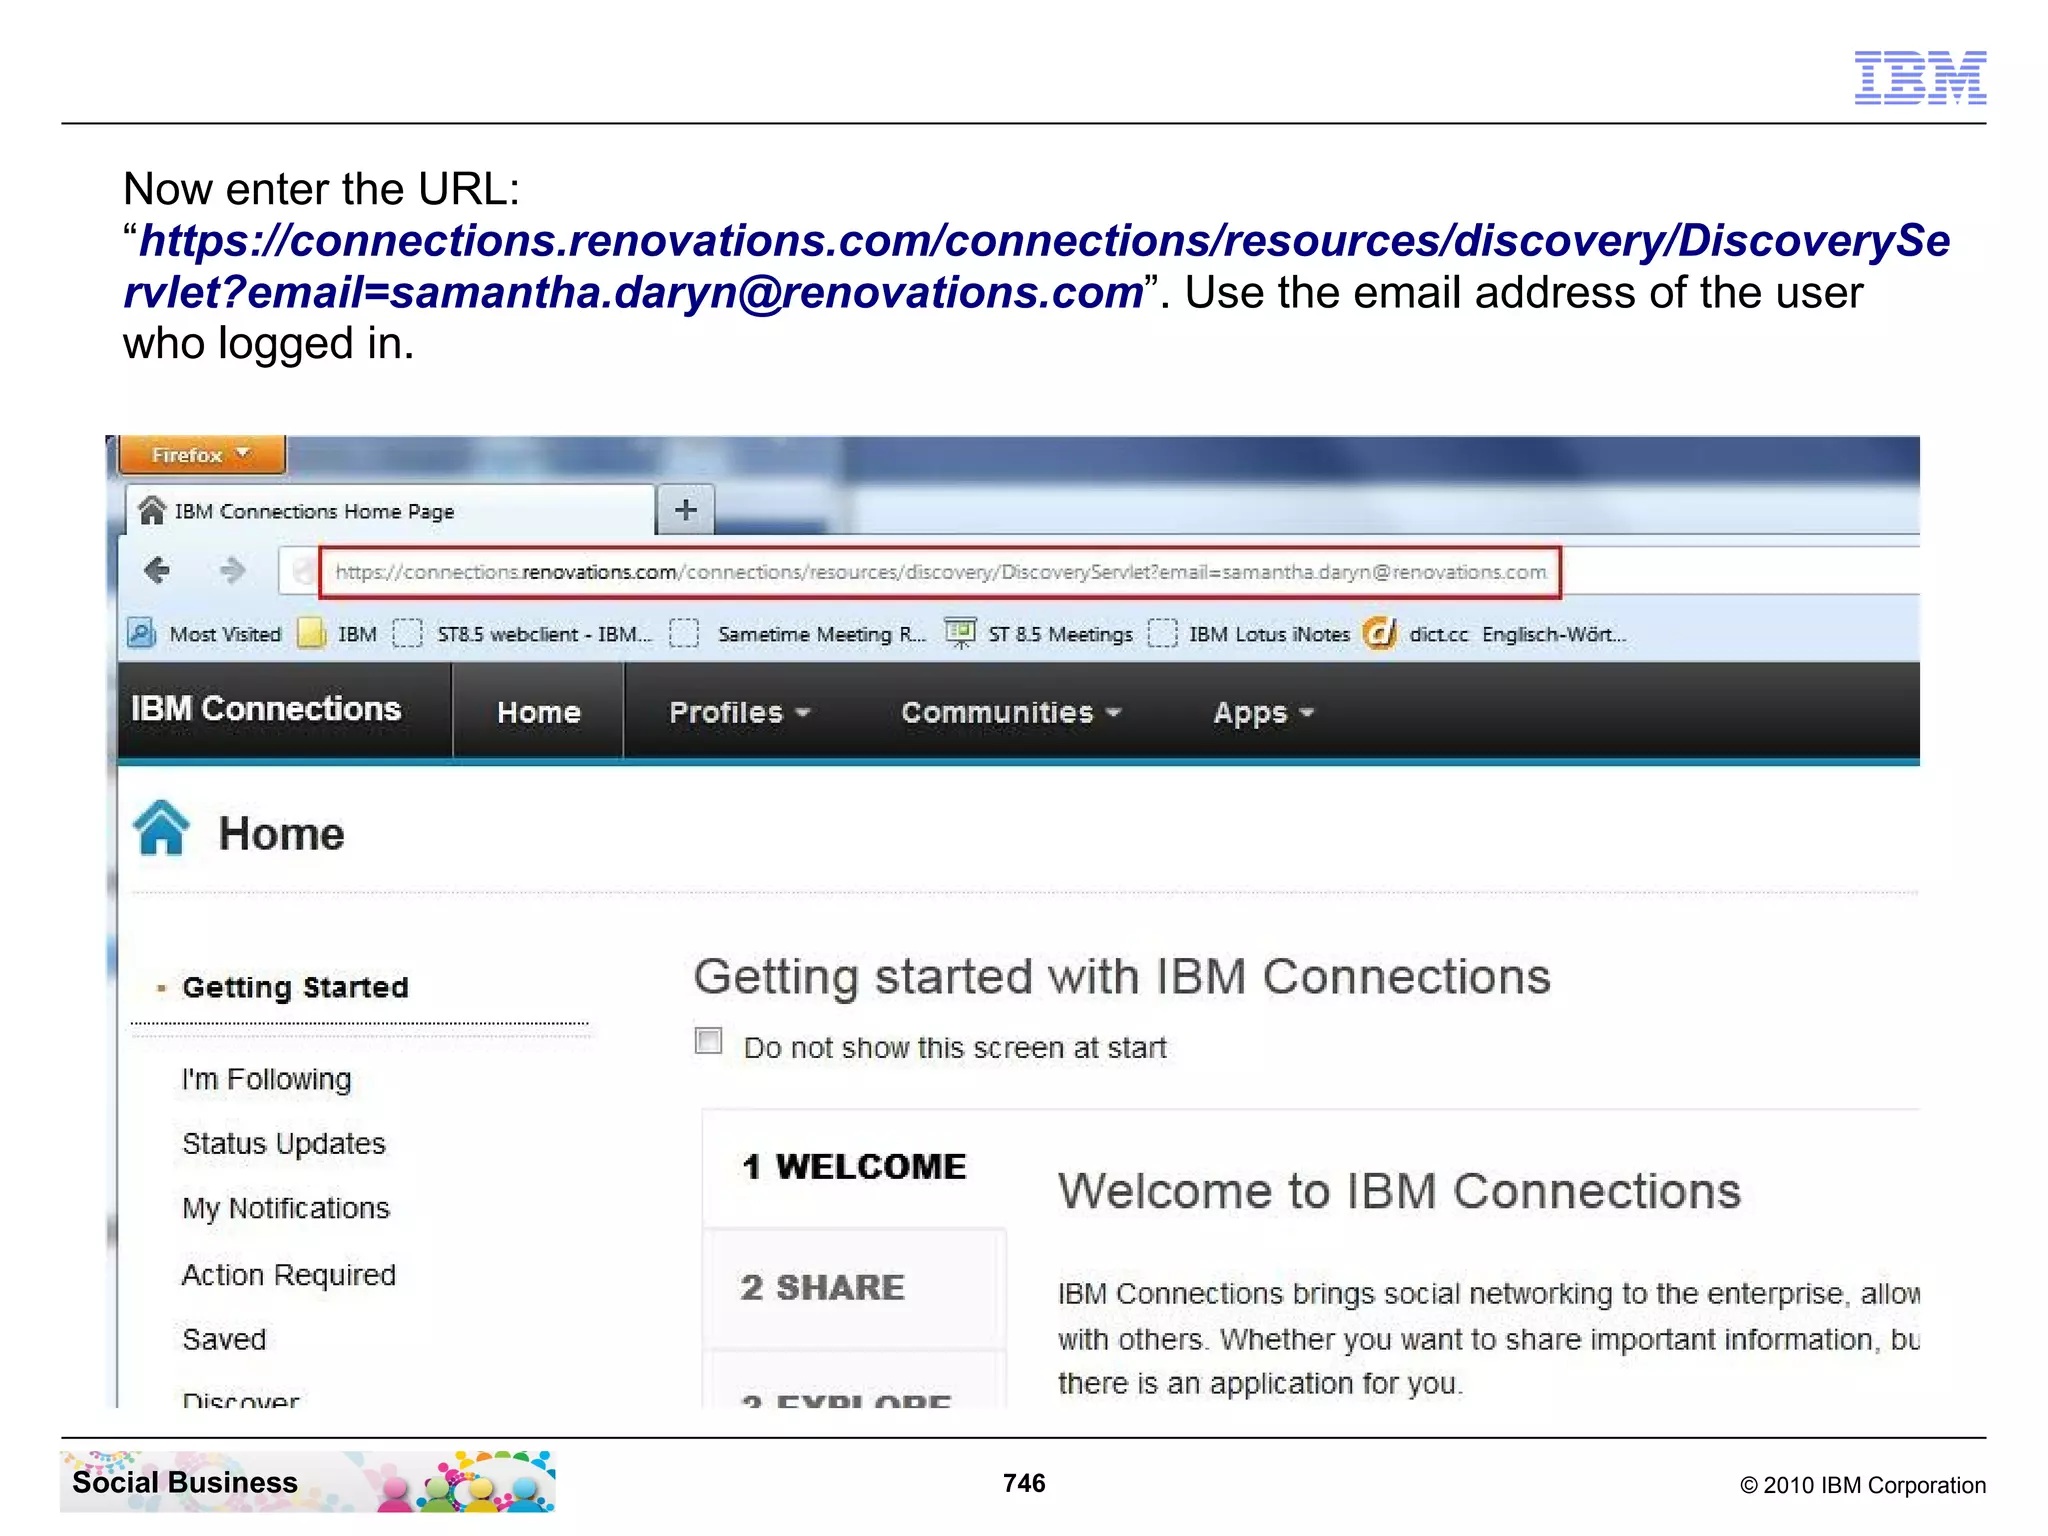
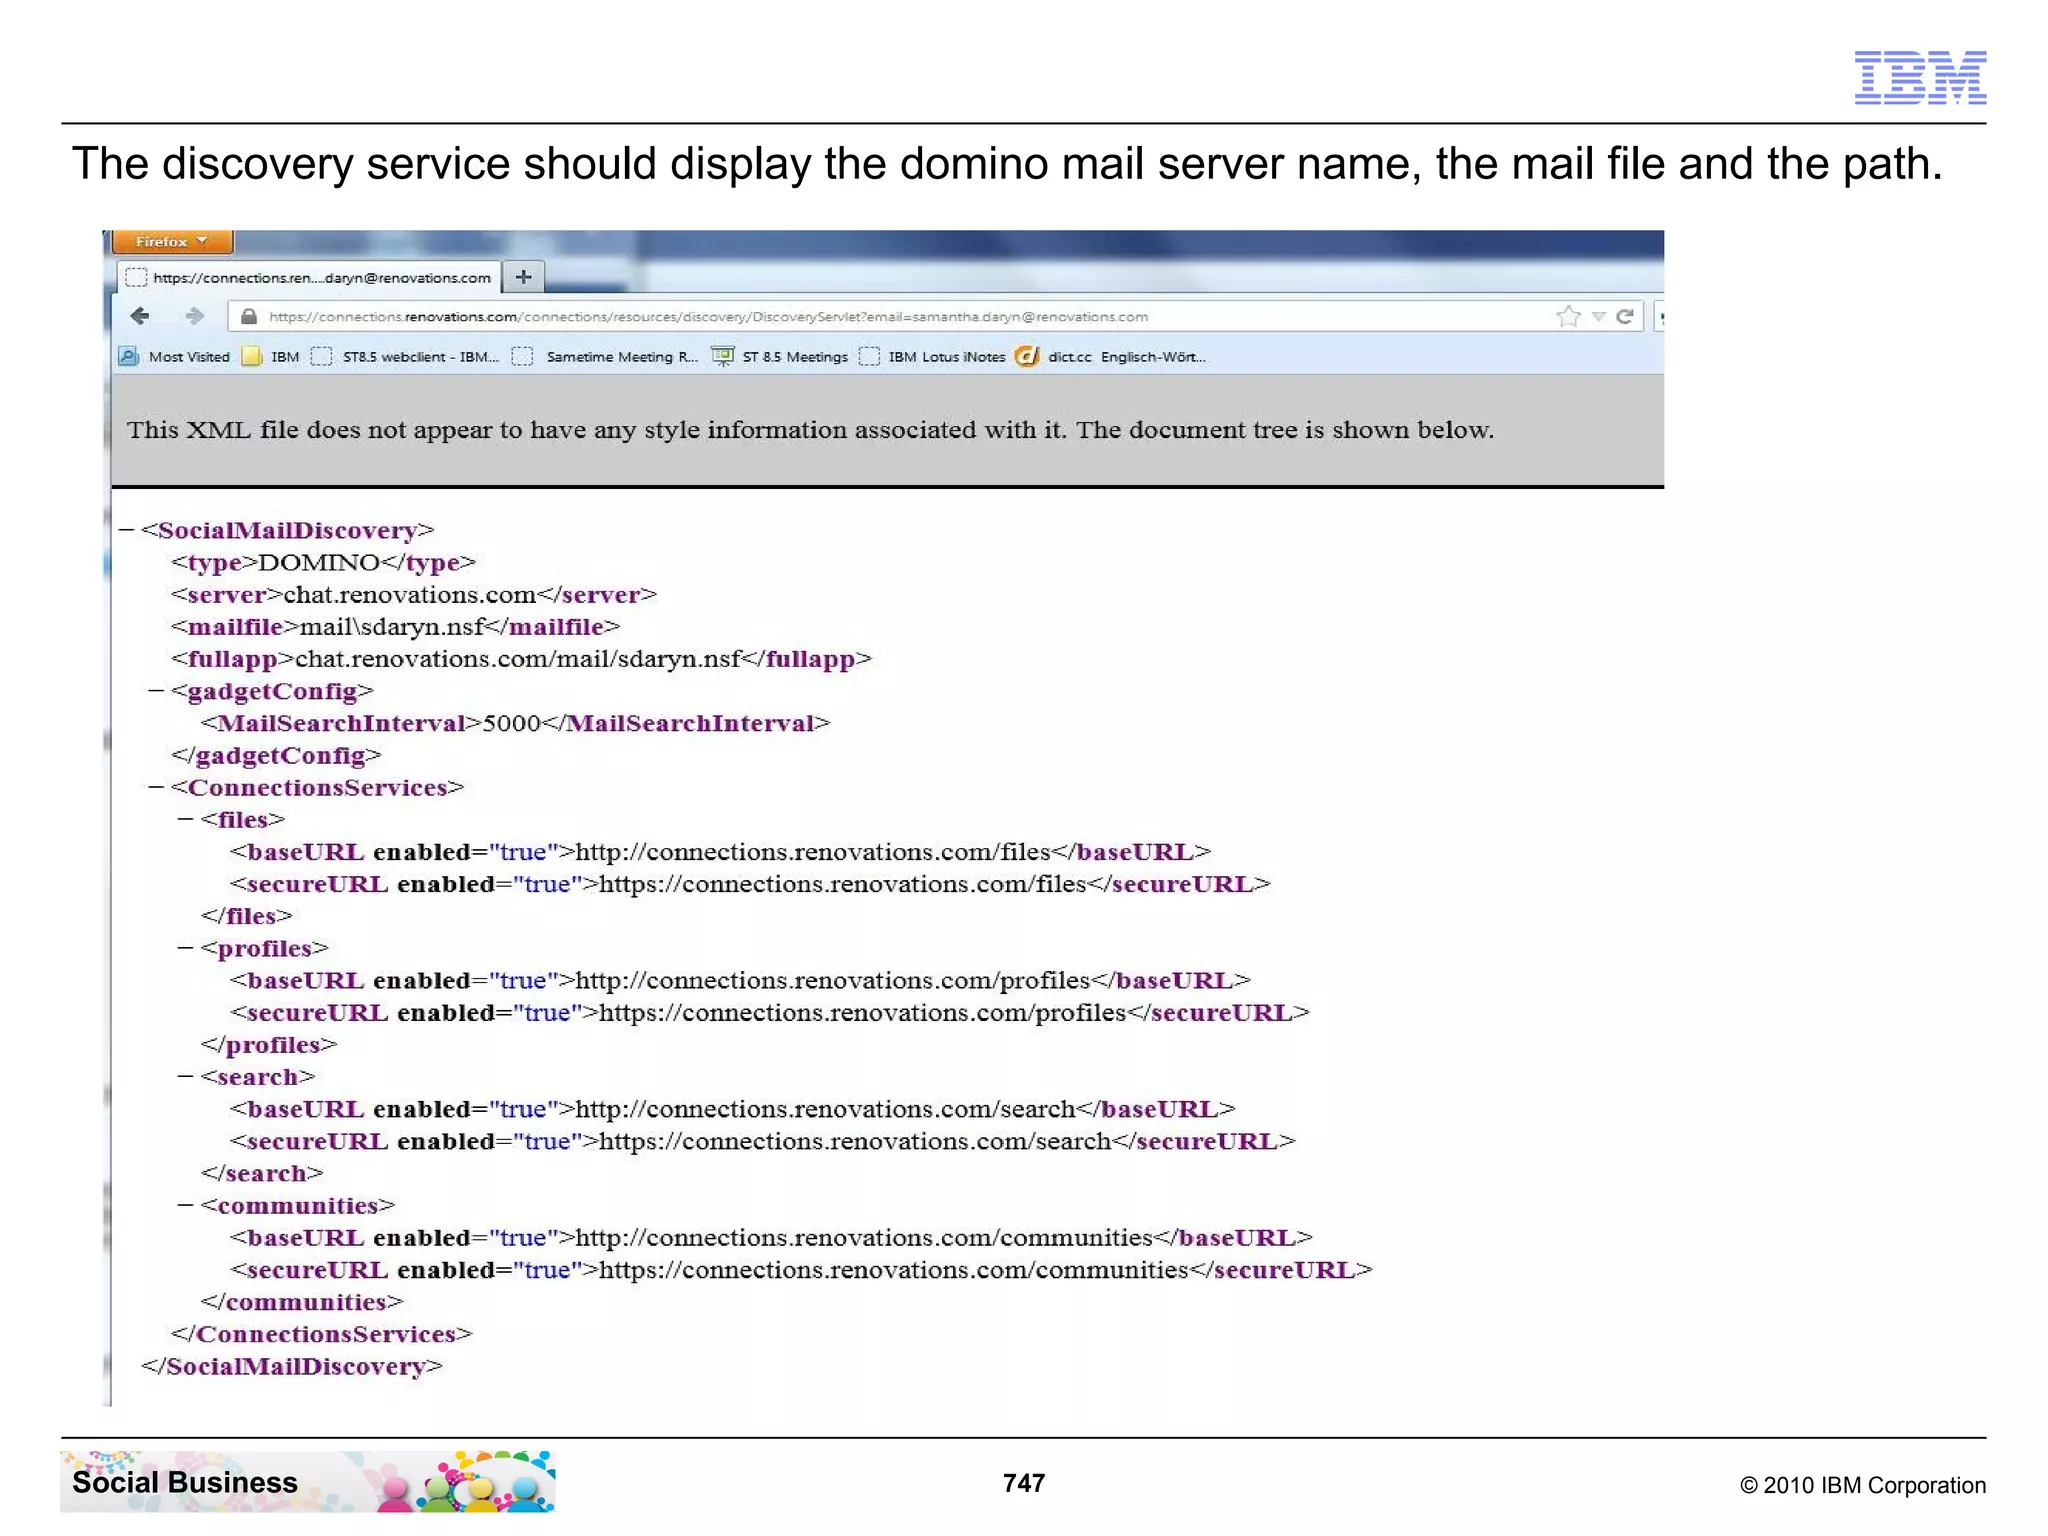
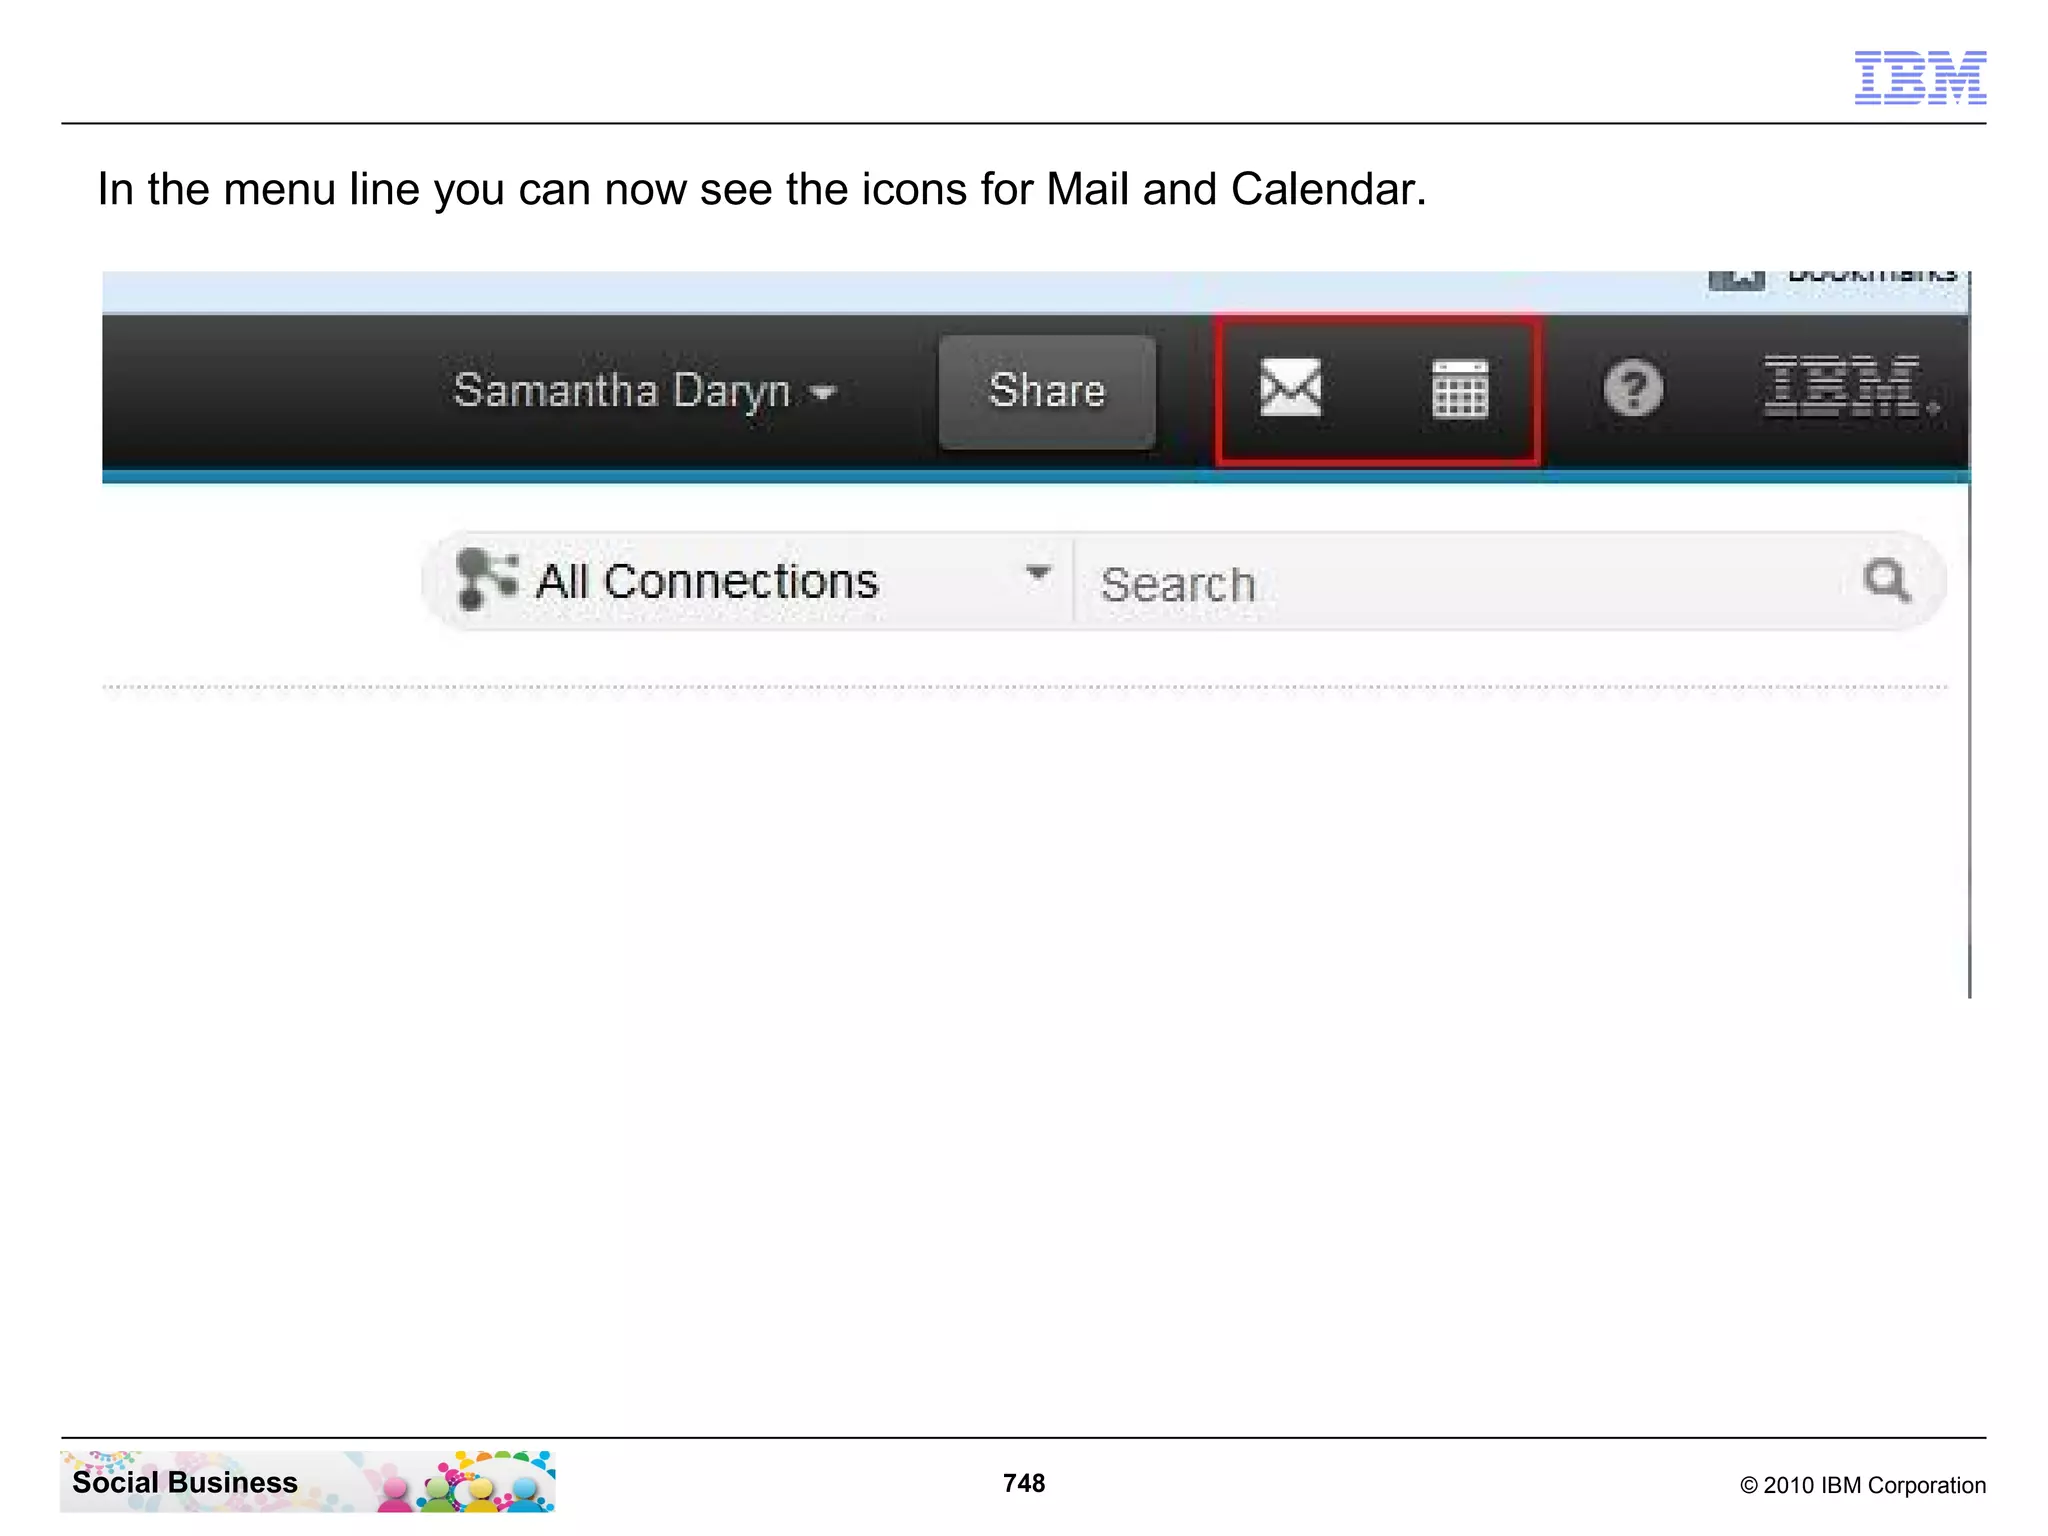
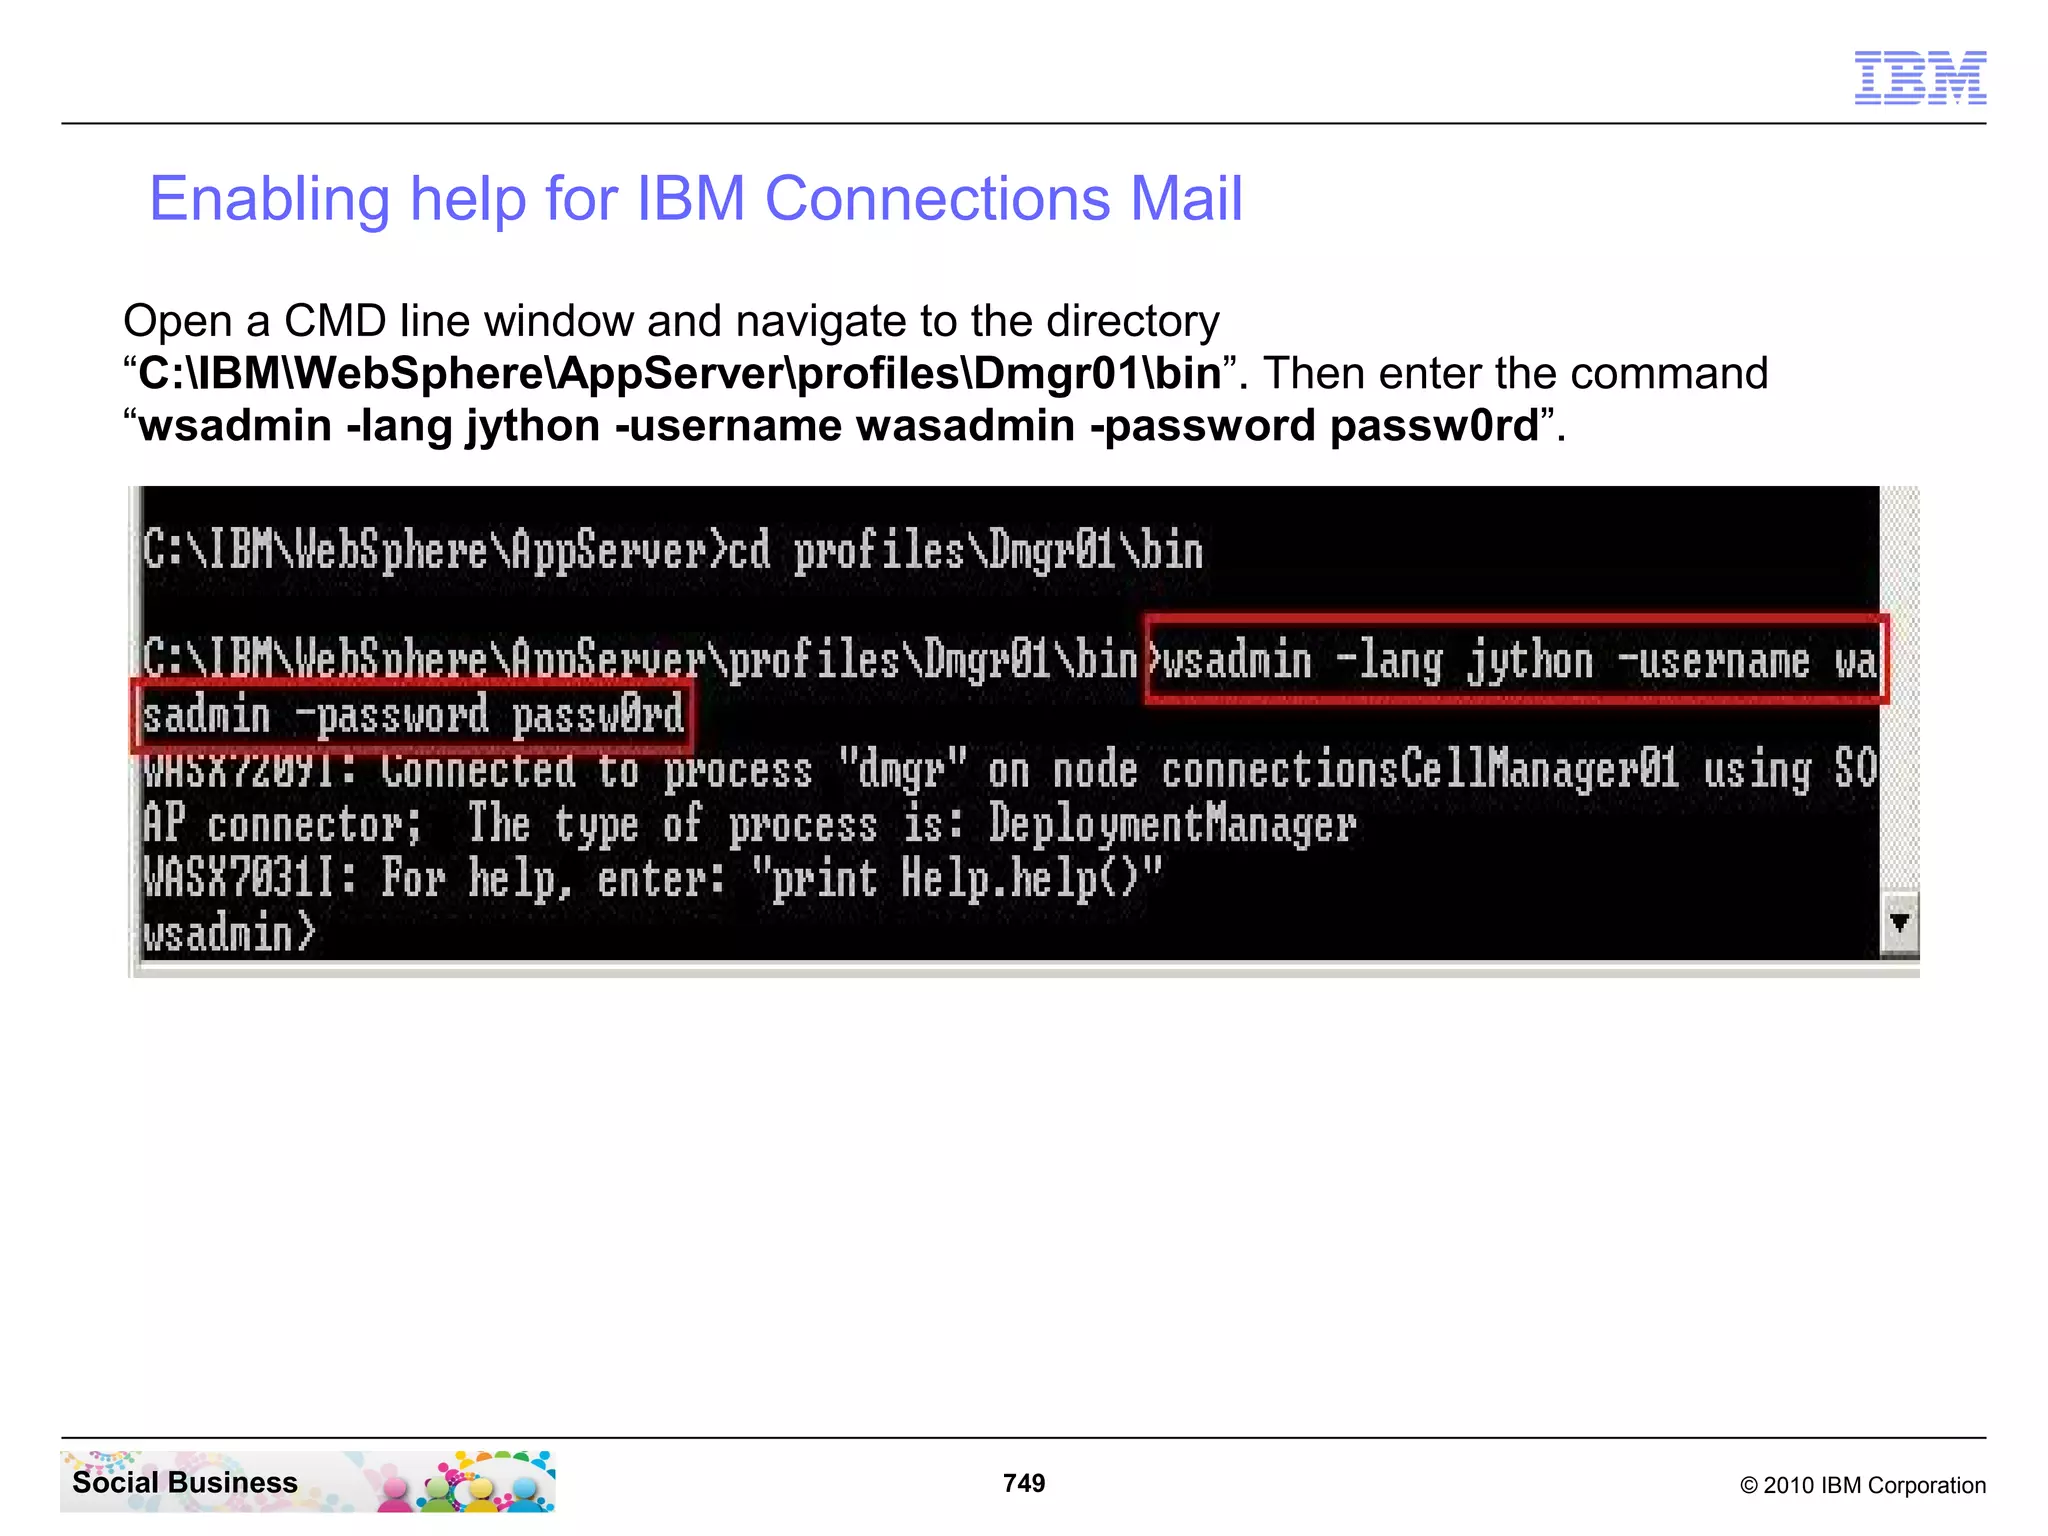
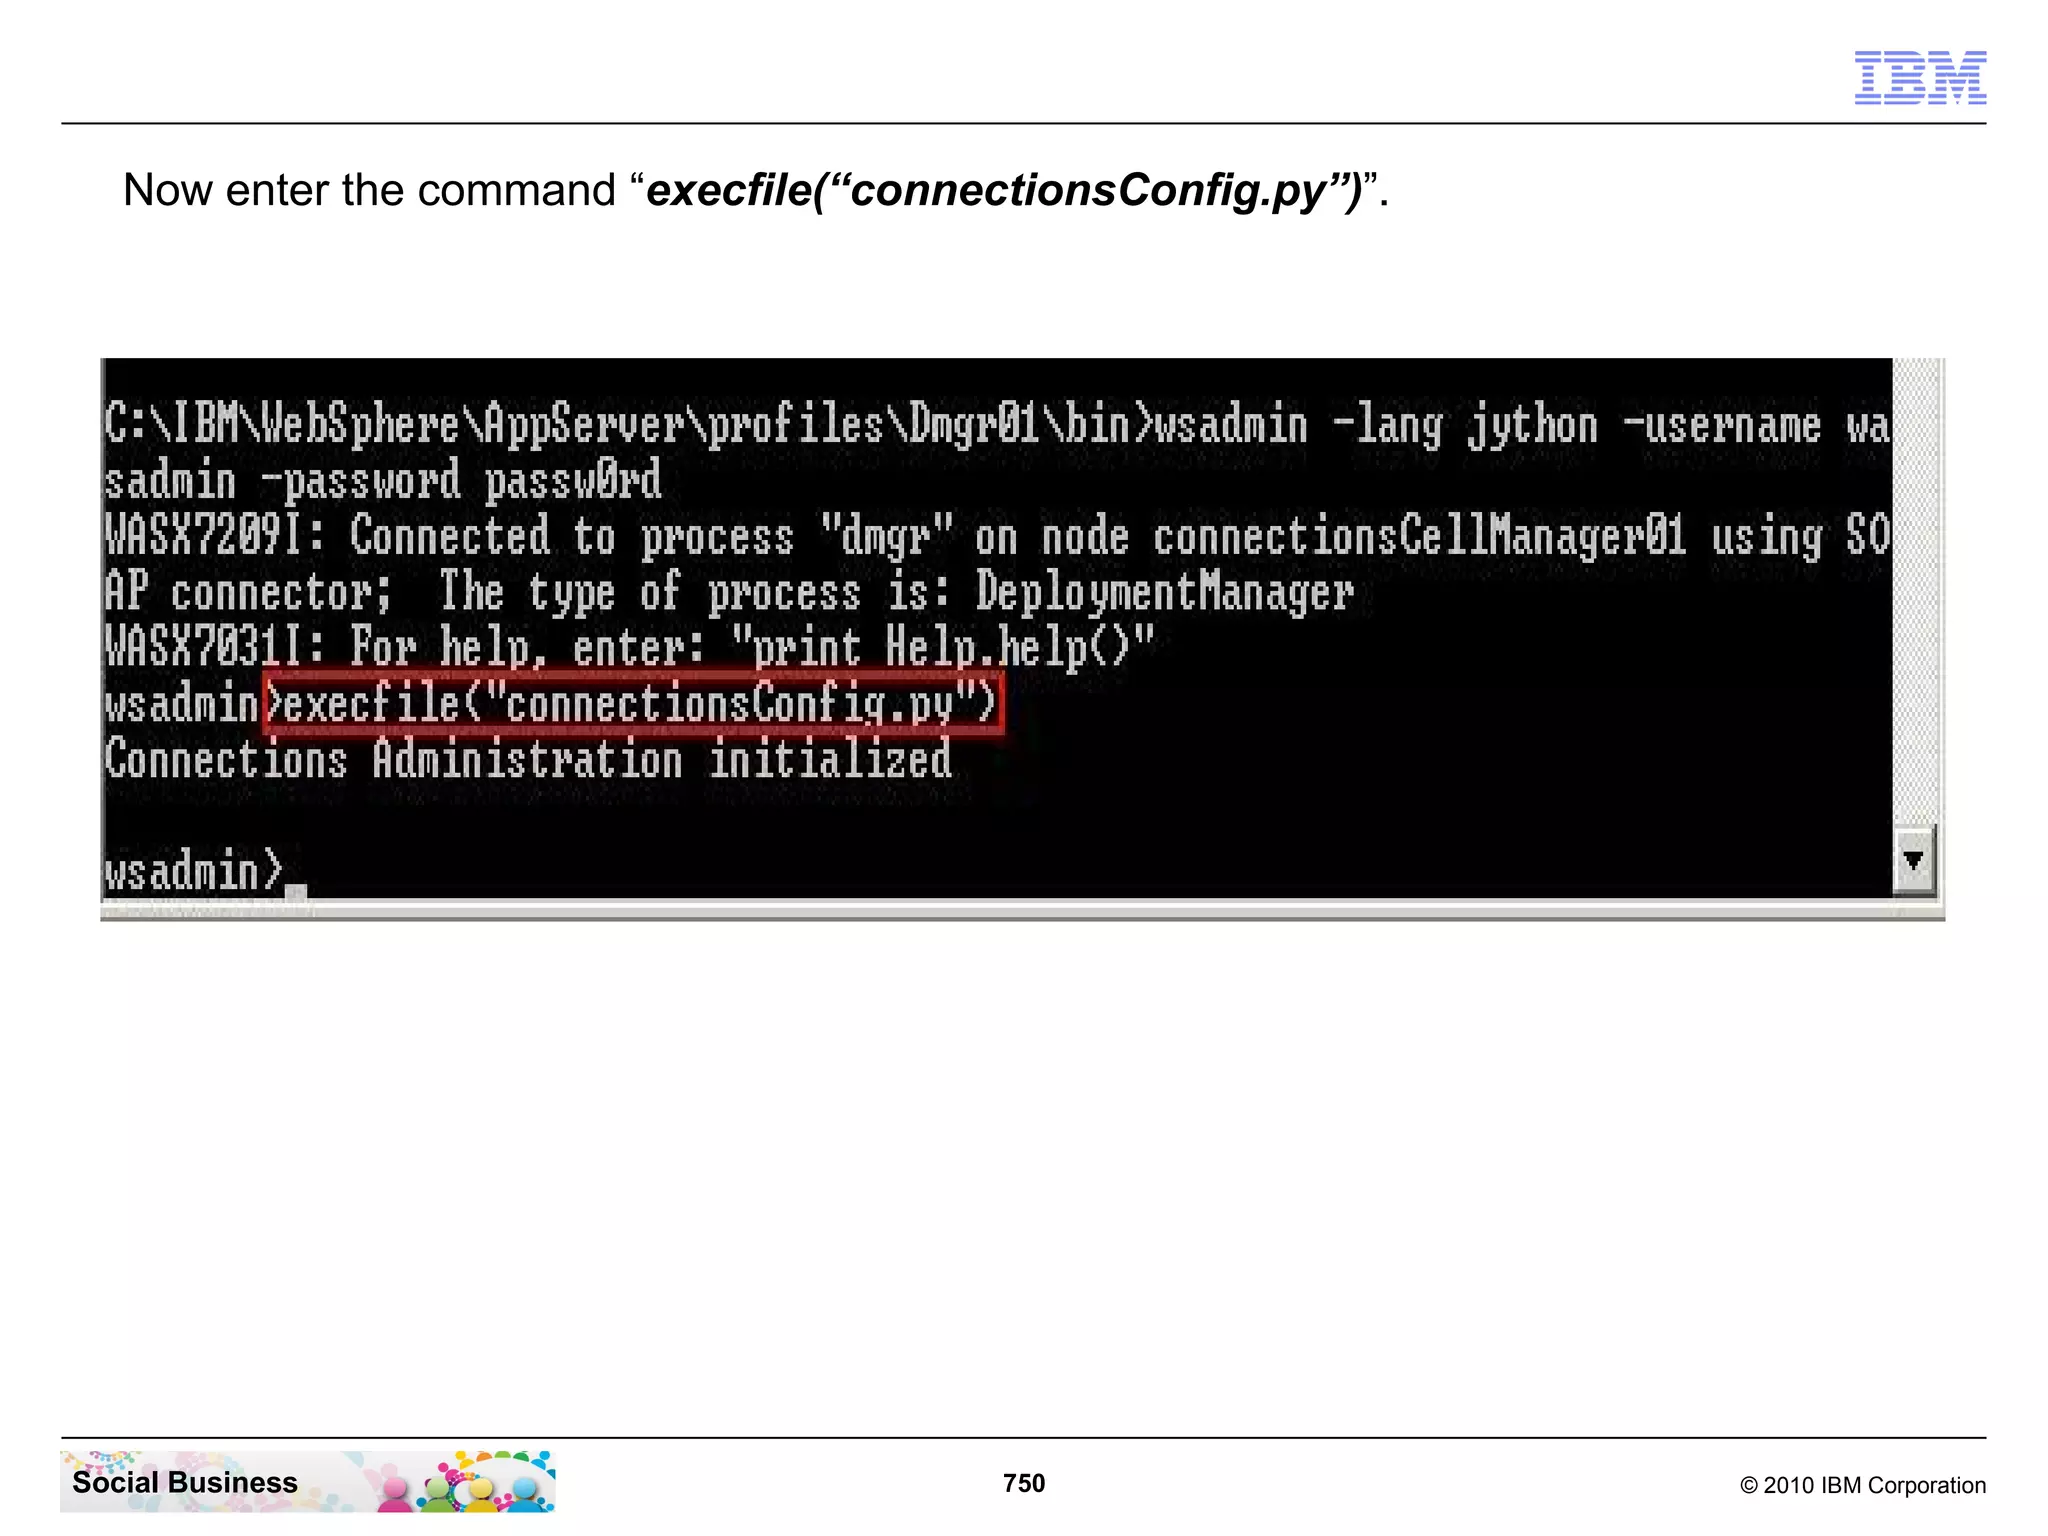
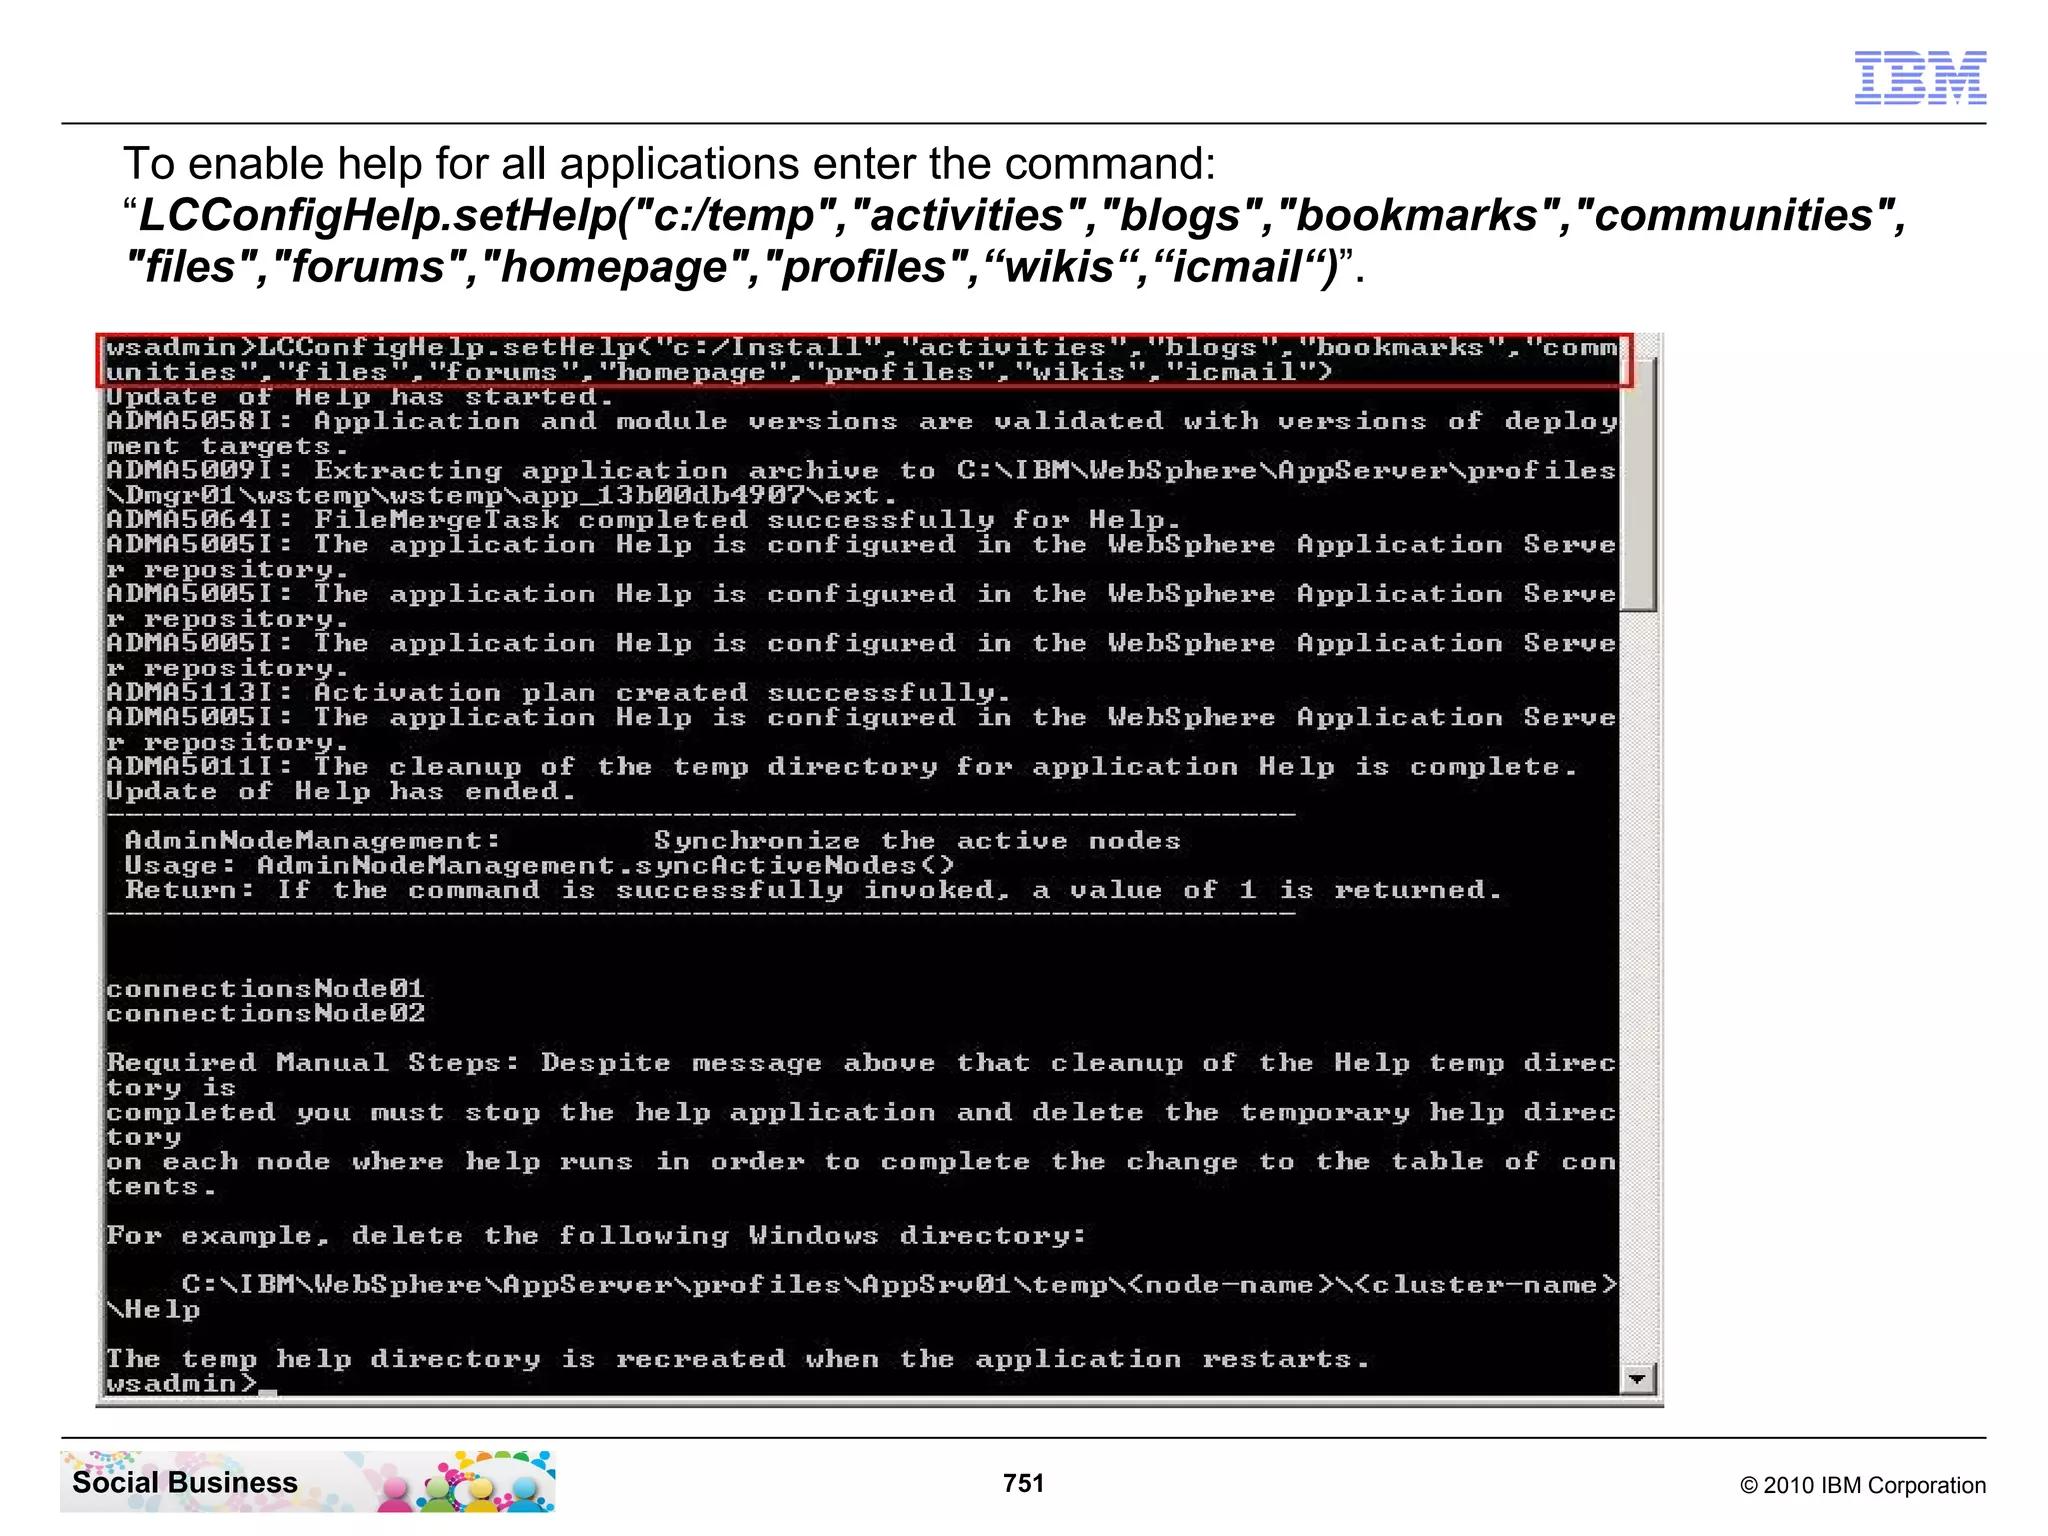
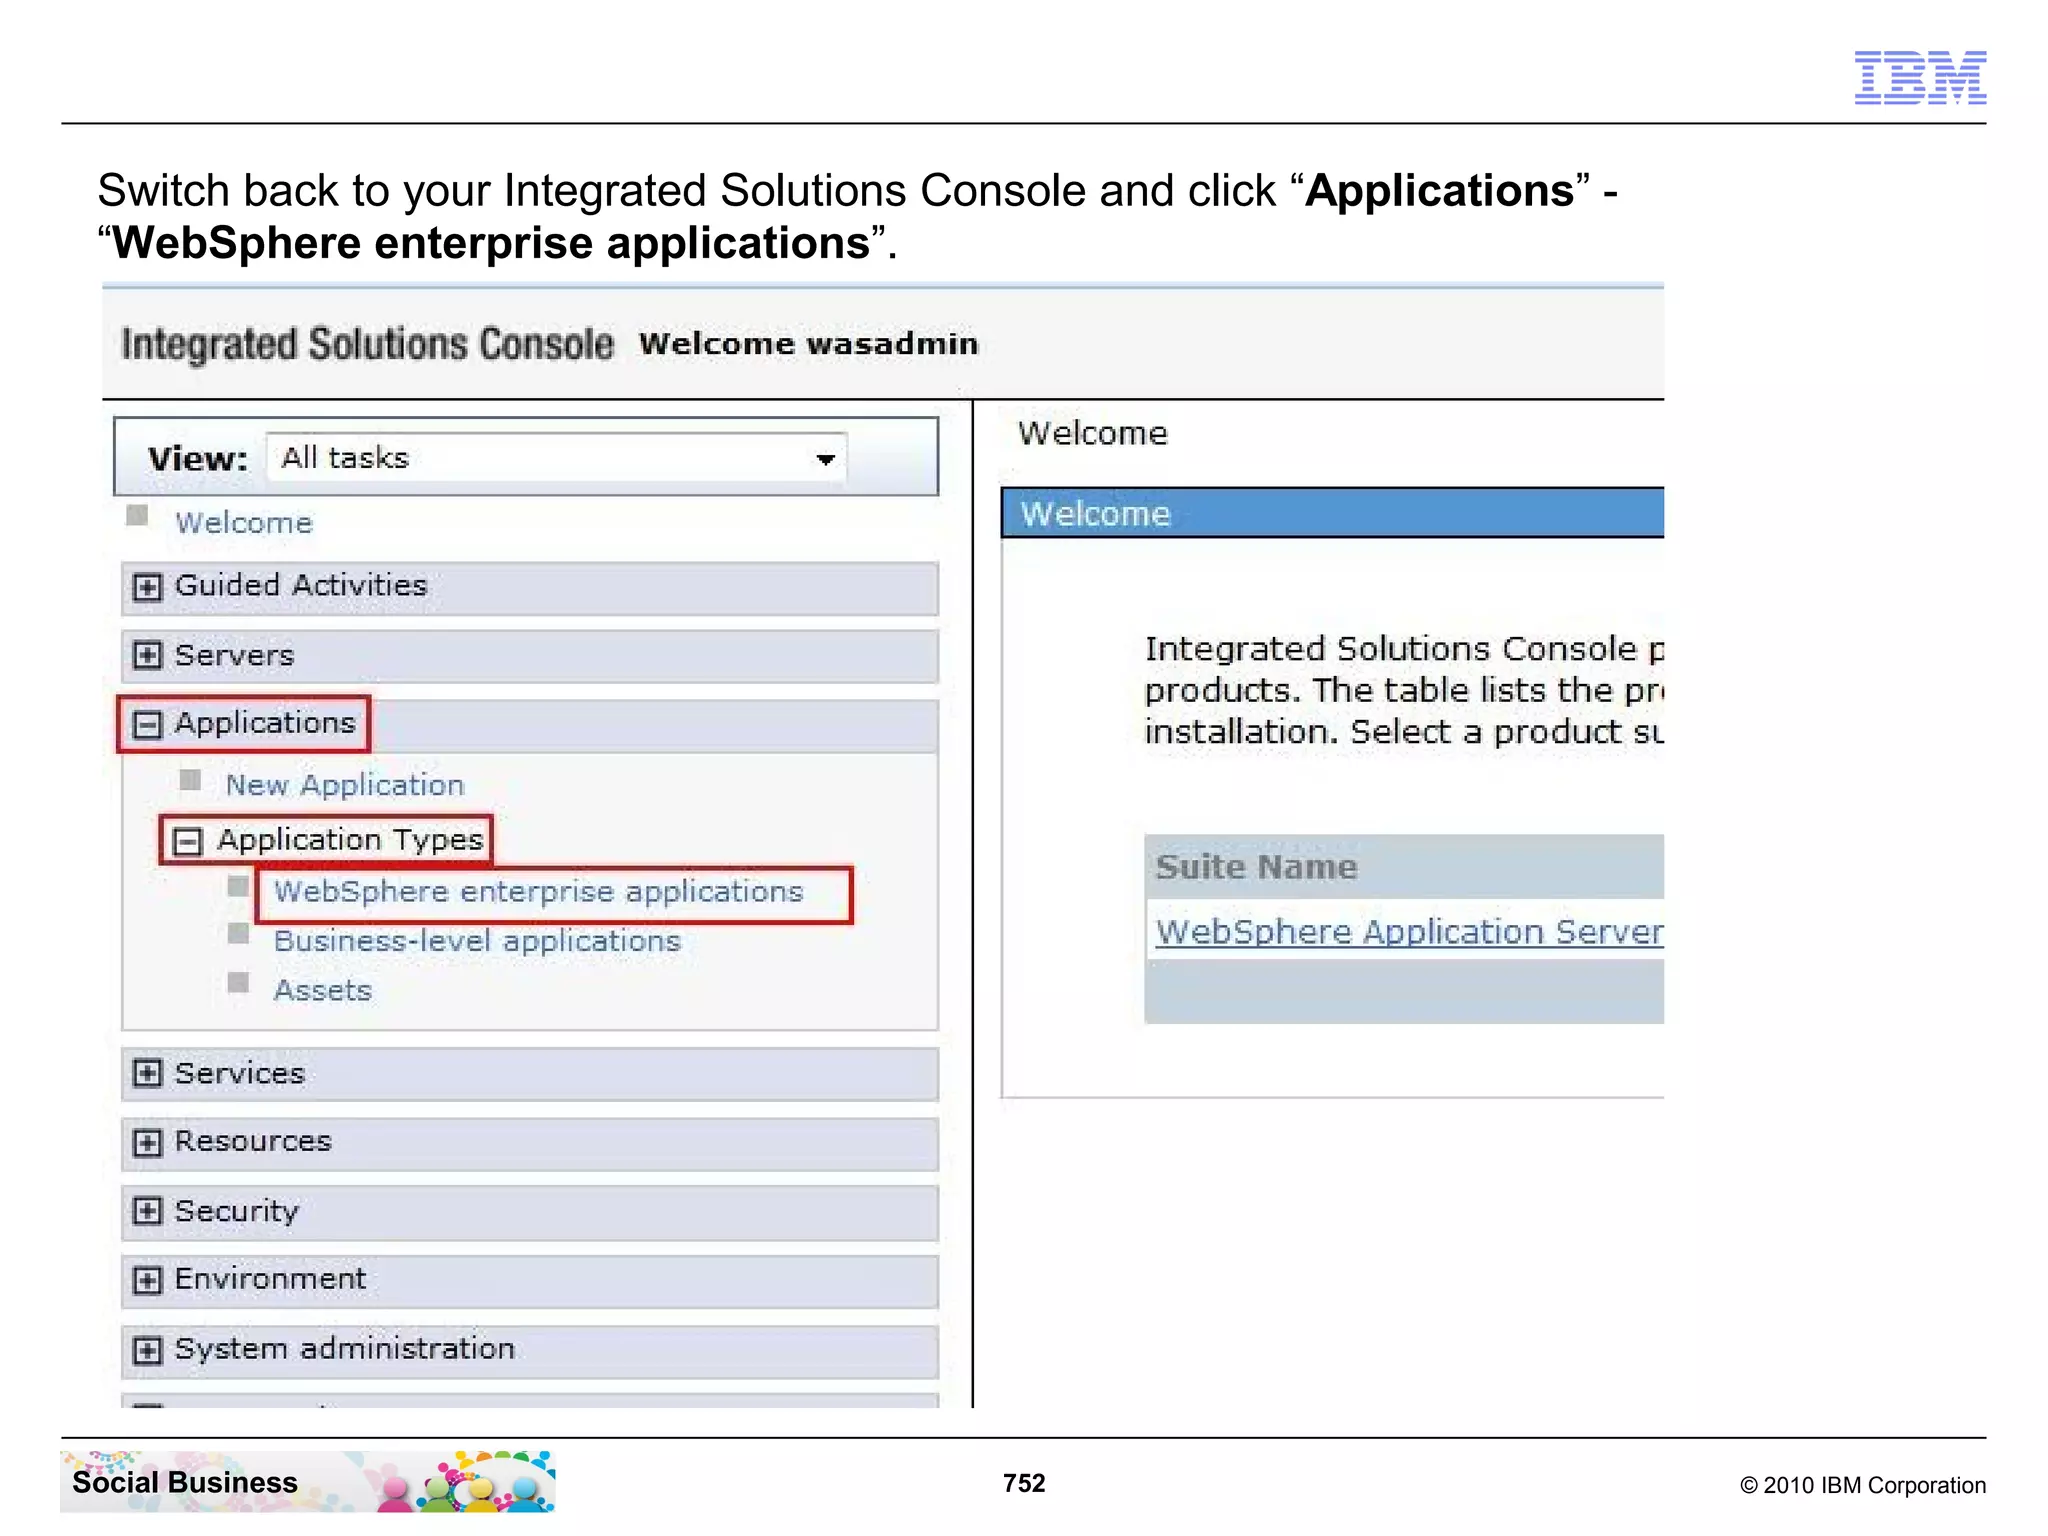
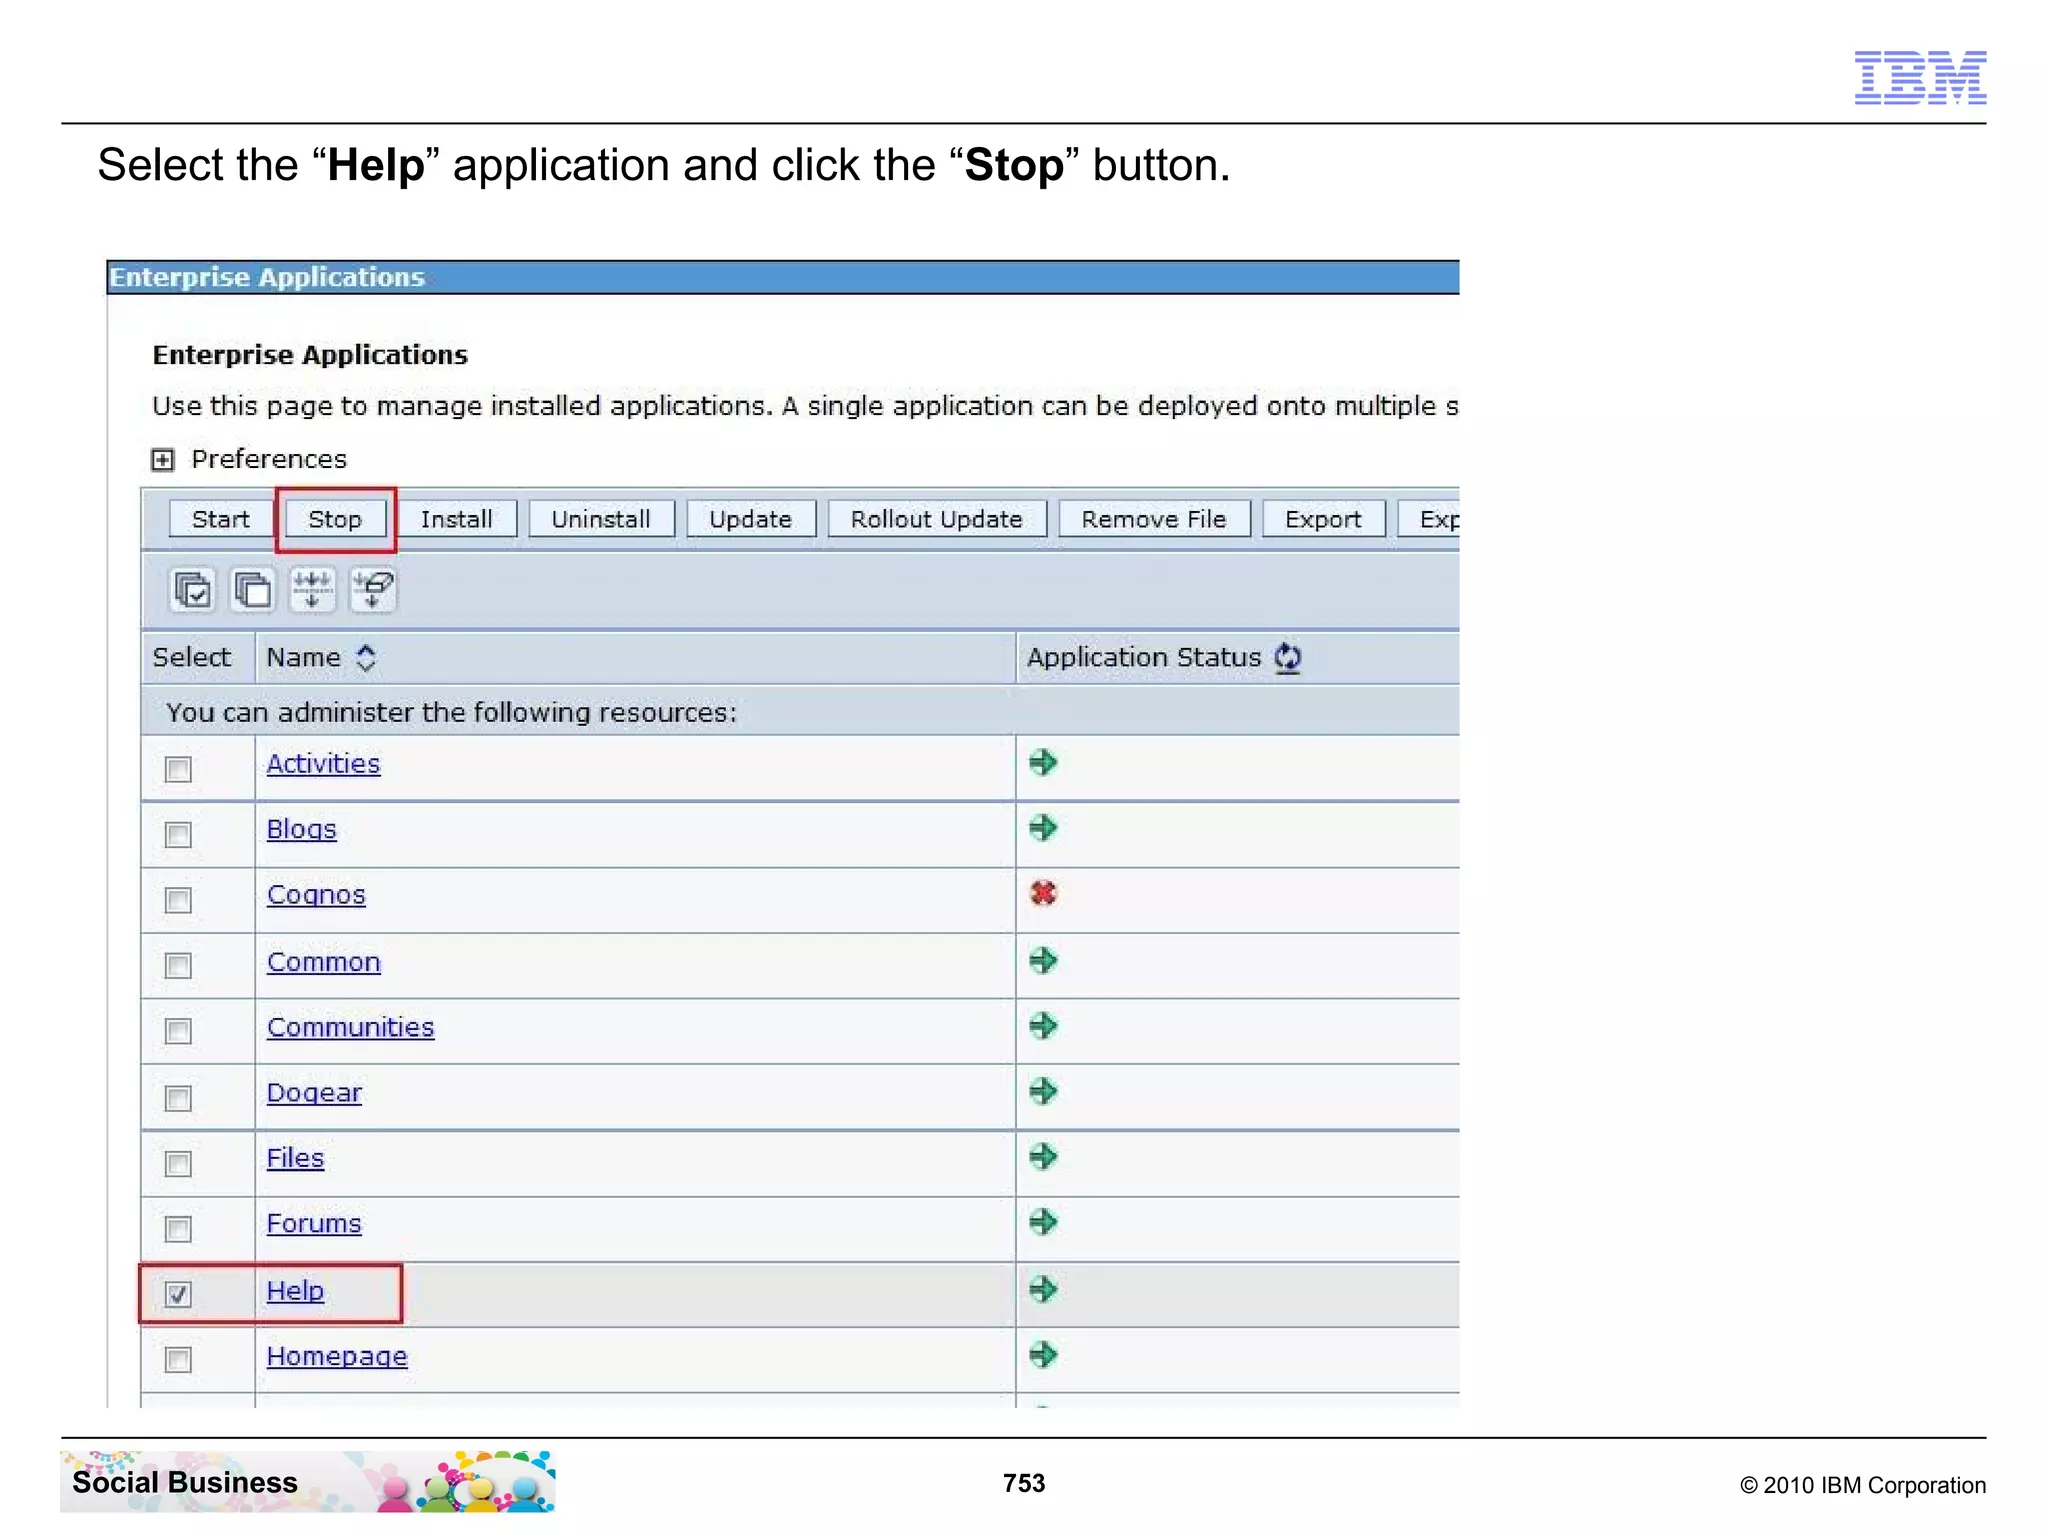
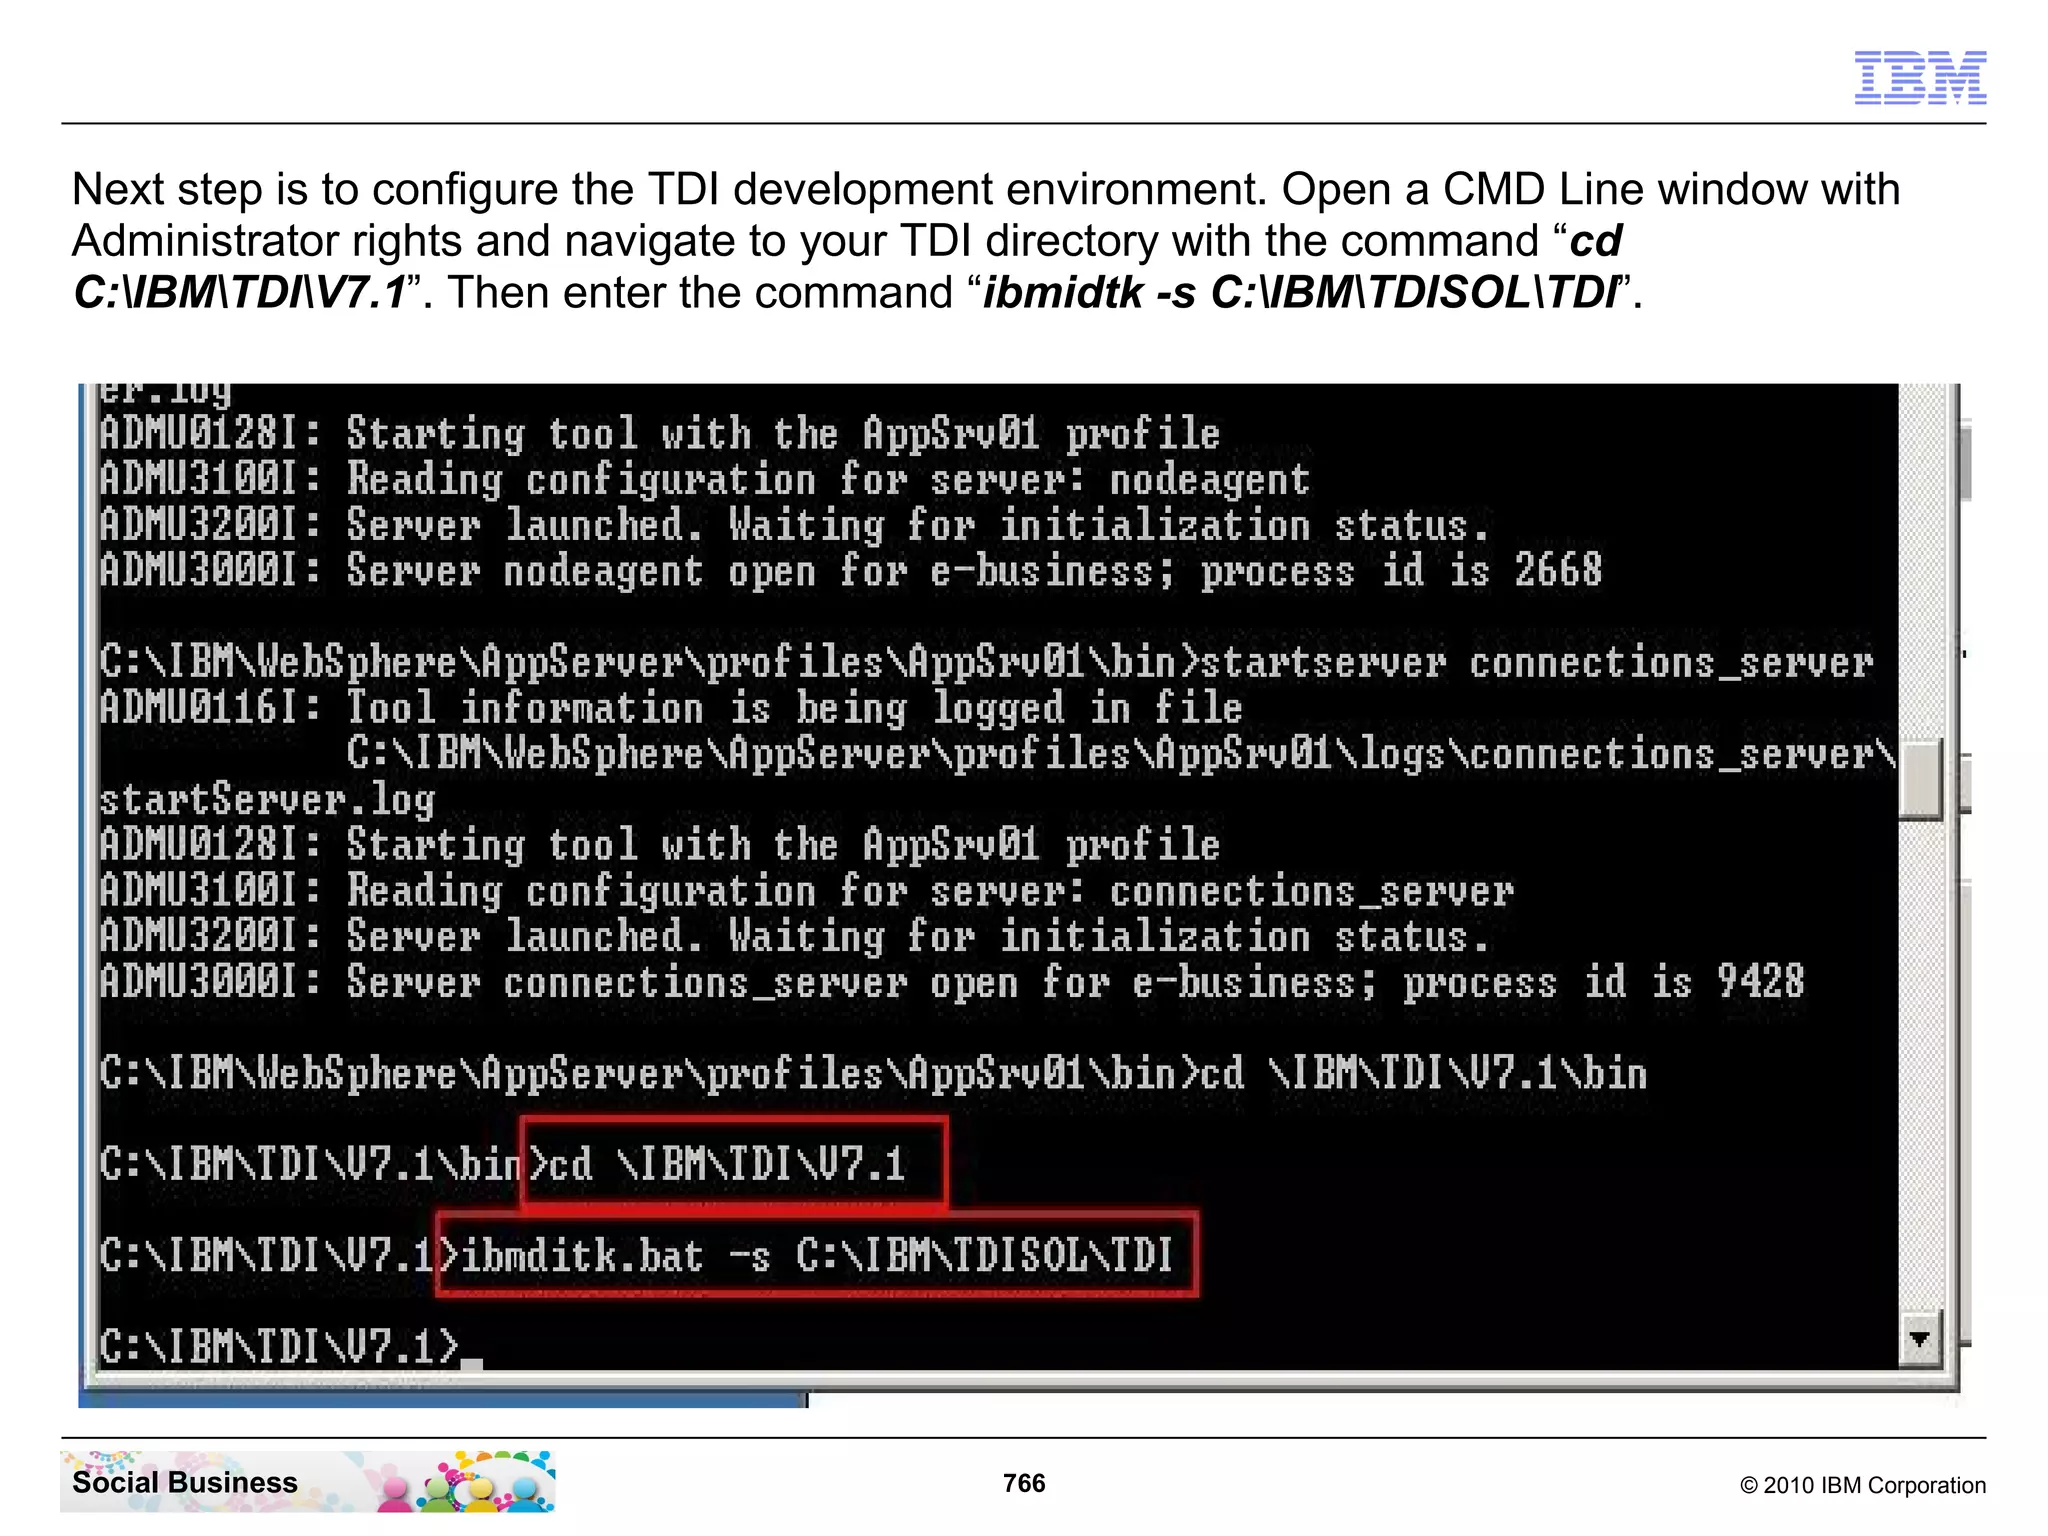
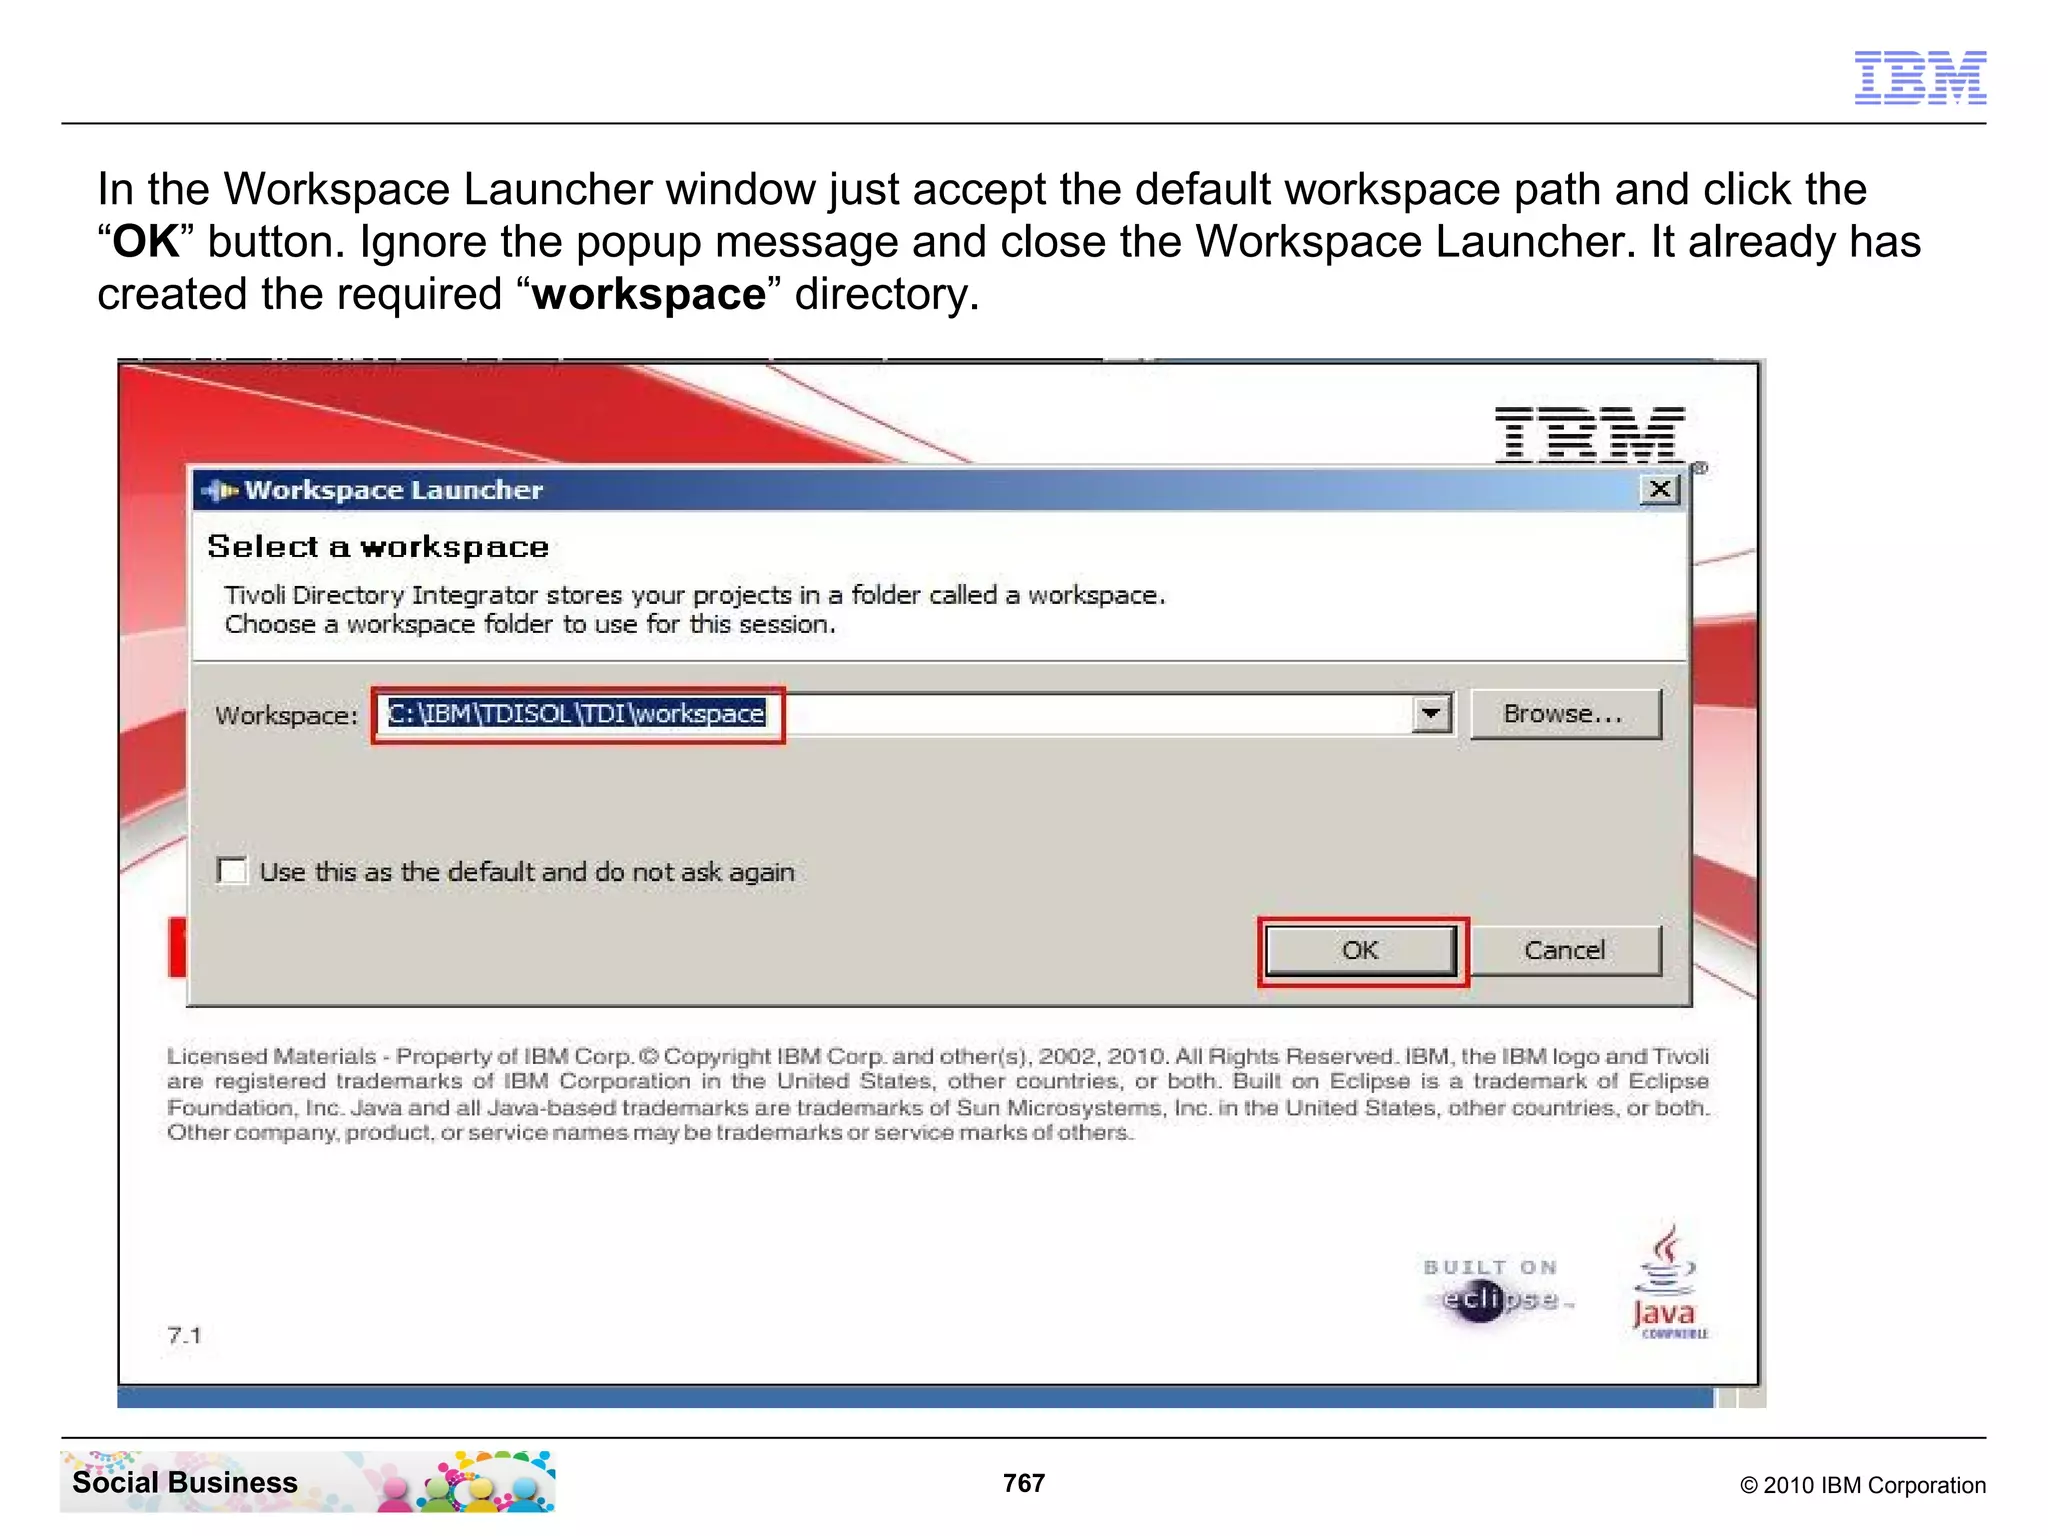
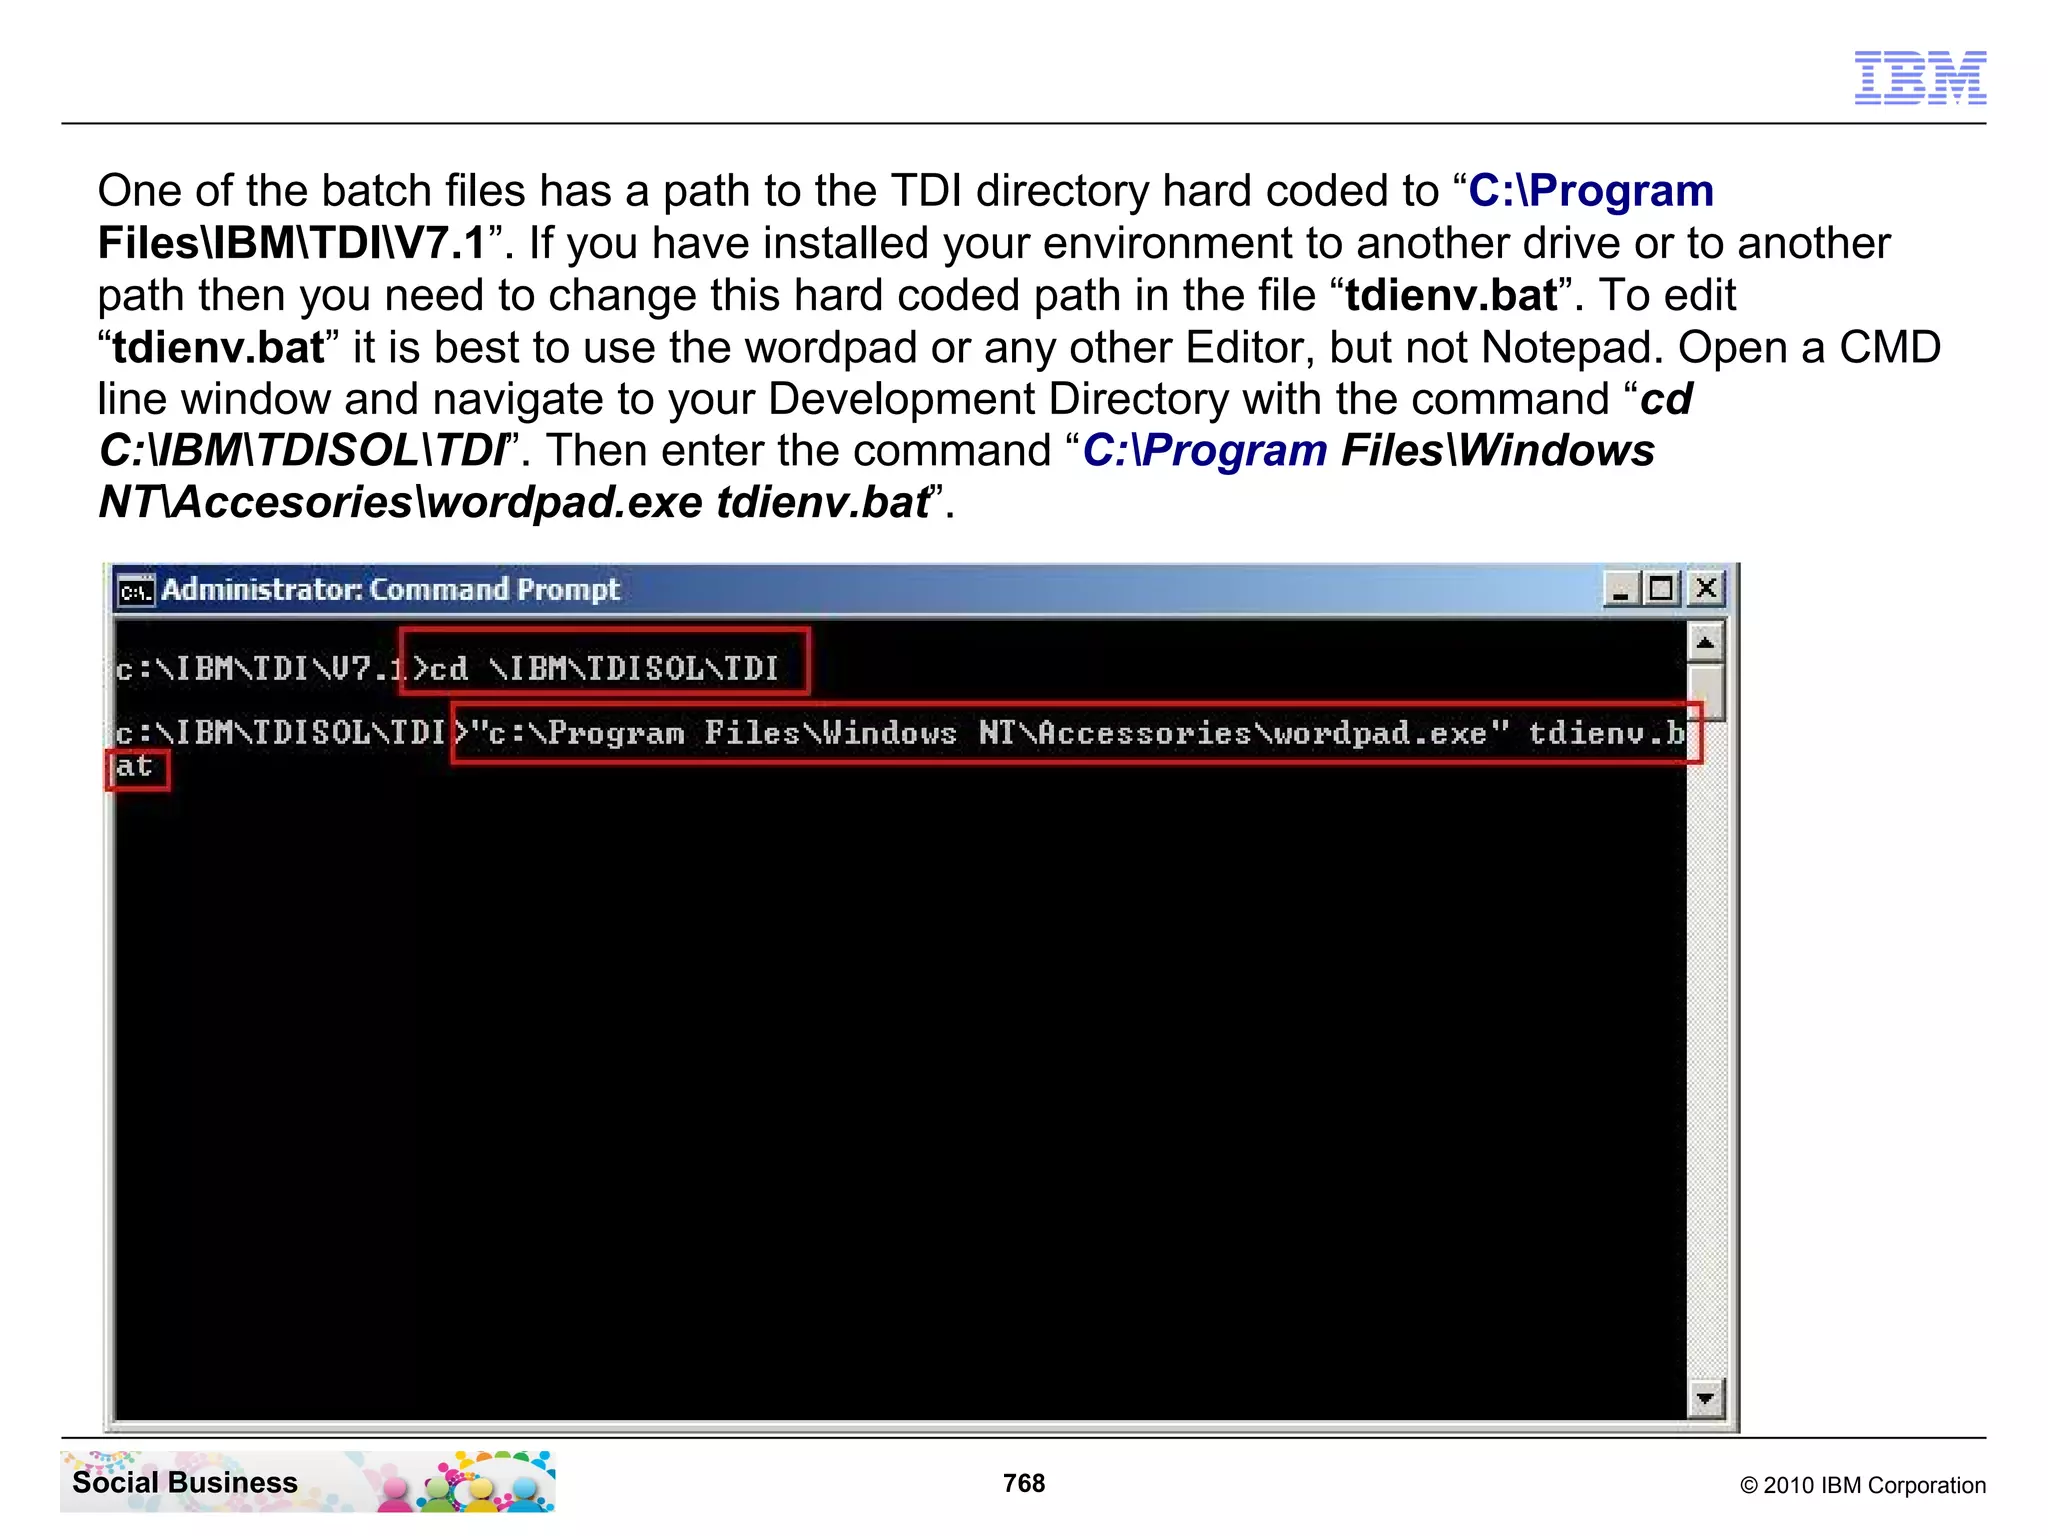
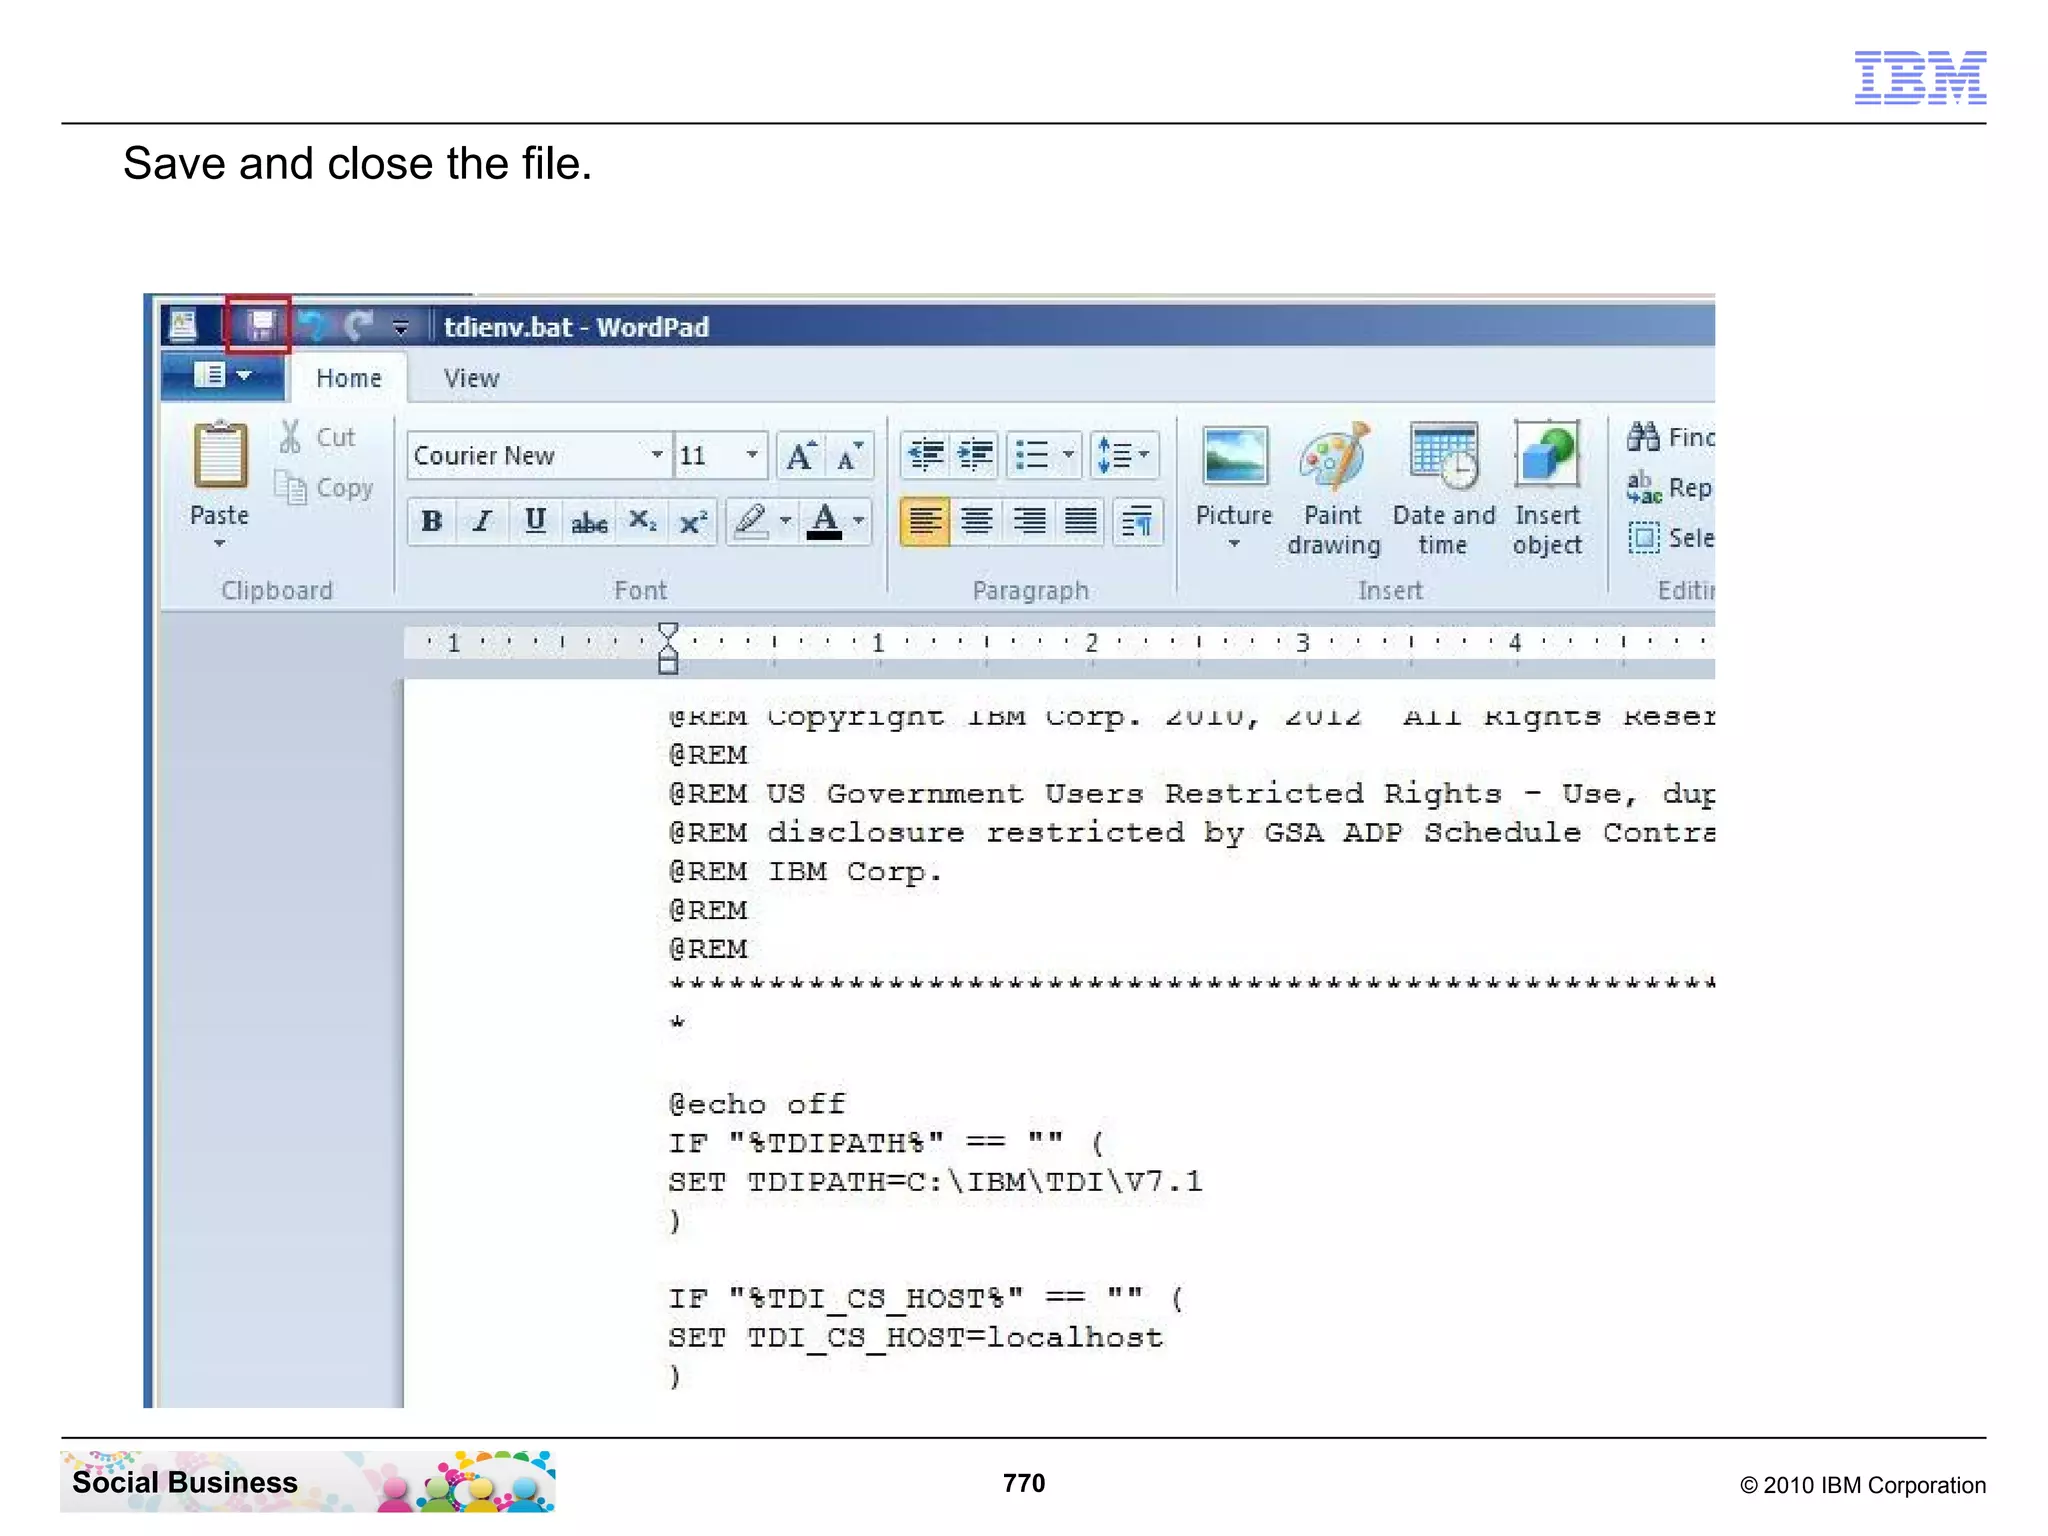
Download as PDF, PPTX


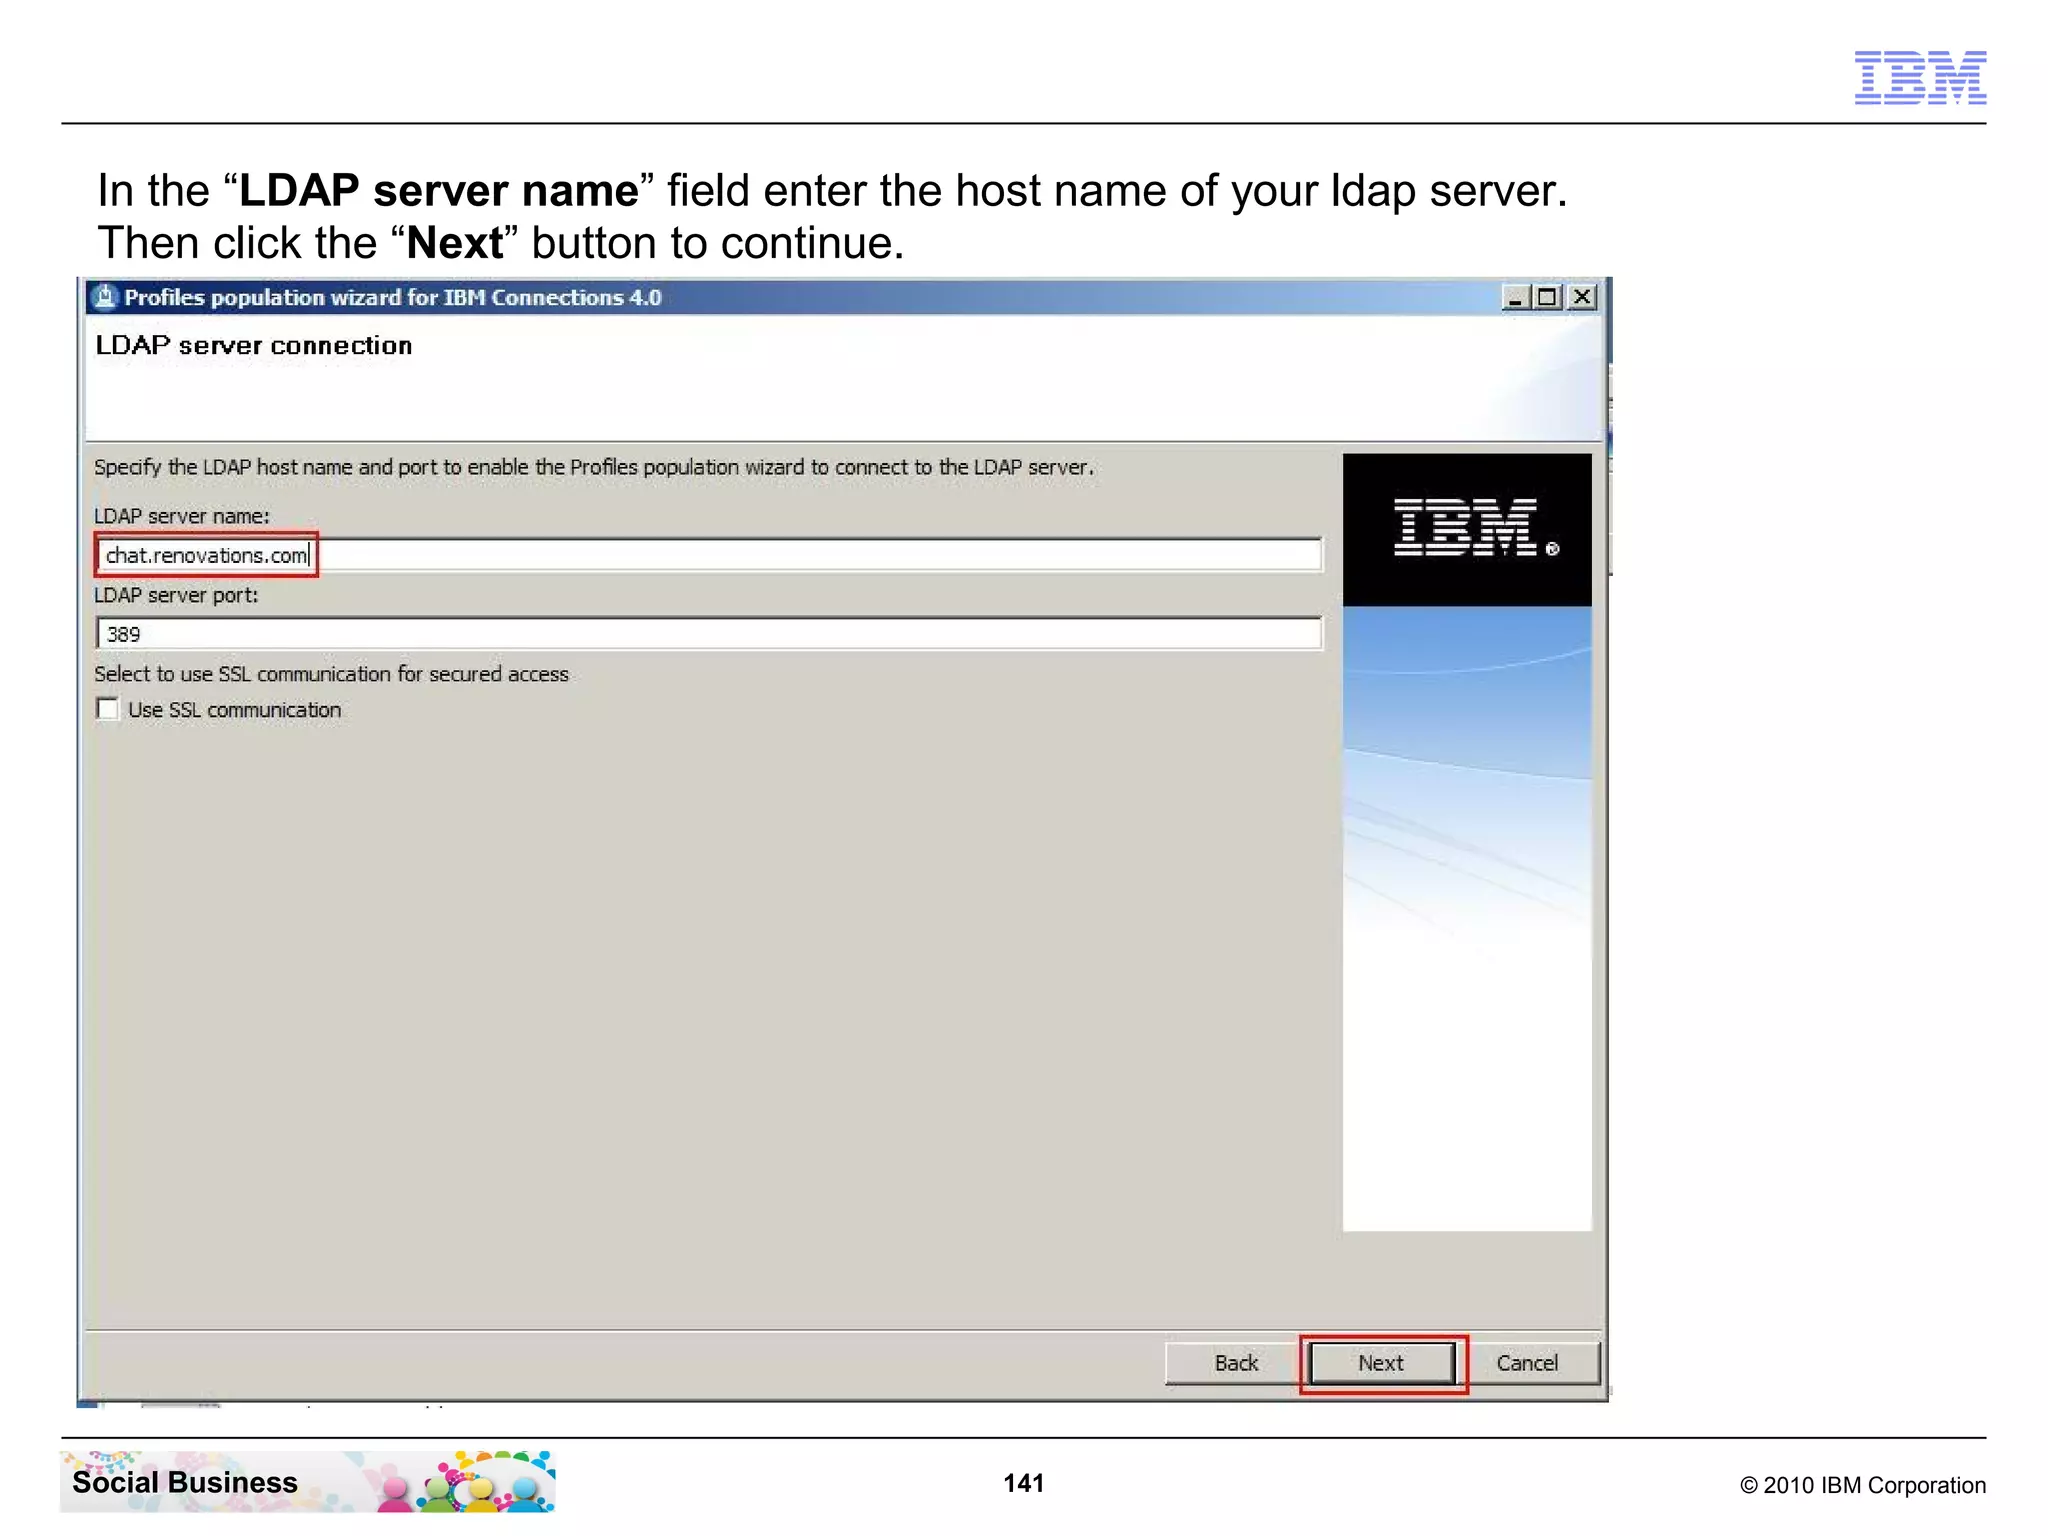

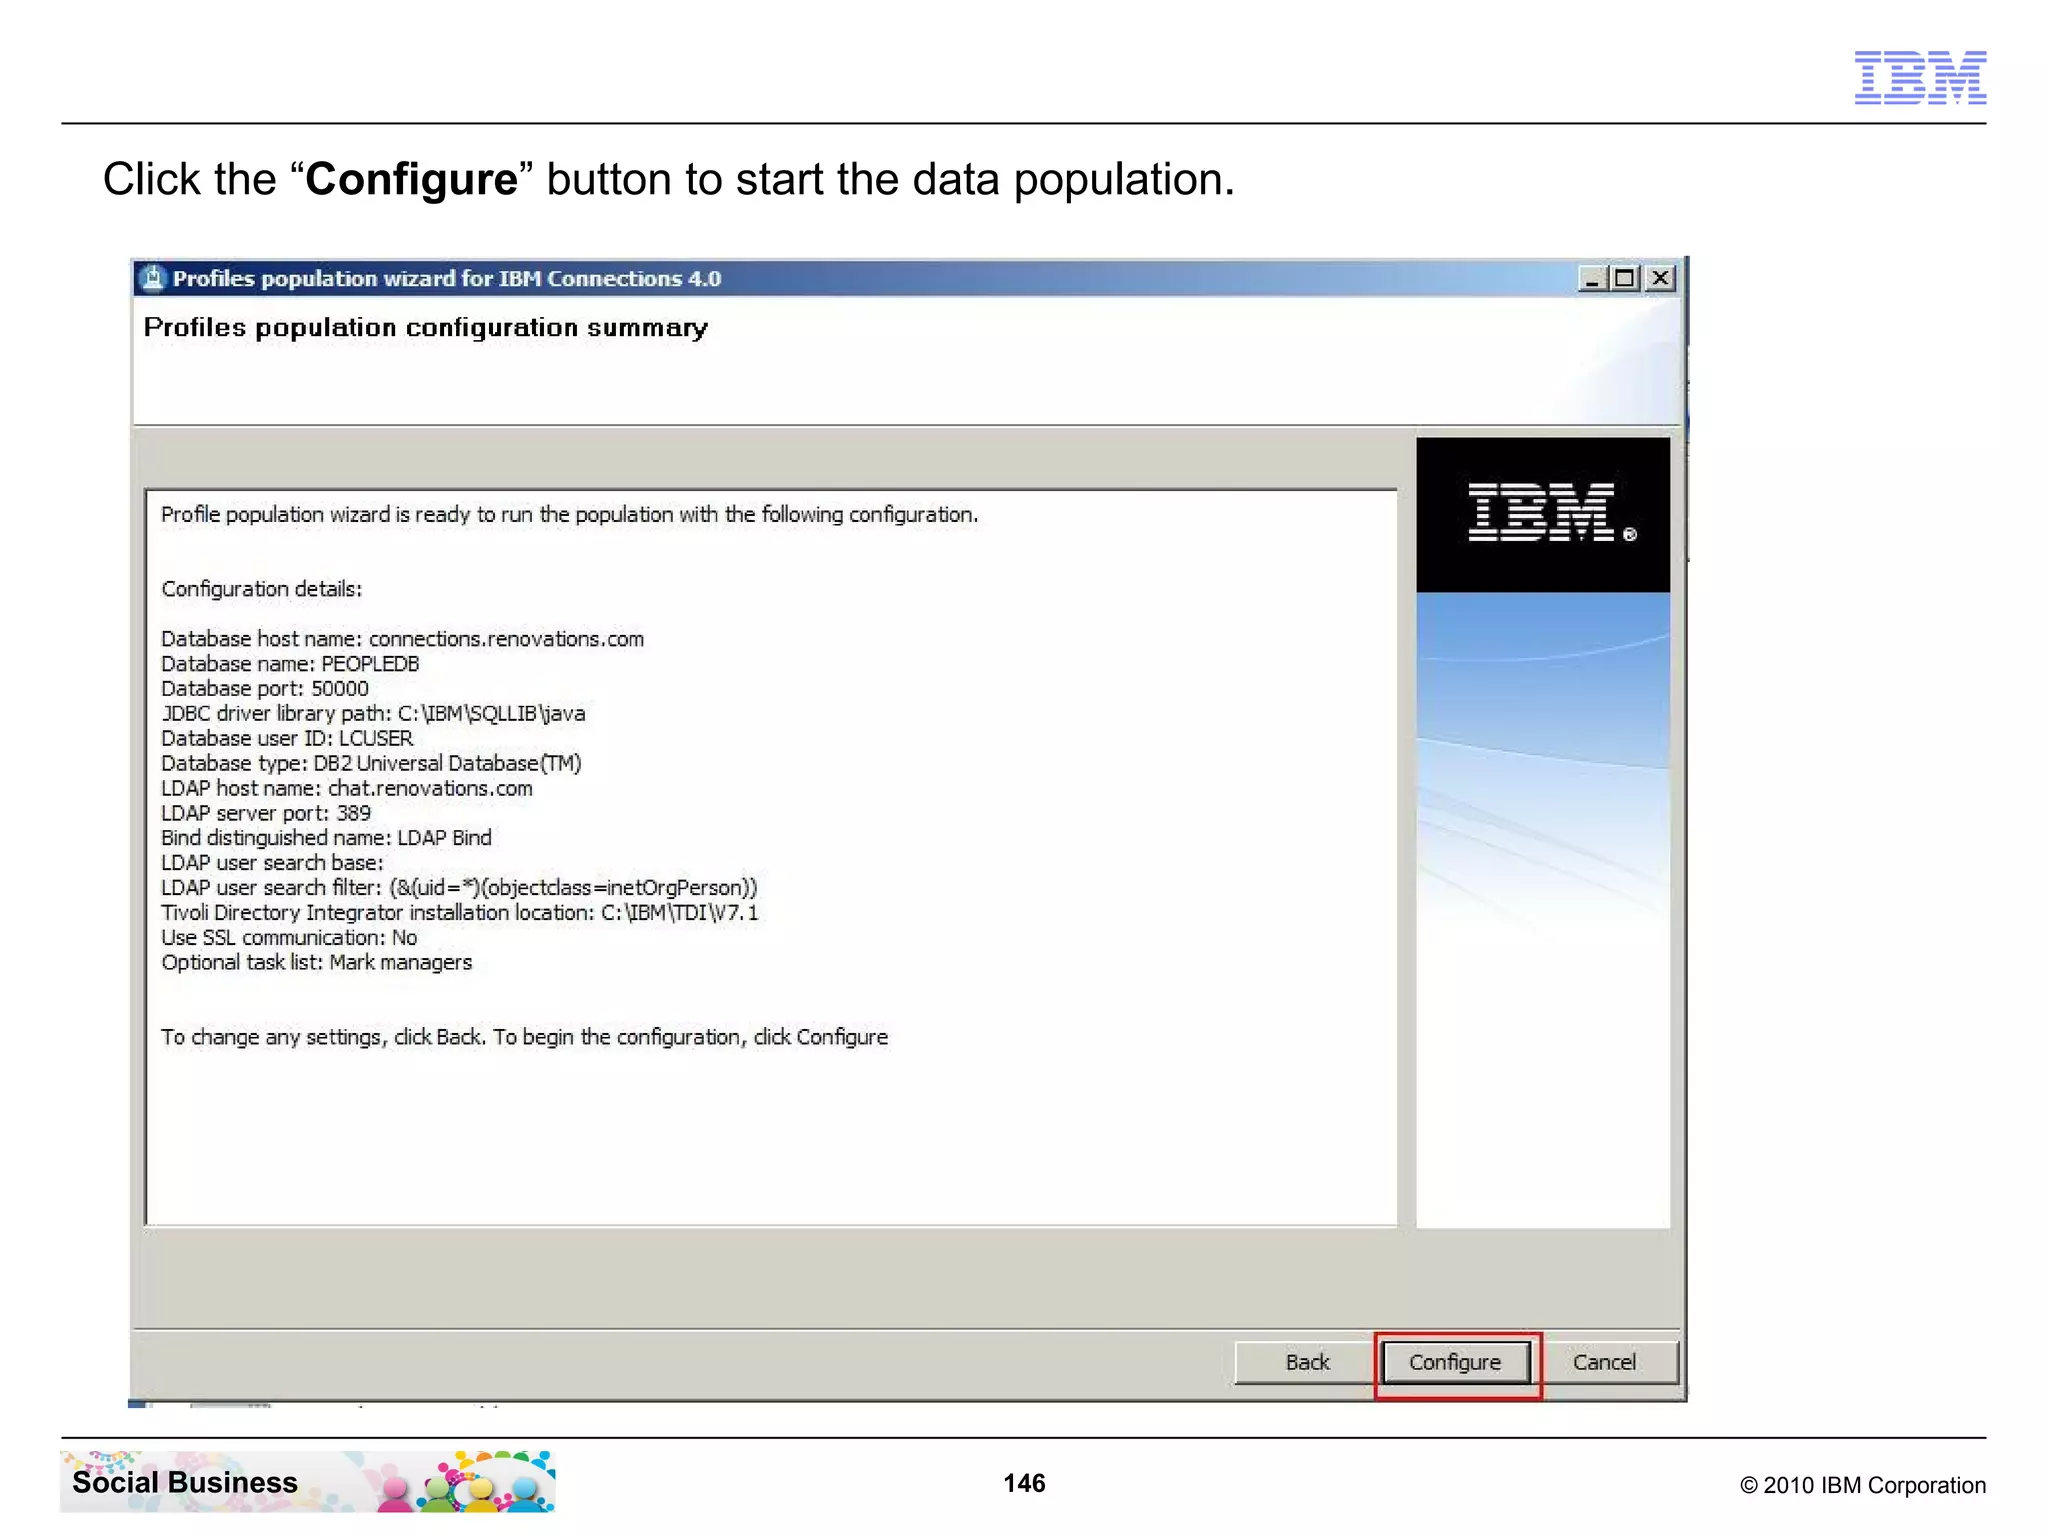


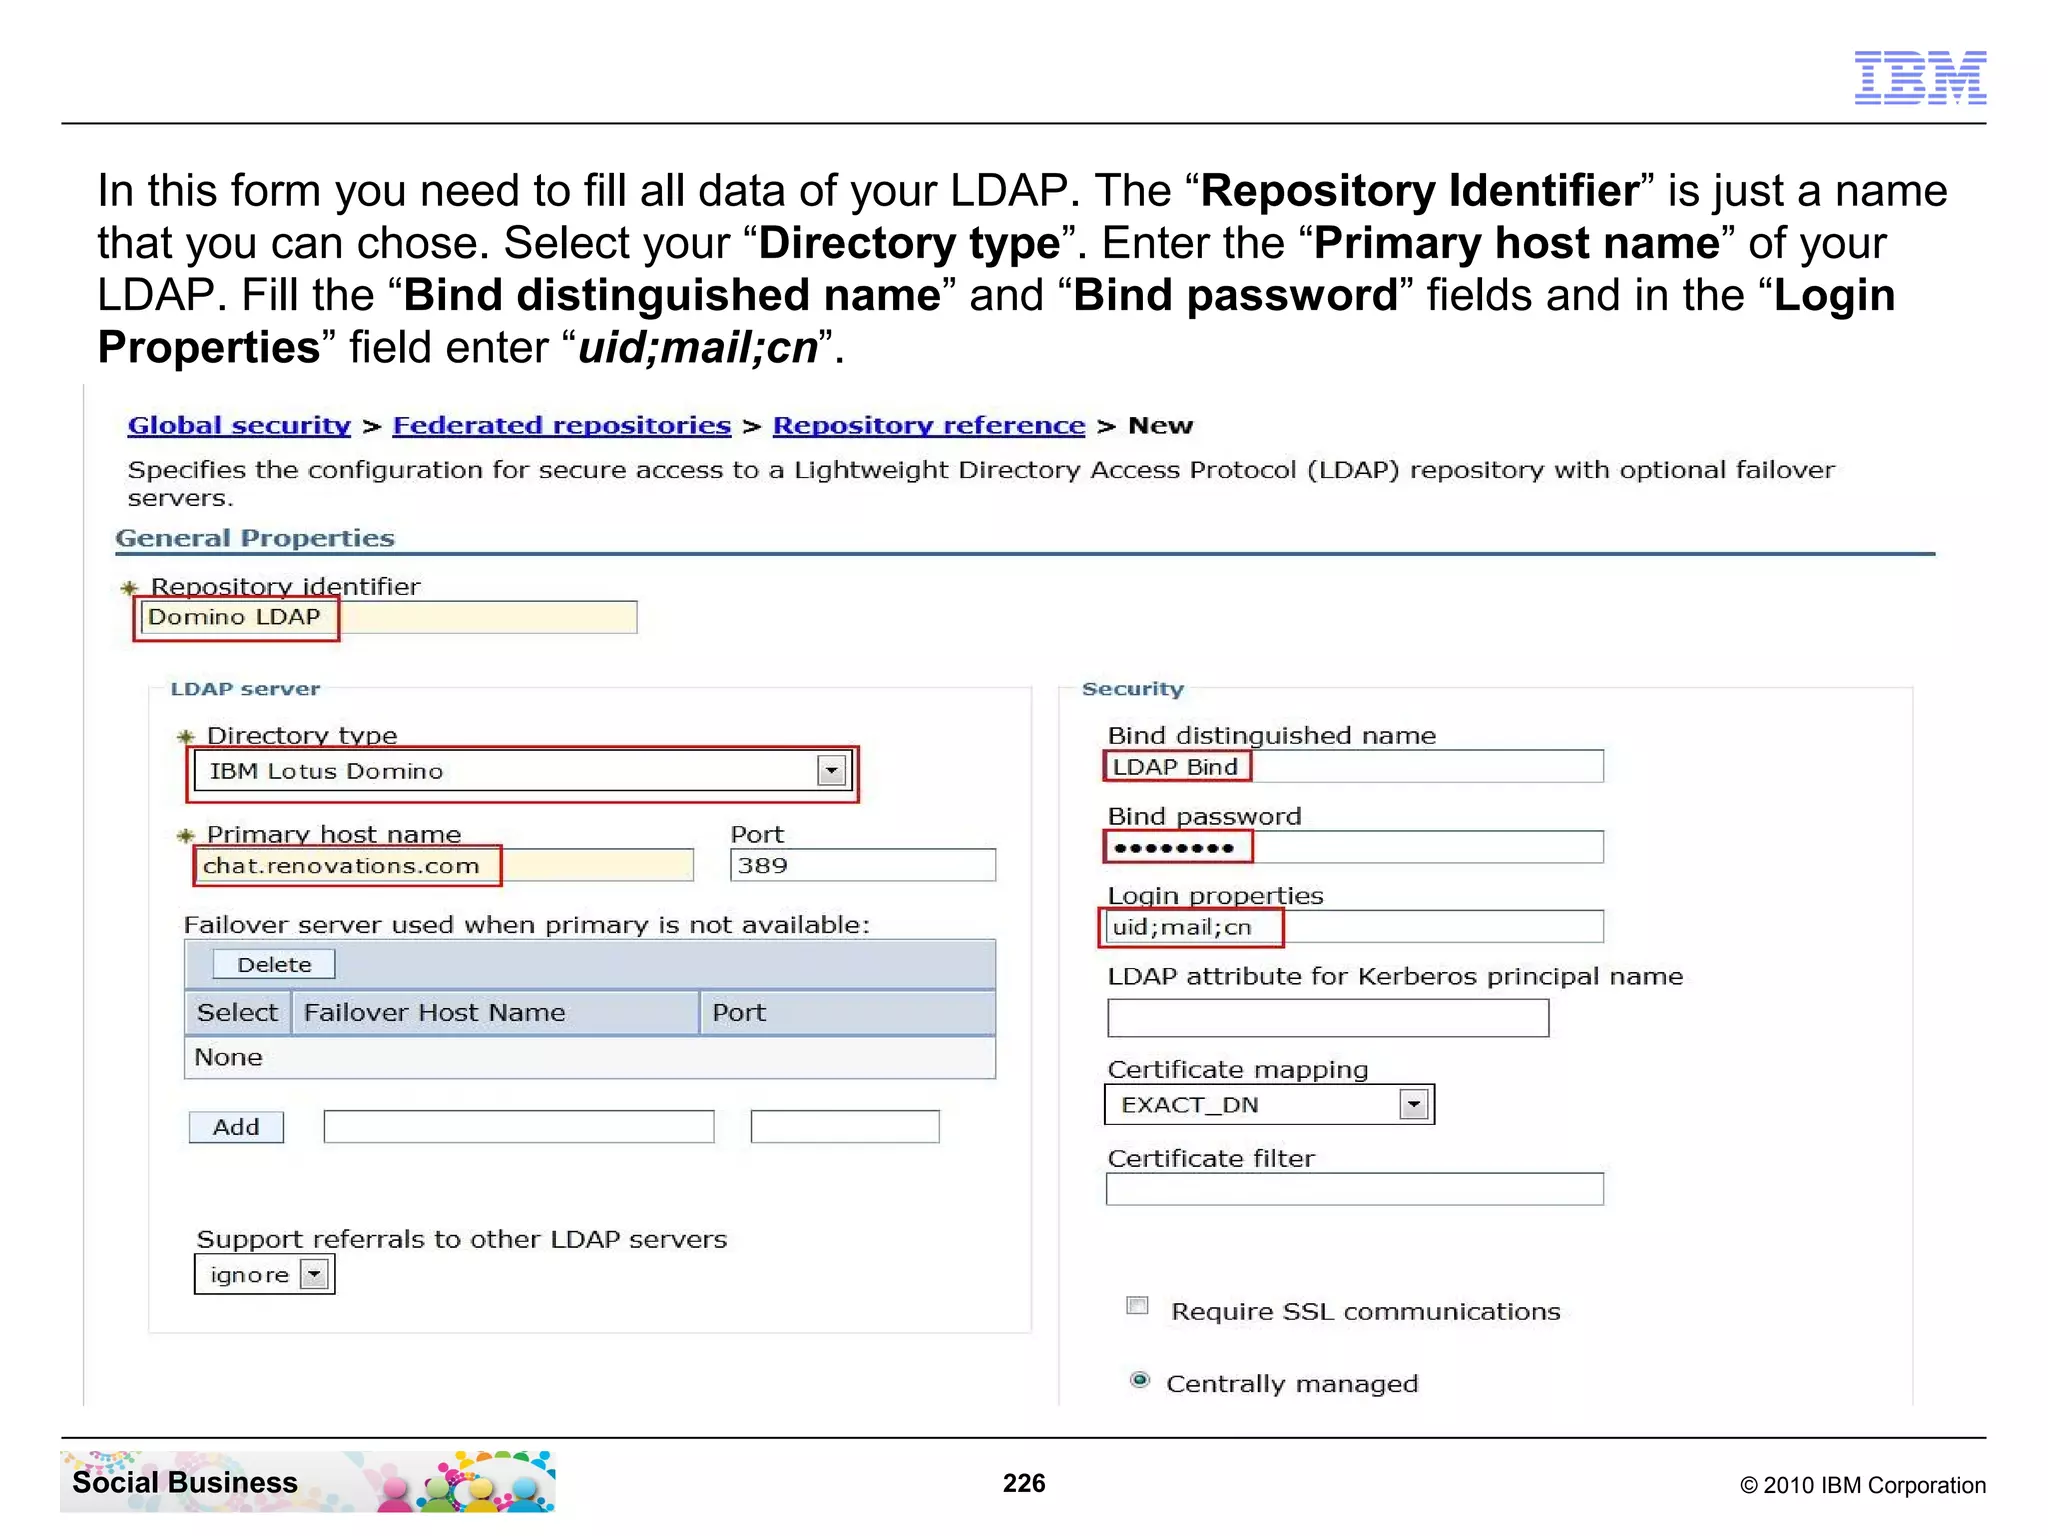


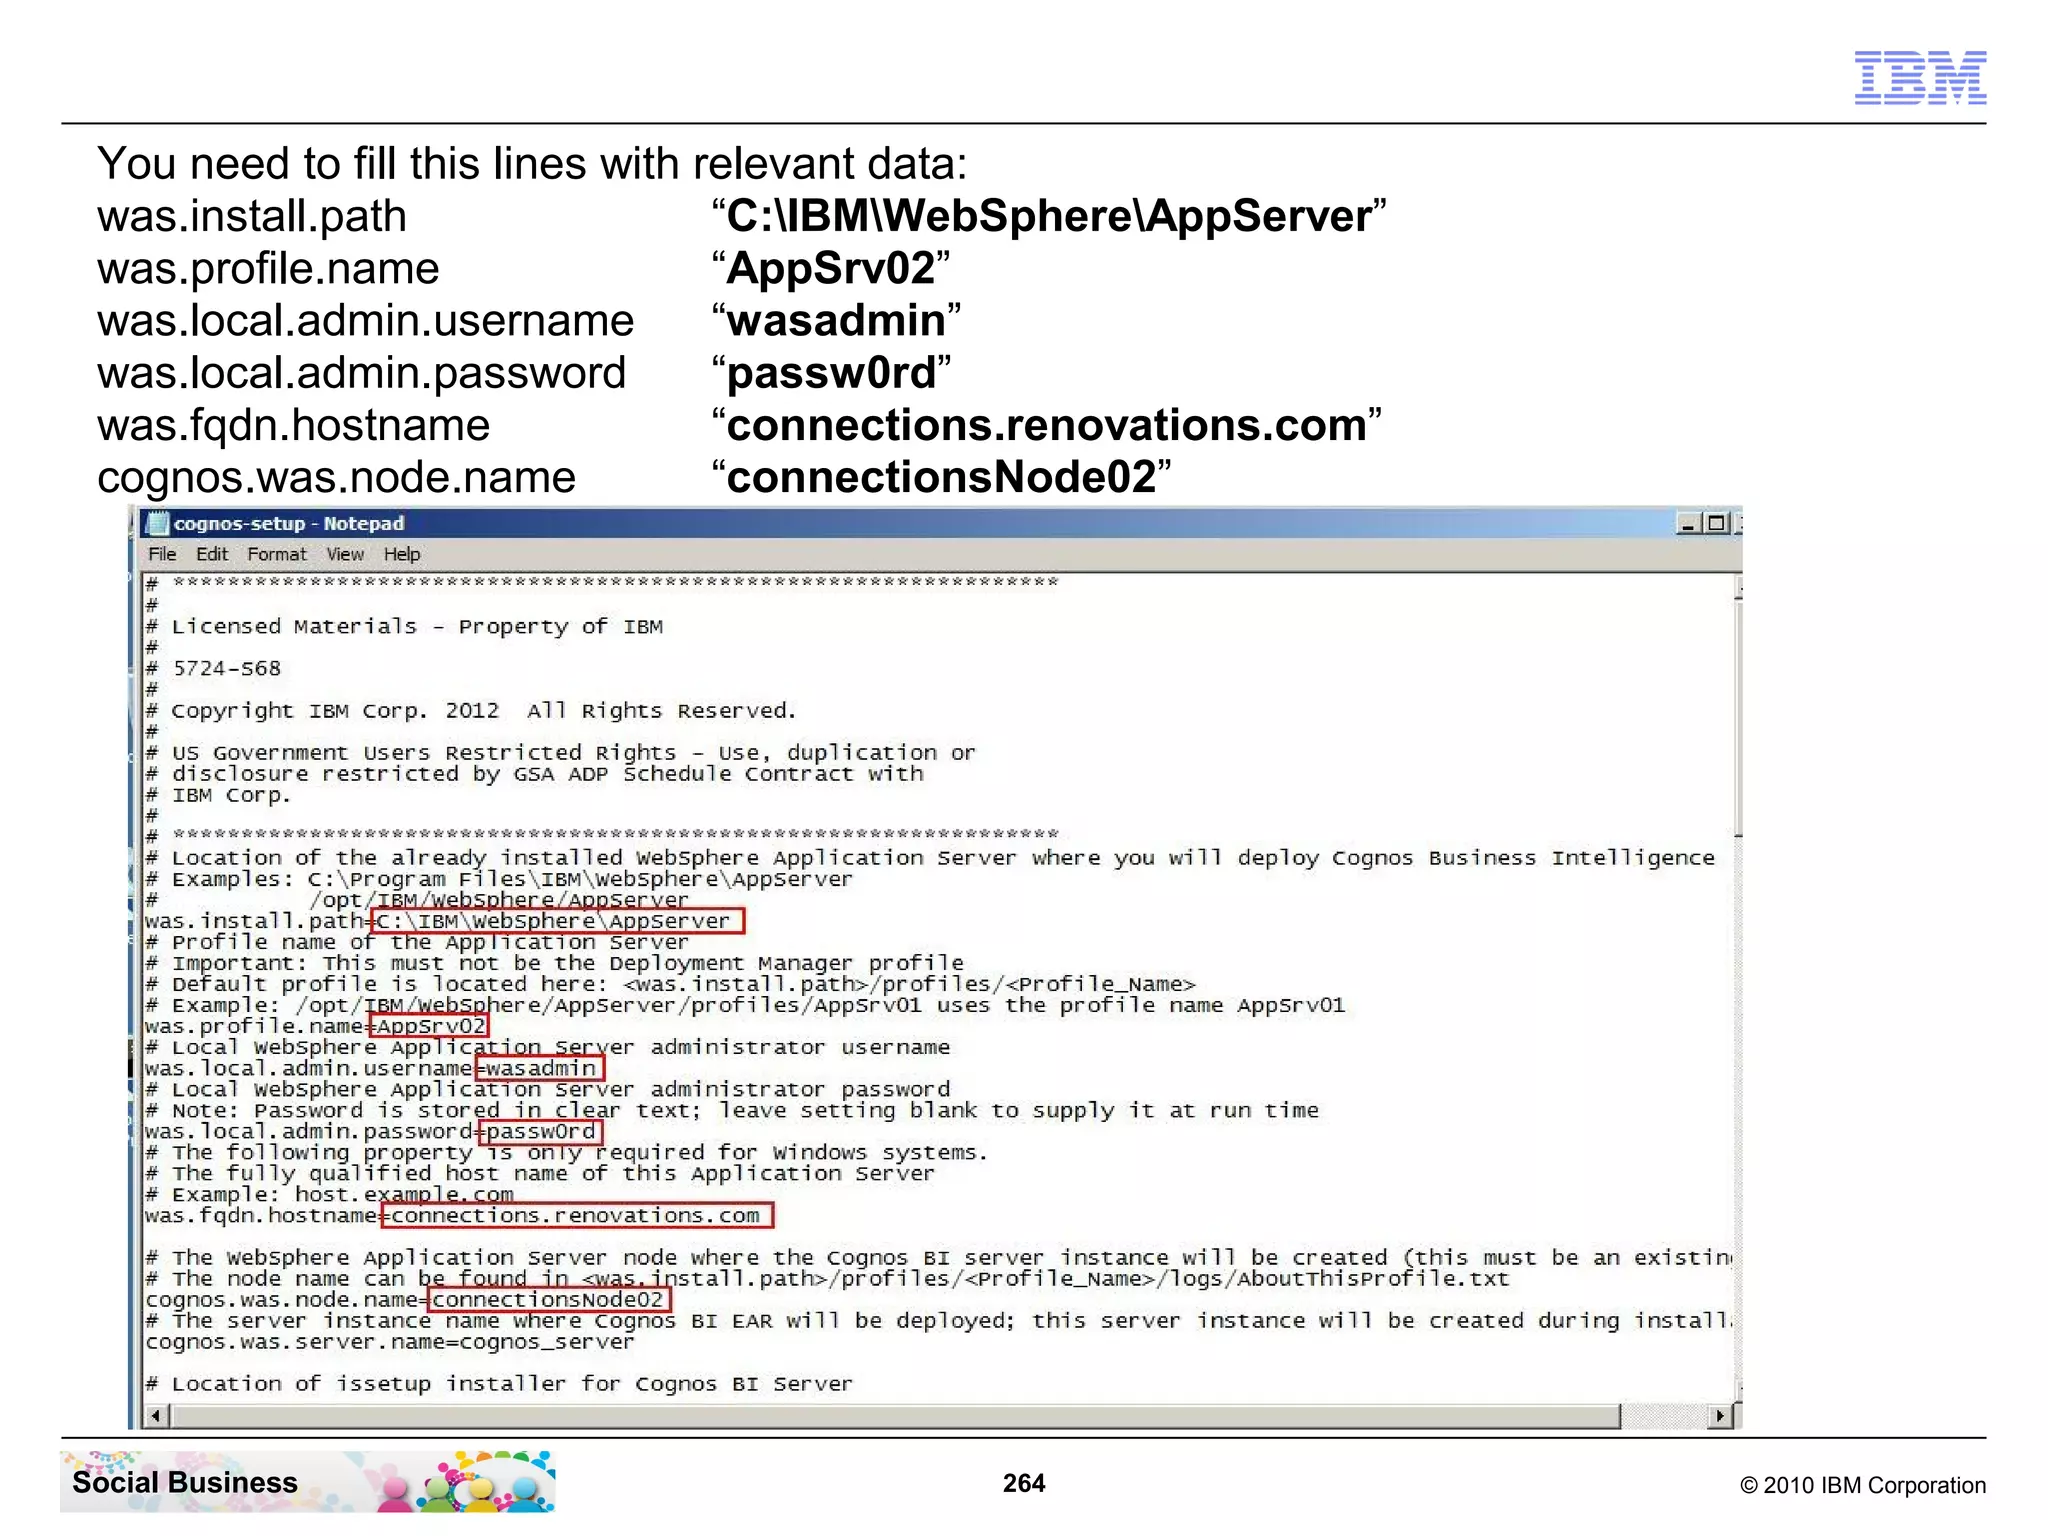


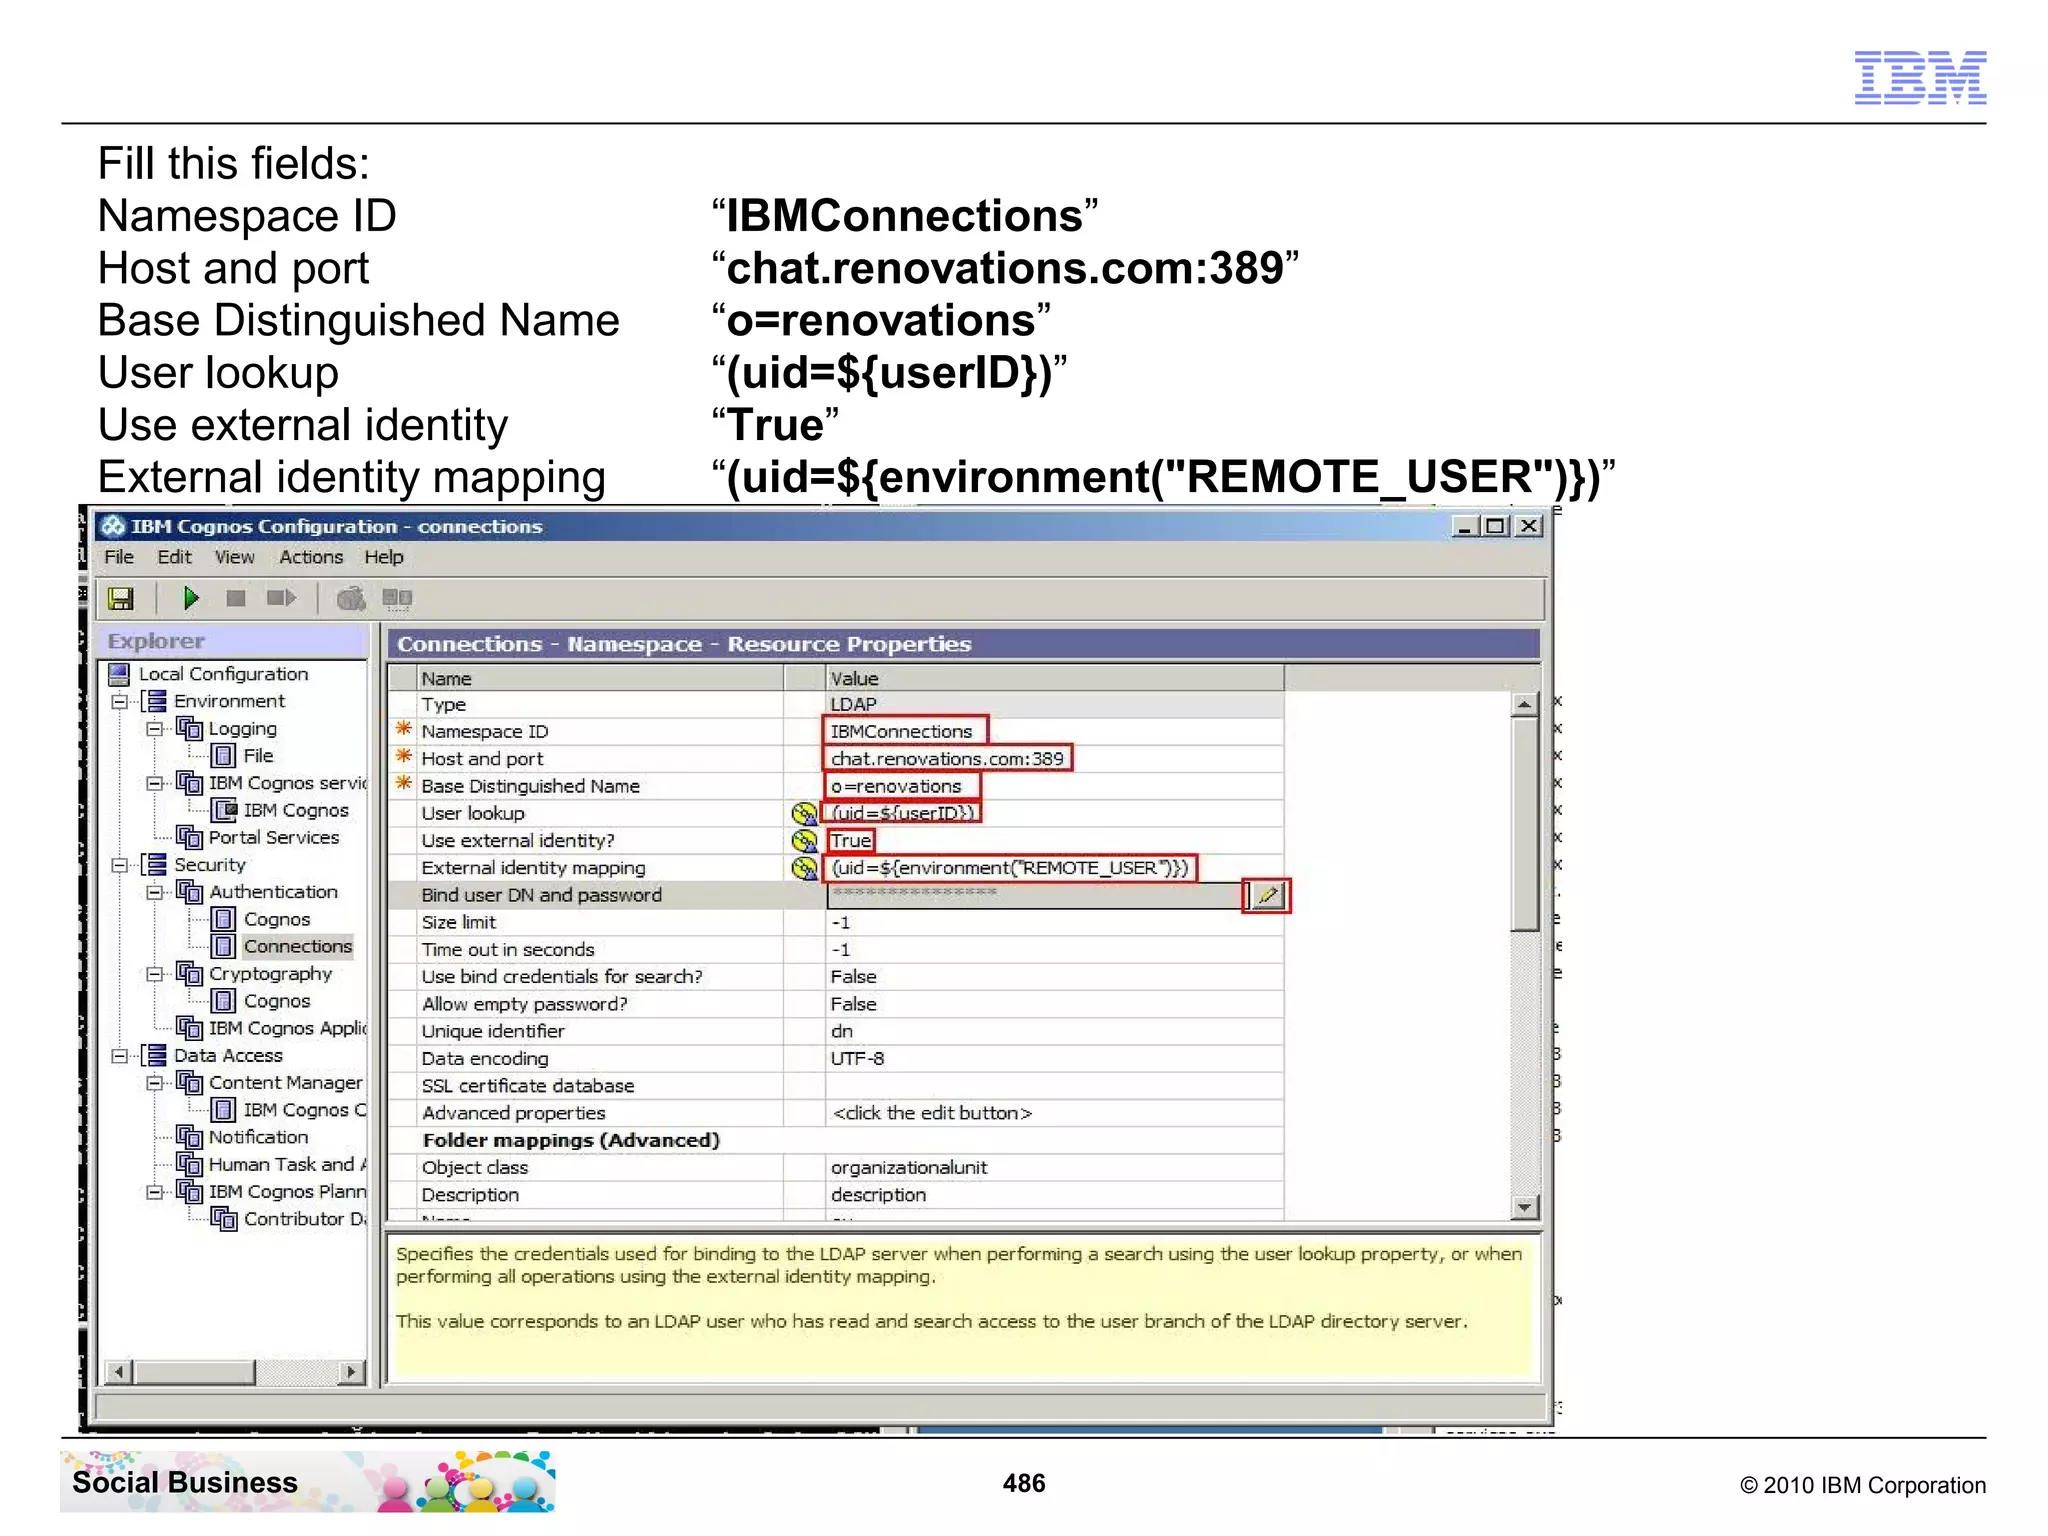


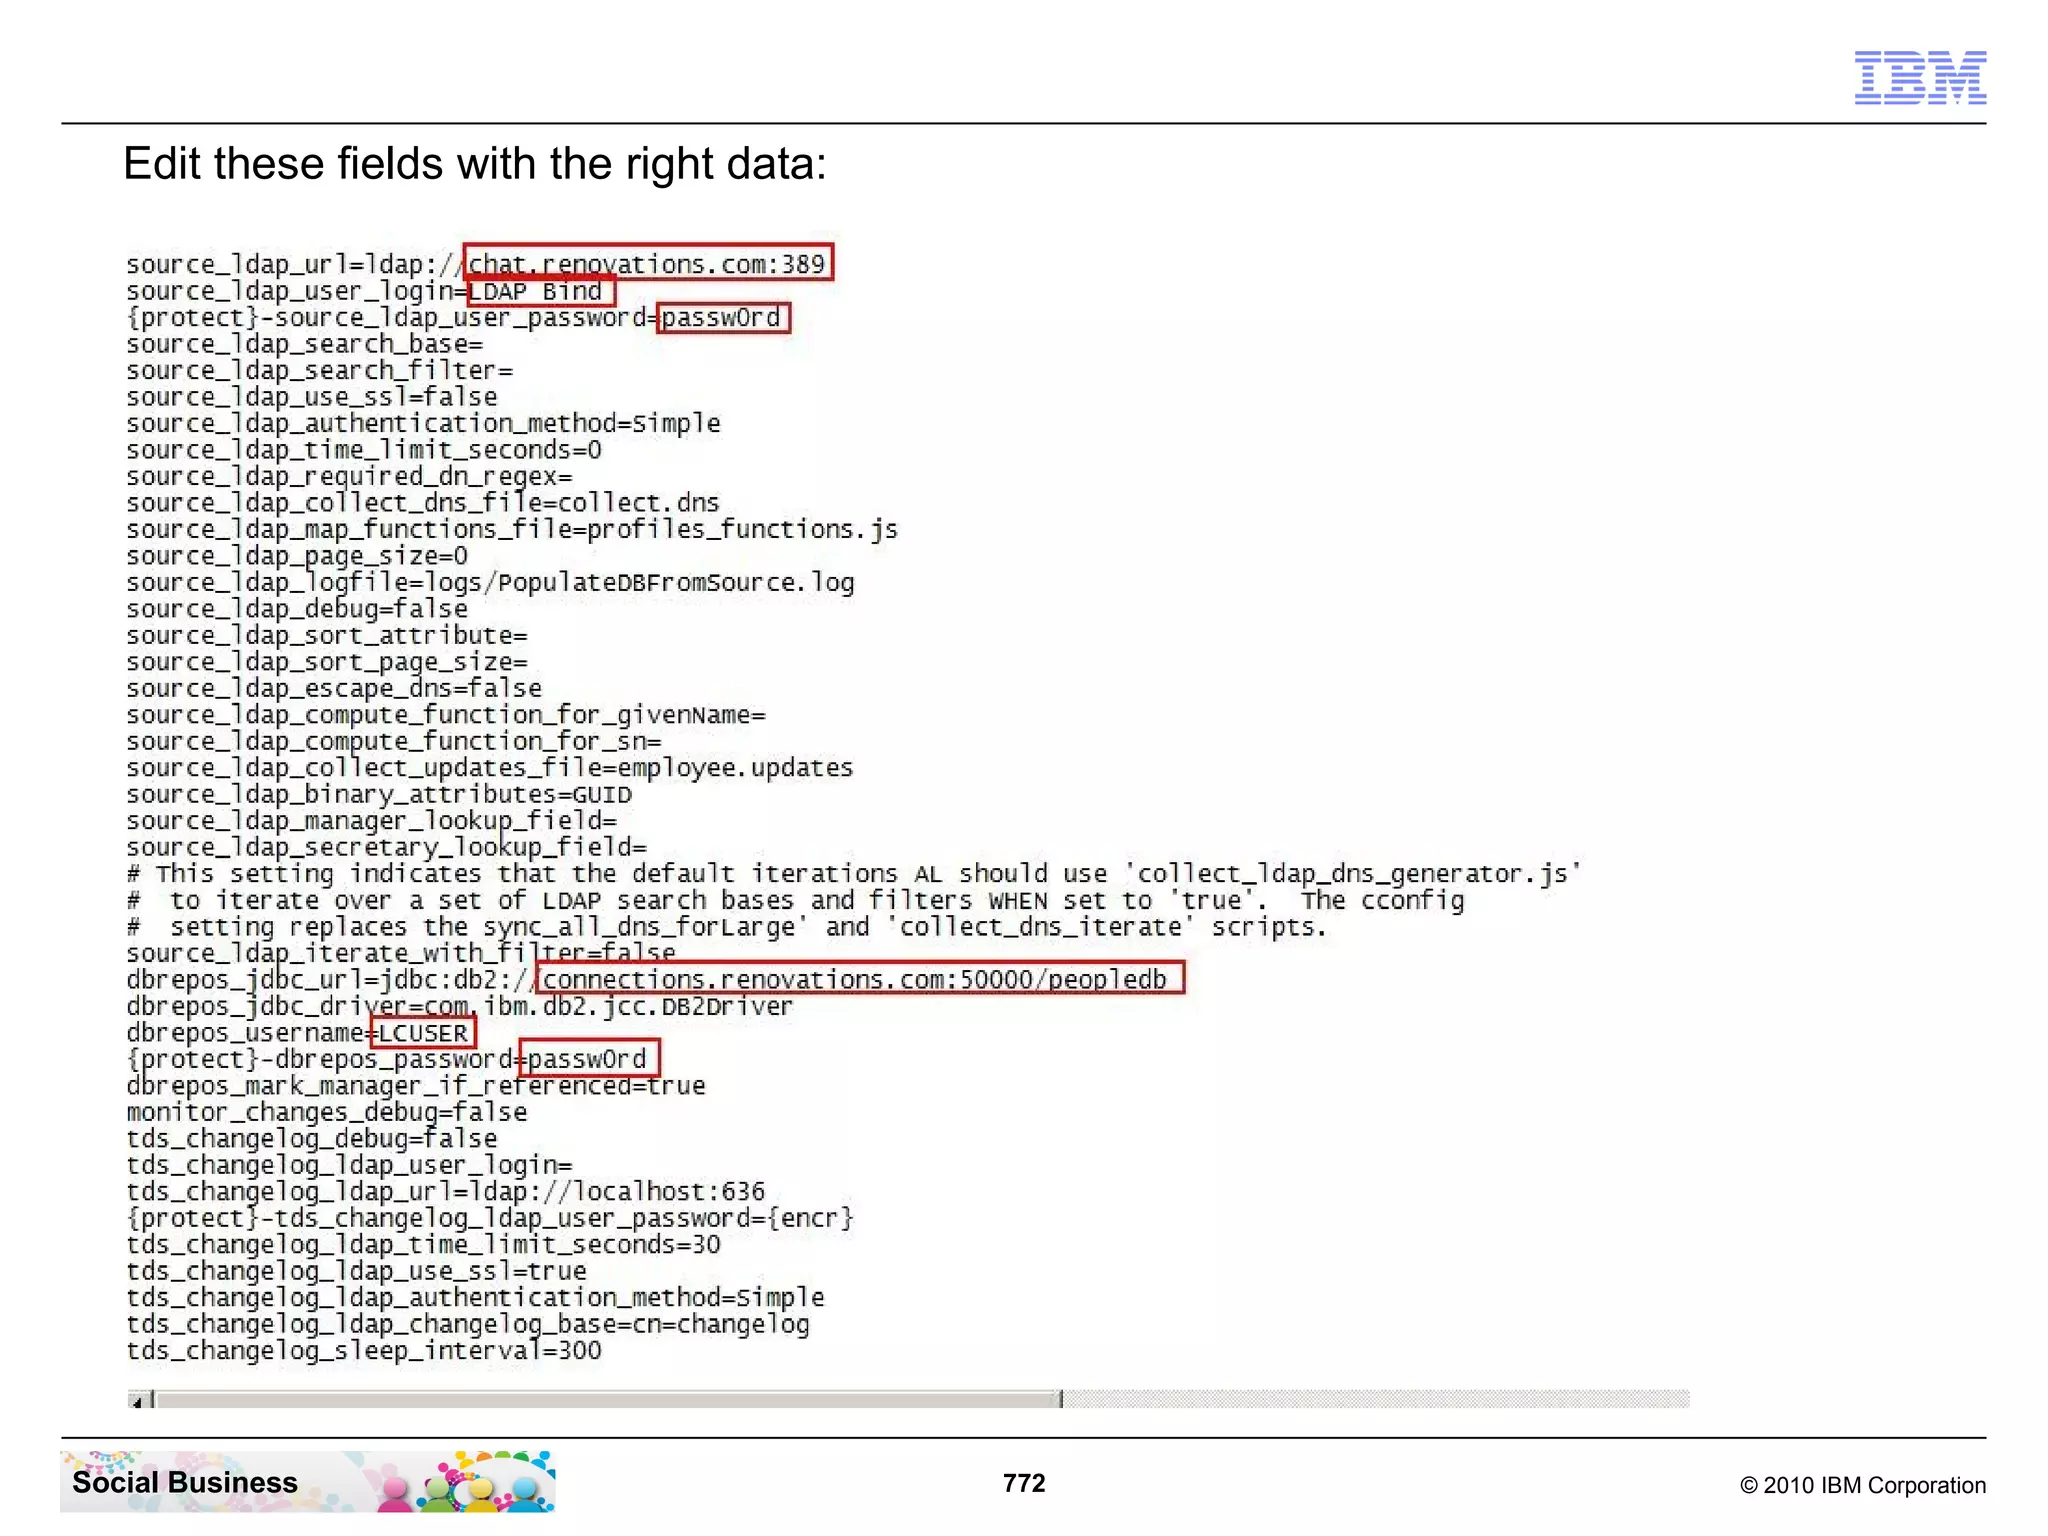

![source_ldap_url=ldap://chat.renovations.com:389
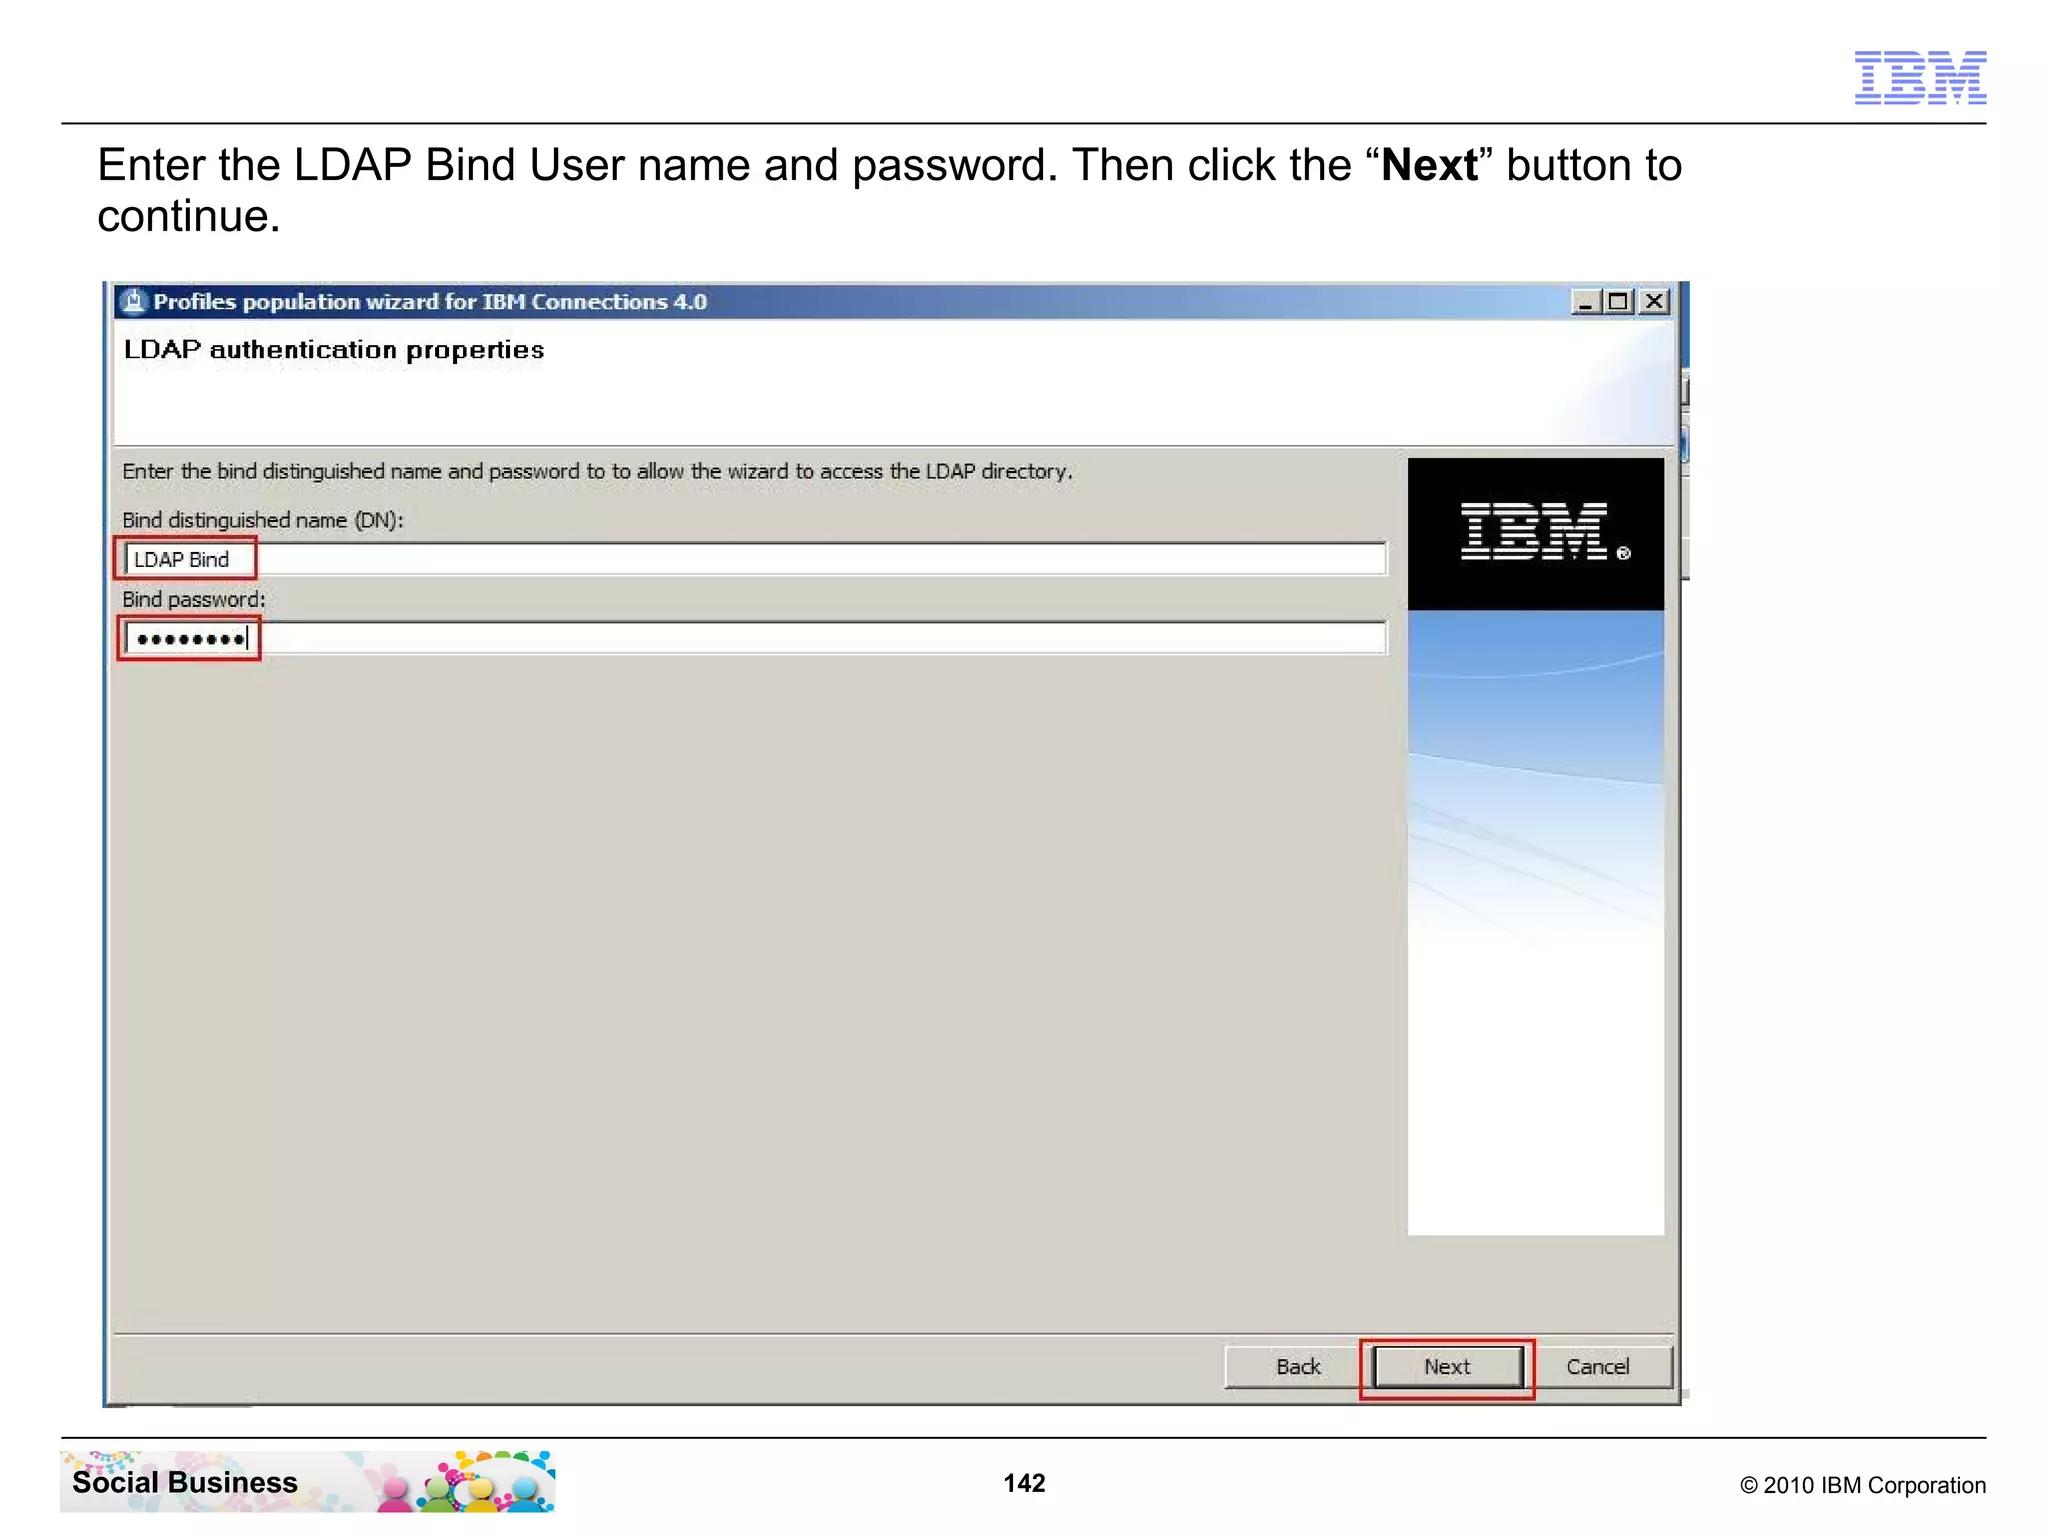
source_ldap_user_login=LDAP Bind
{protect}-source_ldap_user_password=passw0rd
[...]
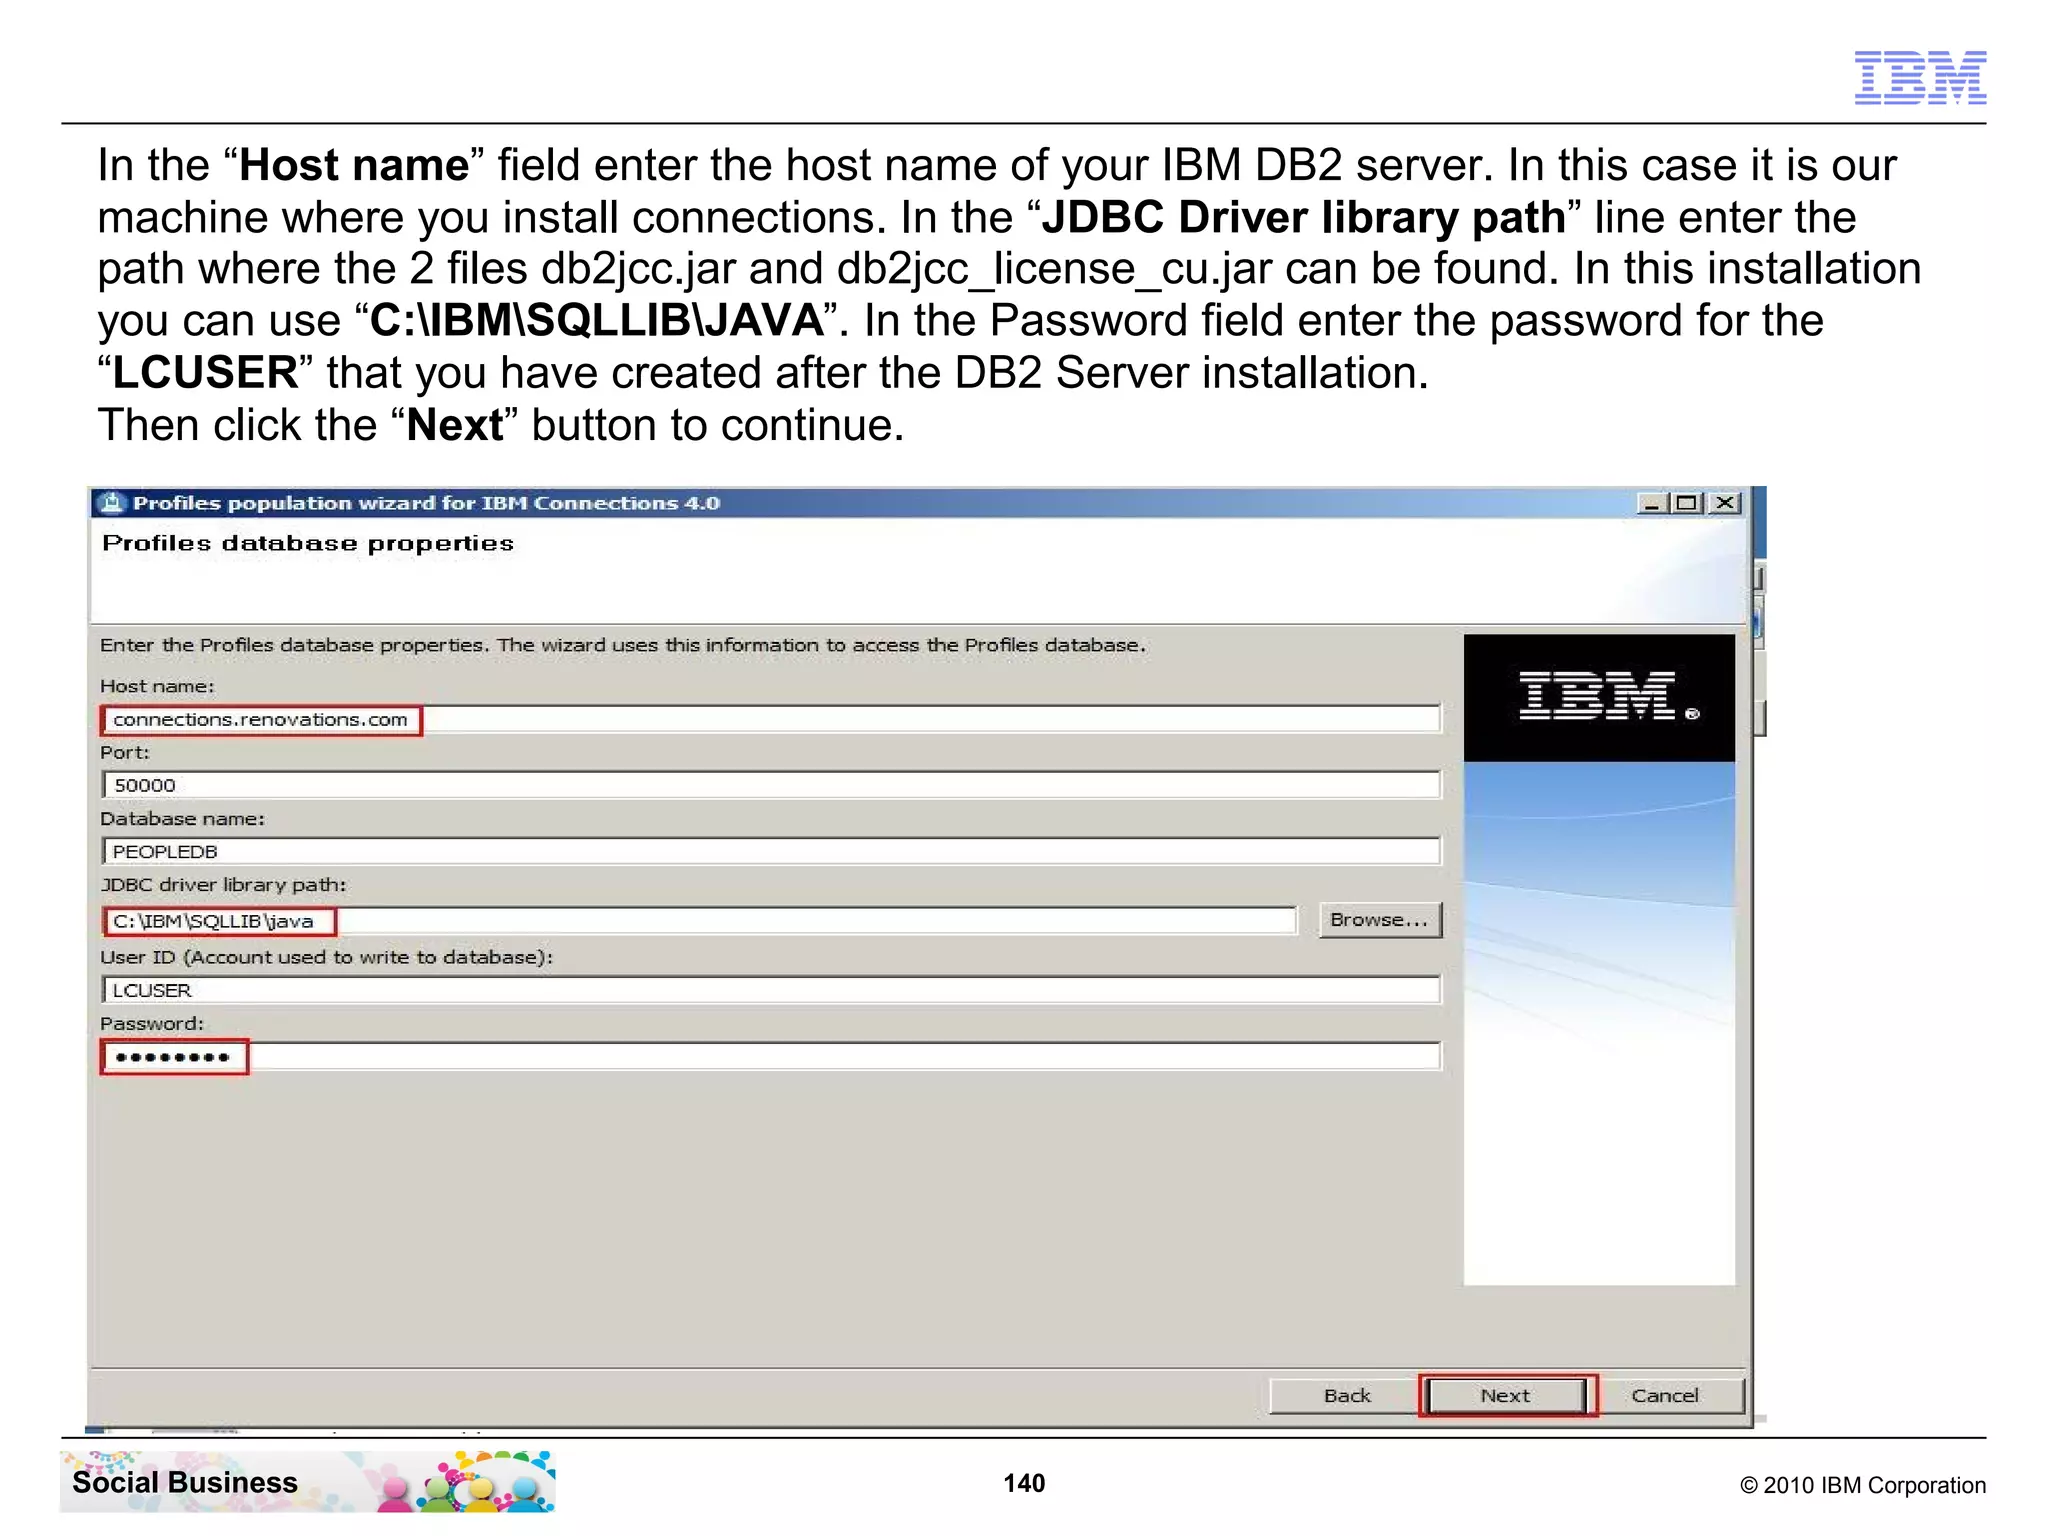
dbrepos_jdbc_url=jdbc:db2://connections.renovations.com:50000/peopledb
dbrepos_jdbc_driver=com.ibm.db2.jcc.DB2Driver
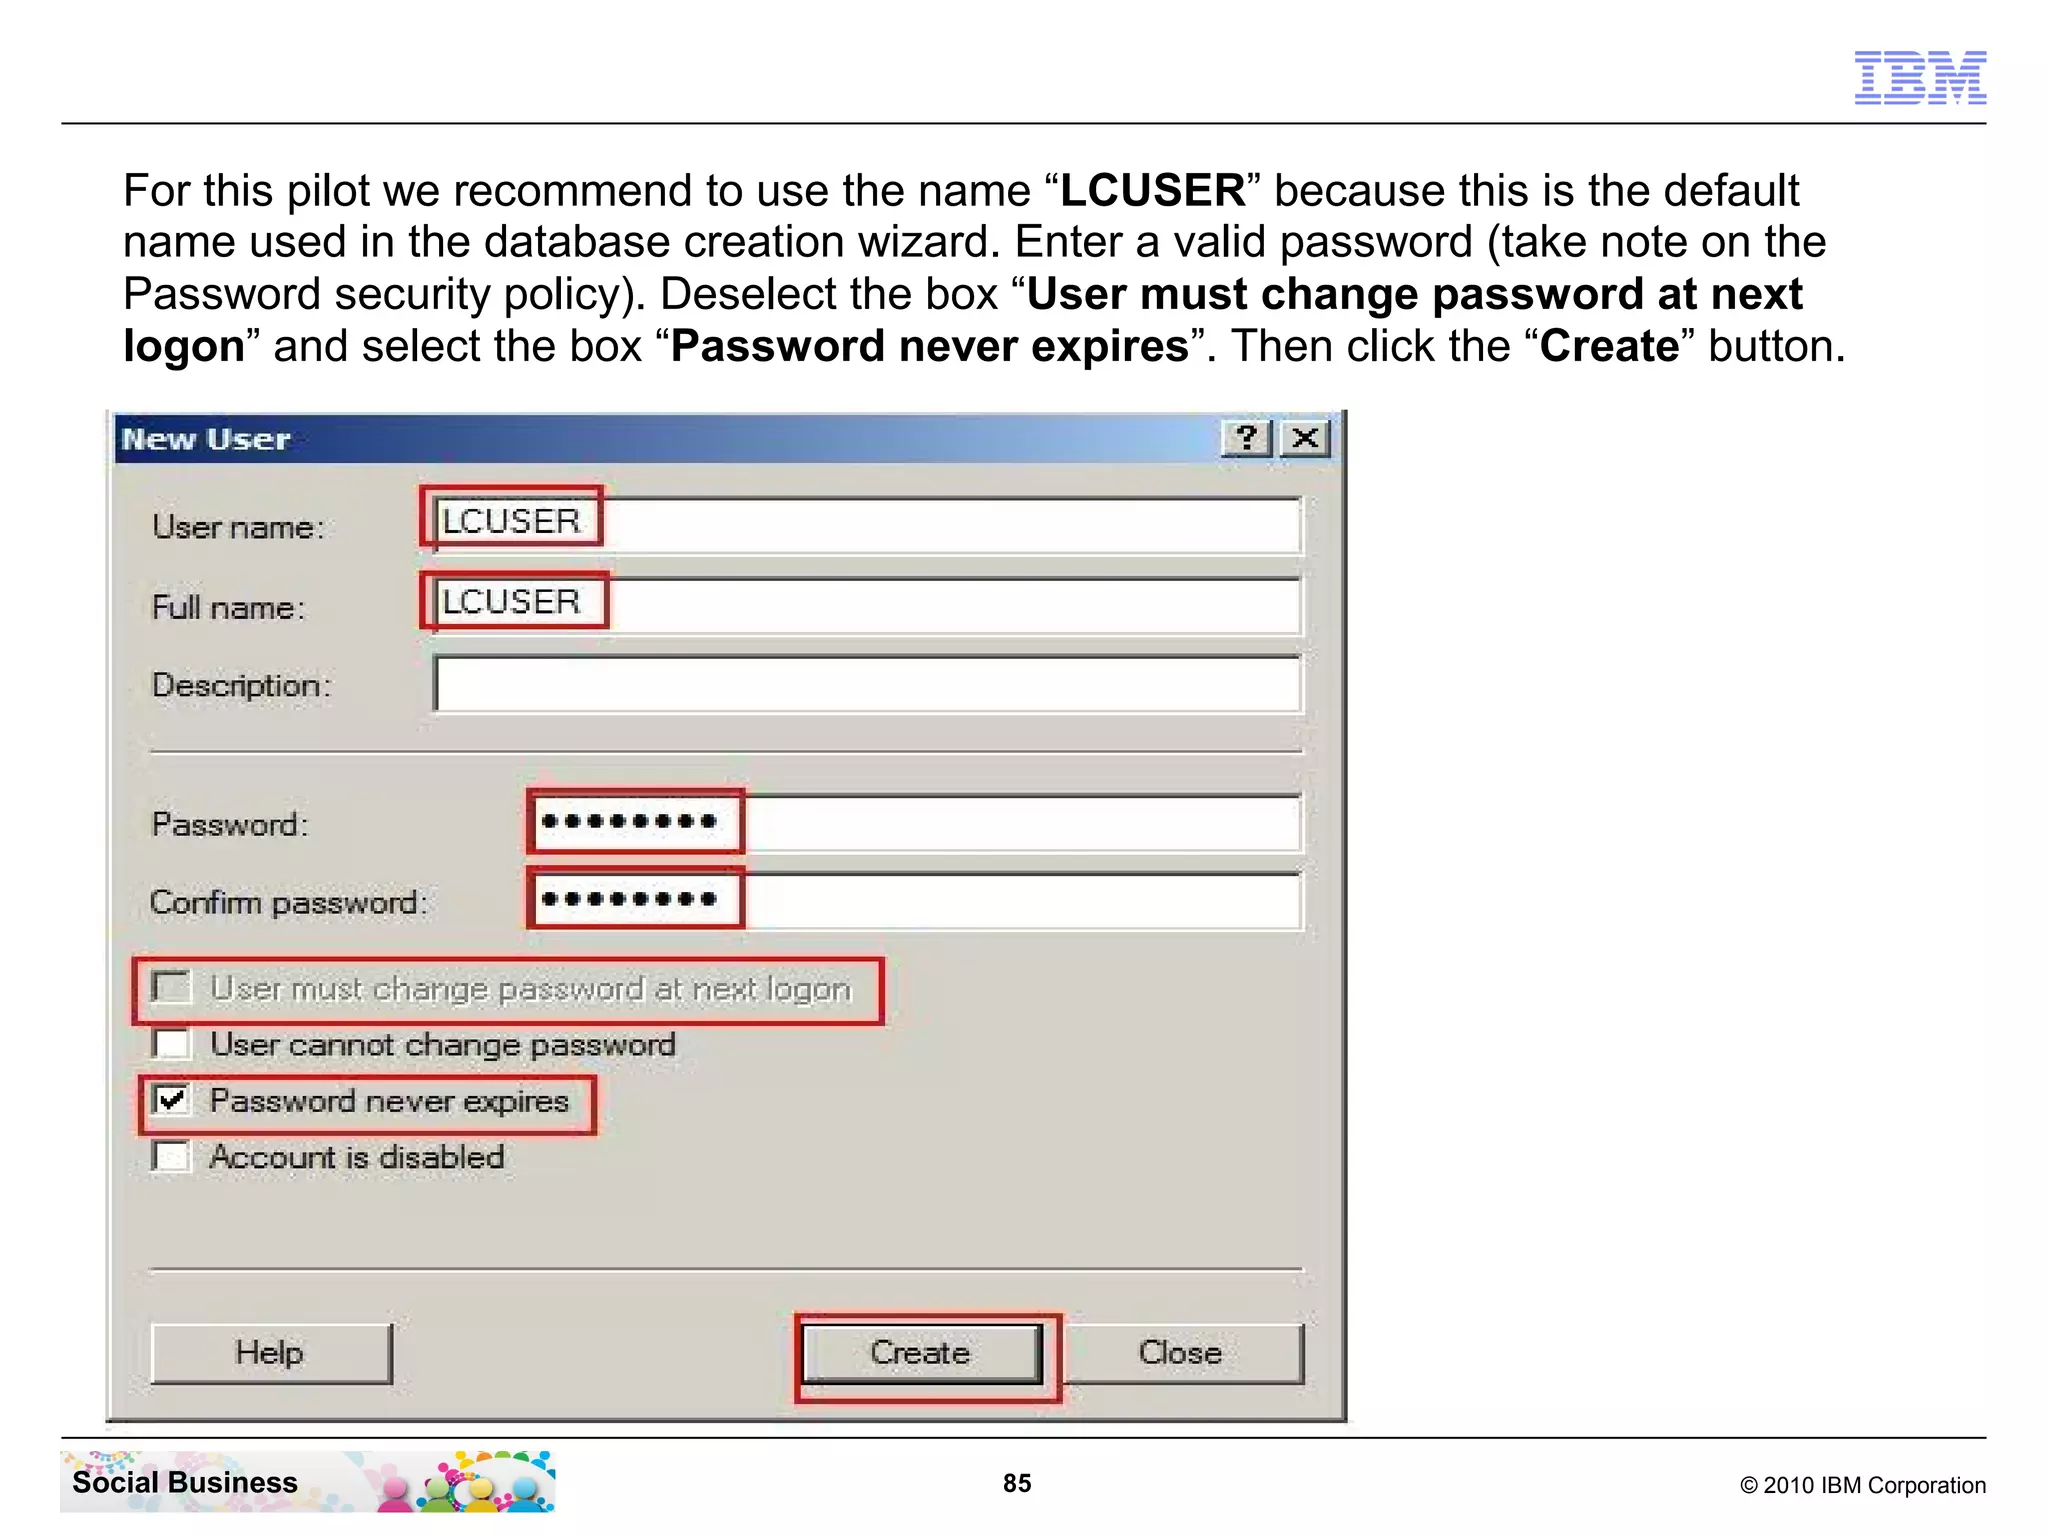
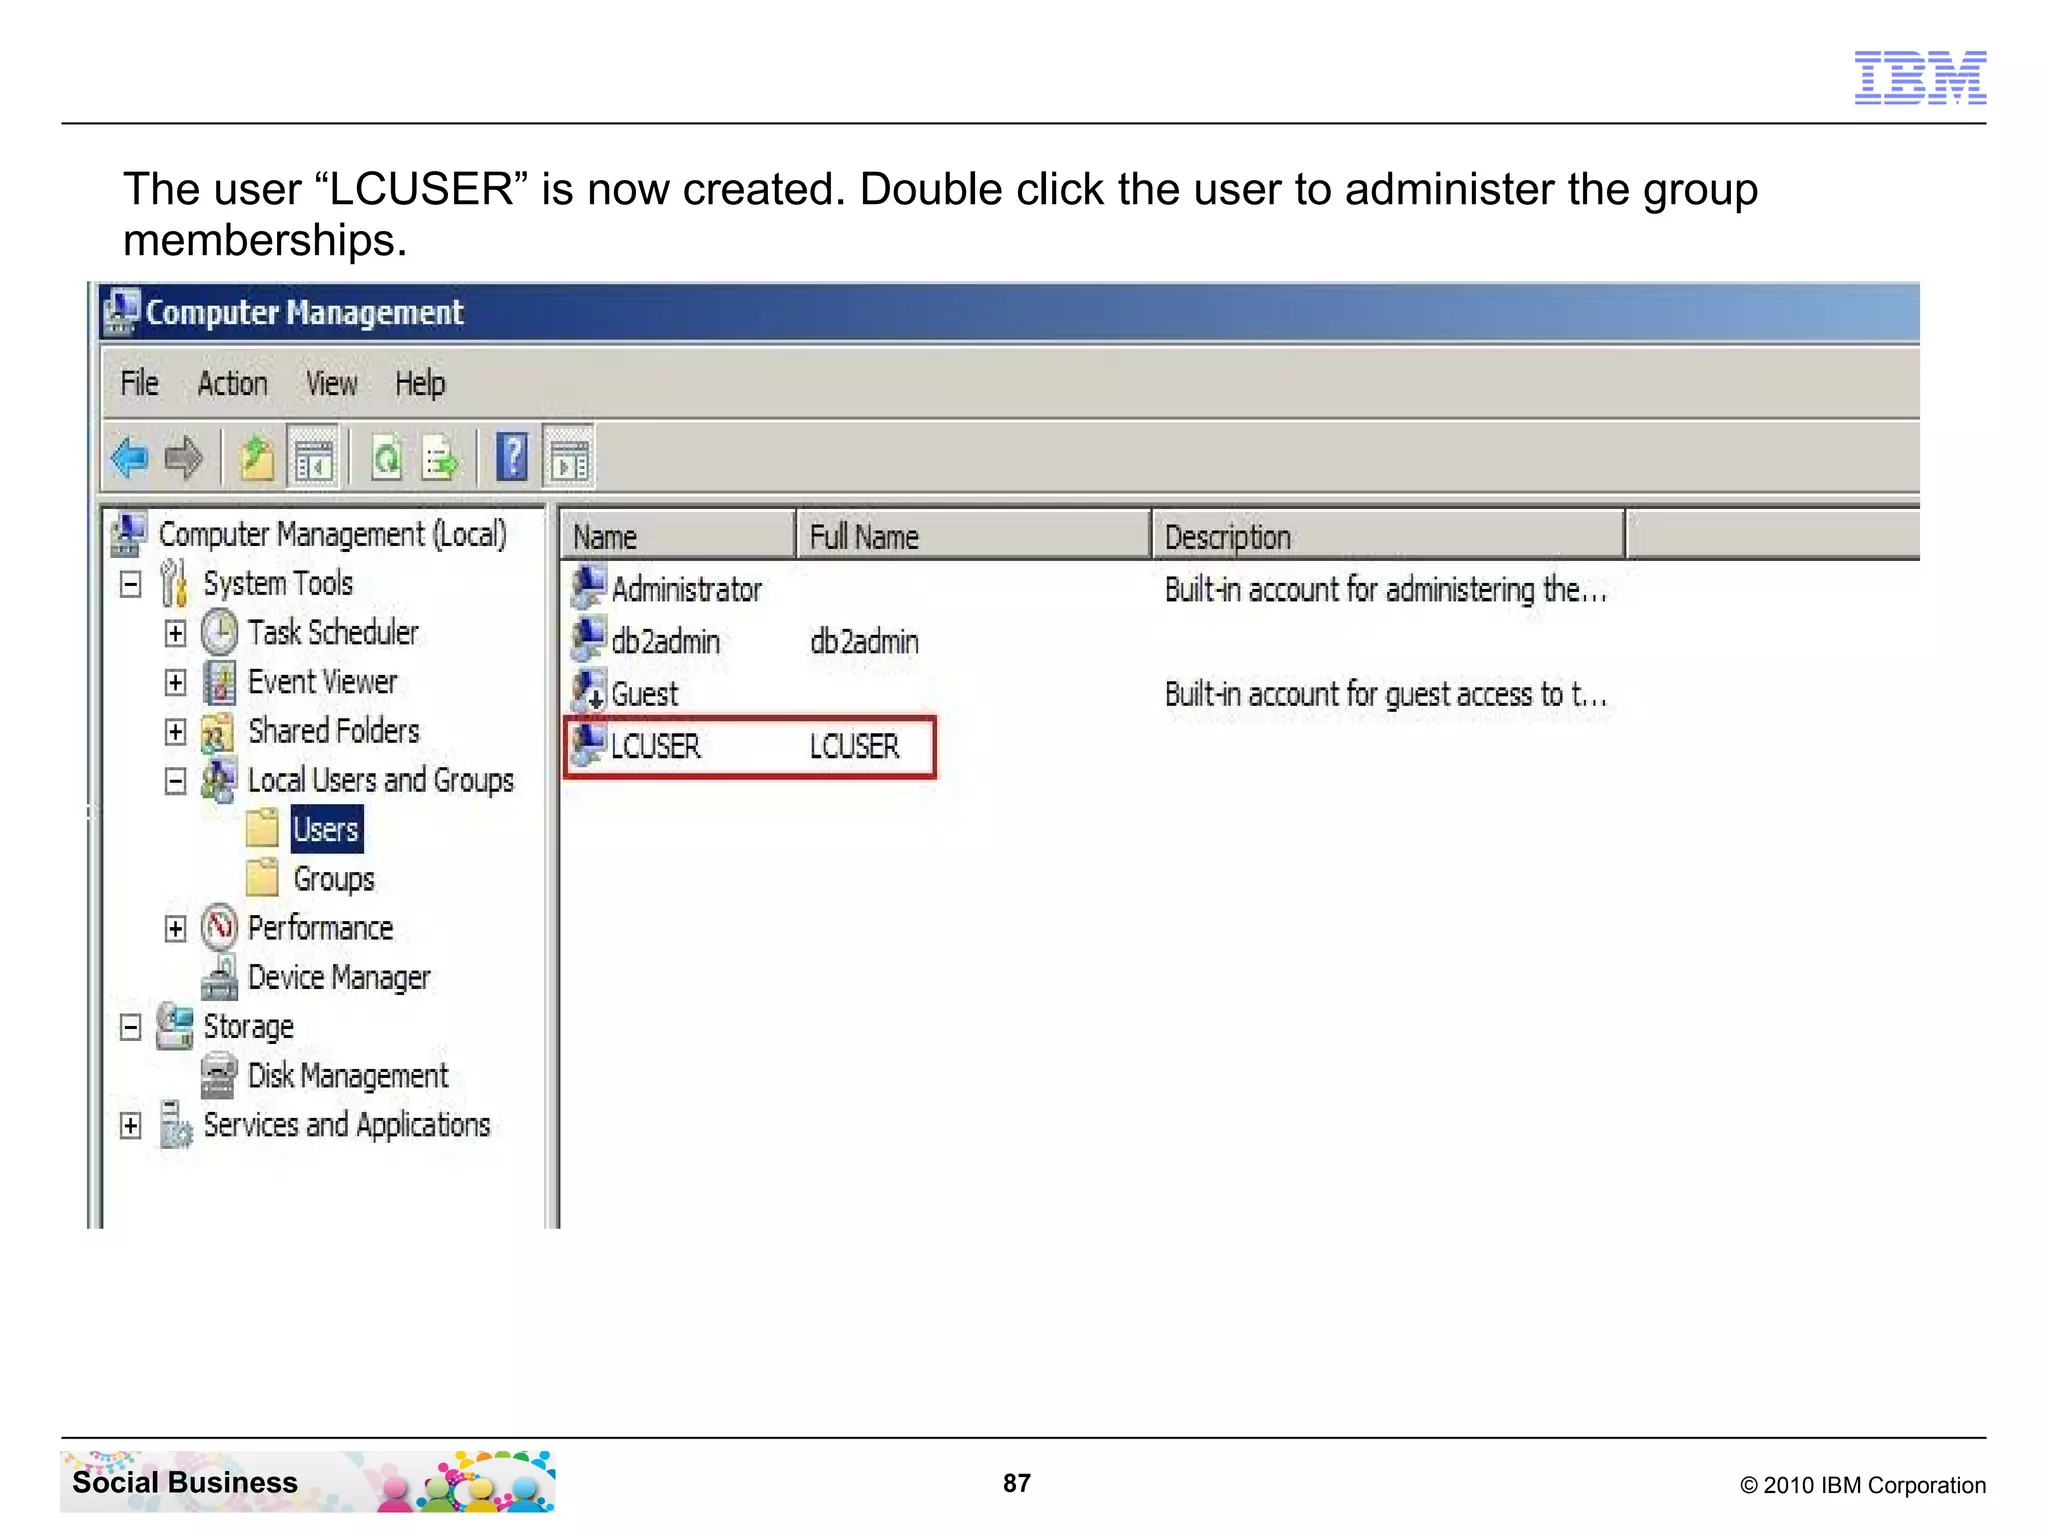
dbrepos_username=LCUSER
{protect}-dbrepos_password=passw0rd
[...]
Social Business 778 © 2010 IBM Corporation](https://image.slidesharecdn.com/ibmconnections4-0installation-fromzerotosocialhero-finalwithdominoldap-121029100629-phpapp01/75/IBM-Connections-4-0-Installation-From-Zero-To-Social-Hero-1-16-for-Domino-LDAP-778-2048.jpg)


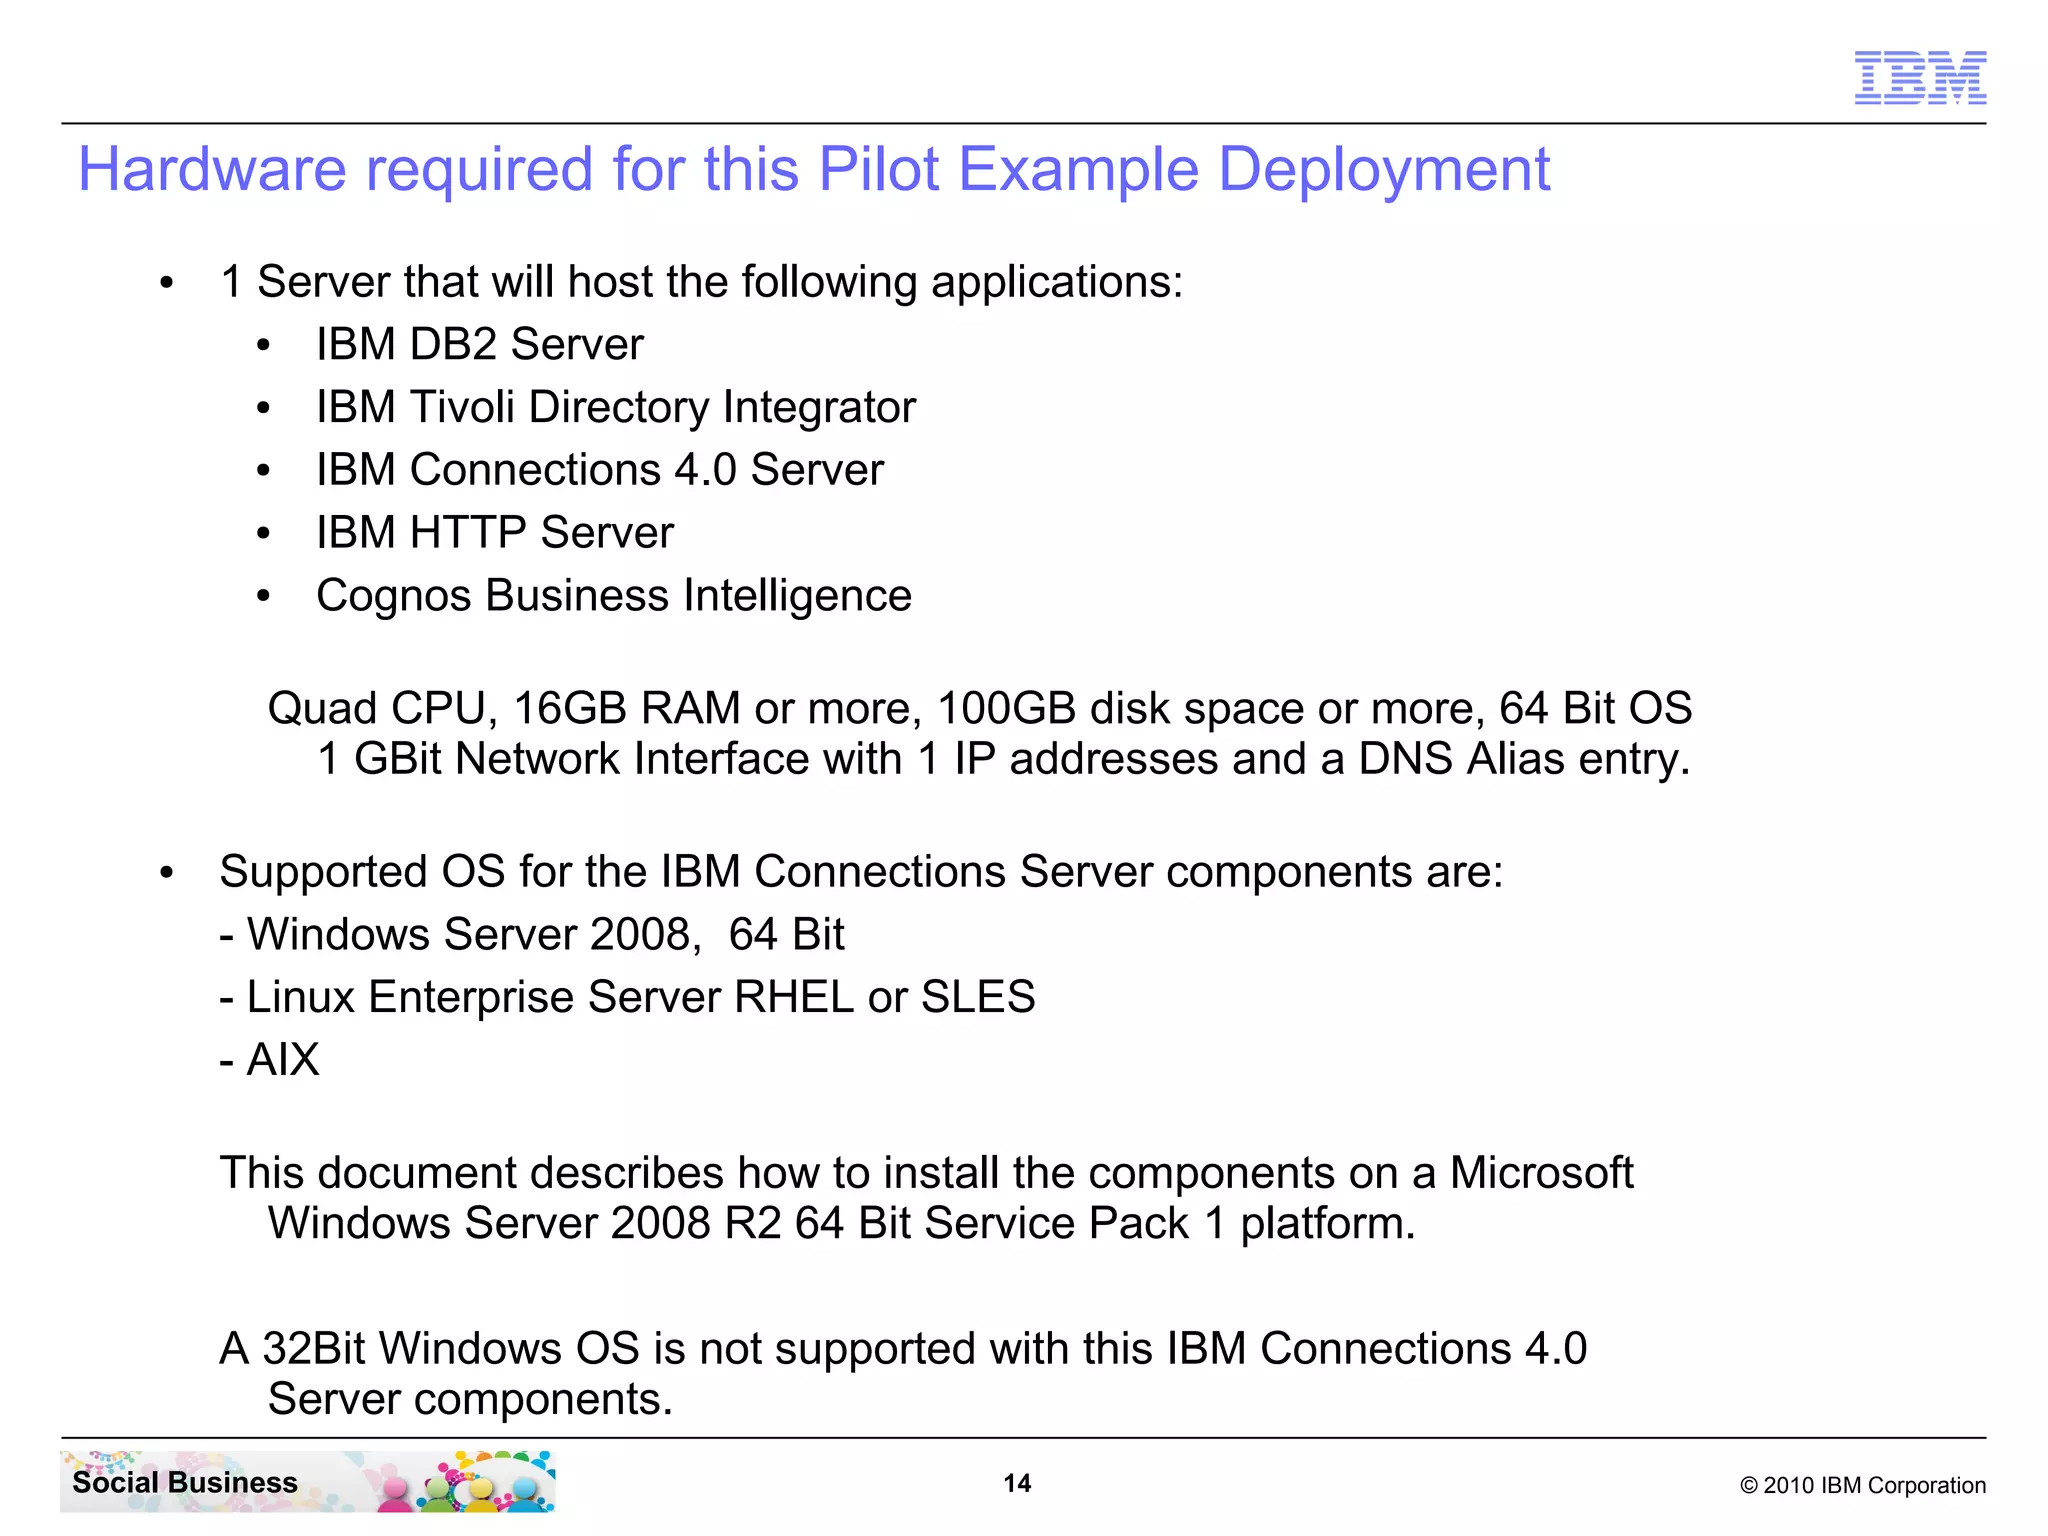
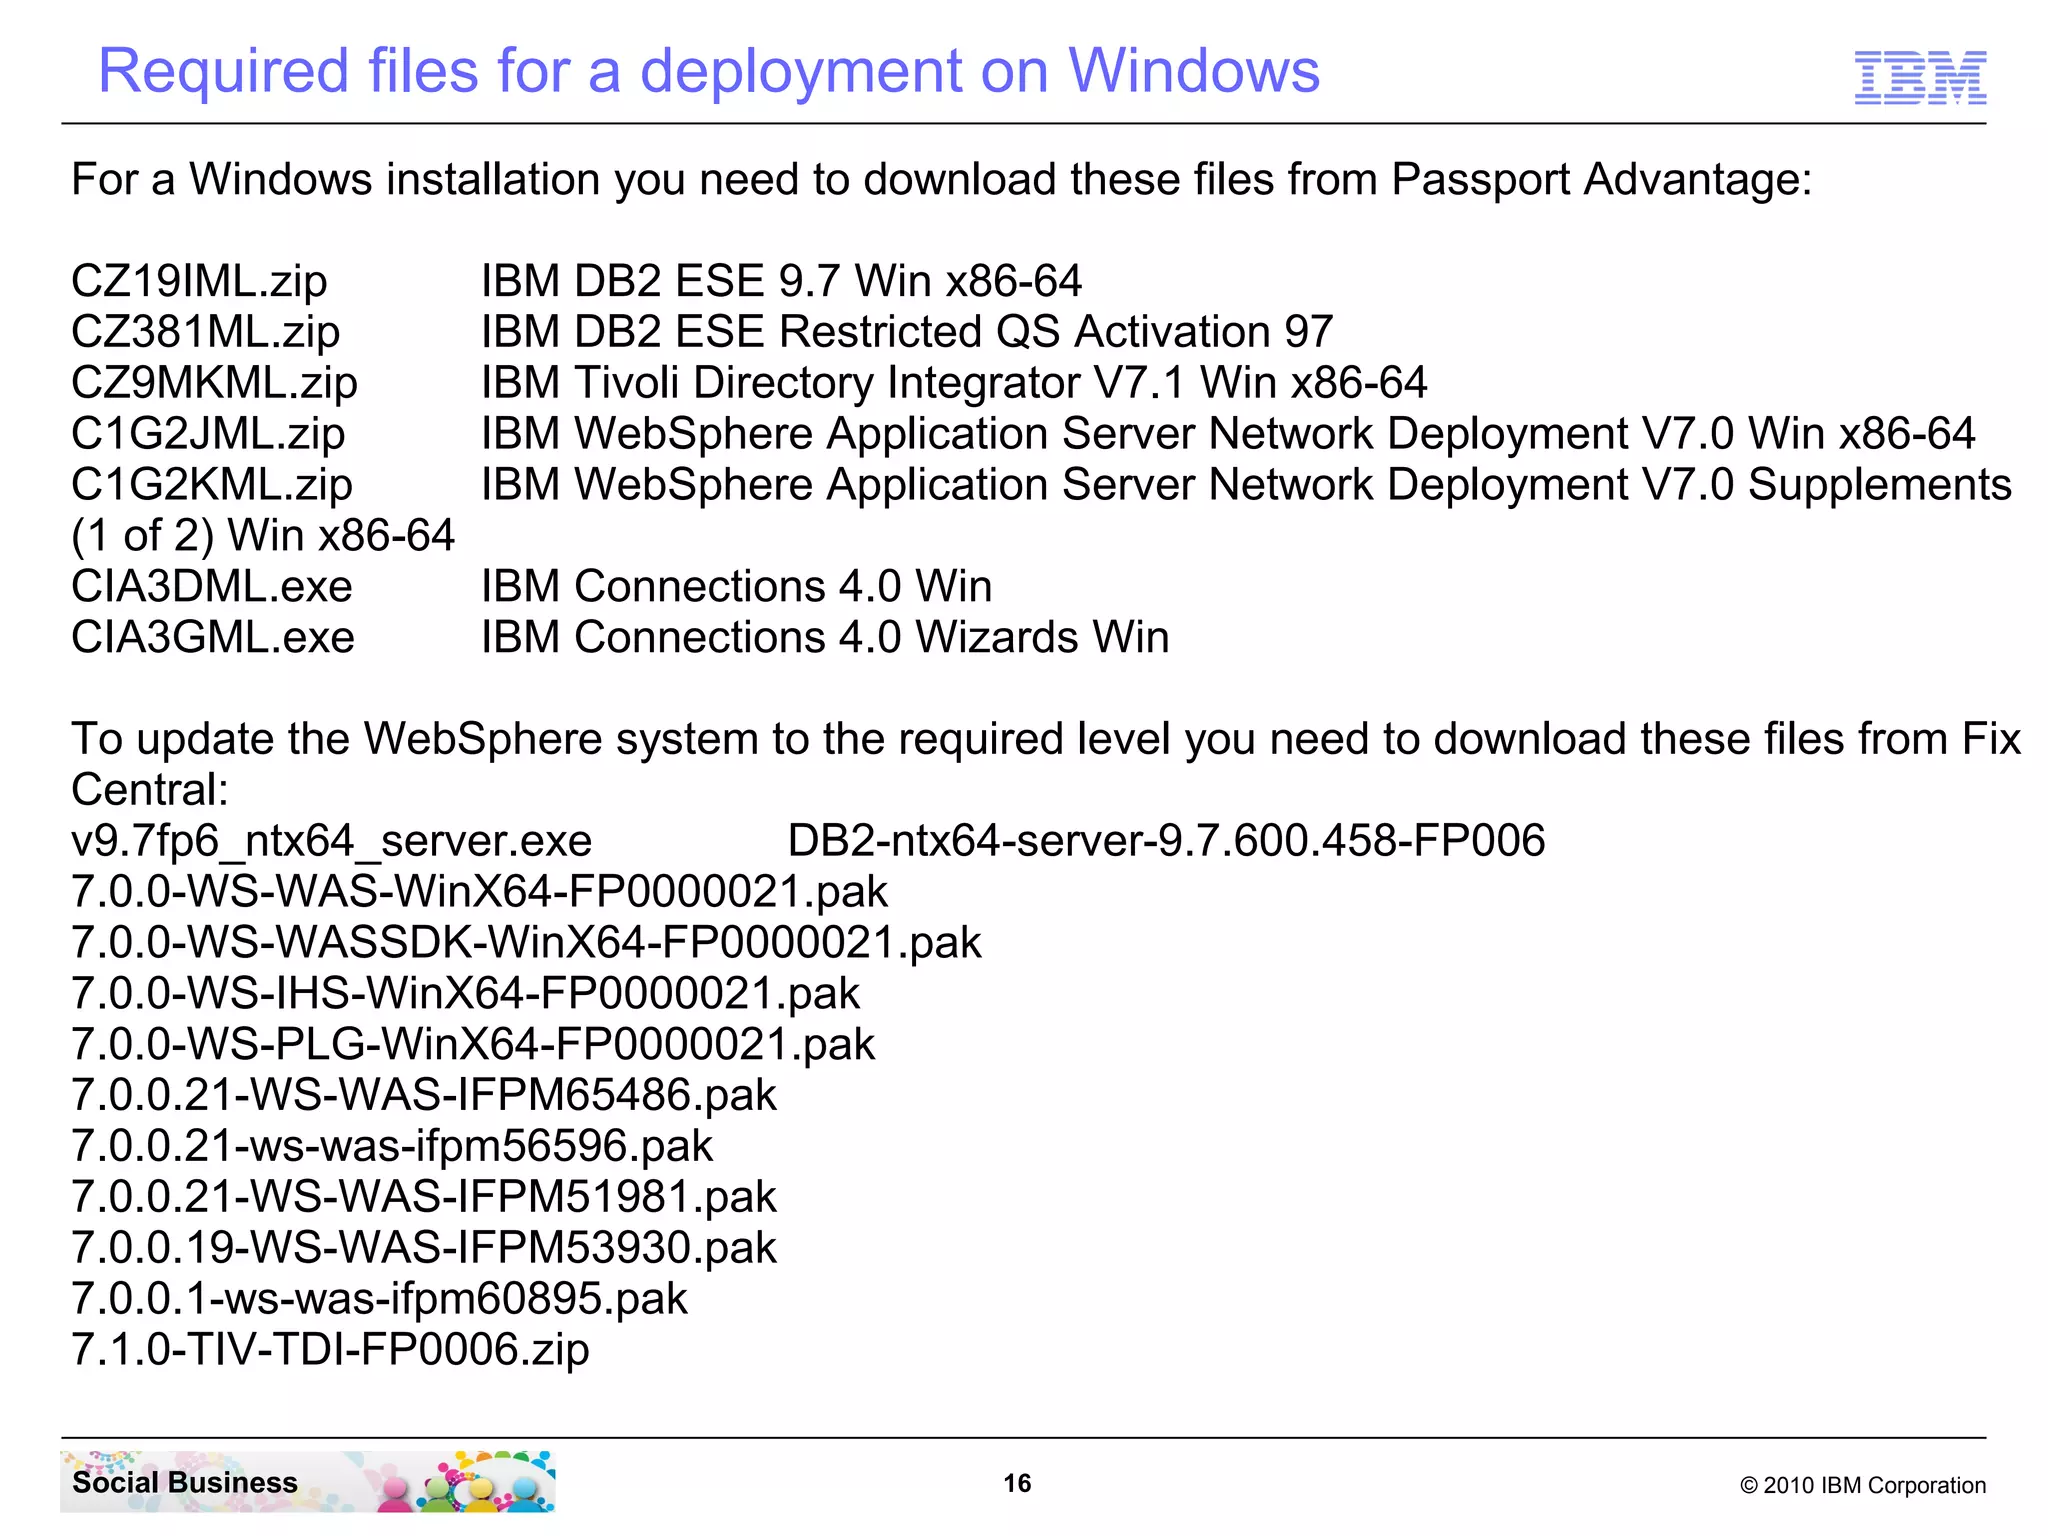
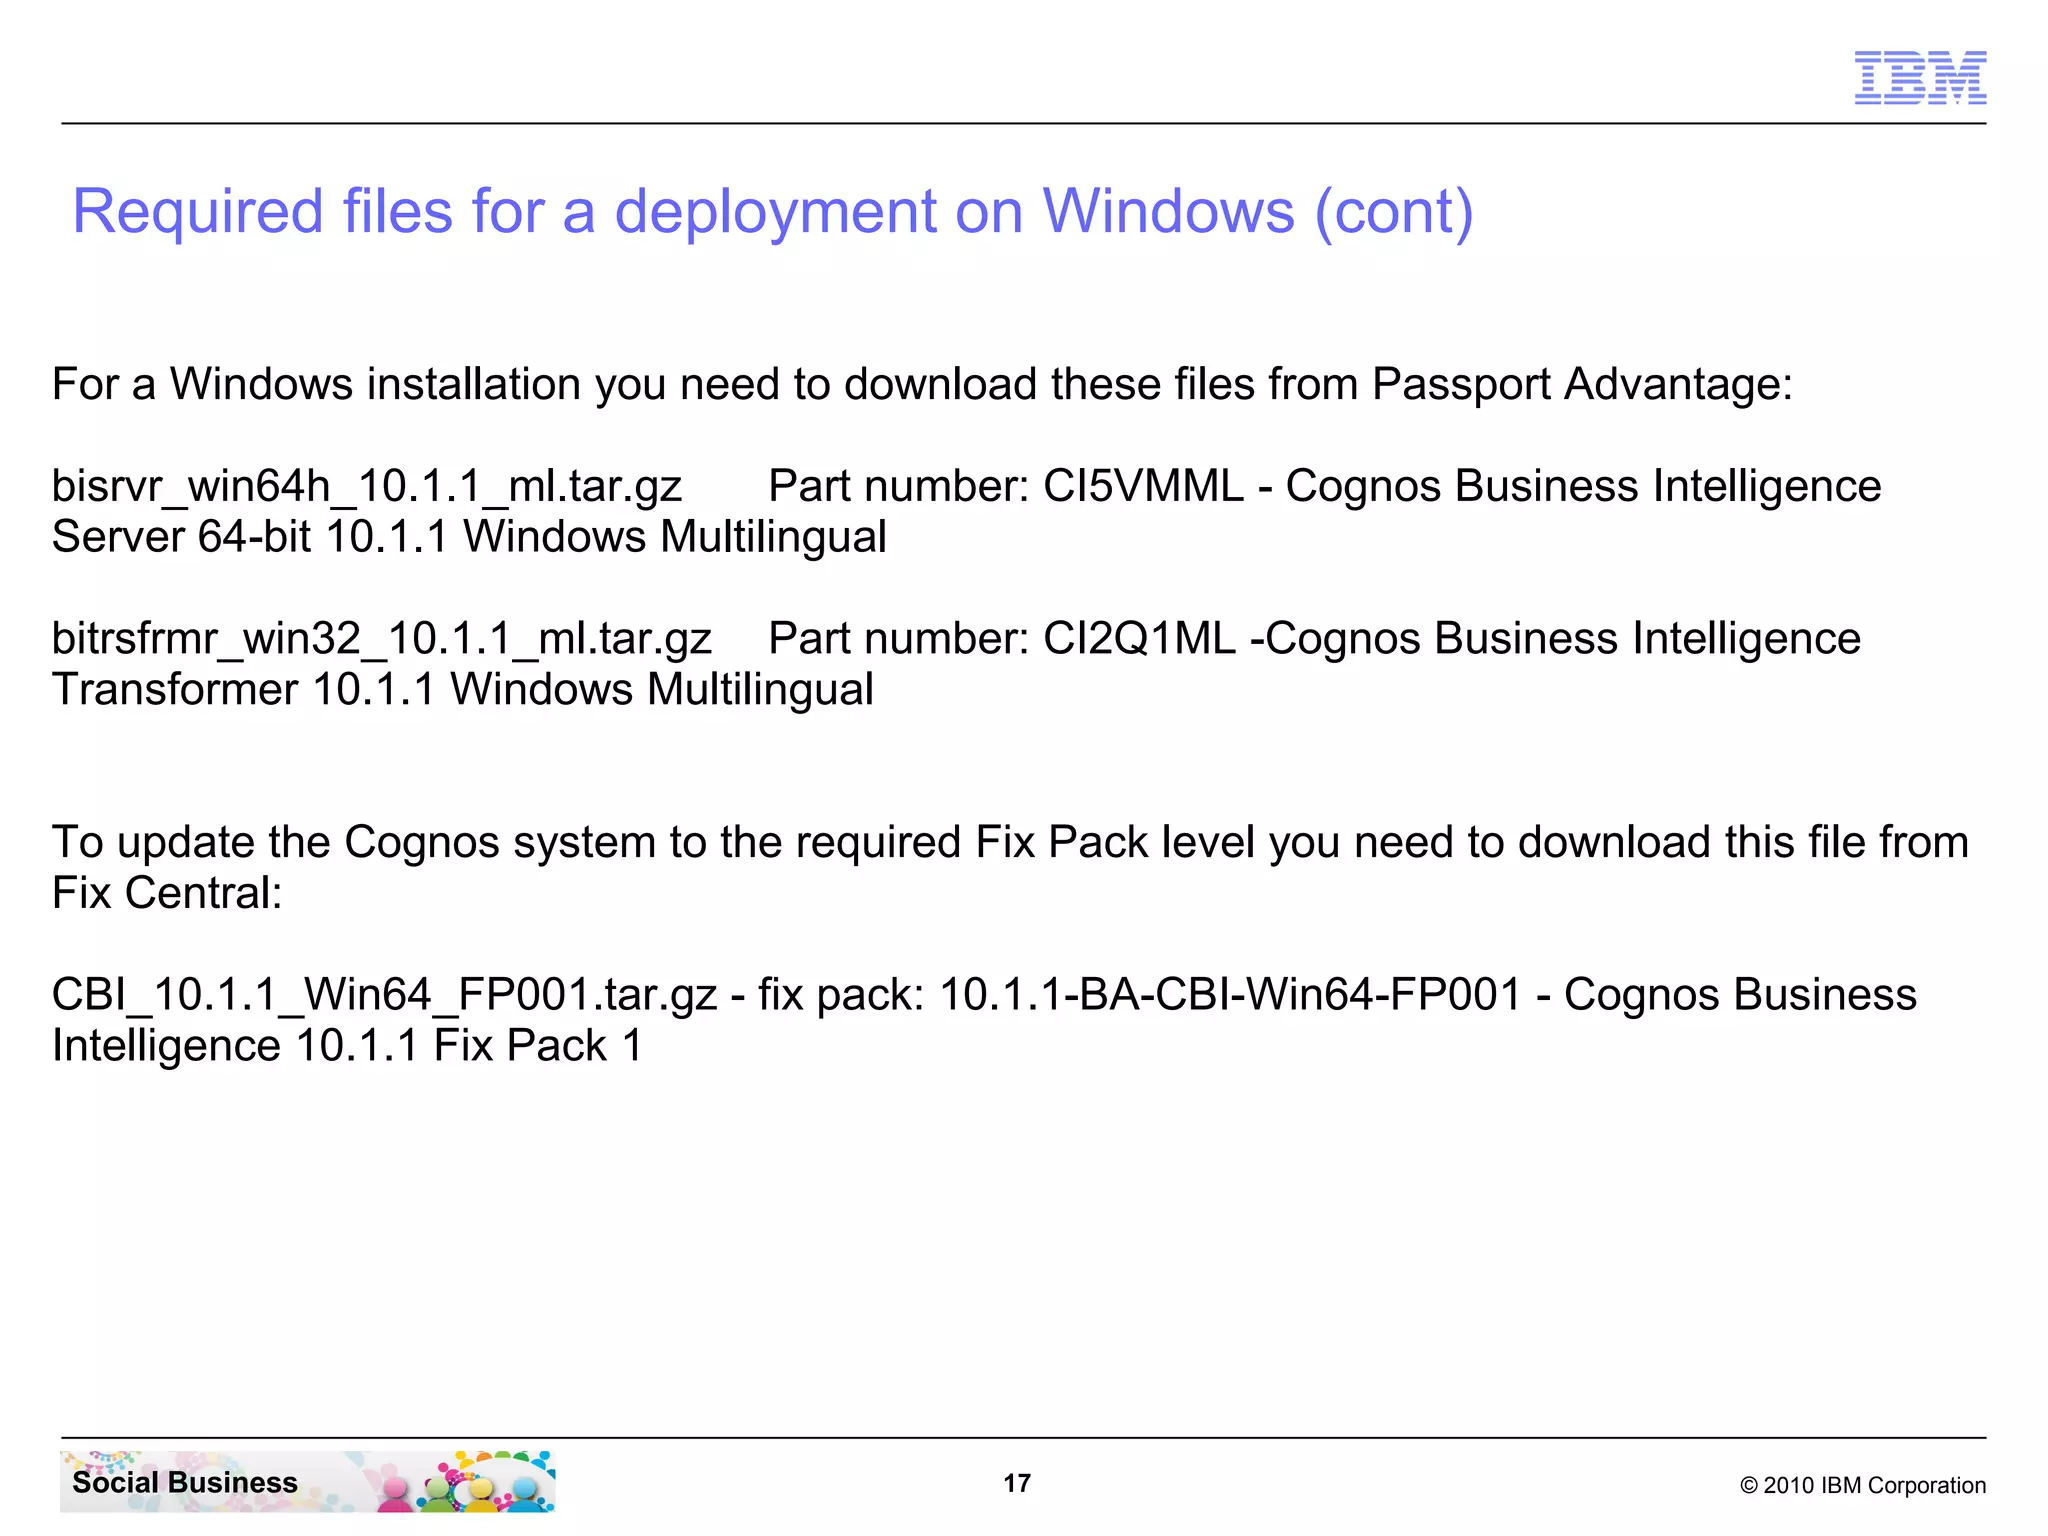
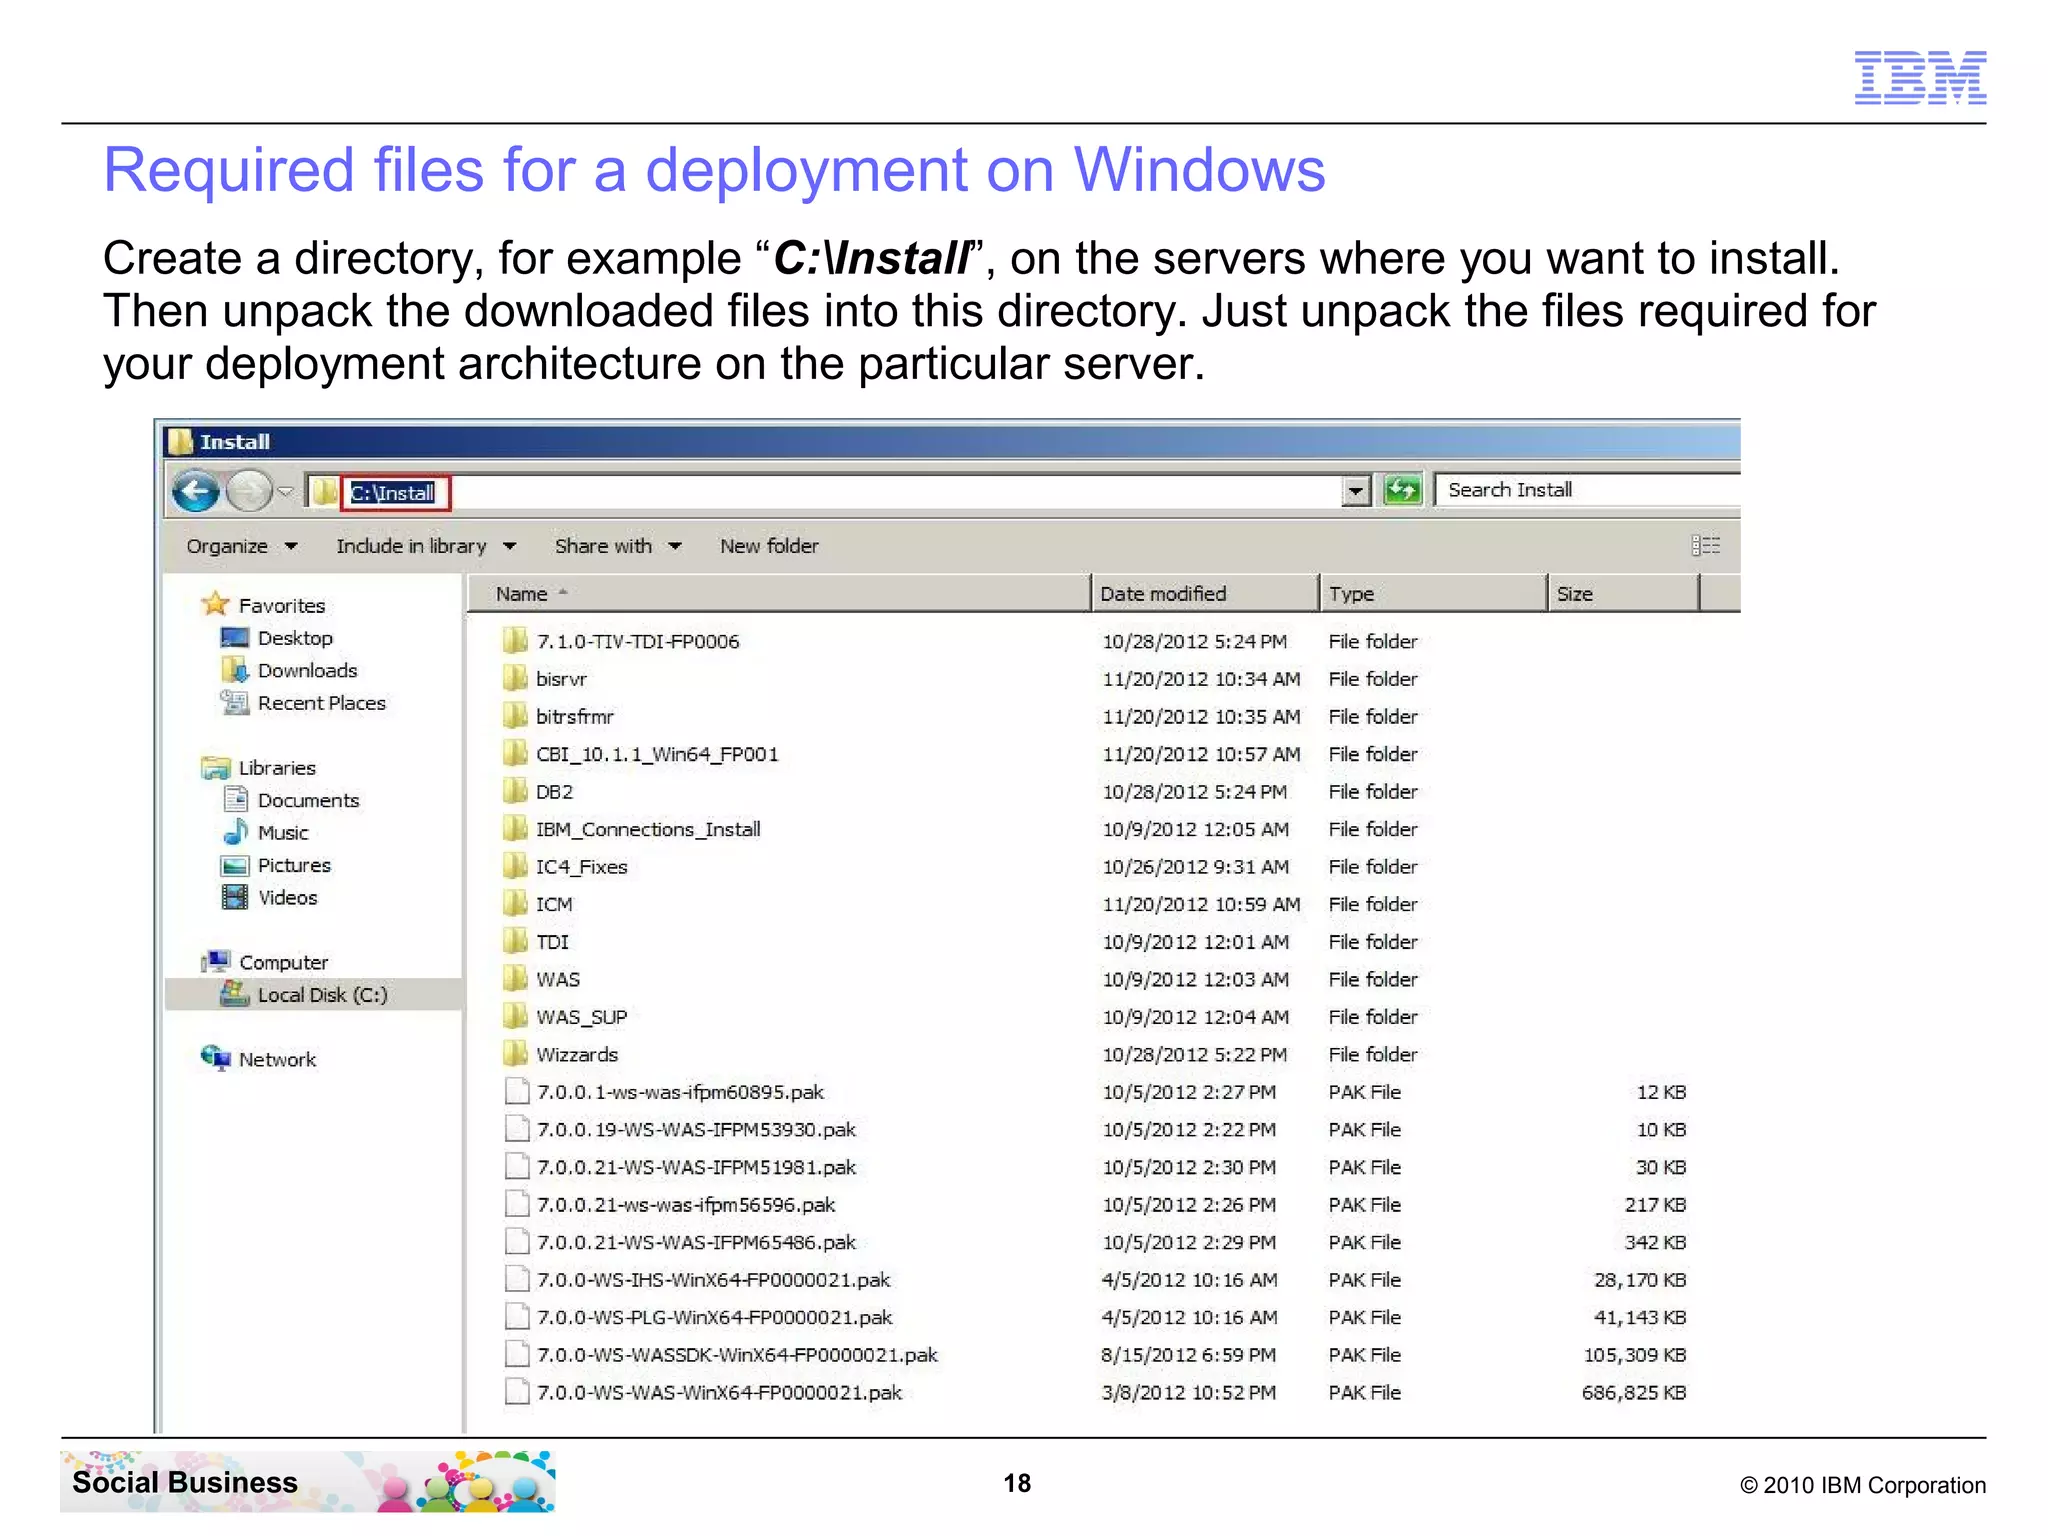
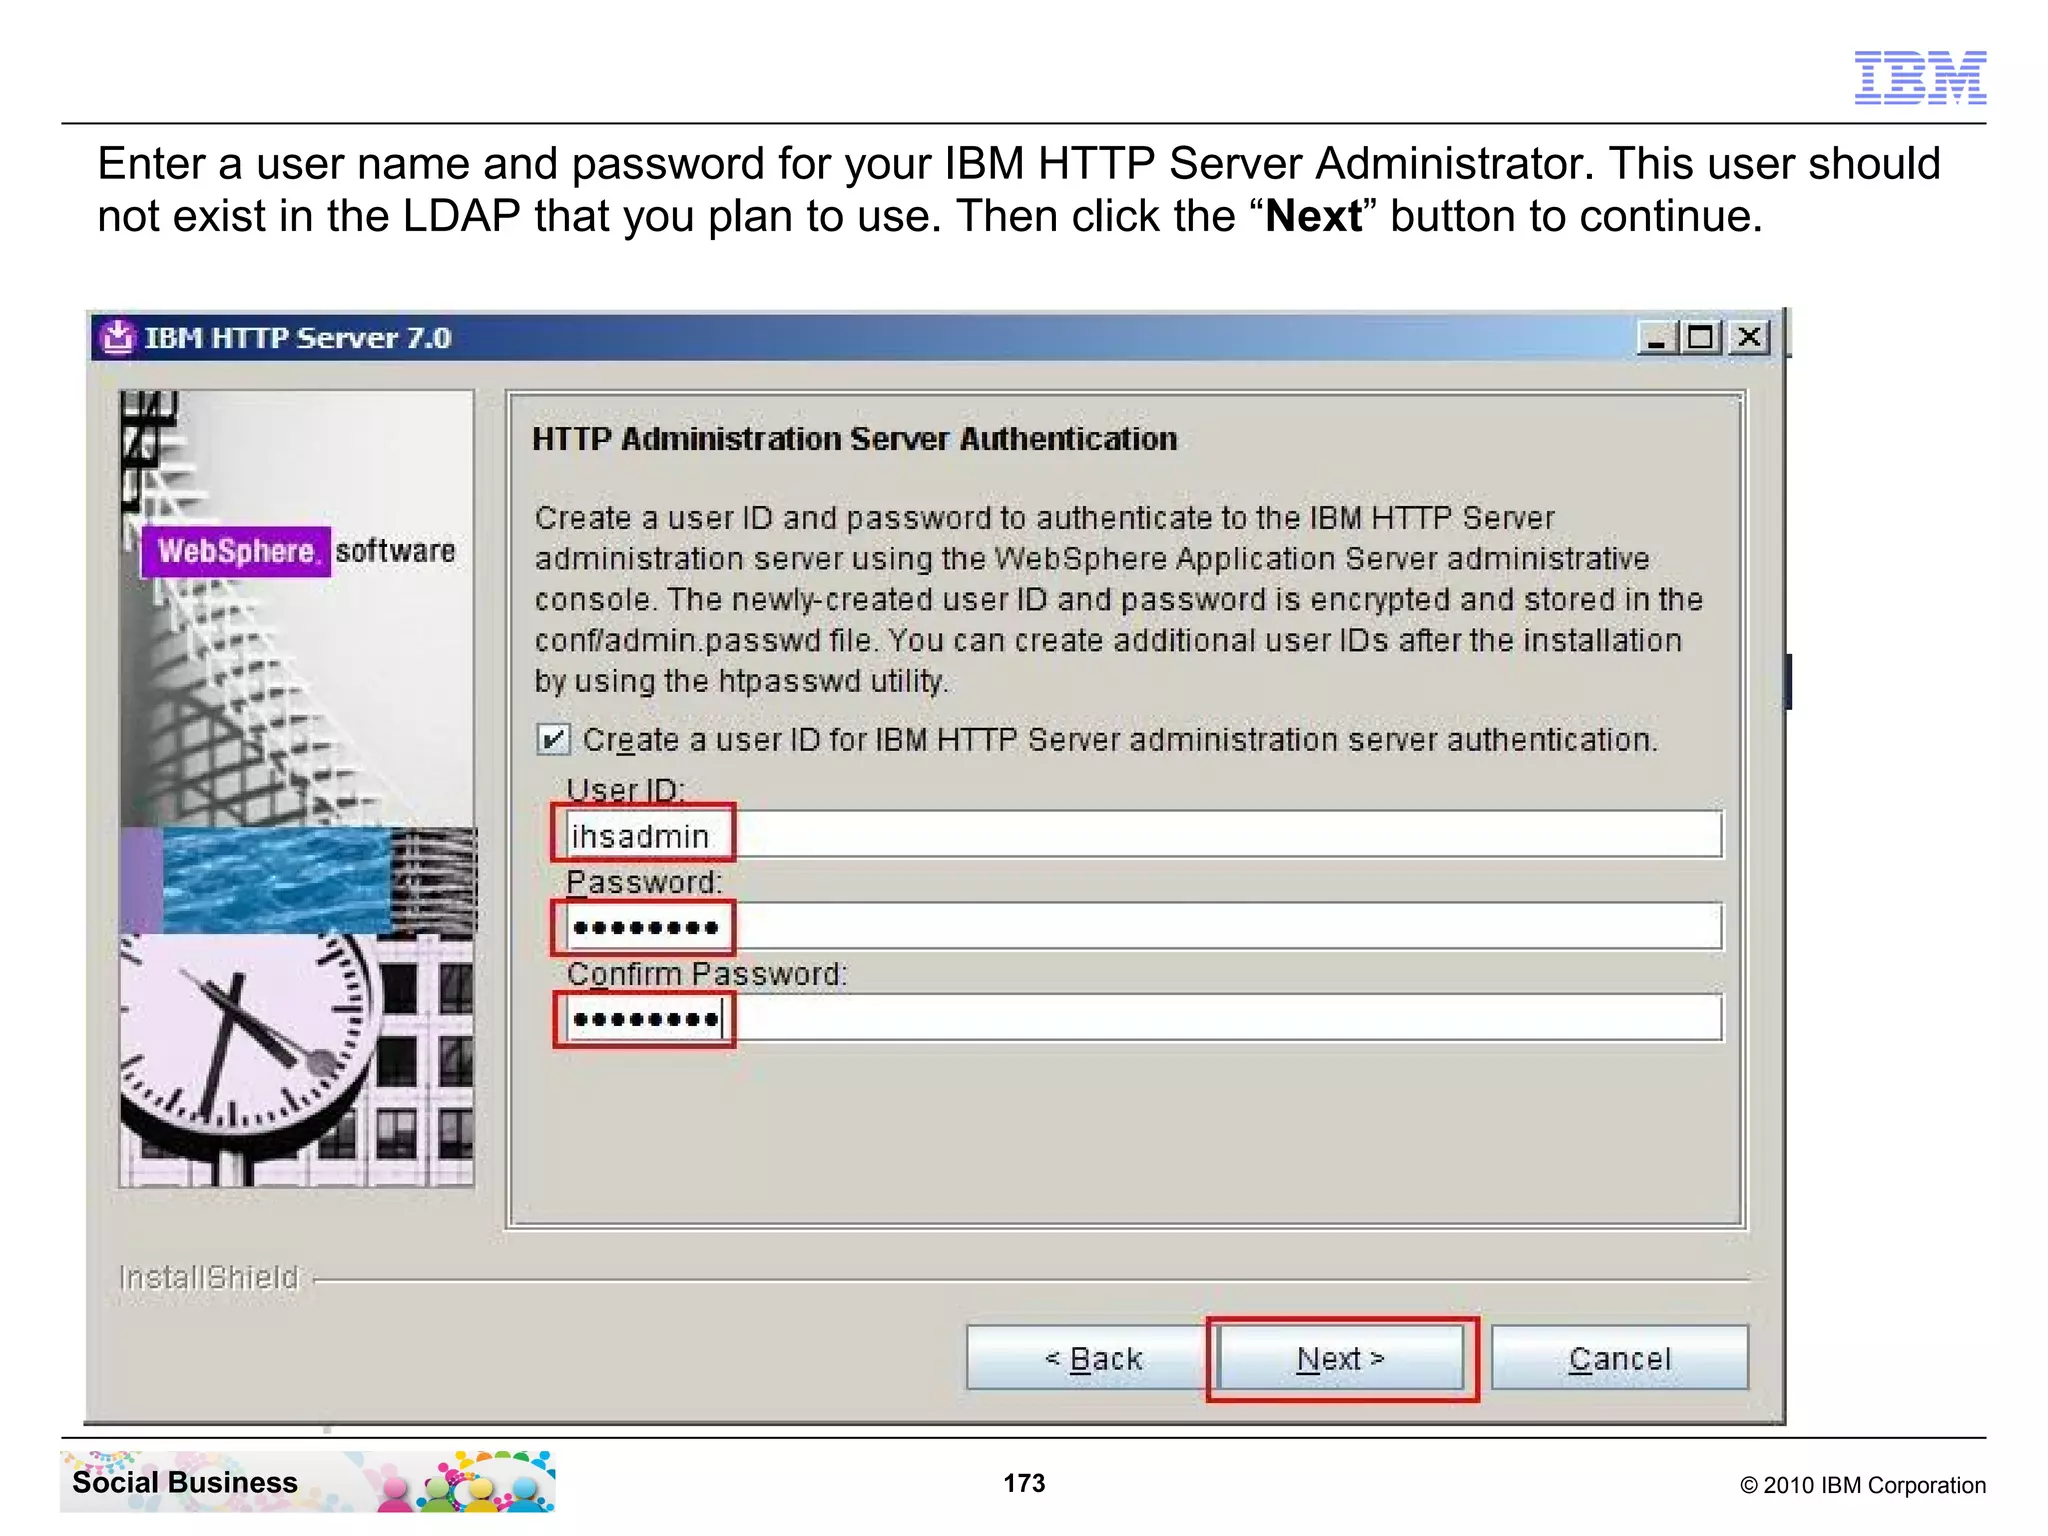
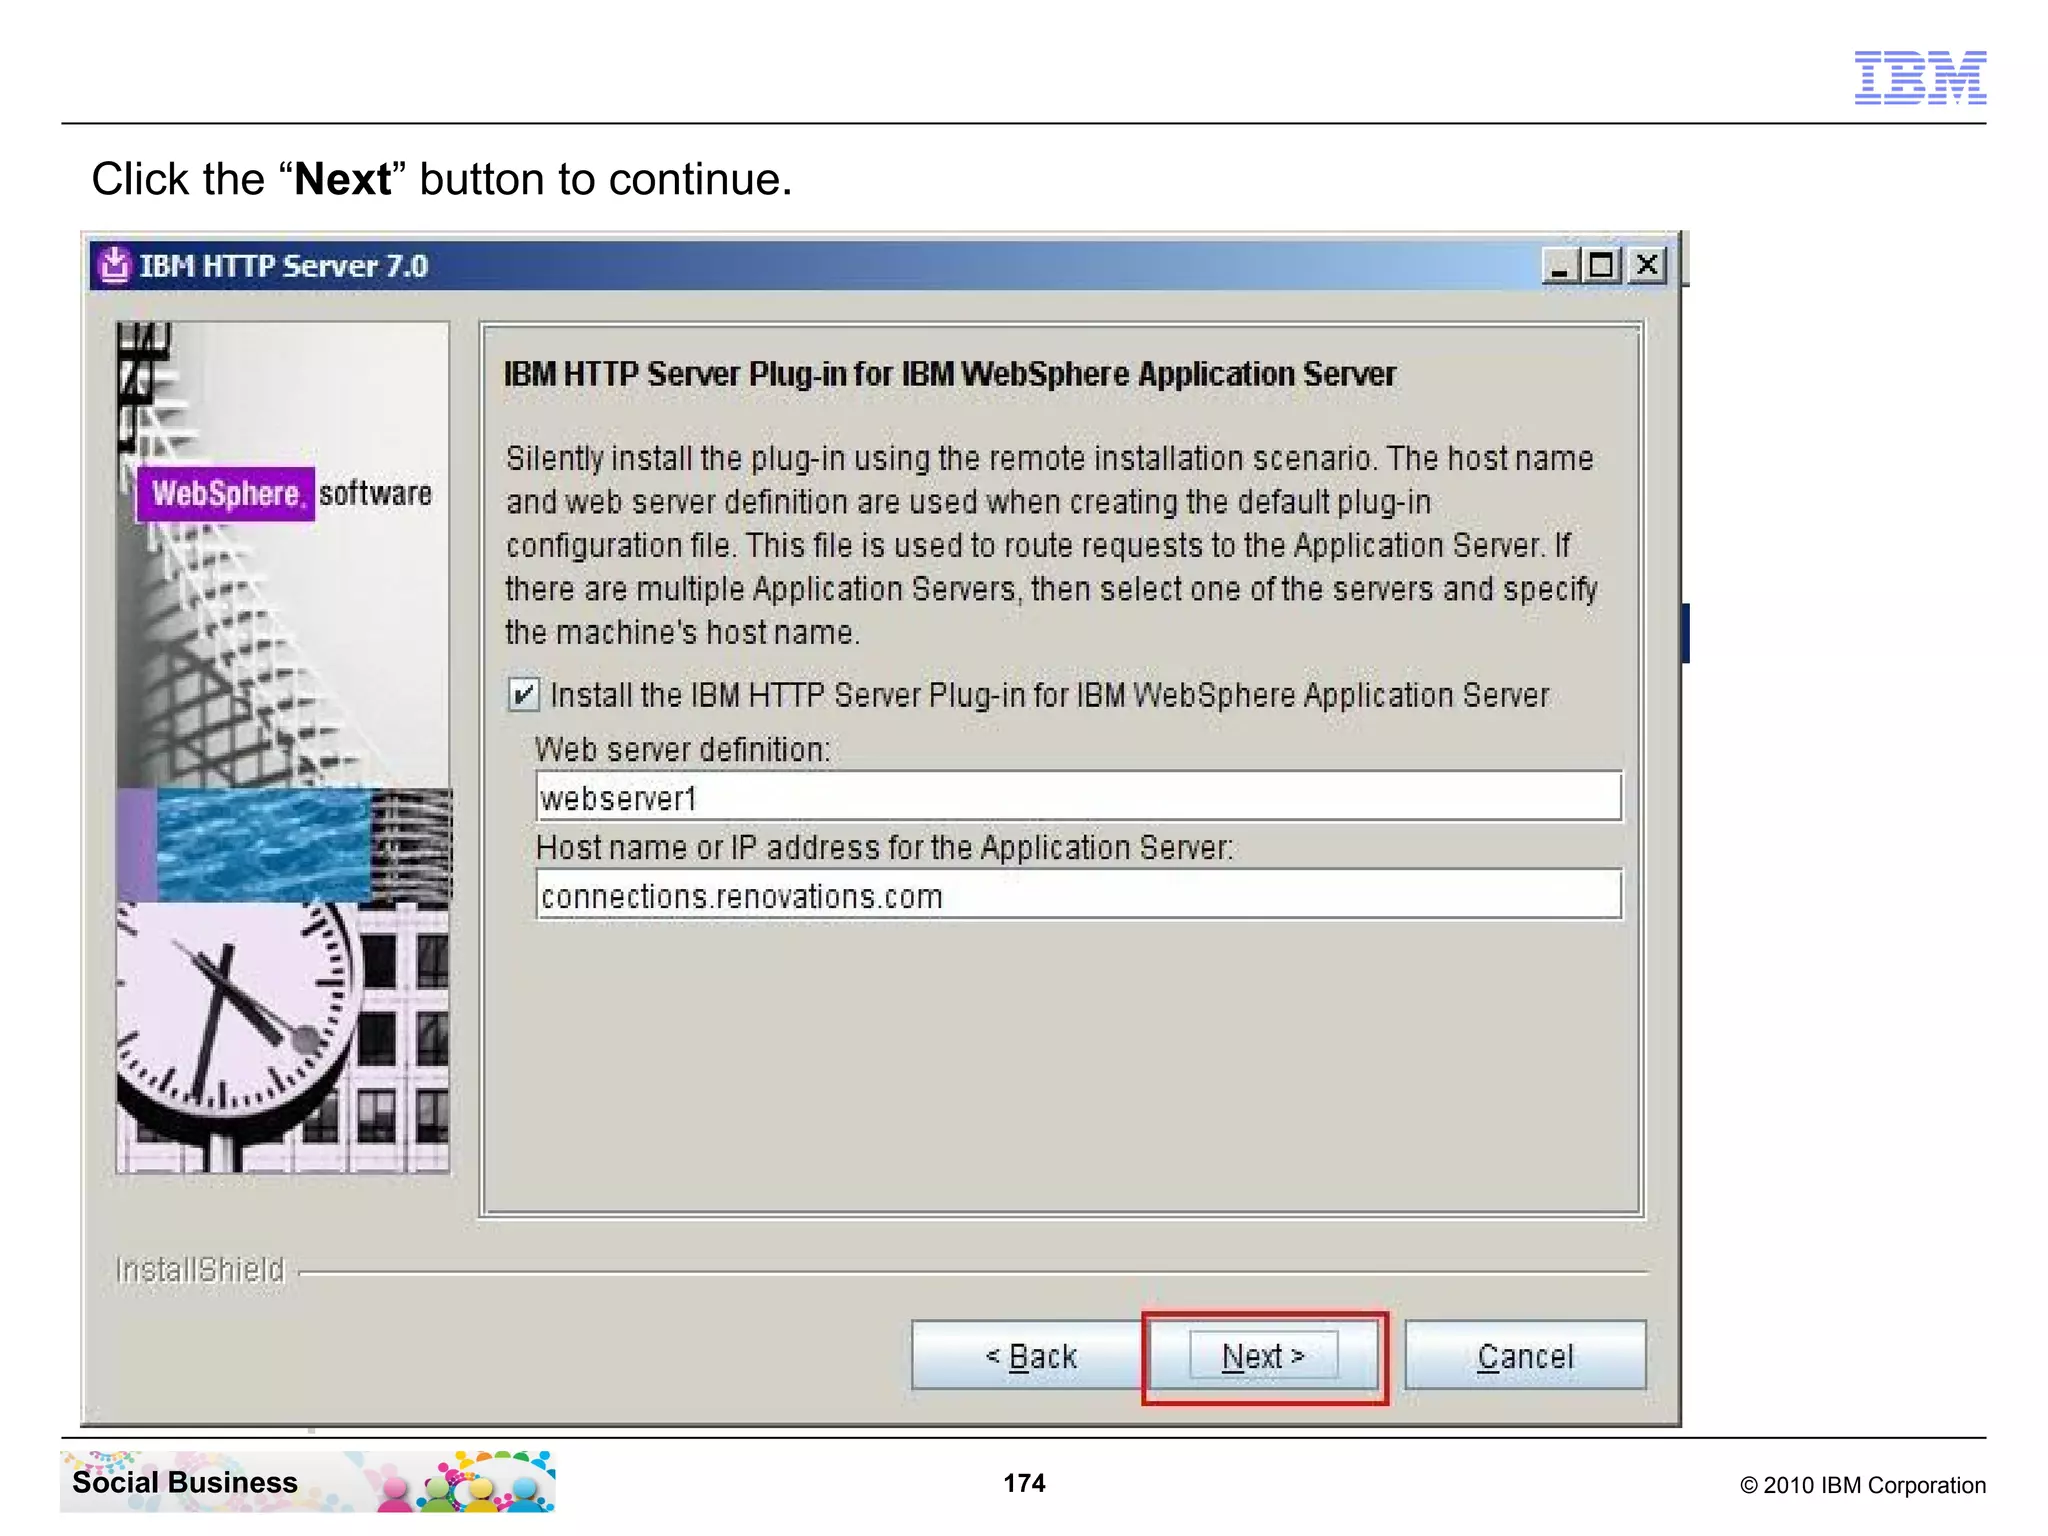
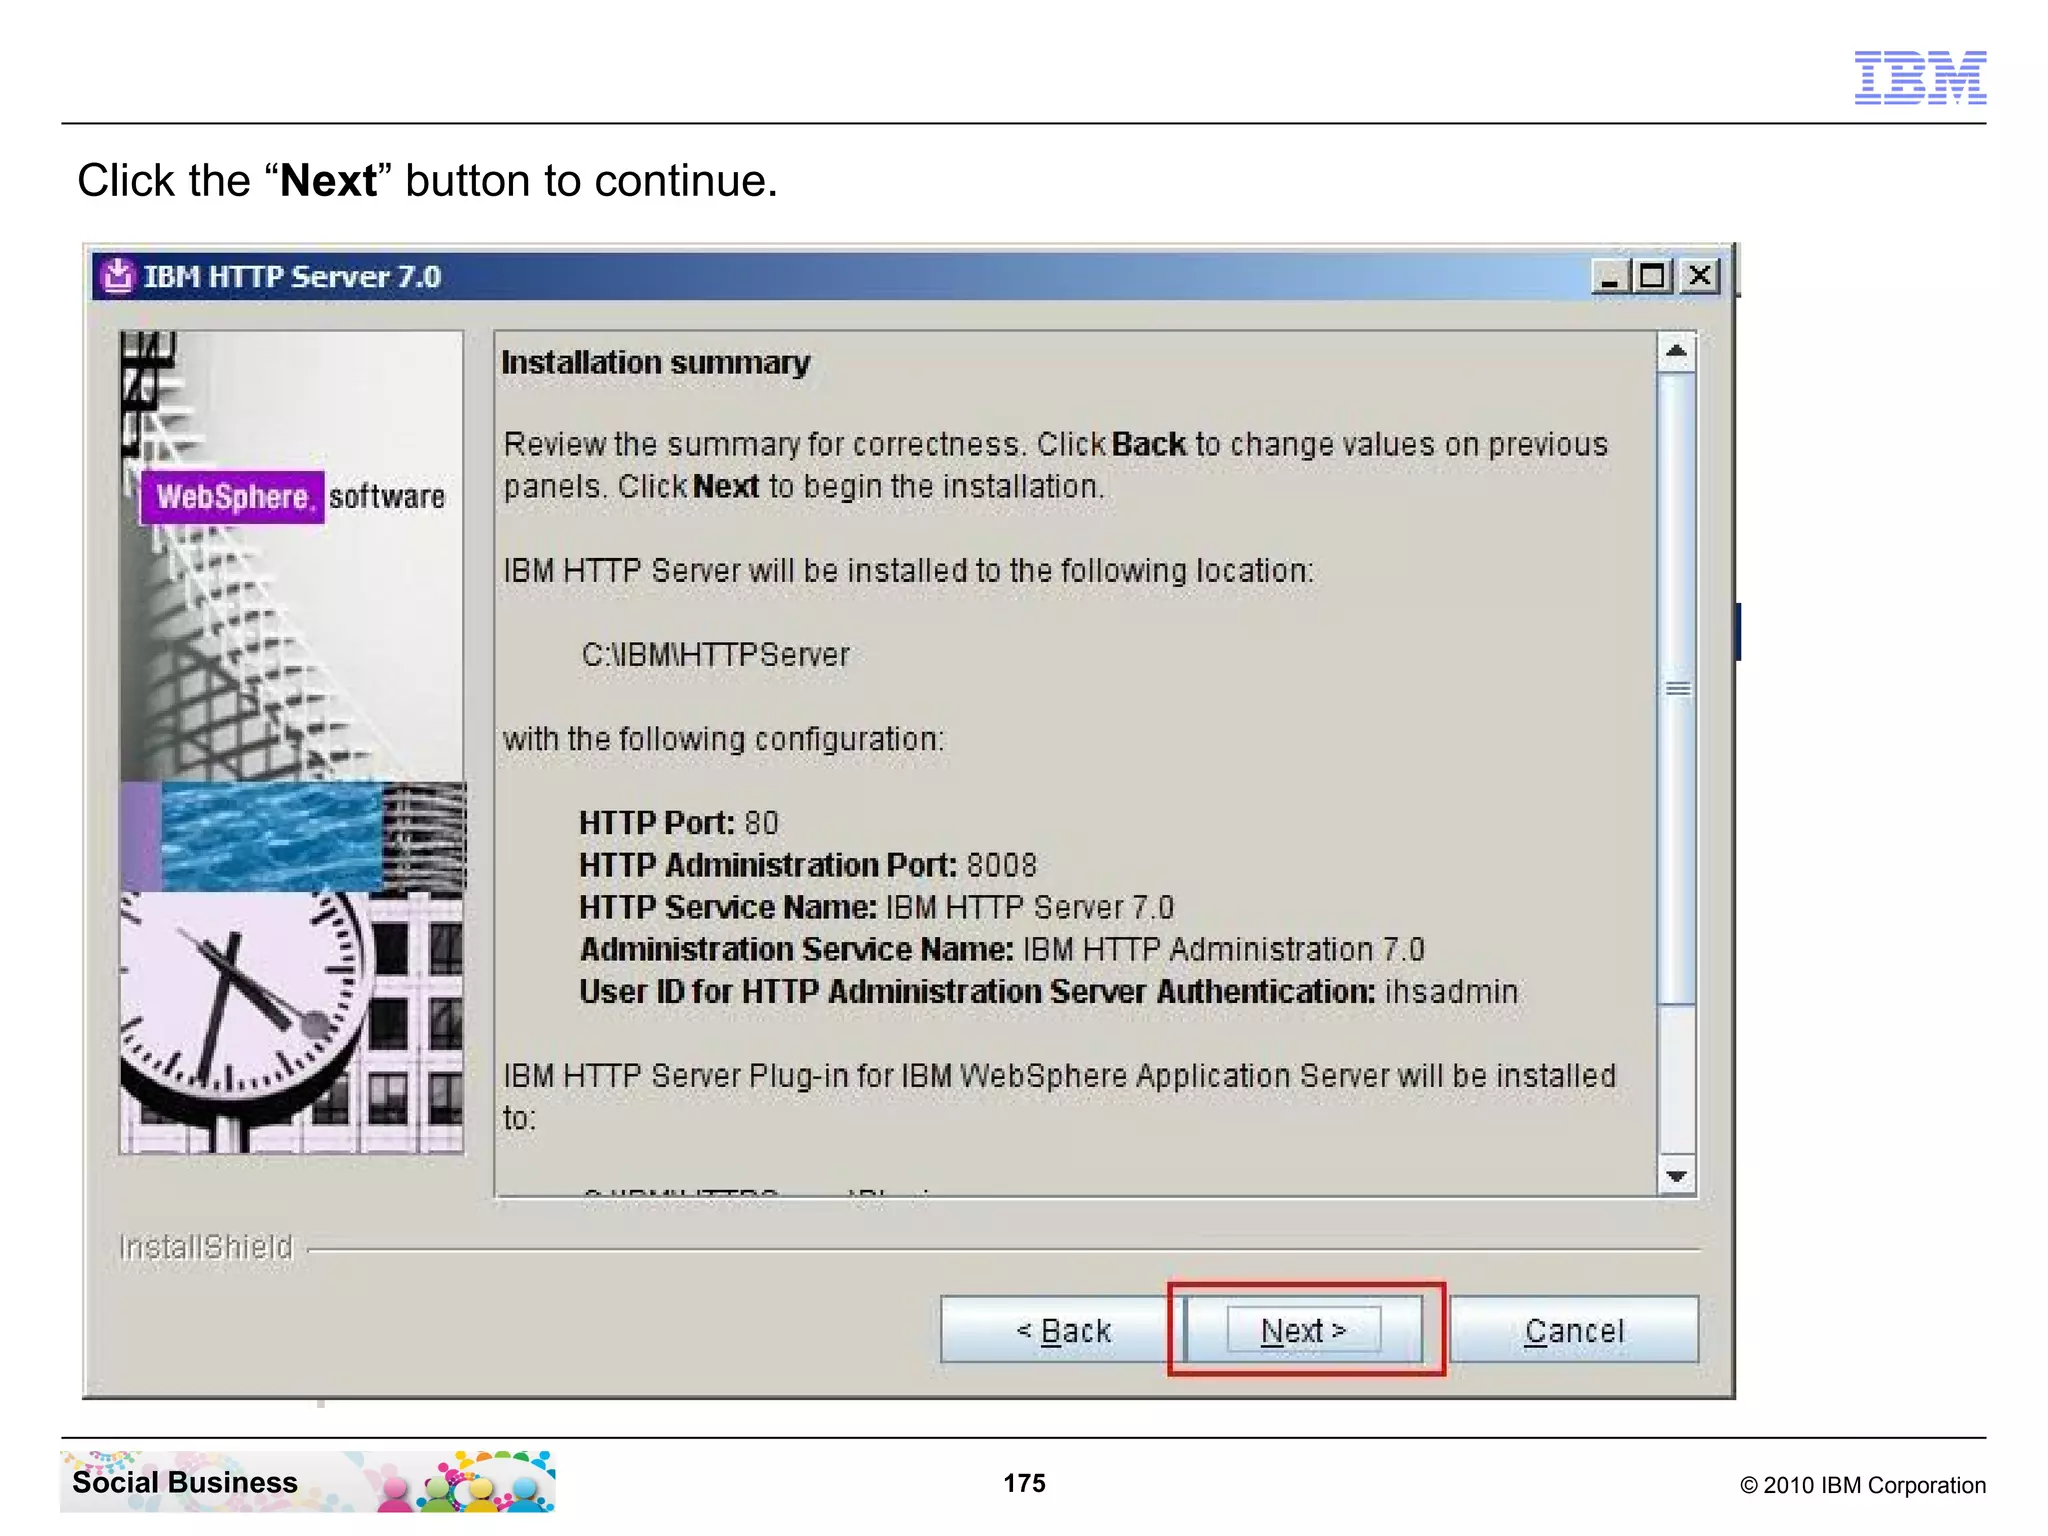
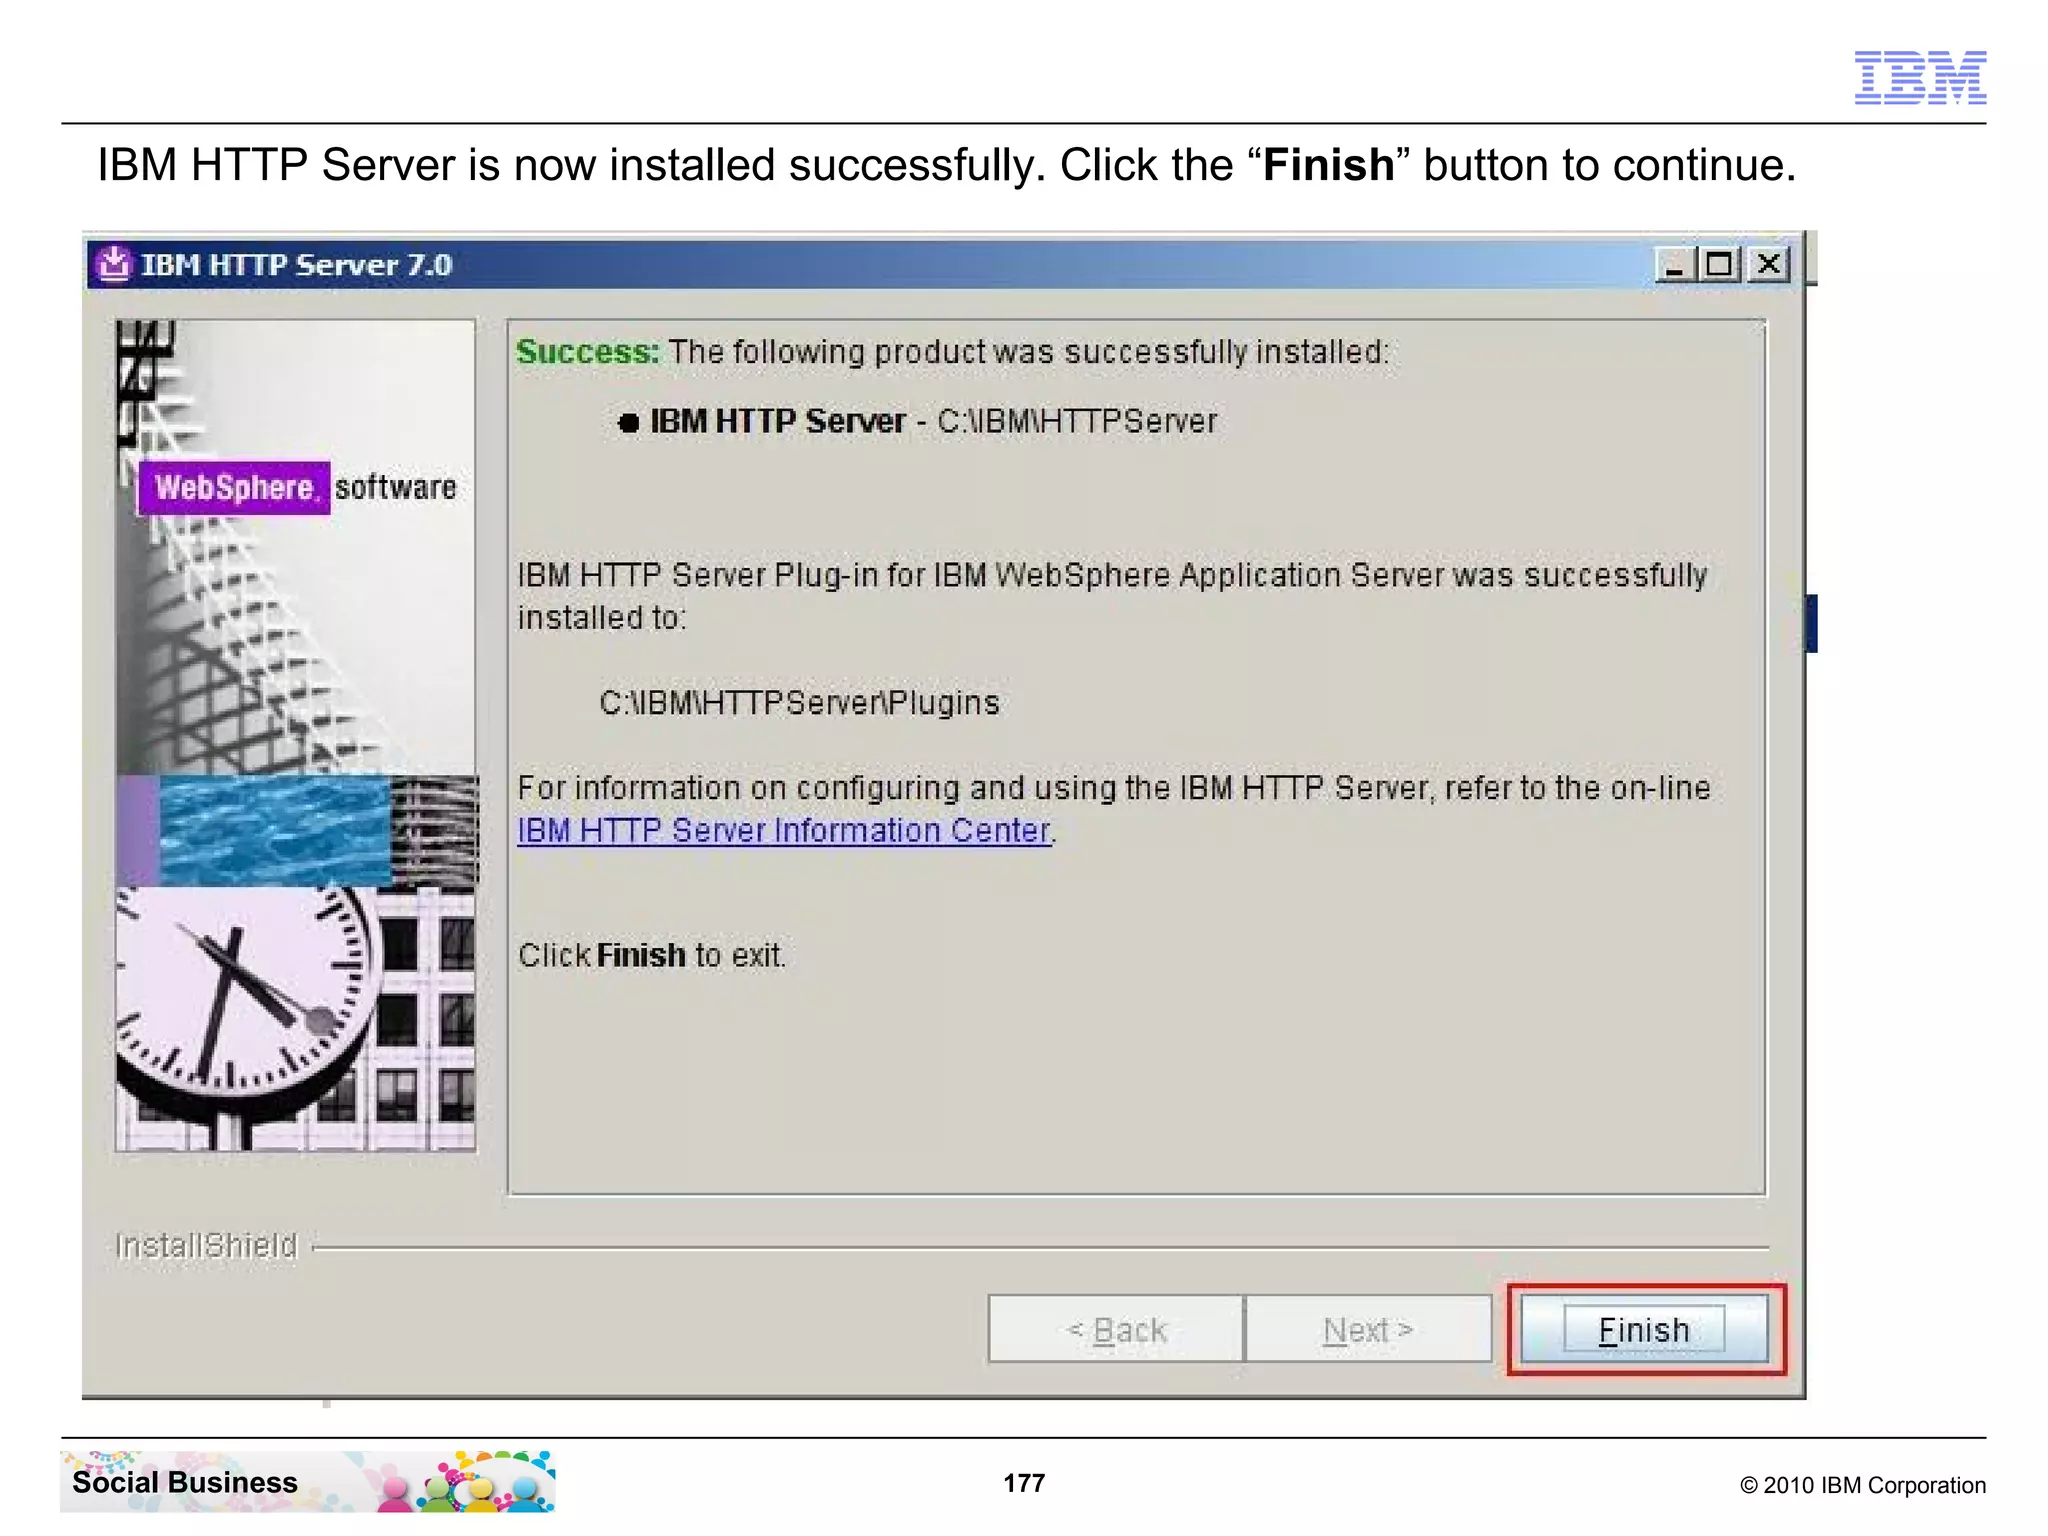
This document provides a guide for quick implementation of an IBM Connections 4.0 server, primarily for small deployments and proof of concepts. It outlines system requirements, installation steps, and necessary components while cautioning against using the guide for production environments. The guide emphasizes the support needed for larger infrastructures and the need for specific IBM licenses and software.


