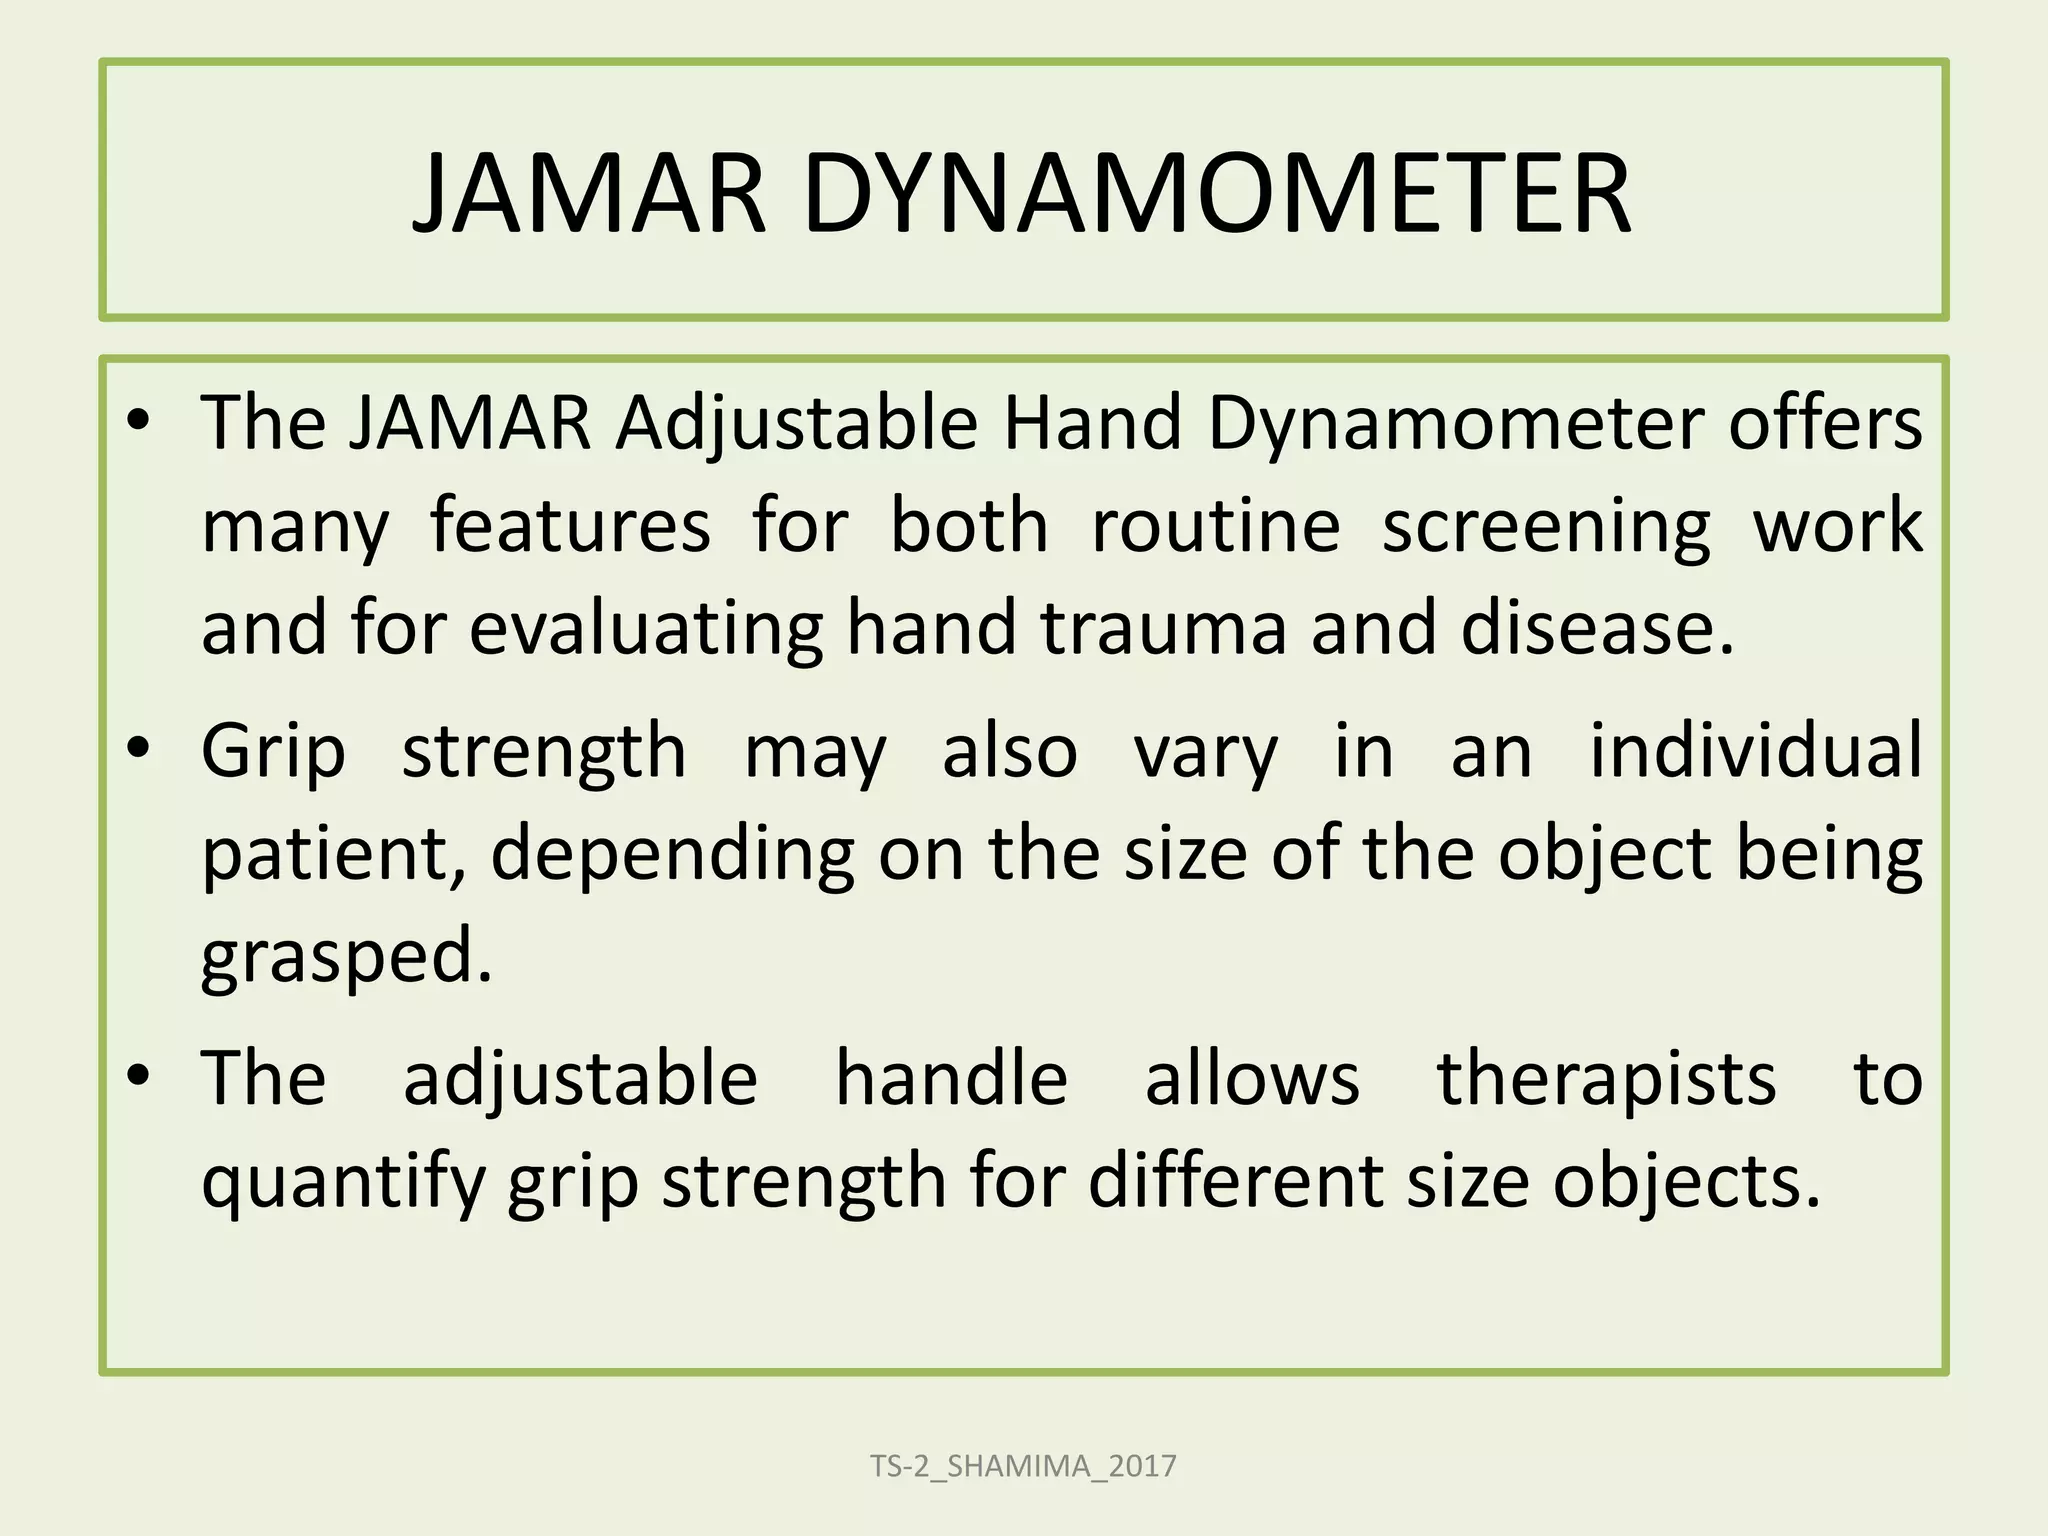
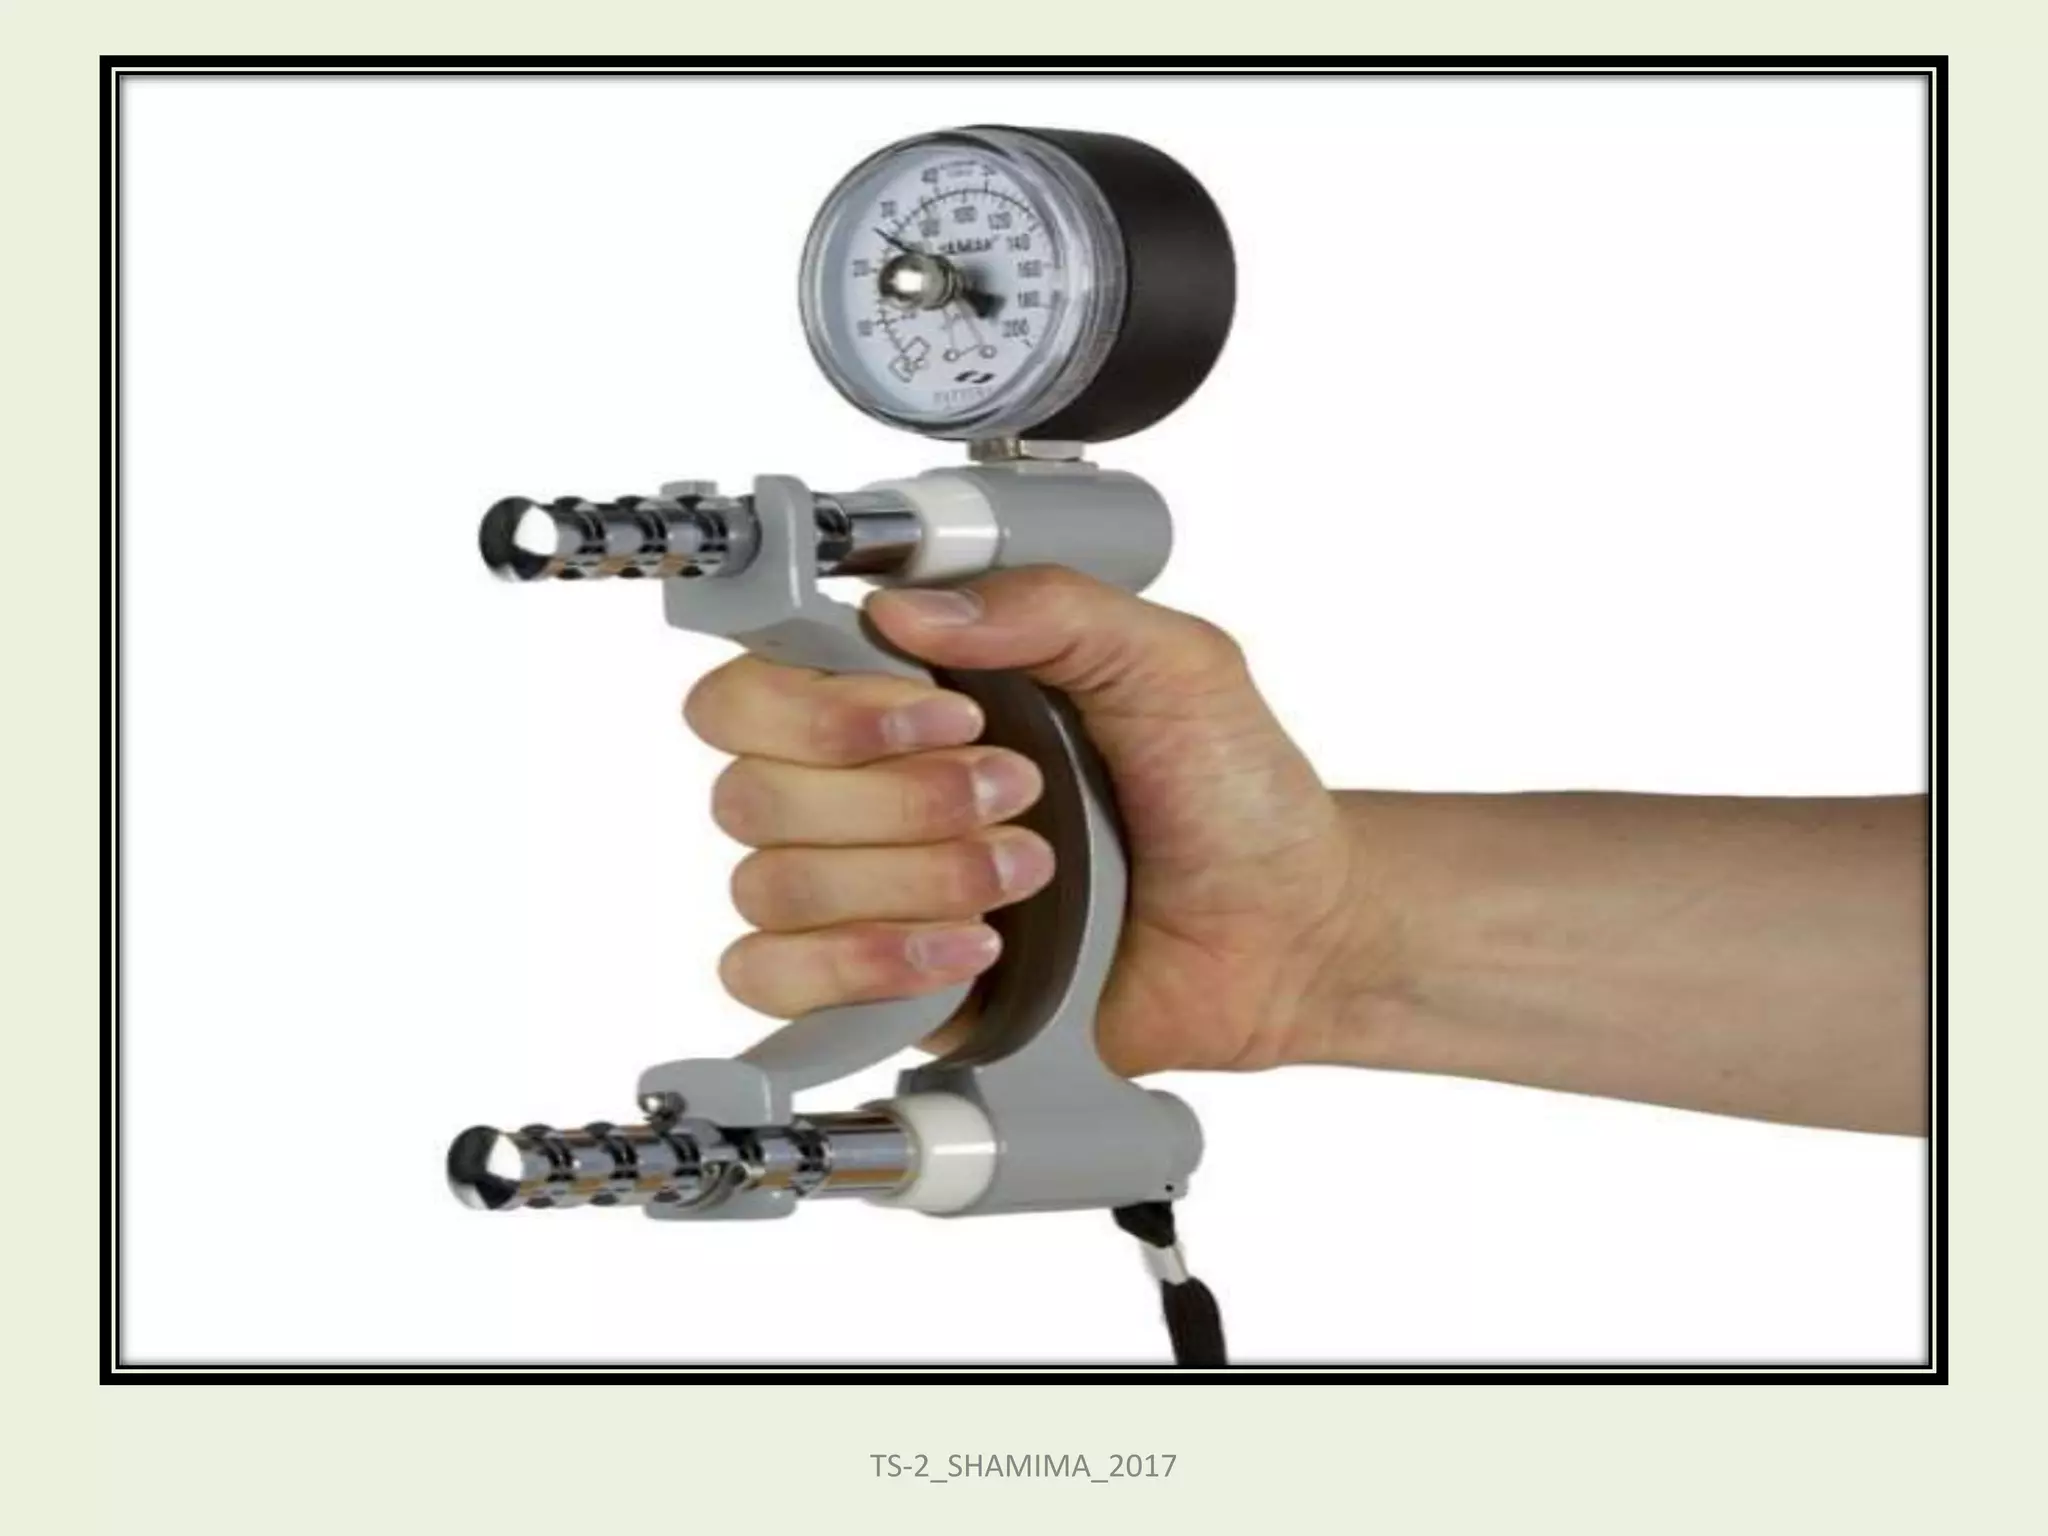
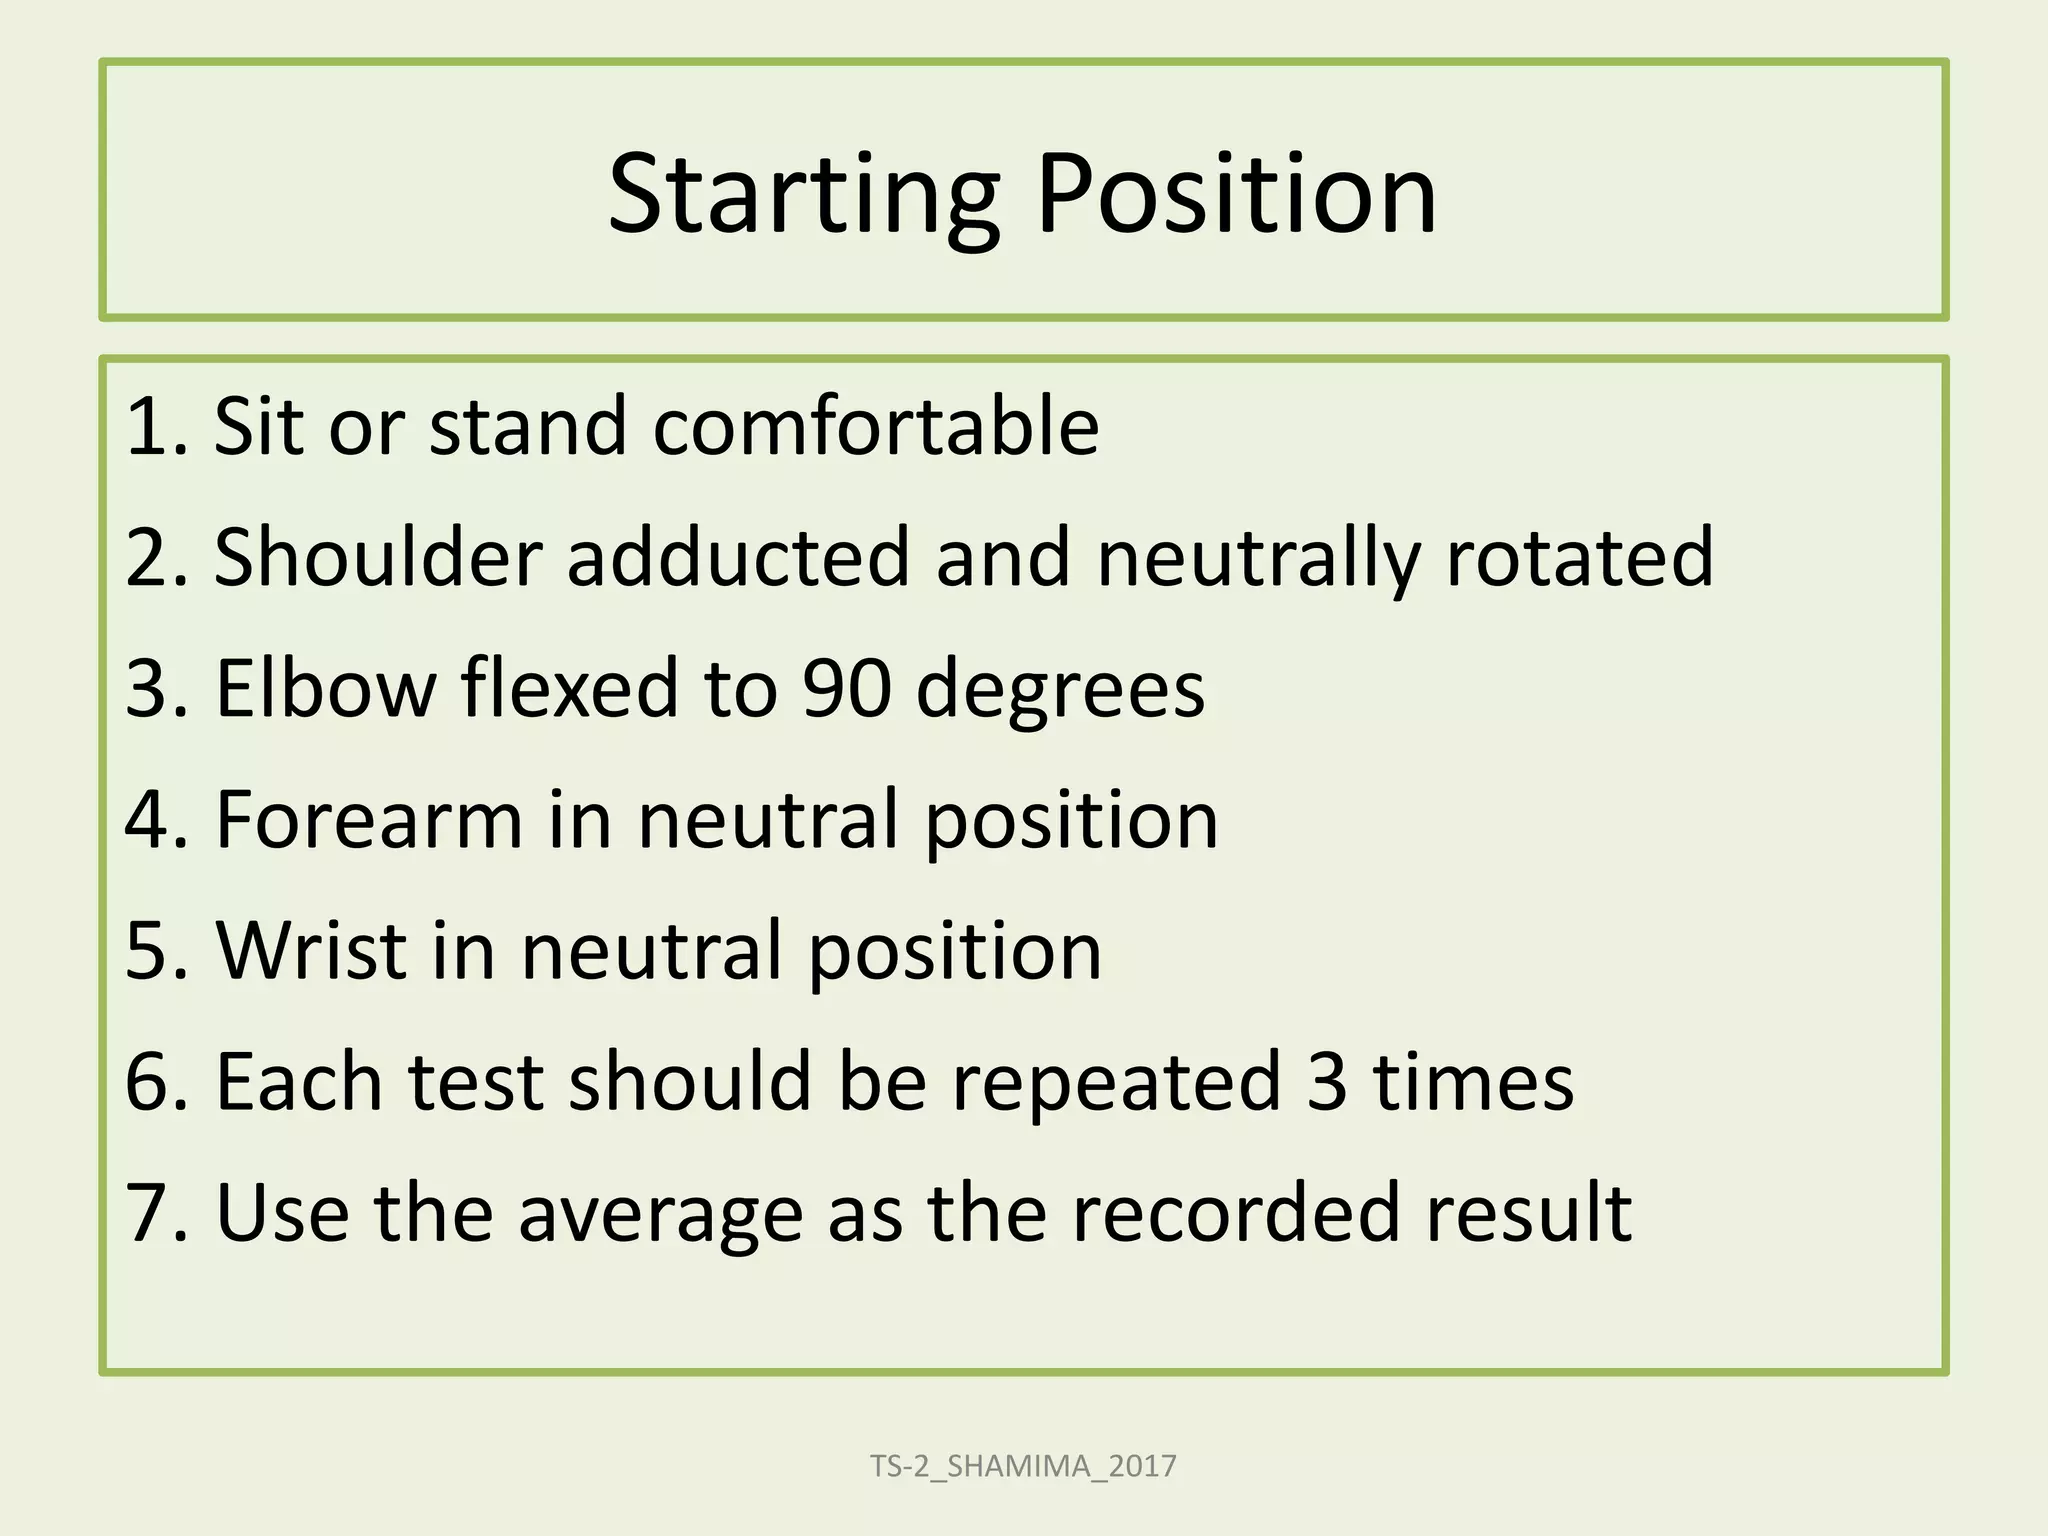
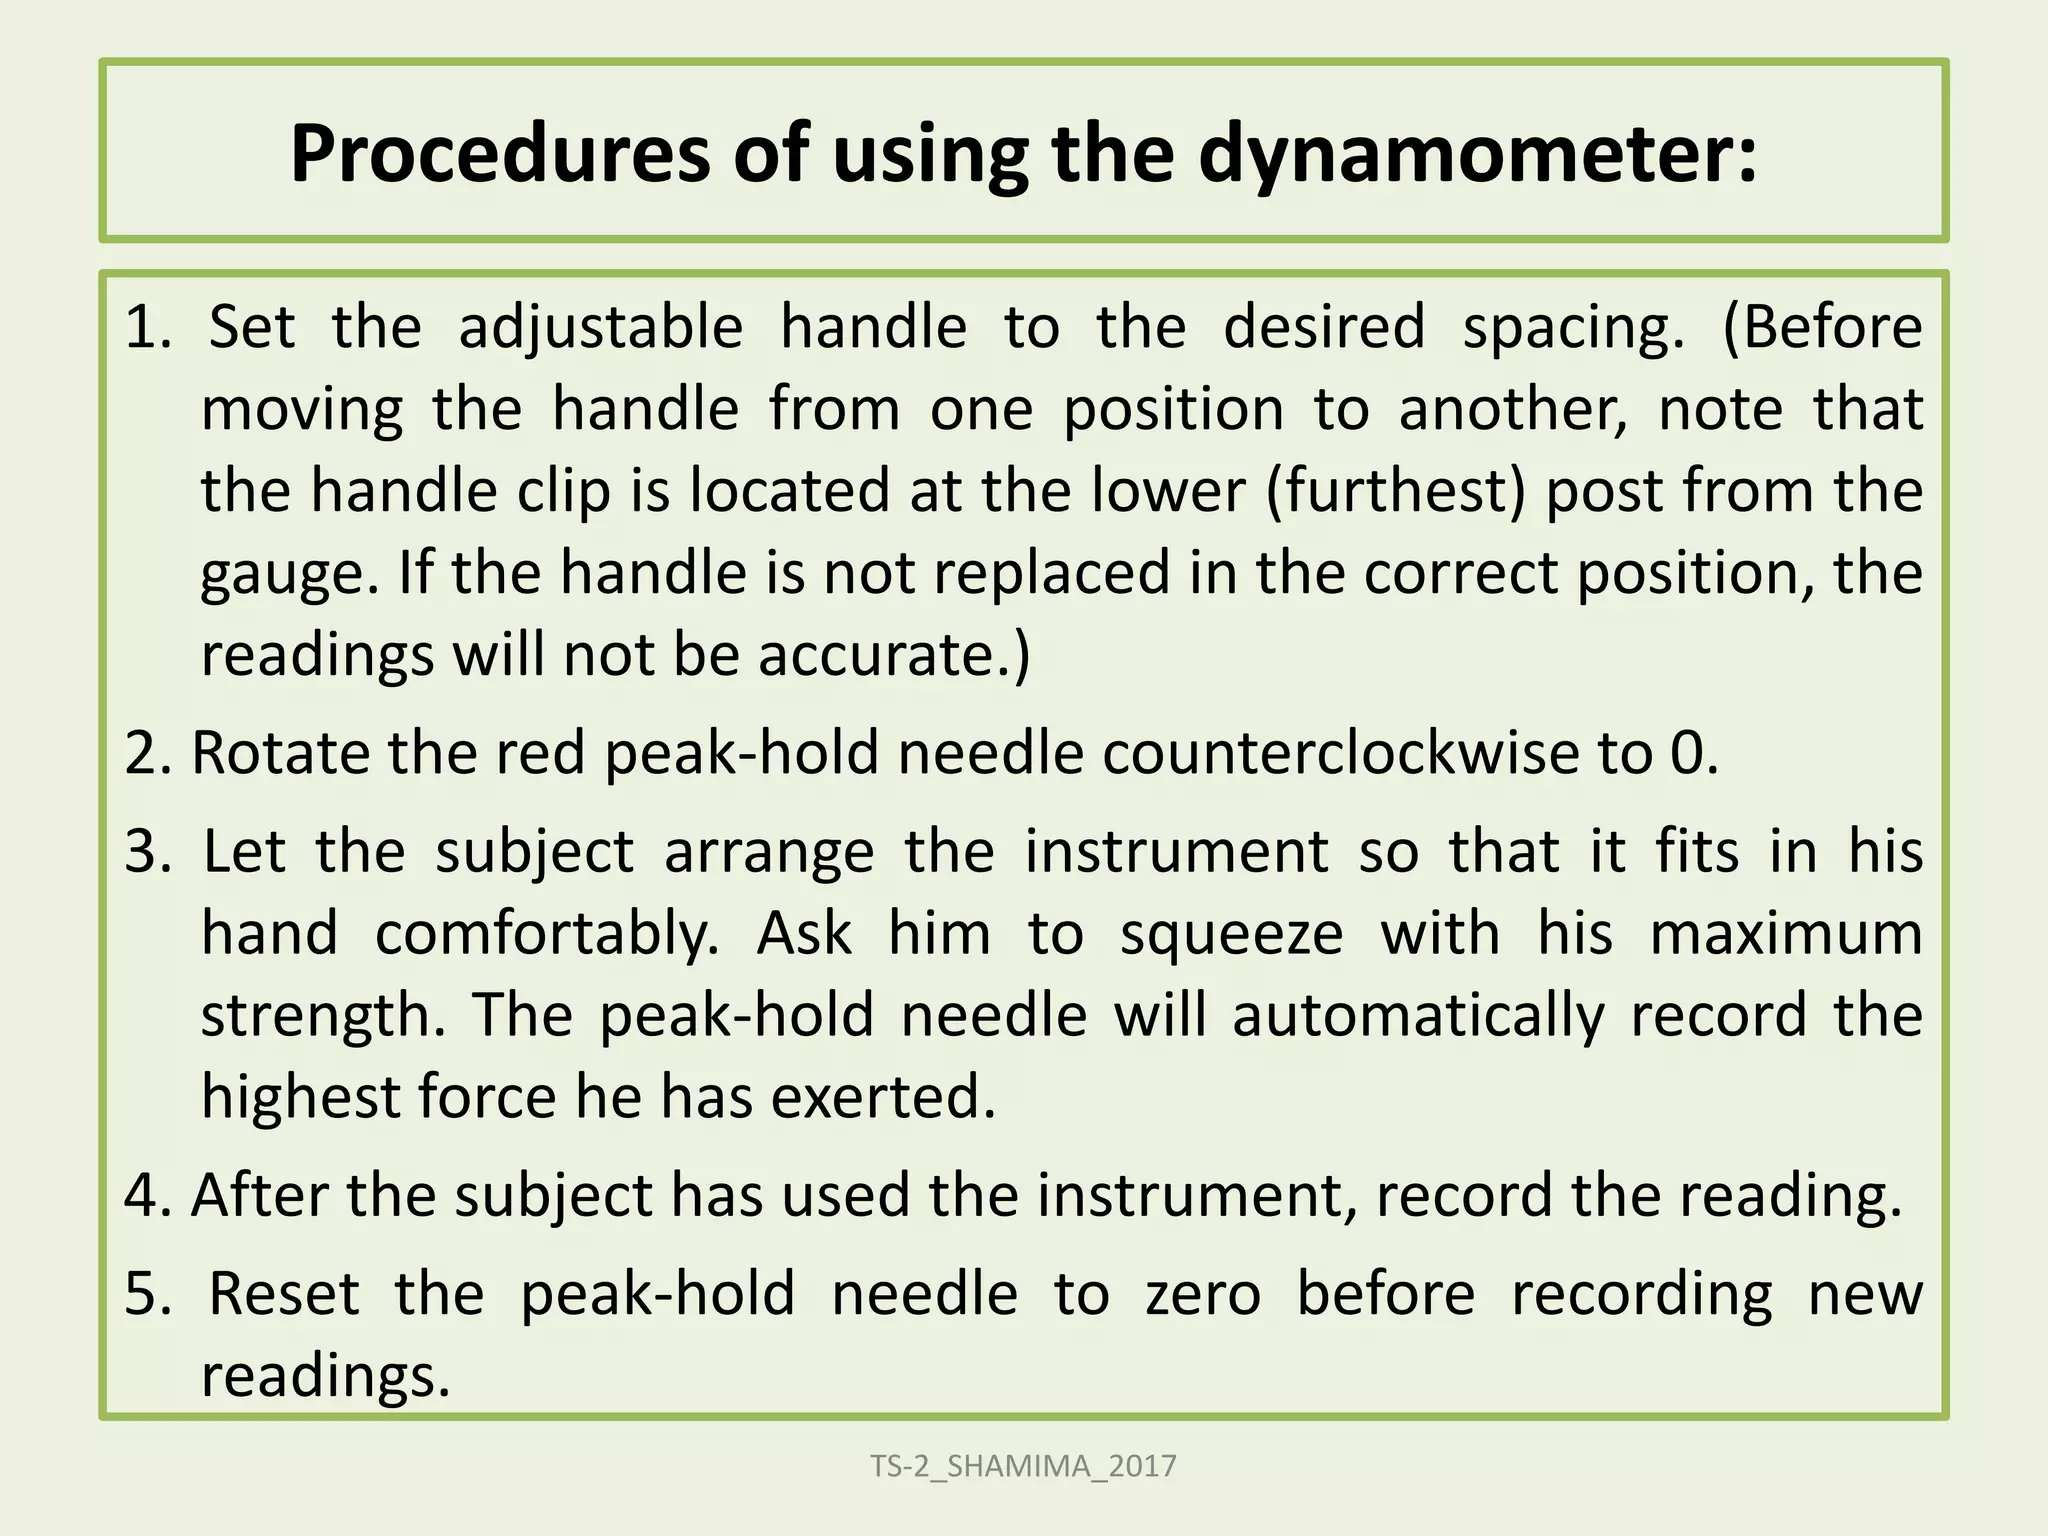
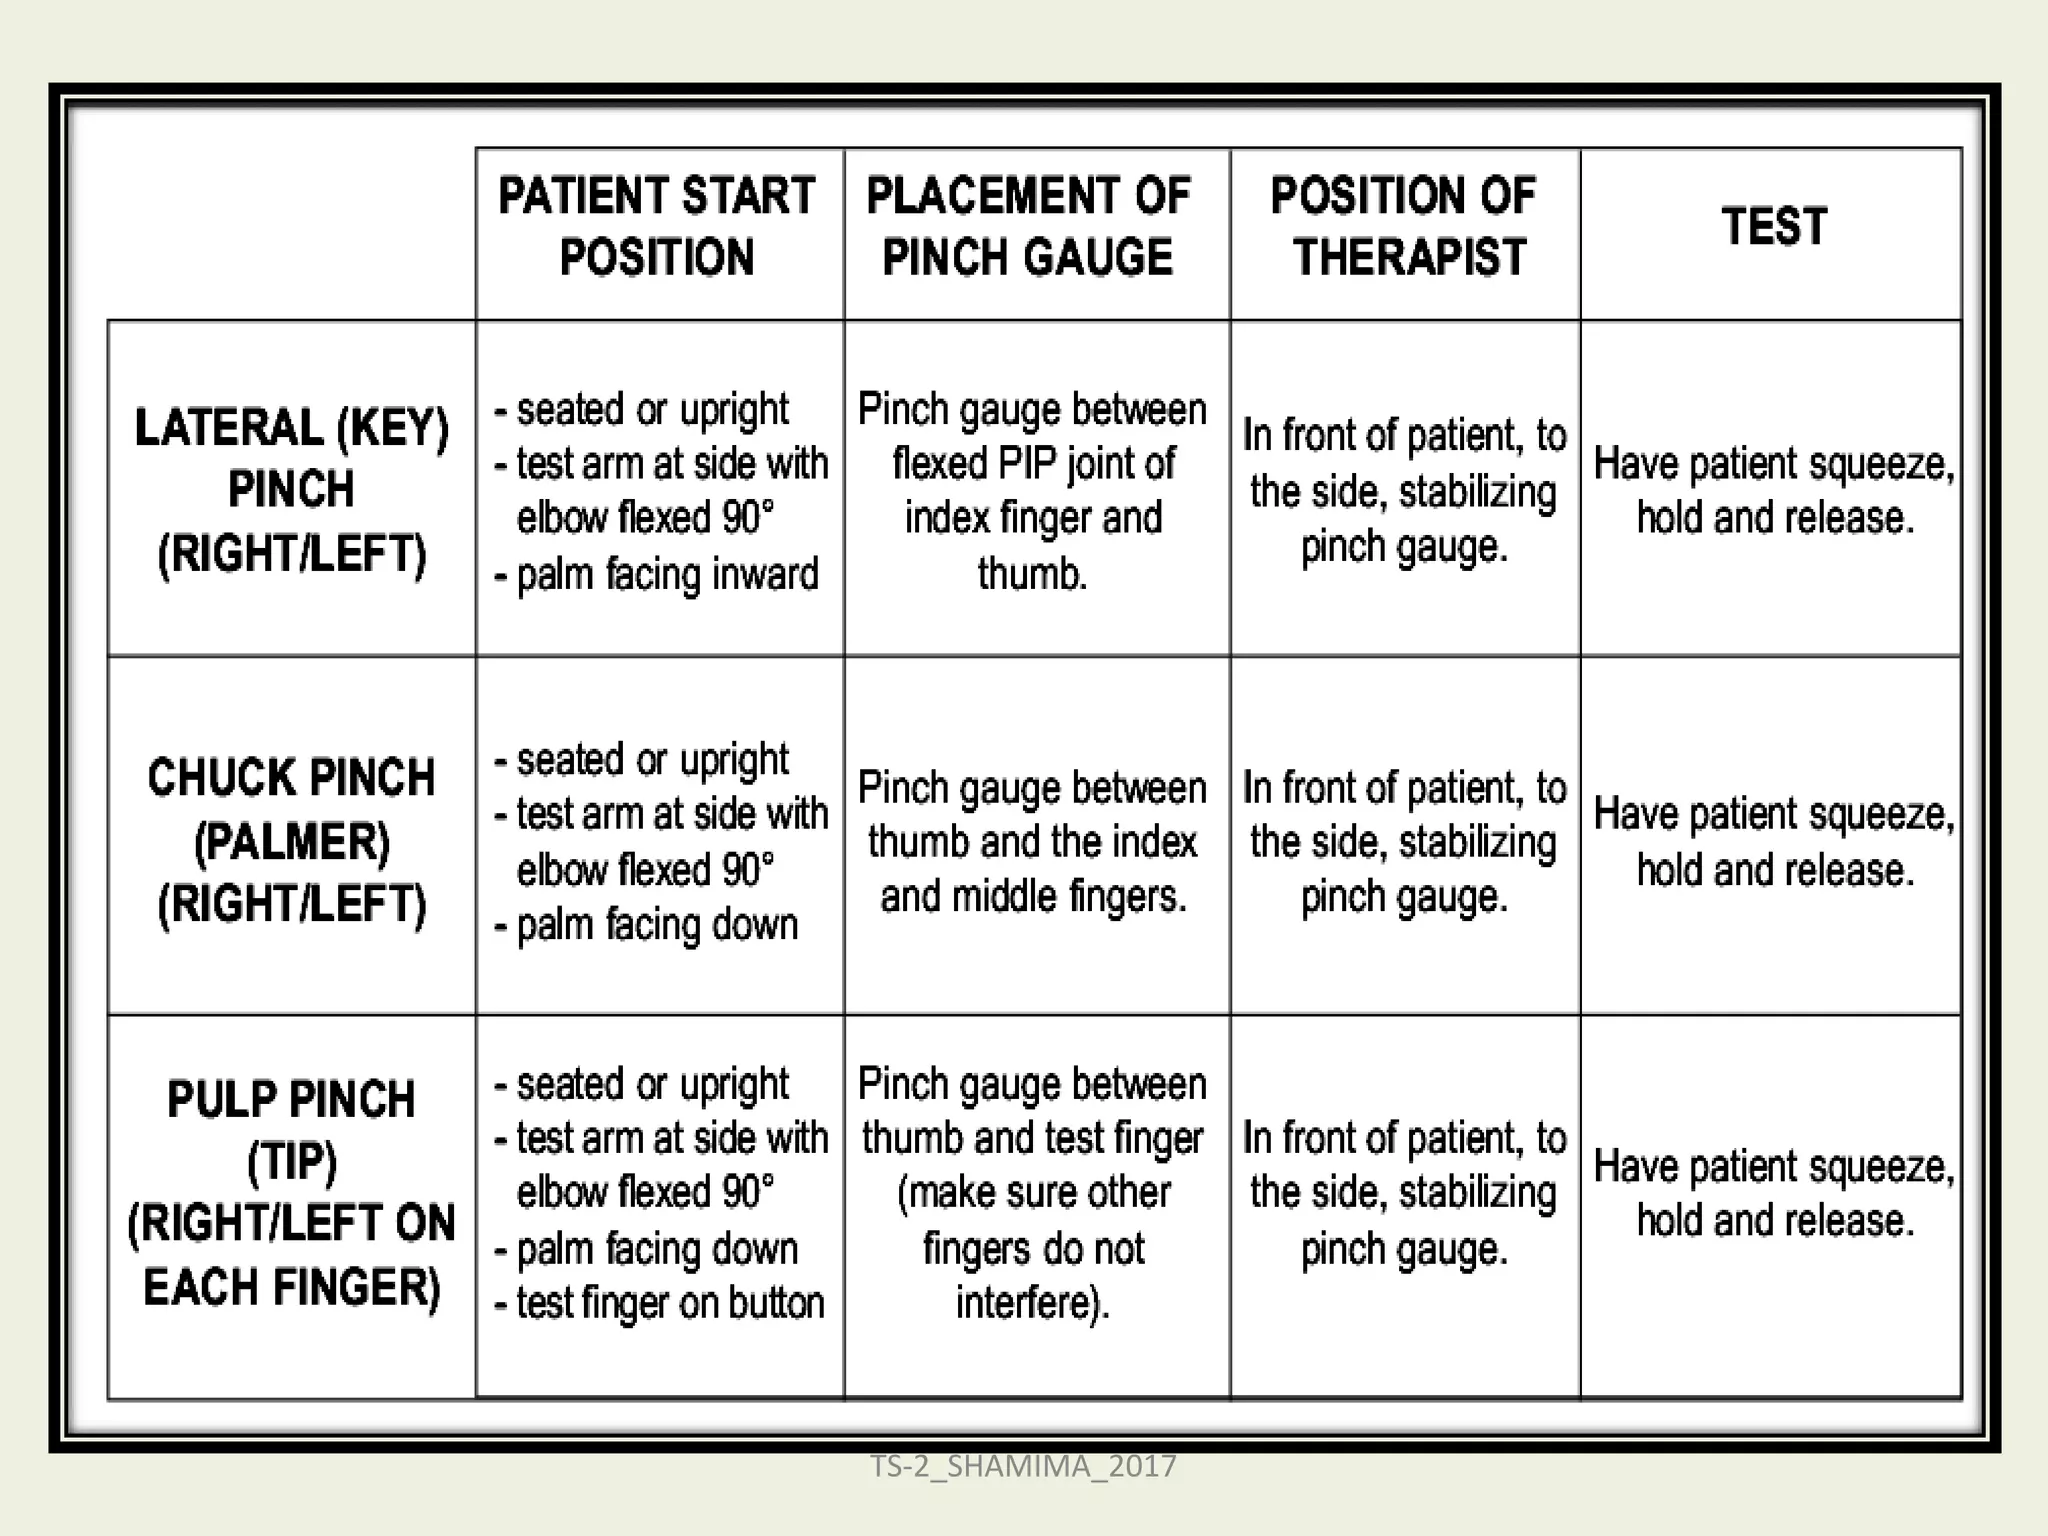
Call Girls Service Faridabad 📲 9999965857 ヅ10k NiGhT Call Girls In Faridabad
GRIP STRENGTH MEASUREMENT_2017.pptx
1. Grip Strength Measurement
Shamima Akter
B. Sc (Honors) in Occupational Therapy
& M. Sc in Rehabilitation Science
Assistant Professor,
Department of Occupational Therapy
Bangladesh Health Professions Institute (BHPI)
Centre for the Rehabilitation of the Paralysed (CRP)
Chapain, Savar
2. JAMAR DYNAMOMETER
• The JAMAR Adjustable Hand Dynamometer offers
many features for both routine screening work
and for evaluating hand trauma and disease.
• Grip strength may also vary in an individual
patient, depending on the size of the object being
grasped.
• The adjustable handle allows therapists to
quantify grip strength for different size objects.
TS-2_SHAMIMA_2017
4. Starting Position
1. Sit or stand comfortable
2. Shoulder adducted and neutrally rotated
3. Elbow flexed to 90 degrees
4. Forearm in neutral position
5. Wrist in neutral position
6. Each test should be repeated 3 times
7. Use the average as the recorded result
TS-2_SHAMIMA_2017
5. Procedures of using the dynamometer:
1. Set the adjustable handle to the desired spacing. (Before
moving the handle from one position to another, note that
the handle clip is located at the lower (furthest) post from the
gauge. If the handle is not replaced in the correct position, the
readings will not be accurate.)
2. Rotate the red peak-hold needle counterclockwise to 0.
3. Let the subject arrange the instrument so that it fits in his
hand comfortably. Ask him to squeeze with his maximum
strength. The peak-hold needle will automatically record the
highest force he has exerted.
4. After the subject has used the instrument, record the reading.
5. Reset the peak-hold needle to zero before recording new
readings.
TS-2_SHAMIMA_2017
10. Mechanical Pinch Gauge
• The finger pinch gauge can be used to measure
pinch strength.
• It is calibrated in pounds and kilograms of force.
Apply pinch force at the pinch groove while
holding the pinch gauge between your thumb
and finger(s).
• When force is applied further toward the tip the
reading will be slightly higher. When force is
applied further toward the rear the reading will
be slightly lower.
TS-2_SHAMIMA_2017
12. Continue..
• The gauge must be “zeroed” before each pinch test.
Grasp the knurled ring of the dial indicator and rotate it
until the zero on the dial indicator is directly under the
black pointer.
• The red maximum pointer must be reset before each
pinch test.
• Rotate the small knurled knob on top of the dial
indicator in a counterclockwise direction until it rests
against the black pointer at the zero marking.
• The red maximum pointer will remain at the subject's
maximum reading until it is reset.
TS-2_SHAMIMA_2017
13. Use the pinch gauge to perform the three basic
pinch tests:
• Tip Pinch (thumb-index pulp pinch) - thumb tip
to index fingertip
• Key Pinch (lateral pinch) - thumb pad to lateral
aspect of middle phalanx of index finger
• Palmer Pinch (chuck pinch) - thumb pad to
pads of the index and middle fingers
TS-2_SHAMIMA_2017