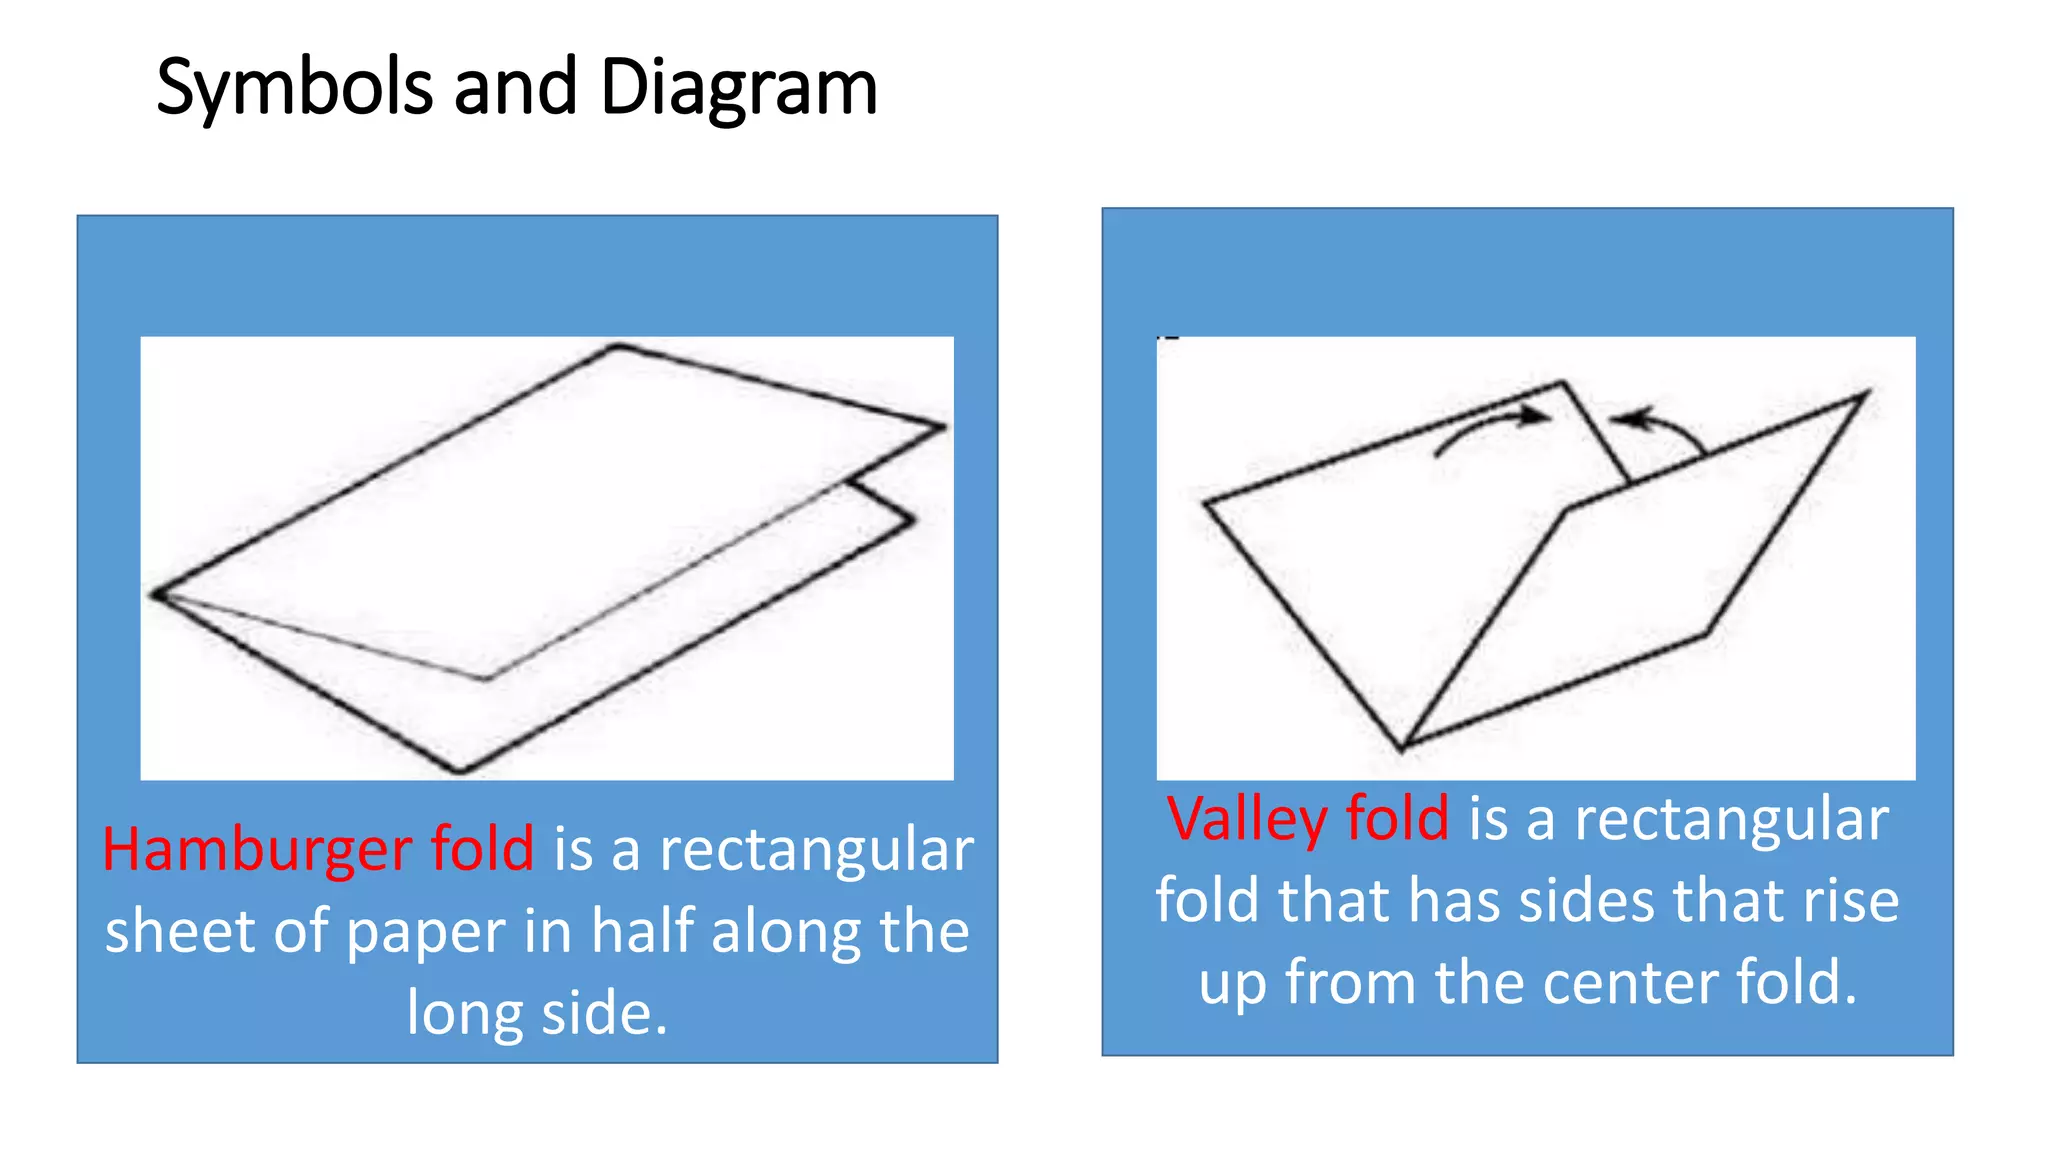
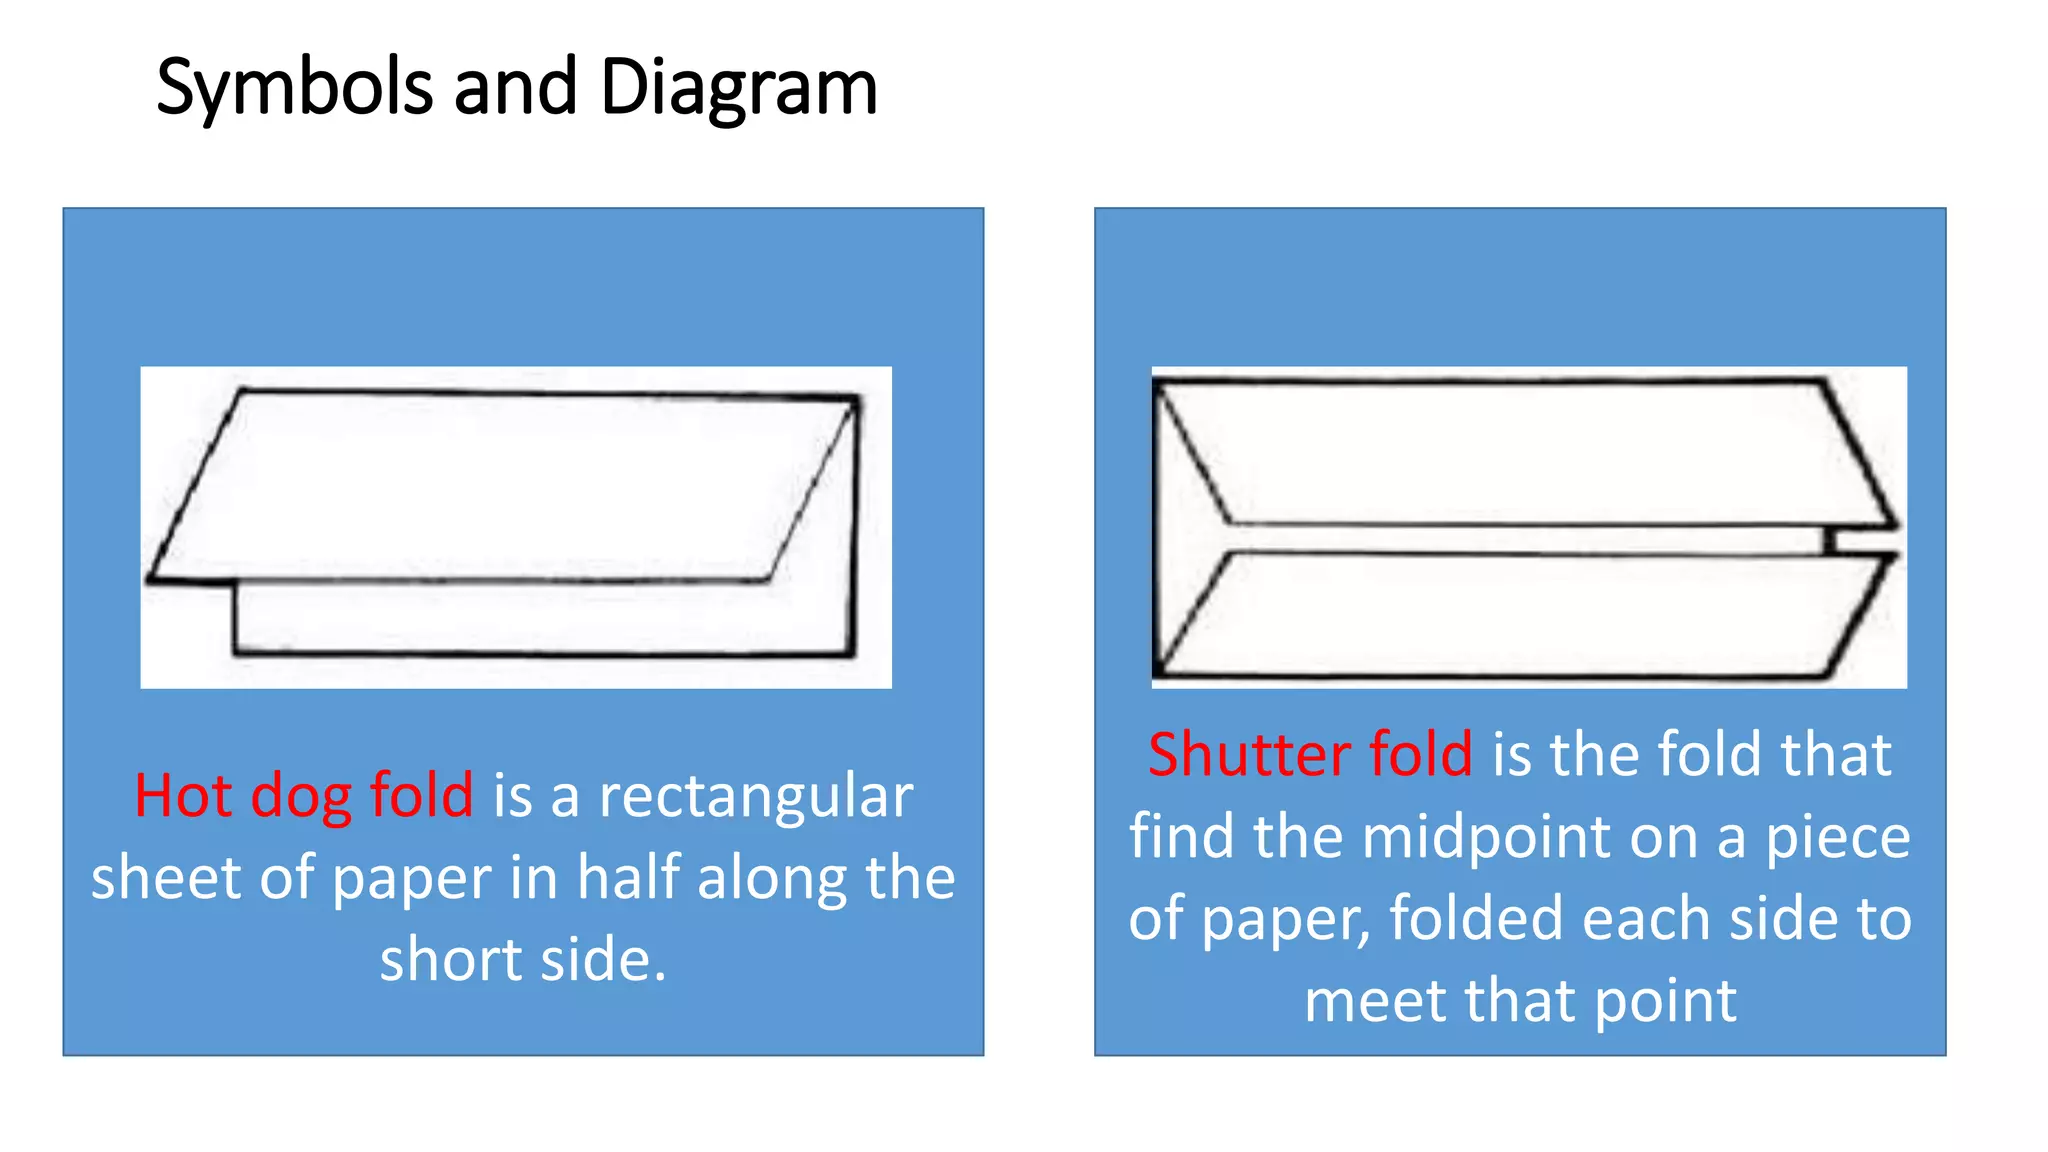
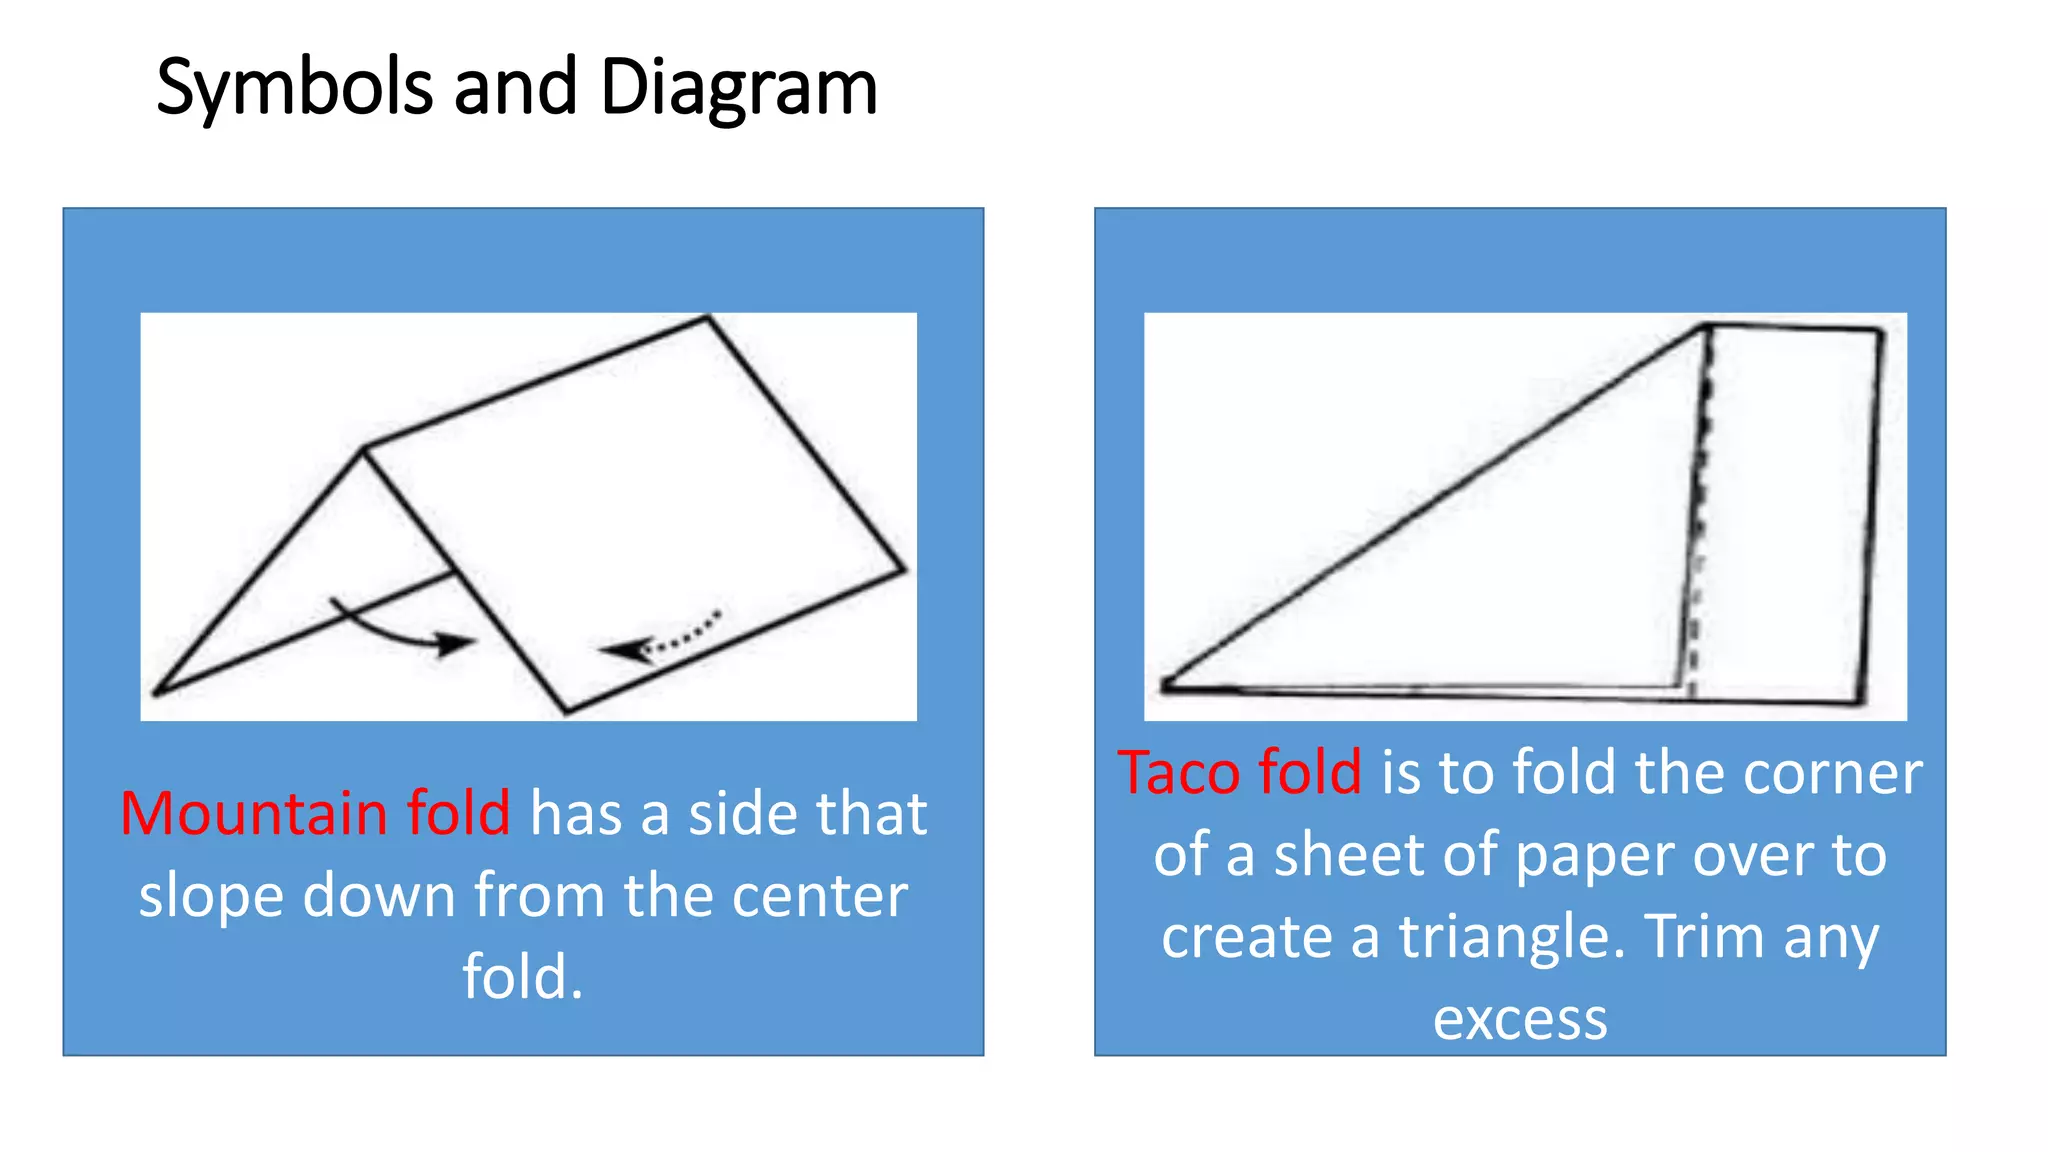
History Class XII Ch. 3 Kinship, Caste and Class (1).pptx
GRADE 9 TLE (ORIGAMI).pptx
1. GRADE 9 TLE (ORIGAMI)
LO 4: Follow methods and
procedures in making origami
2. Objectives
At the end of this lesson, you are
expected to:
•discuss the different methods,
techniques and procedures in making
Origami projects/products
•follow procedures and techniques in
making Origami projects/products
5. Steps in Folding the Paper
1. Check that the paper you are folding is exactly a square.
2. Do not fold against a soft surface, such as a carpet, your lap or bedsheets.
3. Fold against a hard surface ,such as a large hardback book or a table.
4. Crease slowly, firmly, and accurately.
5. Form the early creases with particular care – if they are incorrect place, all the later,
smaller creases will be difficult to place accurately and will look messy.
6. Read the instruction and follow the symbol on each step
7. Many mistakes are made by ignoring written instructions or by not following all the written
instructions on a step, particularly during complex maneuvers.
8. The instruction and symbols on one step will create a shape which looks like the next step
but stripped of its symbols.
9. So, you must always look ahead to the next step to see what shape you are trying to make.
10. Never look at steps in isolation, but see them as being interconnected, like links in a chain.
6. Symbols and Diagram
Thick lines show either raw
edges or edges resulting from
fold.
Thin grey lines show crease
lines which are the result of
prior folds
8. Symbols and Diagram
..... ........
Dash and dotted line shows that the
fold is supposed
to be a mountain fold. Sometimes
you will find this line with a single
dot
Fold the paper where shown
is usually a valley fold
but uses for other fold as
well.
9. Symbols and Diagram
Fold behind, i.e. make a
mountain fold.
Fold and unfold, creating a
crease line.
10. Symbols and Diagram
Fold behind (mountain Fold)
and unfold, creating a mountain
crease line.
Unfold a part of the model in
the shown direction.
11. Symbols and Diagram
Hamburger fold is a rectangular
sheet of paper in half along the
long side.
Valley fold is a rectangular
fold that has sides that rise
up from the center fold.
12. Symbols and Diagram
Hot dog fold is a rectangular
sheet of paper in half along the
short side.
Shutter fold is the fold that
find the midpoint on a piece
of paper, folded each side to
meet that point
13. Symbols and Diagram
Mountain fold has a side that
slope down from the center
fold.
Taco fold is to fold the corner
of a sheet of paper over to
create a triangle. Trim any
excess
15. Group Activity : Discuss What you have
Learned
1. What are the different techniques and
methods in paper folding? Why is it crucial
for us to follow them?
2.Is it necessary for us to follow the
procedure or can we innovate or create
another way of folding? Explain your answer.
16. Quiz Time
• Identify the different symbols in Origami. Write your answer on a
separate paper.
17. Assignment
• Bring the materials that we need in making origami.
Oslo paper
Scissors
Pencil and ruler
What do you observe on the 1ST picture How about the second picture ?
D0 you think there are difference between the two .
It is important to have that ? IT will help us to guide to our daily lives like in our lesson for today
Yes very good is important like for todays lesson