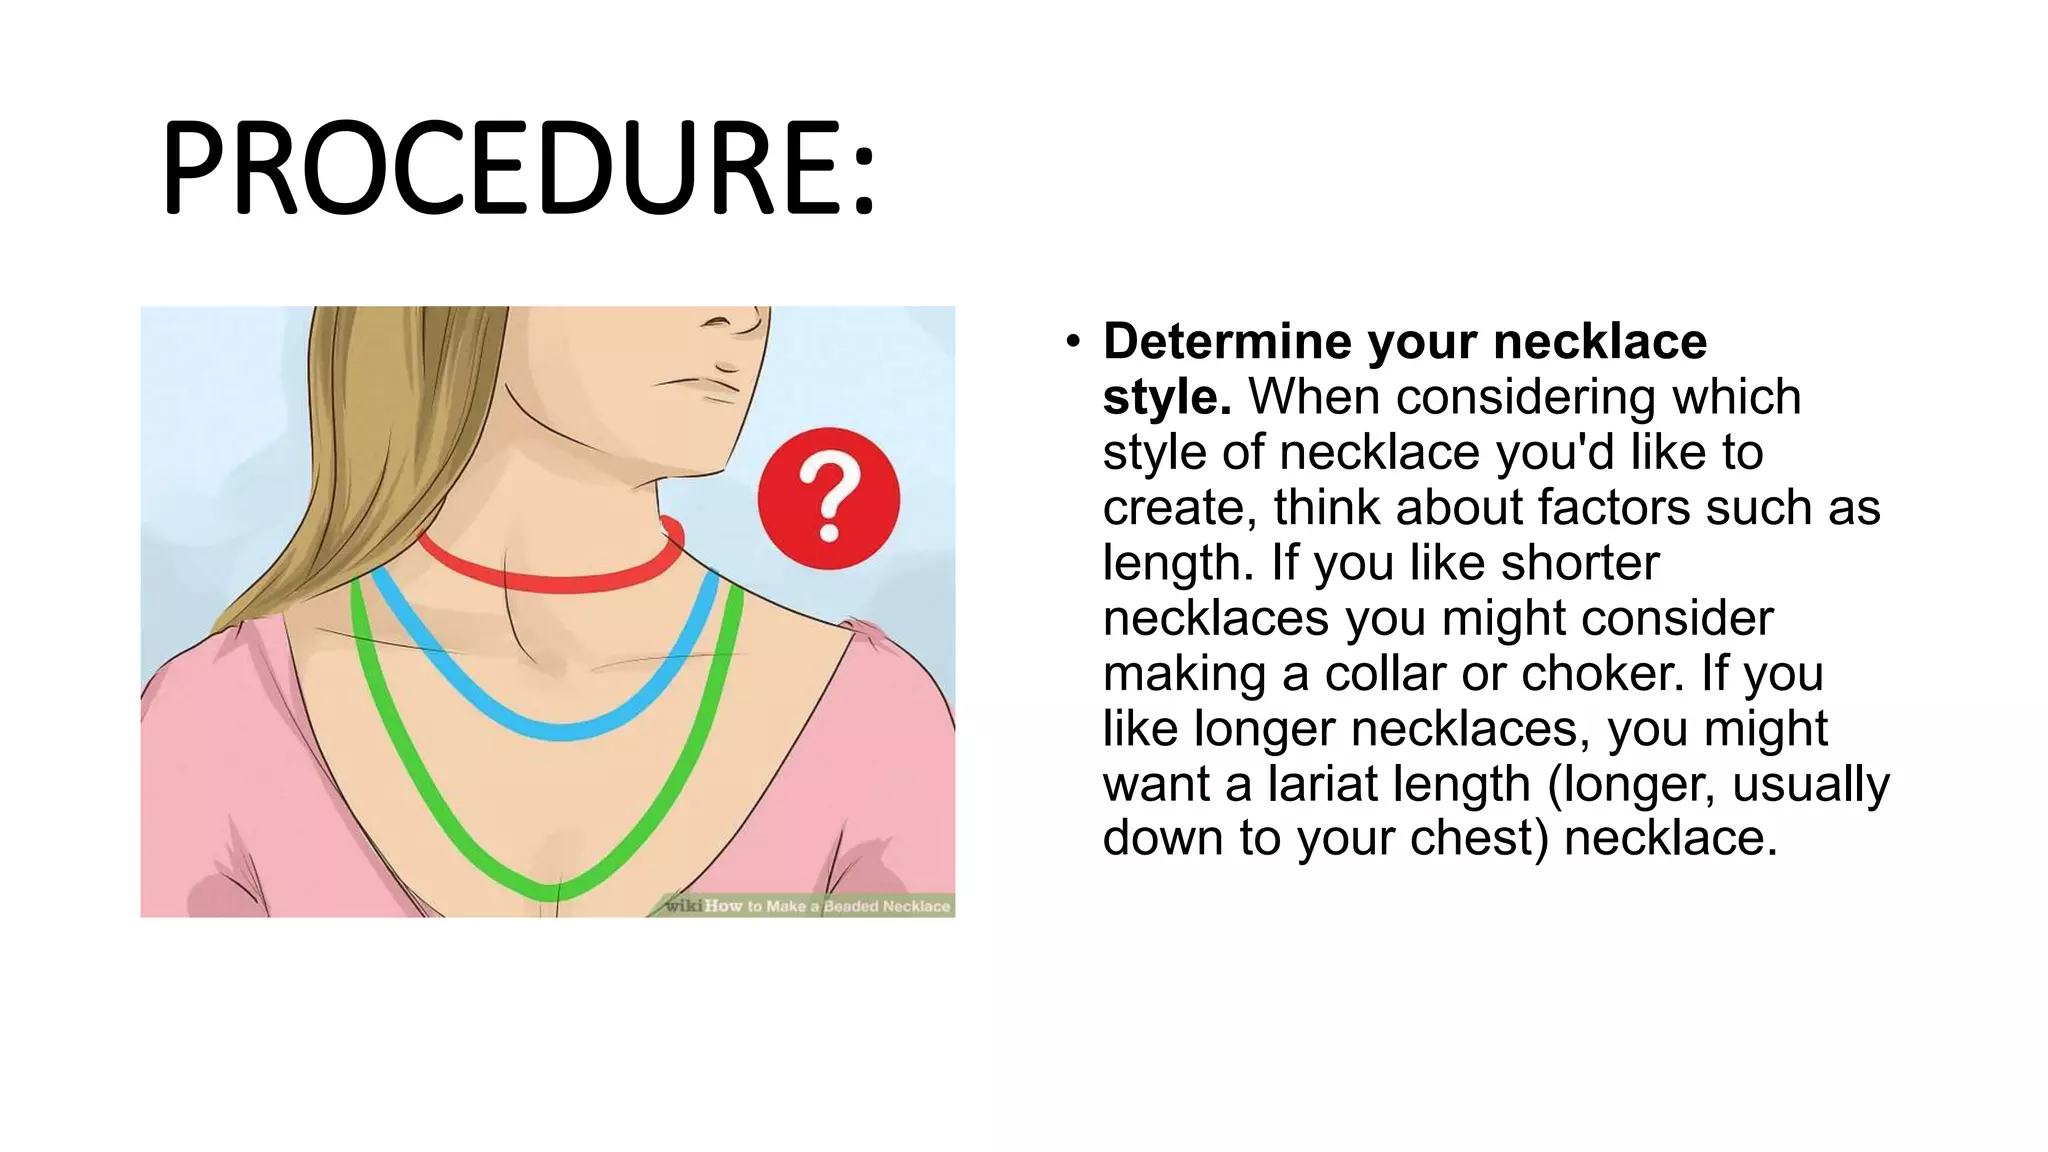
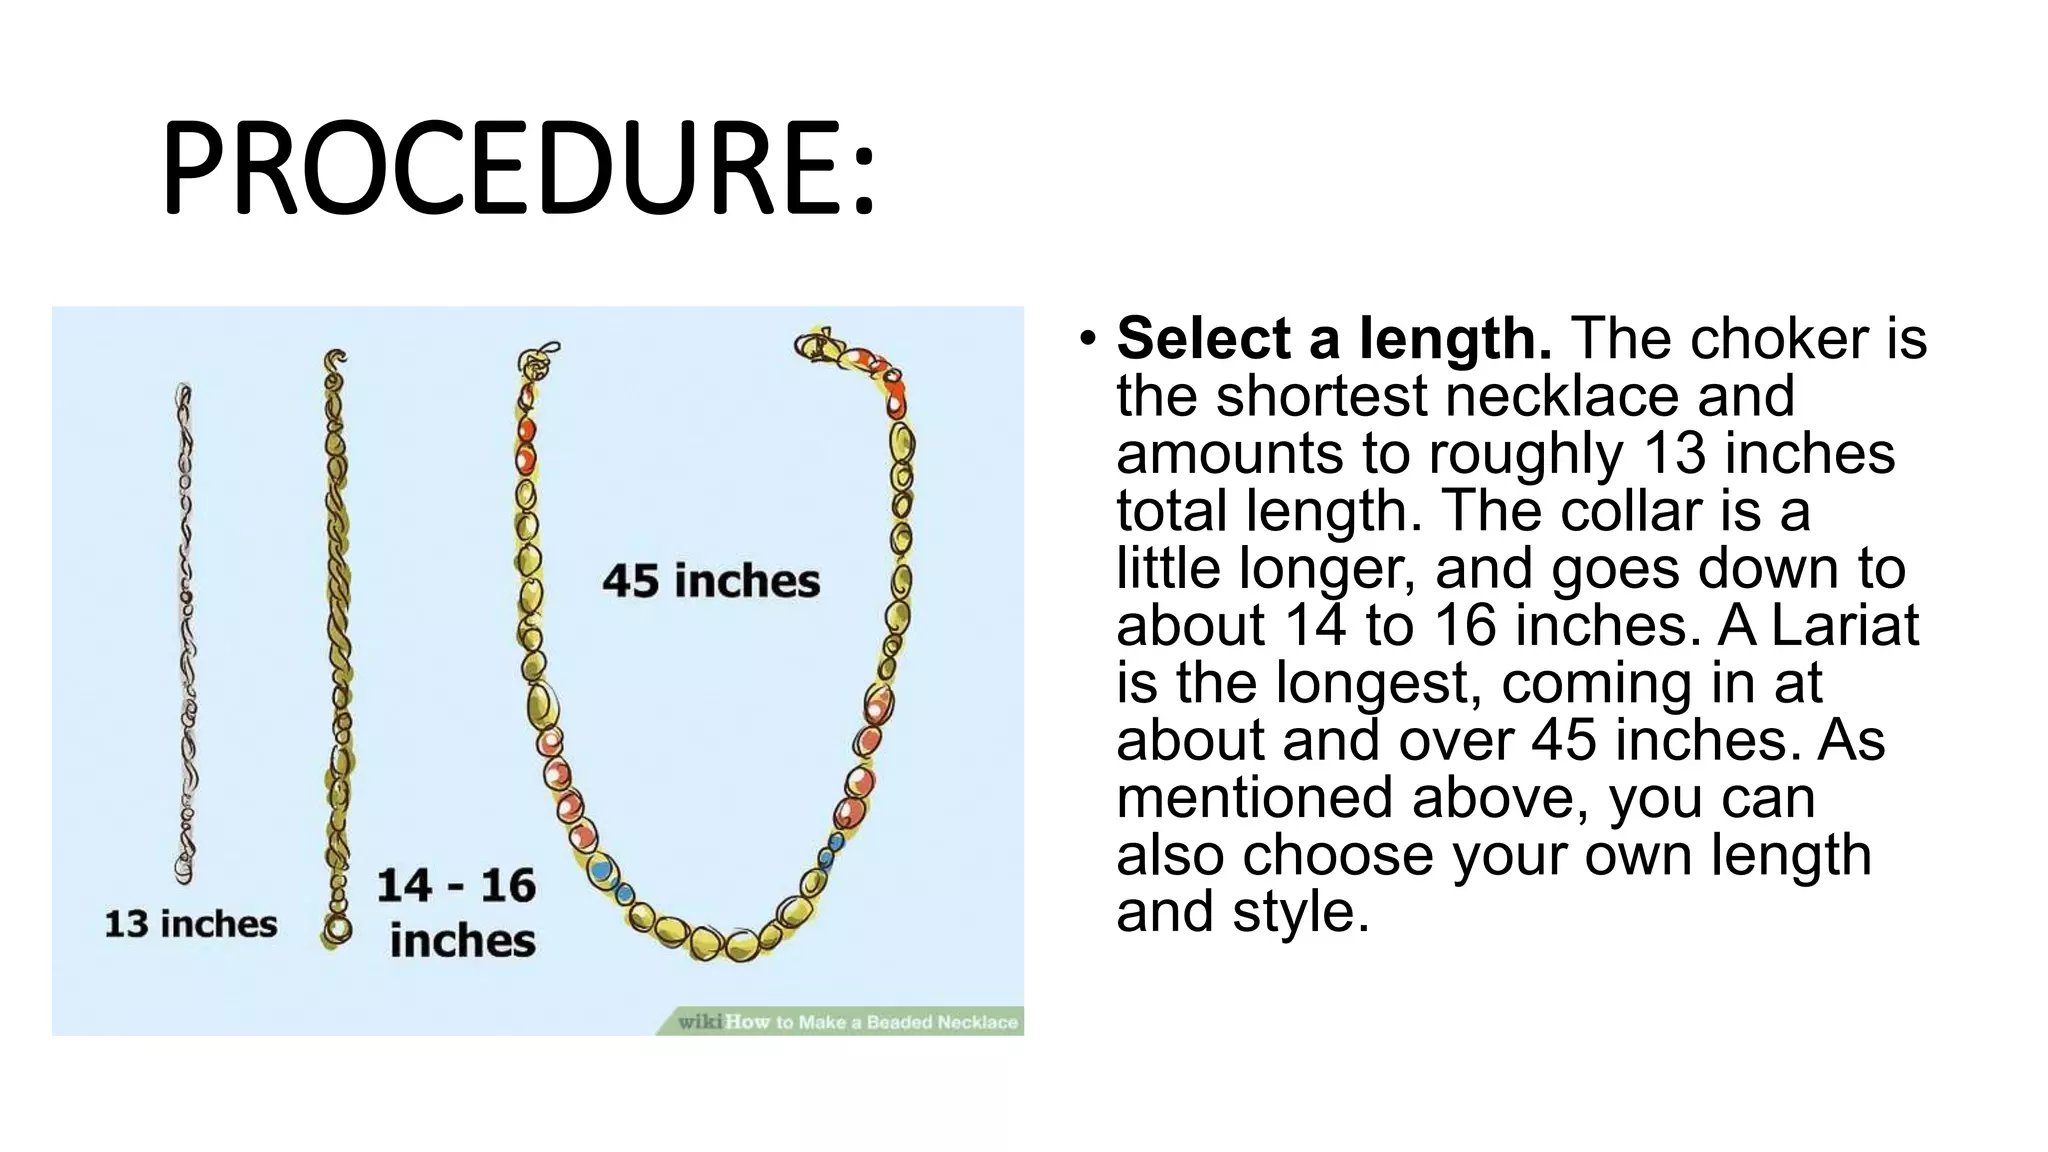
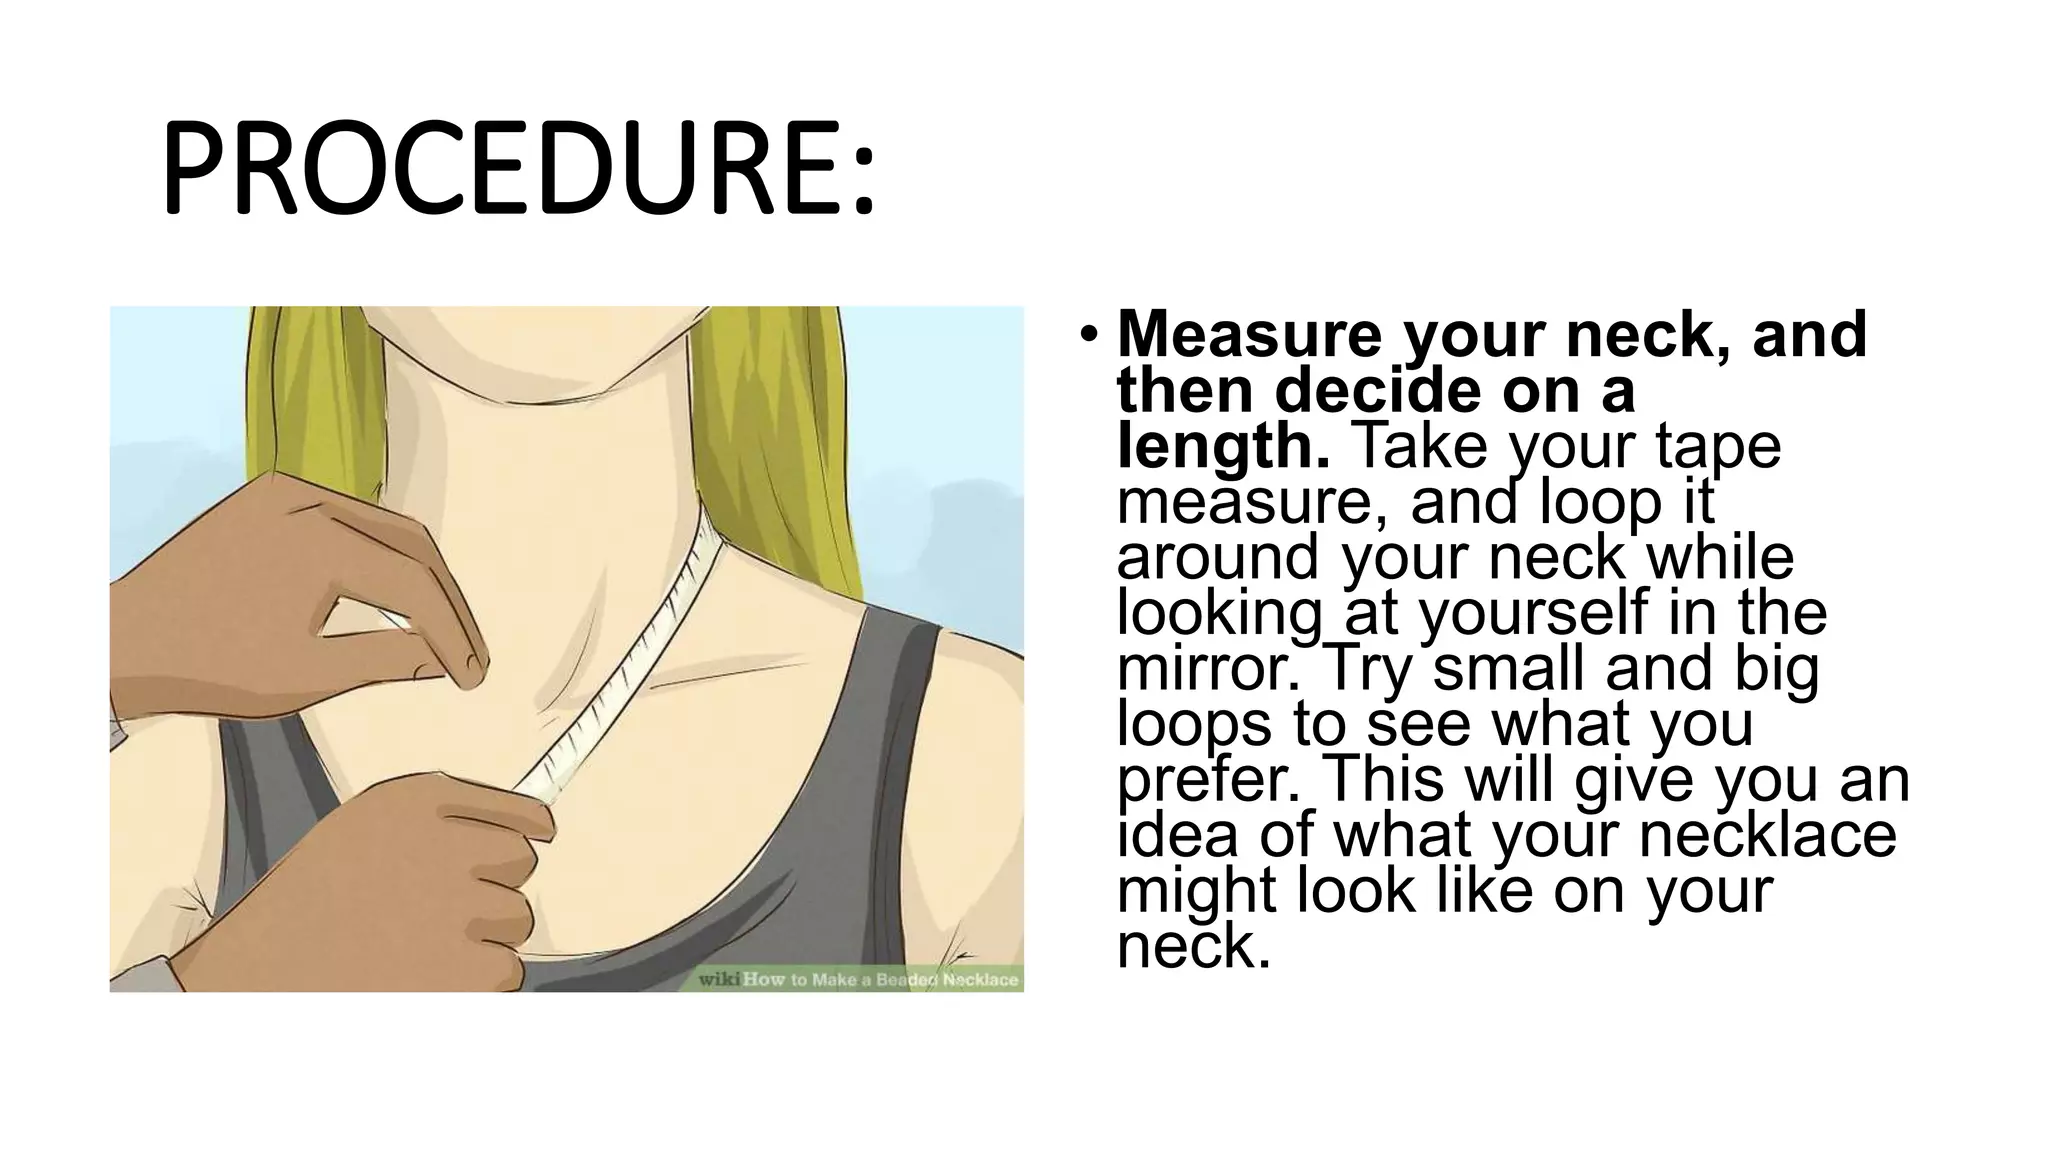
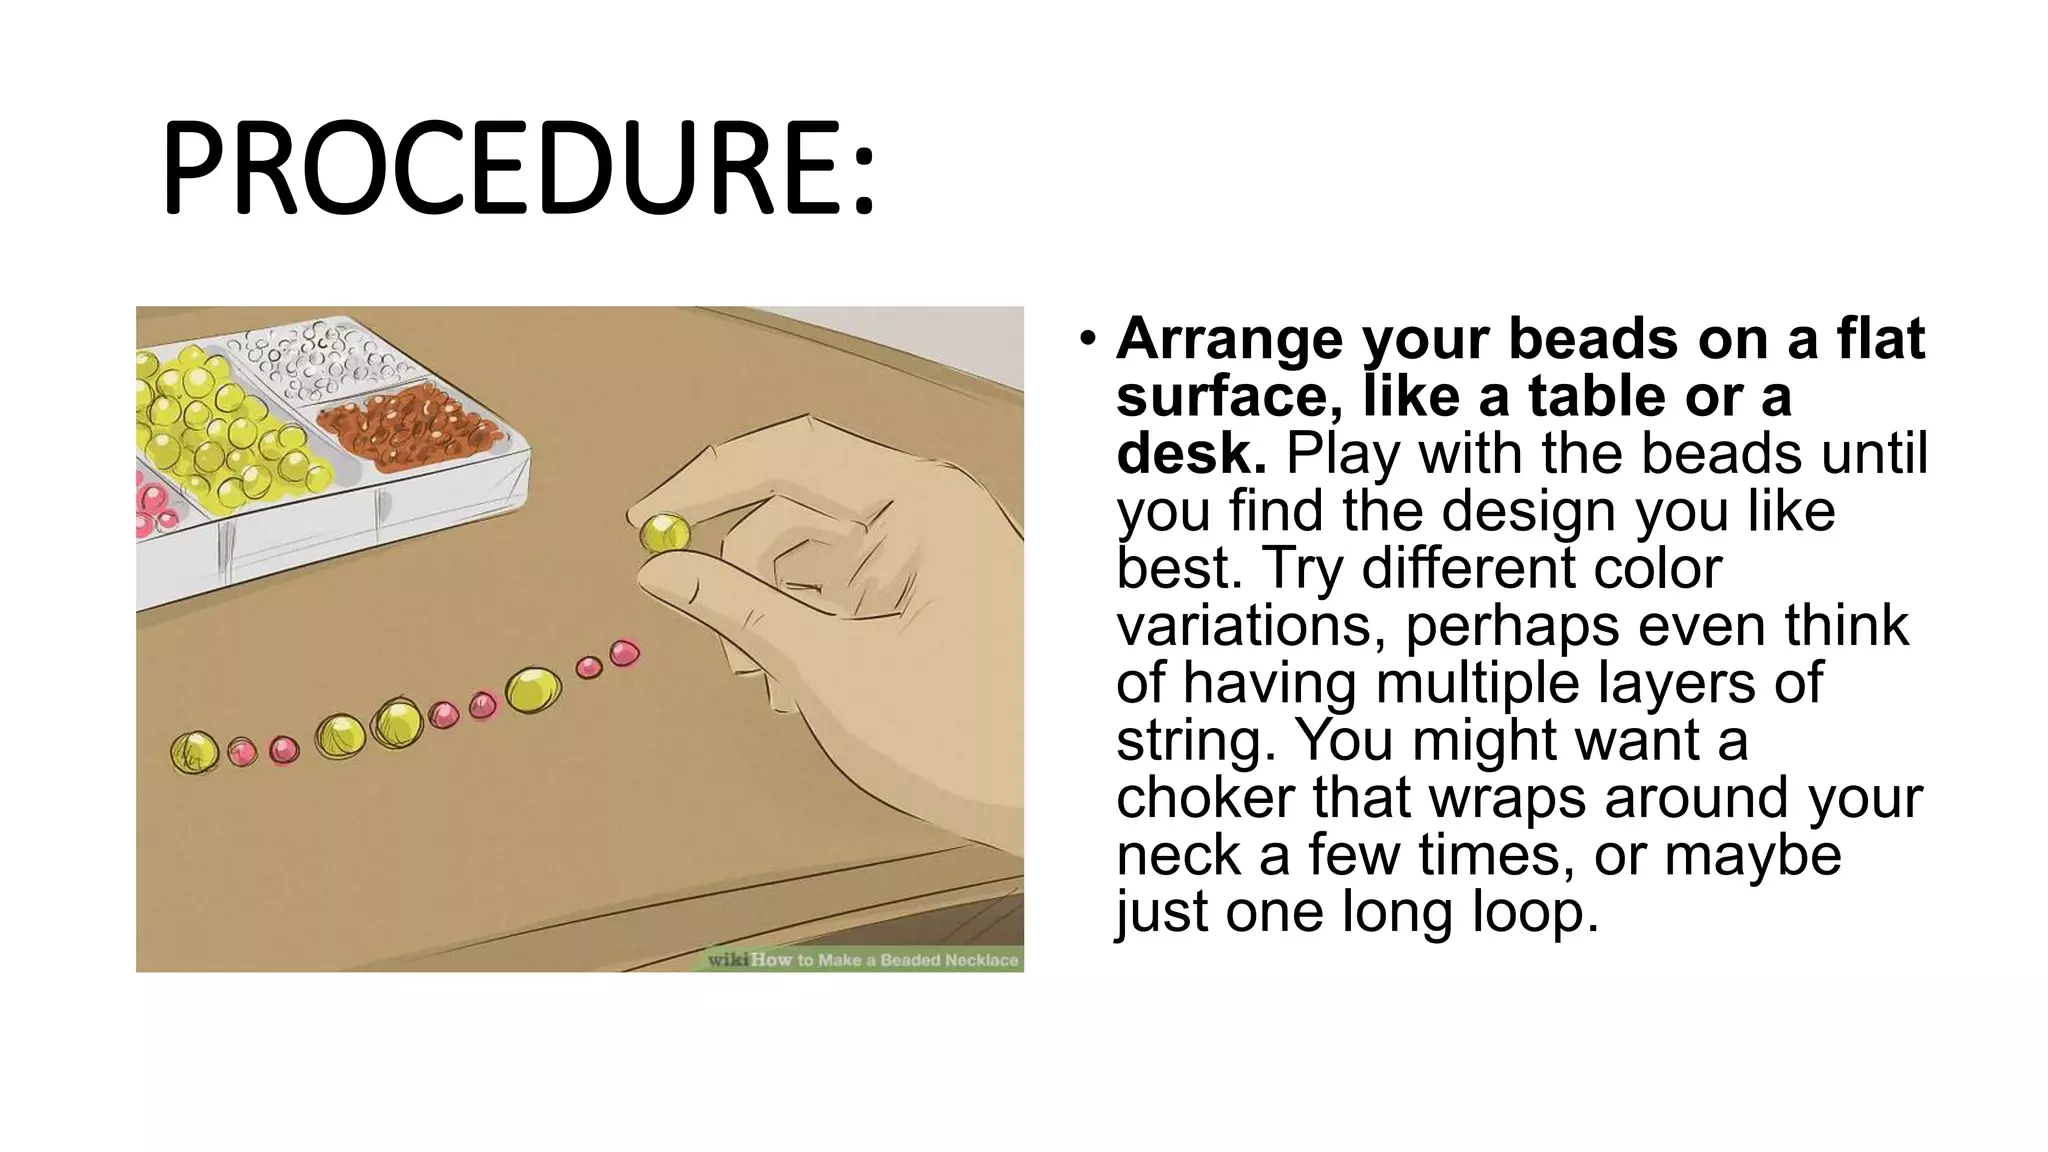
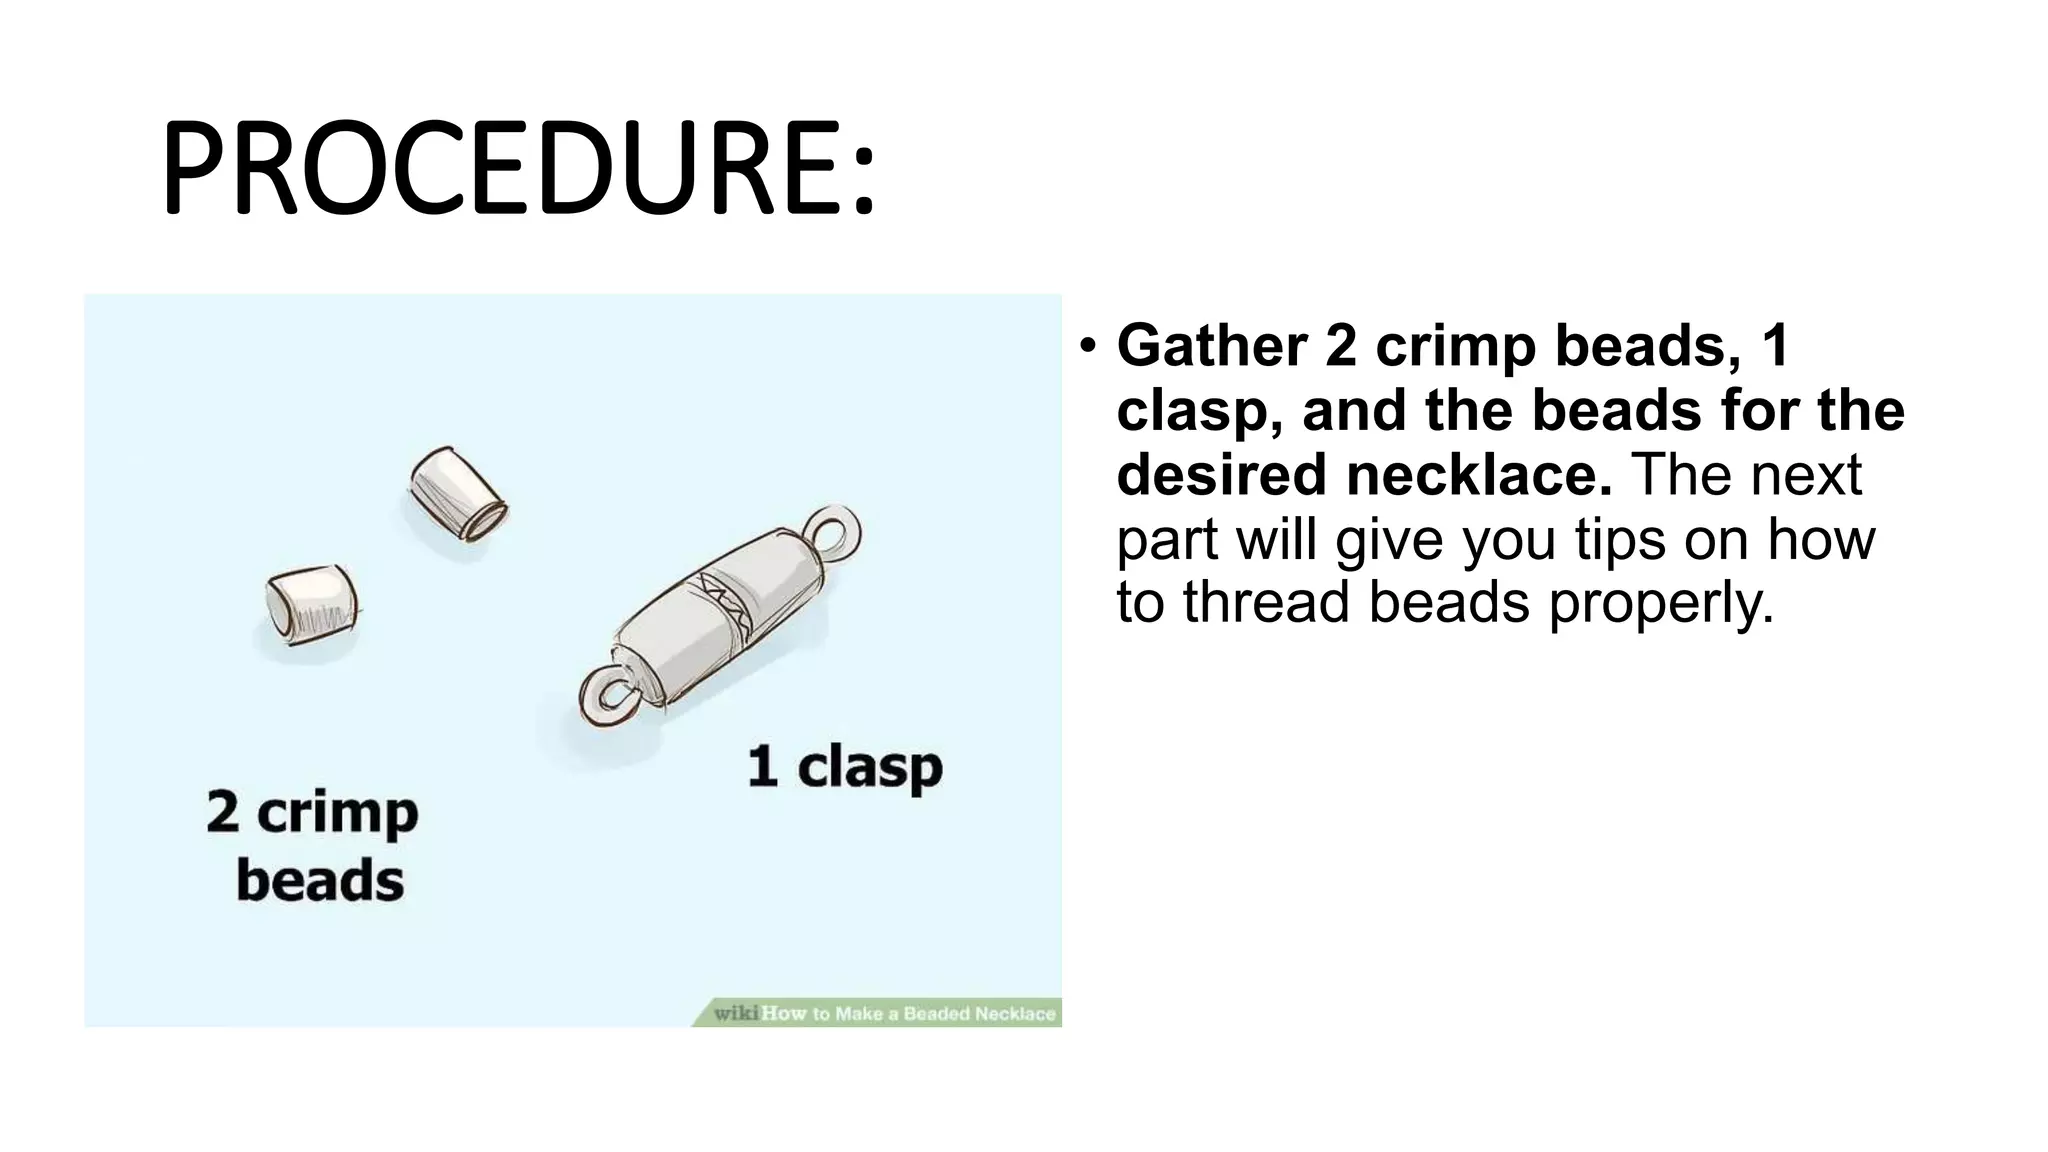
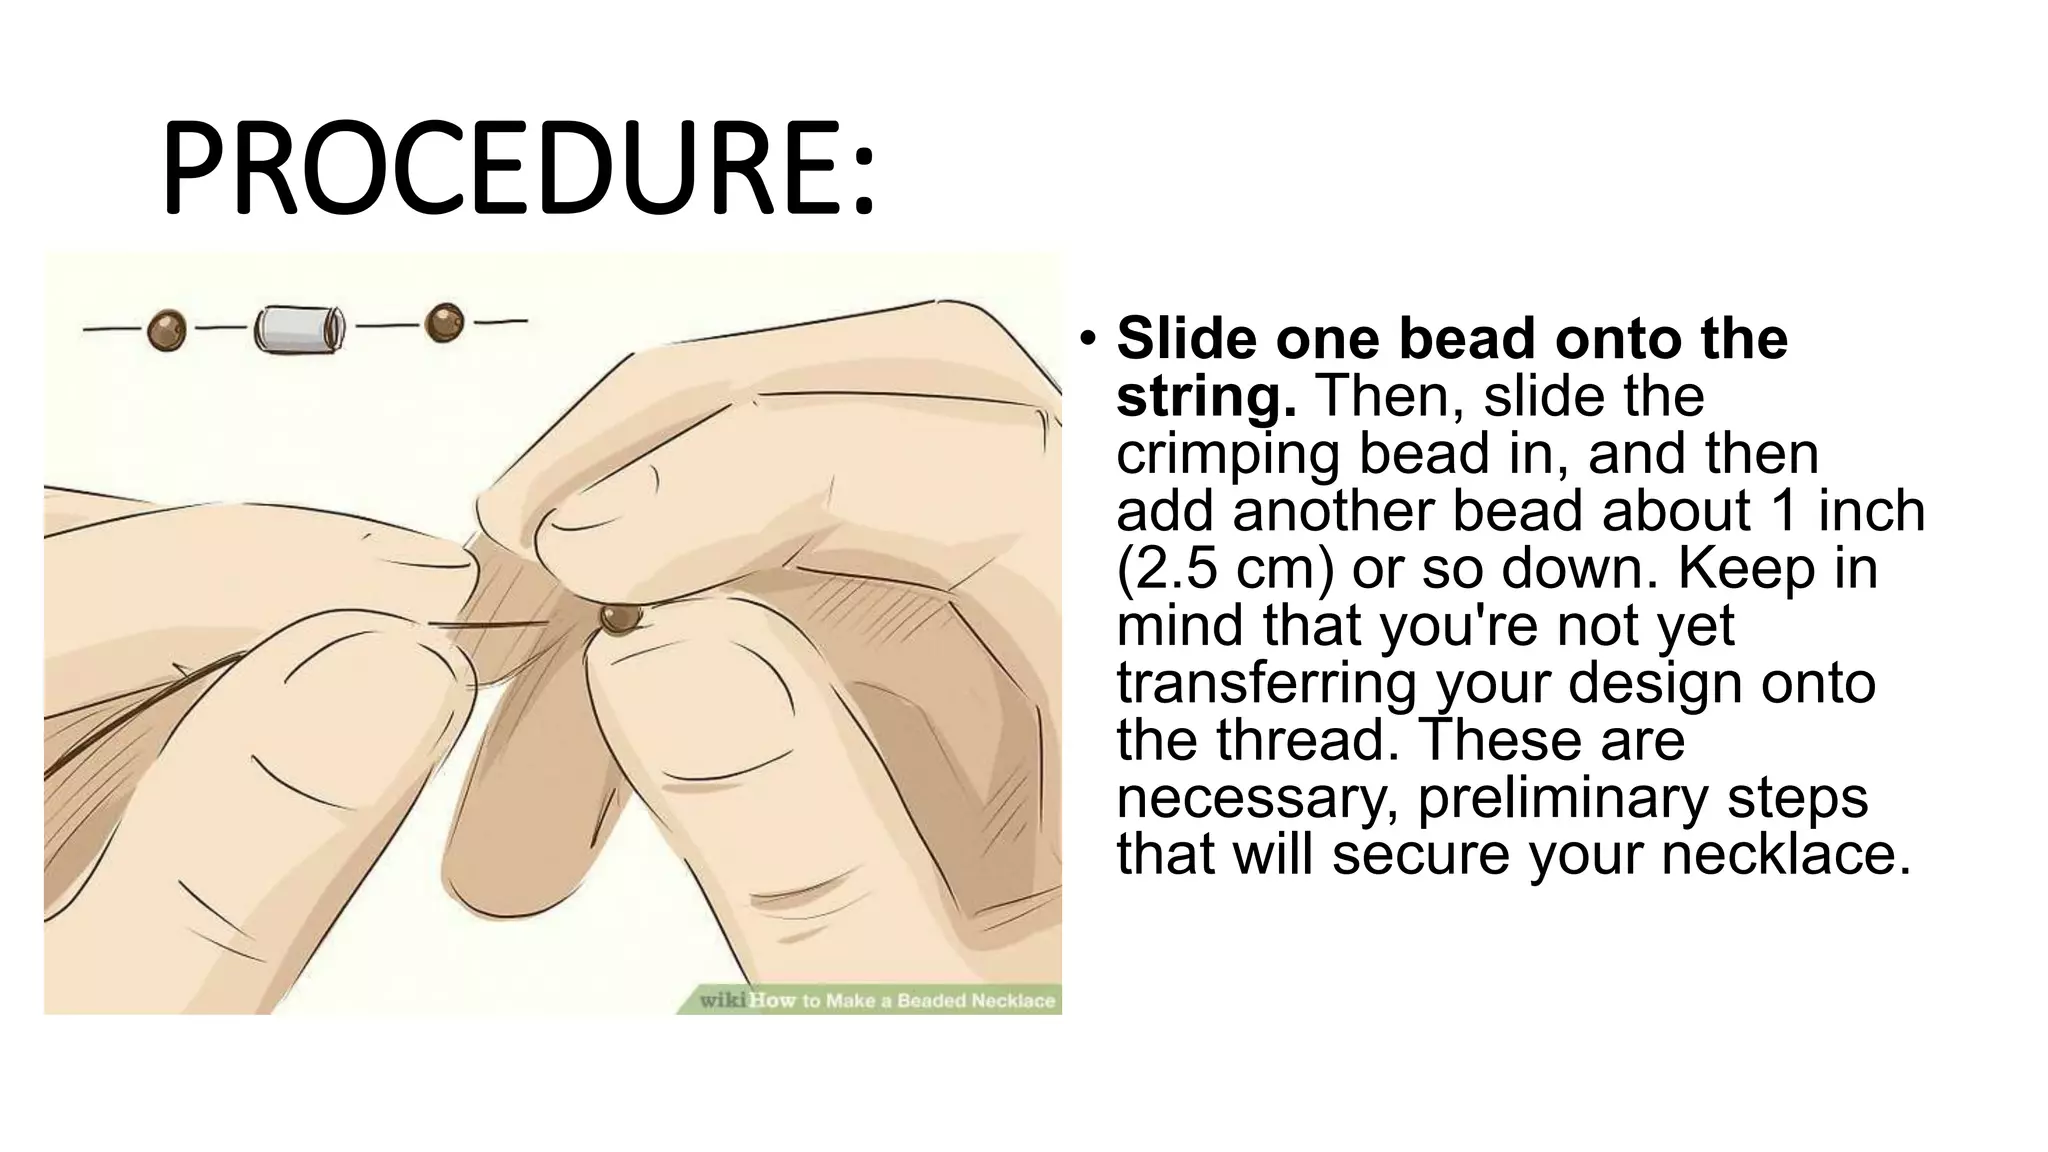
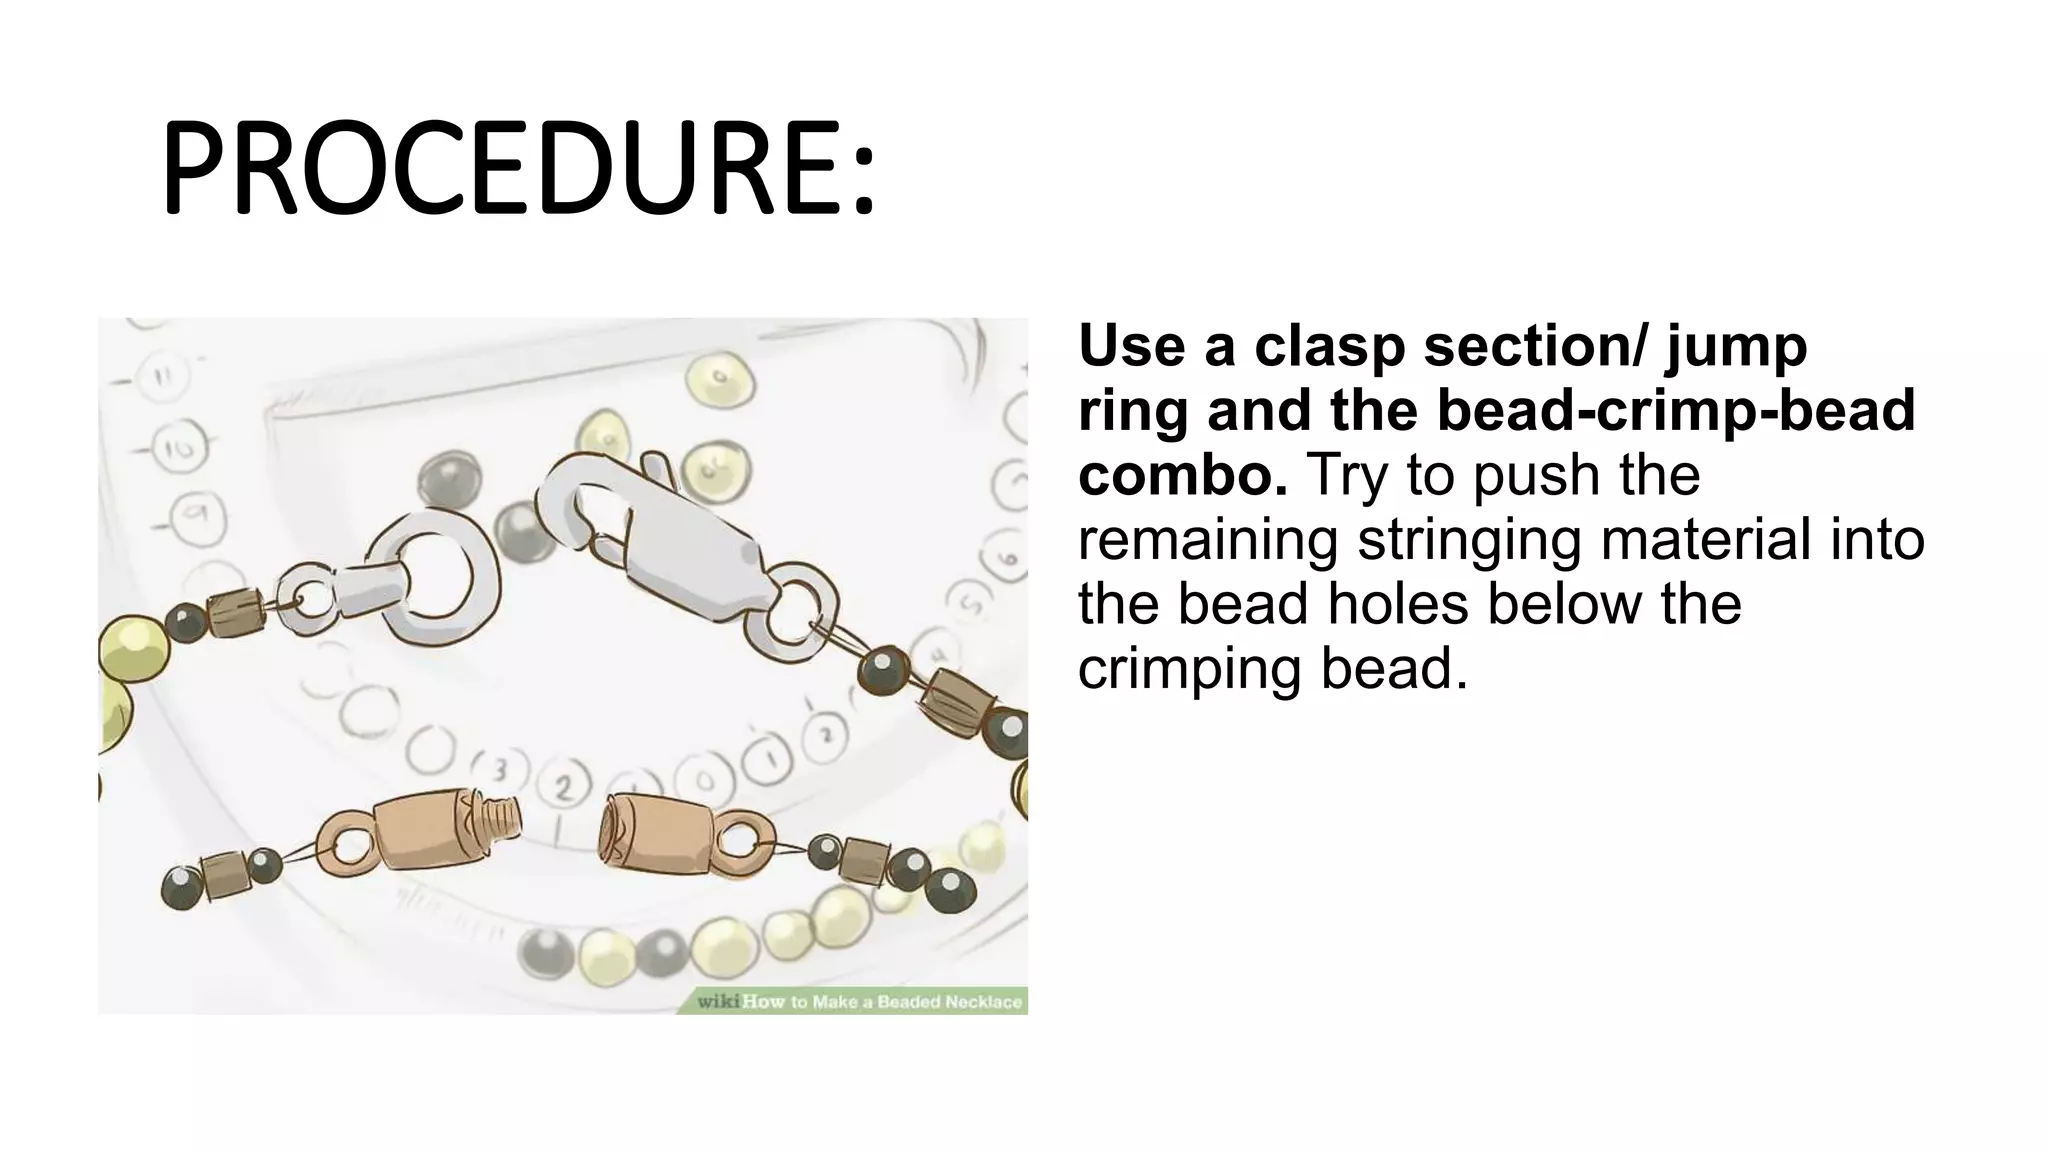
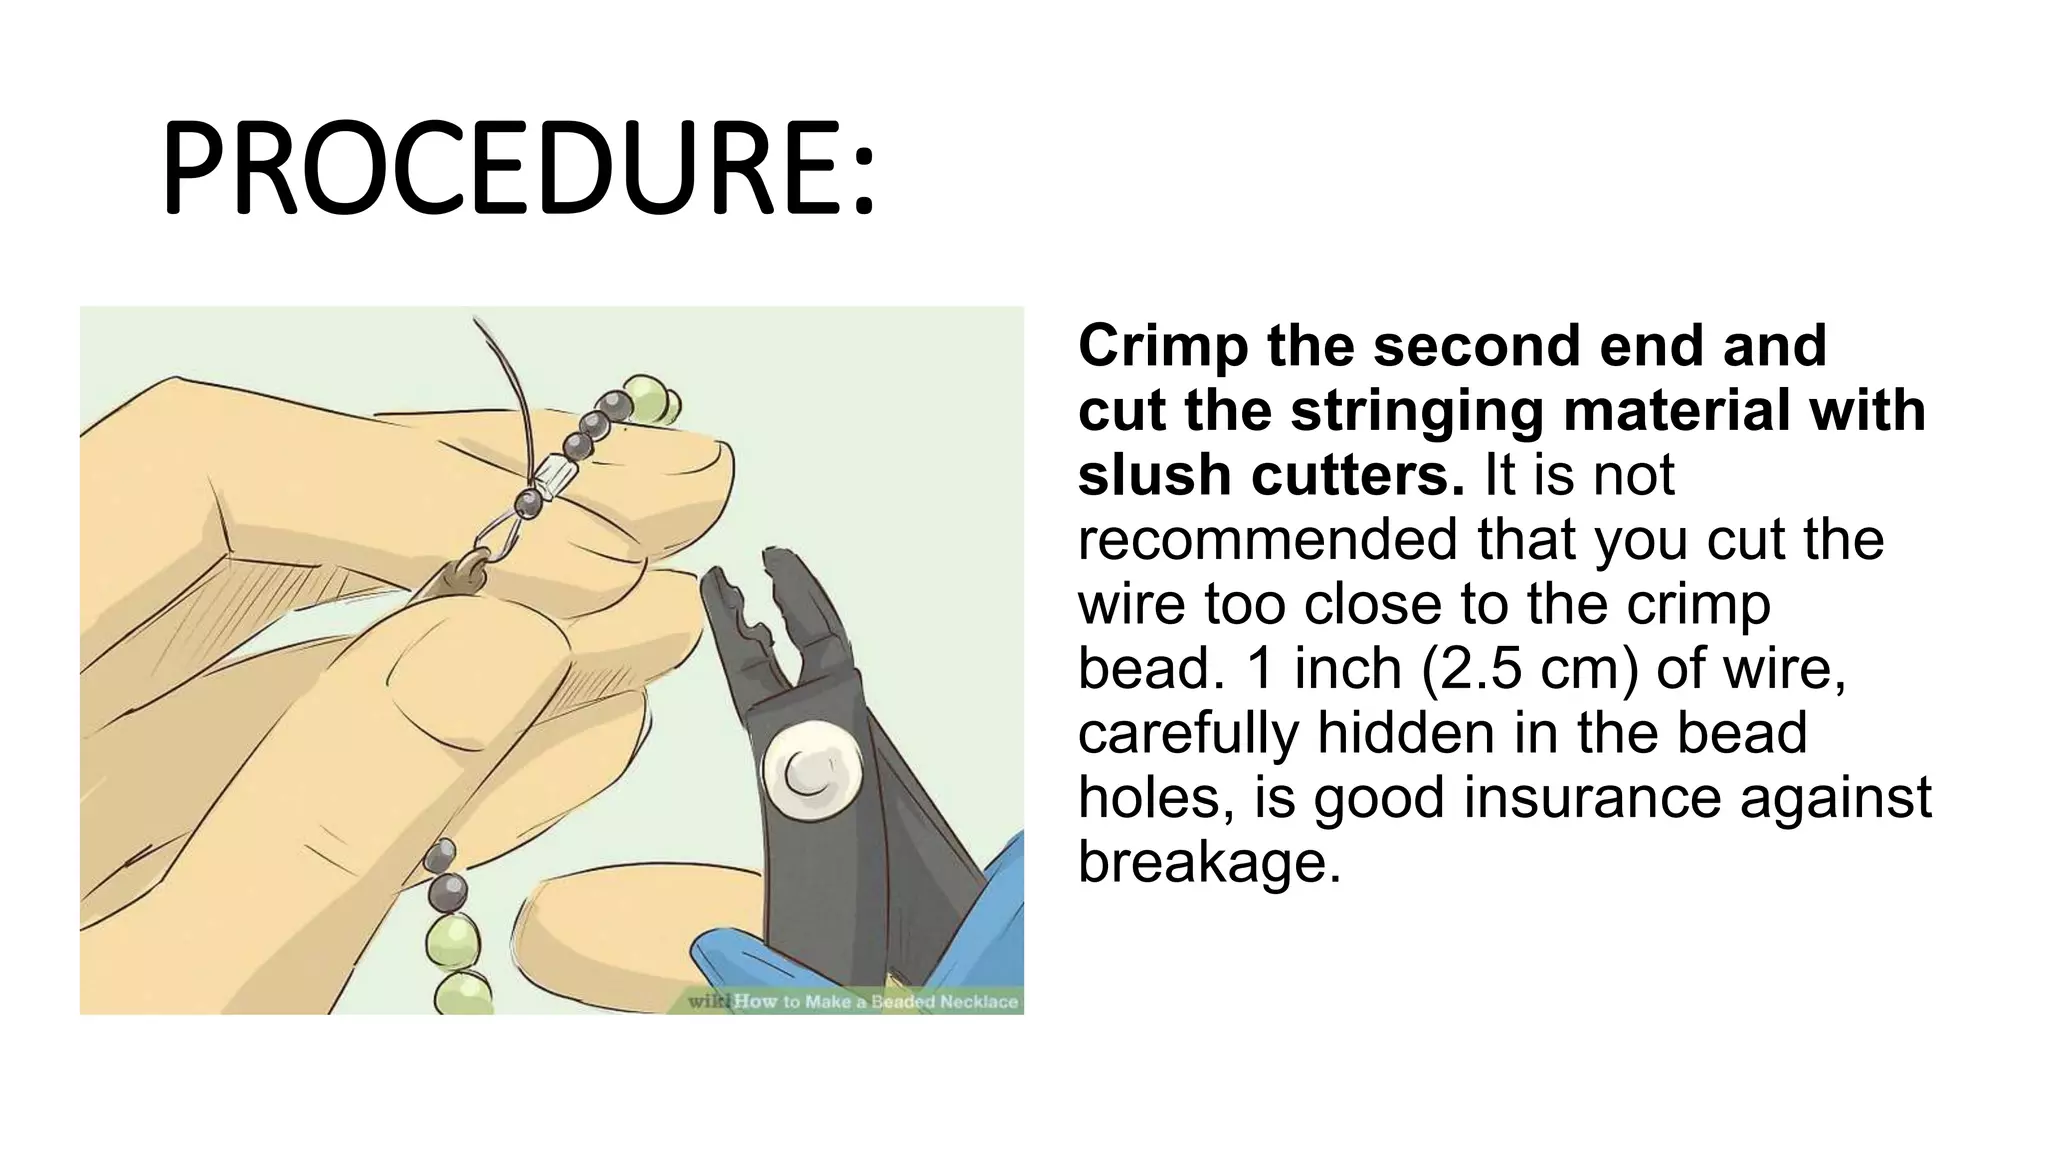
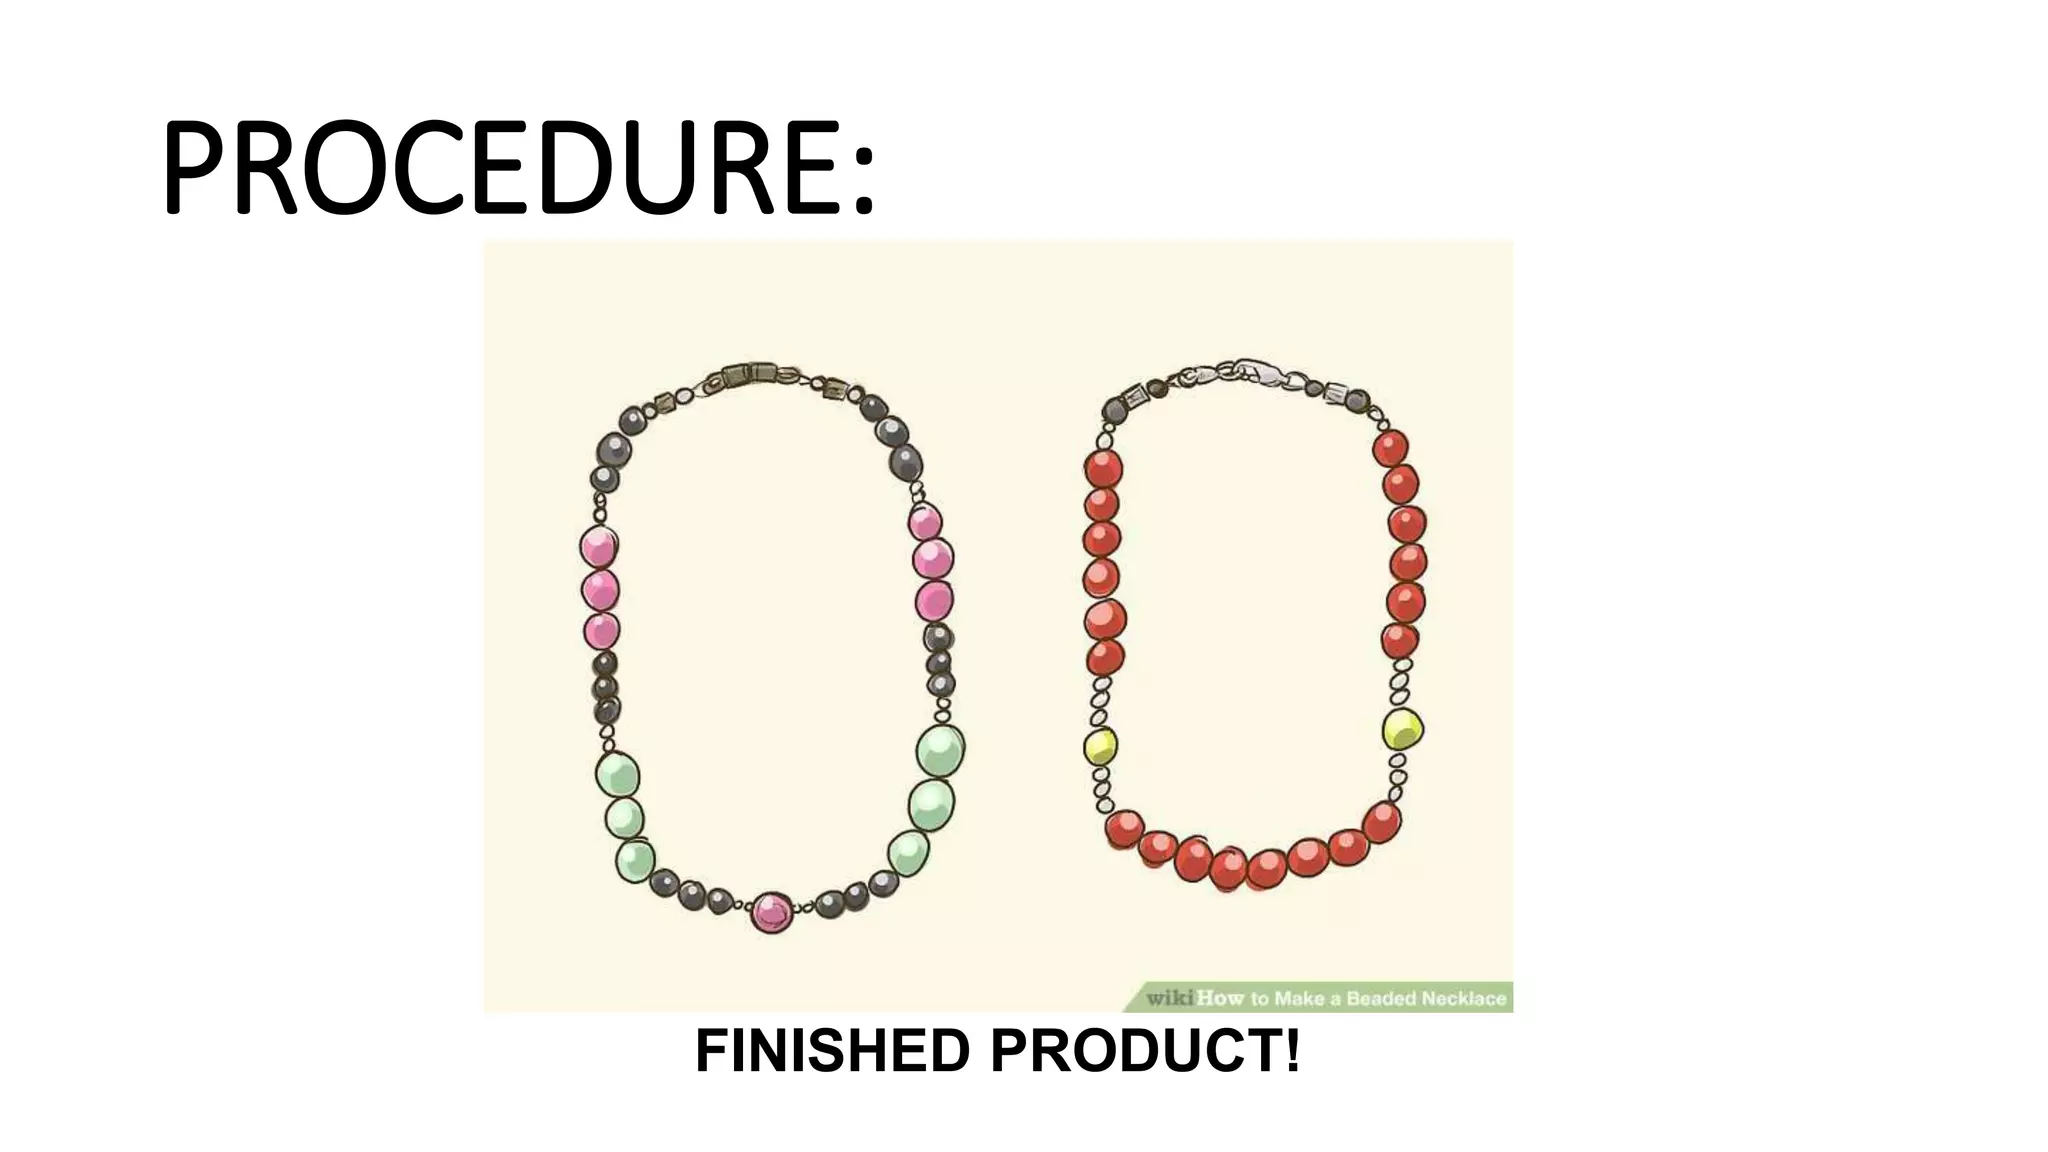
Fashion Accessories
TLE
HOW TO CREATE A NECKLACE
•Nowadays, it has been a necessity, especially for
women, to have a necklace. Beads were used to
create a necklace of your own. In this modern
times, a chain is also usually used to create a
necklace. People often order in online platforms
to avail a necklace, but do you think you can
create a necklace of your own even at home?
Let’s find out!
MATERIALS NEEDED:
Long Nose Pliers
PROCEDURE:
•Gather your beading materials. Make
sure to have all of your materials at
hand: beads, beading thread, wire
cutter, Long Nose Pliers, crimp beads,
super glue, and closures to properly
finish your necklace.
PROCEDURE:
• Determine your necklace
style. When considering which
style of necklace you'd like to
create, think about factors such as
length. If you like shorter
necklaces you might consider
making a collar or choker. If you
like longer necklaces, you might
want a lariat length (longer, usually
down to your chest) necklace.
PROCEDURE:
• Select a length. The choker is
the shortest necklace and
amounts to roughly 13 inches
total length. The collar is a
little longer, and goes down to
about 14 to 16 inches. A Lariat
is the longest, coming in at
about and over 45 inches. As
mentioned above, you can
also choose your own length
and style.
PROCEDURE:
• Measure your neck, and
then decide on a
length. Take your tape
measure, and loop it
around your neck while
looking at yourself in the
mirror. Try small and big
loops to see what you
prefer. This will give you an
idea of what your necklace
might look like on your
neck.
PROCEDURE:
• Arrange your beads on a flat
surface, like a table or a
desk. Play with the beads until
you find the design you like
best. Try different color
variations, perhaps even think
of having multiple layers of
string. You might want a
choker that wraps around your
neck a few times, or maybe
just one long loop.
PROCEDURE:
• Place your bead board on your flat surface. A bead board is a
tool that greatly facilitates the process of stringing beads, and
improves your design skills rapidly. You can use it to measure the
length of your necklace, while keeping the beads in place. If you
plan on making necklaces regularly, or even occasionally, you
should have a board at hand.
PROCEDURE:
• Cut your determined length
of beading thread, plus 6
inches. For example, if you'd
like to make a collar, cut a total
of 22 inches of thread (16
inches plus 6).
PROCEDURE:
• Cut your determined length
of beading thread, plus 6
inches. For example, if you'd
like to make a collar, cut a total
of 22 inches of thread (16
inches plus 6).
PROCEDURE:
• Gather 2 crimp beads, 1
clasp, and the beads for the
desired necklace. The next
part will give you tips on how
to thread beads properly.
PROCEDURE:
• Slide one bead onto the
string. Then, slide the
crimping bead in, and then
add another bead about 1 inch
(2.5 cm) or so down. Keep in
mind that you're not yet
transferring your design onto
the thread. These are
necessary, preliminary steps
that will secure your necklace.
PROCEDURE:
• Place one end of the clasp
(the jump ring) on after the
crimping bead. Then, make a
loop with the stringing
material.
PROCEDURE:
Thread the end of the stringing
material through the clasp
section. Then add the bead-crimp-
bead combo, and use the crimping
tool/chain nose pliers to crimp the
bead into place.
If using bead thread, you may wish to
put a dot of super glue of hypo
cement on either end to ensure that
the beads and crimp stay on.) These
steps will protect the stringing
material from rubbing on the ends of
the crimp bead, which may cause the
necklace to break.
PROCEDURE:
Slide your design onto the
string. Once you're satisfied
with your design, carefully
remove one bead at a time, and
string it onto the thread. Be sure
to leave about 3-4 inches (7.5-
10 cm) of stringing material at
the end. Thread beads onto the
stringing material until there are
none left on your bead board.
PROCEDURE:
Use a clasp section/ jump
ring and the bead-crimp-bead
combo. Try to push the
remaining stringing material into
the bead holes below the
crimping bead.
PROCEDURE:
Crimp the second end and
cut the stringing material with
slush cutters. It is not
recommended that you cut the
wire too close to the crimp
bead. 1 inch (2.5 cm) of wire,
carefully hidden in the bead
holes, is good insurance against
breakage.
PROCEDURE:
FINISHED PRODUCT!

Fashion Accessories - TLE.pptx

  • 1.
  • 2.
    HOW TO CREATEA NECKLACE •Nowadays, it has been a necessity, especially for women, to have a necklace. Beads were used to create a necklace of your own. In this modern times, a chain is also usually used to create a necklace. People often order in online platforms to avail a necklace, but do you think you can create a necklace of your own even at home? Let’s find out!
  • 3.
  • 4.
    PROCEDURE: •Gather your beadingmaterials. Make sure to have all of your materials at hand: beads, beading thread, wire cutter, Long Nose Pliers, crimp beads, super glue, and closures to properly finish your necklace.
  • 5.
    PROCEDURE: • Determine yournecklace style. When considering which style of necklace you'd like to create, think about factors such as length. If you like shorter necklaces you might consider making a collar or choker. If you like longer necklaces, you might want a lariat length (longer, usually down to your chest) necklace.
  • 6.
    PROCEDURE: • Select alength. The choker is the shortest necklace and amounts to roughly 13 inches total length. The collar is a little longer, and goes down to about 14 to 16 inches. A Lariat is the longest, coming in at about and over 45 inches. As mentioned above, you can also choose your own length and style.
  • 7.
    PROCEDURE: • Measure yourneck, and then decide on a length. Take your tape measure, and loop it around your neck while looking at yourself in the mirror. Try small and big loops to see what you prefer. This will give you an idea of what your necklace might look like on your neck.
  • 8.
    PROCEDURE: • Arrange yourbeads on a flat surface, like a table or a desk. Play with the beads until you find the design you like best. Try different color variations, perhaps even think of having multiple layers of string. You might want a choker that wraps around your neck a few times, or maybe just one long loop.
  • 9.
    PROCEDURE: • Place yourbead board on your flat surface. A bead board is a tool that greatly facilitates the process of stringing beads, and improves your design skills rapidly. You can use it to measure the length of your necklace, while keeping the beads in place. If you plan on making necklaces regularly, or even occasionally, you should have a board at hand.
  • 10.
    PROCEDURE: • Cut yourdetermined length of beading thread, plus 6 inches. For example, if you'd like to make a collar, cut a total of 22 inches of thread (16 inches plus 6).
  • 11.
    PROCEDURE: • Cut yourdetermined length of beading thread, plus 6 inches. For example, if you'd like to make a collar, cut a total of 22 inches of thread (16 inches plus 6).
  • 12.
    PROCEDURE: • Gather 2crimp beads, 1 clasp, and the beads for the desired necklace. The next part will give you tips on how to thread beads properly.
  • 13.
    PROCEDURE: • Slide onebead onto the string. Then, slide the crimping bead in, and then add another bead about 1 inch (2.5 cm) or so down. Keep in mind that you're not yet transferring your design onto the thread. These are necessary, preliminary steps that will secure your necklace.
  • 14.
    PROCEDURE: • Place oneend of the clasp (the jump ring) on after the crimping bead. Then, make a loop with the stringing material.
  • 15.
    PROCEDURE: Thread the endof the stringing material through the clasp section. Then add the bead-crimp- bead combo, and use the crimping tool/chain nose pliers to crimp the bead into place. If using bead thread, you may wish to put a dot of super glue of hypo cement on either end to ensure that the beads and crimp stay on.) These steps will protect the stringing material from rubbing on the ends of the crimp bead, which may cause the necklace to break.
  • 16.
    PROCEDURE: Slide your designonto the string. Once you're satisfied with your design, carefully remove one bead at a time, and string it onto the thread. Be sure to leave about 3-4 inches (7.5- 10 cm) of stringing material at the end. Thread beads onto the stringing material until there are none left on your bead board.
  • 17.
    PROCEDURE: Use a claspsection/ jump ring and the bead-crimp-bead combo. Try to push the remaining stringing material into the bead holes below the crimping bead.
  • 18.
    PROCEDURE: Crimp the secondend and cut the stringing material with slush cutters. It is not recommended that you cut the wire too close to the crimp bead. 1 inch (2.5 cm) of wire, carefully hidden in the bead holes, is good insurance against breakage.
  • 19.