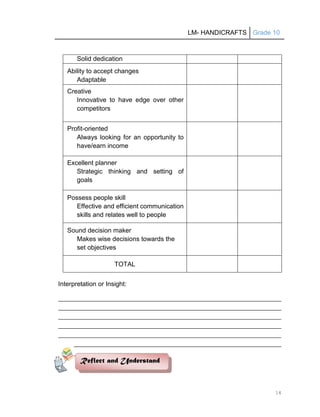
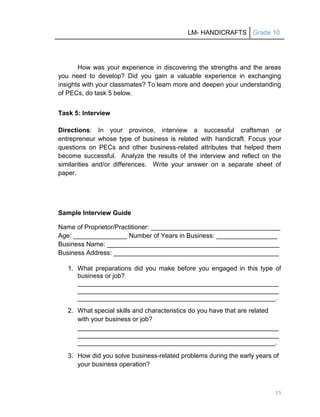
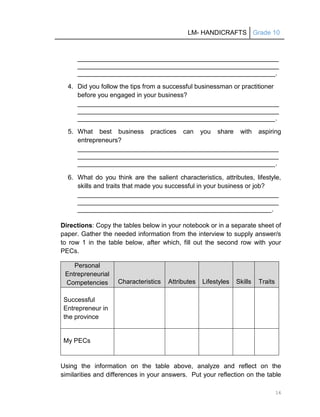
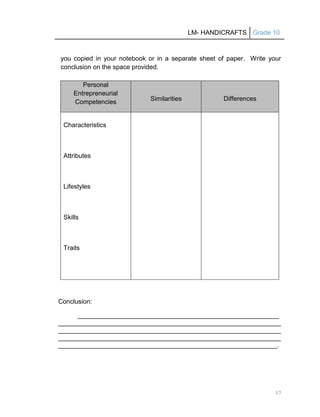
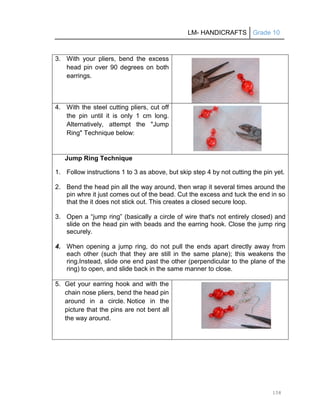
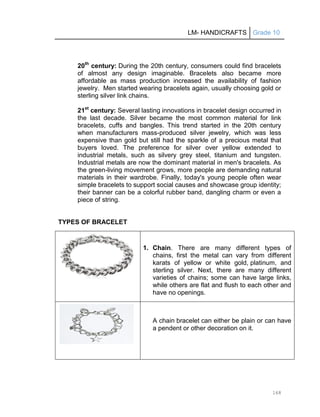
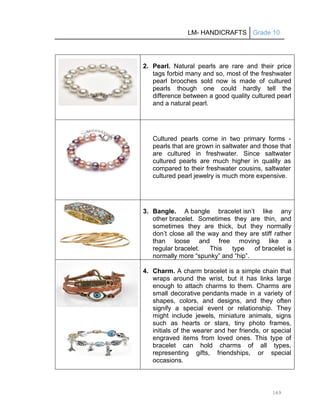
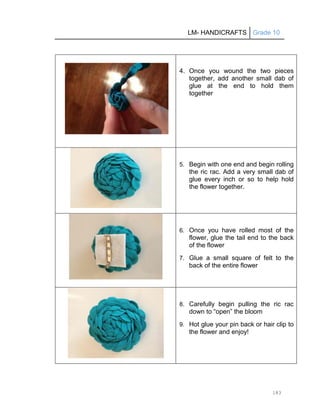
This document is a learning module for handicrafts for 10th grade students. It includes:
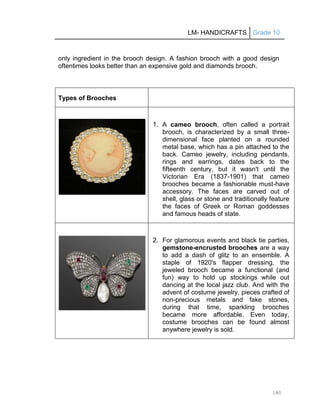
- An introduction and overview of the course objectives which are to develop personal entrepreneurial skills and perform origami, paper mache, fashion accessory creation and production.
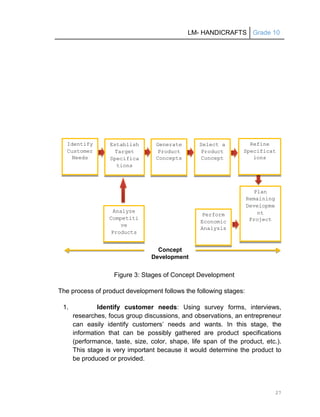
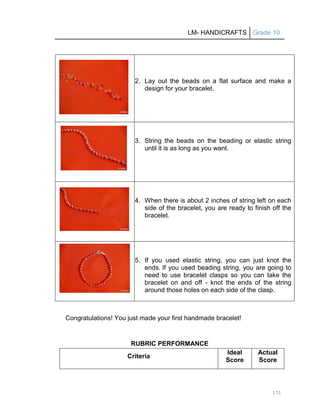
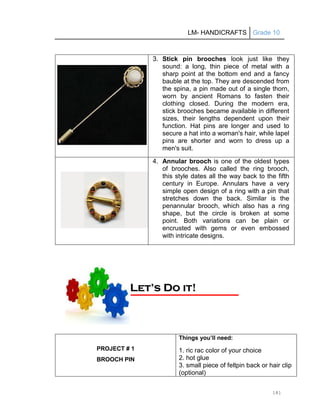
- The module is divided into 4 quarters covering different handicraft skills like origami, paper mache, and fashion accessories. Each quarter includes lessons, activities, and assessments.
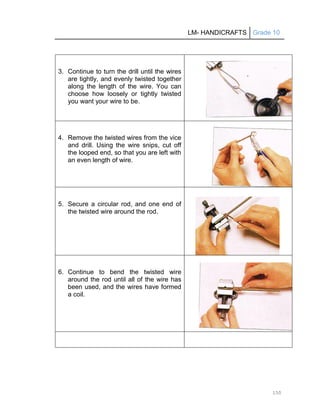
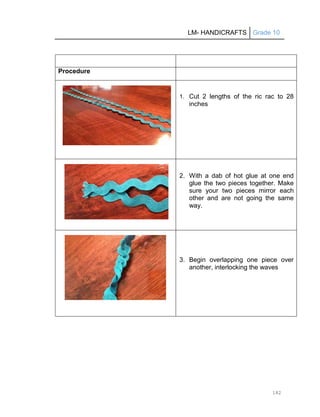
- Details are provided on how to use the learning material including completing diagnostic assessments, lessons, enhancement activities and post tests for each competency.
- The appendices include a glossary, references and answer key for assessments.
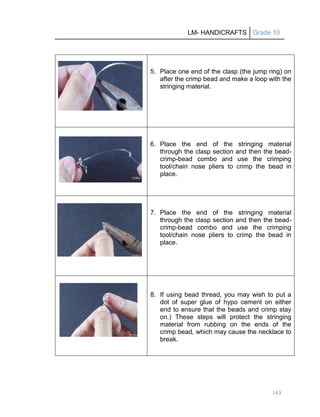
The document provides a comprehensive learning