Final qu4 evaluation
•Download as DOCX, PDF•
0 likes•164 views

I used a variety of media technologies at different stages of my coursework, including: - Blogger to document my work and share videos and presentations from other sites. - Prezi and PowerPoint to plan and explain topics. These were embedded in Blogger. - After Effects to create graphics for my trailer ident. - SurveyMonkey and Excel to collect and analyze audience feedback. - Facebook to get feedback on rough cuts from a private group. - YouTube to host and share videos and for research. - iPhone for location footage and voice memos during construction and evaluation. - Photoshop and FinalCut to construct, edit, and evaluate my work.

More Related Content
What's hot
What's hot (20)
Similar to Final qu4 evaluation
Similar to Final qu4 evaluation (20)
More from Alleyn's School Film Studies Department
More from Alleyn's School Film Studies Department (20)
Recently uploaded
Recently uploaded (20)
Final qu4 evaluation
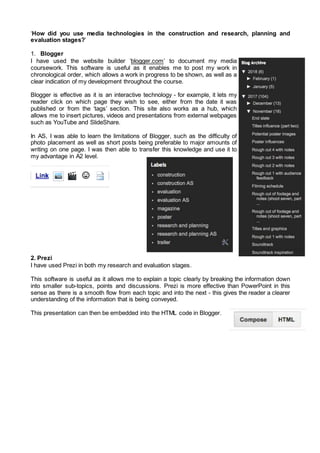
- 1. ‘How did you use media technologies in the construction and research, planning and evaluation stages?’ 1. Blogger I have used the website builder ‘blogger.com’ to document my media coursework. This software is useful as it enables me to post my work in chronological order, which allows a work in progress to be shown, as well as a clear indication of my development throughout the course. Blogger is effective as it is an interactive technology - for example, it lets my reader click on which page they wish to see, either from the date it was published or from the ‘tags’ section. This site also works as a hub, which allows me to insert pictures, videos and presentations from external webpages such as YouTube and SlideShare. In AS, I was able to learn the limitations of Blogger, such as the difficulty of photo placement as well as short posts being preferable to major amounts of writing on one page. I was then able to transfer this knowledge and use it to my advantage in A2 level. 2. Prezi I have used Prezi in both my research and evaluation stages. This software is useful as it allows me to explain a topic clearly by breaking the information down into smaller sub-topics, points and discussions. Prezi is more effective than PowerPoint in this sense as there is a smooth flow from each topic and into the next - this gives the reader a clearer understanding of the information that is being conveyed. This presentation can then be embedded into the HTML code in Blogger.
- 2. 3. PowerPoint I have used PowerPoint in both my planning and evaluation stages. This software is useful as it is clear and simple. This is most effective for shorter, quicker analysis where pictures and images are needed alongside the writing in order to illustrate my thoughts. This can then be uploaded to SlideShare and embedded into the HTML code in Blogger.
- 3. 4. After Effects I used After Effects to create the ident for my trailer (construction stage.) This software is excellent for creating sophisticated digital graphics. I think that this was very effective in rendering realistic 3D images (of the solar system), even though I was working on a reasonably basic level, as I had never used the software before and was very inexperienced. This helped greatly in making my trailer look slick and professional, especially as it is the first thing that the viewer sees when watching! 5. SurveyMonkey I used SurveyMonkey in the research stage of my coursework. I used this website to collect information about my target audience’s interests about trailers and film. This helped me a lot as I was able to have this data automatically digitised, and the quantitative put into charts without me needing to manually put it into the computer. This website is also effective as you are able to send your audience a link - quick, easy and portable - rather than giving them a physical questionnaire. This was helpful as this data gave me information about my audience’s interests in genre, style, narrative and many more. 6. Excel I used Excel in my evaluation stage for audience feedback. When I did ask my target audience to fill out a questionnaire, this software came in useful as it allowed me to key in the data quickly (and creating a chart), rather than me having to draw them by hand, hence speeding up my work.
- 4. 7. Facebook I used Facebook in my construction and evaluation stages. This social media site allowed me to create a private group with members of my target audience - this site is useful as it is easy to make posts where people will be notified and will respond to. The private element is good as it means that people are able to say what they want without the worry of strangers being able to view it. Facebook is very easy to post videos and links to as well - this is where I posted rough cuts of my trailer, which my audience then responded to, in the comments section. This site is better than YouTube, which is seen as very out of date in terms of audience responses. On Facebook, people are active on it every day, and are much more likely to comment and be responsive. It is more casual and natural, in the sense that you are able to have a conversation and react to each other’s thoughts easily.
- 5. 8. YouTube I used YouTube in all stages of my coursework. This site is useful as I use it to upload all my videos, which I can then insert onto Blogger. It may be out of fashion in terms of social media, but it is a very useful for giving a URL link / embed for another site. It is also one of the only free video sharing sites which anyone is able to access. YouTube is also extremely useful for secondary research - almost every trailer ever published can be found on there, meaning that every reference for researching trailers has been found from this site. 9. iPhone I have used my phone in my construction and evaluation stages. I used my phone for reccee shoots, both pictures and video. This is effective as it is purely for recording; the actual style and aesthetic quality is not important at these stages. The phone fits in your pocket rather than being a heavy bag full of equipment. I also used my phone’s ‘voice memos’ app for the voiceover - this was because the sound recorder did not work correctly; some of the time it did not record, and when it did a loud buzzing could be heard which completely ruined the sound. Instead I opted to use my iPhone which was the next best thing, and worked perfectly fine. The sound on it is a little echoey compared to the microphone, as the technology is not advanced enough to be able to erase the background noise on the audio. I used my phone for my Vox Pops, as these interviews are meant to be casual - this way your audience members will not feel pressurised and will therefore give you more comprehensive and truthful answers about your work! Using a phone rather than a camera is also quick and non- intrusive, which is efficient as it saves time as well as putting your interviewee at ease. 10. Lights (from art department) I used these lights when filming in the apartment building (construction stage.) These lights were very helpful as they allowed me to take control over the lighting instead of solely trying to work with what I had in terms of lighting ‘on set’ (here being a university accommodation kitchen!) This enabled me to create more atmospheric and dramatic lighting, increasing the contrast between light and dark as well as giving further detail and sharpness on the actor’s faces. I used these lights after realising that I had to do a re-shoot as the light levels in the accommodation were too low, meaning the quality of the footage was not to the standard that I wanted it to be.
- 6. I also used put an orange coloured gel on the light in order to bring out the colours in the actor’s skin and hence helping to make the colours richer and more intense. 11. Photoshop This software has it’s benefits, as it is designed for professional graphic designers rather than interested consumers, meaning that it is high tech and many options are available. This allows me to be more creative and experimental with my visual ideas. However, there is also a downside to this as it is less intuitive than software such as FinalCut, meaning it is harder to ‘get the hang of’ working with it. This leads to going over things several times before becoming confident and therefore work taking longer to complete. 1. I used Photoshop for the construction of my poster - I created text boxes over the imported photo in order to combine the image and text. I also used colour correction to enhance the saturation and contrast of the light on the face. 2. I also used it for the construction of my magazine cover - I scanned in my handmade image, and again used text boxes to incorporate the writing onto my image. This digital element made the cover look slick and professional when combined with the collage. I also imported images of 3D glasses and a barcode to add further detail which gave the finishing touches to the product, as well as using colour correction to increase the saturation. Another tool I used was the Spot Healing Brush, which I used to remove a couple of small dirt marks on the face of the scanned image. 3. I then used Photoshop for my evaluation of the ancillary tasks - this was useful as I was able to lay out the finished product, influences and written evaluation all together on one large canvas. This is effective as the reader is able to view everything simultaneously, which is more engaging and suitable when talking about a visual product than a linear essay, for example. 4. I also used Photoshop in the research stage of my ancillary tasks. For research it proved useful when labelling and talking about similar media texts. It is effective as it allows the picture and text to be of equal importance, when usually the writing is given more significance. In media, however, visuals are key and Photoshop’s large canvases allow room for both. 12. FinalCut
- 7. FinalCut has been essential to my coursework, as it is the software I used for Post Production as well as being a way of presenting my work in evaluation. It is more intuitive than Photoshop which is a benefit as it is much more simple to use and means I can get a lot of editing done in a short amount of time. My confidence with this software also allows me to expand my creative ideas as I am able to alter and experiment with the tools and methods that I already know how to use. Here are some of the things that FinalCut has allowed me to do in post production: 2. Editing techniques; visuals - Superimposition - this effect was essential to my trailer in order to create a sense of confusion (due to James’s drug addled mind) and a distorted reality. I was able to layer two, or even three, pieces of footage on top of each other before decreasing the opacity in order for each layer to be visible. - Colour correction - as the colouring was key for the trippy, psychedelic atmosphere of the film, I ensured that all my shots had increased saturation and contrast in order for the colours to be as vibrant as possible (without looking exaggerated or fake.) I also used other tools as times here, such as altering the hues to give a warmer / colder feel to certain shots. I also changed the ‘conversation scene’ to monochrome with the black and white filter before altering the contrasts and exposure here too. - Speed and shot reversal - At times, I wanted certain shots to be slightly sped up / slowed down in order to keep with the pace of both the other visuals and the soundtrack. E.g, I sped up a shot of James walking in order for him to be moving in time with the guitar riff. I did this by customising the speed of the clip. As well as this, I used ‘reverse clip’ for shots to be played backwards, e.g. a close up of James lifting his head. This editing effect enabled me to enhance the feeling of James’s normal reality being subverted, as well as the notion of his brain being rewired and processing in different ways. 2. Non-continuity editing - For the majority of my trailer I used montage editing, which is a difference from the way in which I used FinalCut to edit in AS, which was continuity editing. In my A2 coursework, the editing I used was non-chronological and more like a patchwork of a mental state rather than a sequence of events that must make chronological sense. As my main product this year is a trailer, this also means that my narrative is open ended (an ellipsis.)
- 8. - FinalCut made this editing easy to do. To achieve a montage sequence, the editing must have very short takes which use cutaways and jump cuts in order to build and keep up tension, atmosphere and suspense. I was able to cut down long clips by using the Trim tool, but was able to cut the clip to a precise moment by using the Blade tool. The Blade tool also proved useful for montage as I was able to slice up the clip into multiple ‘chunks’, which I could then place and insert between clips throughout the whole trailer. This made my product look more professional as the trailer references the same scene throughout, rather than all in one go before being discarded / forgotten about. This referring back helps to consolidate the narrative and give further structure to the trailer. - I also used a flash back/forward, which is another example of non-continuity editing. I used the colour correction (black and white effect) to help differentiate this from being part of the montage sequence. Other advantages… - The clear and simple layout of FinalCut also worked to my advantage; when working with a large amount of footage, it can become confusing to know which clip is the correct / relevant one. This software was effective as it displays still images from the clip, so the user is able to identify the take. It also allows you to rename the file so it is easier to find. - I also used it to create my animatic in my planning stage; this was effective as it made me aware of the pacing that I needed for my trailer and helped me to figure out the timings of my shots, and what I could realistically fit into two minutes. - I also used this software for creating rough cuts of each film shoot that I did in construction. This was incredibly useful as I was able to clearly view how much footage I had shot, as well as being able to identify which clips I could discard and which were worth keeping and using. I was able to place everything in chronological order as well as organising by scene (e.g. ‘bathroom scene’ / ‘office scene’). This helped me greatly as I was able to keep track of everything that I had done, and allowed me to identify what I still needed to do, or improve / re shoot anything that was not good enough. FinalCut is able to be exported into a video file which is effective as I was then able to view these rushes / reels of footage easily through YouTube when needing to reference the correct clips when during the construction process. - FinalCut also proved useful in the evaluation stage; I produced a video of photo files to accompany a voiceover presentation. This software is effective as you are able to combine audio and visual files, and change the timing of each so they synchronise correctly.
- 9. 13. Sound recorders I used the digital audio recorders in the construction stage of my coursework. This proved to be a step up from my AS work, as I did not have a partner to work with to help me (as my job was to do camerawork as she controlled the sound.) Therefore, I had to learn new skills; how to ensure that the mic was recording and saving the files as well as being at the correct level to pick up the sounds. This proved harder than it seemed as the recorders were very unreliable; the plug connectors were dodgy, meaning no sound was picked up unless the plugs were all extremely tightly secured. Also, even when this was successful, there was a loud buzzing present in all of the tracks (due to a fault within the recorder.) I used the digital recorders to record soundbites - however, I did not include many of them in the final cut of the trailer as I felt as if they detracted from the soundtrack. I recorded foley sound in the streets of China Town, footsteps of both James and Andy walking and tubes entering and leaving the station. However, I didn’t use any of these in the trailer. Although, I did use other recordings in effective ways; the sound of the elevator ‘dinging’ and the voice stating ‘floor 7’, the sound of James typing on his keyboard, and the sound of the tap dripping. These worked with the soundtrack as they are very clear, definite sounds rather than ‘background noise’. 14. Cameras (and lenses) I used the Canon 80D lens and a 50mm lens to shoot my trailer. This camera is a major step up from the point and shoot cameras that I used for my pre-lim task at AS, as these have many professional features including HD video and many different light / exposure / atmosphere settings. Last year at AS, me and my partner used her Canon 550D camera, with a 50mm f1.4 lens. This lens was very effective as it was able to fix pin sharp focus on the foreground whilst blurring the background. This made our footage look very professional, combined with the lens’s ability to pick up rich detail and colouring. However, one downside of using this lens was the fact that it did not have an auto focus - this meant that we had to manually focus the camera if anything within the frame moved when shooting.
- 10. This year, filming was technically easier as the lens I used had an auto focus, meaning I did not have to manually adjust the lens as the figures moved within the frame. This meant I was able to focus more on factors such as composition and camera angles. However, I preferred using the (…) lens at AS as it was able to capture vibrant colour and rich, crisp detailing even in very low light. While filming my trailer I found that I had to be very conscious of the quality of my light levels, as the camera was not able to pick up the vibrance very well in darker conditions, and appeared grainy when the footage was imported into the computer. This led to me having to do a re-shoot with specialised lighting in order to fix these issues.