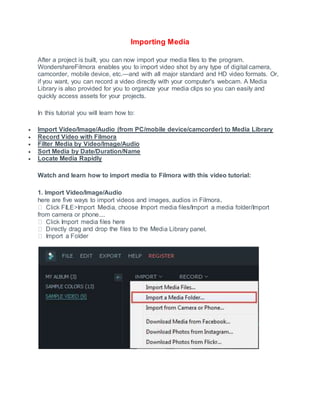
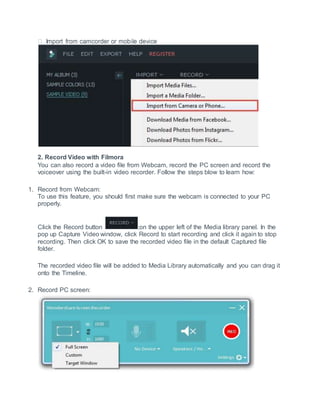
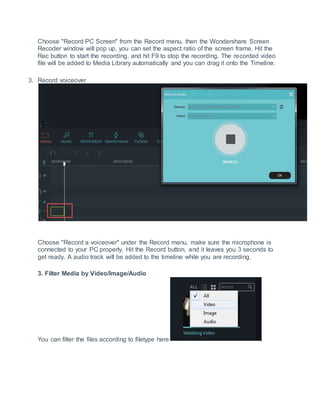
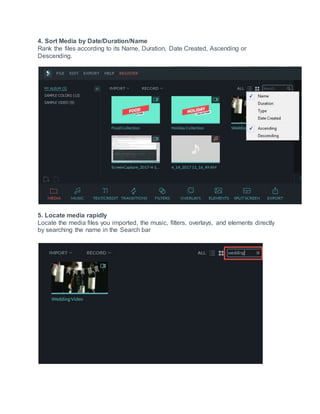
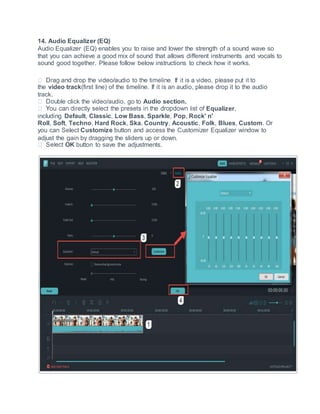
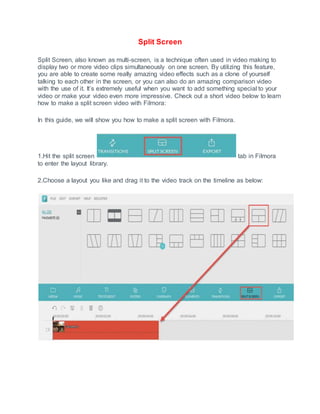
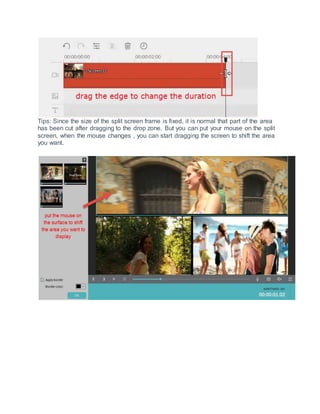
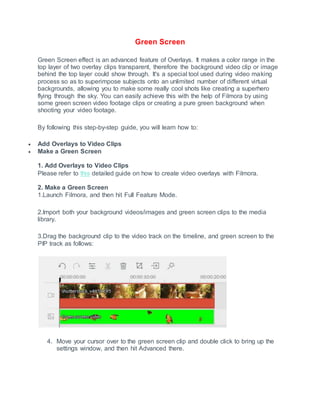
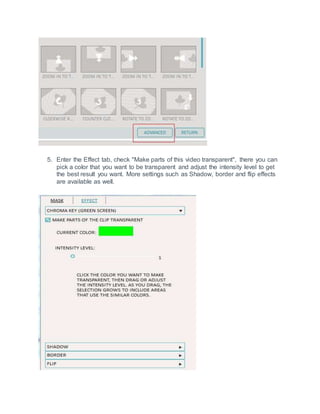
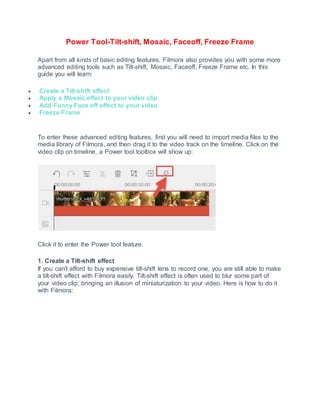
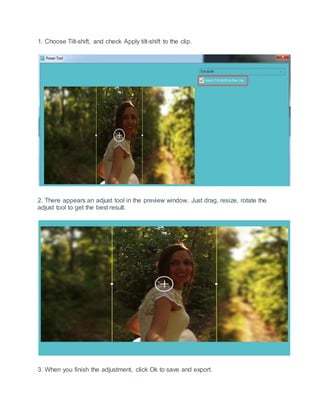
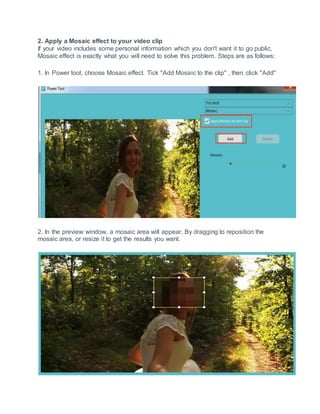
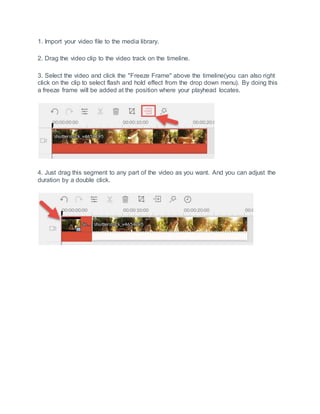
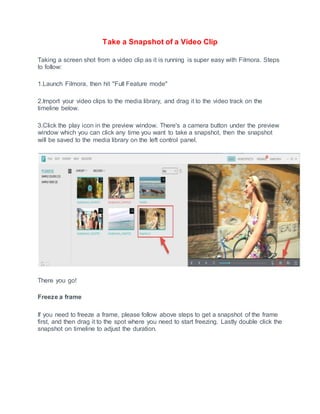
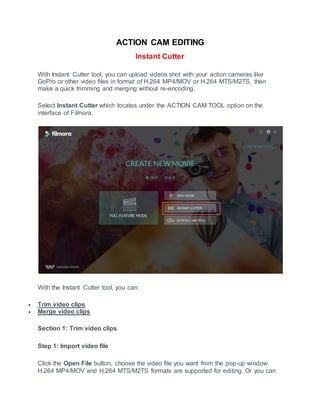
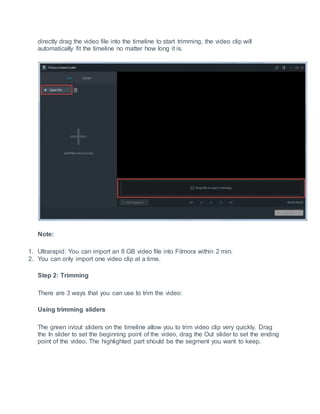
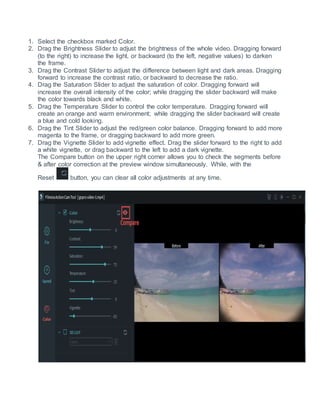
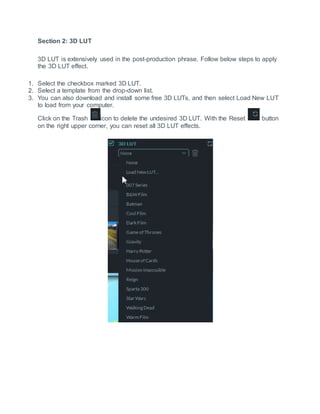
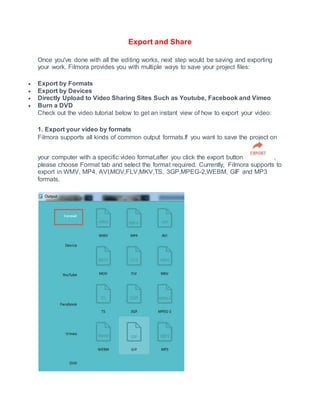
Filmora is an all-in-one video editing software with a simple interface. It has both an easy mode for creating videos with themes and an advanced mode for fully customized editing. The document discusses how to import media, perform basic editing functions like trimming and splitting clips, and navigate Filmora's interface. Key points include importing video, images, and audio, recording directly in Filmora, filtering and sorting media, performing edits like rotations and crops, and joining multiple videos together.


![BASIC EDITING
EDITING VIDEO
Trim/Split/Rotate/Crop/Join video
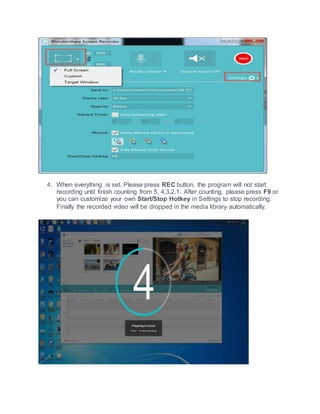
After all the media files have been imported, you can now edit them in your video
project. You can edit the sequences by arranging clips in the order you want them to
appear in your movie, and "clean up" your video footage, edit out the unwanted parts
and keep only the best bits to include in your movie and more. In this guide you will
learn:
Select Clips in the Media Library
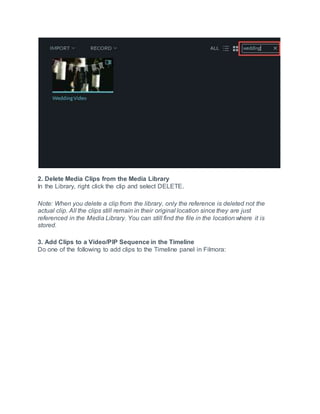
Delete Clips from the Media Library
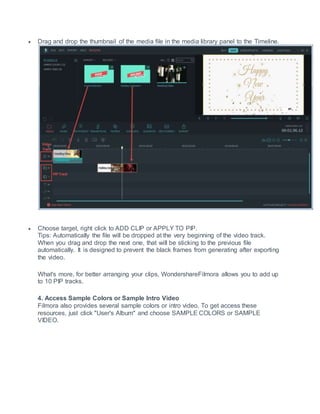
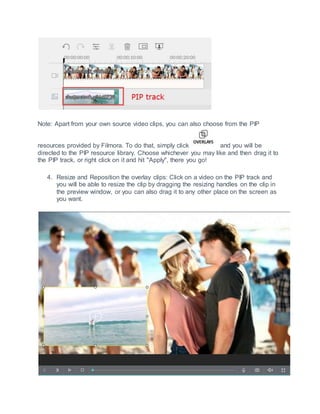
Add Clips to a Video/PIP Sequence in the Timeline
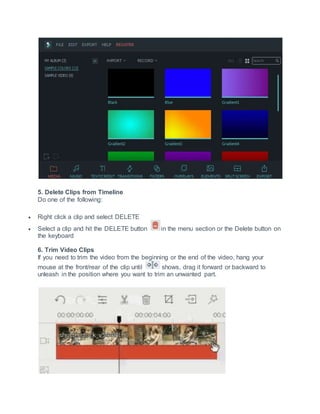
Access Sample Colors or Sample Intro Video
Delete Clips from Timeline
Trim Video Clips
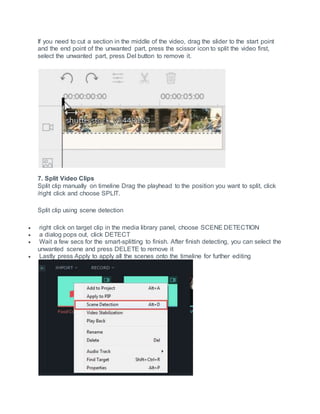
Split Video Clips and scene detection
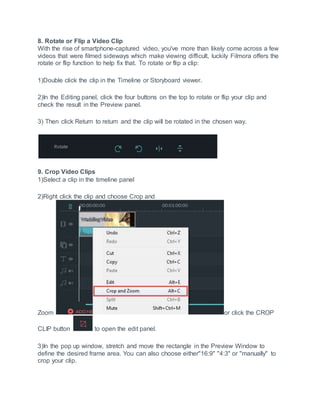
Rotate Video Clips
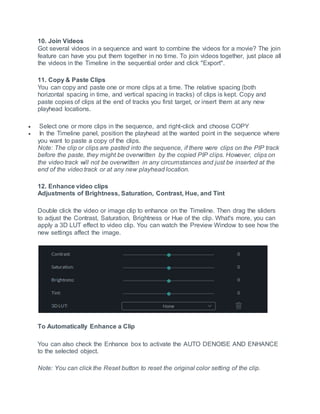
Crop/Flip Video Clips
Join Video Clips
Copy and Paste Video Clips
Enhance video clips
Change video playback speed
Rearrange the Playback Order of Clips in a Track
Zoom in/Zoom out Timeline
Resize videos
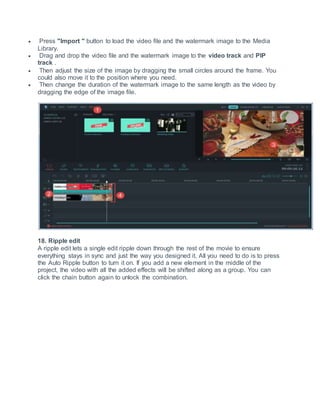
Add watermark/logo to the video
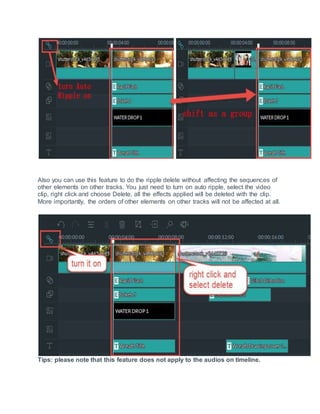
Ripple edit
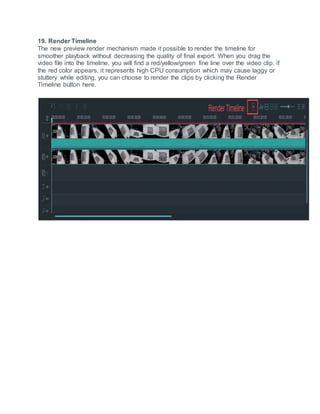
Render Timeline
1. Select Clips in the Media Library
1. Select one media file: click a thumbnail.
2. Select multiple media files: press and hold [Ctrl], and then click the thumbnails you
want.
3. Select a sequence of media files: click the first thumbnail in the sequence, press and
hold [Shift], and then click the last thumbnail in the sequence.
Note: You can locate the media file directly by searching its name in the Search bar](https://image.slidesharecdn.com/filmoratutorial-200406173020/85/Filmora-tutorial-20-320.jpg)


![Wondershare Filmora 14 Full Crack With Activation Key [Latest 2025]](https://cdn.slidesharecdn.com/ss_thumbnails/wondersharefilmora14guide-250911072933-1f2ad6e0-thumbnail.jpg?width=640&height=640&fit=bounds)


