1) The student researched music videos using secondary sources like Wikipedia and online articles. They watched existing music videos on YouTube for inspiration.
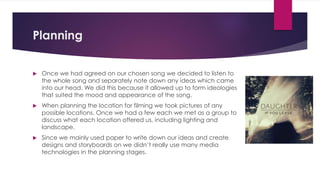
2) In planning, the student listened to the song and took location photos, though mostly used paper for planning.
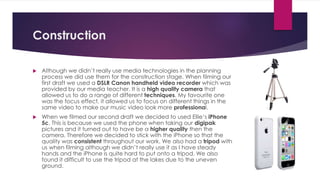
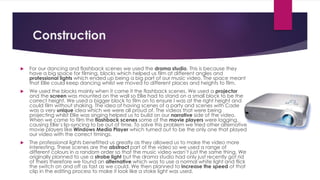
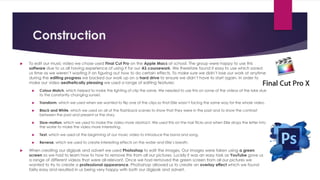
3) In construction, they filmed drafts using a DSLR and iPhone, and used a drama studio with professional lights and a projector. They edited in Final Cut Pro, adding effects and color matching. Photoshop removed a green screen.
Unblocking The Main Thread Solving ANRs and Frozen Frames
Evaluation question 4
1. EVALUATION QUESTION 4: How did
you use media technologies in the
construction, research, planning
and evaluation stage?
2. Research
In order to establish what the definition of a music video actually is I did
some research using mostly secondary sources. The website that I found
most helpful was Wikipedia, this is because it does not only define what a
music video is but also gave me a range of information on the history of
music videos. I understood Wikipedia is sometimes an unreliable source
due to it being anonymous and can be edited with incorrect information
so I did further research on reliable websites to check that the information
was in fact correct.
3. Research
Other secondary source I used consisted of online articles from Media
Magazine. This included:
An interview with Pete Fraser, which I thought was a very useful source as it told
me all the things I had to do in order to achieve a high grade in Media. Pete
Fraser is the chief examiner for OCR Media Studies so I knew the information I
was given was accurate and reliable and would benefit me greatly.
An extract from ‘Sound and Vision: A Music Video Reader’ by Simon Frith. The
extract gave me very useful information on Commodification, Text
Schizophrenia, Postmodern Disappearance of Reality and The Erosion of
Authenticity. All these are very useful factors to know when creating a music
video. Since this was published on the website I was confident that the
information was reliable due to the extract having to be approved in order to
be on the website.
An interview with Suzy Davis, who is an award winning editor. The editing
process is one of my favourite parts of creating a project so I found this very
interesting. She has a passion and a specialism in editing which showed me that
the information I was reading would help me due to it being in great detail.
4. Research
To further my research I used YouTube which offered me to
millions of music videos, recent and old. I watched pop-up
videos like Rembrandts - I'll be there for you. Pop-up videos
consist of a range of information about the singer/band and
anyone in the video. Since this song is the ‘Friends’ theme
tune it consisted of facts about the band and then the main
six actors in ‘Friends’. I found this really interesting and learnt
many fact that I didn’t know.
Watching existing music videos gave me some inspiration
and ideas that I wanted to include in my music video. To
help me decide on what type of music video I wanted to
create I watched a range of the three type of music video
(Narrative, Performance and Concept) to give my a clear
indication of what each type consists of.
5. Planning
Once we had agreed on our chosen song we decided to listen to
the whole song and separately note down any ideas which came
into our head. We did this because it allowed up to form ideologies
that suited the mood and appearance of the song.
When planning the location for filming we took pictures of any
possible locations. Once we had a few each we met as a group to
discuss what each location offered us, including lighting and
landscape.
Since we mainly used paper to write down our ideas and create
designs and storyboards on we didn’t really use many media
technologies in the planning stages.
6. Construction
Although we didn’t really use media technologies in the planning
process we did use them for the construction stage. When filming our
first draft we used a DSLR Canon handheld video recorder which was
provided by our media teacher. It is a high quality camera that
allowed us to do a range of different techniques. My favourite one
was the focus effect, it allowed us to focus on different things in the
same video to make our music video look more professional.
When we filmed our second draft we decided to used Ellie’s iPhone
5c. This is because we used the phone when taking our digipak
pictures and it turned out to have be a higher quality then the
camera. Therefore we decided to stick with the iPhone so that the
quality was consistent throughout our work. We also had a tripod with
us when filming although we didn’t really use it as I have steady
hands and the iPhone is quite hard to put onto a tripod. We also
found it difficult to use the tripod at the lakes due to the uneven
ground.
7. Construction
For our dancing and flashback scenes we used the drama studio. This is because they
have a big space for filming, blocks which helped us film at different angles and
professional lights which ended up being a big part of our music video. The space meant
that Ellie could keep dancing whilst we moved to different places and heights to film.
We used the blocks mainly when it came it the flashback scenes. We used a projector
and the screen was mounted on the wall so Ellie had to stand on a small block to be the
correct height. We used a bigger block to film on to ensure I was at the right height and
could film without shaking. The idea of having scenes of a party and scenes with Cade
was a very unique idea which we were all proud of. The videos that were being
projecting whilst Ellie was singing helped us to build on our narrative side of the video.
When we came to film the flashback scenes some of the movie players were lagging,
causing Ellie’s lip-syncing to be out of time. To solve this problem we tried other alternative
movie players like Windows Media Player which turned out to be the only one that played
our video with the correct timings.
The professional lights benefitted us greatly as they allowed us to make the video more
interesting. These scenes are the abstract part of the video so we used a range of
different colours in a random order so that the music video wasn’t just the same thing. We
originally planned to use a strobe light but the drama studio had only just recently got rid
of theirs therefore we found an alternative which was to use a normal white light and flick
the switch on and off as fast as we could. We then planned to increase the speed of that
clip in the editing process to make it look like a stoke light was used.
8. Construction
To edit our music video we chose used Final Cut Pro on the Apple Macs at school. The group were happy to use this
software due to us all having experience of using it for our AS coursework. We therefore found it easy to use which saved
us time as we weren’t wasting it on figuring out how to do certain effects. To make sure we didn’t lose our work at anytime
during the editing progress we backed our work up on a hard drive to ensure we didn’t have to start again. In order to
make our video aesthetically pleasing we used a range of editing features:
Colour Match, which helped to make the lighting of clip the same. We needed to use this on some of the videos at the lake due
to the constantly changing sunset.
Transform, which we used when we wanted to flip one of the clips so that Ellie wasn’t facing the same way for the whole video.
Black and White, which we used on all of the flashback scenes to show that they were in the past and to show the contrast
between the past and present or the story.
Slow-motion, which we used to make the video more abstract. We used this on the hair flicks and when Ellie drops the letter into
the water to make the video more interesting.
Text, which we used at the beginning of our music video to introduce the band and song.
Reverse, which we used to create interesting effects on the water and Ellie’s breath.
When creating our digipak and advert we used Photoshop to edit the images. Our images were taken using a green
screen so we had to learn how to how to remove this from all our pictures. Luckily it was an easy task as YouTube gave us
a range of different videos that were all relevant. Once we had removed the green screen from all our pictures we
wanted to try to create a professional appearance. Photoshop allowed us to create an overlay effect which we found
fairly easy and resulted in us being very happy with both our digipak and advert.
9. Evaluation
In the evaluation stage I used a variety of media technologies. In order to
gain feedback from the relevant people we filmed and gave
questionnaires to people within our target audience age range and then
also our media teacher. We then turned this feedback into pie charts and
bar charts on Microsoft Excel to show the data in different ways. This
allowed us to visually see our feedback and to compare the data.
We also used YouTube in the evaluation stage to upload our music video.
We chose to upload it onto YouTube because it allows anyone to watch it
and give us feedback by commenting below the video. This also helped
us to identify whether we had created a music video which had
repeatability, authenticity and appealed to the correct target audience.