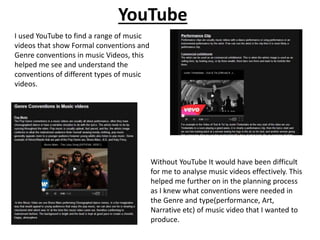
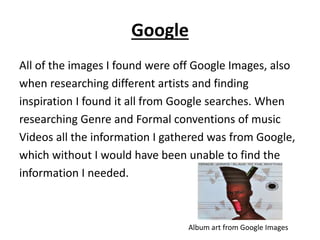
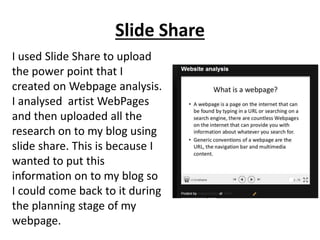
How did you use media
technologies in the construction
and research, planning and
evaluation stages?
Technologies used
in research
YouTube
I used YouTube to find a range of music
videos that show Formal conventions and
Genre conventions in music Videos, this
helped me see and understand the
conventions of different types of music
videos.
Without YouTube It would have been difficult
for me to analyse music videos effectively. This
helped me further on in the planning process
as I knew what conventions were needed in
the Genre and type(performance, Art,
Narrative etc) of music video that I wanted to
produce.
Google
All of the images I found were off Google Images, also
when researching different artists and finding
inspiration I found it all from Google searches. When
researching Genre and Formal conventions of music
Videos all the information I gathered was from Google,
which without I would have been unable to find the
information I needed.
Album art from Google Images
Blogspot
All my research was posted on Blogspot.
Using Blogspot I was able to organise all
my research making it easy to access
online, I could embed YouTube videos
and images on to Blogspot that I could
look back at. I was able to post my work
in order. This helped me a lot as I could
easily go back to my research whenever
I needed to.
Windows Movie Maker
• I used Windows Movie Maker to edit and put
together the video that I produced when
doing my General research on CDs and why
audiences still buy them. I then uploaded this
onto my Blog. This helped me identify what
kind of things audiences look for when buying
CDs.
Slide Share
I used Slide Share to upload
the power point that I
created on Webpage analysis.
I analysed artist WebPages
and then uploaded all the
research on to my blog using
slide share. This is because I
wanted to put this
information on to my blog so
I could come back to it during
the planning stage of my
webpage.
Technologies used
in Planning
Photo bucket
We uploaded all our story boards, blocked plans,
images used for digi-pack etc onto Photo
bucket as it was safe on there and any of us
could easily access it. It made it easier for our
group as we didn't have to keep asking each
other for pieces of work instead it was all
available on photo bucket.
Whats app/ Mobile Phones
All members of our phone had access to a mobile phone
which was great as it meant we could communicate with
each other properly. We created a Whats App Group
were we would discuss and develop our concept ideas
and make plans for our production work and discuss any
issues we had. Android phones were very helpful as we
could take pictures of our work and send them to each
other instantly through the internet.
Internet/Google Maps
I used the internet for location scouting for our original
piece, I was able to find studios on Google and call them up
to check if there available. When I found one in our price
range I used Google maps to find the bus route to the
location and shared this on the Whats app group with the
rest of my Group. Without Google Maps and the internet
we would have struggled to find a studio and we would
have struggled to get there too.
Construction:
Digi-pak
Photoshop
Photoshop was used to create my whole Digi-pack. I
used photo shop to edit all my images and cut out the
bits that I don't need. I added different colour effects
to images and manipulated them to look the way I
wanted them to. I self taught my self how to edit my
exploring the different options available on
Photoshop.
One Image that I
edited into four
different images
The Images were taken on a
HD camera that I owned to get
highest quality picture
possible.
Prezi
I created a Prezi Account on
which I created a
presentation. I uploaded
each draft of my Digipack
and analysed it and wrote
down the audience feed back
I got for each one. This
allowed me to see which
areas I needed to work on
when improving my Digi-pack
and shows the development
to the final product.
Construction:
Website
WIX
I created my Artists website using
Wix. Wix allowed me to create a
brand new website in way I
pleased and it provided templates
to help me do so. As I'm not a
professional Website Designer It
seemed like the best website
designer for me So it was simple
but flexible too. It allowed me to
embed Videos from YouTube and
upload pictures I had edited on
Photoshop on to the website.
Construction:
Video
Final Cut
The main editing Software we used when
producing our Video was Final Cut. We used
Final Cut to put together all the video clips we
had filmed. To make it flow and not look jumpy
we used different effects and fades. We were
trained in using Final cut and it was a software
that we were familiar and comfortable using.
HD Camera
We used our own HD Sony Camera and filmed all our footage
in HD. This is because our Music Video was filmed in the
forest and the camera we were given was not as effective in
the open and in direct sunlight the image came out to dark.
The camera we used was sharper and adjusted the colour in
the sunlight so it doesn't look dark. We also attached a glide
cam in order to take panning shots which made the video
look more professional.
Facebook
I posted my Final Edit on to Facebook where I
asked for feedback, some gave me
constructive criticism and some gave me
comments saying it is good. However, I was
only given a little helpful advice on how to
improve my Video.

Evaluation Question 4

  • 1.
    How did youuse media technologies in the construction and research, planning and evaluation stages?
  • 2.
  • 3.
    YouTube I used YouTubeto find a range of music videos that show Formal conventions and Genre conventions in music Videos, this helped me see and understand the conventions of different types of music videos. Without YouTube It would have been difficult for me to analyse music videos effectively. This helped me further on in the planning process as I knew what conventions were needed in the Genre and type(performance, Art, Narrative etc) of music video that I wanted to produce.
  • 4.
    Google All of theimages I found were off Google Images, also when researching different artists and finding inspiration I found it all from Google searches. When researching Genre and Formal conventions of music Videos all the information I gathered was from Google, which without I would have been unable to find the information I needed. Album art from Google Images
  • 5.
    Blogspot All my researchwas posted on Blogspot. Using Blogspot I was able to organise all my research making it easy to access online, I could embed YouTube videos and images on to Blogspot that I could look back at. I was able to post my work in order. This helped me a lot as I could easily go back to my research whenever I needed to.
  • 6.
    Windows Movie Maker •I used Windows Movie Maker to edit and put together the video that I produced when doing my General research on CDs and why audiences still buy them. I then uploaded this onto my Blog. This helped me identify what kind of things audiences look for when buying CDs.
  • 7.
    Slide Share I usedSlide Share to upload the power point that I created on Webpage analysis. I analysed artist WebPages and then uploaded all the research on to my blog using slide share. This is because I wanted to put this information on to my blog so I could come back to it during the planning stage of my webpage.
  • 8.
  • 9.
    Photo bucket We uploadedall our story boards, blocked plans, images used for digi-pack etc onto Photo bucket as it was safe on there and any of us could easily access it. It made it easier for our group as we didn't have to keep asking each other for pieces of work instead it was all available on photo bucket.
  • 10.
    Whats app/ MobilePhones All members of our phone had access to a mobile phone which was great as it meant we could communicate with each other properly. We created a Whats App Group were we would discuss and develop our concept ideas and make plans for our production work and discuss any issues we had. Android phones were very helpful as we could take pictures of our work and send them to each other instantly through the internet.
  • 11.
    Internet/Google Maps I usedthe internet for location scouting for our original piece, I was able to find studios on Google and call them up to check if there available. When I found one in our price range I used Google maps to find the bus route to the location and shared this on the Whats app group with the rest of my Group. Without Google Maps and the internet we would have struggled to find a studio and we would have struggled to get there too.
  • 12.
  • 13.
    Photoshop Photoshop was usedto create my whole Digi-pack. I used photo shop to edit all my images and cut out the bits that I don't need. I added different colour effects to images and manipulated them to look the way I wanted them to. I self taught my self how to edit my exploring the different options available on Photoshop. One Image that I edited into four different images The Images were taken on a HD camera that I owned to get highest quality picture possible.
  • 14.
    Prezi I created aPrezi Account on which I created a presentation. I uploaded each draft of my Digipack and analysed it and wrote down the audience feed back I got for each one. This allowed me to see which areas I needed to work on when improving my Digi-pack and shows the development to the final product.
  • 15.
  • 16.
    WIX I created myArtists website using Wix. Wix allowed me to create a brand new website in way I pleased and it provided templates to help me do so. As I'm not a professional Website Designer It seemed like the best website designer for me So it was simple but flexible too. It allowed me to embed Videos from YouTube and upload pictures I had edited on Photoshop on to the website.
  • 17.
  • 18.
    Final Cut The mainediting Software we used when producing our Video was Final Cut. We used Final Cut to put together all the video clips we had filmed. To make it flow and not look jumpy we used different effects and fades. We were trained in using Final cut and it was a software that we were familiar and comfortable using.
  • 19.
    HD Camera We usedour own HD Sony Camera and filmed all our footage in HD. This is because our Music Video was filmed in the forest and the camera we were given was not as effective in the open and in direct sunlight the image came out to dark. The camera we used was sharper and adjusted the colour in the sunlight so it doesn't look dark. We also attached a glide cam in order to take panning shots which made the video look more professional.
  • 20.
    Facebook I posted myFinal Edit on to Facebook where I asked for feedback, some gave me constructive criticism and some gave me comments saying it is good. However, I was only given a little helpful advice on how to improve my Video.