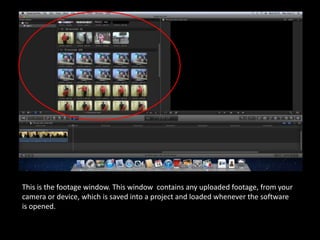
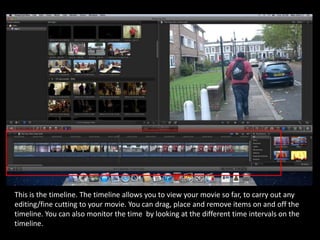
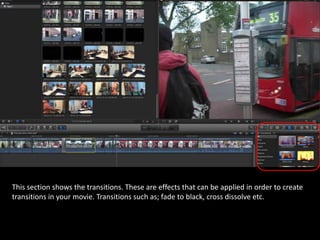
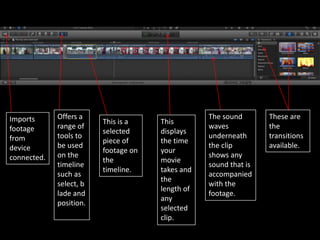
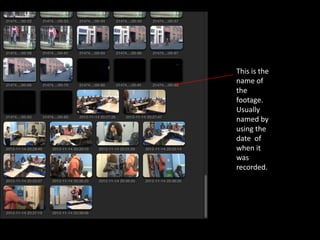
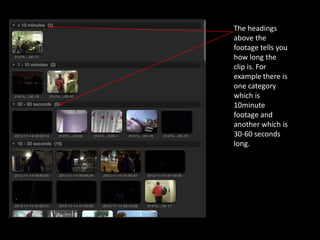
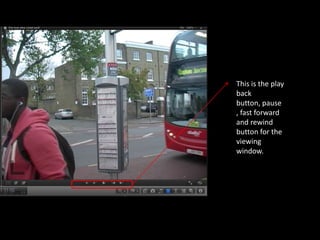
This document provides an overview of the editing process in Final Cut Pro. It describes key areas of the interface including the viewing window for playback, the footage window for imported media, and the timeline for assembling and editing clips. It also points out tools for imports, selections, transitions and sound editing, allowing for an organized editing workflow in the software.
2. This is the viewing window. The viewing window plays back scenes and
anything highlighted or played on my timeline.
3. This is the footage window. This window contains any uploaded footage, from your
camera or device, which is saved into a project and loaded whenever the software
is opened.
4. This is the timeline. The timeline allows you to view your movie so far, to carry out any
editing/fine cutting to your movie. You can drag, place and remove items on and off the
timeline. You can also monitor the time by looking at the different time intervals on the
timeline.
5. This section shows the transitions. These are effects that can be applied in order to create
transitions in your movie. Transitions such as; fade to black, cross dissolve etc.
6. Imports Offers a The sound These are
This is a This
footage range of waves the
selected displays
from tools to underneath transitions
piece of the time
device be used the clip available.
footage on your
connected. on the shows any
the movie
timeline sound that is
timeline. takes and
such as accompanied
the
select, b with the
length of
lade and footage.
any
position.
selected
clip.
7. This is the
name of
the
footage.
Usually
named by
using the
date of
when it
was
recorded.
8. The headings
above the
footage tells you
how long the
clip is. For
example there is
one category
which is
10minute
footage and
another which is
30-60 seconds
long.
9. This is the play
back
button, pause
, fast forward
and rewind
button for the
viewing
window.