Download to read offline
![Digital Stories Using Microsoft Photo Story 3 for Windows Carrie Roth [email_address] (248) 865-6643](https://image.slidesharecdn.com/digitalstories-100125044105-phpapp02/85/Digital-Stories-1-320.jpg)
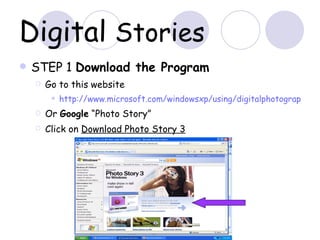
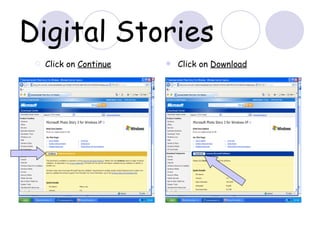
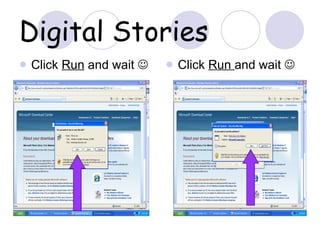


This document provides tips for creating digital stories using Microsoft Photo Story 3. It recommends planning out the story, organizing images and documents, creating a storyboard, and adding titles, narration, motion, and music. The steps include downloading and installing Photo Story 3 and Windows Media Player, importing pictures, editing and arranging images, adding titles and other elements, recording narration, customizing motion, inserting music while following copyright laws, and saving and viewing the completed story.


