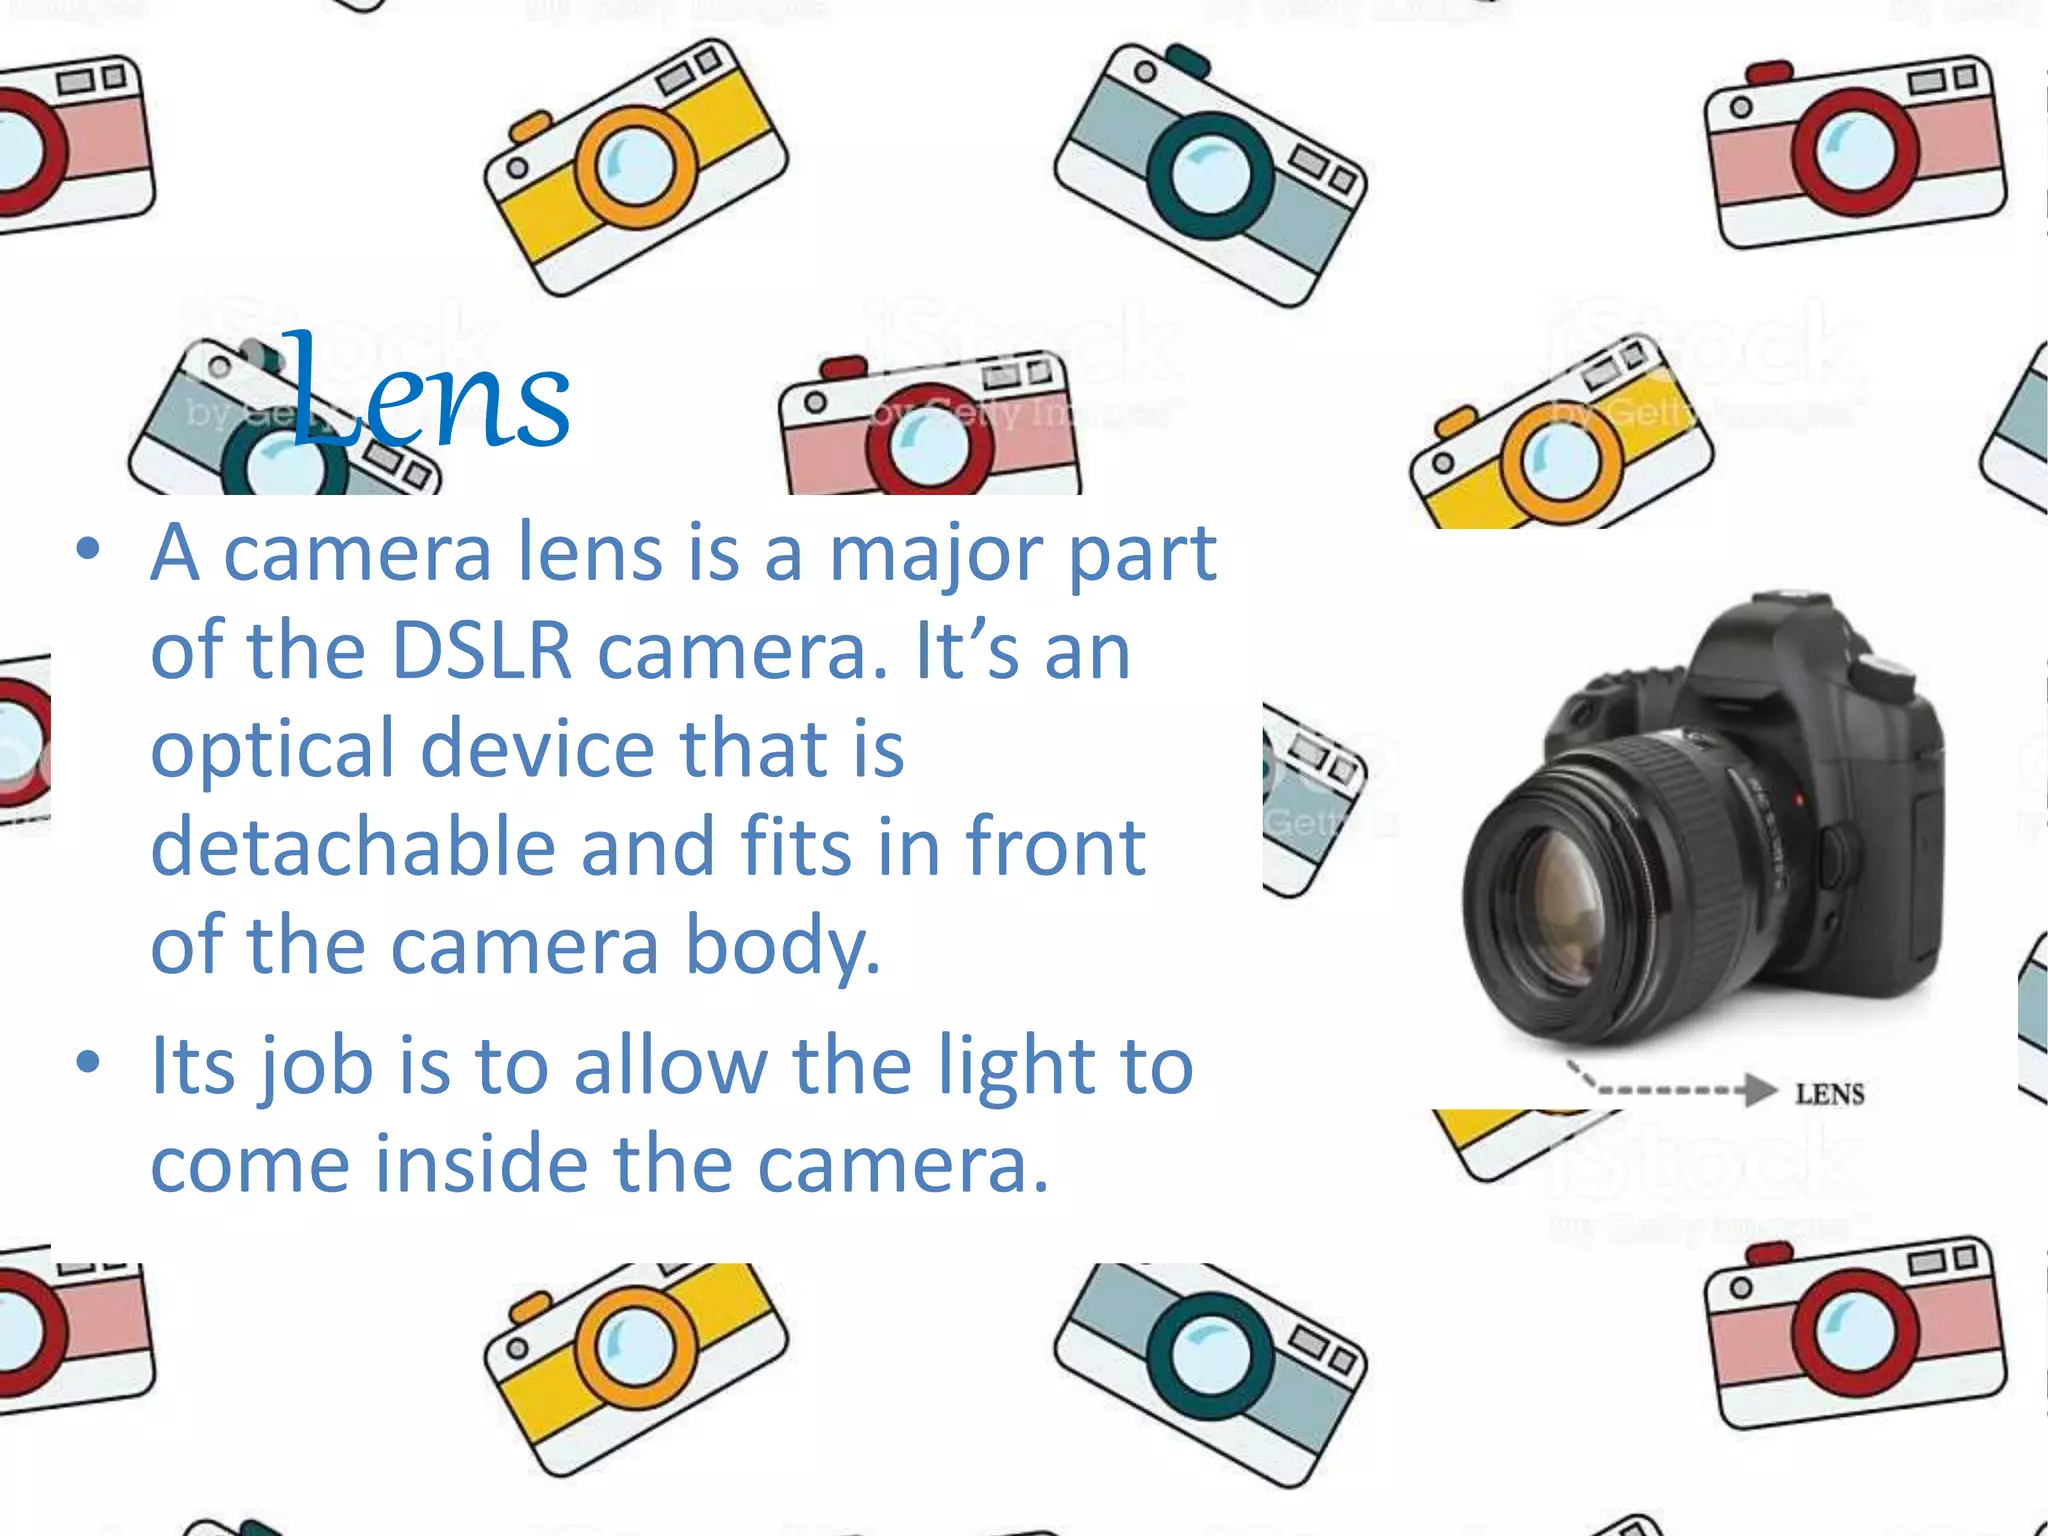
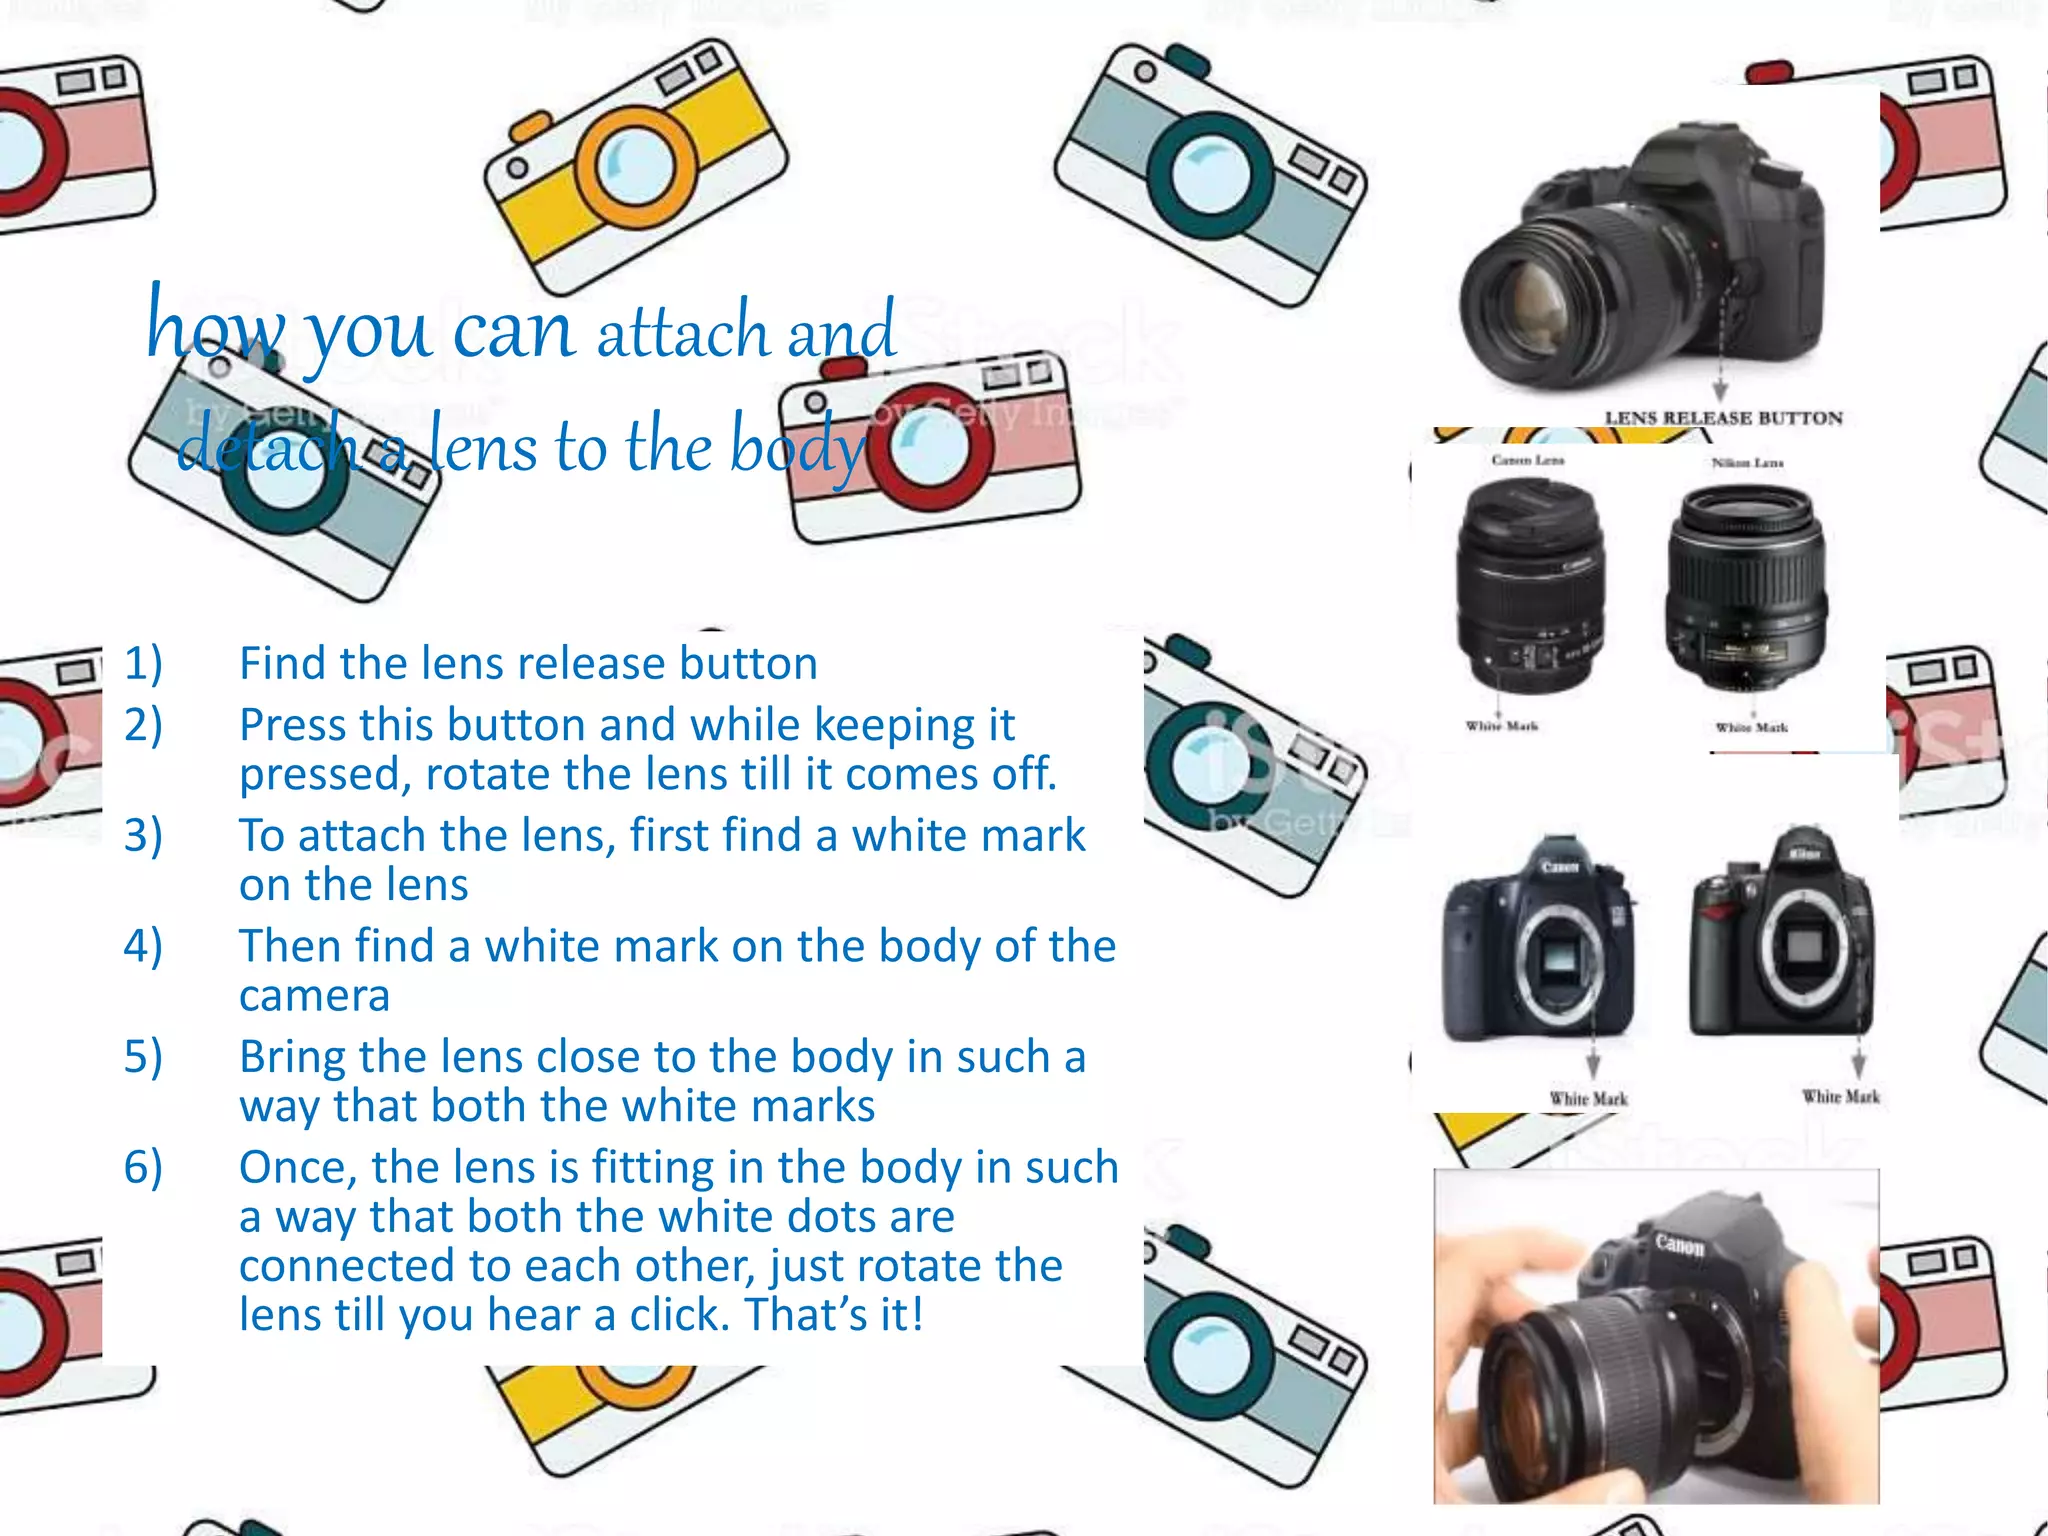
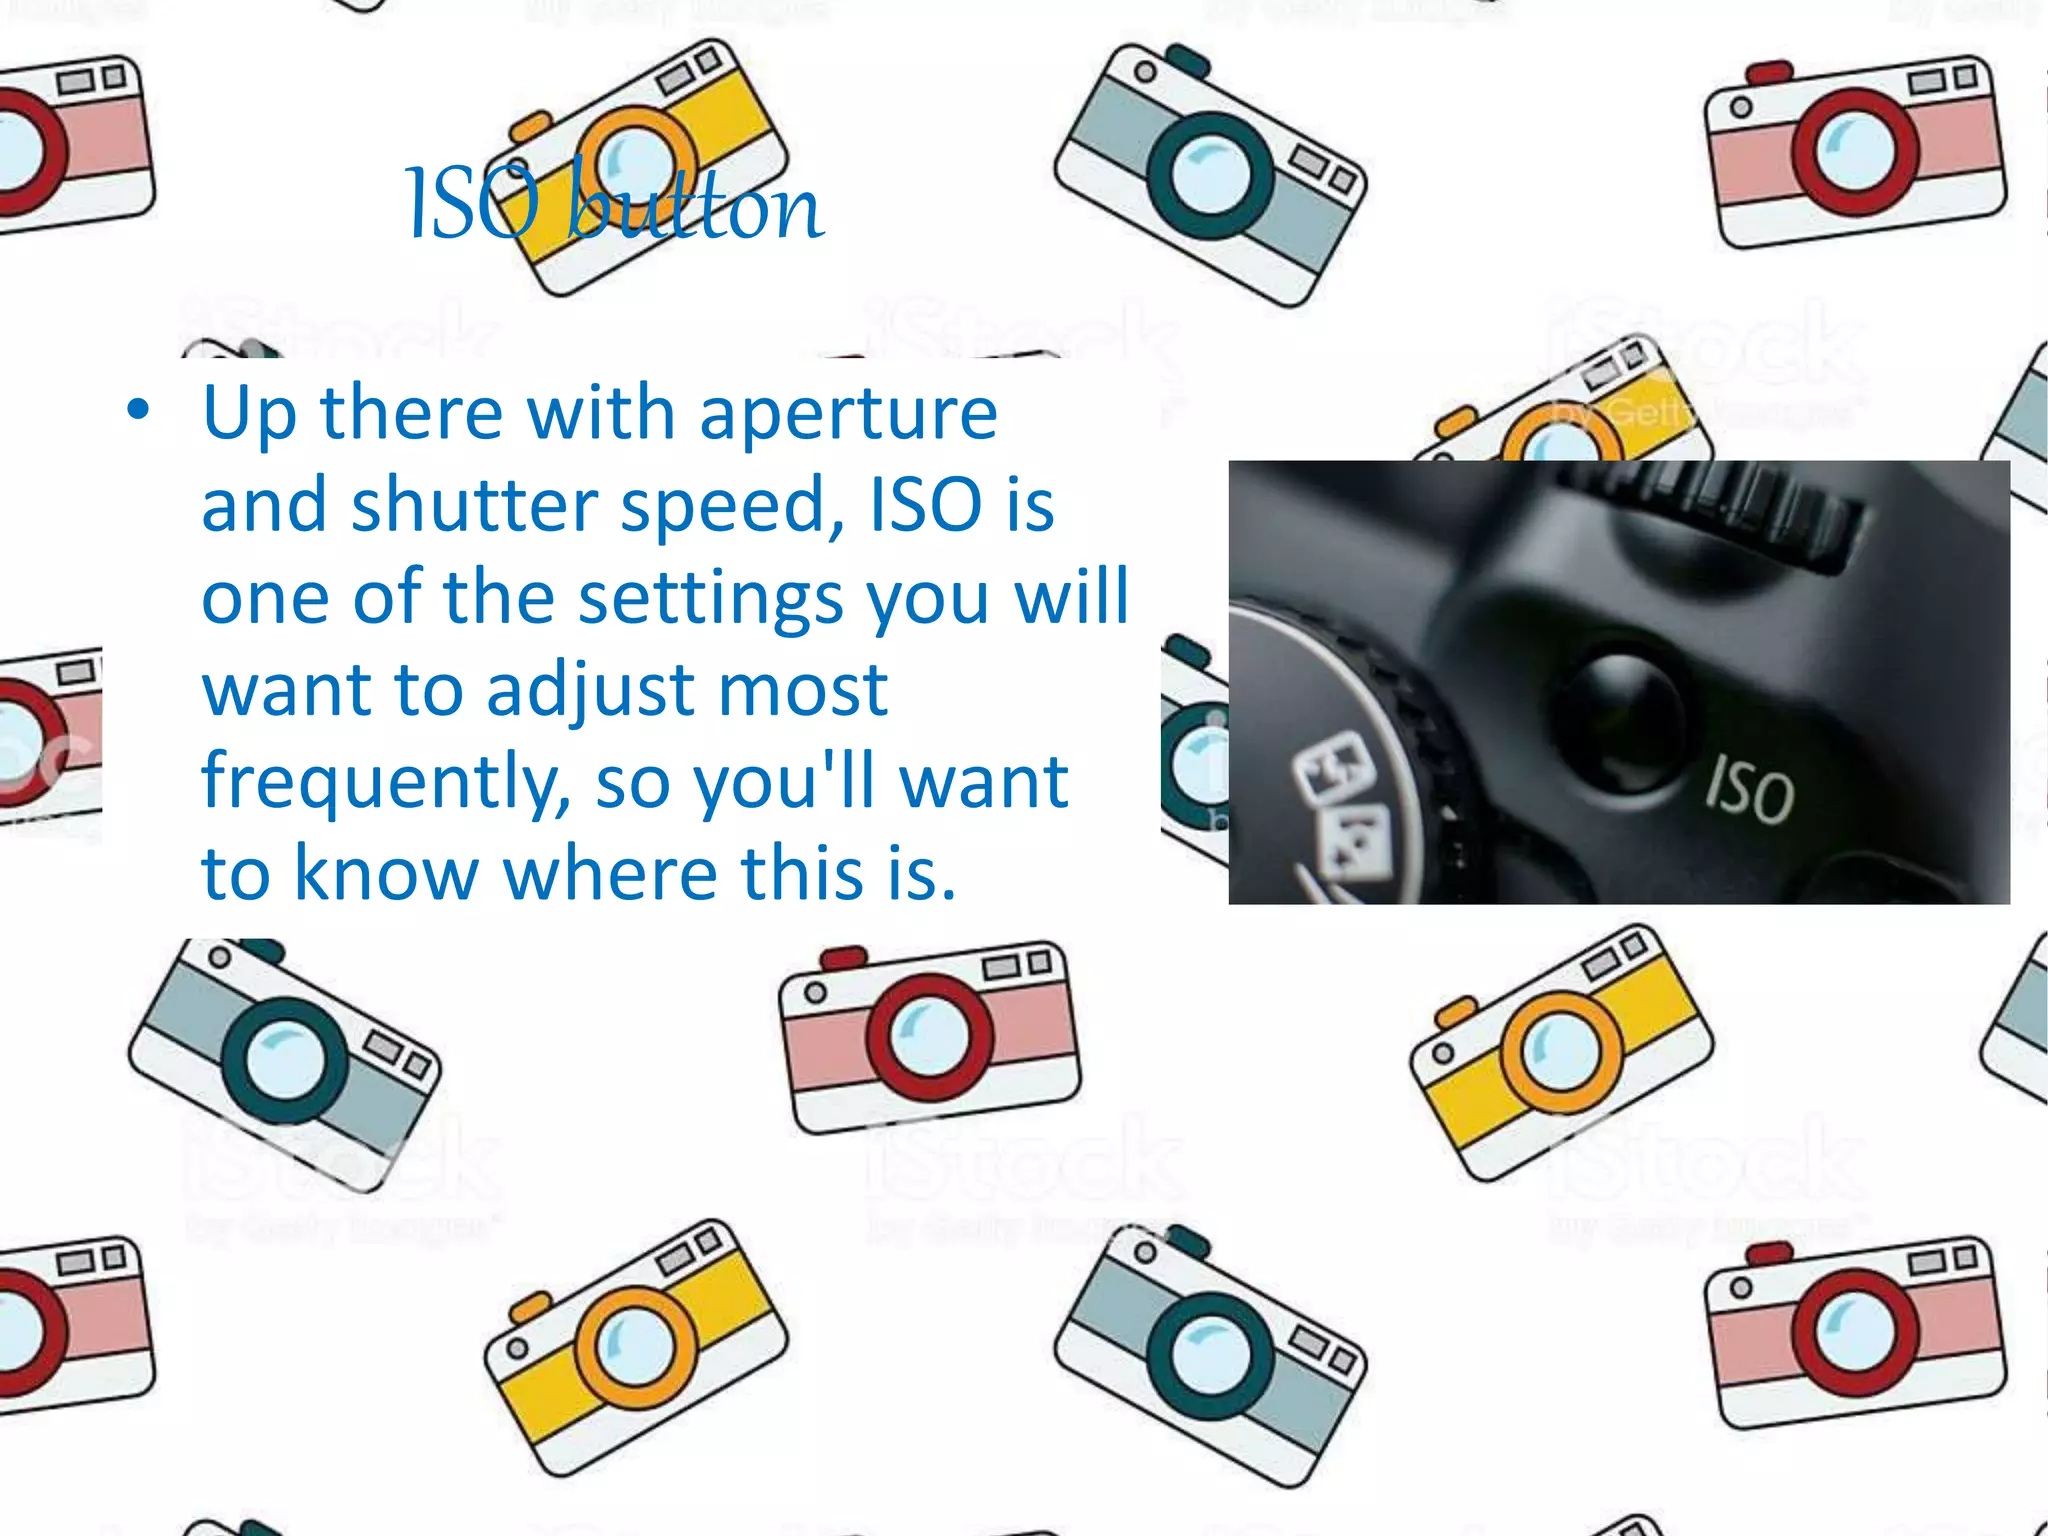
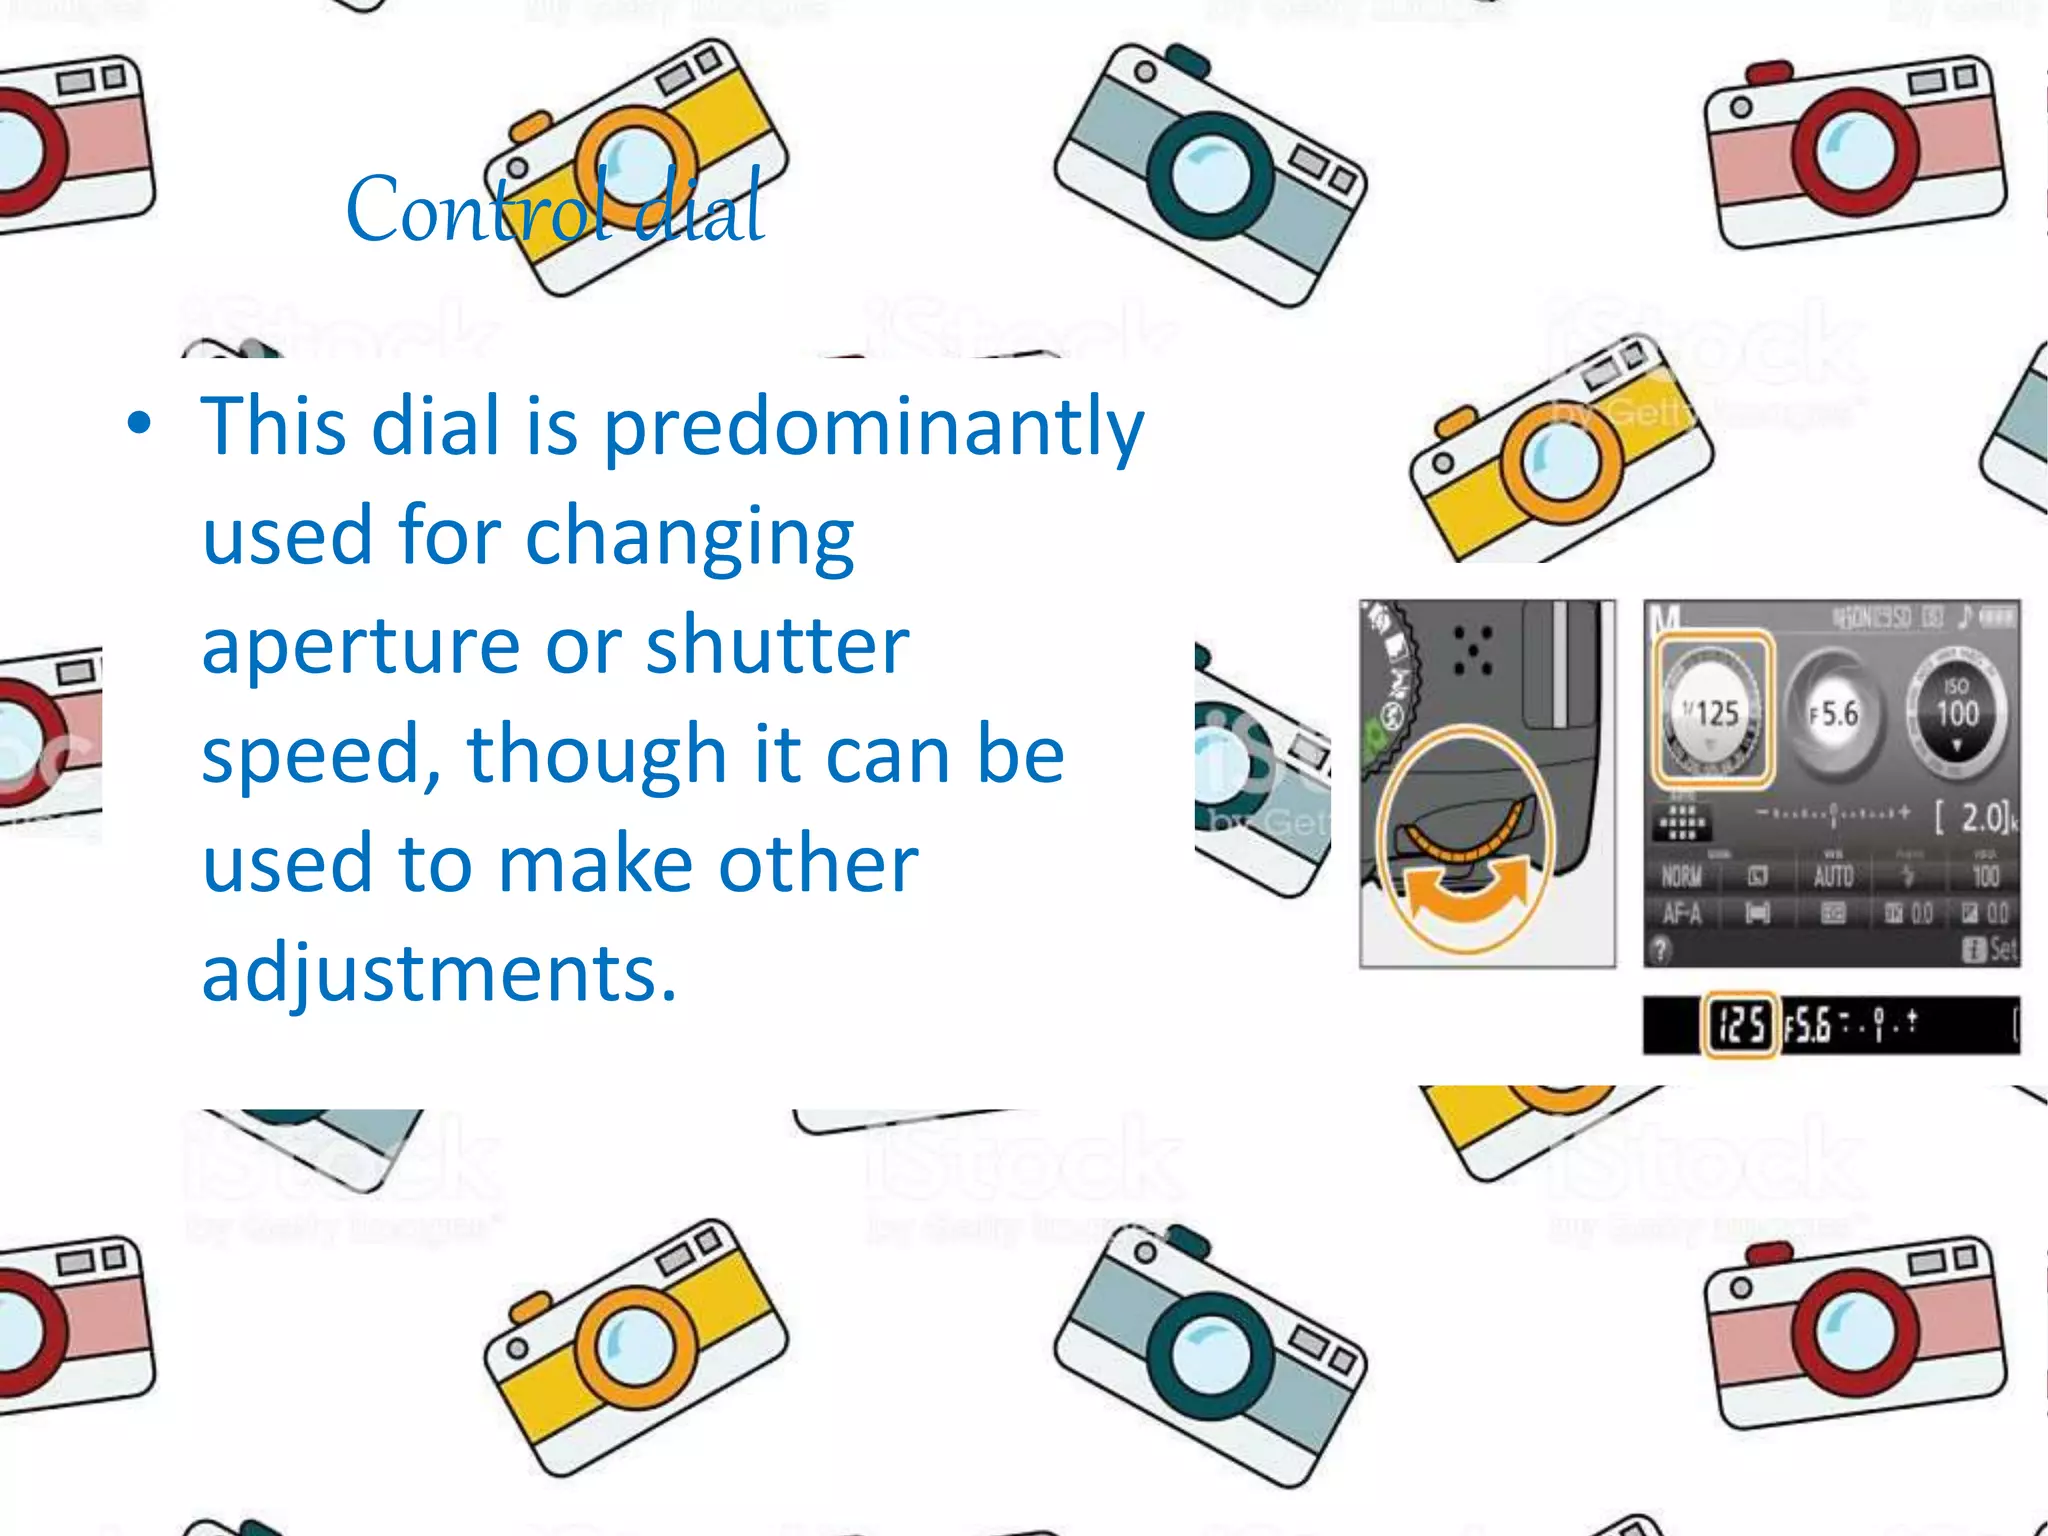
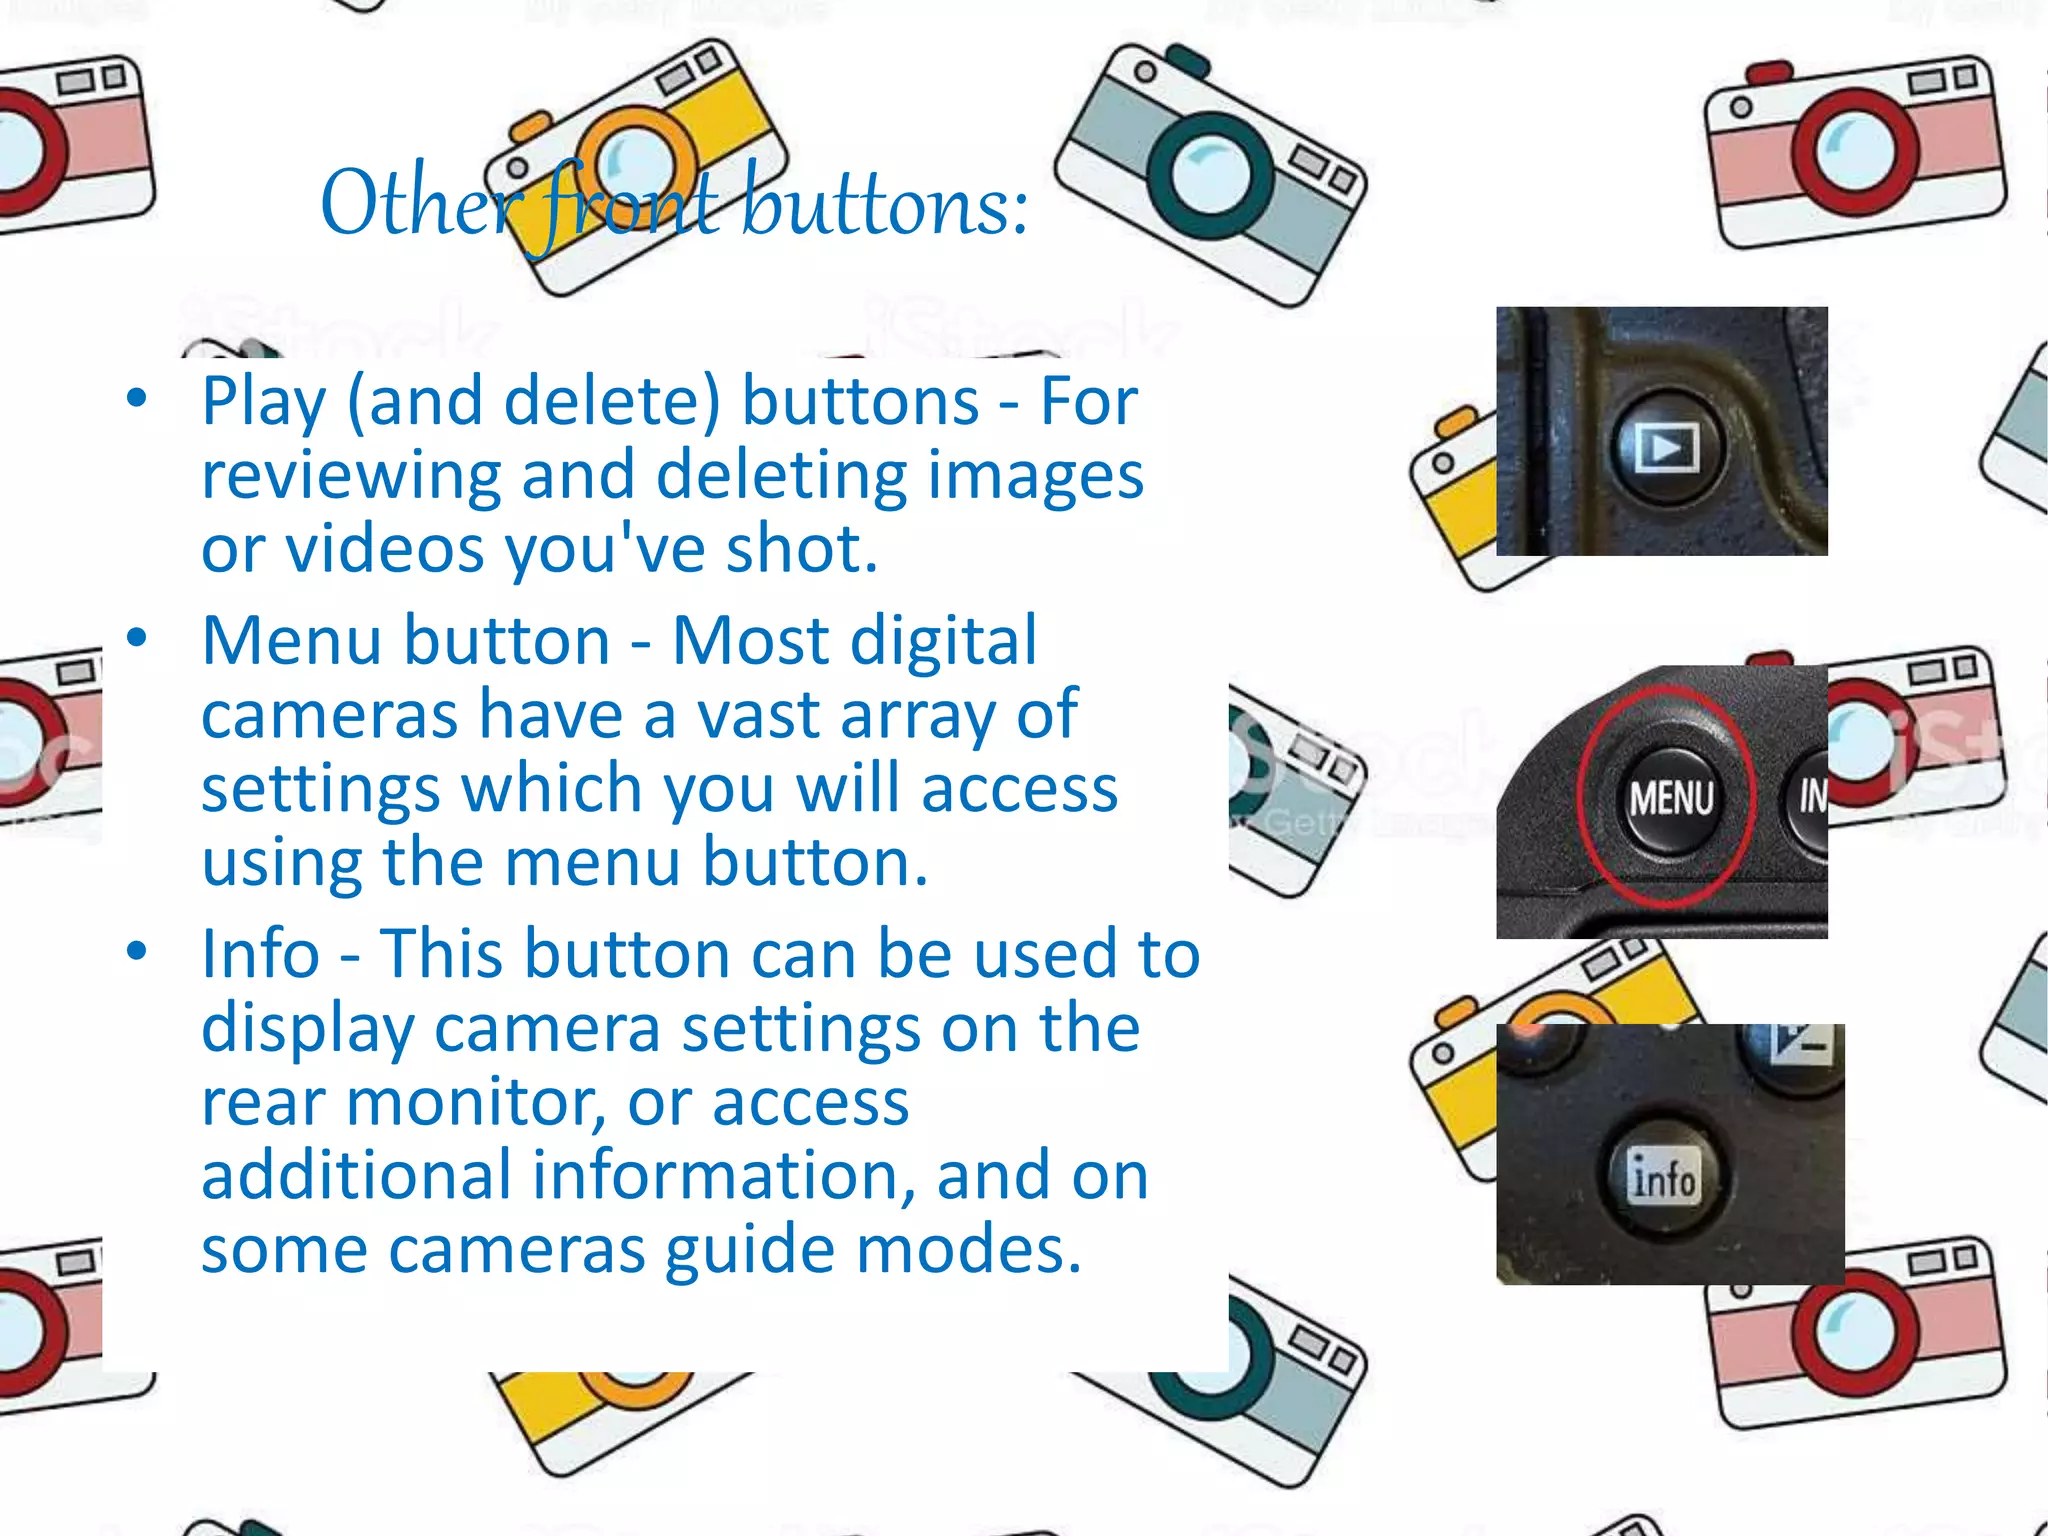
Different Parts/buttons of a DSLR
camera
LESSON:2
(saleha imtiaz)
DSLR stands for Digital Single-Lens Reflex
camera. Before we see how it works, let’s go
through its different parts and functions.
Lens
• A camera lens is a major part
of the DSLR camera. It’s an
optical device that is
detachable and fits in front
of the camera body.
• Its job is to allow the light to
come inside the camera.
how you can attach and
detach a lens to the body
1) Find the lens release button
2) Press this button and while keeping it
pressed, rotate the lens till it comes off.
3) To attach the lens, first find a white mark
on the lens
4) Then find a white mark on the body of the
camera
5) Bring the lens close to the body in such a
way that both the white marks
6) Once, the lens is fitting in the body in such
a way that both the white dots are
connected to each other, just rotate the
lens till you hear a click. That’s it!
Lens types
• Lenses in which you can zoom in
and zoom out are called as
zoom lenses.
• There are other type of lenses
called as prime or block lenses,
which have a fixed focal length.
For example, the image below
shows a 50mm prime lens for
Canon and Nikon
Mode dial
• A mode dial is a circular dial that
you see on top of the camera.
• A mode dial is used to select the
mode that the camera operates in.
• There are two important ones –
Automatic and Manual.
• When you are in the automatic
mode, it’s easy to shoot as the
camera does everything.
• Manual mode gives you that control.
• Other modes will be discussed in
further lessons.
ISO button
• Up there with aperture
and shutter speed, ISO is
one of the settings you will
want to adjust most
frequently, so you'll want
to know where this is.
Live-View
• Live-view refers to using
the DSLR’s LCD screen to
shoot
• Once you press the live-
view button, you will see
that the LCD screen gets
enabled allowing you to
see through it.
Viewfinder:
• viewfinder,
which is the
hole that you
can see
through
Control dial
• This dial is predominantly
used for changing
aperture or shutter
speed, though it can be
used to make other
adjustments.
Exposure compensation
• This button is used with
control dial to change
the aperture.
Shutter release button:
• Cameras typically have a two-
stage shutter-release button: a
first stage in which the shutter-
release button is lightly pressed
halfway, and a second in which
the shutter-release button is
pressed the rest of the way
down. The camera focuses
when the shutter-release
button is pressed halfway and
takes a picture when the
button is pressed the rest of
the way down.
Video start stop
Video start-stop button —
Don’t press the red button!
Unless you want to shoot
video.
Other front buttons:
• Play (and delete) buttons - For
reviewing and deleting images
or videos you've shot.
• Menu button - Most digital
cameras have a vast array of
settings which you will access
using the menu button.
• Info - This button can be used to
display camera settings on the
rear monitor, or access
additional information, and on
some cameras guide modes.
Thank you.

Different parts of camera

  • 1.
    Different Parts/buttons ofa DSLR camera LESSON:2 (saleha imtiaz)
  • 2.
    DSLR stands forDigital Single-Lens Reflex camera. Before we see how it works, let’s go through its different parts and functions.
  • 3.
    Lens • A cameralens is a major part of the DSLR camera. It’s an optical device that is detachable and fits in front of the camera body. • Its job is to allow the light to come inside the camera.
  • 4.
    how you canattach and detach a lens to the body 1) Find the lens release button 2) Press this button and while keeping it pressed, rotate the lens till it comes off. 3) To attach the lens, first find a white mark on the lens 4) Then find a white mark on the body of the camera 5) Bring the lens close to the body in such a way that both the white marks 6) Once, the lens is fitting in the body in such a way that both the white dots are connected to each other, just rotate the lens till you hear a click. That’s it!
  • 5.
    Lens types • Lensesin which you can zoom in and zoom out are called as zoom lenses. • There are other type of lenses called as prime or block lenses, which have a fixed focal length. For example, the image below shows a 50mm prime lens for Canon and Nikon
  • 6.
    Mode dial • Amode dial is a circular dial that you see on top of the camera. • A mode dial is used to select the mode that the camera operates in. • There are two important ones – Automatic and Manual. • When you are in the automatic mode, it’s easy to shoot as the camera does everything. • Manual mode gives you that control. • Other modes will be discussed in further lessons.
  • 7.
    ISO button • Upthere with aperture and shutter speed, ISO is one of the settings you will want to adjust most frequently, so you'll want to know where this is.
  • 8.
    Live-View • Live-view refersto using the DSLR’s LCD screen to shoot • Once you press the live- view button, you will see that the LCD screen gets enabled allowing you to see through it.
  • 9.
    Viewfinder: • viewfinder, which isthe hole that you can see through
  • 10.
    Control dial • Thisdial is predominantly used for changing aperture or shutter speed, though it can be used to make other adjustments.
  • 11.
    Exposure compensation • Thisbutton is used with control dial to change the aperture.
  • 12.
    Shutter release button: •Cameras typically have a two- stage shutter-release button: a first stage in which the shutter- release button is lightly pressed halfway, and a second in which the shutter-release button is pressed the rest of the way down. The camera focuses when the shutter-release button is pressed halfway and takes a picture when the button is pressed the rest of the way down.
  • 13.
    Video start stop Videostart-stop button — Don’t press the red button! Unless you want to shoot video.
  • 14.
    Other front buttons: •Play (and delete) buttons - For reviewing and deleting images or videos you've shot. • Menu button - Most digital cameras have a vast array of settings which you will access using the menu button. • Info - This button can be used to display camera settings on the rear monitor, or access additional information, and on some cameras guide modes.
  • 15.