Downloaded 398 times

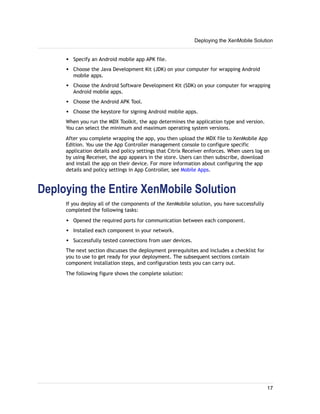
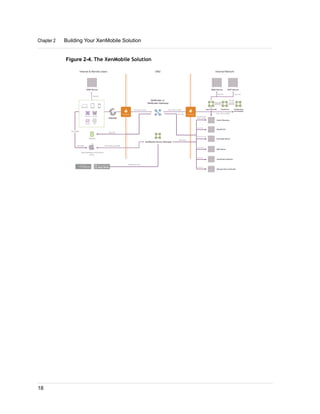


1. XenMobile allows you to manage mobile devices, apps, and data through its main components: NetScaler Gateway, XenMobile Device Manager, XenMobile App Edition, MDX Toolkit, and Worx apps. 2. You can deploy the XenMobile components in various configurations depending on your needs, such as deploying only NetScaler Gateway and App Controller to enable remote access to apps, or deploying all components for comprehensive device, app, and data management. 3. A common deployment involves NetScaler Gateway for secure remote access, Device Manager for mobile device management, and App Controller for mobile app and data access, with optional integrations with StoreFront and ShareFile.